MID-CENTURY PLANTER
Alun Machin

When it comes to growing greenery indoors, it’s all about the plant plus soil plus water on timber, which is an equation for potential moisture damage. So I’ve used a secret DIY product to make this indoor planter completely watertight.
This indoor planter is a very cute 400mm high and can fit two 150 x 150mm pots. My favourite indoor plant is Zanzibar which is so hardy the label reads ‘Thrives on neglect’. Perfect for a non-green thumb like me!

For waterproofing I use Gripset Betta Bitumen Rubber, which is so lovely to work with. It goes on nice and thick, doesn’t have much odour, dries quickly and washes out of the brush easily! That’s my fave, all-round kind of product.

I’m inspired by mid-century design and love how the elegant Porta Timber Tasmanian oak dowel legs reflect the curves in the ribbed cladding. Finishing it with Bondall’s Monocel Clear Timber Varnish adds a richness to the woodgrain while protecting from moisture damage.

I’ve used a little Japanese saw for most of this project. It also helps if you can use a drop saw to cut the plywood for the box, or arrange to have it done at the hardware store.

DIY Tools & Materials
measuring tape, combination square and pencil
dropsaw or handsaw with mitre box
drill with drill bits
25mm timber screws to assemble the box
countersinking bit
8mm drill bit
Bondall Bondcrete adhesive for assembly
painter’s tape to hold the cladding
40mm timber screws to attach the legs
timber filler in a colour to match Tasmanian oak
Monocel Stain & Varnish in Clear to finish
kitchen sponge cut to size to apply varnish
Gripset Betta Bitumen Rubber to seal the box
brush to apply bitumen
120 and 240-grit abrasive paper with a sanding block
plant in a pot 150 x 150mm

Cutting List
12mm plywood cut to 250 x 150mm for the sides and 150 x 150mm for the ends of the box
12mm plywood cut to 250 x 170 mm for the base of the box
2 x 2.4m lengths of 35 x 8mm Porta Ribbed Edging in Tasmanian oak for the cladding, trimmed to 150mm-long pieces
one 1.8m length of 18 x 6mm fly bead in Tasmanian oak for the capping
1.2m of 19mm dowel for the legs, cut to 300mm lengths
1.2m length of 6mm dowel for the leg rails
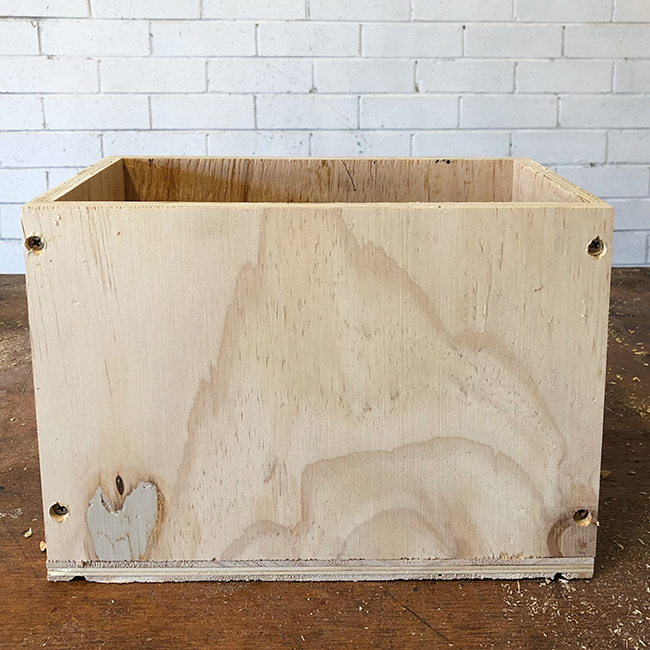
STEP 1 Make the box
Drill pilot and countersink holes into the sides, 6mm from the edge, then attach the ends using Bondcrete adhesive and 25mm timber screws, making sure the screws sit below the surface.

STEP 2 Make holes for the rails
On the legs, measure up 150mm from the base and use an 8mm drill bit to make the holes, then use a small drill bit to make starter holes into the top of the legs.
TIP Clamp the legs and hold the drill upright to ensure the holes are straight through the centre.

STEP 3 Attach legs to the base
On the box base, mark 20mm from the edges to countersink and secure 40mm timber screws through and into the top of each leg, then thread the dowel rails through, adjusting the legs so the rail is straight.
TIP Dab a little Bondcrete into the holes, adjust the rails then leave them to dry.

STEP 4 Complete the box
Countersink holes through the base and into the sides, apply Bondcrete along the edges then attach with 25mm screws.
TIP Add three screws along the sides and two into the ends.

STEP 5 Add the cladding
Start along one side, adding Bondcrete to each piece of cladding, positioning them to be flush with the top of the box. Pull the tape tight to hold the cladding while it dries.
TIP Do a test fit along one side and an end, using masking tape to hold it while checking the corners overlap neatly. Remove any extra ridges from the end pieces using a Japanese hand saw.

STEP 6 Attach the capping
Cut the capping to length, beginning with a long side first, measuring the inside of the mitres to match the inside corners of the box. Use a mitre box with a handsaw to make the cuts one piece at a time. Apply Bondcrete and tape the capping to hold secure as it dries.

STEP 7 Waterproof the box
Use a brush to apply Gripset Betta Bitumen Rubber inside the box to about 70mm from the top, leaving to dry thoroughly between coats.
TIP Follow the instructions to apply at least two coats, brushing in different directions to ensure thick coverage.
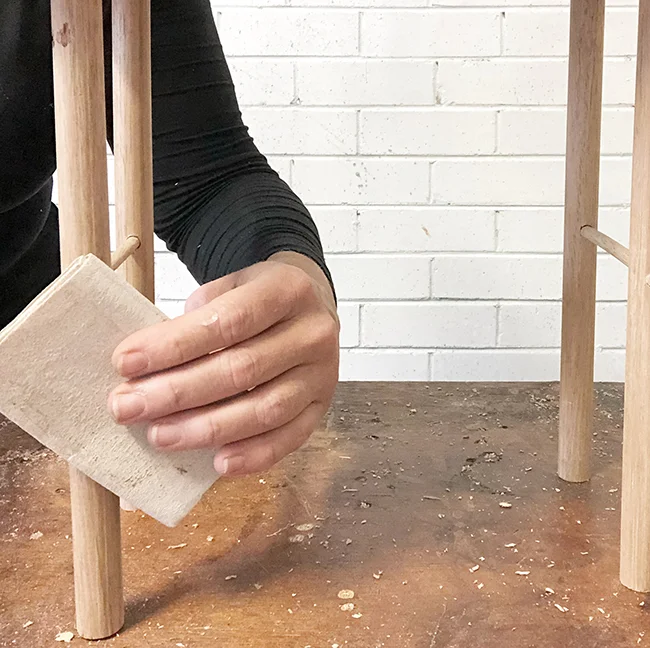
STEP 8 Smooth the surfaces
Use 180-grit abrasive paper to smooth over the cladding and capping, removing any splinters and rounding the edges and corners slightly. Smooth over the legs and over the rail join to remove any adhesive.

STEP 9 Seal the timber
Use a microfibre roller with a mini tray to apply two coats of Monocel Clear Varnish over all the timber surfaces (but avoiding the bitumen), rolling into the ribbing and leaving to dry between coats.
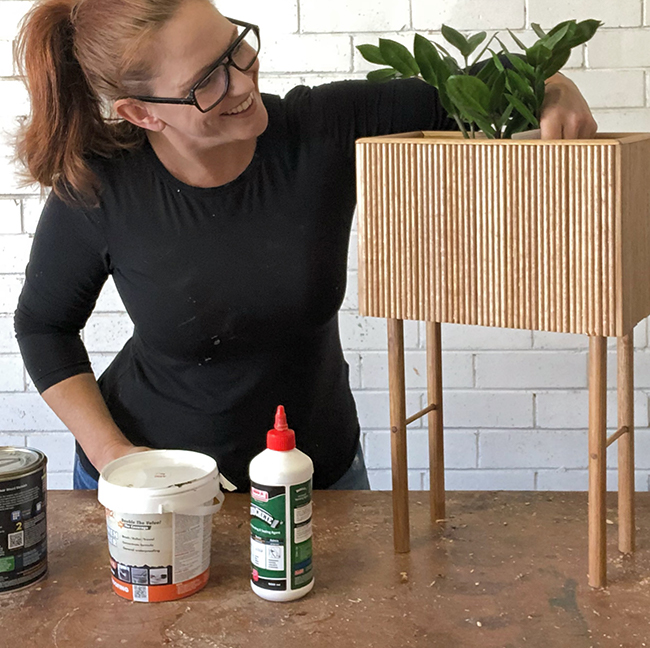
STEP 10 Add the plant
All you have to do now is drop in the potted plant, no tray required to avoid drips and spills.

Want to make the planter but don’t have the power tools? Order the Little Red Industries Indoor Planter Kit that includes the plywood box, Tasmanian oak cladding and legs cut to size, with pre-drilled holes, so you simply assemble, waterproof and finish. Plant not included!
Email natasha@littleredindustries.com for price and shipping details.