Cut & Frame a Mirror
Natasha Dickins
I couldn’t find a timber-framed mirror in the exact size needed for my laundry reno so, of course, I decided to DIY.
Mirror, mirror on the wall. Who is the fairest of them all?
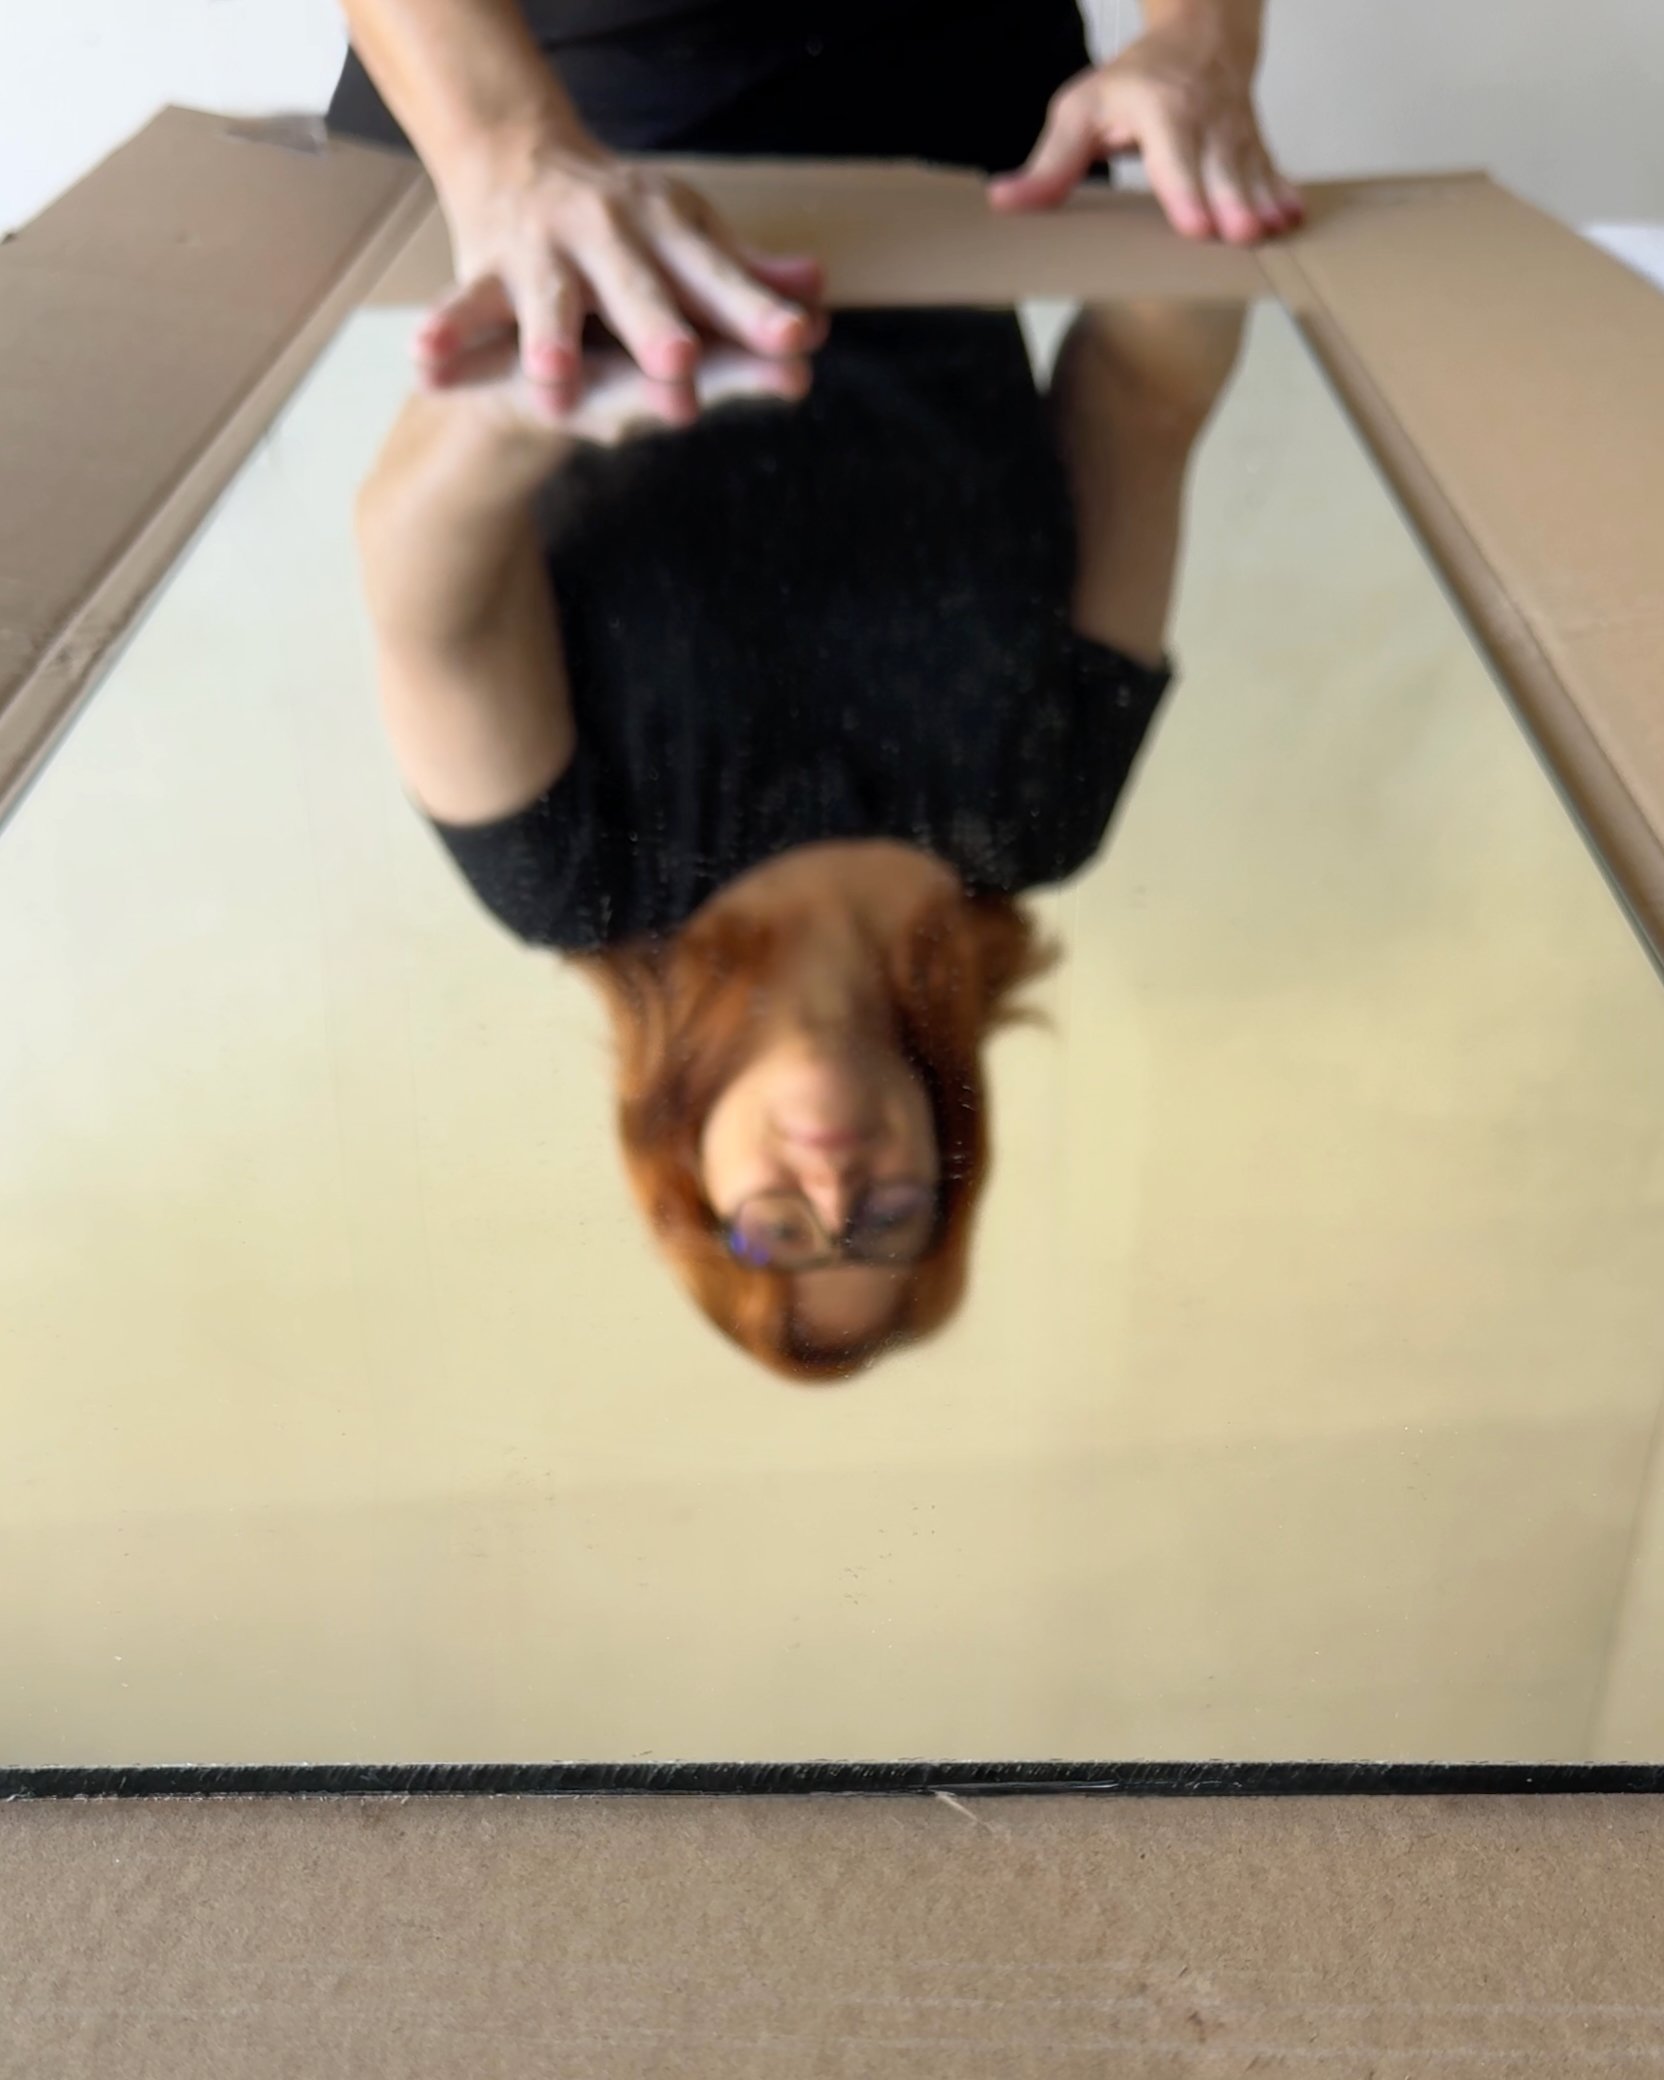
I’d bought a 1200mm x 350mm x 5mm-thick flat-edge mirror but carelessly chipped the corner when I got it home. I kept it to reuse in a smaller project.
TIP Keep the cardboard packaging to use as a protective layer when cutting the glass.
“I’d never cut mirror before but this was as simple as using a glass cutting tool.”
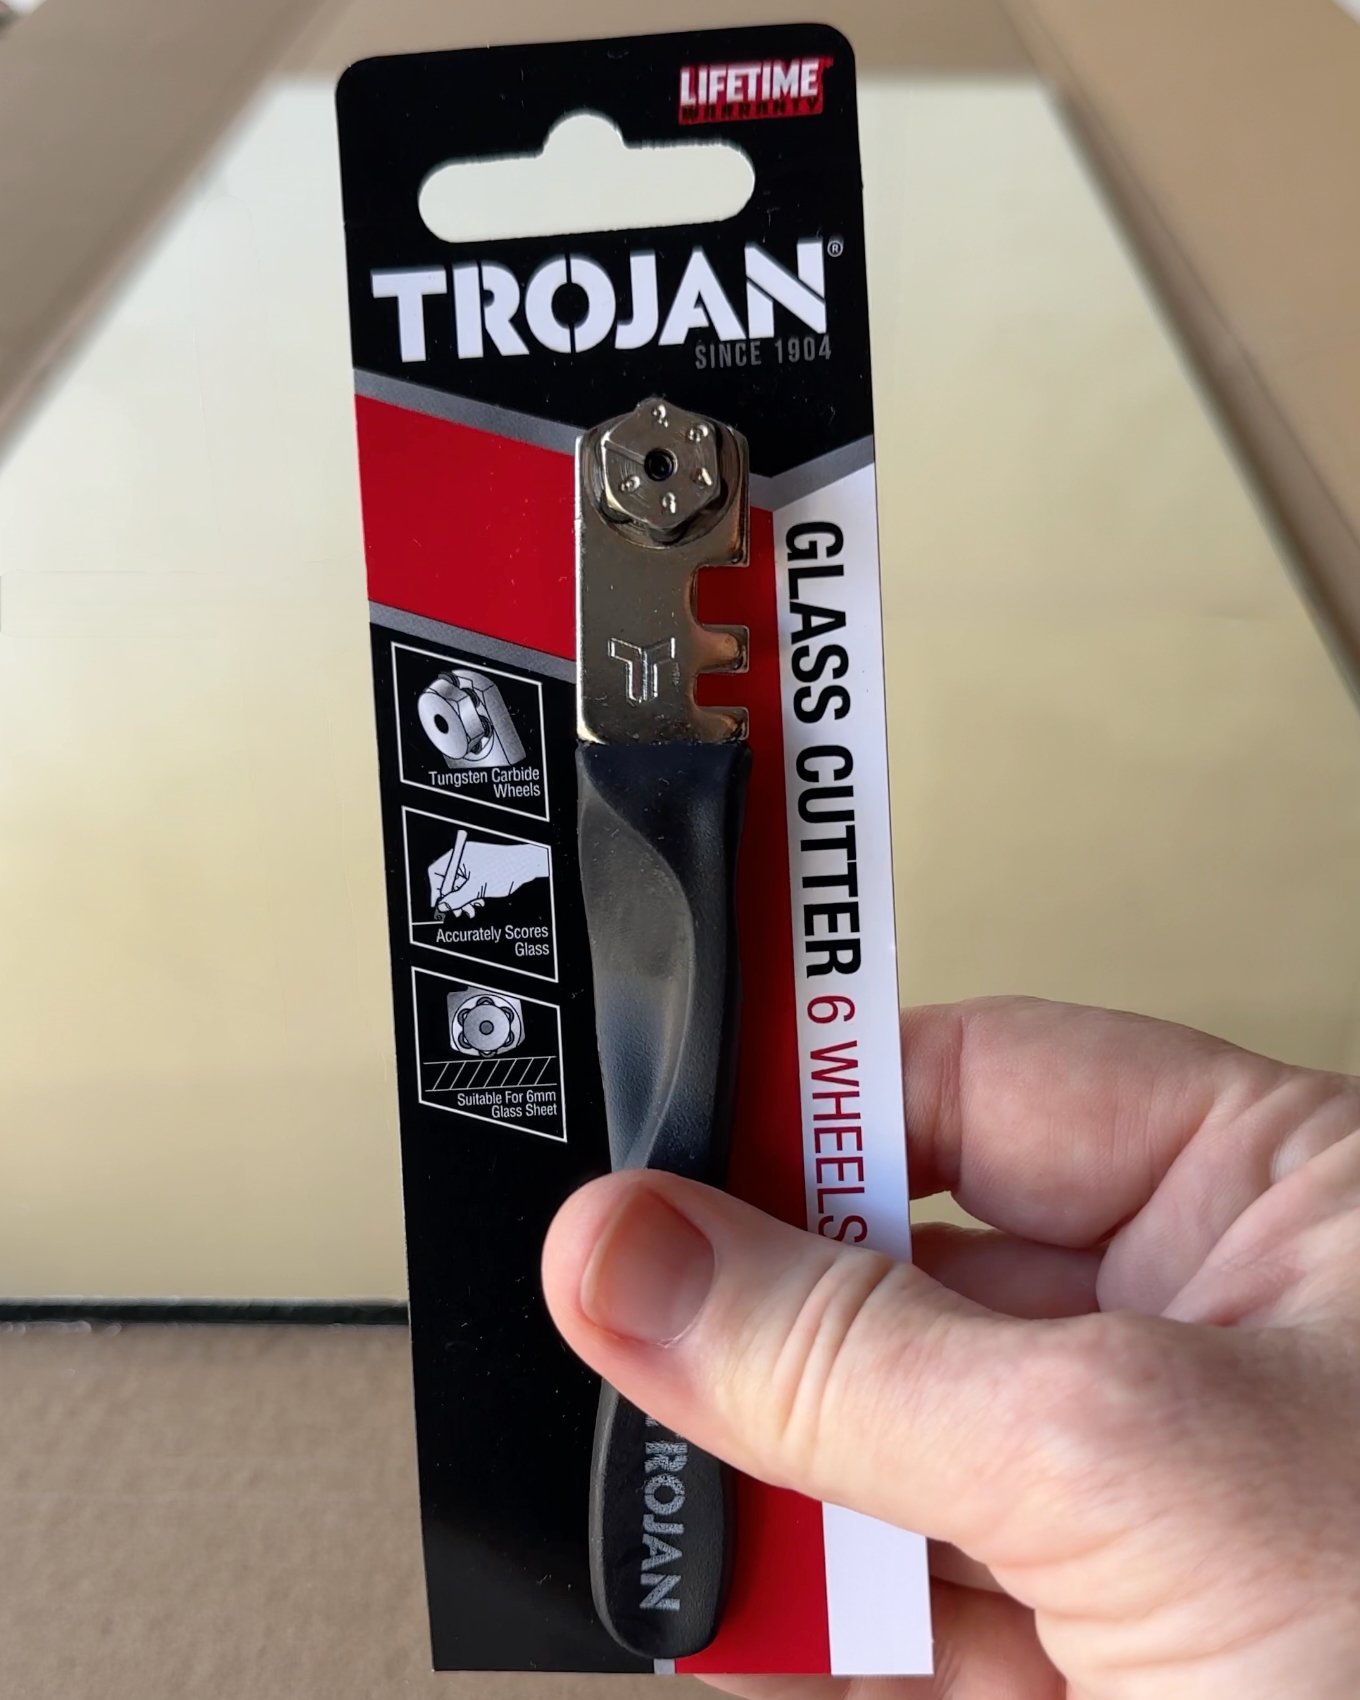
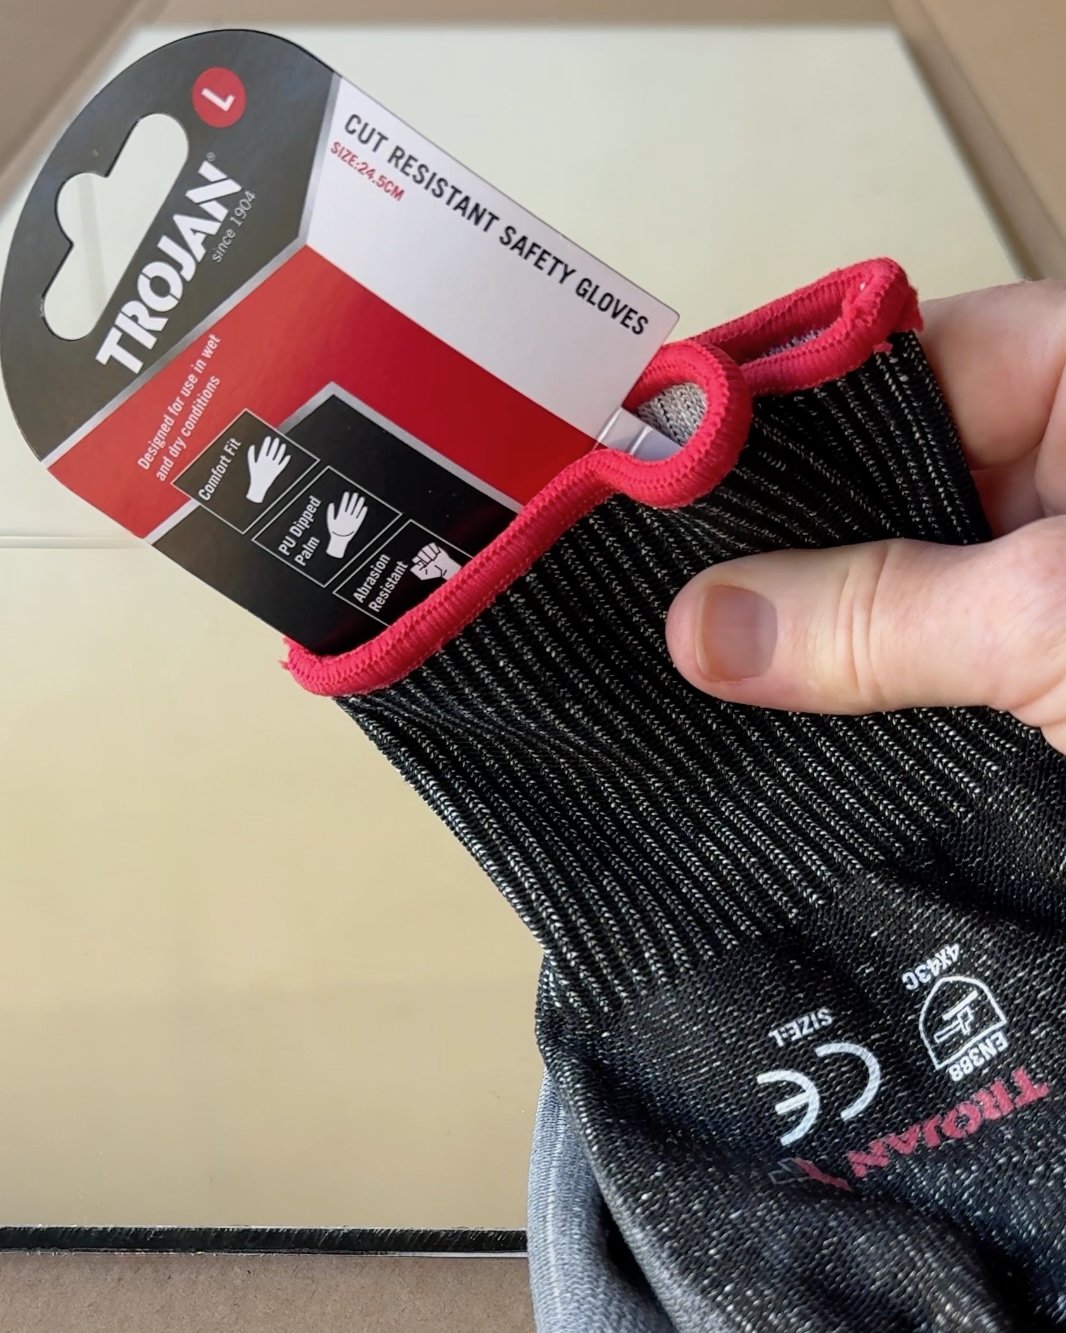
At my local hardware store, I spent $10 each on a glass cutter to score the mirror and cut-resistant safety gloves.


I used a 400mm metal combination square to mark the cut with a felt-tip pen then ran some machine oil along the line.


Using the combination square as a straightedge, I held it flush against the side of the mirror with one hand. With the other hand, I ran the cutter along it to score the glass.
TIP Press down firmly so the tungsten wheel of the cutter makes a crackling, scratching noise.


I tapped along the offcut side with my fist, then folded the cardboard over the cut and moved the mirror so the cut was over the edge of the table.
Holding the mirror flat, I pressed down to snap the scored cut.


I used a utility knife to cut the backing then wiped off the oil and smoothed the cut edges and corners with 120-grit sandpaper.
TIP The cardboard catches tiny glass shards from the cut and the sanding. Be careful when folding it up to dispose of it.
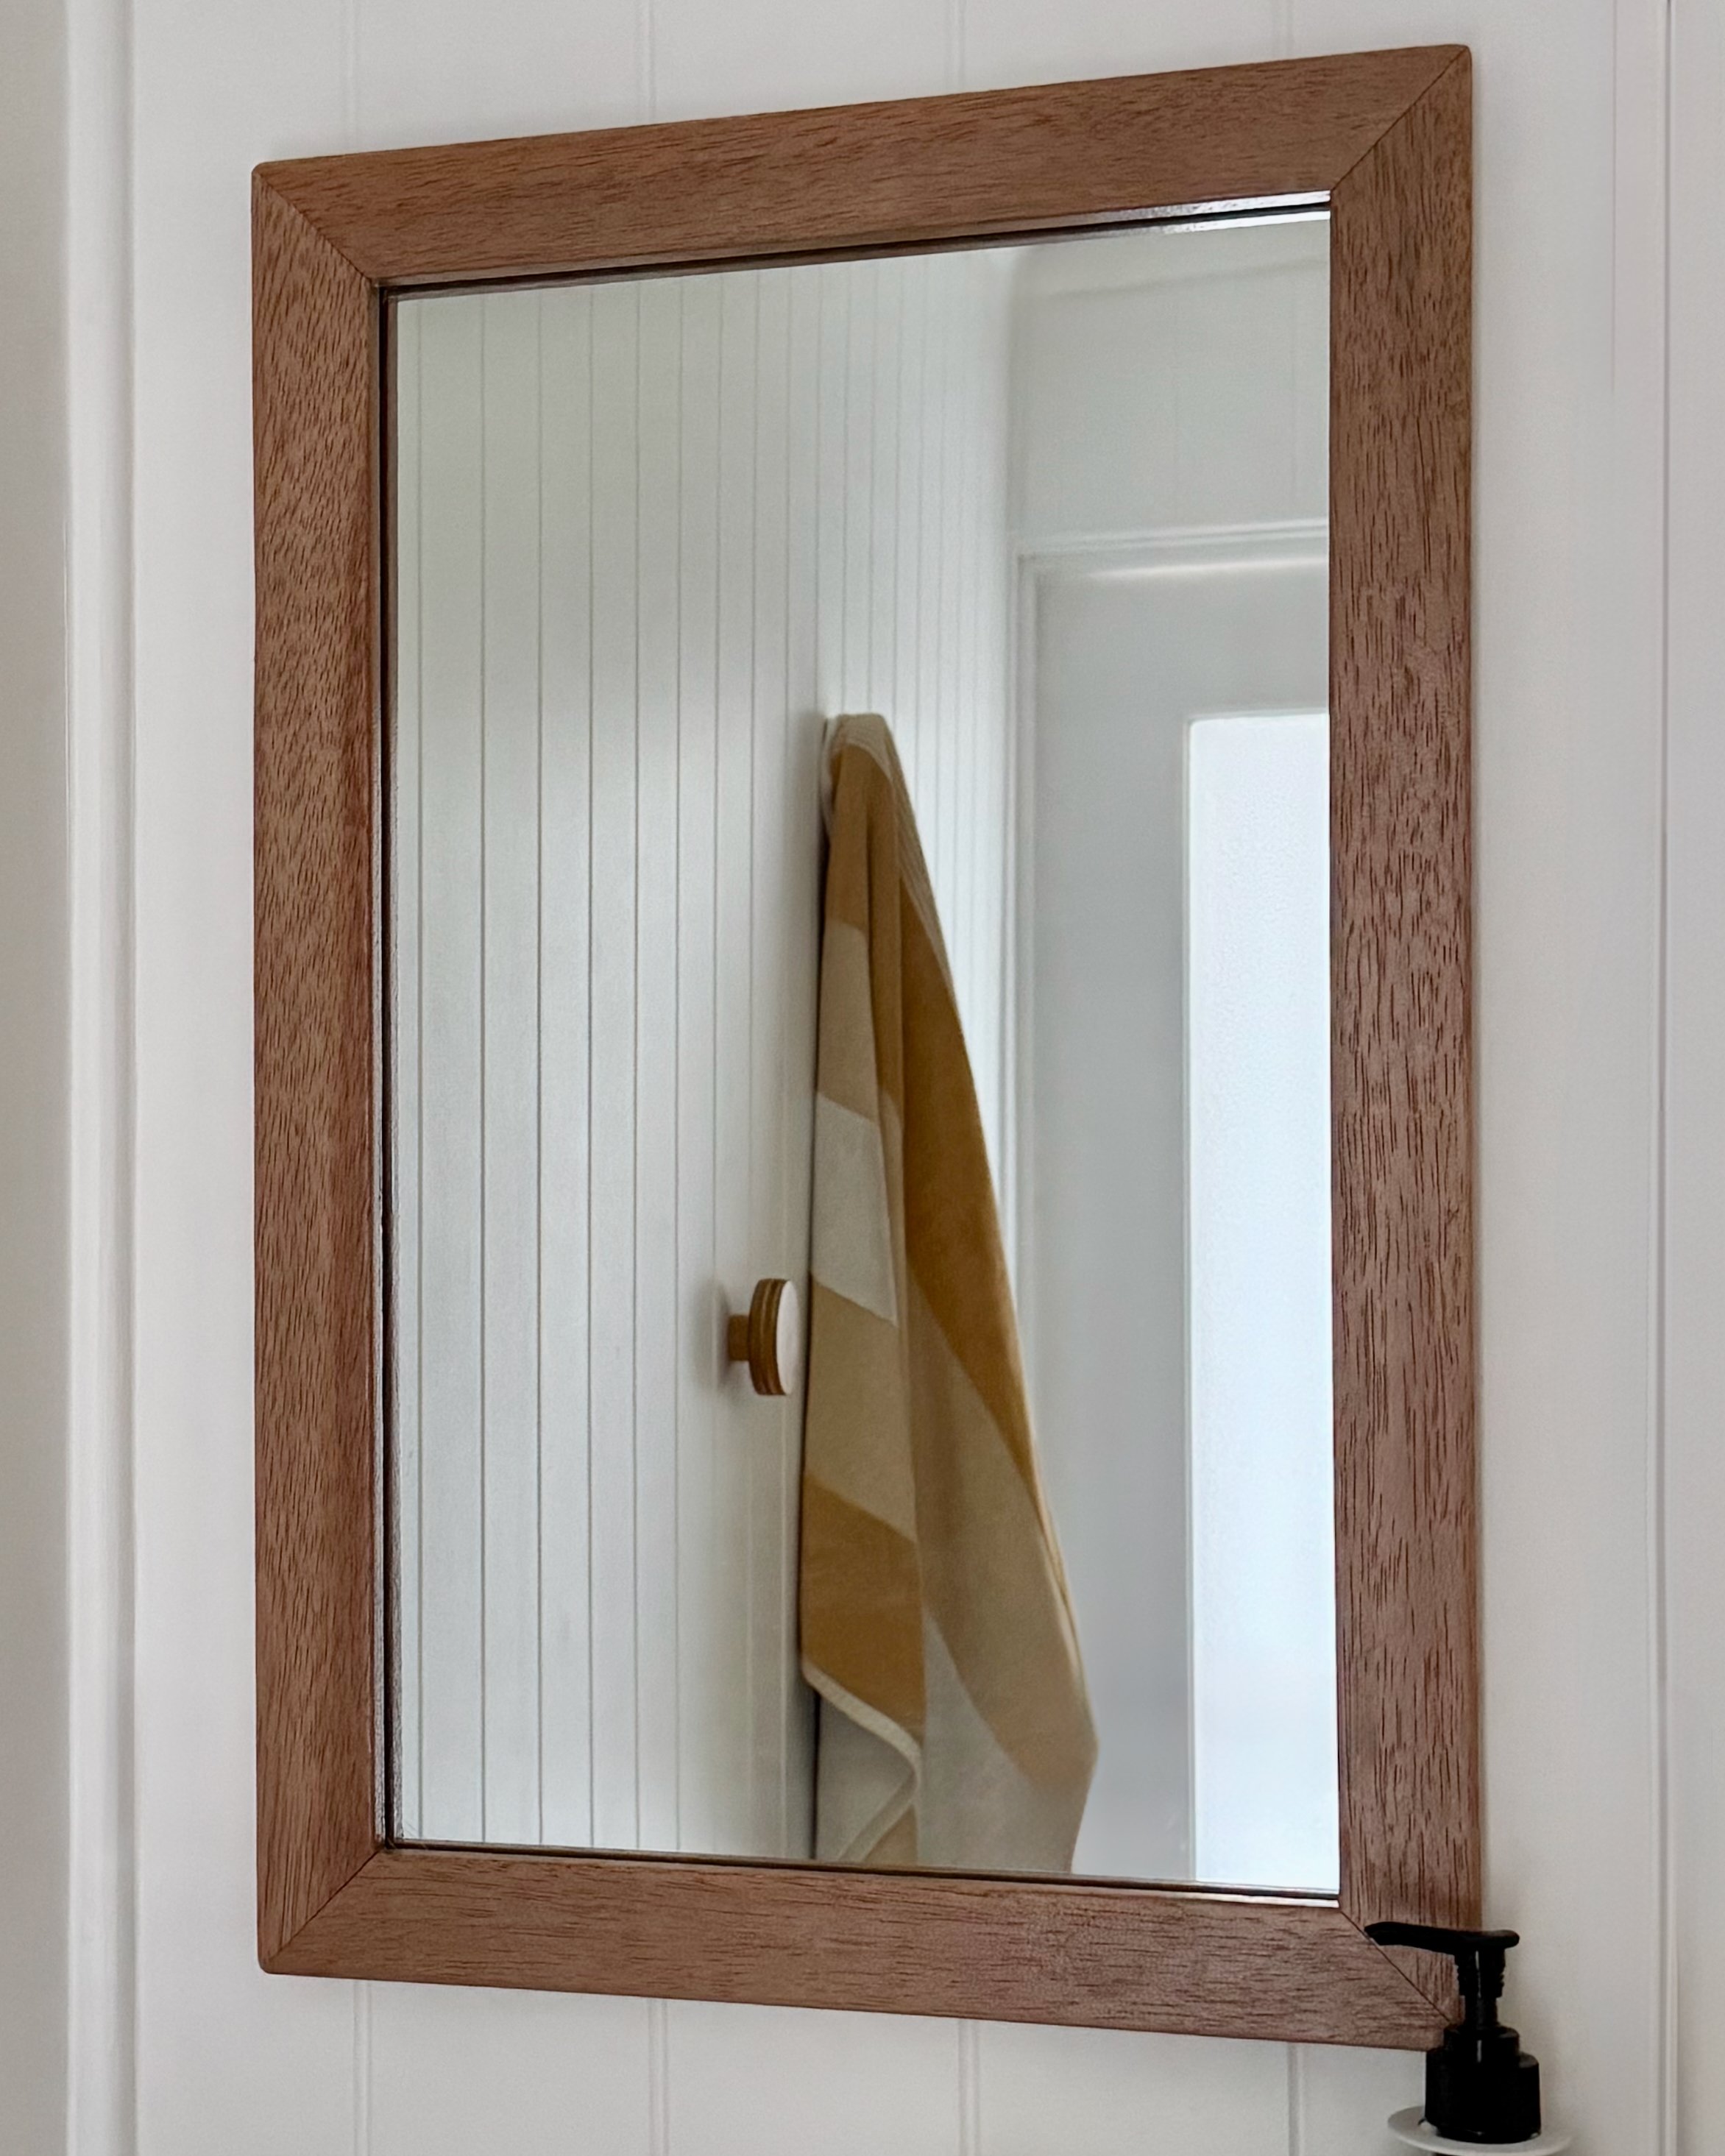
“I made a lightweight timber frame and secured the mirror with mounting corners to ensure it stays safely on the wall.”
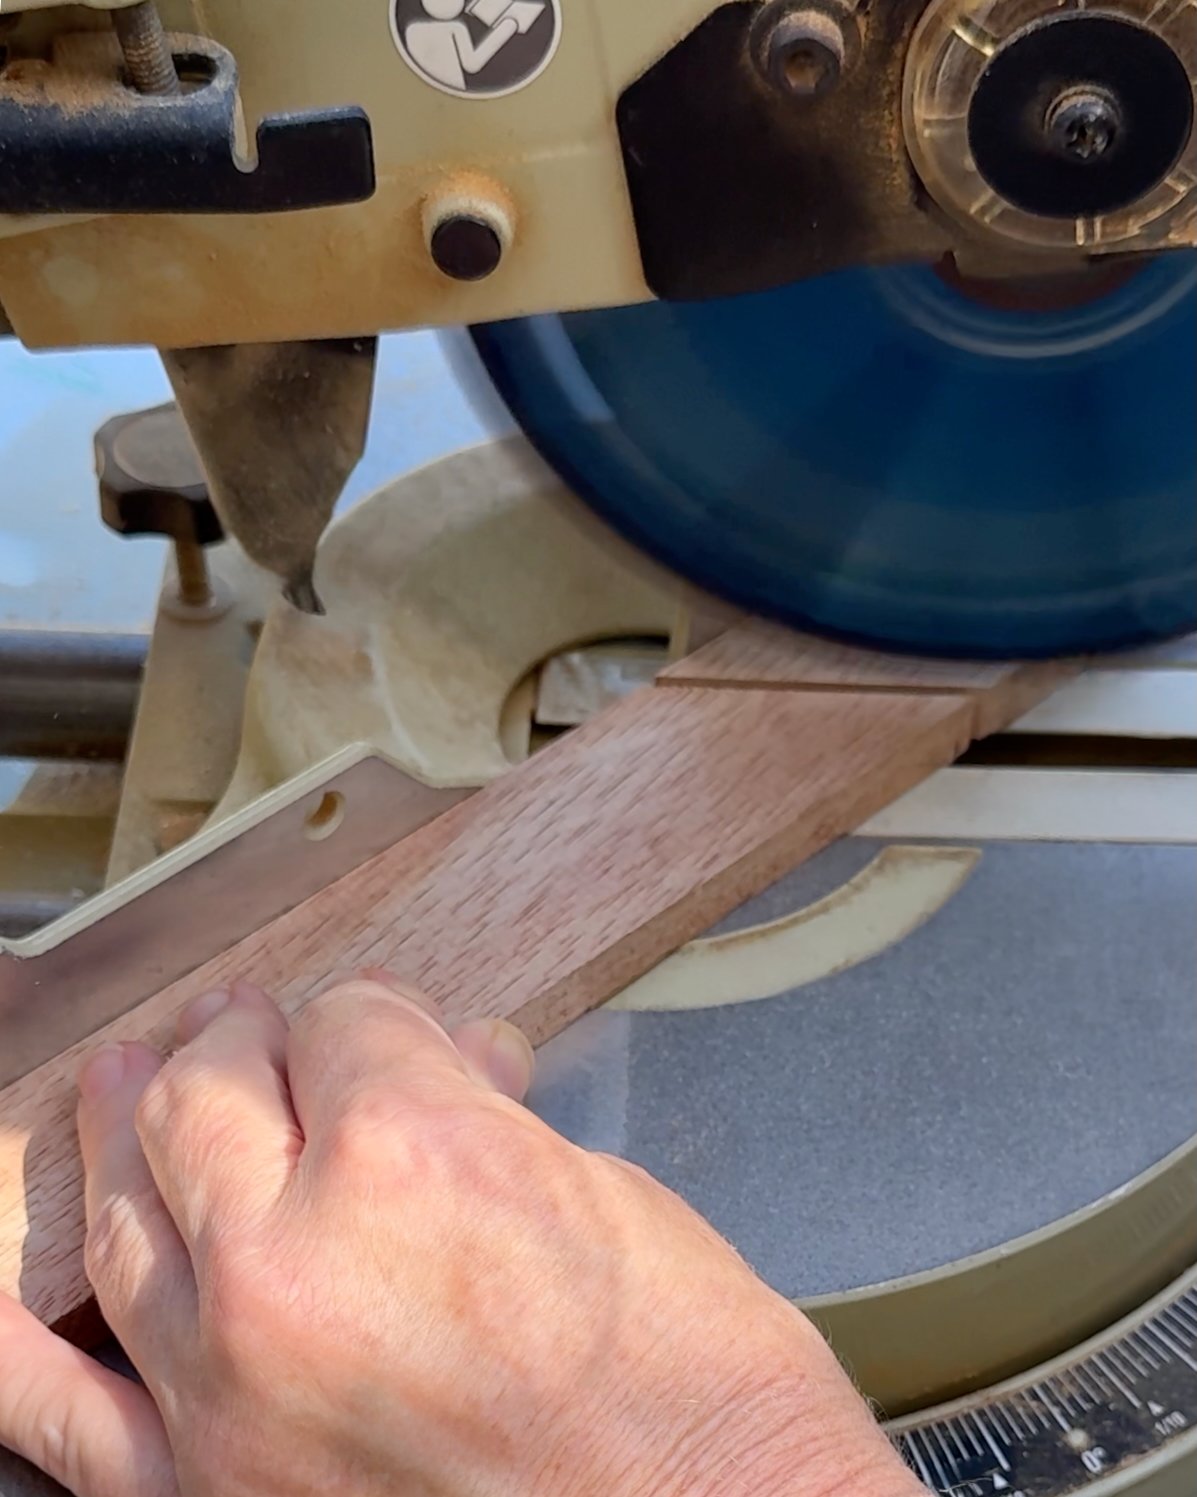

I chose 41mm x 12mm meranti because it looks similar to the Tasmanian oak hardwood that features in the rest of the room, but is more lightweight.
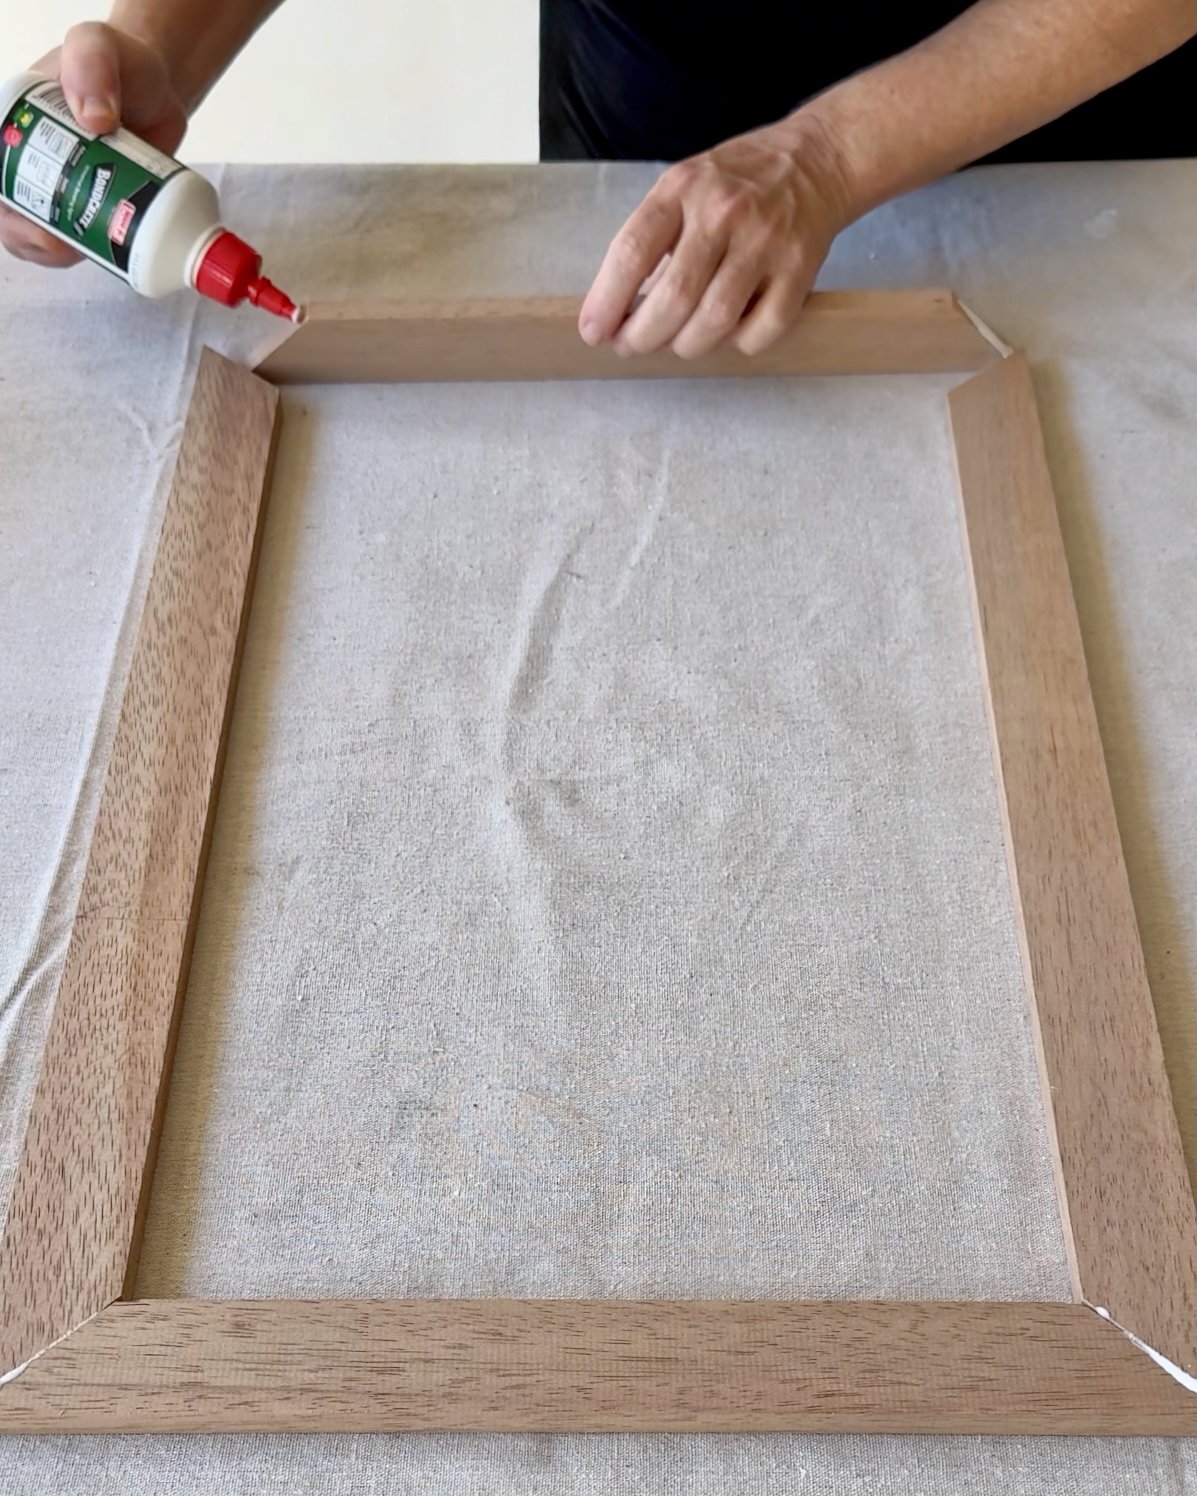
Using a drop saw, I mitred pieces to fit around the mirror, glued them with Bondall Bondcrete as a woodworking adhesive then used quick-grip clamps to hold them together while it dried.


On the back of the frame, I secured reinforcement plates over the corner joins.
TIP Use mini pliers to hold the supplied tacks in position while tapping them in with a hammer.

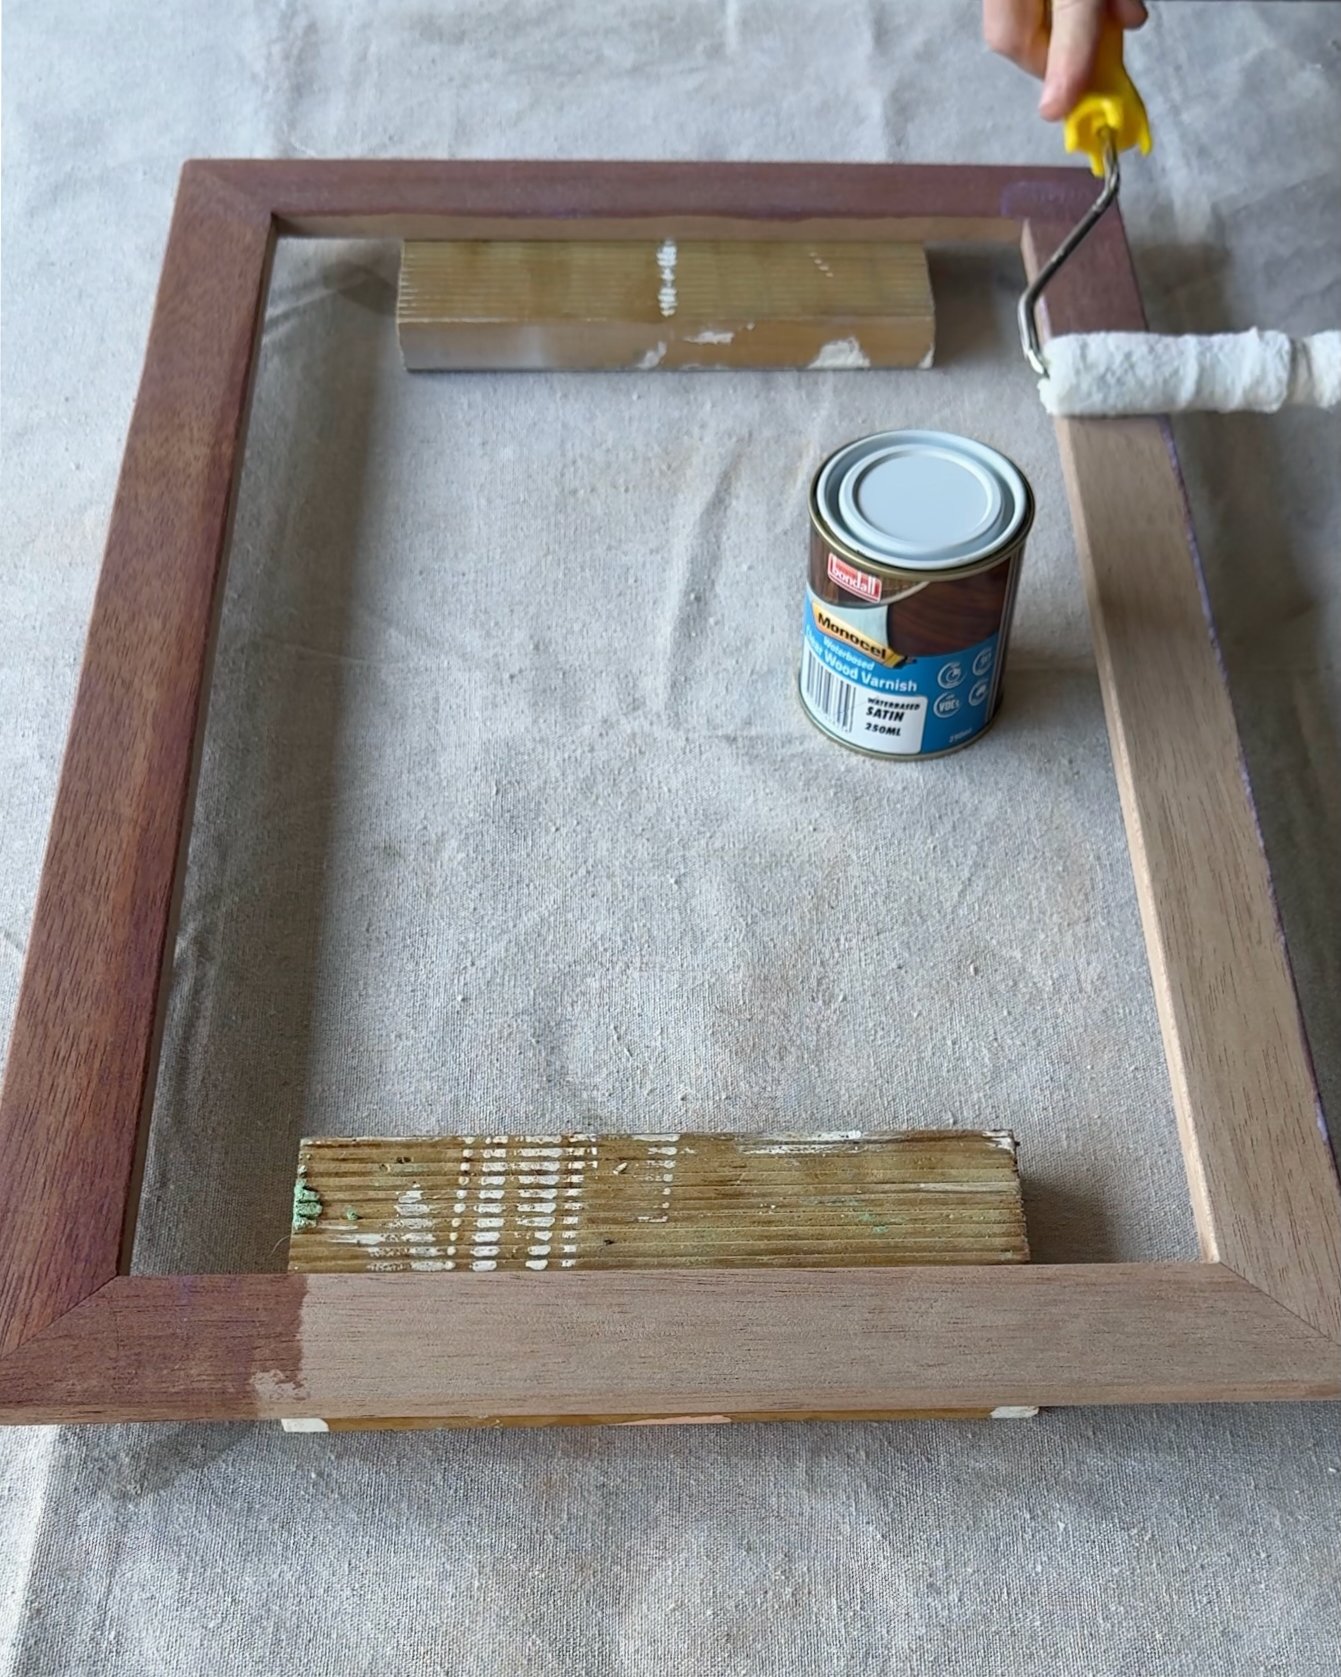
After sanding the framing all over with 180-grit sandpaper, I wiped the dust away with a clean cloth and applied two coats of Monocel water-based clear varnish.
TIP Use a mini microfibre roller to apply, leaving the varnish to dry for an hour or two. Lightly sand the timber smooth and wipe away the dust before applying a second coat.


After centring the mirror face-down on the back of the frame, I positioned mirror mounting corners to hold it in place, pre-drilling tiny starter holes and securing with screws.
TIP Check the length of the supplied screws against the frame. You may need to replace them with shorter ones.
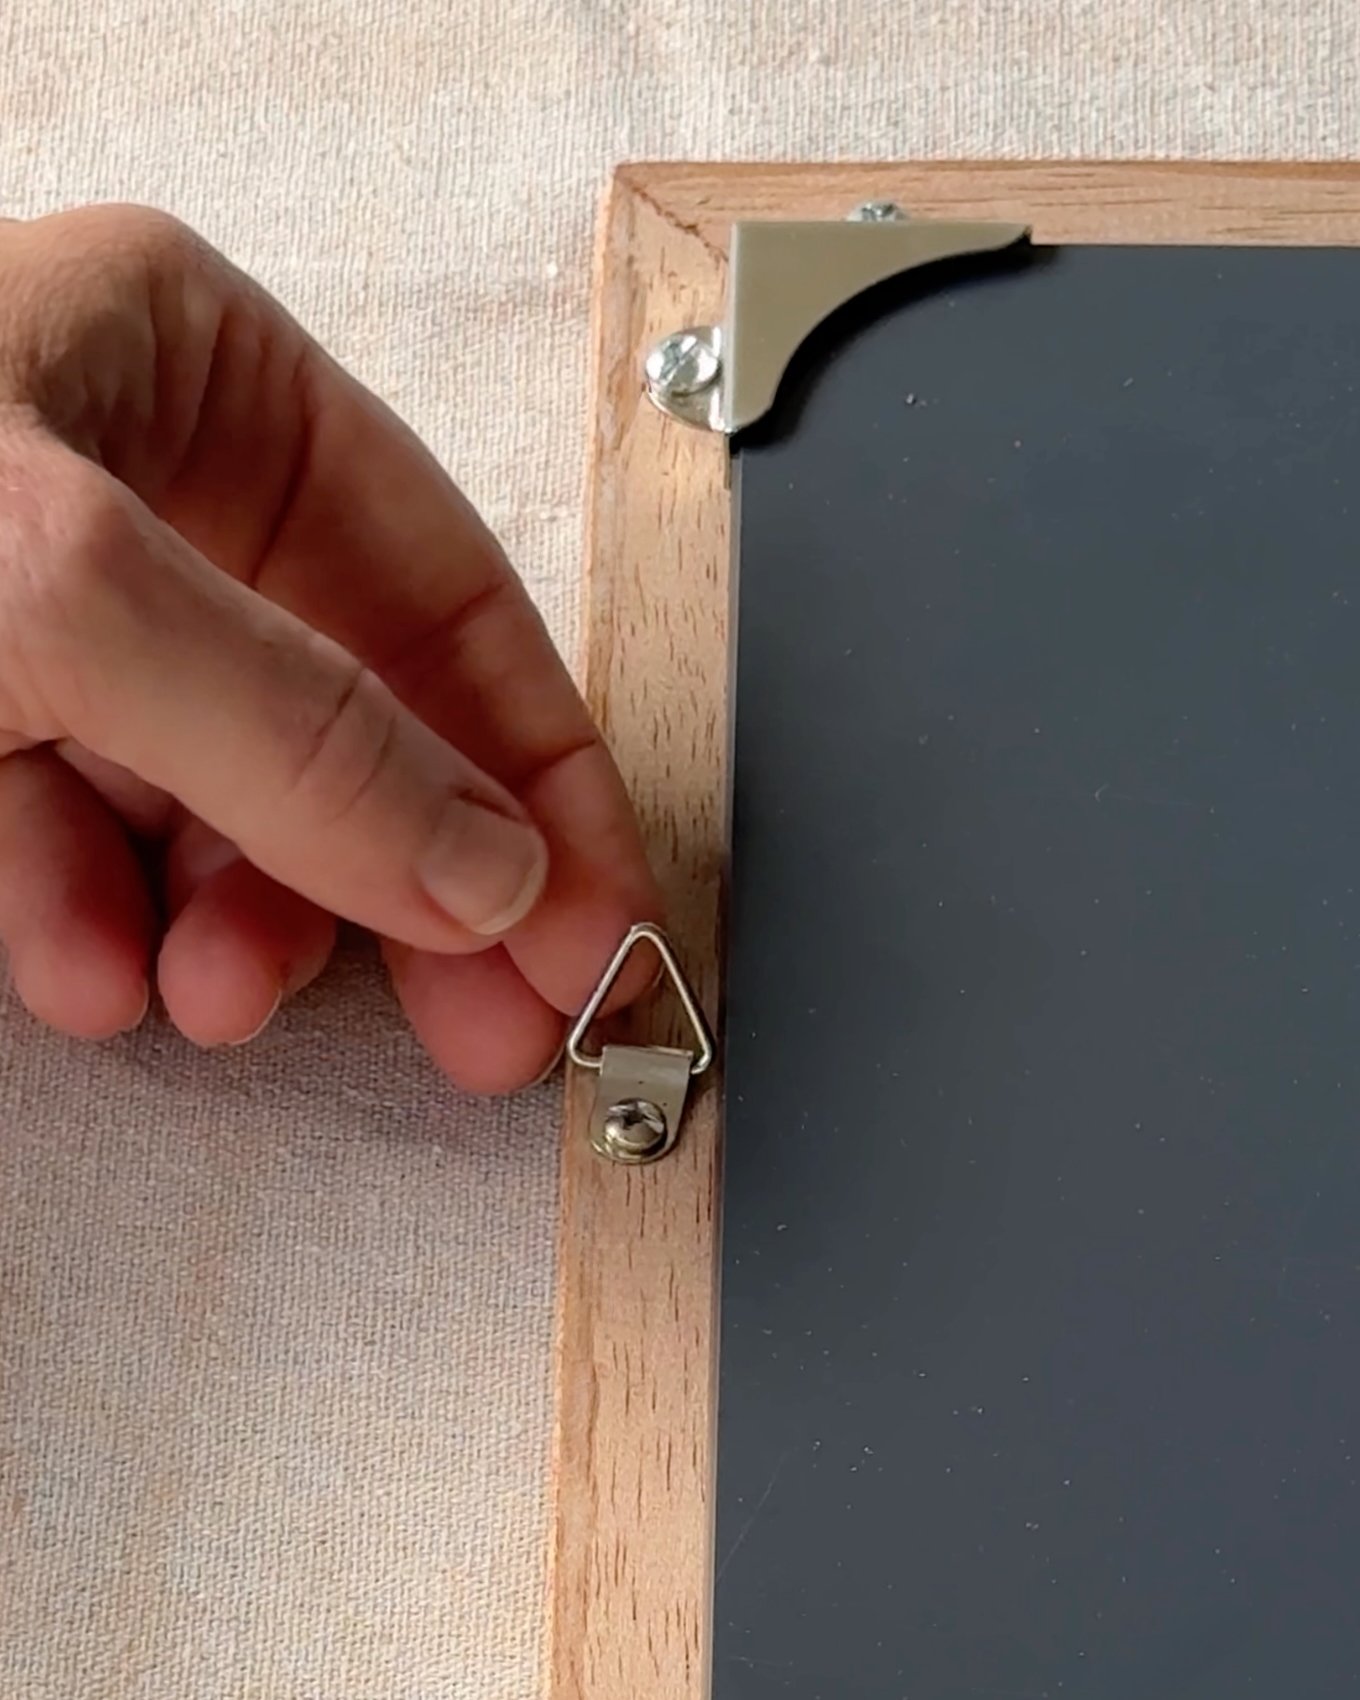
To hang the mirror, I measured 150mm down from the top of the frame to secure triangle hangers either side.
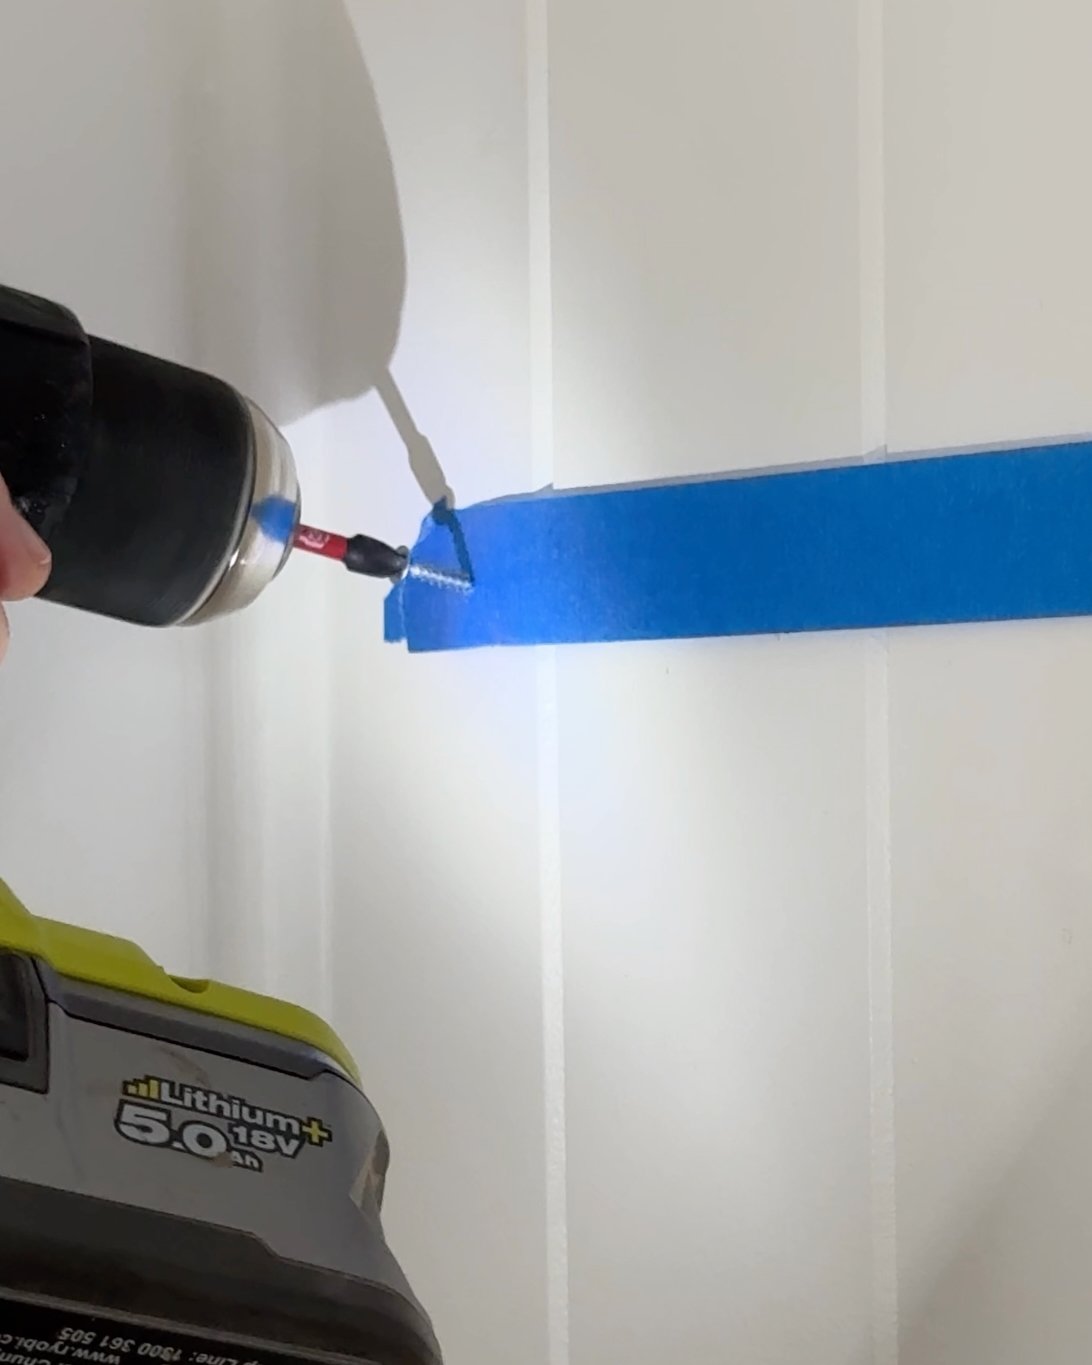
I ran tape over the back of the frame to mark the hangers and transferred this to the wall, using a spirit level to check that the marks on the tape lined up.
Then I pre-drilled and installed two screws, leaving them protruding by 10mm.
TIP Check the screws are secured into wall framing or use anchors suited to your wall type.

To hang the mirror, I reached around the back to hold the triangles up while positioning them on the screws.
Will you be making your own mirror?
Tag me on your project and follow more of my DIY journey on Instagram for tool tips, home improvement and simple building tutorials.