MY SPARE ROOM RENO
Alun Machin

Where do you even begin to design a DIY renovation that improves the space in your home for everyday living?
With a plan of action, of course! It helps you focus as you roll up your sleeves to get handy.

BEFORE Like many Aussie homes, the third spare room at my house is too small for a bedroom but is a great size for a studio office.

AFTER I’ve used a three-step method that works for any reno, big or small. It’s all about DIY with a designer eye to make a room function more efficiently while making it more welcoming.

MY THREE-STEP DIY METHOD
My three-step DIY method really does work every time. See how it relates to this room.
1 Remove the most dysfunctional factor
Changing the door to a sliding one increases floorspace.
2 Add a practical but modern element
Cladding the new door cavity creates a lovely new feature wall.
3 Improve the experience
Designing built-in shelving creates storage and a display area.

I teamed up with Porta to do this room reno, They do beautifully milled timber moulding, trim and dowel that don’t need much sanding or finishing.
For specifics on product names and more detailed how-to steps, head over to the step-by-step spec sheet I put together with them.

Step 1. REMOVE THE MOST DYSFUNCTIONAL FACTOR
The door swings into the room but keeping this area clear takes up valuable floor space. So replacing it with a siding door will make the room more flexible.
TIP I used a drill to remove the hinges, taking off the lower one first so the door didn’t fall on my head, then removed the strike. Start filling these now as you’ll need to do it in stages to wait for the layers to dry.
CALL IN THE SPARKIE
Now is the time to have the electrician move switches and power points. I made the mistake of assuming the switch could simply move to the other side of the entry, but behind that wall was another sliding door cavity with no space for the new switch.
It ended up outside the room, which is fine for an office, but not so great for a bedroom.
TIP Be aware of what’s on the other side of the walls and have a chat with the sparkie when you book them to check if you need to buy switches or fittings.

REMOVE TRIM & SKIRTS
Removing the door also meant removing the trim, so I decided to also replace the wall skirting and window trim with a slimmer, more streamlined profile.
TIP To remove, run a utility knife along the top of the trim where it joins the wall to prevent pulling off the paint.
Tap a chisel or crowbar into the gap and use a pulling-down motion so the tip of the crowbar pushes into the wall at the base, rather than above, which leaves a mark.

FIND THE WALL STUDS
When removing my skirting I found the screws attaching plasterboard to the studs, so I marked them on the floor with painter’s tape and left it there right to the end of the reno.
Knowing where the studs are is essential for attaching the door framing, the shelf, new skirting and window trim, even for putting up pictures.
TIP If you can’t find them, use a stud finder or ask the electrician to help you when he pops in to move any switches. Sparkies have a knack for knowing where they are!

PREPARE FOR PAINTING
To prepare for painting, I ran a scraper around the walls where the skirting was removed, to scrape away paint built-up.
I filled dents and holes with fast-drying crack filler, starting at the doorway and worked around the room thoroughly so I only had to do it once.
TIP Use a sanding block with 180-grit abrasive paper along the skirting line to smooth out the filler and the paint line.

PAINT THE ROOM
Wow, that beige is a stronger colour than it looks. I applied a coat of ceiling paint first, painted the cornices with a brush and used it to cut into the corners of the walls.
Then I used a roller for the wall paint and repeated the full process, doing three coats.
TIP I like using a small plastic-back drop sheet and moving it around the room as I go, but you could put down a full canvas to cover the entire floor.

Step 2. ADD A PRACTICAL BUT MODERN ELEMENT
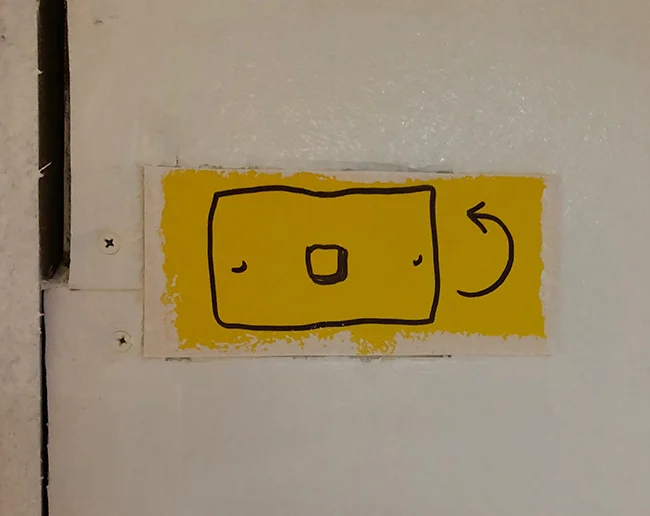
I used a Hume Doors cavity system, door and Evolution One Touch system, which is door hardware that, once installed, means simply tapping the door to open it.
I followed the instructions in the Hume Doors video, which was so easy and lightweight I didn’t even need a second pair of hands to put it together.
TIP Buy the door and cavity ready to assemble with the frame in a standard 75mm or 90mm depth. I used a 90mm, and bought the Evolution One Touch at the same time because it needs installing before the door cavity is covered.

BUILD THE FRAMING
After positioning the door cavity I set up the dropsaw in the room so I could measure and cut to build the pine frame around it, with extra supports along the top for my feature wall.
Before attaching anything I found the wall studs to safely secure the framing with brackets.
TIP Be sure to buy 35mm-thick pine framing in the same depth as the door cavity (mine was 90mm). You’ll need about 2.7m each side, 1.8m along the top and offcuts for extra supports.

CLAD THE FRAME
I clad the cavity and framing in 12mm thick plywood, not worrying about neat joins as it would all be hidden.
I like using a small impact driver, which is noisy but it gets those screws in without having to drill pilot holes.
TIP This is where you need a good ladder, make sure your drill is charged and use 25mm timber screws, which are long enough to hold the plywood in place, making sure they finish flush with the surface.

CUTTING THE DOWEL
After working out that my ceiling has a fall of 10 degrees, I figured a system of cutting Porta 30mm half round dowel at the same angle along the top.
Each stick was a different length so I cut then tested them against the wall before securing.
TIP When designing a feature wall like this, keep in mind the standard length of half dowel is 2.4m. If you have a sloping ceiling, it makes life easier if you plan the tallest full-length piece to be the same.

ATTACH THE DOWEL TO THE WALL
I applied a bead of Bondcrete adhesive along one piece at a time, positioning it then pinning with a nail gun.
To finish, I lightly sanded the wall with 180-grit abrasive paper then coated all raw timber in Monocel Clear Varnish using a mini roller with microfibre cover.
TIP I used a Bostitch gun with tiny pins that were just long enough to go through the side of the dowel and hold it to the plywood while the adhesives dried.
If you’re using brads or nails with a hammer, make sure they sit below the surface and use a timber filler if you need to hide them.

STEP 3. IMPROVE THE EXPERIENCE
To build the recessed shelf next to the new wall, I used Porta primed 18 x 110mm DAR pine so it only needed painting once when assembled.
I built it on site, measuring the pieces to fit and securing to the frame and the wall with 60mm timber screws.
The width of my shelf is 1300mm so I added lengths of 22mm Tasmanian oak dowel for support to prevent bowing, and I like how it ties into the look of the feature wall.
TIP The dimensions depend on your room size. If your shelf is more than 900mm wide, add the dowel supports. I used a speed boar bit (the same 22mm one as for the Evolution One Touch door hardware) to create an indent then secured from the top with 40mm screws and covered them with white Prestige press-in screw caps.

ADD THE WHITE FRAMING
I clad only the cavity in Tasmanian oak, rather than the entire wall, to give timber effect impact. Framing it in white also keeps the edges neat and ensures the timber doesn’t feel too heavy or dark.
I painted 12mm Porta Quad Moulding for the frame, buying a 2.7m length to run the full length of the top.
TIP If your ceiling slopes like mine, make sure you cut the ends of the framing at the same angle so it fits together neatly. It saves time if you set up the drop saw or mitre box with a handsaw and cut it to fit onsite.
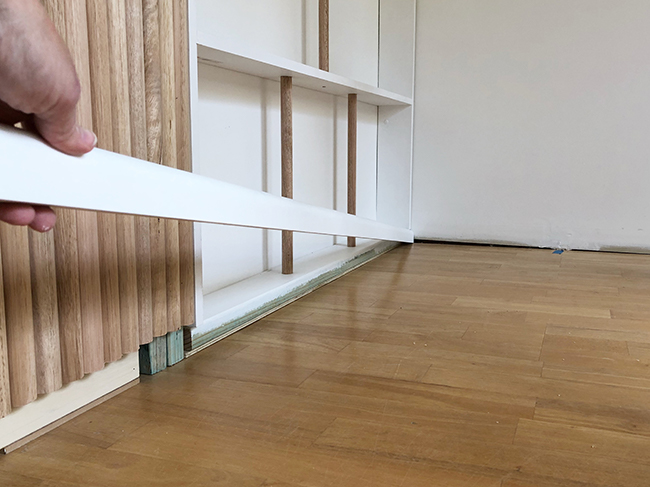
INSTALL THE SKIRTING
I started with the widest wall, using a drop saw to cut one end of the skirting at 45 degrees to transfer the measurement (from the outside corners), cutting and fitting it to the wall. Then used a nail gun to secure it at intervals into the studs.
For one wall spliced two pieces and positioned the join where it would be hidden by furniture, butting them and smoothing over with timber filler and touching up with paint.
TIP I set up the primed skirting outside to appky one coat of paint with a mini roller (which is easier than painting inside).
When cutting, work on the longest wall first, just in case you mess it up and need to cut that piece down for another side.

HANG THE DOOR
It was simple to add the rest of the door hardware, including the rollers, and lift the door into place and tighten it up using the supplied spanner.
This was super easy to do on my own once I worked out to prop the door on a slim piece of plywood to help me lift it slightly, and stand on a stool so I could reach the top.
TIP Paint the door outside while painting the skirting, doing one side at a time and leaving to dry. I kept my door white to bounce light back into the room when it’s closed, but you could add a surprise pop of colour.
How gorgeous is the Flowering Gum by Roofus Australia? It's a pop of colour and personality, and great Aussie design.

TOOLS TO RENO YOUR ROOM
Aim to have the home improvement basics that include a drill with drill bits, hand saw, utility knife and drop saw for cutting, a hammer and mallet, screwdrivers, measuring tape and spirit level, crowbar, chisel and scraper, a broom and paint equipment.
It helps if you can use a nail gun with air compressor and brads, a good ladder and vacuum cleaner.
You’ll also need adhesive, crack filler, ceiling and wall paint plus sandpaper and timber varnish, and timber screws for the framing and plywood cladding.