UPDATED PATIO PAVERS
Natasha Dickins
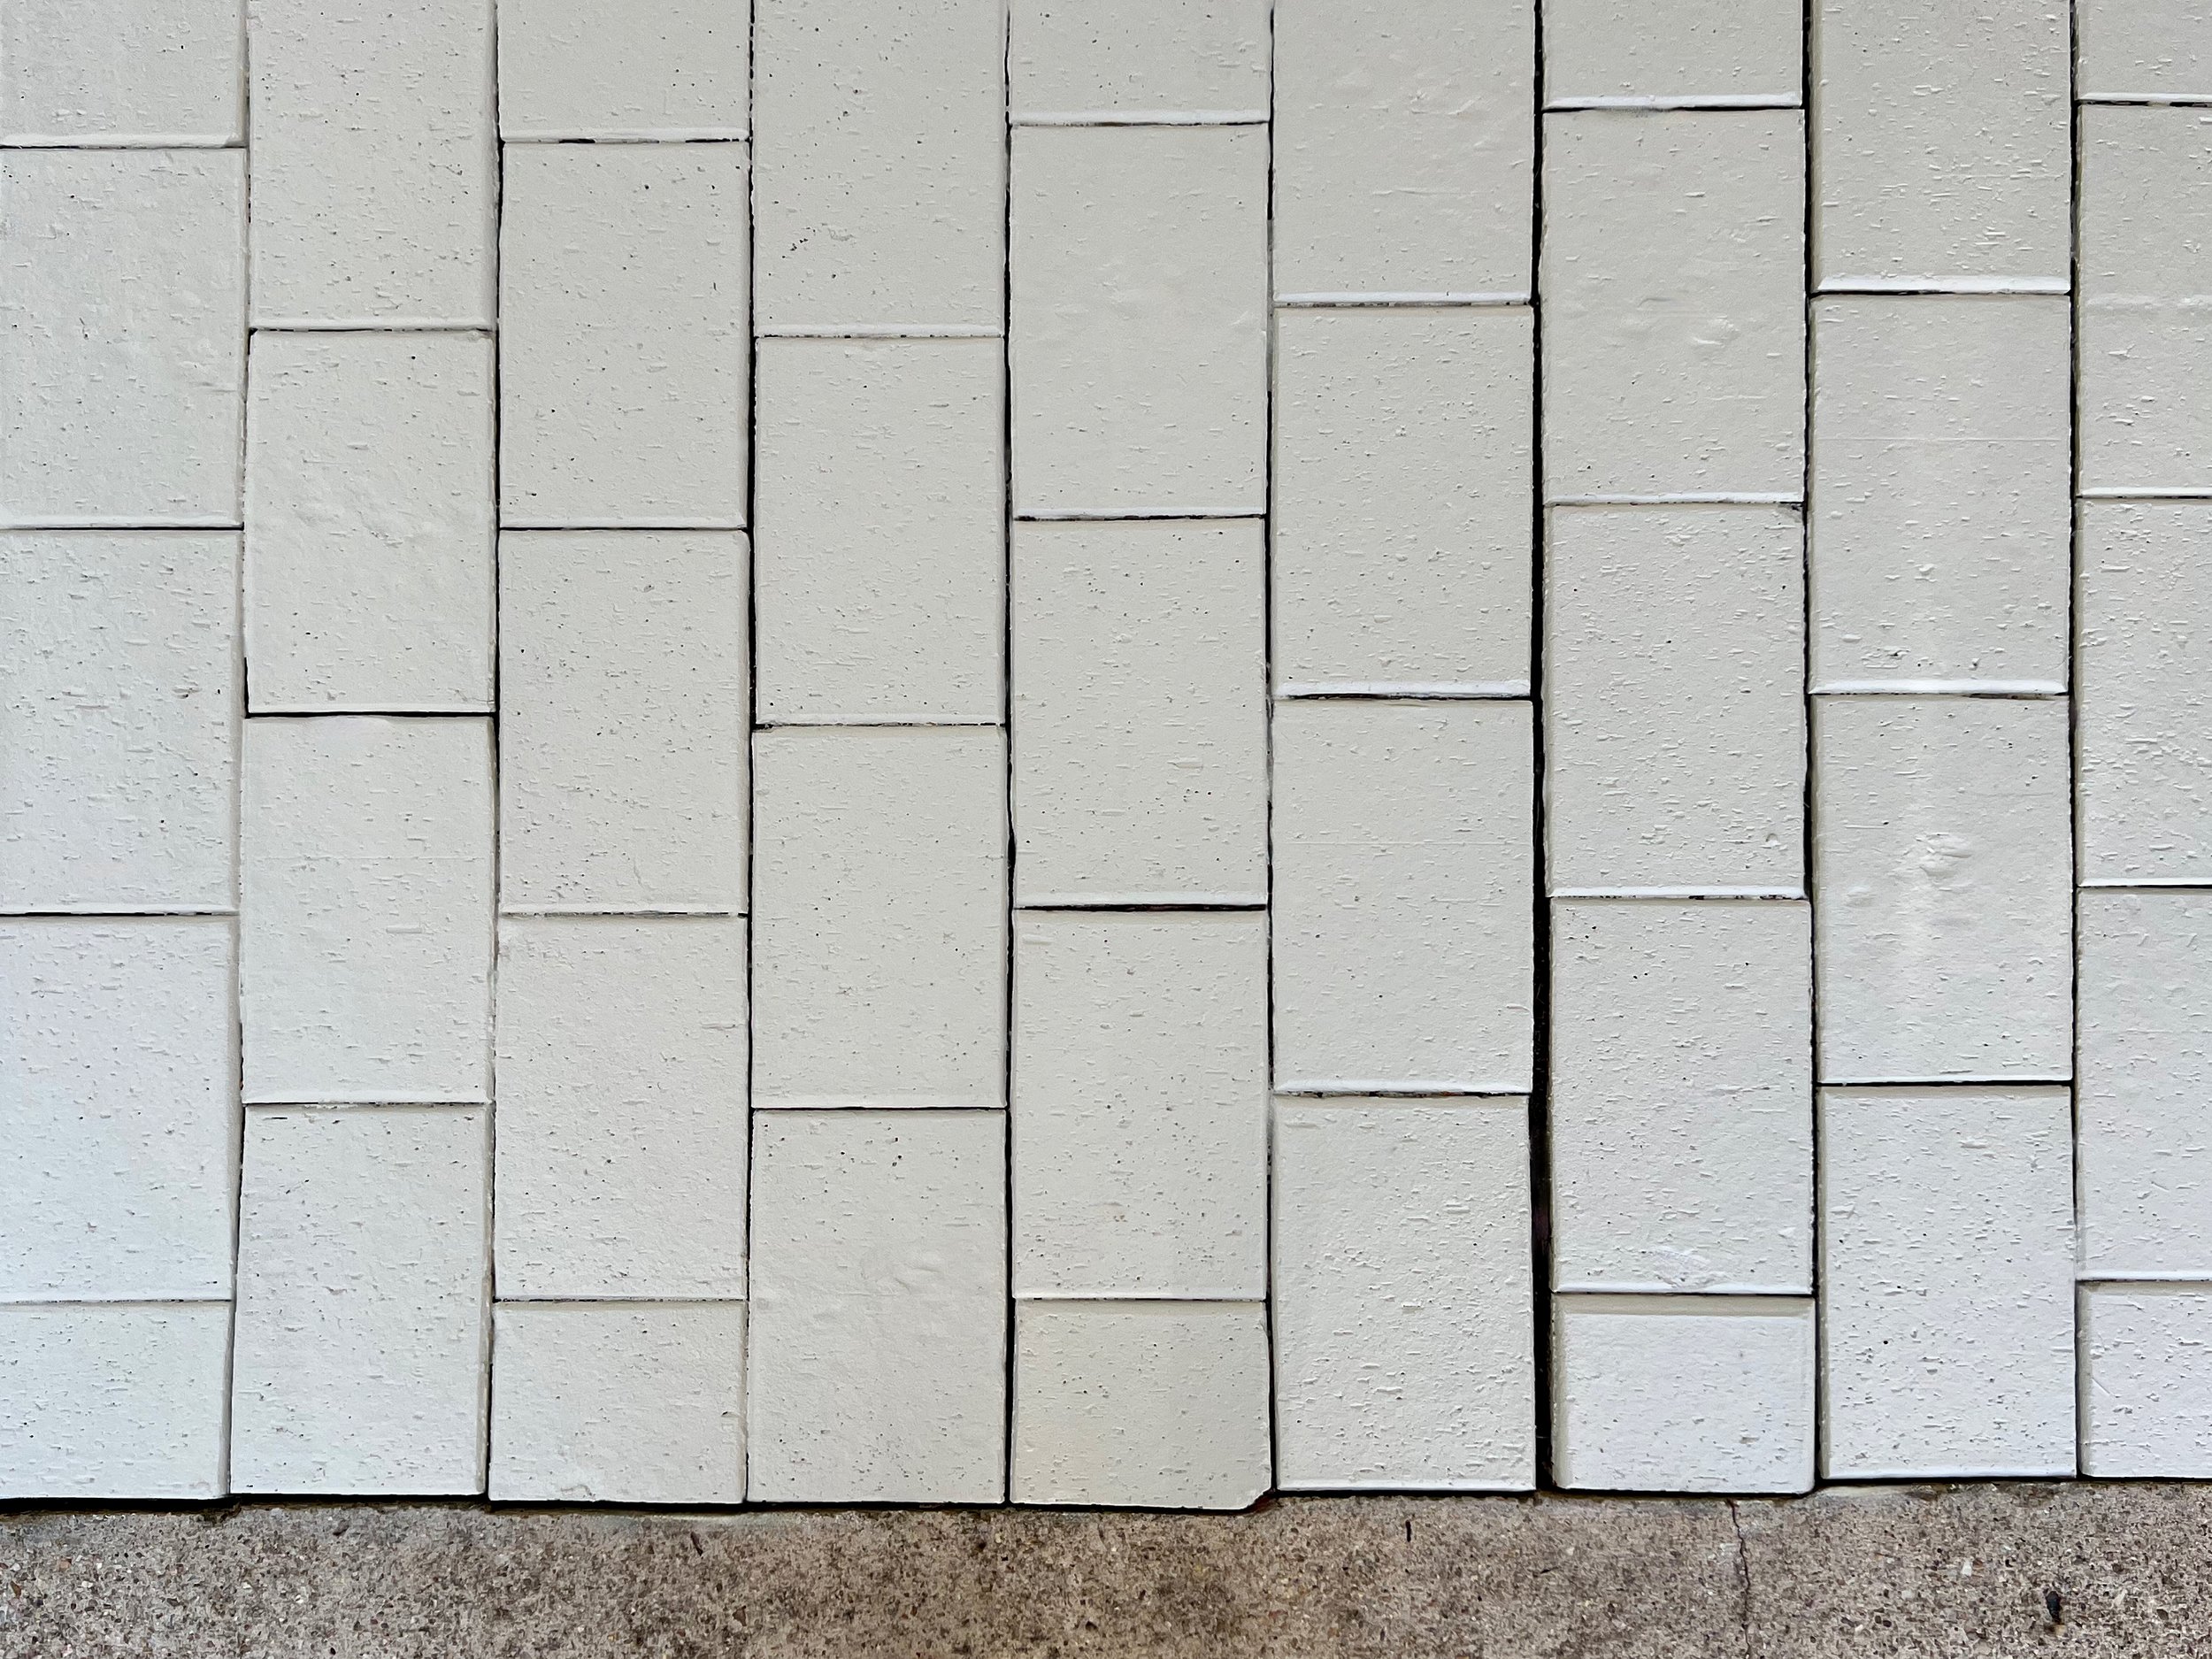
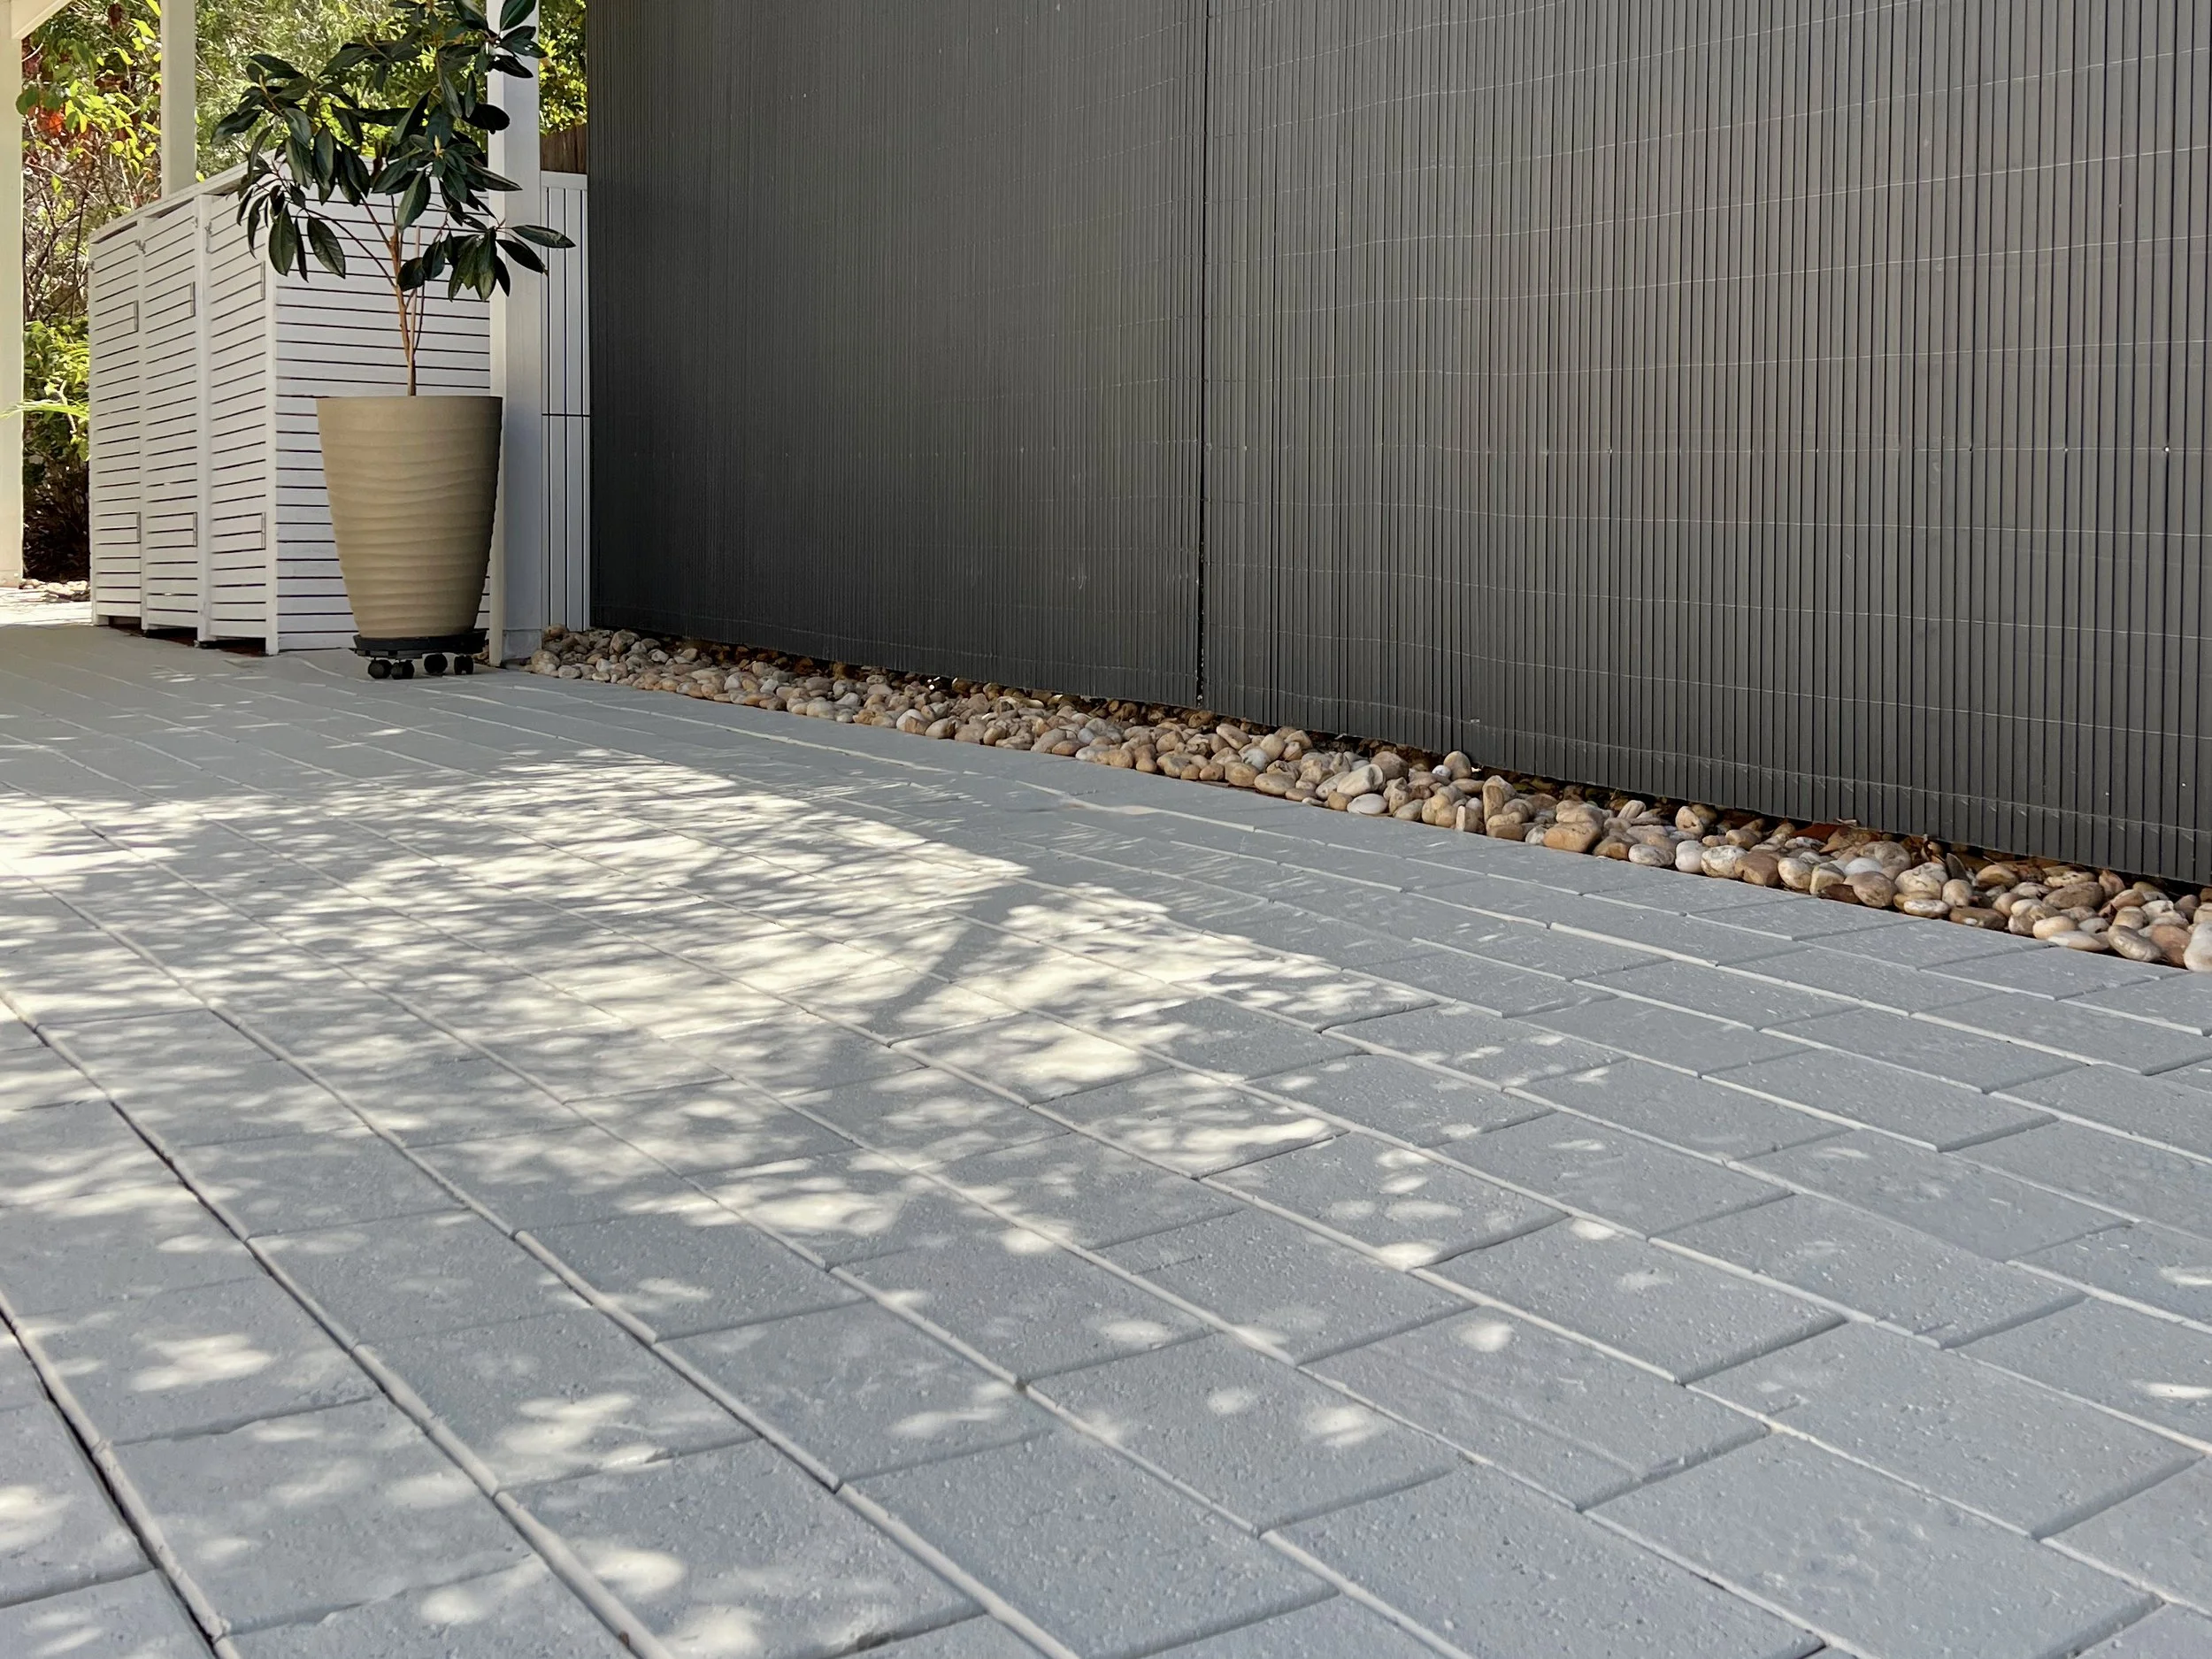
I wanted to modernise this outdoor area and make it easy to keep clean. For a simple weekend makeover, I used the Dulux Concrete & Paving three-stage system, finishing in a sealer tinted to match the surrounding concrete.
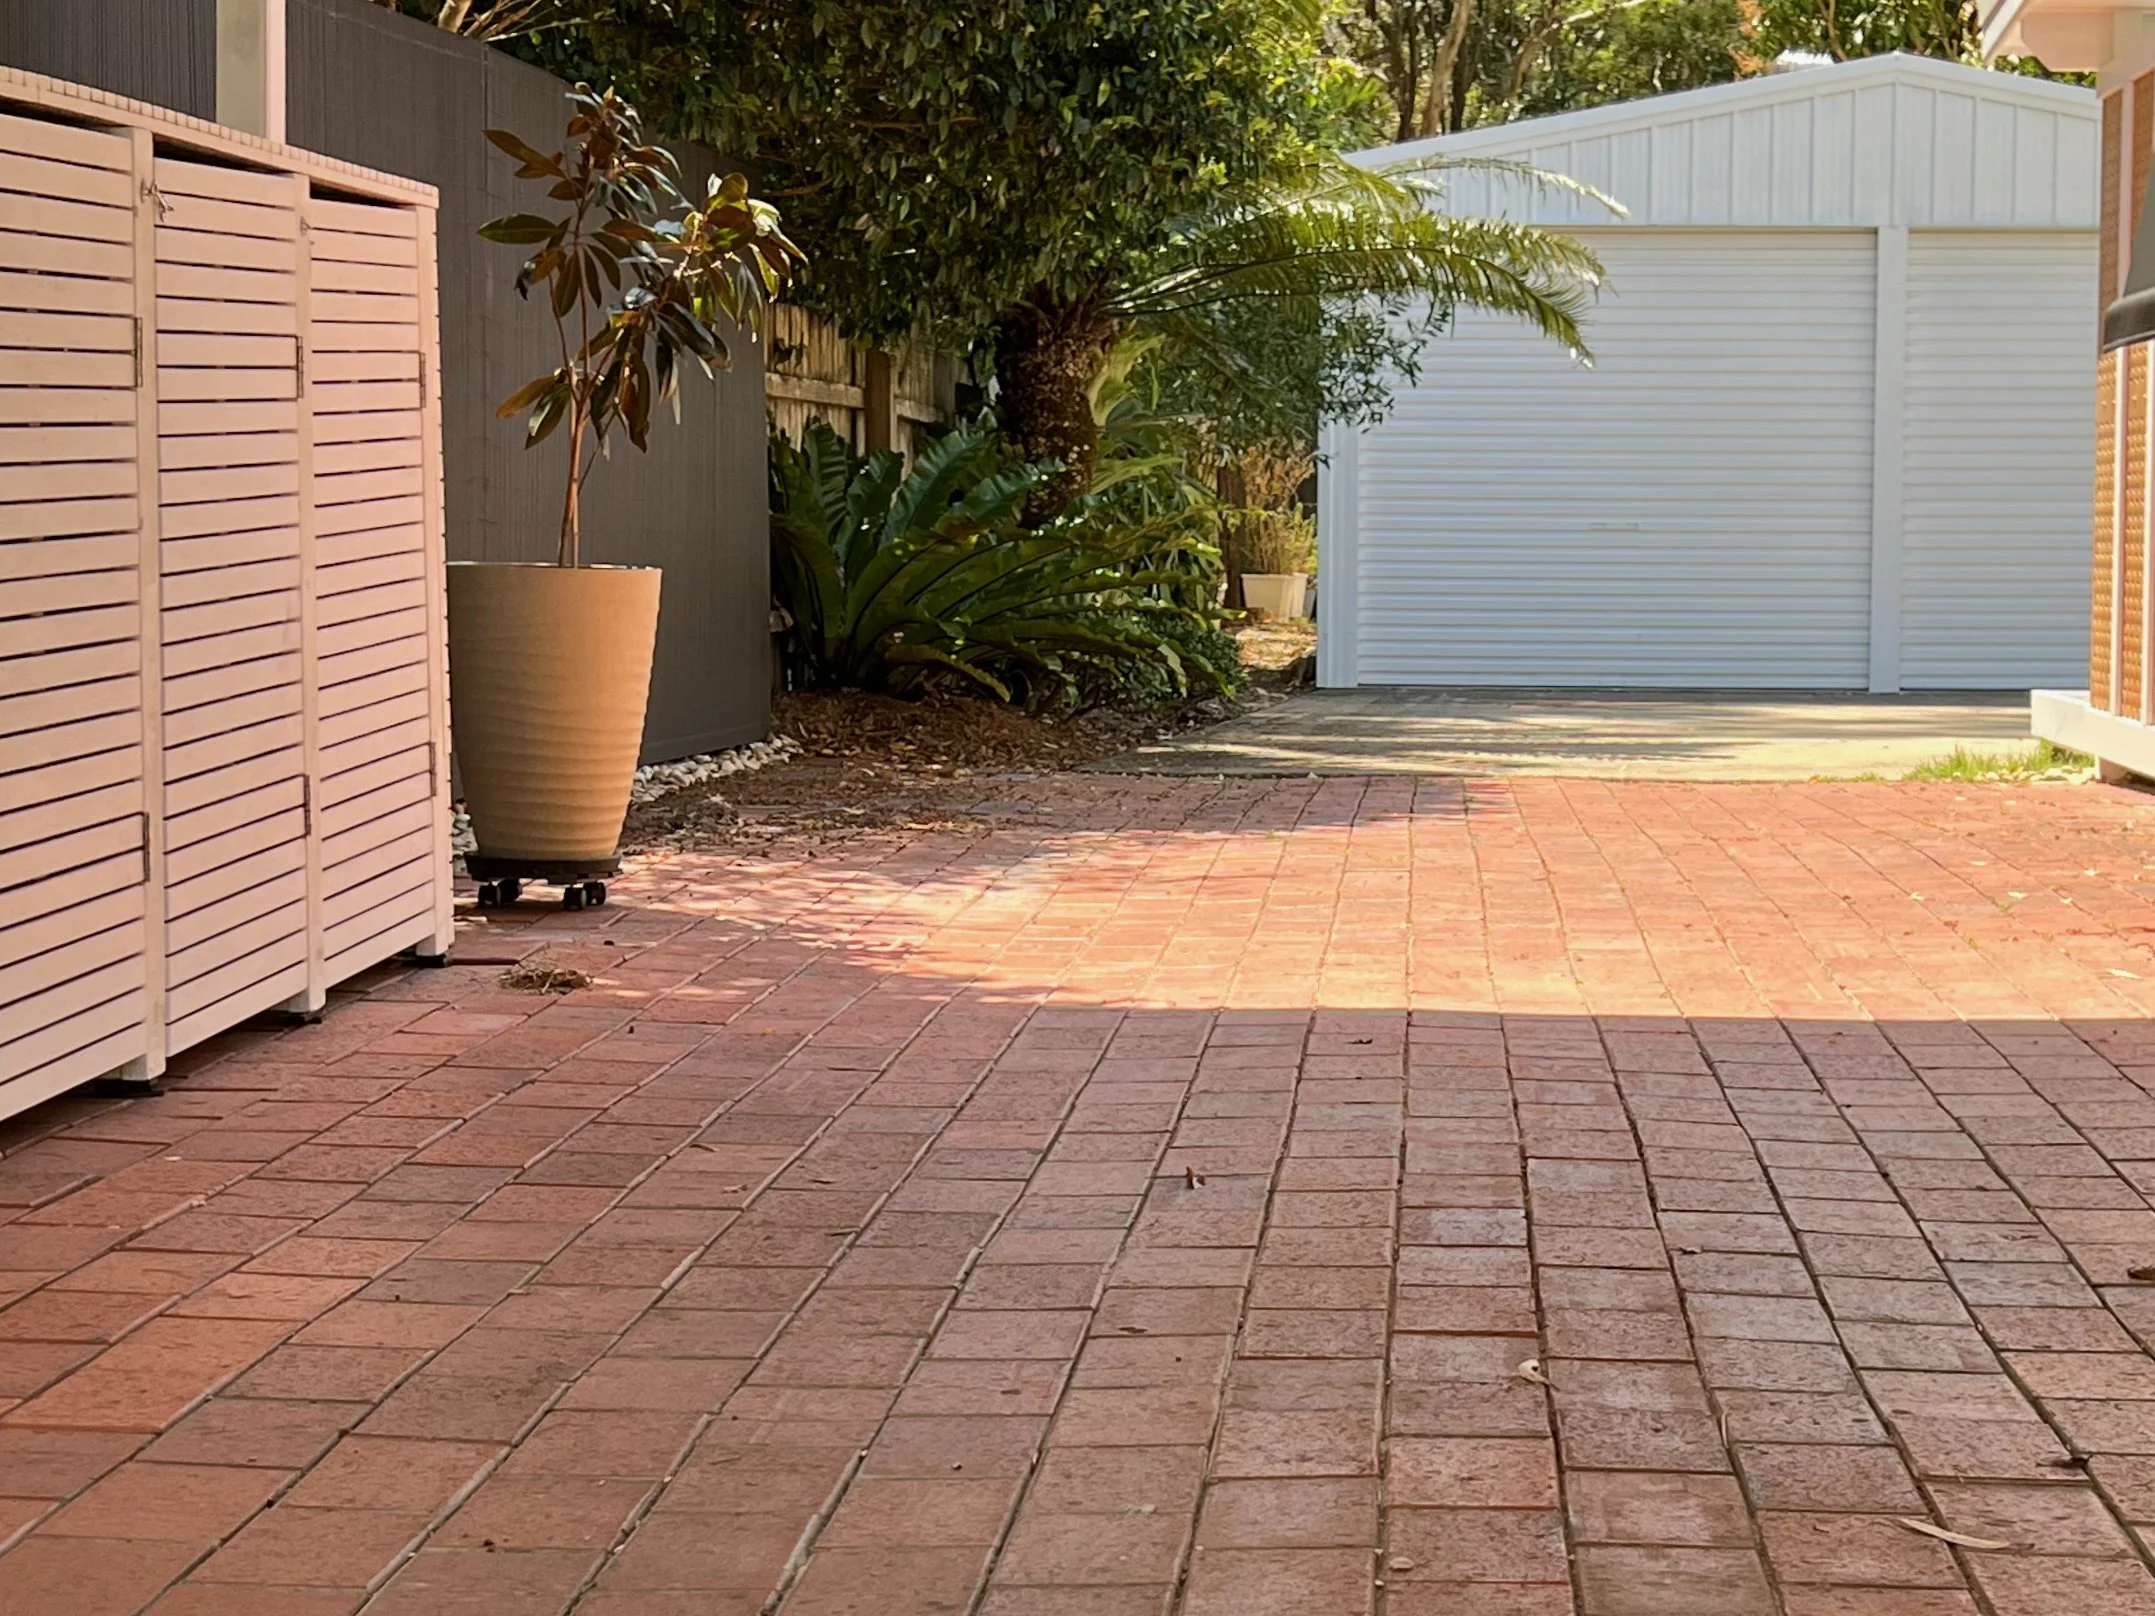
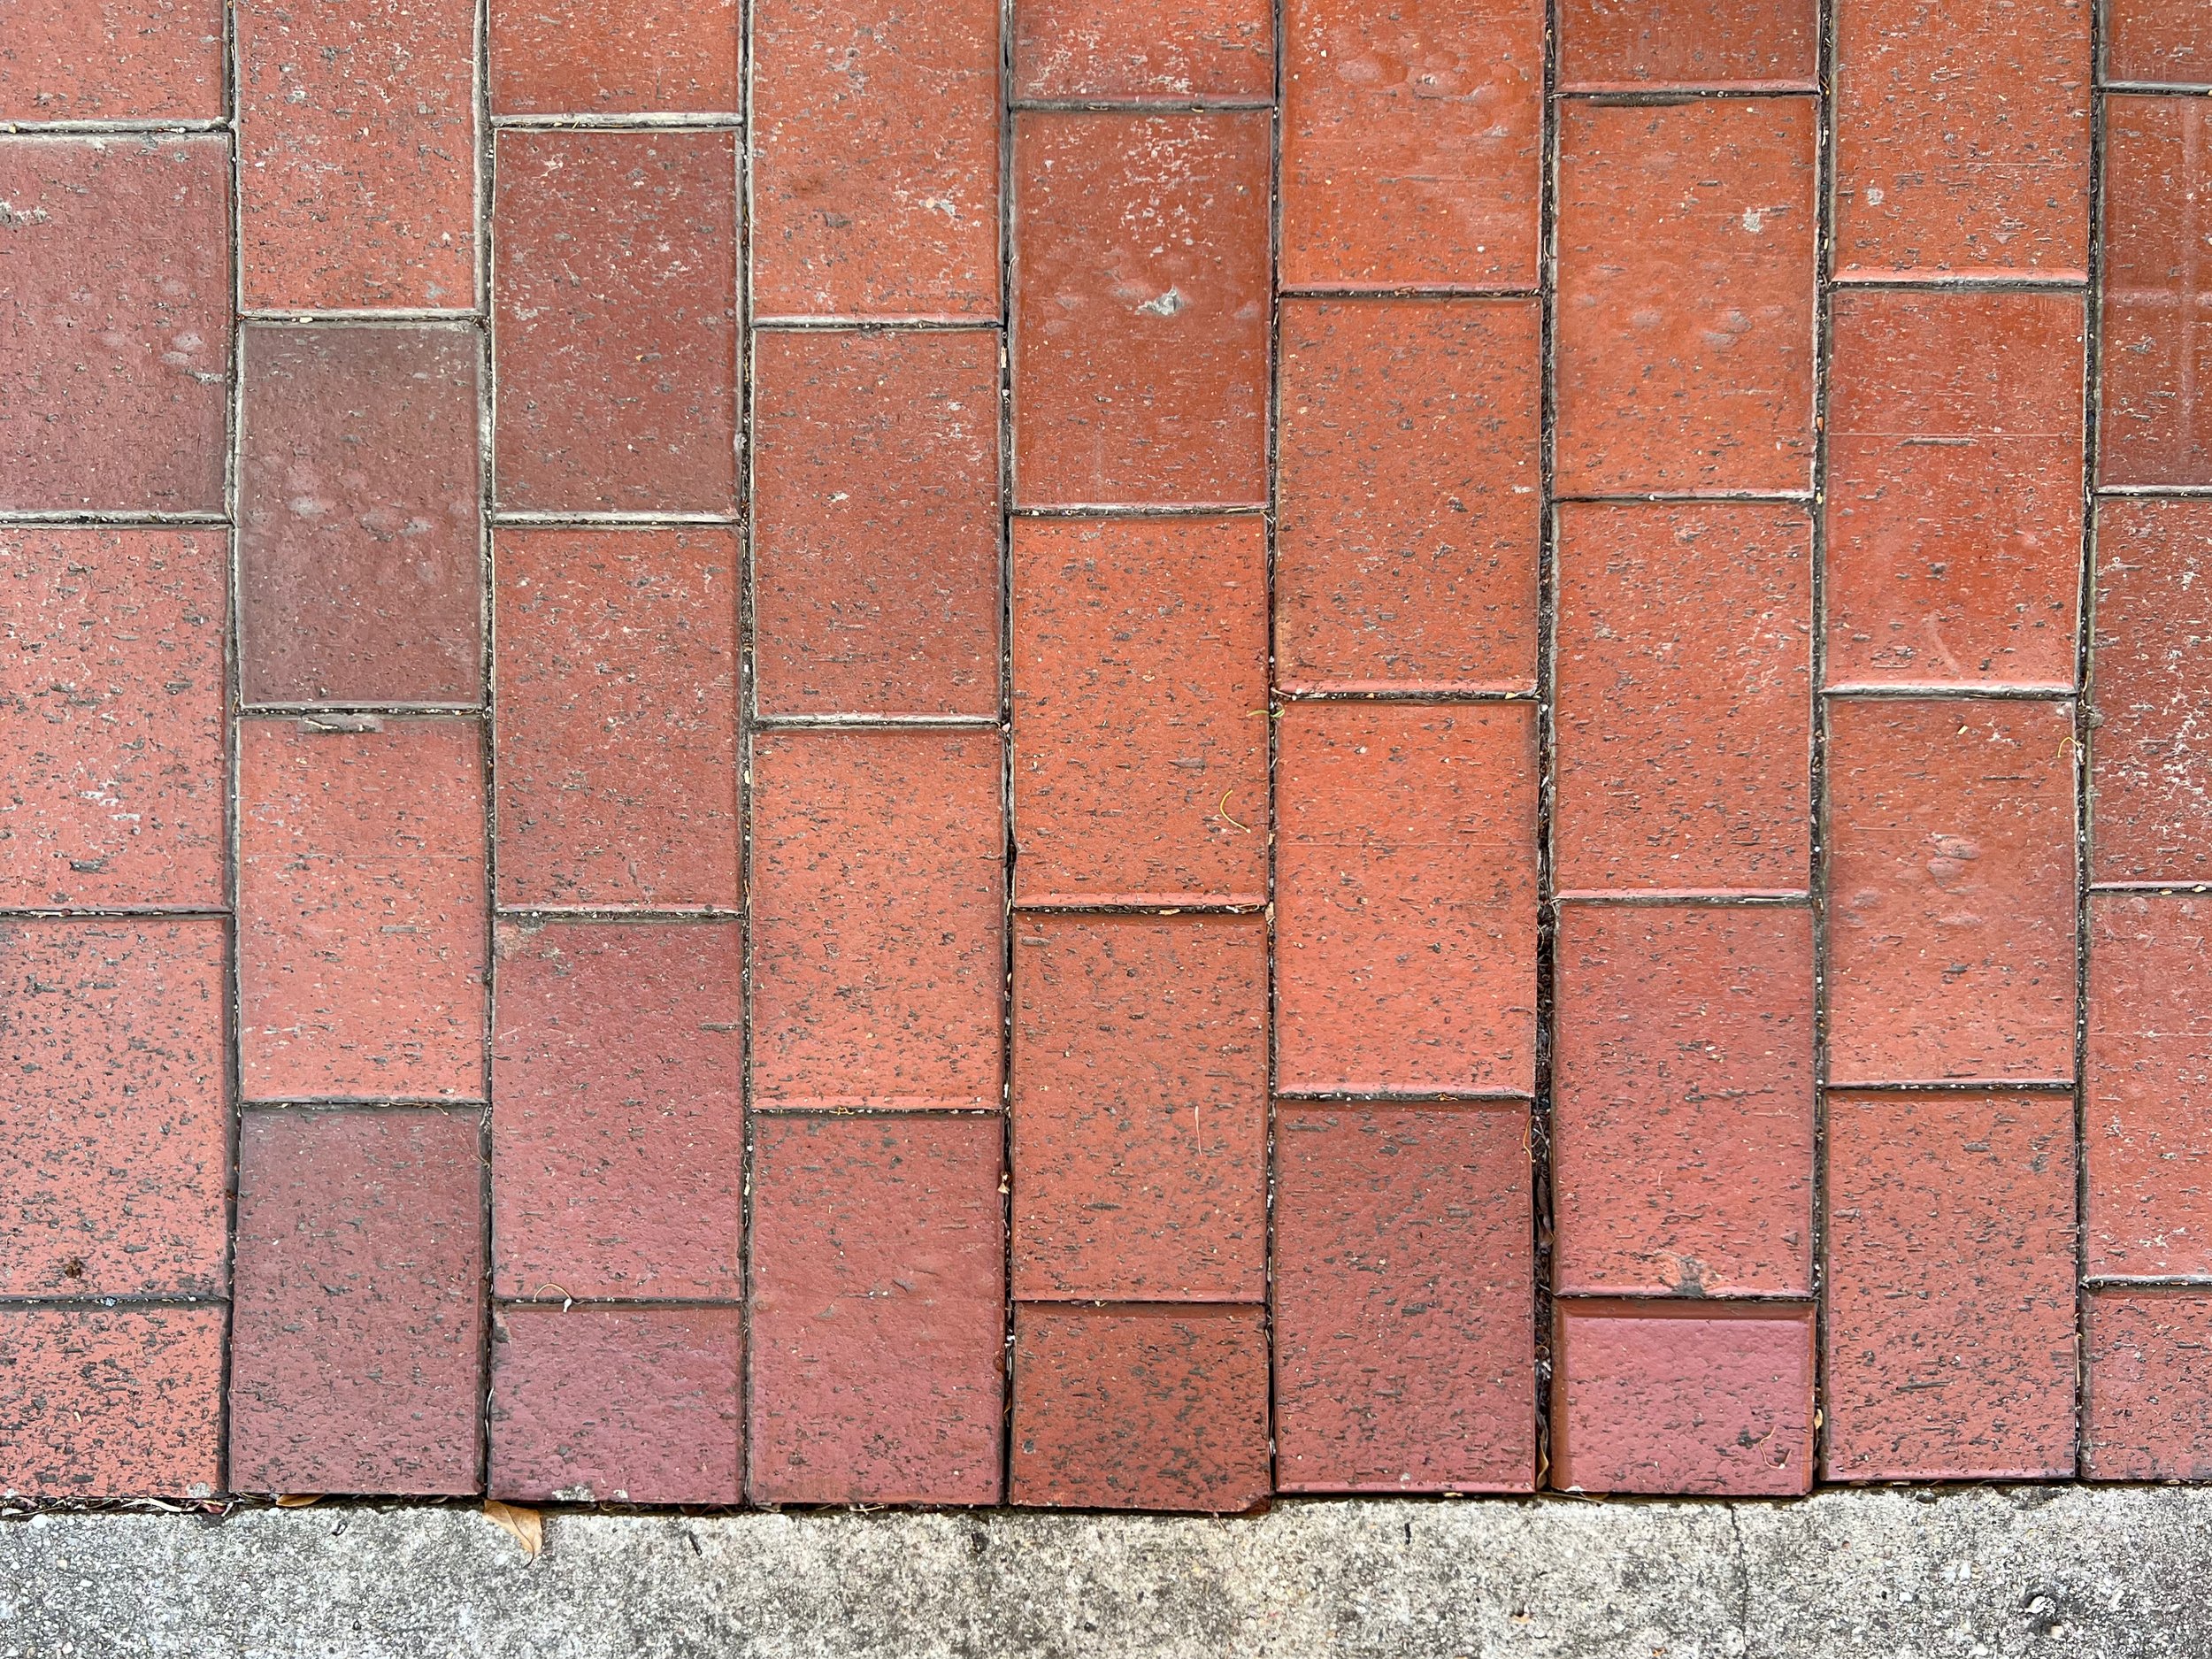
BEFORE No amount of scrubbing would improve these pavers. The red finish also makes the area look dated and not in keeping with the rest of the renovations happening around the house.
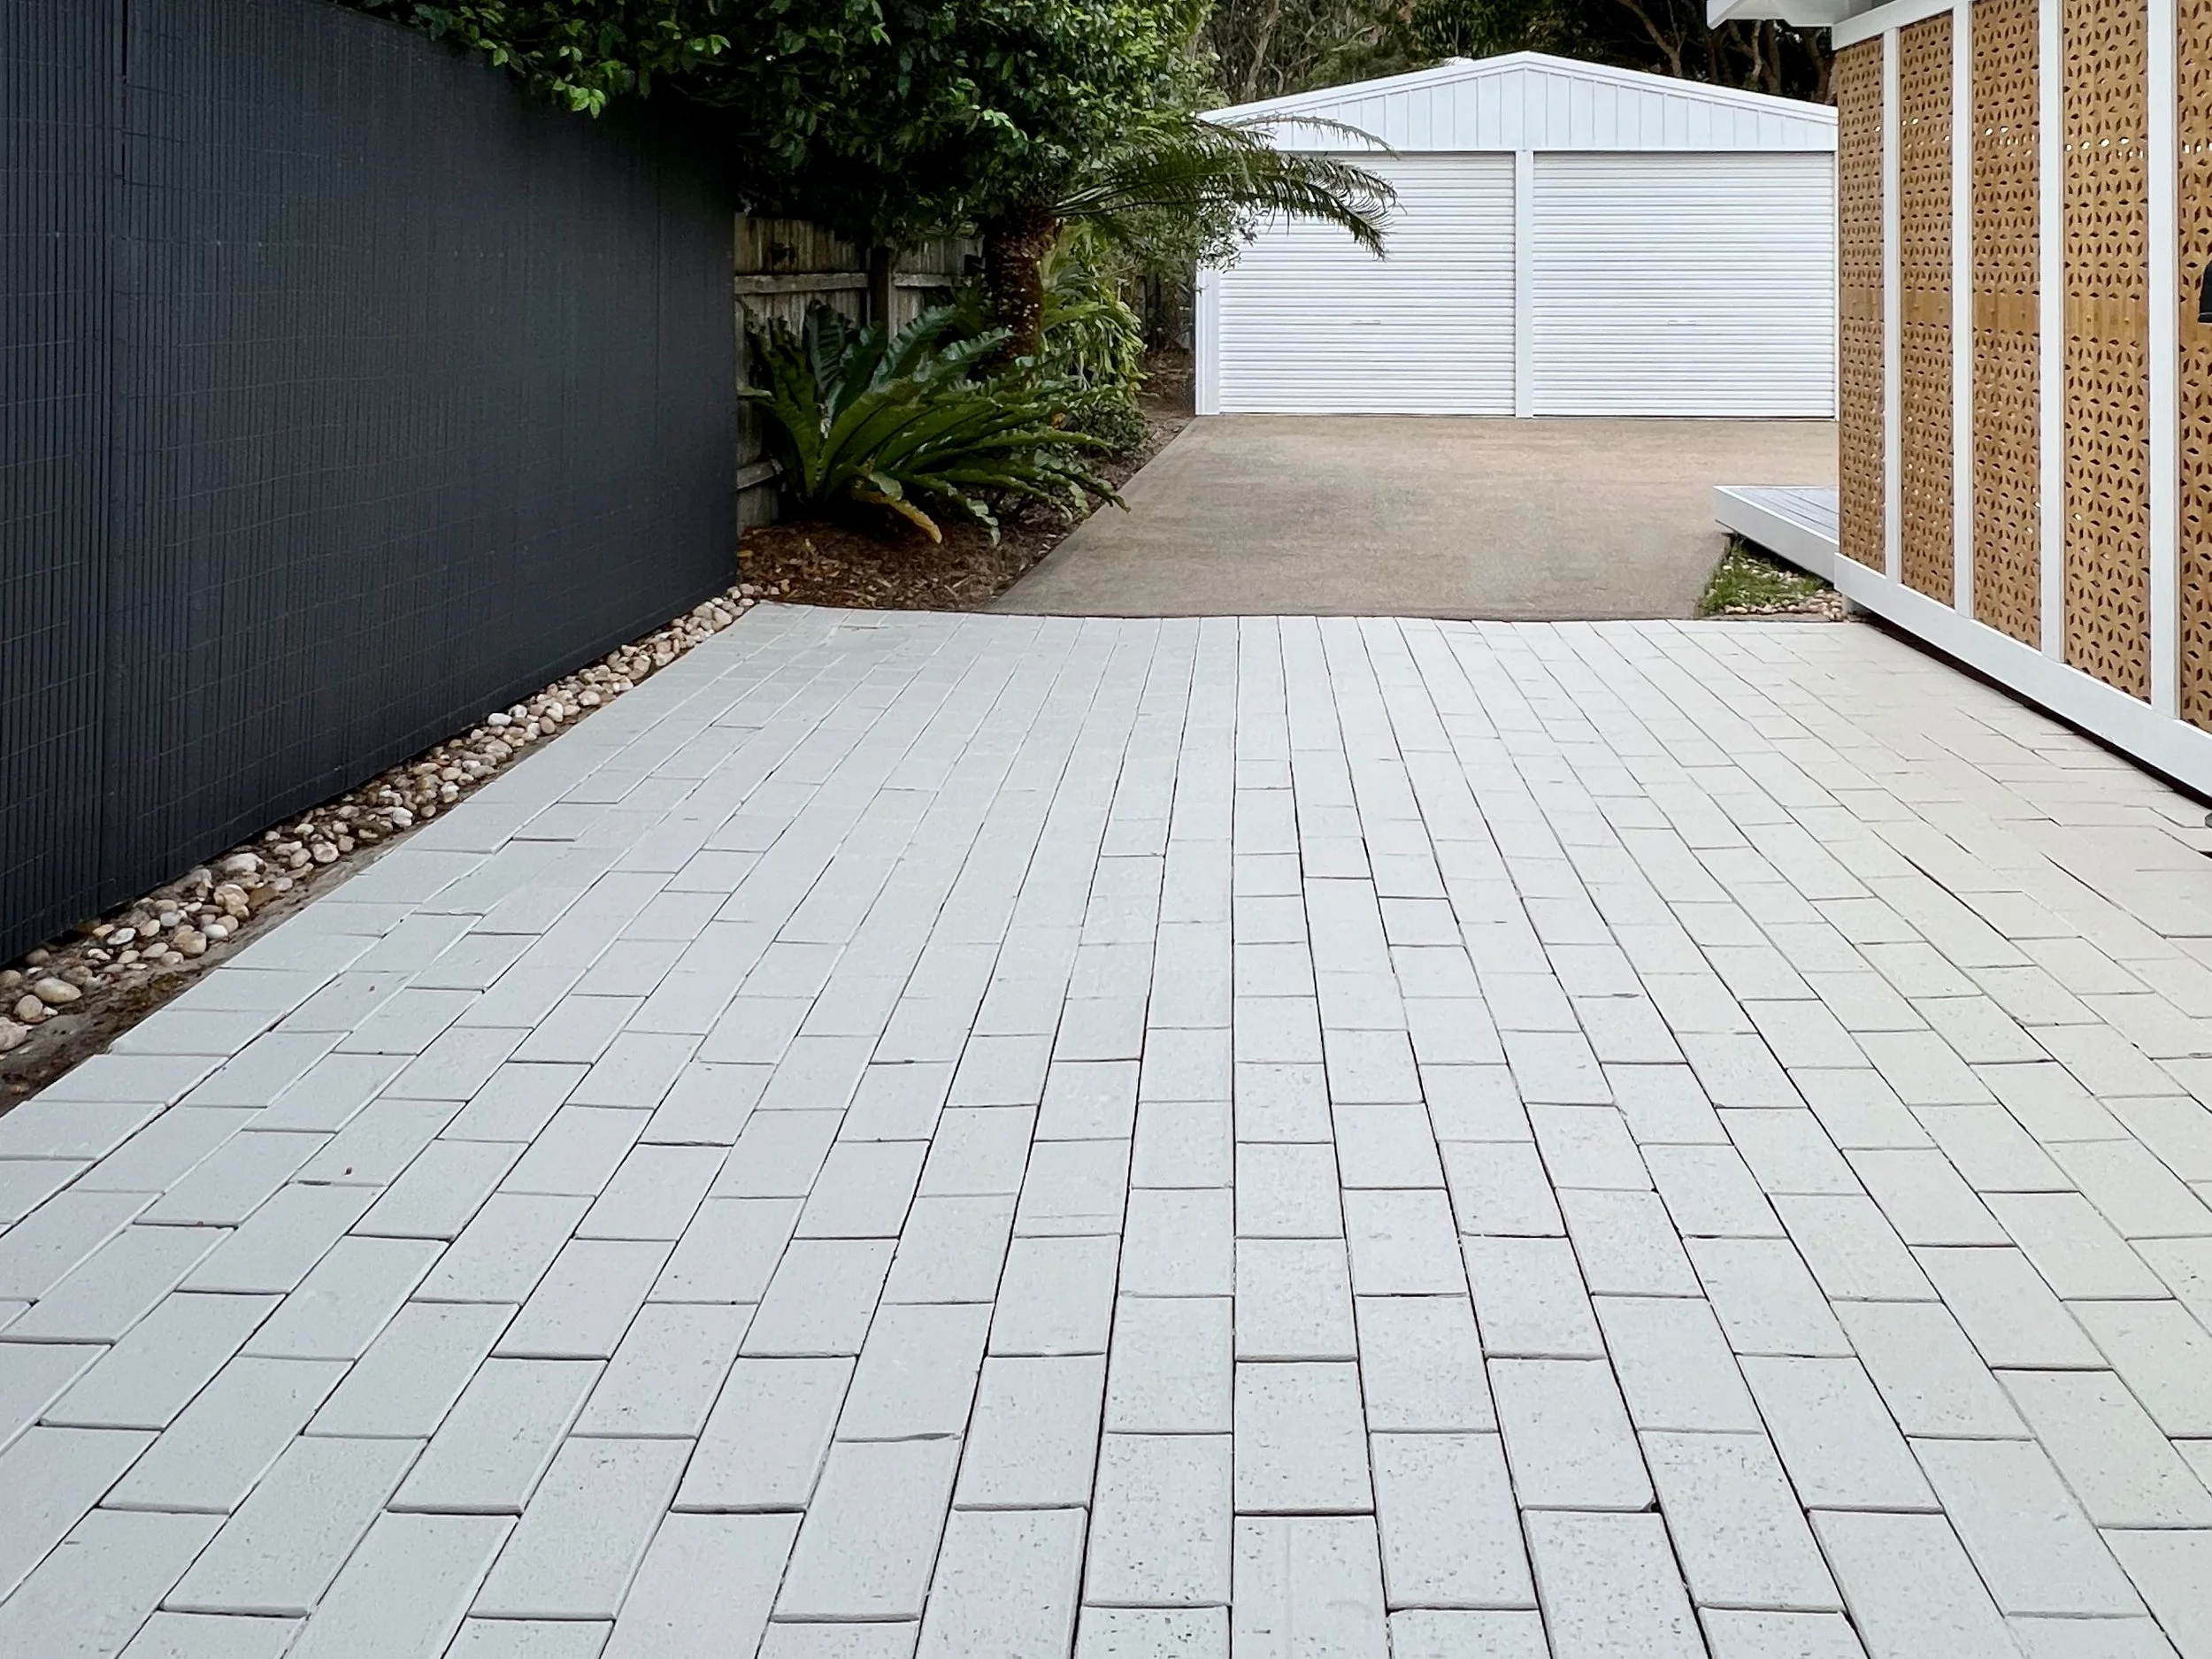
“This area gets so hot in summer. Making the surface lighter has cooled it down so much that we can now walk on it in bare feet.”
TESTING THE SURFACE
Before purchasing products, do the Dulux Concrete & Paving Surface Test to check if your pavers are bare or sealed. Pour on 30ml of water, wait 30 seconds, dab off the excess and check if it has soaked in. Soaked in means it’s bare, but still on the surface indicates sealed. This will determine which products to choose from the Dulux Concrete & Paving range.
WHAT YOU NEED
• Safety boots and eyewear
• Garden broom
• Gloves
• Pressure cleaner
• Dulux Concrete & Paving Sealed Surface Cleaner 4L
• Bucket tray
• Paint tin opener and stirrer
• Stiff bristle brush
• Painter’s tape
• Dulux Concrete & Paving Sealed Surface Primer 2L
• 50mm paintbrush
• Extension pole and roller
• Dulux Professional Roller 22mm nap covers
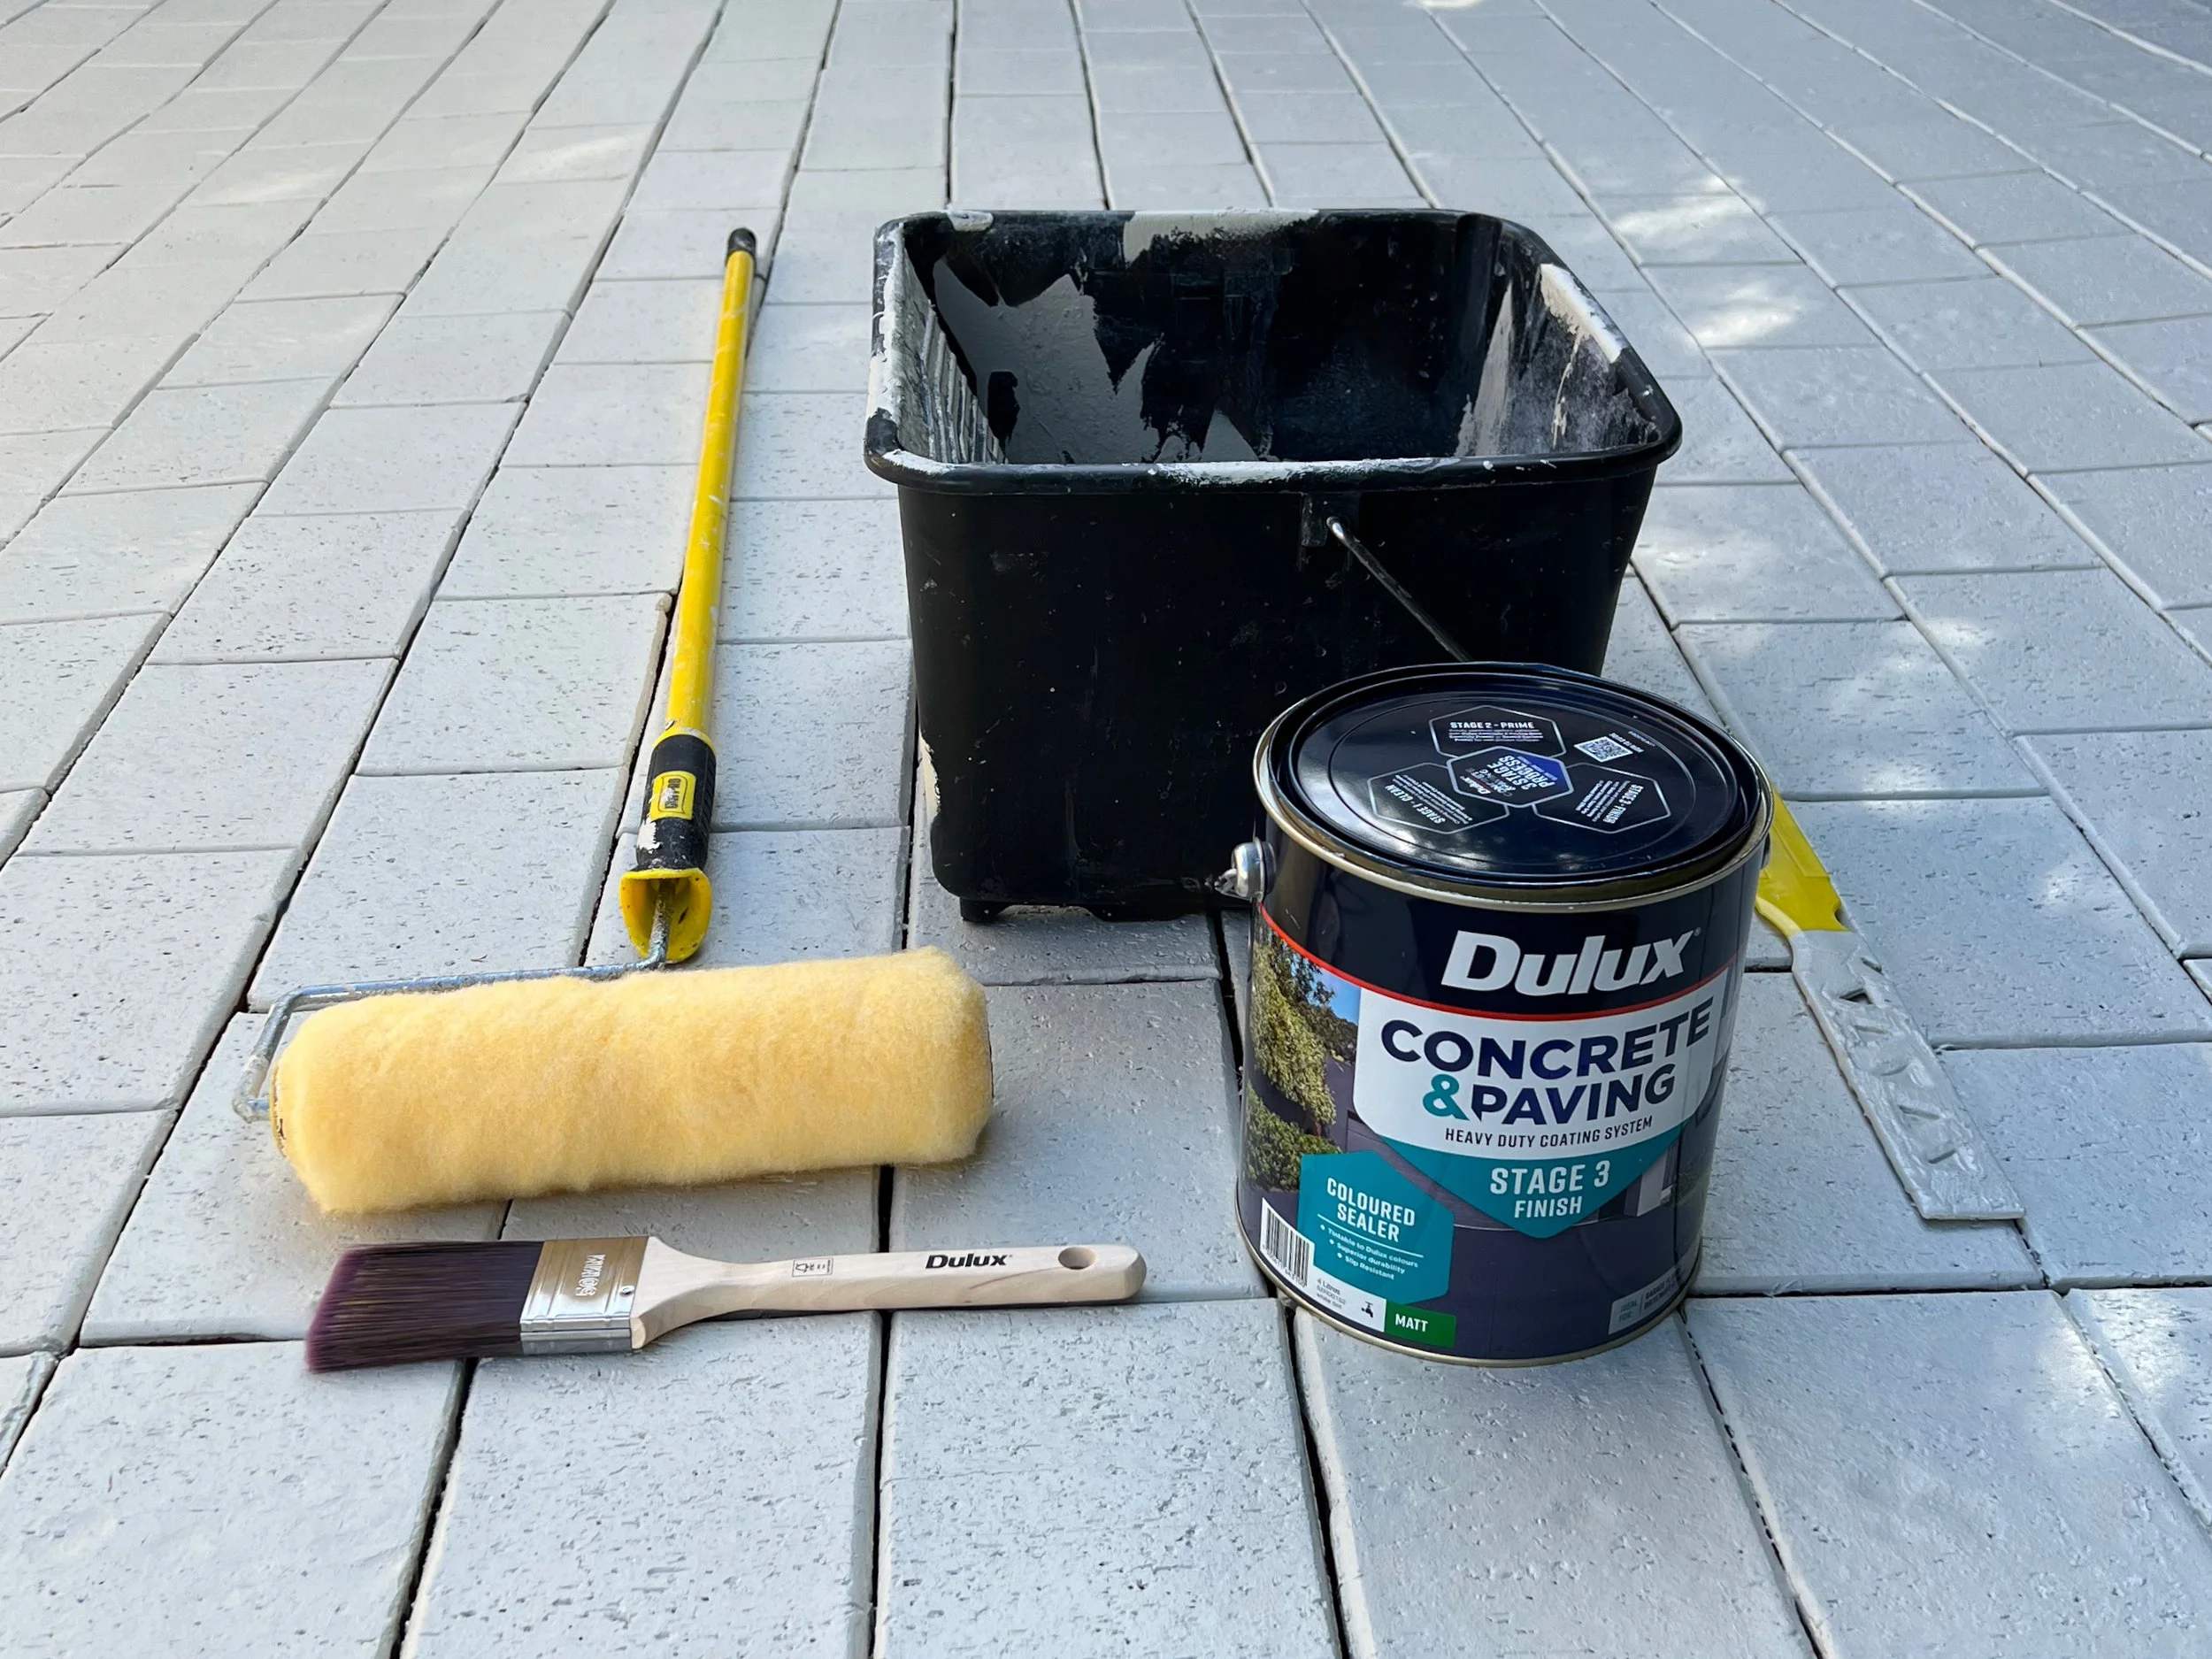
• Dulux Concrete & Paving Coloured Sealer Matt 10L tinted in Dulux Tuft
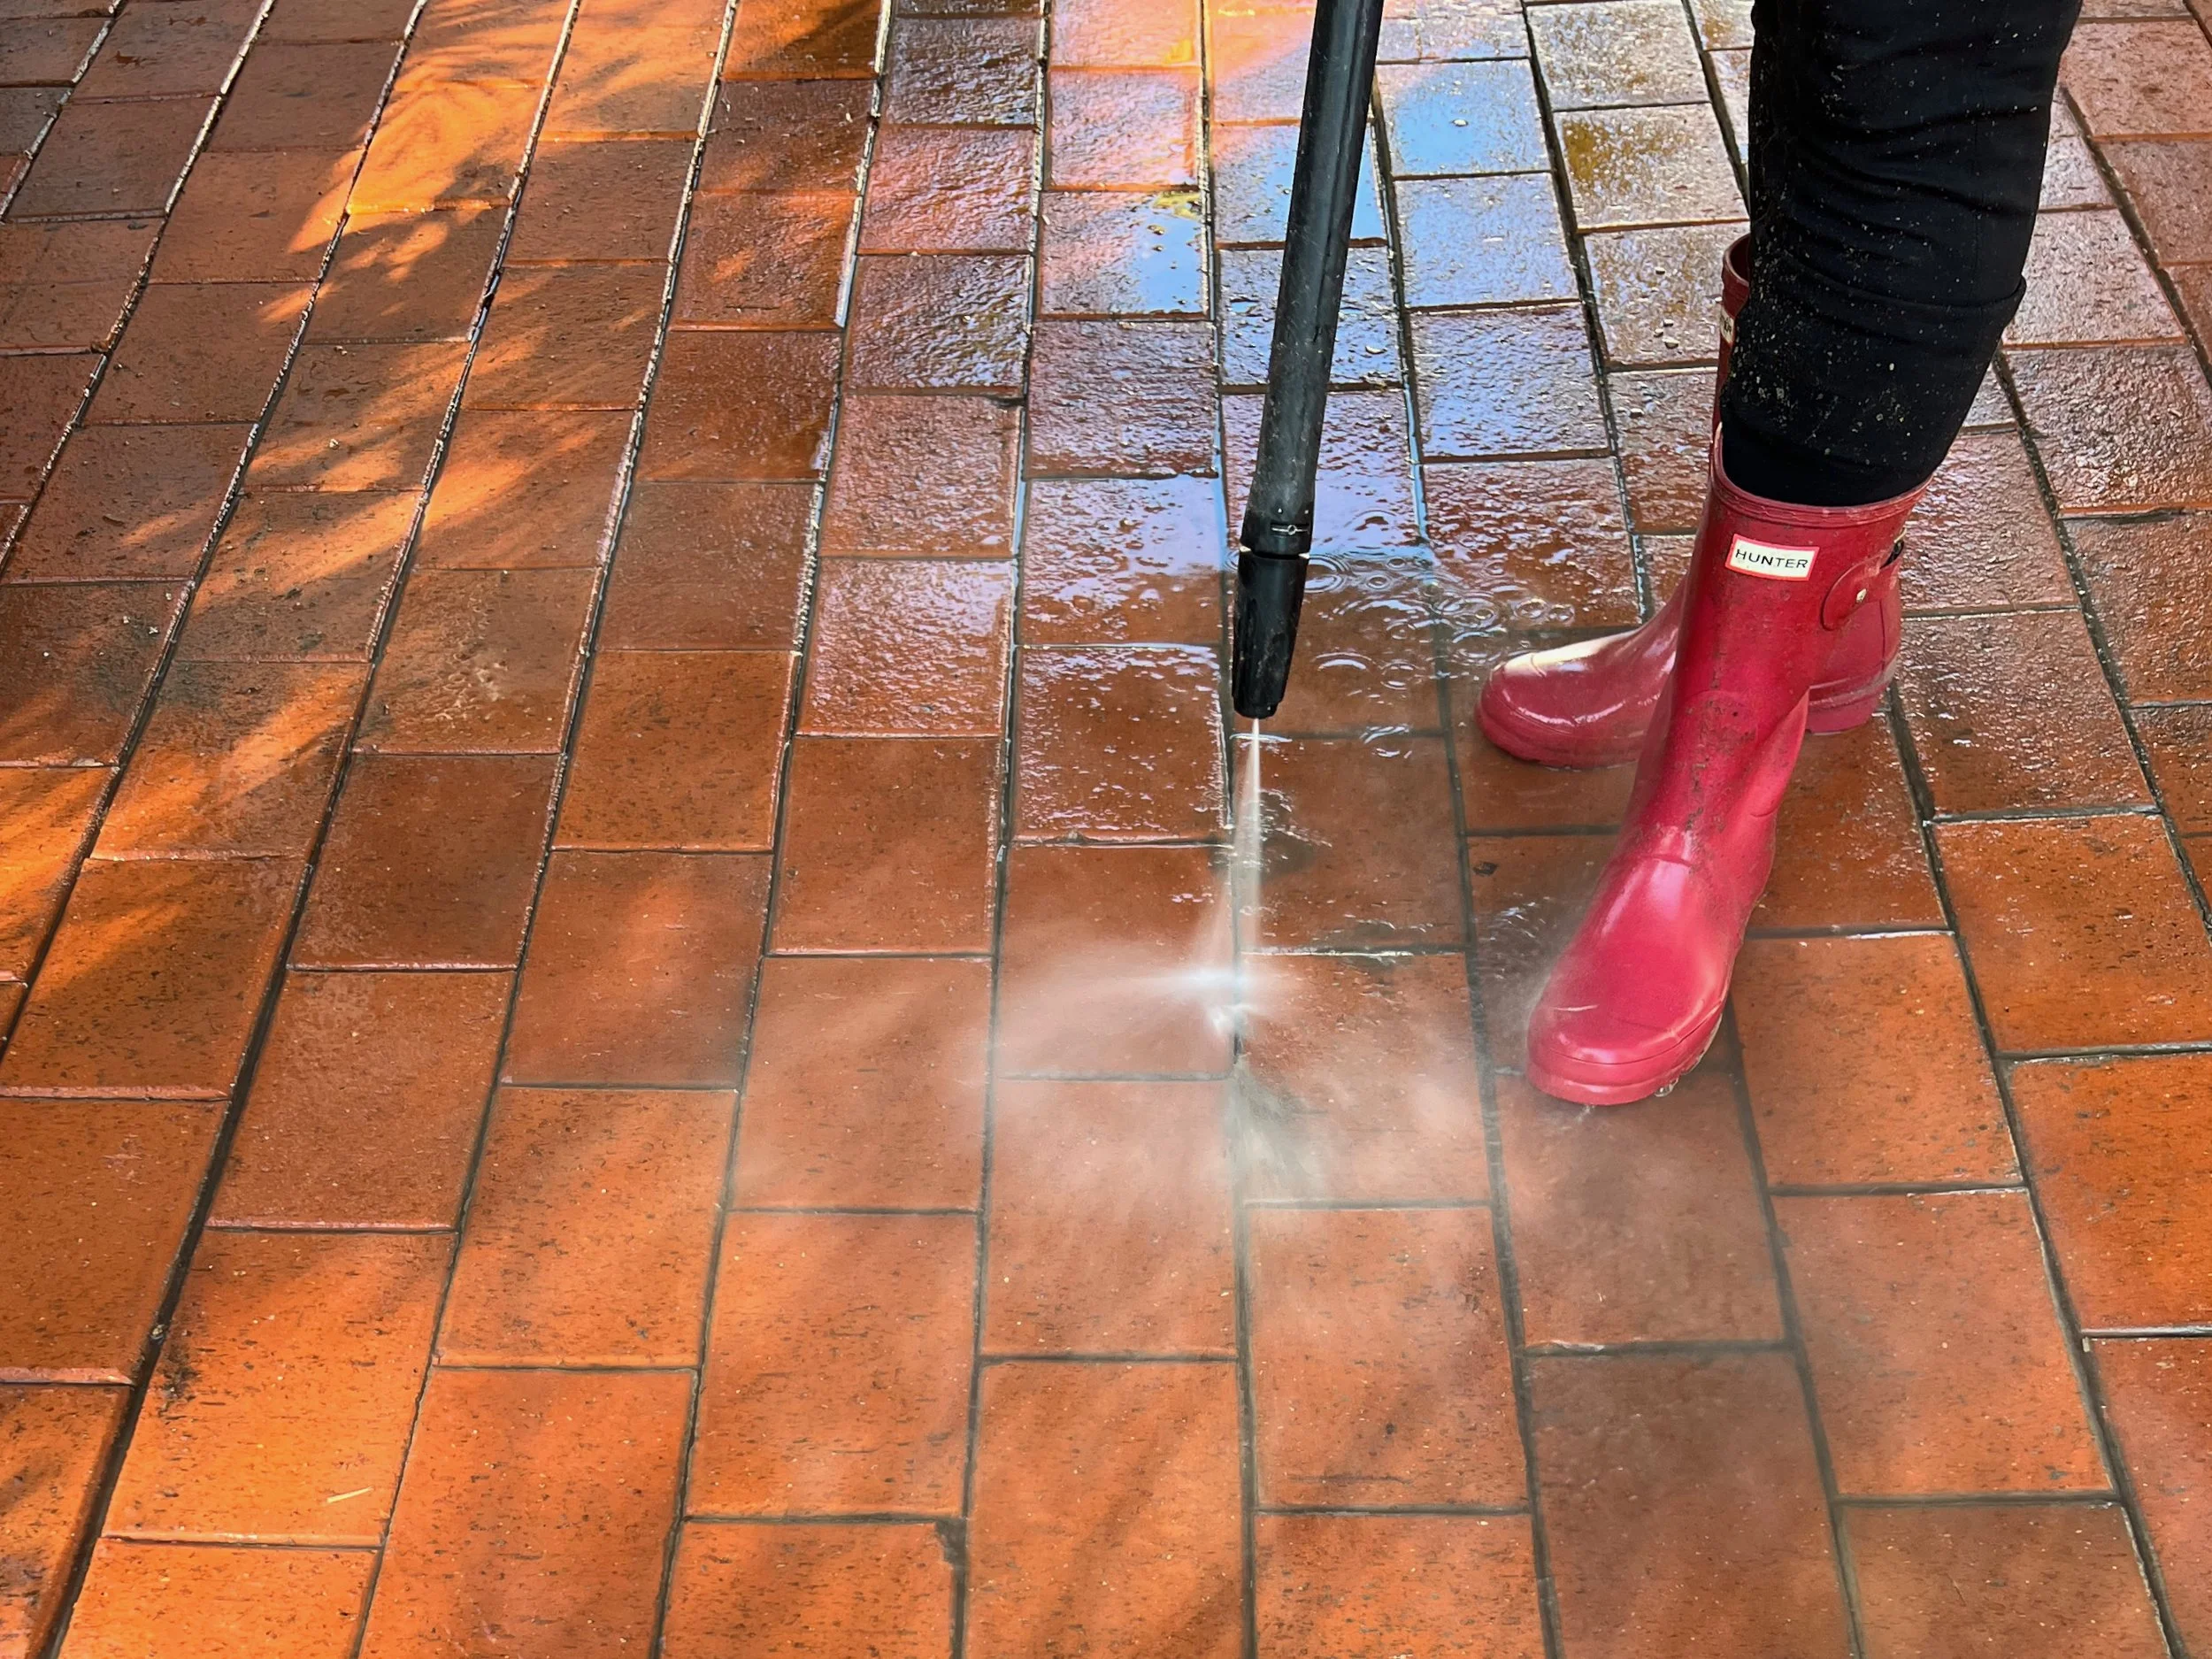
After sweeping with a broom, I pressure washed the pavers wearing boots and eye protection.
TIP Hold the wand at an angle to minimise splashing debris, and be prepared to give the surrounding walls a quick wash down afterwards.
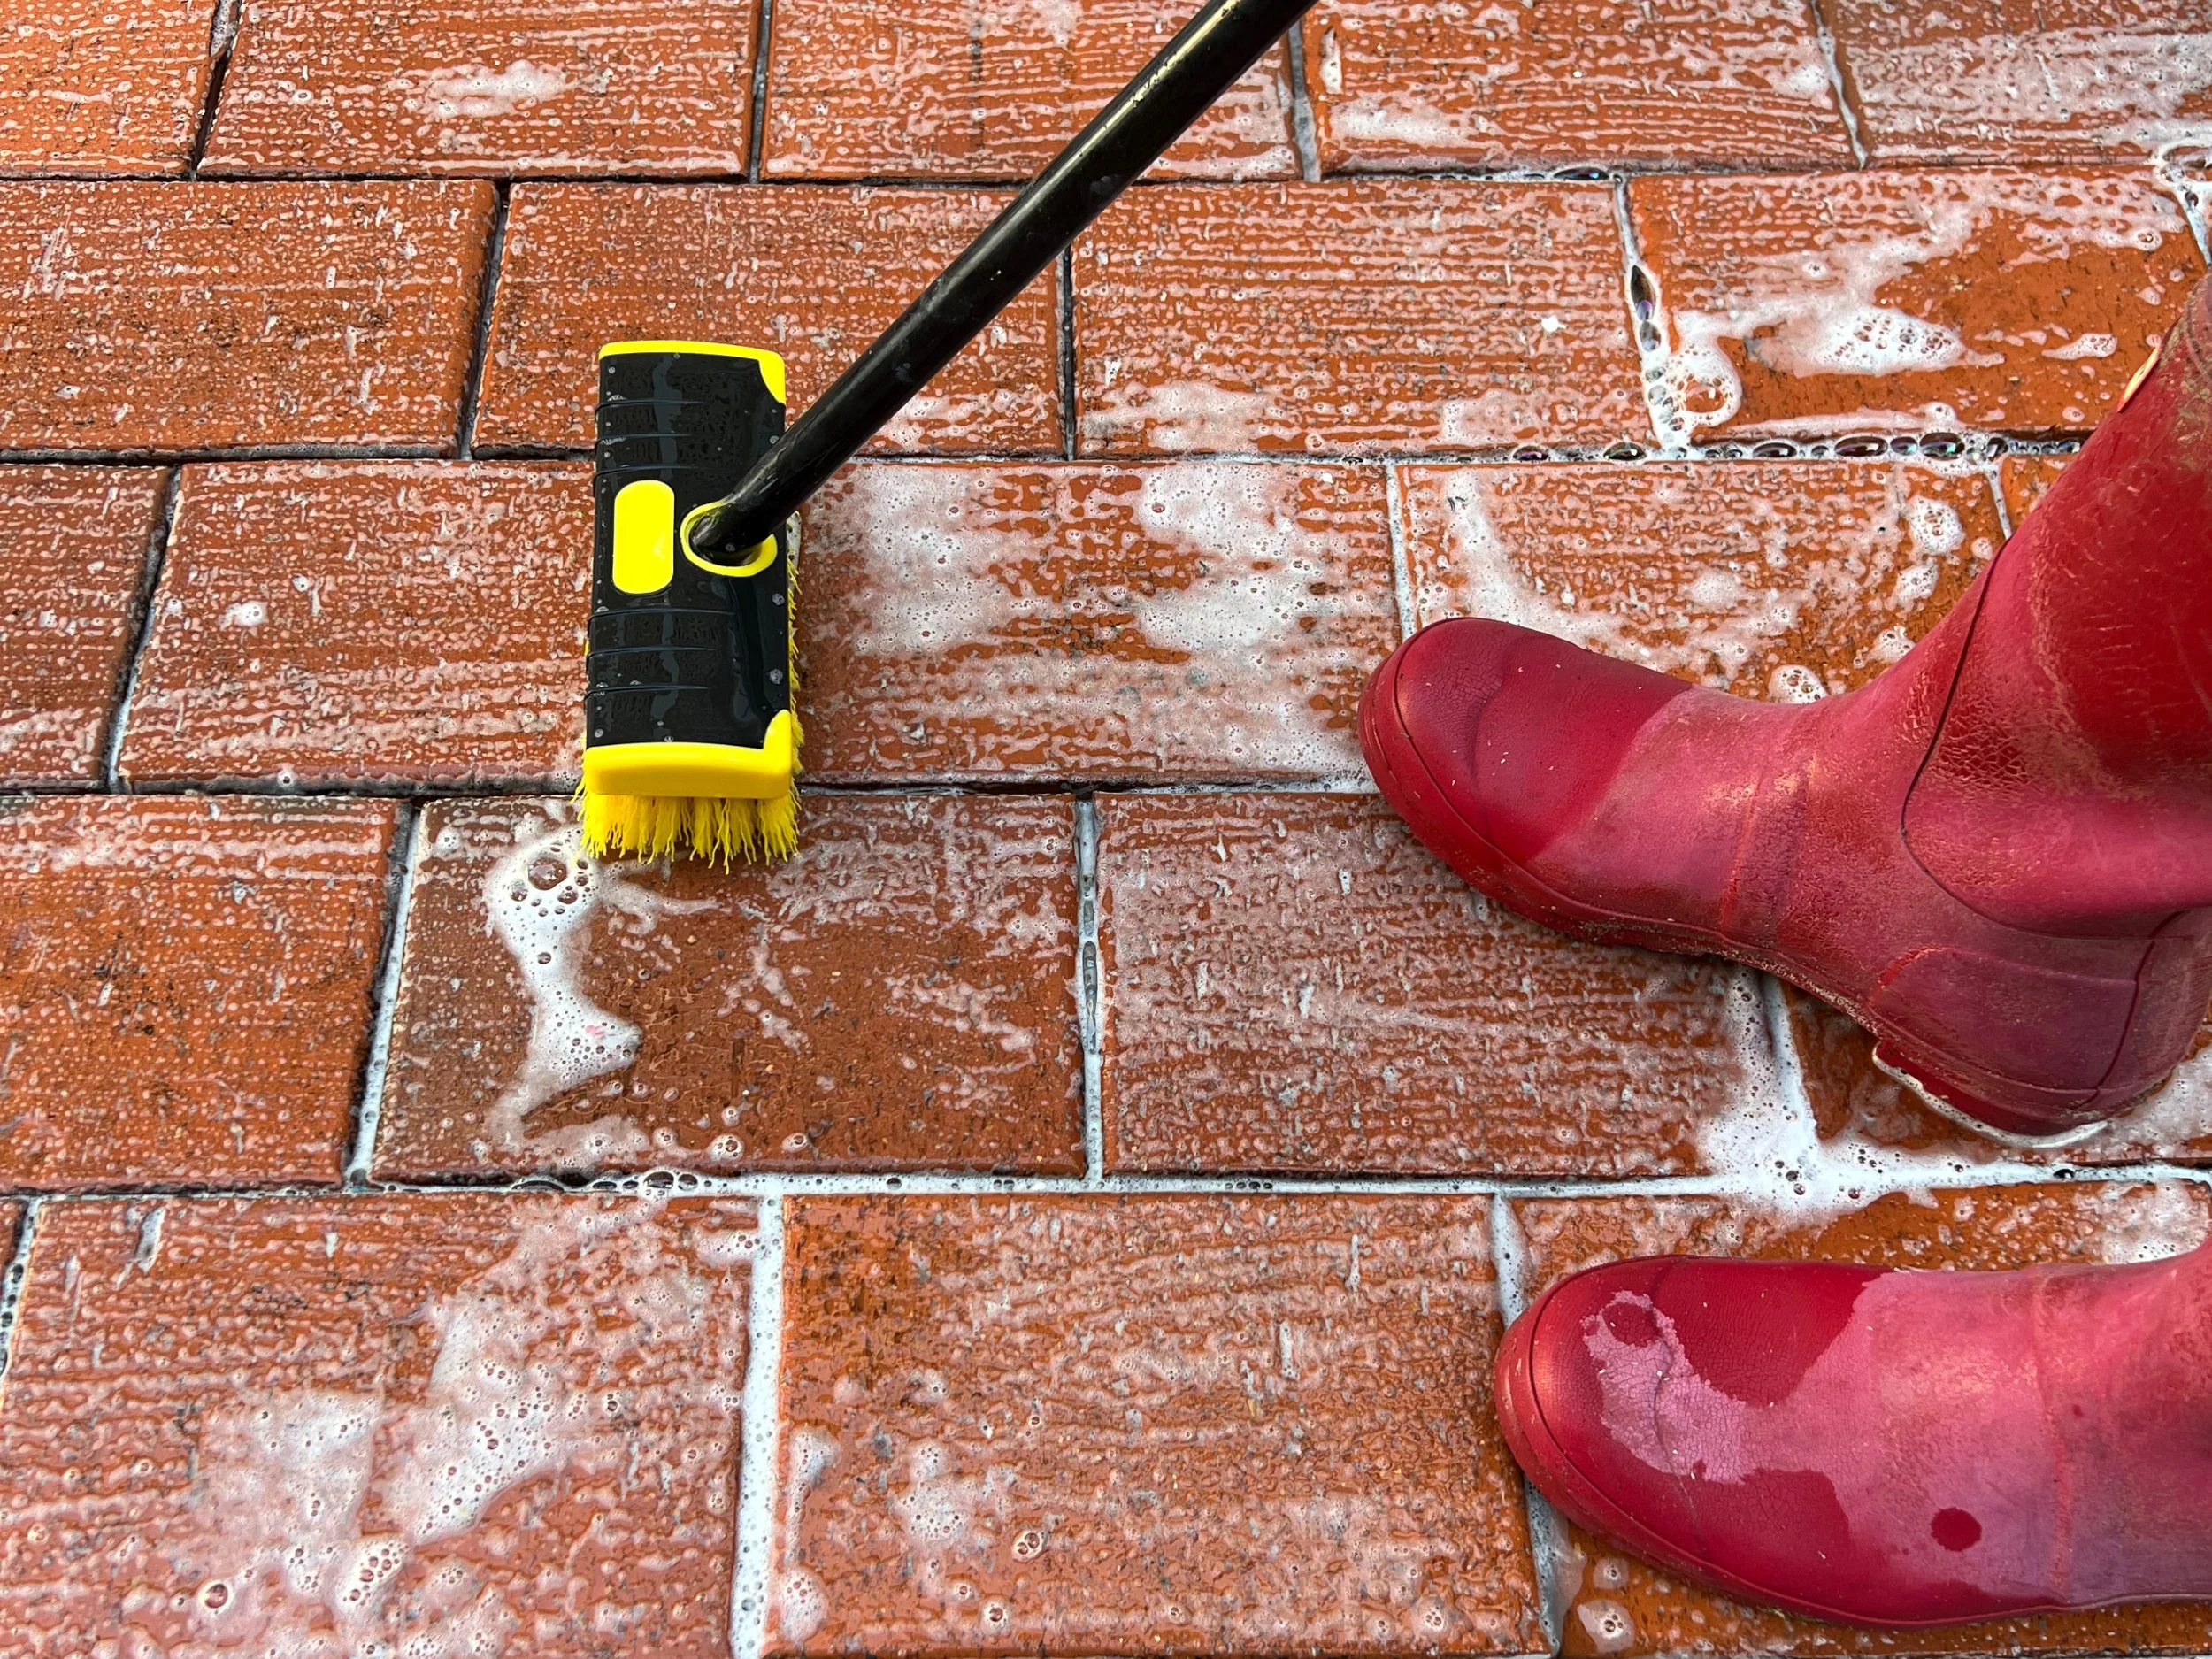
Stage 1 of the system involved mixing up one part Dulux Concrete & Paving Sealed Surface Cleaner into five parts water (1:5) then scrubbing it onto the pavers with a stiff bristle brush. Then I rinsed off with the pressure washer and left the area to dry overnight.
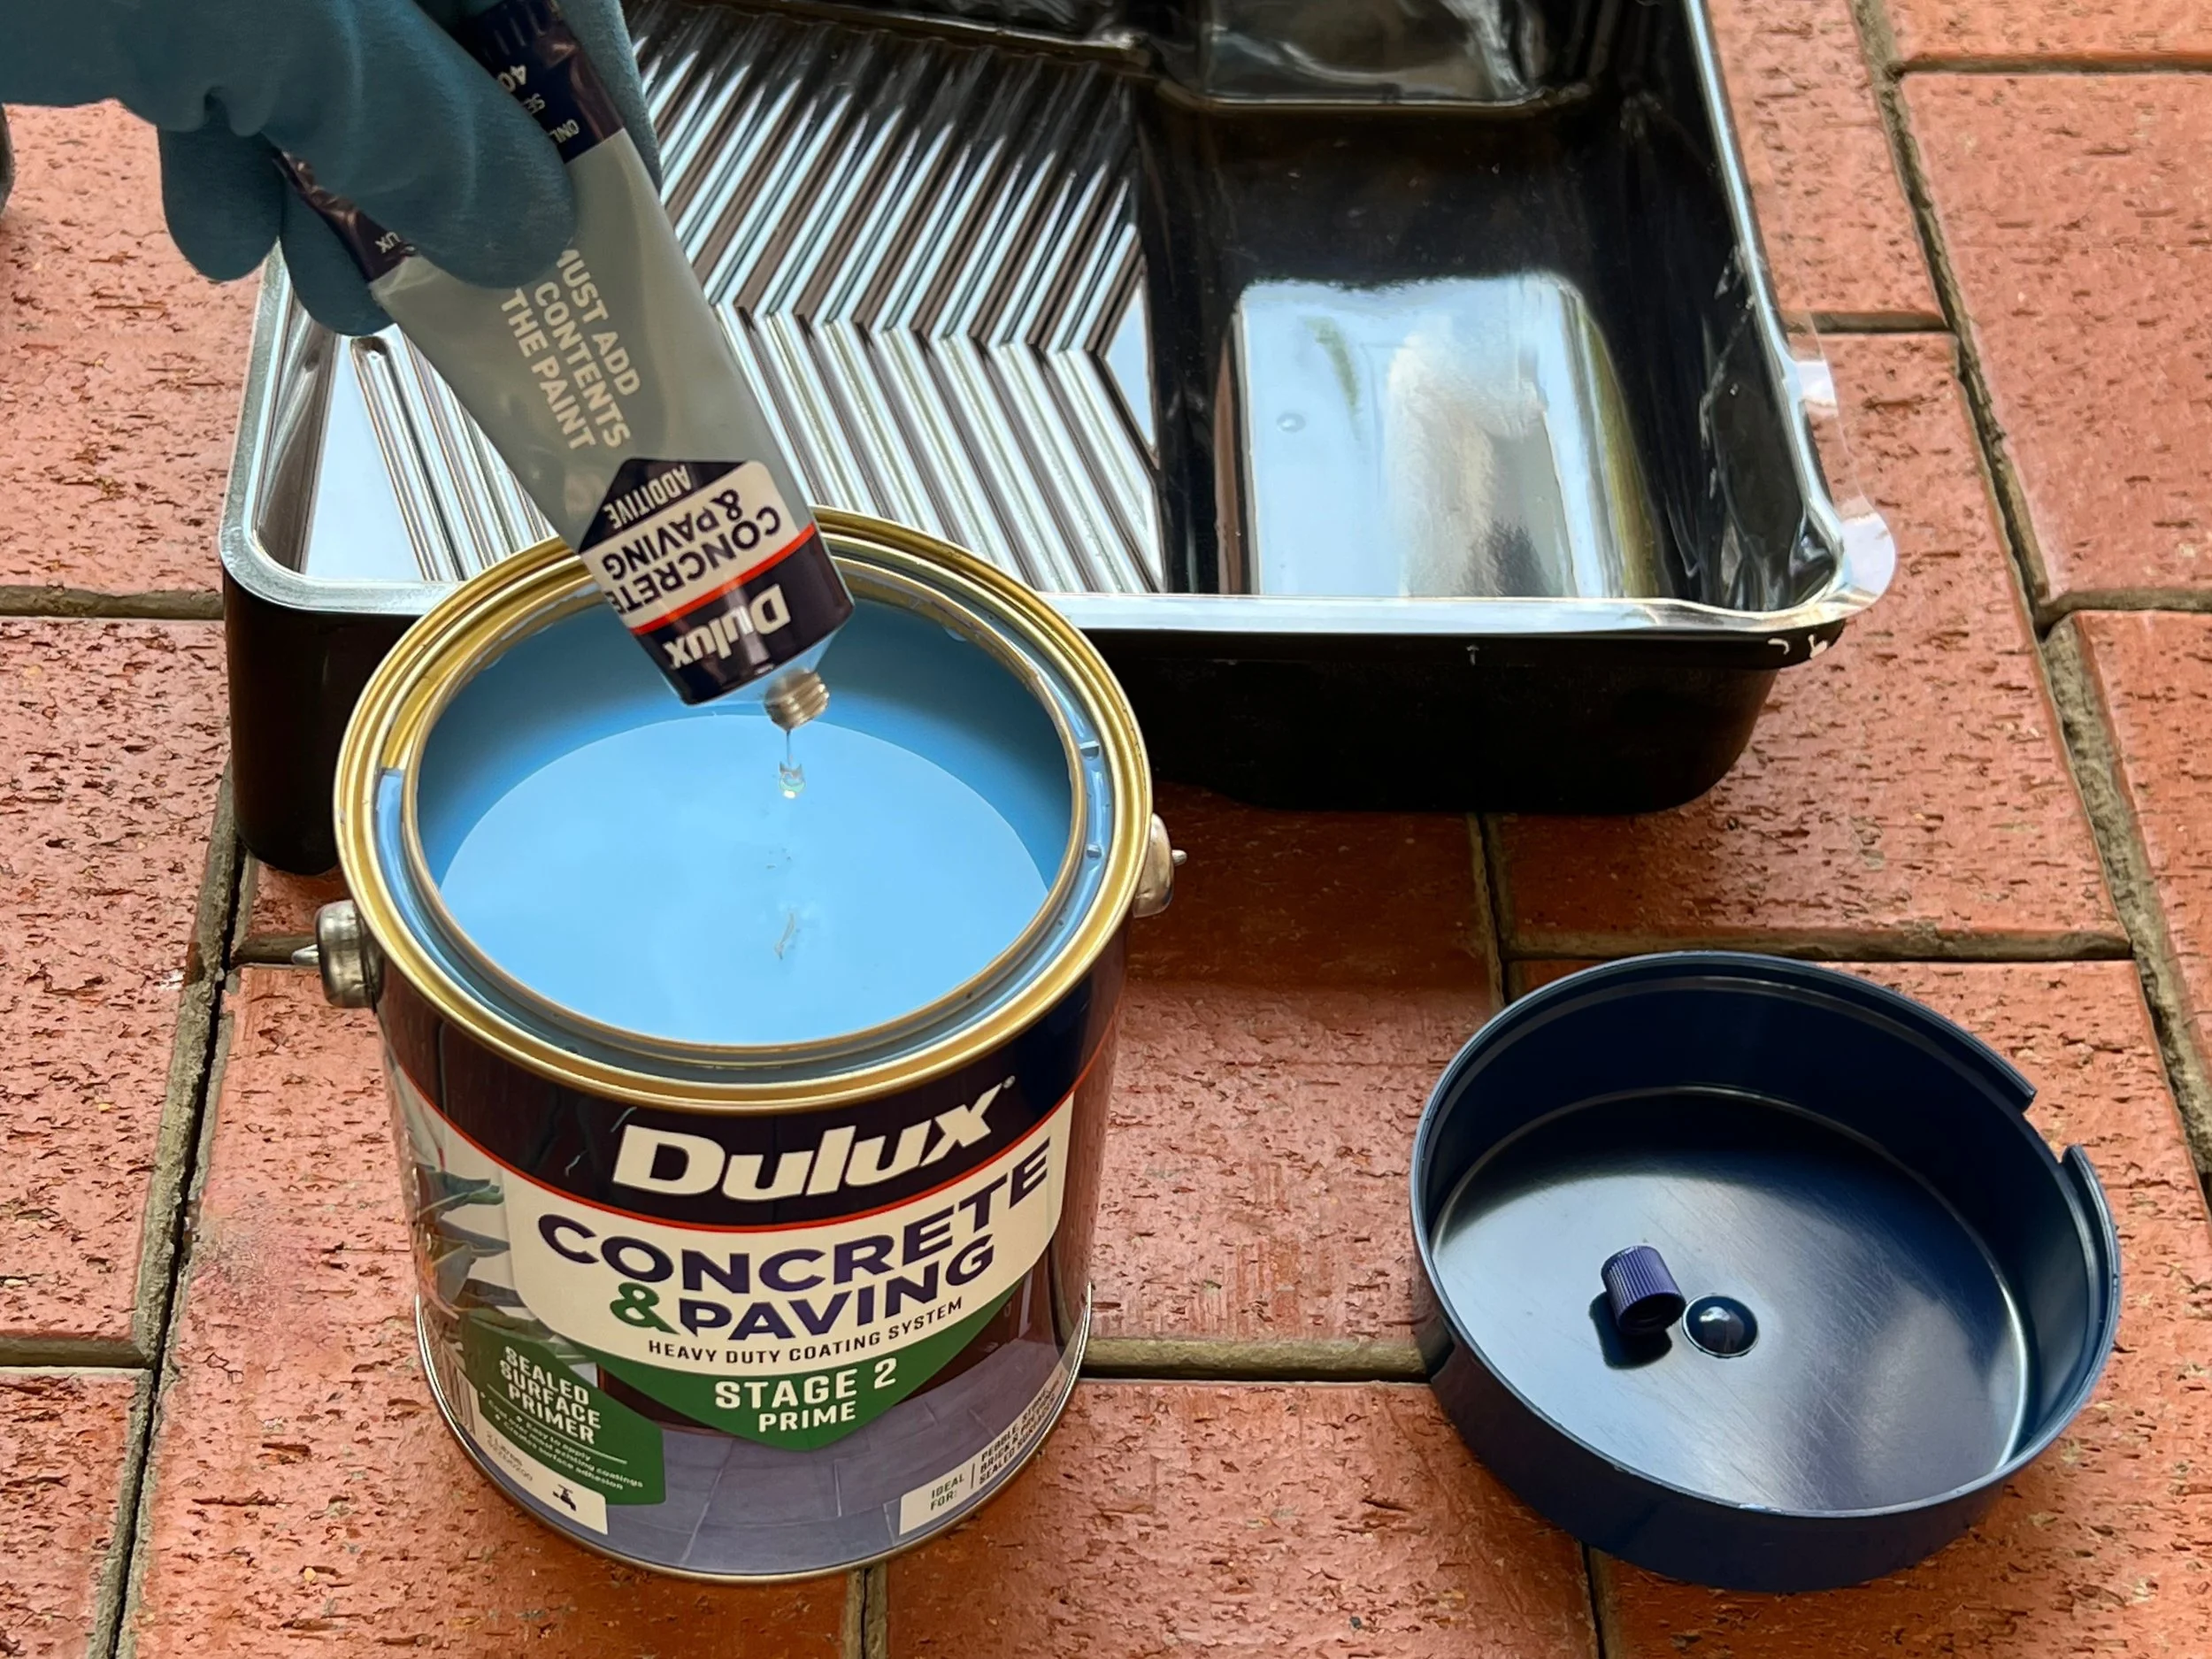
For Stage 2, I mixed up the Dulux Concrete & Paving Sealed Surface Primer with the supplied additive.
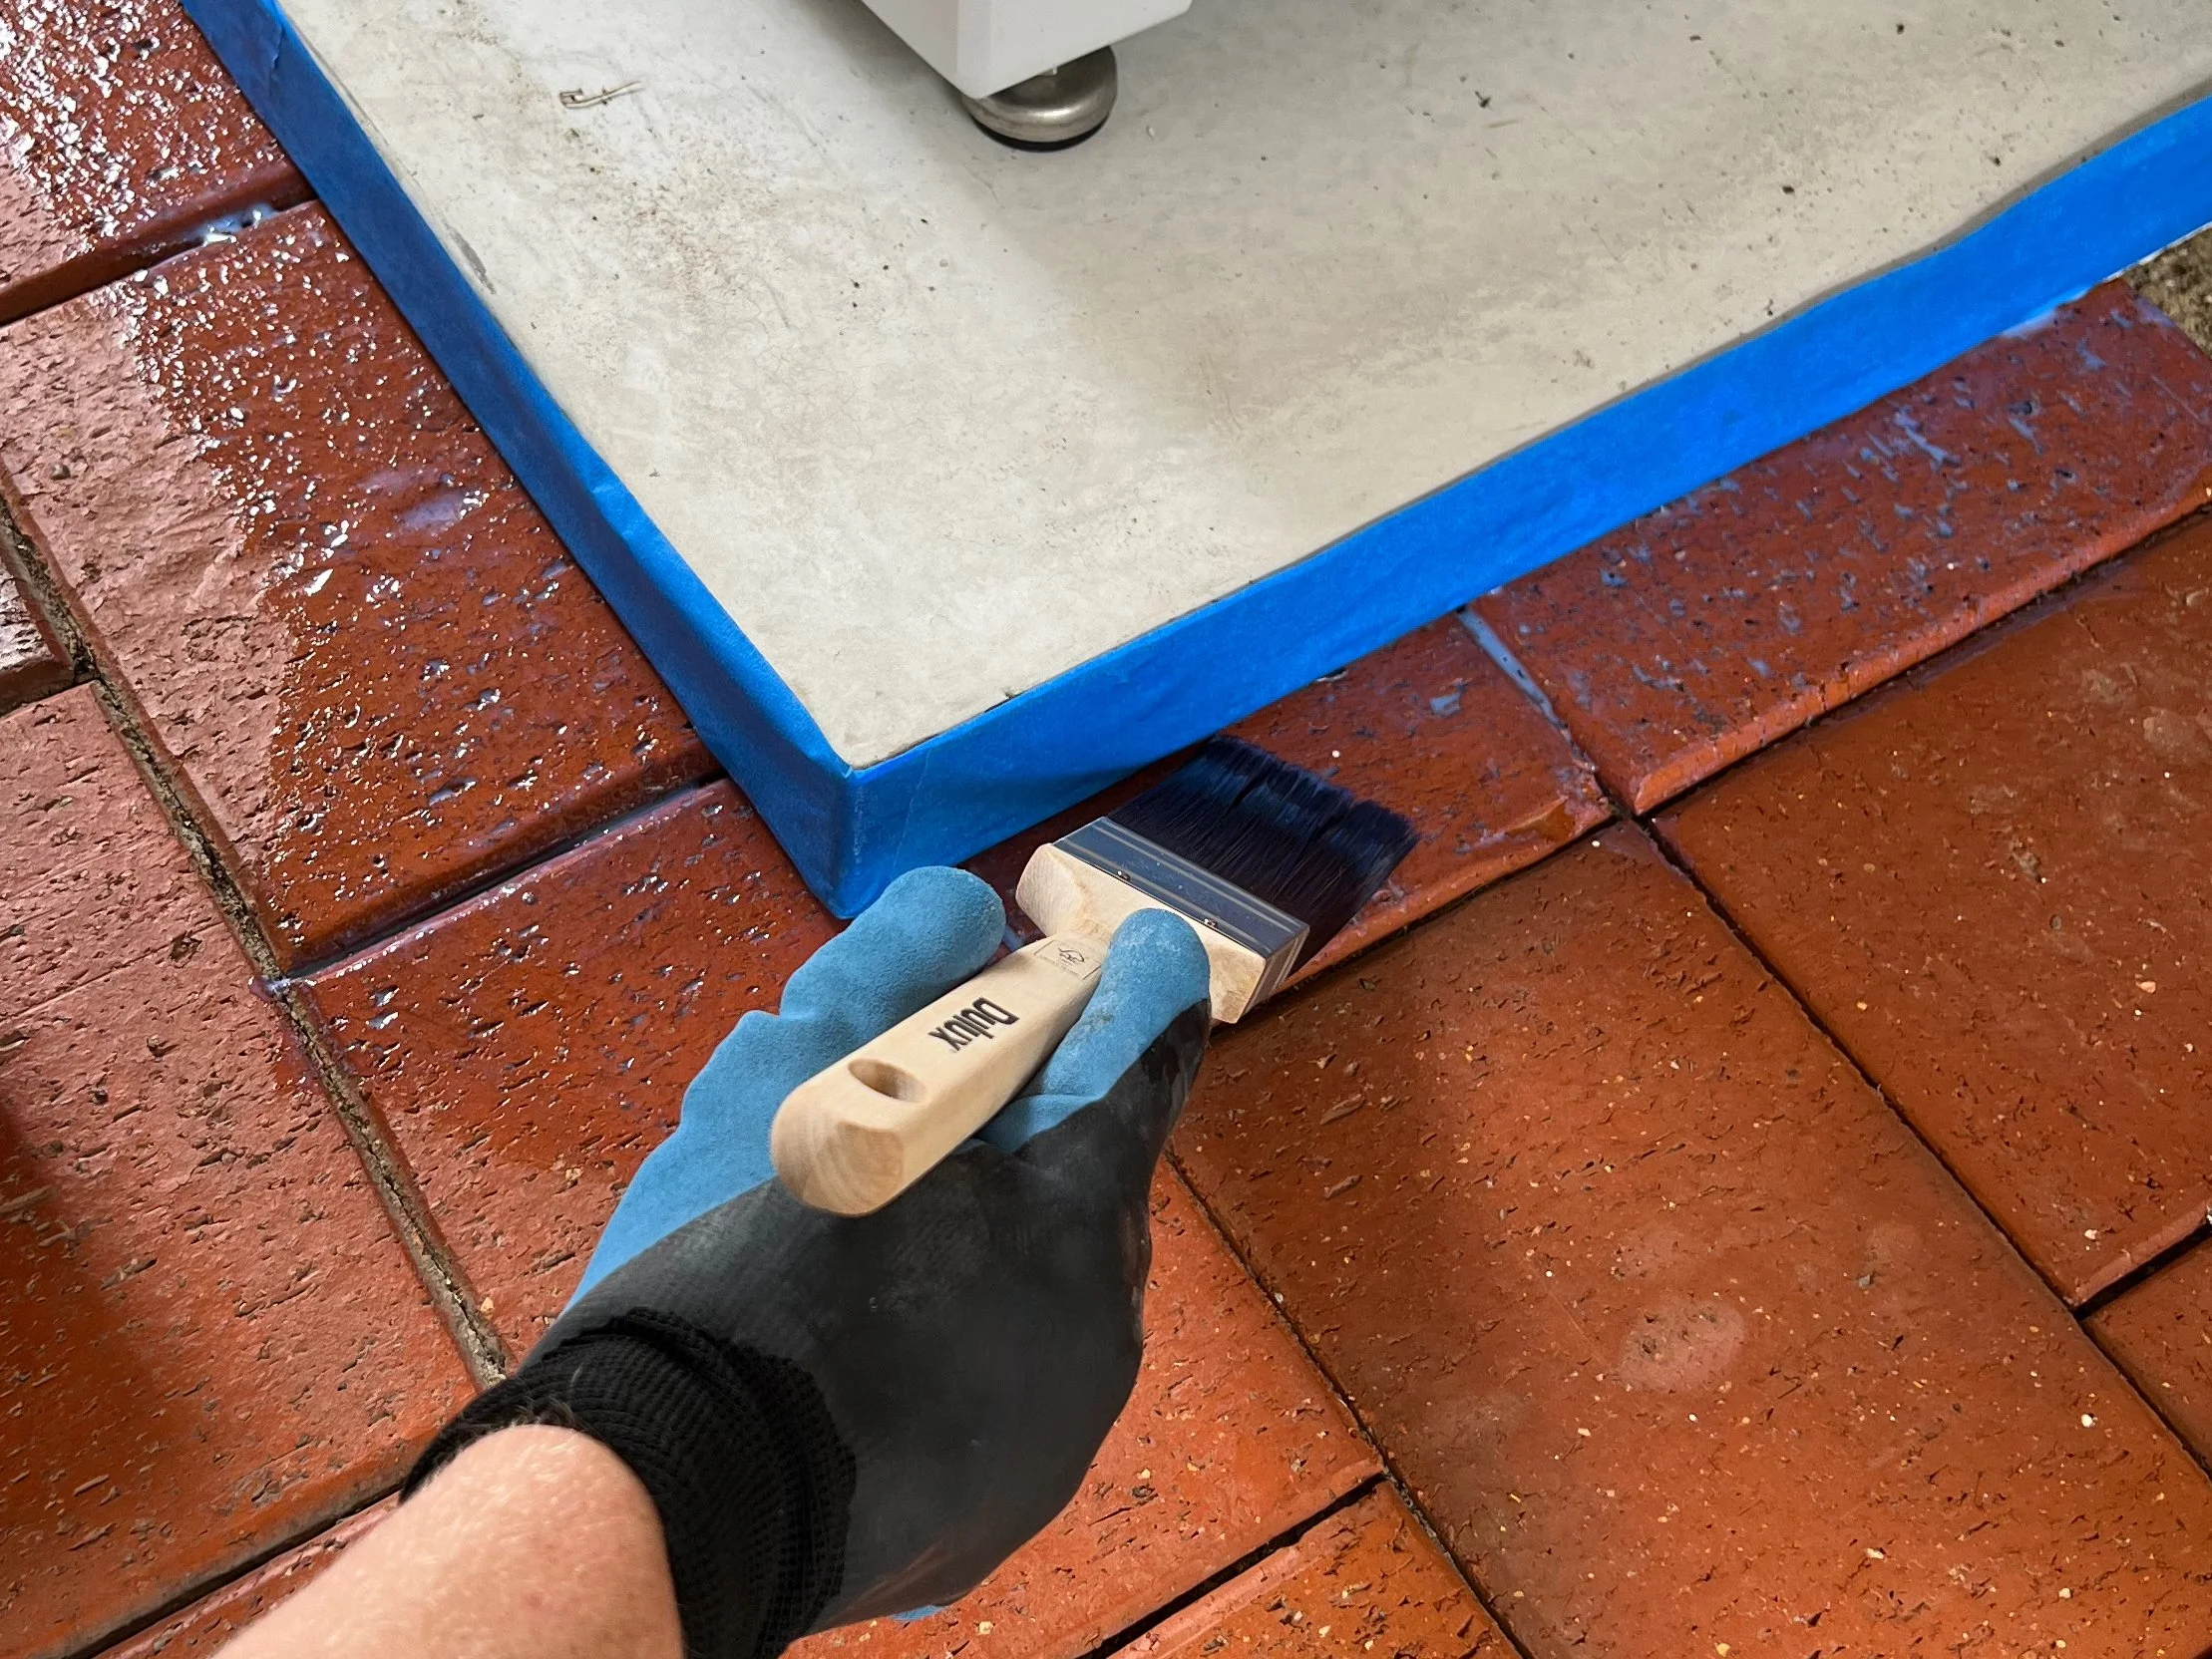
Then I cut in with the primer using a 50mm brush around the edges and a long-nap roller to cover the rest, working in slightly overlapping sections. I left the primer to dry while washing out the brush and bucket, ready to use with the Stage 3 sealer.
TIP Use painter’s tape to mask surrounding areas that won’t be painted.
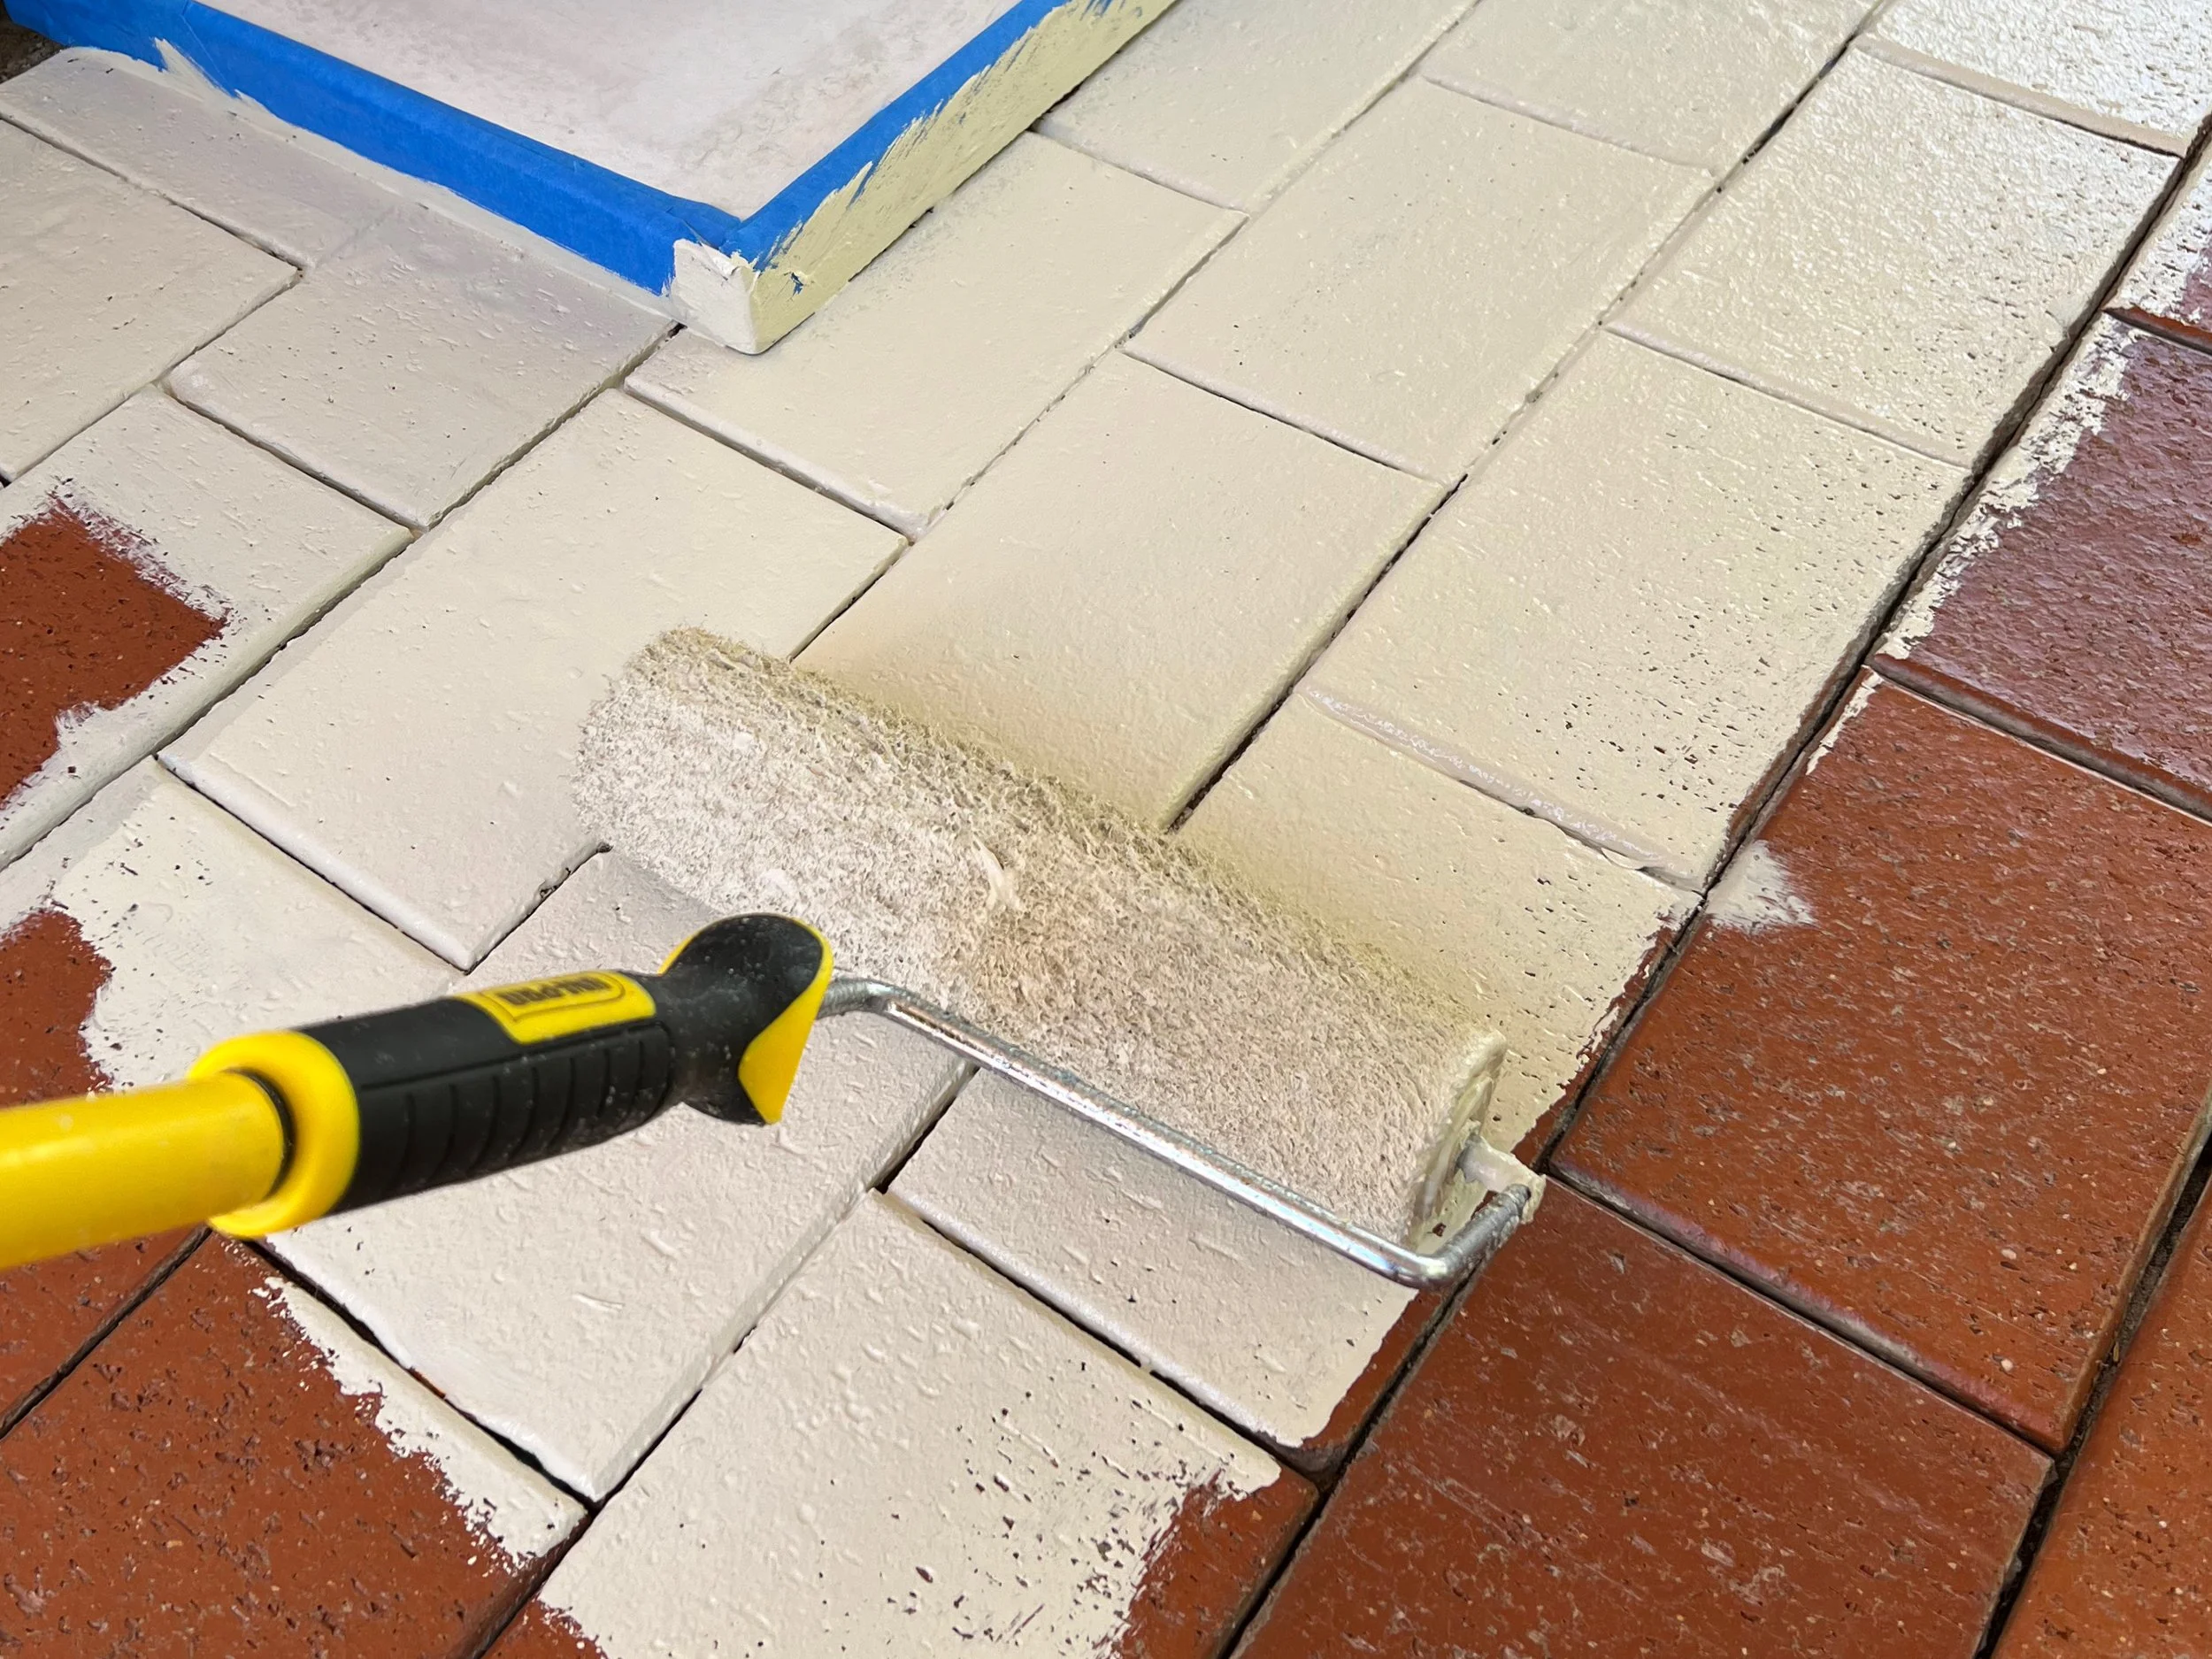
After stirring the tin of Dulux Concrete & Paving Coloured Sealer to ensure the colour and slip-resistant particles were evenly distributed, I checked my shoes were clean and free of grit before using the brush to cut in around the edges.
Then I used a clean long-nap roller to apply, working from end to end in slightly overlapped sections and rolling into the gaps between the pavers, and left it to dry for two hours.
Before applying the second coat, I touched up any unpainted crevices and cracks with the brush, then used a fresh roller cover to repeat the application, rolling from side to side to criss-cross the first coat and ensure an even finish.
When the surface was dry enough to walk on, I removed the tape. It’s recommended leaving the sealer for a couple of days to cure completely before driving on it.
Are you planning to makeover a paved area?
Tag me on your project and follow more of my DIY journey on Instagram for tool tips, home improvement and simple building projects.