SEALED CONCRETE DRIVEWAY
Natasha Dickins

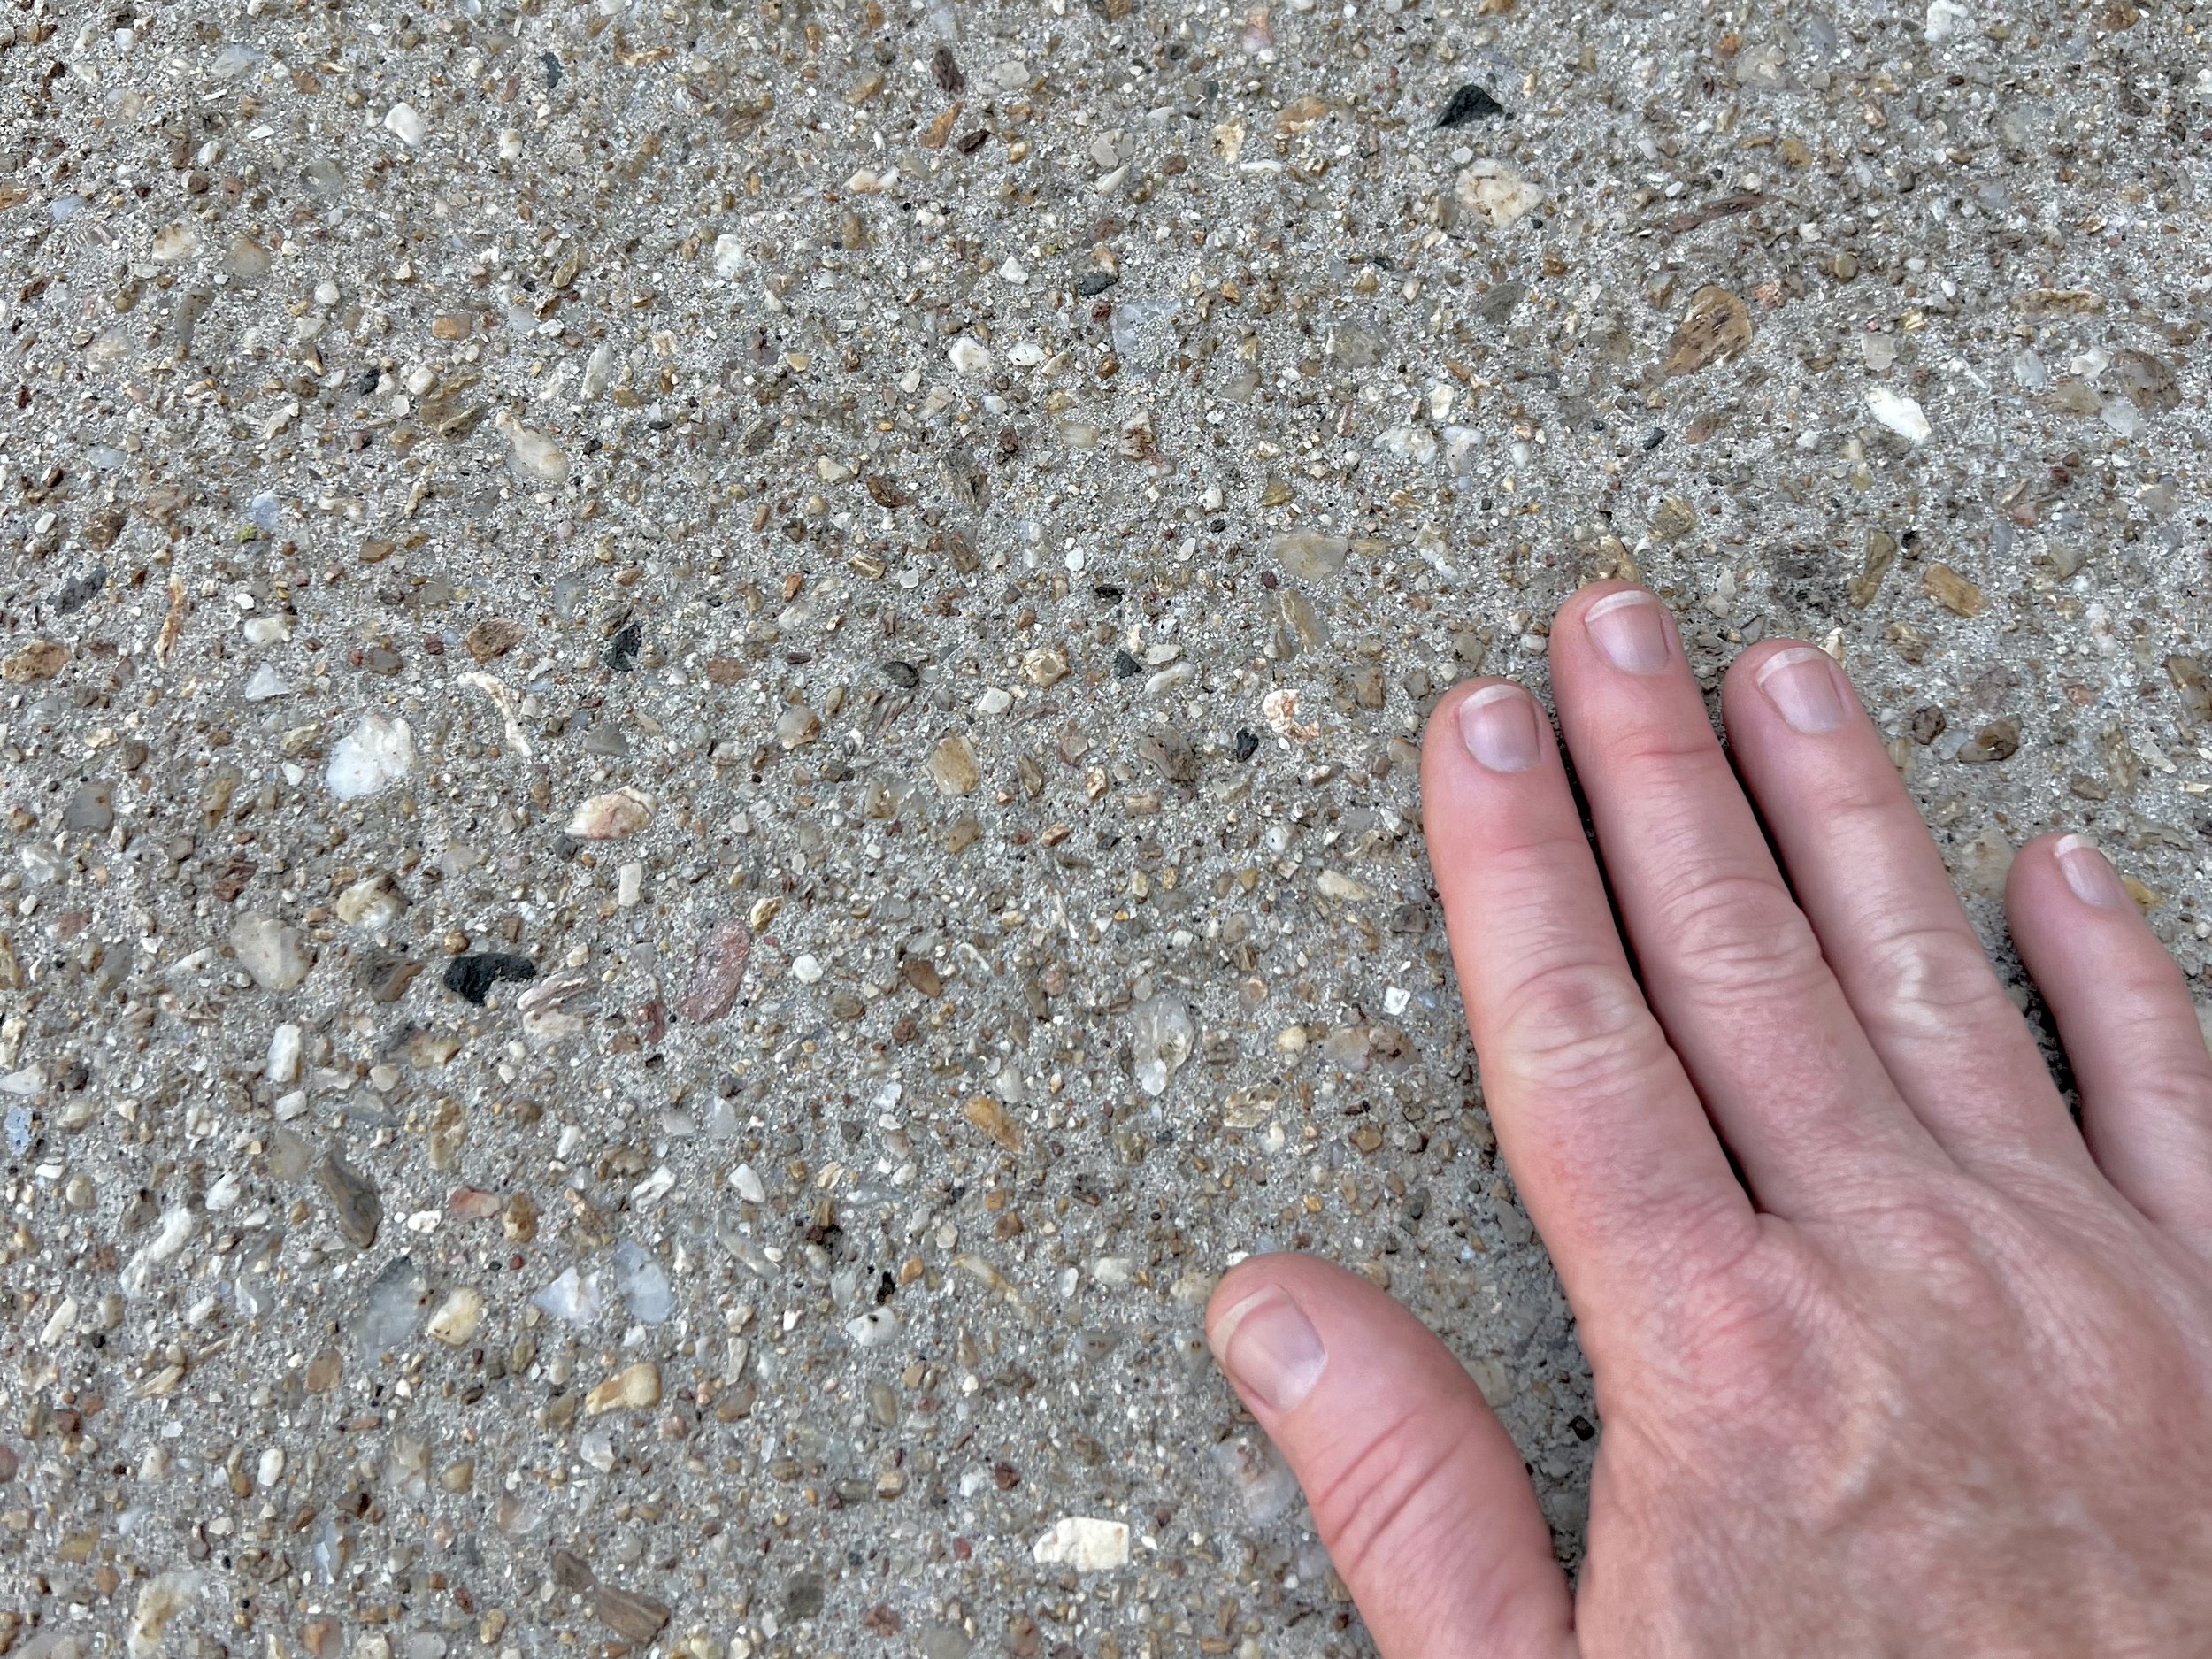
The surface of my driveway had worn away with pressure cleaning and often becomes blackened with mould after wet weather. My plan was to clean the surface then revive it with a clear finish to keep that newly washed look for longer while ensuring it’s easy to hose down.
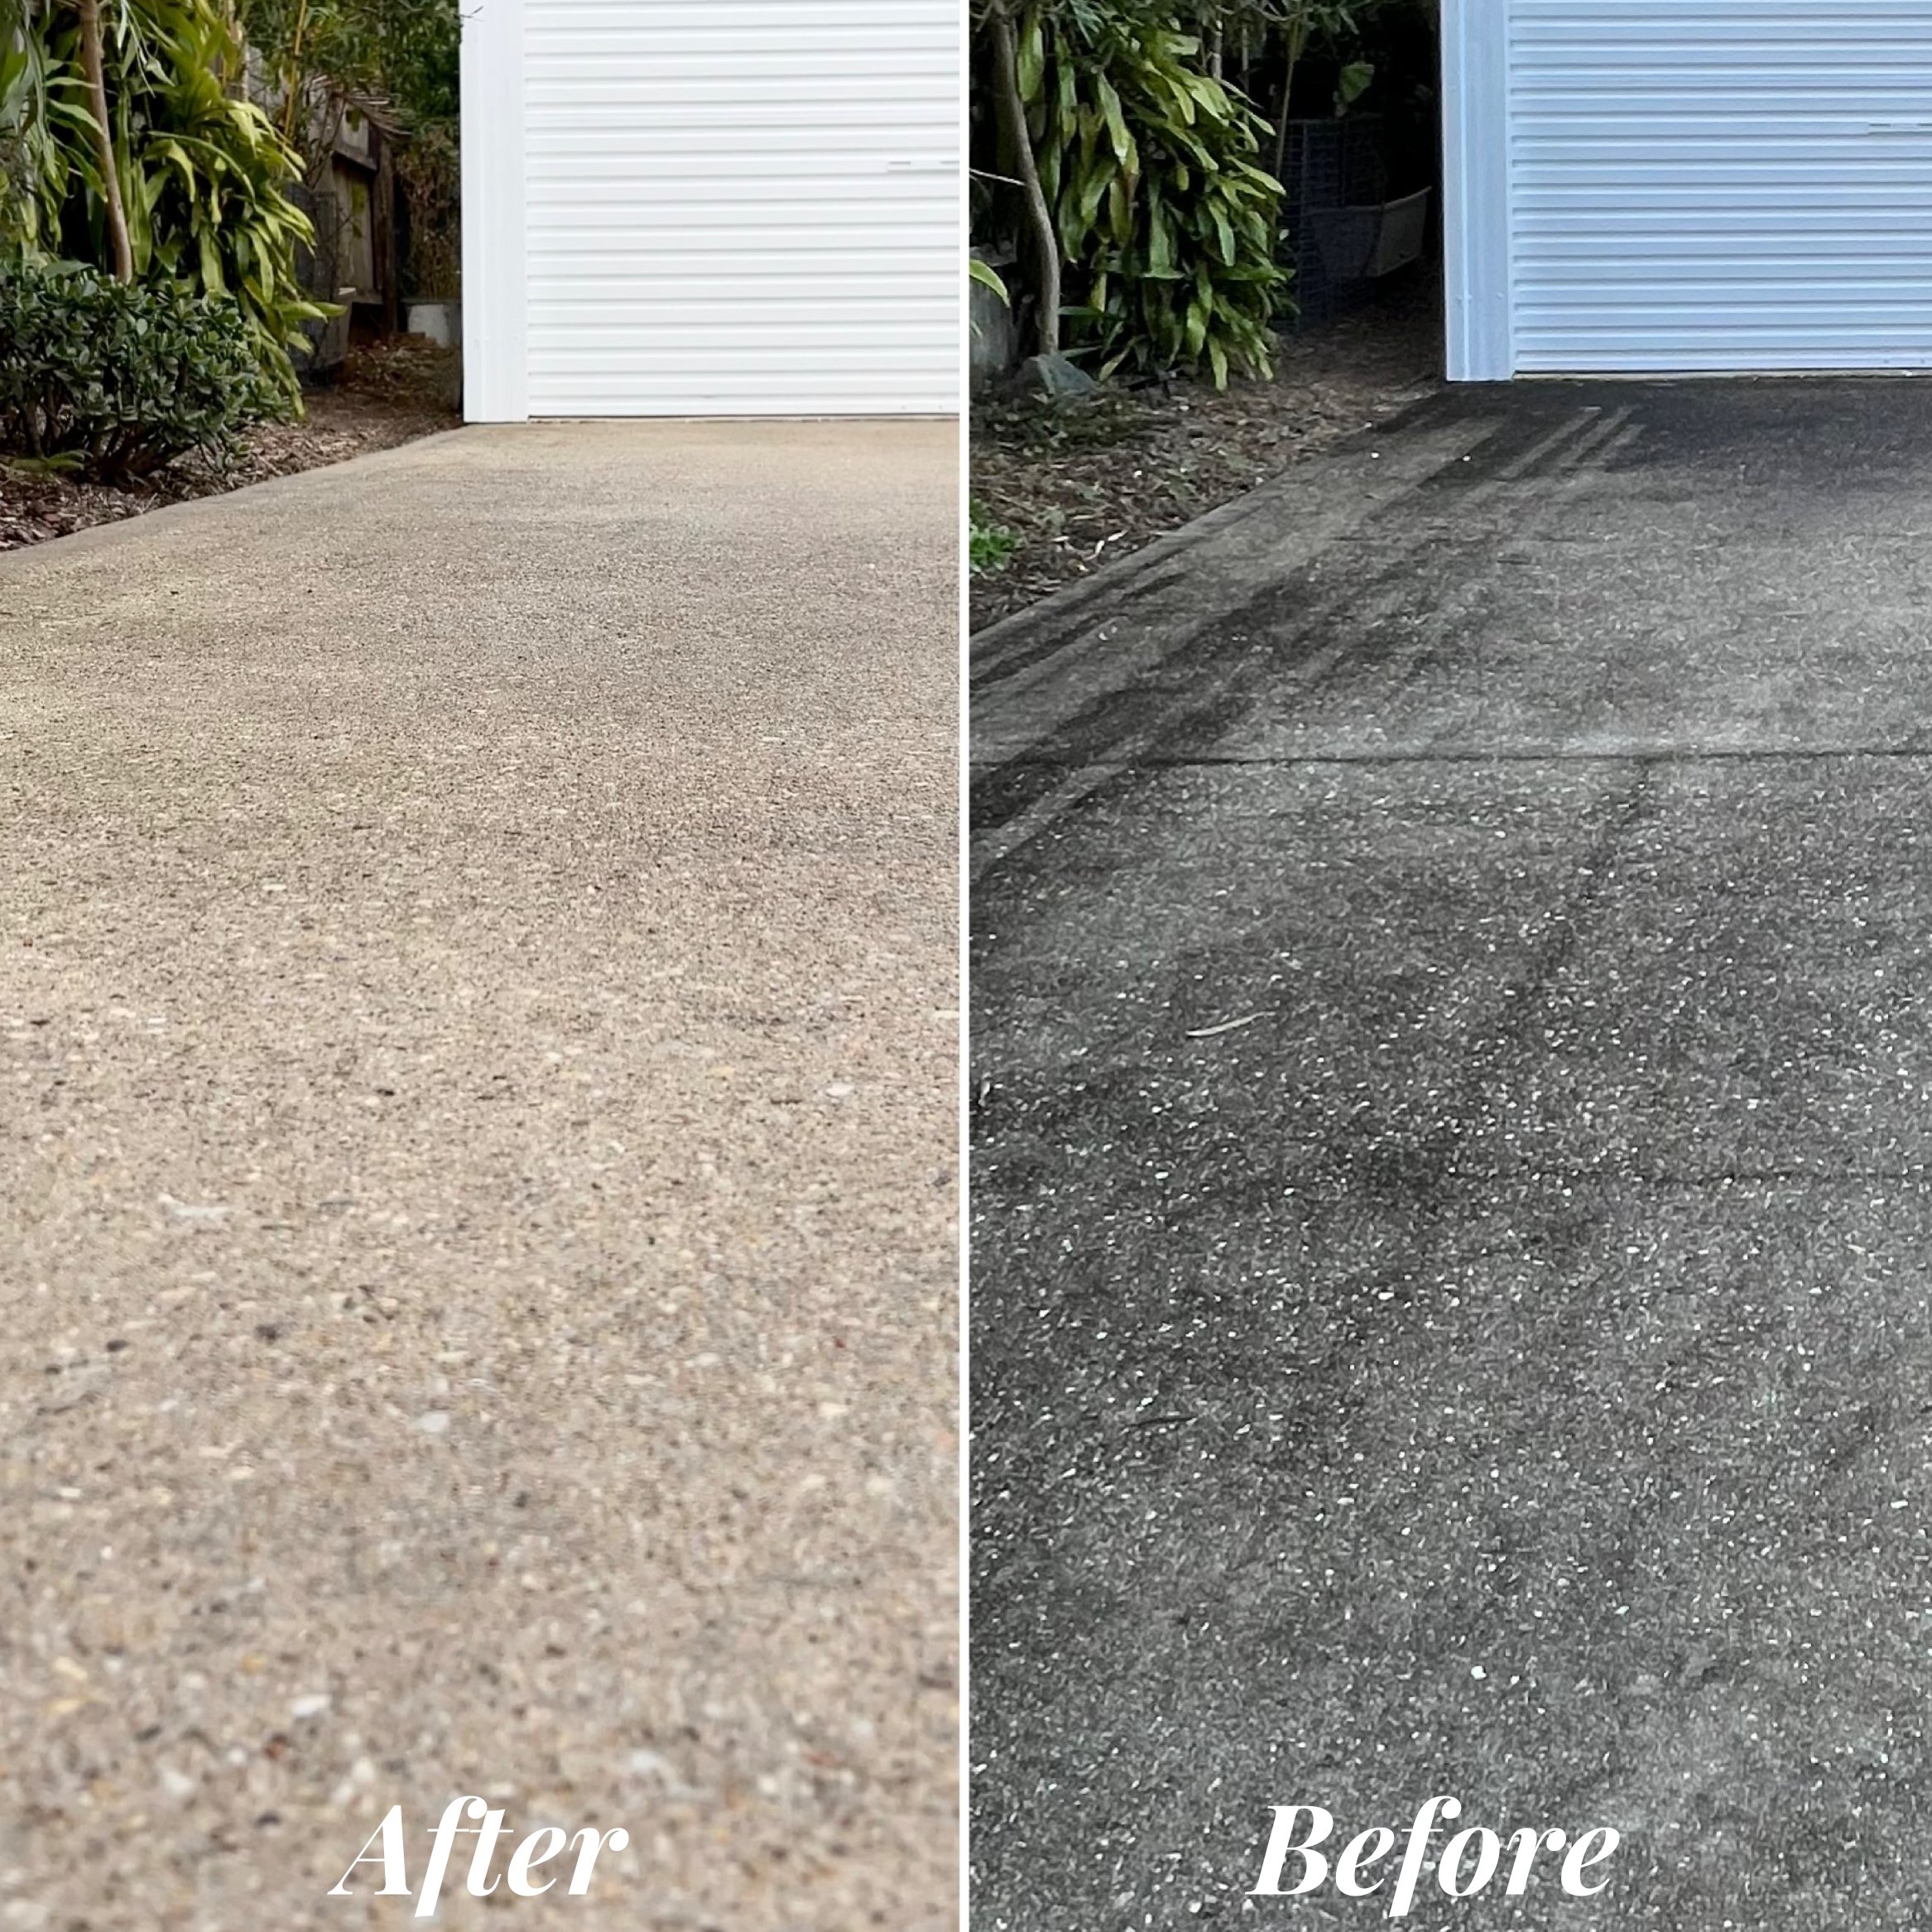
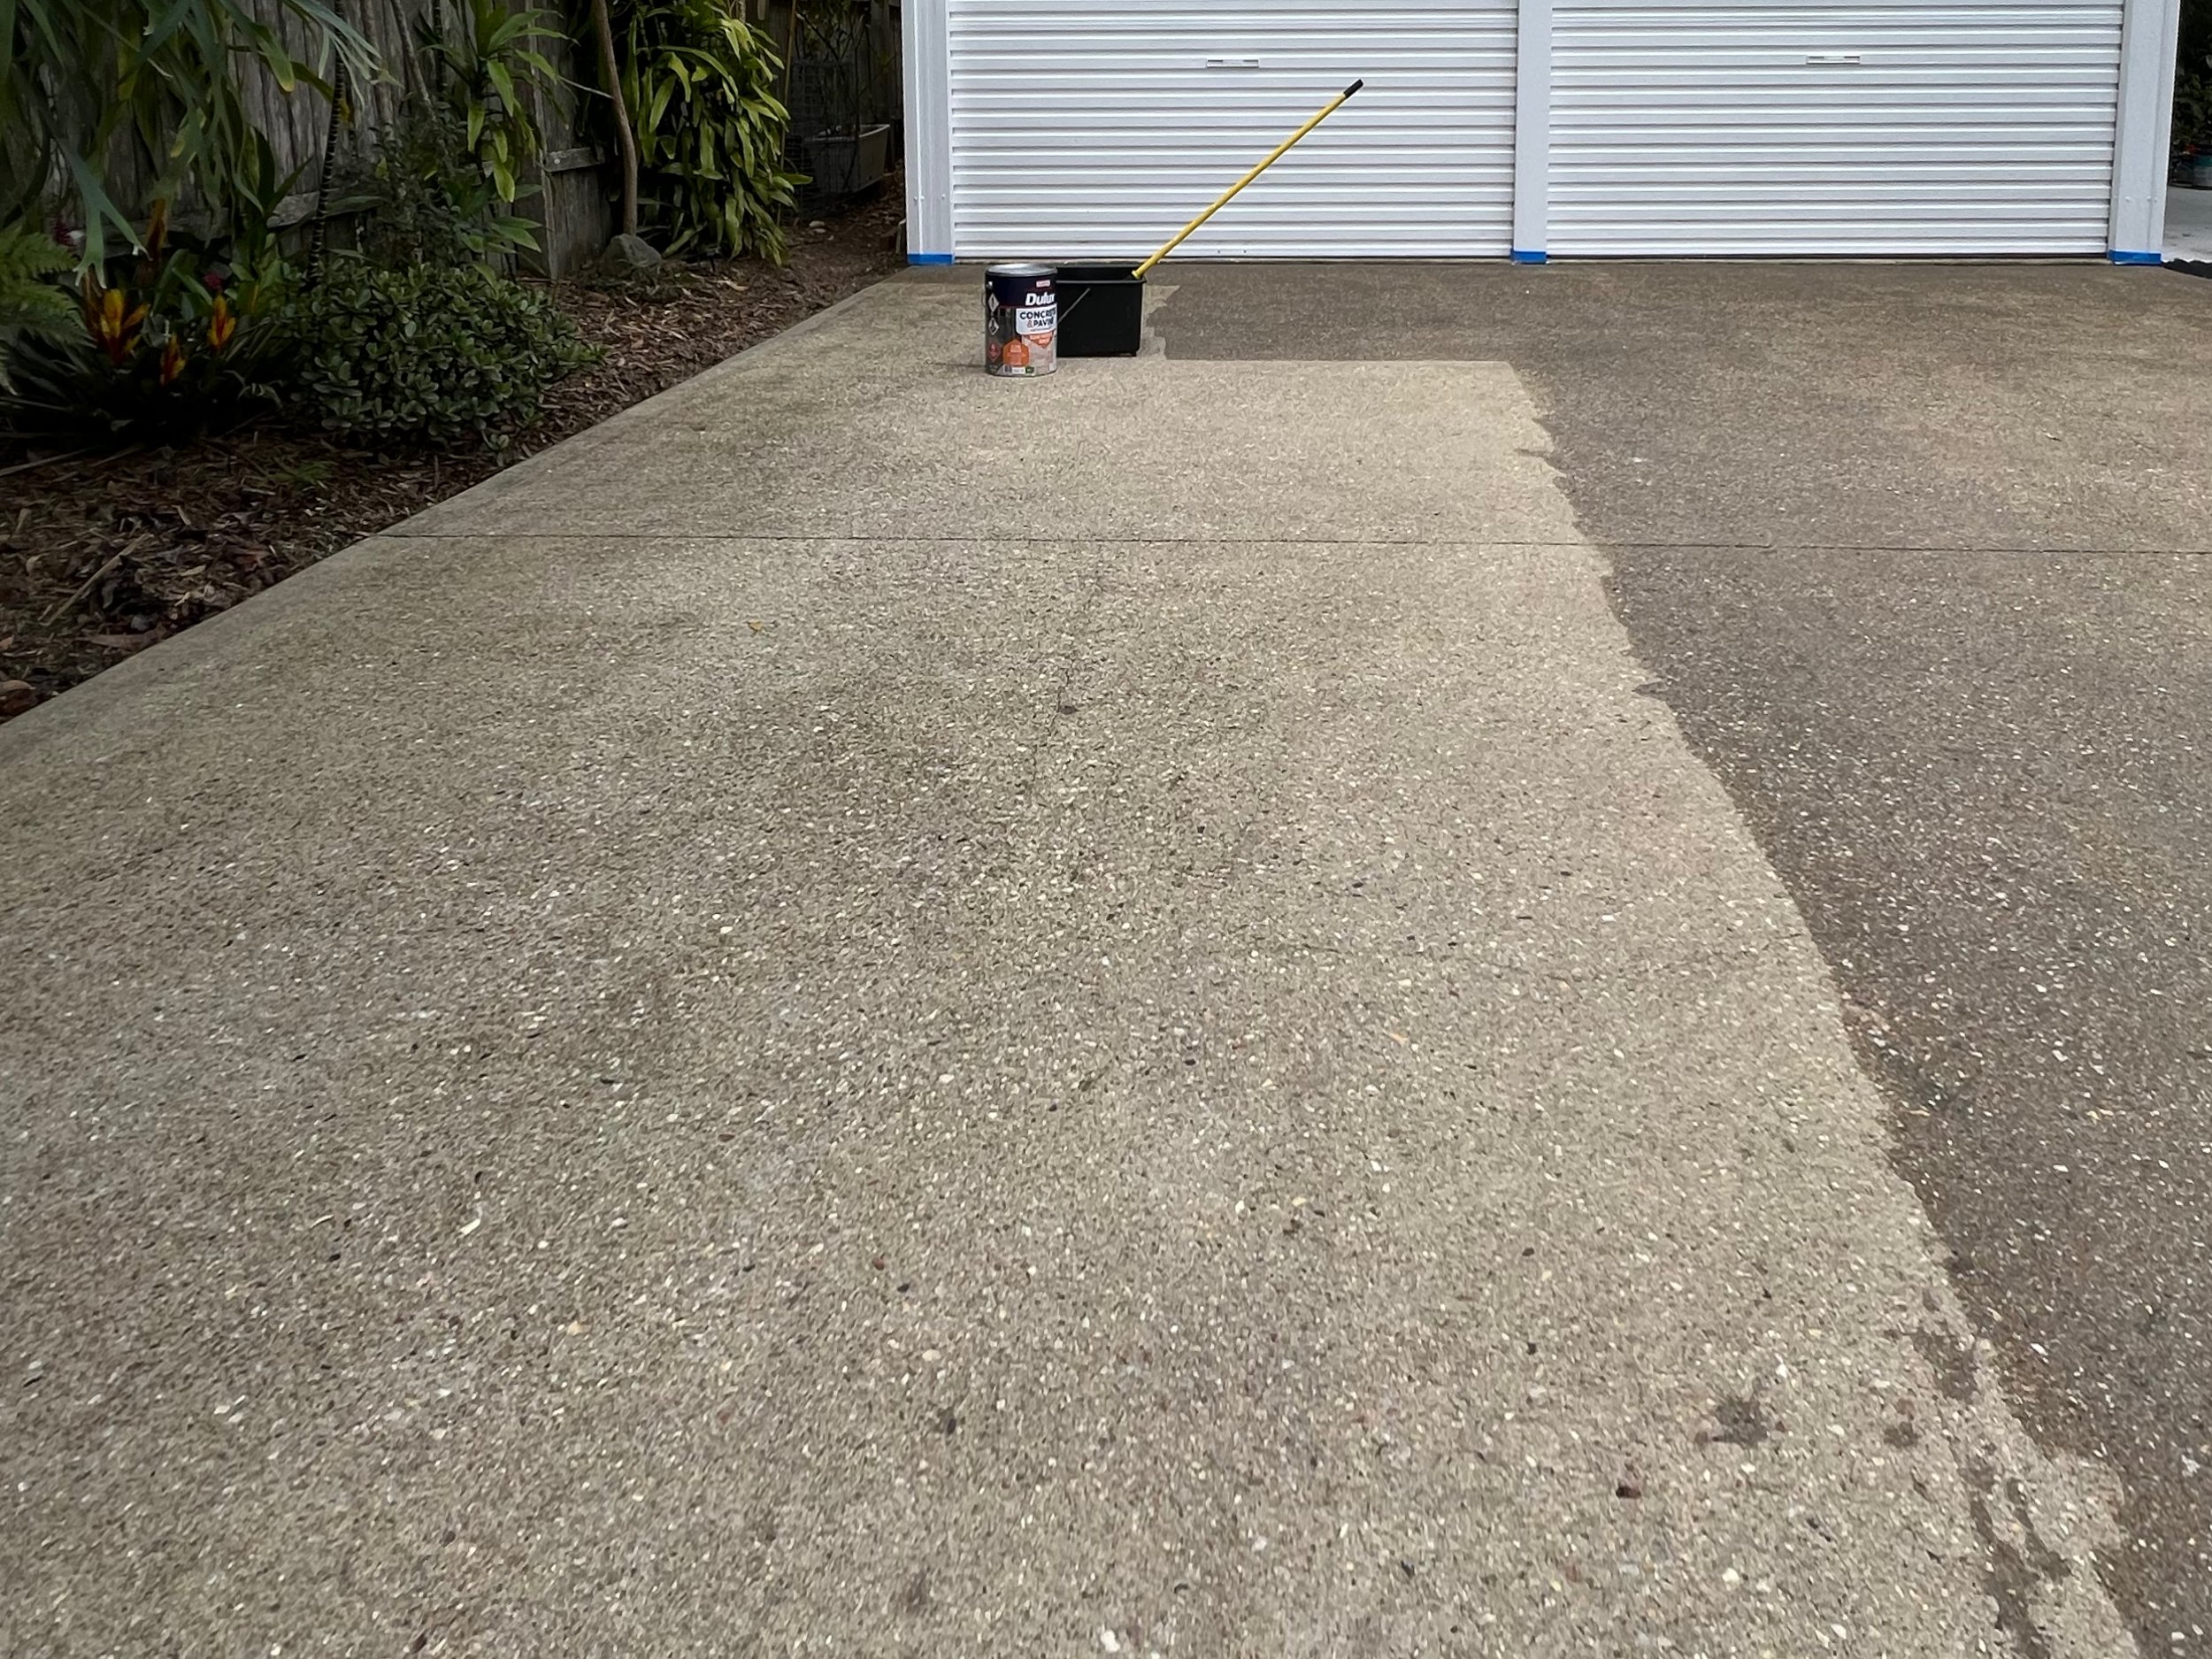
This makeover was a simple two-step process using the Dulux Concrete & Paving range. While the surface is now smooth and clean, it’s also safe to walk on, even in the rain.
“My driveway needed some TLC so that it requires less water to keep clean. I did this makeover in a weekend and love how fresh it looks.”
TESTING THE SURFACE
Before purchasing products, do the Dulux Concrete & Paving Surface Test to check if your driveway is bare or sealed. Pour on 30ml of water, wait 30 seconds, dab off the excess and check if it has soaked in. Soaked in means bare, still on the surface indicates sealed.
If sealed, prep with Dulux Concrete & Paving Sealed Surface Cleaner and follow the packaging instructions. If your driveway is bare, get started with Dulux Concrete & Paving Bare Concrete Etch & Clean.
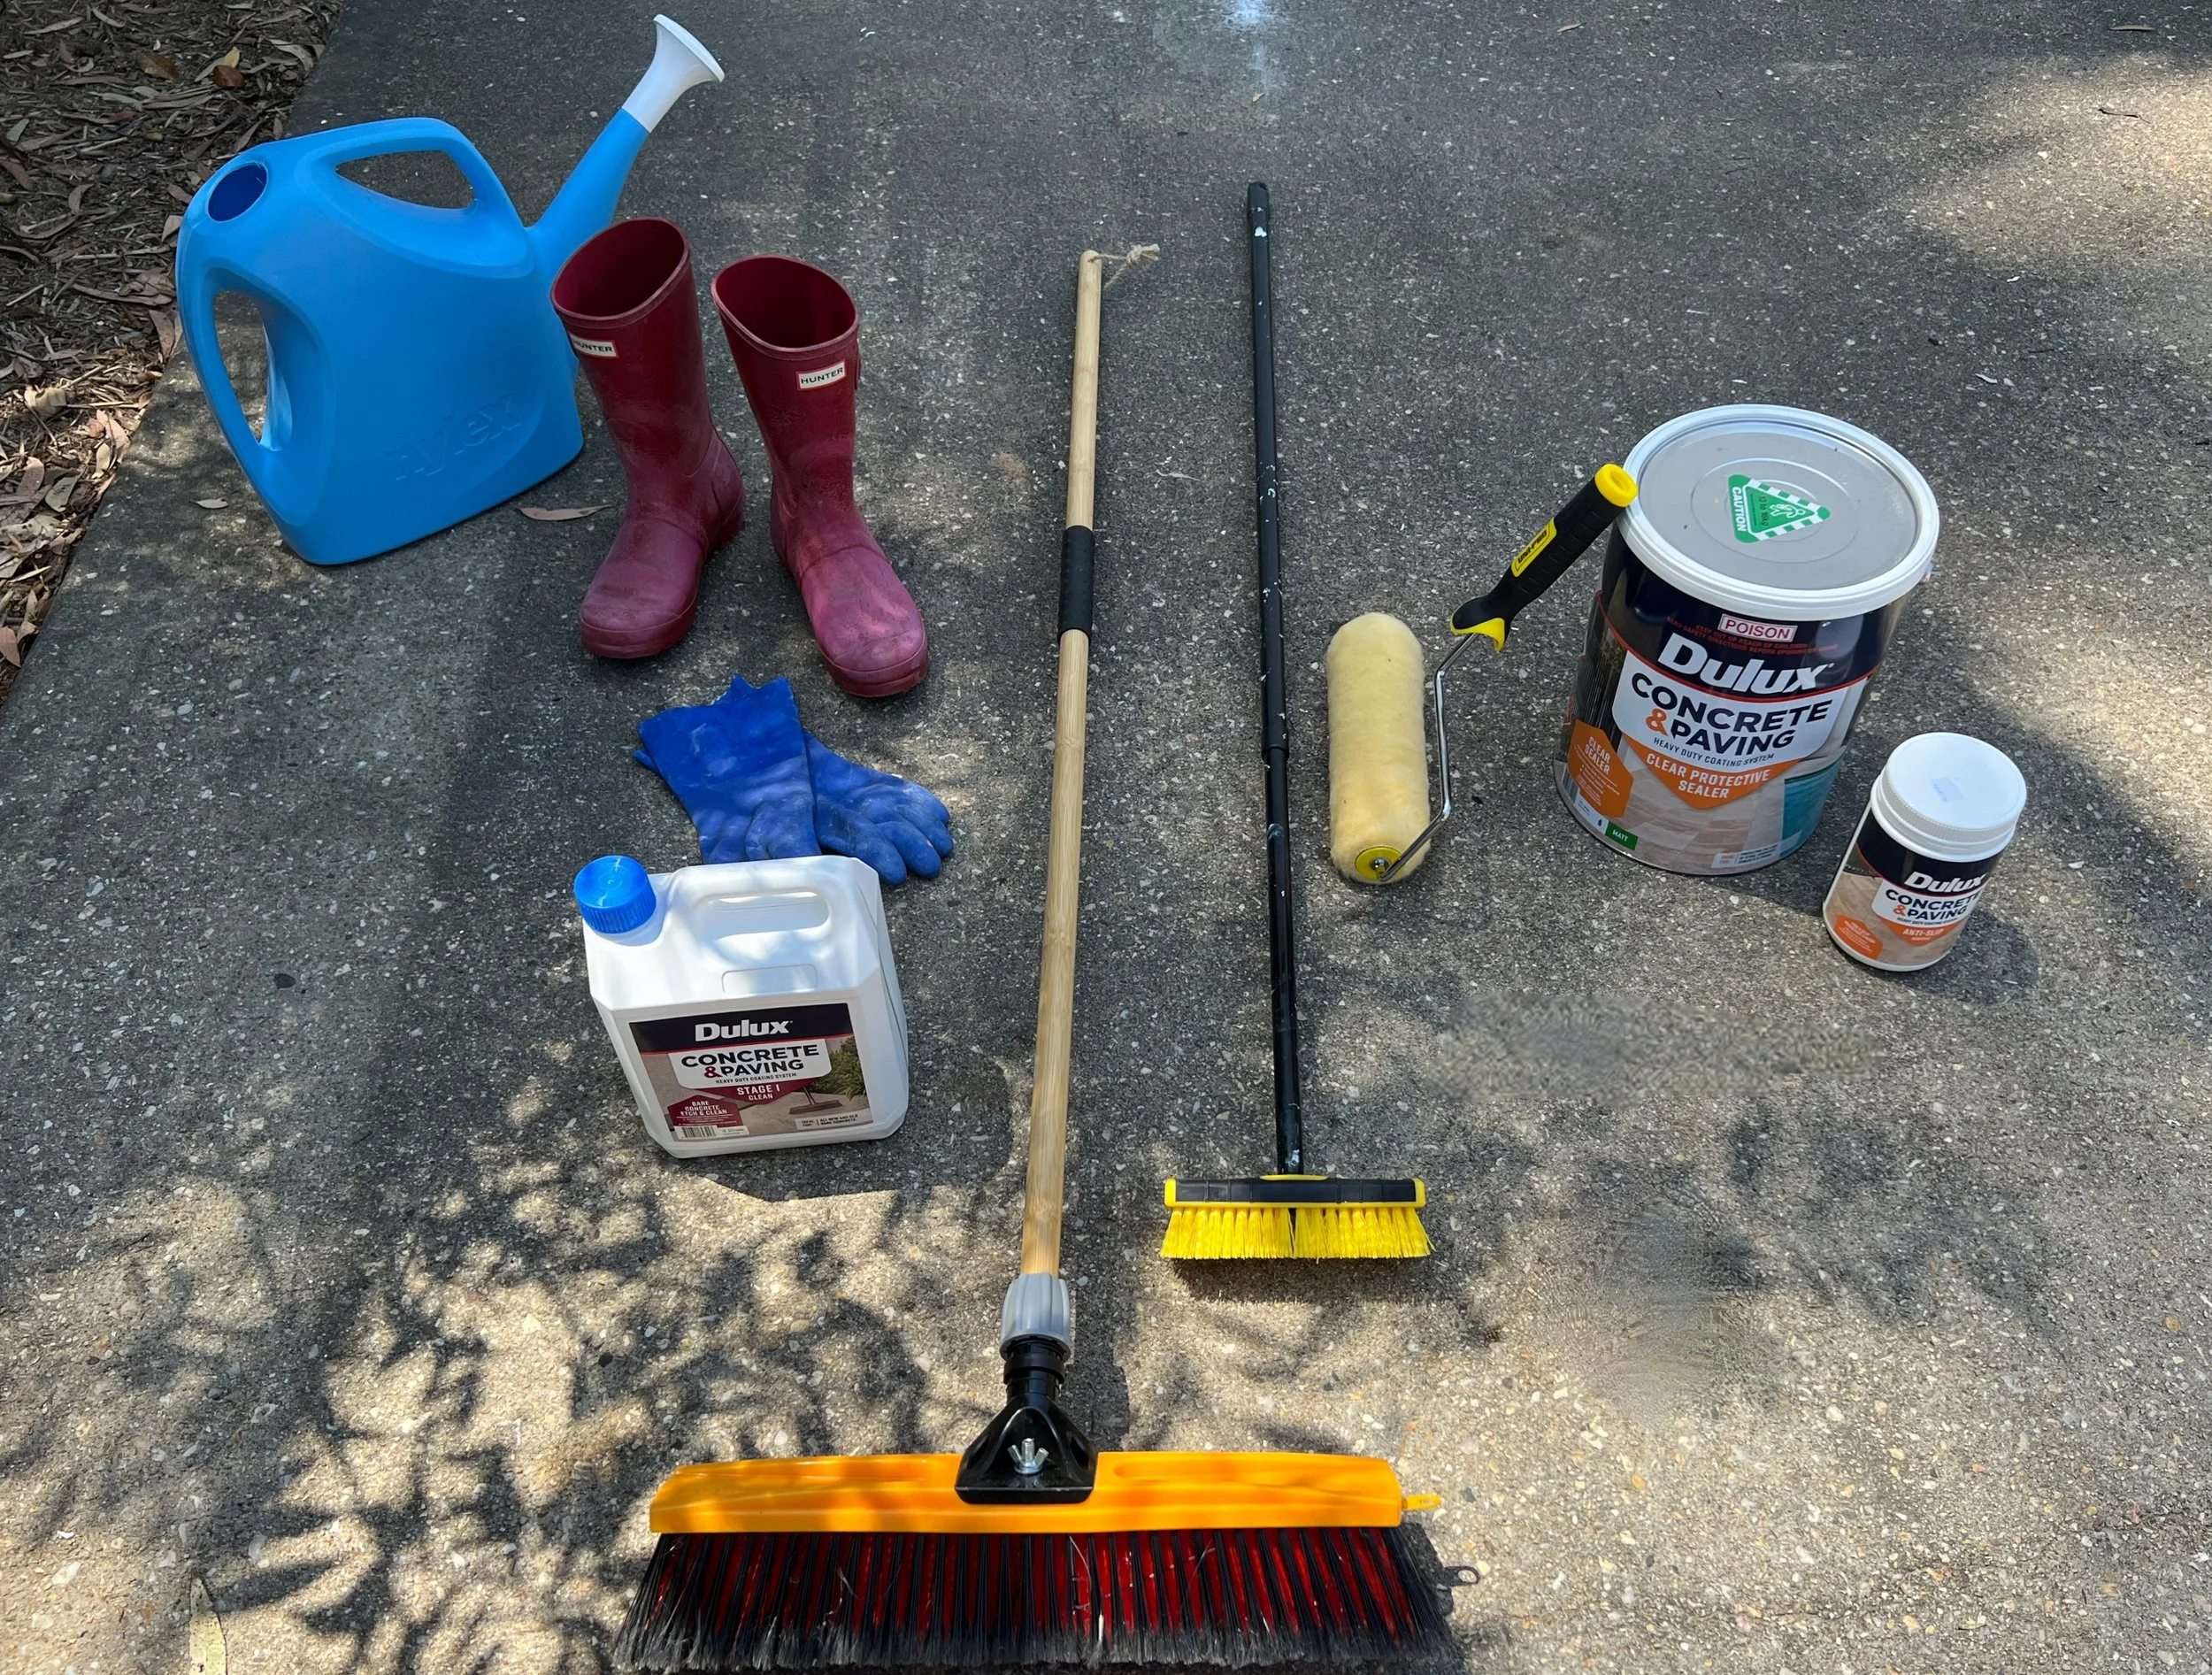
WHAT YOU NEED
• Safety boots and eyewear
• Garden broom
• Gloves
• Pressure cleaner
• Dulux Concrete & Paving Bare Concrete Etch & Clean 4L
• Plastic watering can
• Stiff bristle brush
• Paint tin opener and stirrer
• Dulux Concrete & Paving Clear Protective Sealer in Matt 10L
• Dulux Concrete & Paving Anti Slip Additive 300g
• Bucket tray
• Extension pole and roller
• Dulux Professional Roller 22mm nap cover
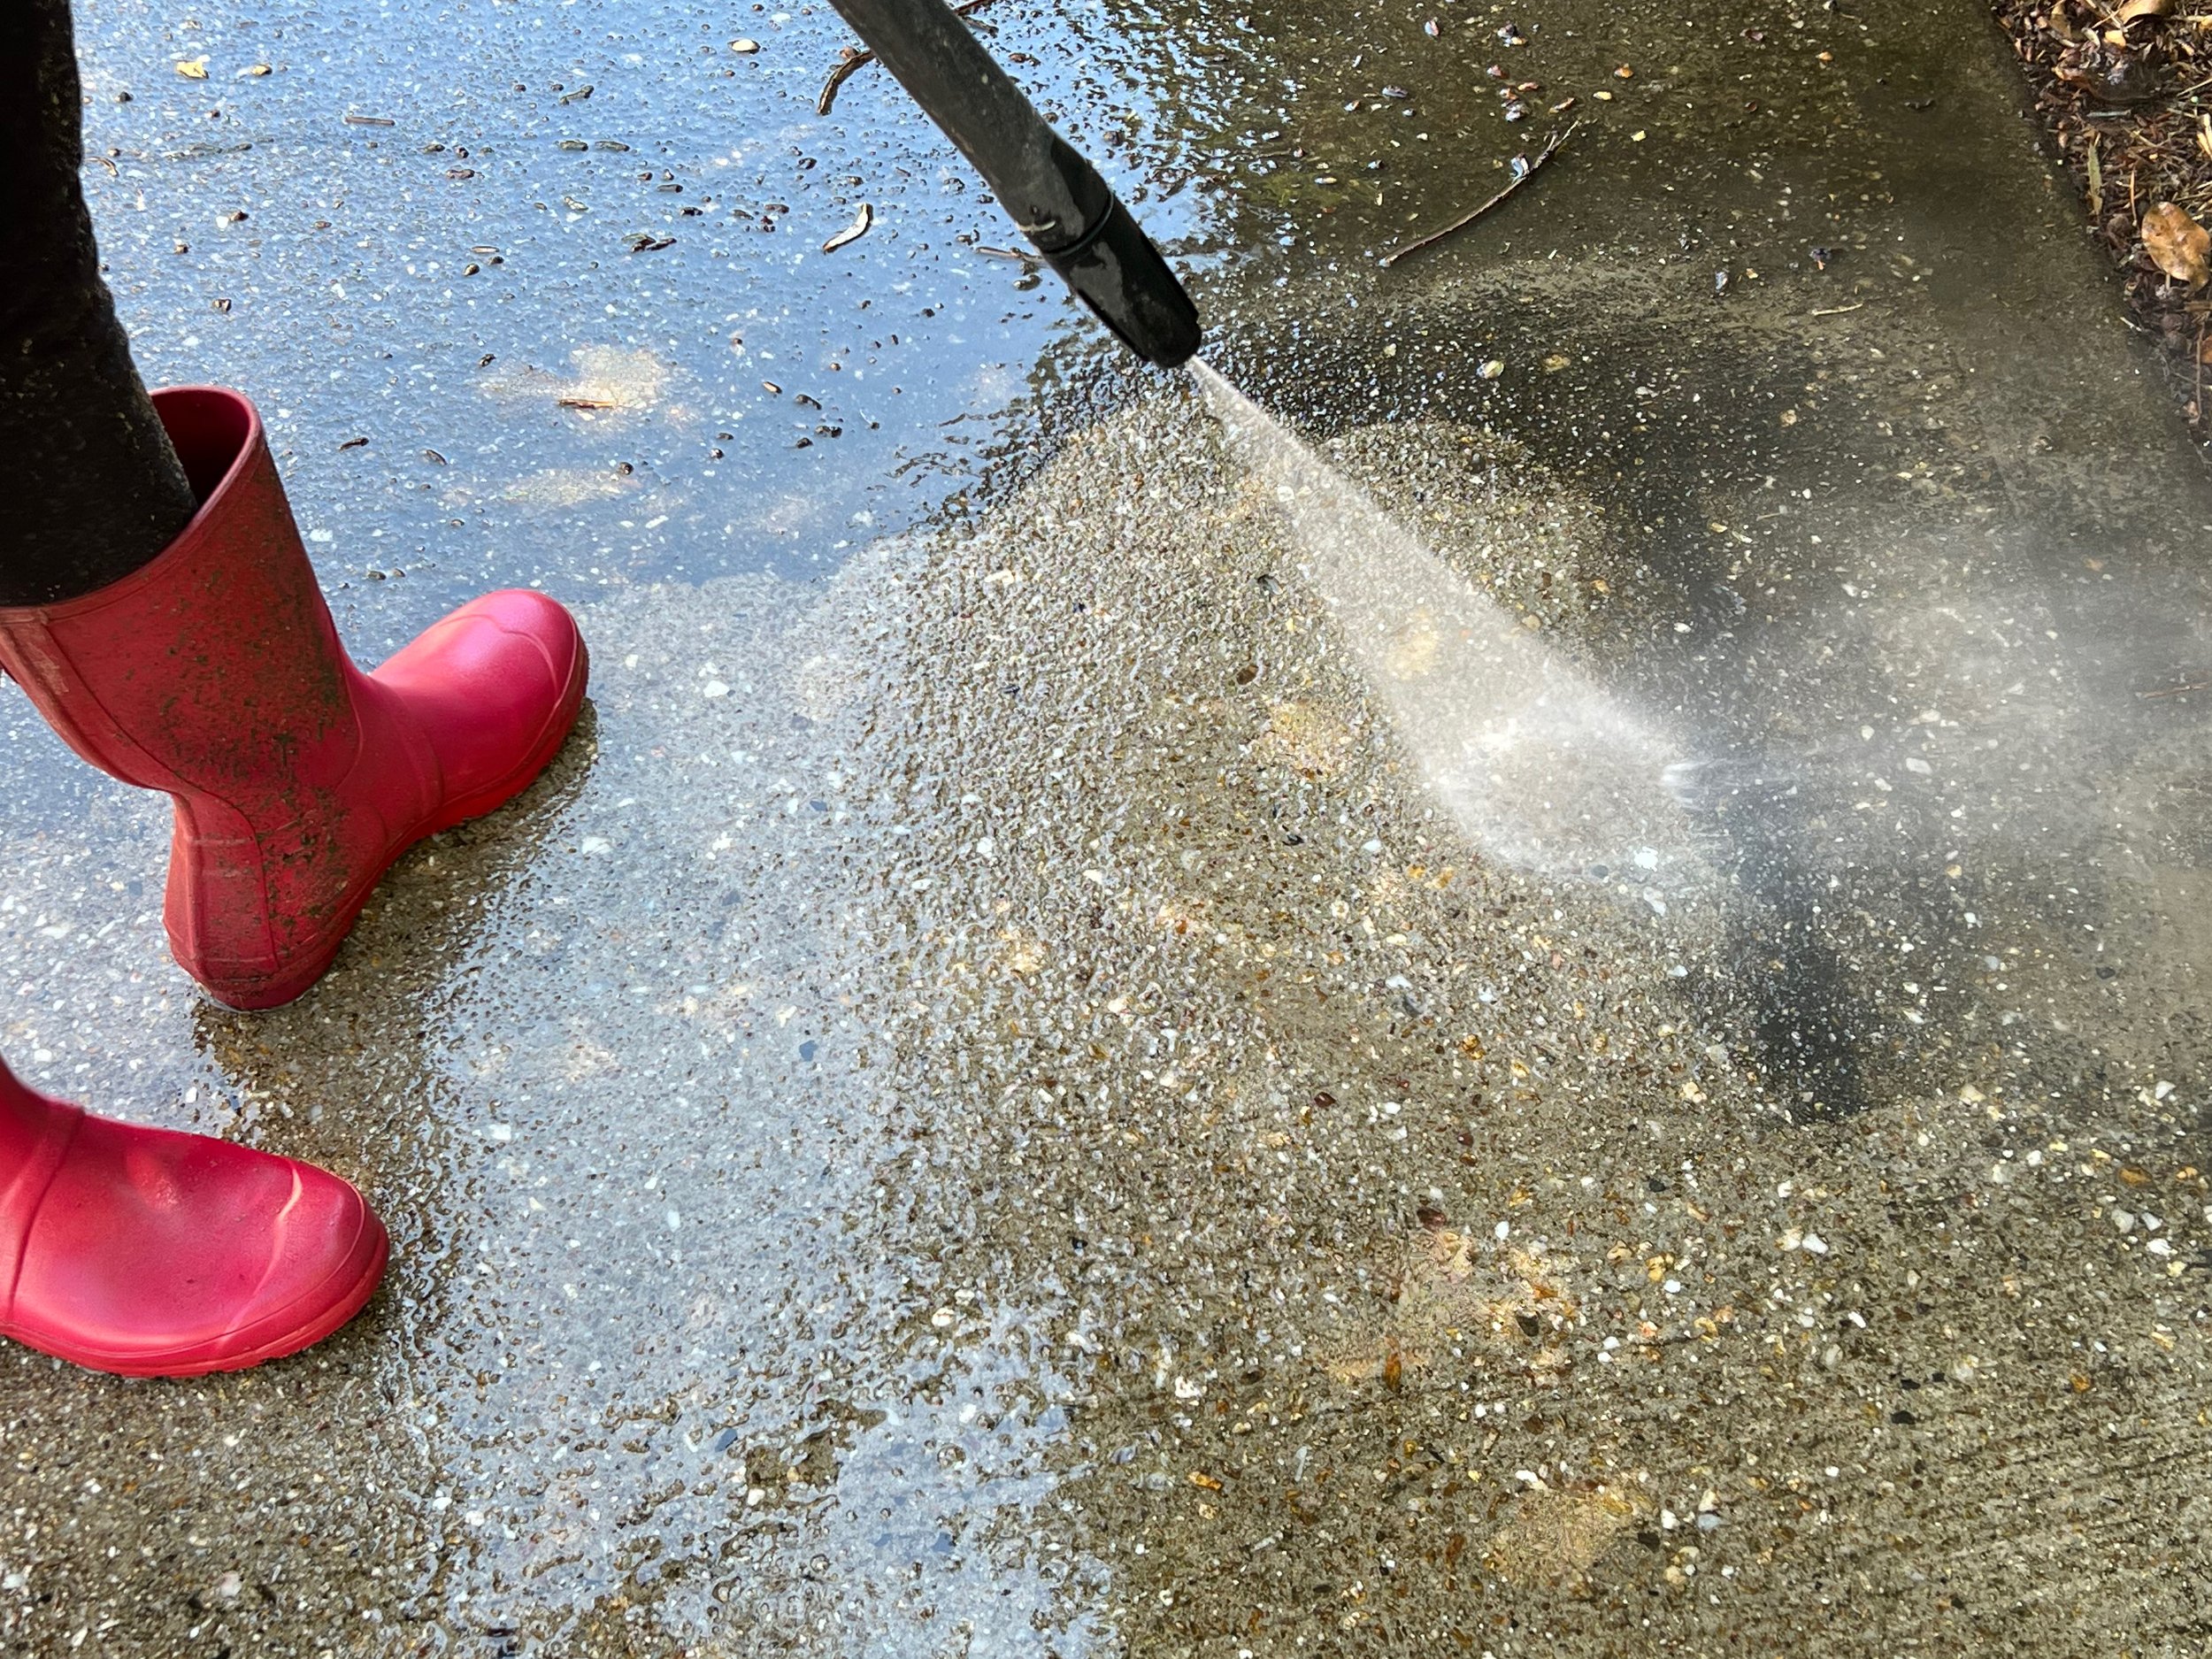
First I swept away debris with a broom then, wearing boots and eye protection, I pressure washed from the highest point of the driveway so the dirty runoff doesn’t affect the cleaned area.
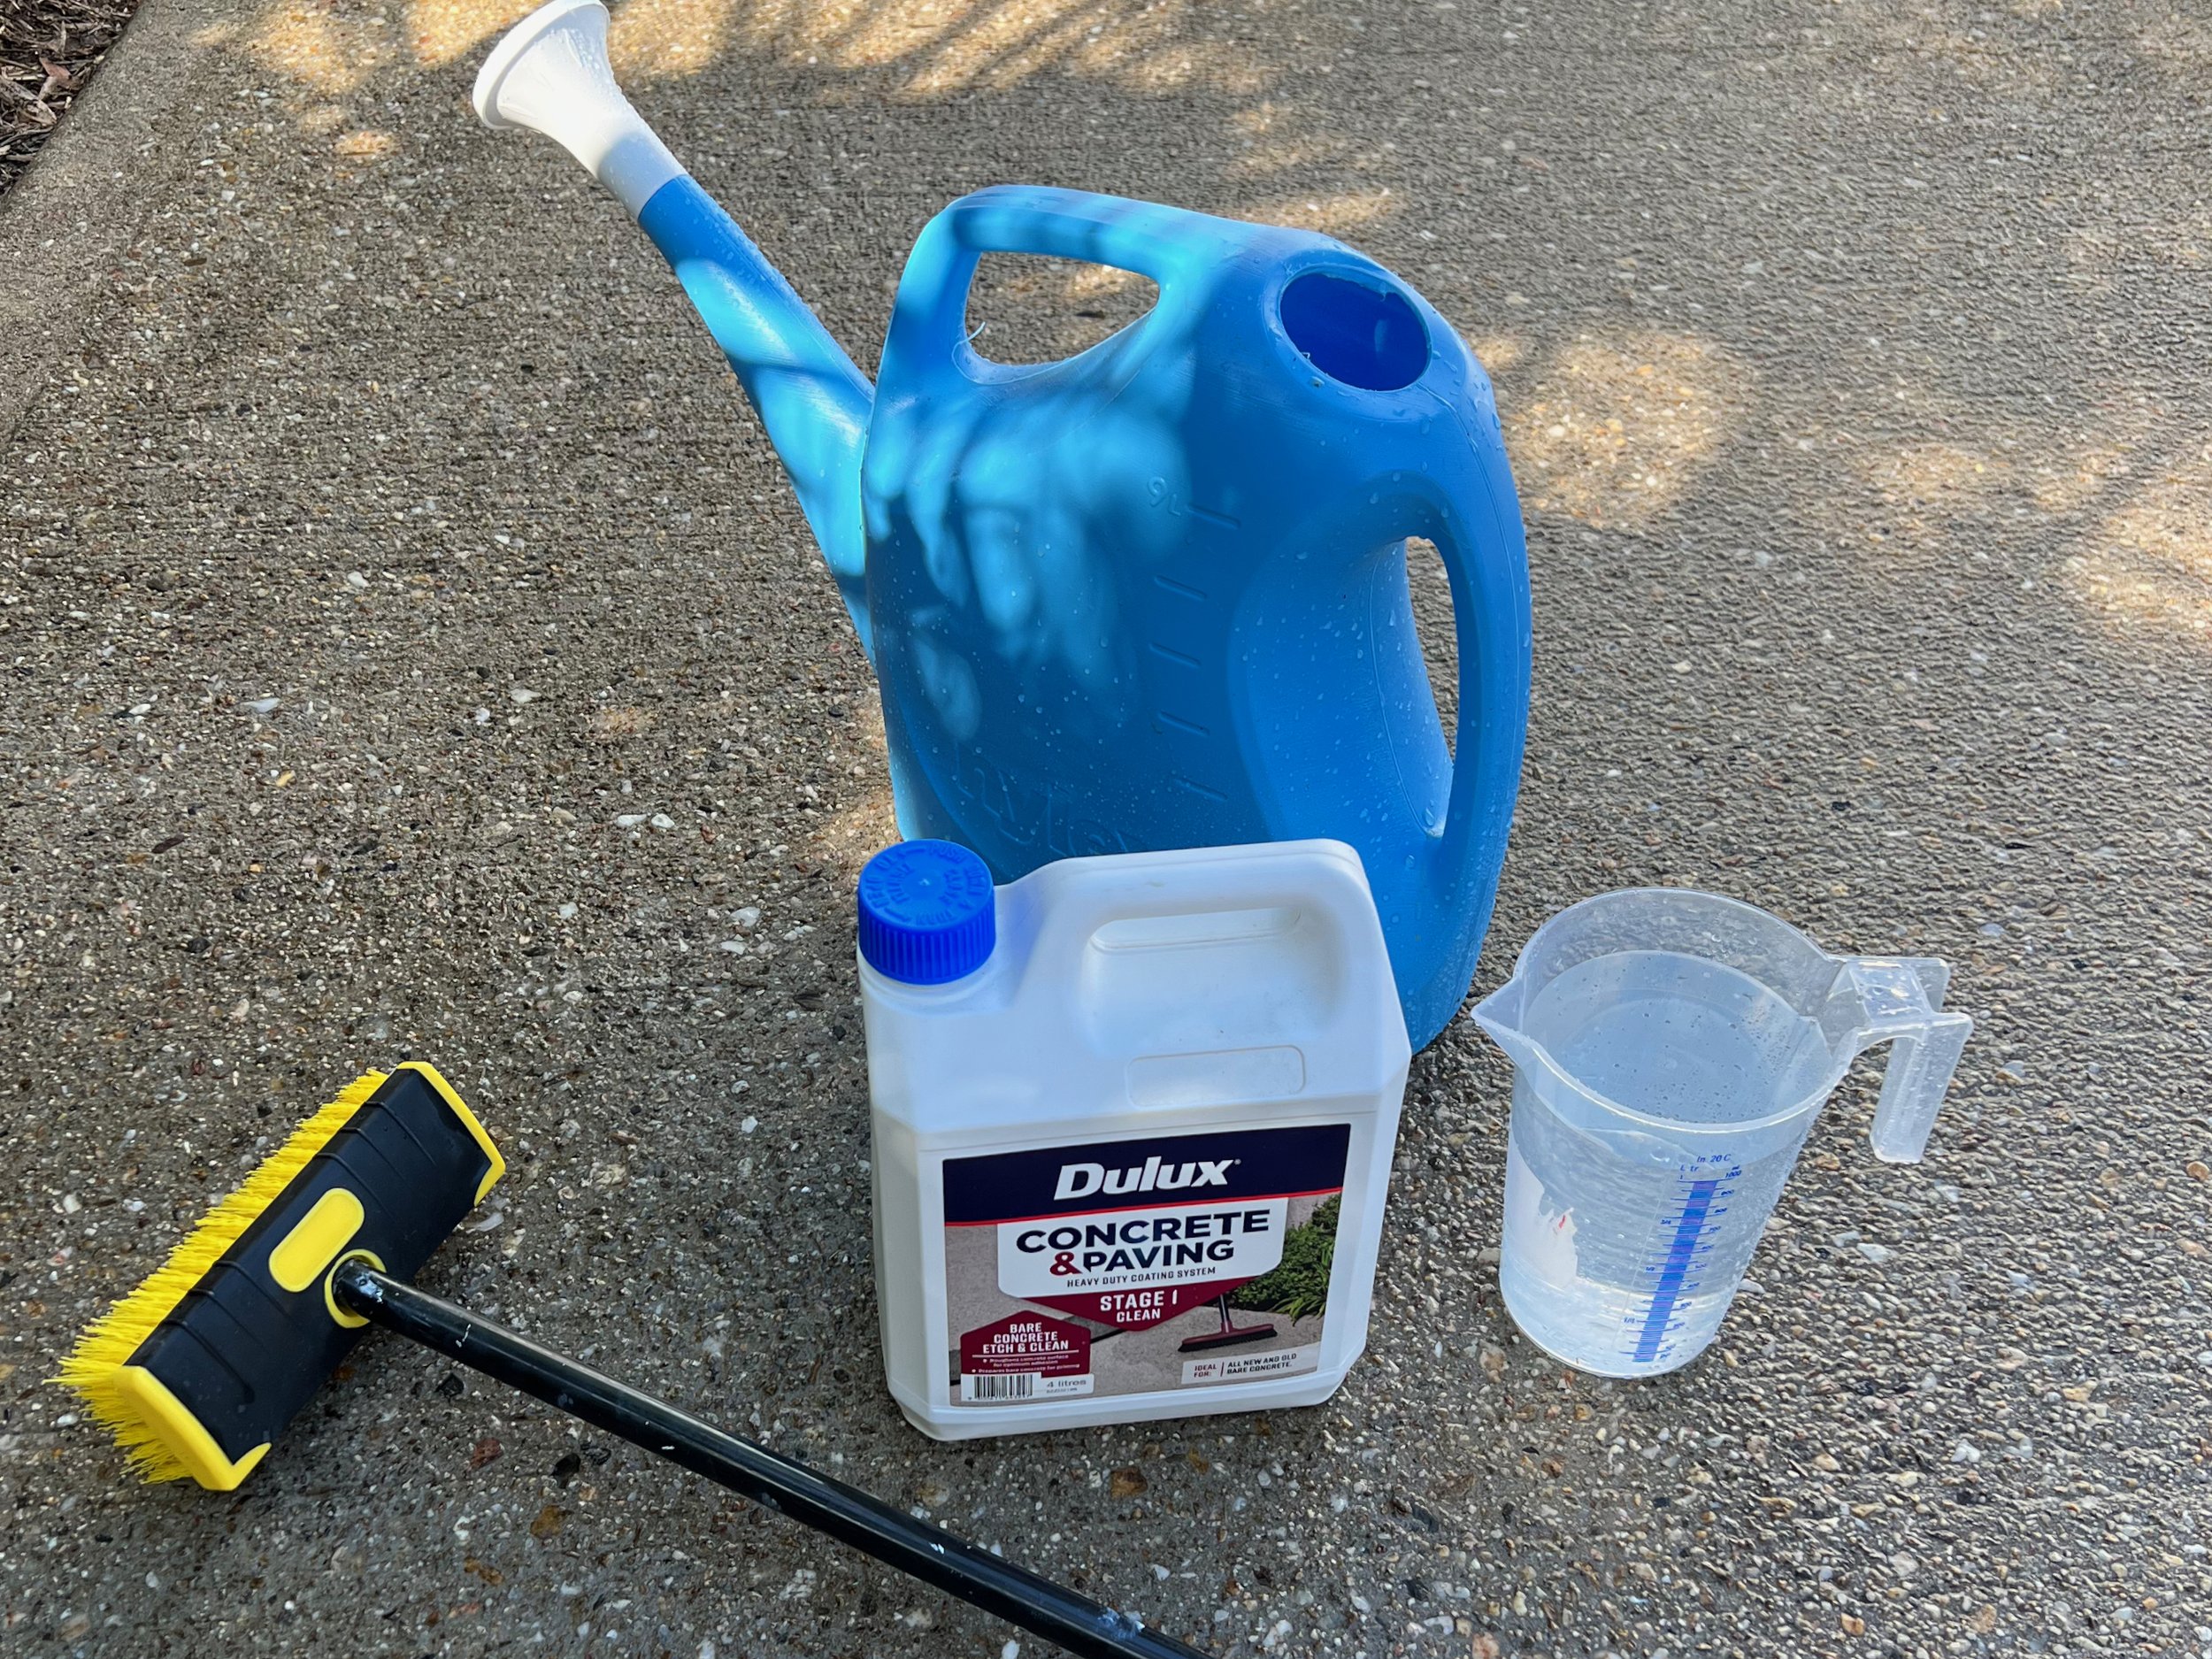
Using measurements on the side of a watering can, I mixed one part Dulux Concrete & Paving Bare Concrete Etch & Clean into four parts water (1:4).
Working in sections, I poured the solution over the driveway, scrubbing with a stiff bristle brush, waited 10 minutes for the etch to work its magic while re-watering and scrubbing any heavy spots and making sure the solution didn’t dry out.
TIP You know the etch is working on the concrete as it froths and makes a crackling noise. Be sure to wear gloves, glasses and protective clothing.
After rinsing off the etch with the pressure washer I left the driveway to dry thoroughly overnight. Next day, when I checked the surface, it felt like rough sandpaper.
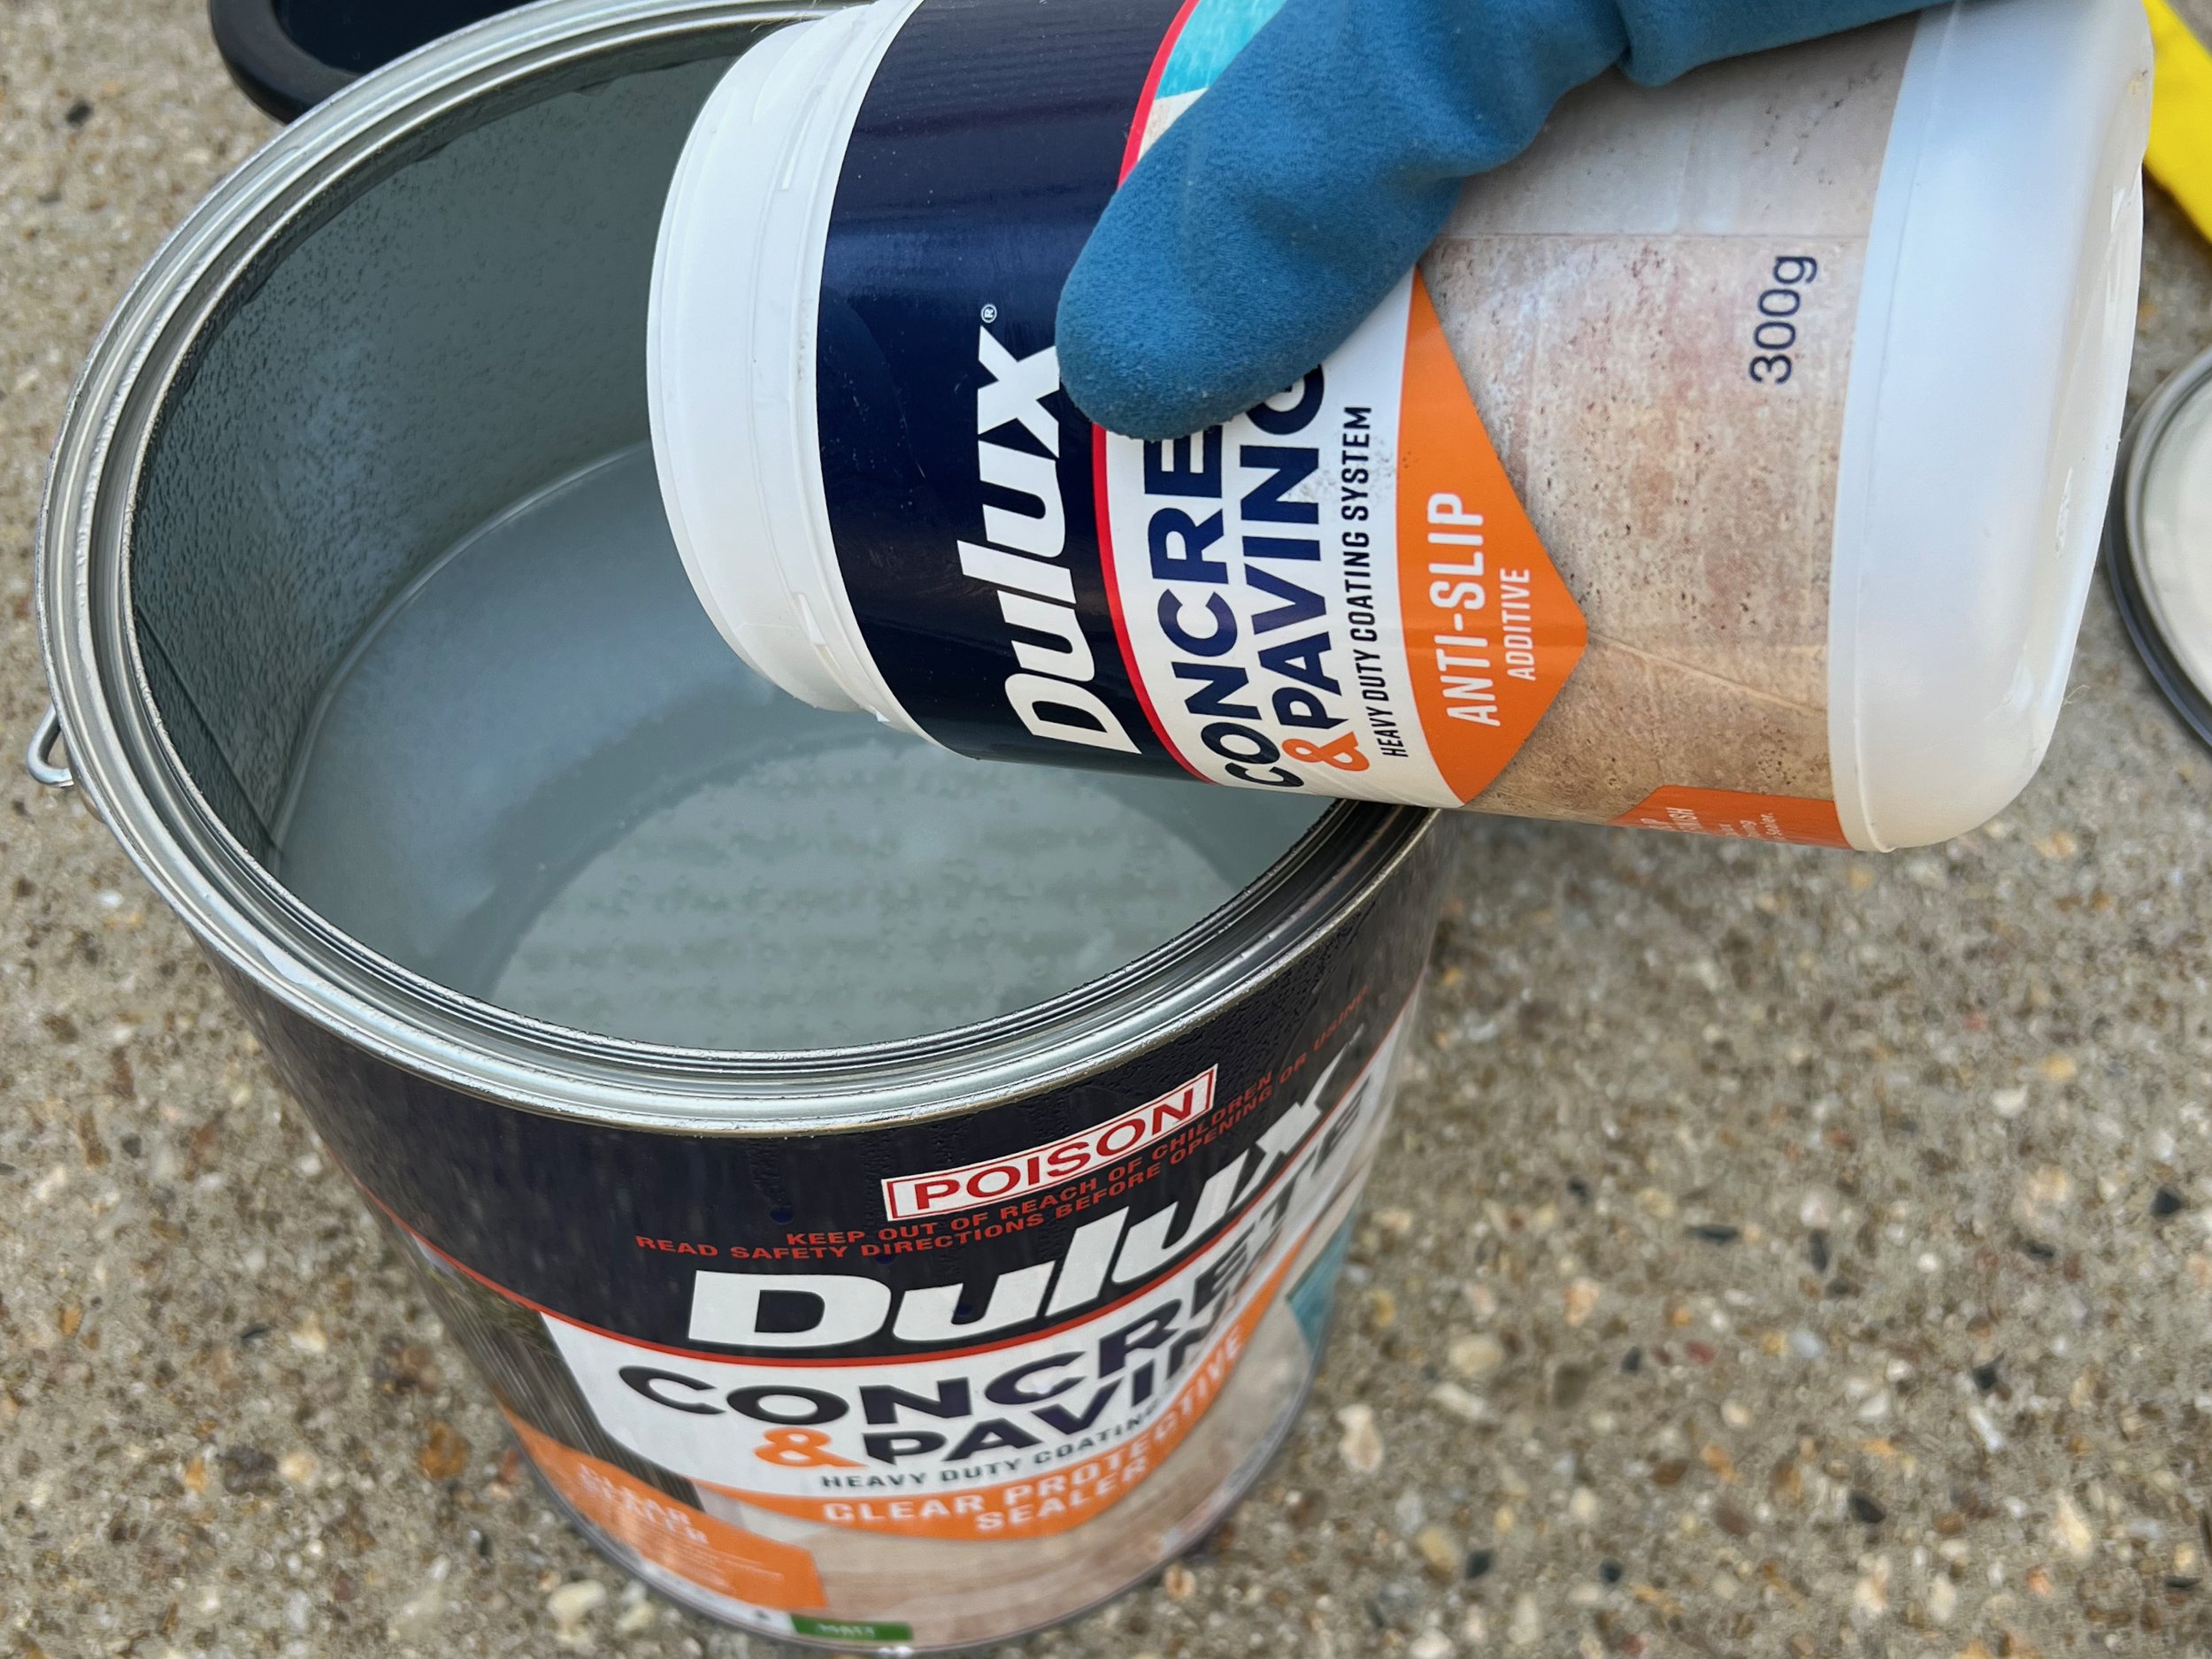
I poured a full 300g tub of Dulux Concrete & Paving Anti Slip Additive into a 10L tin of Dulux Concrete & Paving Clear Protective Sealer in Matt and stirred until the additive dissolved.
TIP Always stir the tin before refilling into the bucket tray to ensure the tiny clear beads of the additive are combined with the sealer.
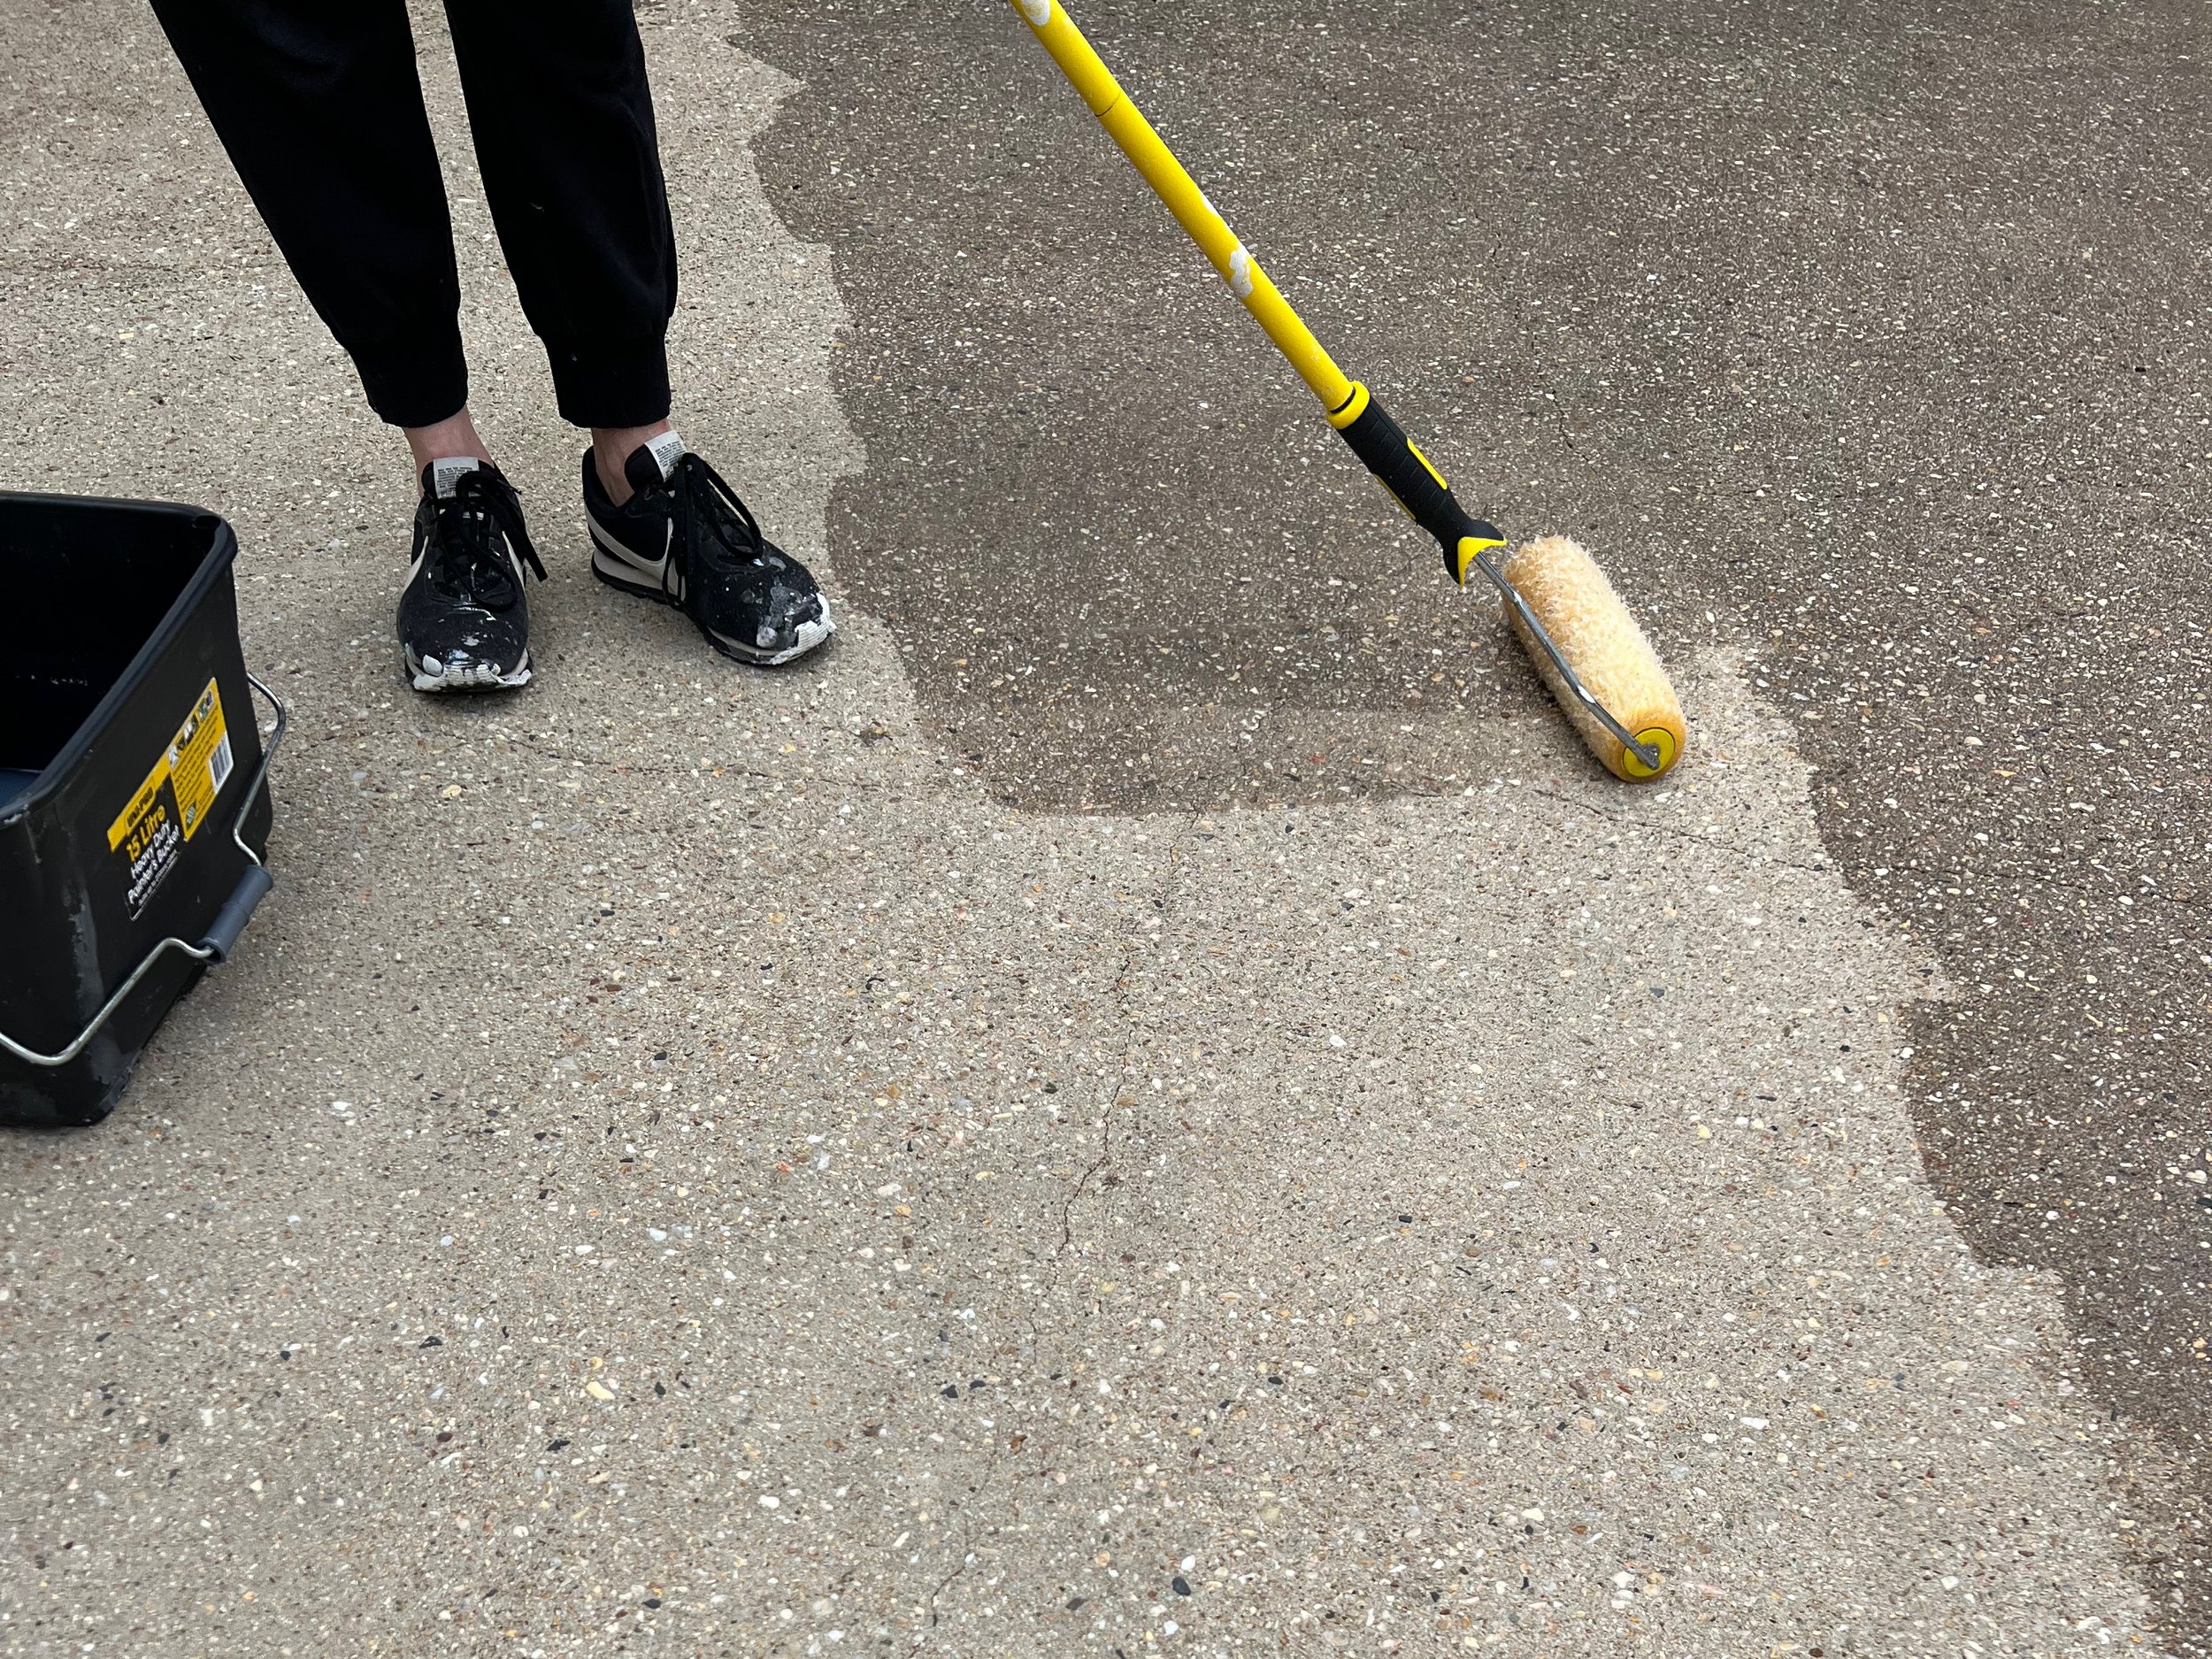
Using a wide 22mm-nap roller with an extension pole, I applied the sealer in overlapping sections, working from one end of the driveway to the other and leaving it to dry for two hours.
TIP A long-nap roller helps coat the rough surface evenly. For maximum efficiency, use it with an adjustable extension pole to suit your height.
I checked my shoes were clean and free of grit before applying the second coat of sealer, again working in slightly overlapping sections. I used a large bucket with built-in tray that required less refills than a regular tray.

To clean up, I washed the tray out immediately and wrapped the roller covers in a bin bag to disposed of them in household waste.
TIP It’s recommended that the sealer cure completely for a couple of days before walking or driving on it.
Are you planning to makeover your driveway?
Tag me on your project and follow more of my DIY journey on Instagram for tool tips, home improvement and simple building projects.