Install a Misting System
Natasha Dickins
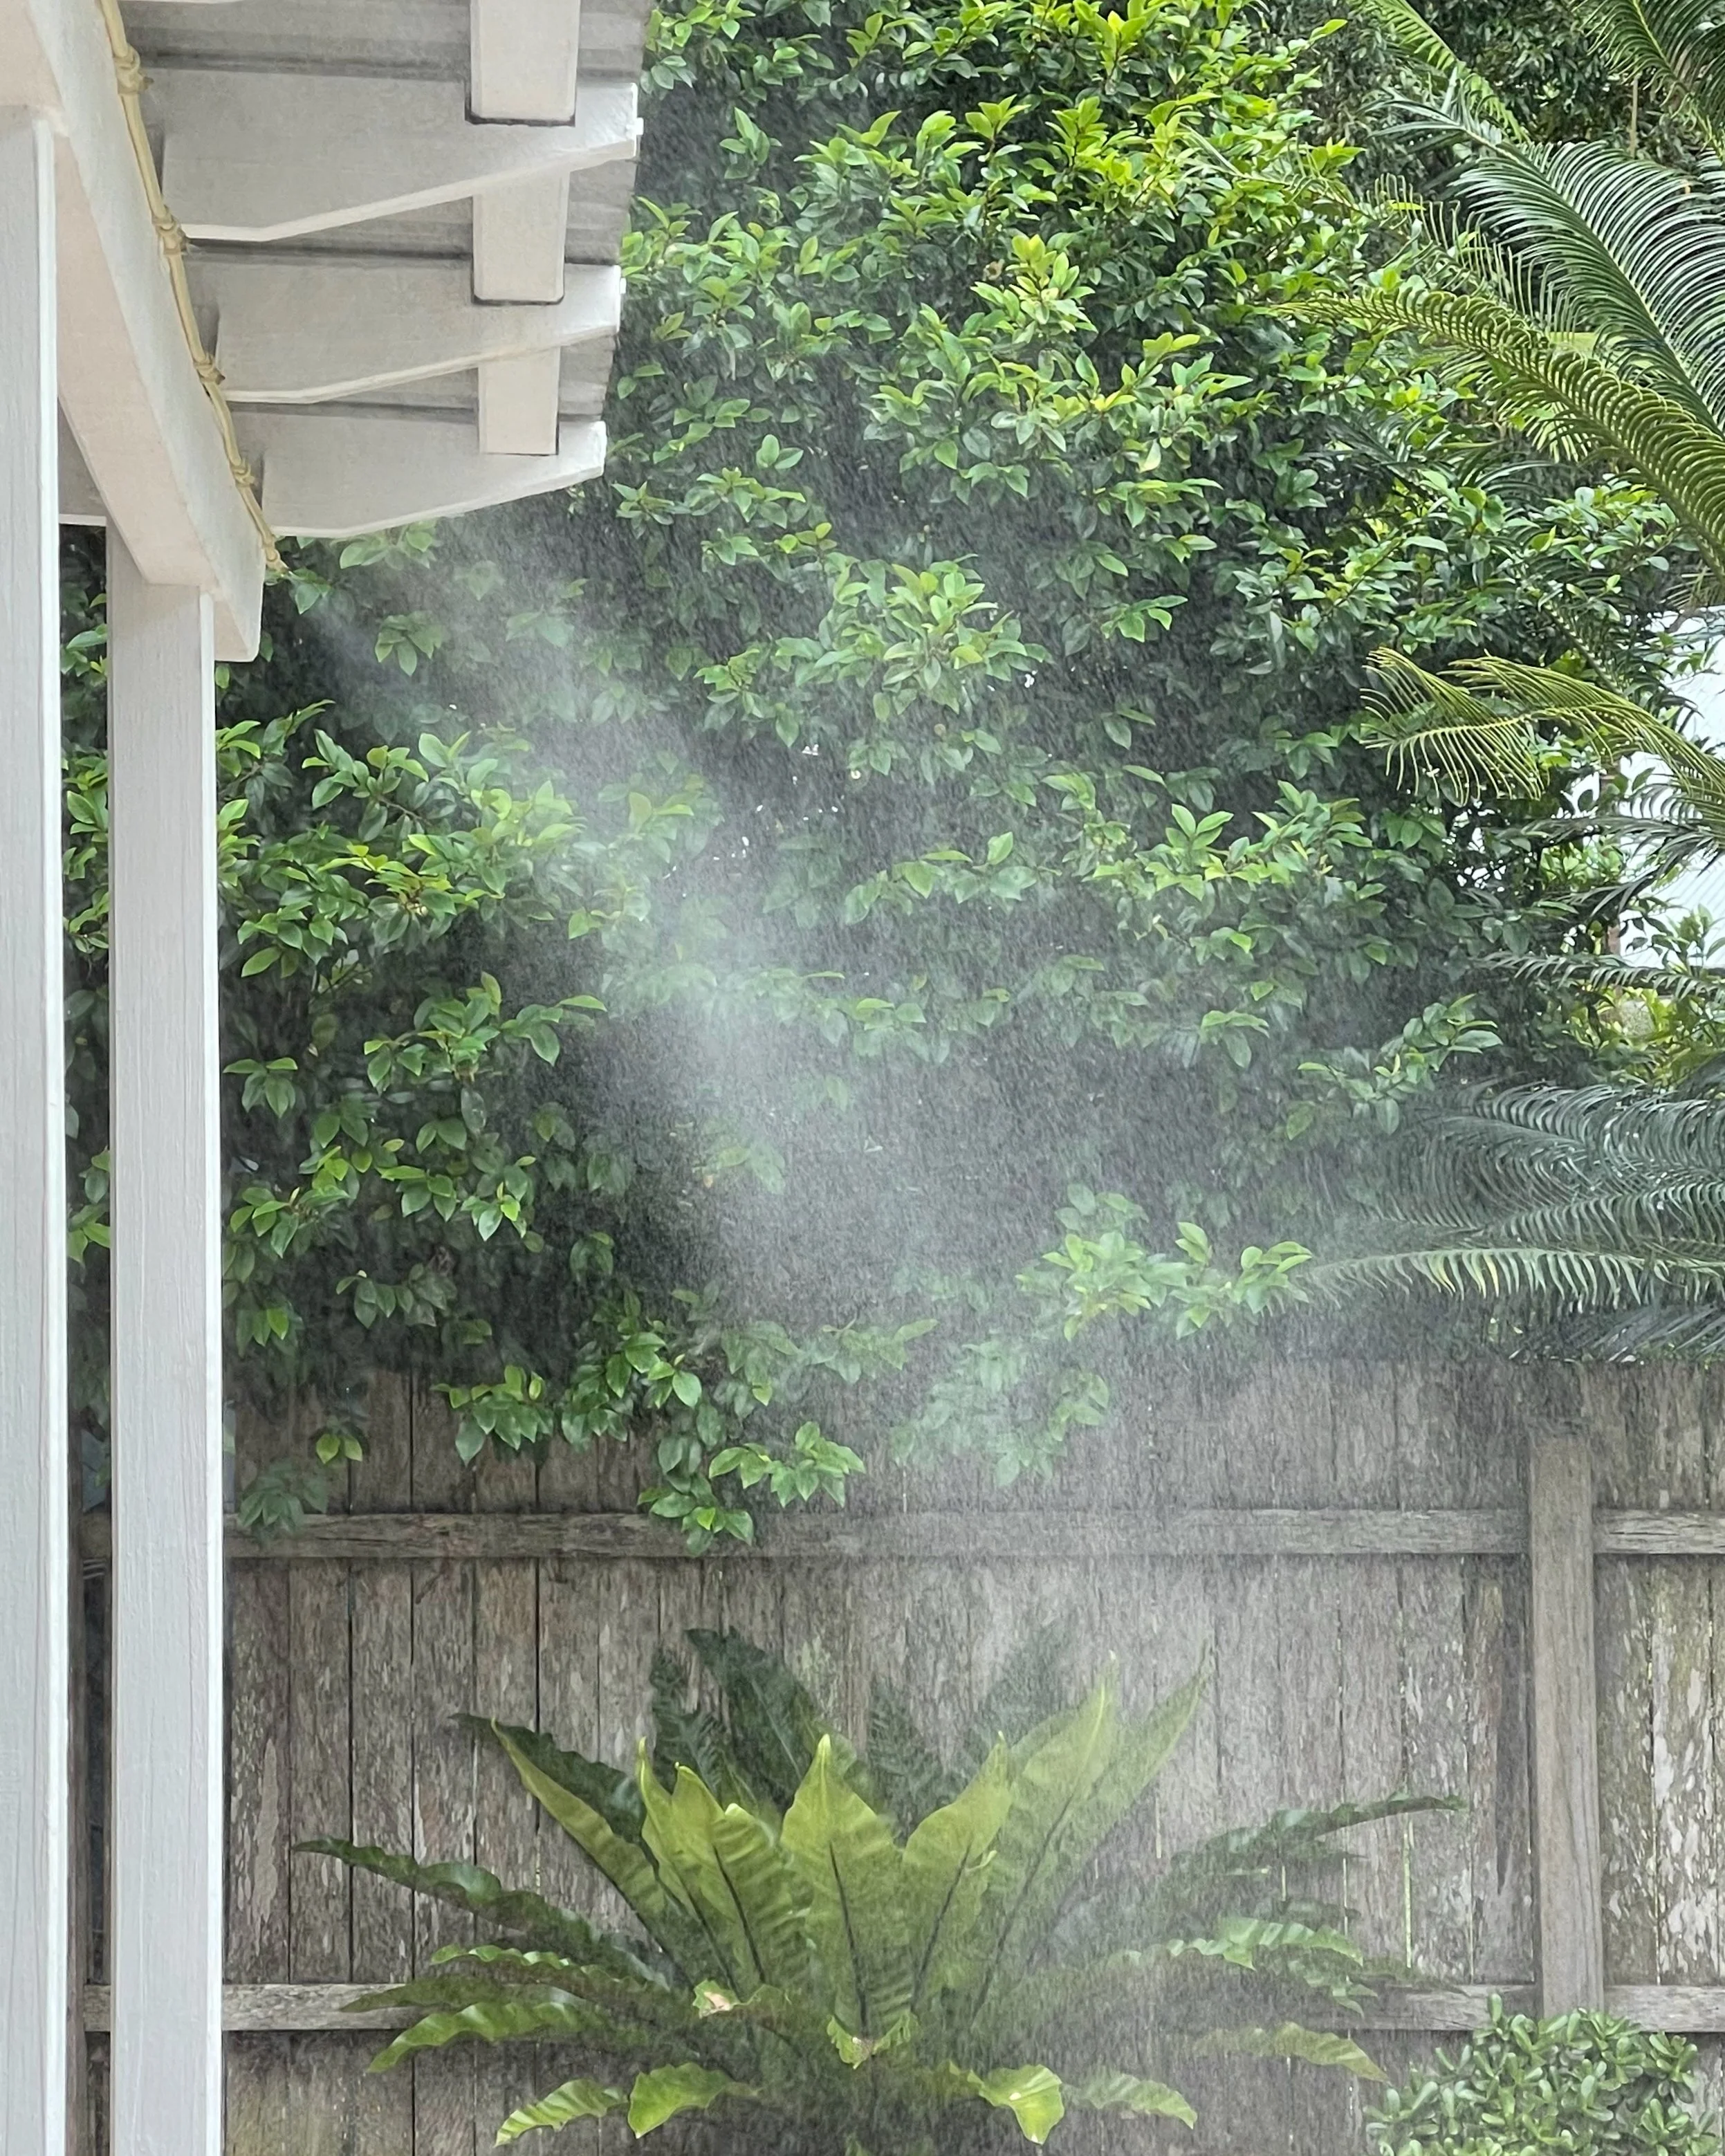
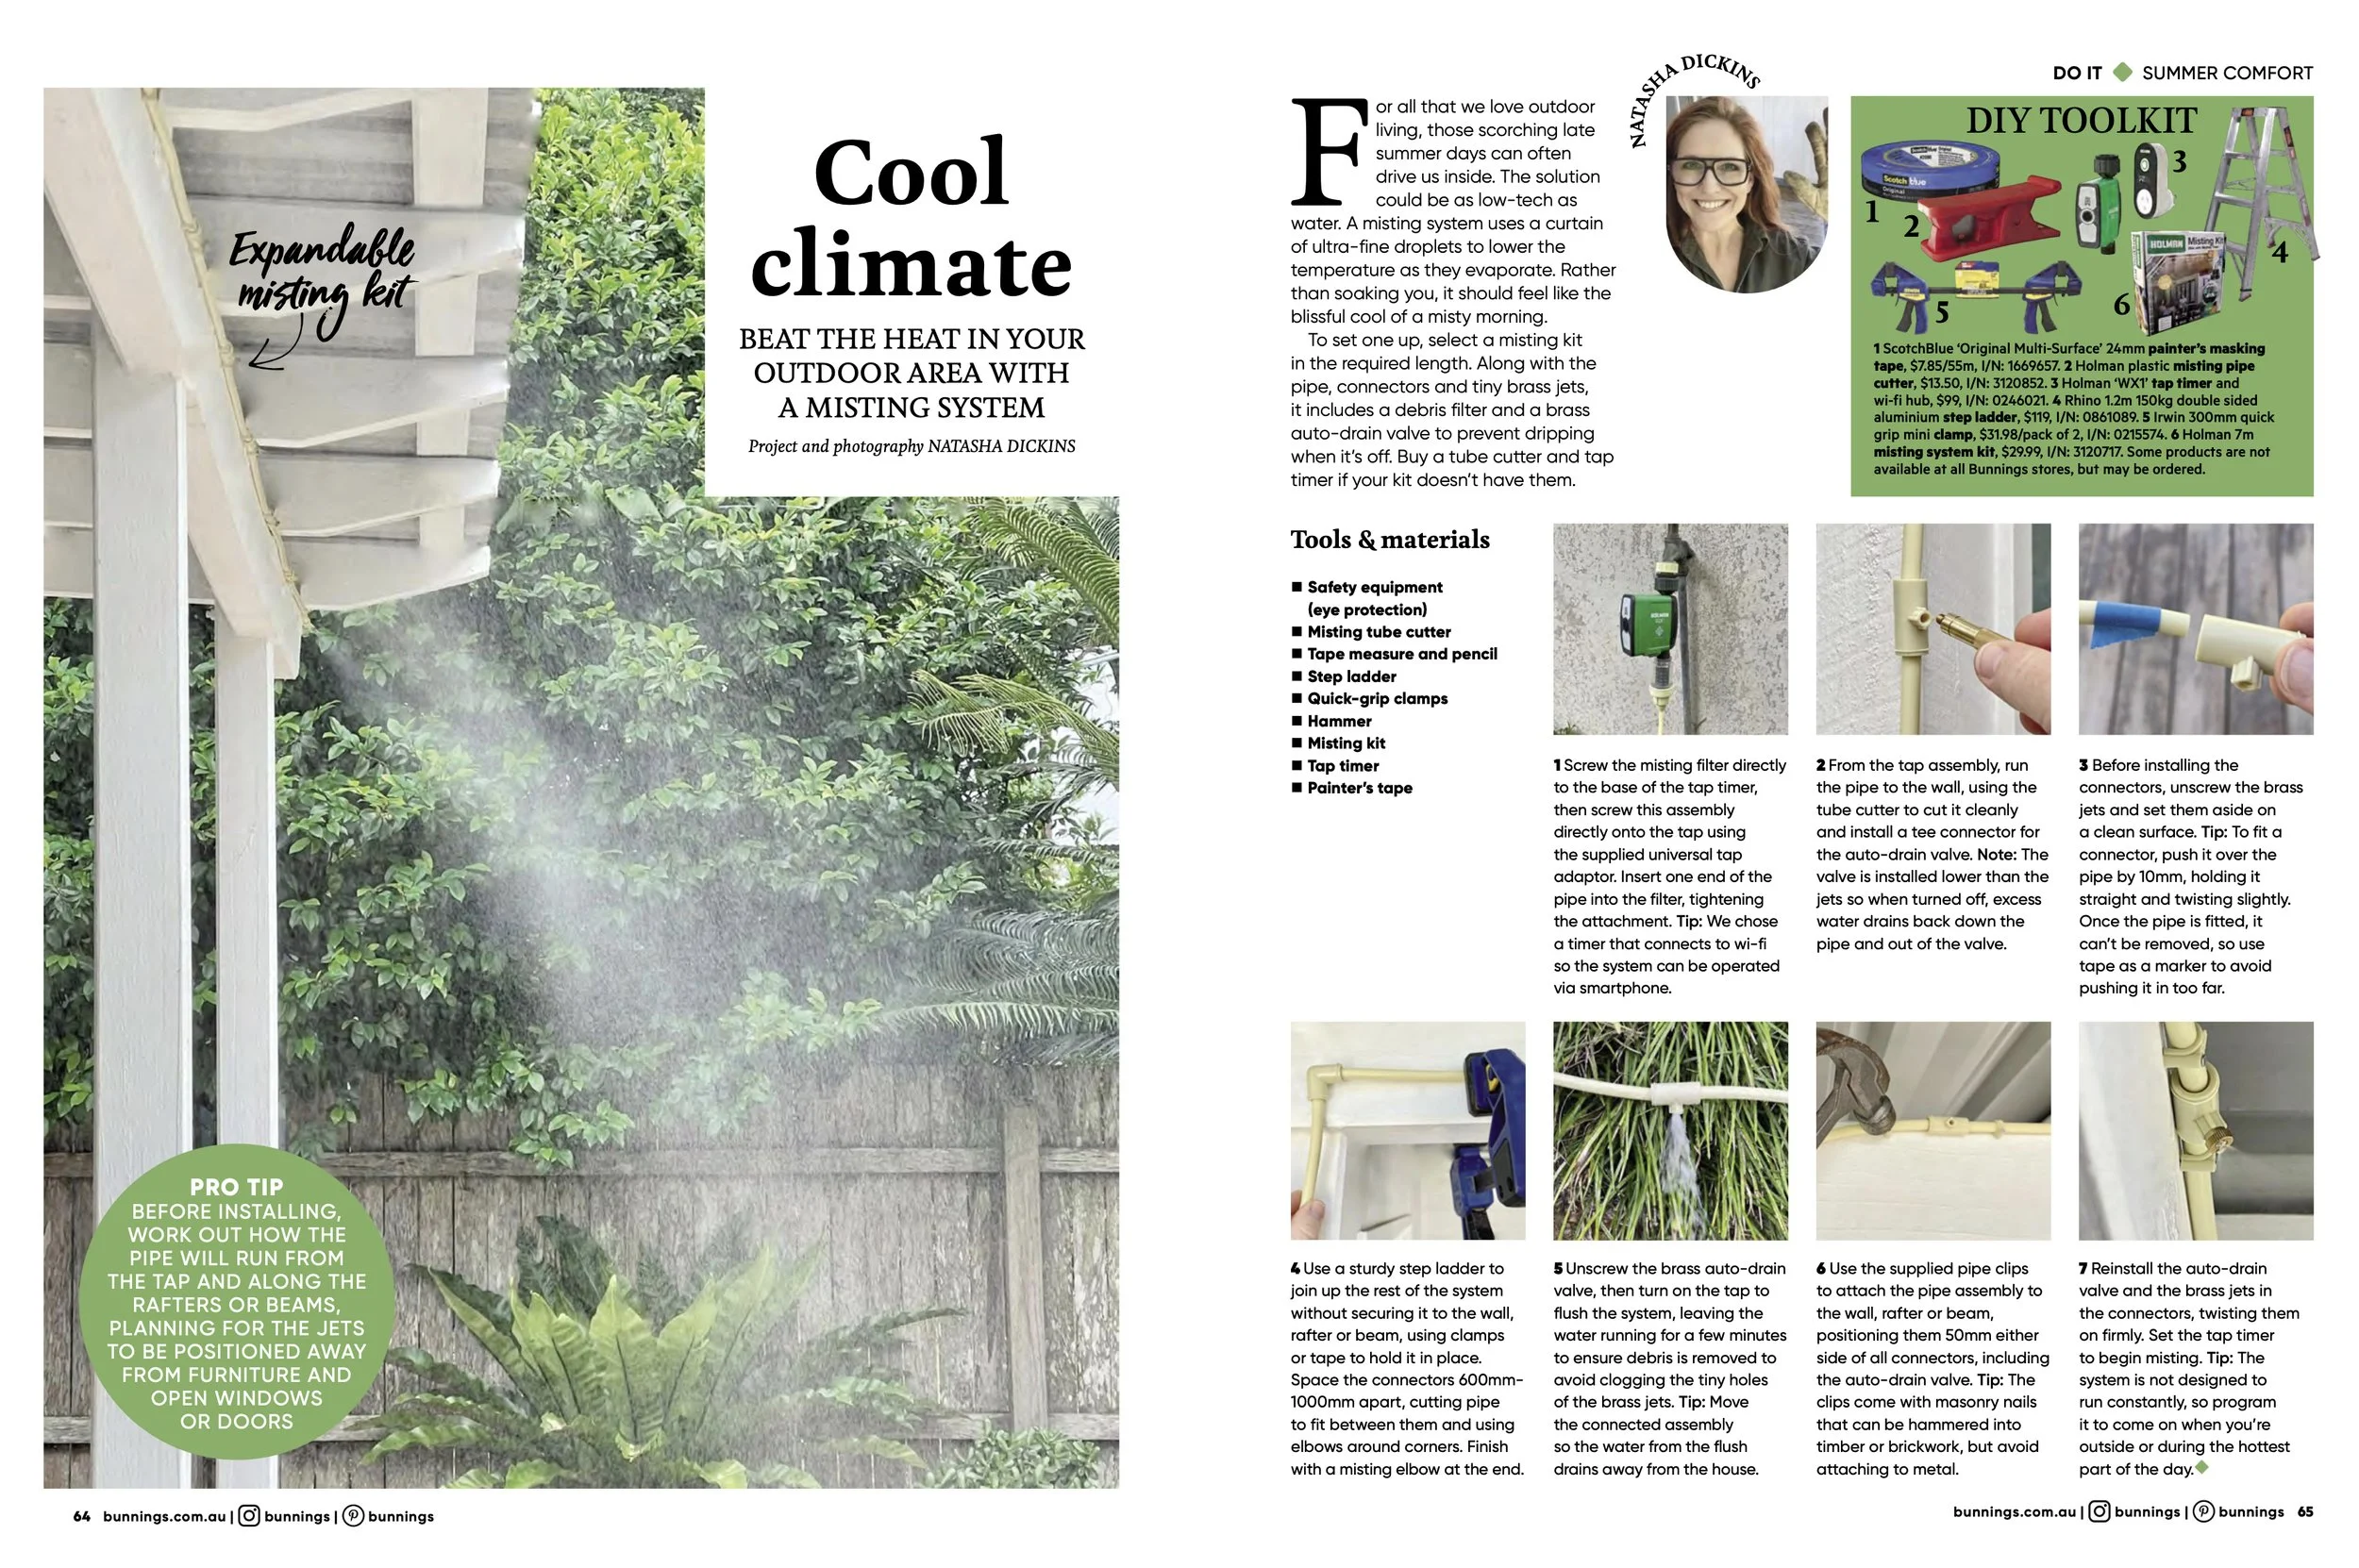
It’s been a super hot summer so I installed a misting system that instantly cools the outdoor area with a fine curtain of misty spray. It also reminds me of being on holiday in Palm Springs!
HOW IT WORKS
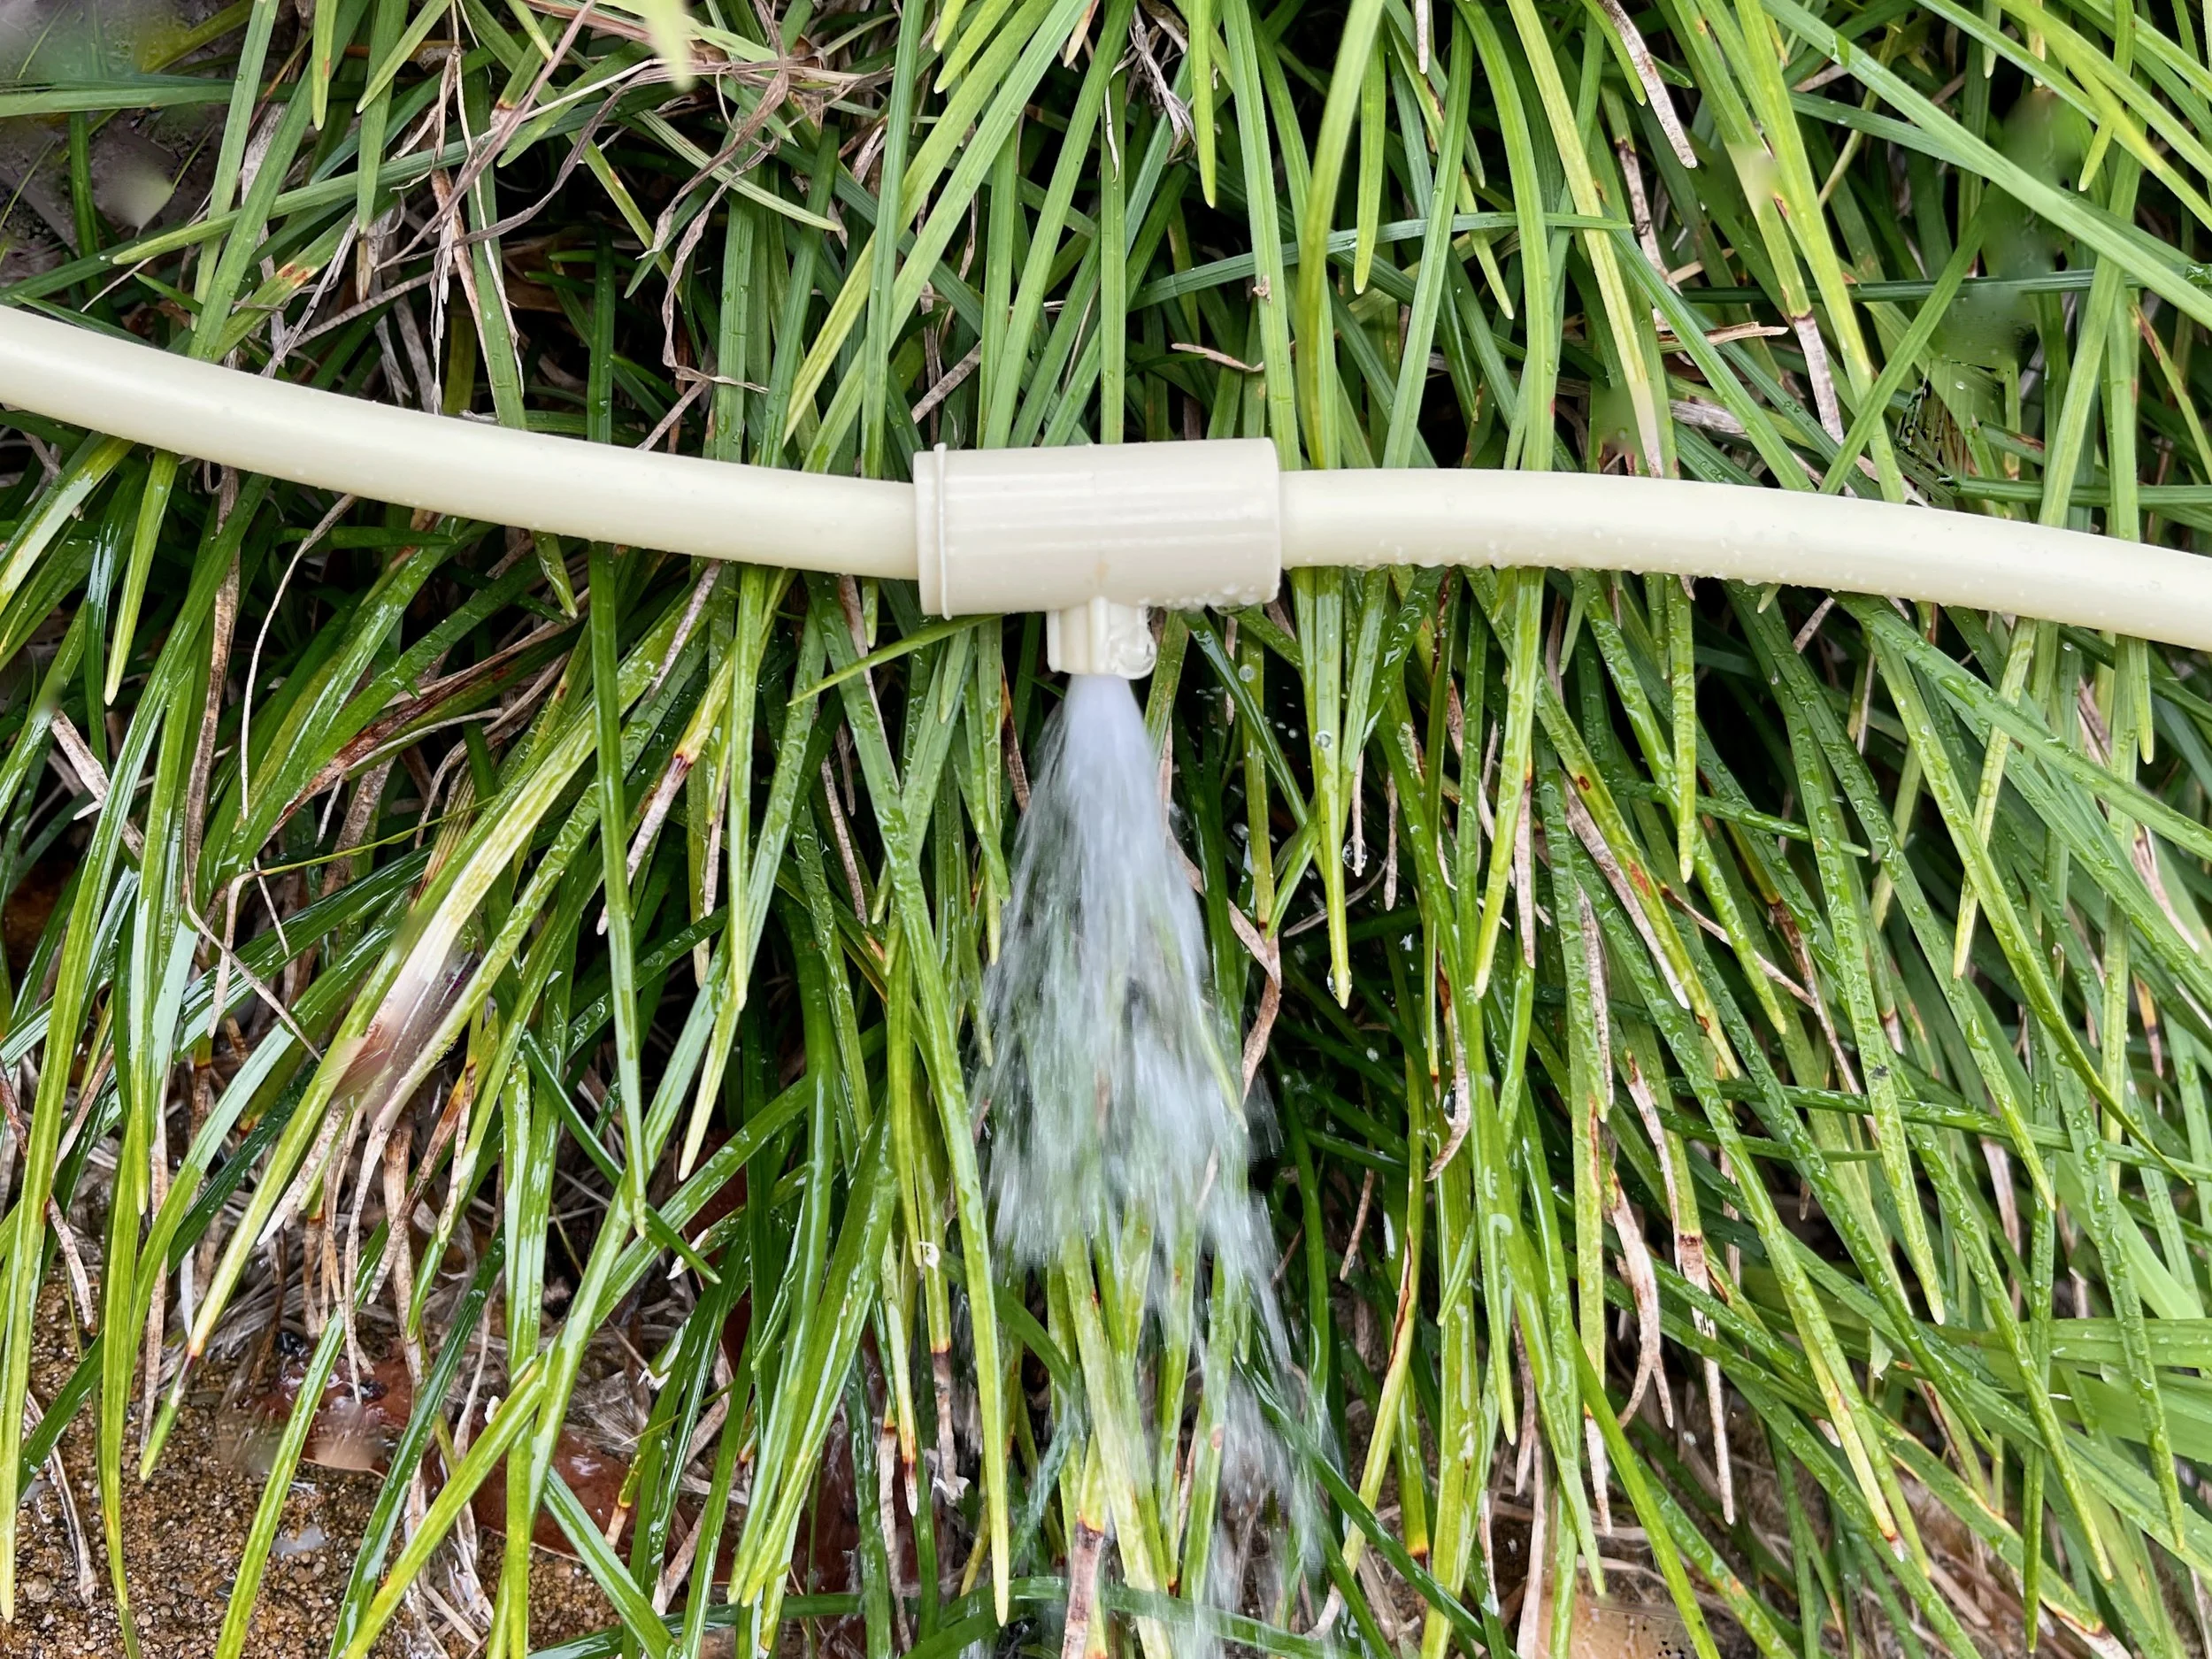
Tiny droplets of water lower the air temperature as they evaporate. They’re emitted from small brass jets attached to compression connectors, which are joined by short lengths of pipe. A longer length of pipe runs around the wall and joins to the garden tap.
TIP I picked up a tap timer with wifi hub so that it could be operated via smartphone. The same system also remotely operates the irrigation for watering our veggie garden.
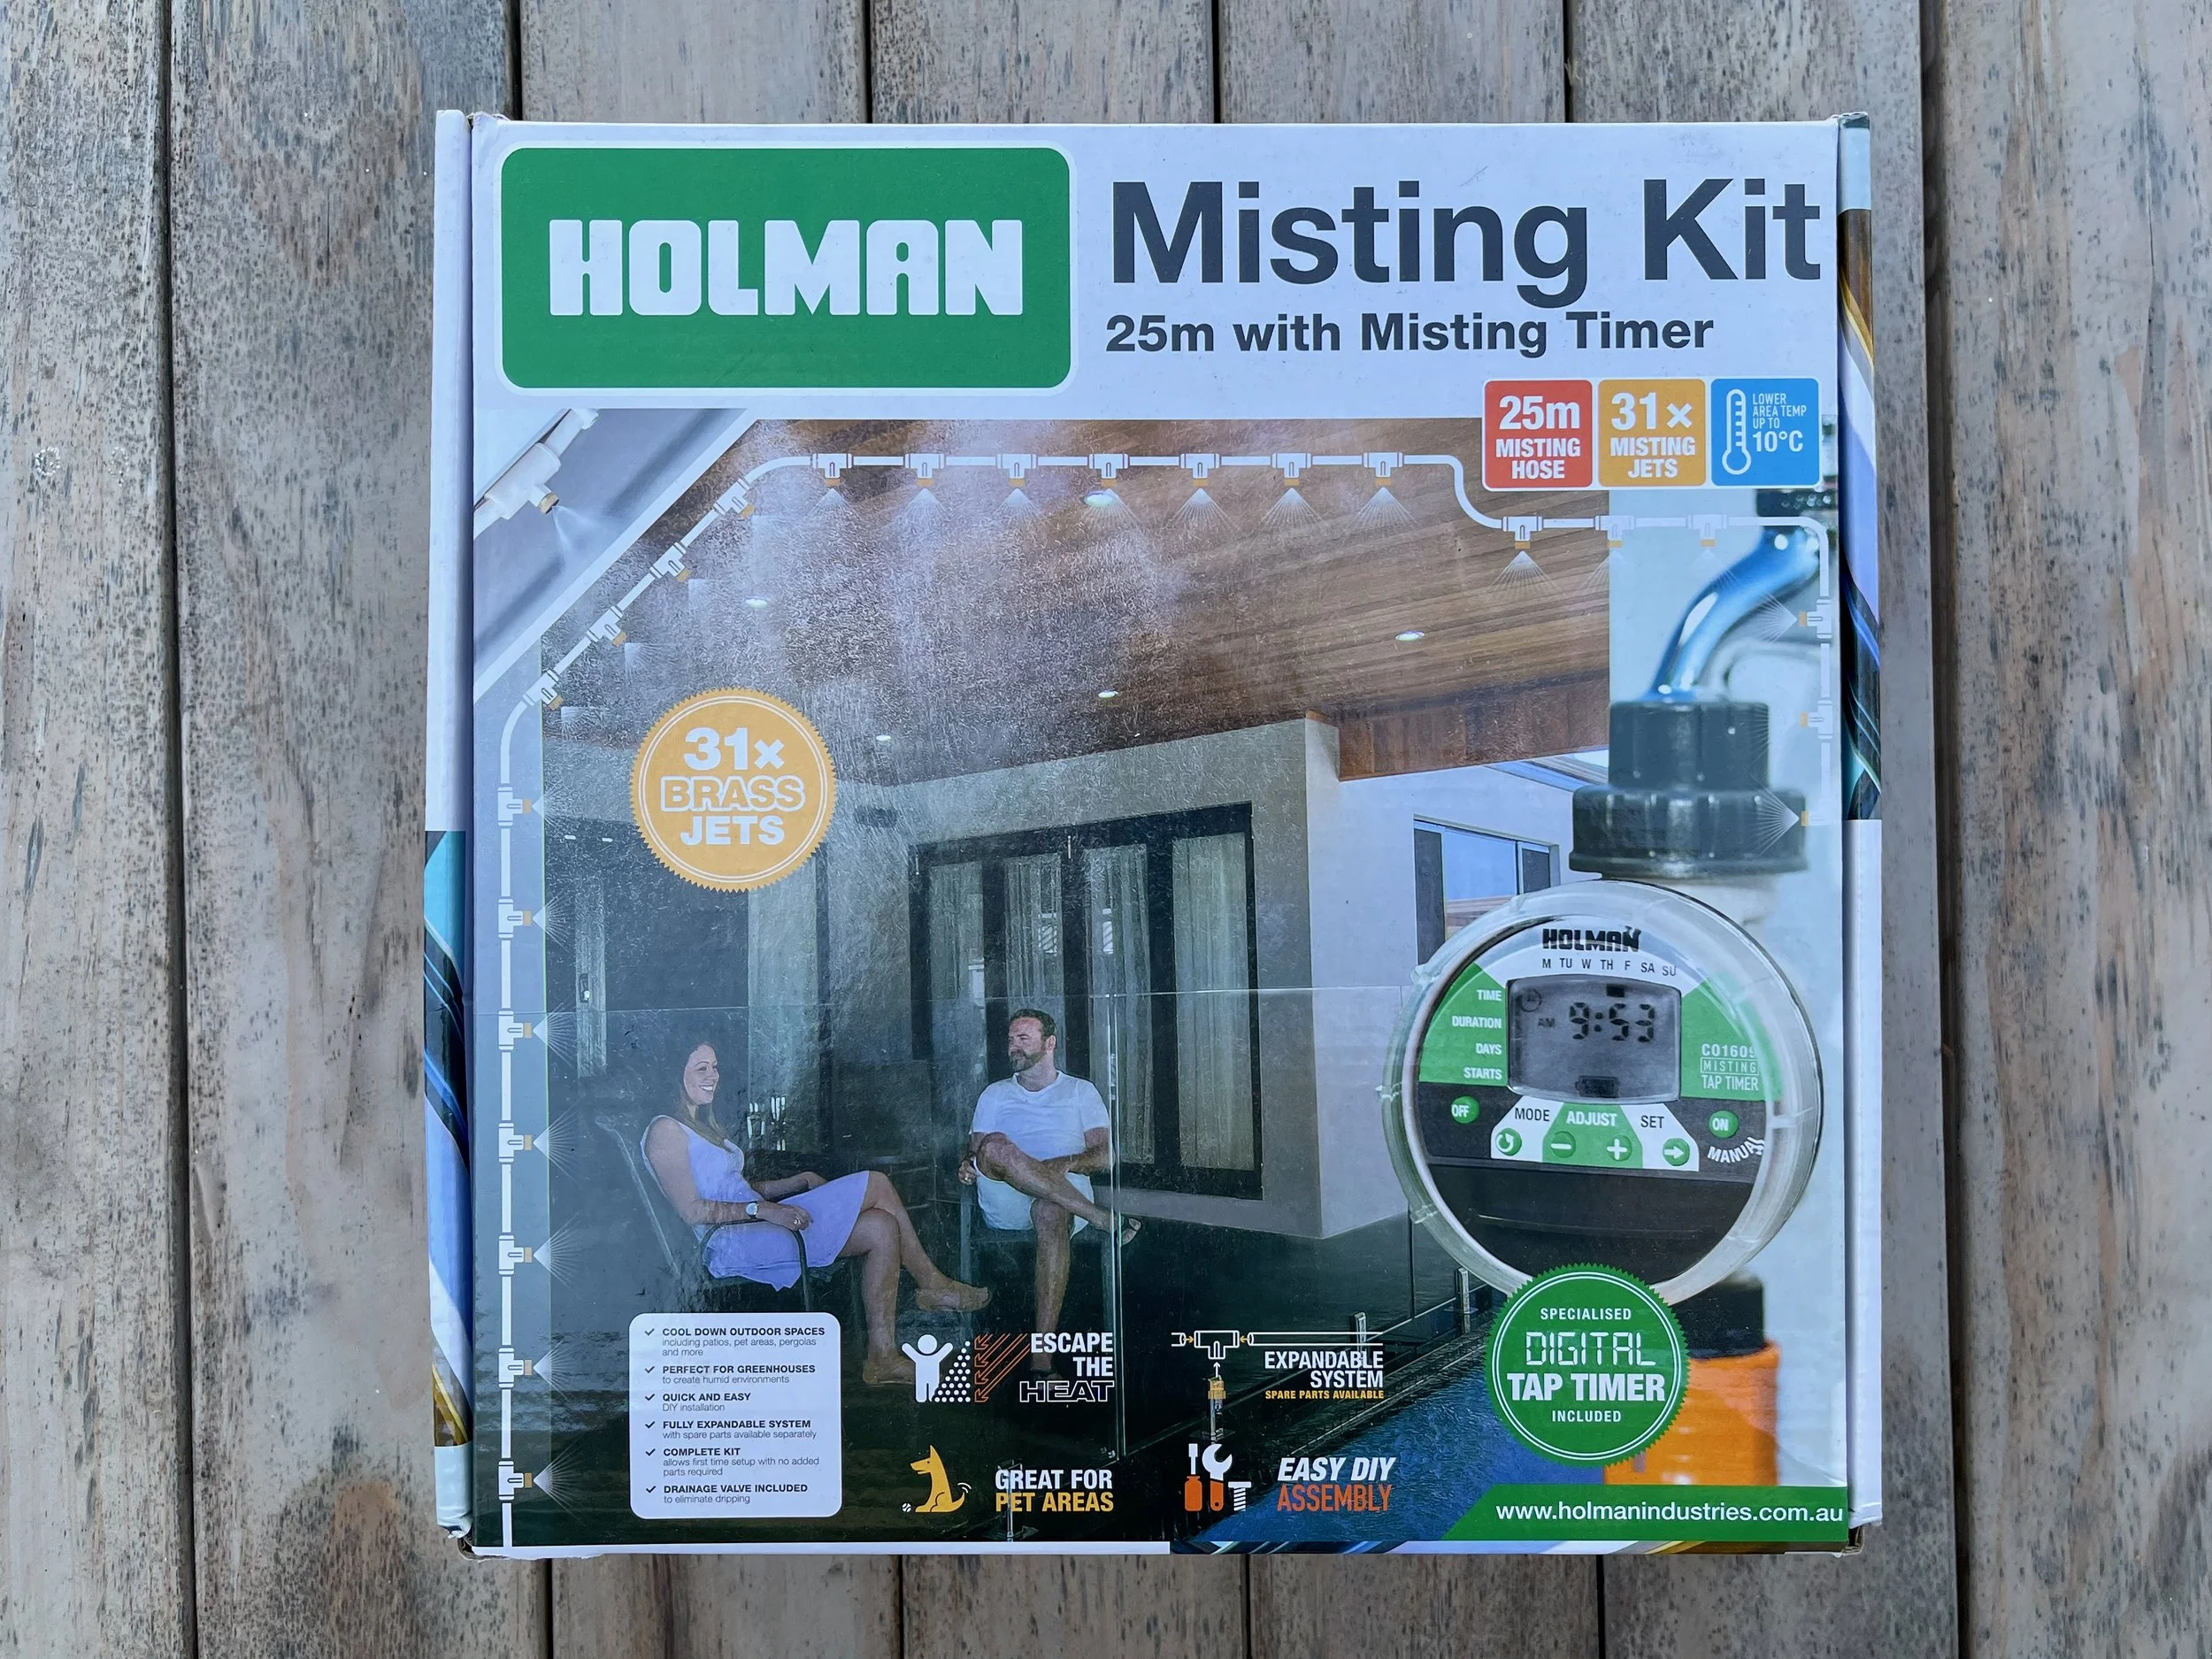
To set up the misting system, I picked up a kit with 25m of pipe to fit my space. It included a filter to keep out debris and an auto-drain valve to prevent dripping when it’s turned off.
Also included are tee-shaped compression connectors for joining short lengths of the pipe, with an elbow-shaped one for the end. There is a brass jet for each connector.
There are a couple of plain elbows for running the pipe around the wall, plus pipe clamps with nails for securing to the wall and beam.
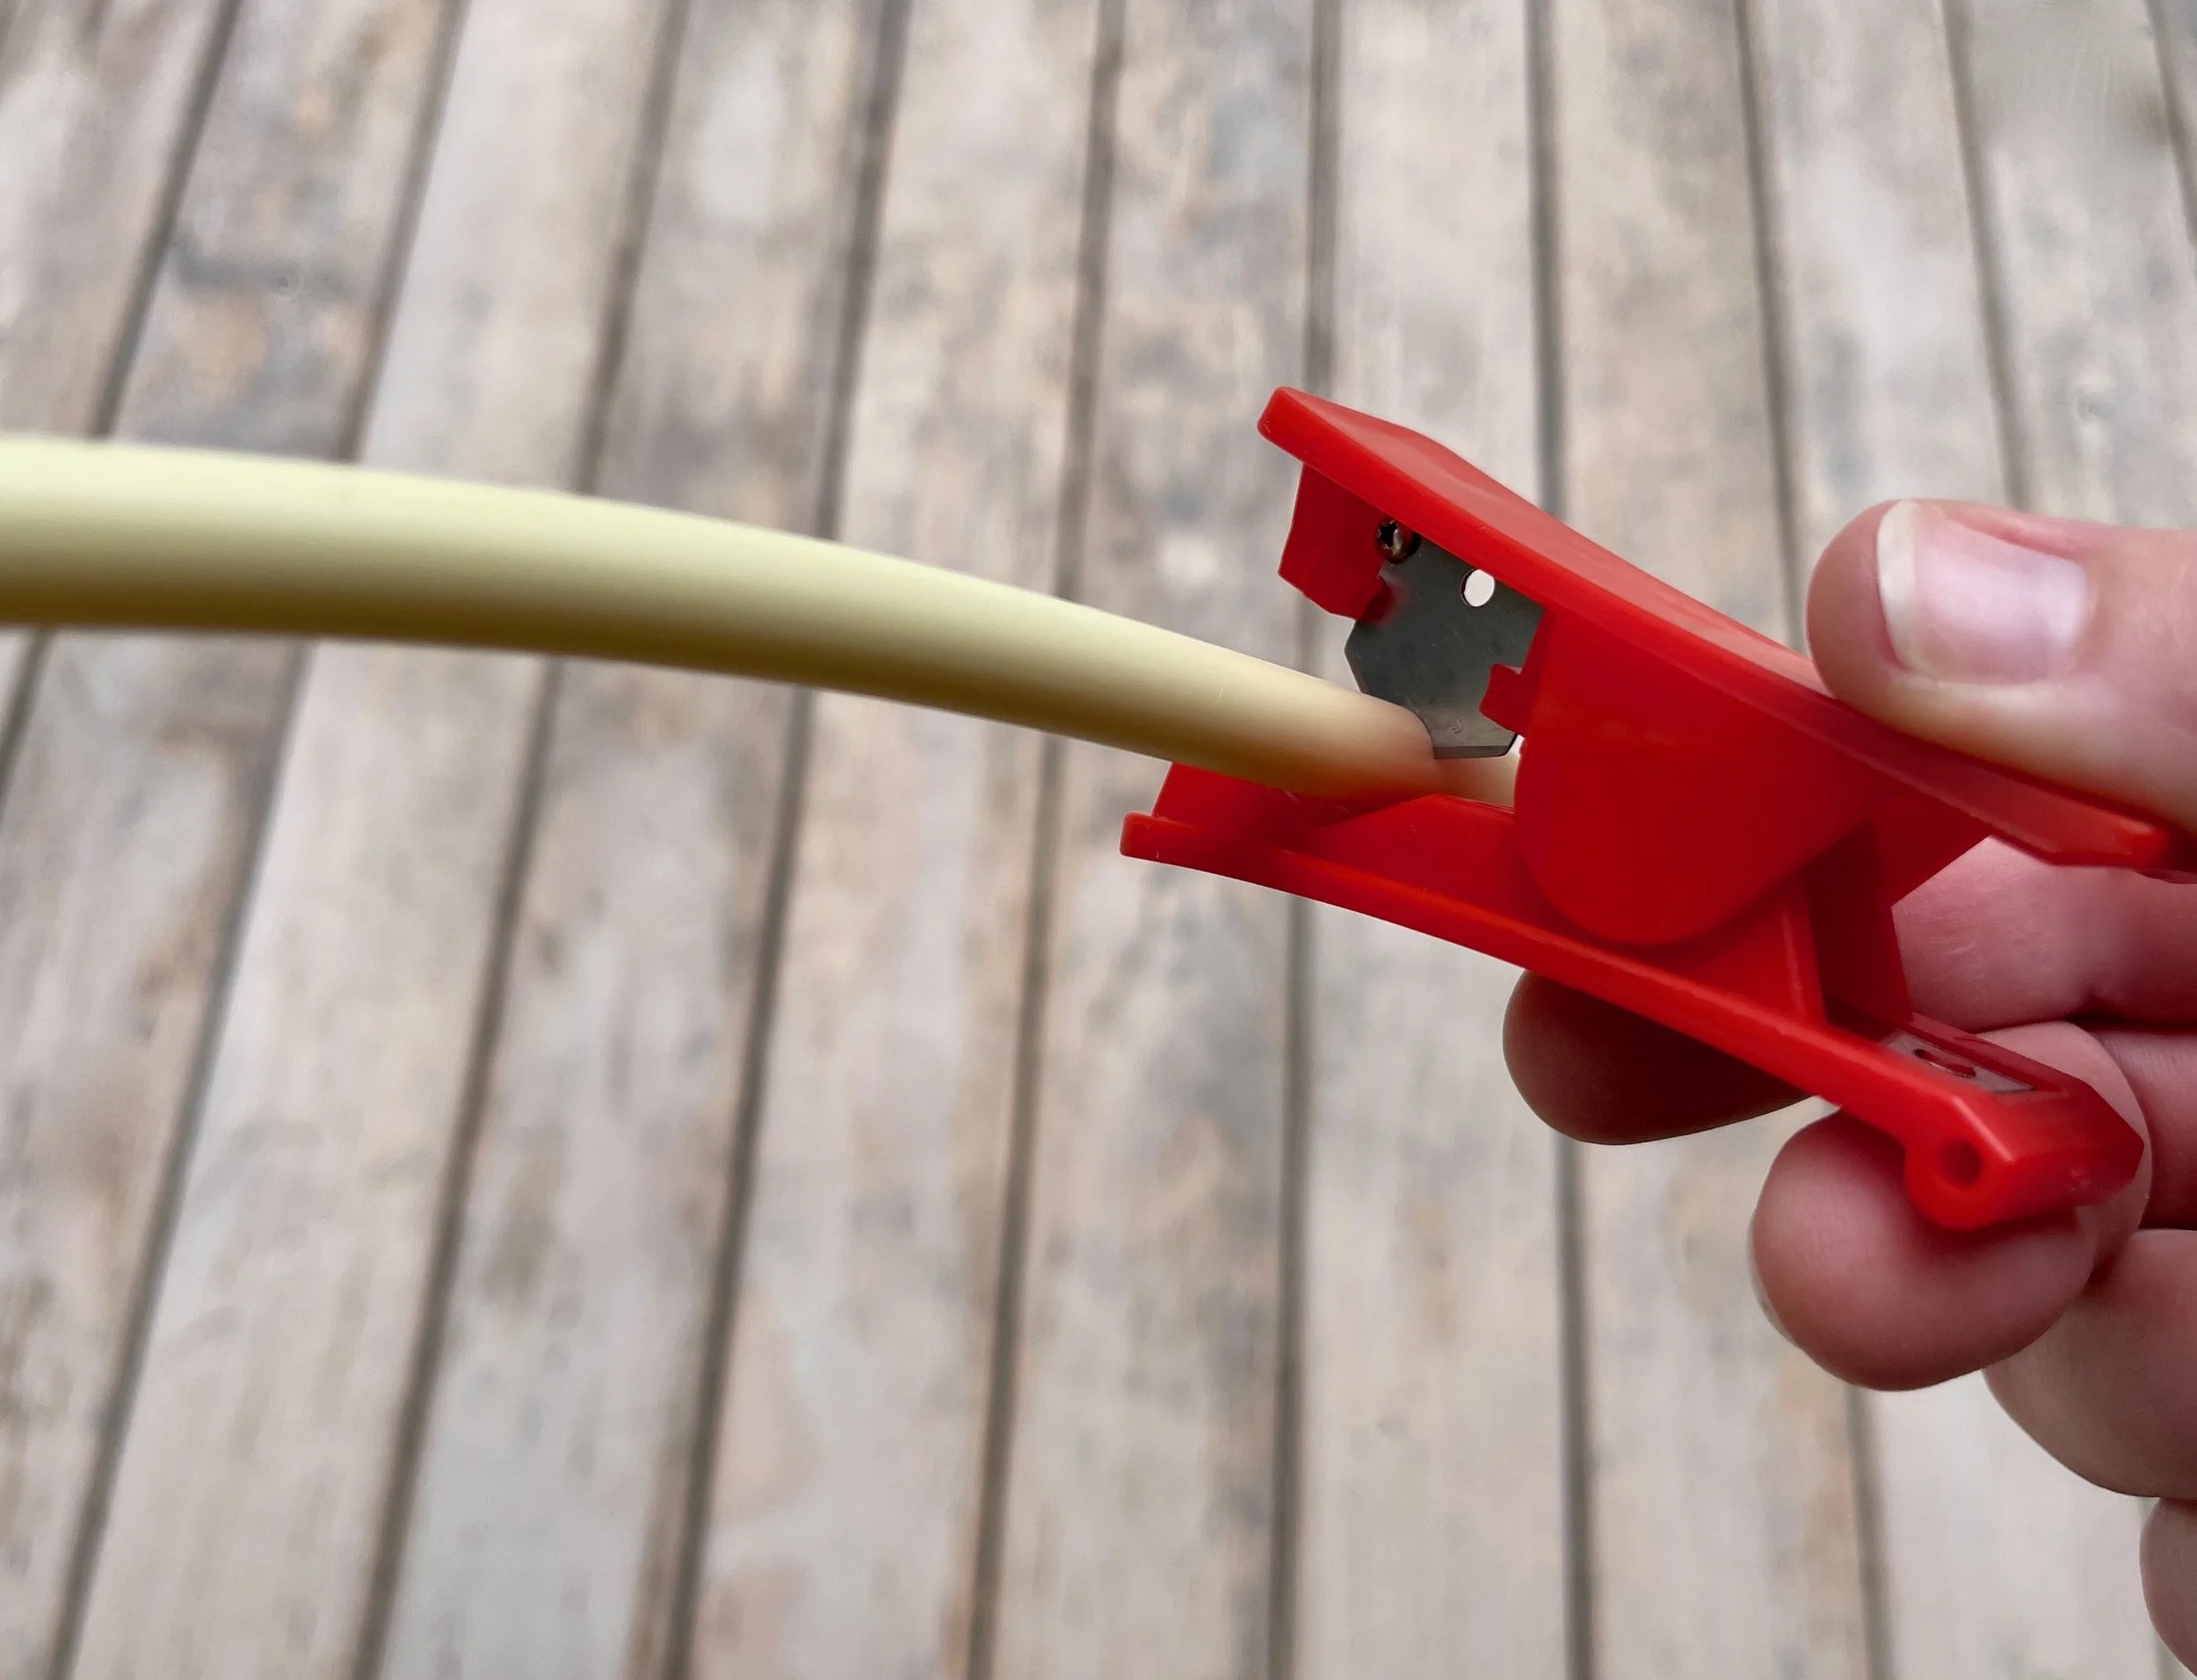
TIP Buy a tap timber if your kit doesn’t include one, along with a good pipe cutter (shown above).
“Before installing the misting kit, I worked out how the pipe would run from the tap and along the roof beam, planning the jets to face away from furniture and any open windows. ”
WHAT YOU NEED
• Misting kit
• Tap timber and wifi hub
• Step ladder
• Tape measure and pencil
• Painter’s tape
• Hammer
• Pipe cutter
• Quick-grip clamps
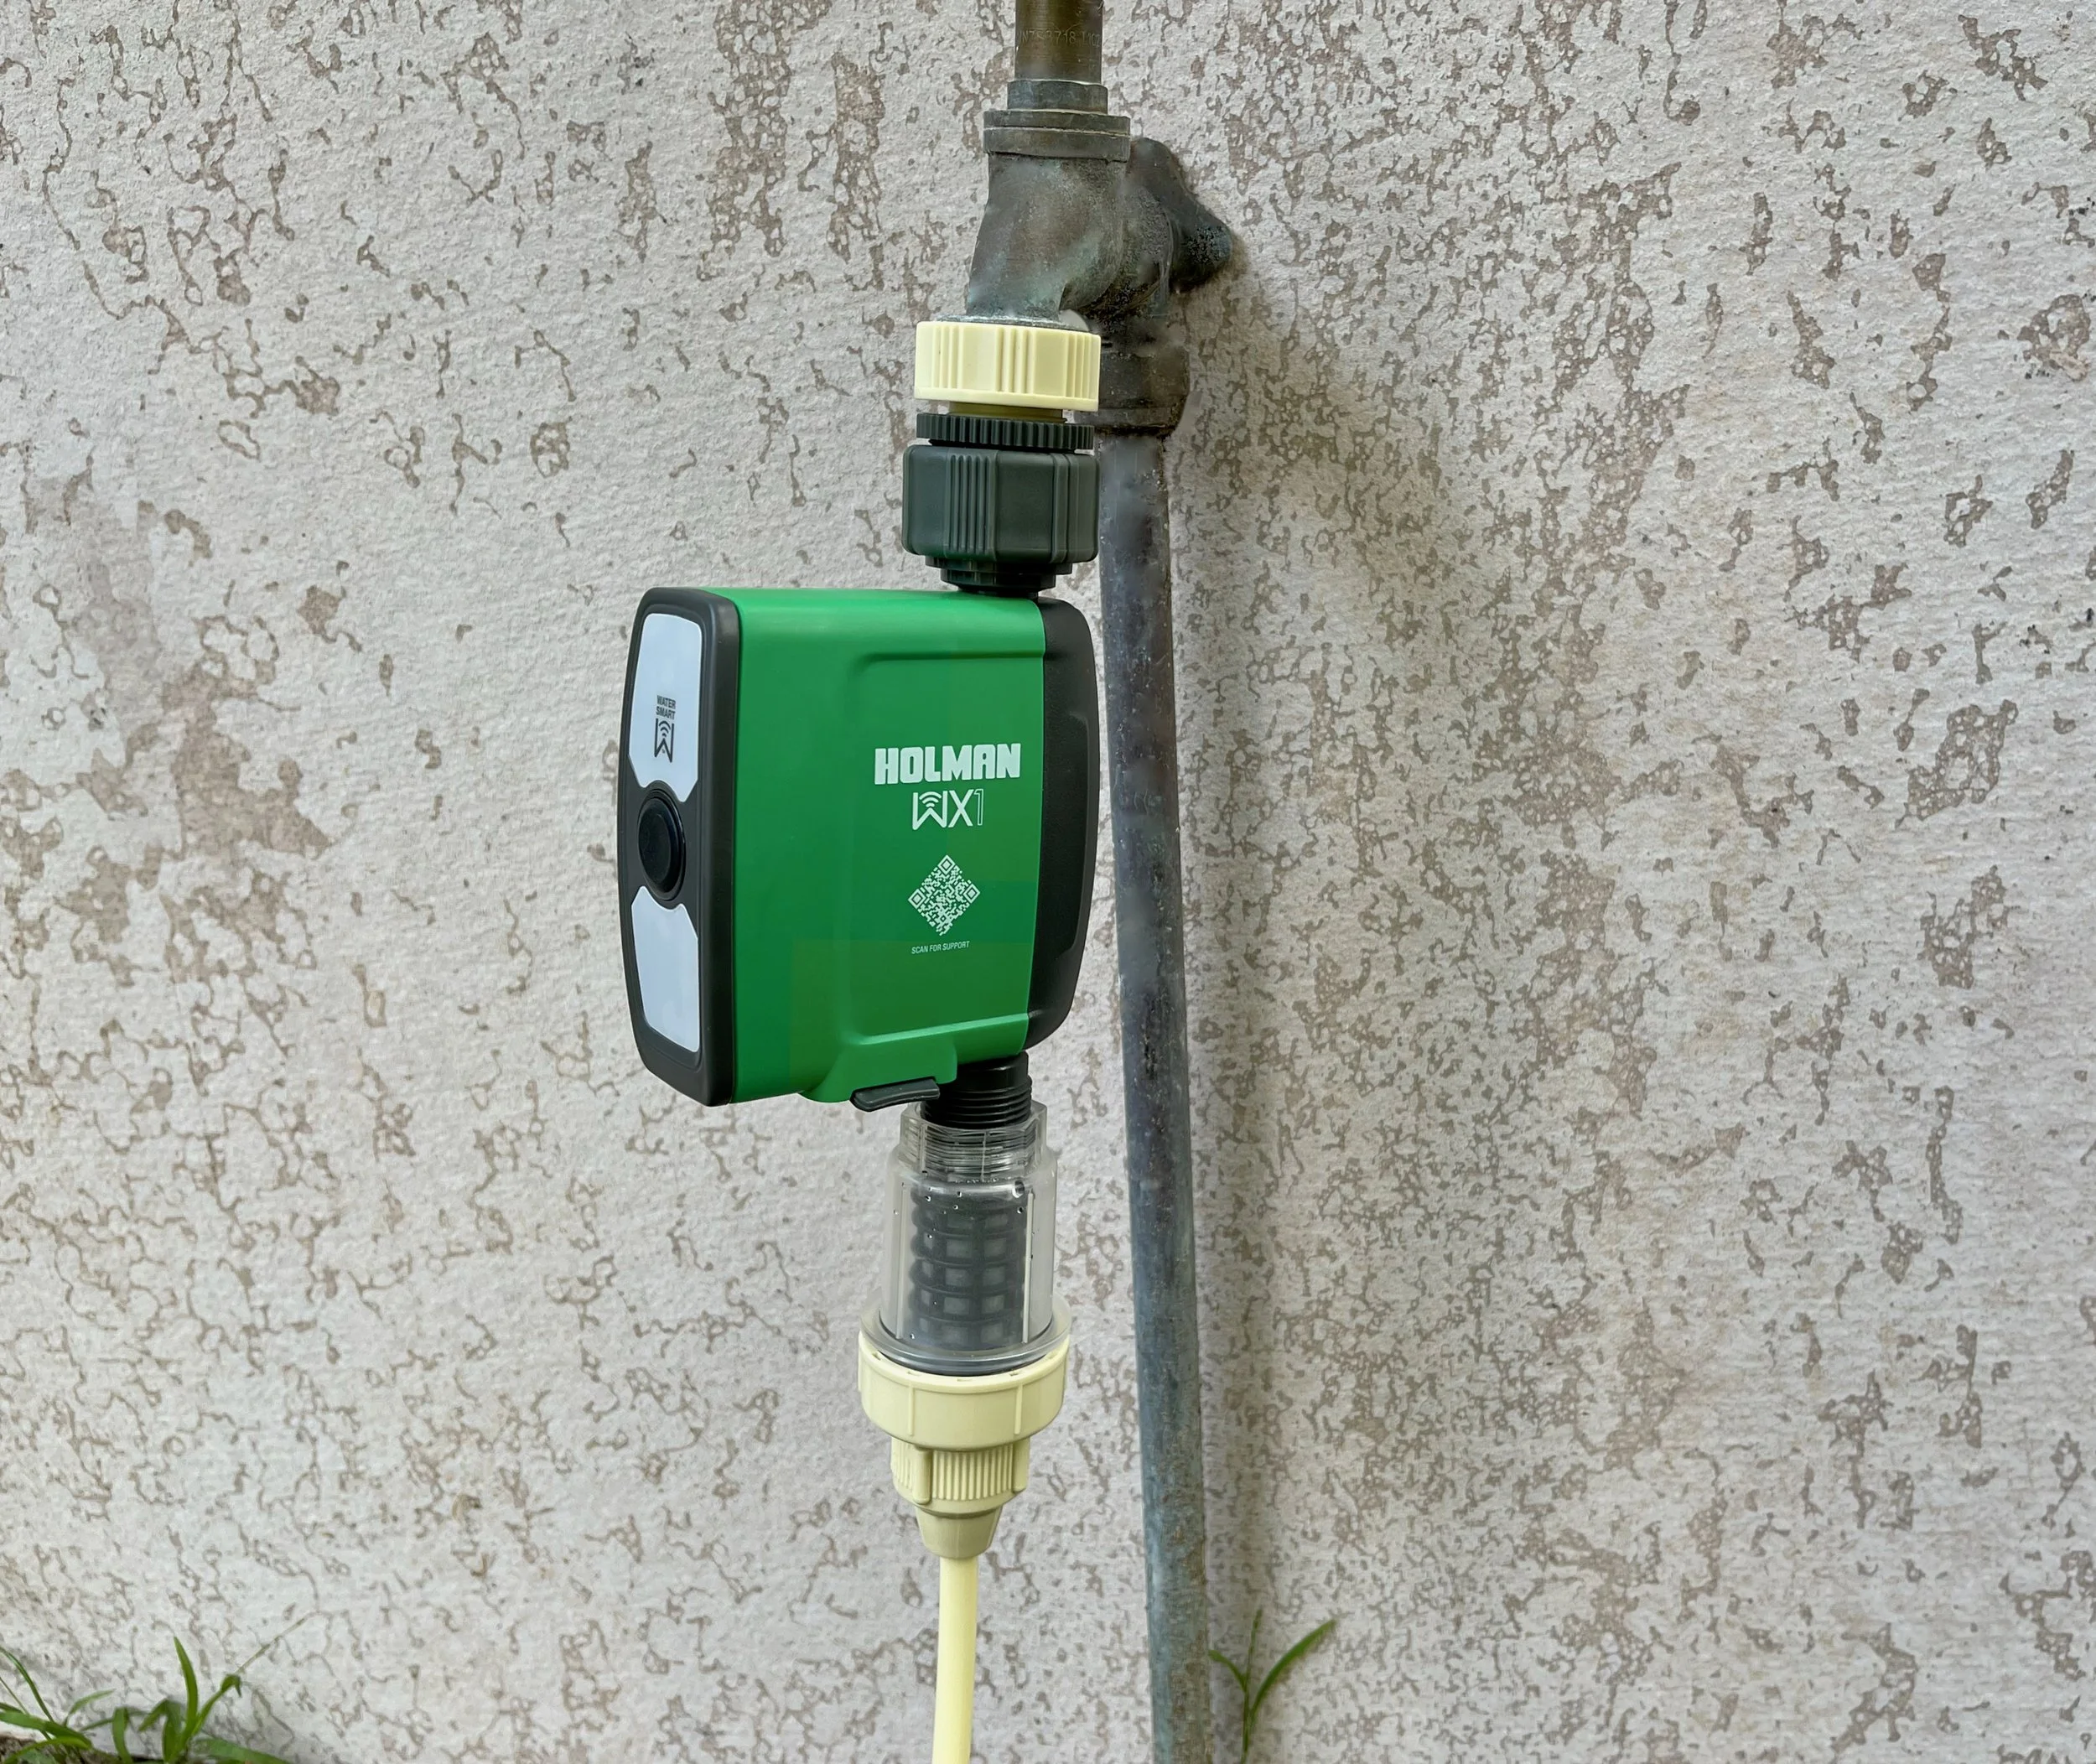
I screwed the misting filter into the base of the tap timer, then attached this assembly directly onto the tap using the supplied universal tap adaptor. I inserted one end of the pipe into the filter and tightened the attachment.
From the tap, I ran the pipe to the wall and halfway up, using the pipe cutter to cut it cleanly. Then I installed a tee connector for the auto-drain valve.
TIP The valve is installed lower than the jets, so when the system is turned off, any excess water in the pipe drains back down and out the valve, rather than pooling in or dripping out of the connectors.
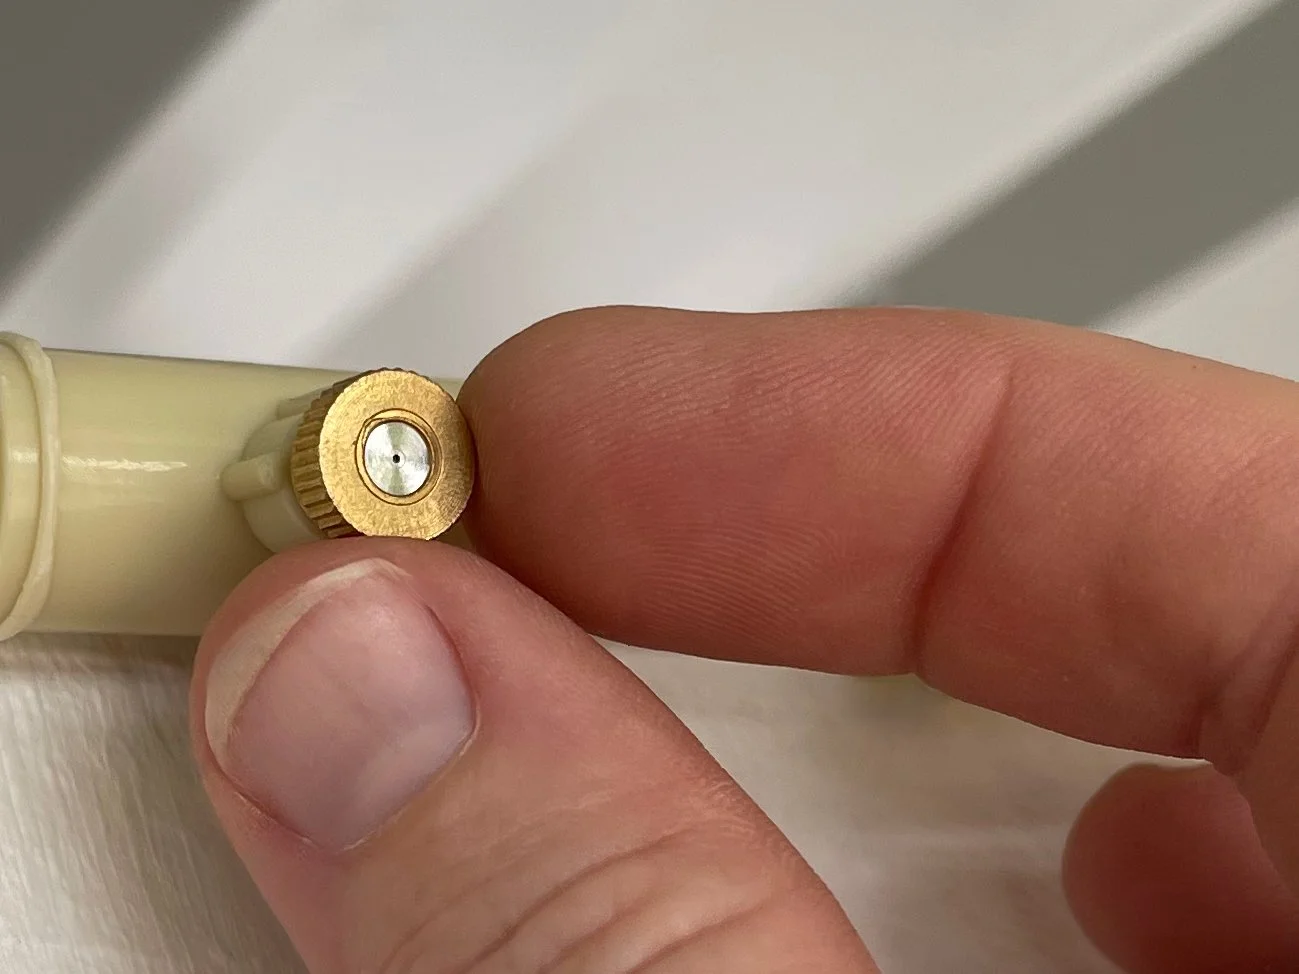
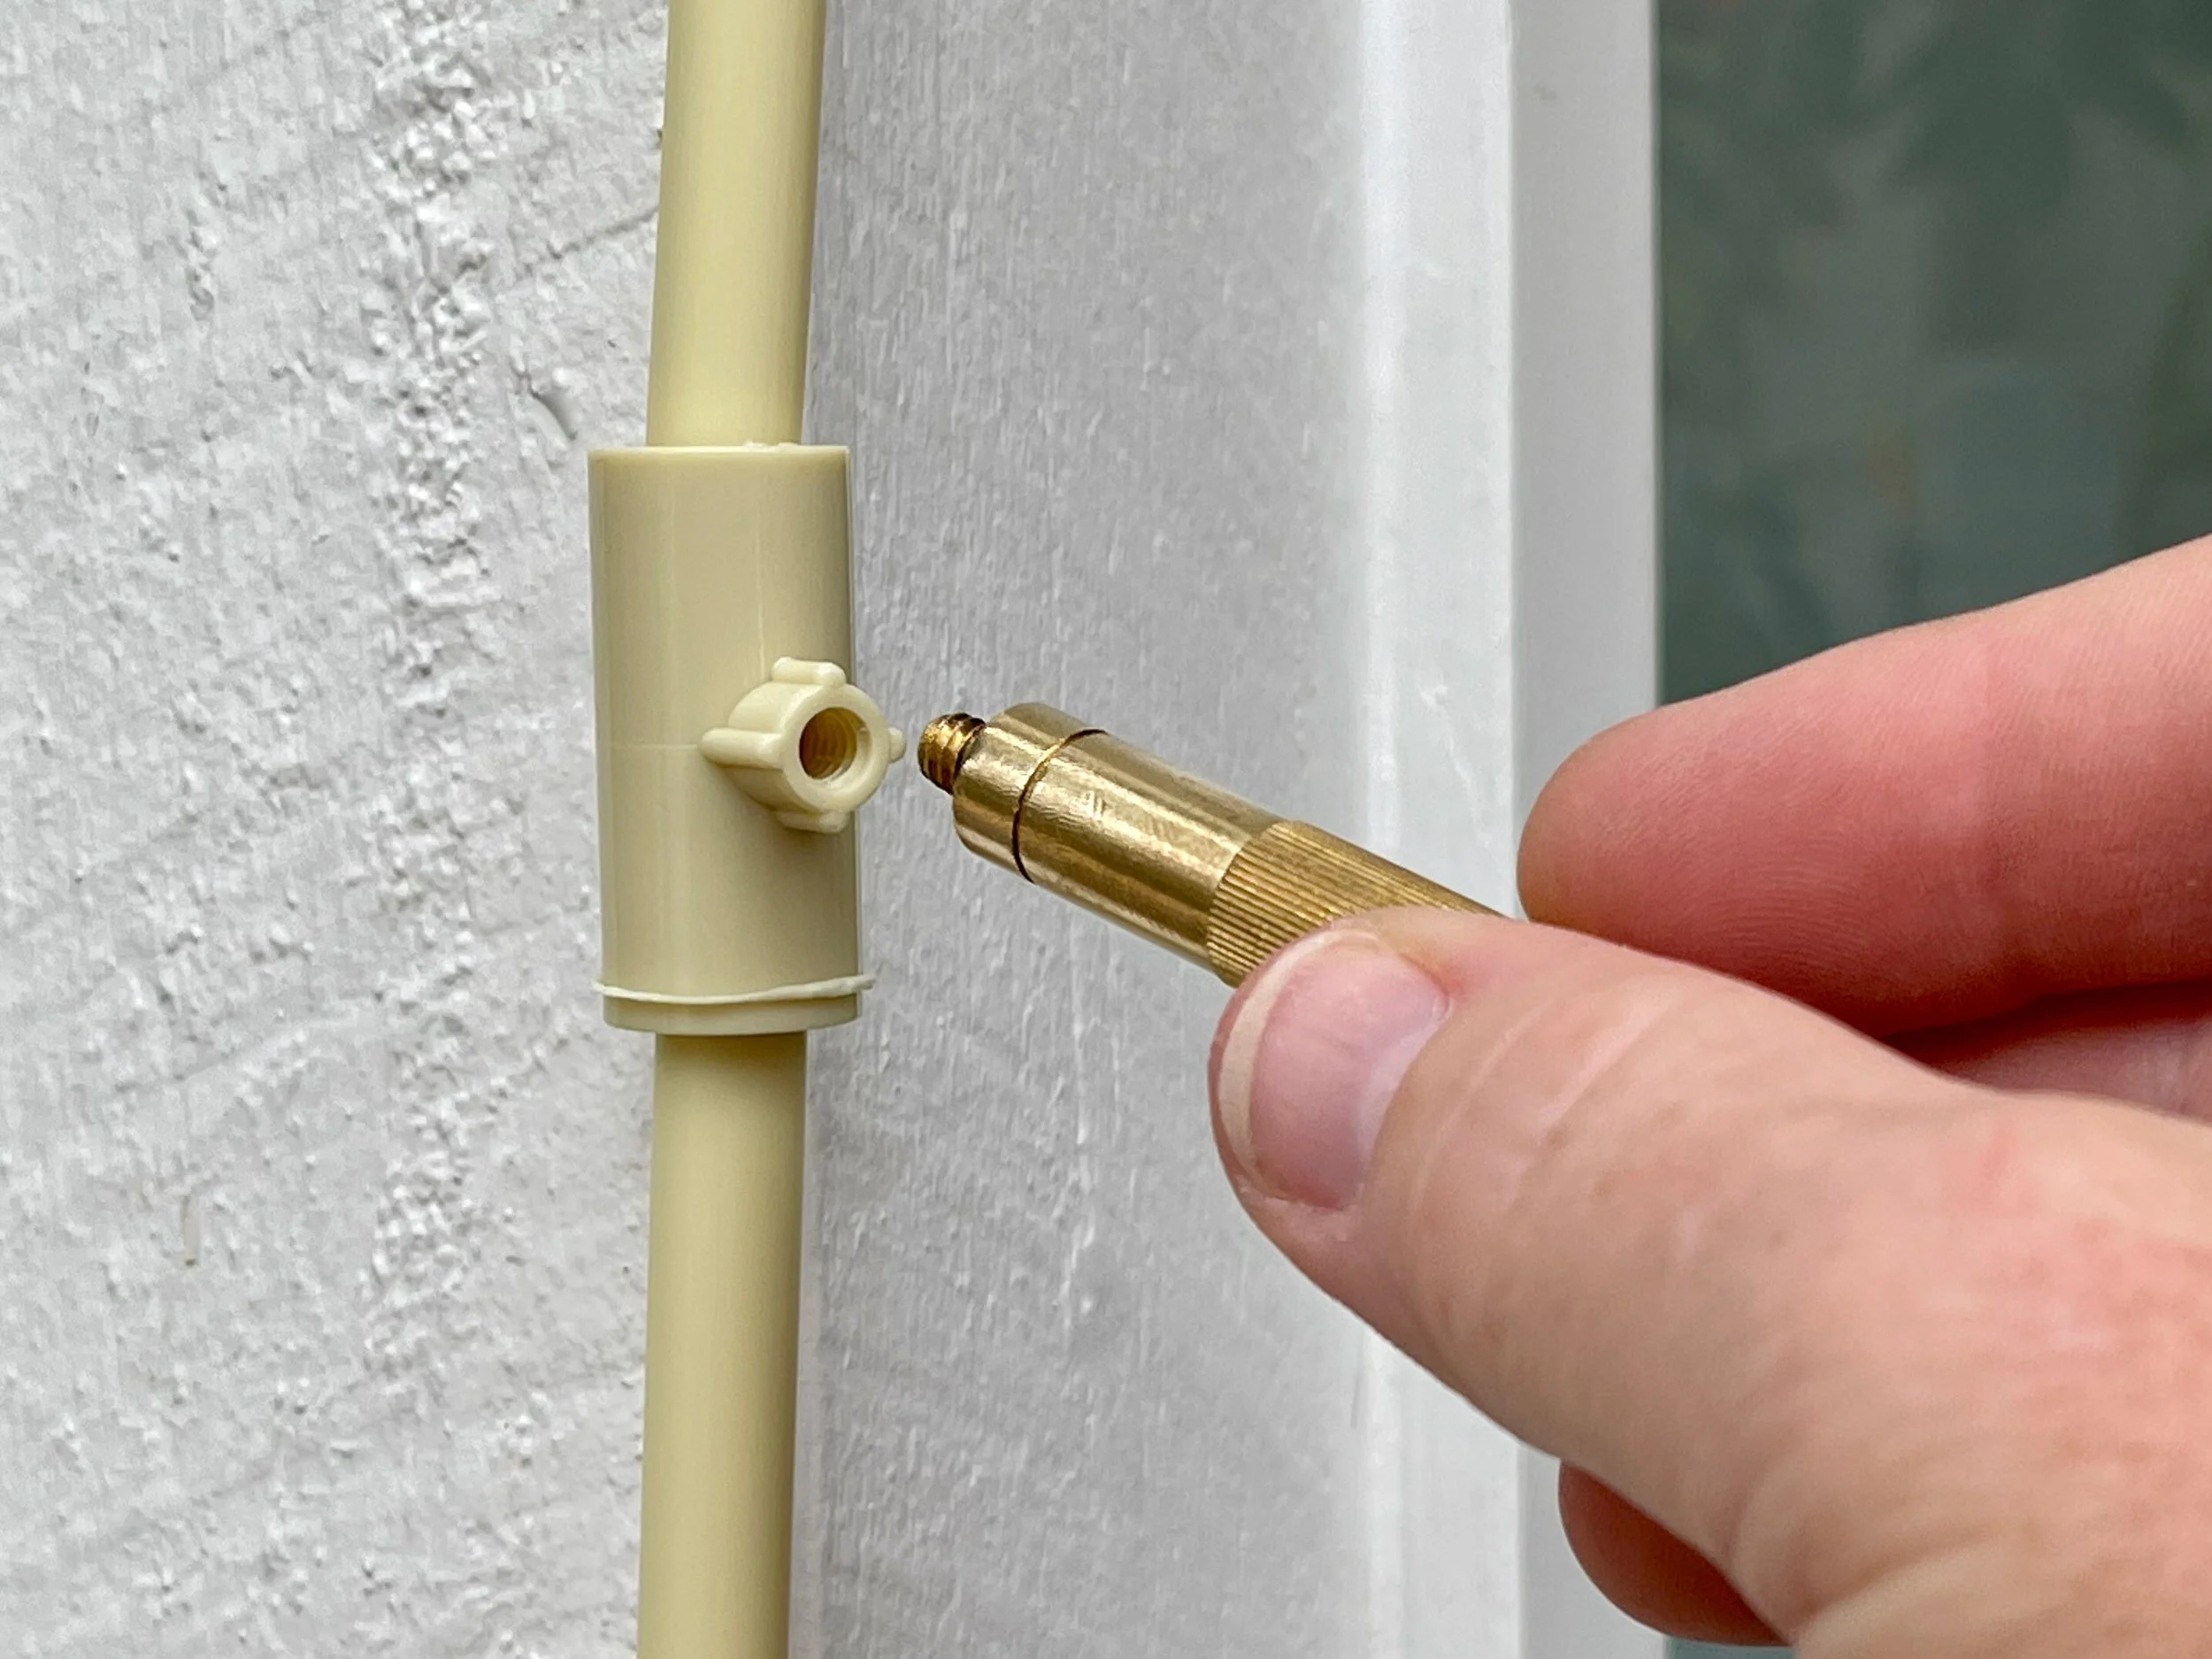
I unscrewed the brass jets, that look like tiny tap fittings, and set them aside on a clean surface.
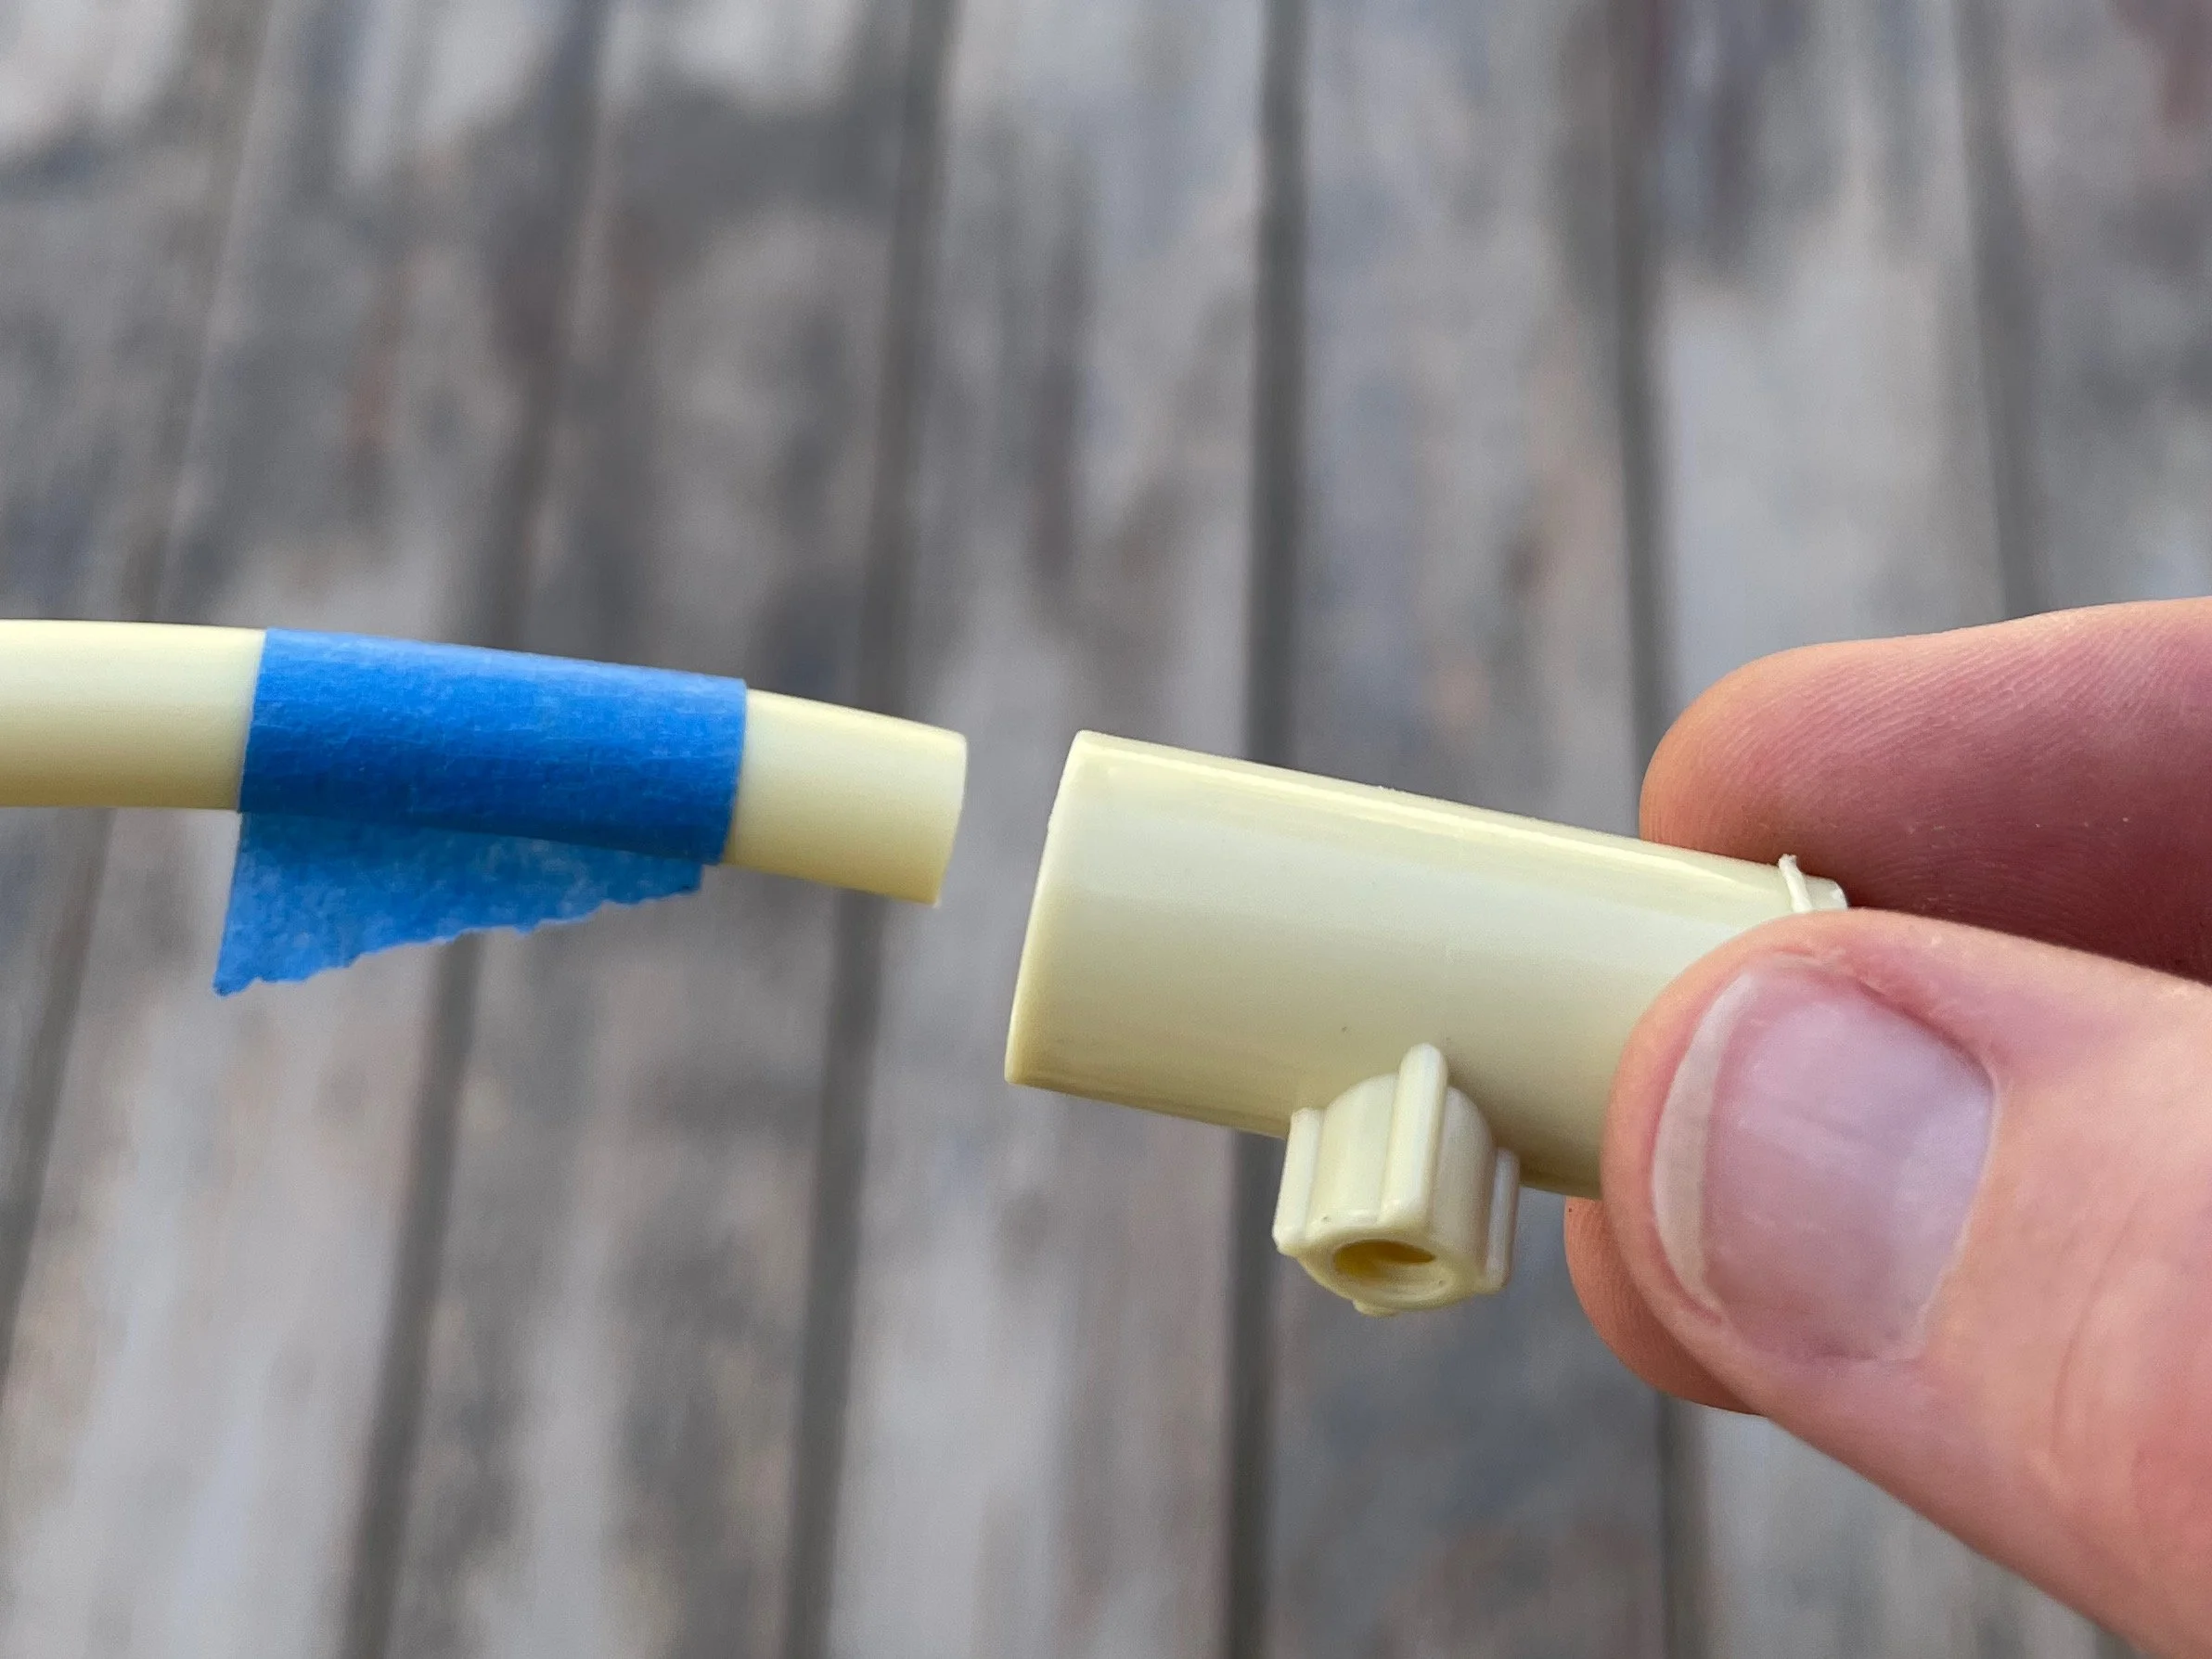
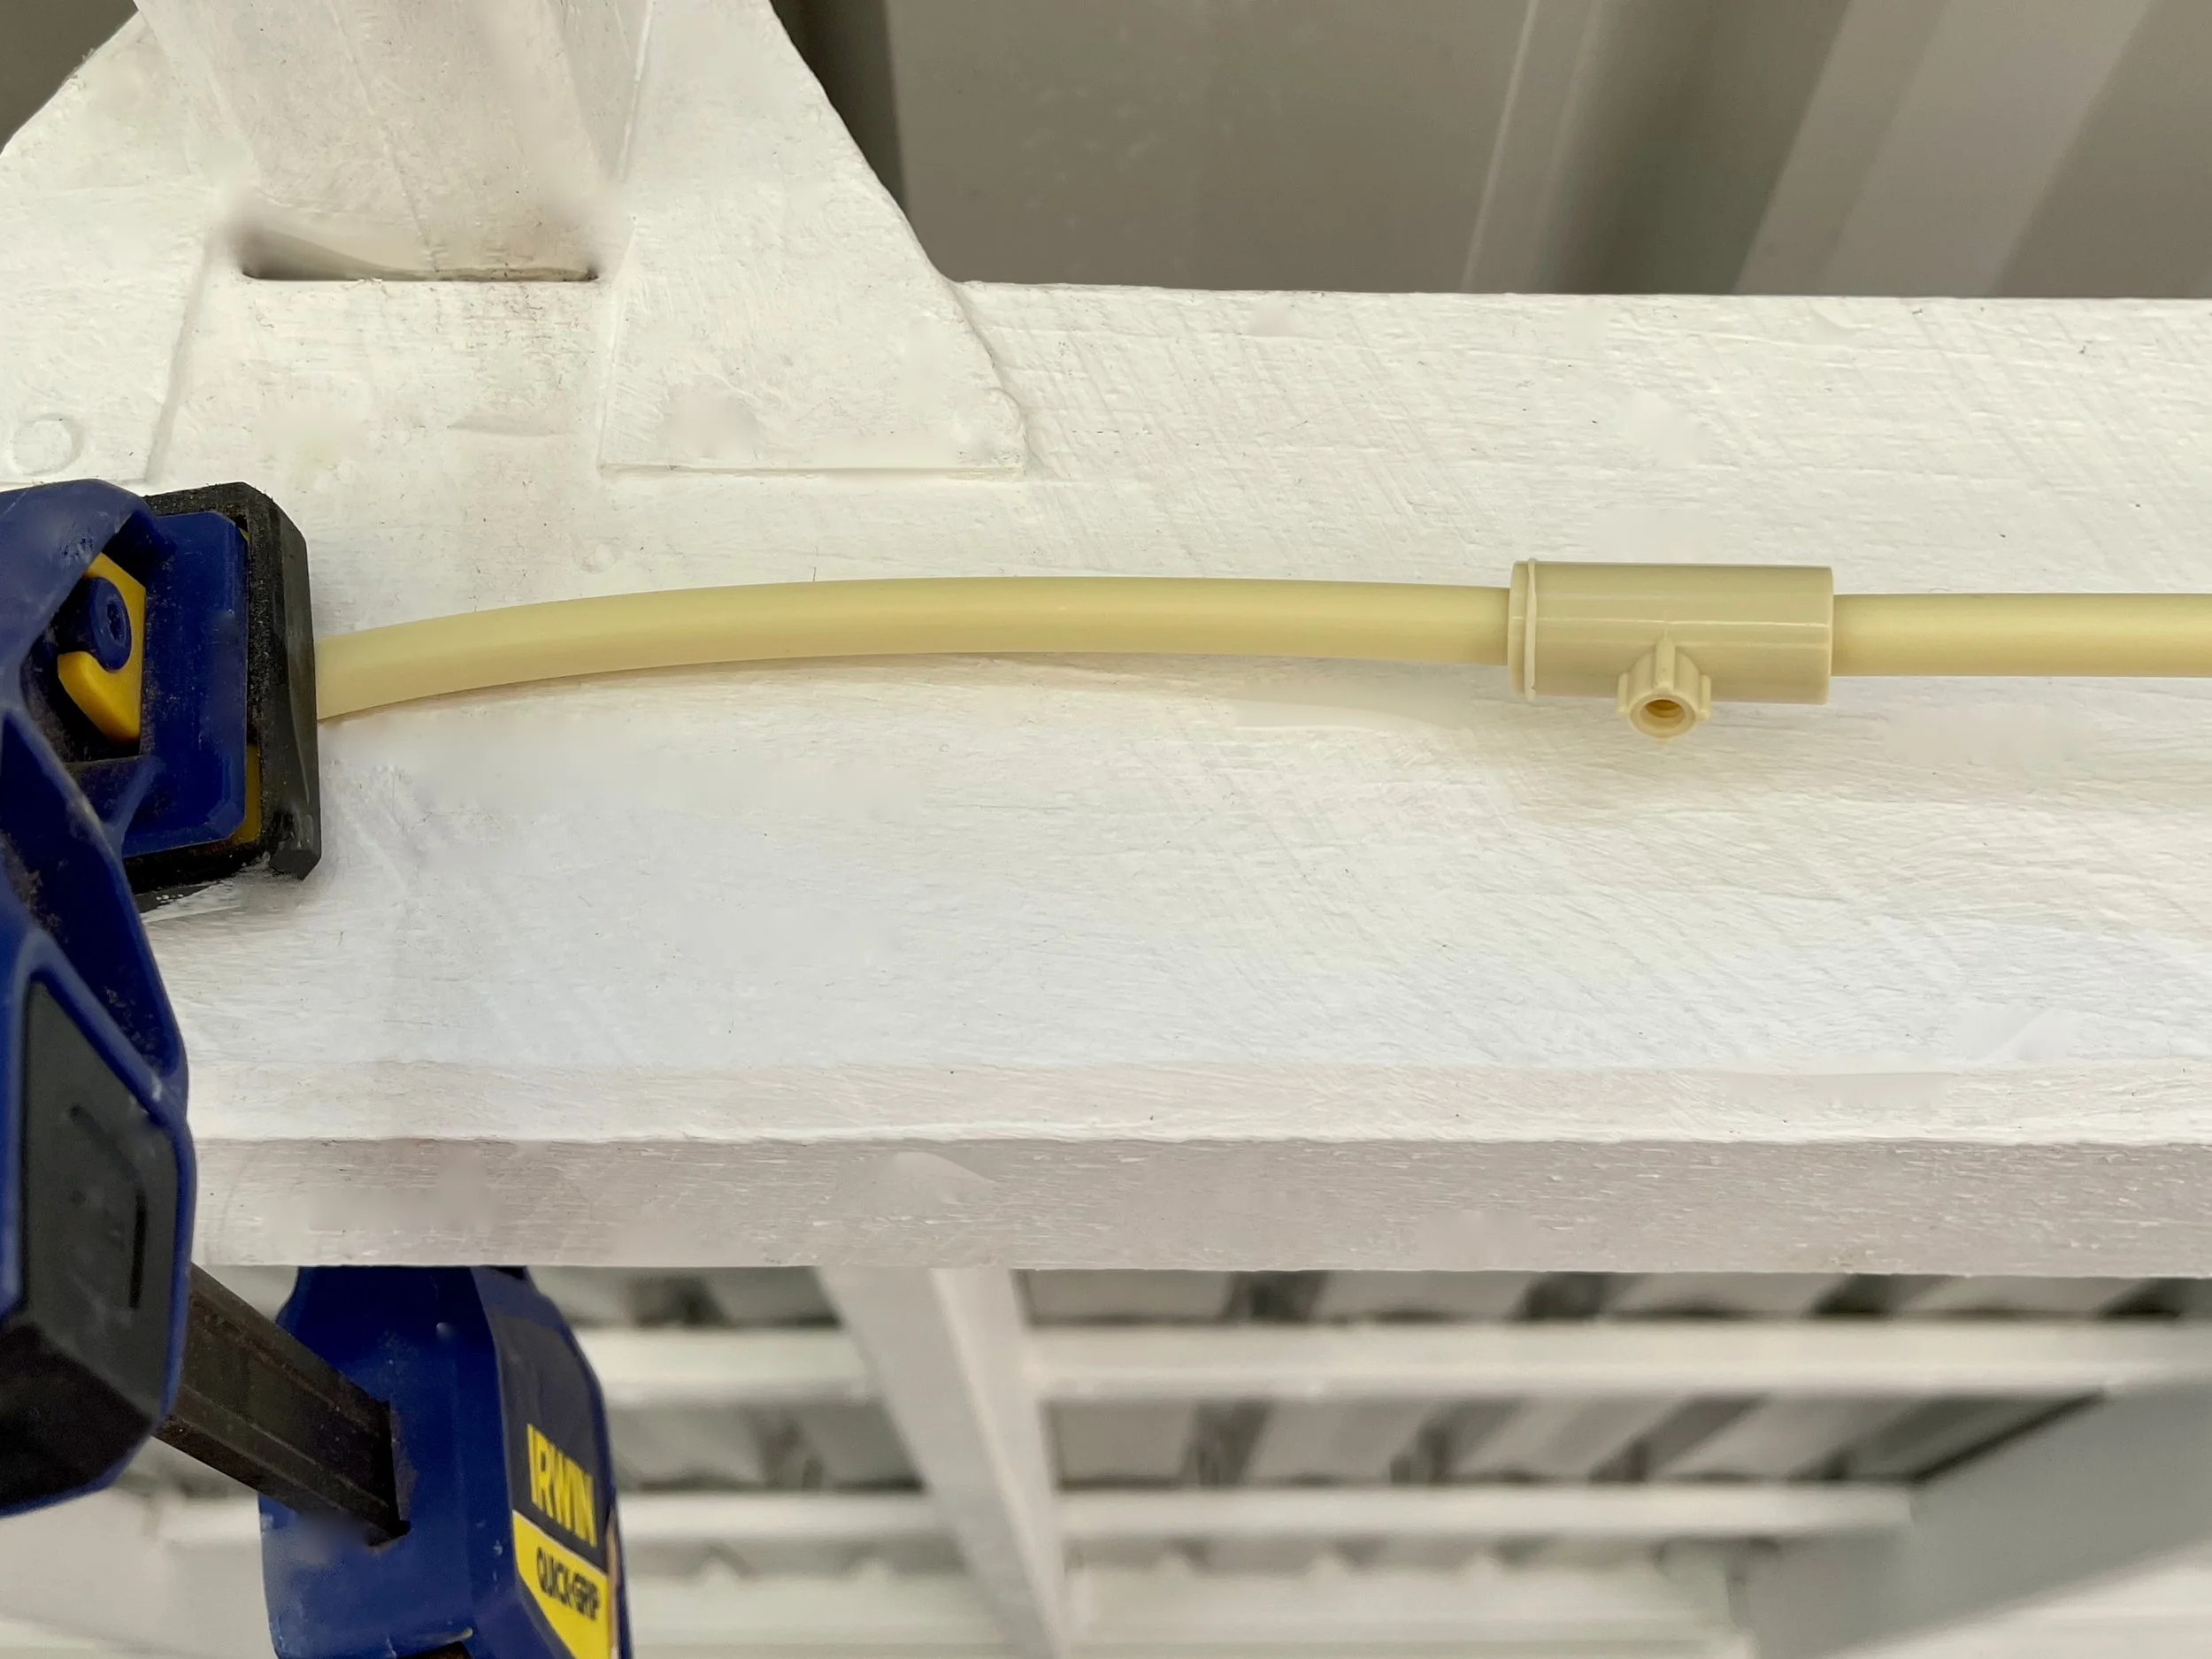
To fit each tee connector, I pushed it onto the pipe by 10mm, holding it straight and twisting slightly. Once the pipe is fitted, it grips firmly and can’t be removed, so I used tape as a marker to avoid pushing it in too far where it could obscure the water flow into the jet.
I joined up the rest of the system without securing it to the wall or beam, standing on a step ladder to use clamps to hold it in place.
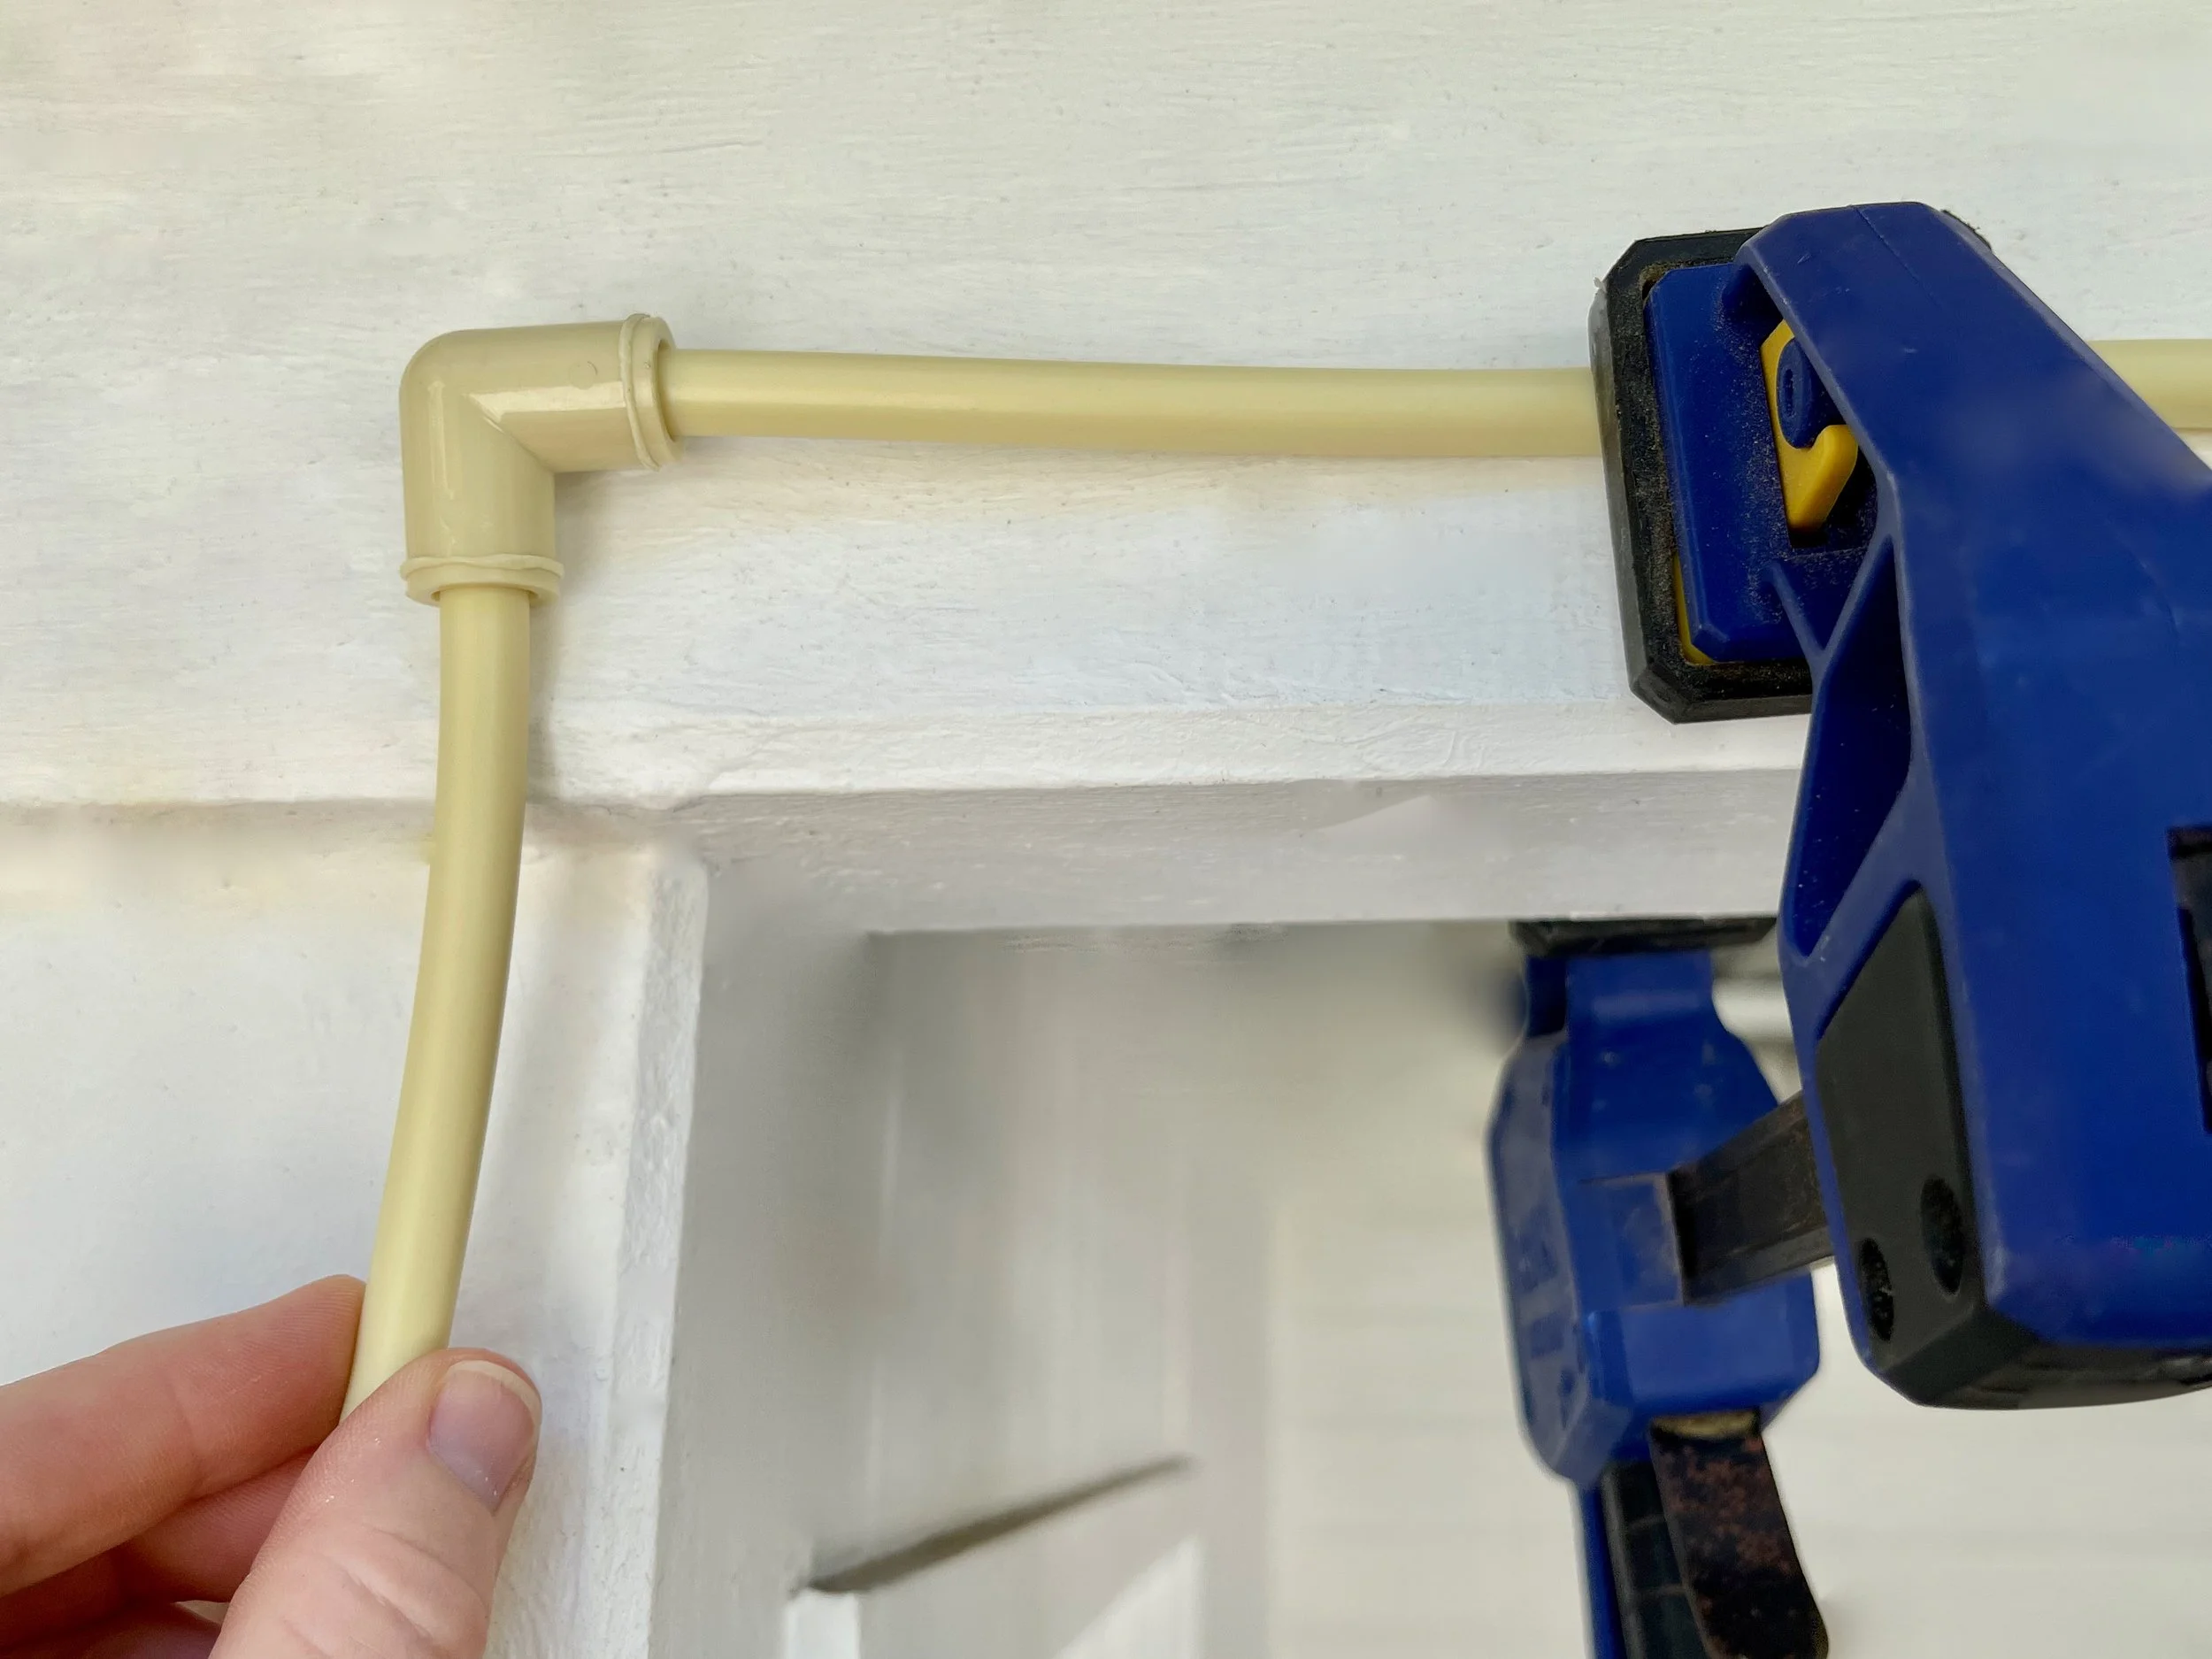
I spaced the tee connectors along the beam, about 600mm apart, cutting pipe to fit between them. I finished with an elbow-shaped connector at the end, opposite the tap, and used plain elbows to run pipe around the wall towards the tap.
After unscrewing the auto-drain valve, I turned on the tap to flush the system, leaving the water running for a few minutes to ensure any debris was removed to avoid clogging.
I turned the tap off and waited for the water drain out.
TIP Before turning on the tap, I removed the clamps and took down the section of the system that ran along the beam, moving it to the edge of the deck so water pooled away from the house. If you don’t mind the area getting wet for this clean-out, then leave it clamped in place.
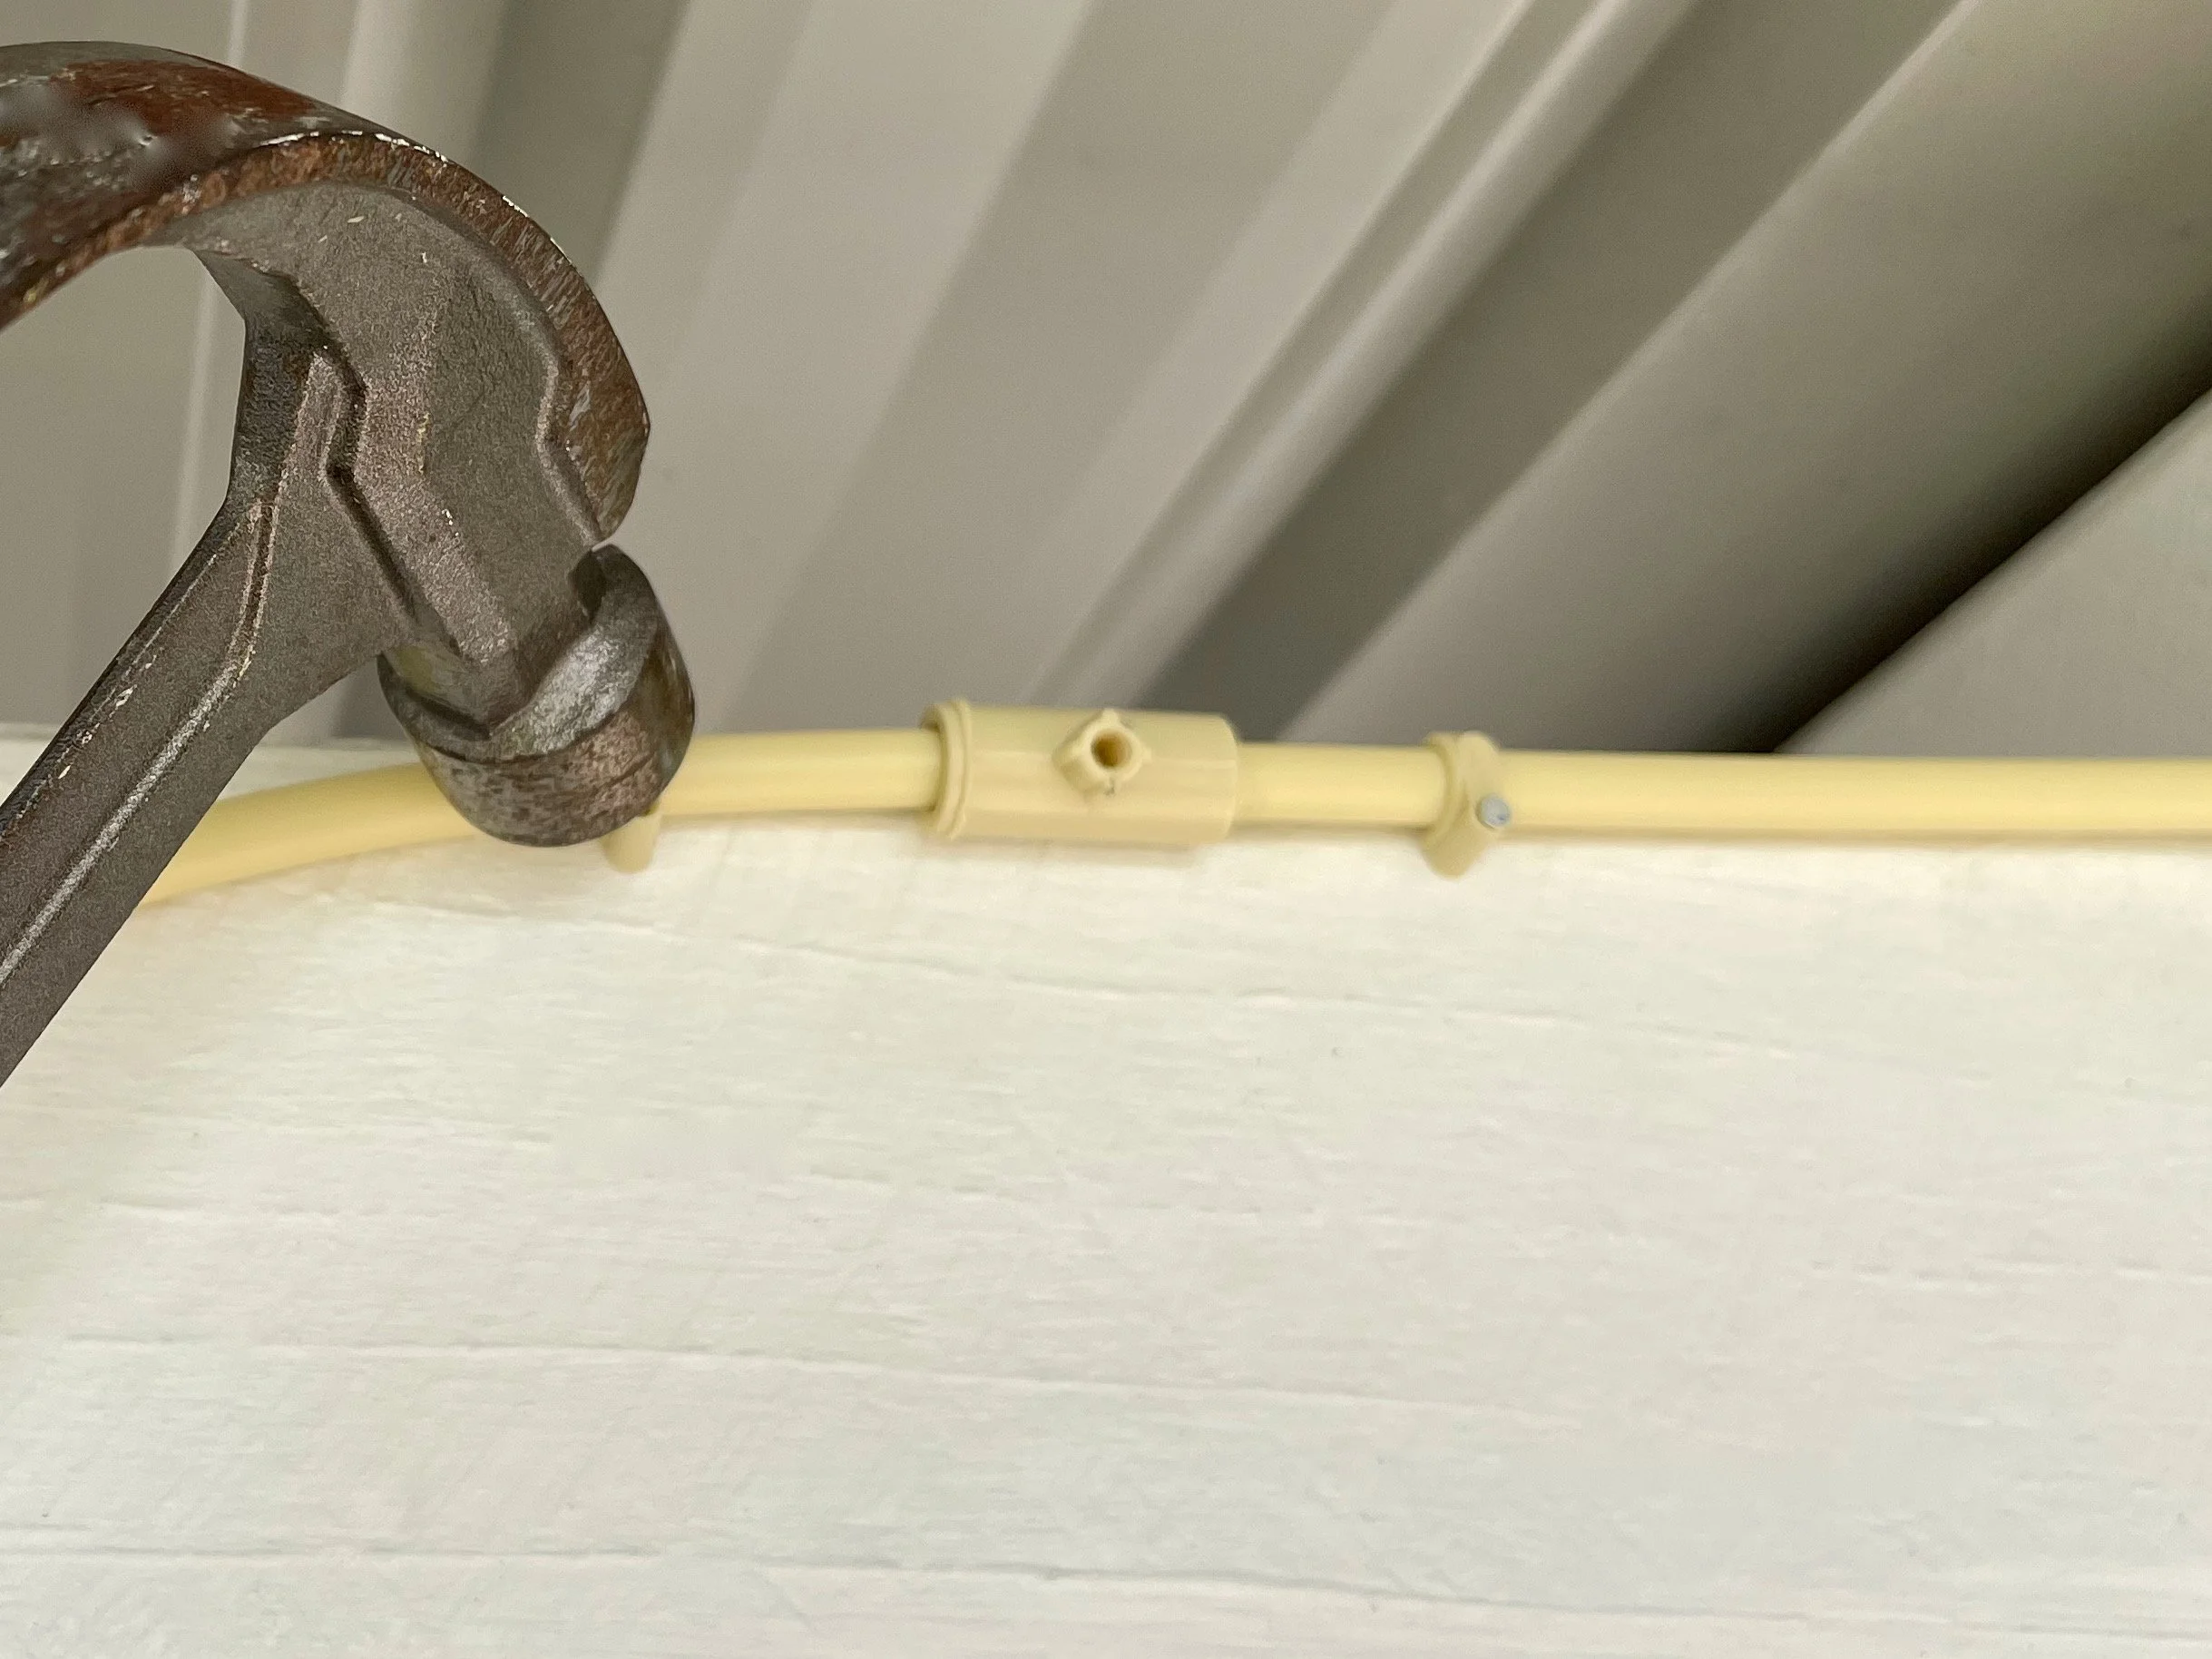
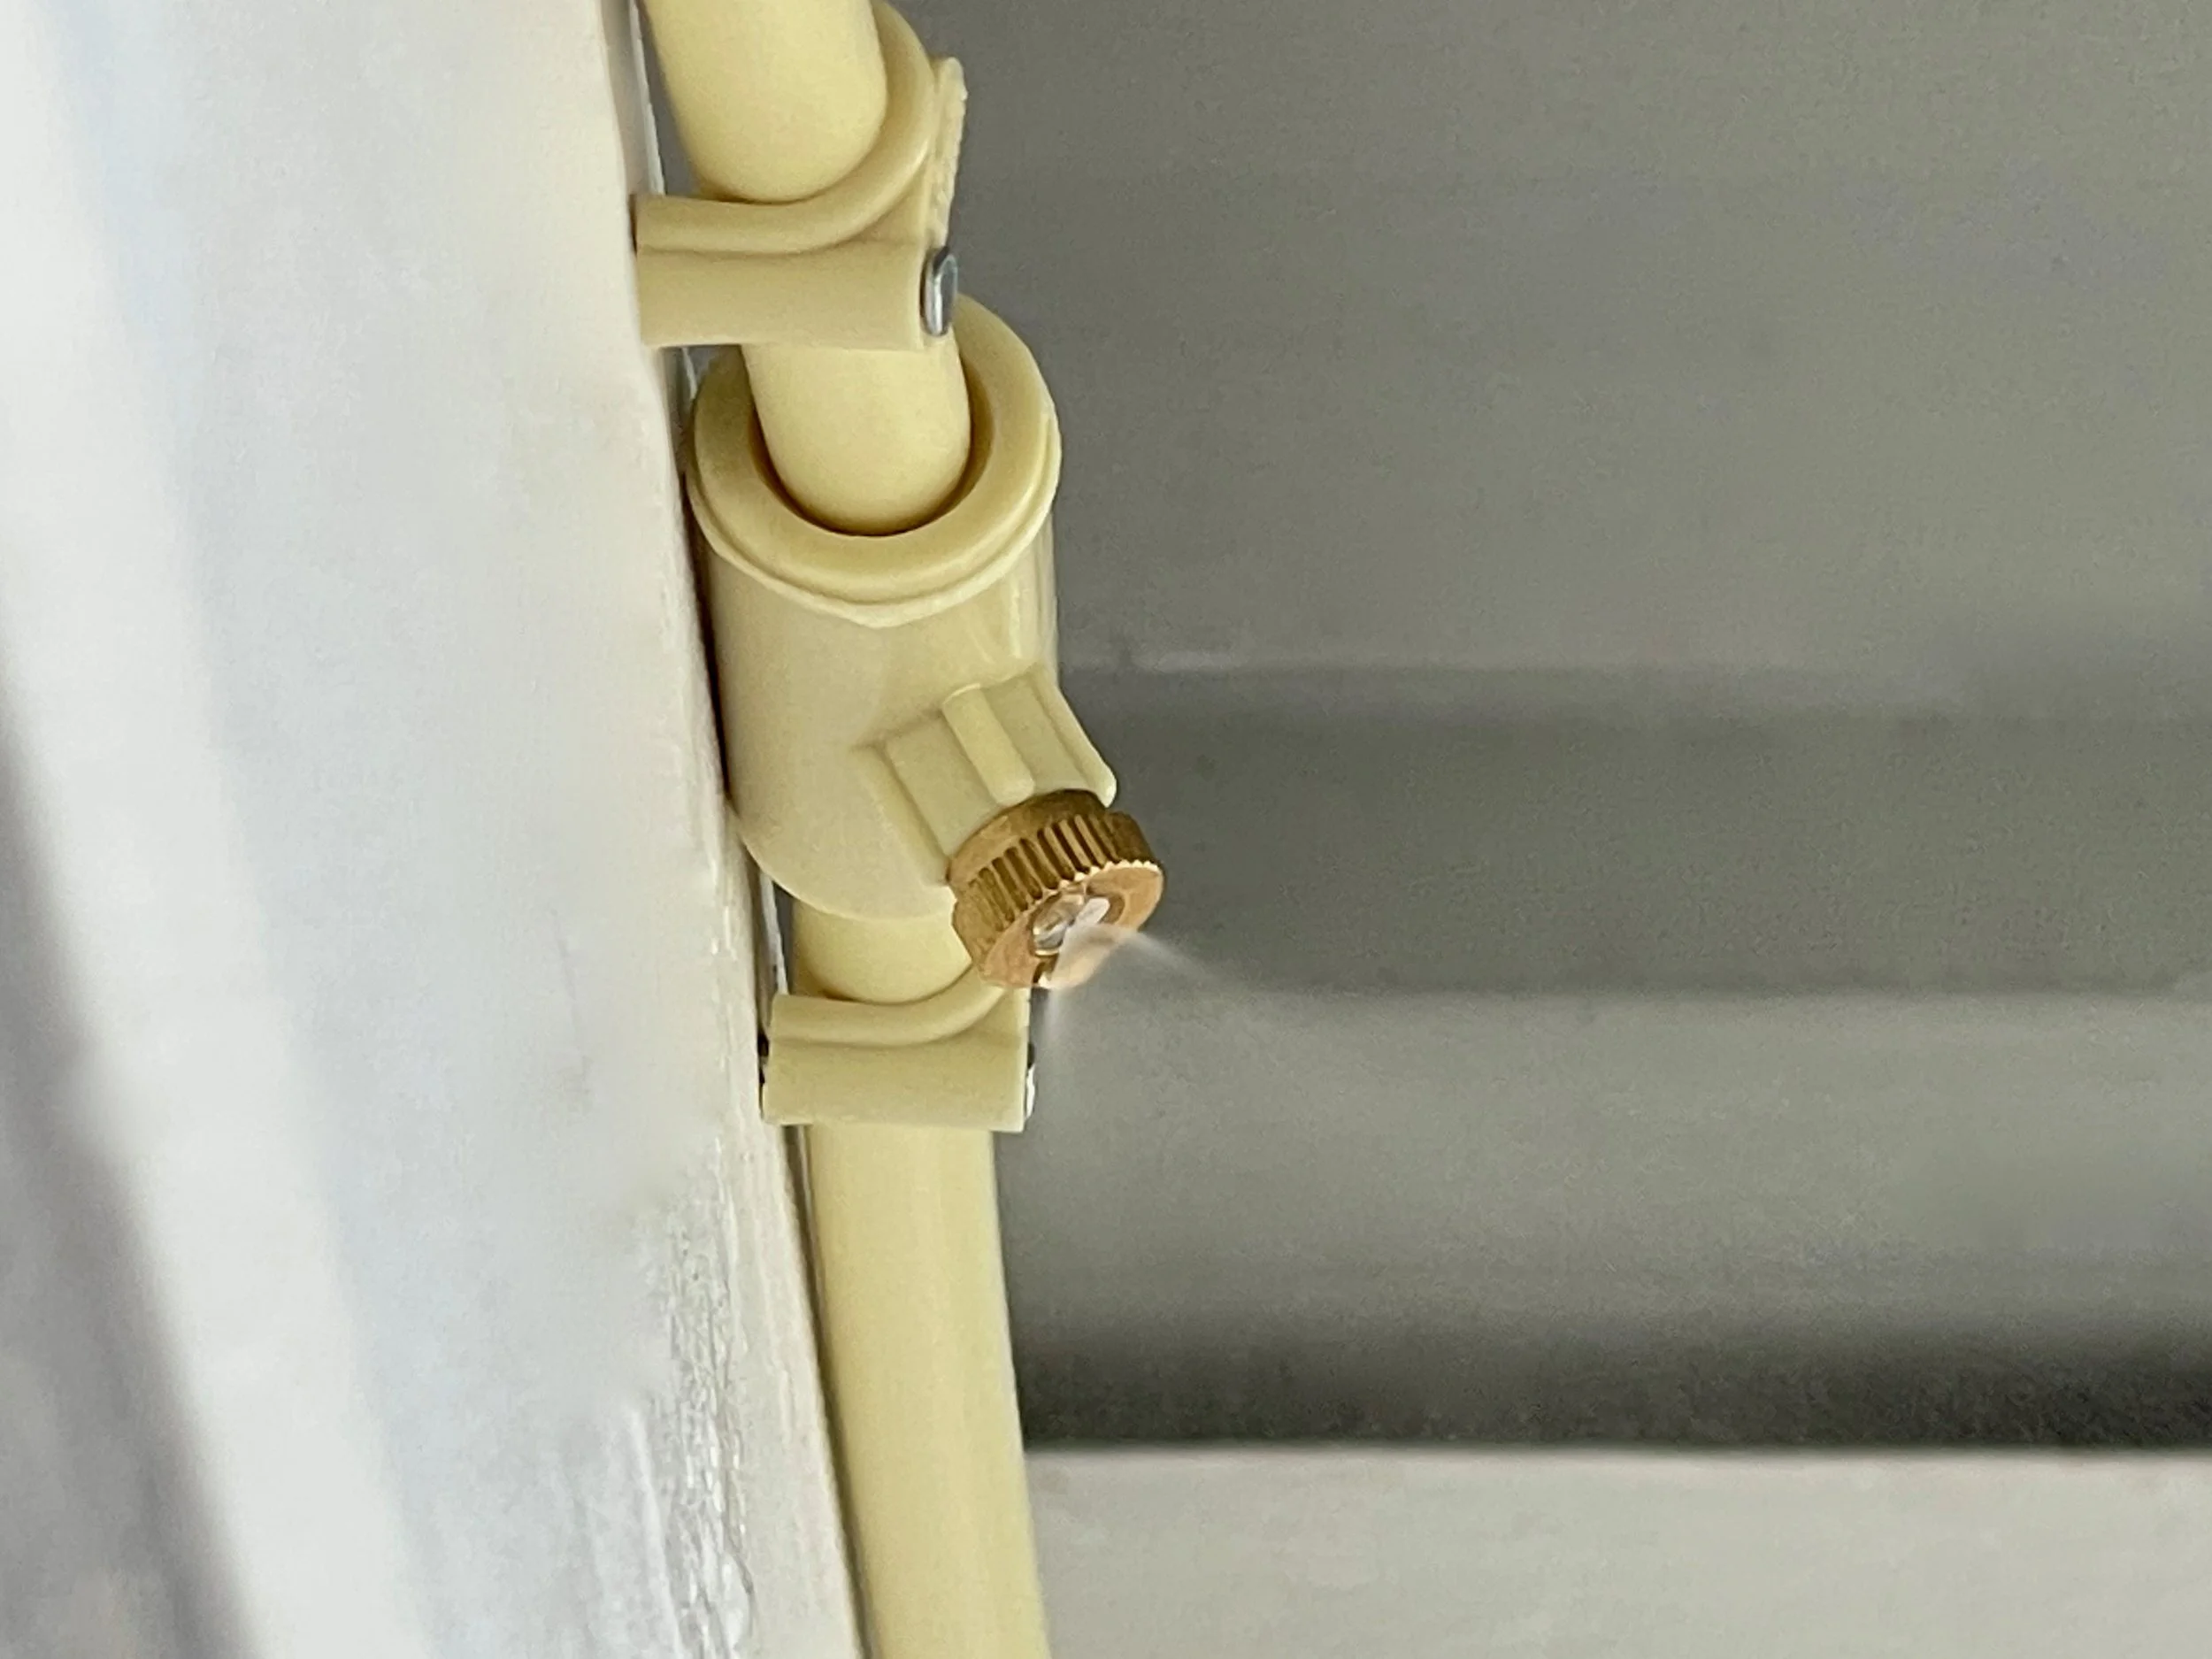
To attach the system to the beam, I stood on the step ladder to hammer the pipe clamps about 50mm both sides of each connector to hold them in place. I also tapped the clamps around the pipe along the wall and either side of the auto-drain valve near the tap.
TIP I began at the far end to secure elbow connector, then gently pulled the pipe and clamped it to the beam to work on each section.
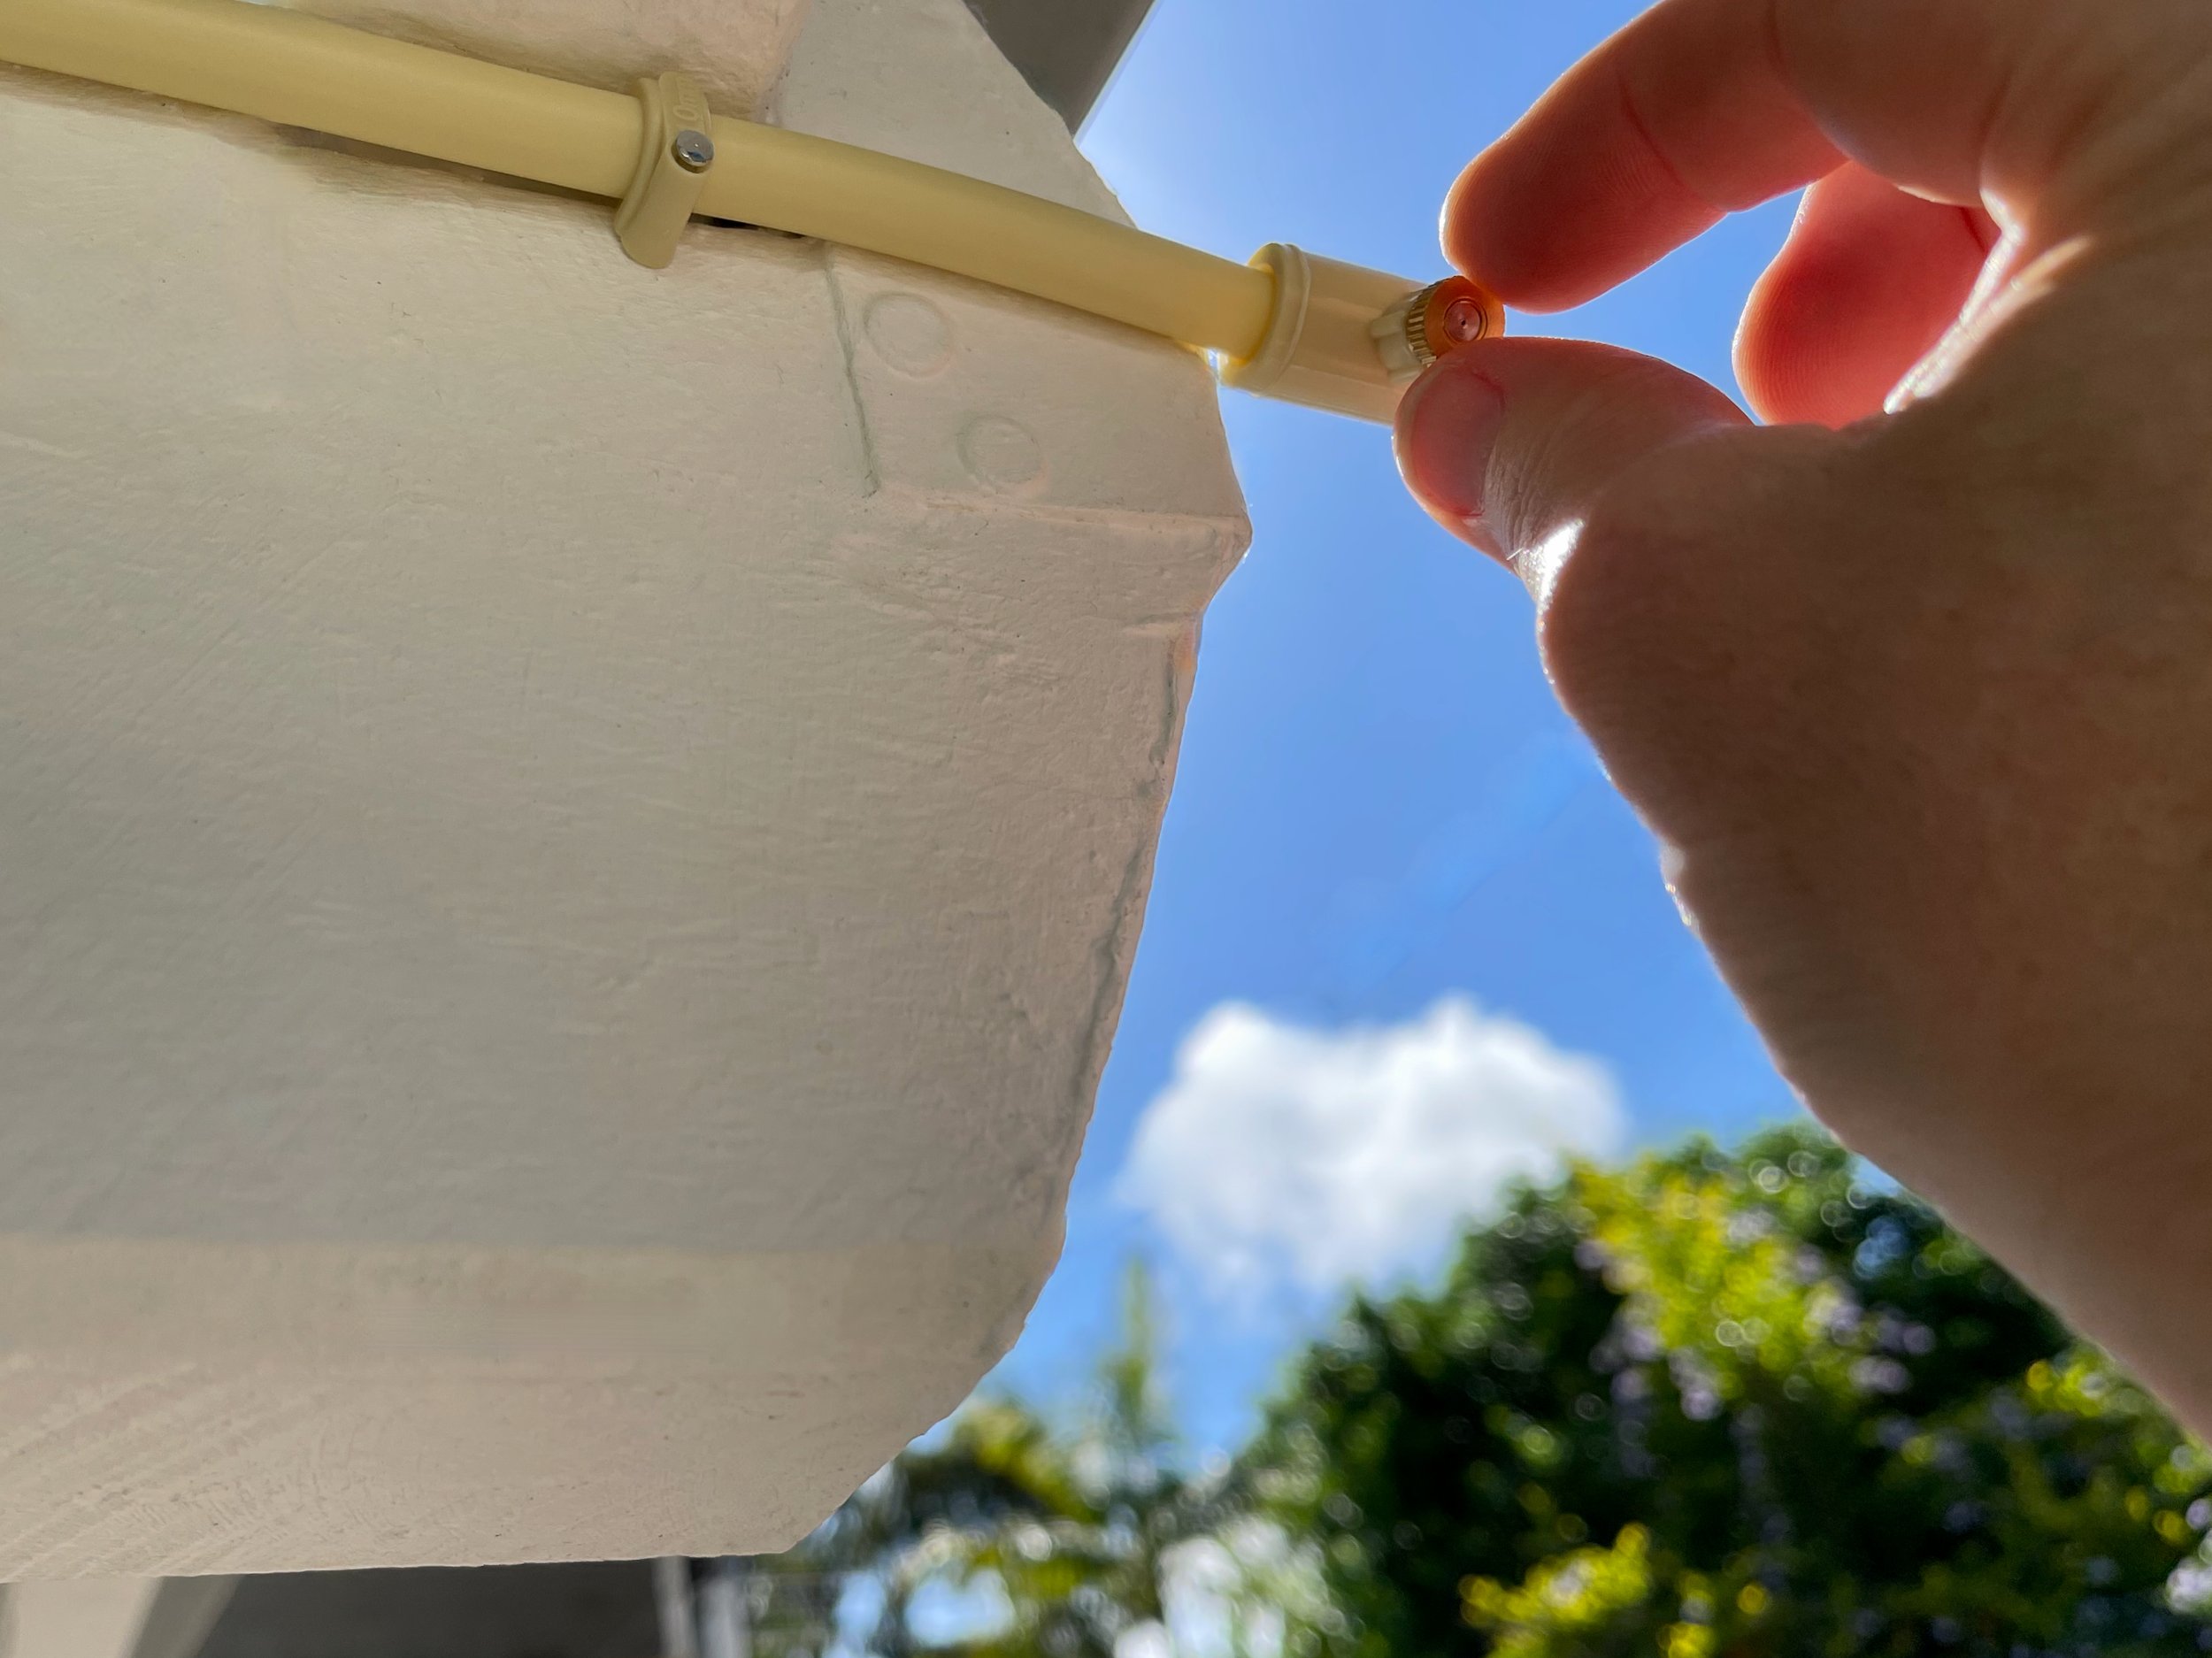
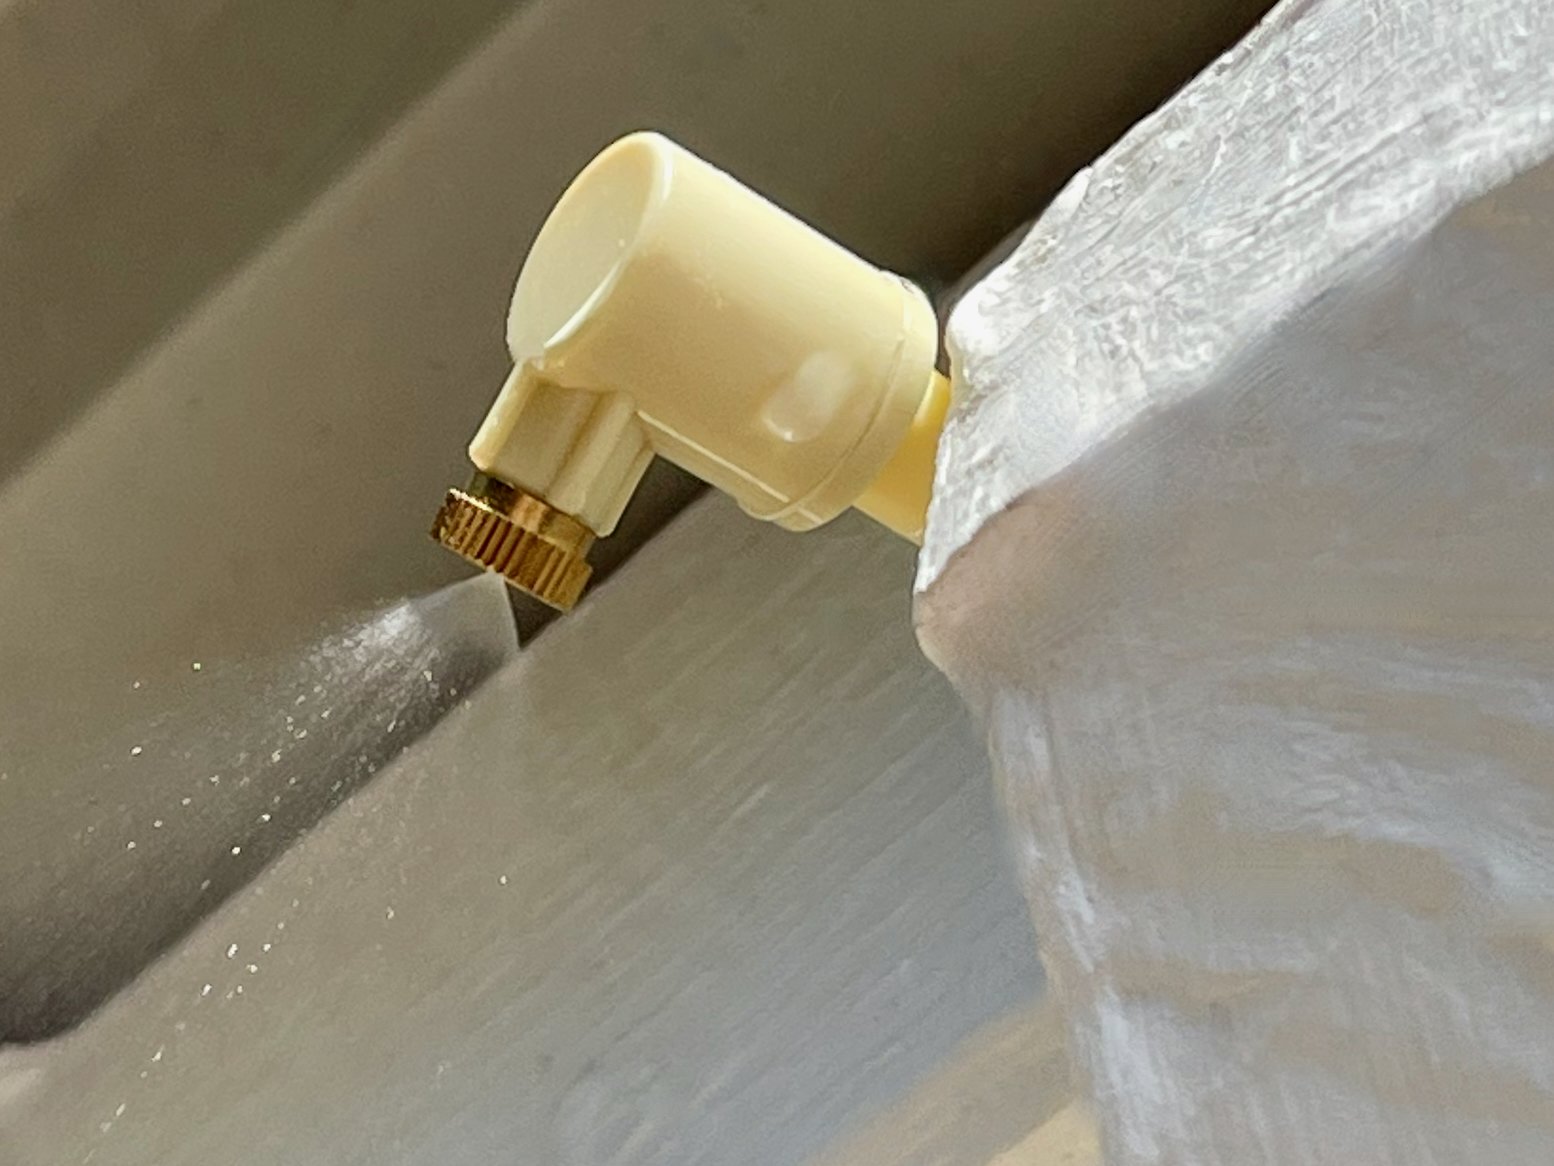
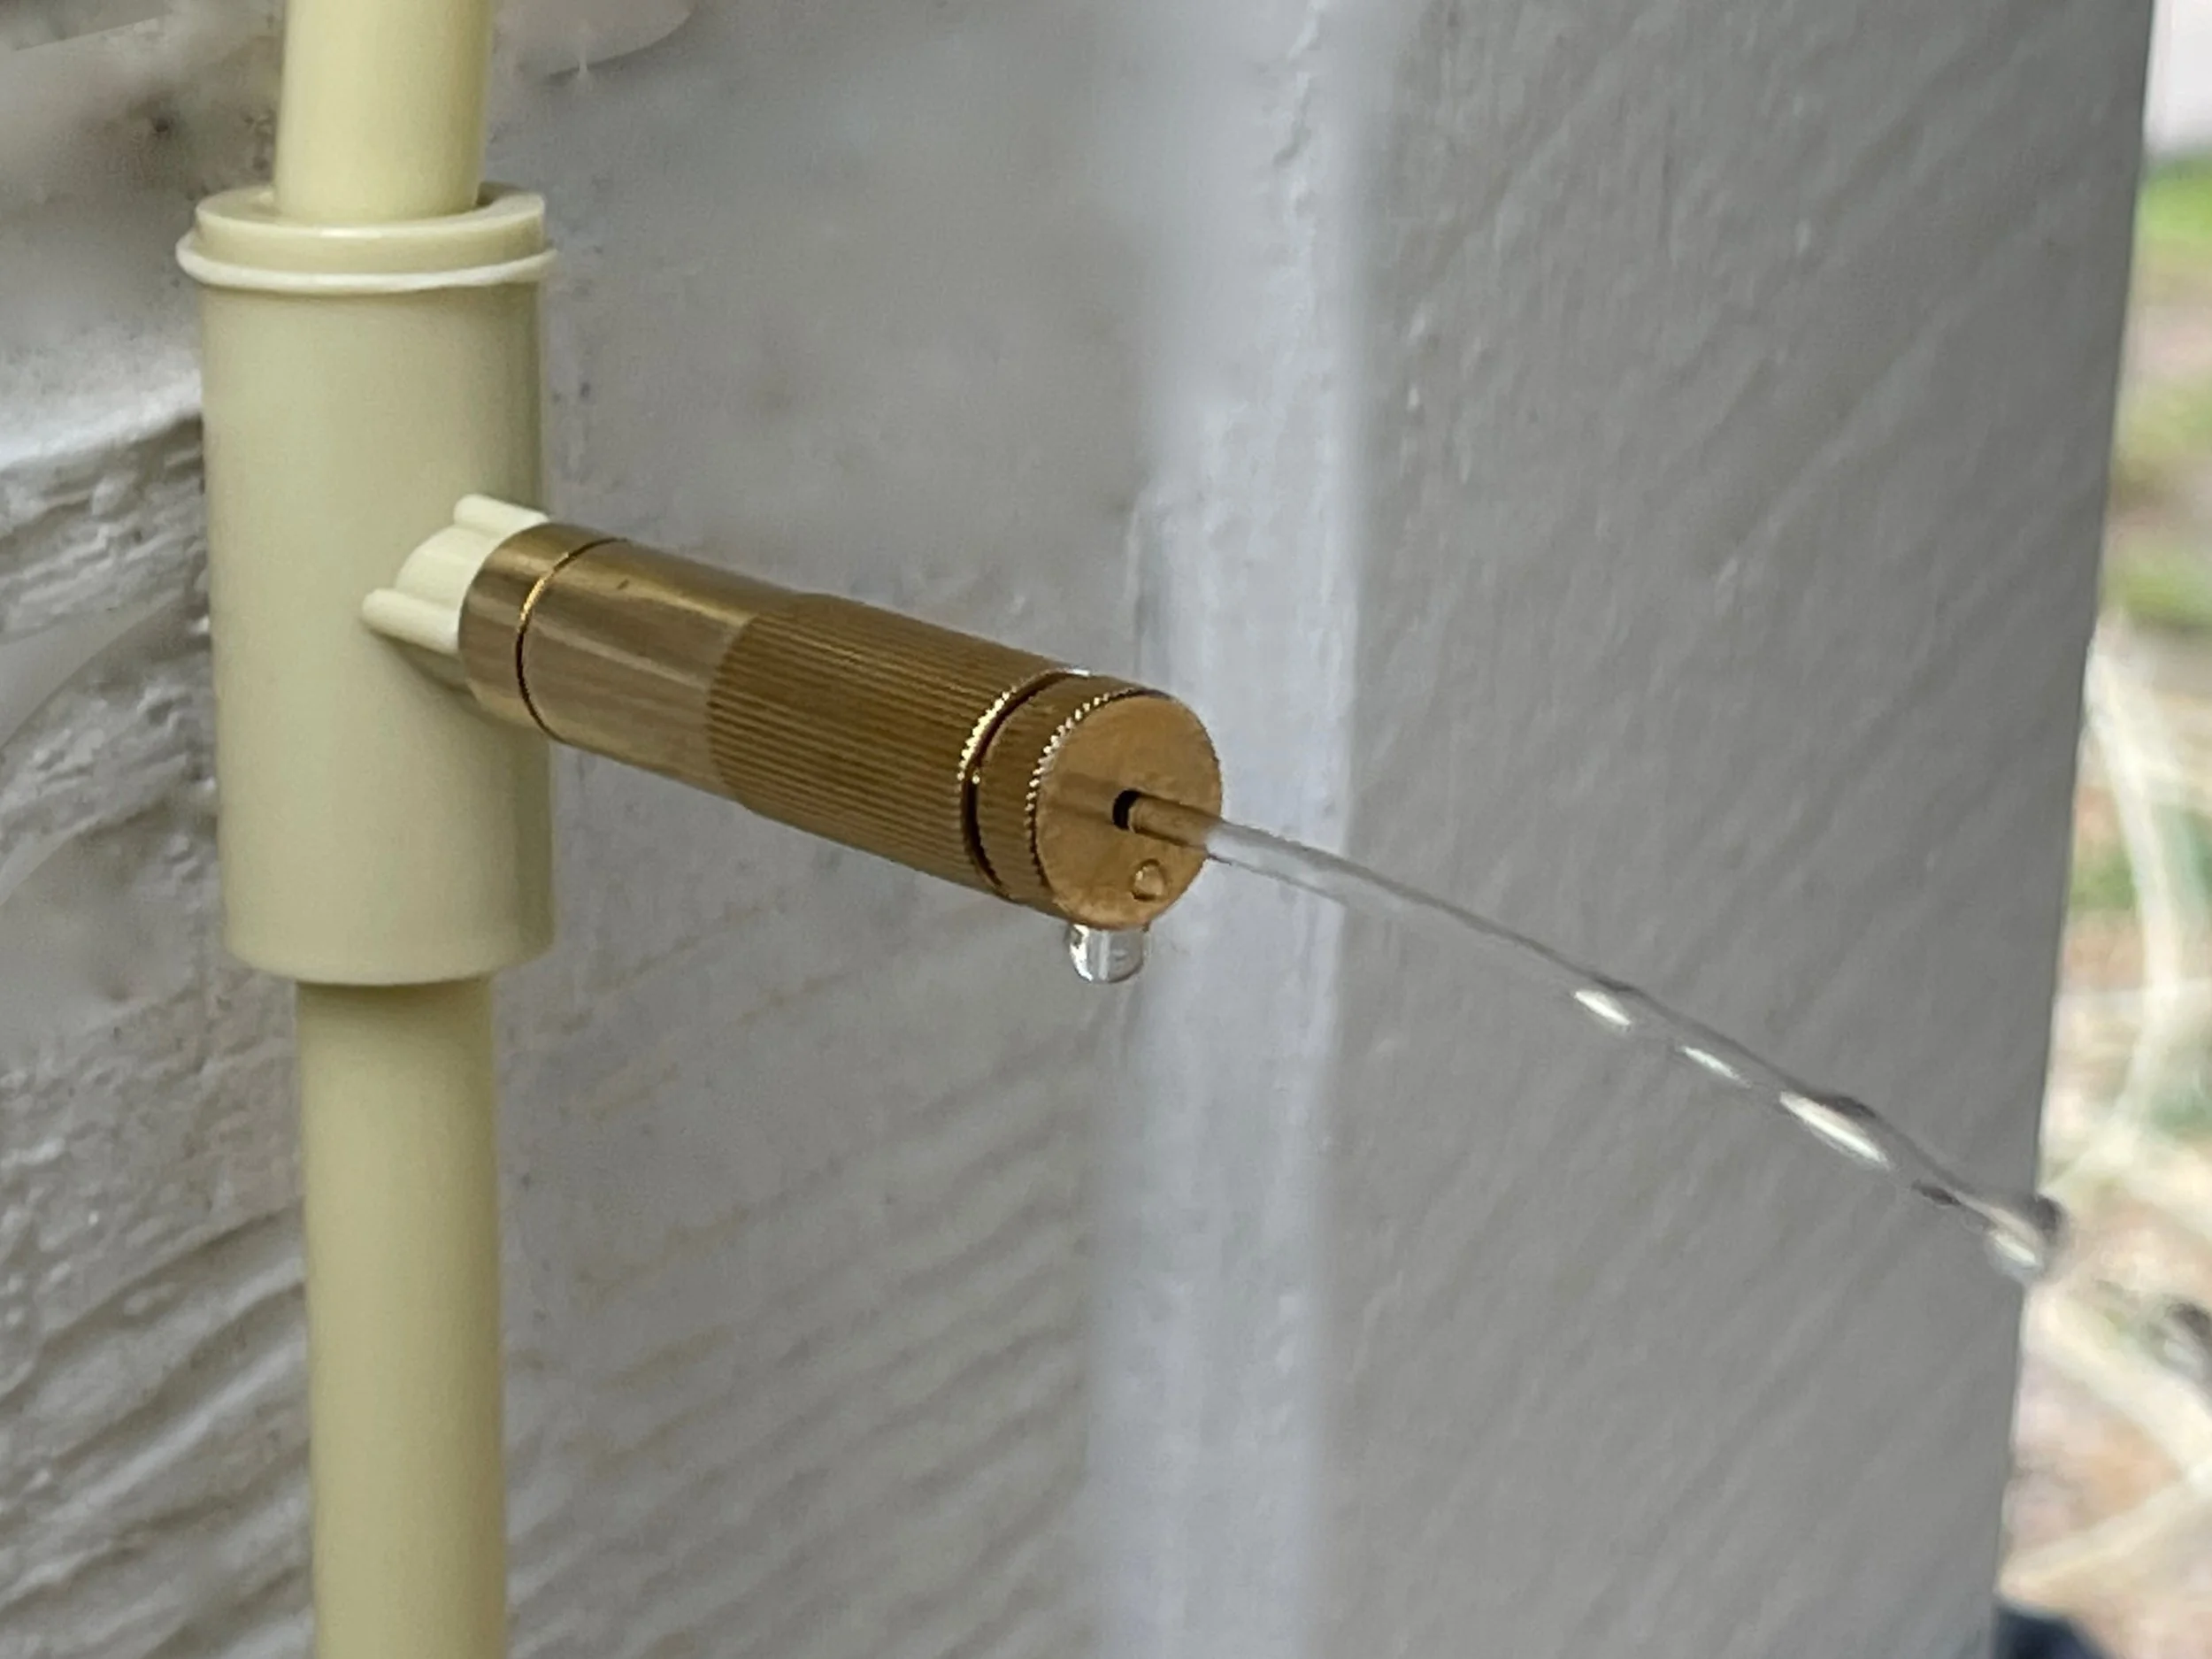
I twisted the small brass jets into the connectors, screwing them on firmly. These images shows the elbow at the end. I also reinstalled the brass auto-drain valve near the tap.
Then I set the tap timer to begin misting!
TIP This system isn’t designed to run constantly, so program it to come on when you’re outside or during the hottest part of the day.
A variation of this story first published in Bunnings magazine.