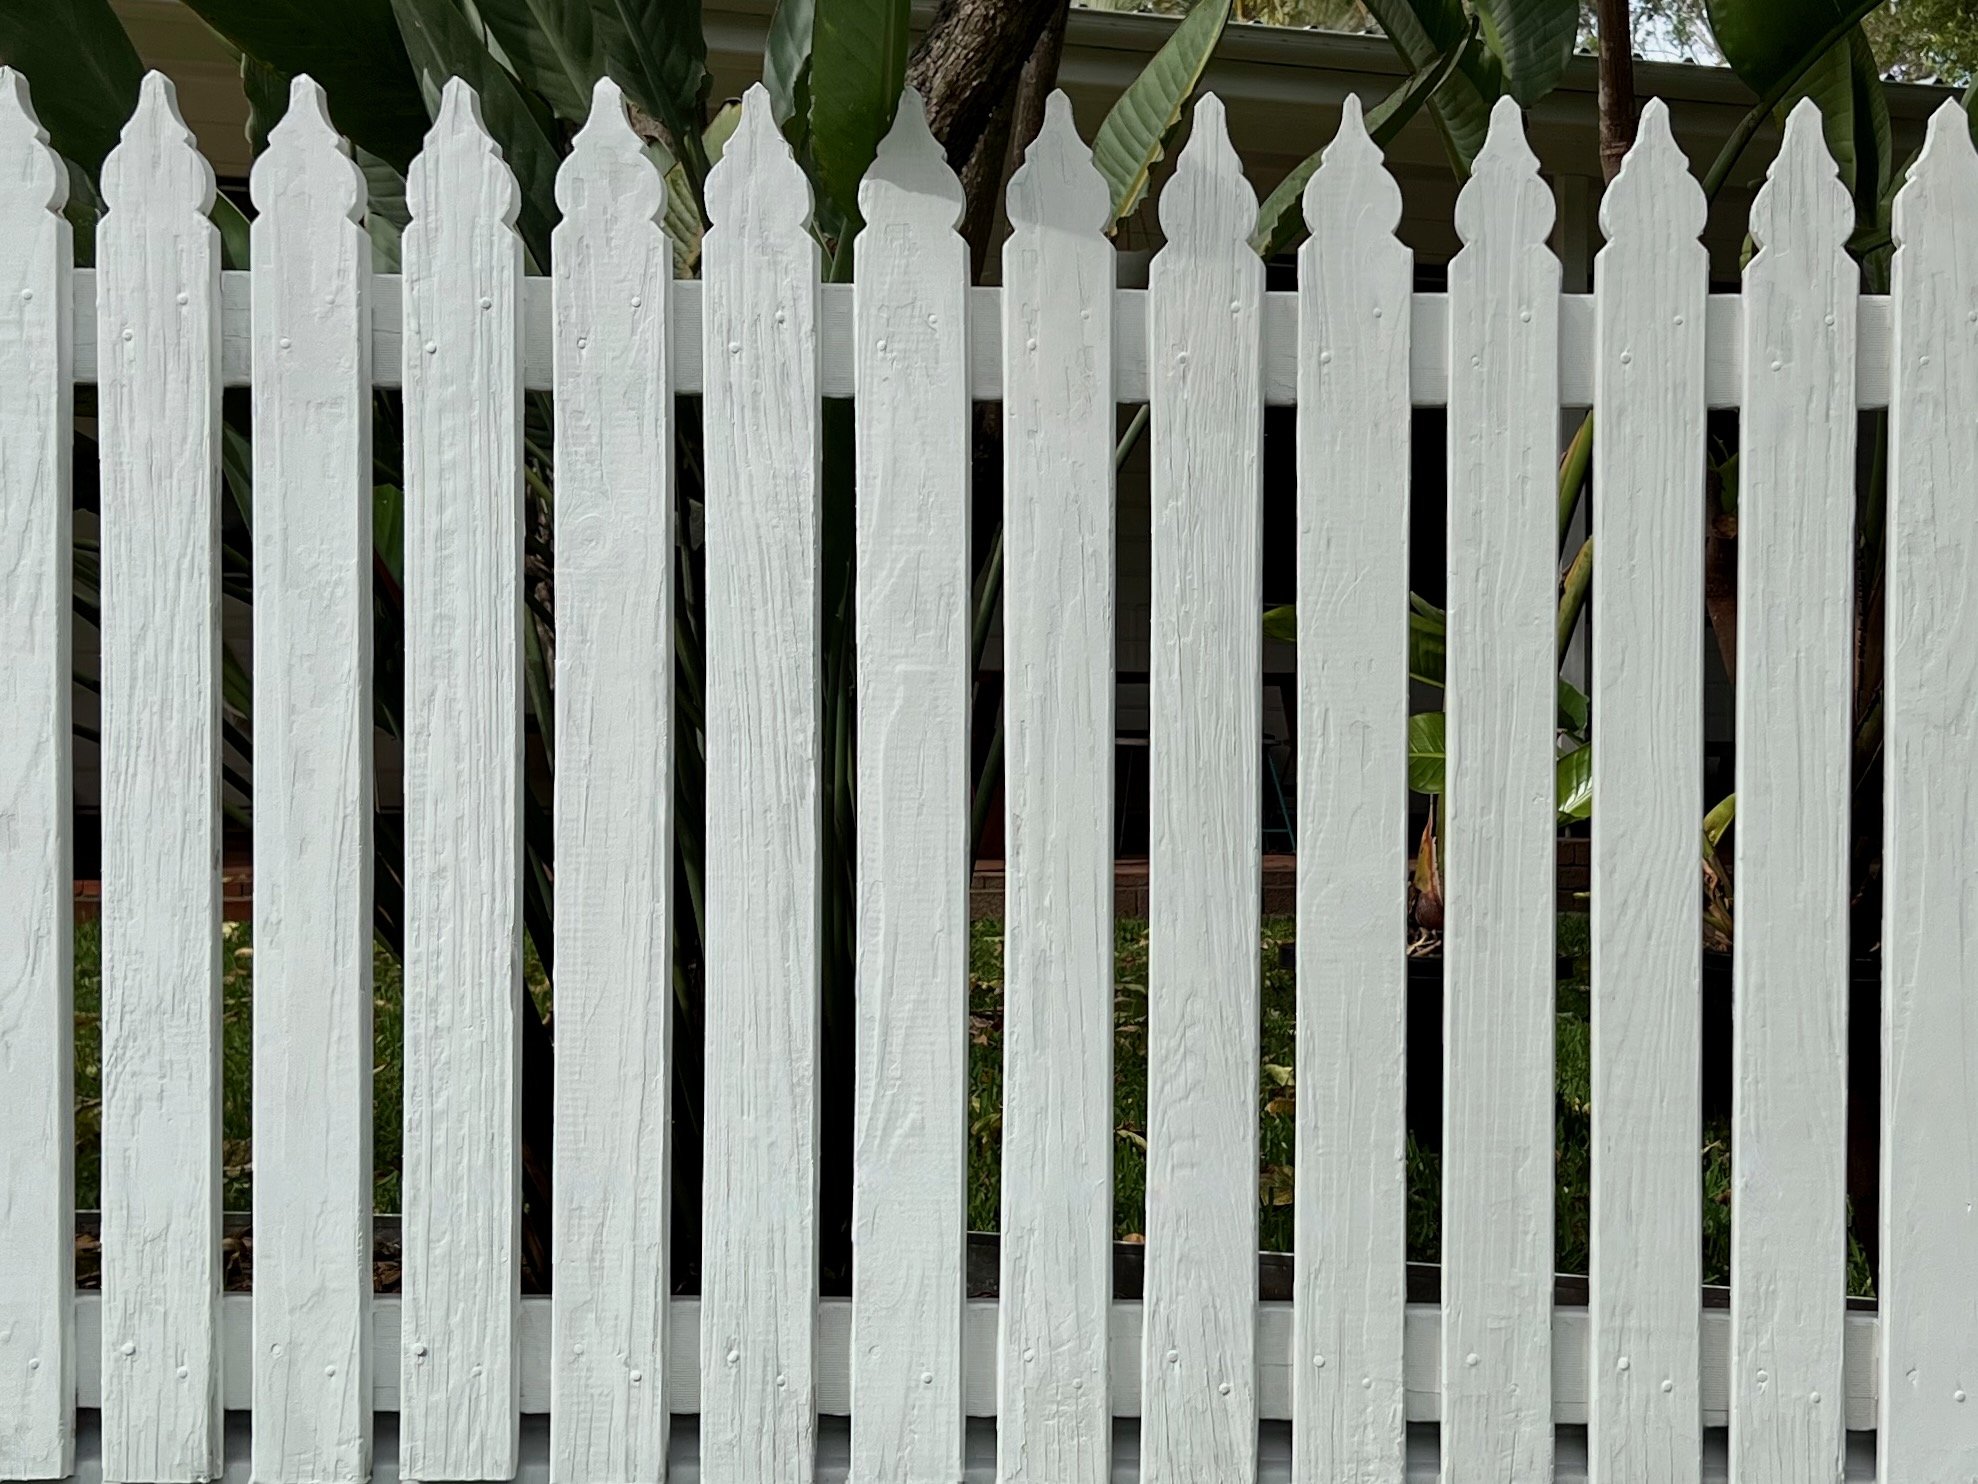
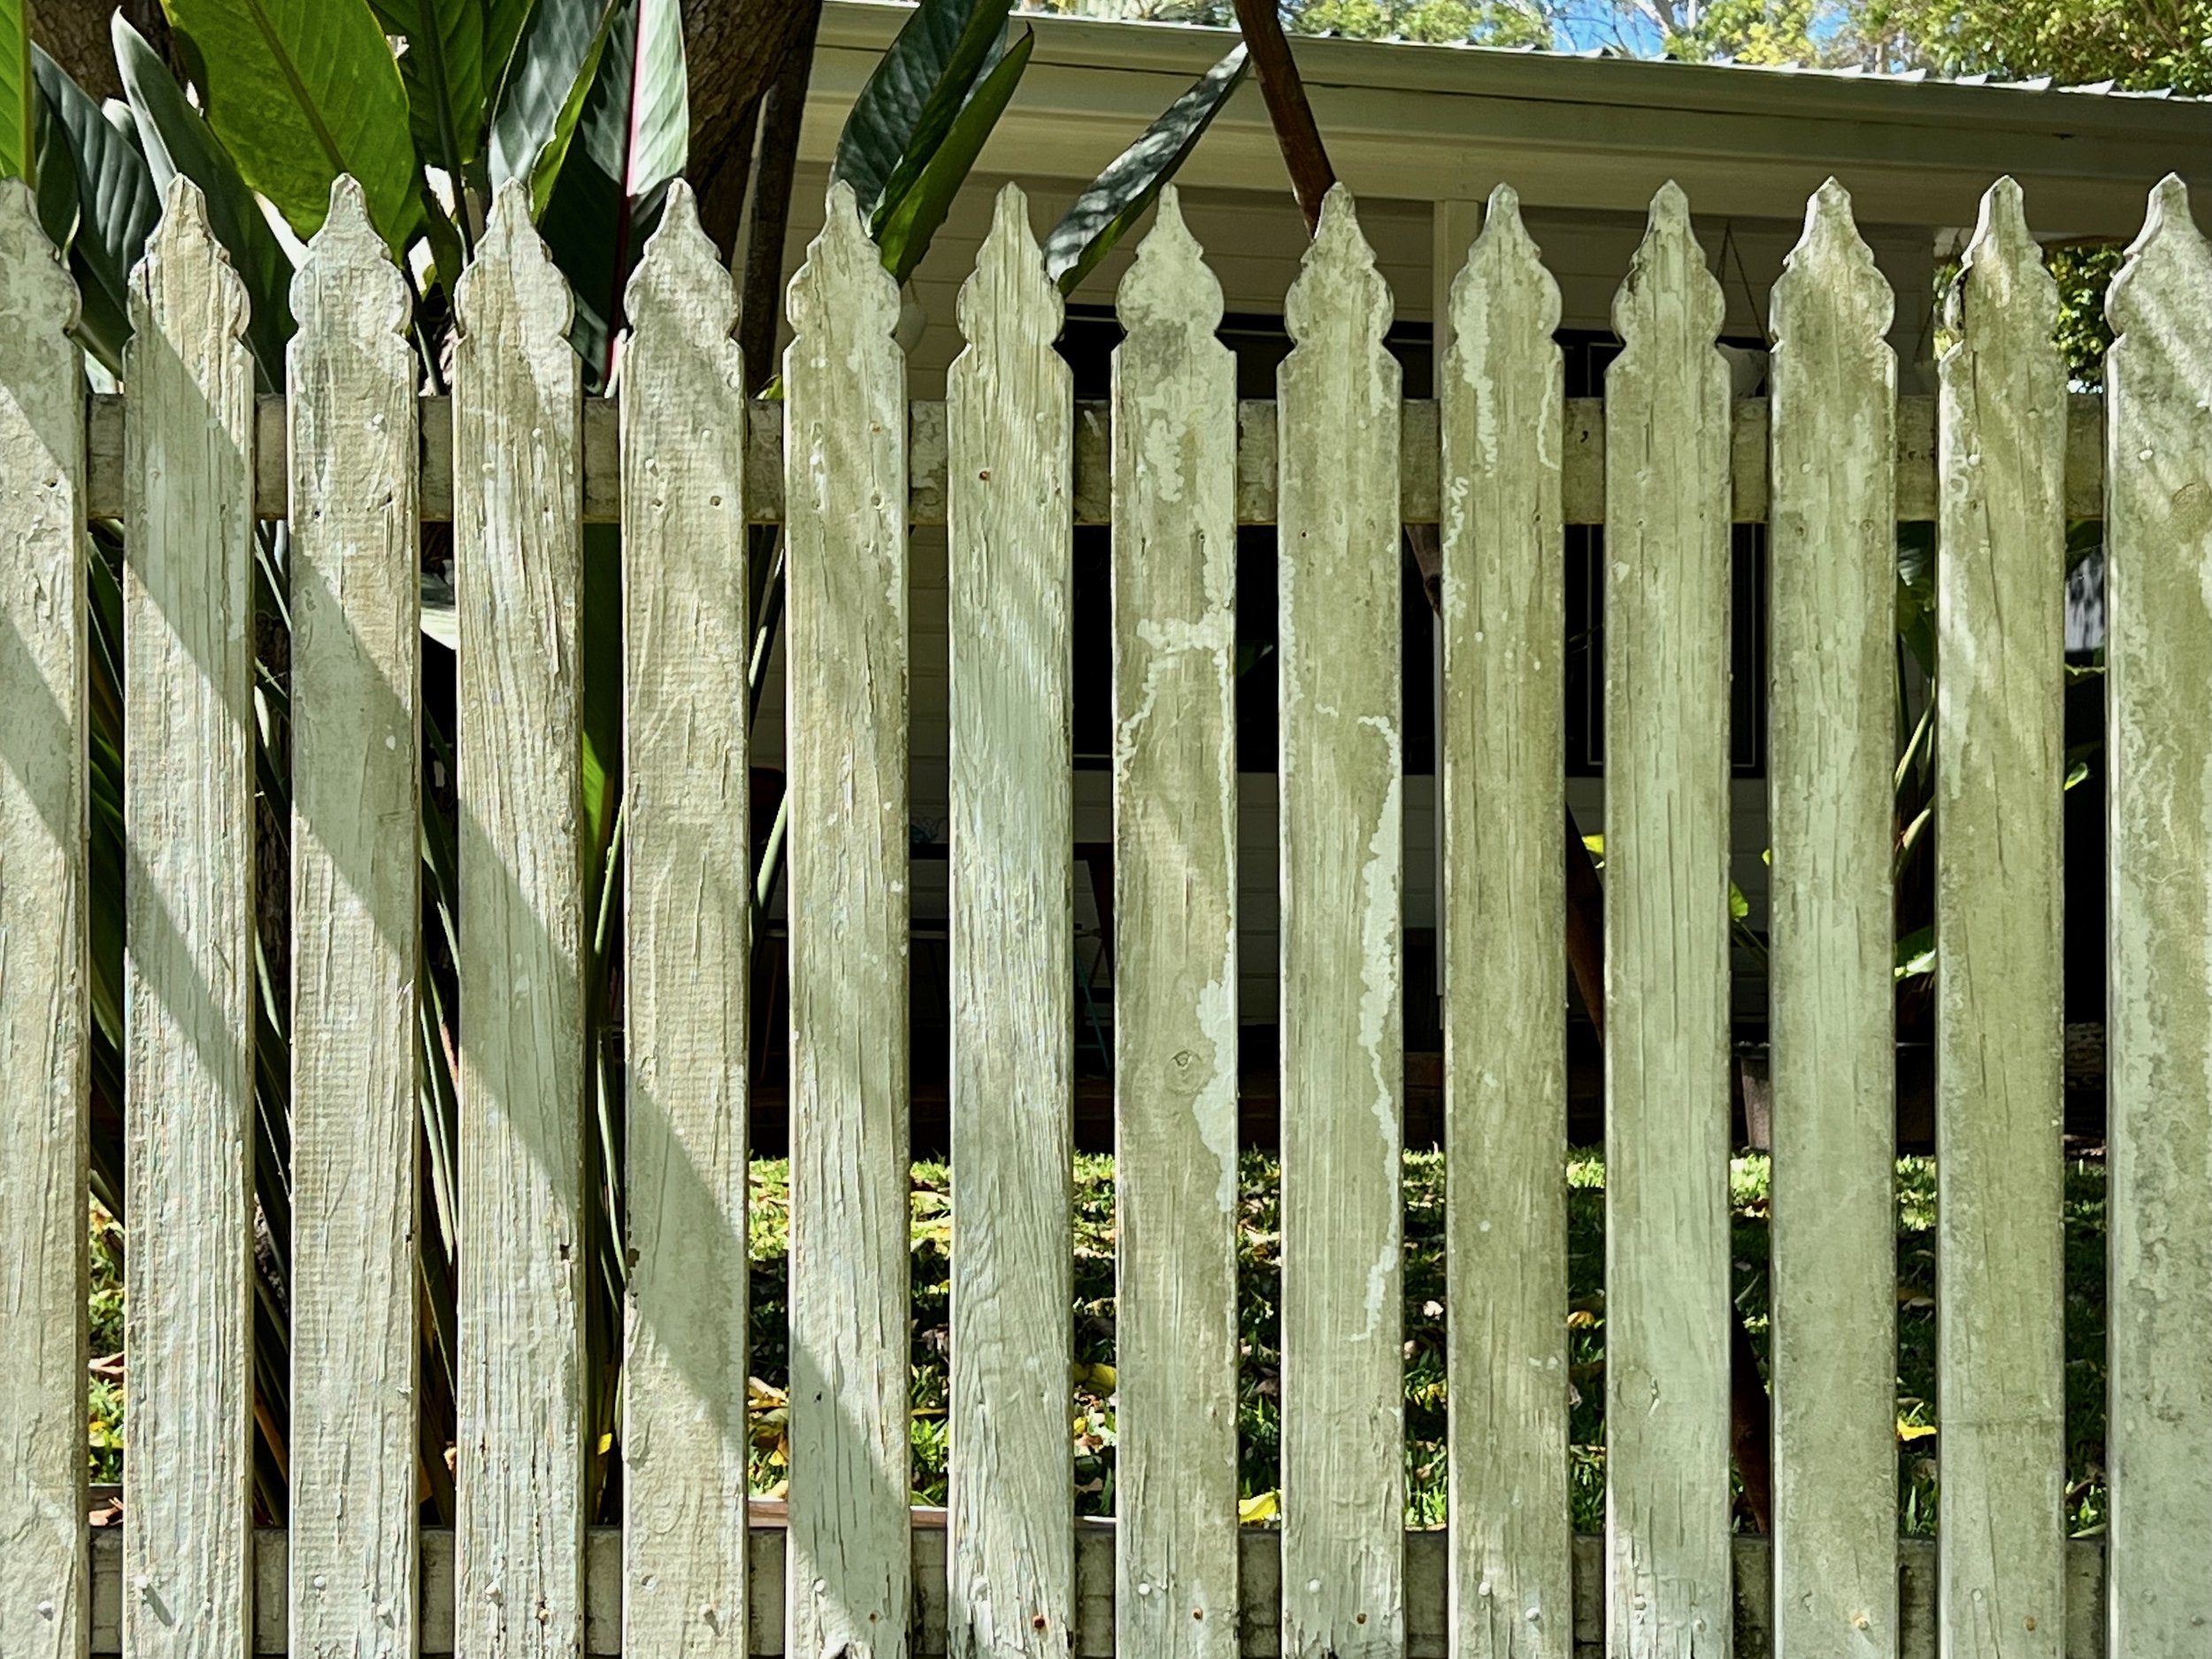
REPAINT A PICKET FENCE WITH MINIMUM EFFORT
Natasha Dickins
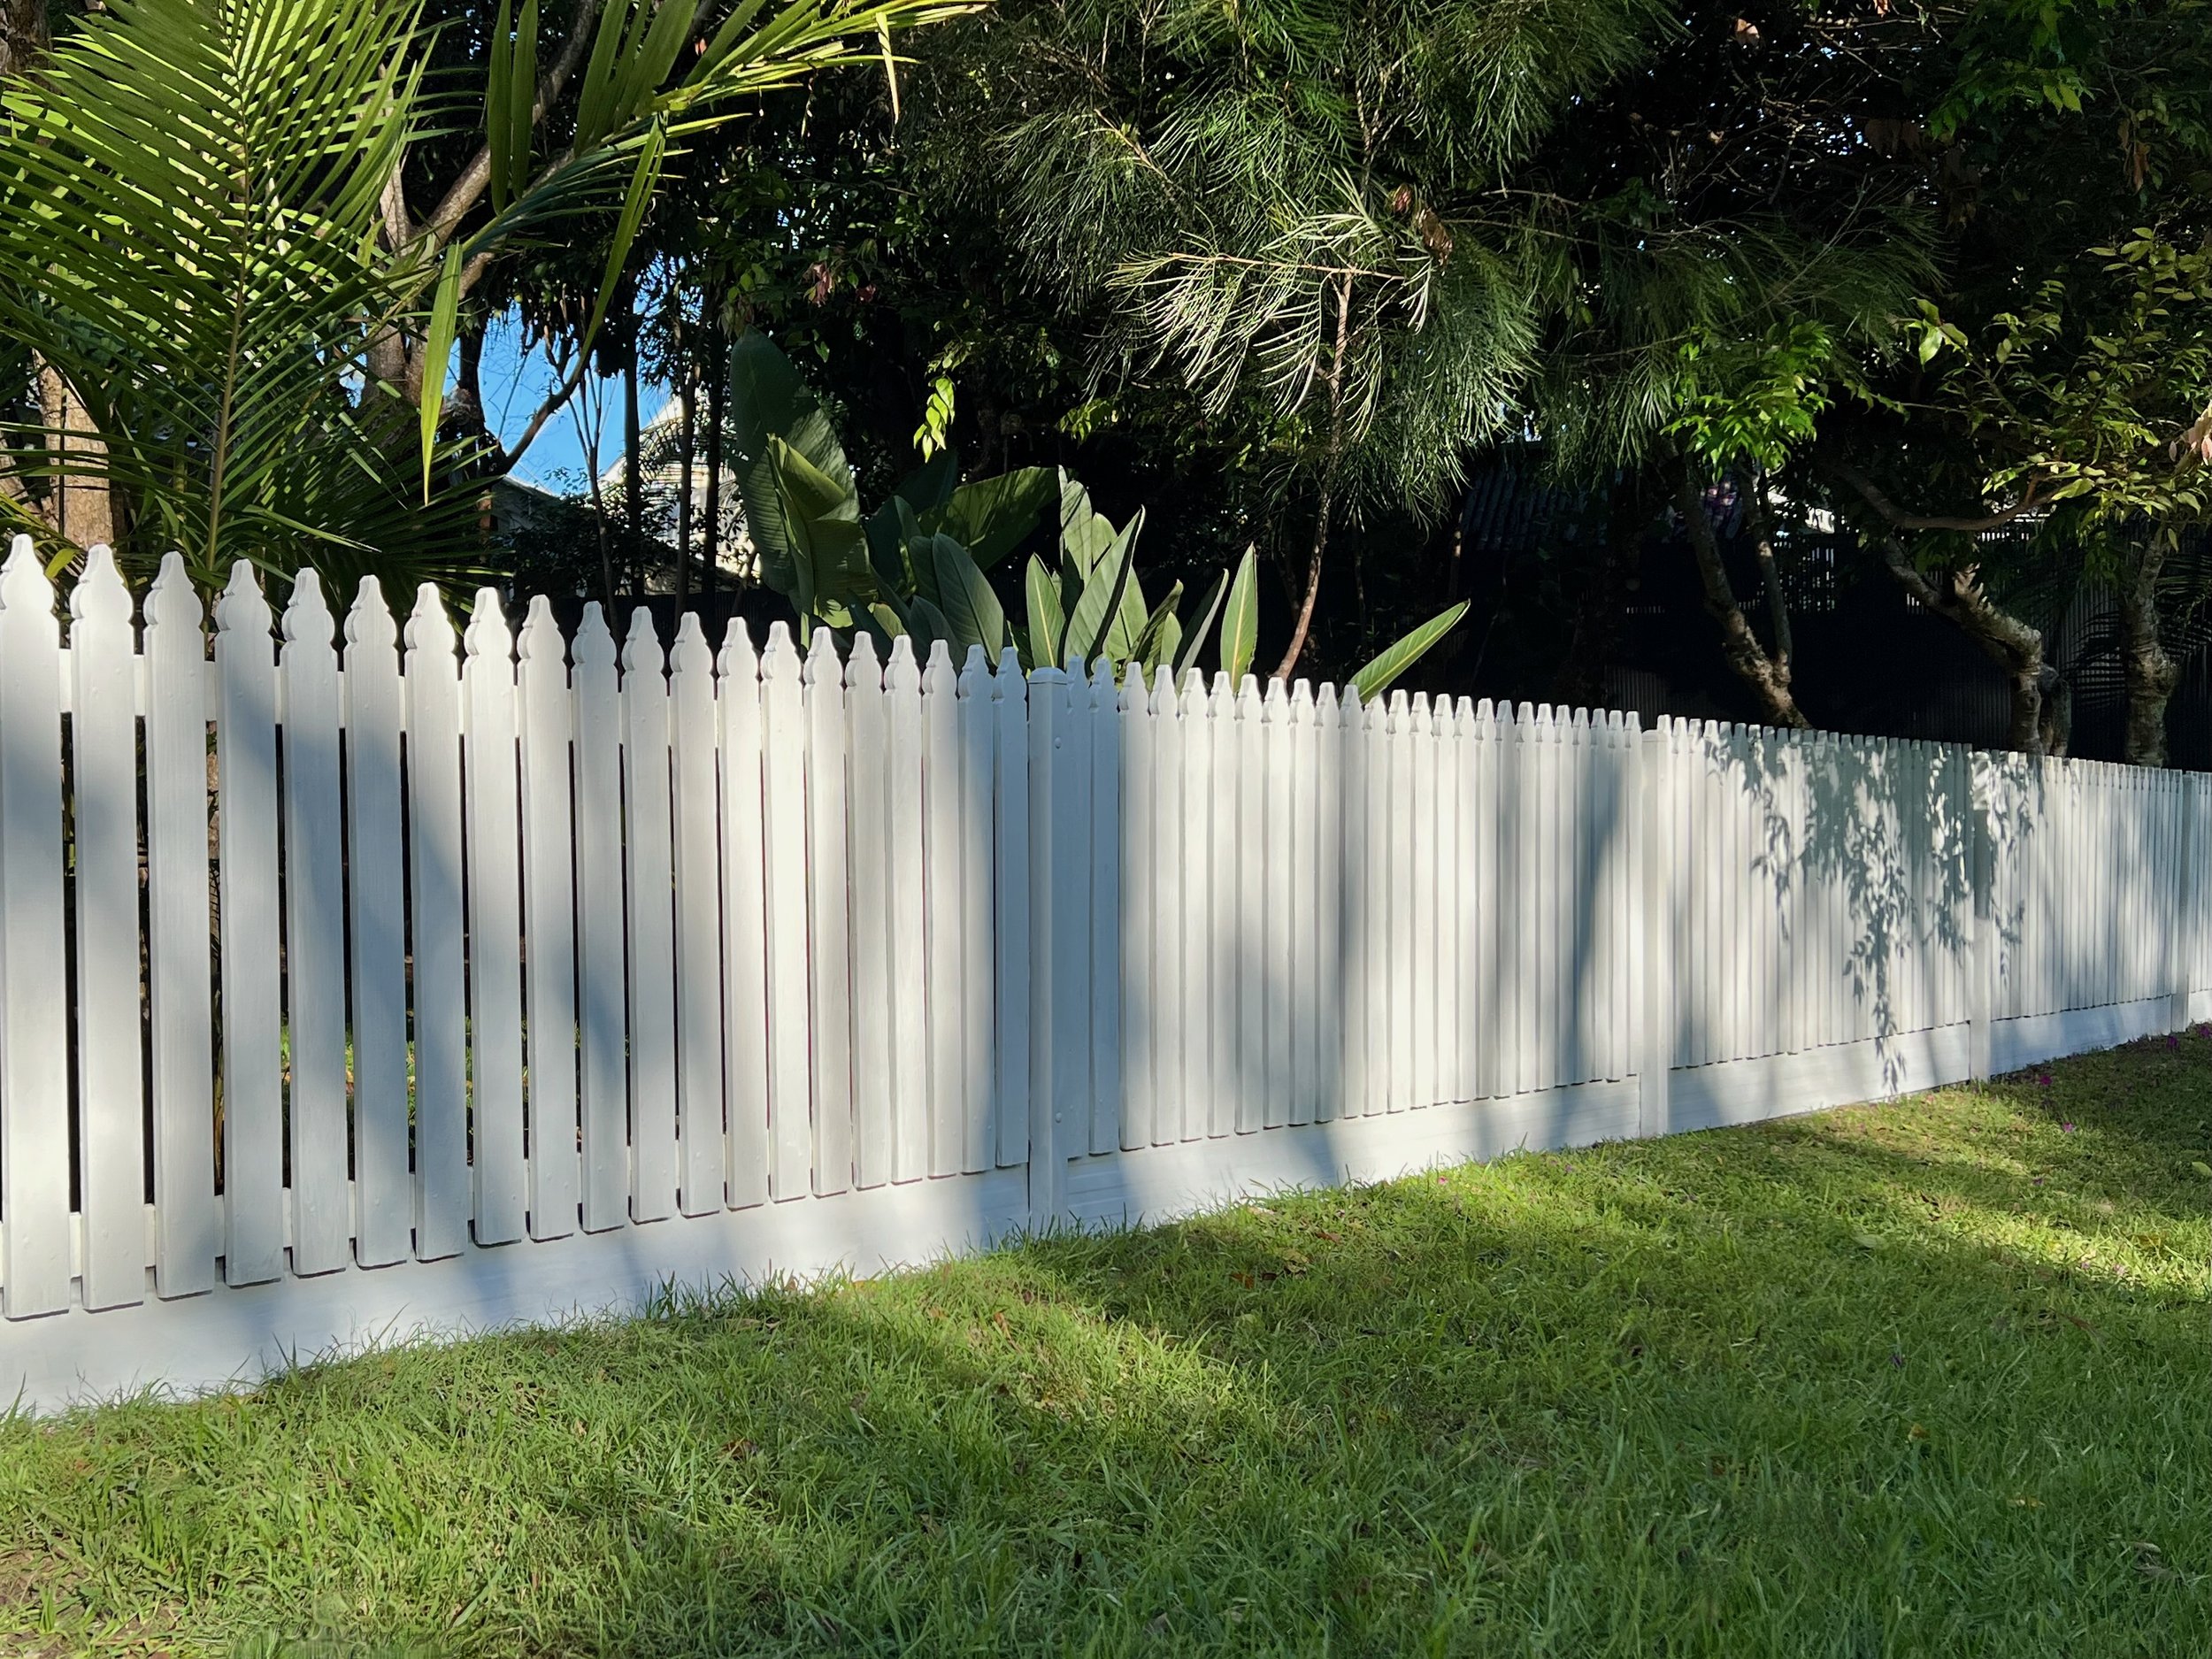
I transformed this picket fence from weathered to wow in a weekend using products especially designed to take the effort out of painting.
While it took me just a couple of hours to do the actual DIY, spreading this project over a couple of days allowed the timber dry out after cleaning and let each coat of paint dry thoroughly.
“It takes just five simple steps to transform a picket fence with minimum effort.”

Here’s what I used…
• Pressure washer
• 80mm 2-in-1 patcher scraper
• Exterior filler
• 105mm x 265mm large hand sander
• 115mm-wide painter’s sandpaper in 180-grit
• 4.6L painter’s bucket
• 50mm sash cutter
• Drop cloth
• Picket fence and post roller
• 230mm deep tray
• Disposable liner
• 50mm roller refills

➀ CLEAN THE SURFACE
To get started, I used a pressure cleaner to wash down both sides of the pickets, moving the nozzle methodically up and down the rails. Then left the fence to dry thoroughly overnight.
TIP While this is quickest way to remove cobwebs and dirt build-up, it can remove more loose paint than you need. Do an out-of sight test, adjusting the pressure to suit, or move the nozzle further away from the surface.

➁ PATCH HOLES
Working along the pickets, I checked for holes and used an exterior filler with an 80mm 2-in-1 patcher scraper to smooth over them and scrape off the excess.
I also scraped off any flaking paint and stubborn sections of dirt.
TIP Filler lightens as it dries, so it’s ready to sand when the patch is all one colour and doesn’t feel spongey. On a warm day it won’t take long to cure.

➂ SAND TO SMOOTH
Using a large hand sander, I did a quick once-over with 180-grit sandpaper to smooth the filled holes and the front of each picket.
TIP To fit sandpaper, loosen the wing nuts of the sander, slip one end under a metal bracket and tighten the nut. Cut the paper to fit into the opposite bracket and tighten.
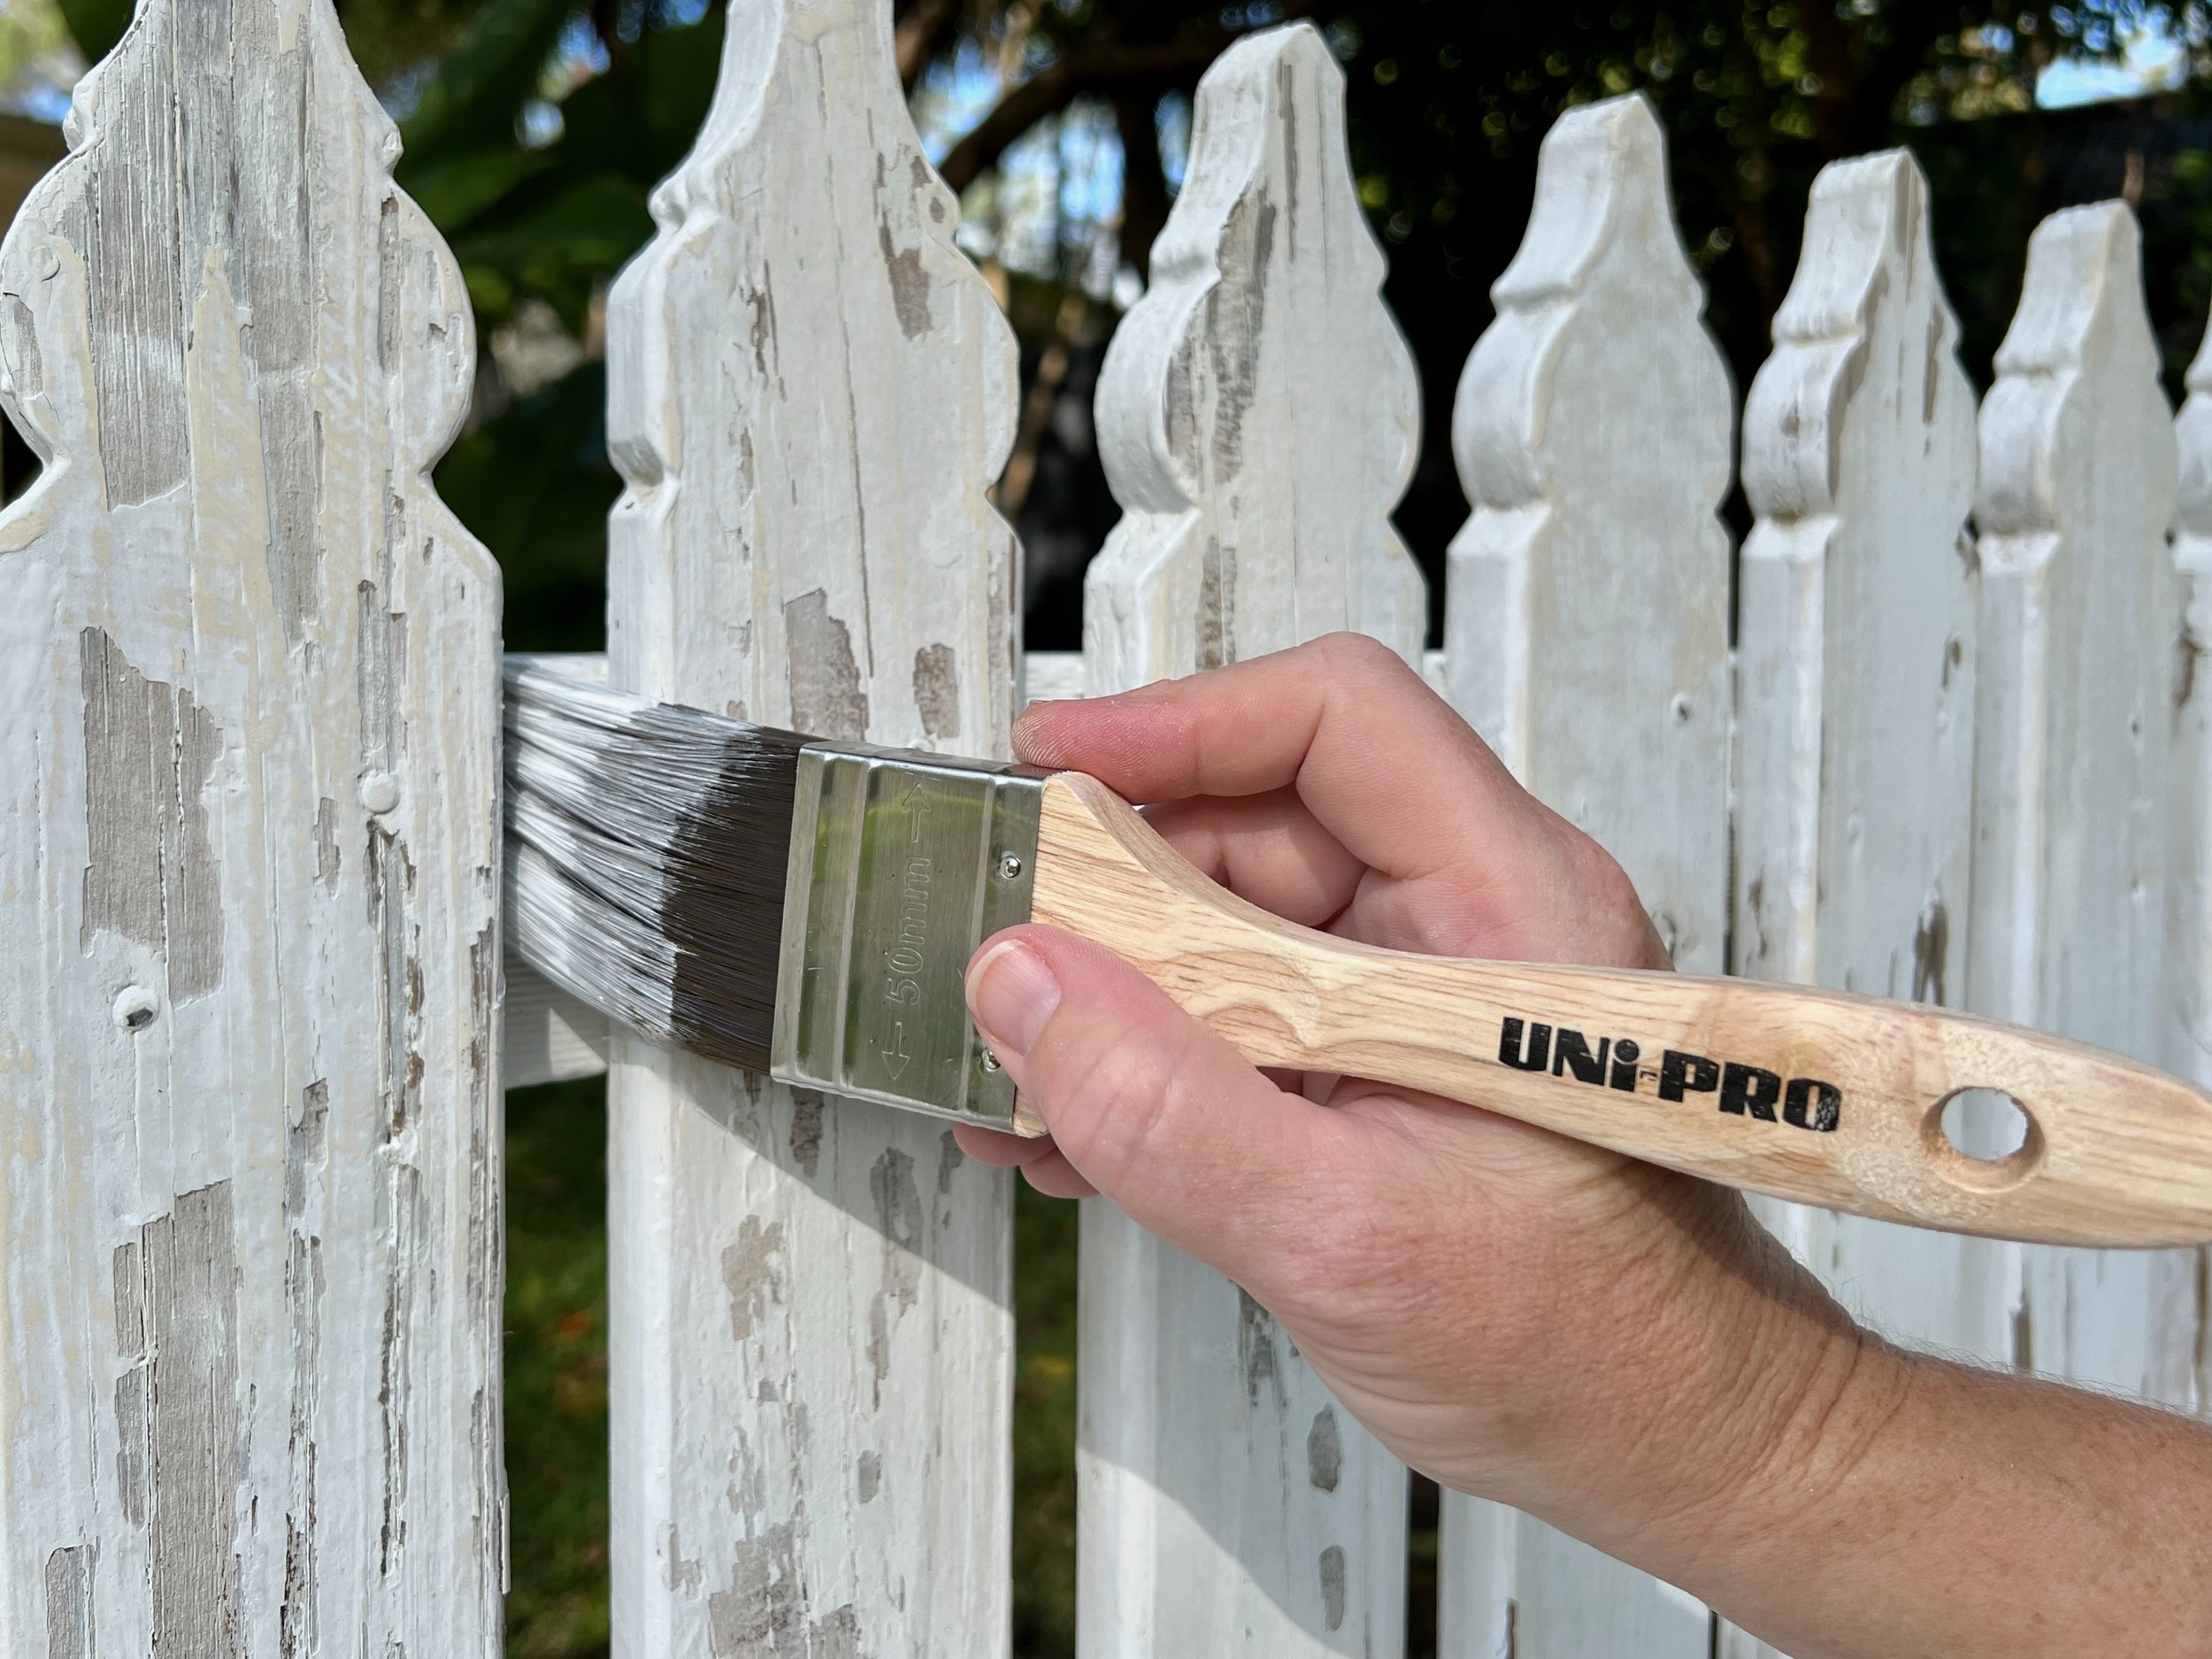

➃ CUT IN WITH A BRUSH
Then I used a 50mm sash cutter to dab into the gaps between the pickets and paint along the top and base rails, also painting around the profiles. I finished each gap by brushing along the bottom to catch any drips before moving on to the next.
TIP Dipping directly into the tin can contaminate any leftover paint, so mix paint thoroughly before pouring workable amounts into a smaller container or tray, and refill as needed. I used a 4.6L painter’s bucket with a 3-in-1 Magnetic Brush Clip that holds the brush between painting stints so it simply drips back into the paint.

➄ ROLL ON THE PAINT
I spread a drop sheet along the front of the fence, then used a picket fence and post roller to halve my painting time by coating the front and edges of the pickets at the same time.
TIP To use, hold the roller flat and move it over the top of the pickets, then move the tip into the gap and roll downwards to paint the edges. Repeat for a second coat if needed.

HOW TO LOAD THE ROLLER…
Use a 230mm deep tray with disposable liner for an area big enough to move over the ridges in different directions.
Dip the sides in paint and run them up over the ridges to saturate and remove excess. Then dip the point in paint and move the roller sideways over the ridges.
TIP Replace covers of the picket fence and post roller with 50mm roller refills or simply use 100mm mini roller covers to paint larger pickets and posts.

Are you planning to paint a fence?
Tag me on your project and follow more of my DIY journey on Instagram for tool tips, home improvement and simple building projects.