Deck Screening
Natasha Dickins
After giving my deck an upgrade by resealing the boards and replacing the fascia, I knew it would benefit from screening for privacy and shade.
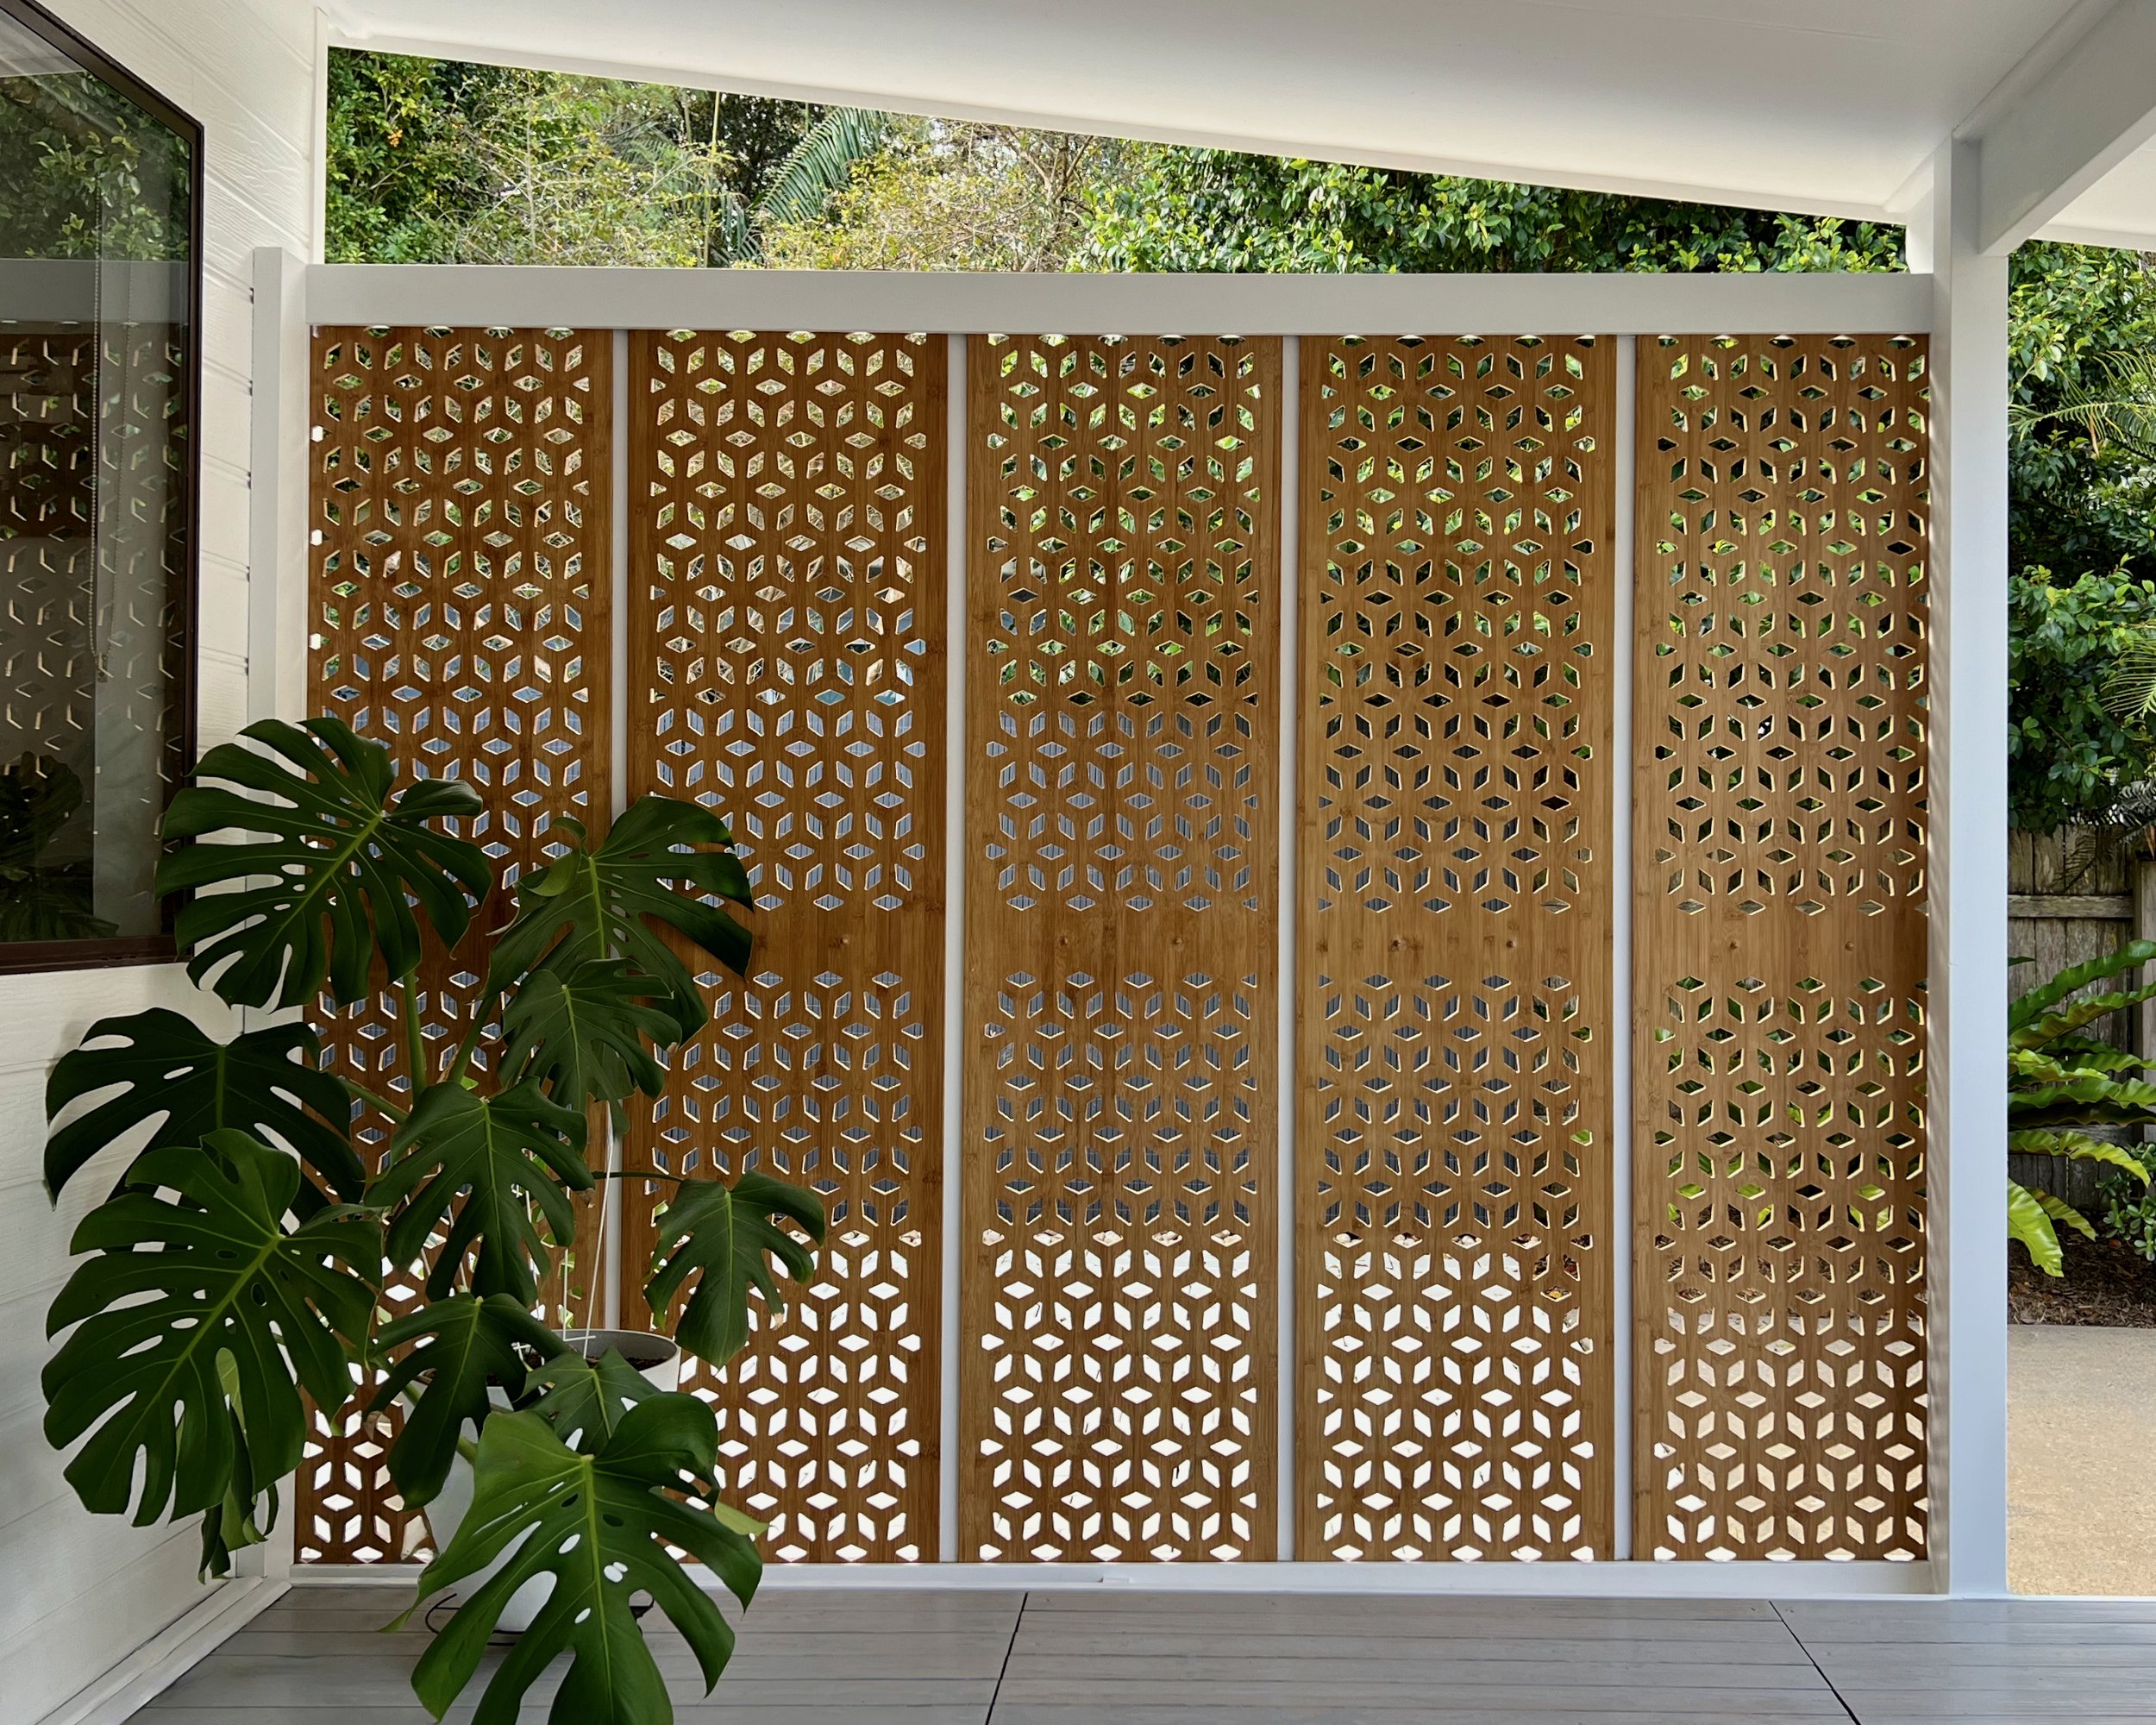
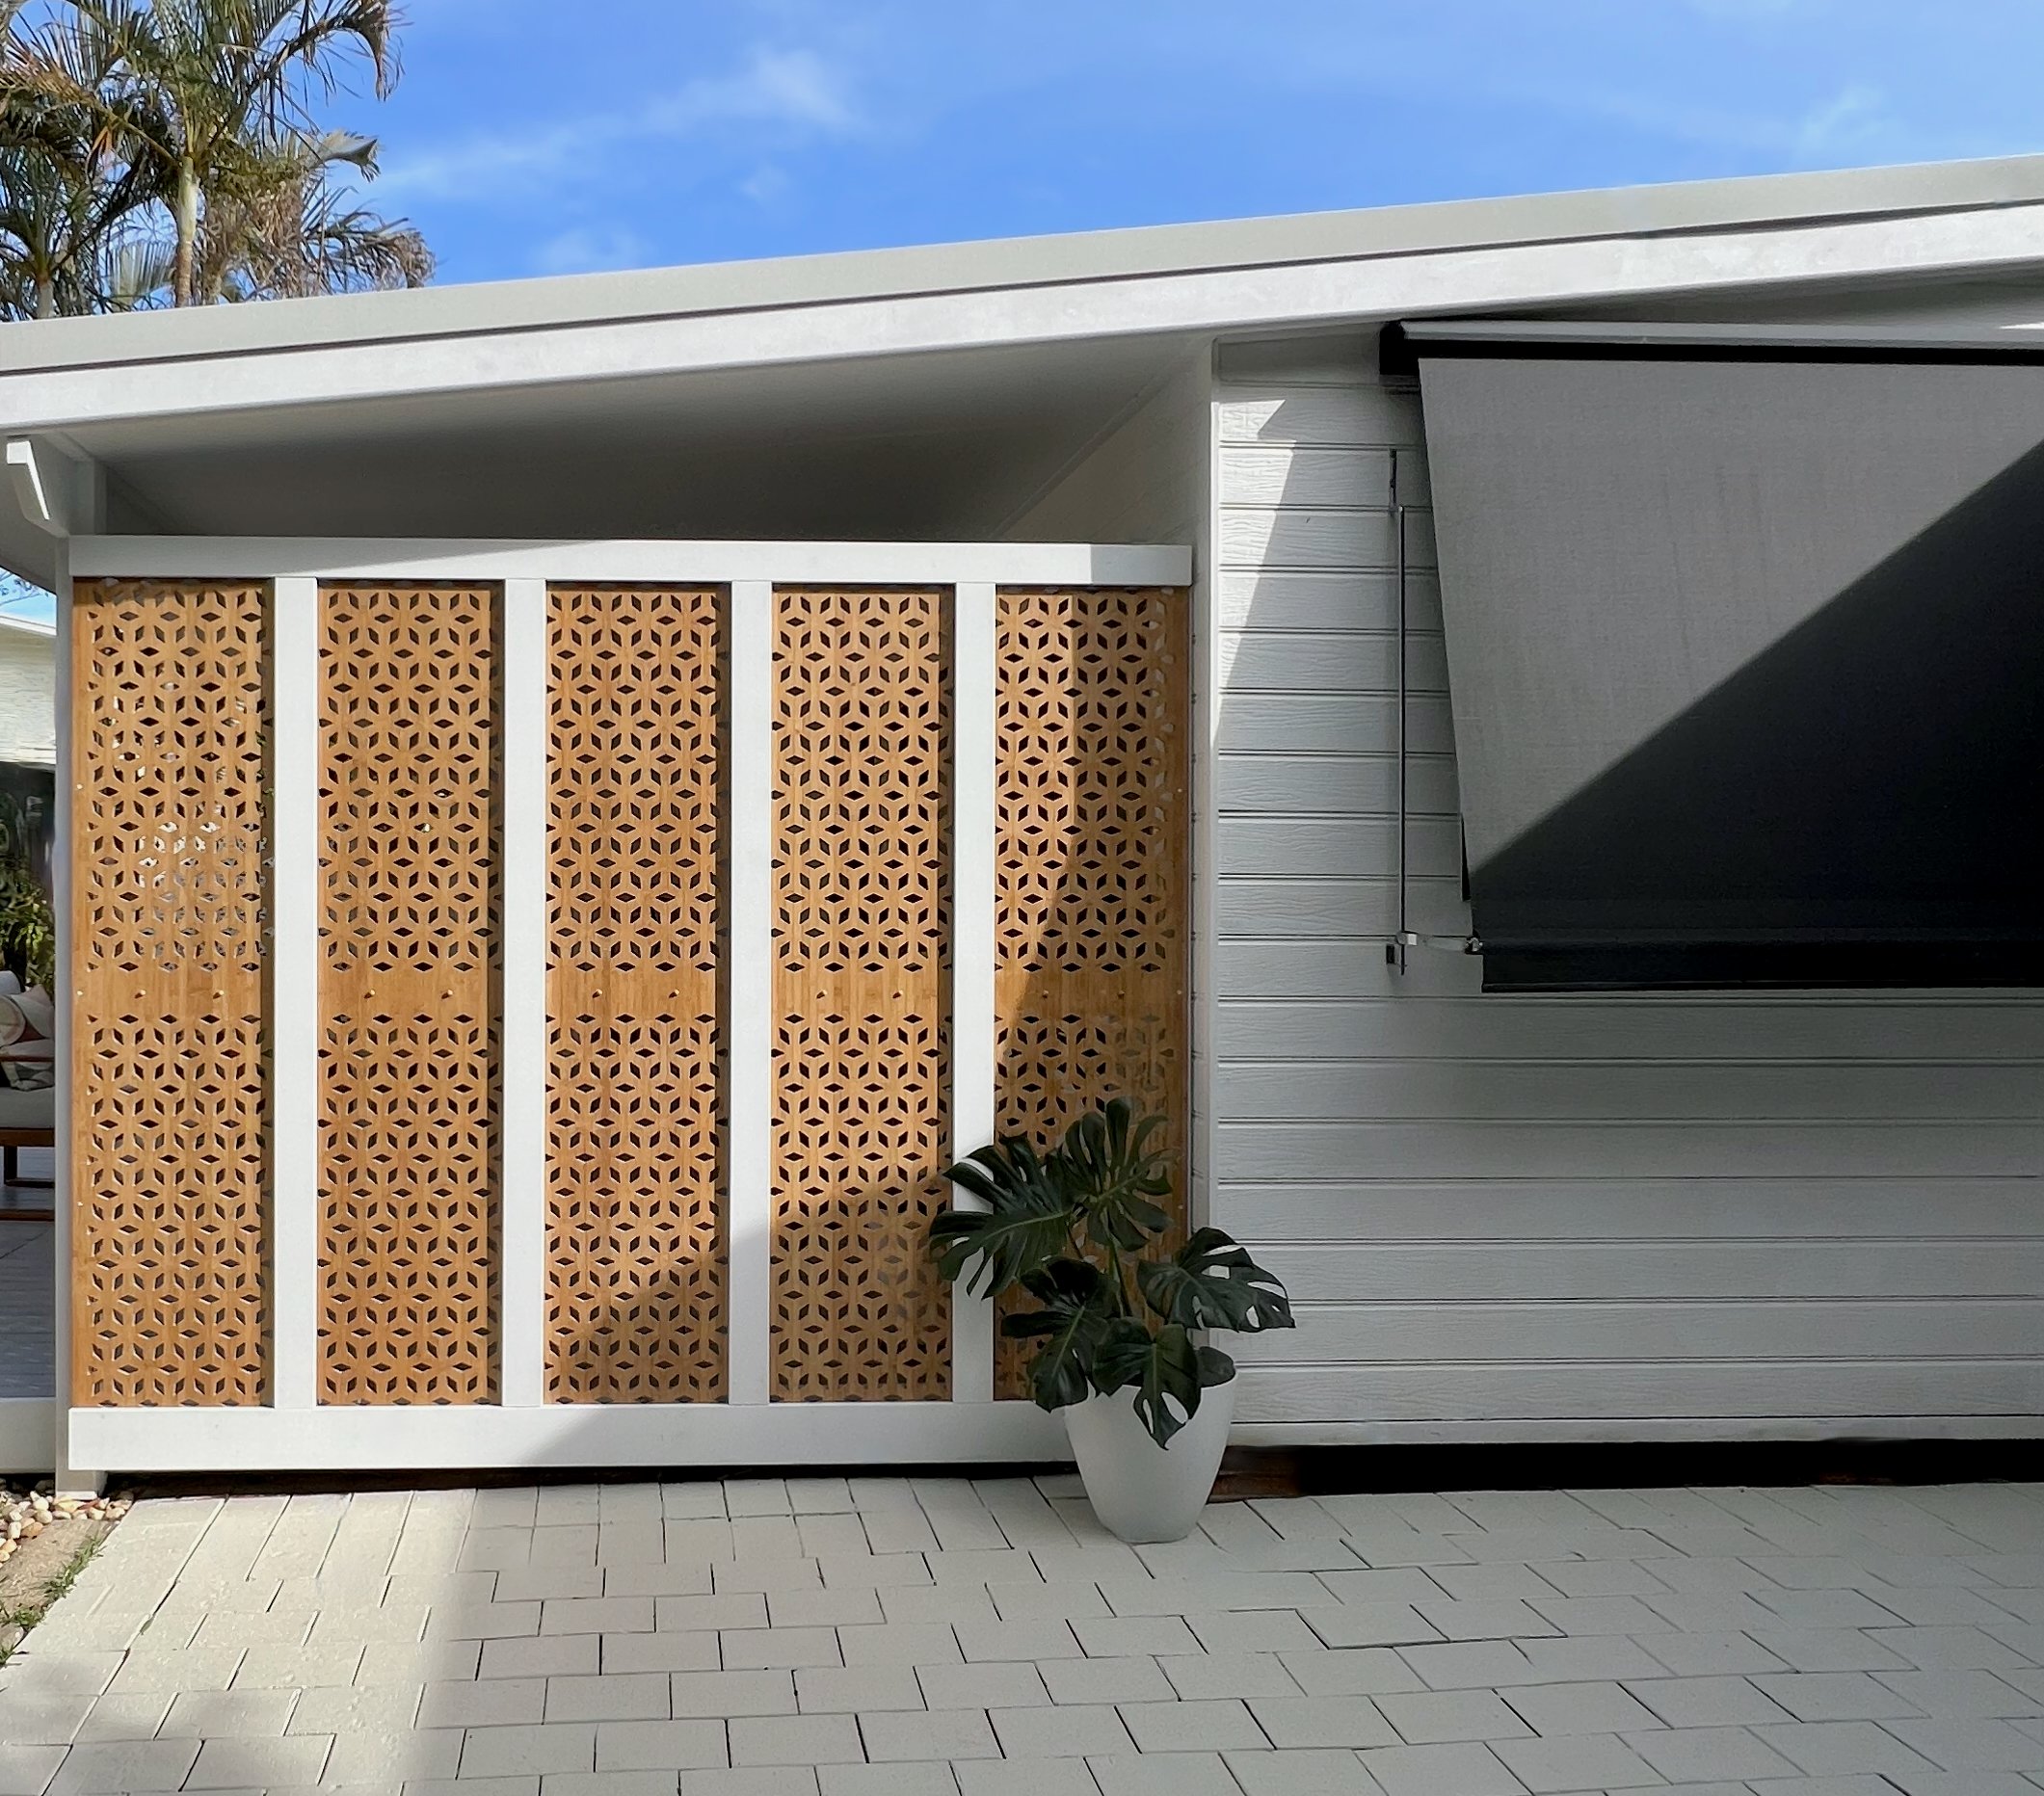
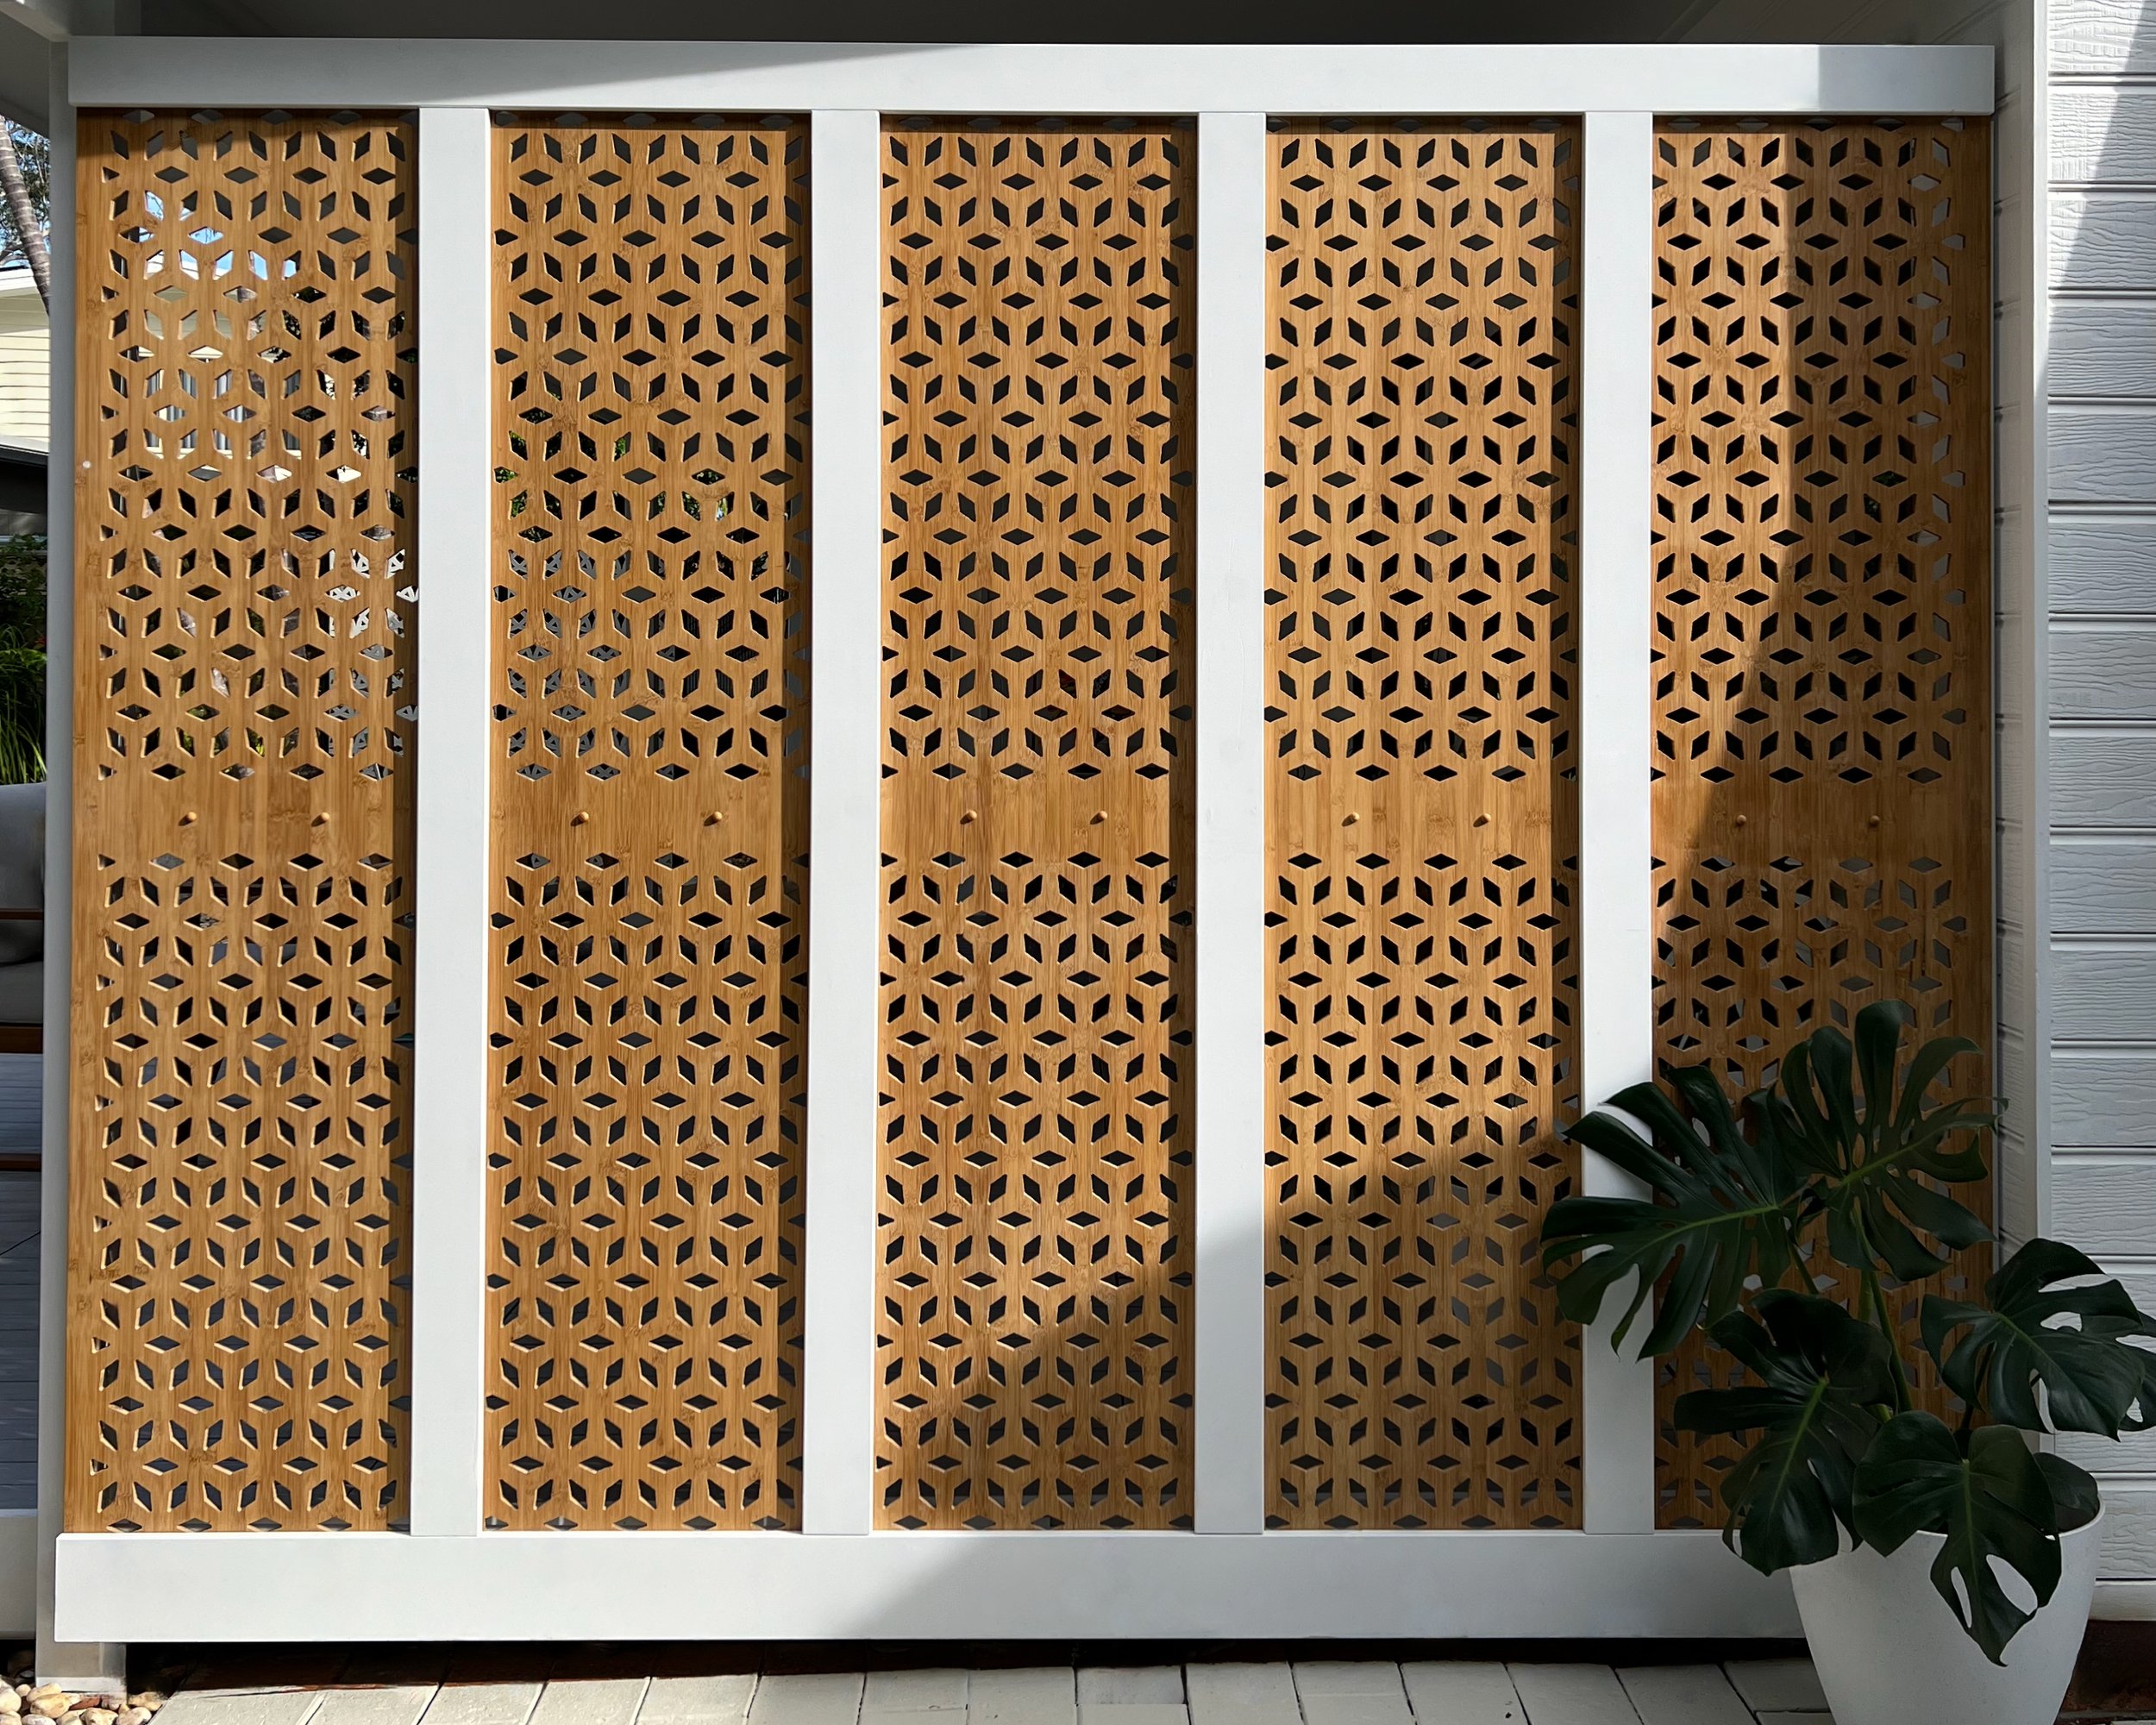
I had five bamboo panels from a previous project. Originally designed to be installed horizontally as fence extenders, hung vertically they transform my outdoor area into an entirely new room.
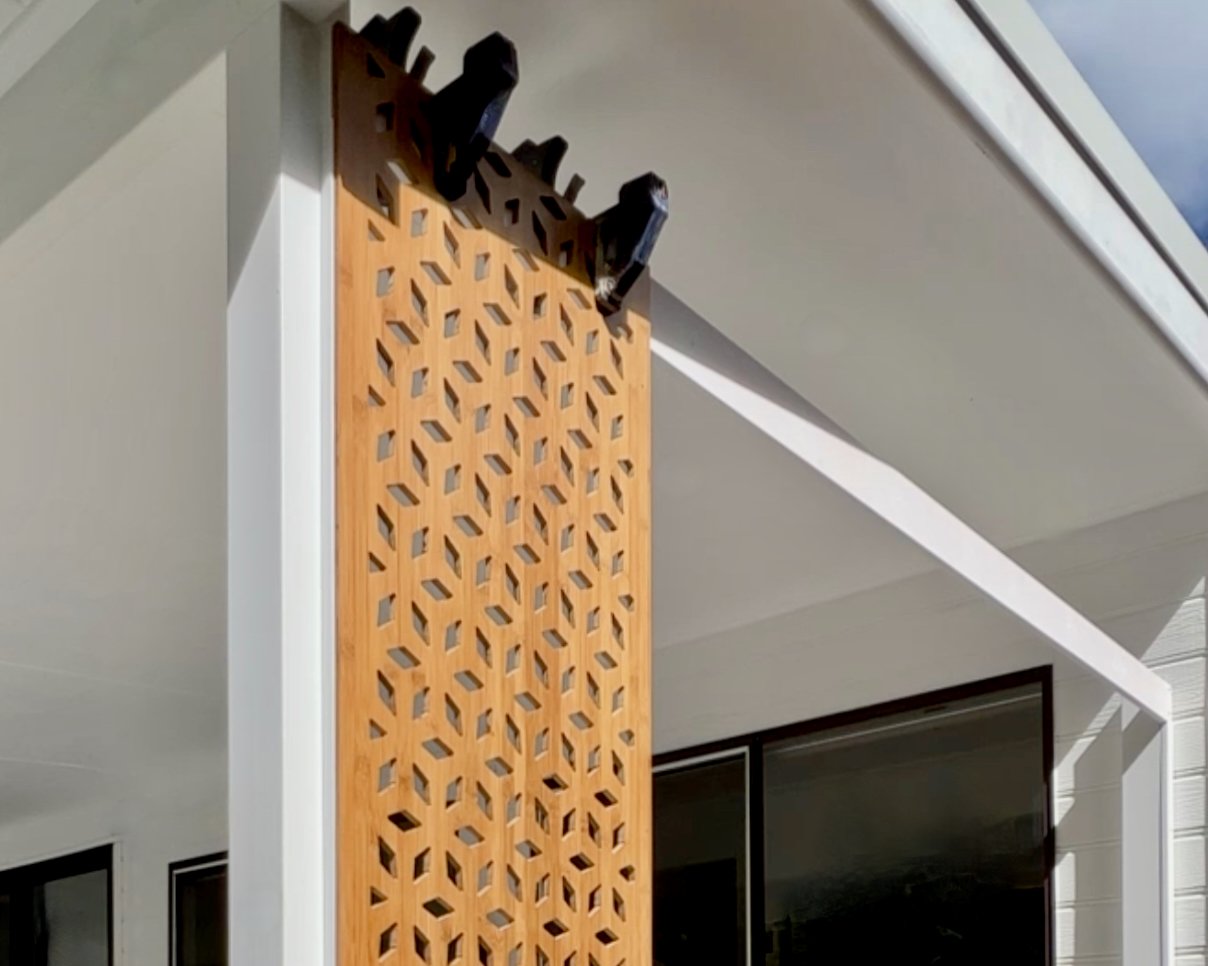
The screening is built from the back so the base lines up with the fascia. For fixing points, I used the corner roof post as one side and secured a second 90mm x 42mm post to the house wall with 75mm batten screws.
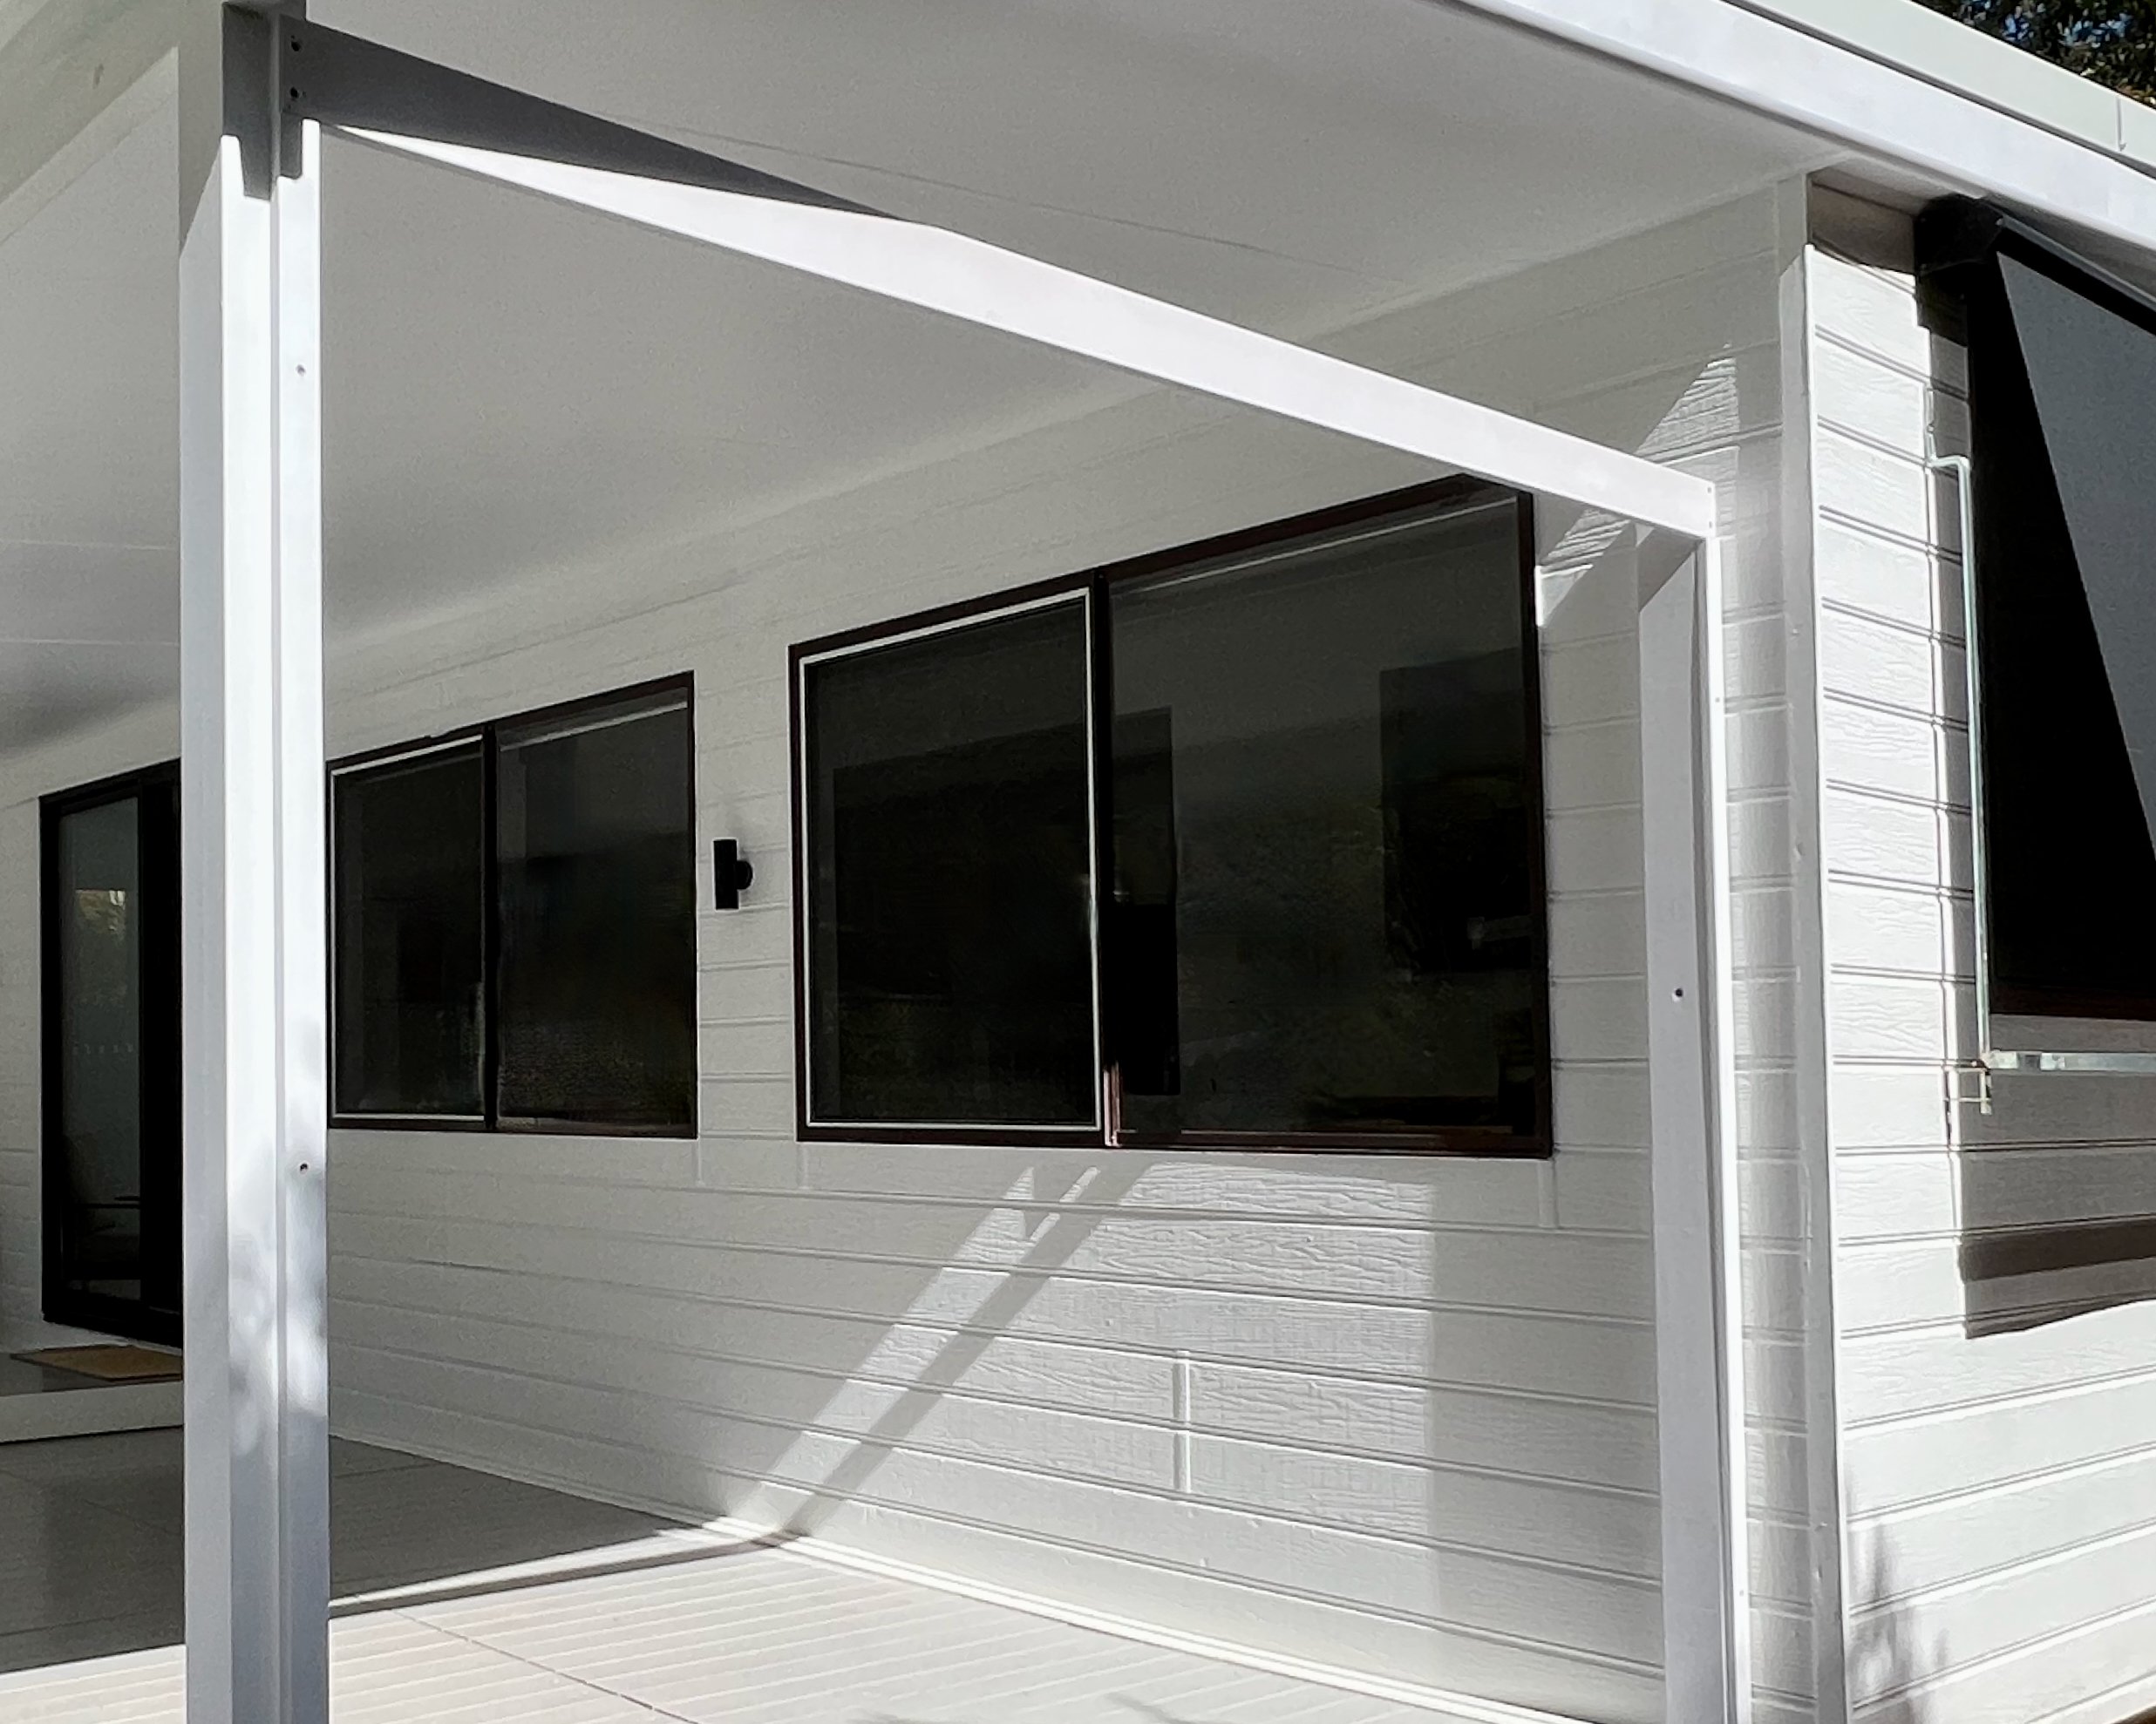
The panels are sandwiched between top and base rails at the front and back. The front frame has sides attached to the posts. The back frame has uprights covering the 30mm gaps between the bamboo panels. My finished screen is 2150mm high x 2620mm wide.
TIP To prevent bowing, I created extra support using an angle bracket and an offcut attached to the deck. The base rail is later screwed into this.
“I took five laser-cut bamboo fence extension panels, flipped them vertically, cut them down and sandwiched them between a painted frame to create a built-in wall of screening.”
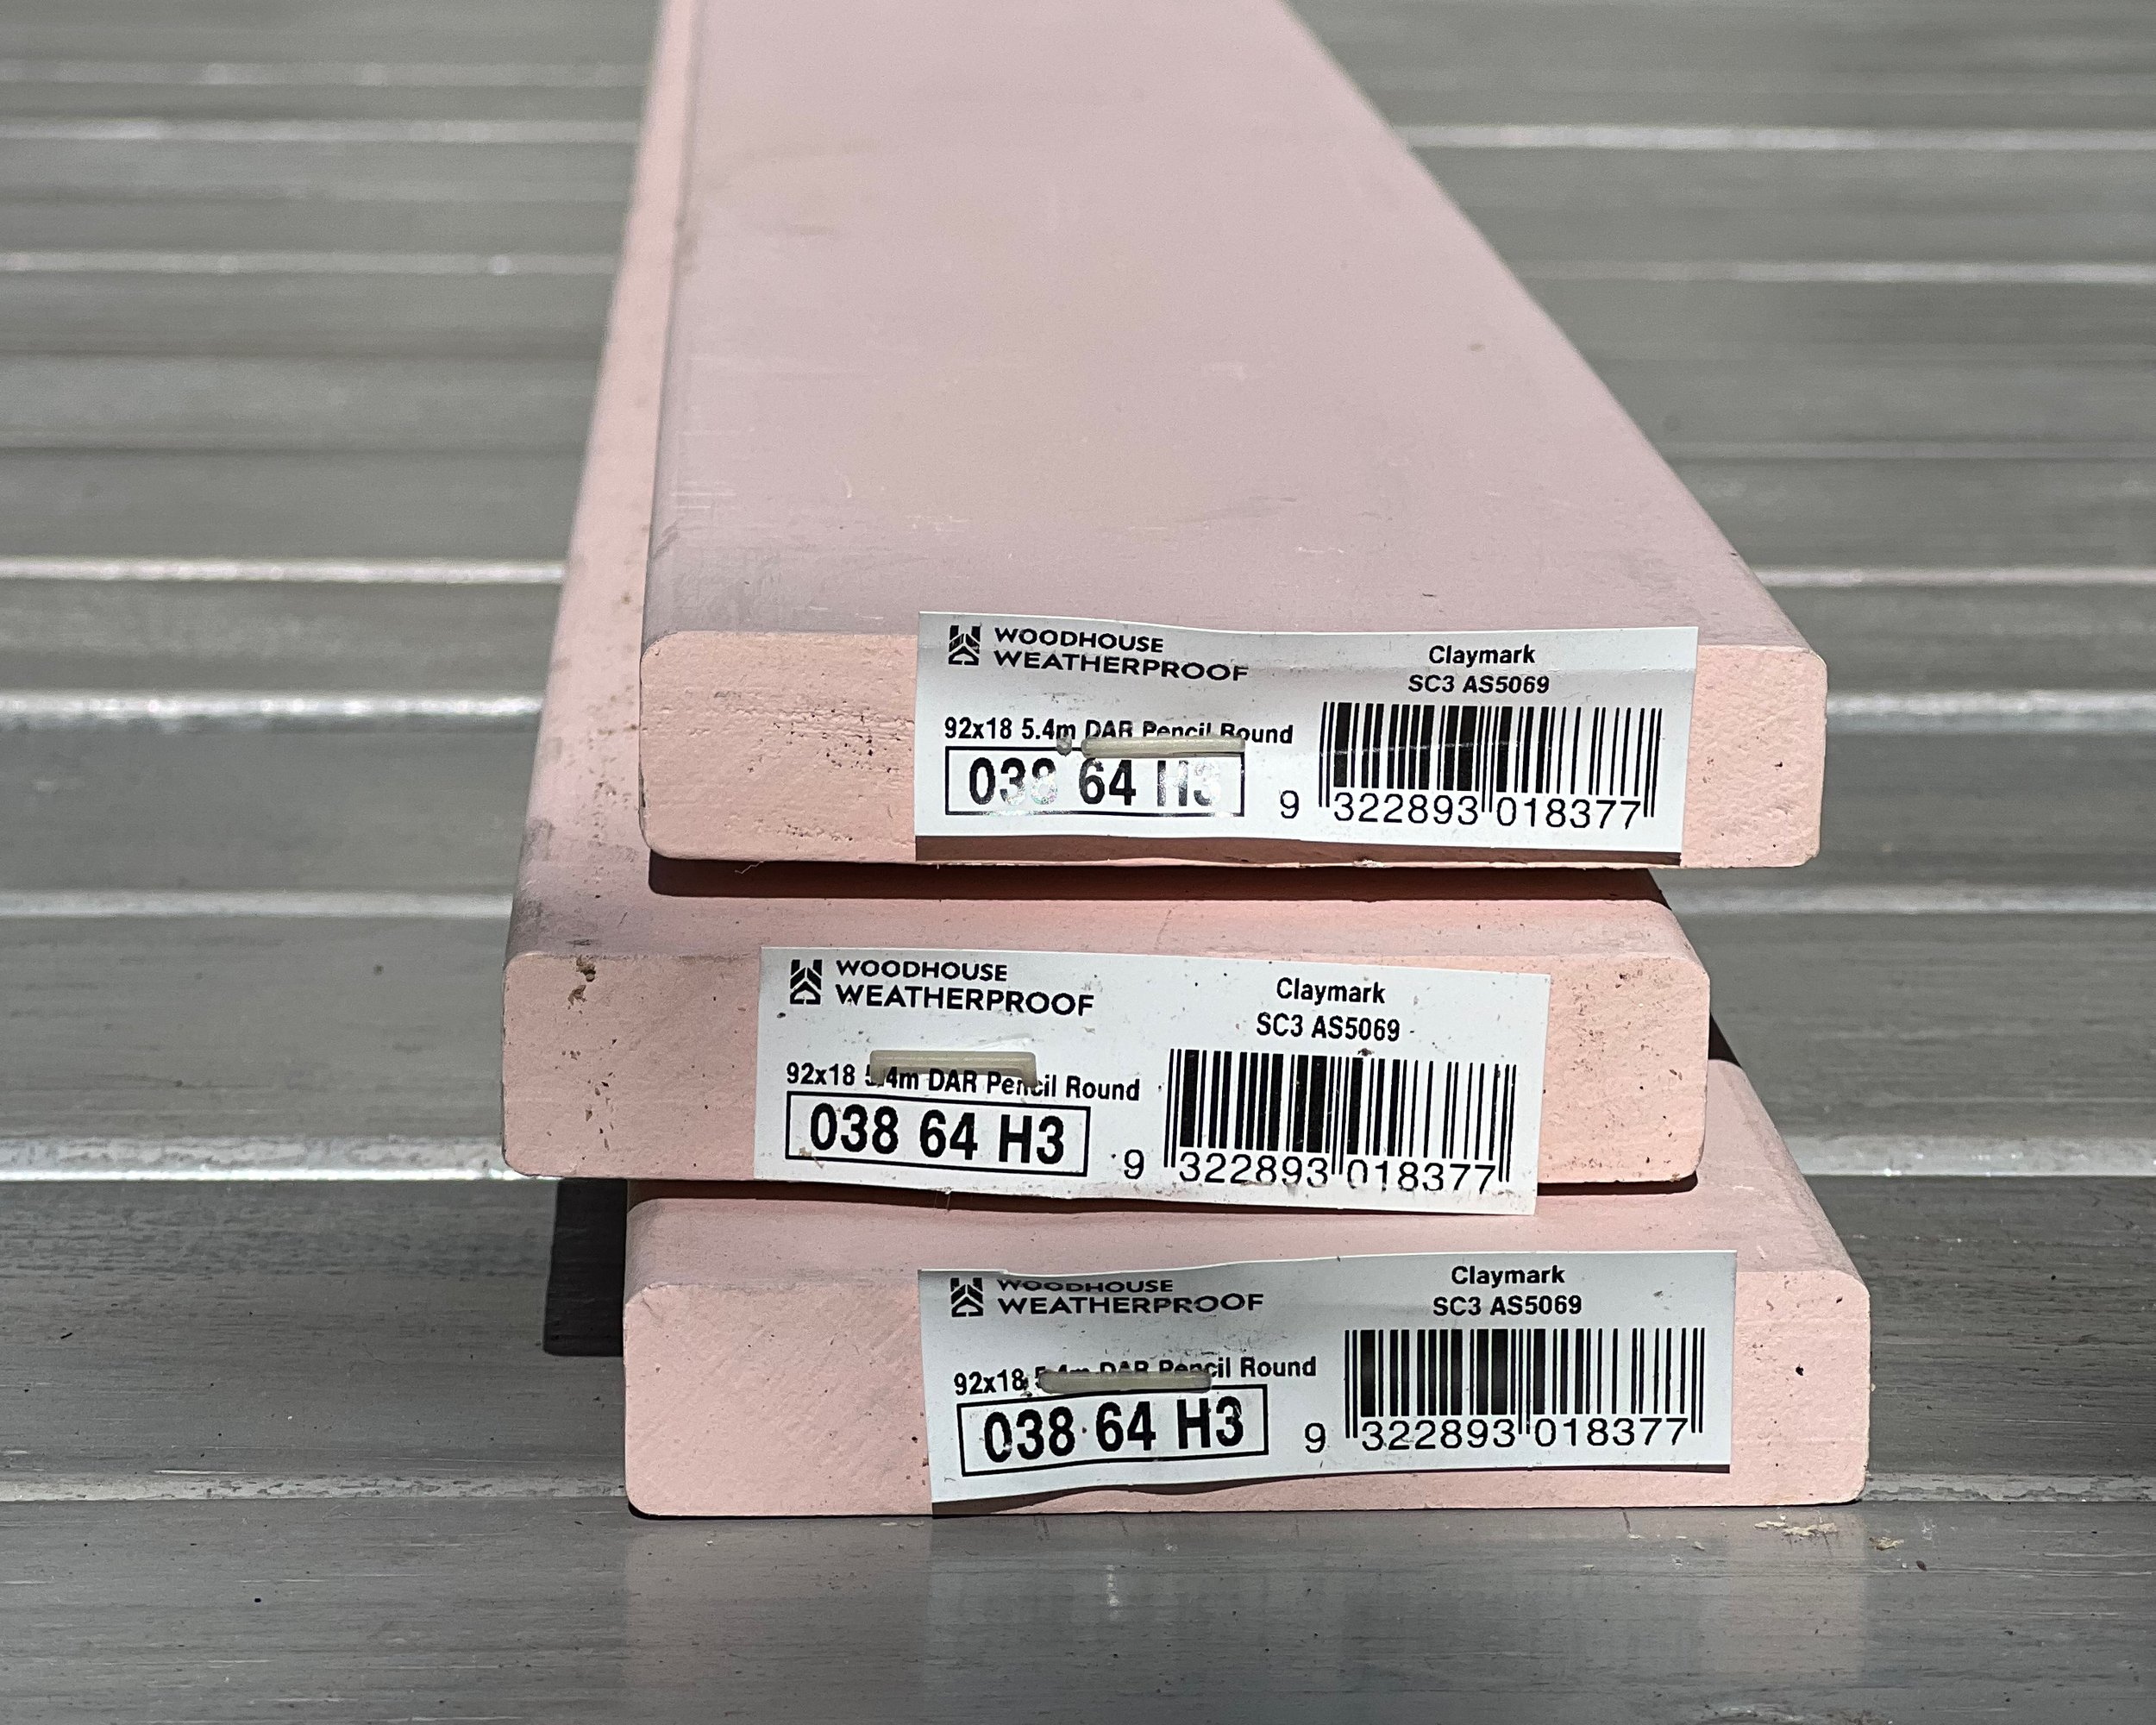
For maximum weatherproofing, I used Woodhouse Weatherproofed primed H3 LOSP treated pine for the frame and galvanised countersunk screws. I finished the panels in Monocel Gold Exterior Clear Varnish in Satin for a lightly lacquered finish.

I set my mitre saw to cut 5.4m lengths of primed pine of various widths…
• From 92mm x 18mm, four rails 2620mm long to span between the posts at the top and base, front and back.
• from 42mm x 18mm, two sides 1970mm long to fit the posts vertically between the front rails.
• From 92mm x 18mm, four uprights the same length (1970mm) to cover gaps between the panels at the back.
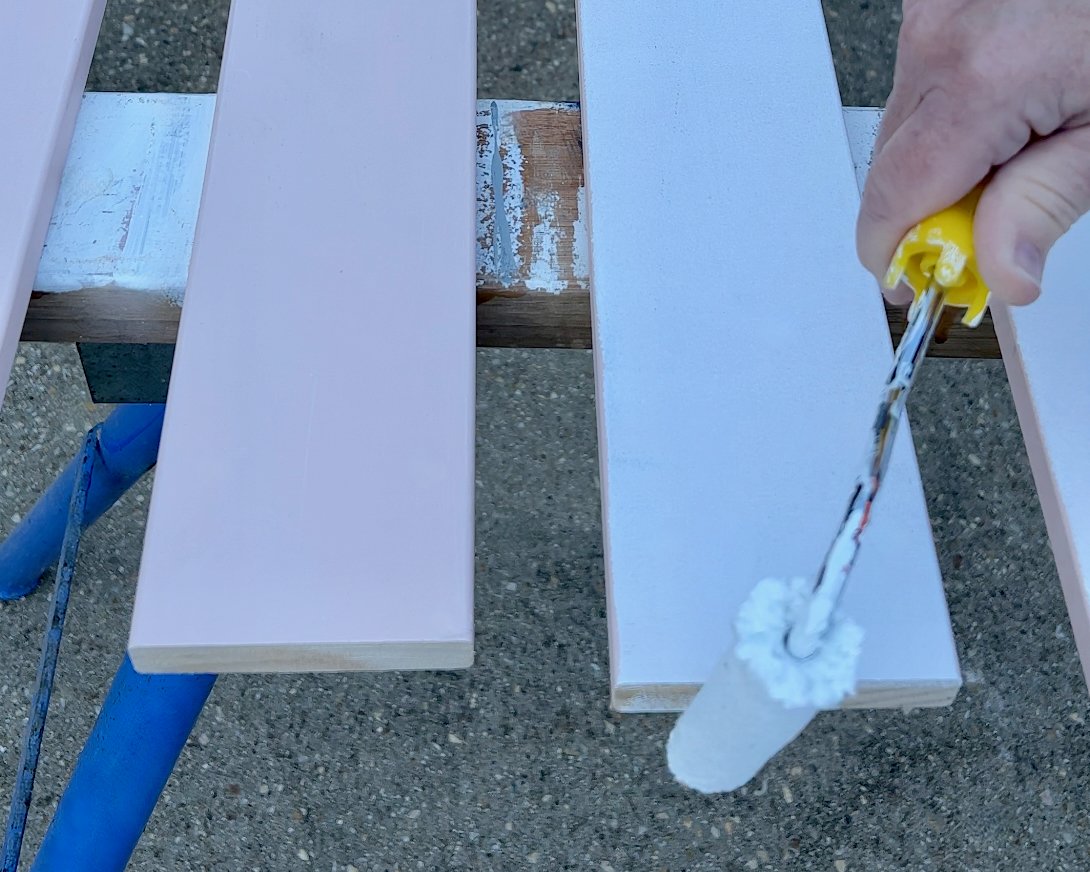
Before assembling the frame, I set out the pine pieces on sawhorses to apply two coats of exterior paint, making sure the ends were sealed.
To build the front frame I installed a rail against the posts just under the rafter, then added the two 42mm sides and a rail along the base, also securing it into the angle-bracket support attached to the deck.
TIP I pre-drilled with a 8G combination countersinking bit and secured this front part of the frame with 8G x 40mm galvanised countersunk screws.

I cut five 2400mm x 500mm bamboo fence extension panels with a track saw to match the height of the frame, trimming equally from both ends to keep the laser-cut pattern centred.
TIP Cut the first one and use it as a template to trim the others from the top and bottom.
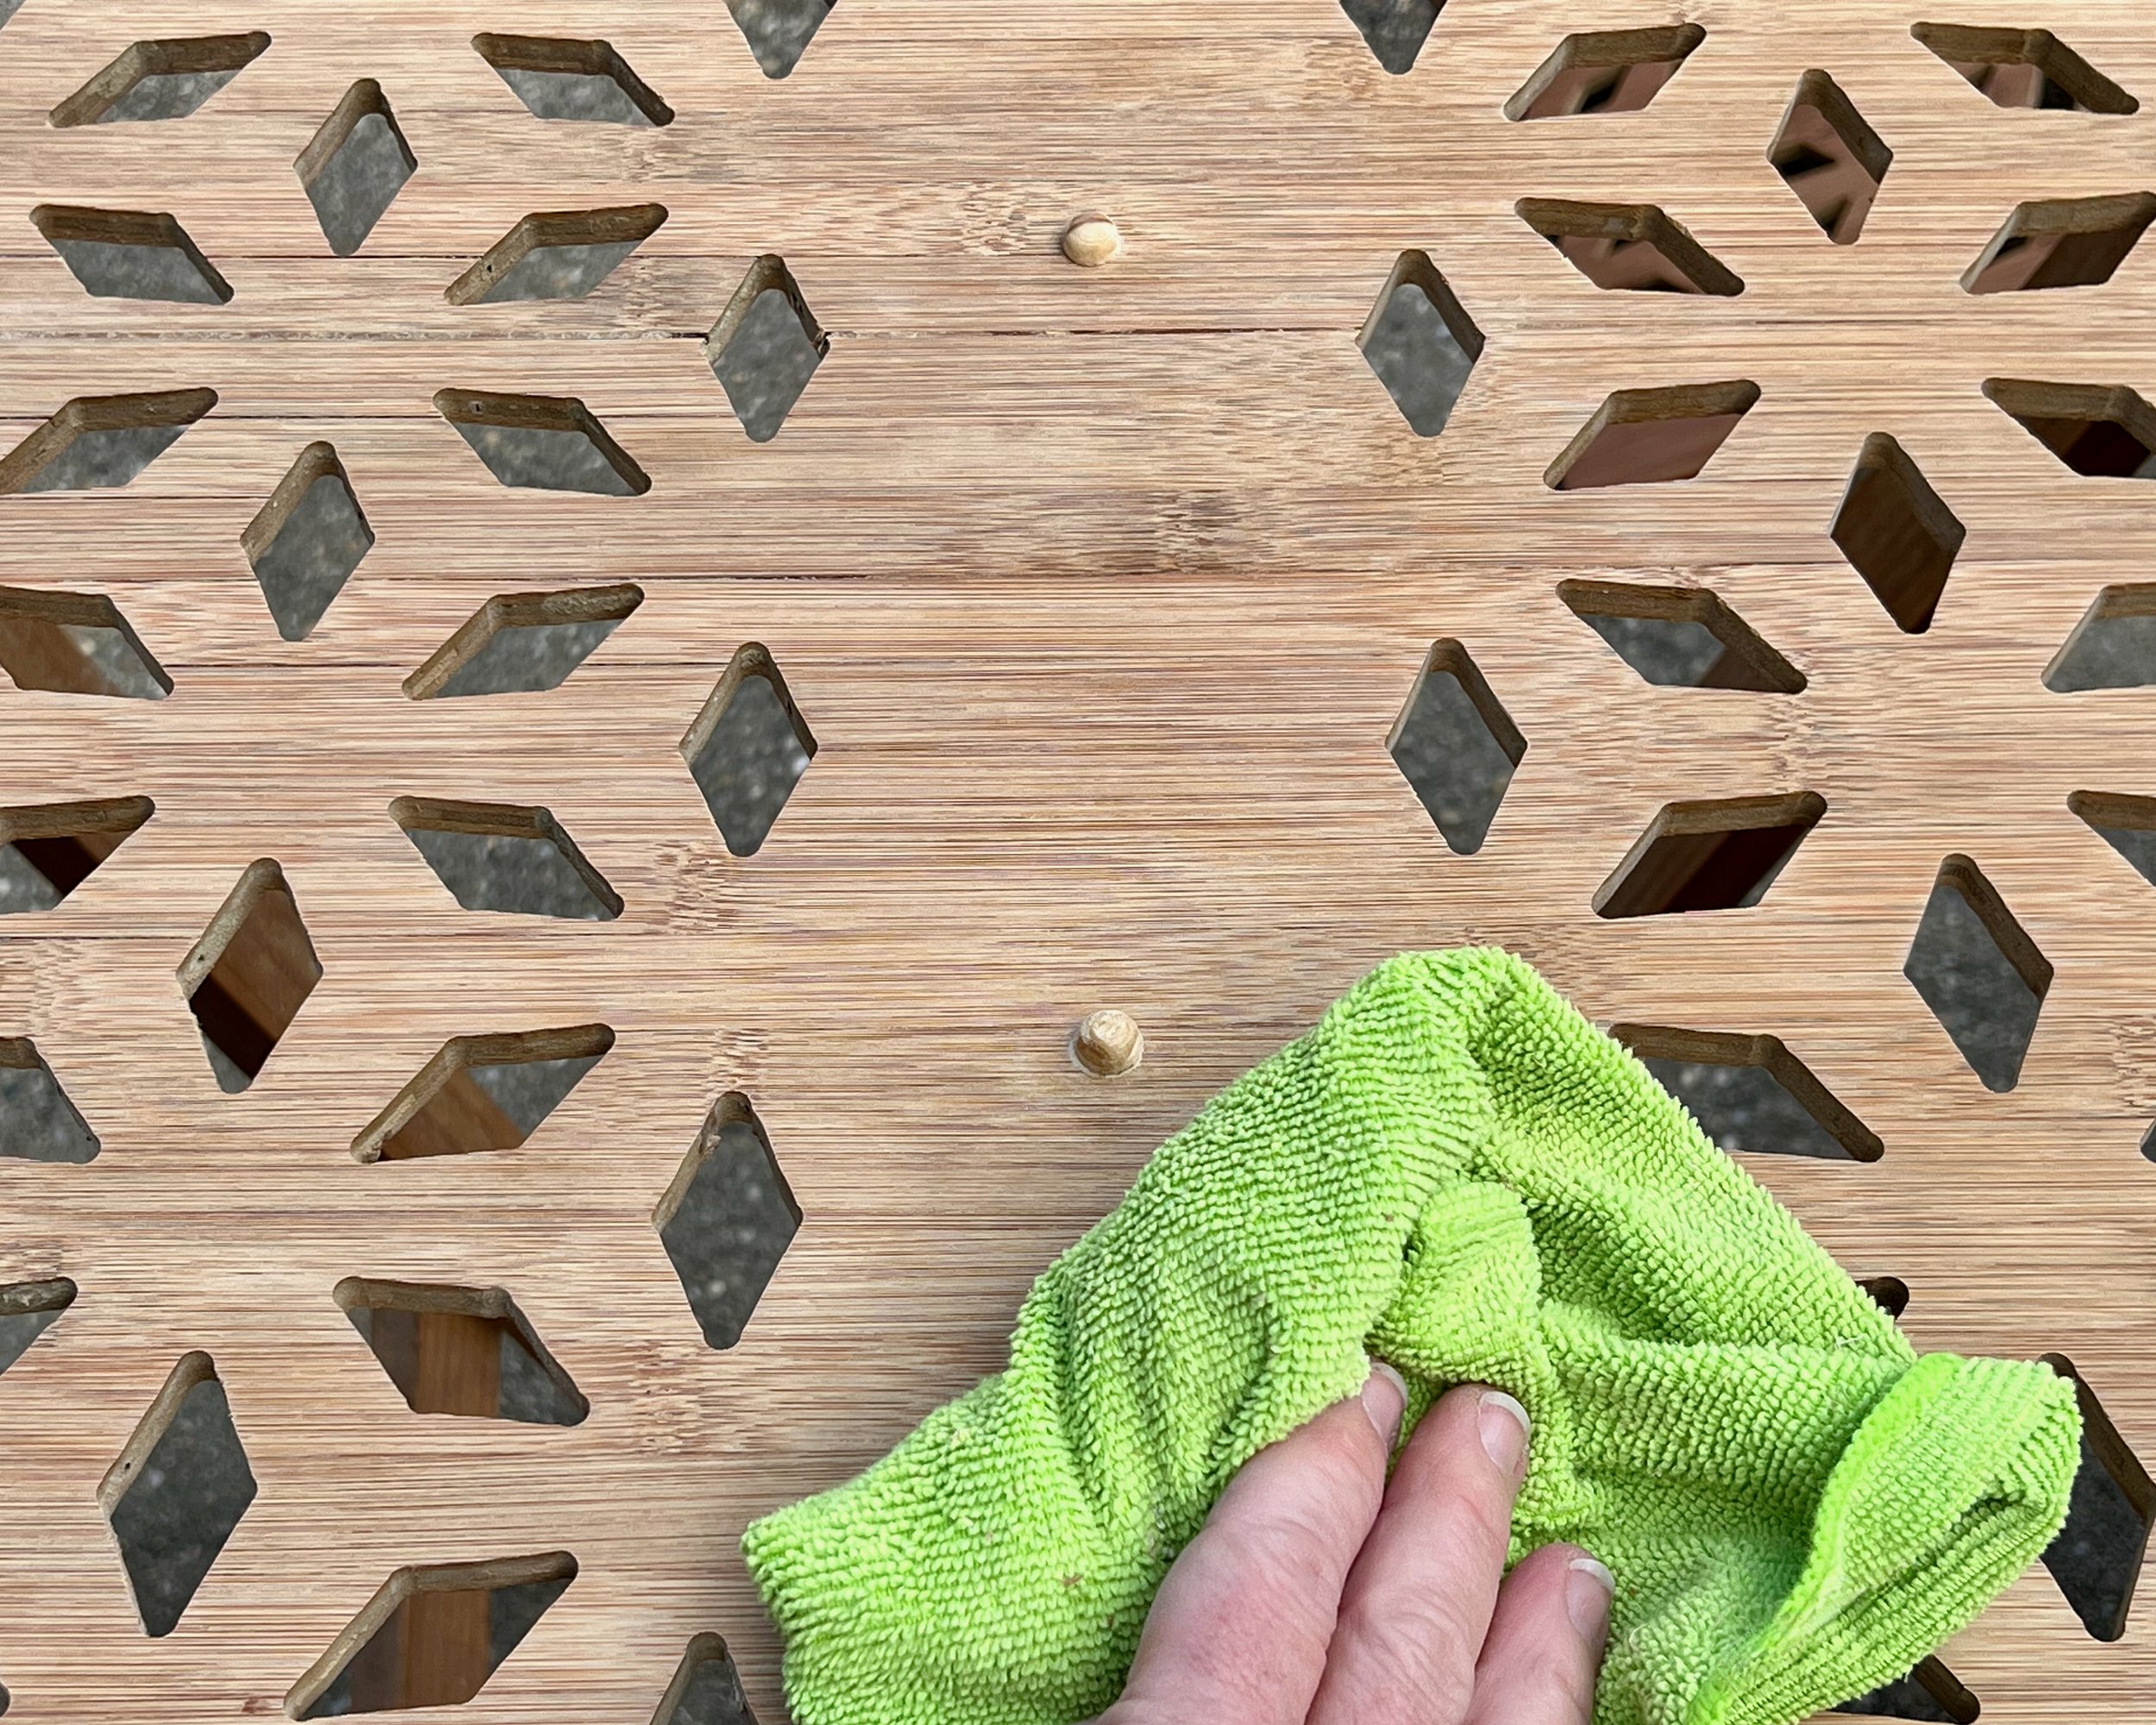
After sanding the panels lightly, I dabbed Bondall Bondcrete Woodworking Adhesive into the original holes along the centre of the panels and tapped in timber cover buttons on both sides, using a damp cloth to wipe away excess while removing any dust.
TIP If the cover buttons are too big, enlarge the holes using a same-size drill bit. These add a cute detail while masking a reminder the panels were designed for attaching to a fence.
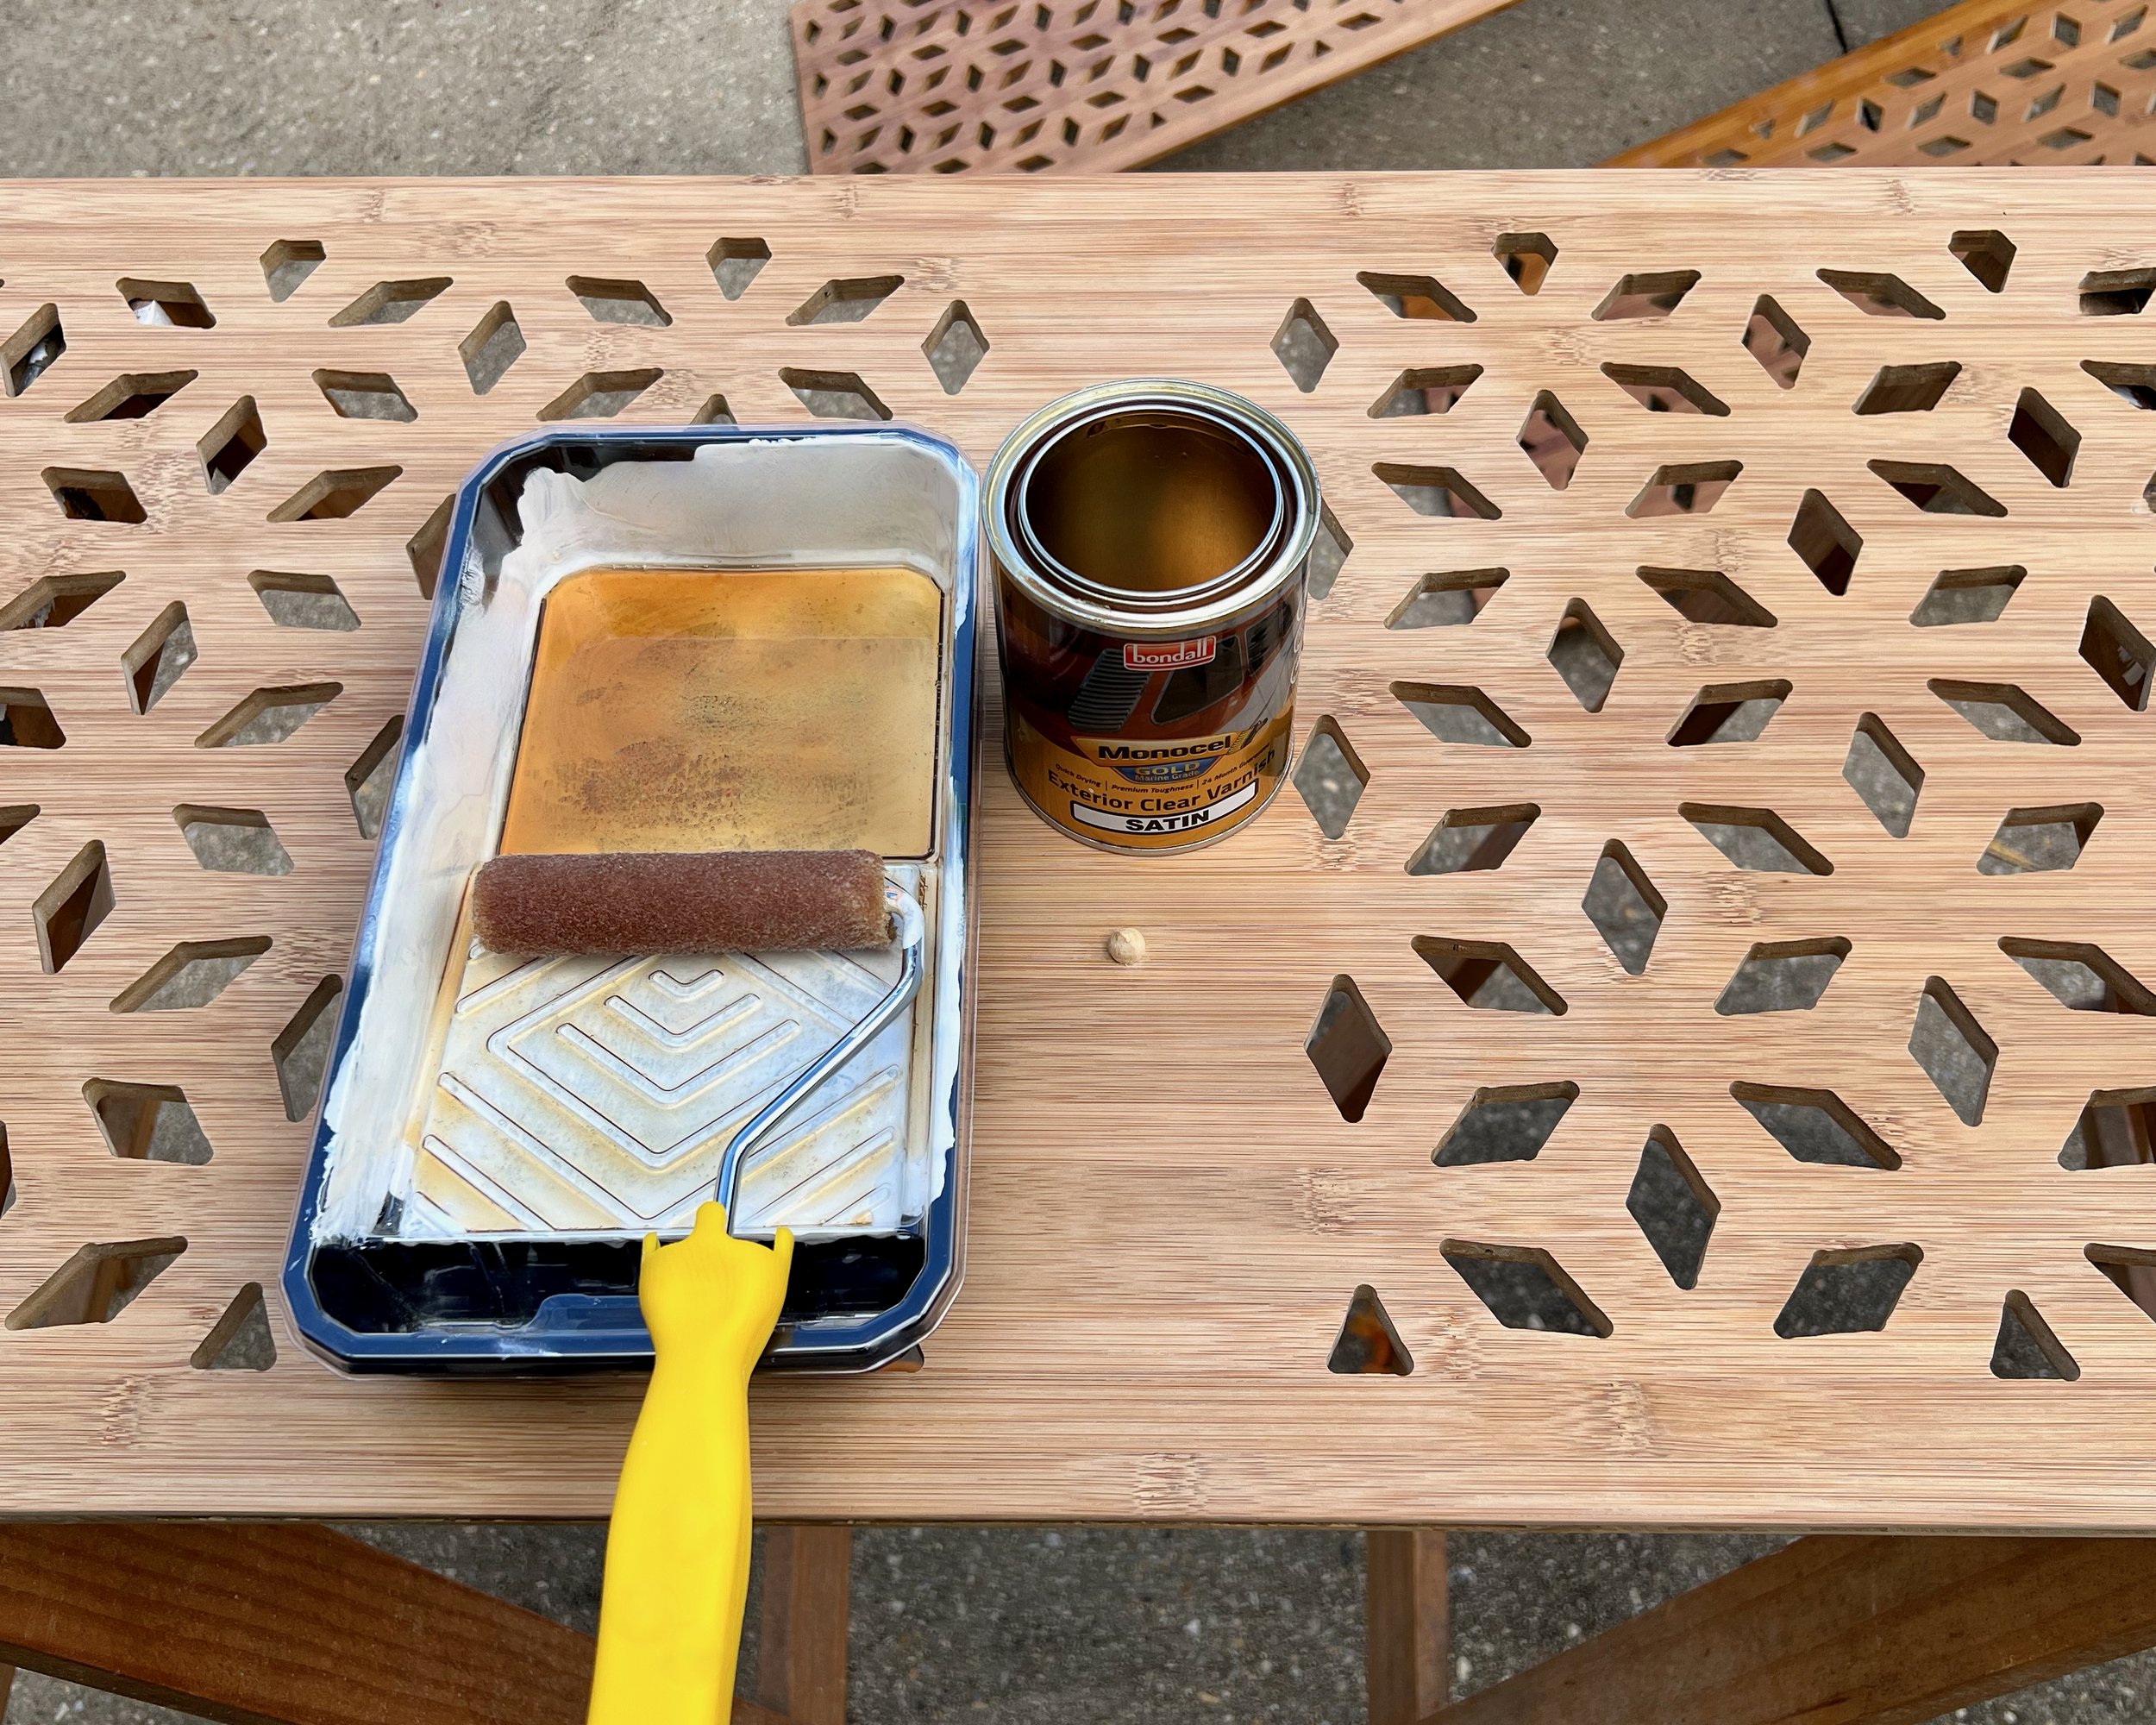
Once the adhesive was dry I applied two coats of Monocel Gold Exterior Clear Varnish in Satin with a mini mohair roller, leaving it to dry after each.
TIP The marine-grade varnish gives the bamboo a sheen, which contrasts nicely against the matt white frame while keeping it easy to clean.
To hang the panels I positioned the first one flush with the front frame, clamped the top, pre-drilled and secured with 8G x 25mm galvanised countersunk screws. I made a 30mm-wide timber spacer to use for positioning the remaining panels with even gaps, clamping and installing one at a time.
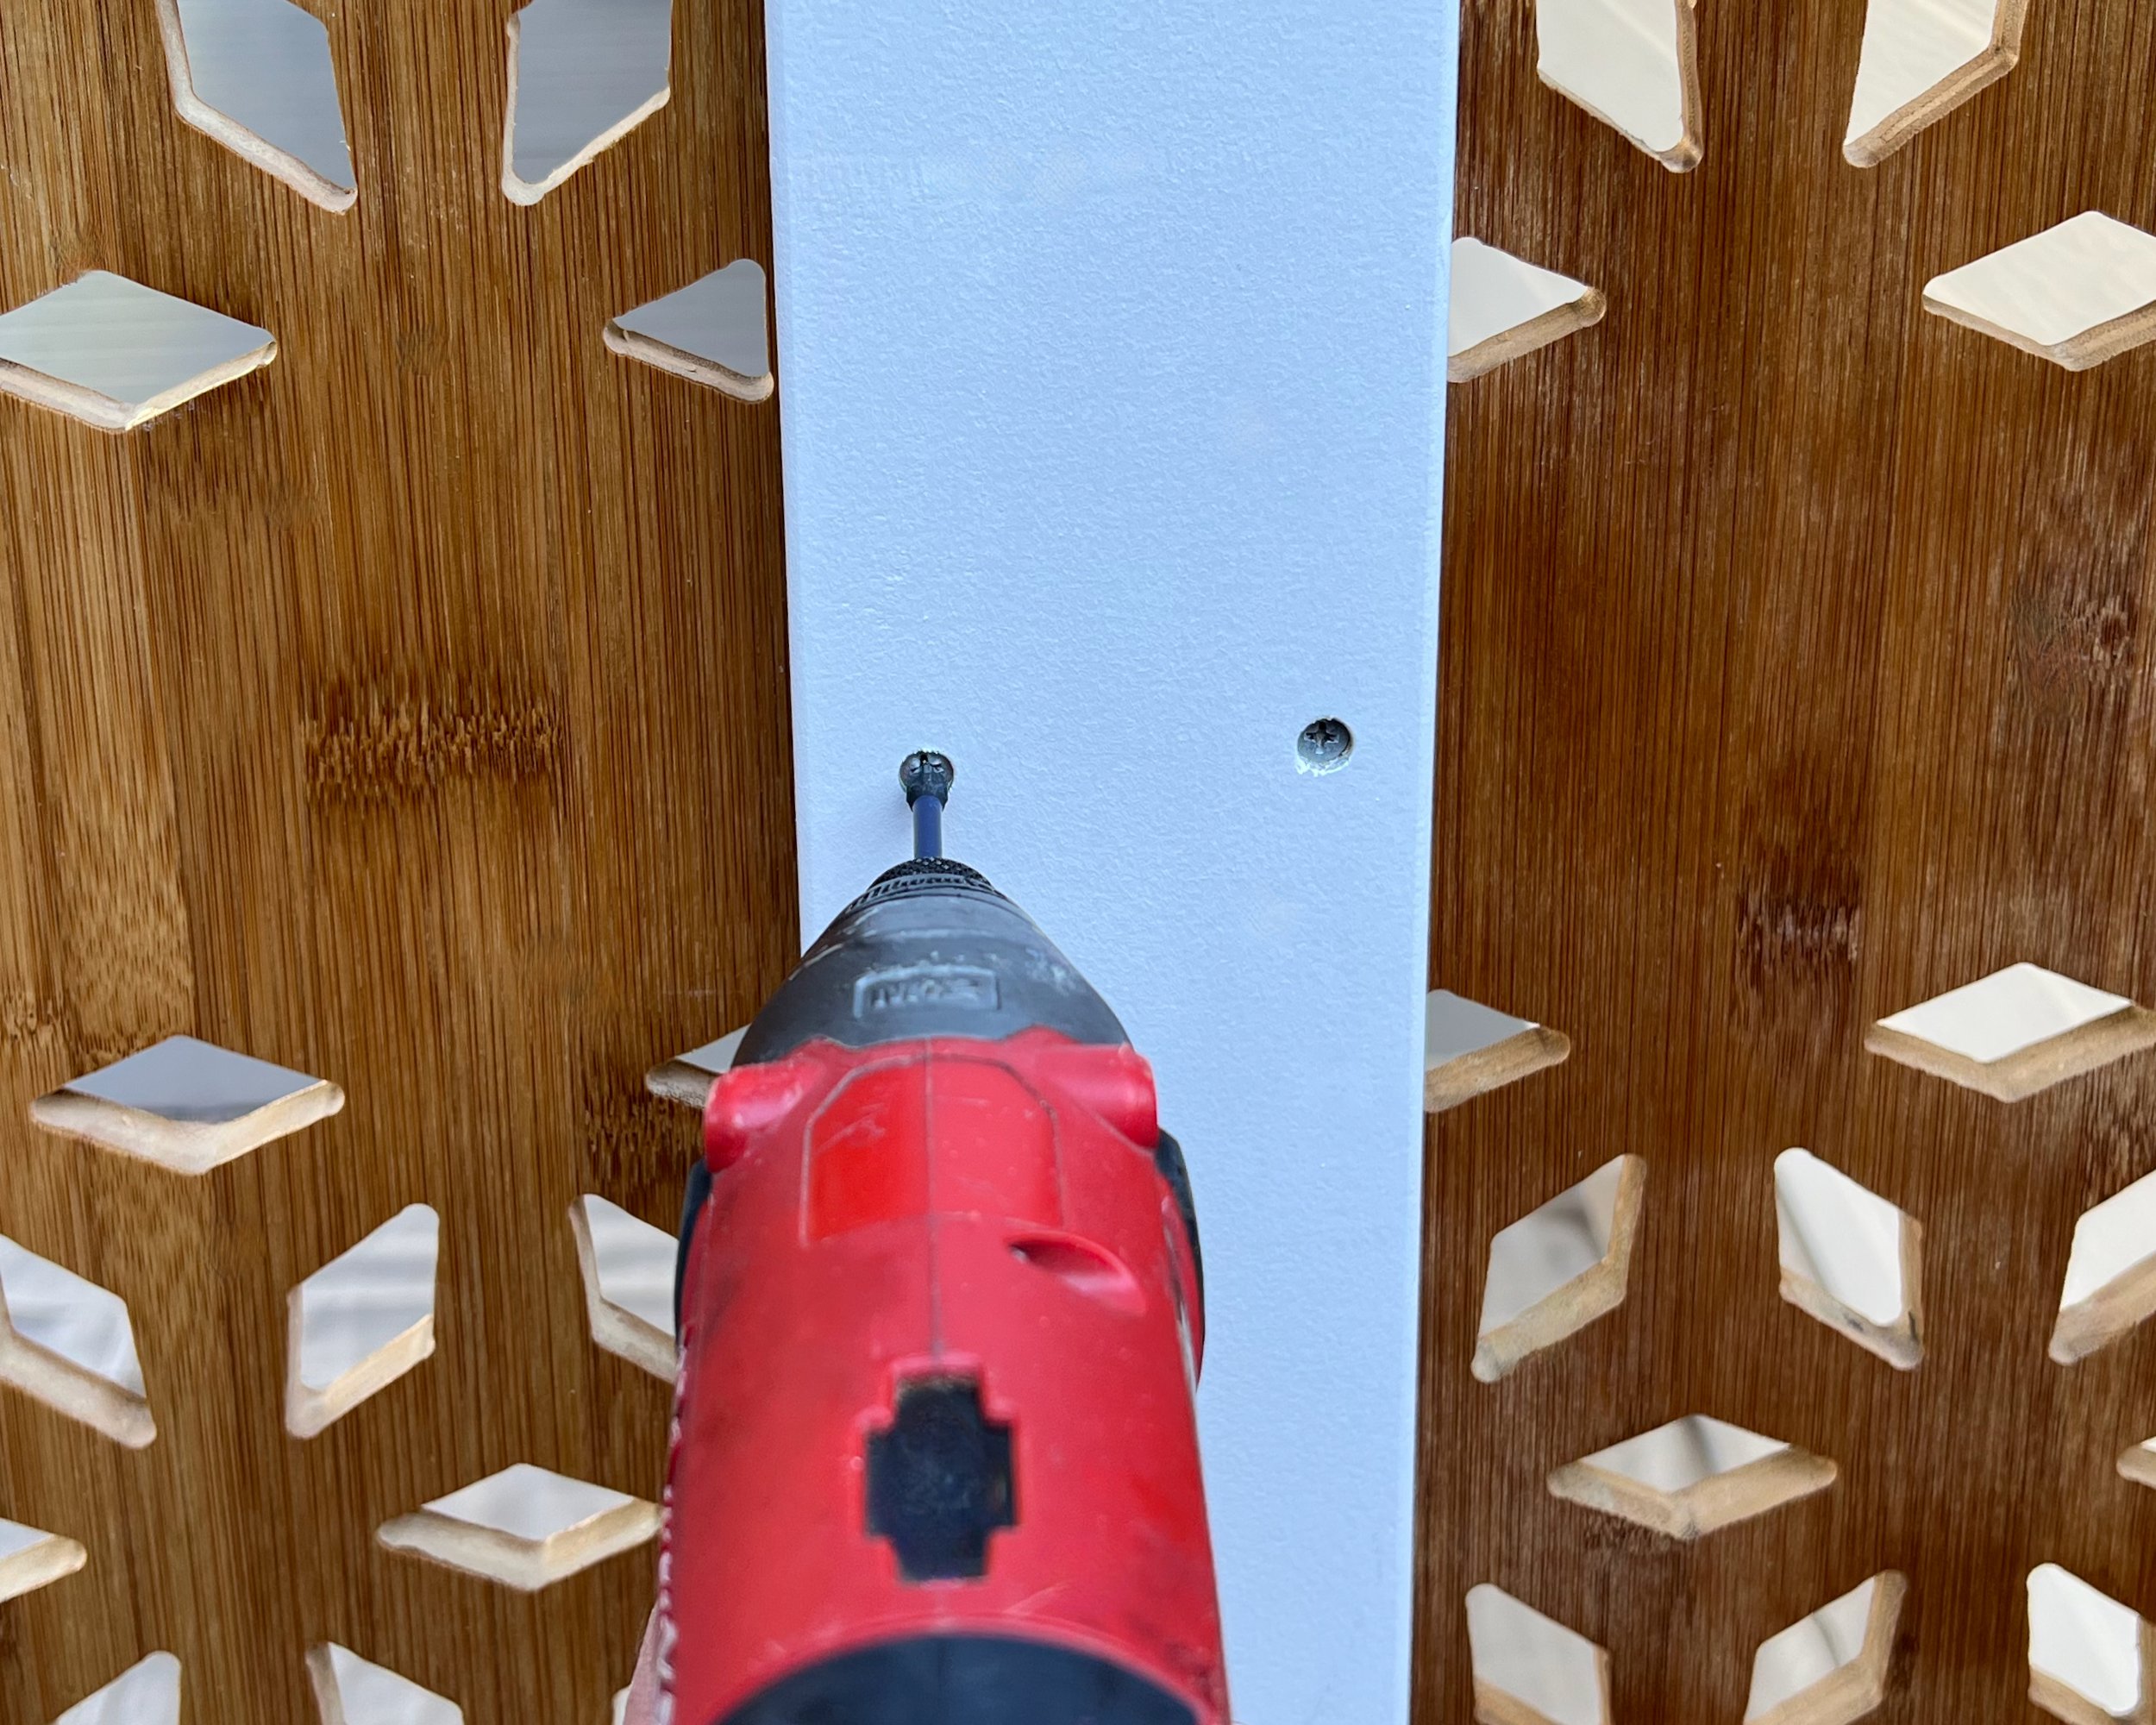
I installed a rail along the top of the panels, then the uprights and base rail, making sure this second round of screws was positioned to avoid the first round.
After filling the screw heads with exterior filler, I sanded and touched up with paint on the frame and varnish on the panels.
To DIY a screen that fits your space, adjust my measurements and cut your materials to suit.

The screening acts like a wall to create a cosy space with shade, ventilation and lovely dappled light. Looks so good it featured as an outdoor summer project in Bunnings Magazine.

Here’s how the fence extension panels started out as an indoor room divider, which also featured in Bunnings Magazine.

Are you planning to try my fence-panel hack to build a screen?
Tag me on your project and follow more of my DIY journey on Instagram for tool tips, home improvement and simple building projects.