My DIY BATHROOM RENOVATION
Natasha Dickins
Whoo-hoo! I’ve been planning the transformation of this bathroom for a long time.

But, before going into the details, I’d like to announce what a positive change it’s made to the way we navigate through our home.
Here’s a little about the design choices…
“My simple aim is for life improvement through home improvement.”

PLANNING an ERGONOMIC BATHROOM
My mum was in a wheelchair when she came to stay a few years ago. Like many Australian homes, ours was inadequate in catering for her.
While this new bathroom is definitely not set up for fully assisted living, I’ve made it as efficient as possible while exploring the concept of future-proofing.
We may eventually need a smart toilet, handrails, thermostatic shower and built-in seating, along with more storage and considered space for assisted care.
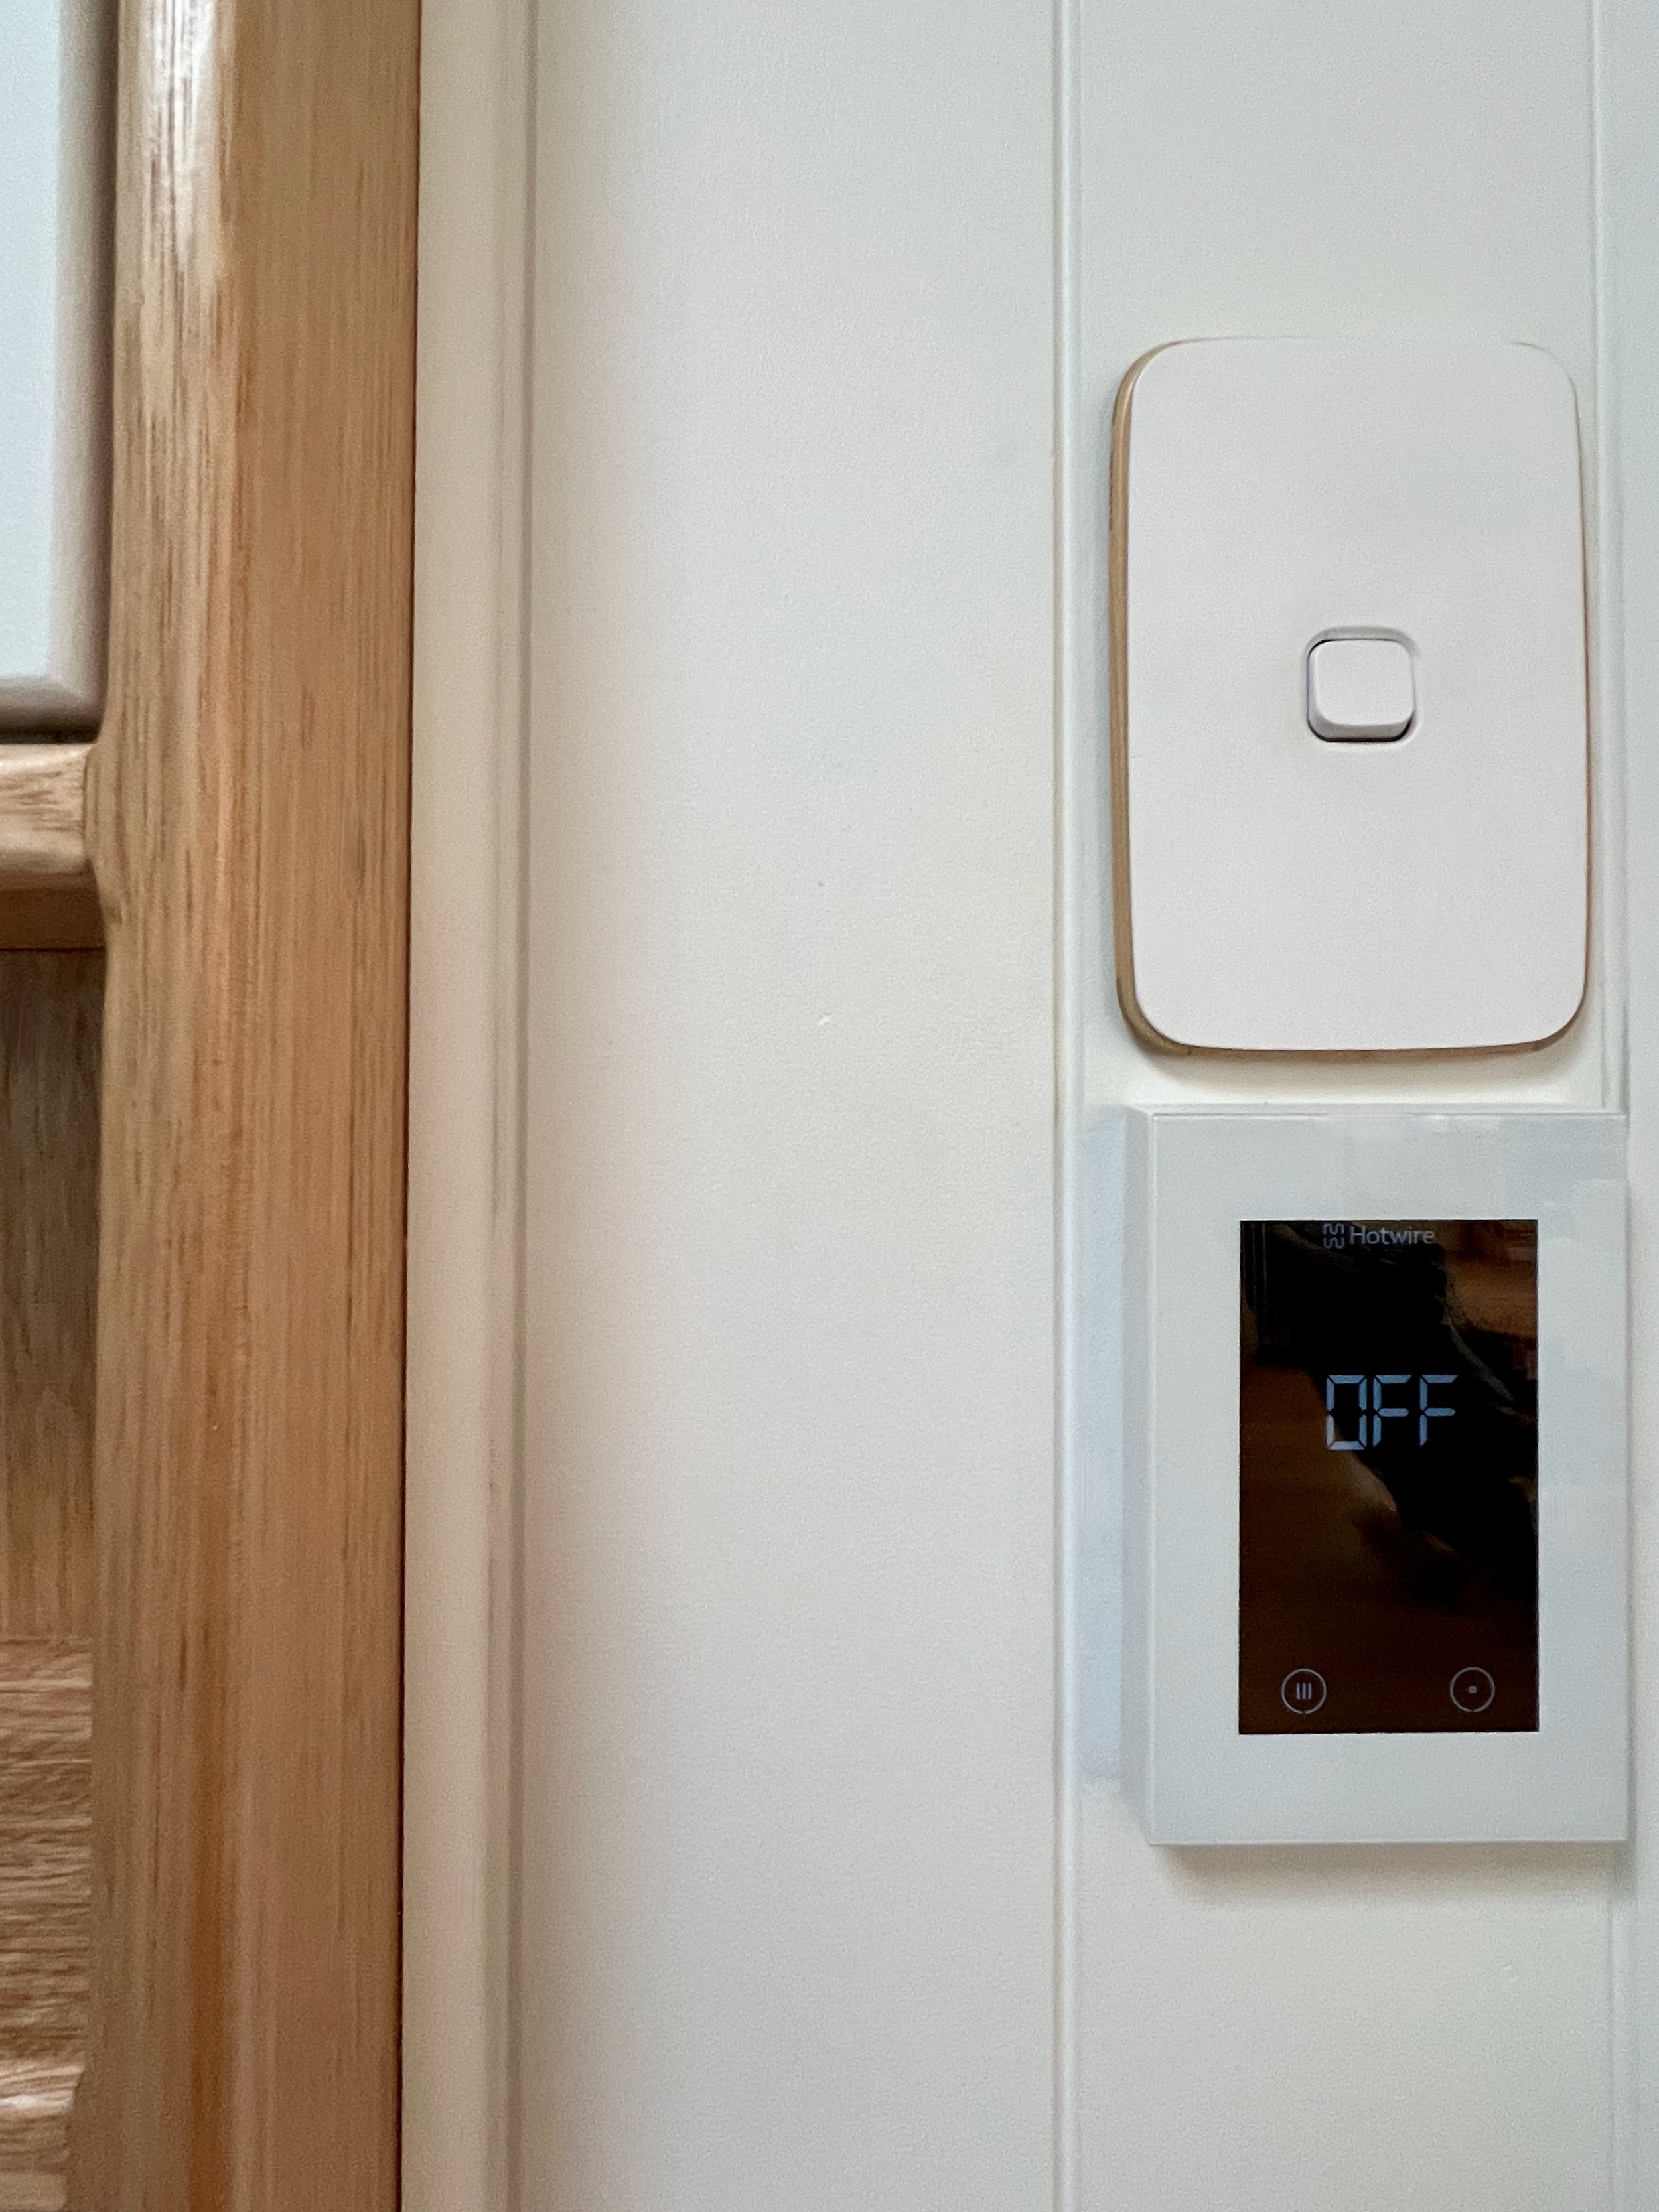
Meanwhile, I’ve invoked technology to create a seamless experience with a voice-activated skylight, sensor lighting under the basin and heated flooring.
The utilities are positioned at exactly the right height and the fixtures are chosen for functionality so they’re easily operable without full hand movements, good for guests who sufferer arthritis but also for paint-covered digits.
I’ve minimised protruding joinery and fixtures with push-to-open cabinet doors and a recessed toilet roll holder.
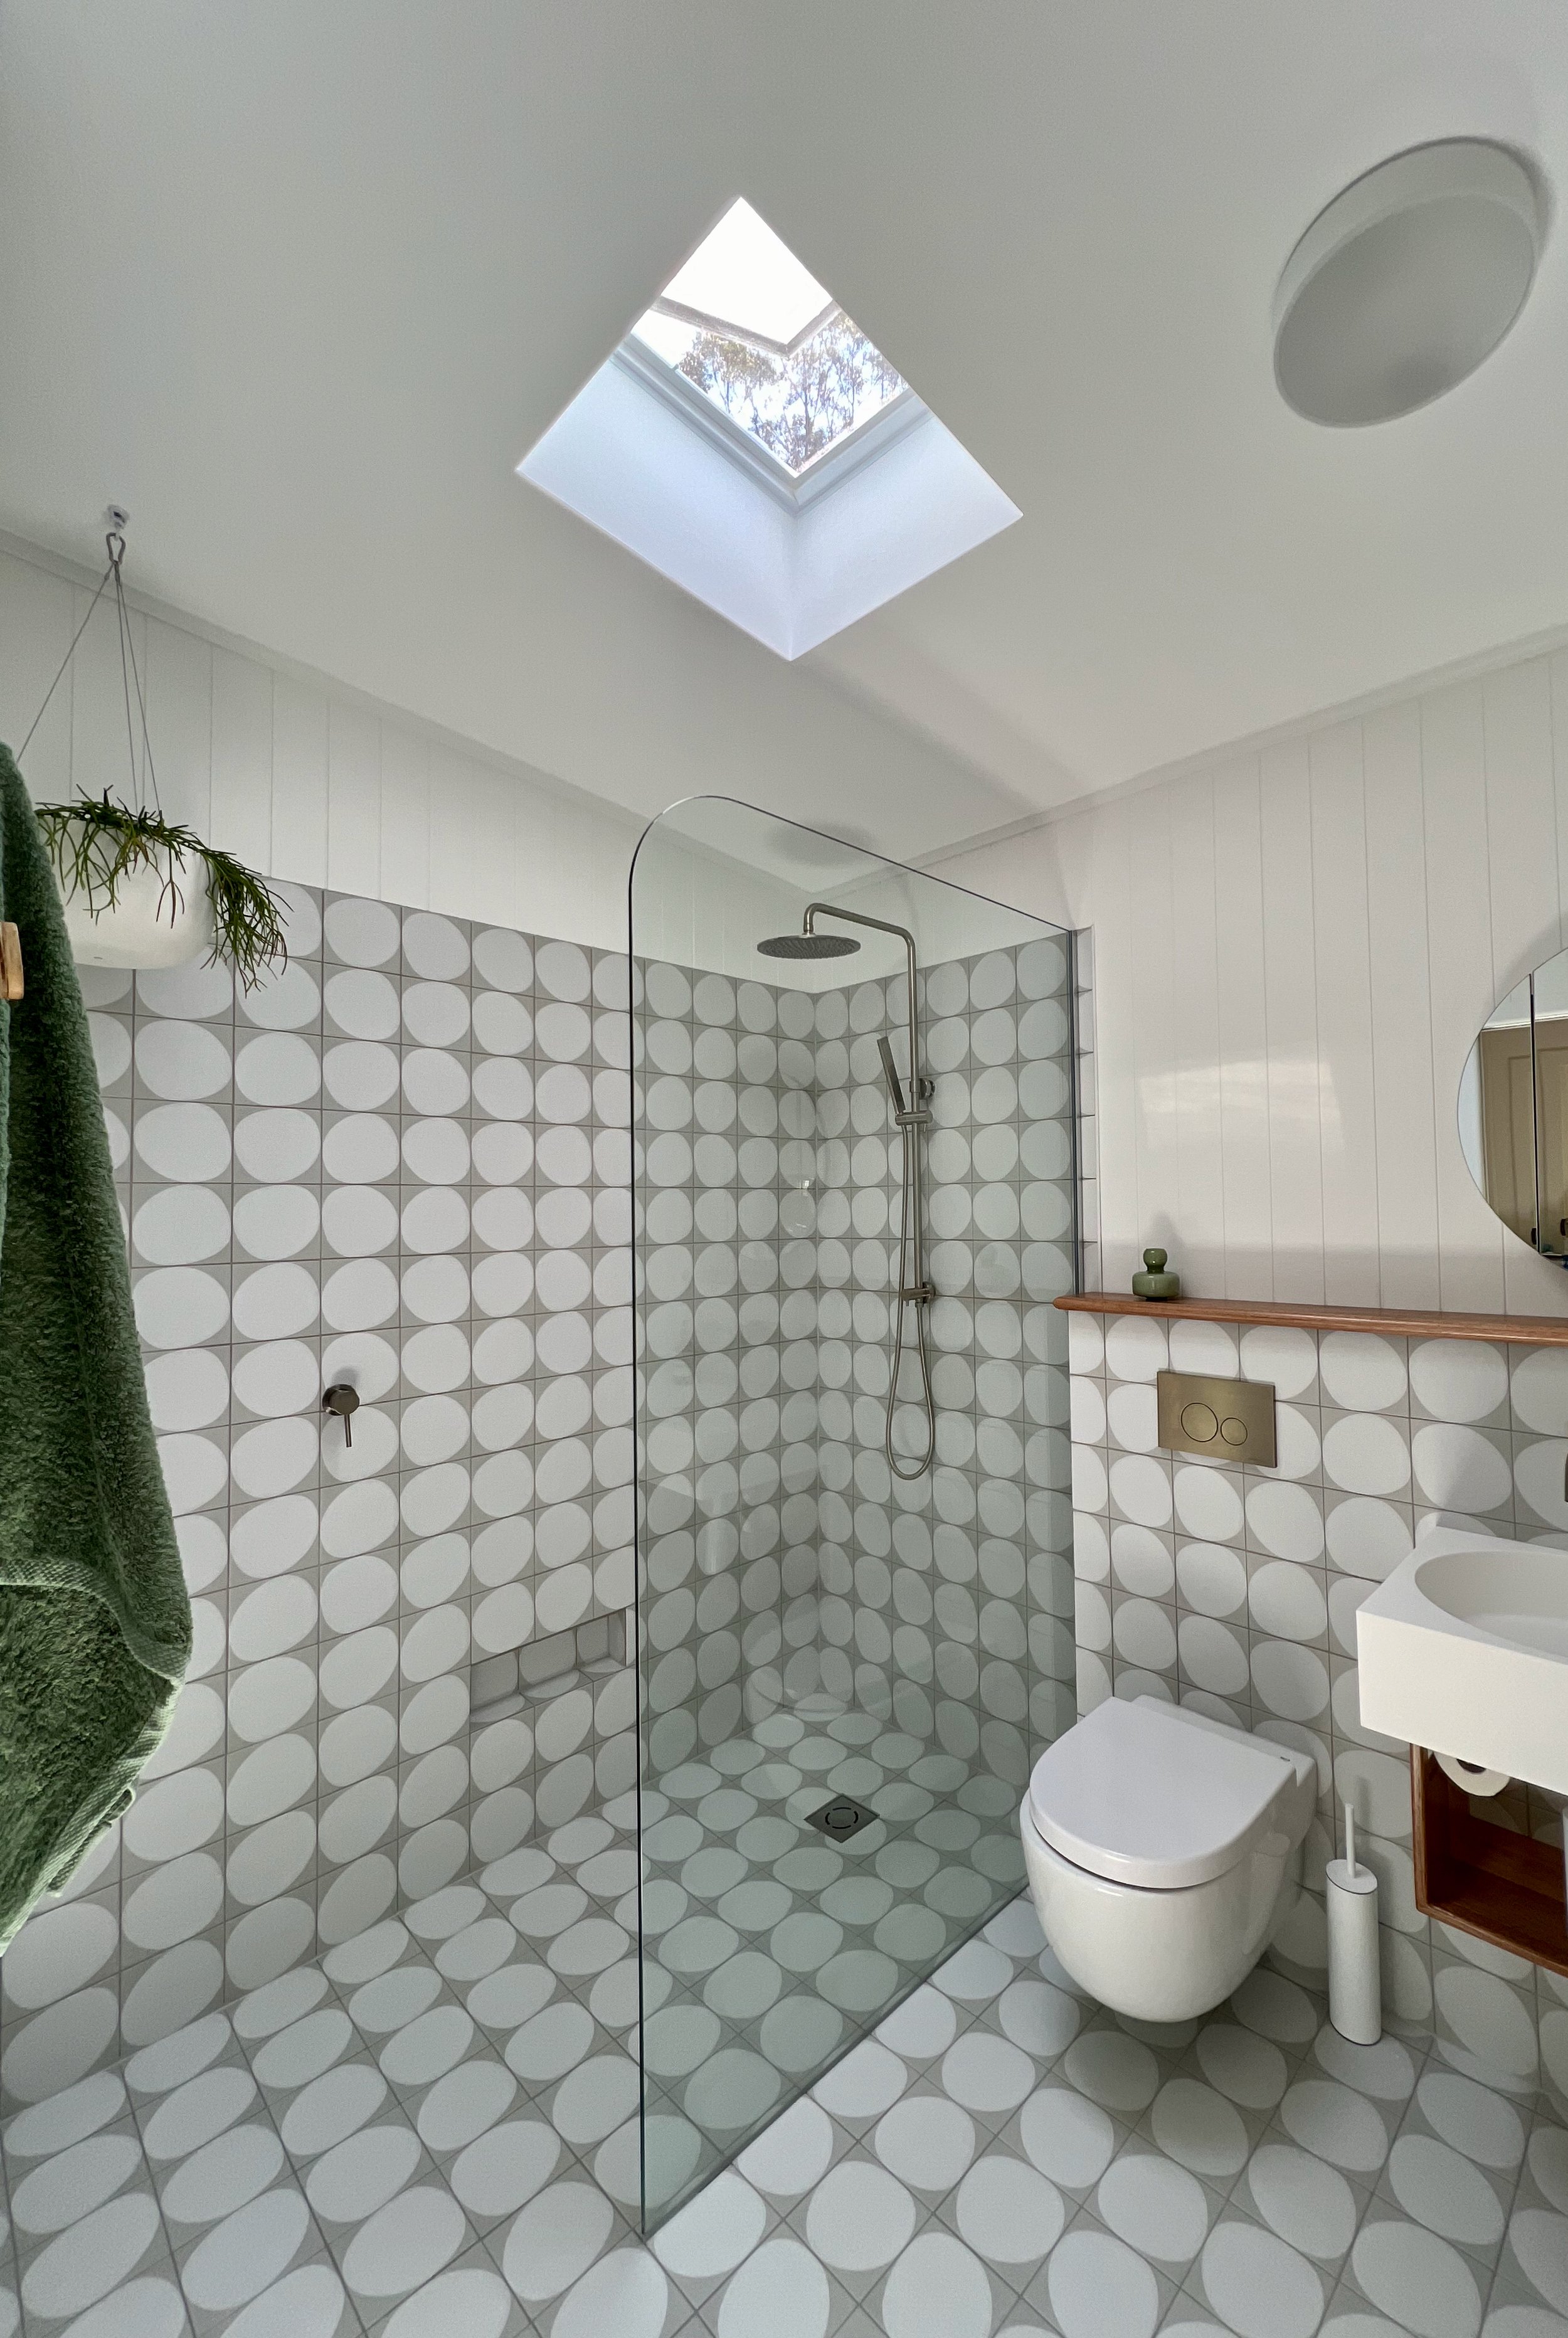
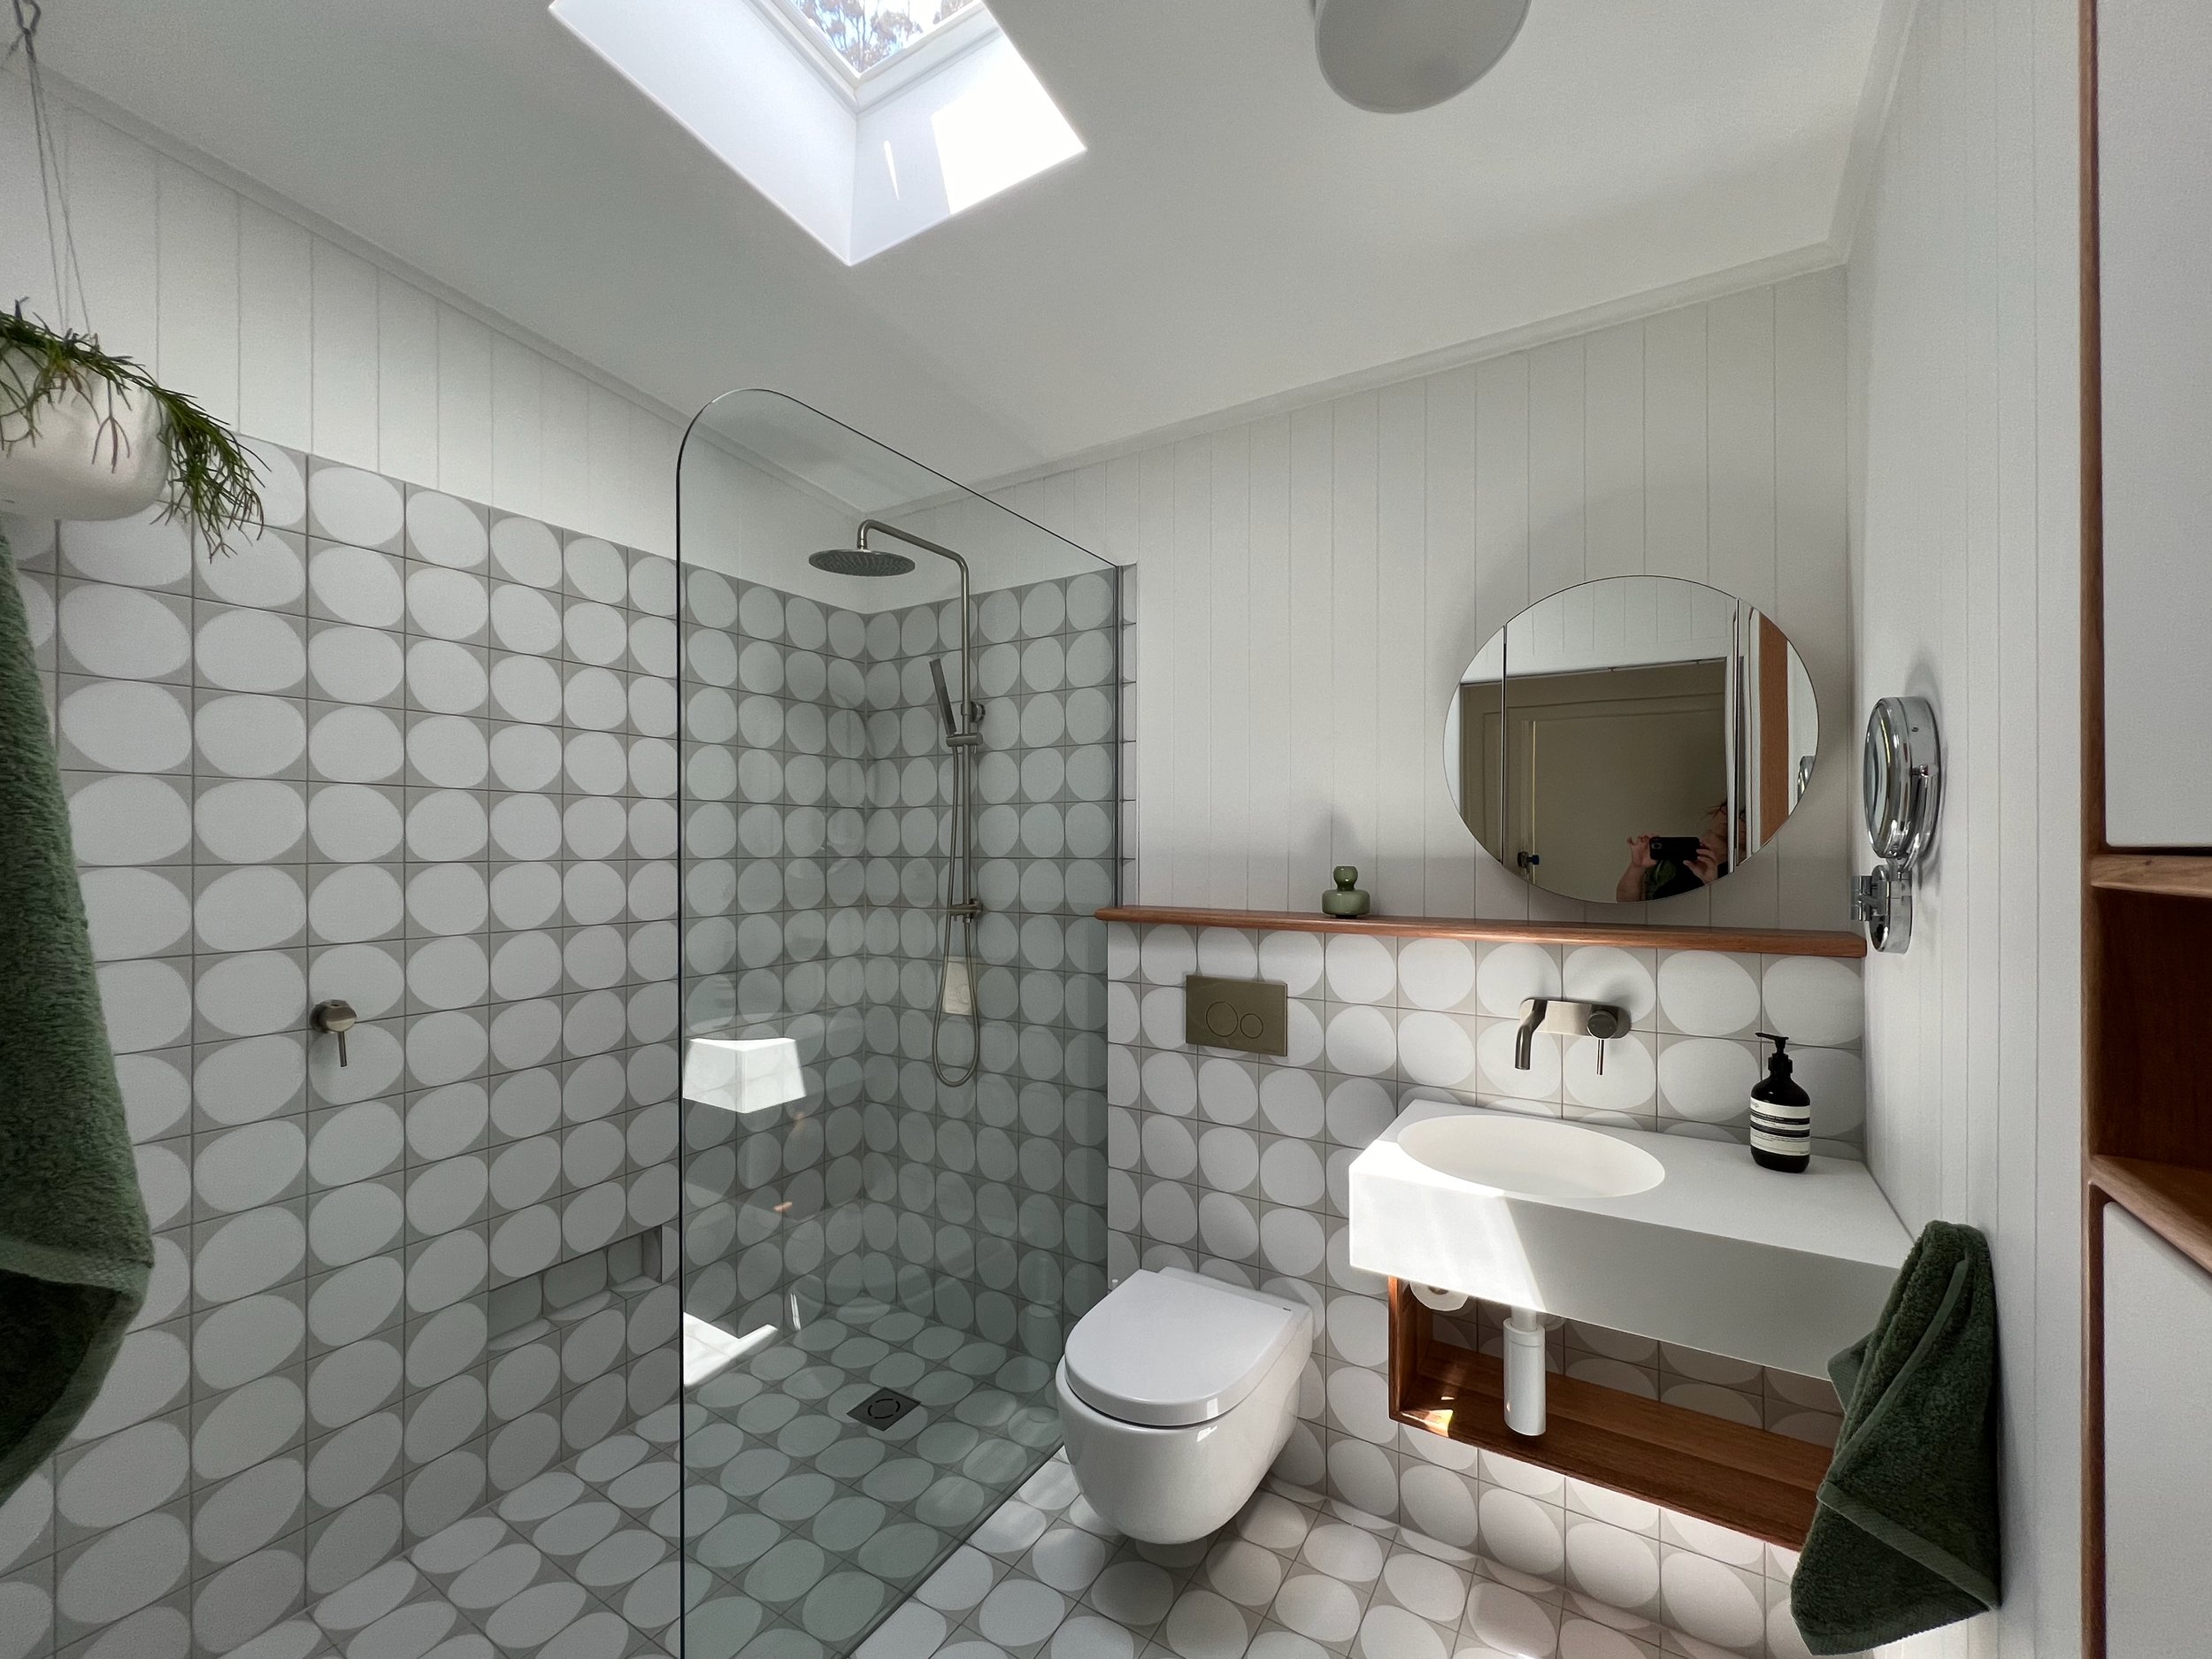
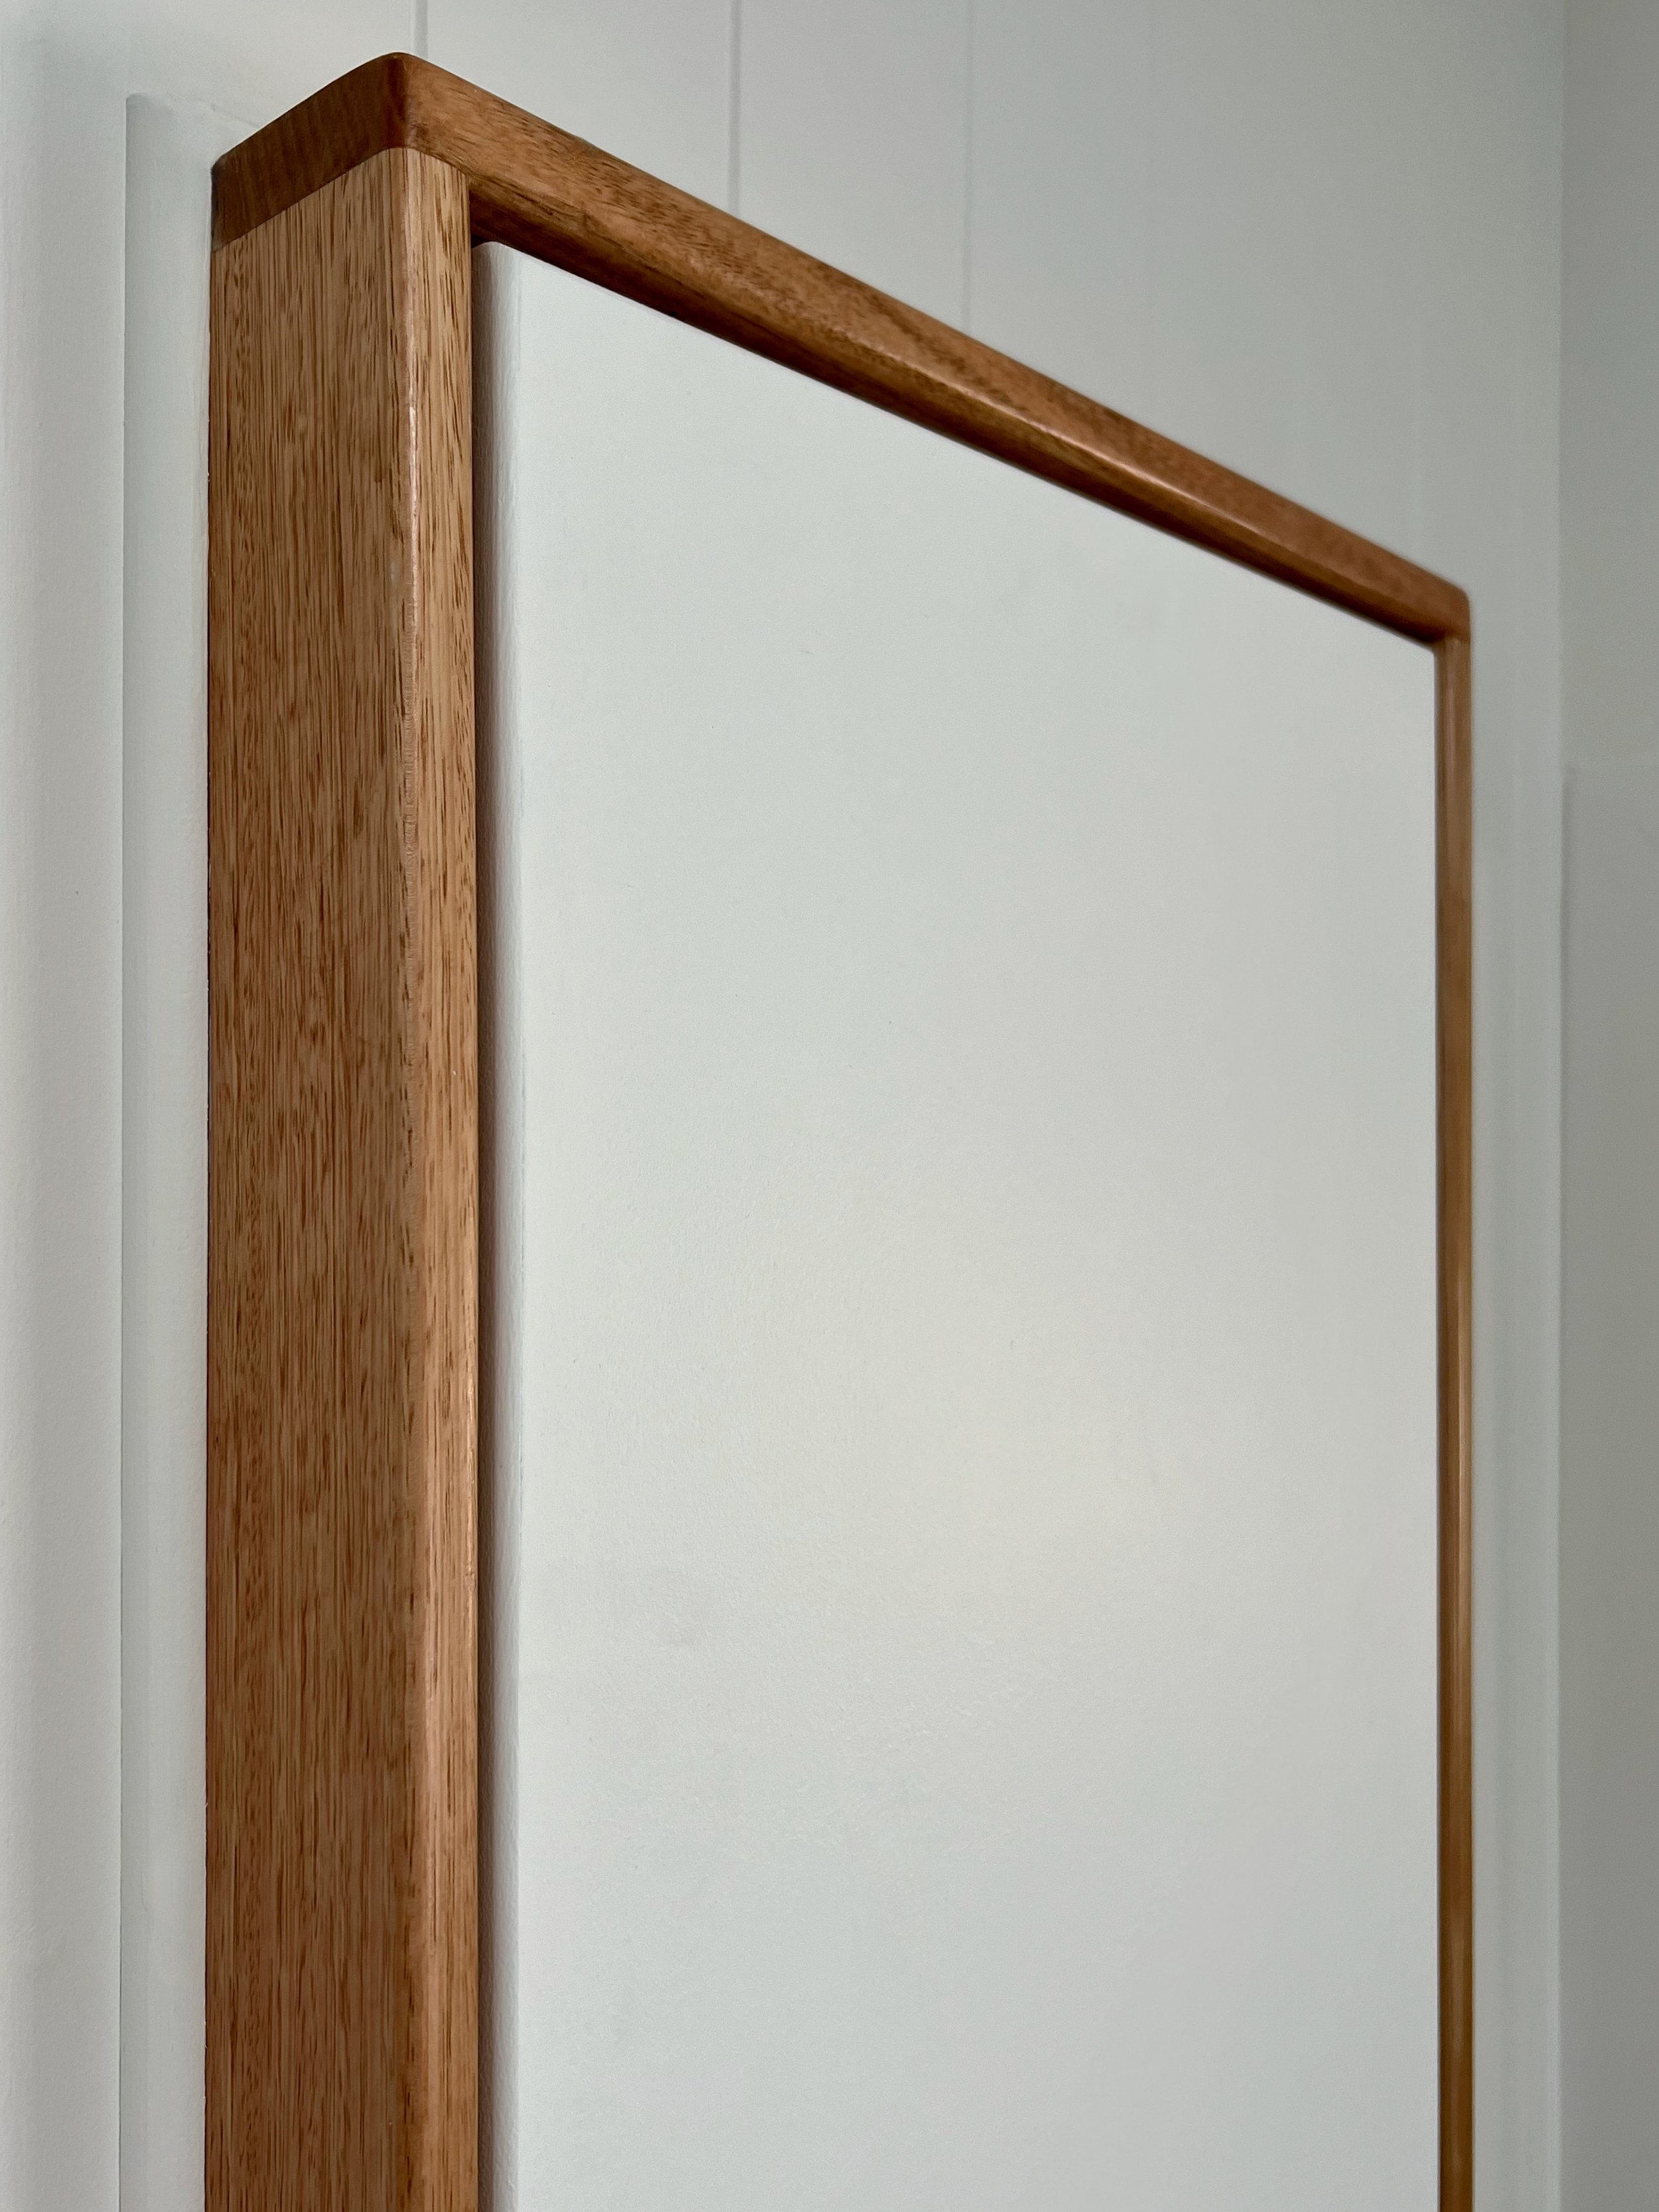
To maintain a friendly feeling of spaciousness I’ve chosen softer, rounded corners over sharper, square edges, such as with the shower screen.
And my number one requirement? An LED magnifying mirror so I can put in contact lenses and apply makeup without wearing glasses.
“For me, future-proofing creates solutions to minimise the effects of getting older. So when it comes to bathroom design, it anticipates the effects of ageing by making our personal spaces ergonomically more efficient.”
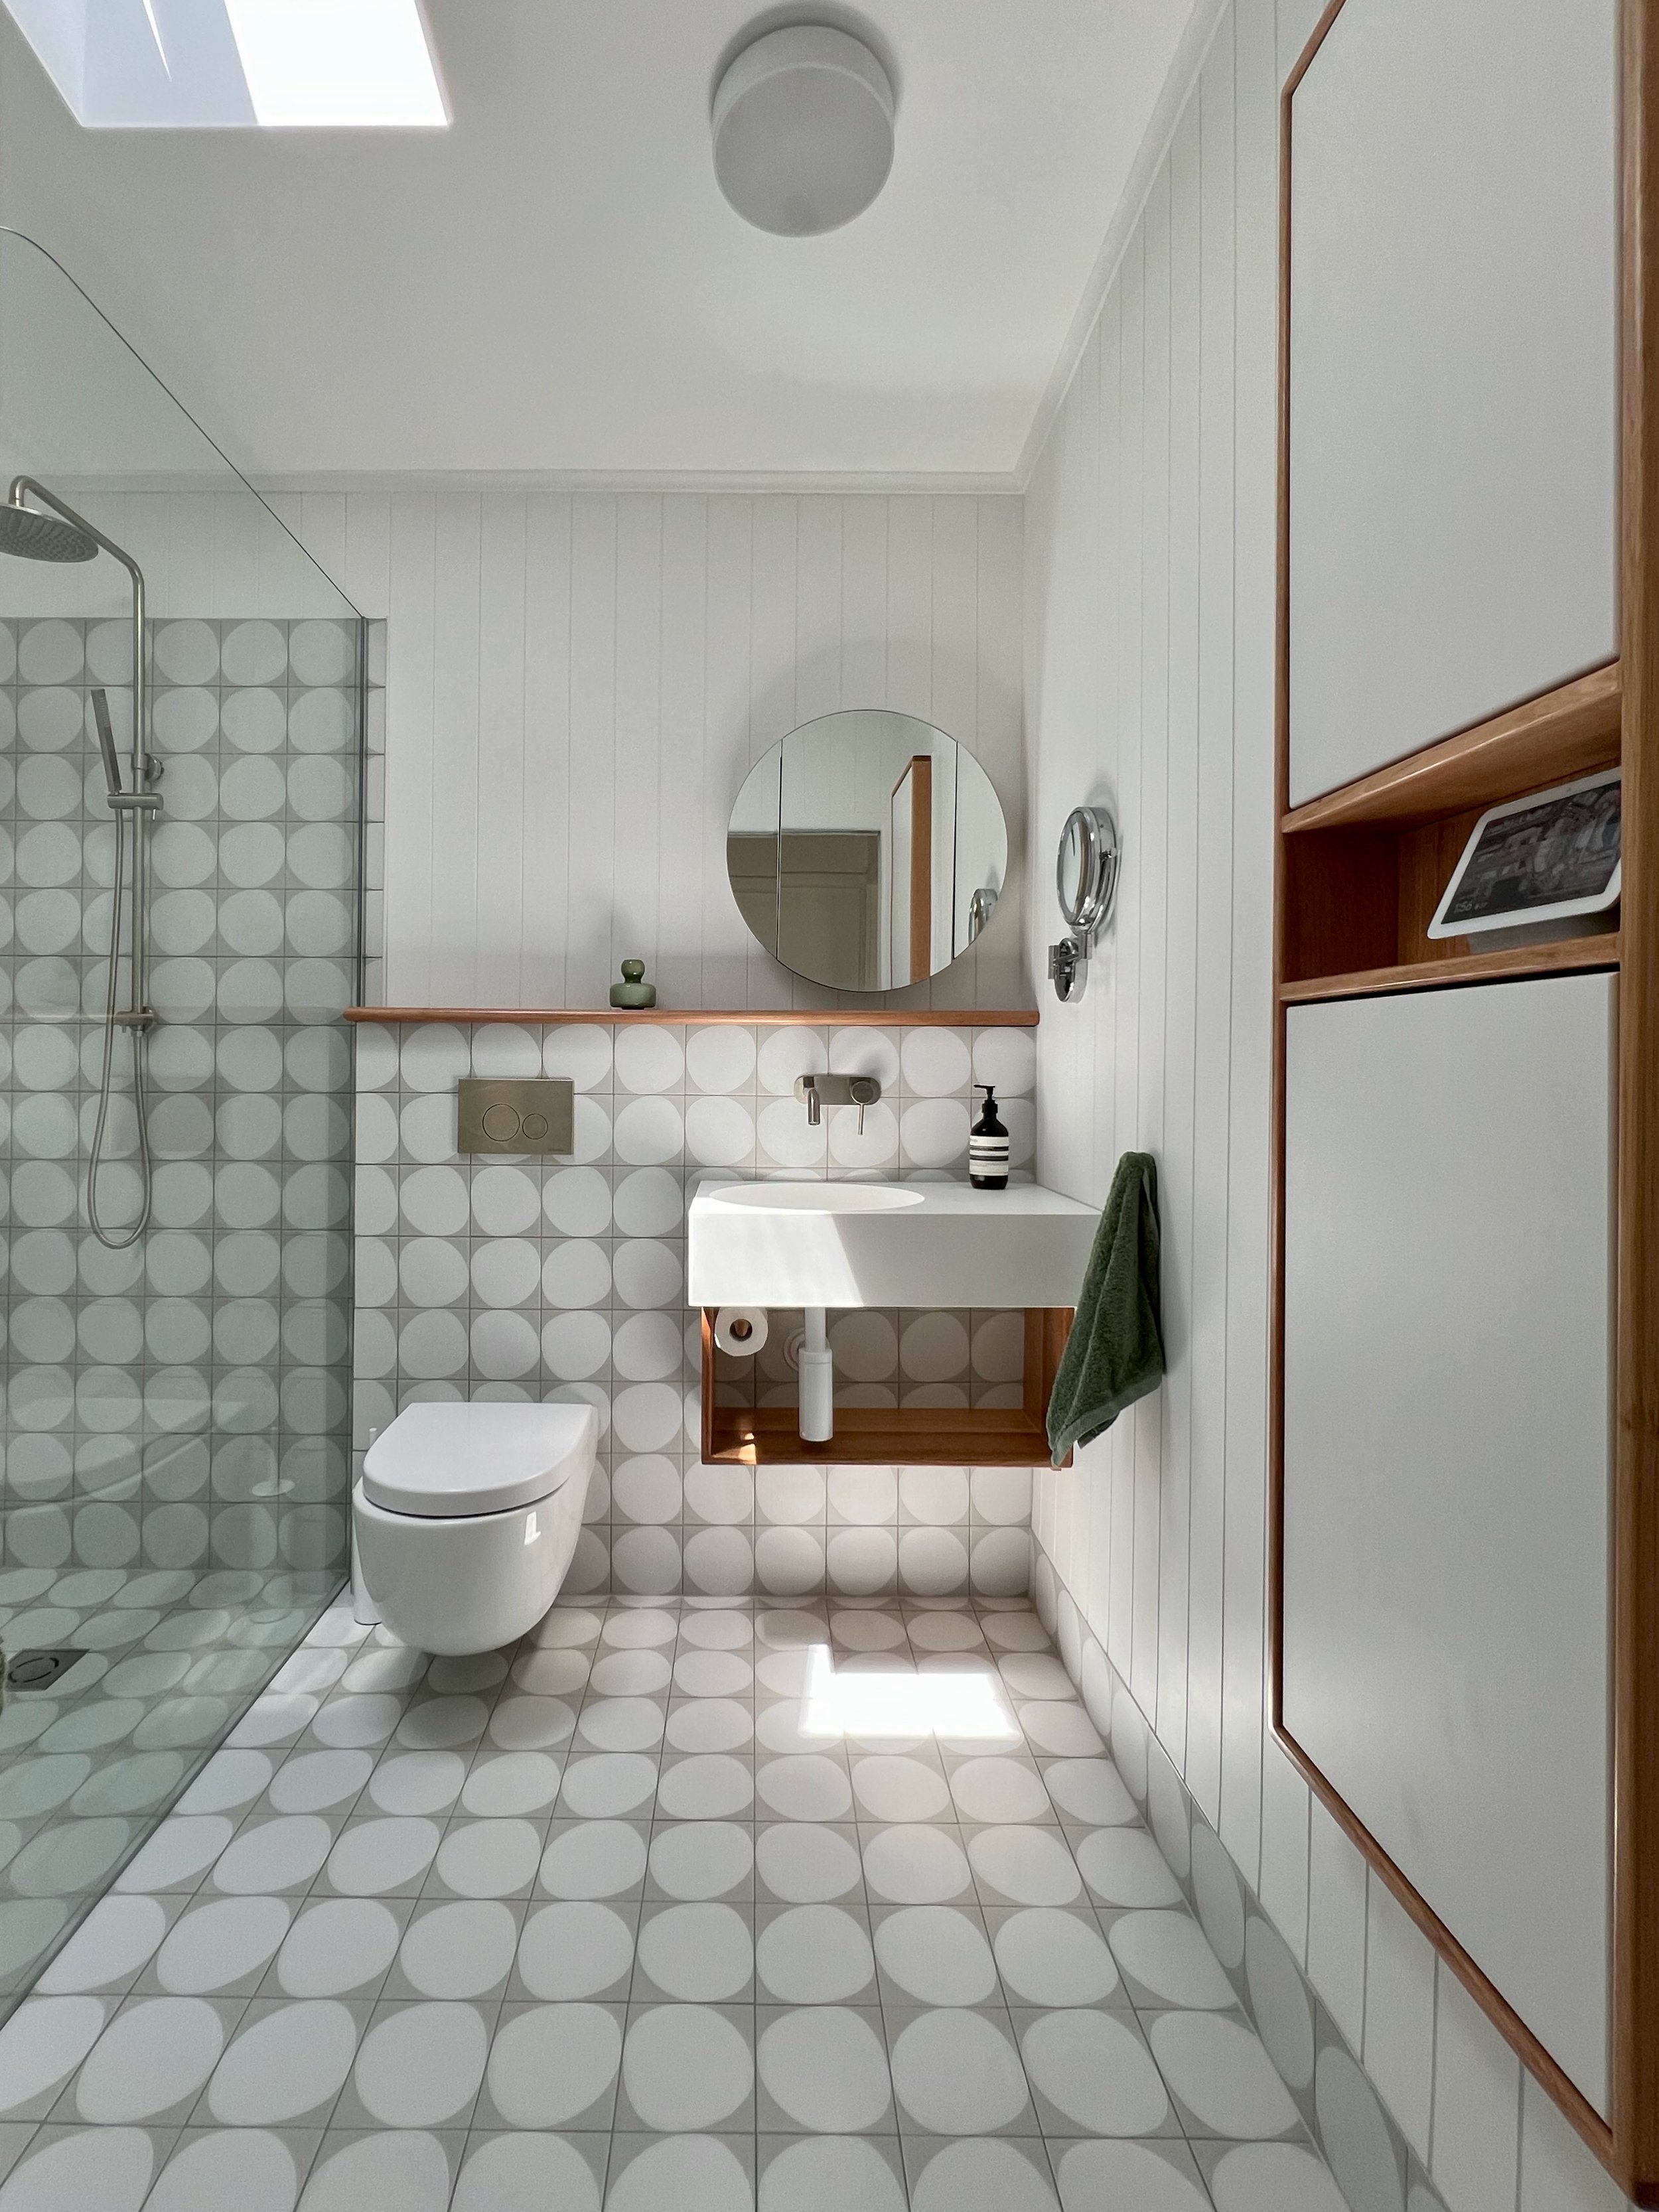
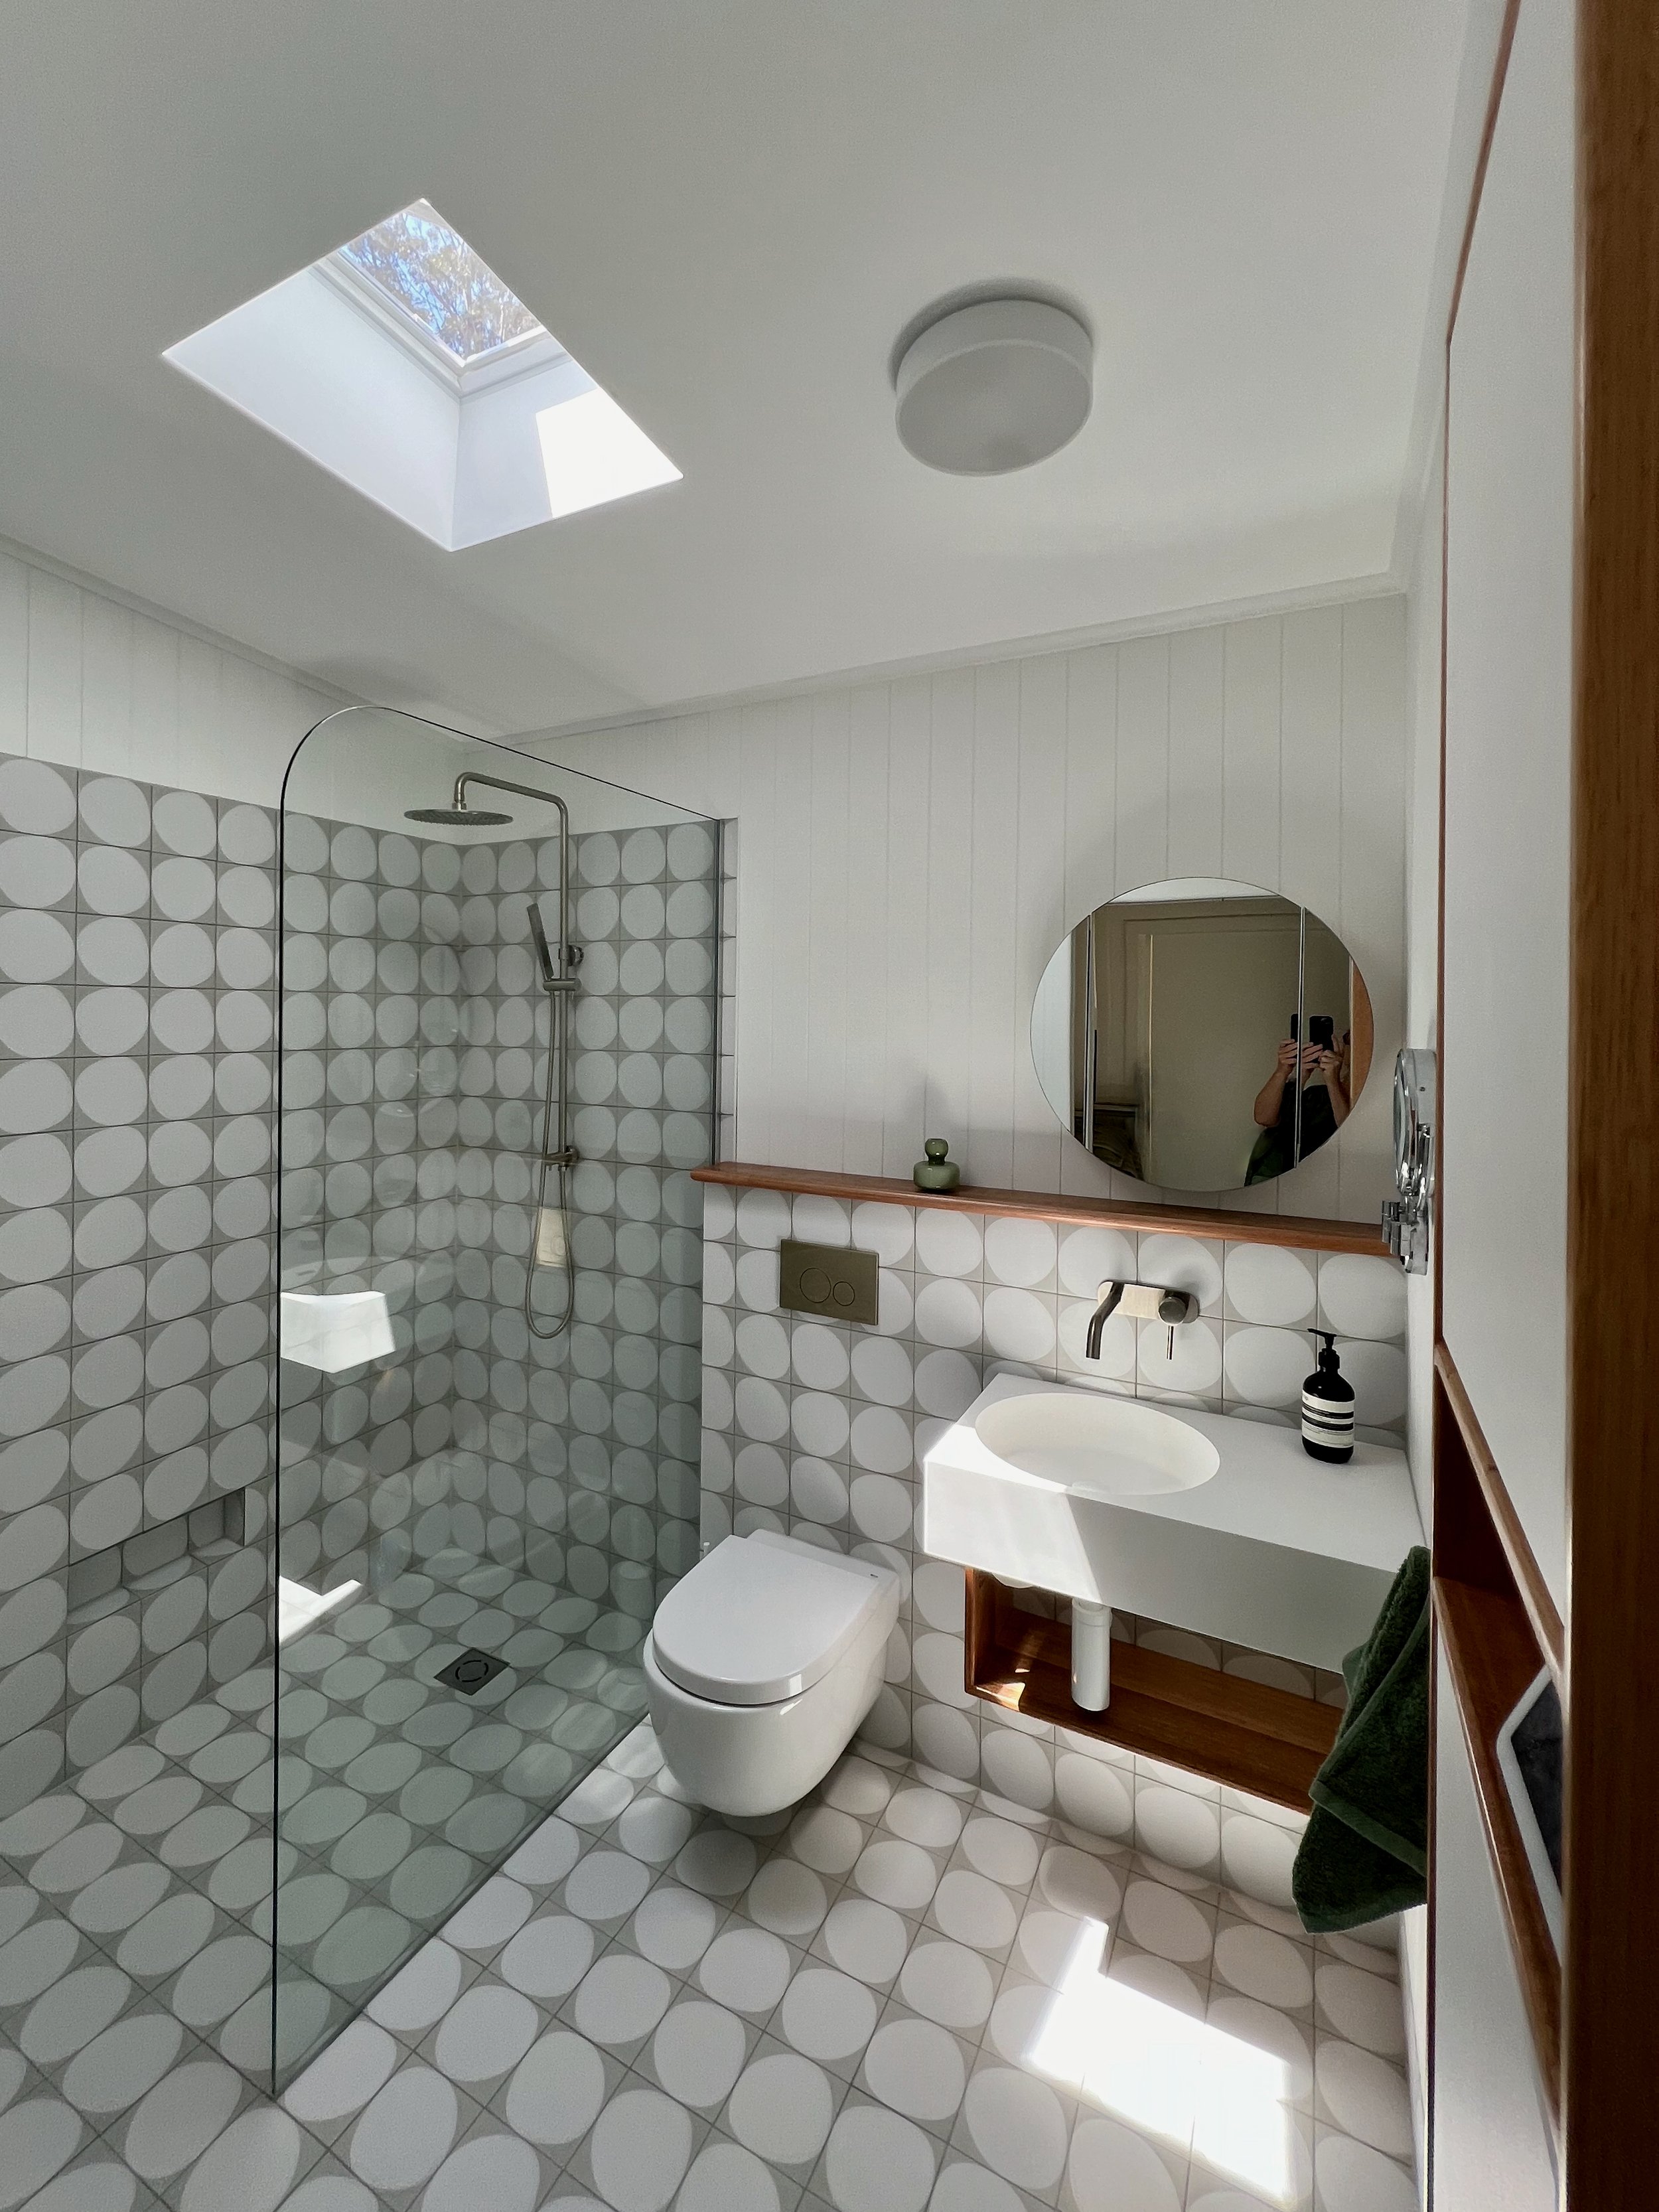
With a bigger budget and more time, every design decision for this renovation was to result in elevating the small room to feel generous, functional and beautiful.
BEFORE THE BEFORE
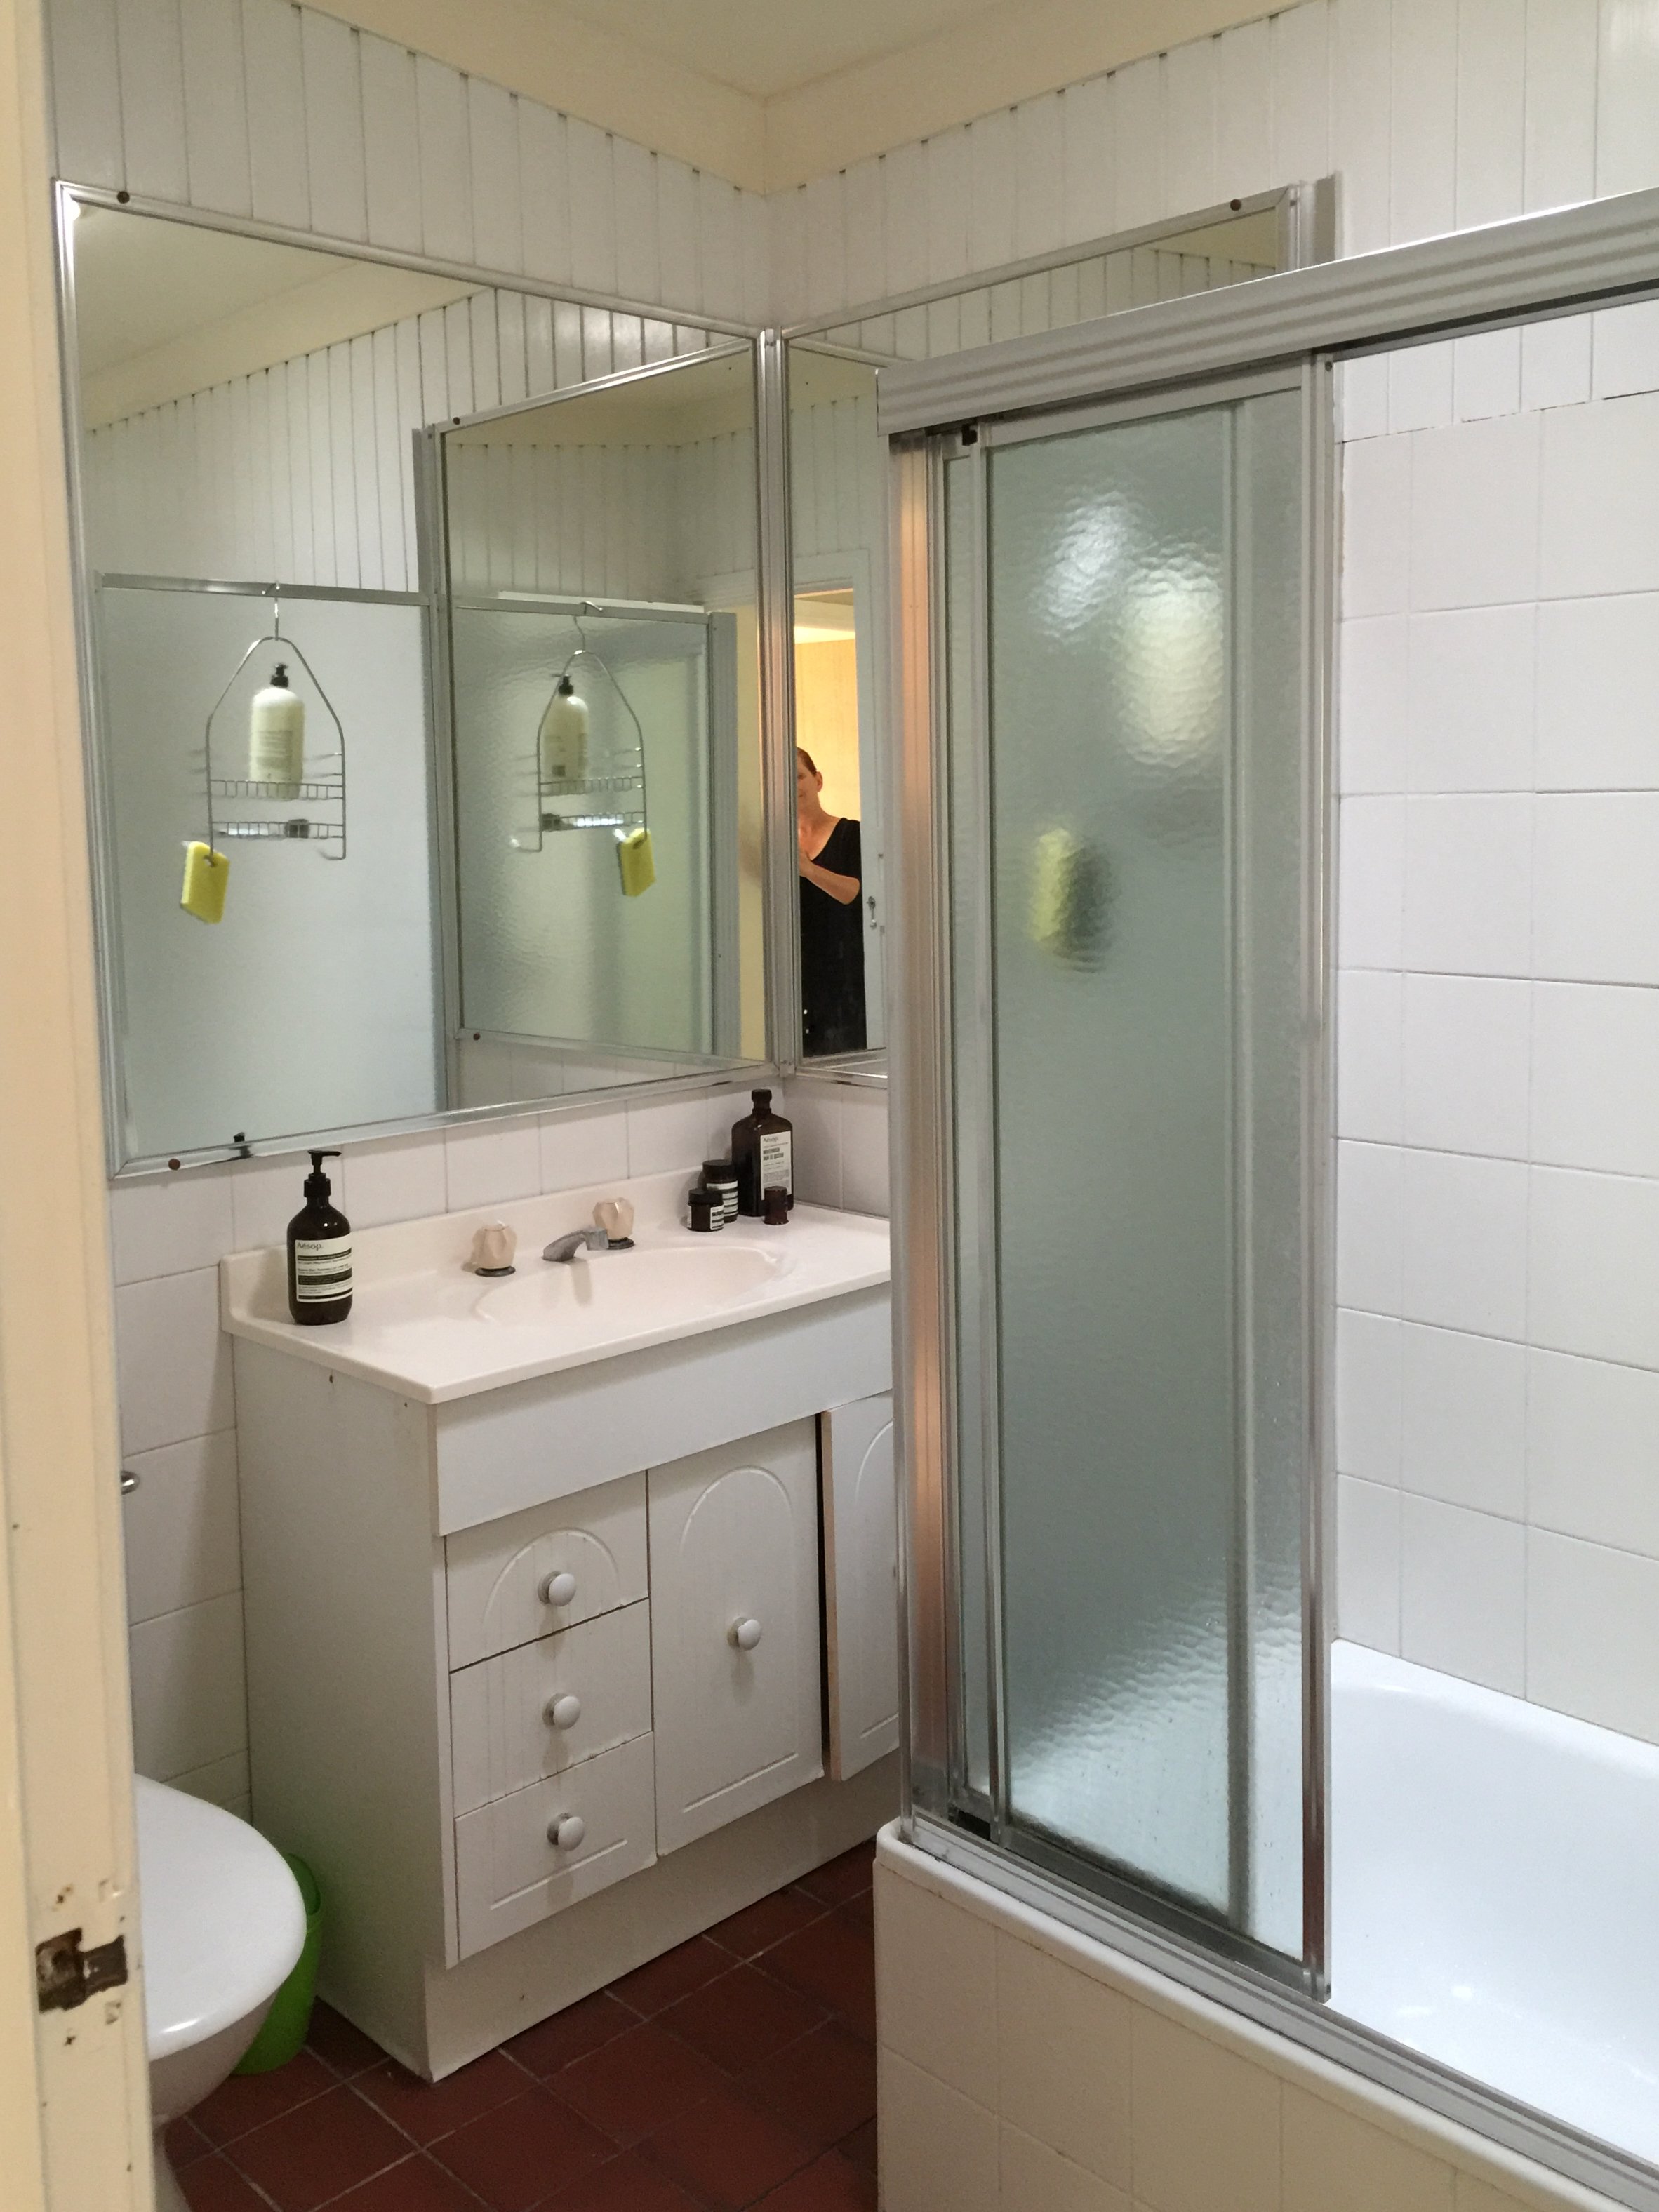
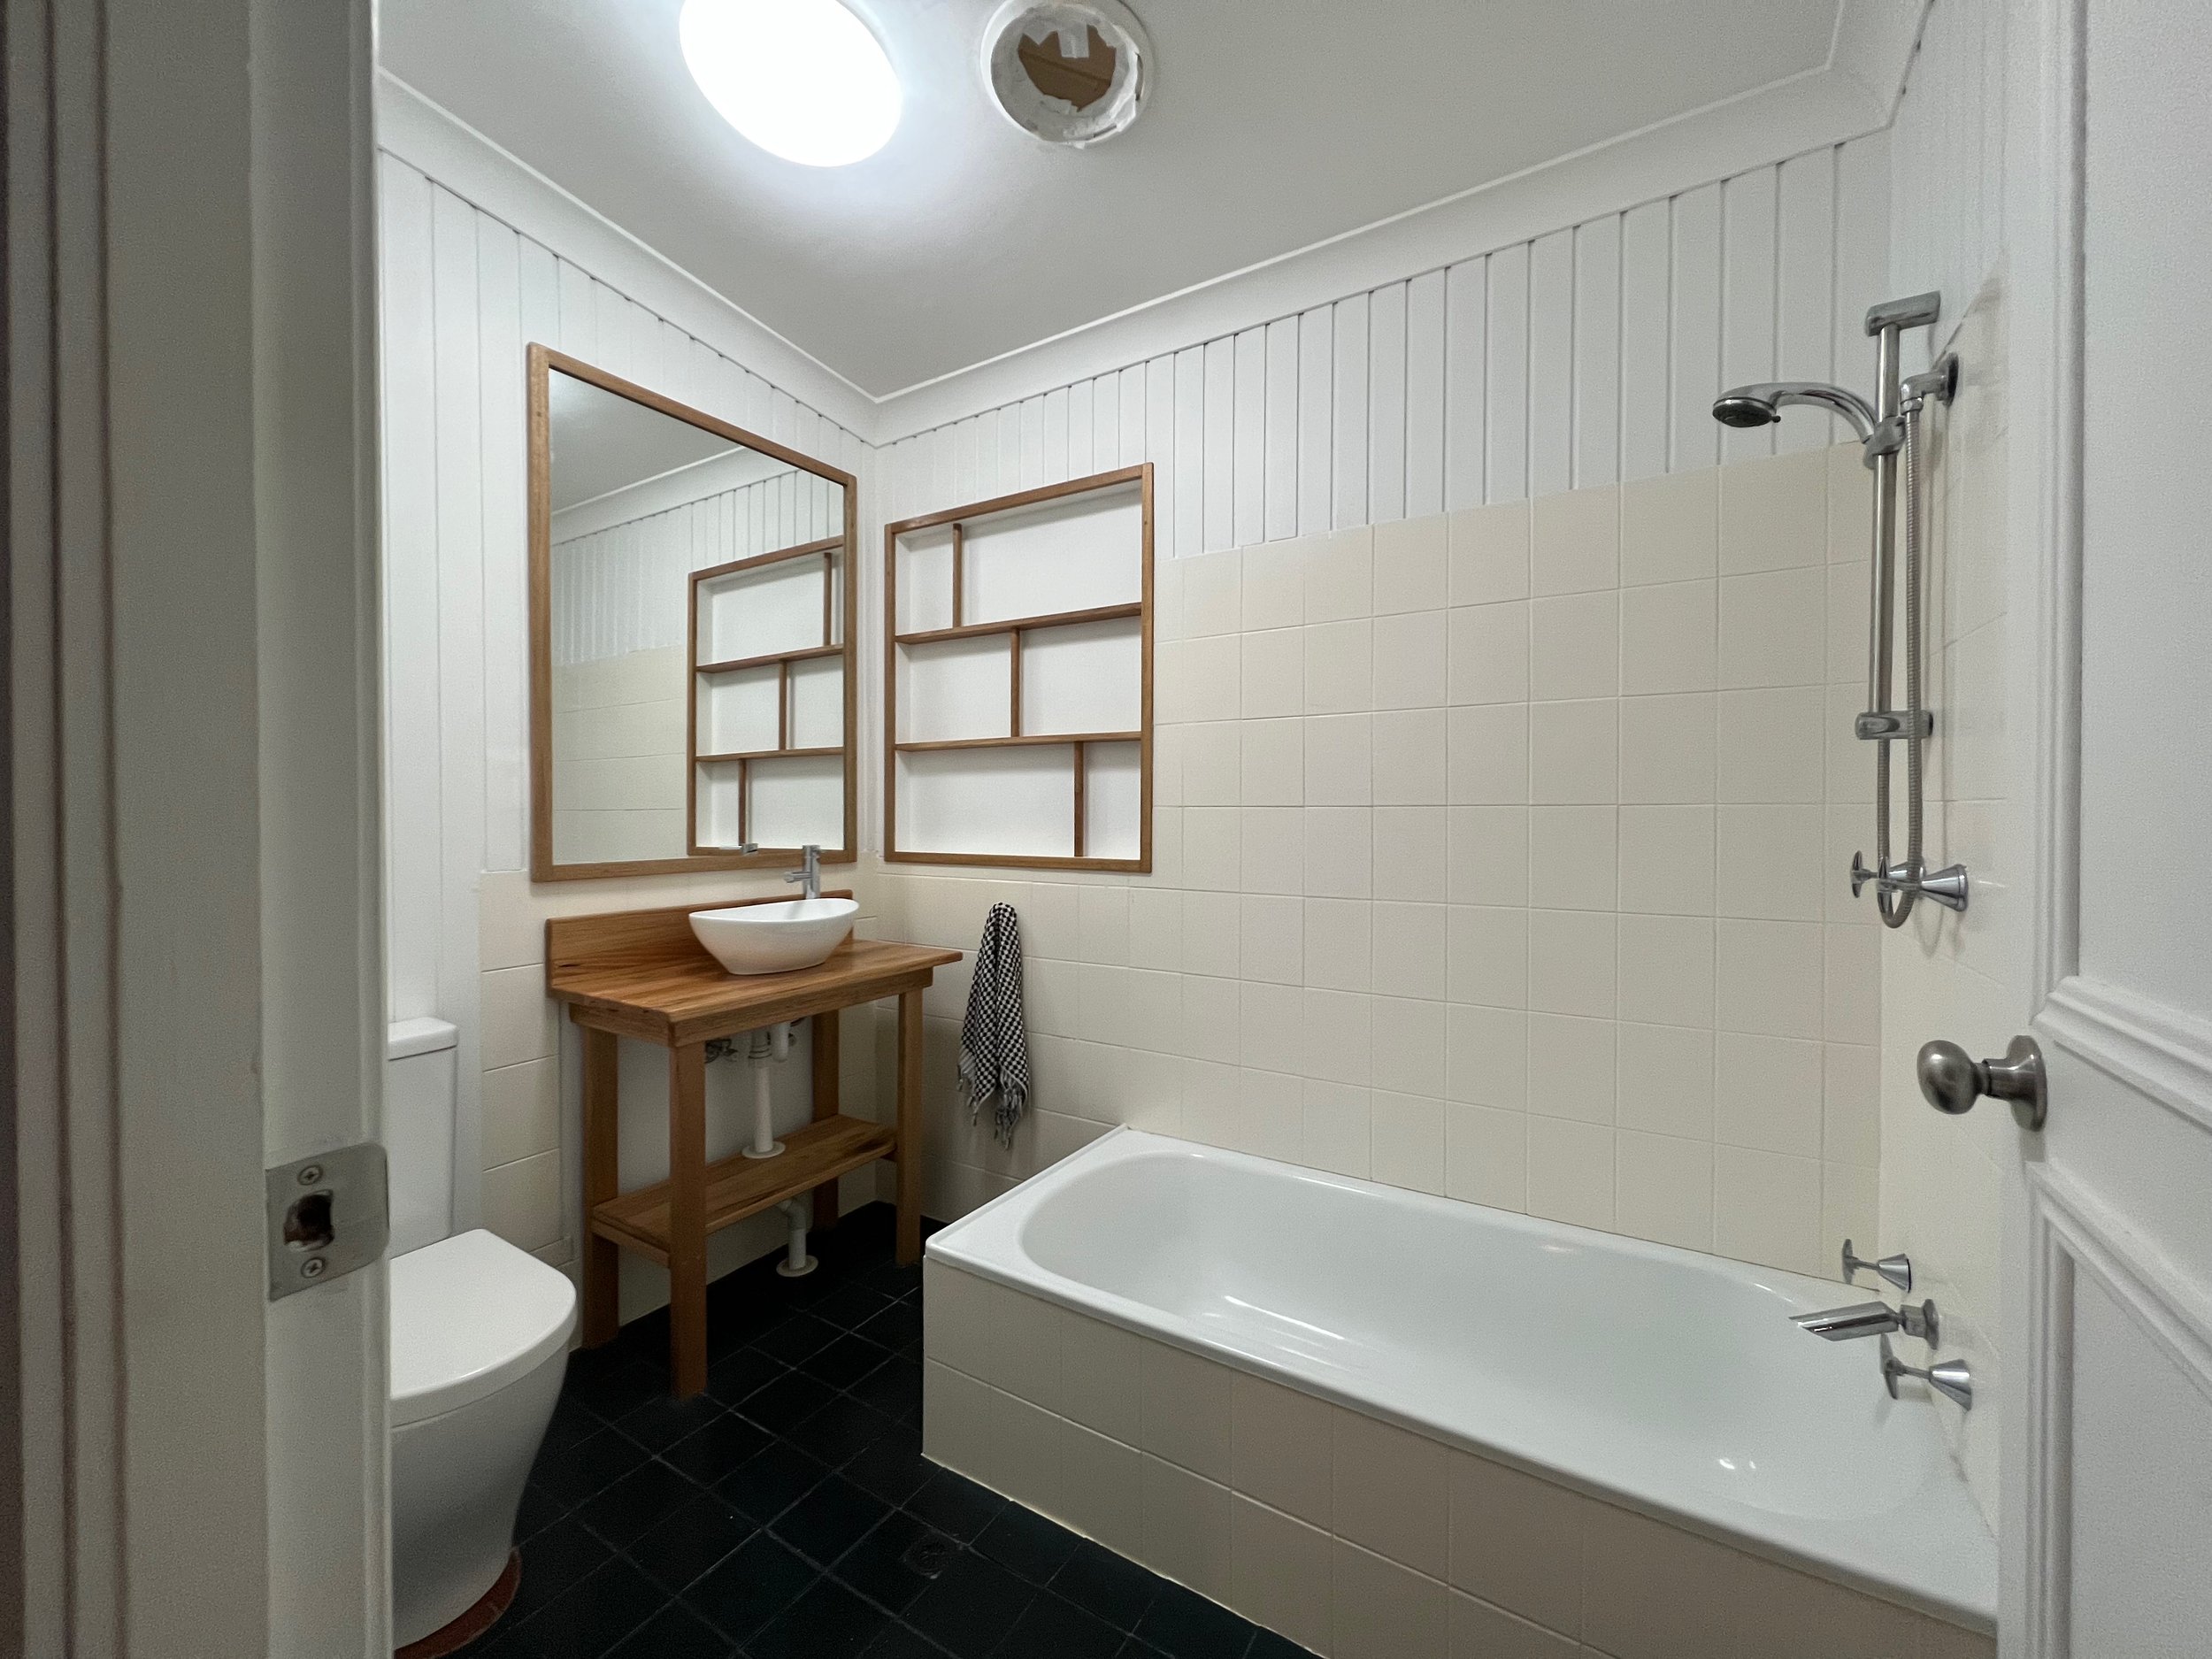
This room had a quick DIY cosmetic makeover six years ago, when I removed the shower screen, above left, replaced the old vanity and loo, and added some handcrafted features, above right.

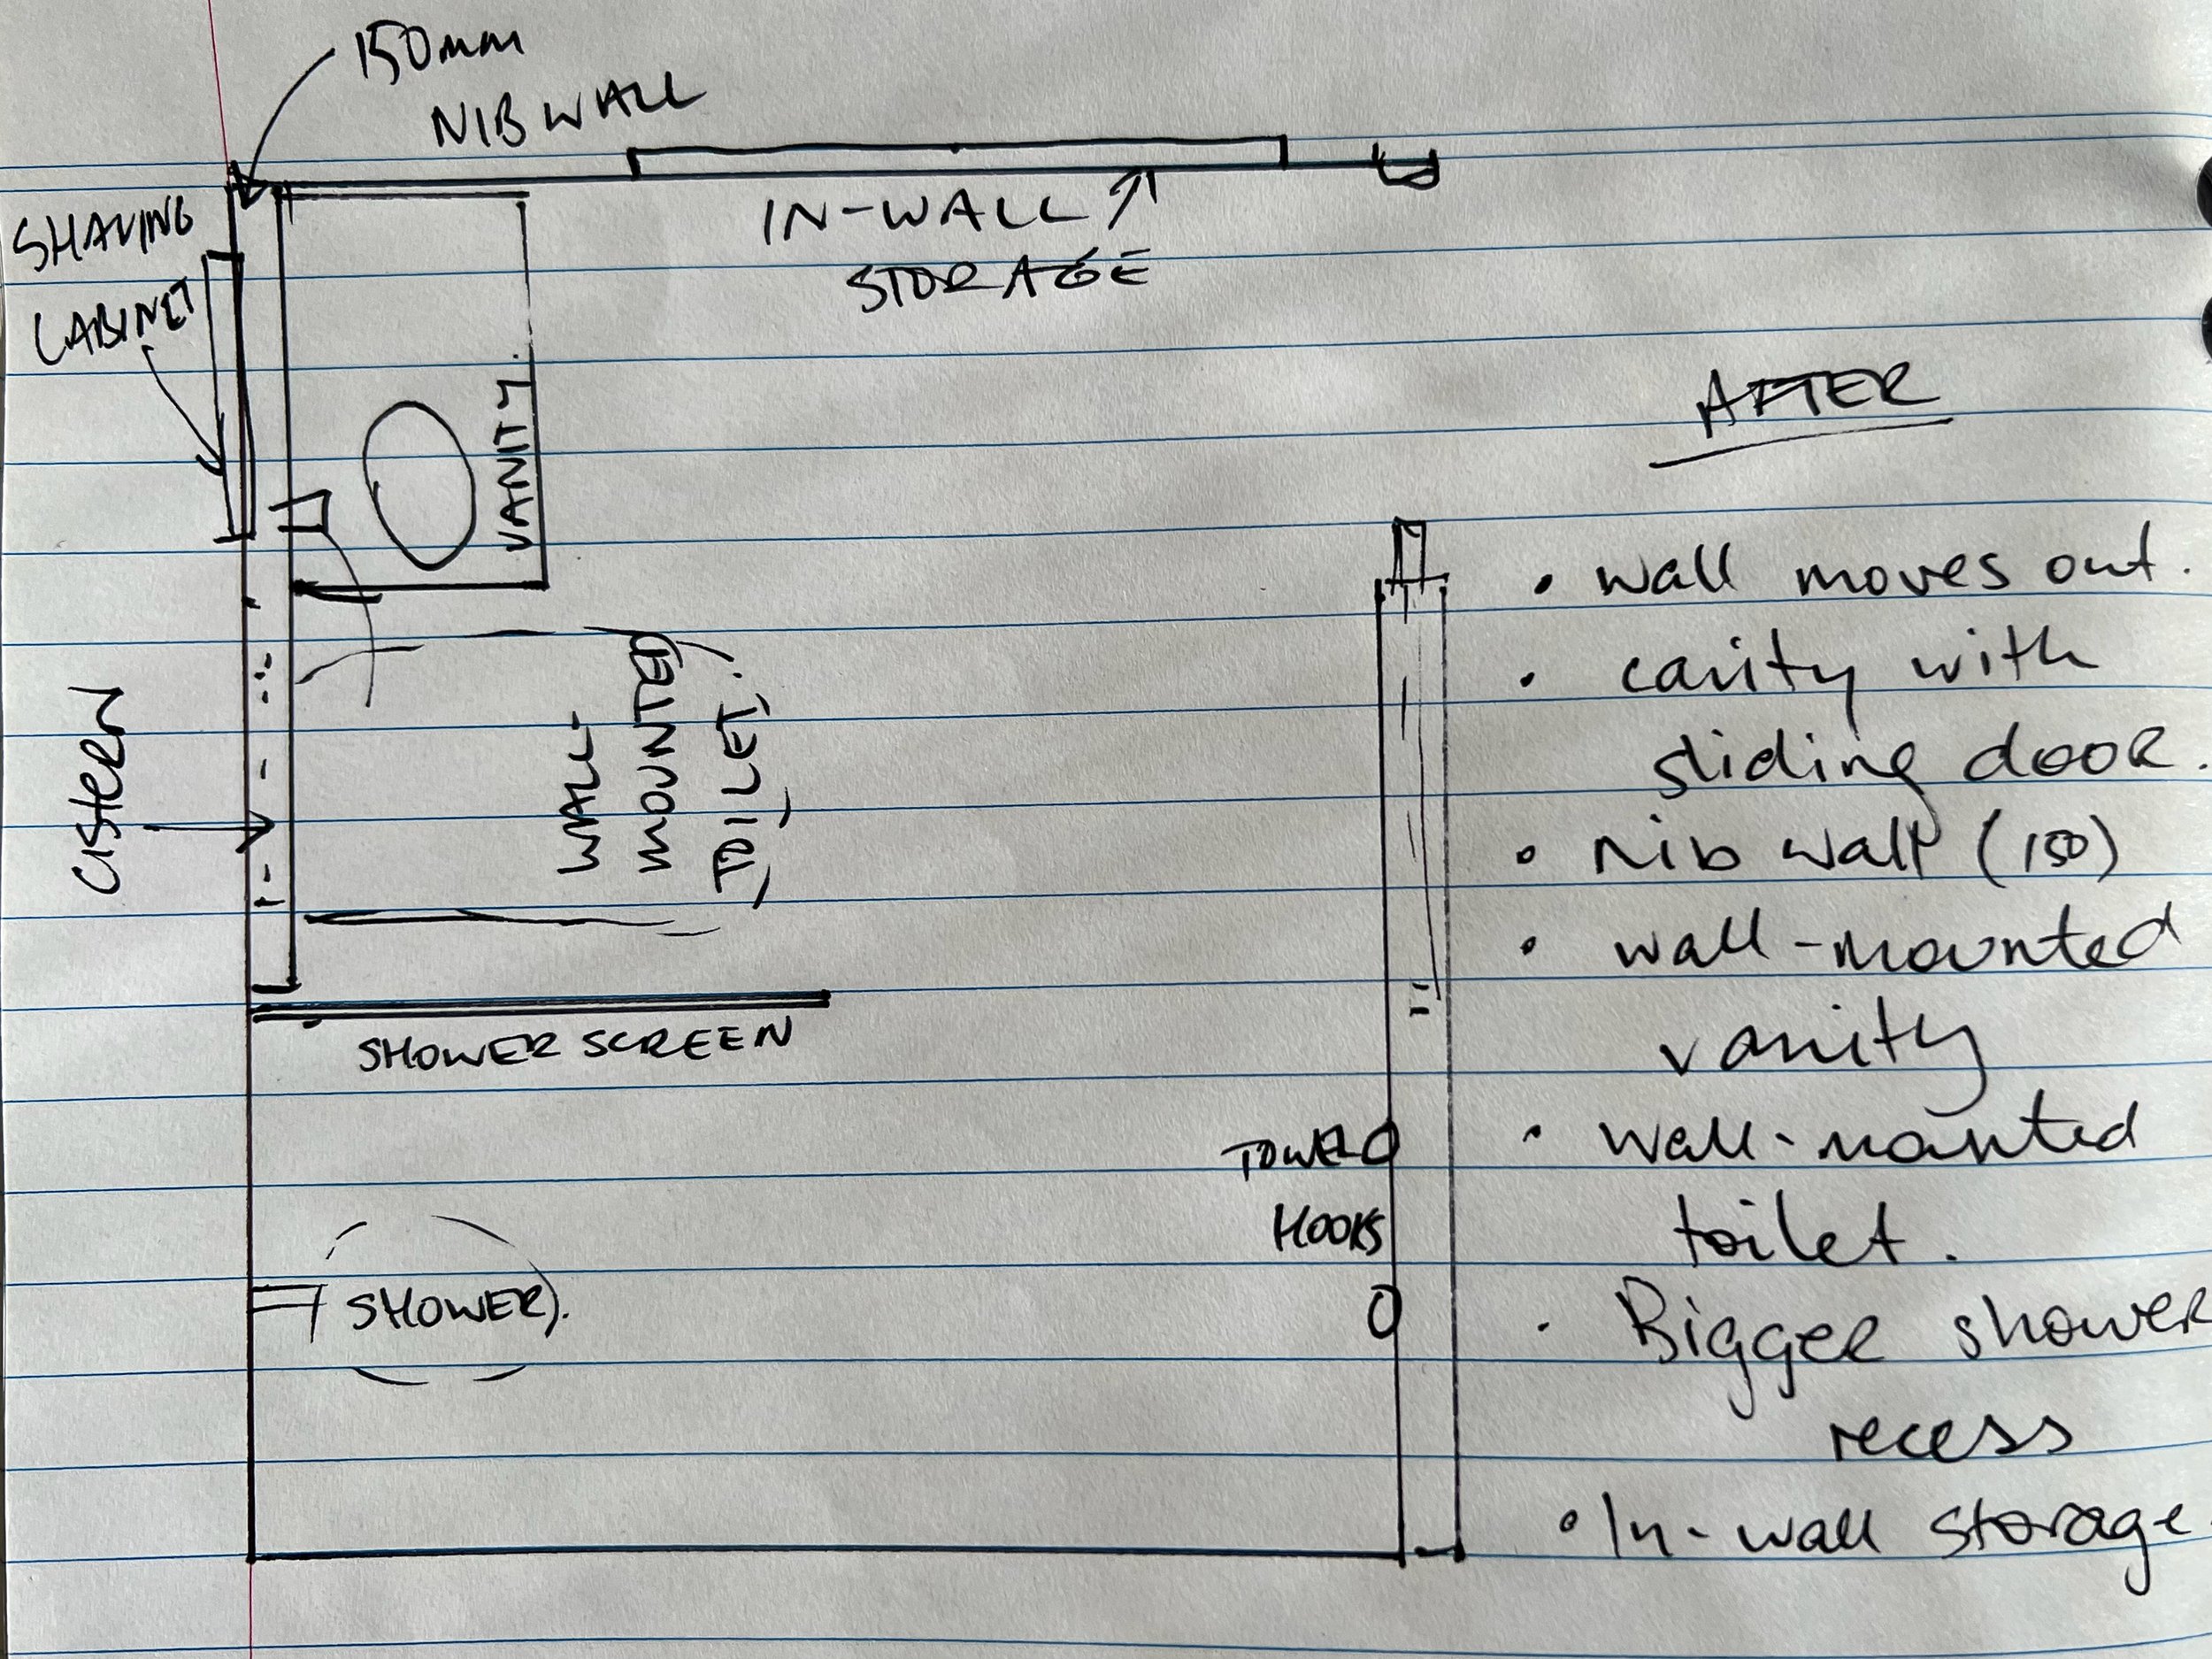
BEFORE & AFTER FLOOR PLAN
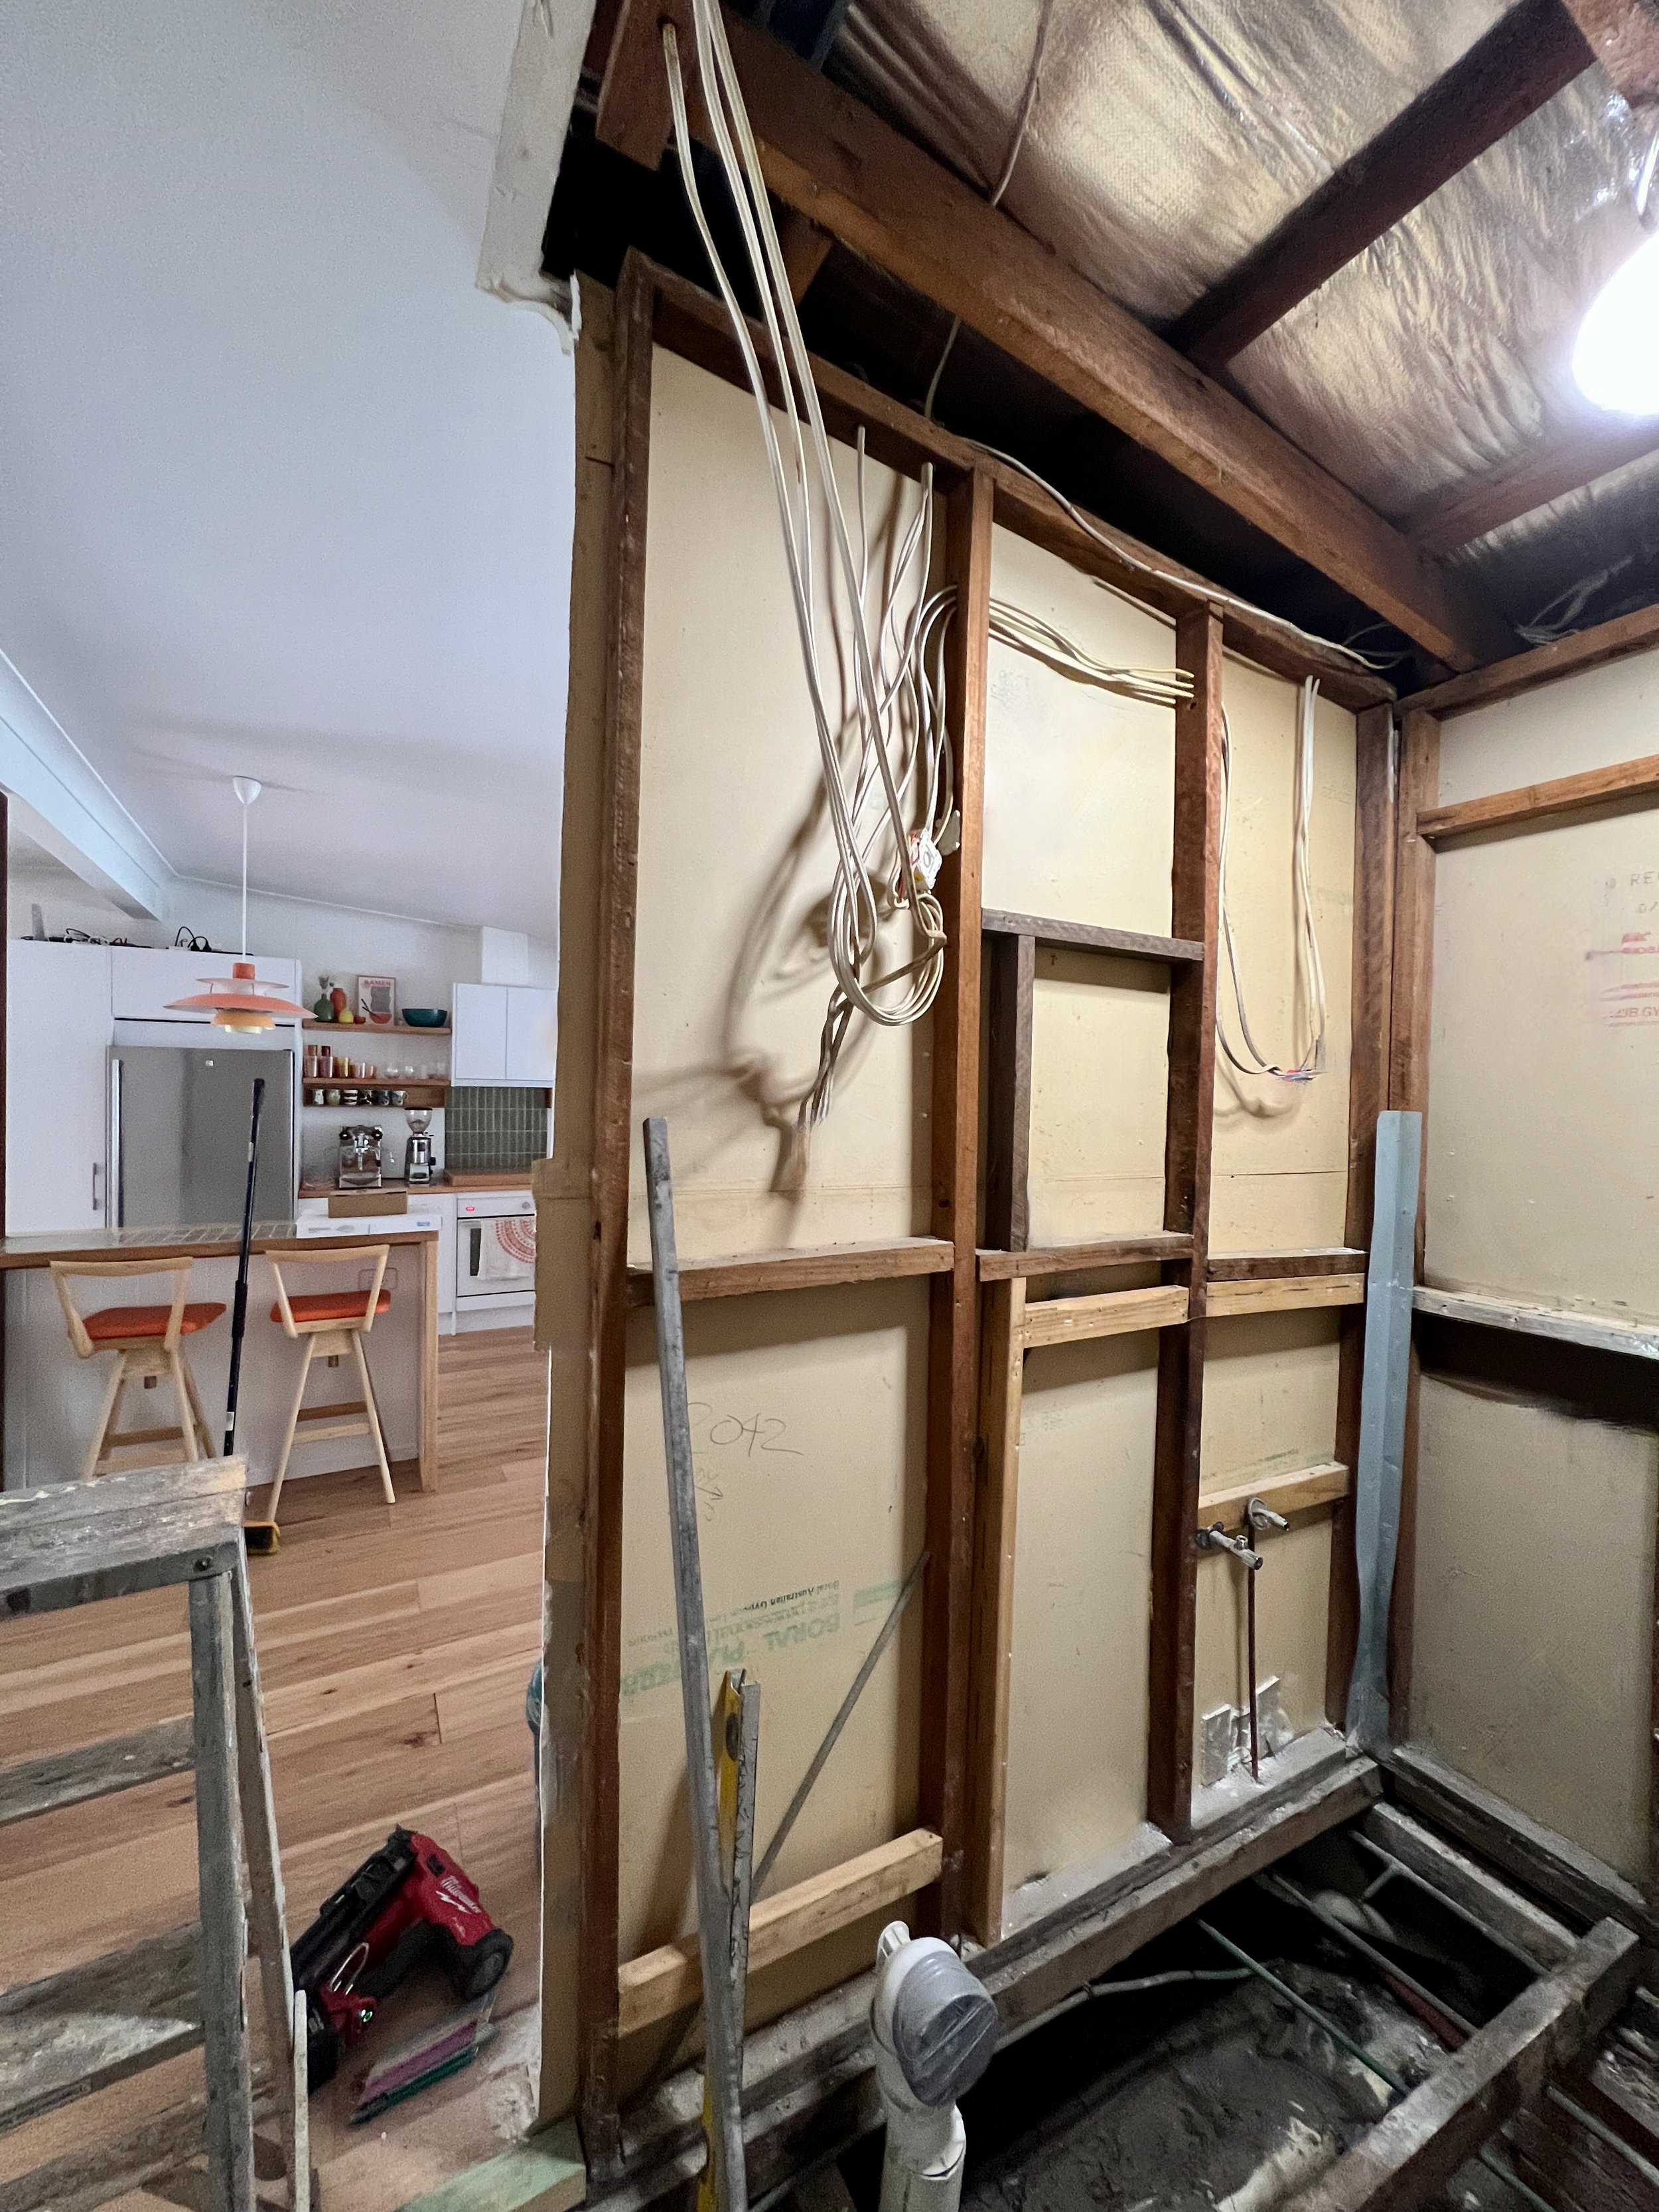
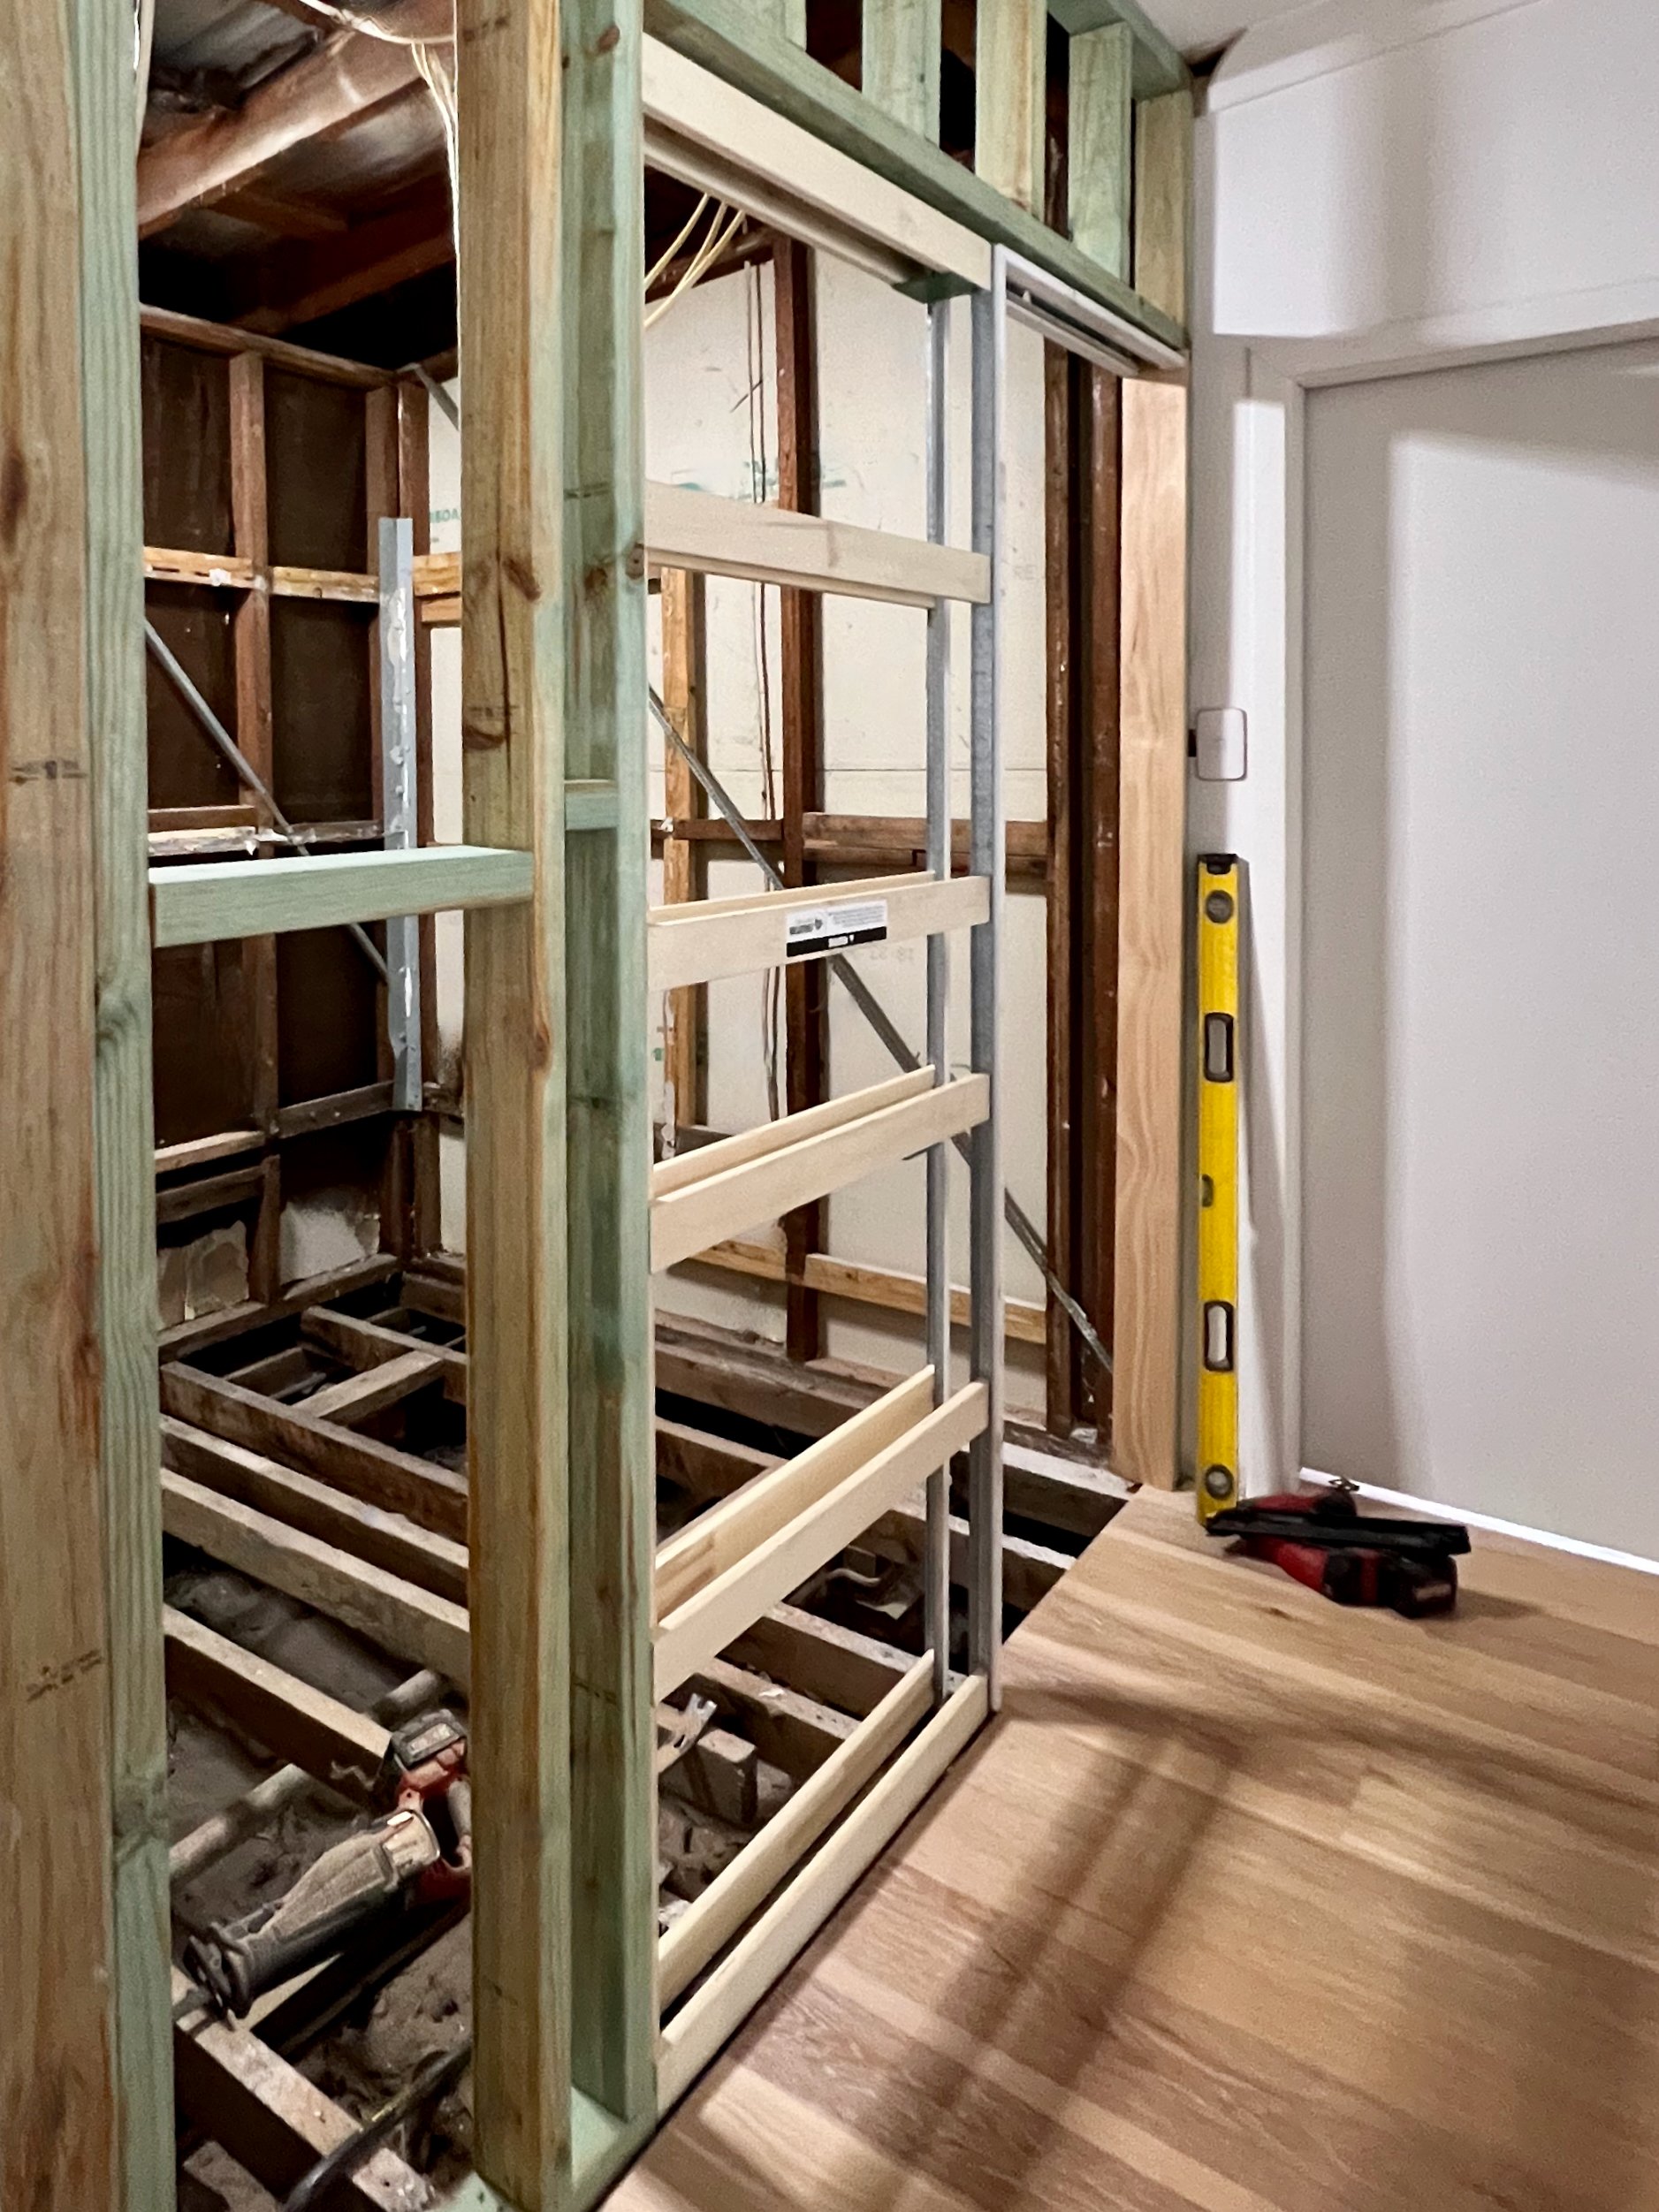
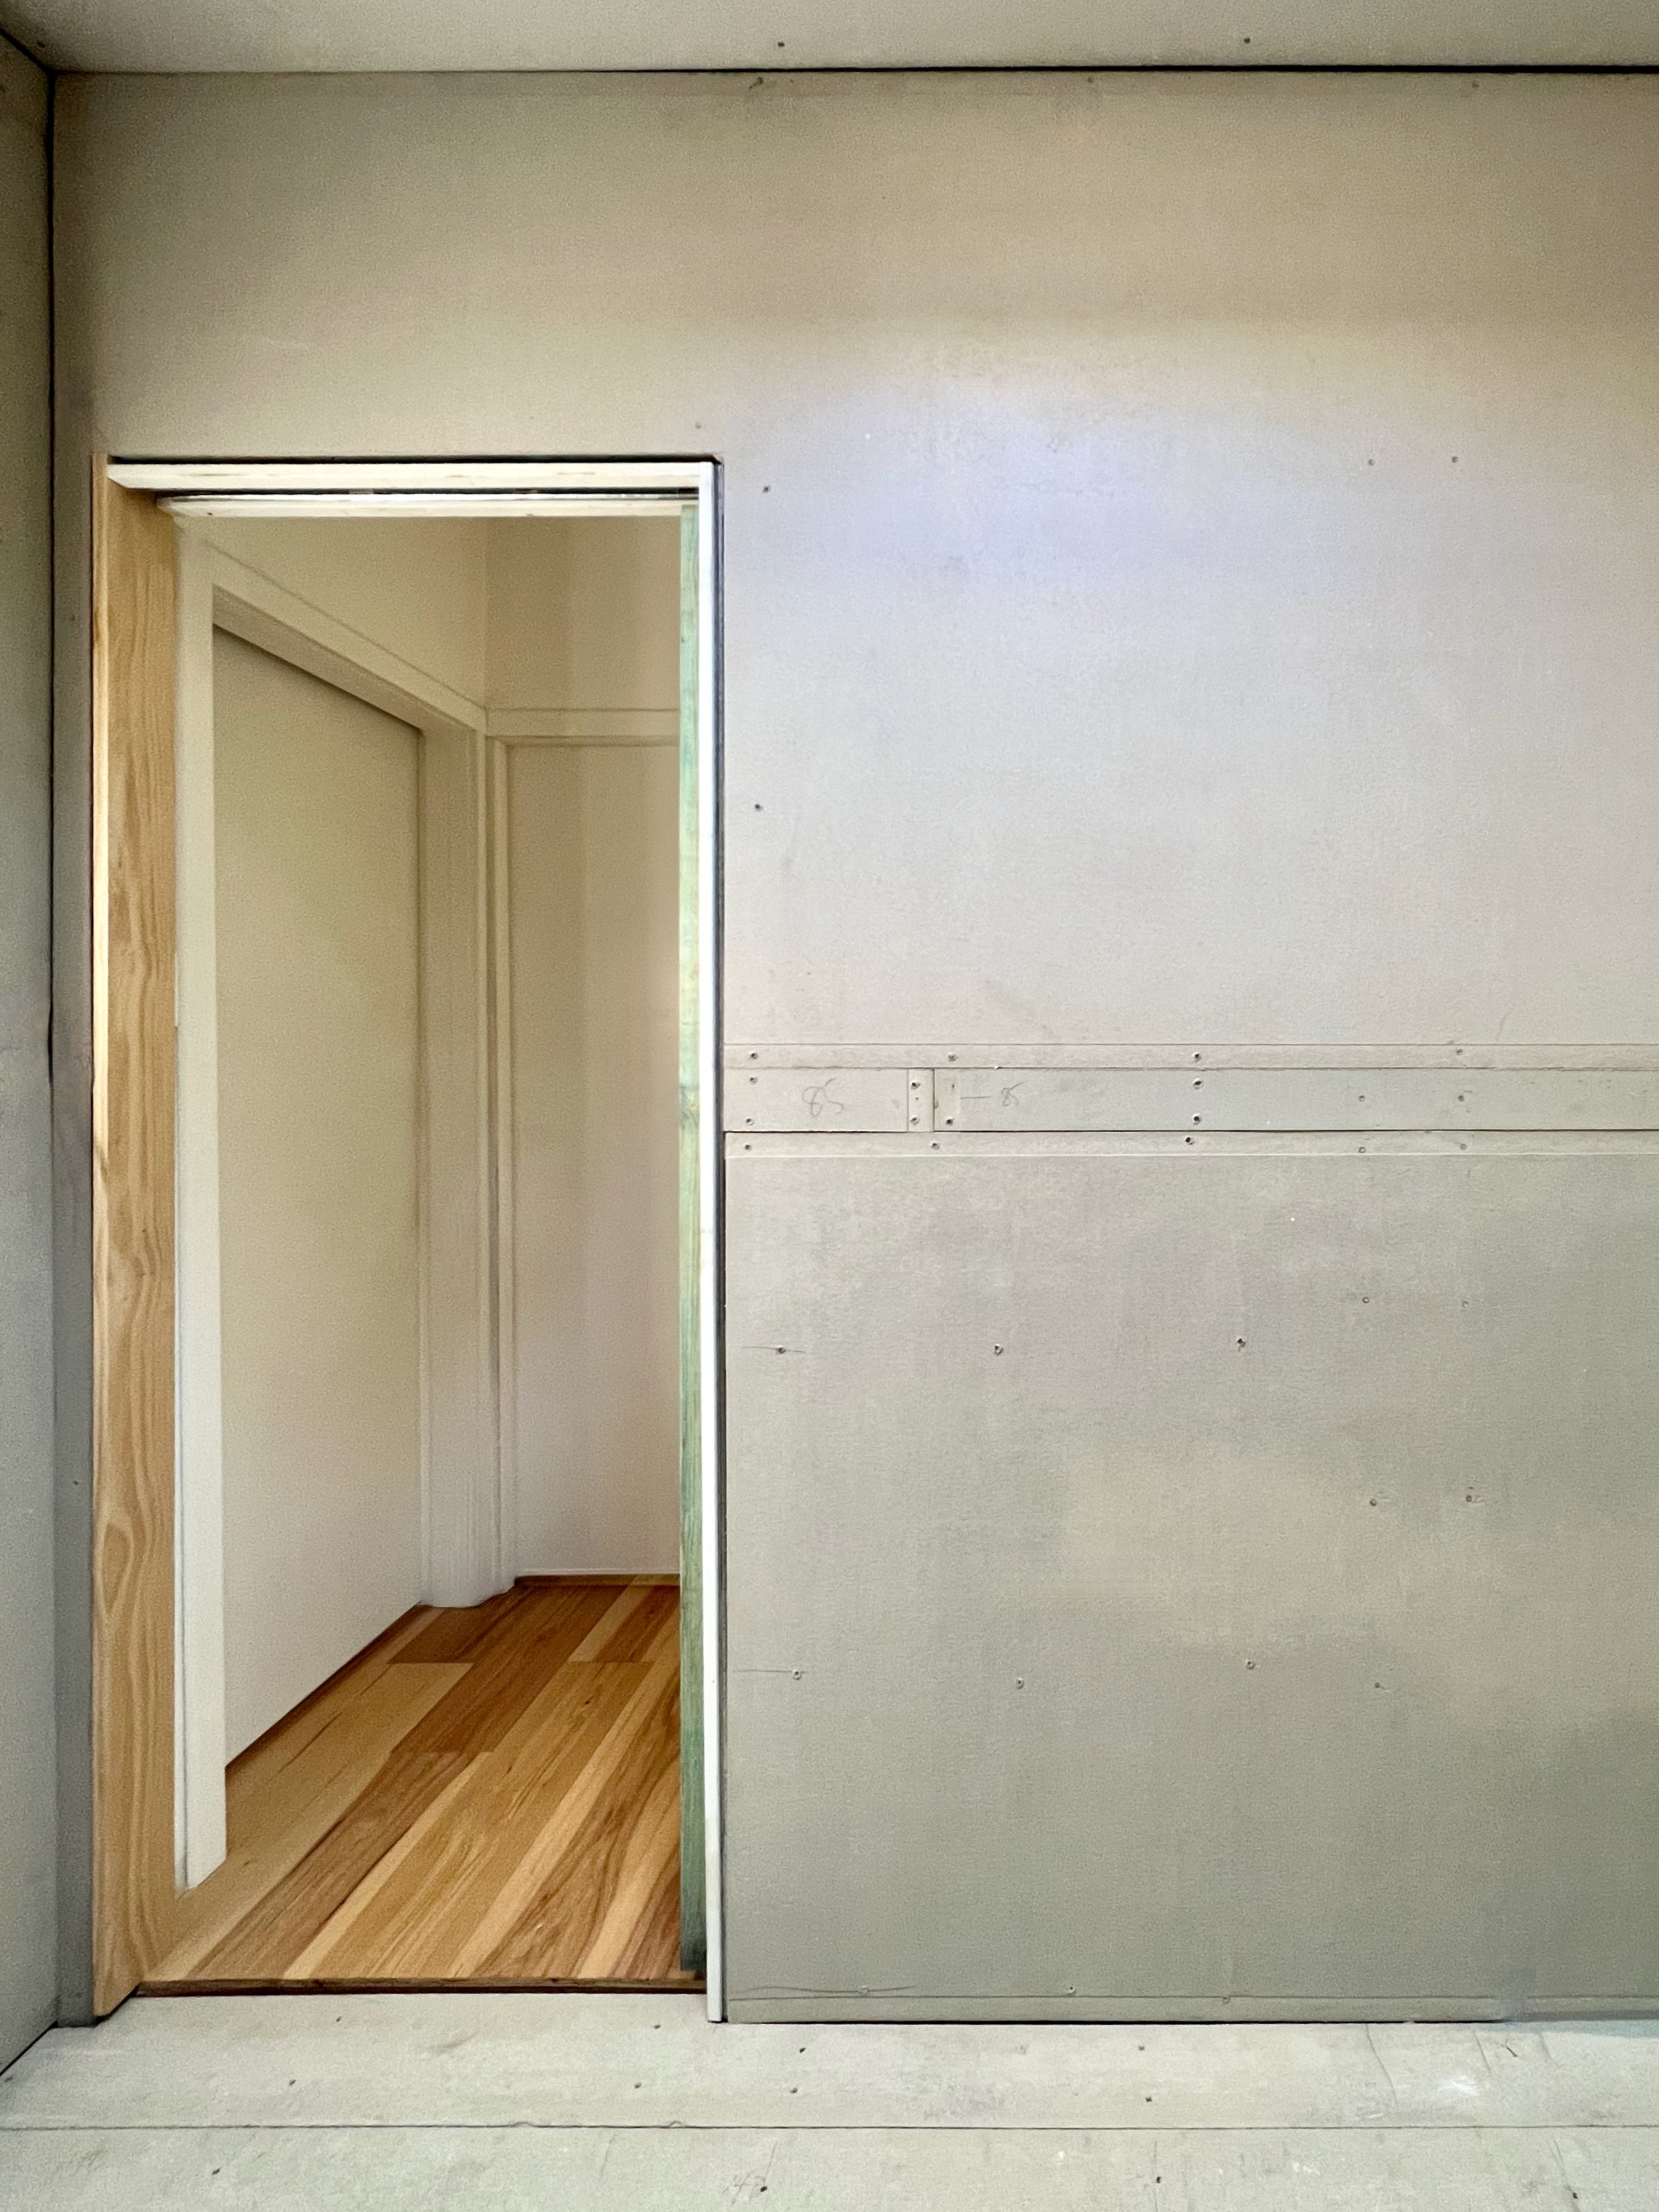
To increase floorspace, the bath was pulled out and the inward-swinging door replaced with a sliding pocket door built into the wall that was moved into the hallway by 200mm.
A skylight adds light and ventilation to make up for the lack of windows.
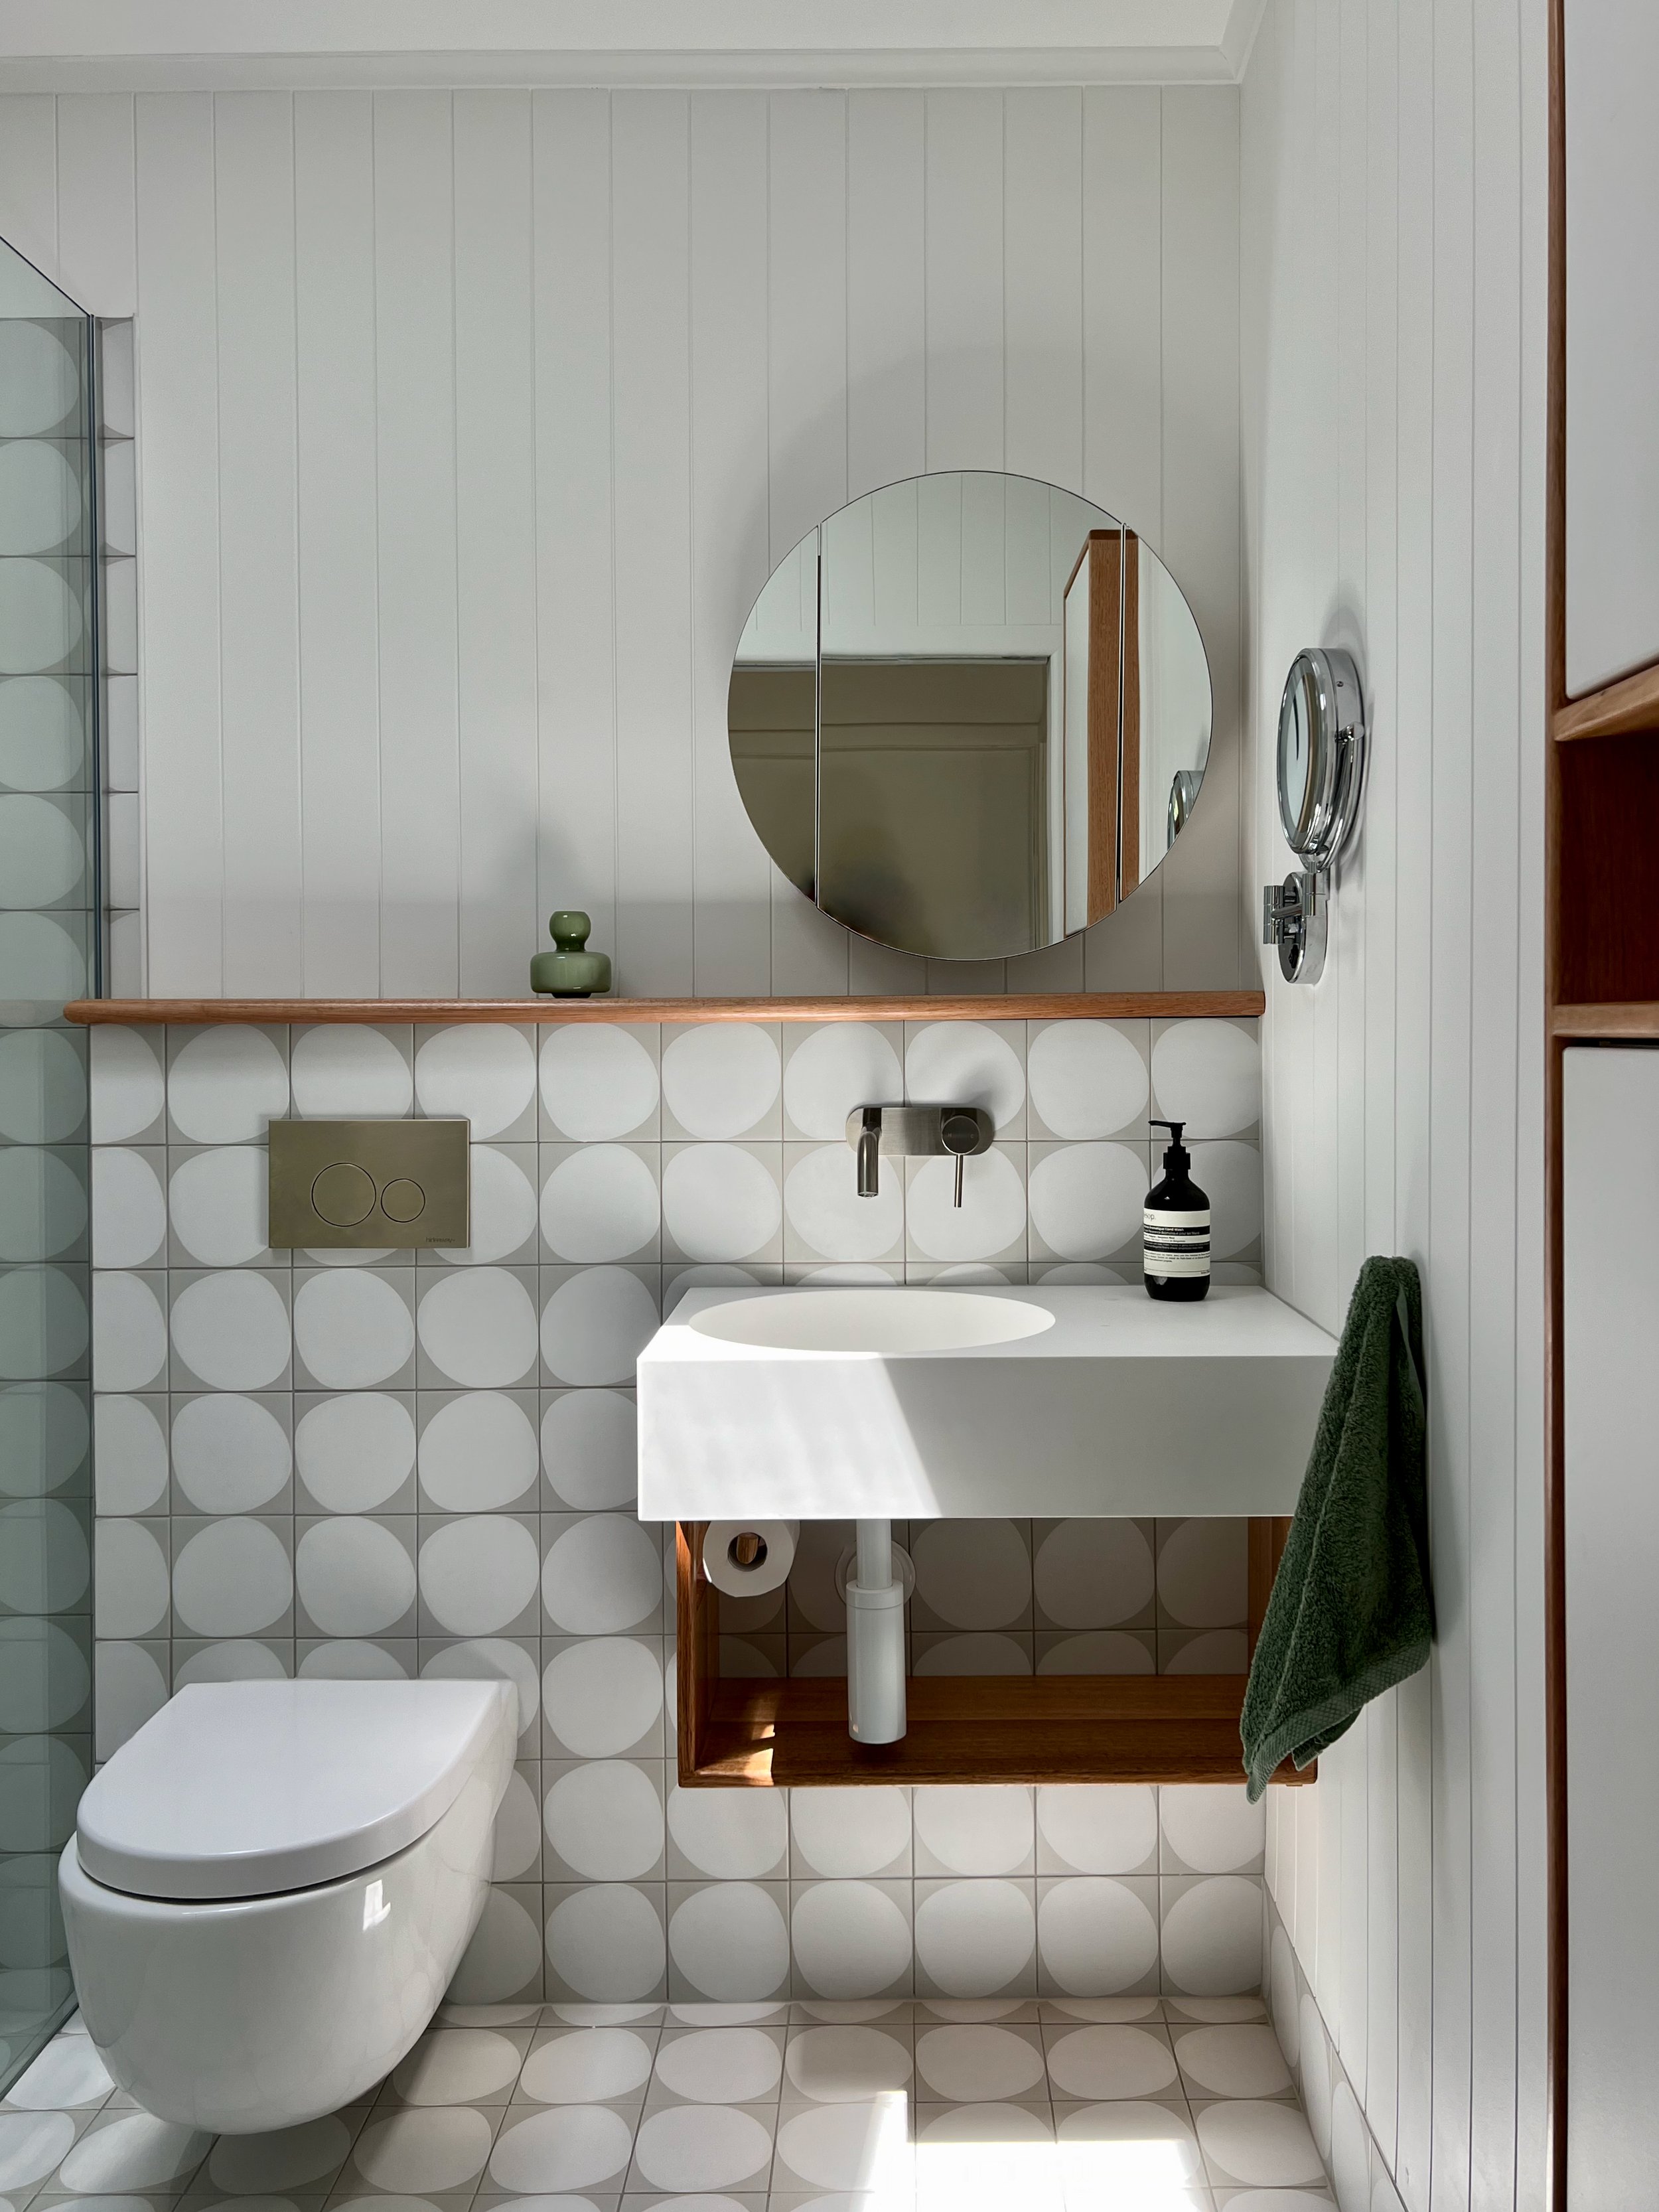
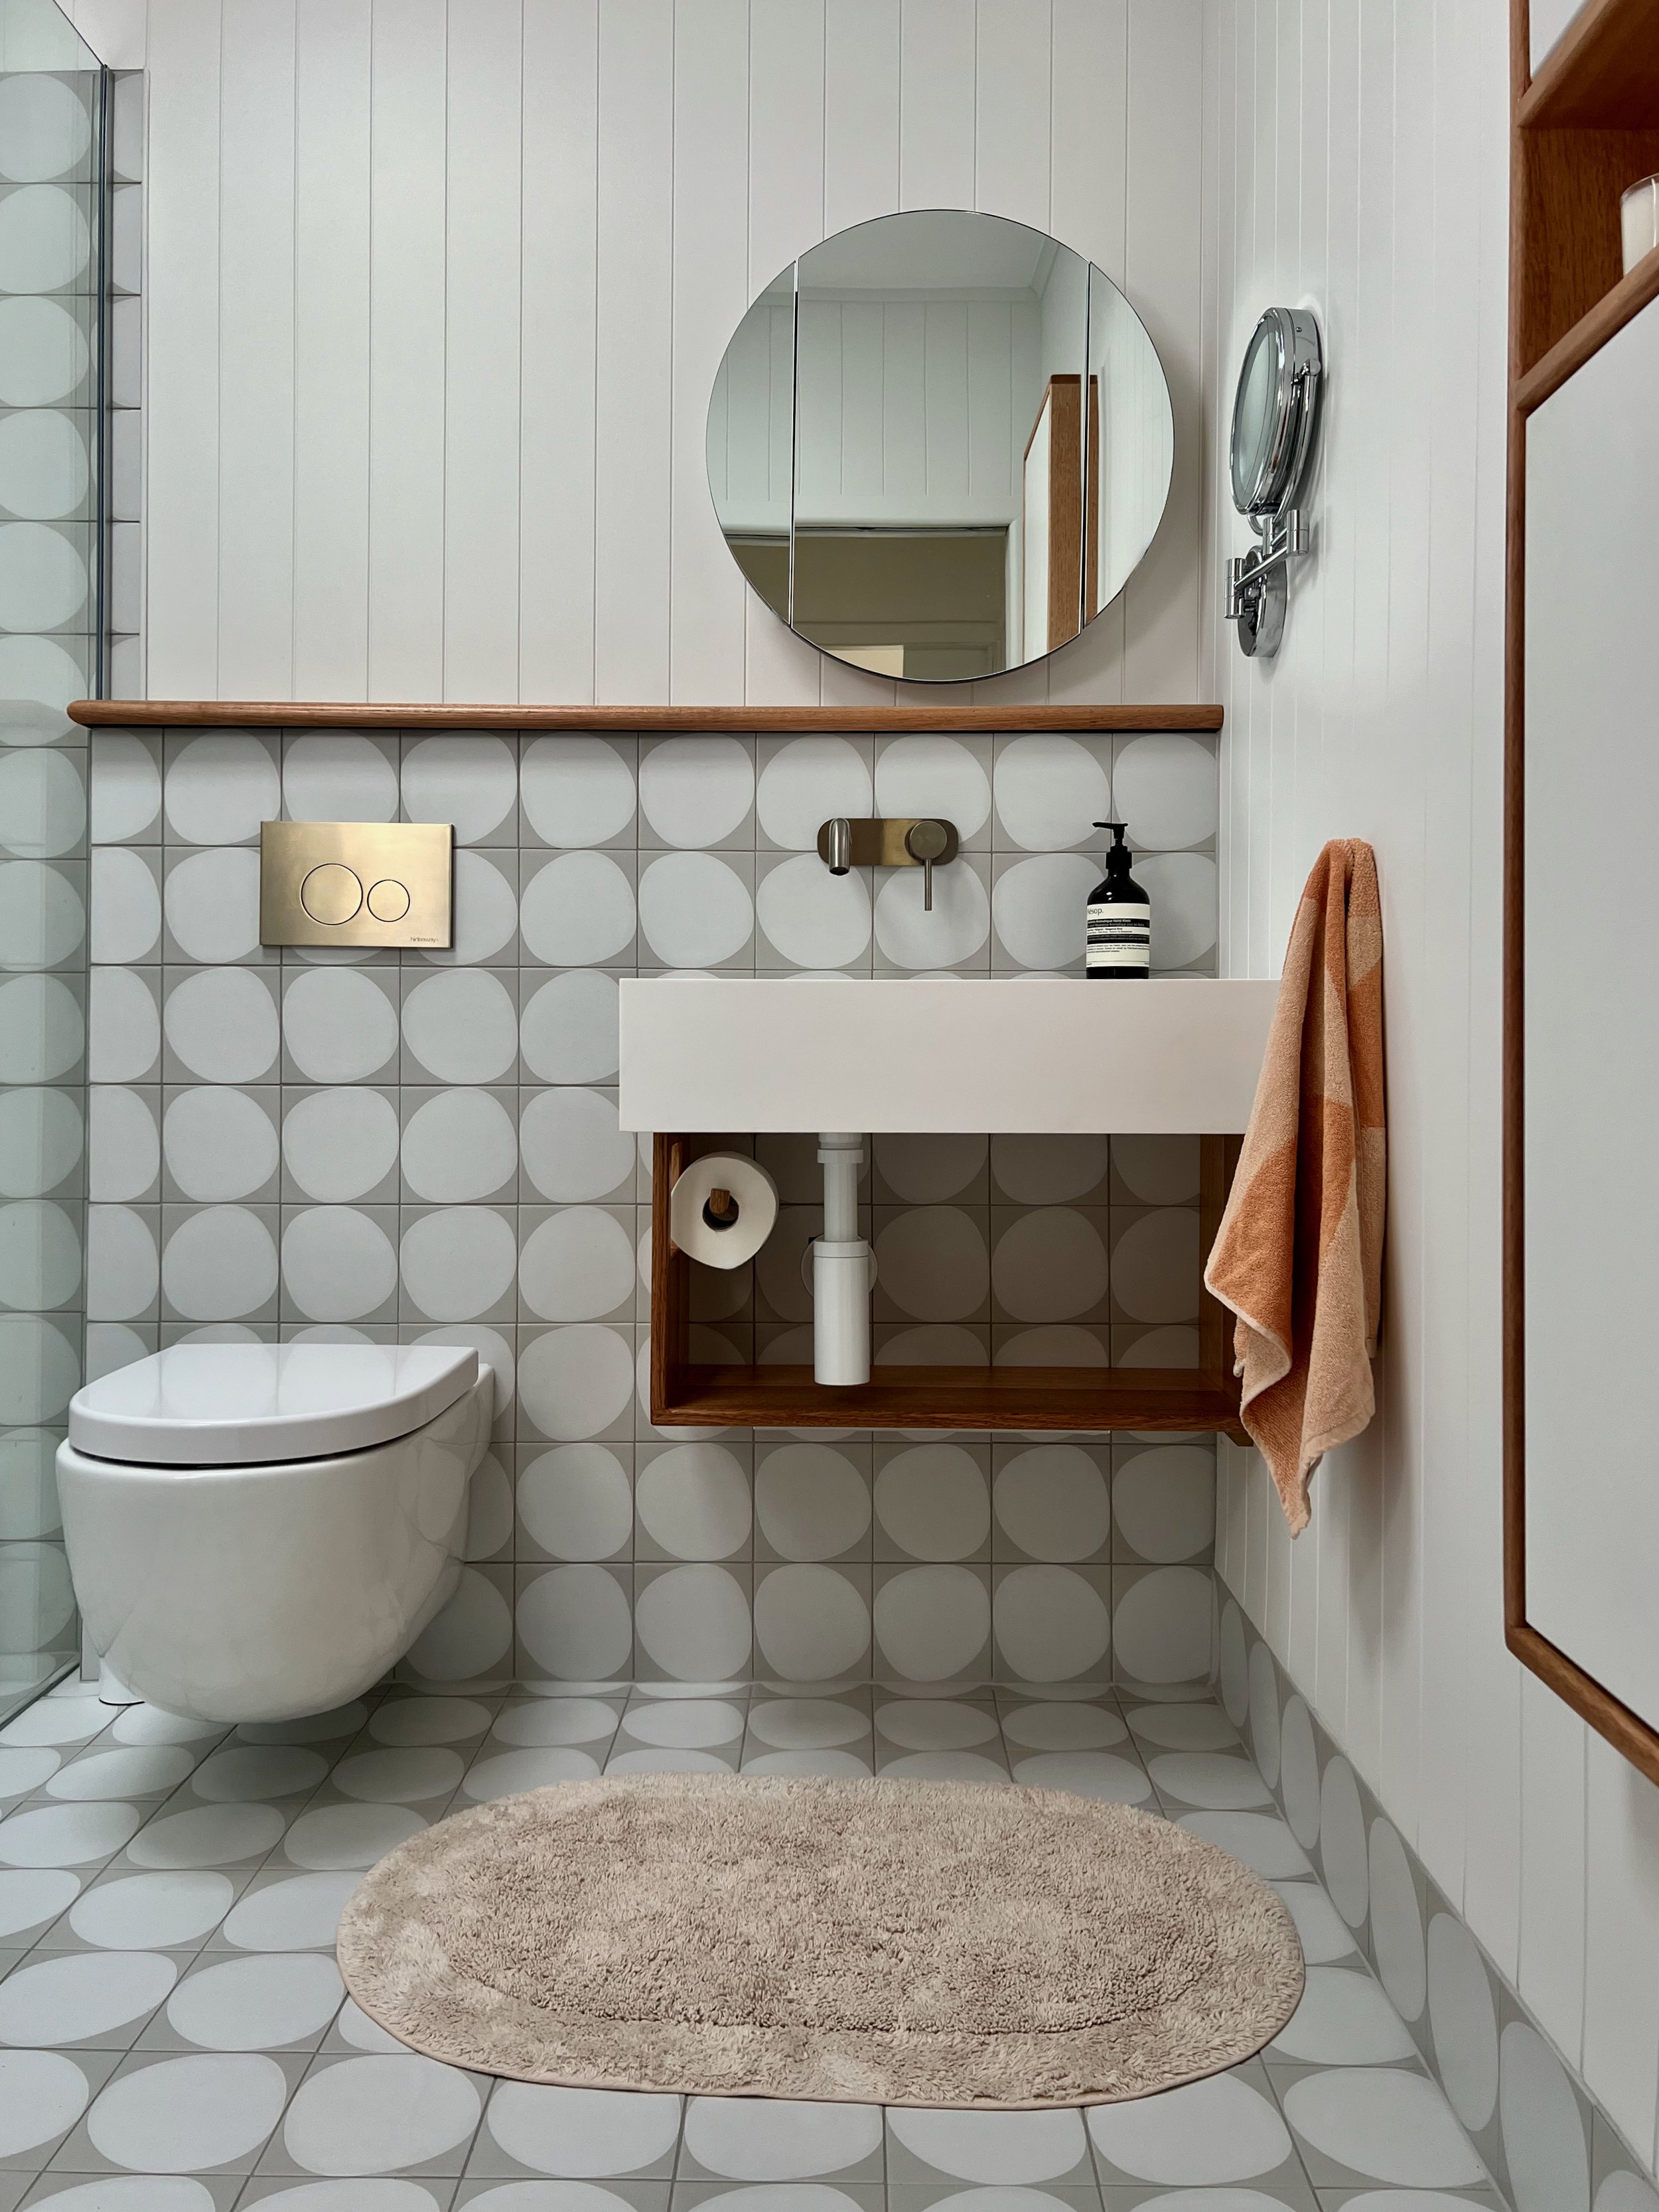
Opposite the door is the basin. As the most visited utility it’s the most directly accessible.
The second most-used utility is the toilet, positioned away from direct sight lines of the doorway.
The nib wall stops at the shower screen to allow the walk-in shower to be as deep and wide as the room allows.

MOVING THE WALL
Adding 200mm to the room gives a little extra to the shower and the space in front of the toilet without impacting the hallway.
TIP When the builder popped in to discuss the plan, they provided a list of materials that I ordered and had delivered. This saved them a day of shopping and having to pay the initial bill, which in turn saved me.
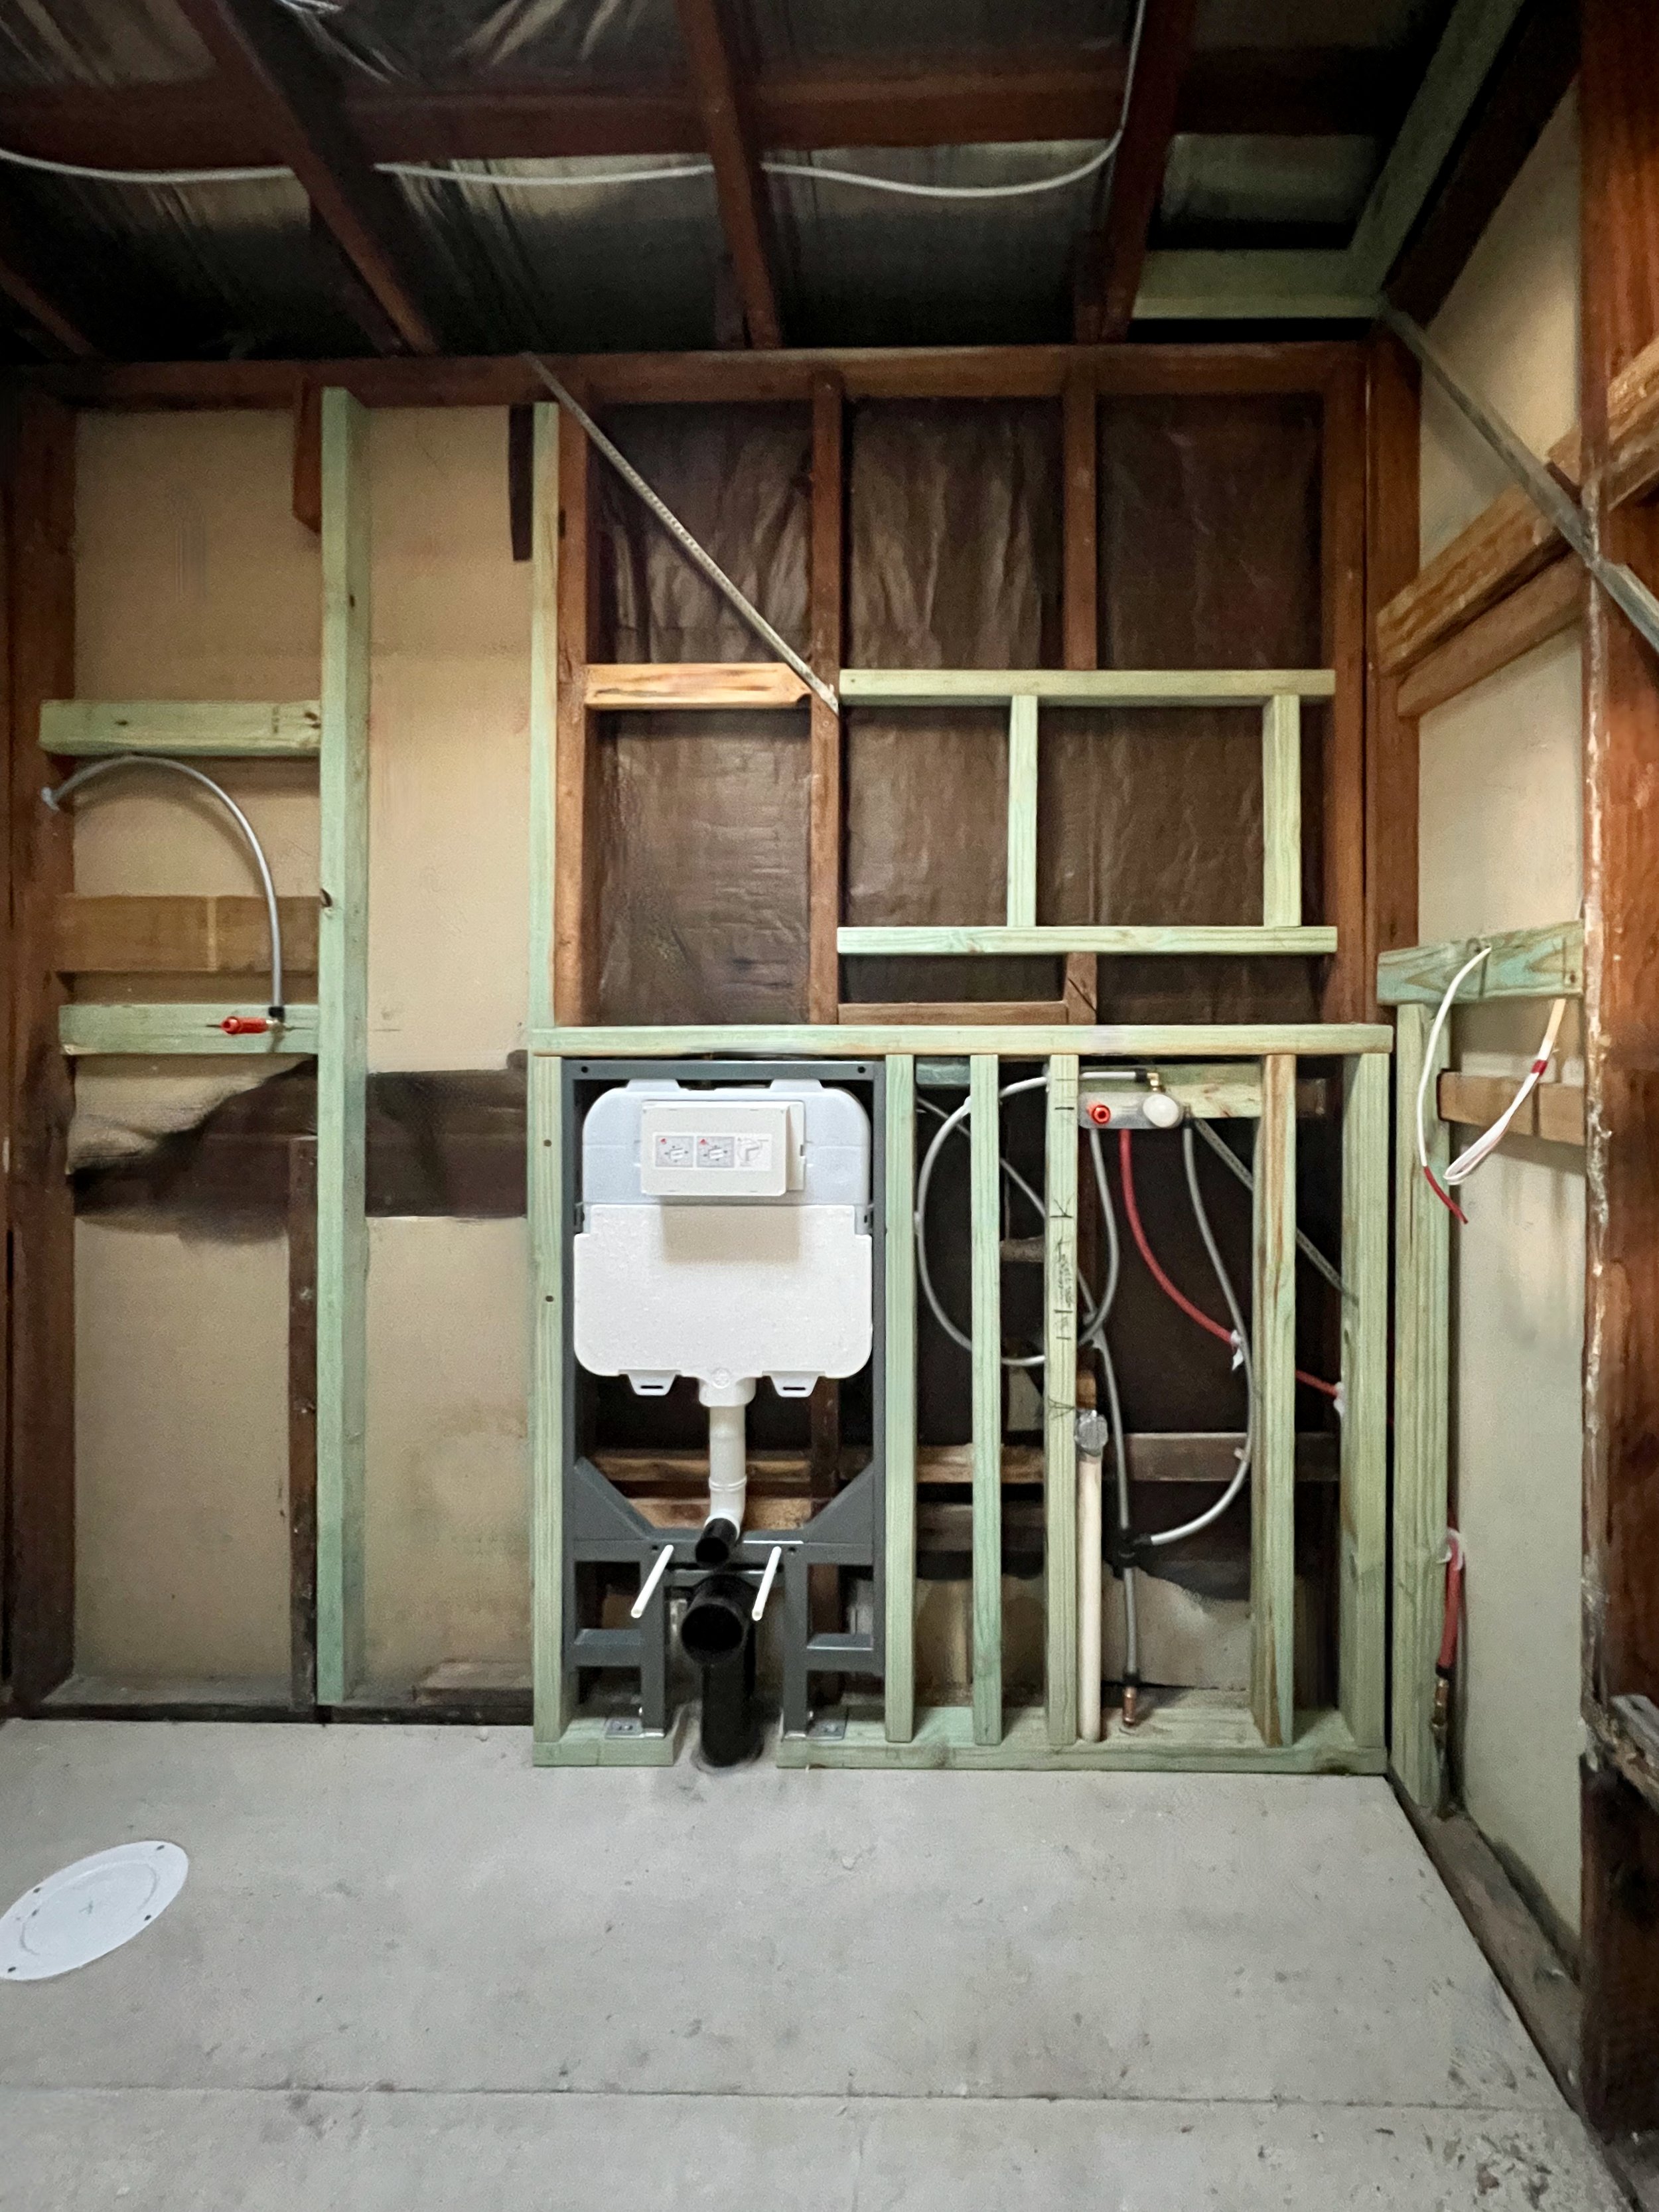
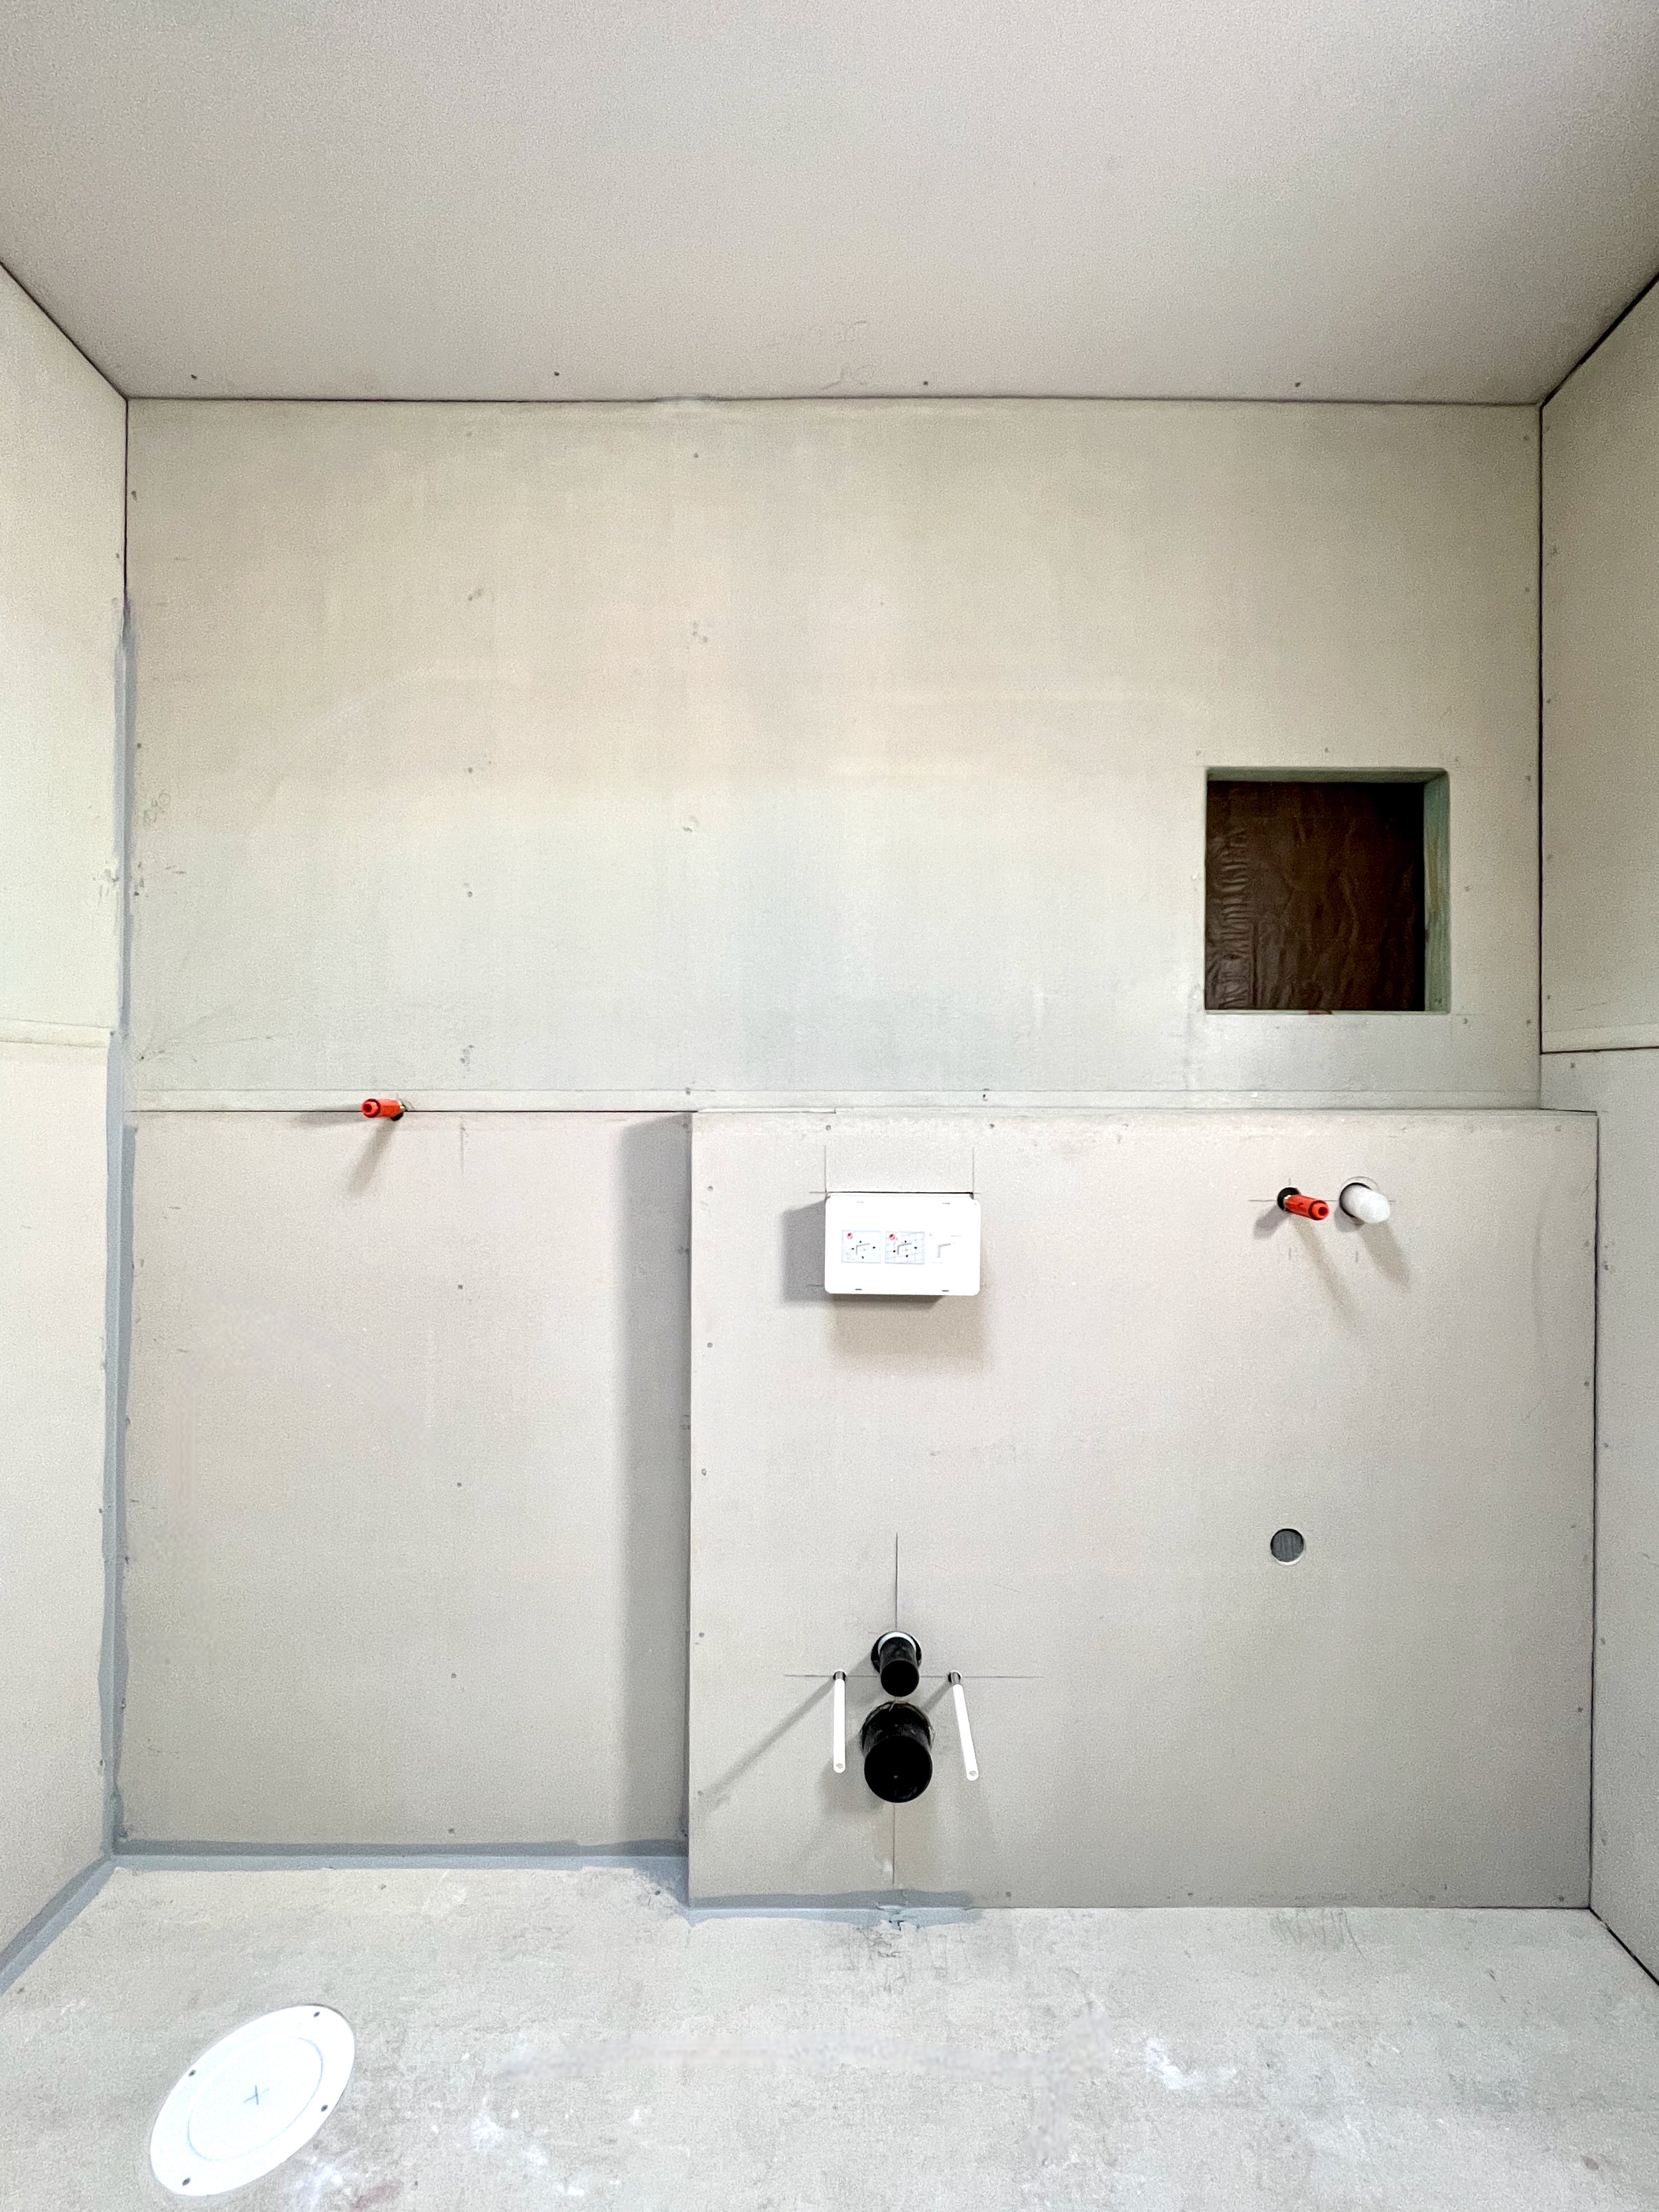
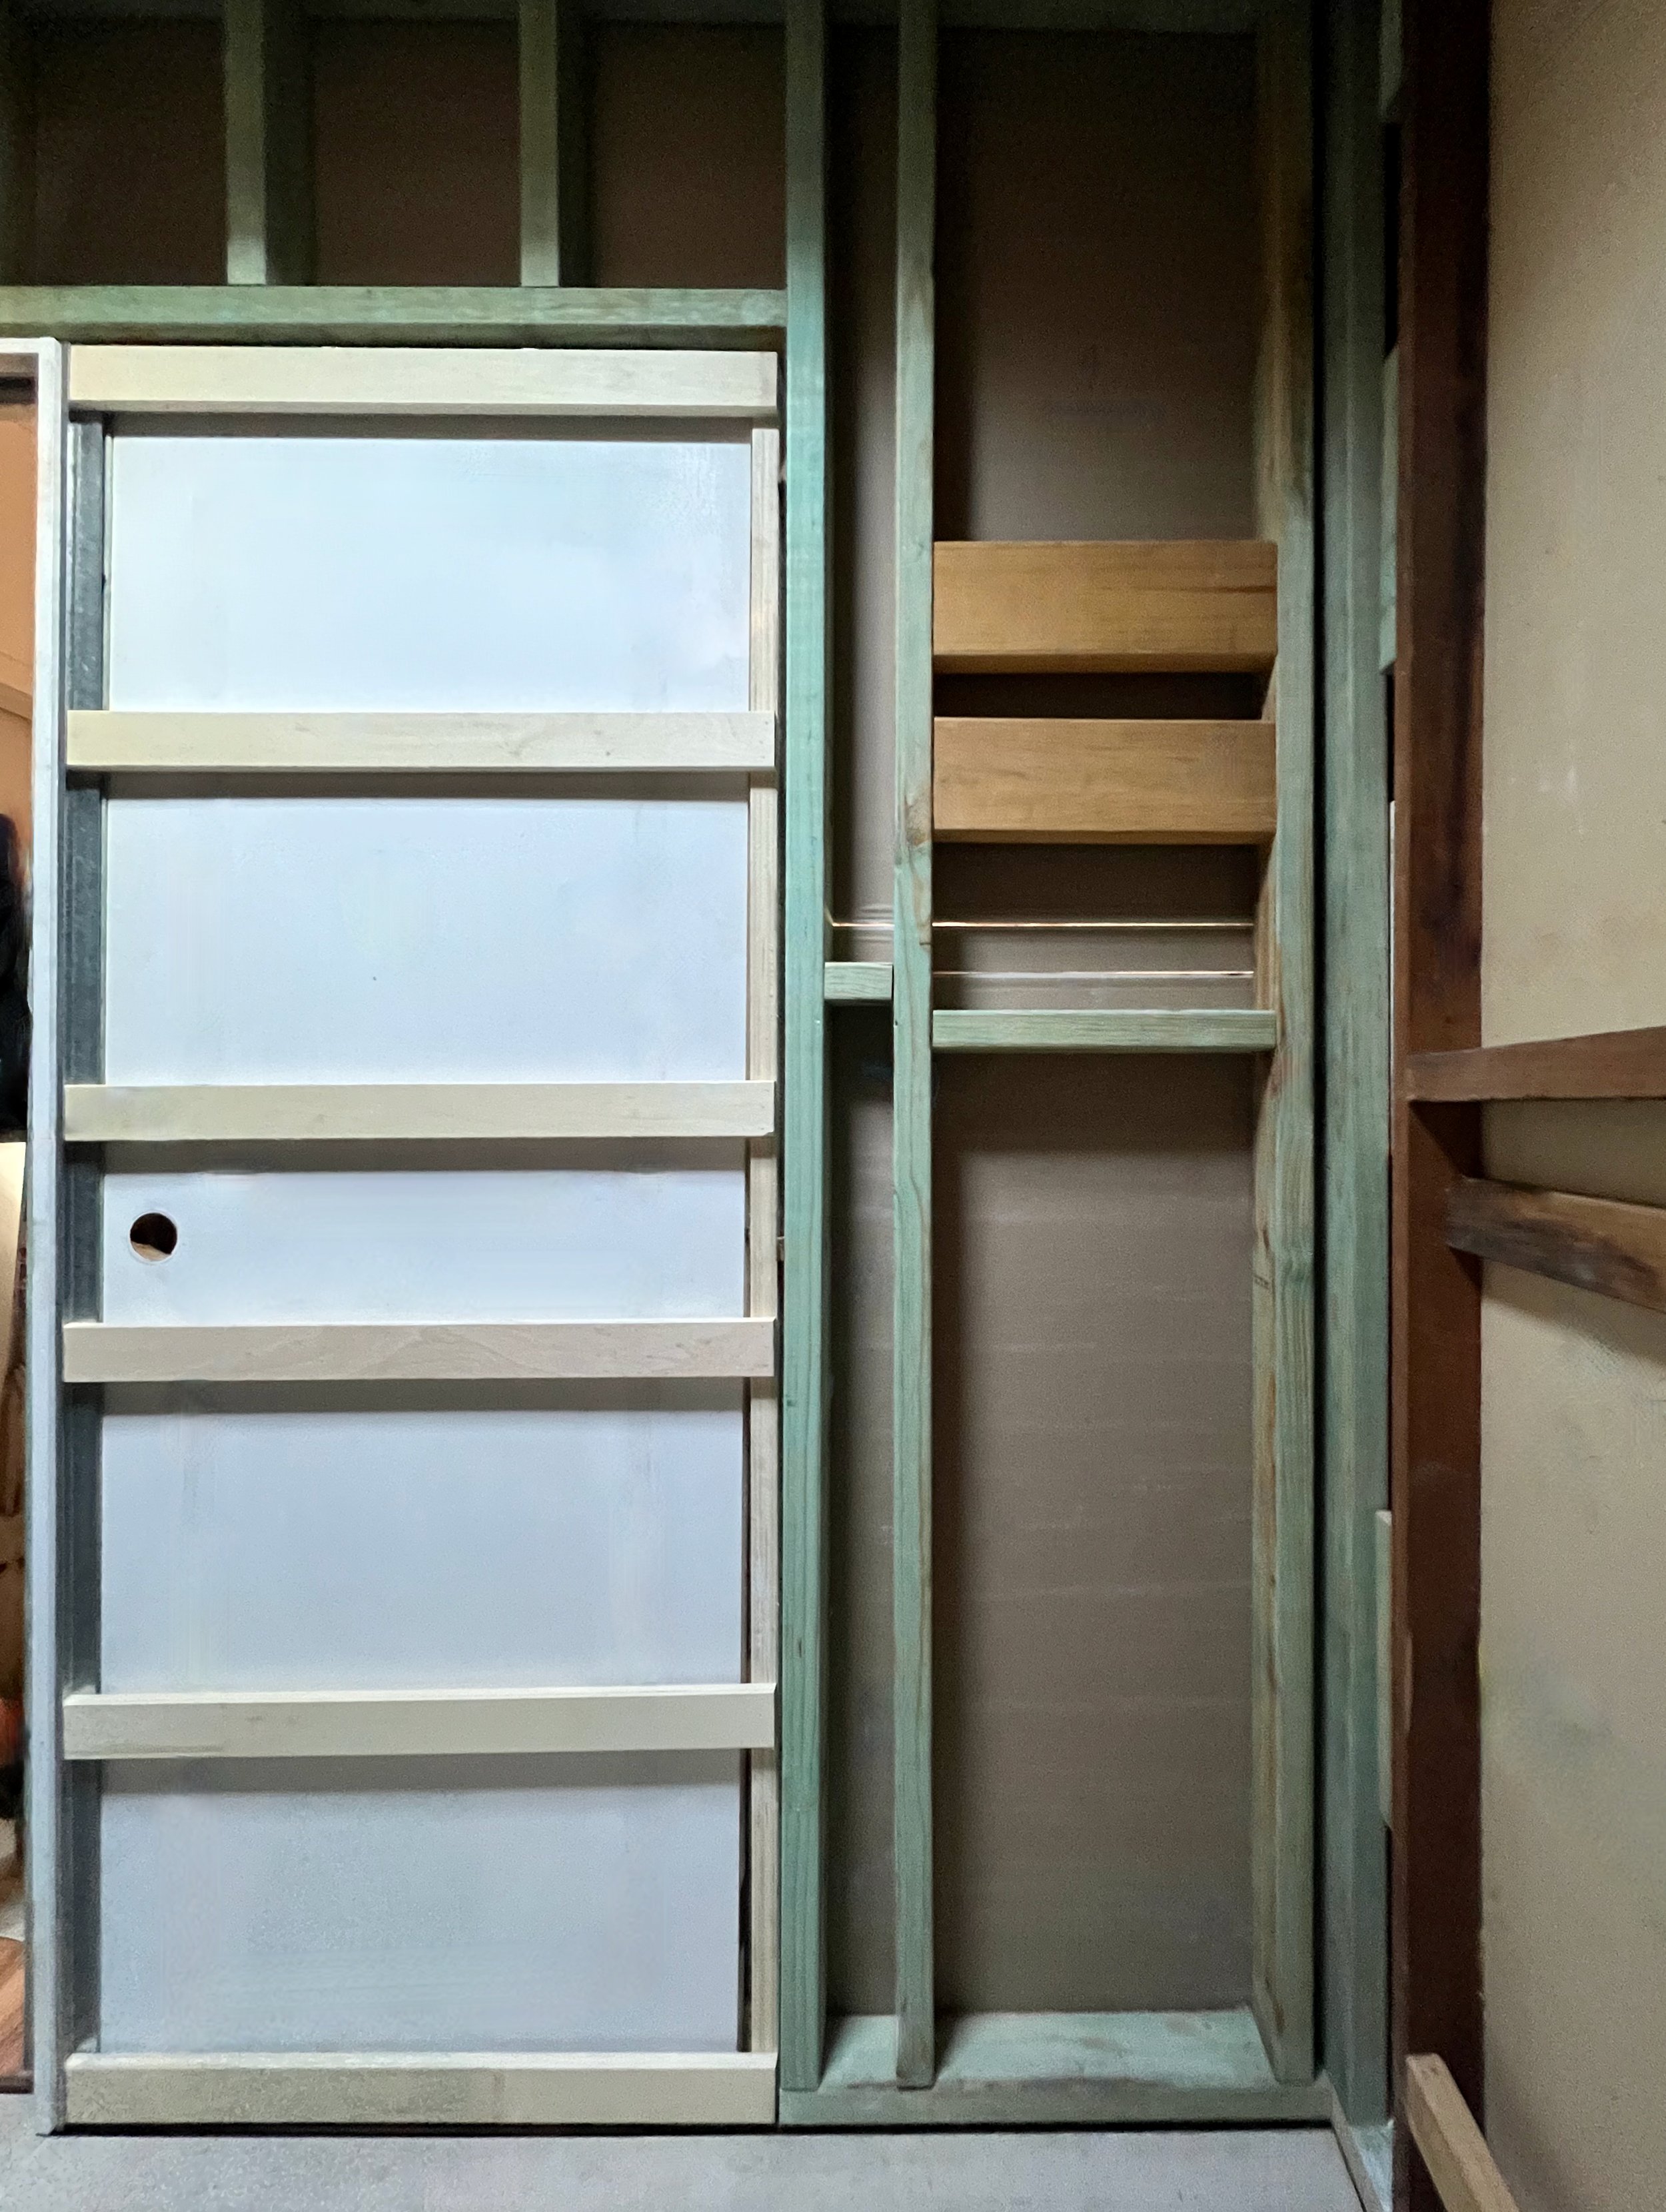
A USEFUL NIB WALL
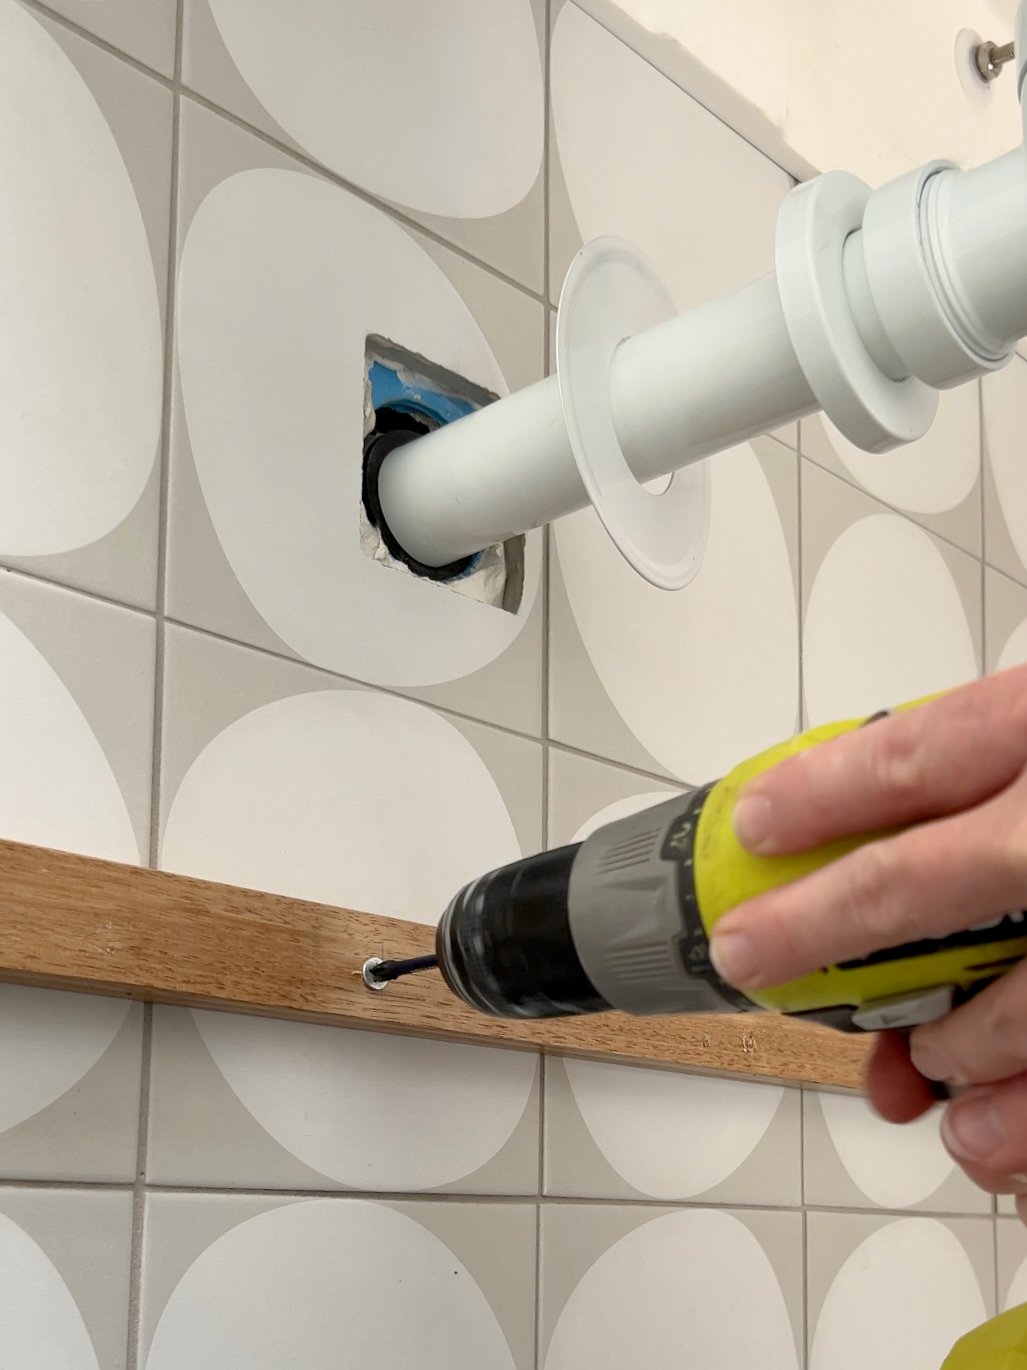
The builder framed up the 1200mm-high nib wall to run along the opposite wall to encompass the in-wall cistern and plumbing for the floating pan and basin.
Keeping them off the floor helps create the illusion of space.
TIP I found it essential to have fixtures on site before building began so I could check placement, heights and set outs with the trades. ‘Fixtures’ includes the toilet and cistern, basin, bottle trap, shaving cabinet, tap ware, shower set, even the floor waste and lights.
BEST INVESTMENT EVER
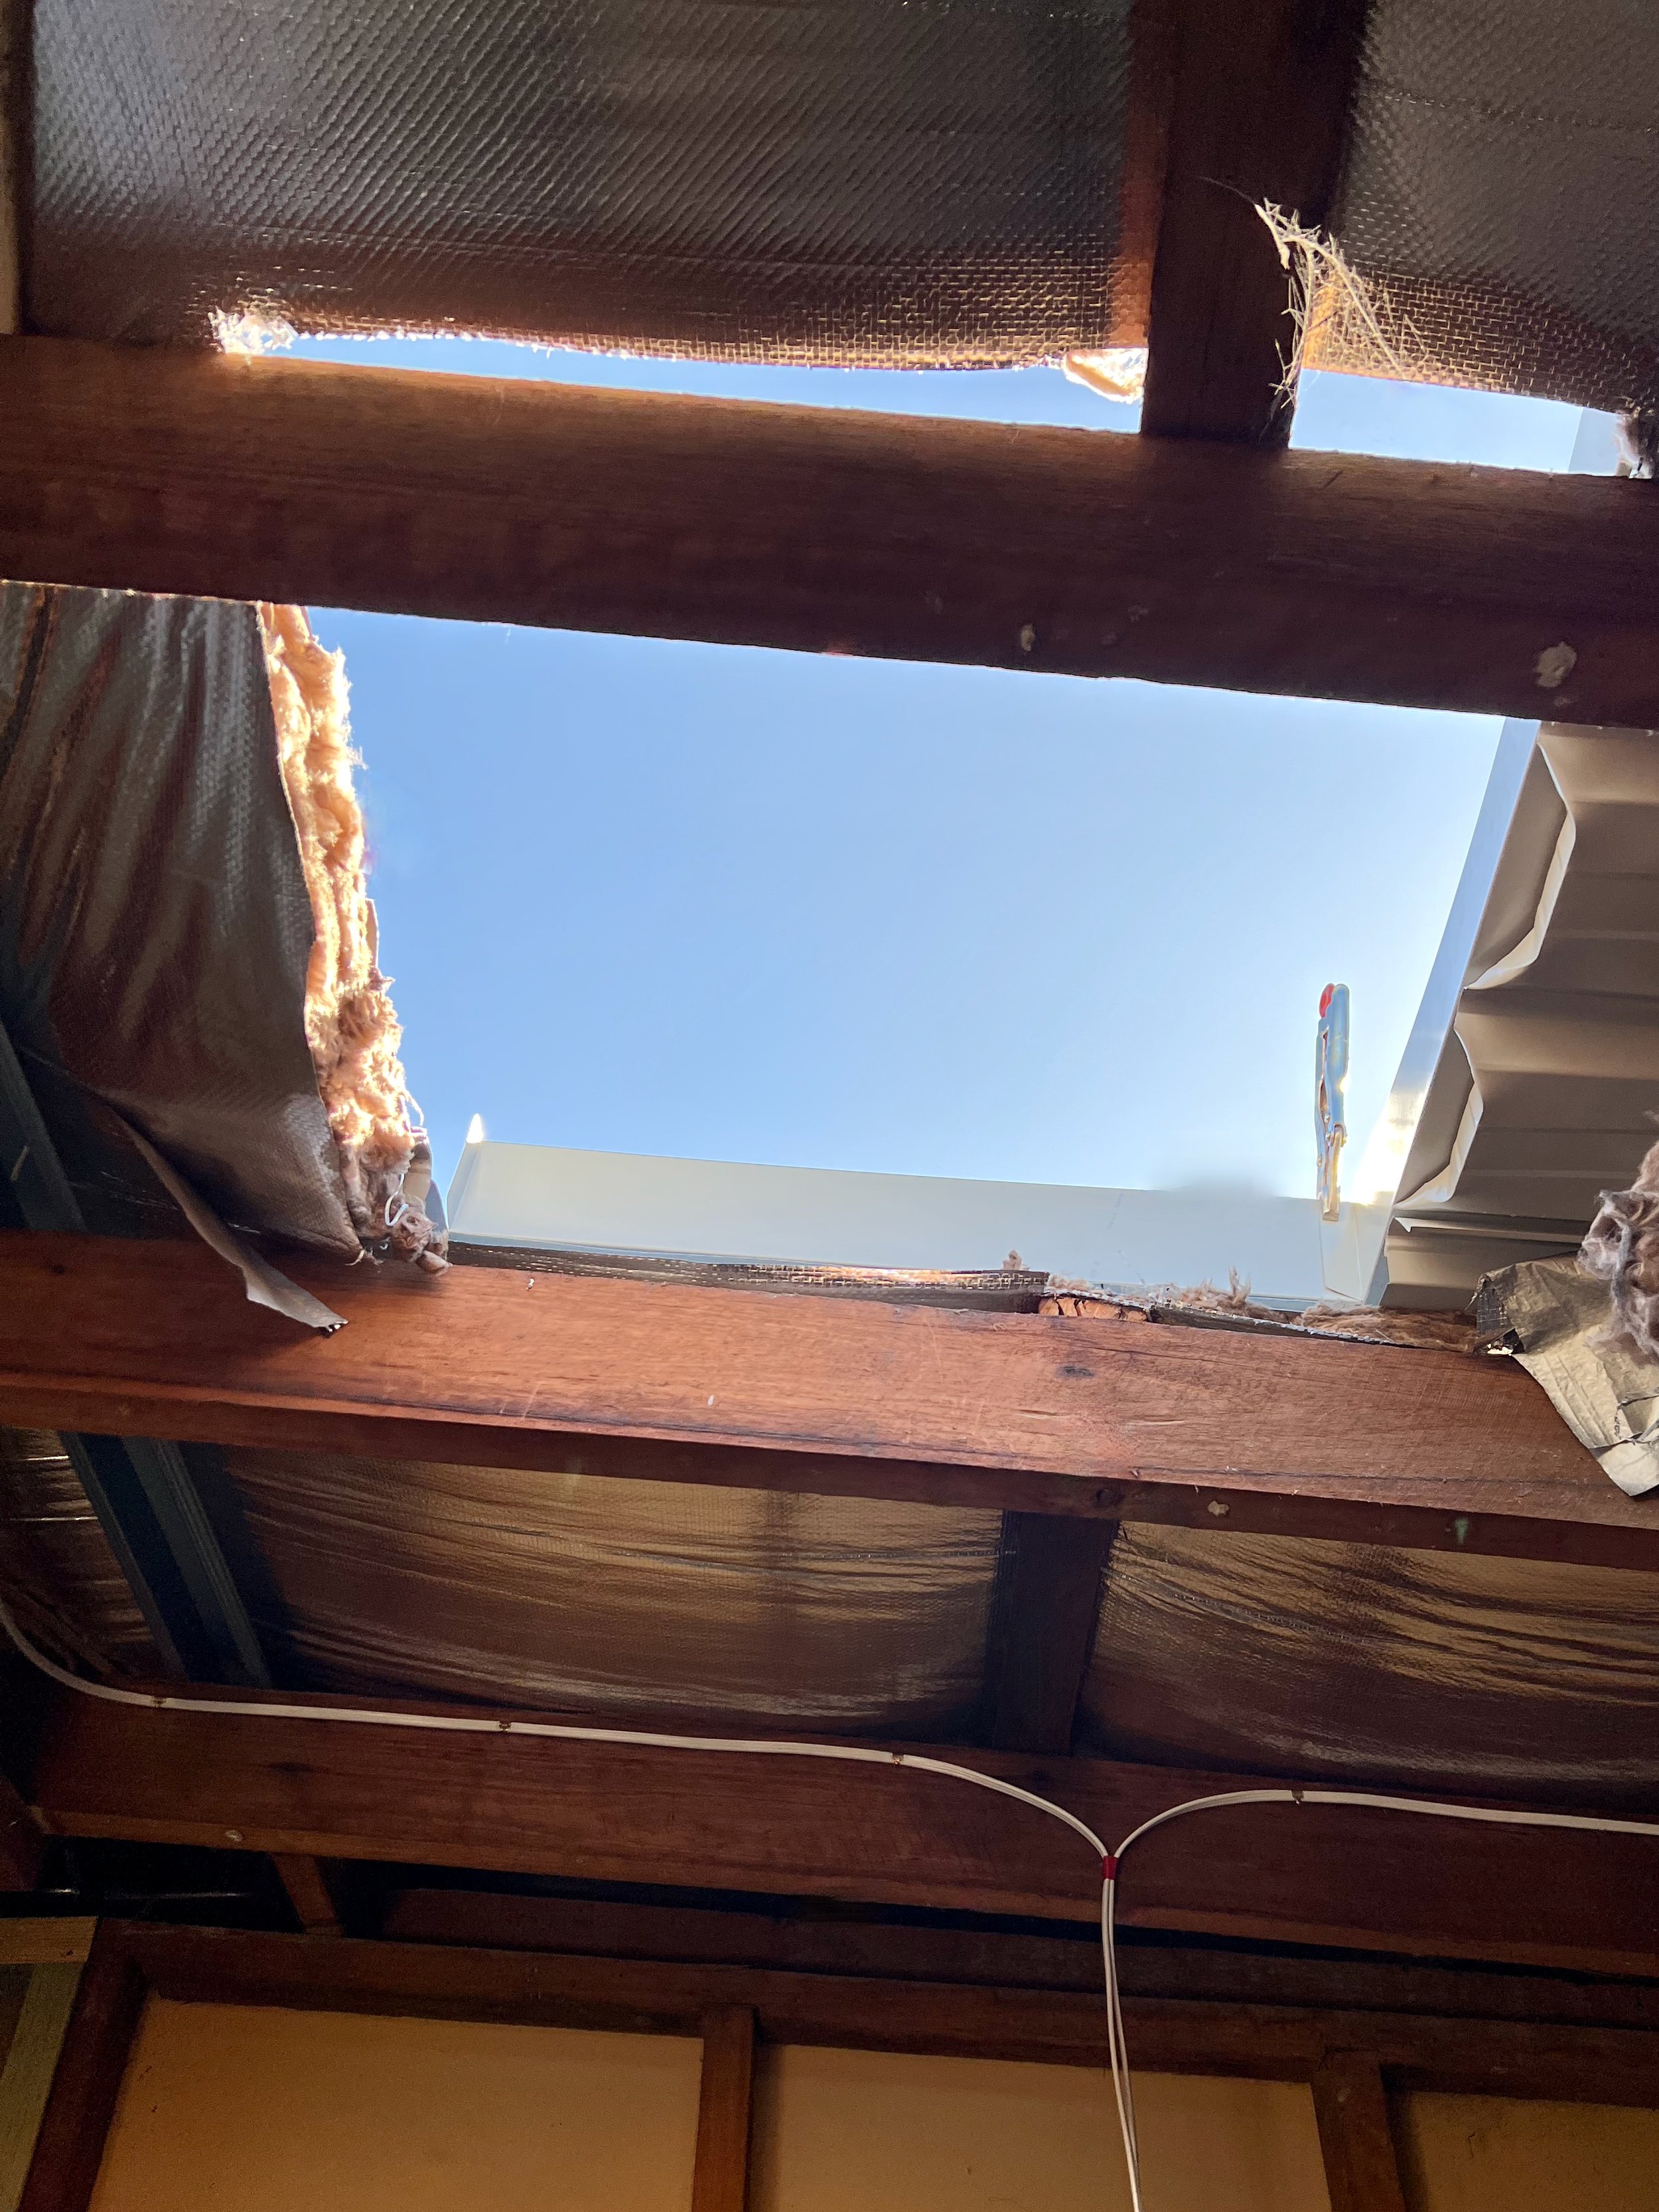
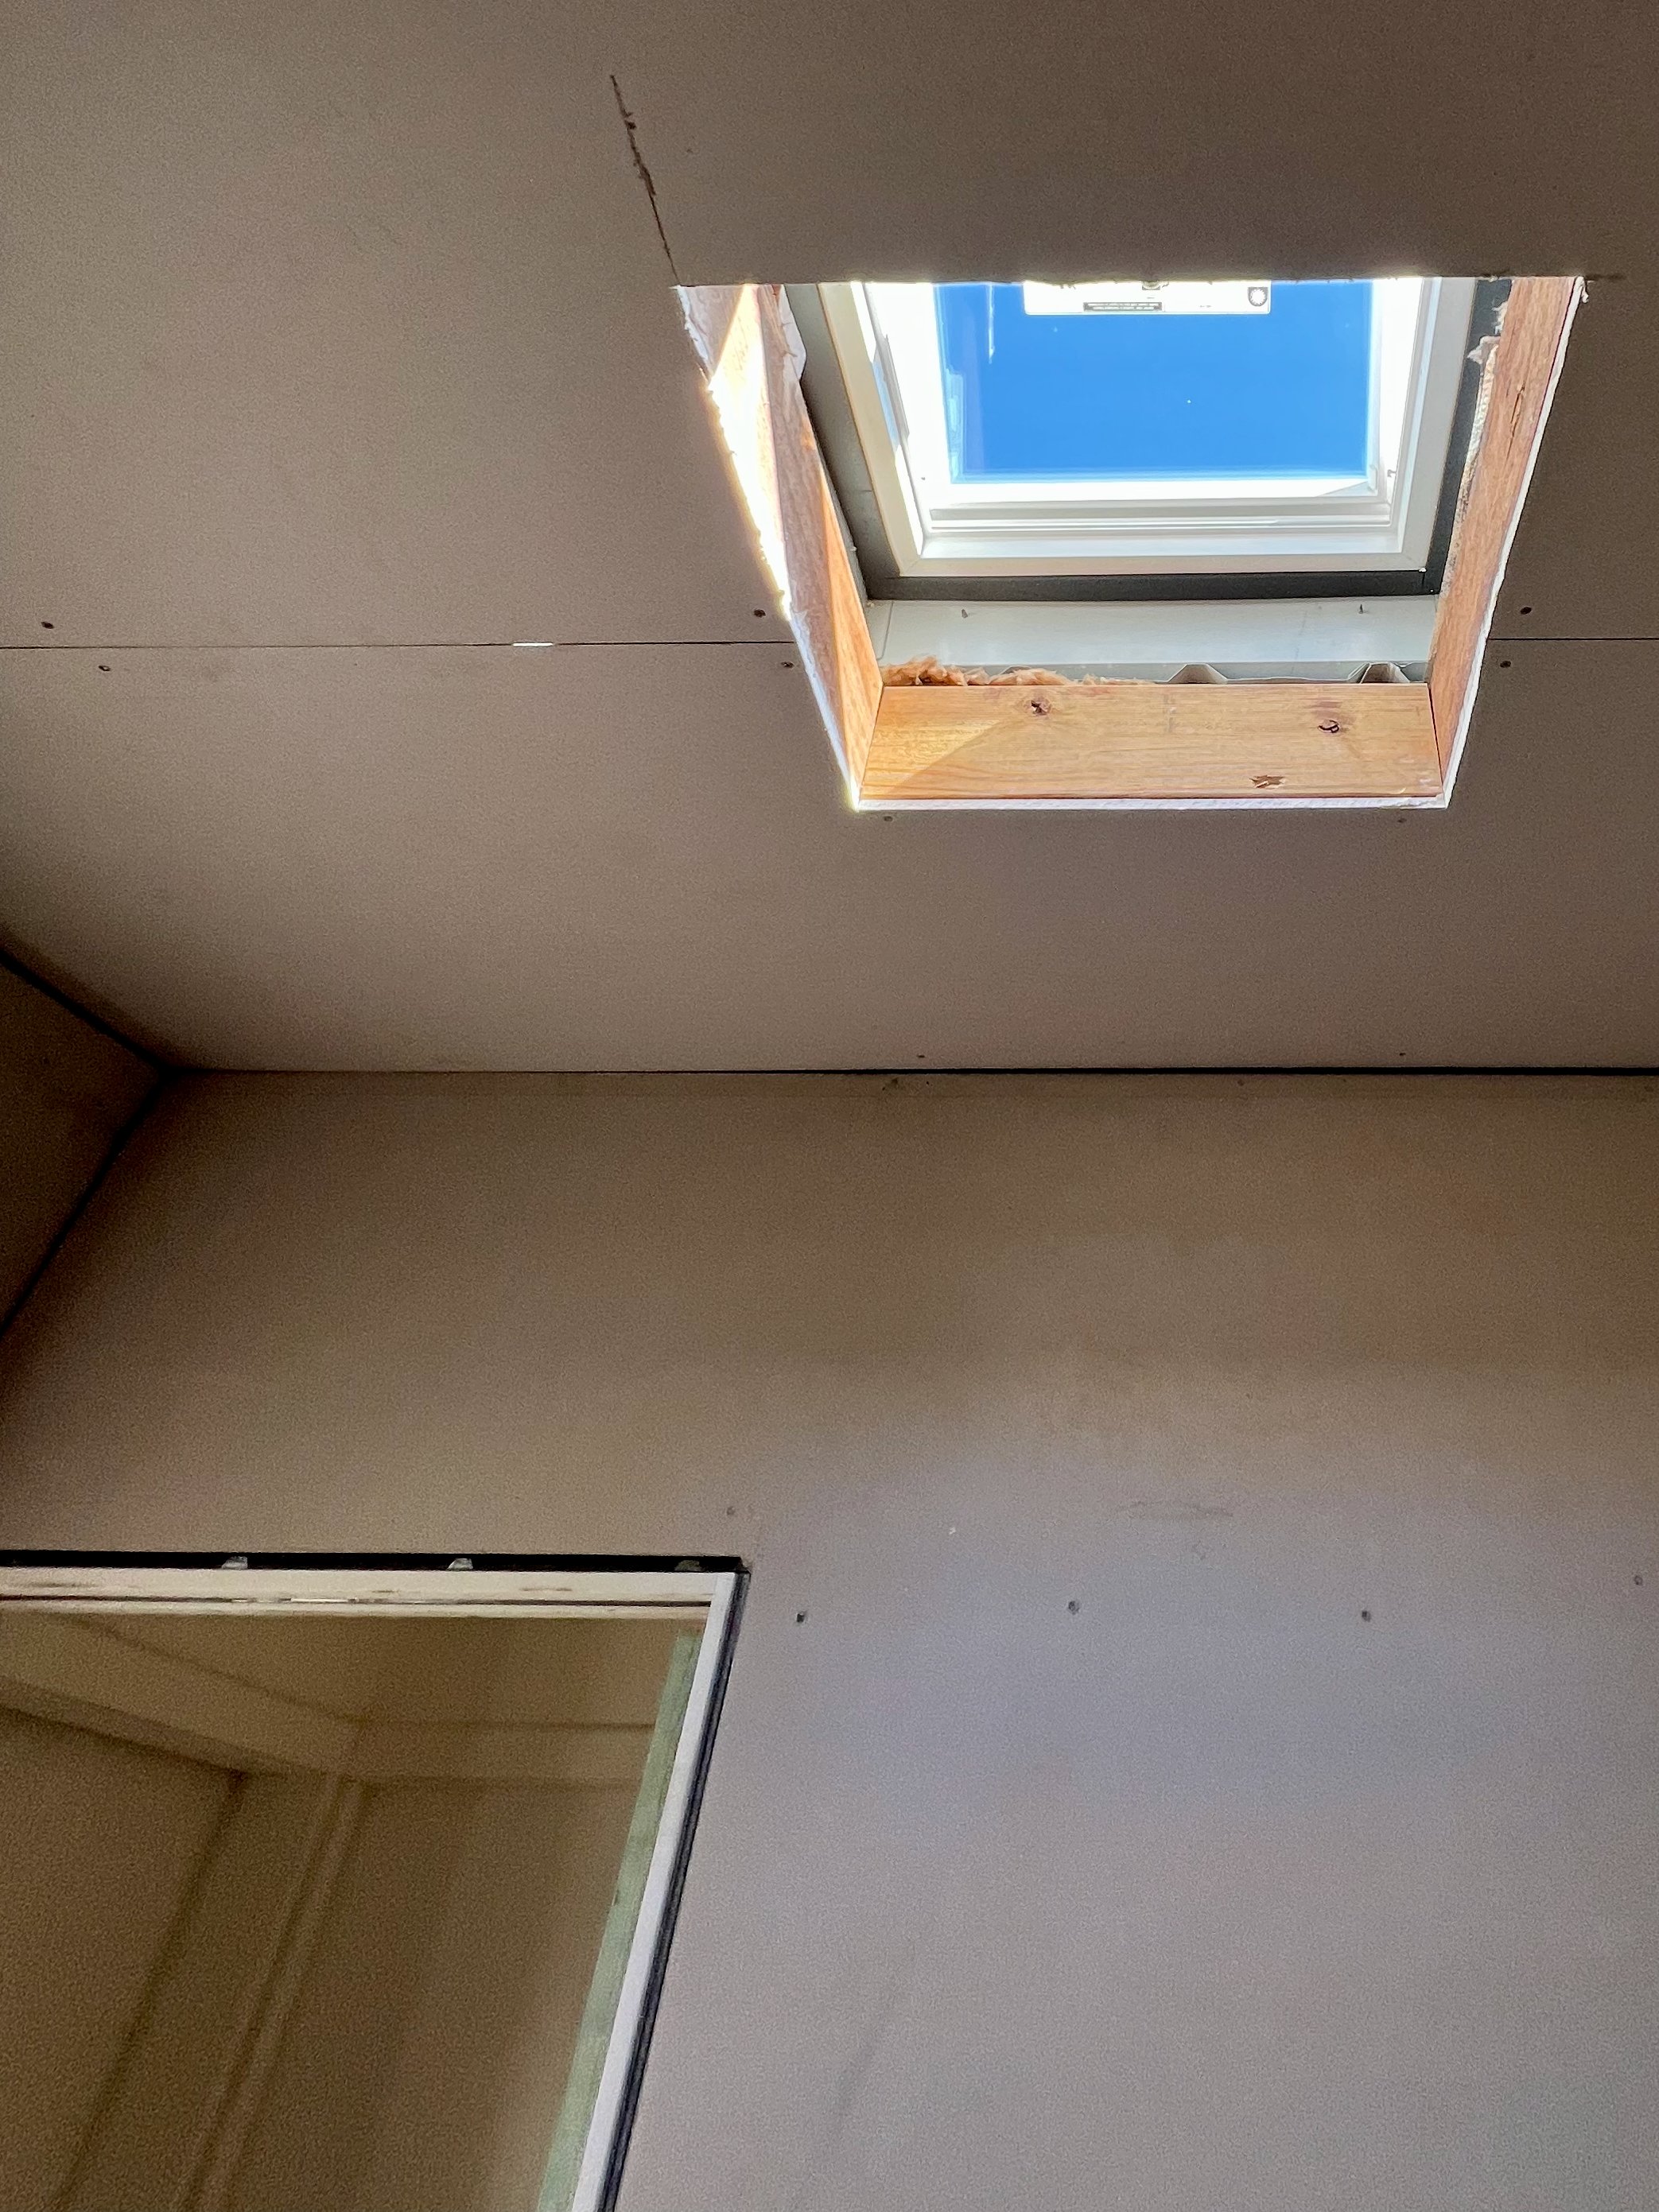
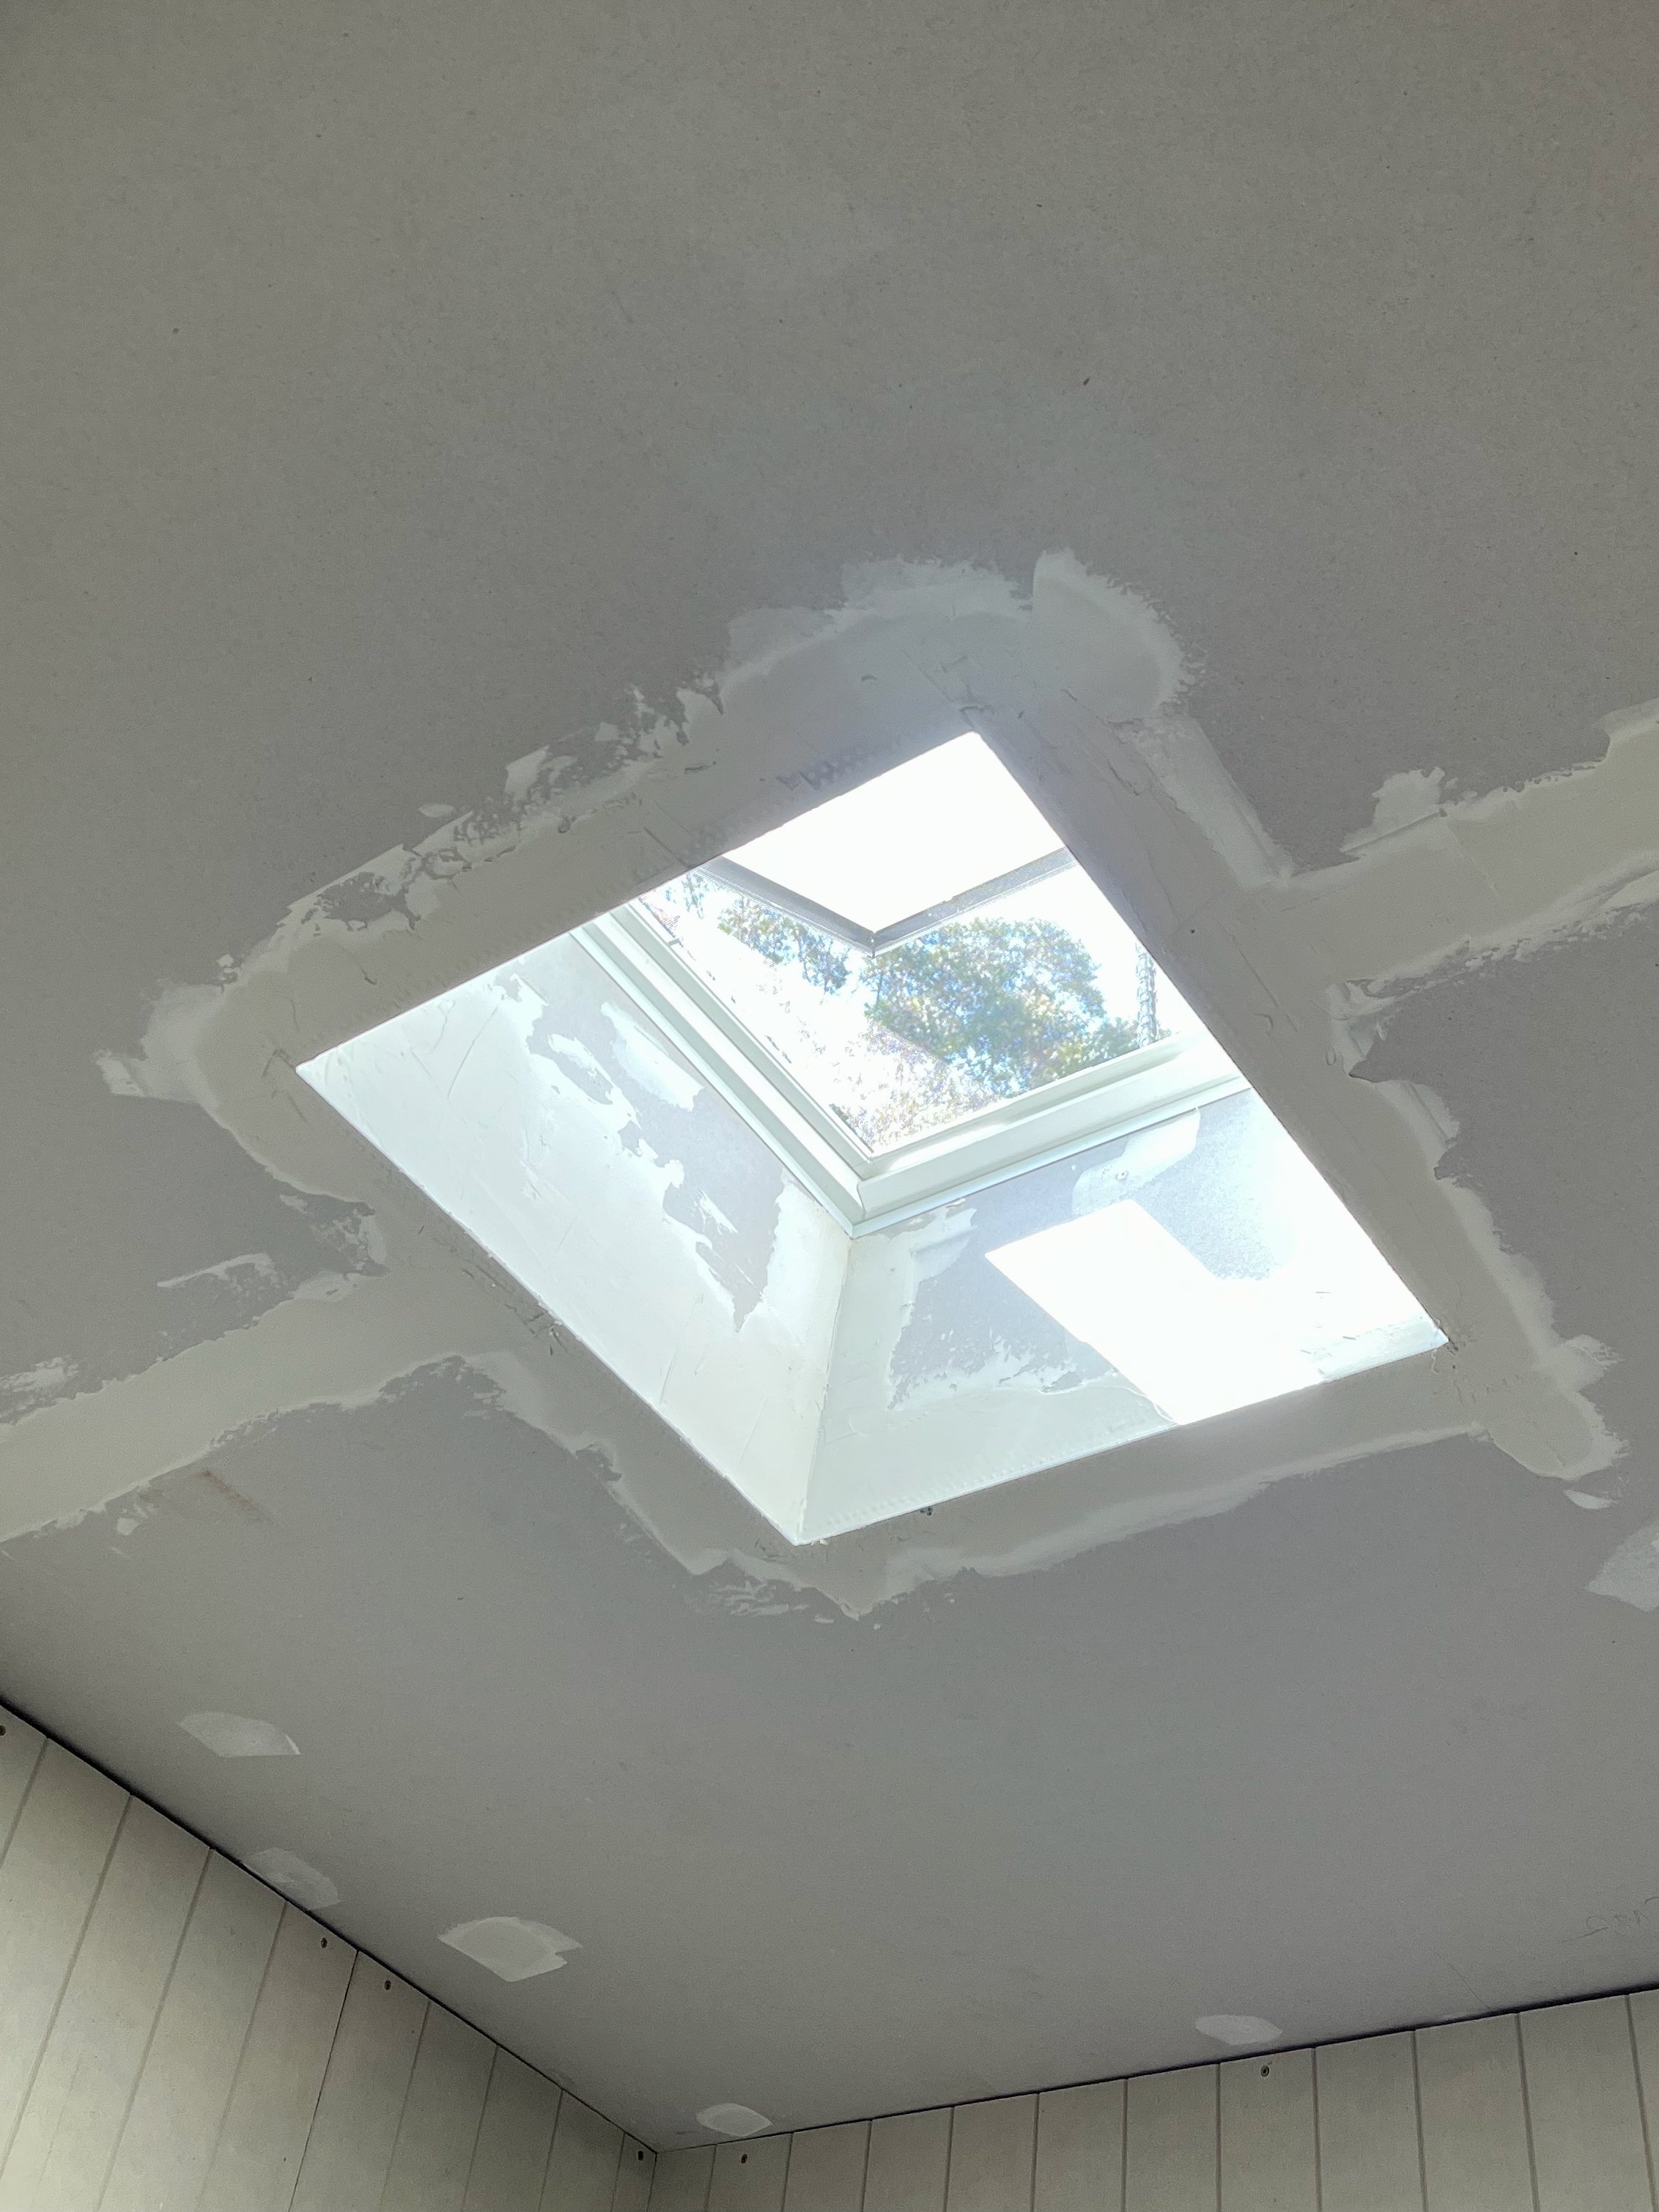
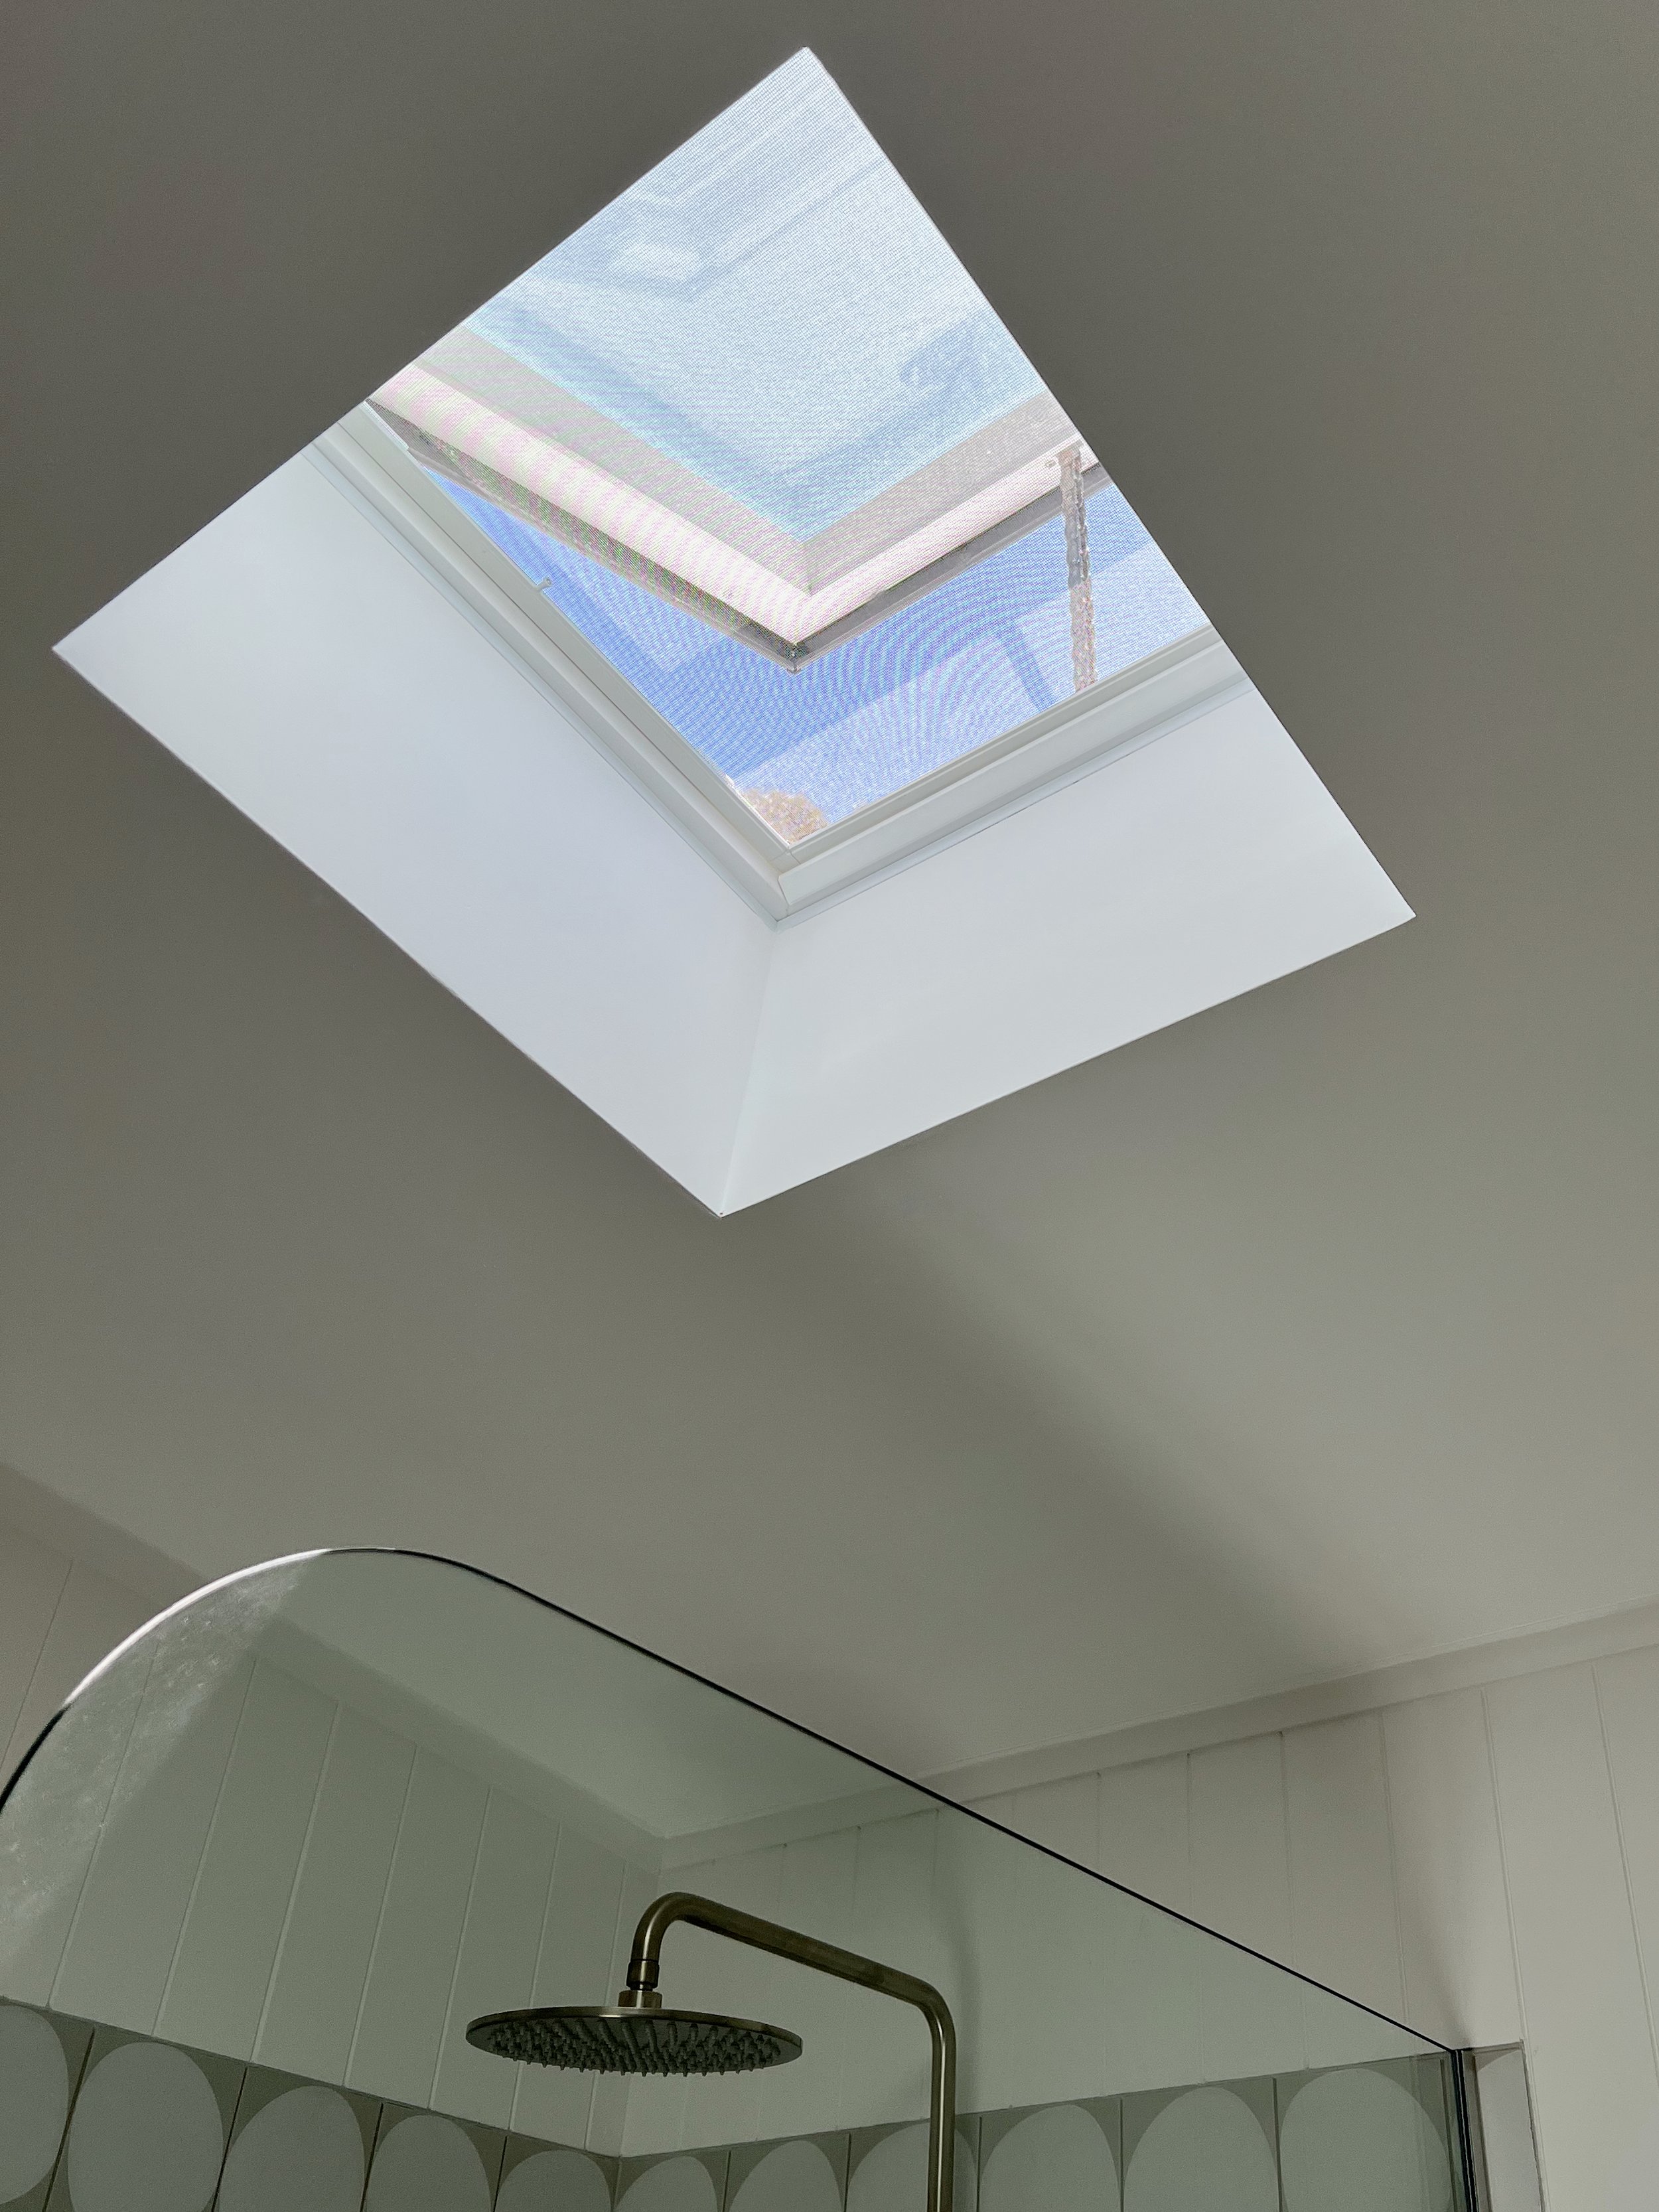
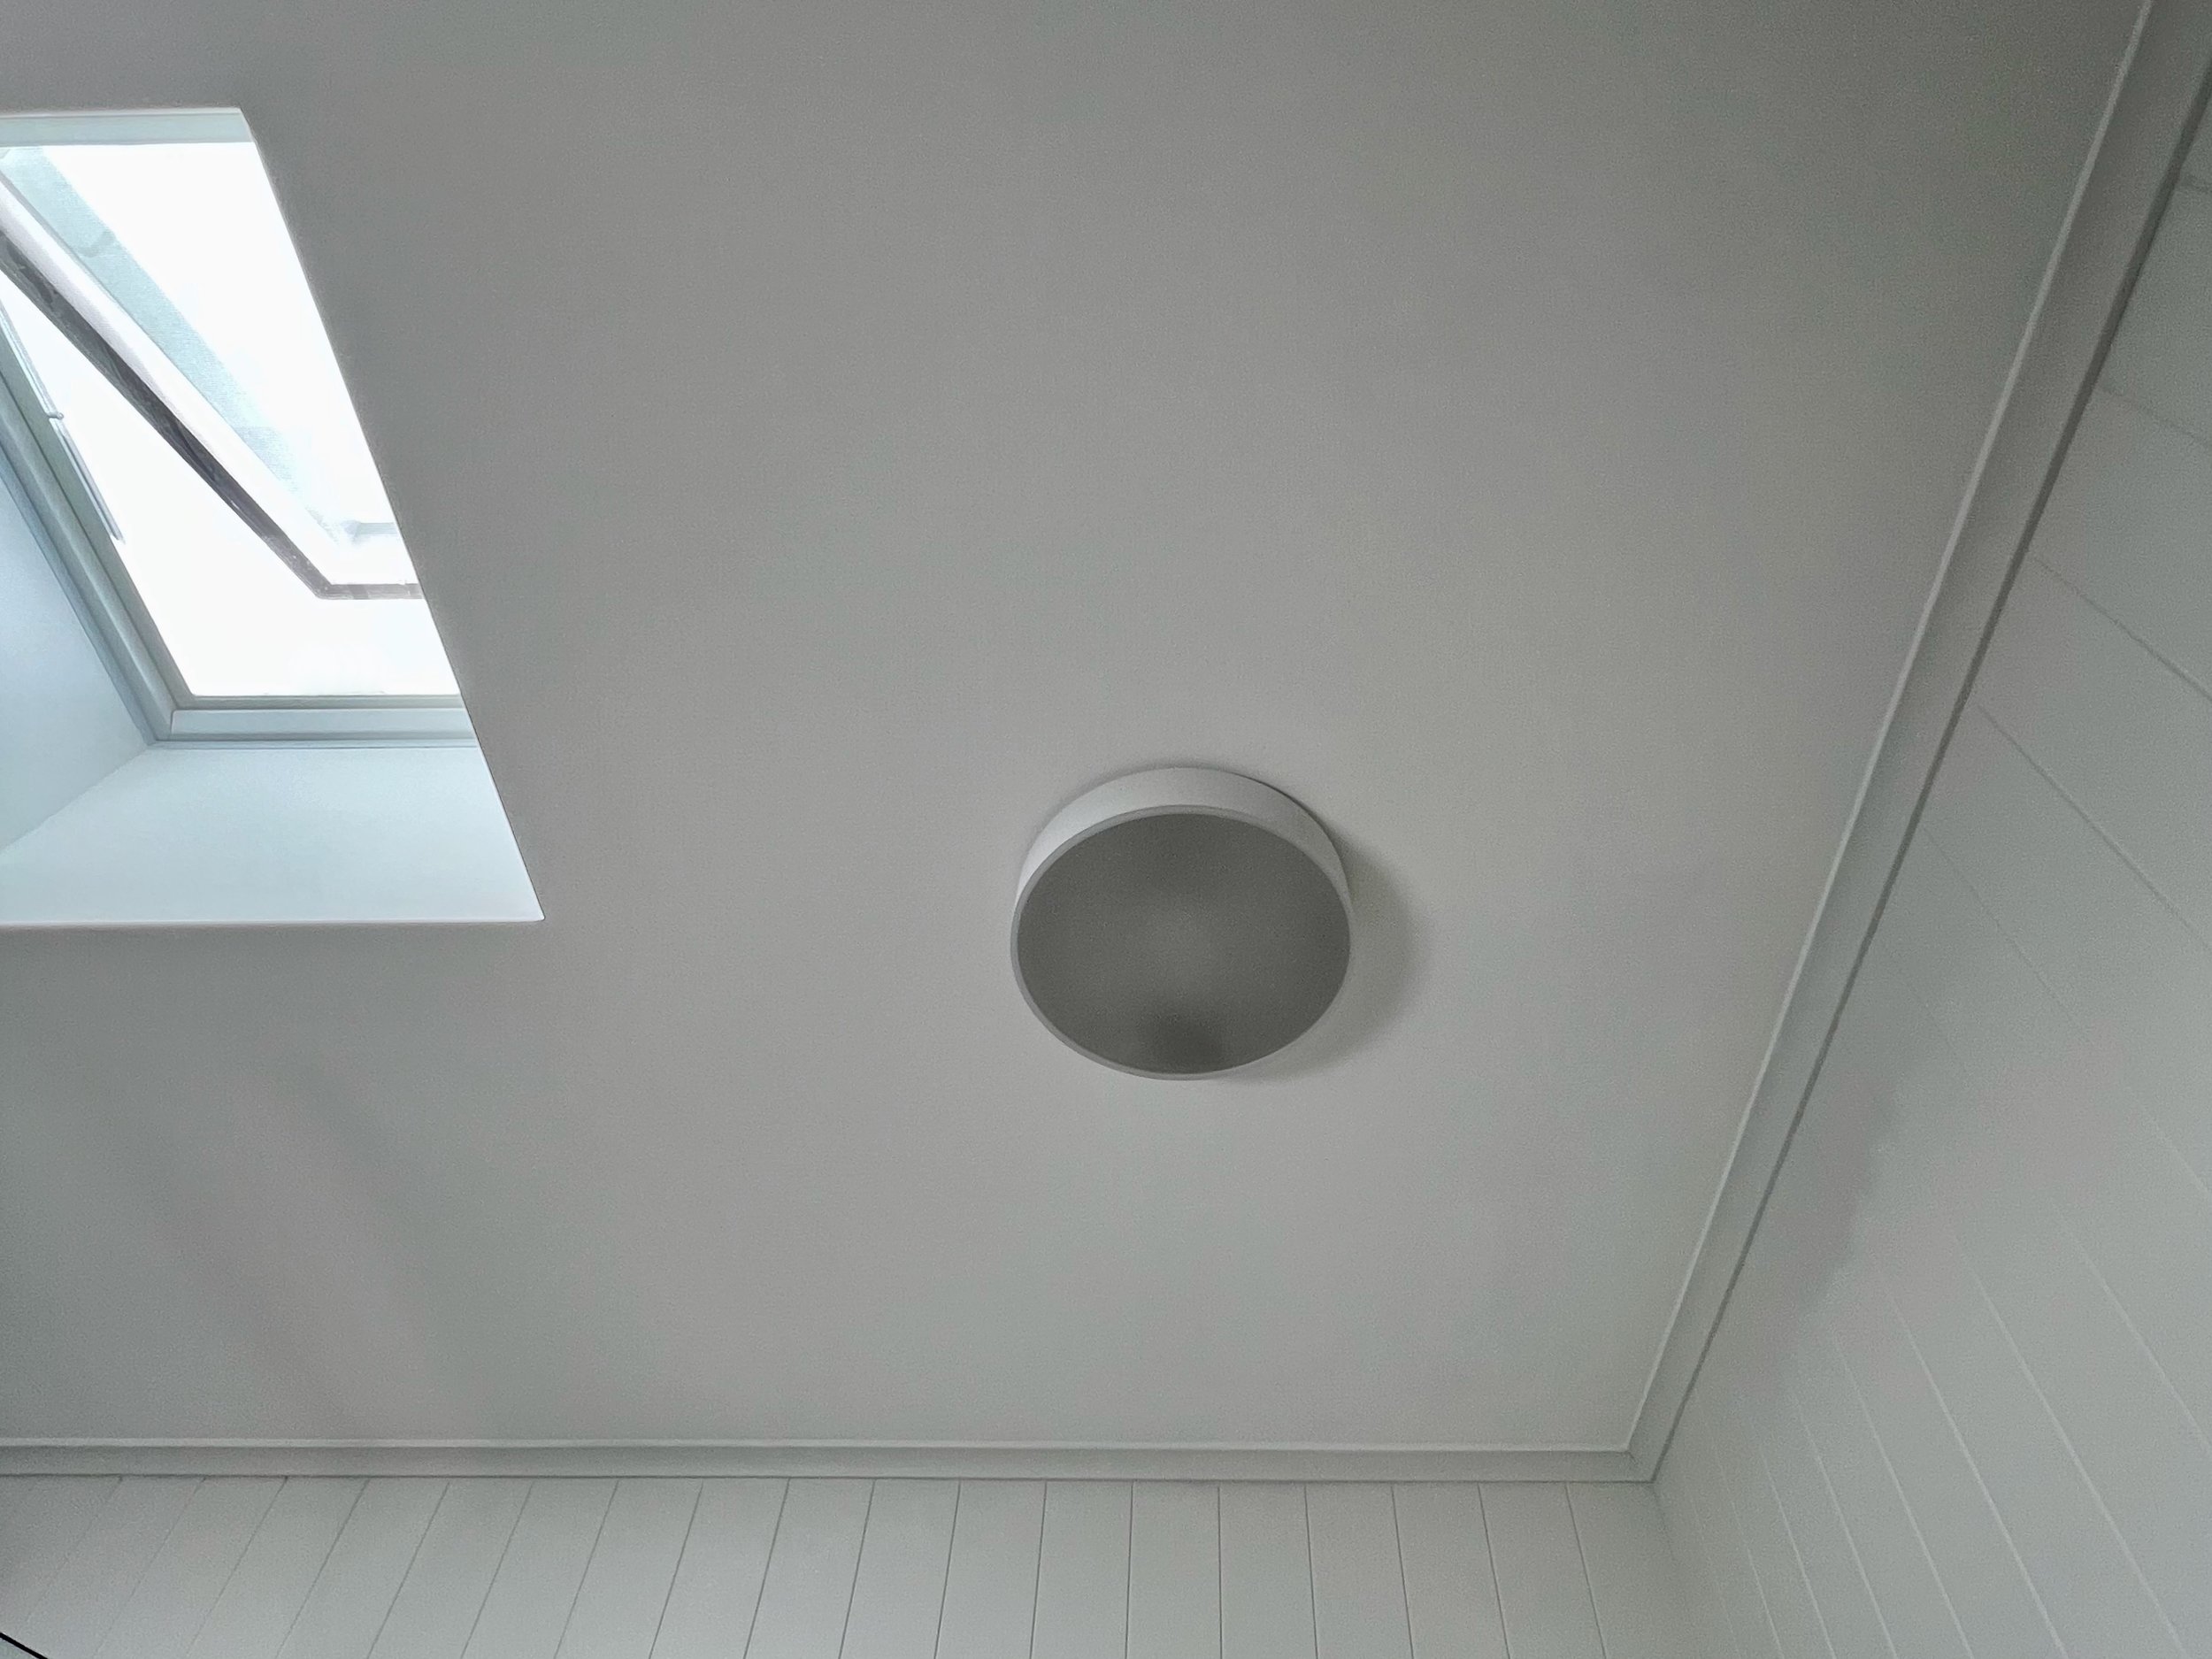
With no exterior wall for a window, a skylight was essential to increase airflow and natural light.
I chose a 665mm-square flat roof open skylight with solar panel and battery that’s operated by phone or voice. When it rains a sensor automatically closes it.
After the roofer installed the skylight and the builder hung the plasterboard, I sheeted up into the cavity, plastered and painted it along with the ceiling.
By day the room is bright and airy, by night I can see the stars while showering. But the most delightful result is how it channels the sound of the nearby South Pacific Ocean into the room.
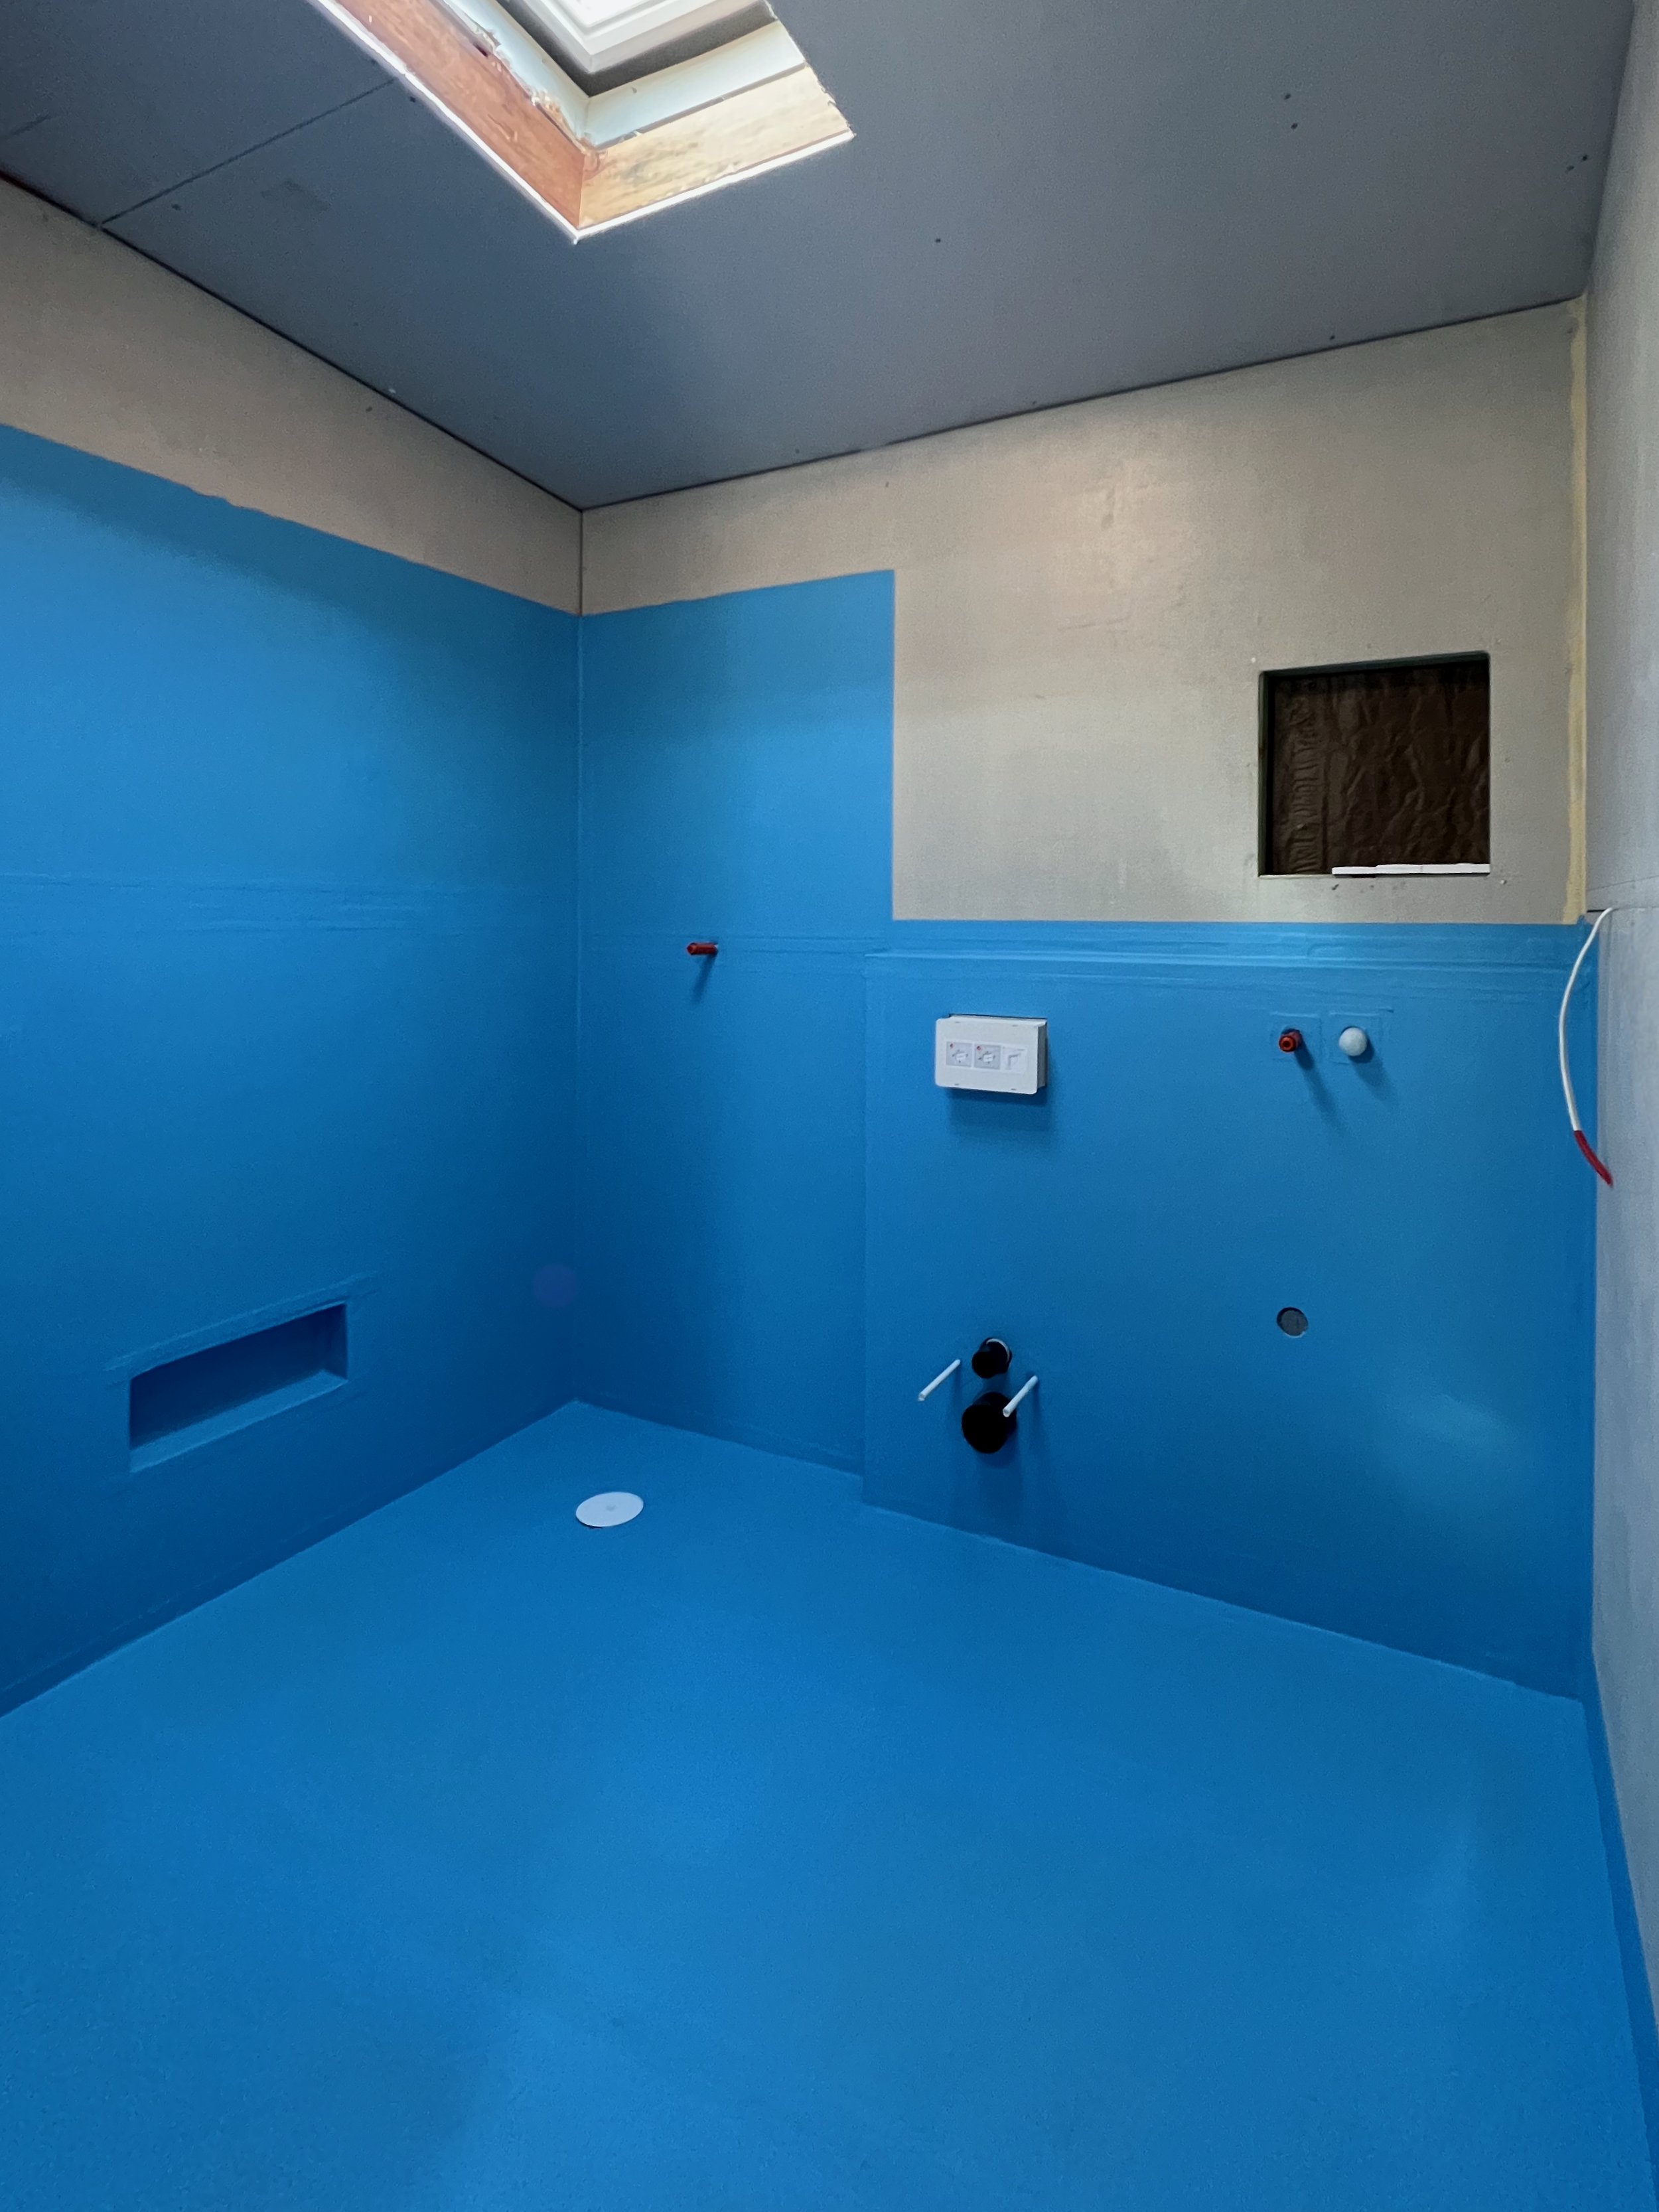
ABOUT WATERPROOFING
The builder lined the walls in fibre cement Villaboard then the tiler waterproofed.
They used bond-breaker tape to close gaps around pipes and drains, then applied two coats of membrane to seal wet areas including the shower recess up to at least 1800mm high. It’s also applied over the floor and up the base of non-wet walls by 150mm where the tiles are laid as skirting.
TIP Waterproofing in NSW must be done by a professional. To ease the budget, I arranged for the materials to be on-site to save the tiler having to purchase them.
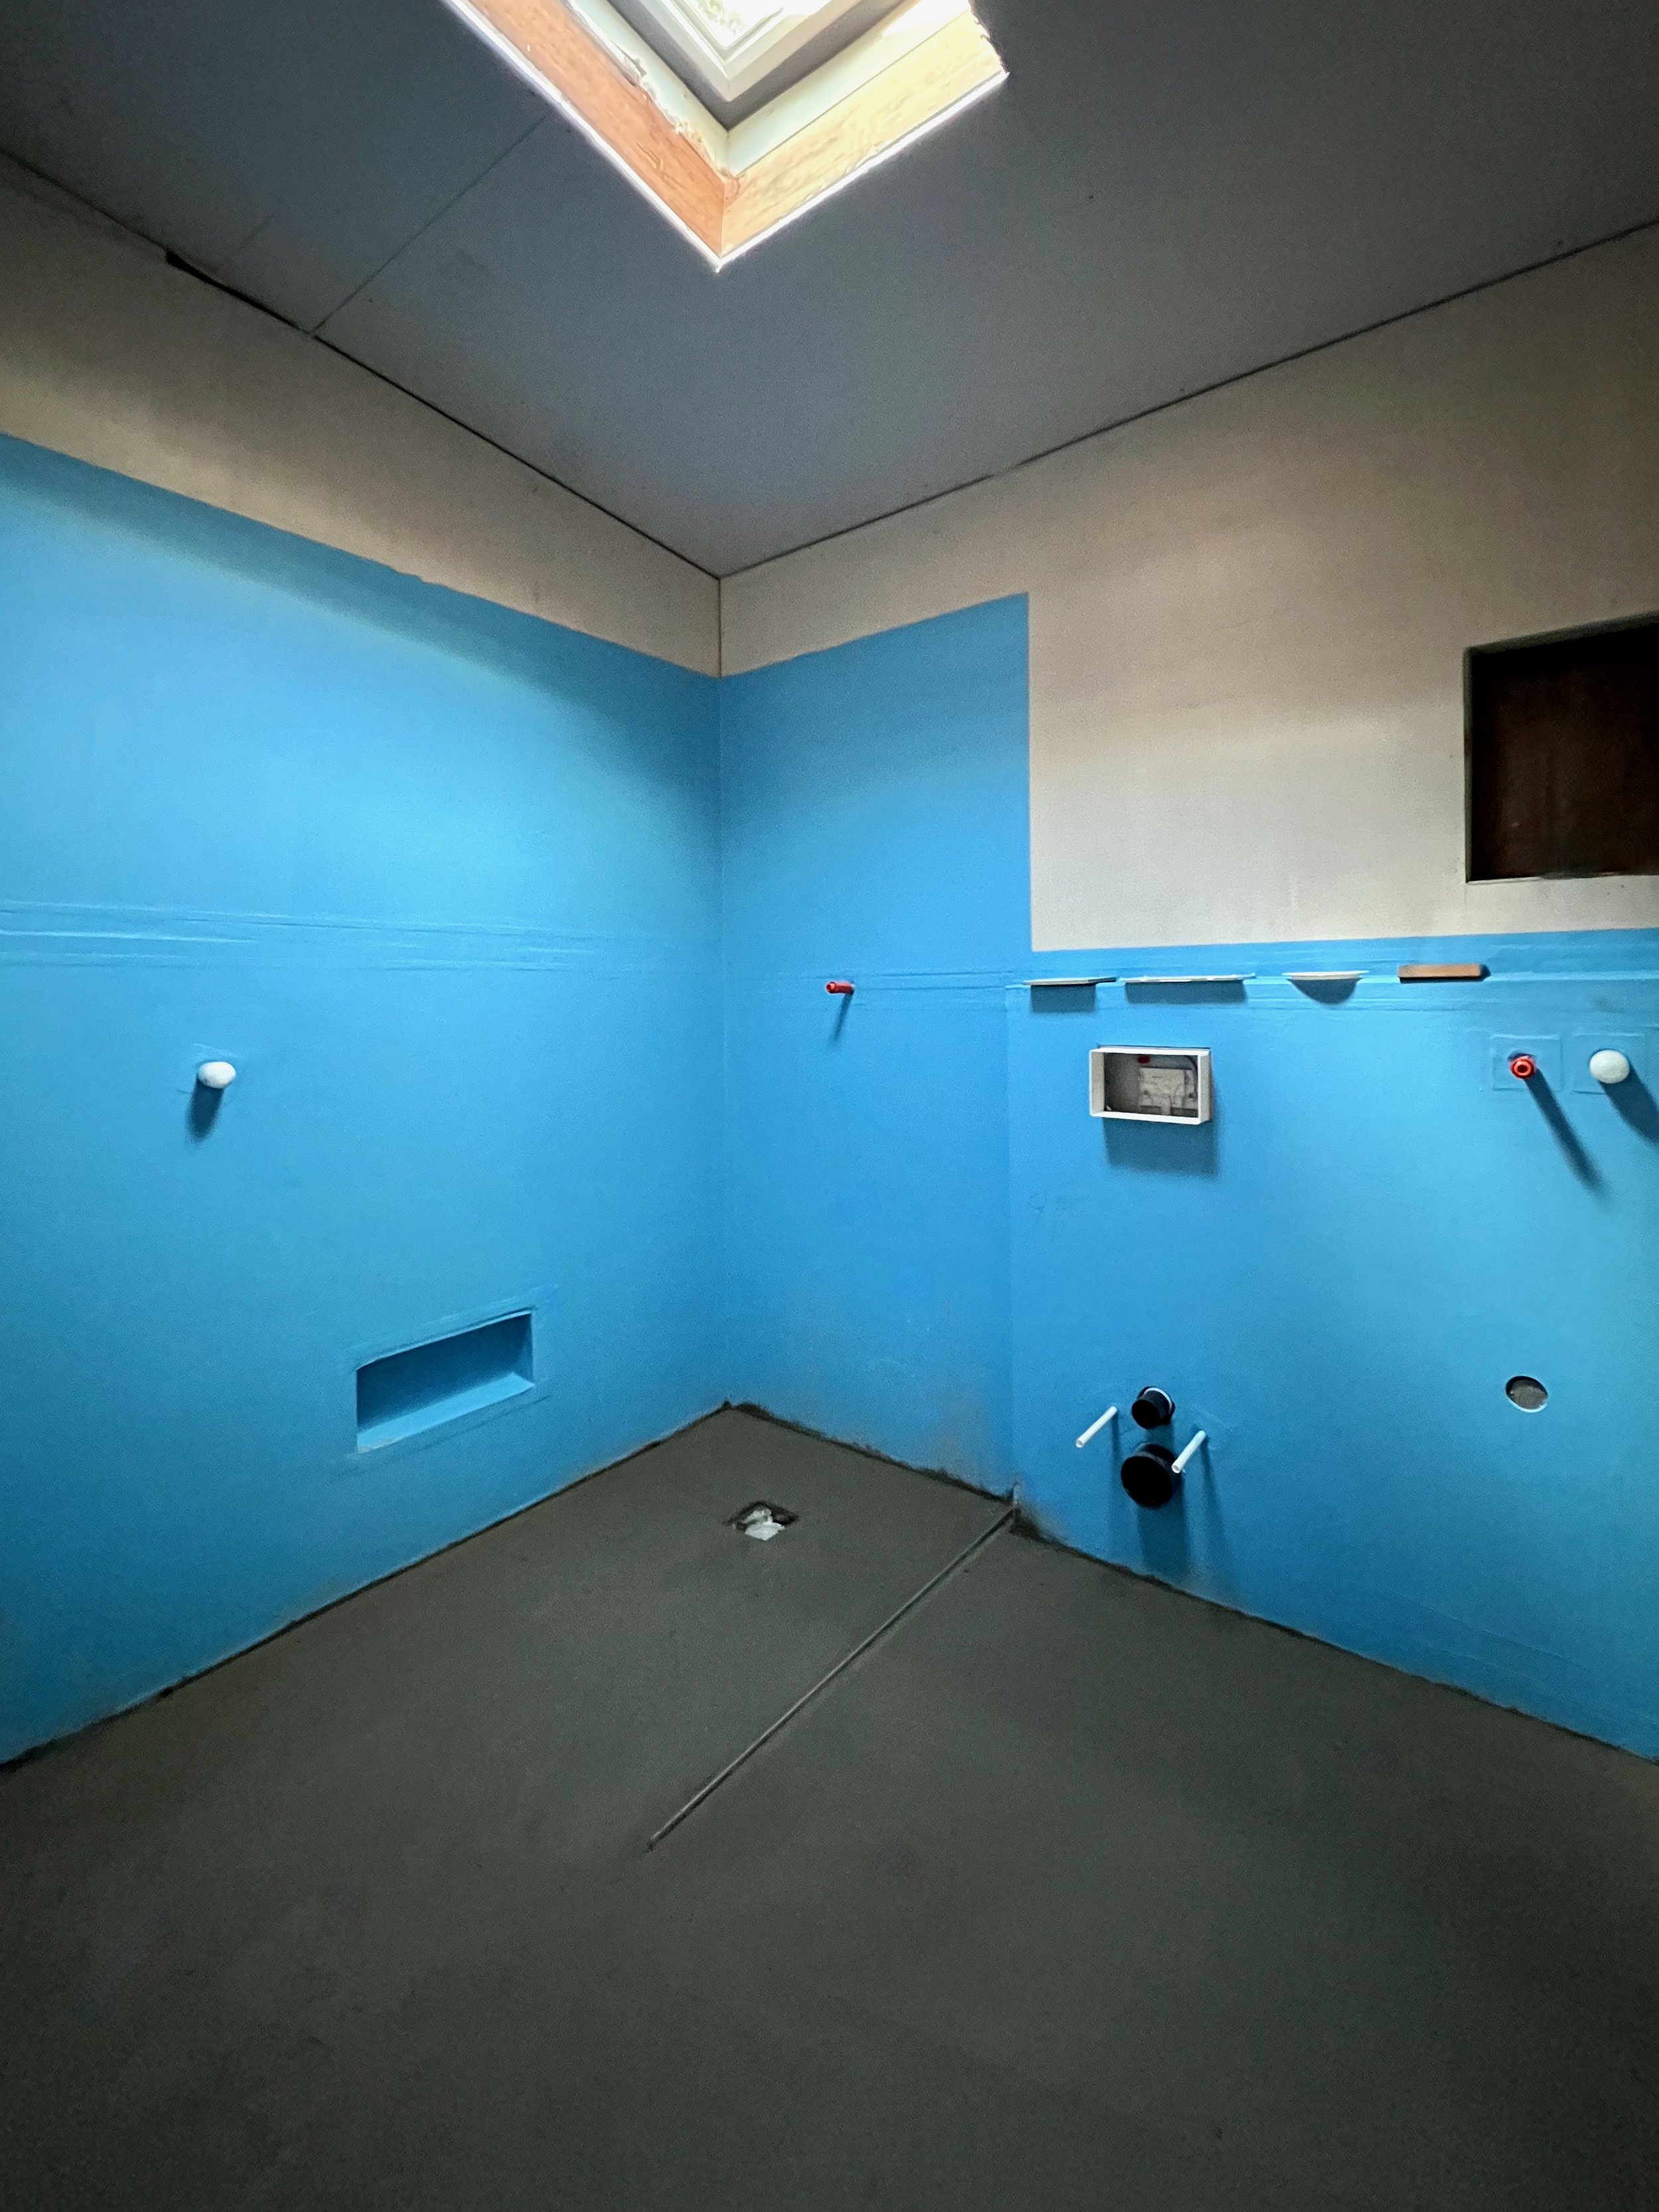
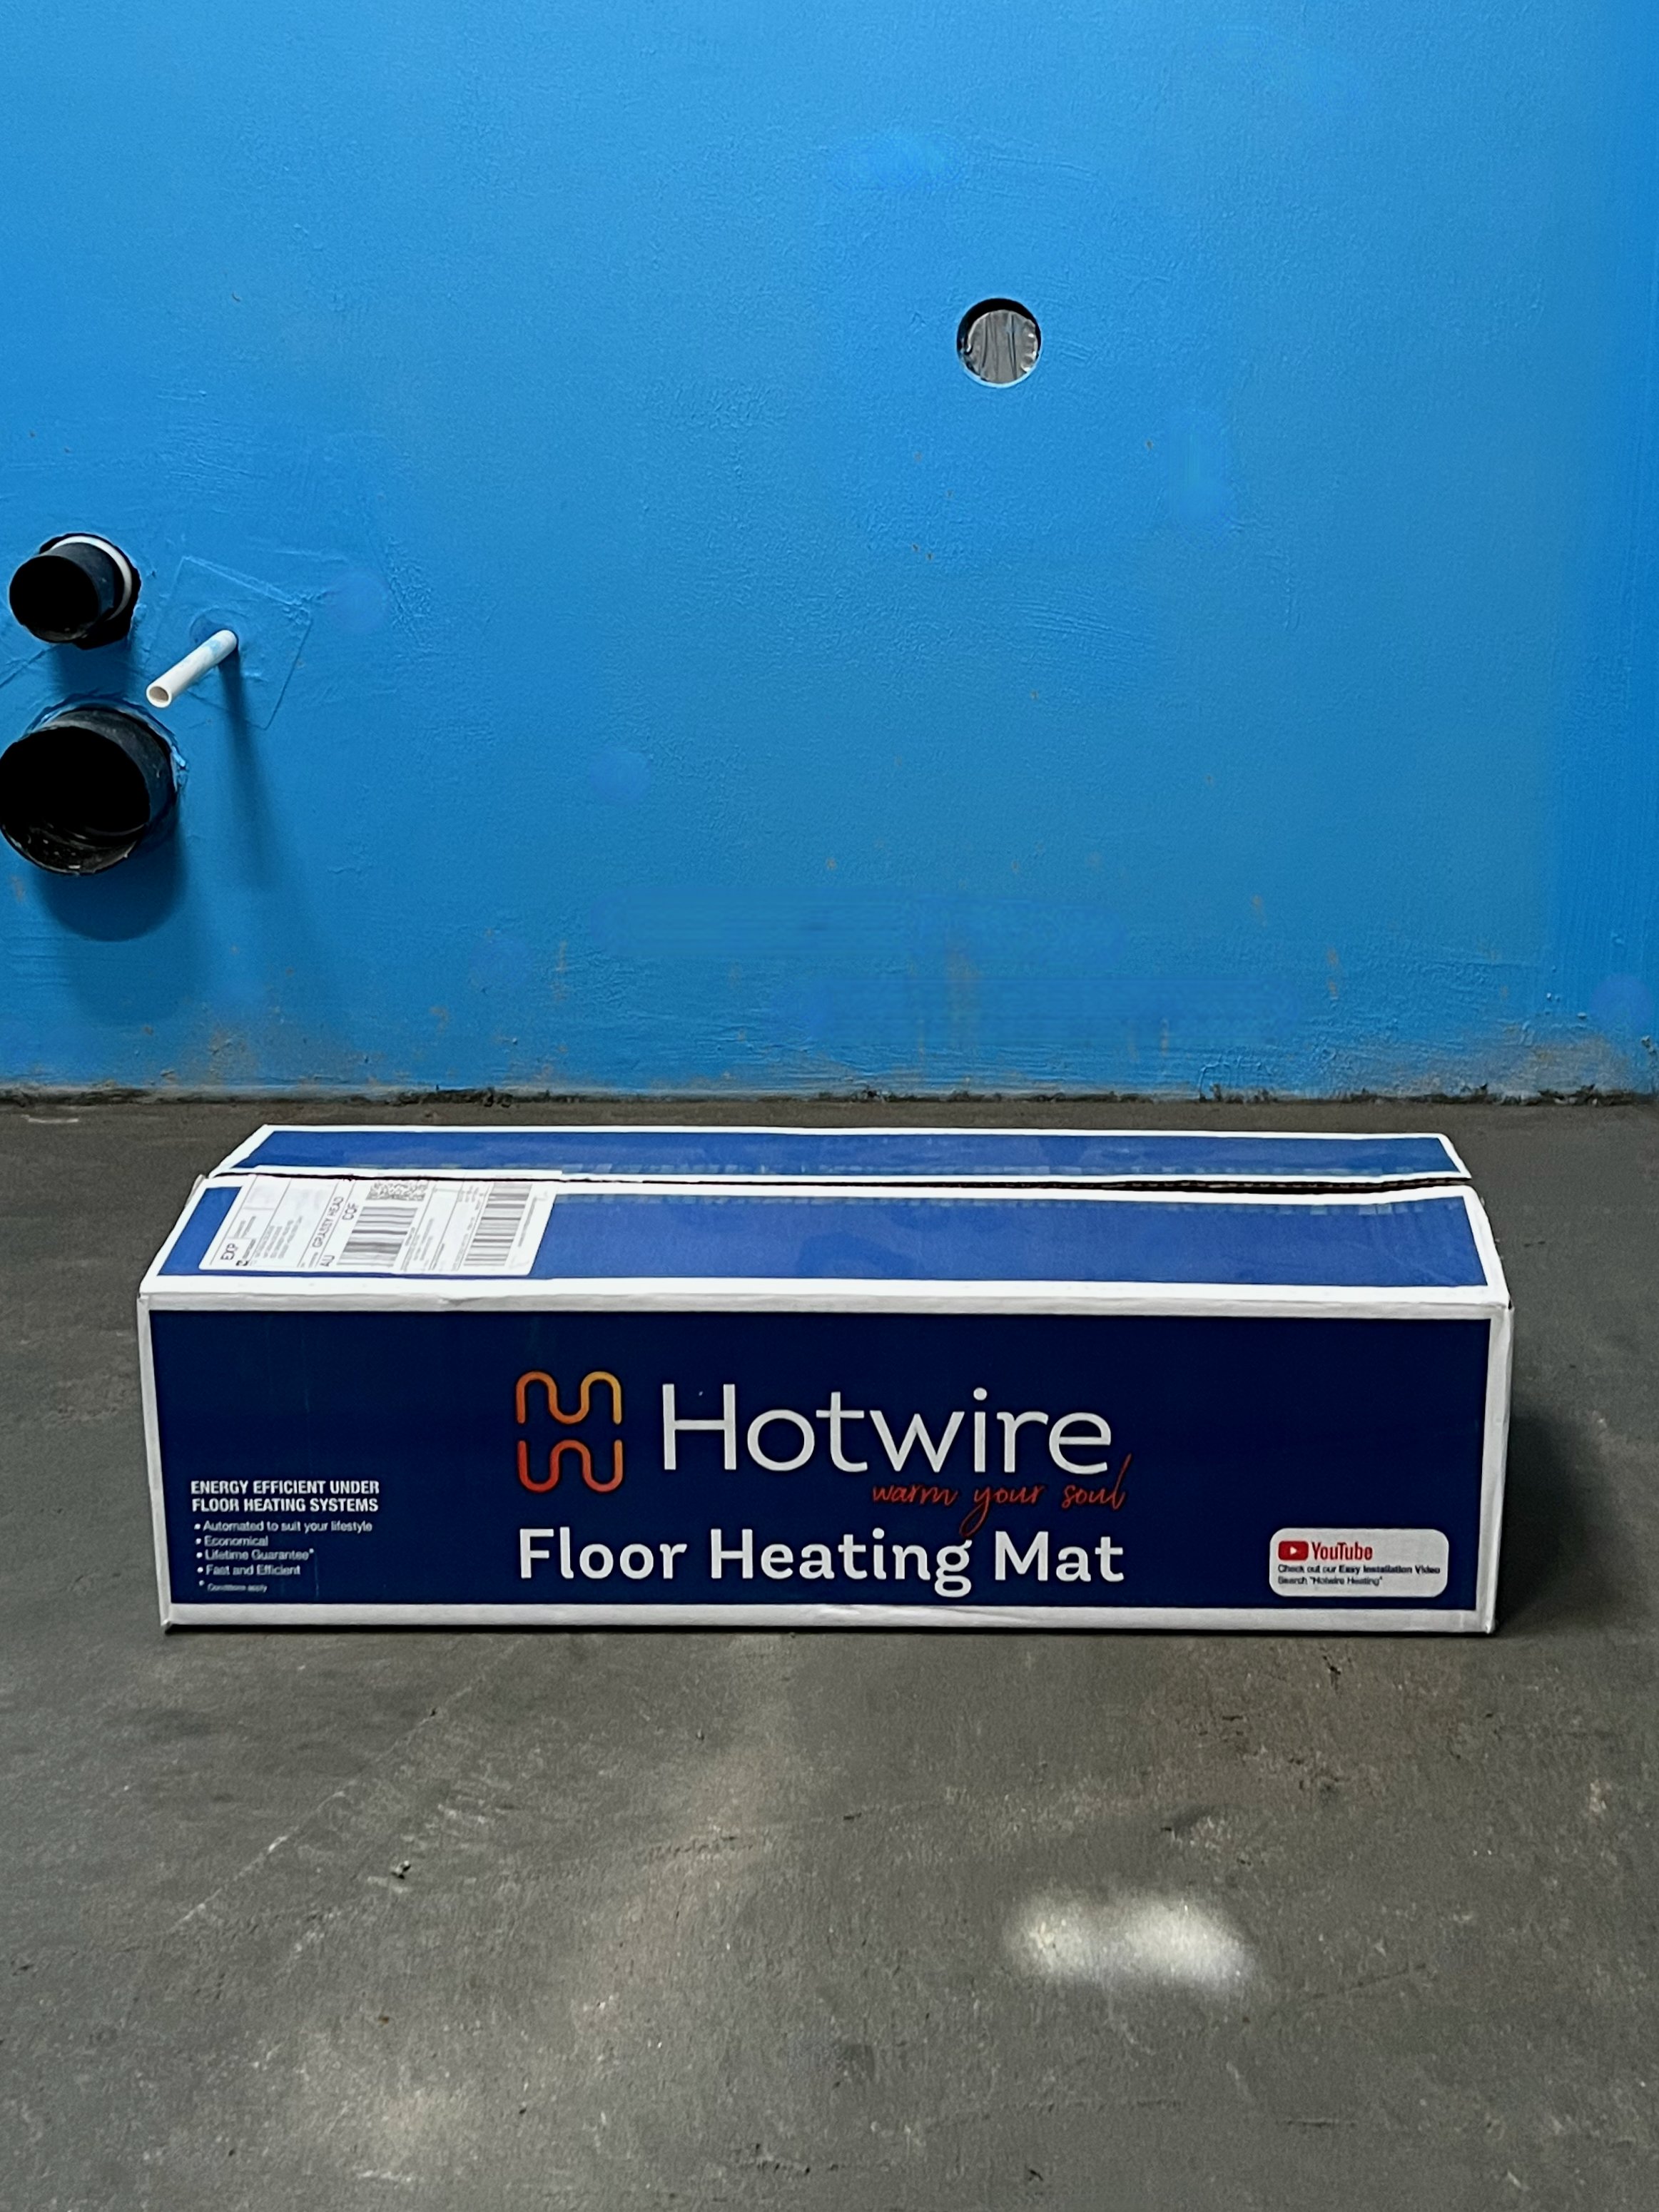
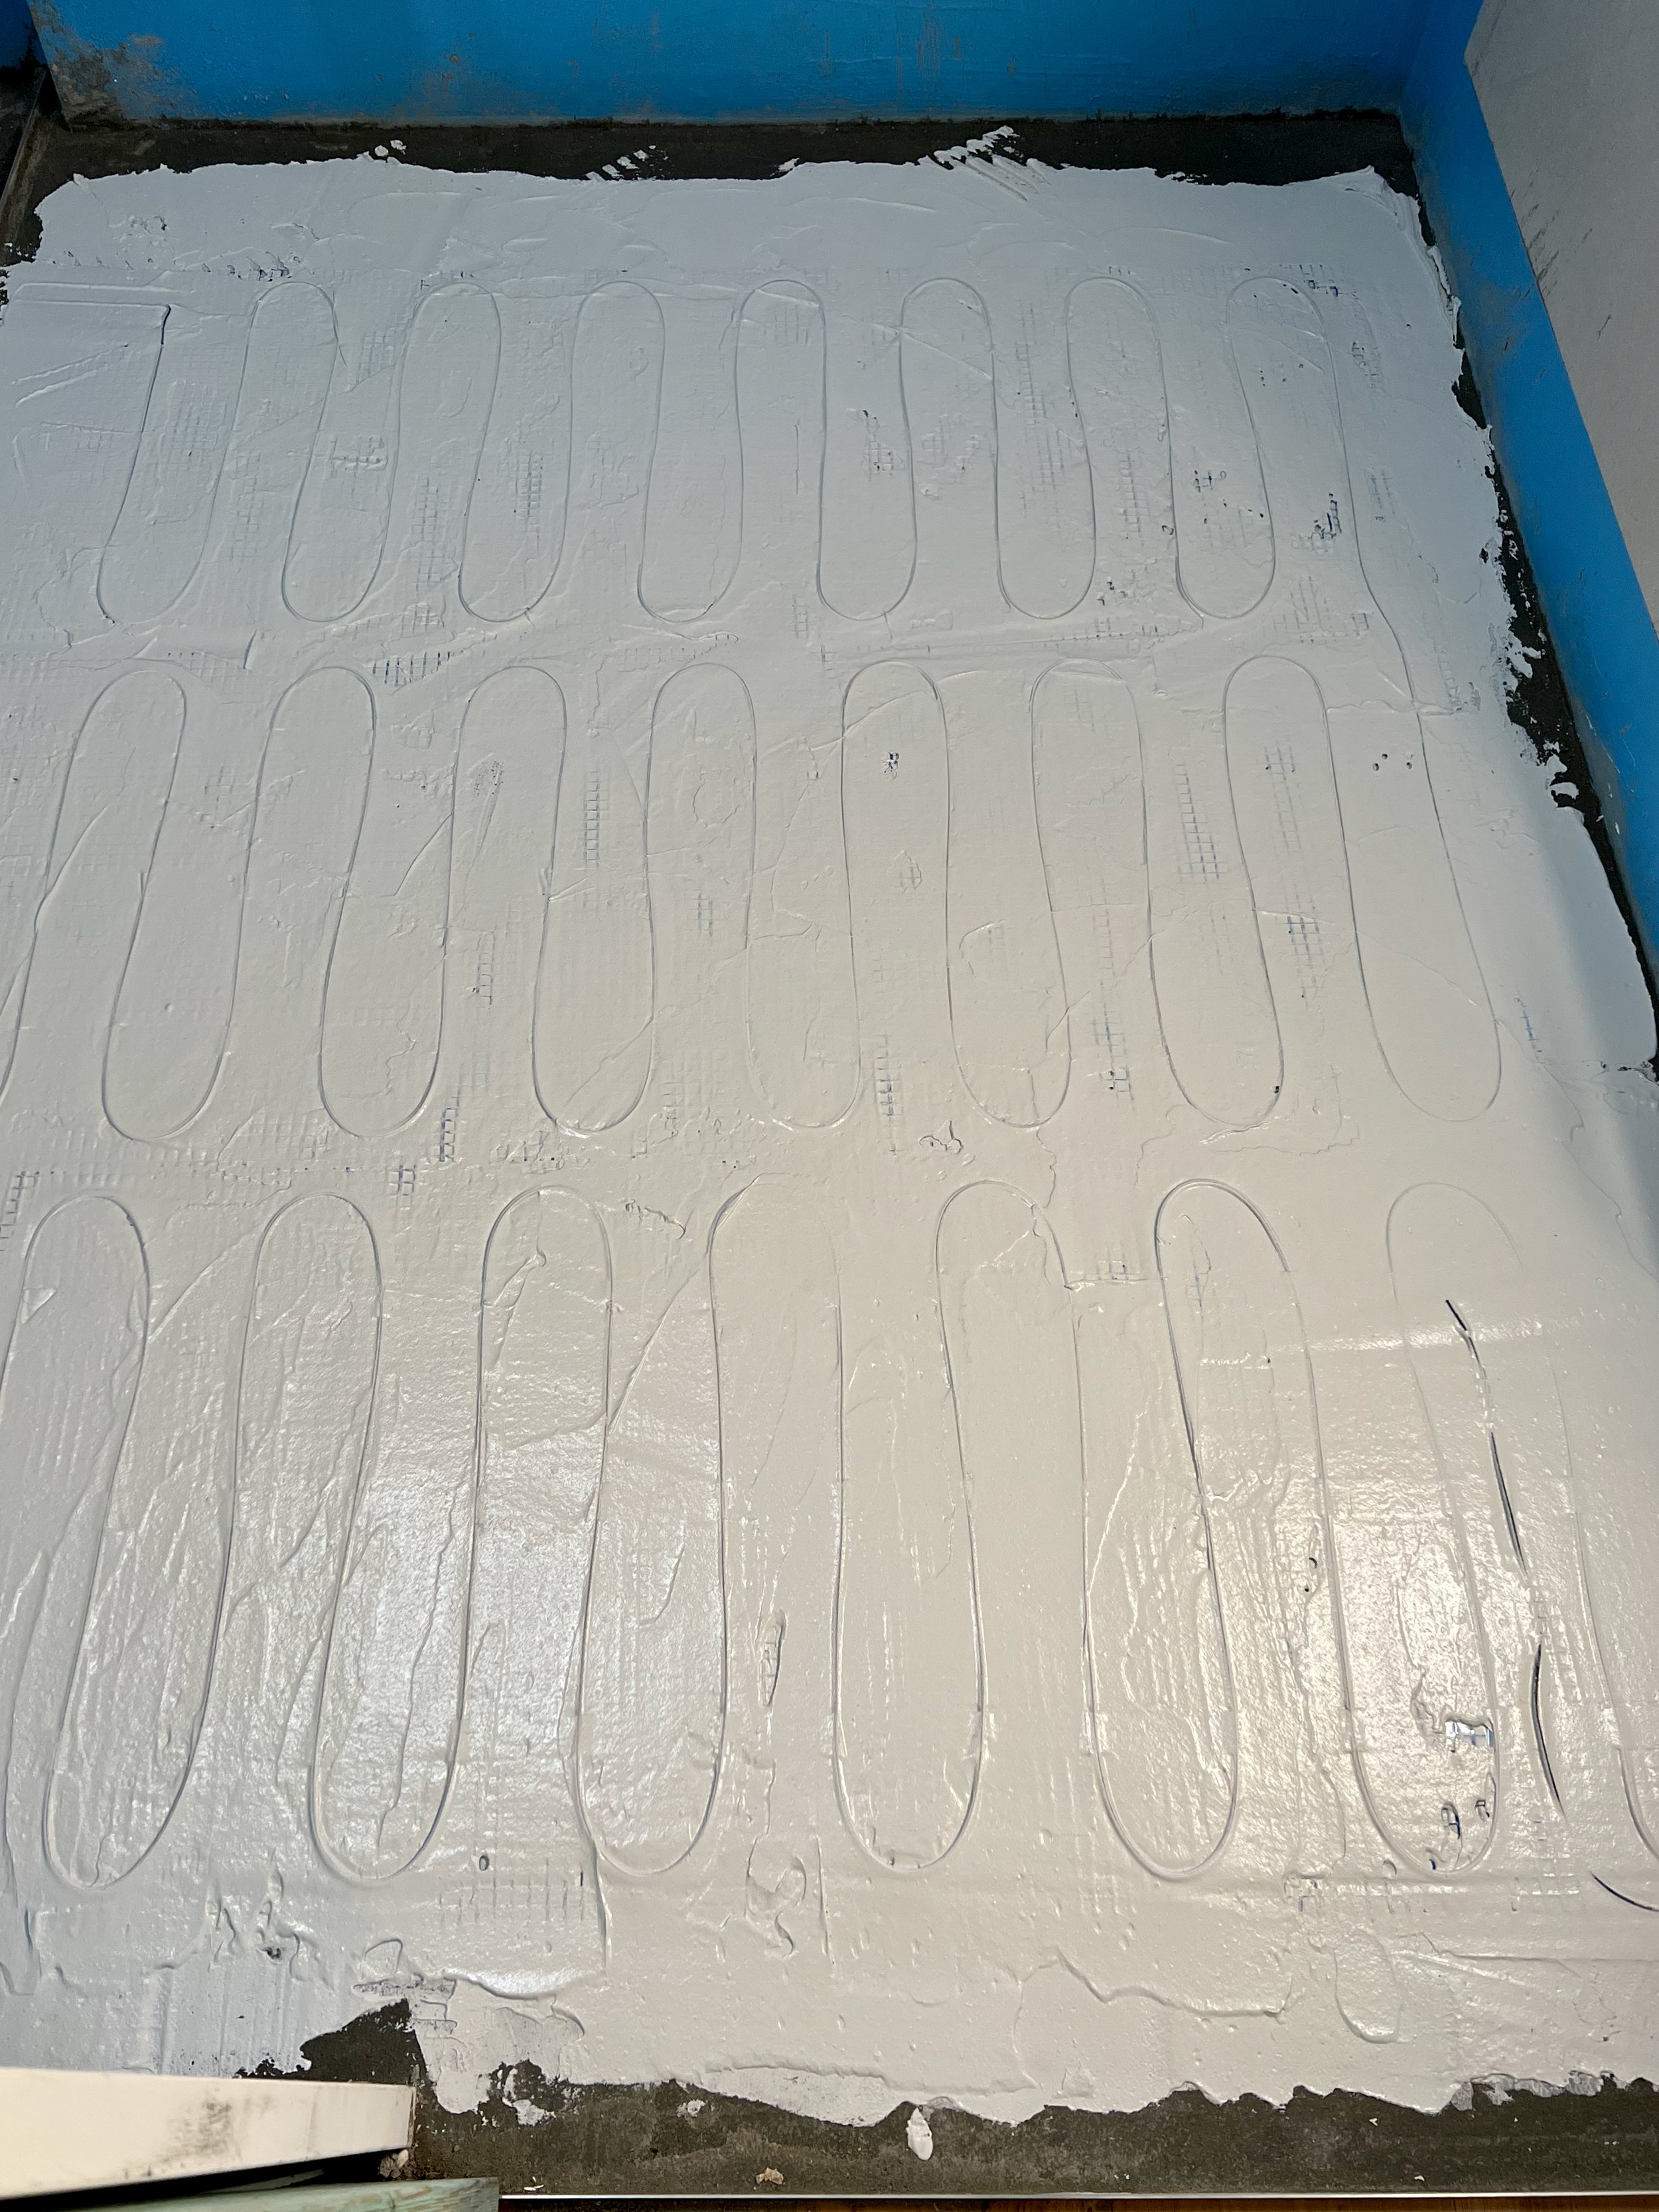
HEATING THE FLOOR
After waterproofing, the tiler screeded the floor to create a fall into the shower recess for directing water flow to the waste.
Then they bedded down a Hotwire floor heating mat in front of the basin and toilet, running the wire up the wall for the electrician to install the switch later.
Temperature control is also another element of future-proofing and, while we don’t have particularly cold winters, it’s nice to have warmth underfoot.
TIP I also purchased the heat mat before installation. When choosing a size, note it isn’t suitable for the shower recess.
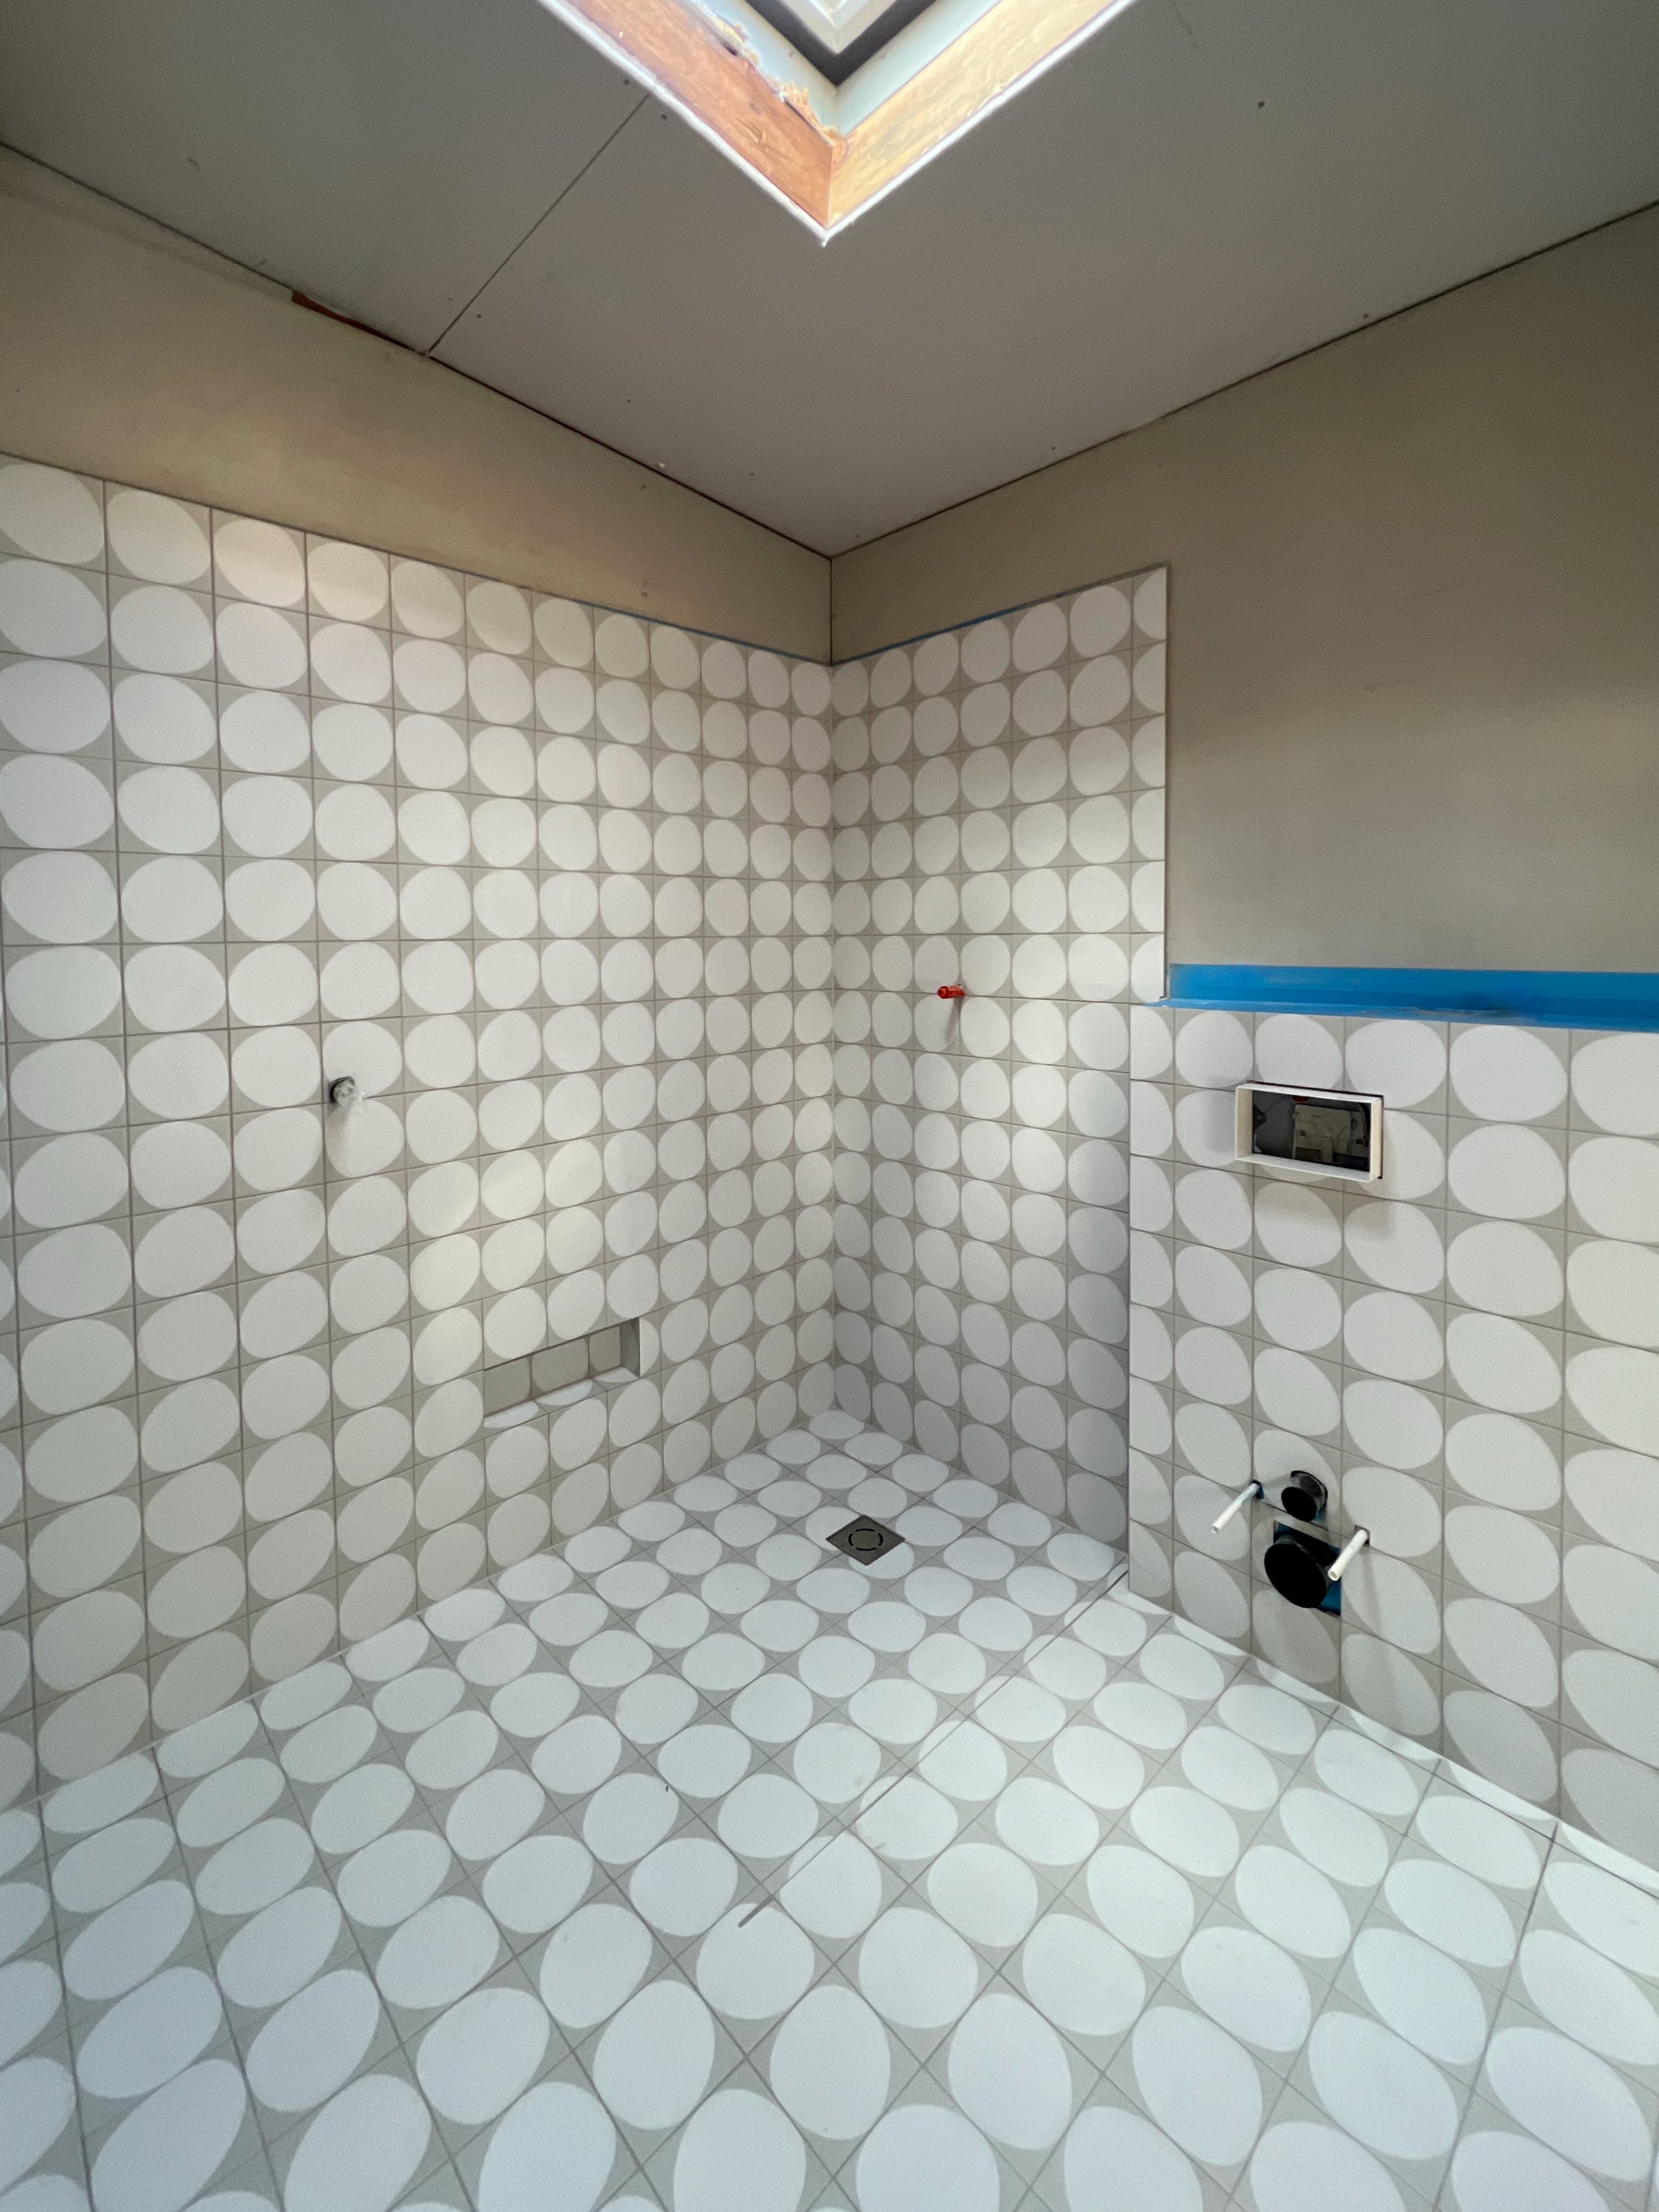
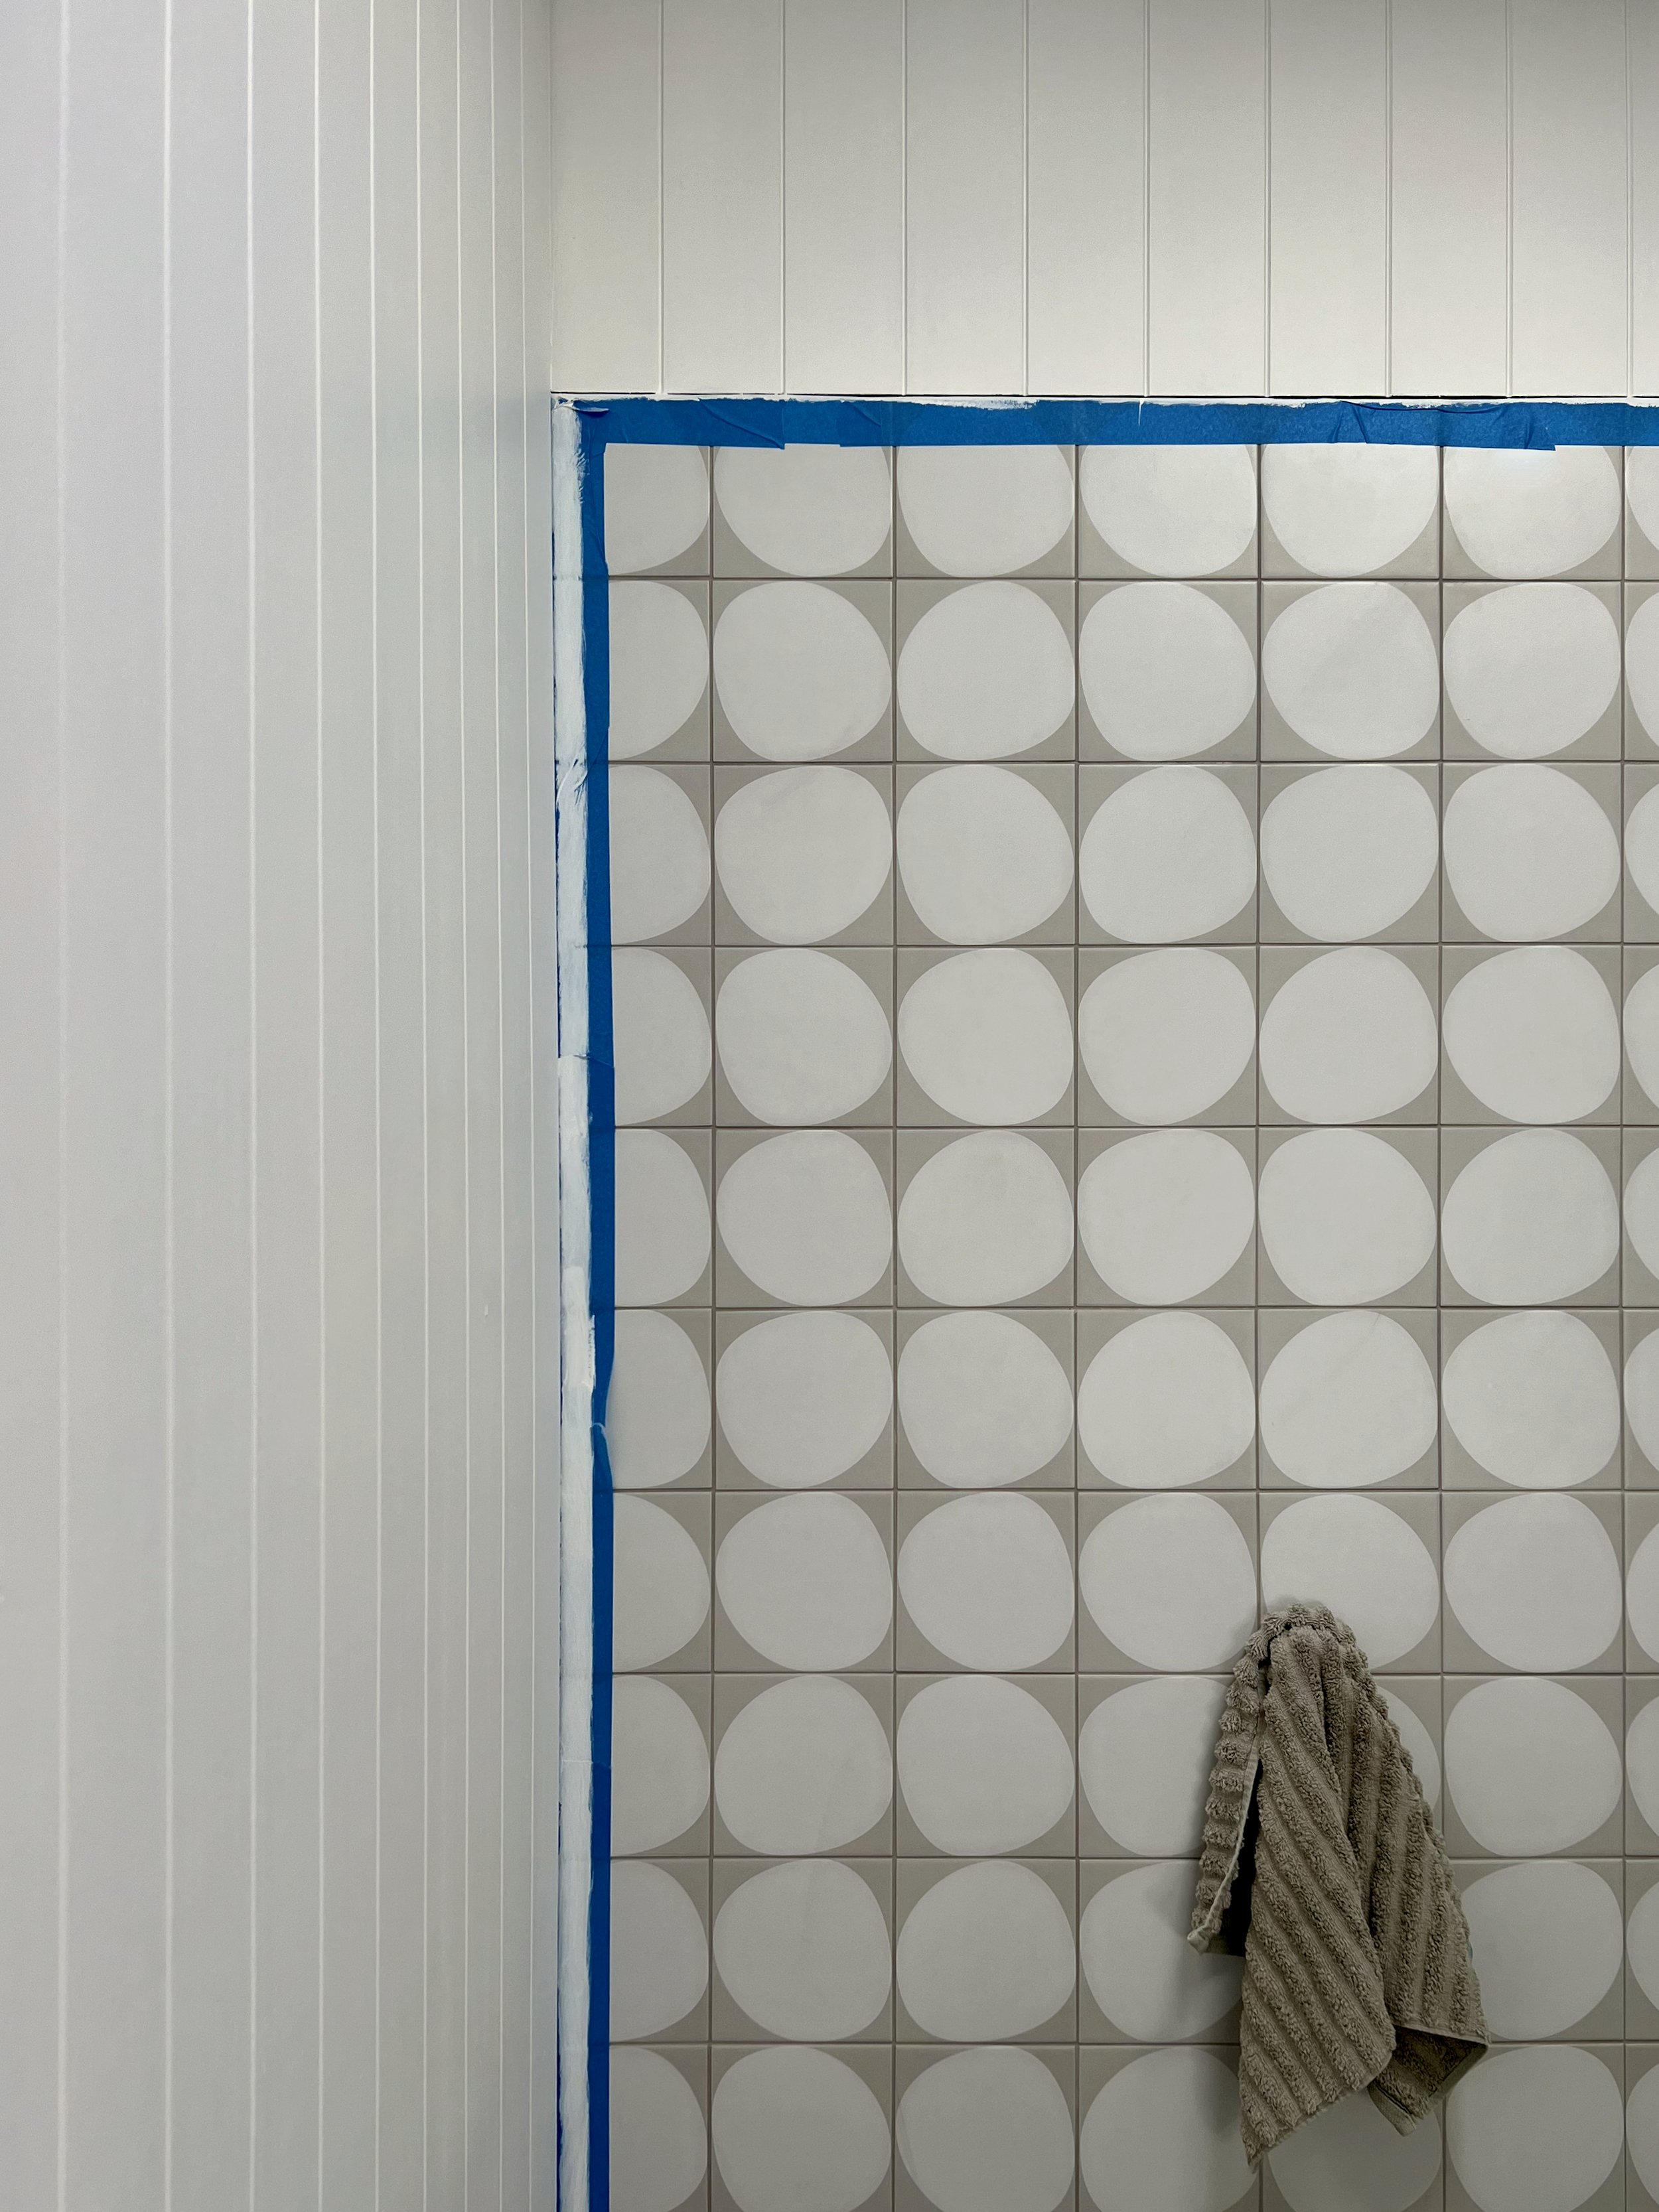
THOSE TILES!
There’s no denying the tiles have big impact.
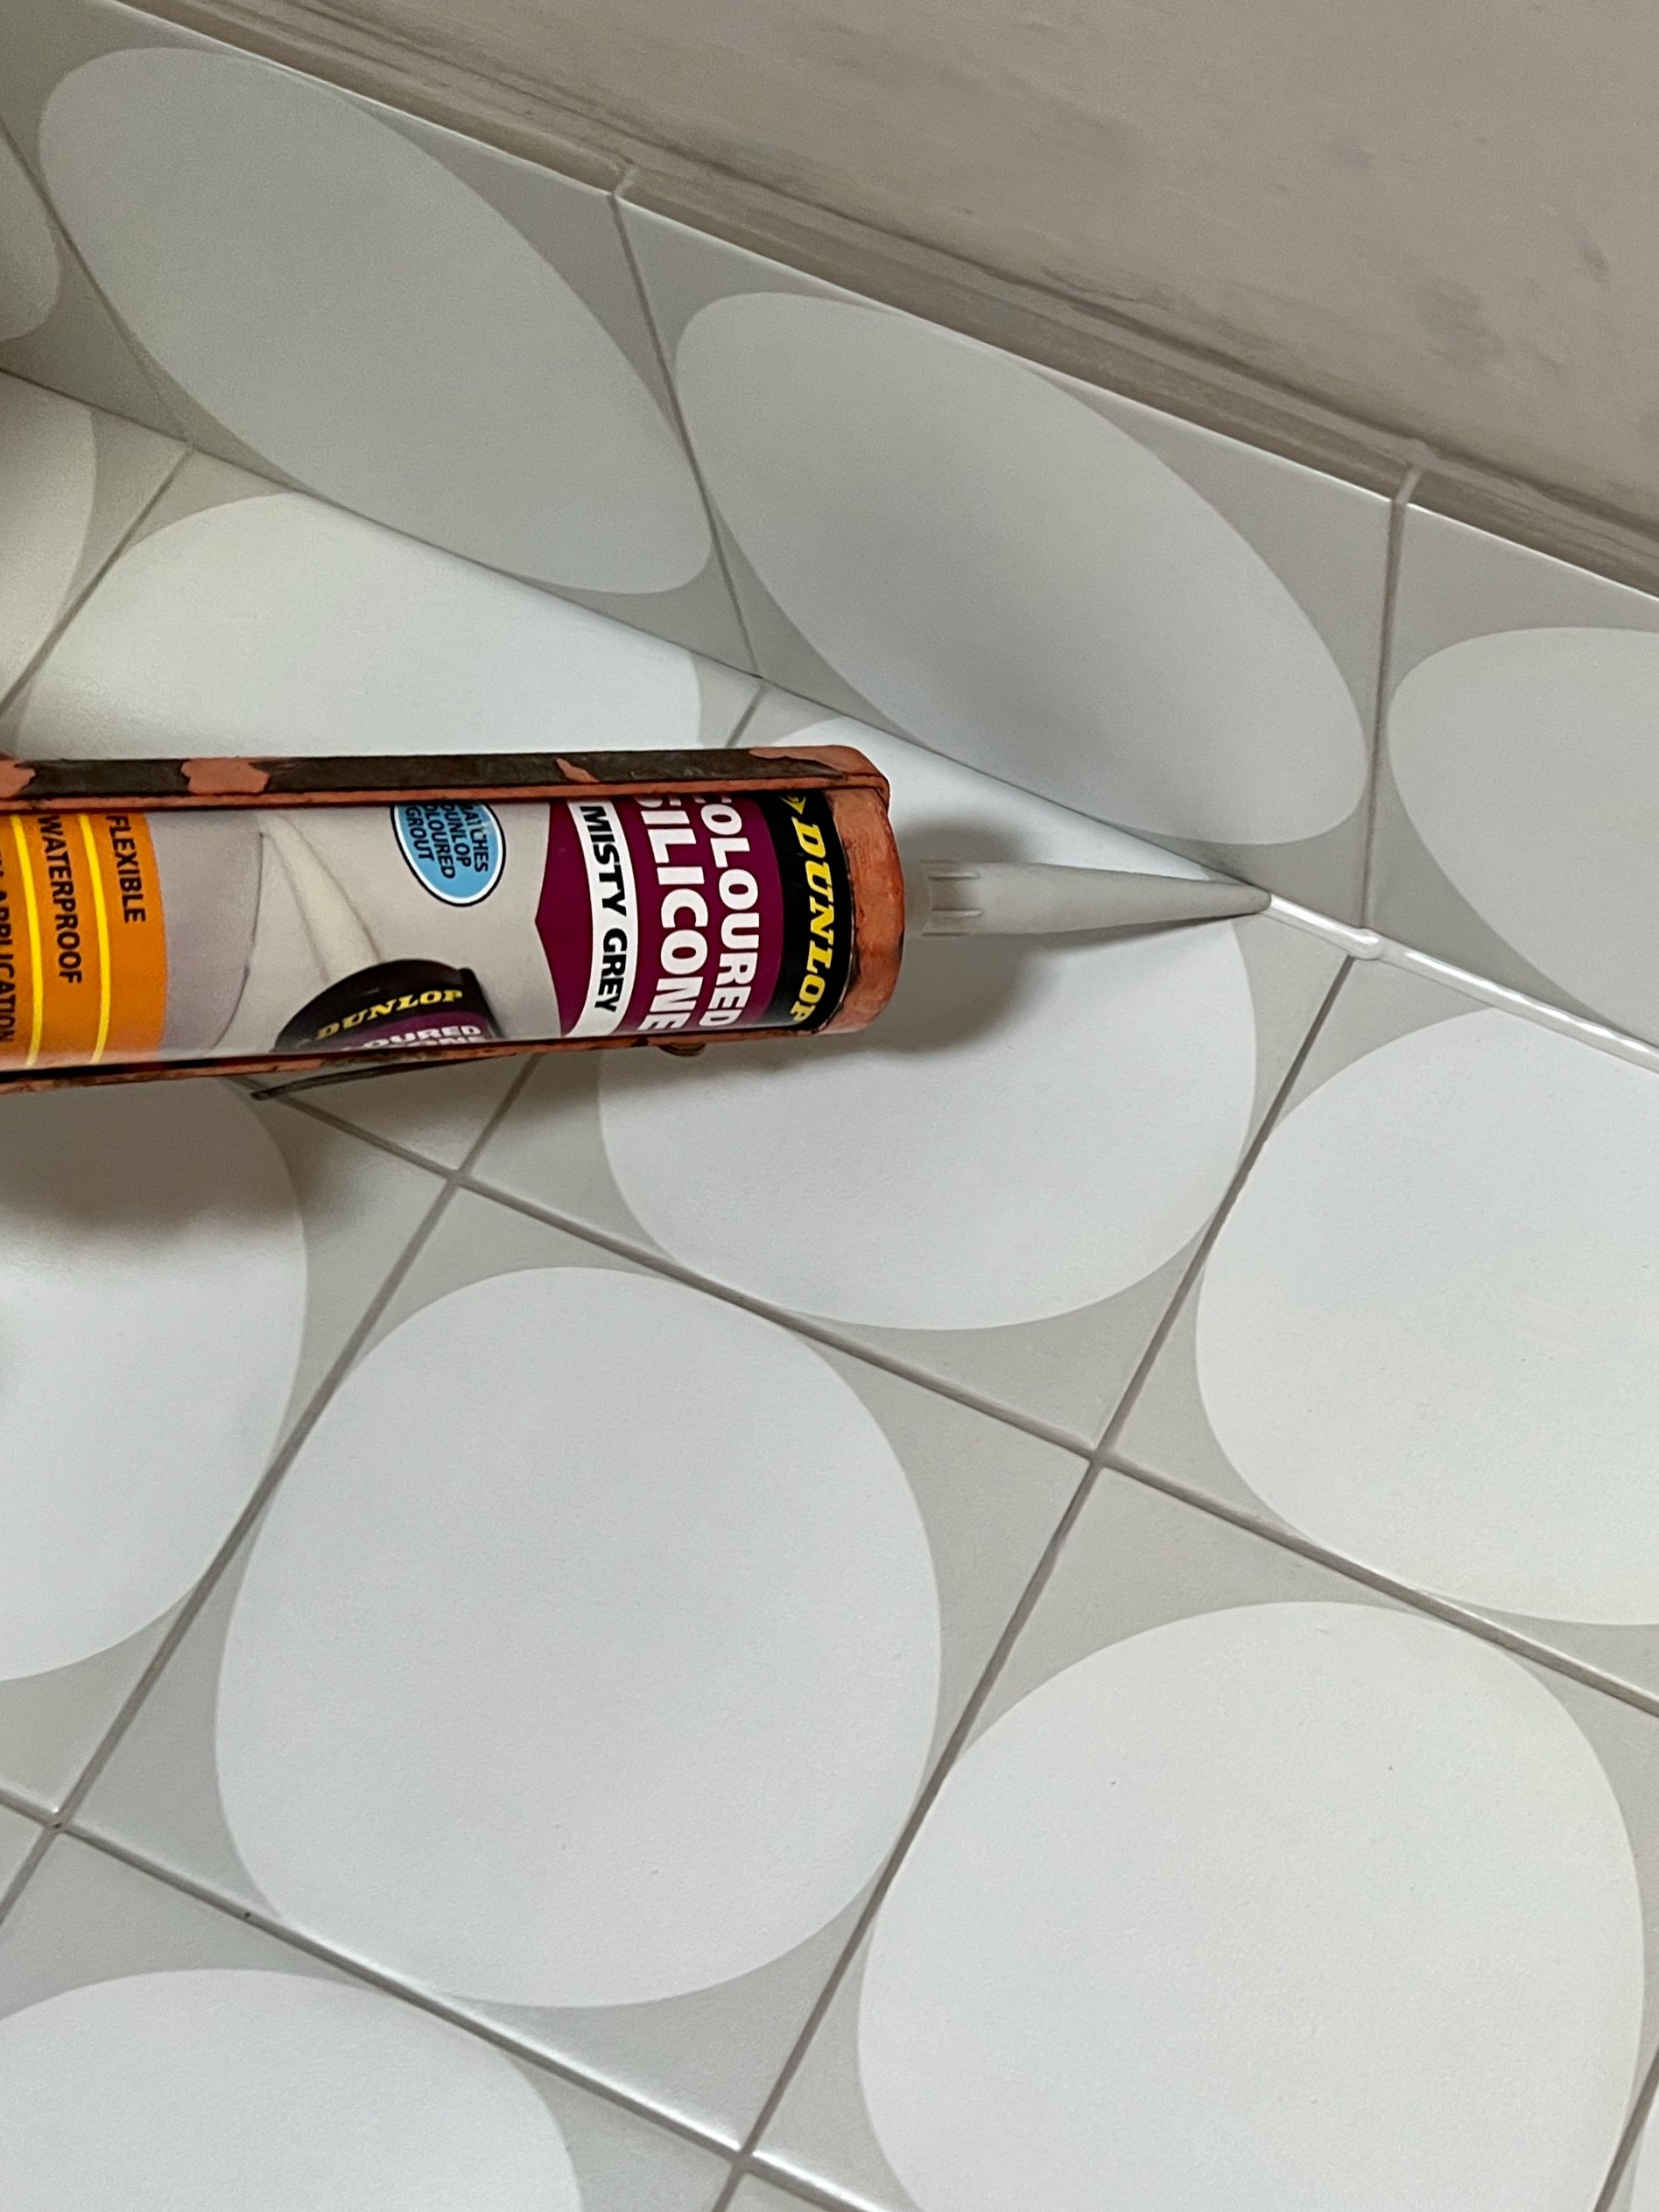
From DiLorenzo Tile Merchants, the 150mm-square Futura White Drop are a light beige and grey tile suitable for walls, floors and wet areas. They’re finished with flexible grout in Misty Grey and the joints sealed with coloured silicone in Misty Grey.
Get a quantity estimate from the tiler. I forgot to include the extended wall in my measurements and was a few boxes short. Thankfully, the supplier had more from the original pallet, although I paid for a second delivery and it held up production.
TIP When choosing tiles, be sure they suit the surface as wall-only tiles can’t be used on the floor. When choosing the grout, note it darkens when wet, so if you’re undecided between shades I recommend going darker.
WHEN IT COMES TO PAINT…
I installed fibre cement panels with VJ grooves along the walls from the doorway. This saves on tiling costs but also, as much as I love the design, would you want four walls in that full-on pattern?
Then I installed 55mm cove cornice, the smallest profile available, although the internal mitred corners were tricky to get right along the raked ceiling.
To keep the room as bright as possible, I matched the pale circle of the tile to the lightest white tone, choosing Casper White Quarter for the panelling and extending it onto the cornice to make the walls look higher. I used Vivid White on the plasterboard ceiling and skylight cavity to maximise light refraction.
TIP It’s worth splashing out on specialised hard-wearing paint with mould inhibitors. I used Dulux Ceiling White +PLUS Kitchen and Bathroom. For the walls and cornice, I primed with Dulux 1-Step then finished with Dulux Wash&Wear +PLUS Kitchen & Bathroom.
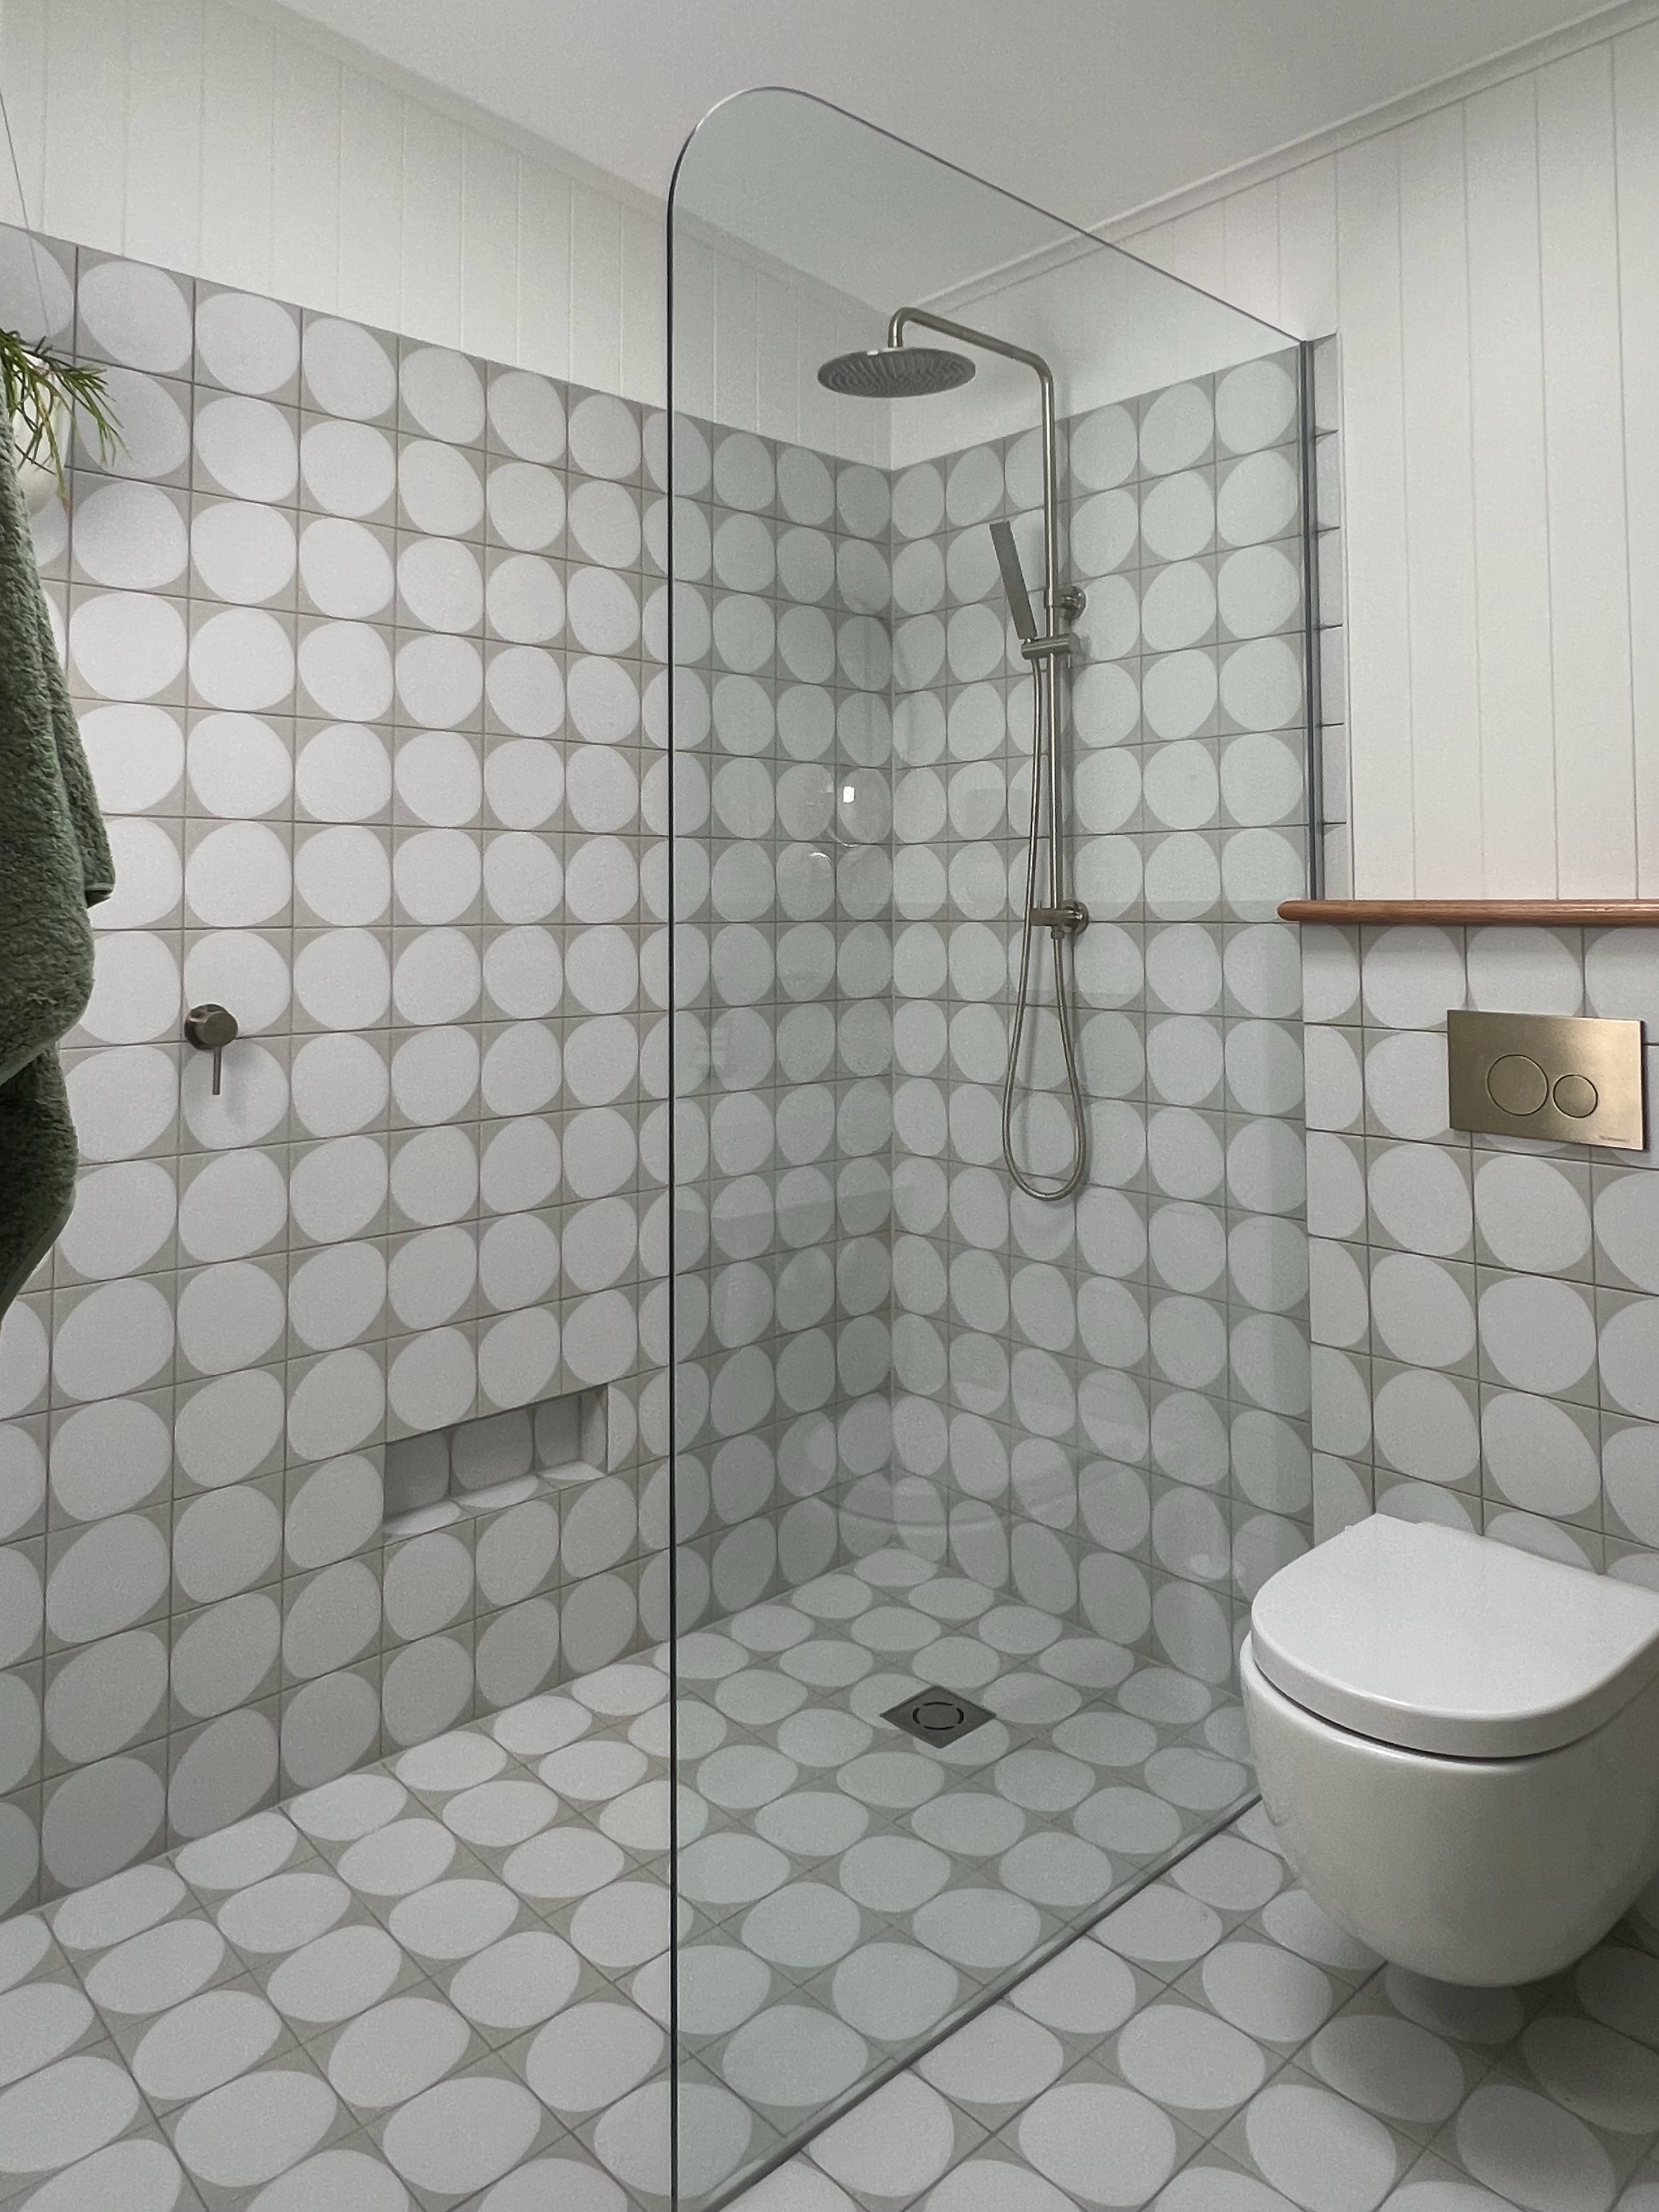
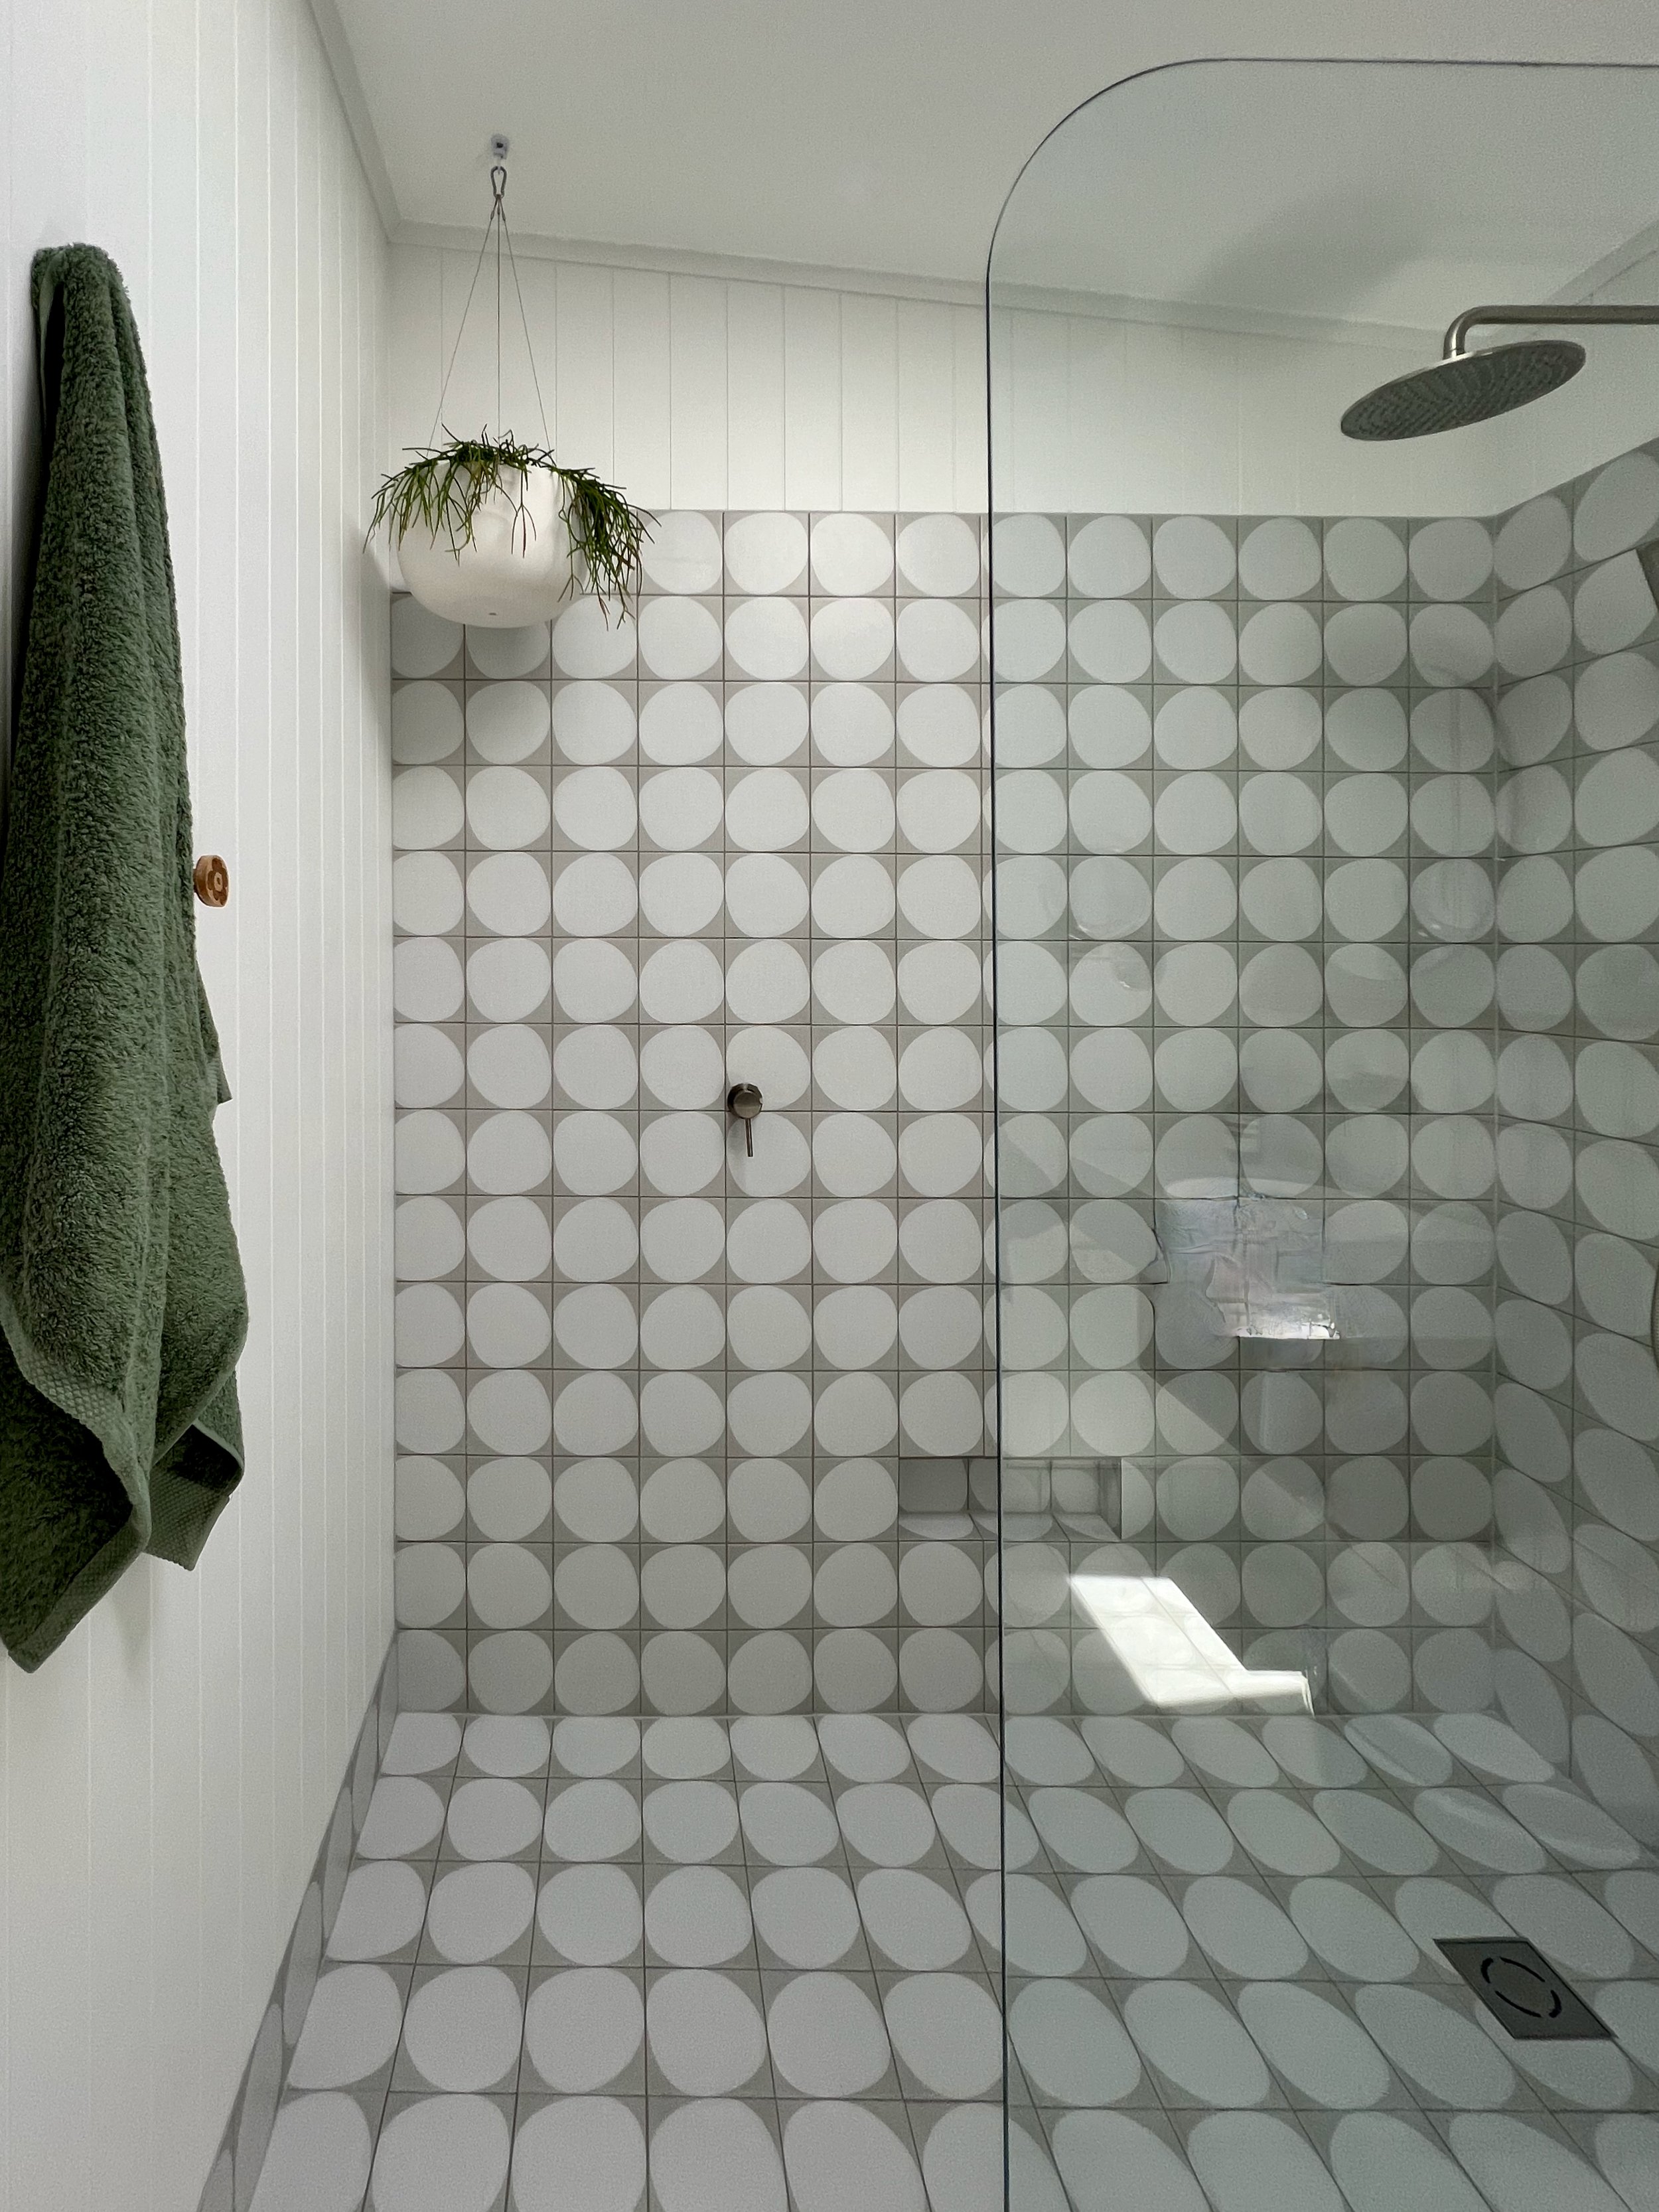
DESIGNING THE SHOWER RECESS
The aim was to have a walk-in shower, without steps or moving door and enough width to wash hair with elbows out. While there wasn’t space for a built-in bench seat, I did include a recess for shaving legs and washing feet.
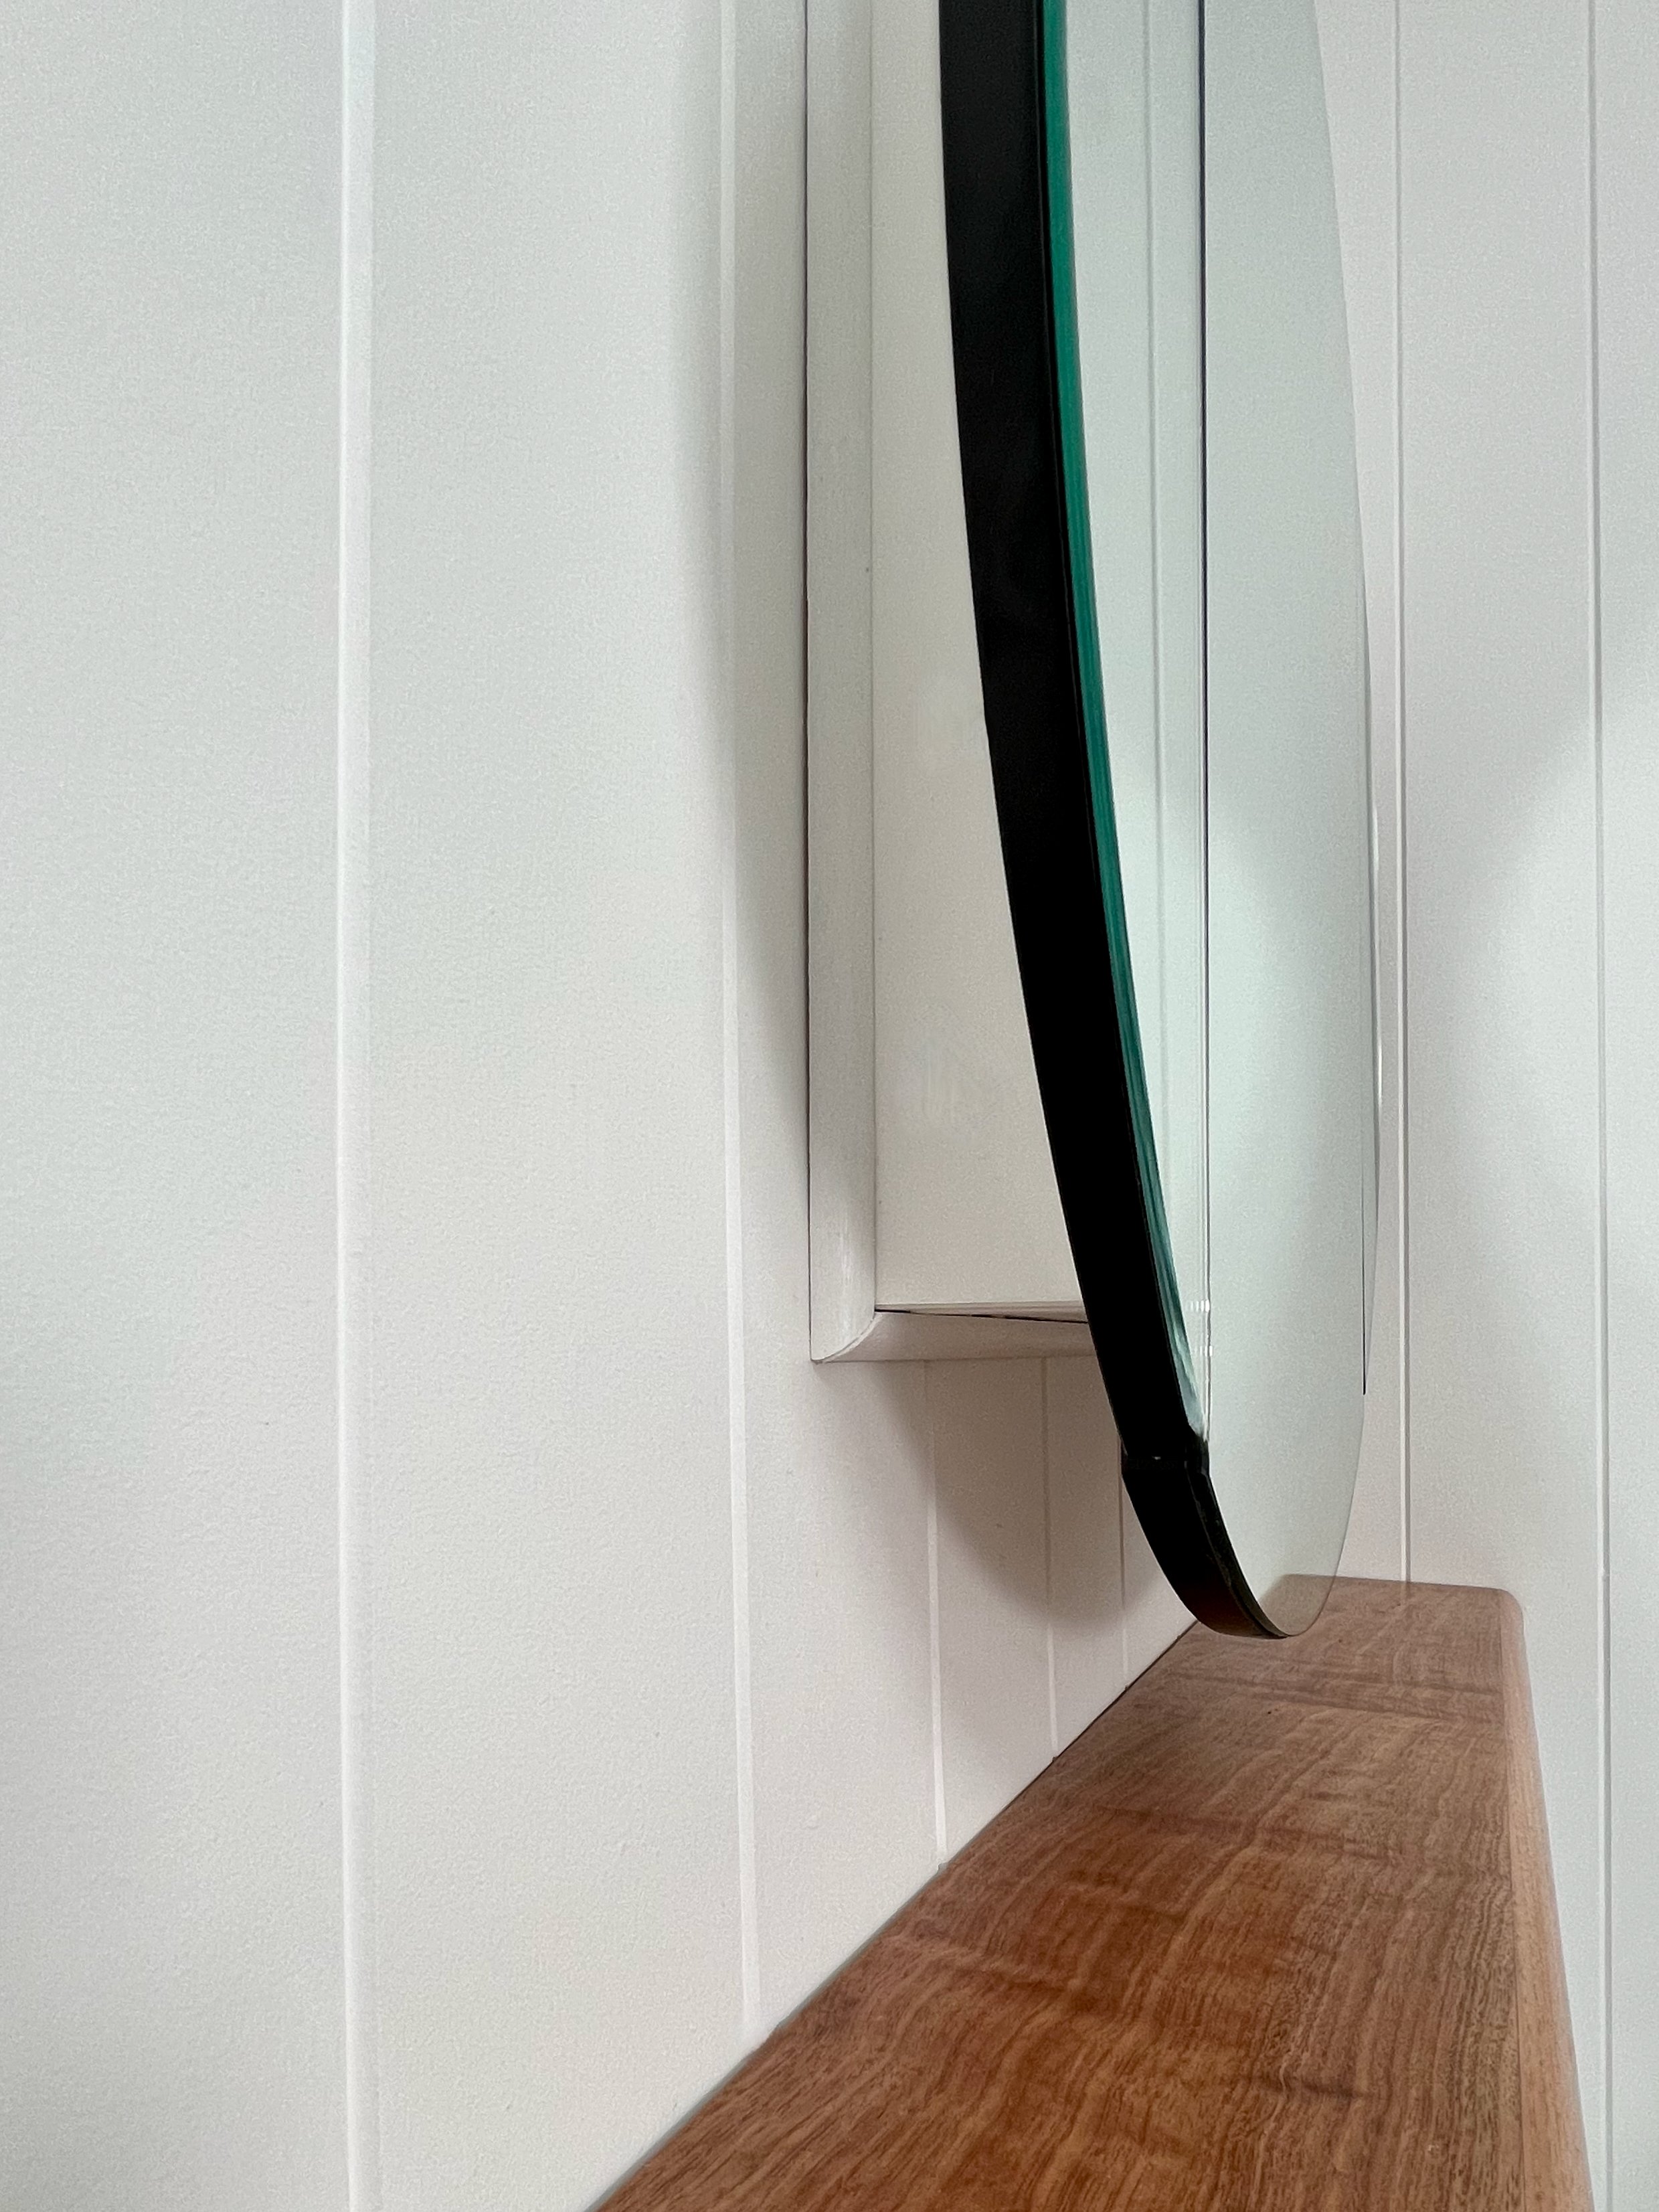
The walls were slightly out of square so the screen had to be customised. While I had my heart set on fluted glass, the glazier suggested it would be double the waiting time, double the cost and suck up half the light in the room. So I chose clear glass with bevelled edges and a radial corner.
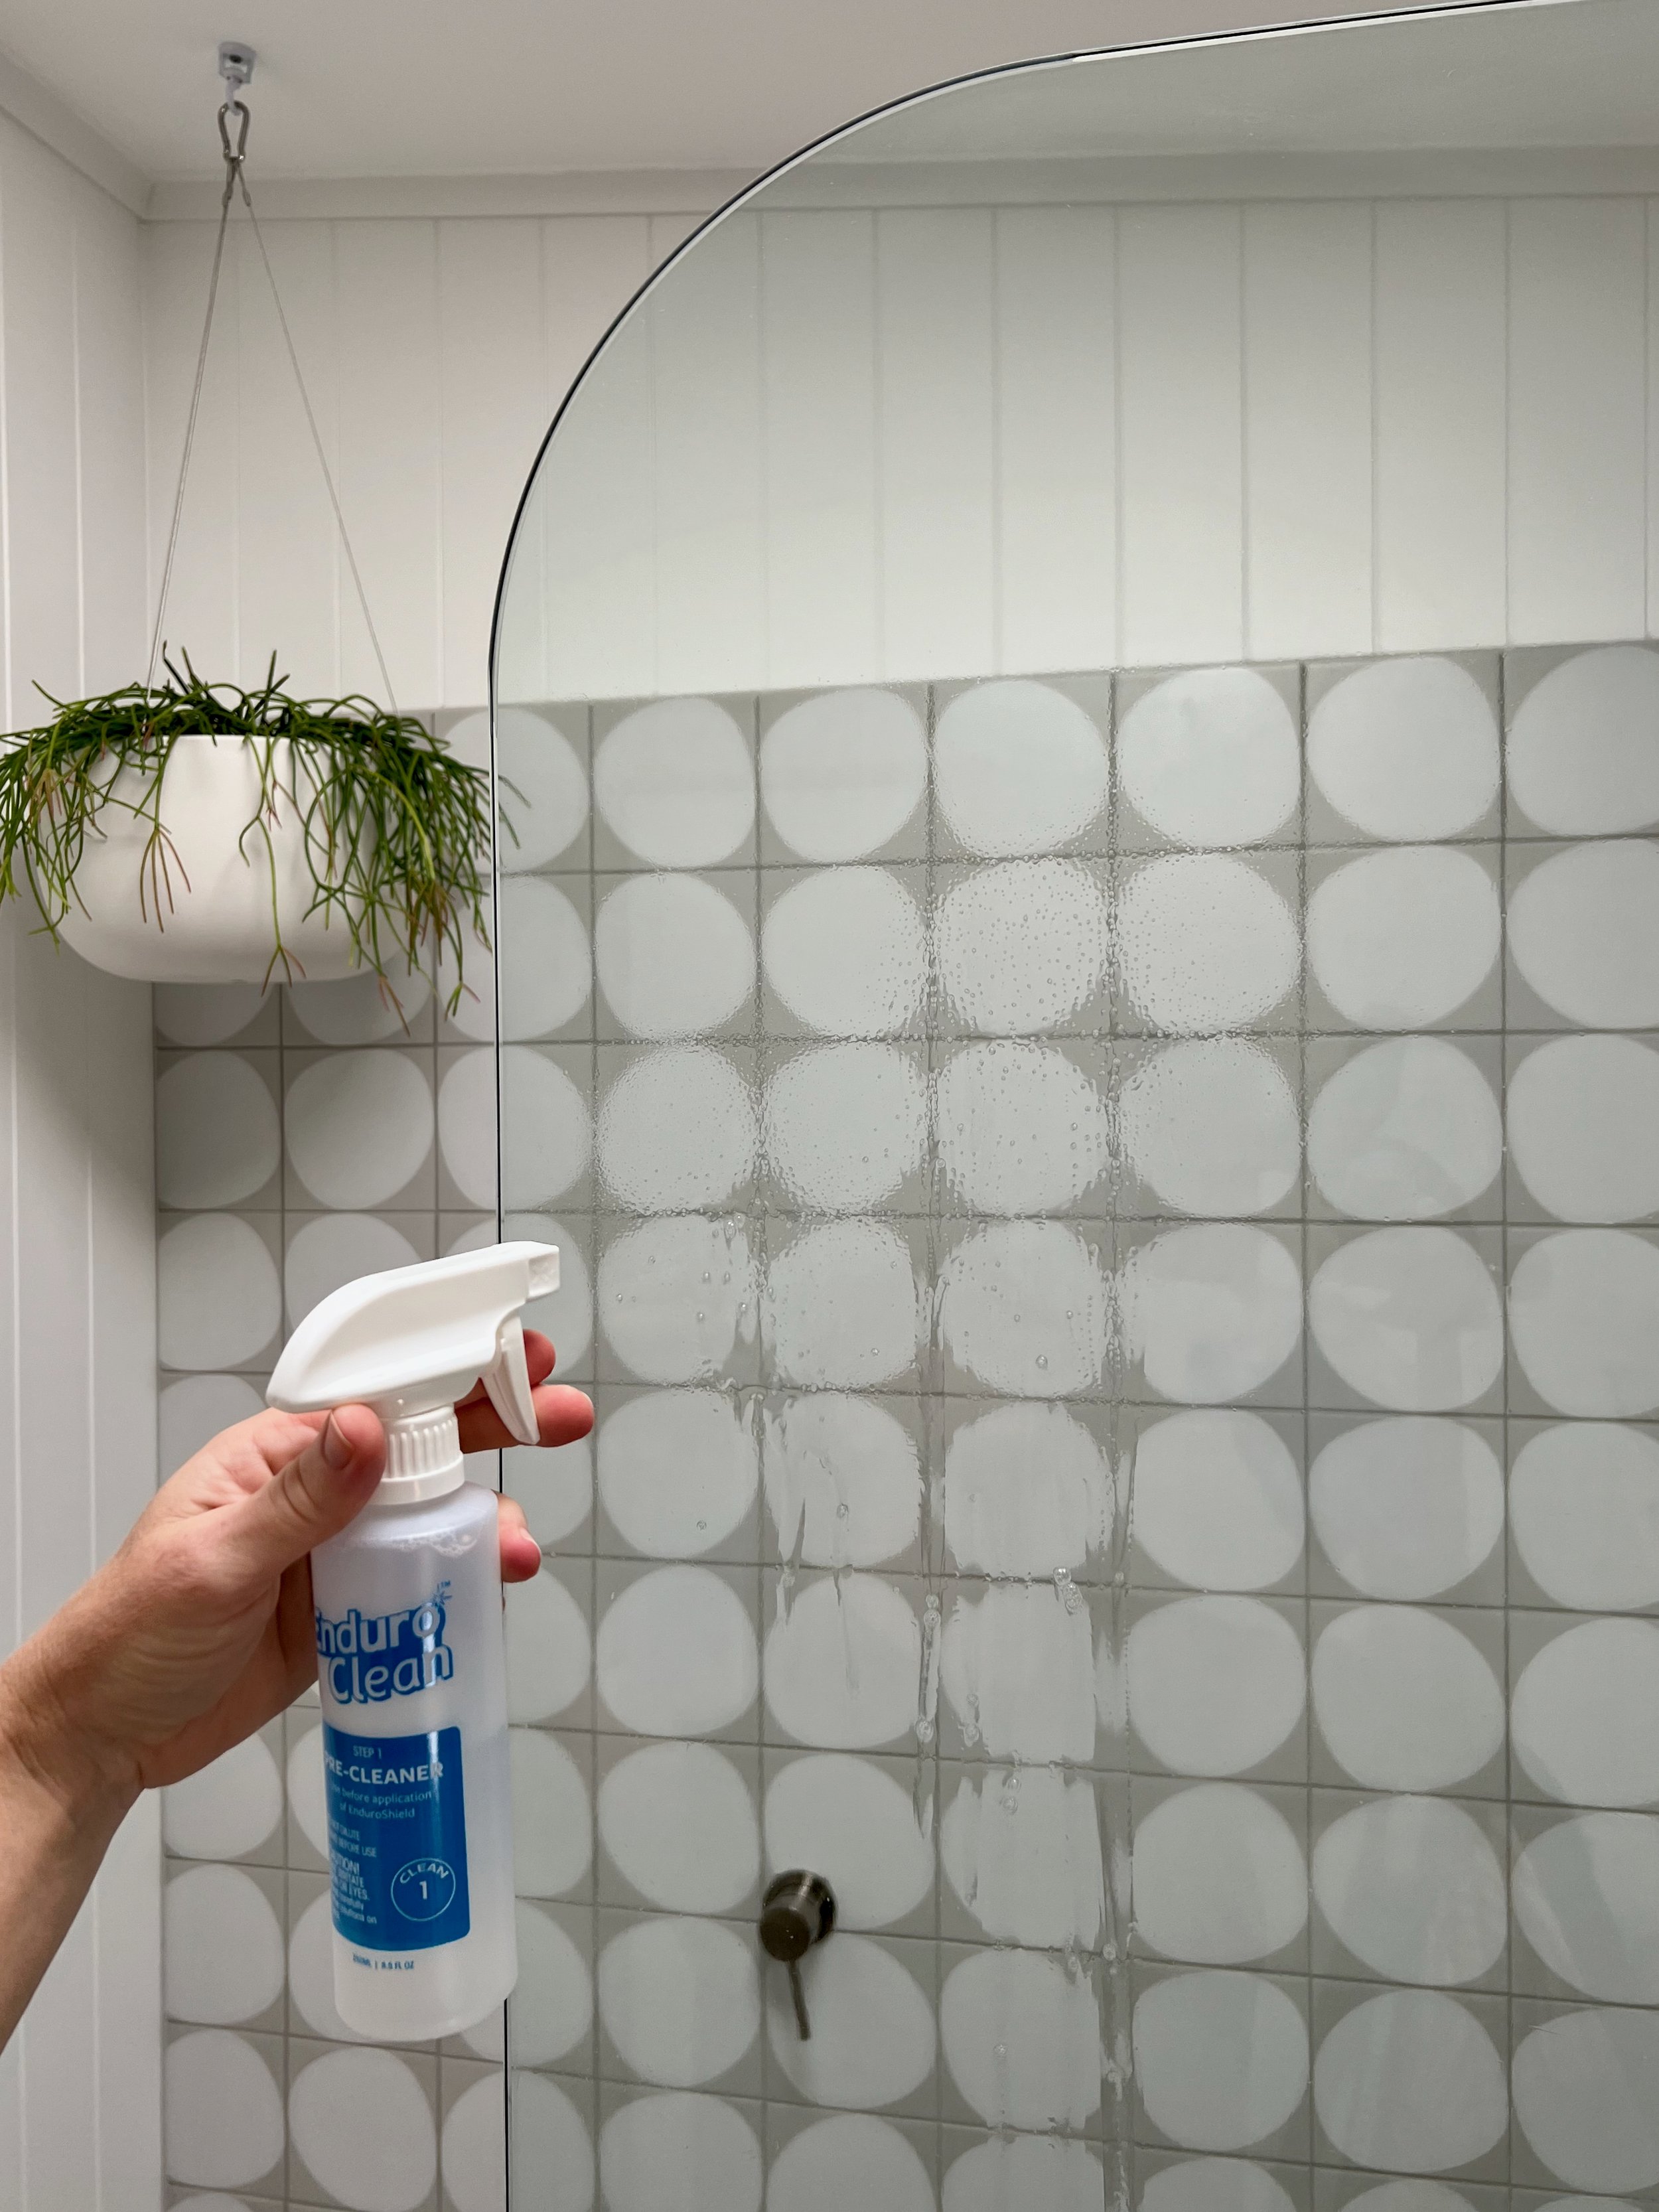
DOWNSIZE CLEANING TIME
After installing the screen the glazier advised, ‘Don’t use the shower until you’ve treated the glass with Enduroshield. You’ll thank me in six months when you hardly have to clean it.’ I did, and he was right!
TIP The EnduroShield Home Glass Treatment kit is the best $100 you’ll spend on cleaning products.
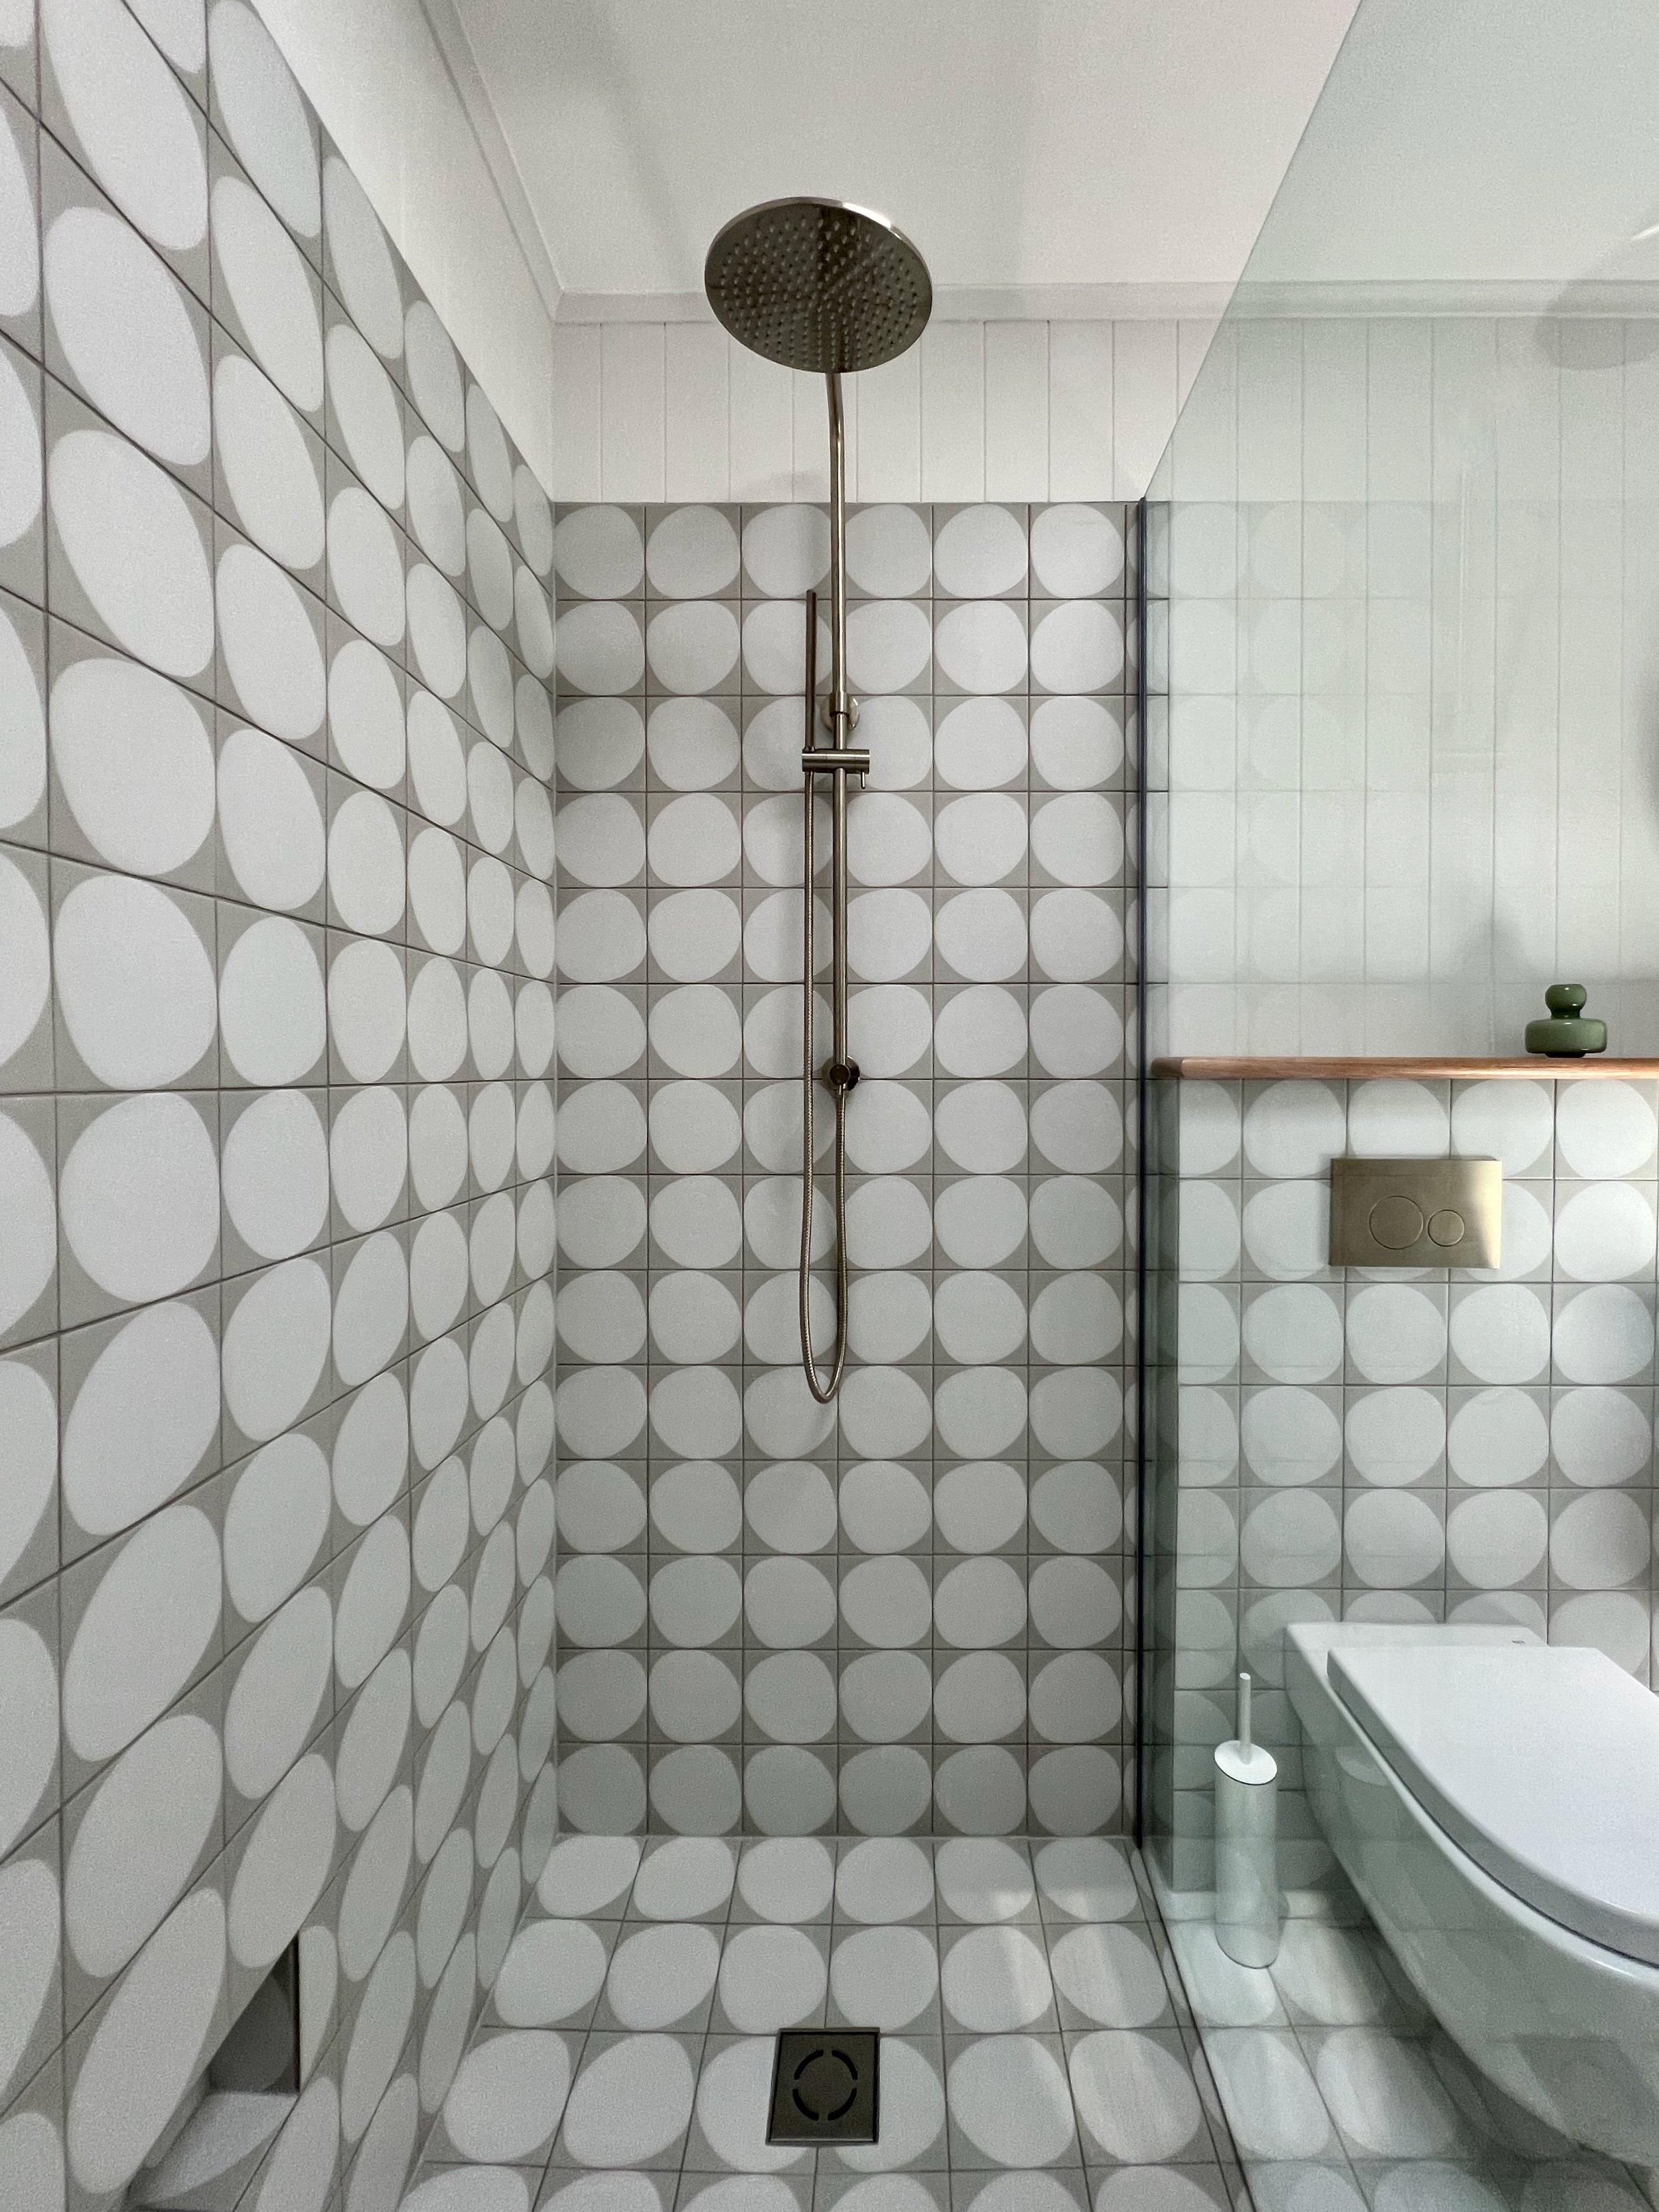
DOUBLE-DUTY SHOWER SET
This shower rail set combines a rain shower head with a hand held hose that makes cleaning easier while catering to potential mobility issues. The diverter turns easily and is less confusing to engage than pin-style ones.
The mixer is positioned near the entrance of the shower so you don’t get wet before the water is at the right temperature. It’s also easy to adjust and control the temperature accurately.
The simple square floor waste can be lifted out for access to the drain.
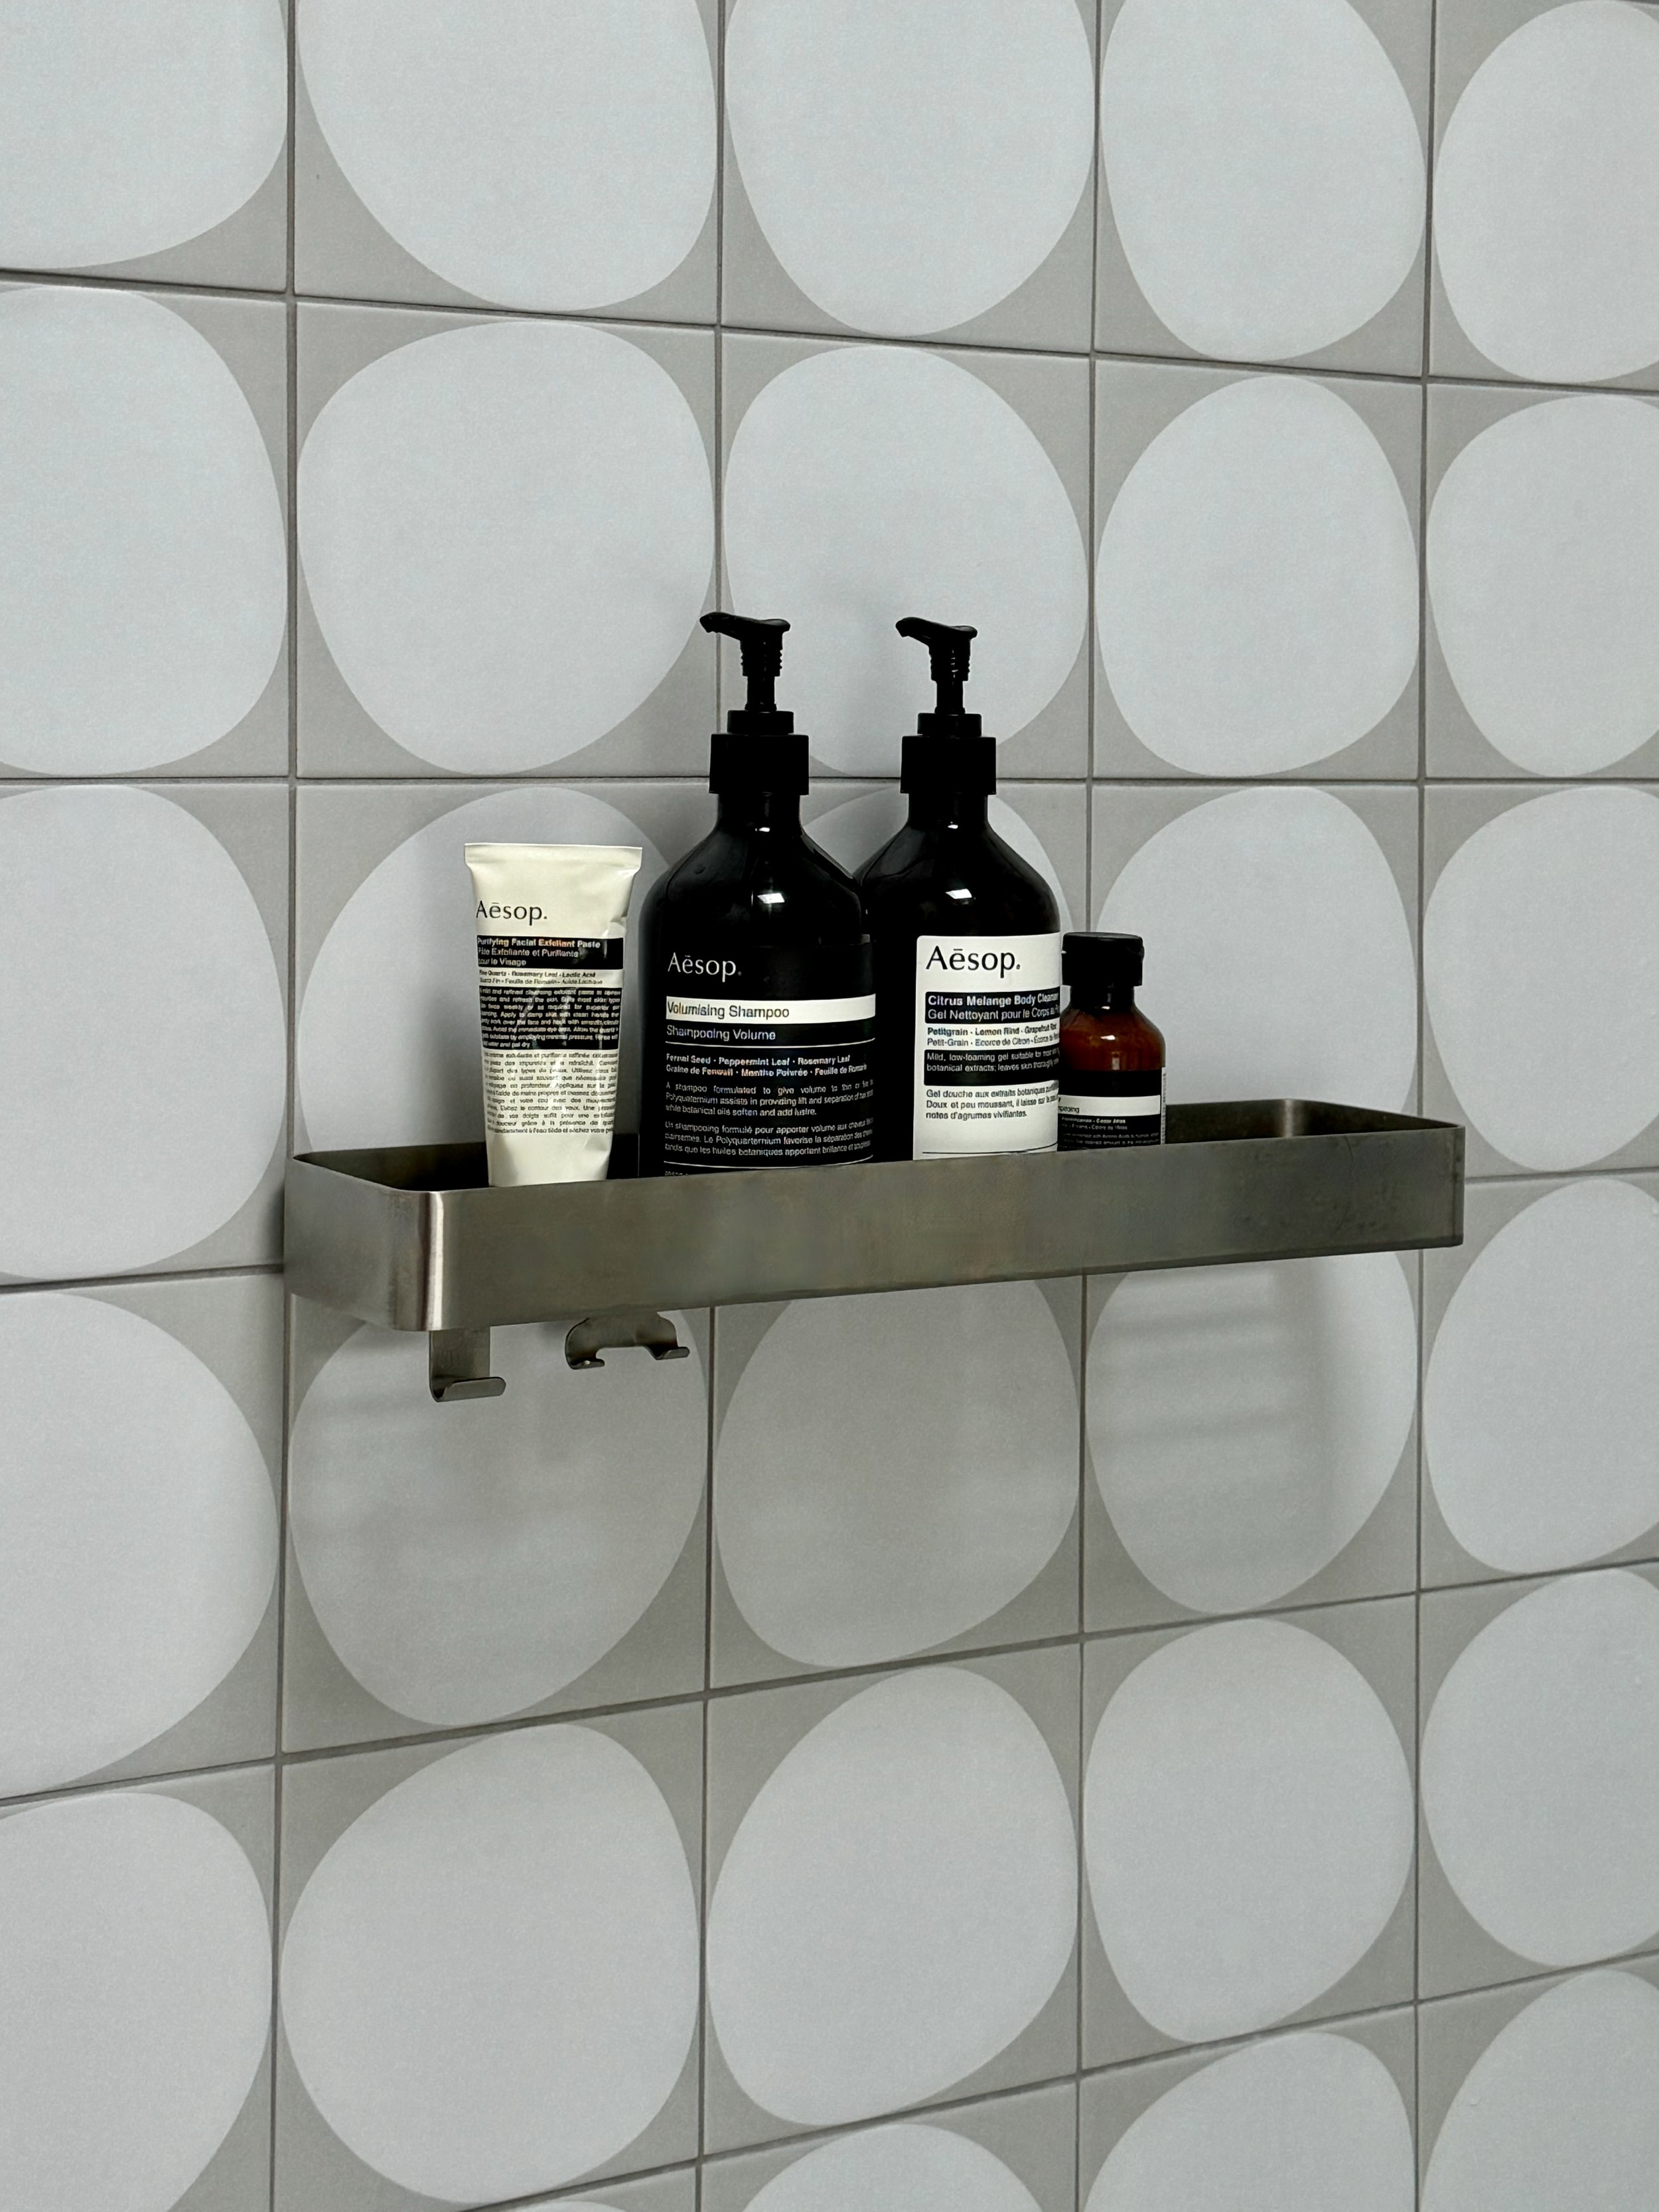
I’ve since installed this brushed nickel shower caddy that clips off to be cleaned in the dishwasher.
It’s positioned directly above the wall recess and in line with the mixer.
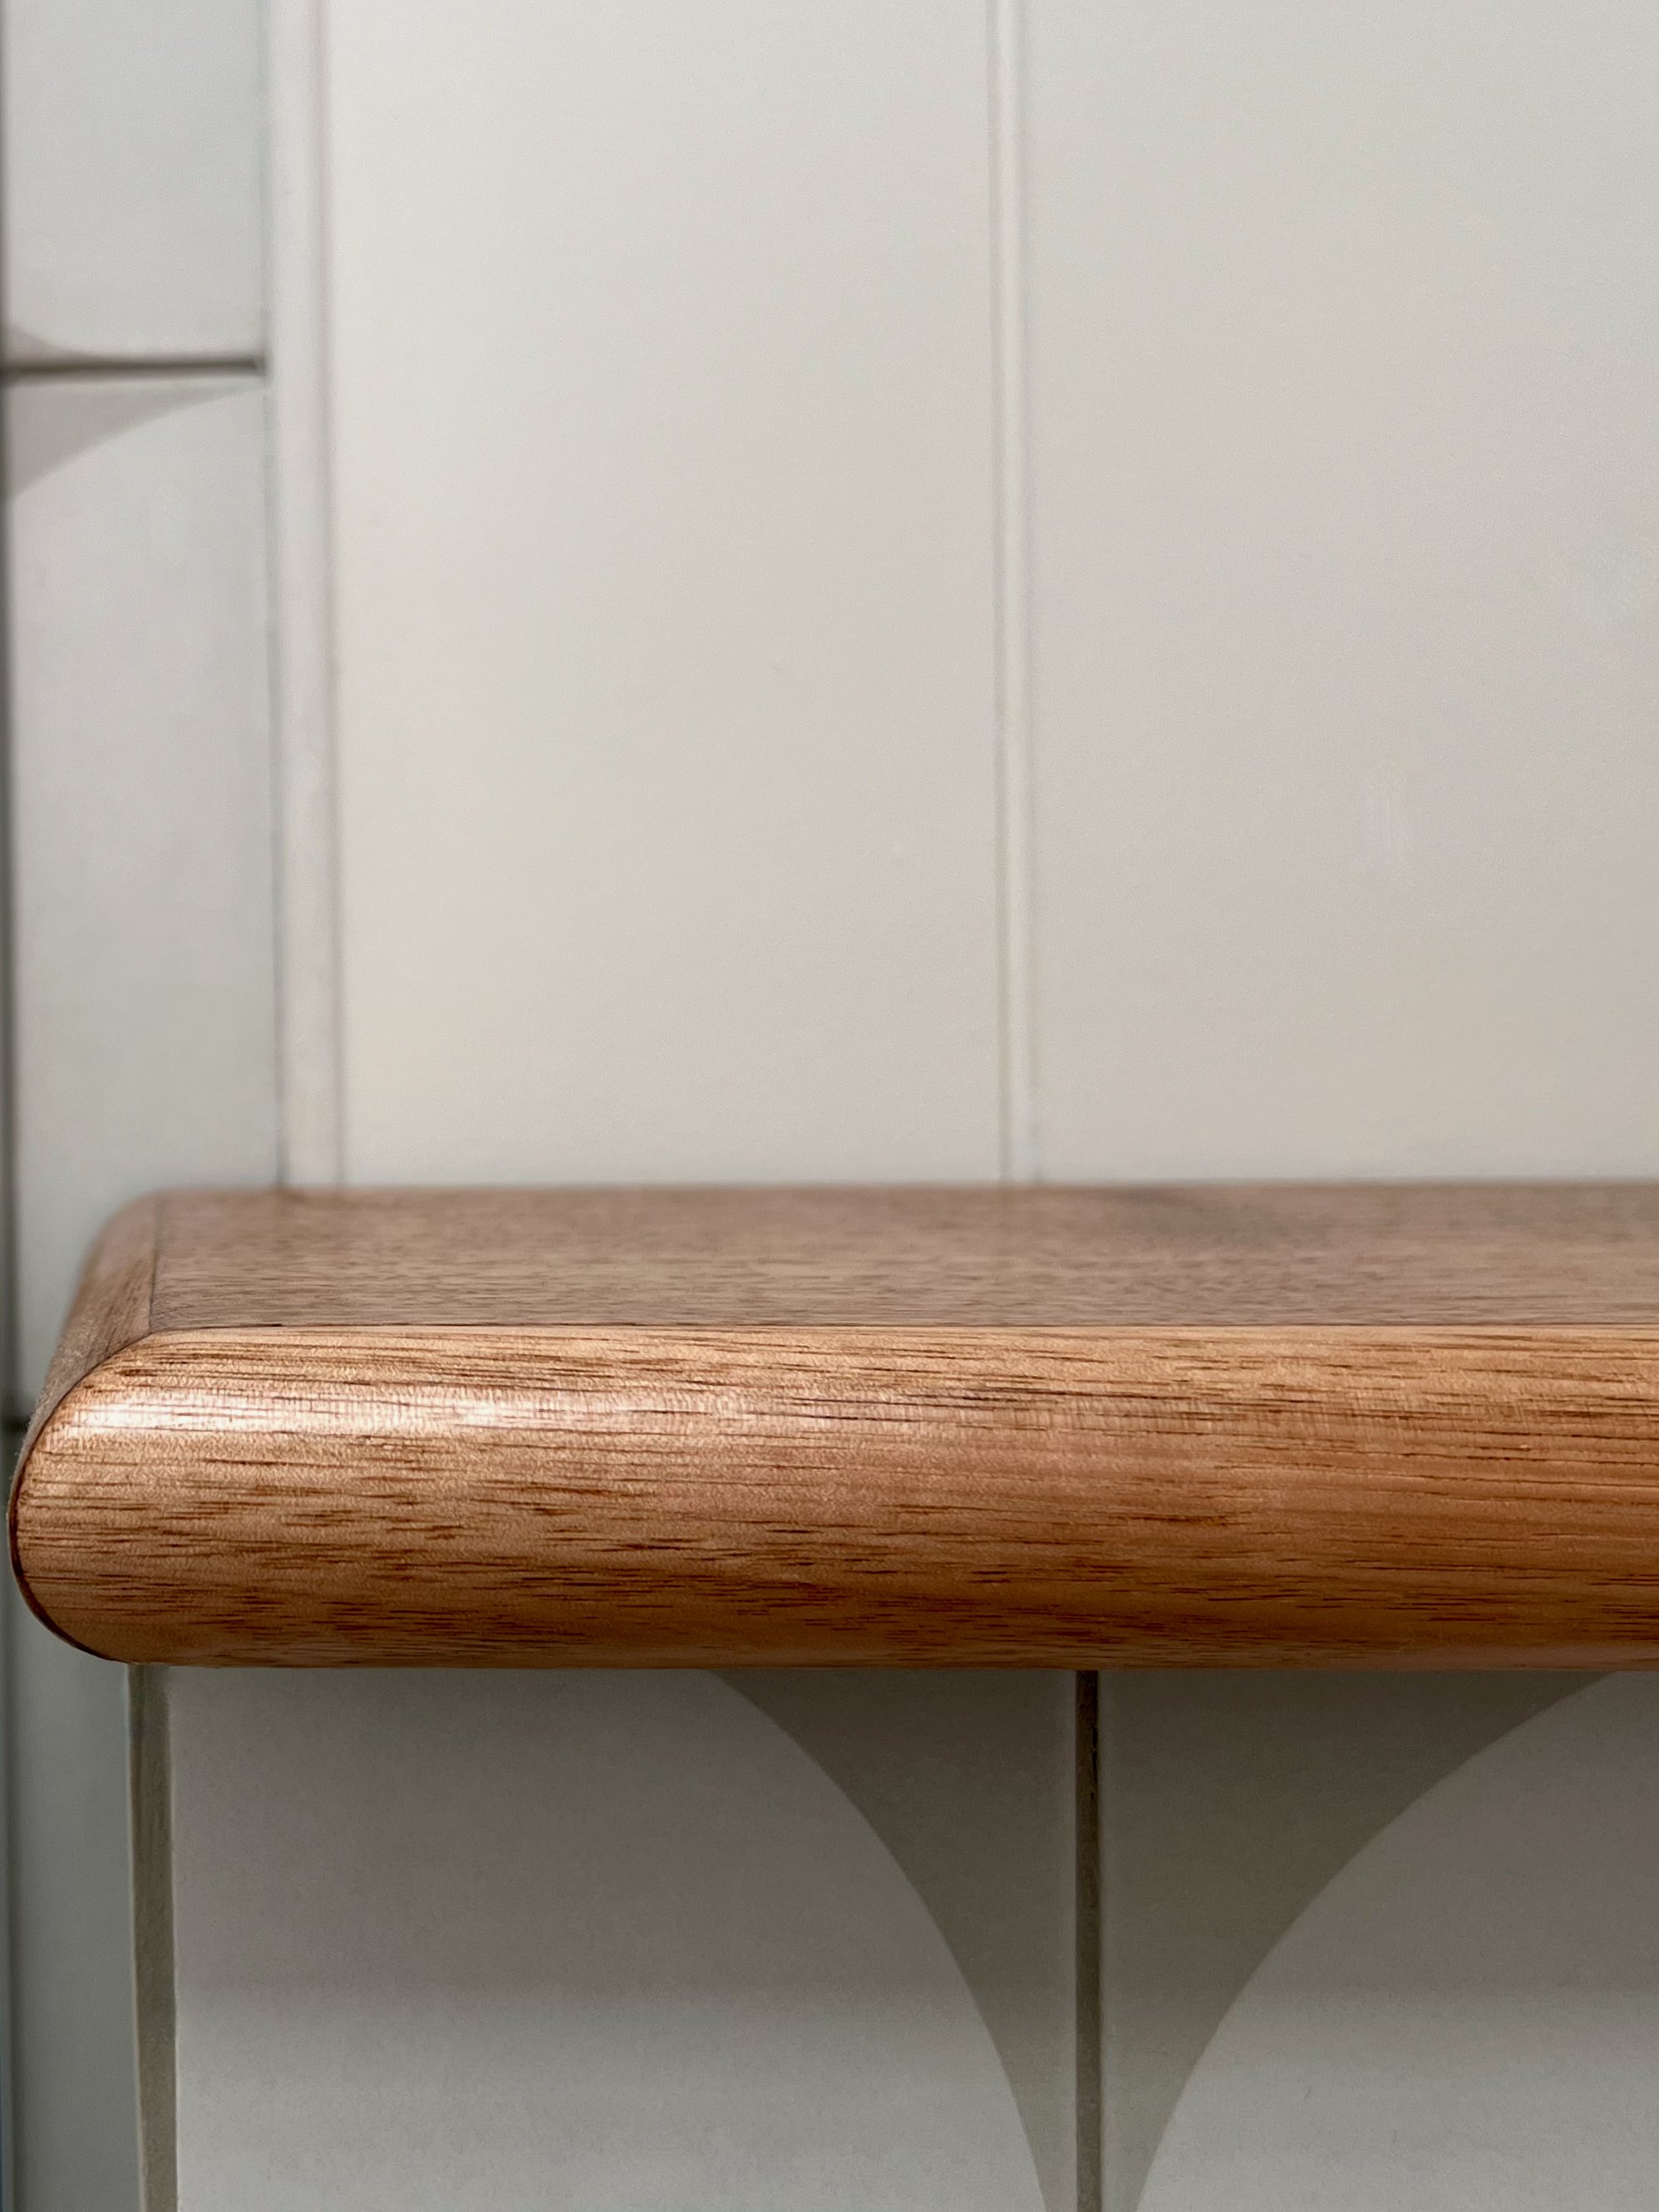
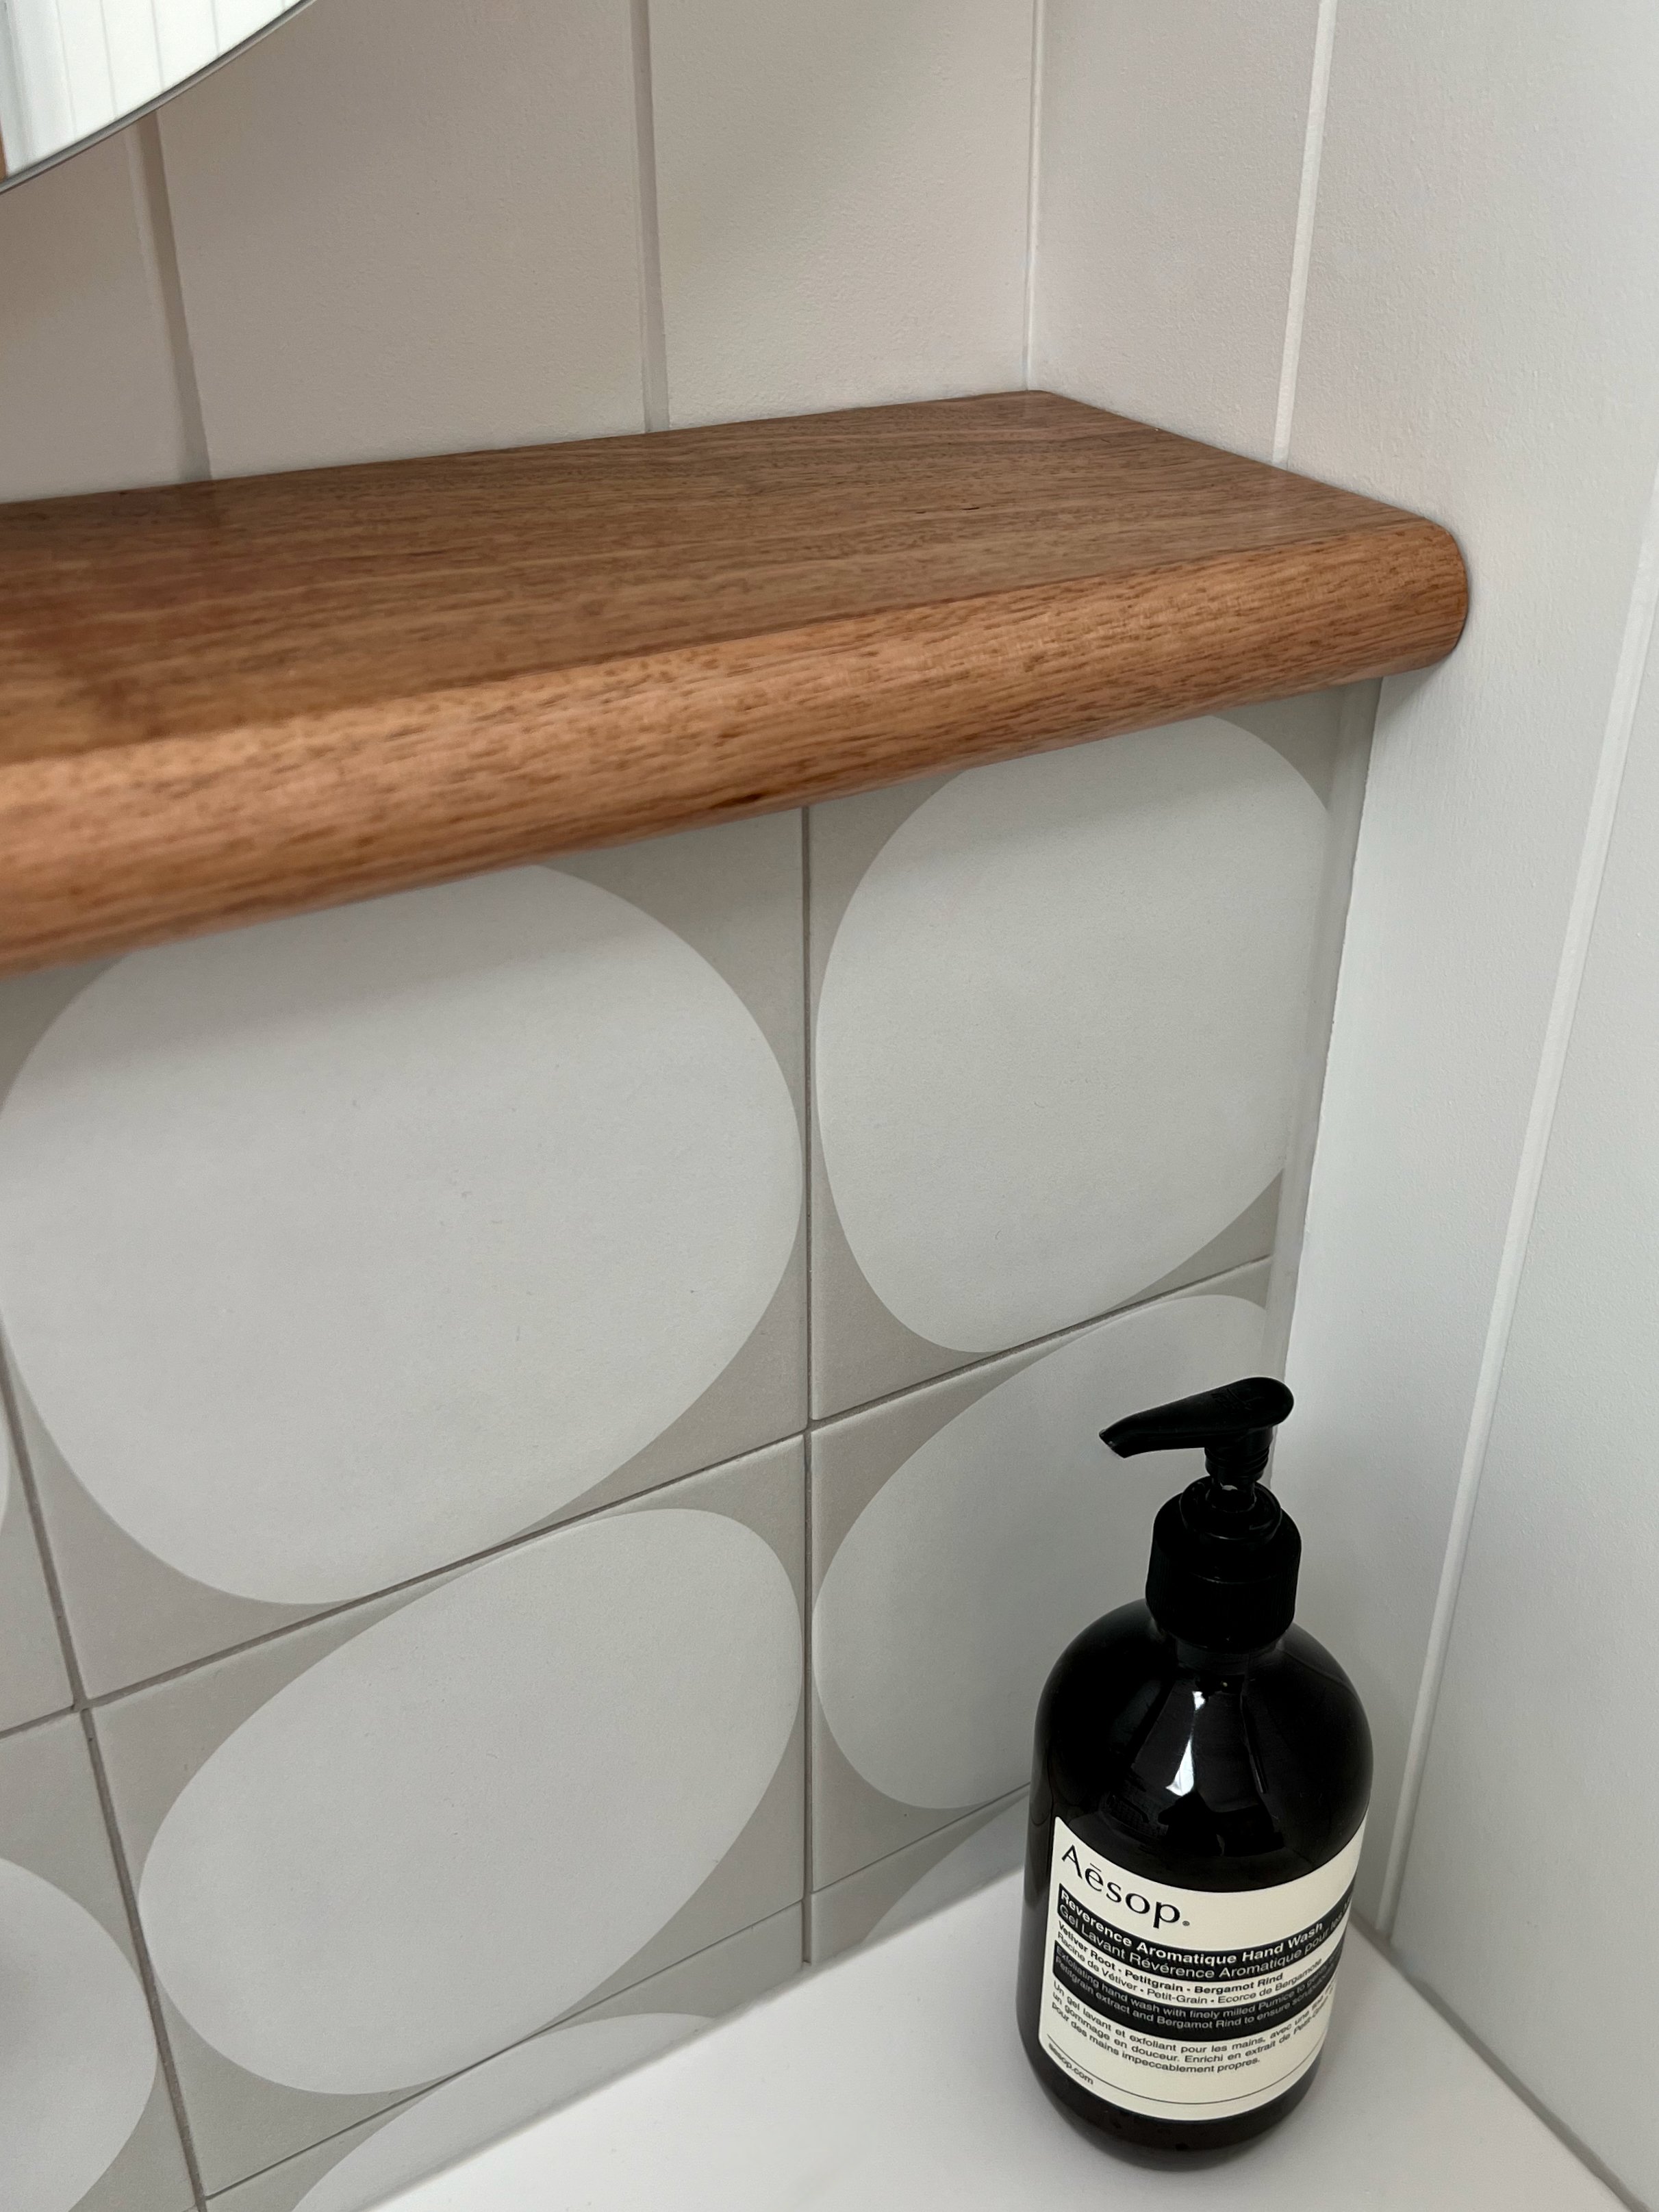
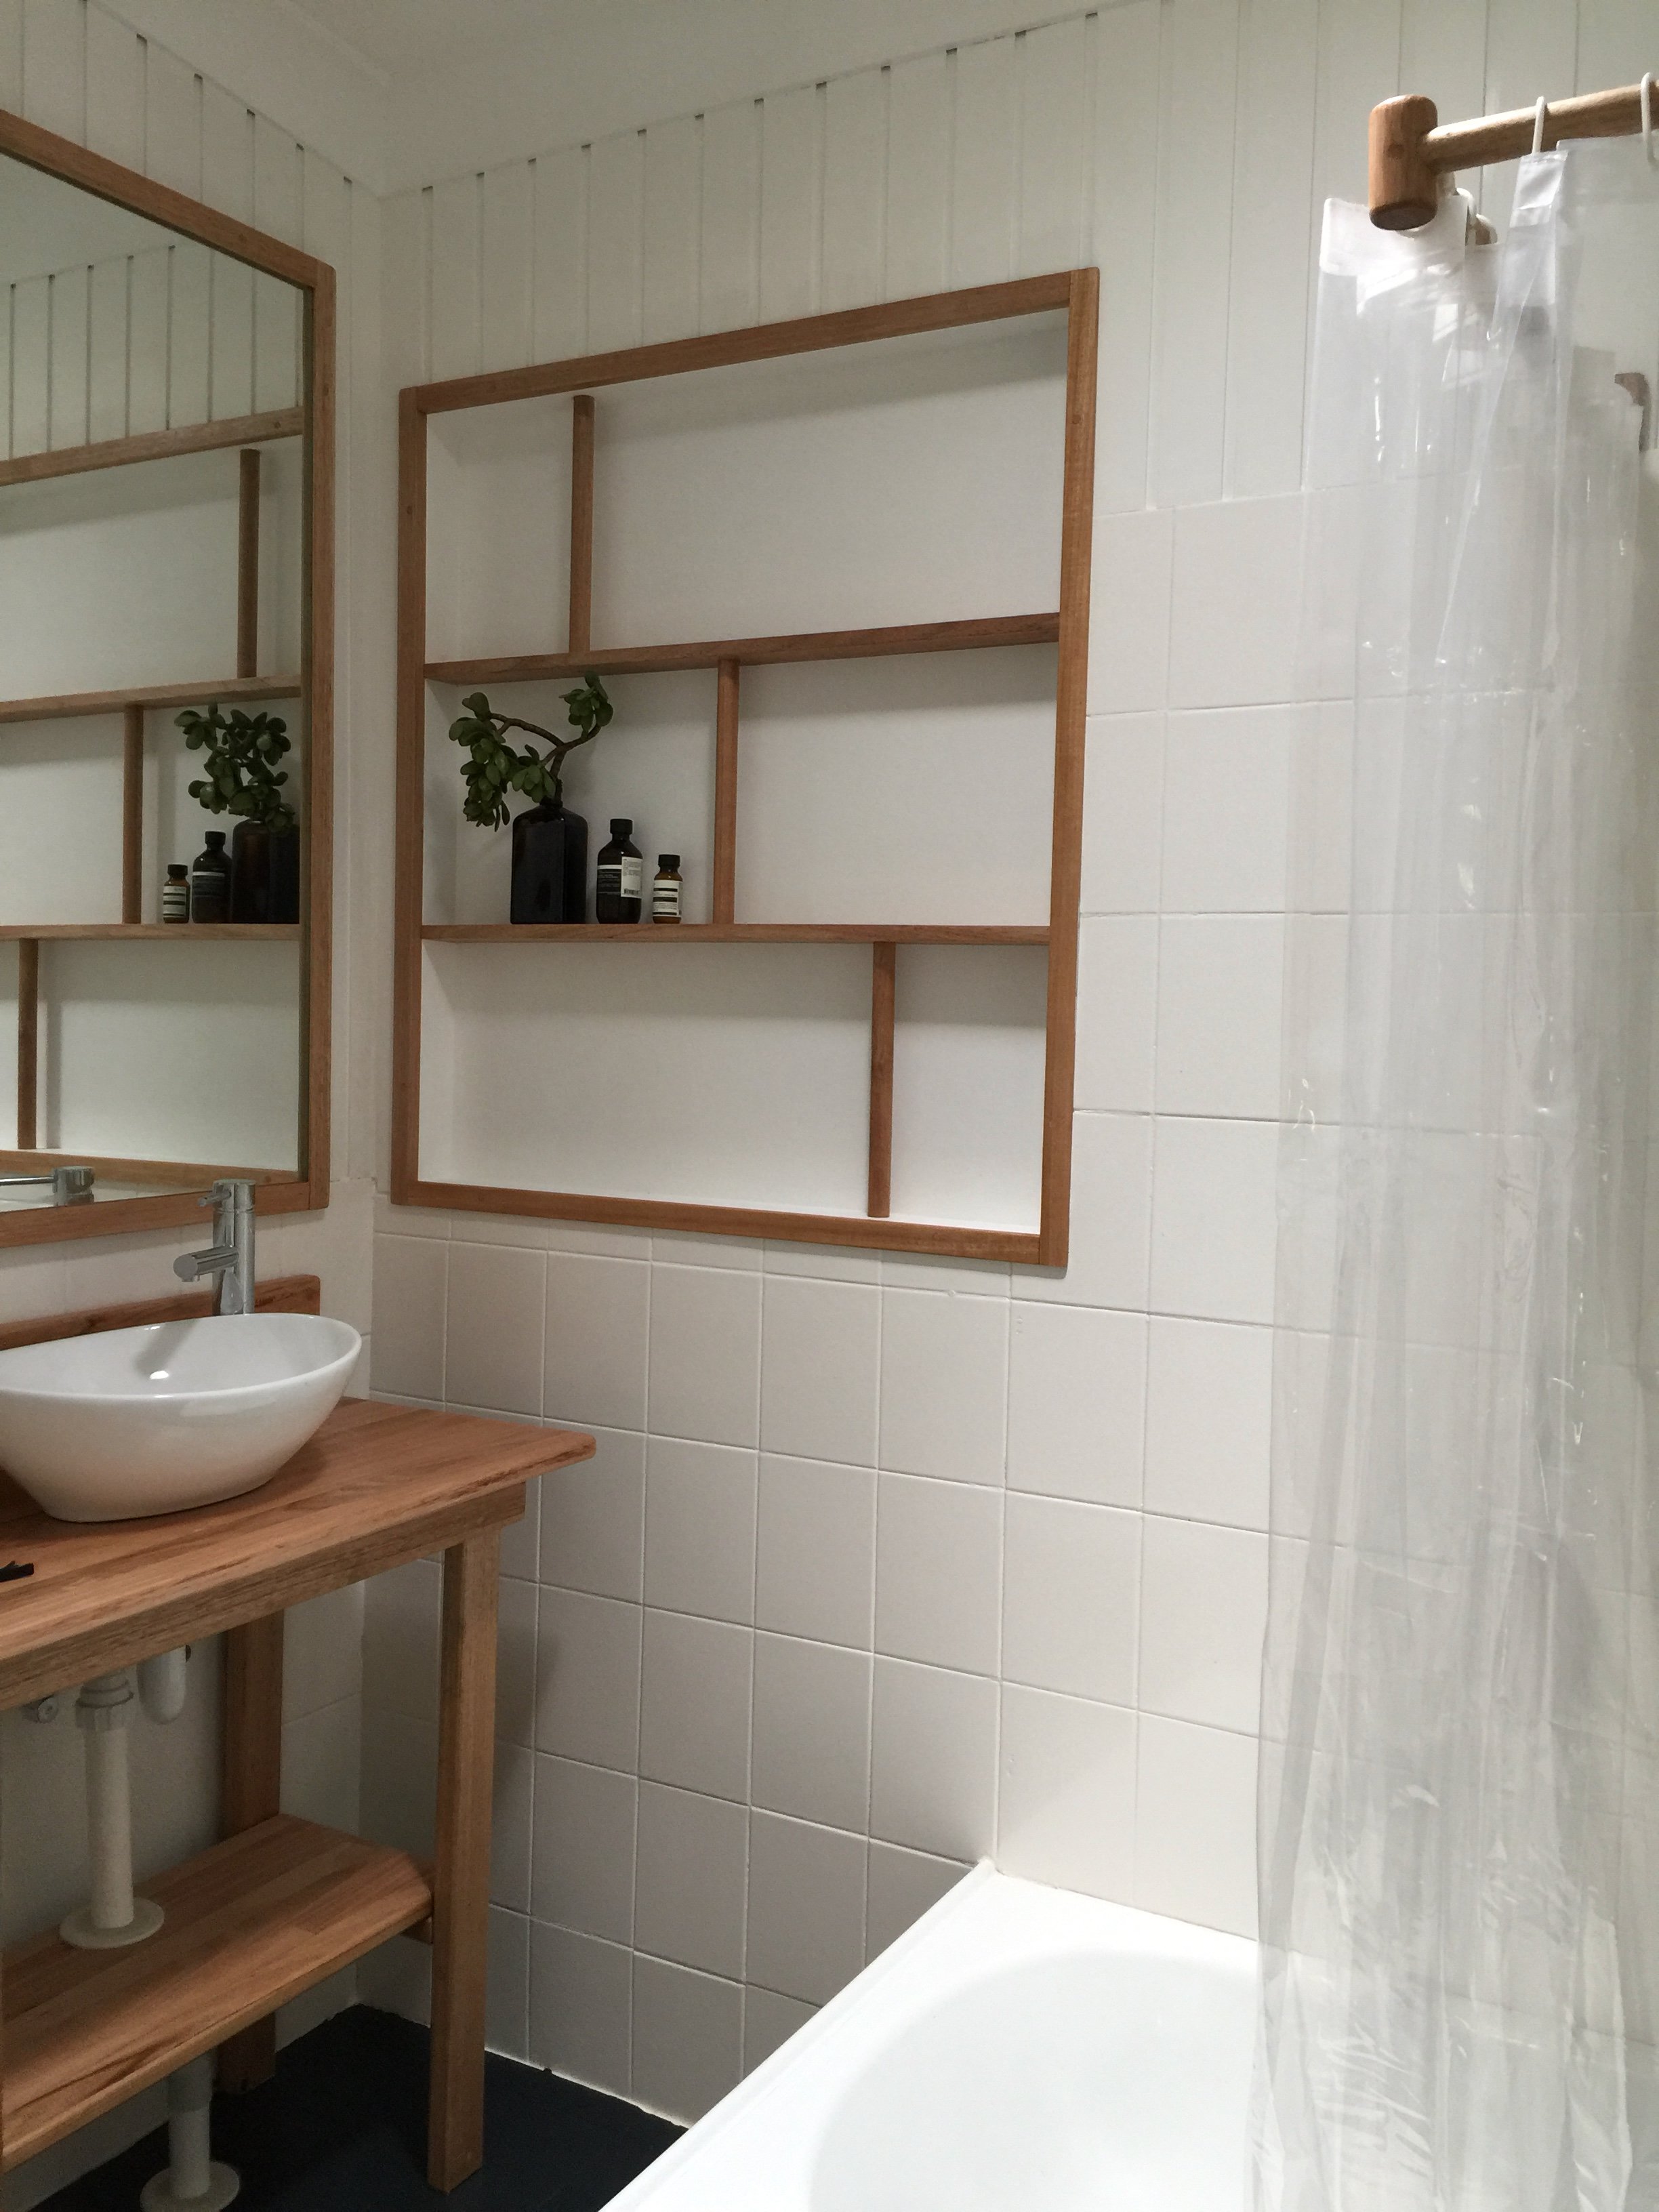
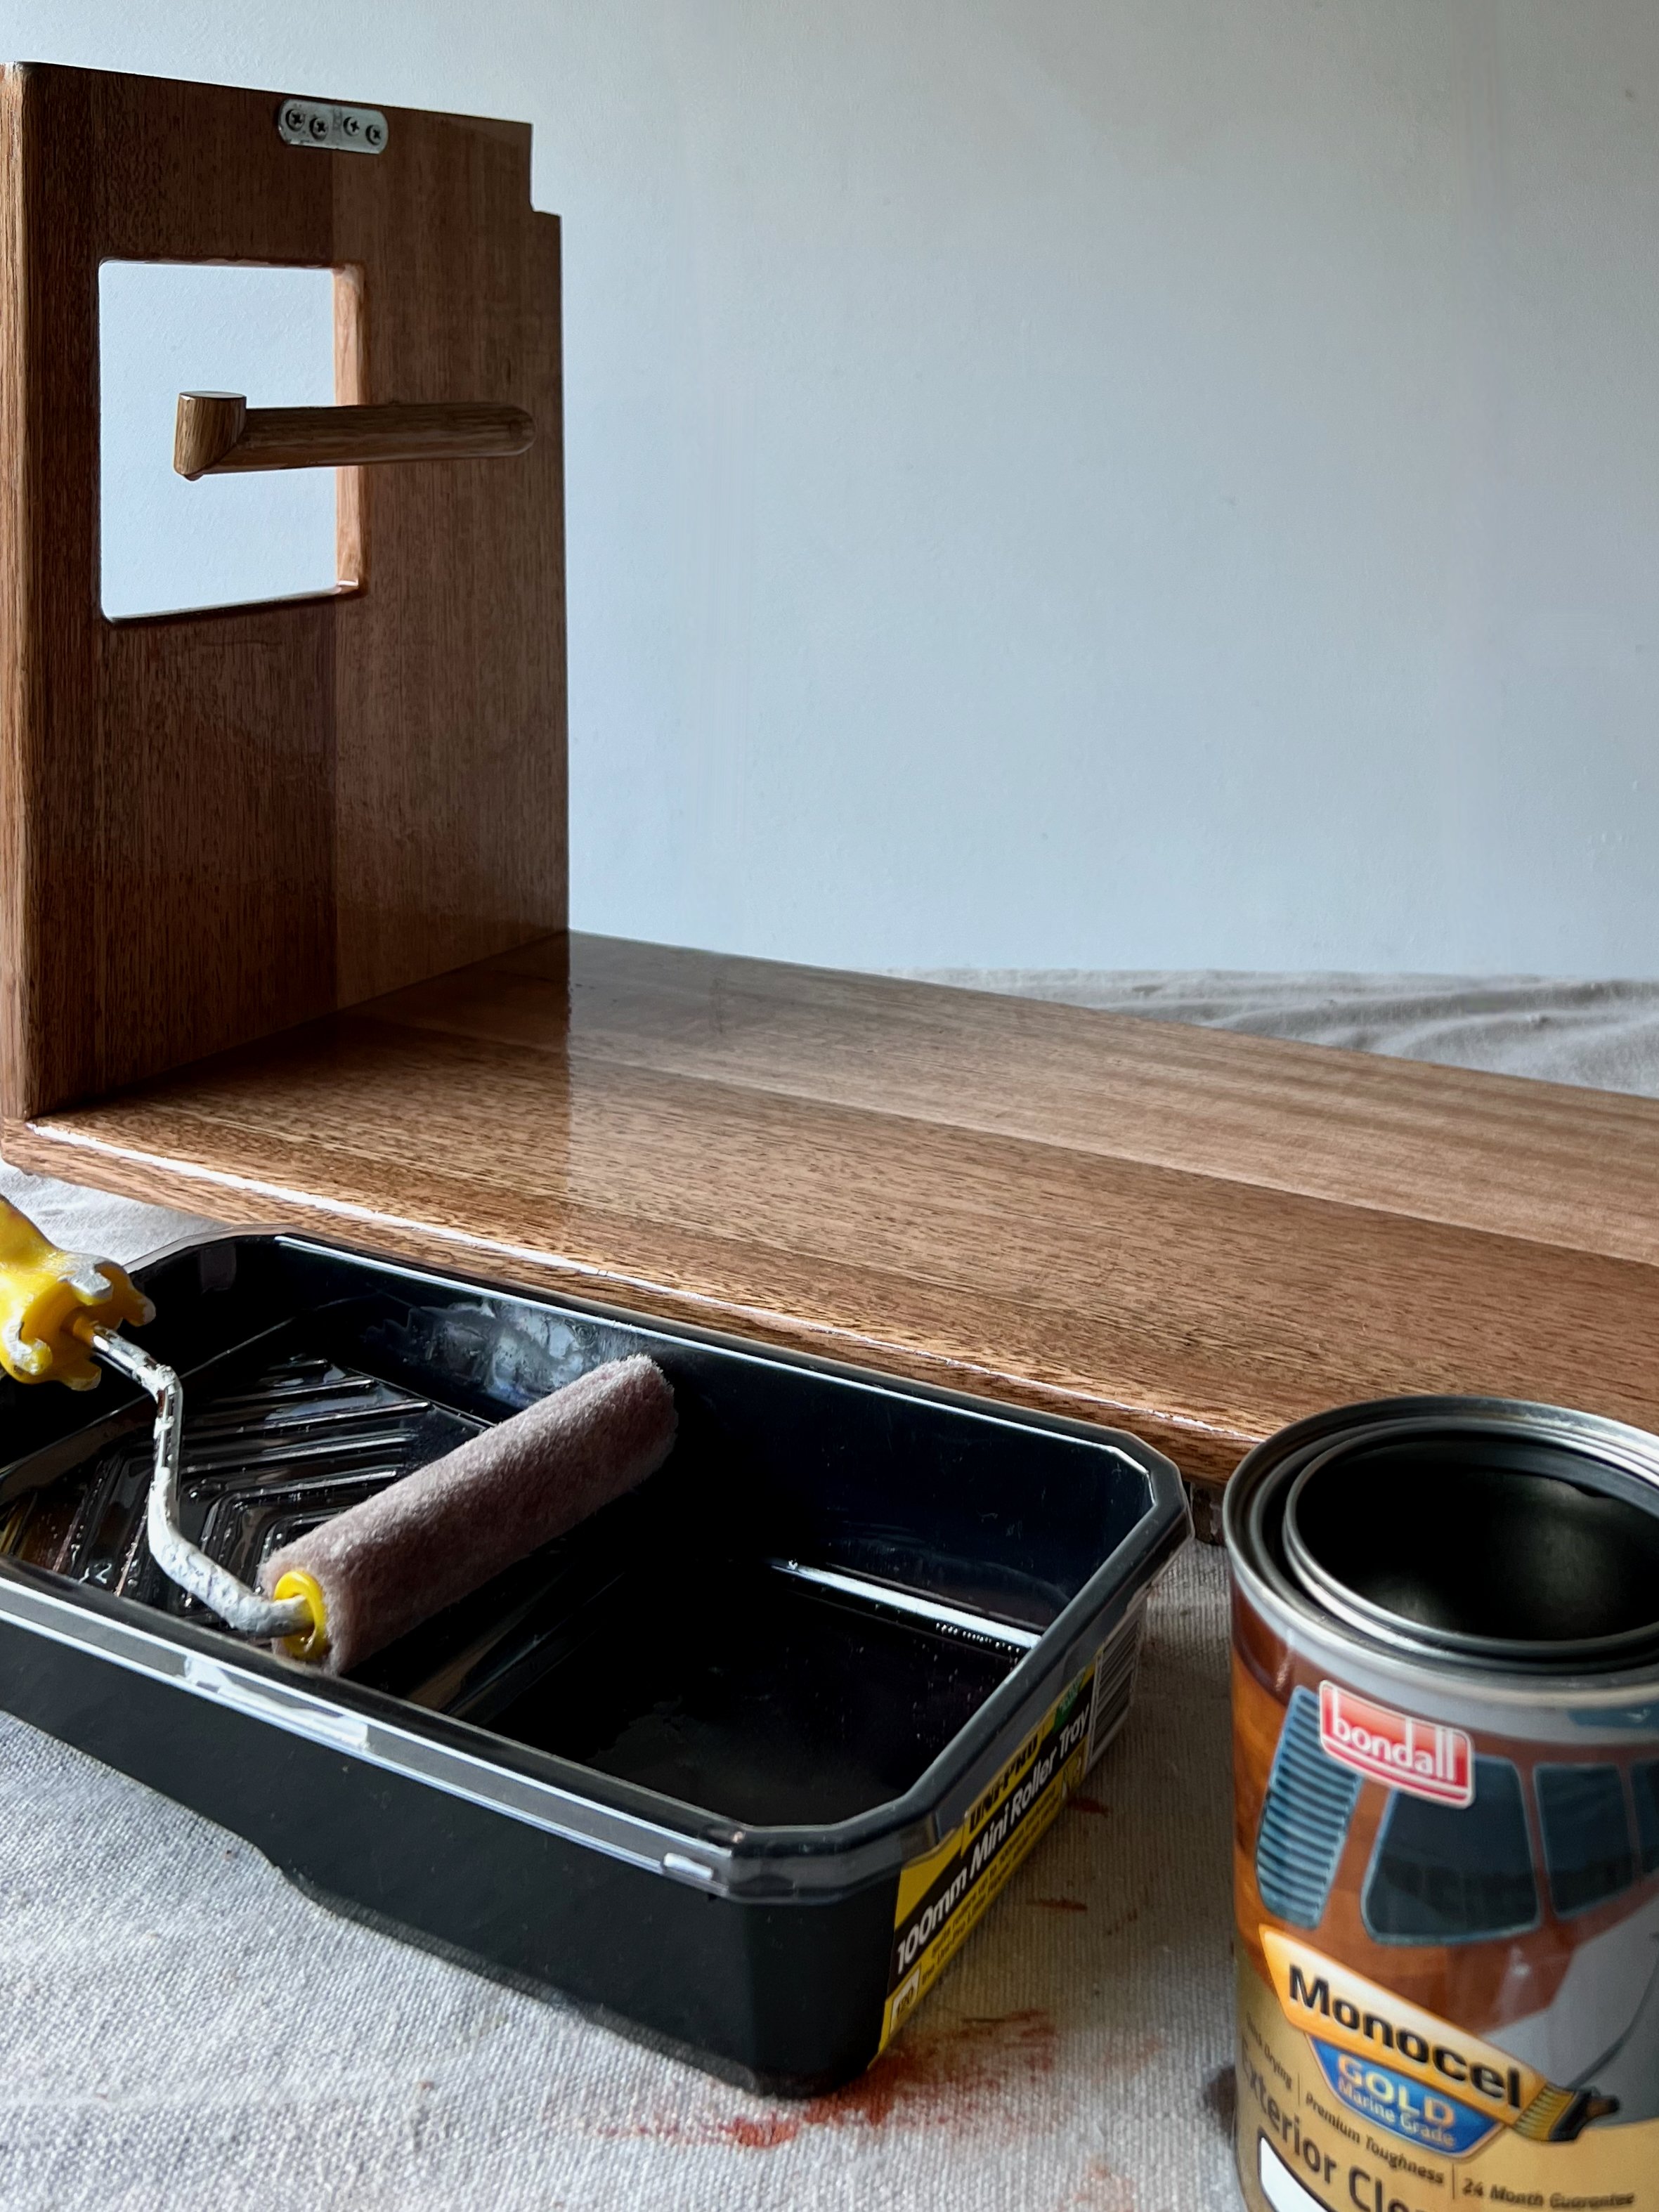
To finish the nib wall, I made a shelf from 19mm x 135mm DAR Tasmanian oak with mitred 30mm half-round dowel along the front to cover the top of the tiles and make it look more substantial.
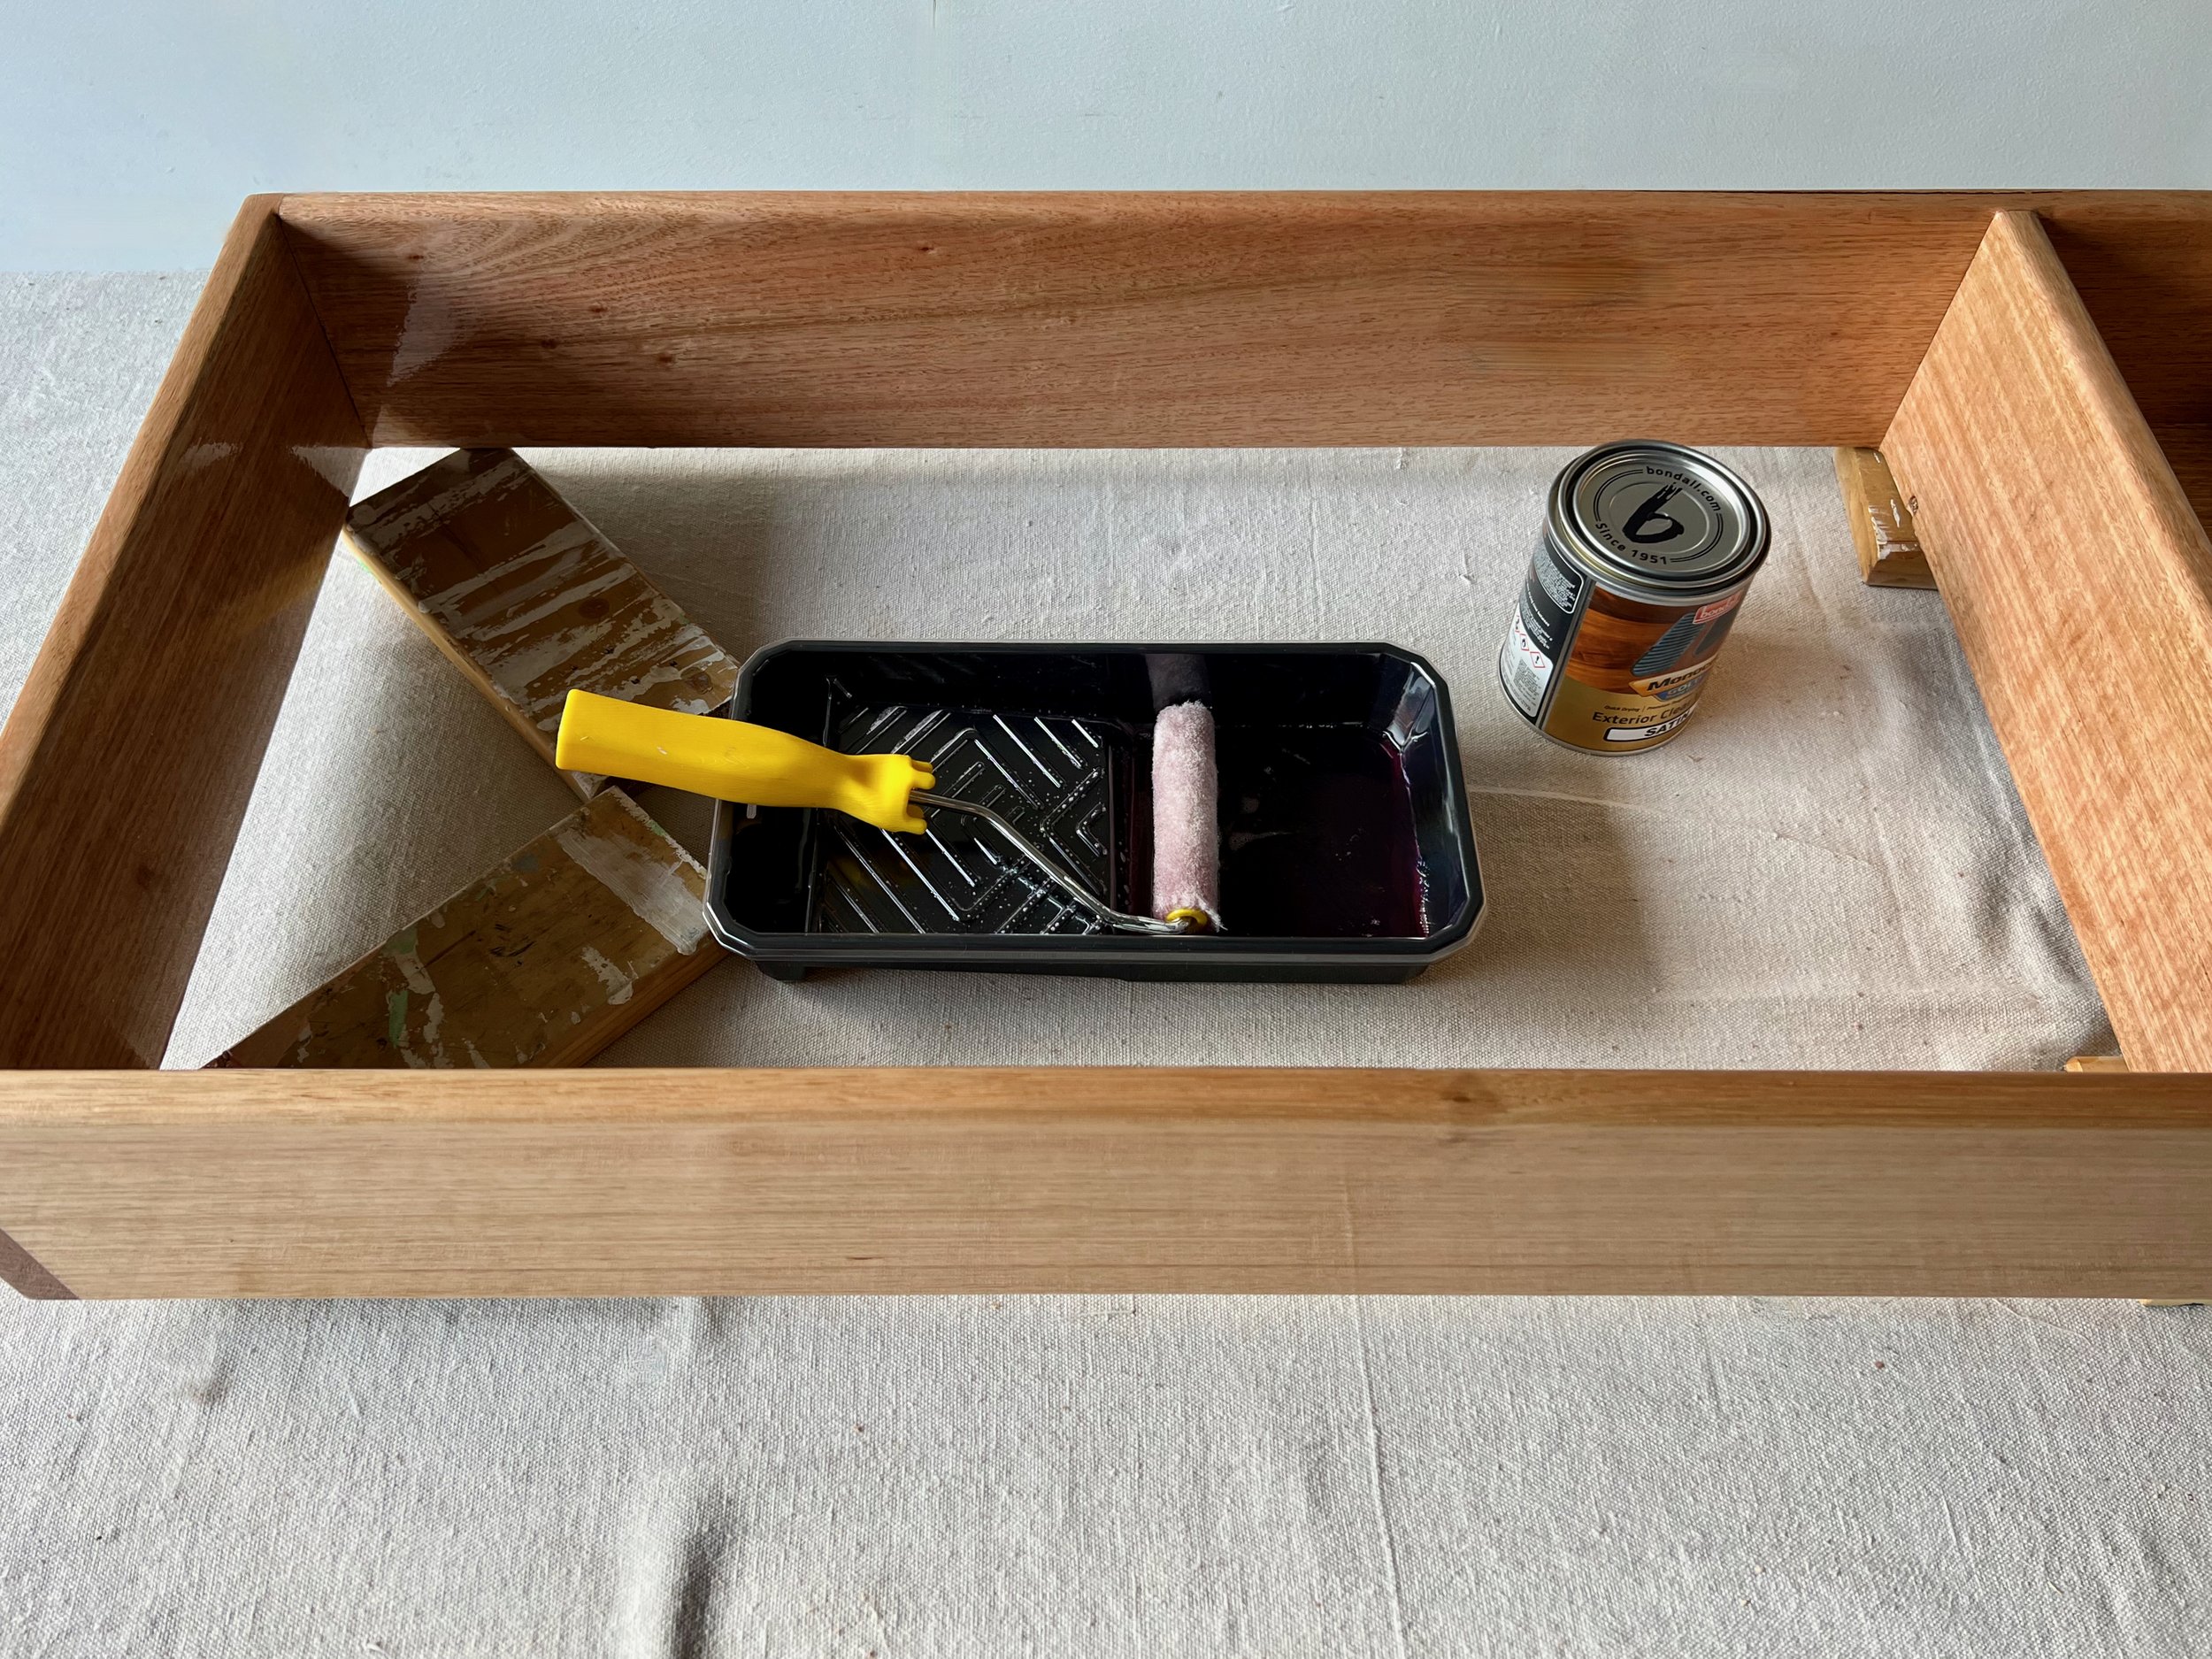
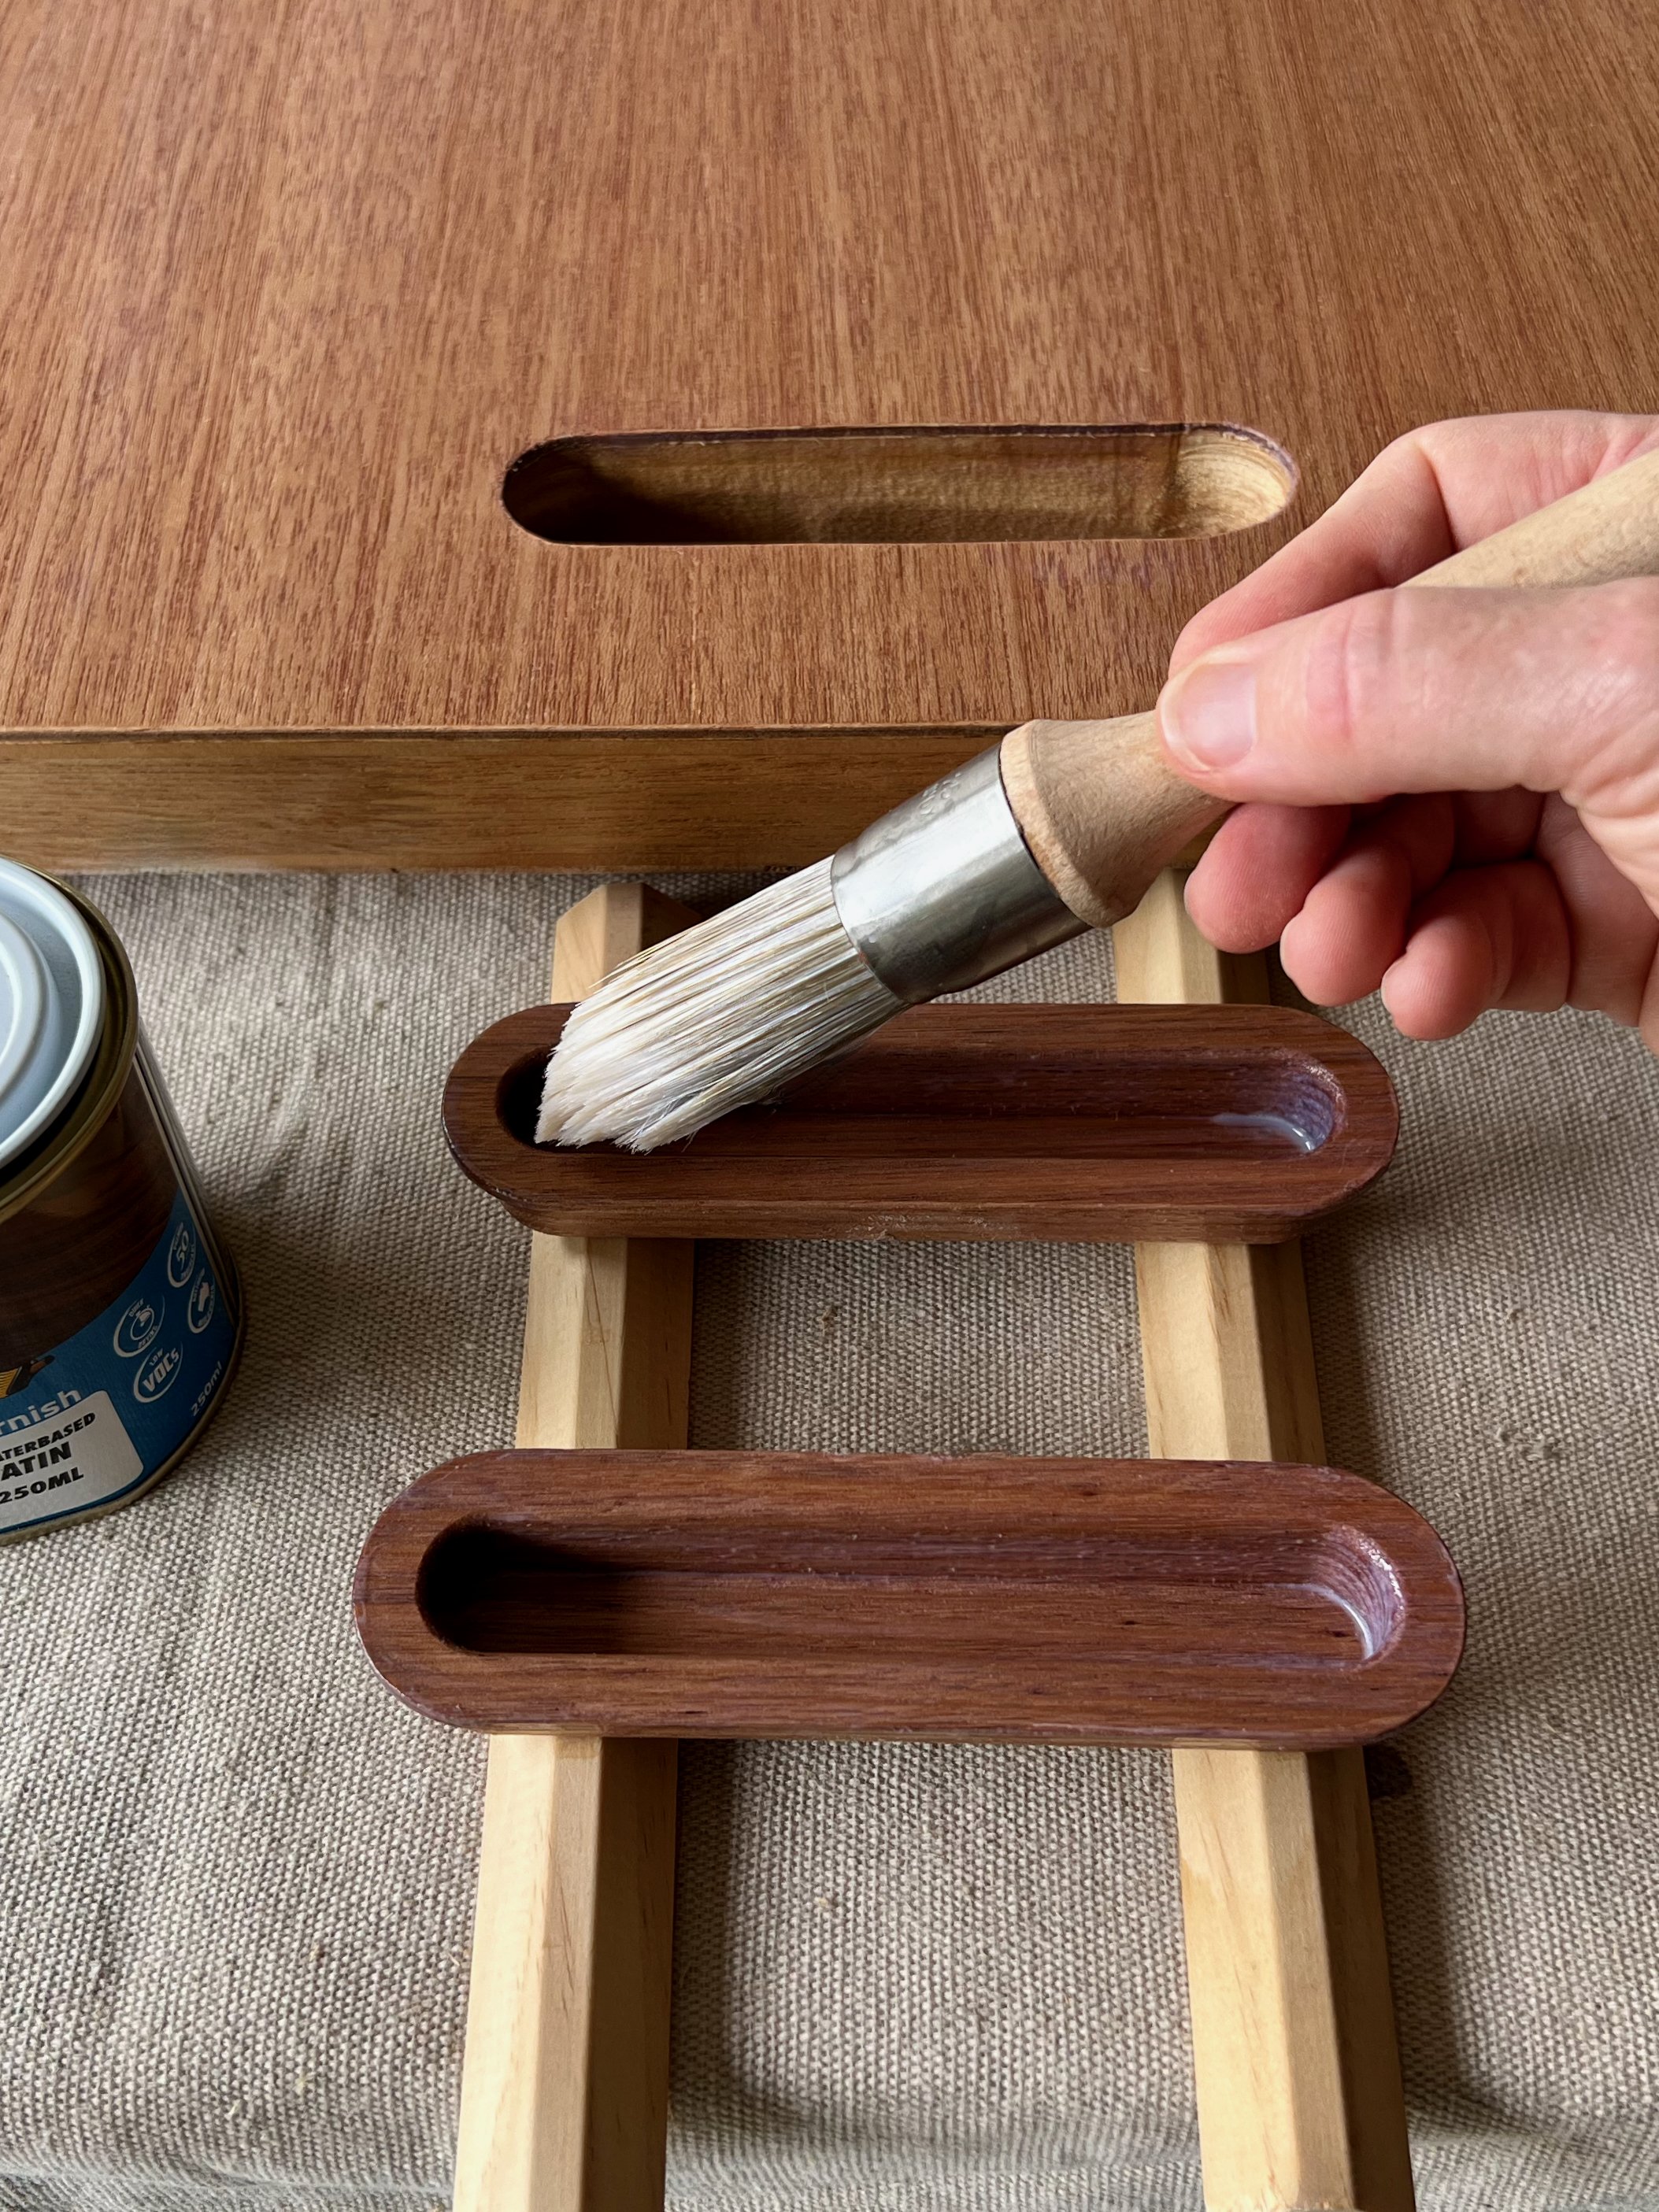
TIP All the timber features in my bathroom are DIY – from the nib and under-basin shelves to the built-in cabinet and towel hooks. I’ve sealed everything in marine-grade Monocel Gold Clear Satin varnish, which is designed for boats so I know it can stand up to heat and moisture in a bathroom.
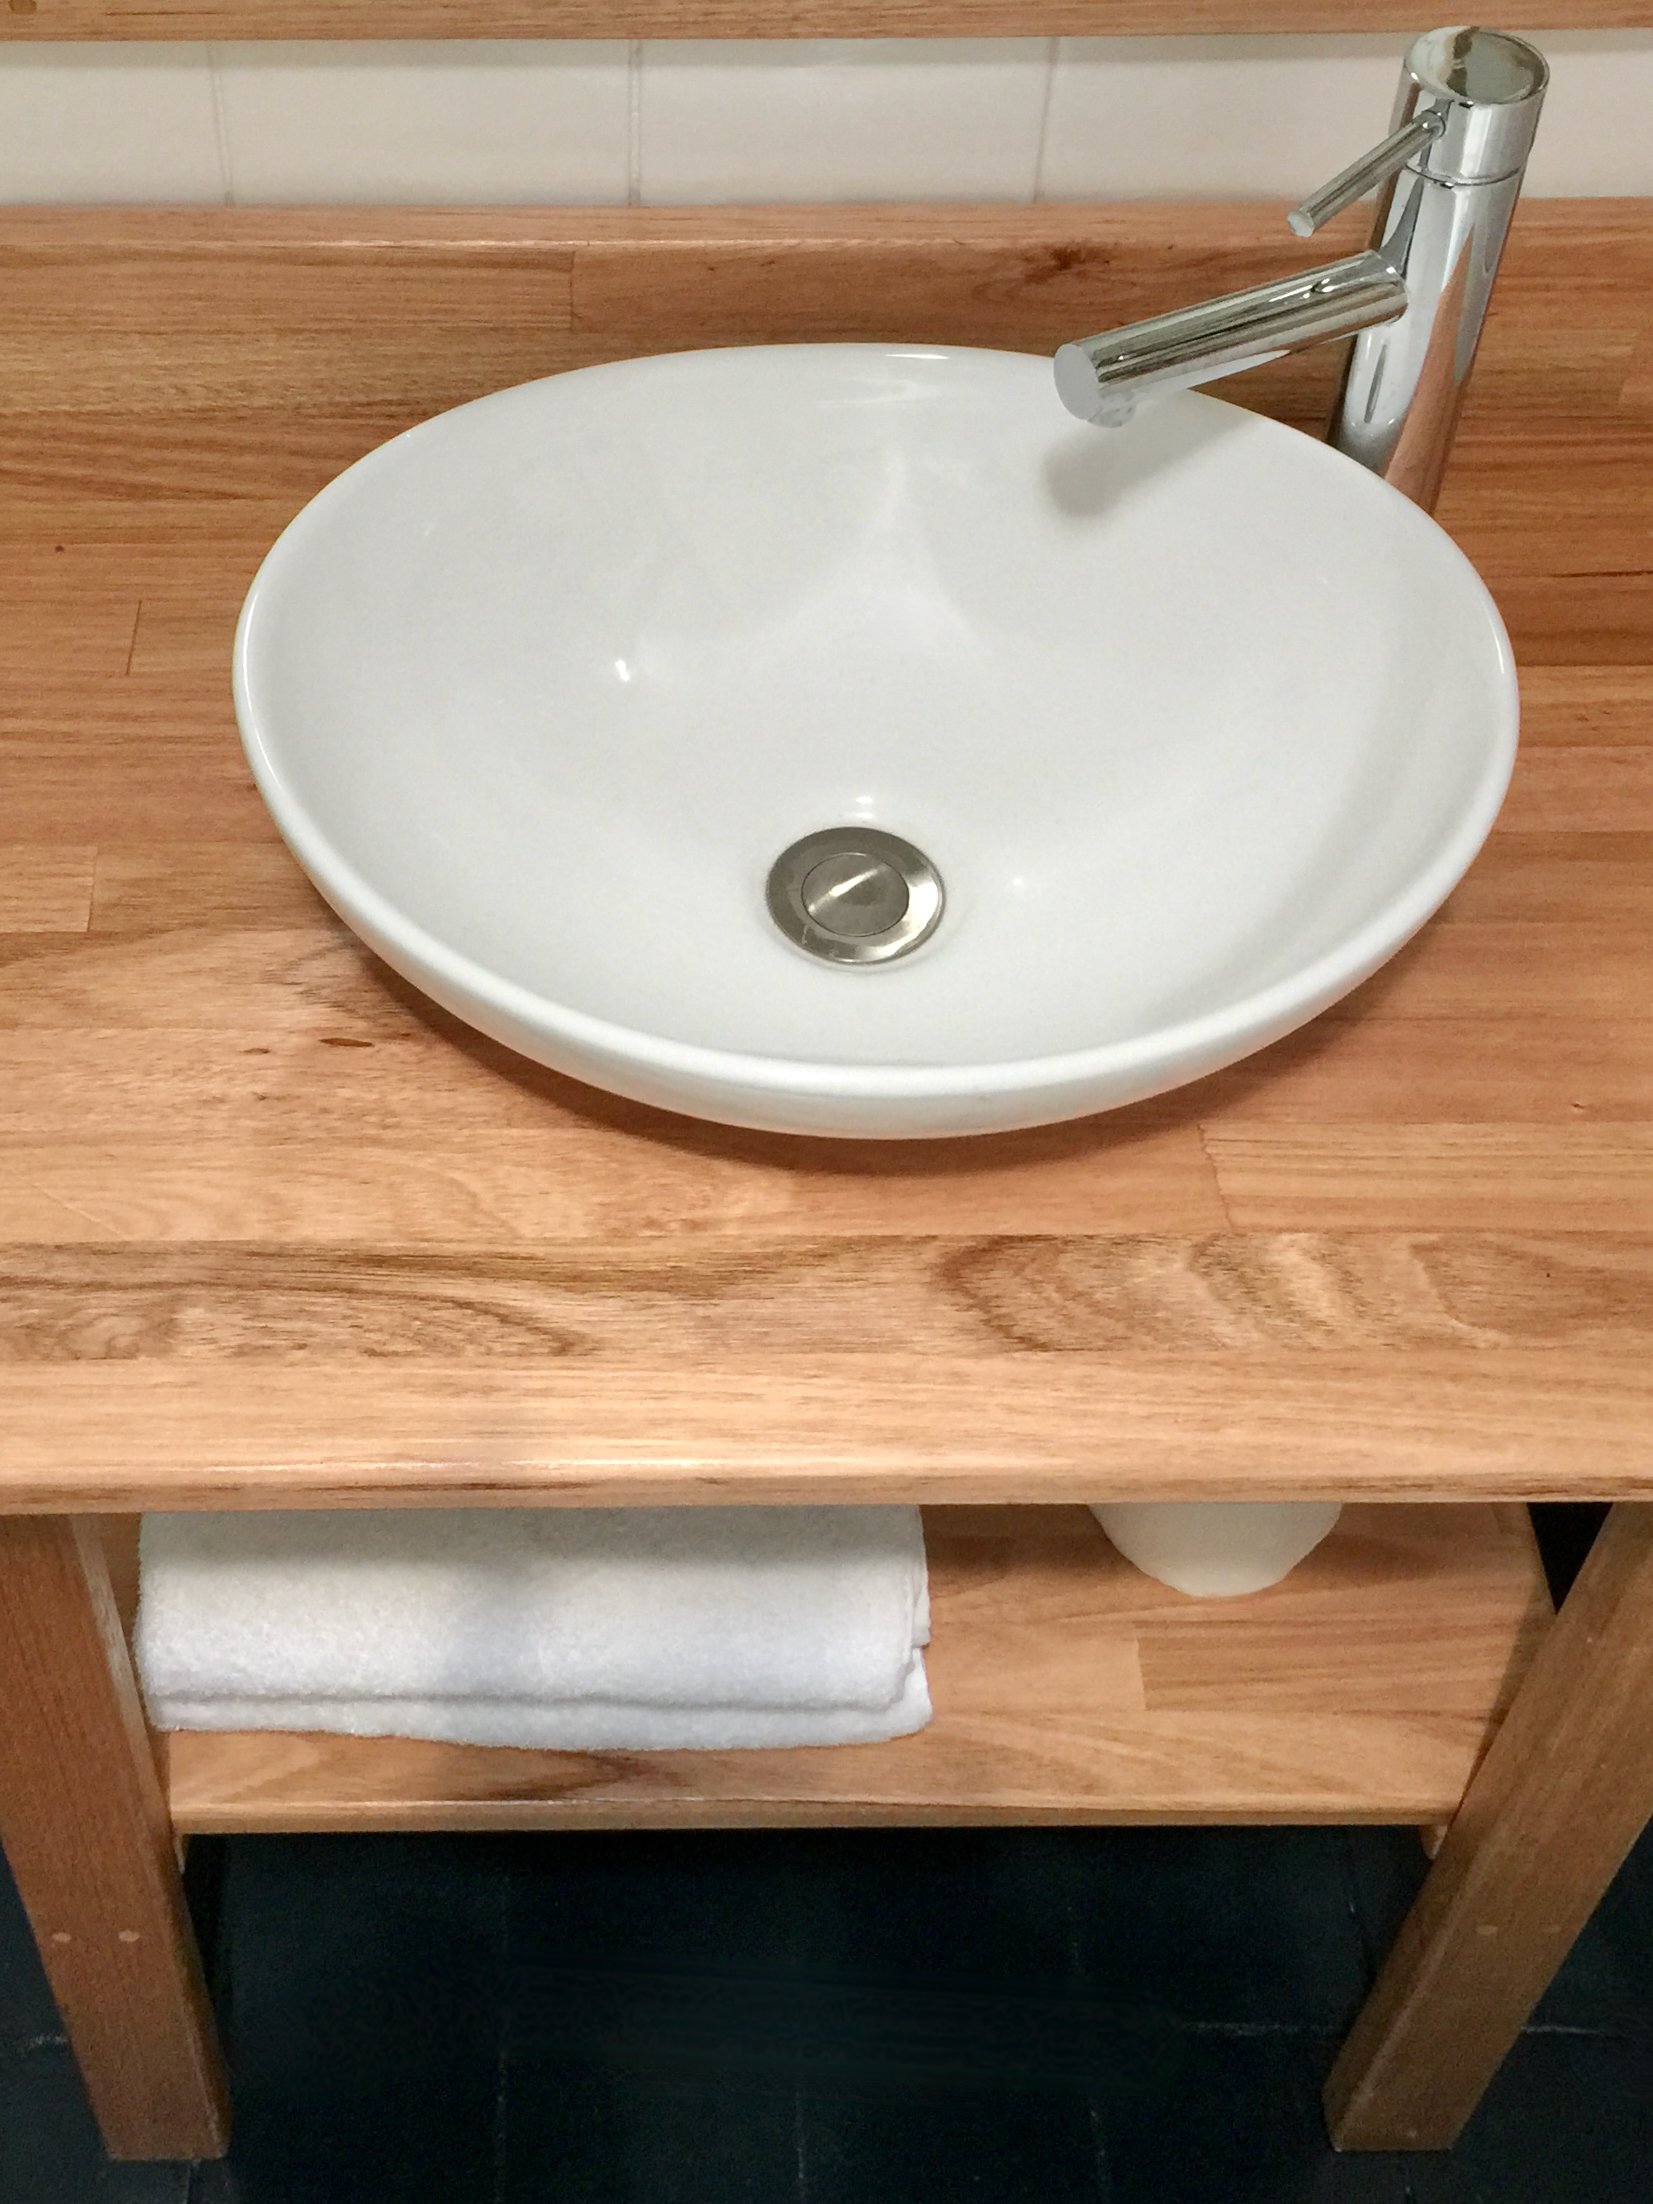

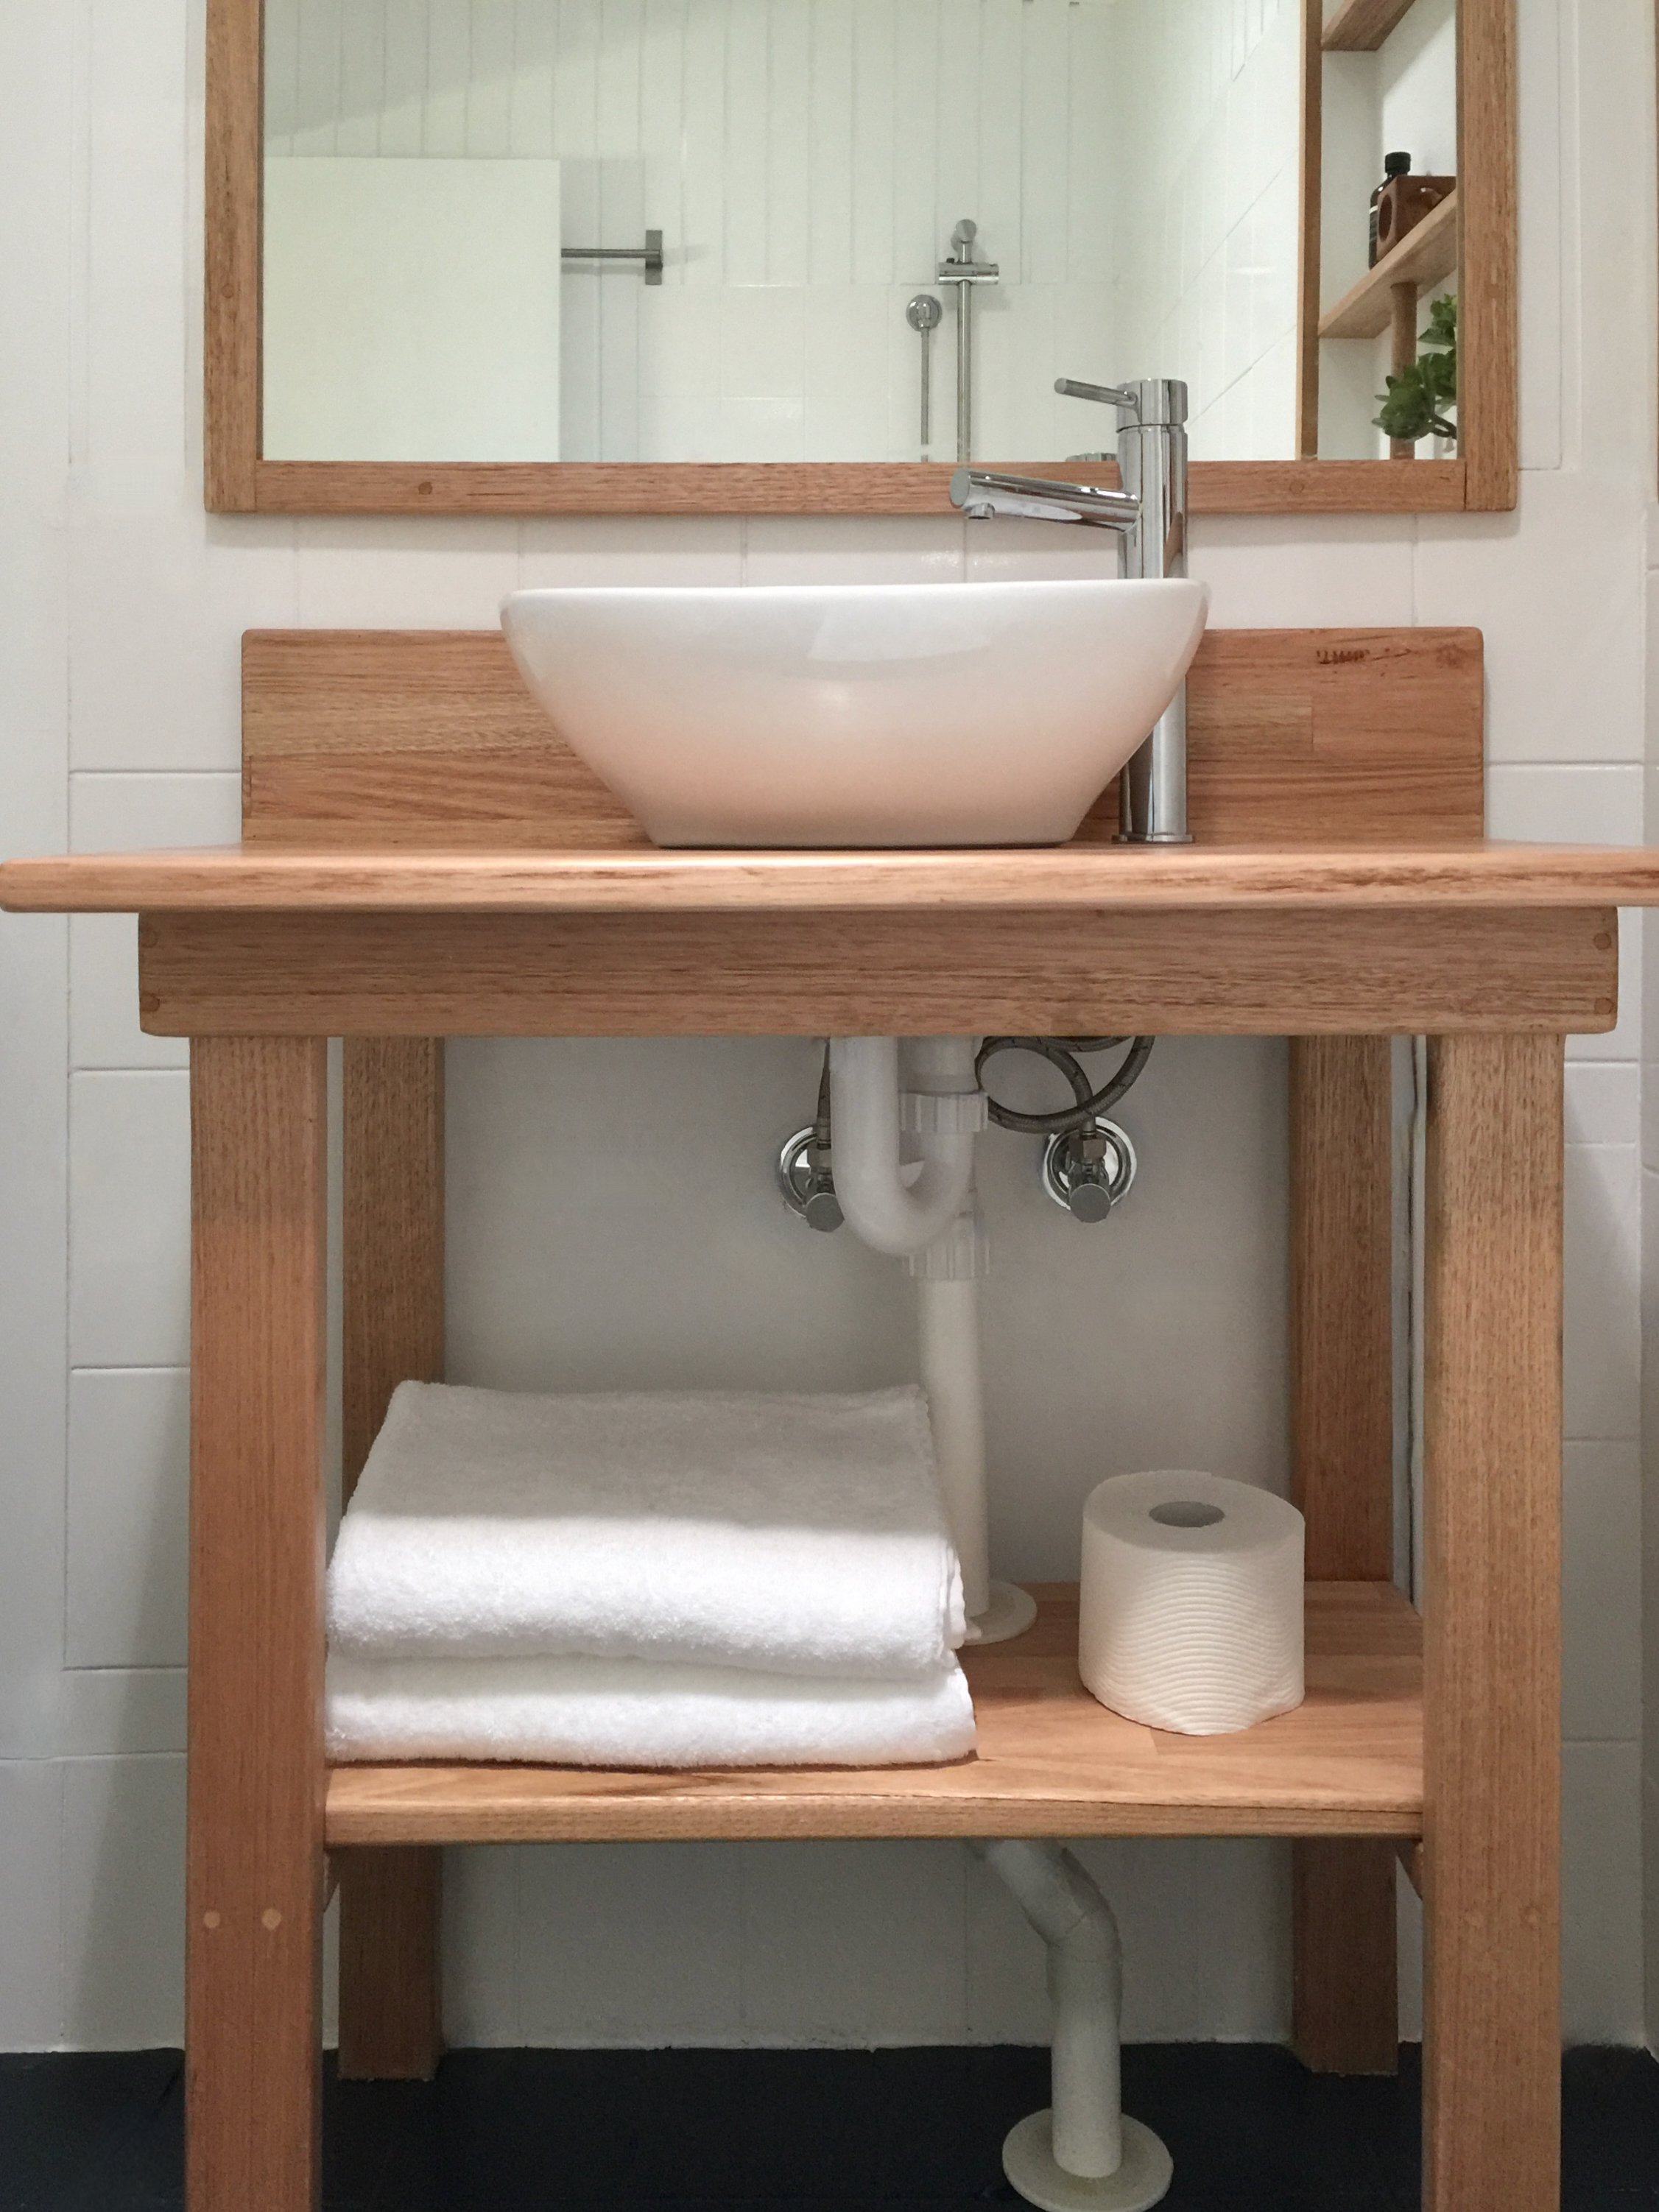
CHOOSING THE BASIN AND TAP
My original bathroom facelift included a bowl-type sink and mixer (above, left). They were inexpensive and install but difficult to clean around and accessibility wasn’t great, especially for kids.
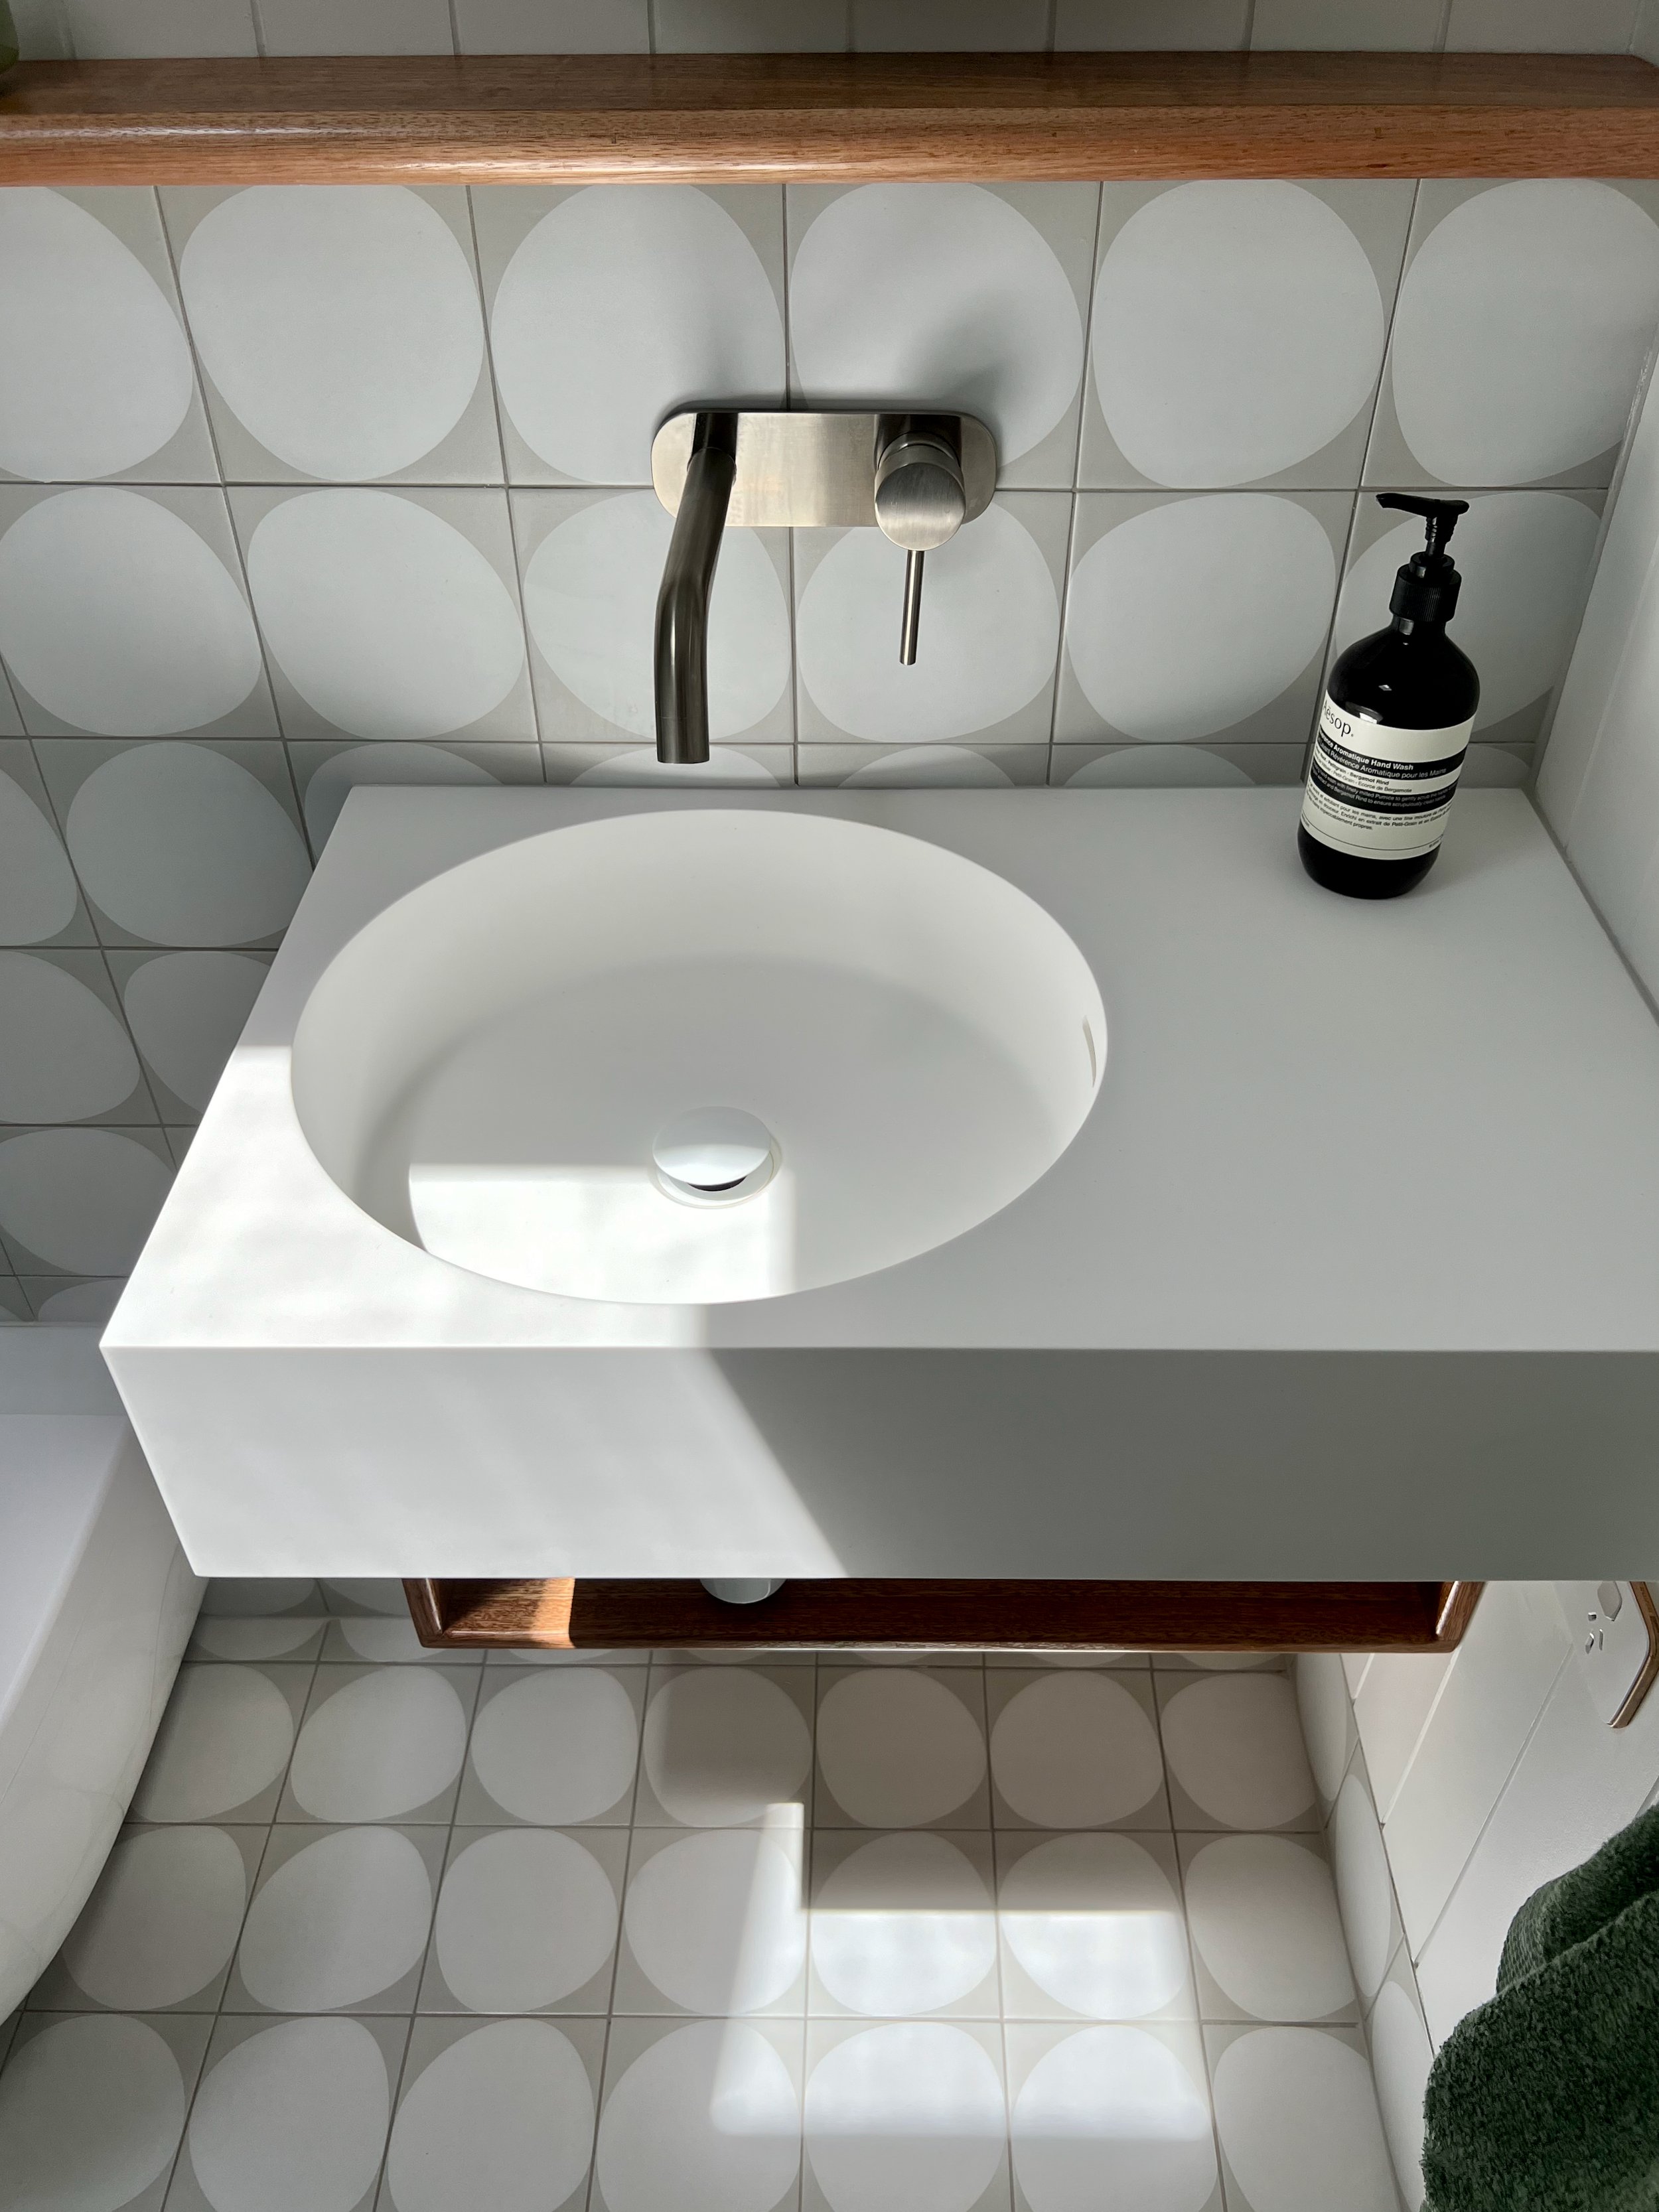
So I did a one-stop online shop at ABI Interiors (not sponsored) for all fixtures, including the seamless white wall-mounted basin, bottle trap and pop-up waste (above, right).
The mixer set with backplate is also wall-mounted, matching the shower mixer in its simplicity to operate with one hand and without resistance.
TIP Tapware doesn’t have to be all the same brand, just choose the same finish for a cohesive look. I find brushed nickel more timeless than popular brass or black.
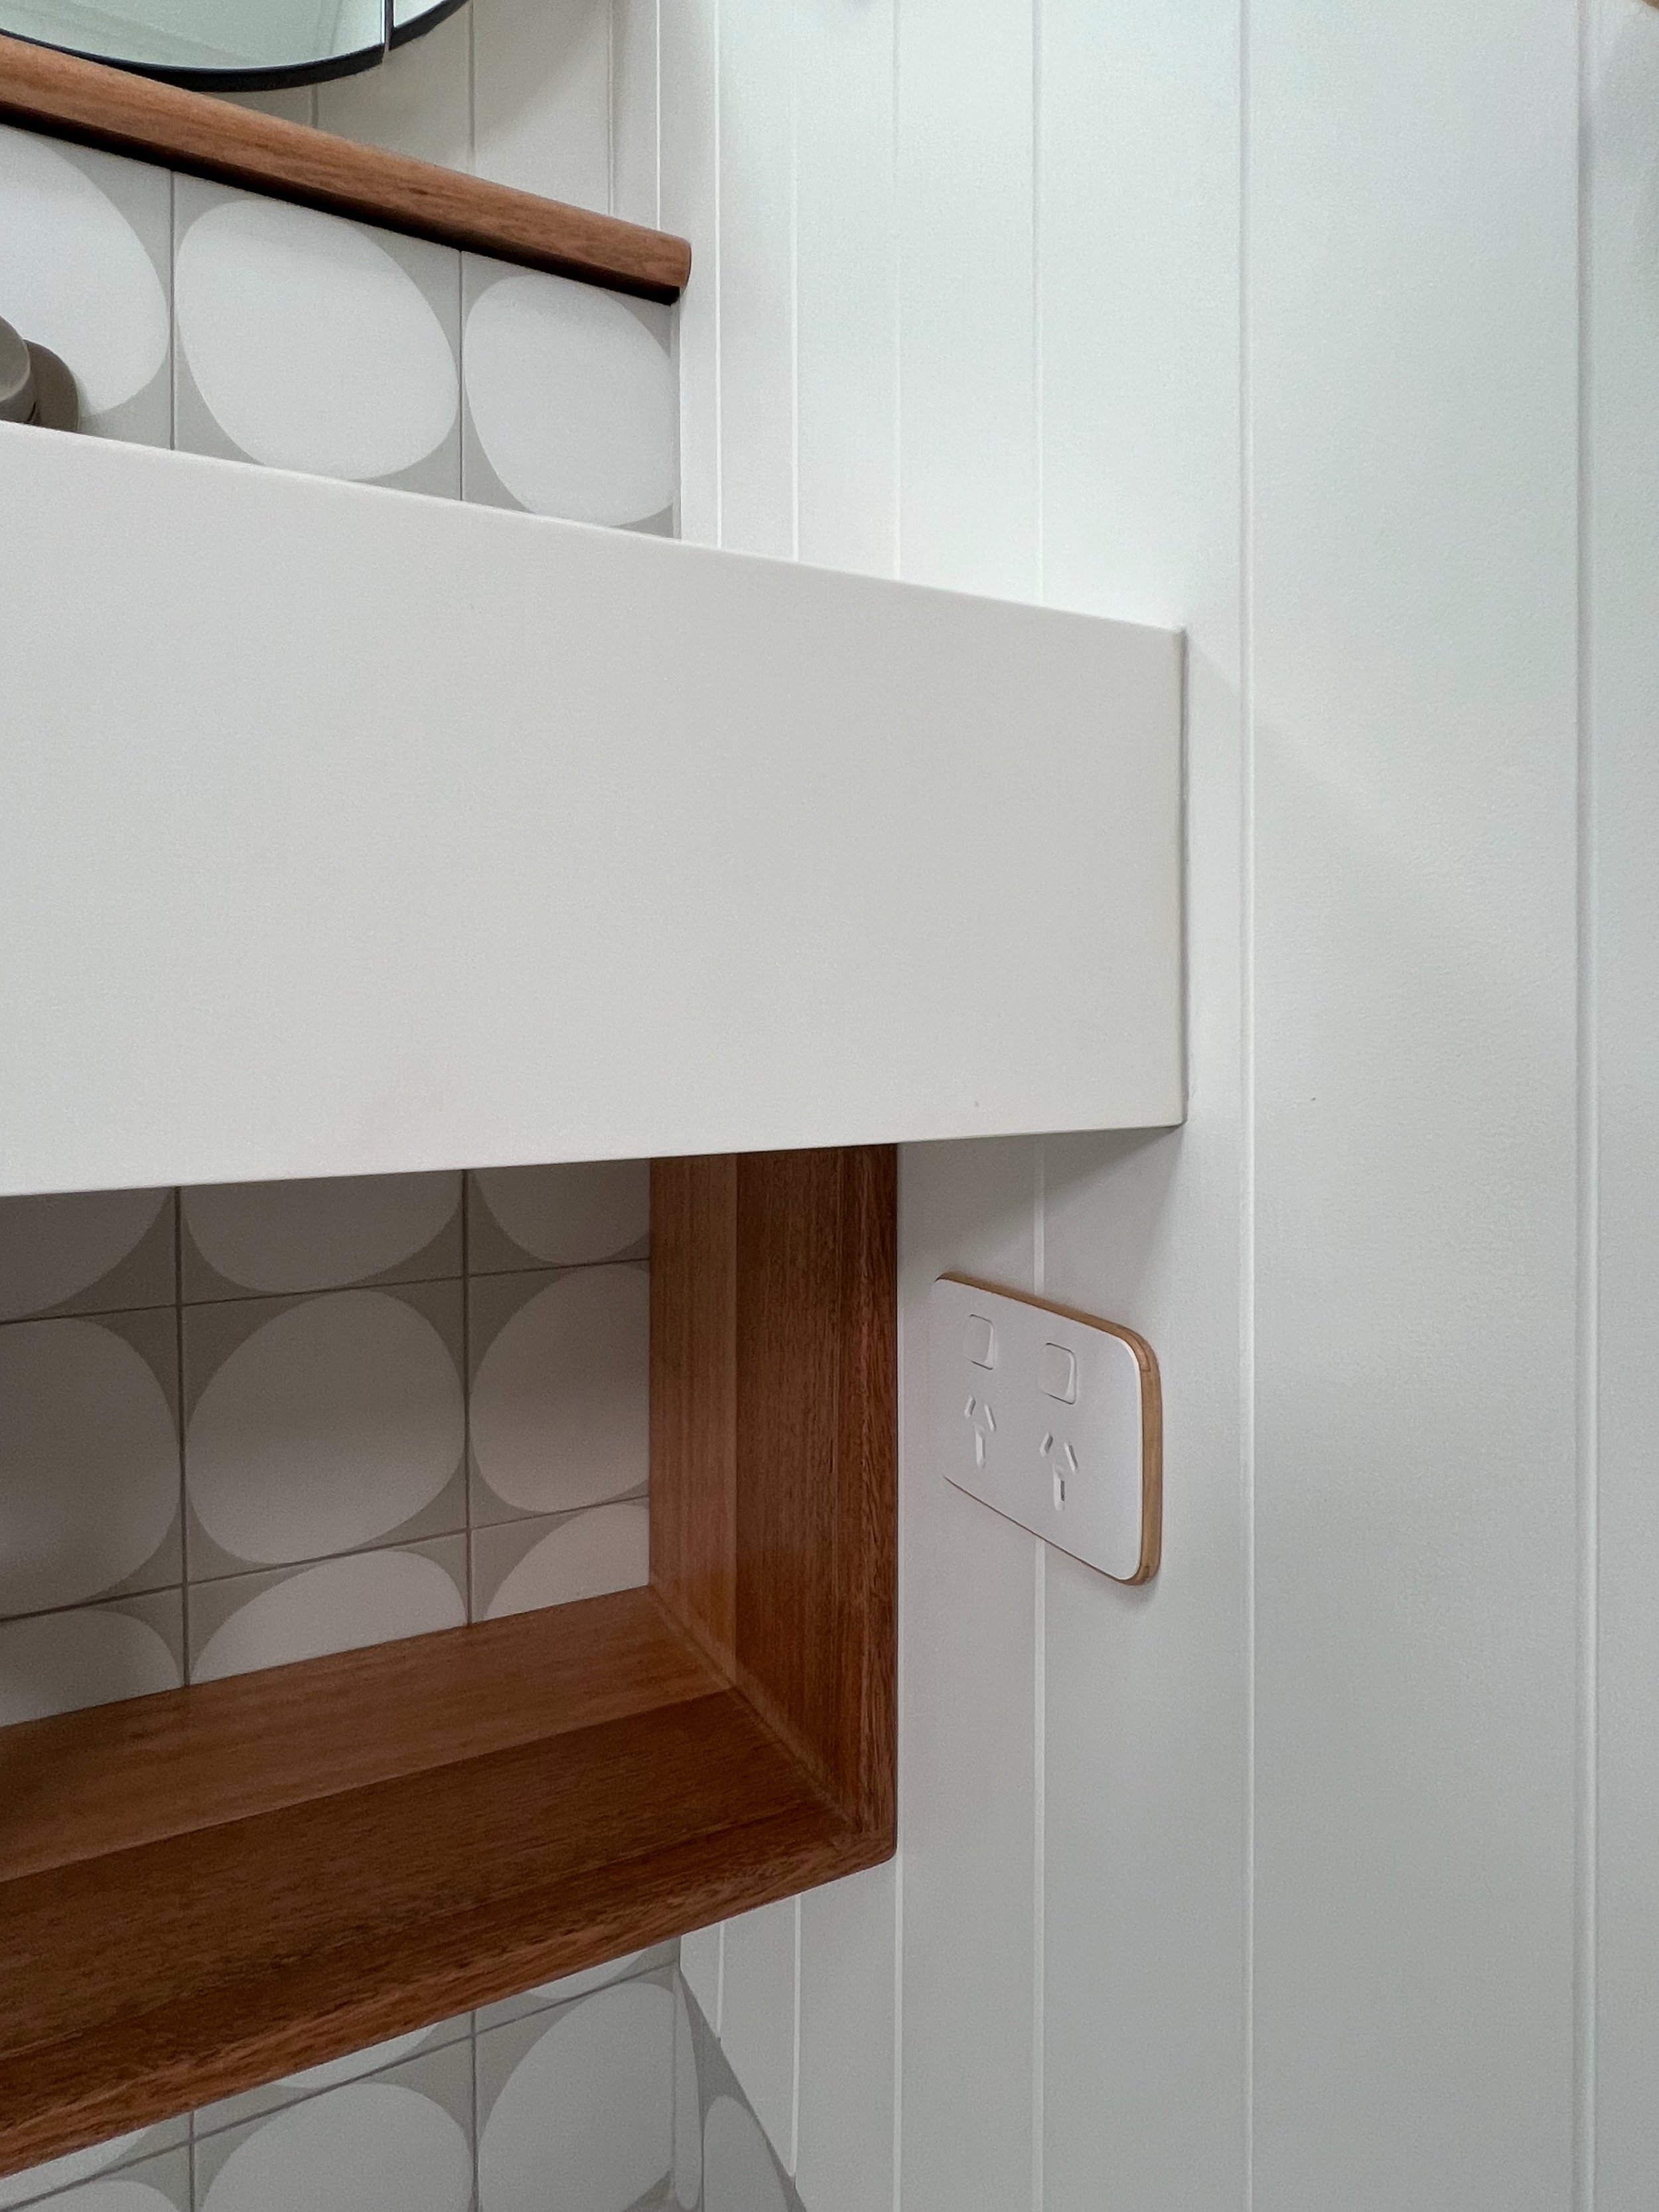
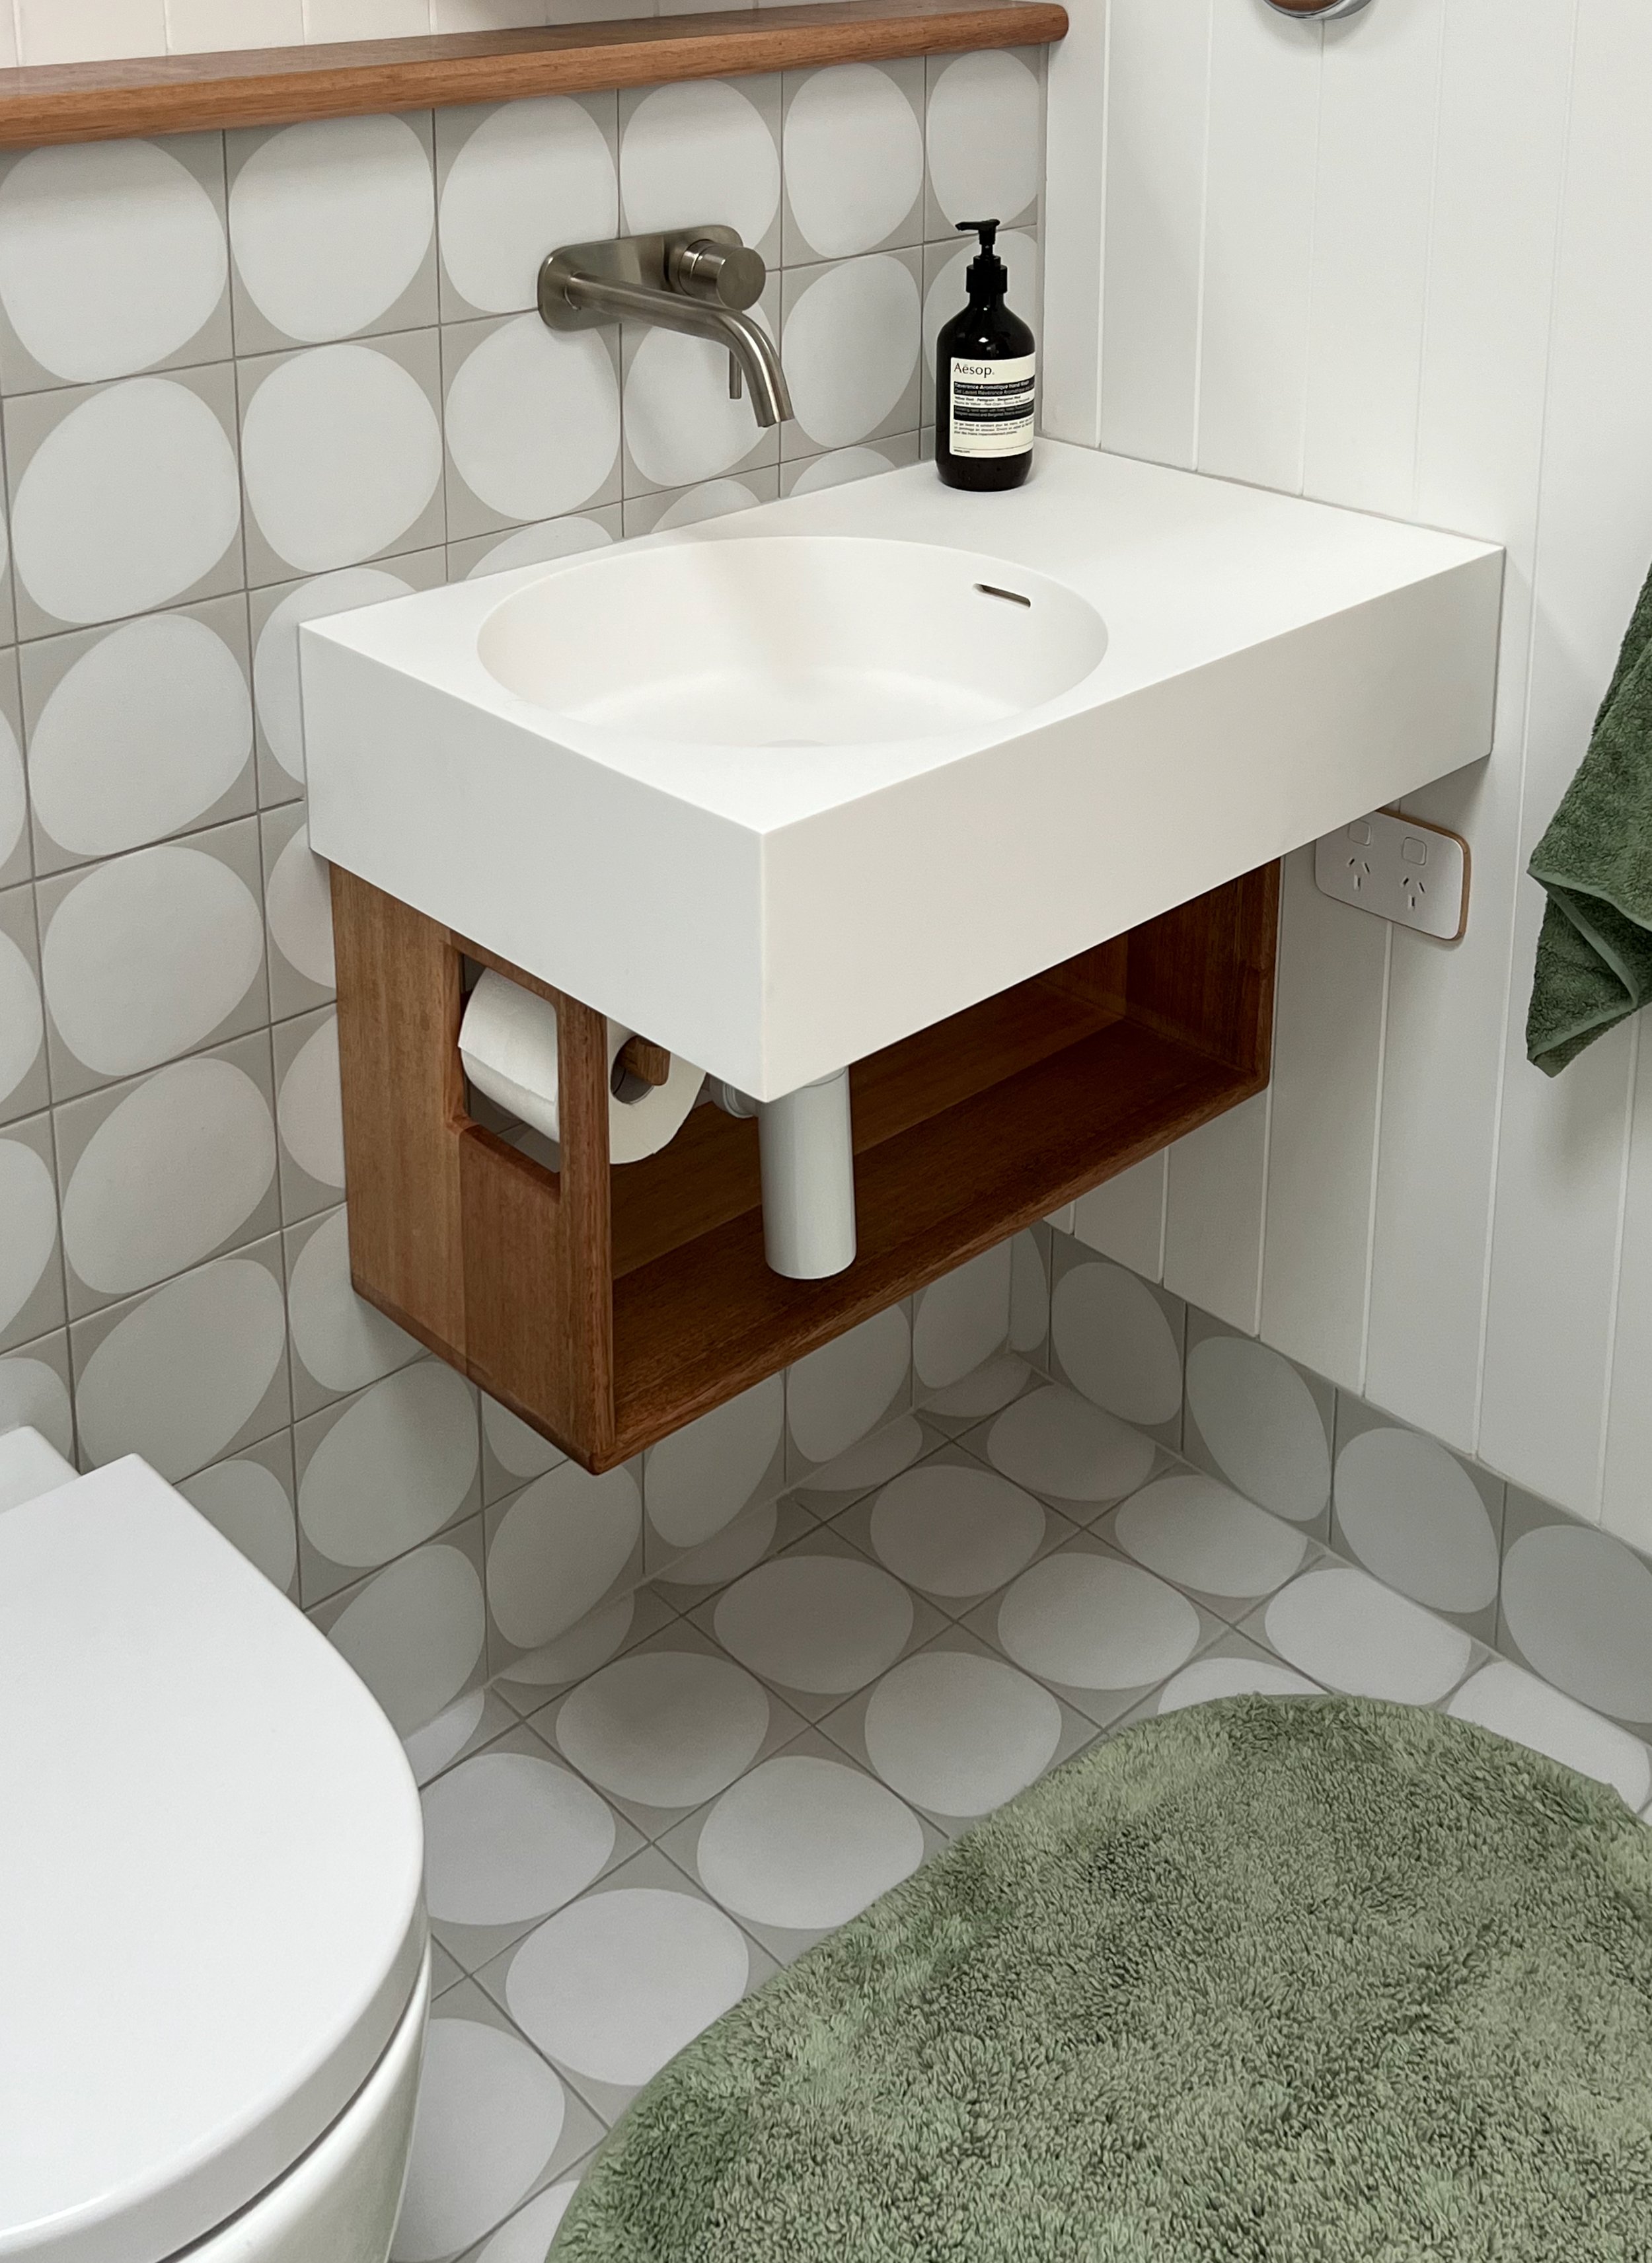
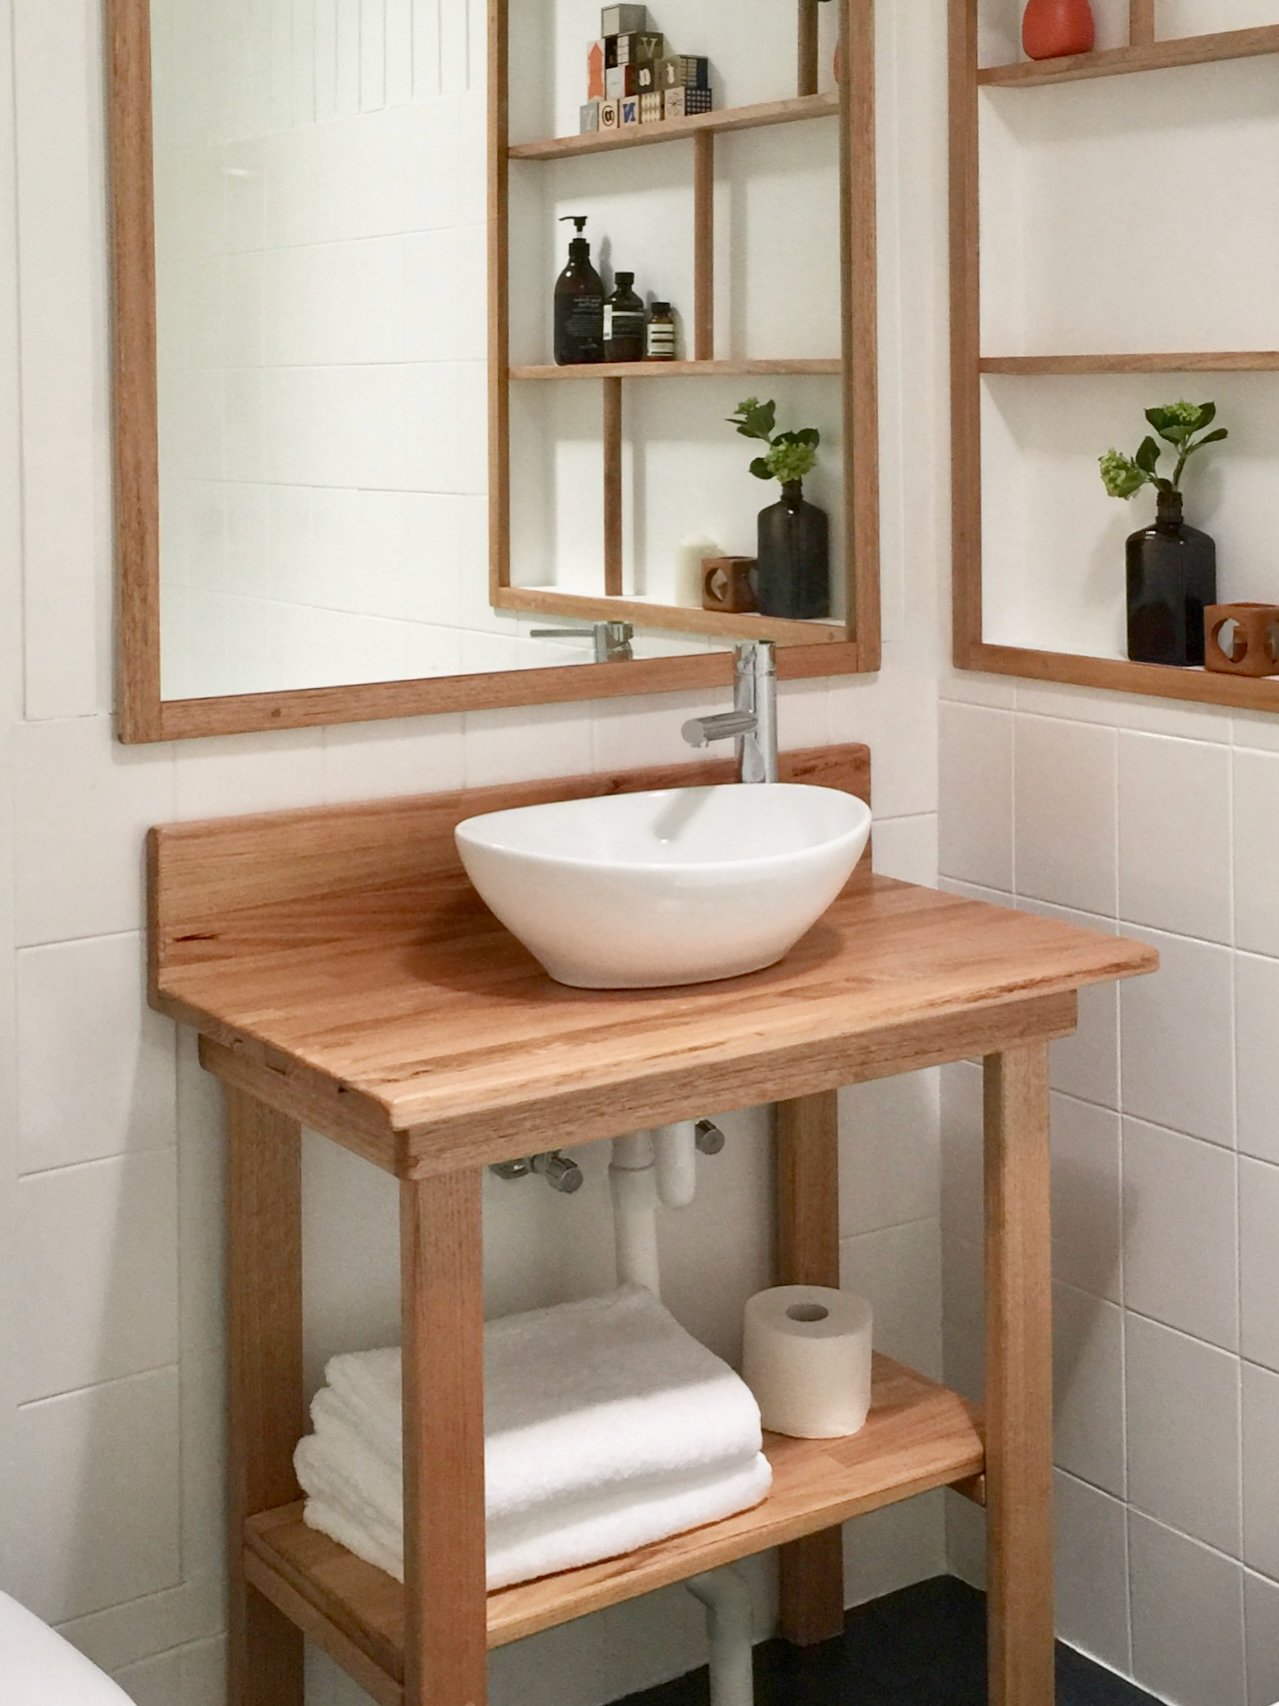
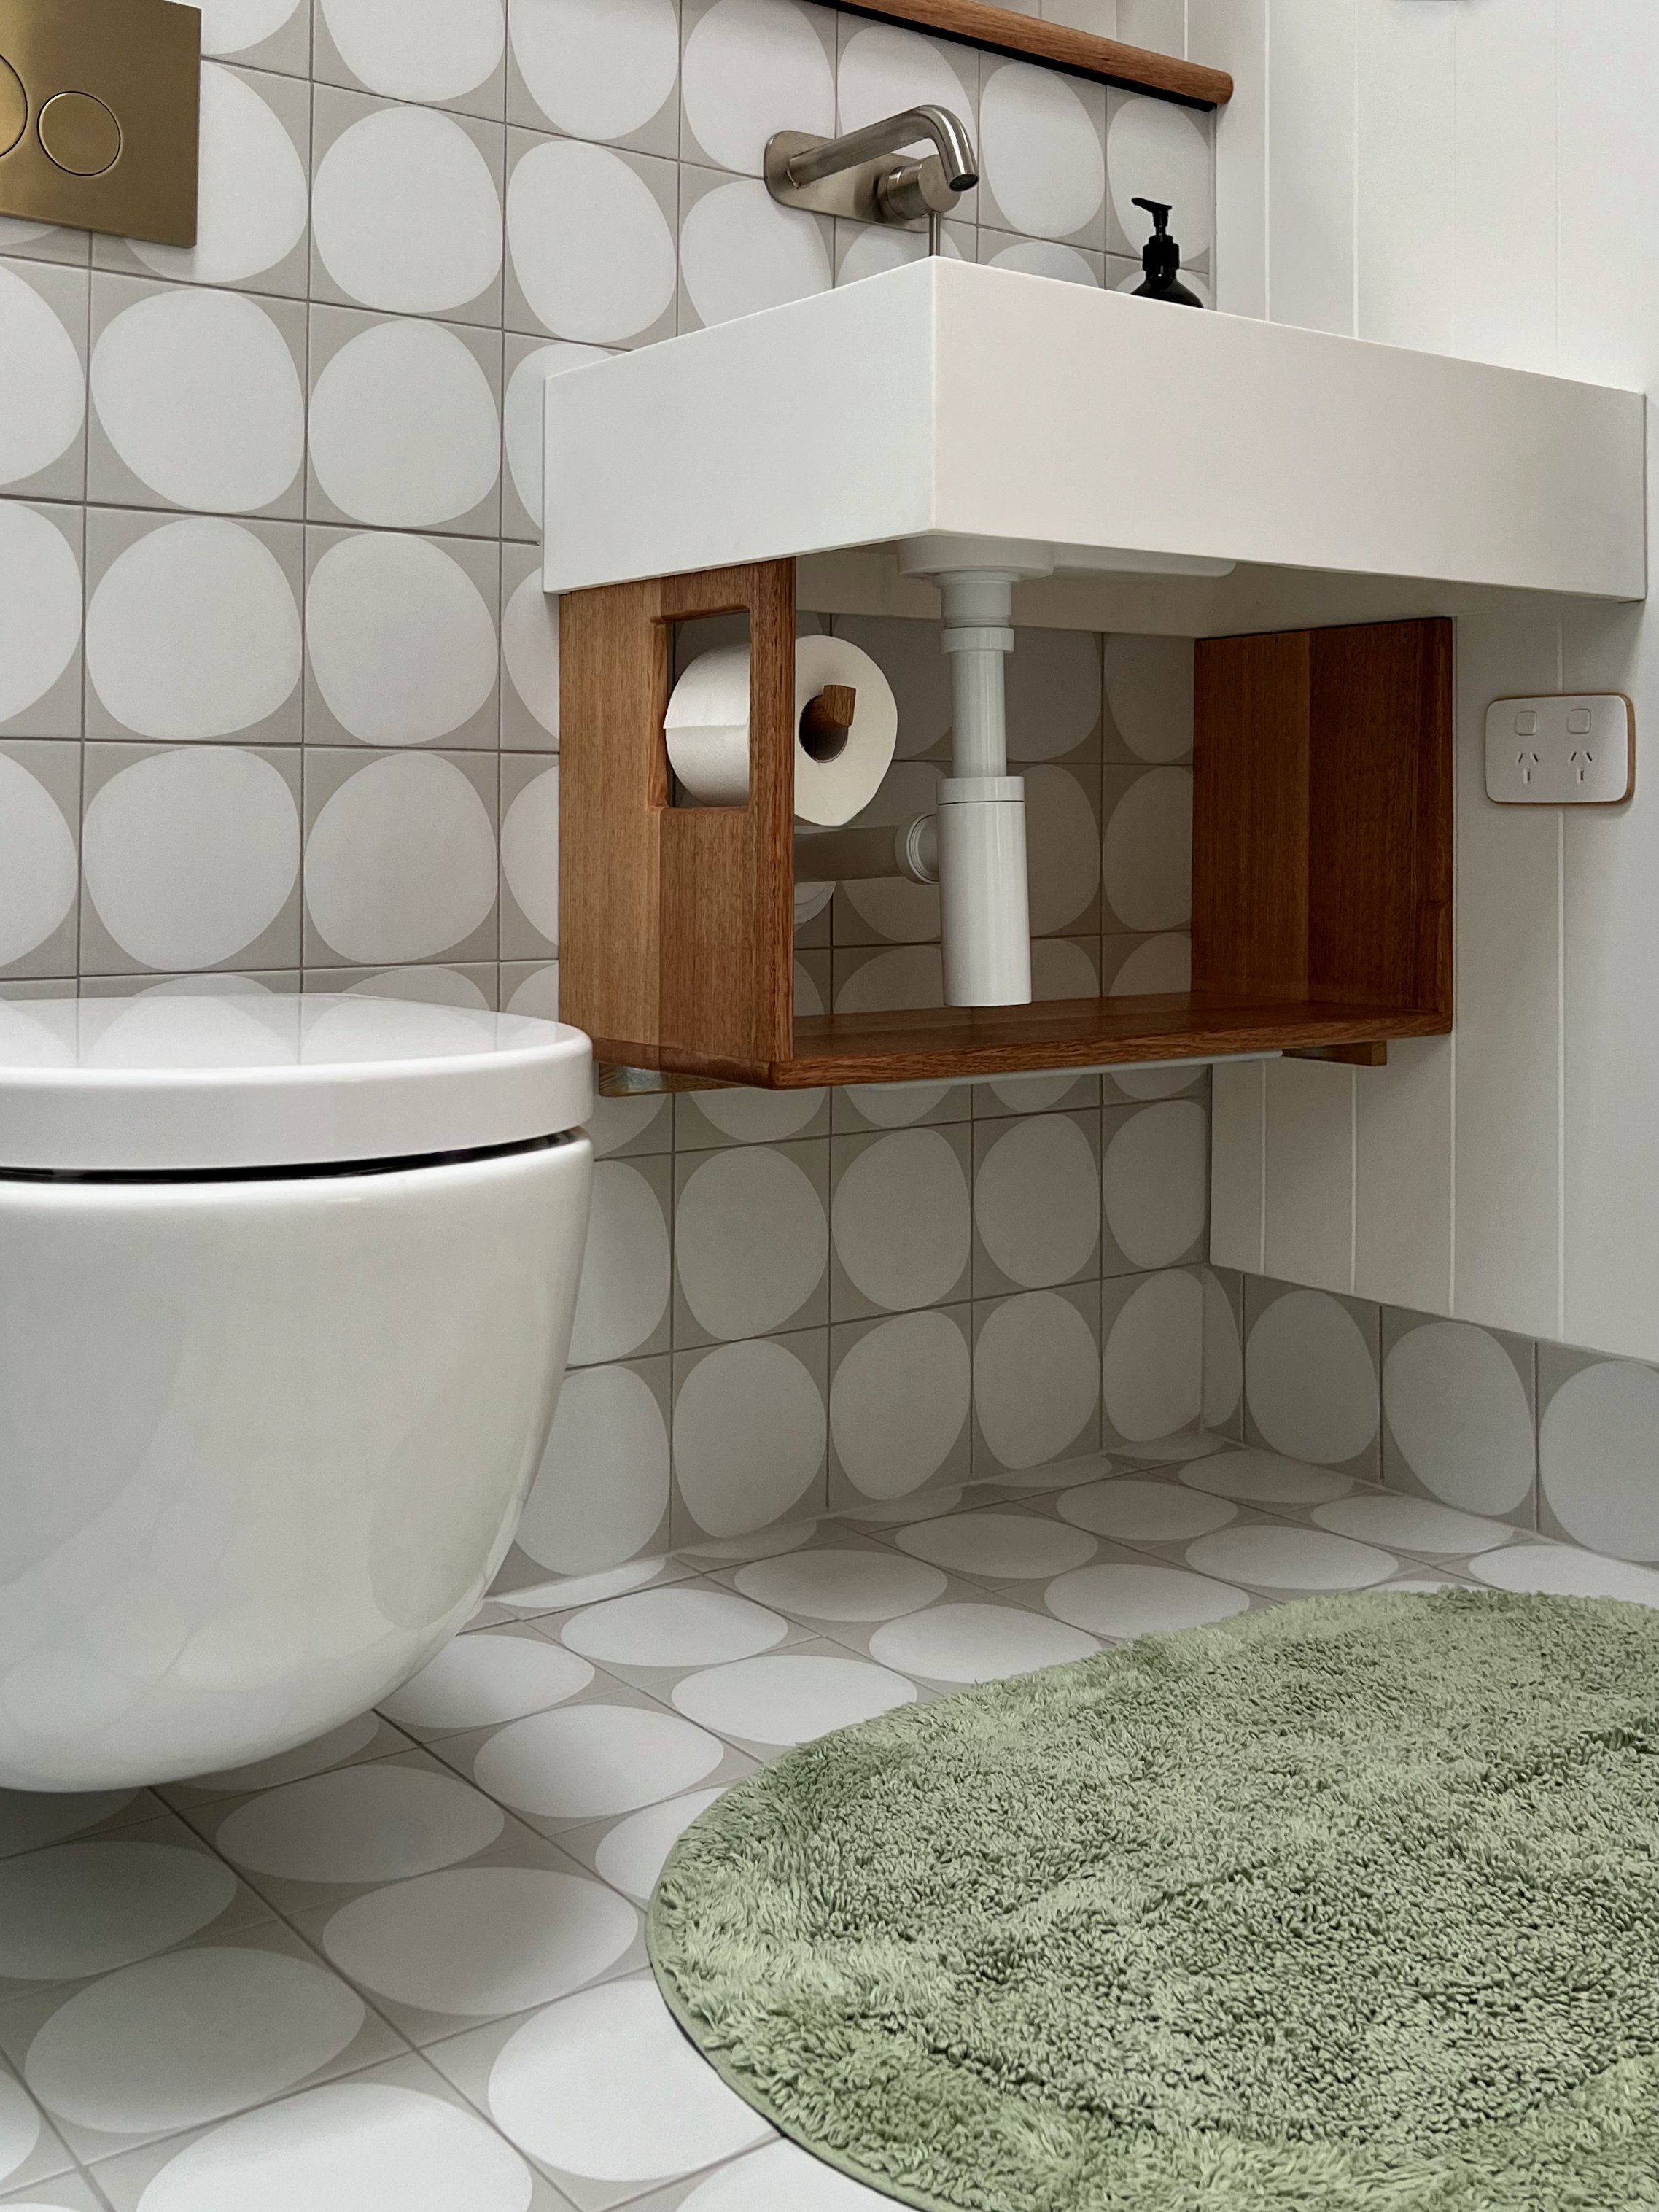
MY UNDER-BASIN JOINERY
While I love the all-in-one basin, it needed some storage underneath. So of course I DIYed.
Using the same Tasmanian oak as the nib shelf, I designed a compact shelf to sit back from the edge of the basin to prevent knees from knocking it.
There’s a built-in toilet roll holder, space for spare rolls and makeup bags, plus a power point tucked underneath for a hairdryer.
THE TOILET SET UP
The in-wall, wall-hung cistern is incorporated into the framing of the nib wall so it was essential to have it on site when the building began.
I chose the wall-hung pan with soft-close seat for the compact shape. Being rimless and off the ground keeps it easy to clean.
I also spent an extra on the in-wall metal flush plate in brushed nickel, rather than plastic, for better quality.
There was nowhere to position the toilet roll holder that didn’t require swinging around to the wall, so I integrated it into the basin joinery.
It works well while ensuring the dilemma of which way the roll should fall is answered every time as it only works facing forward.
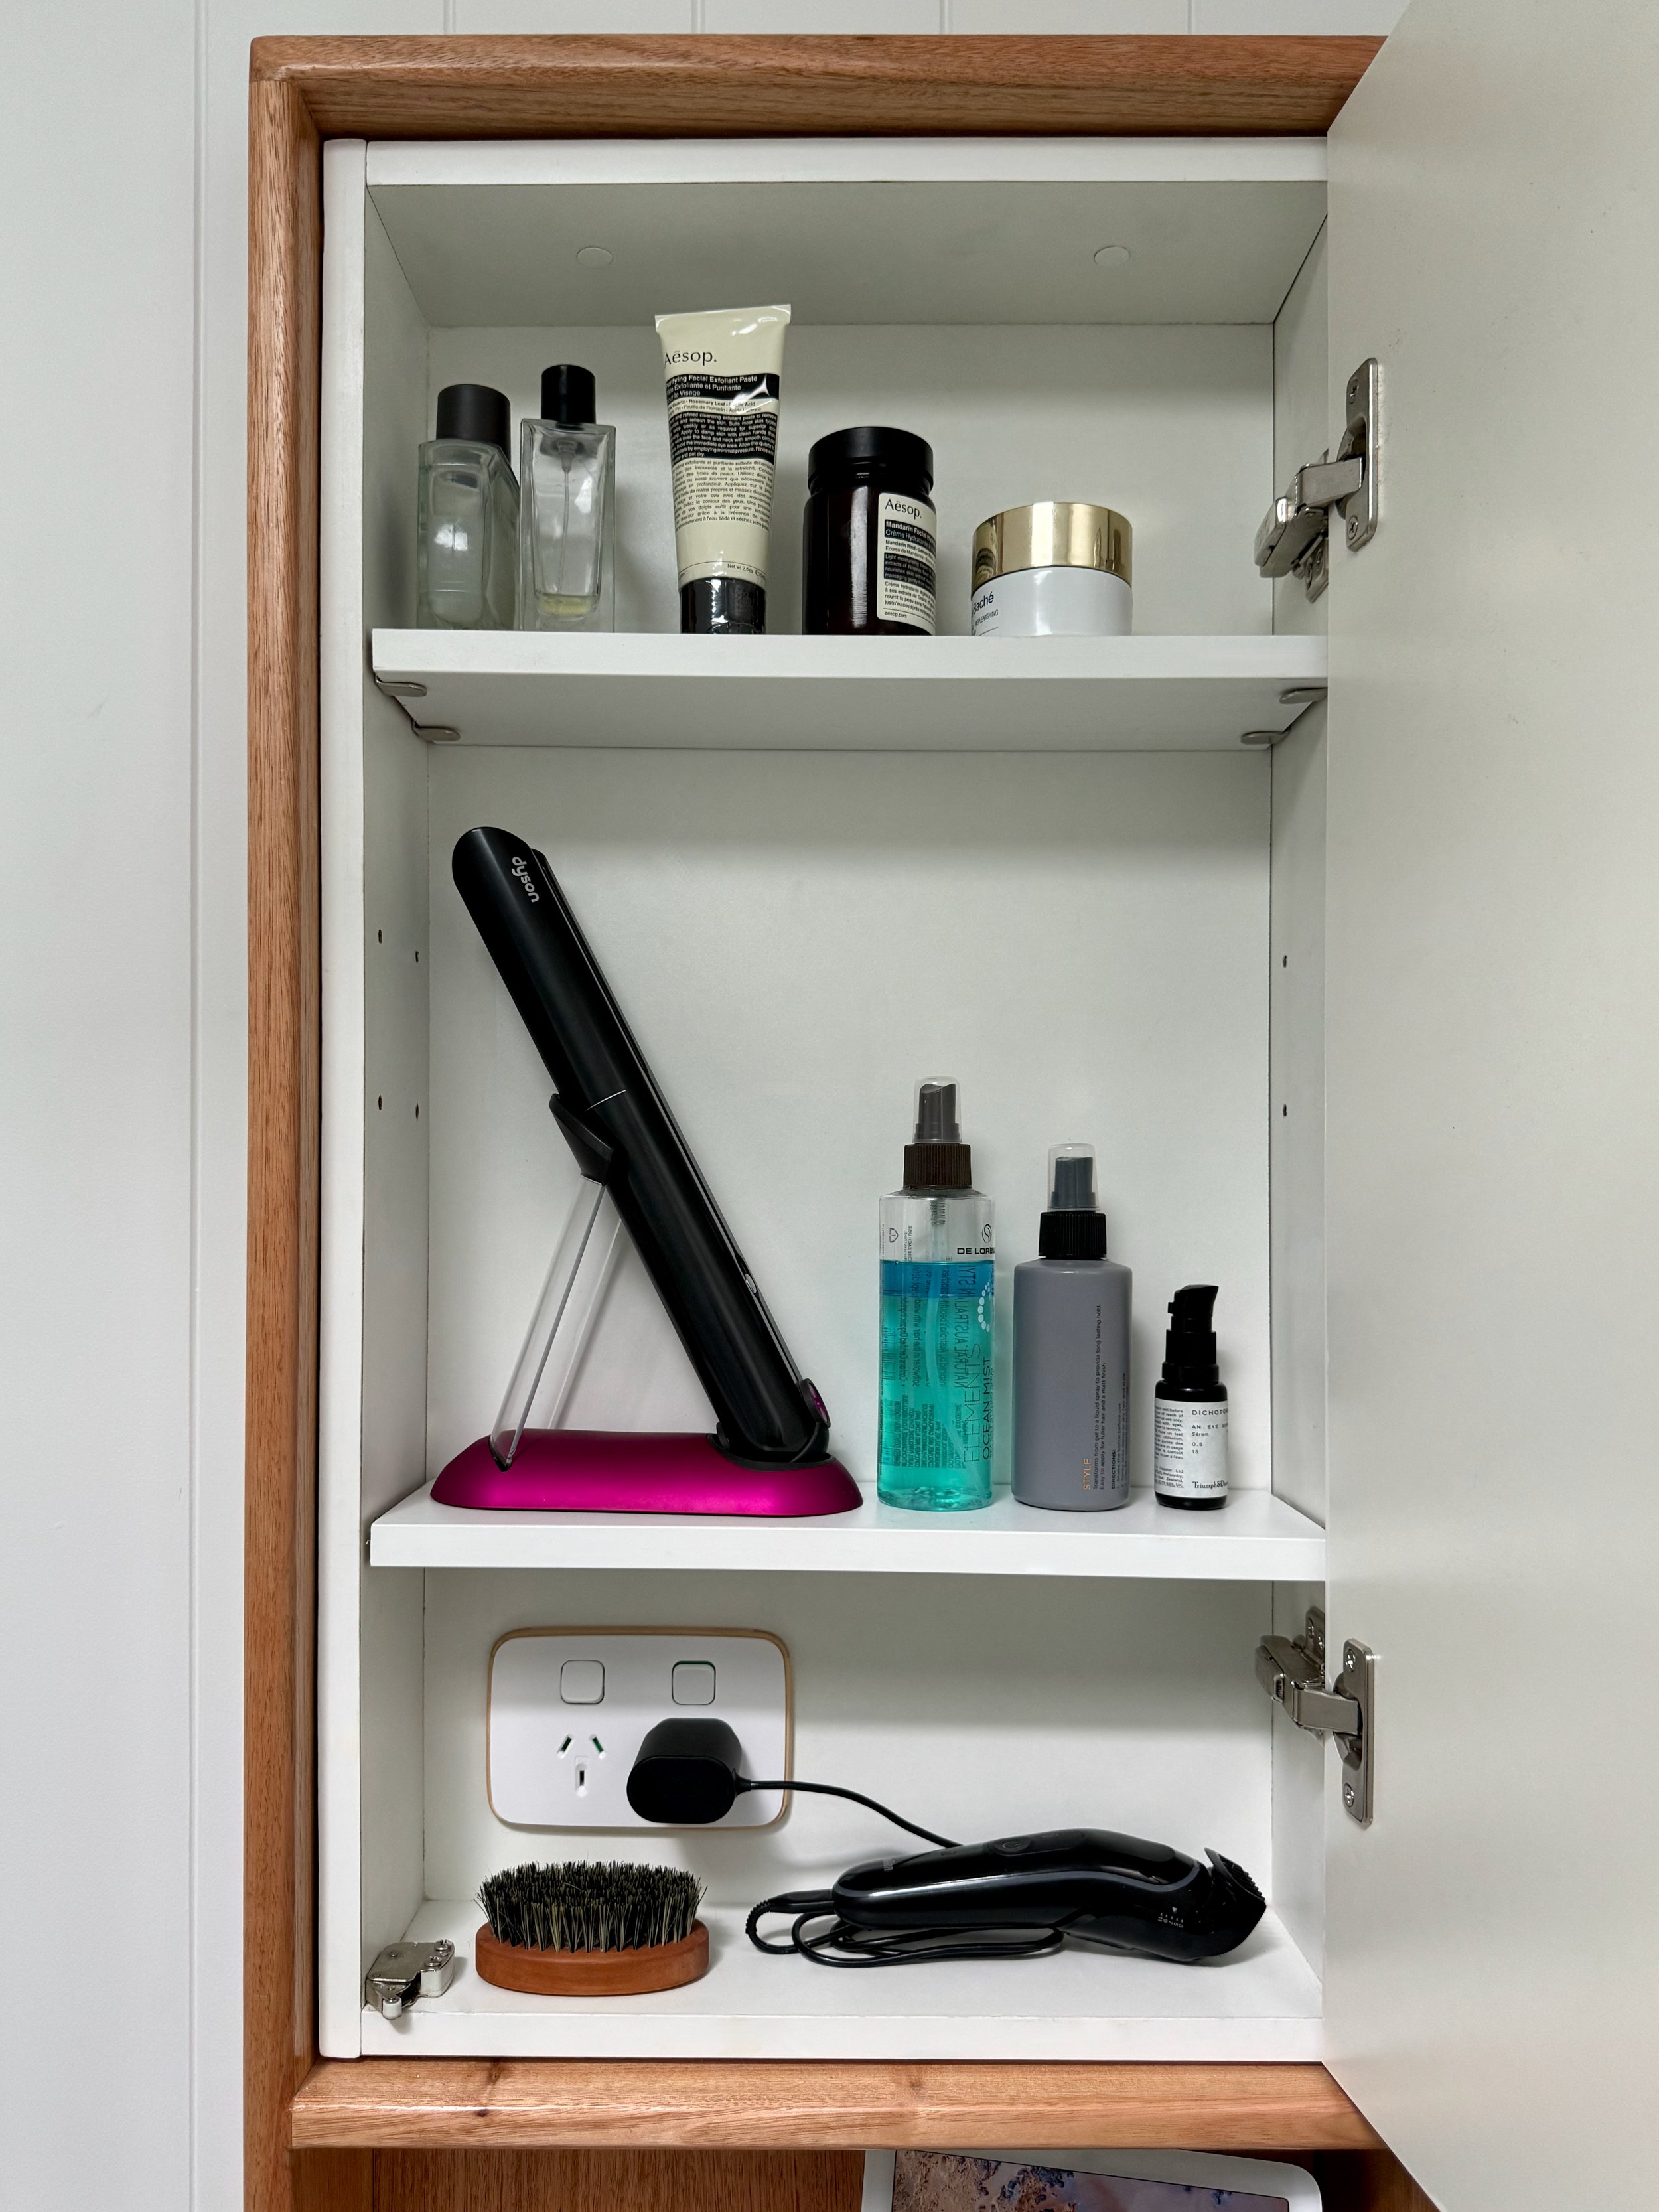
RECESSED SHAVING CABINET
The builder created a recess for the shaving cabinet when framing up the wall. It’s positioned above the basin for easy access to water-using essentials like toothbrushes.
After hanging the VJ panelling, I installed it to open from right to left to avoid knocking the fold-out shaving mirror, then added white-painted moulding to hide the wall join.
TIP I chose a 600mm frameless mirror cabinet with backlit USB LED that lights up when the door is opened. The split mirror means the door doesn’t swing out as far as a full mirror would so you don’t have to step back to open it.
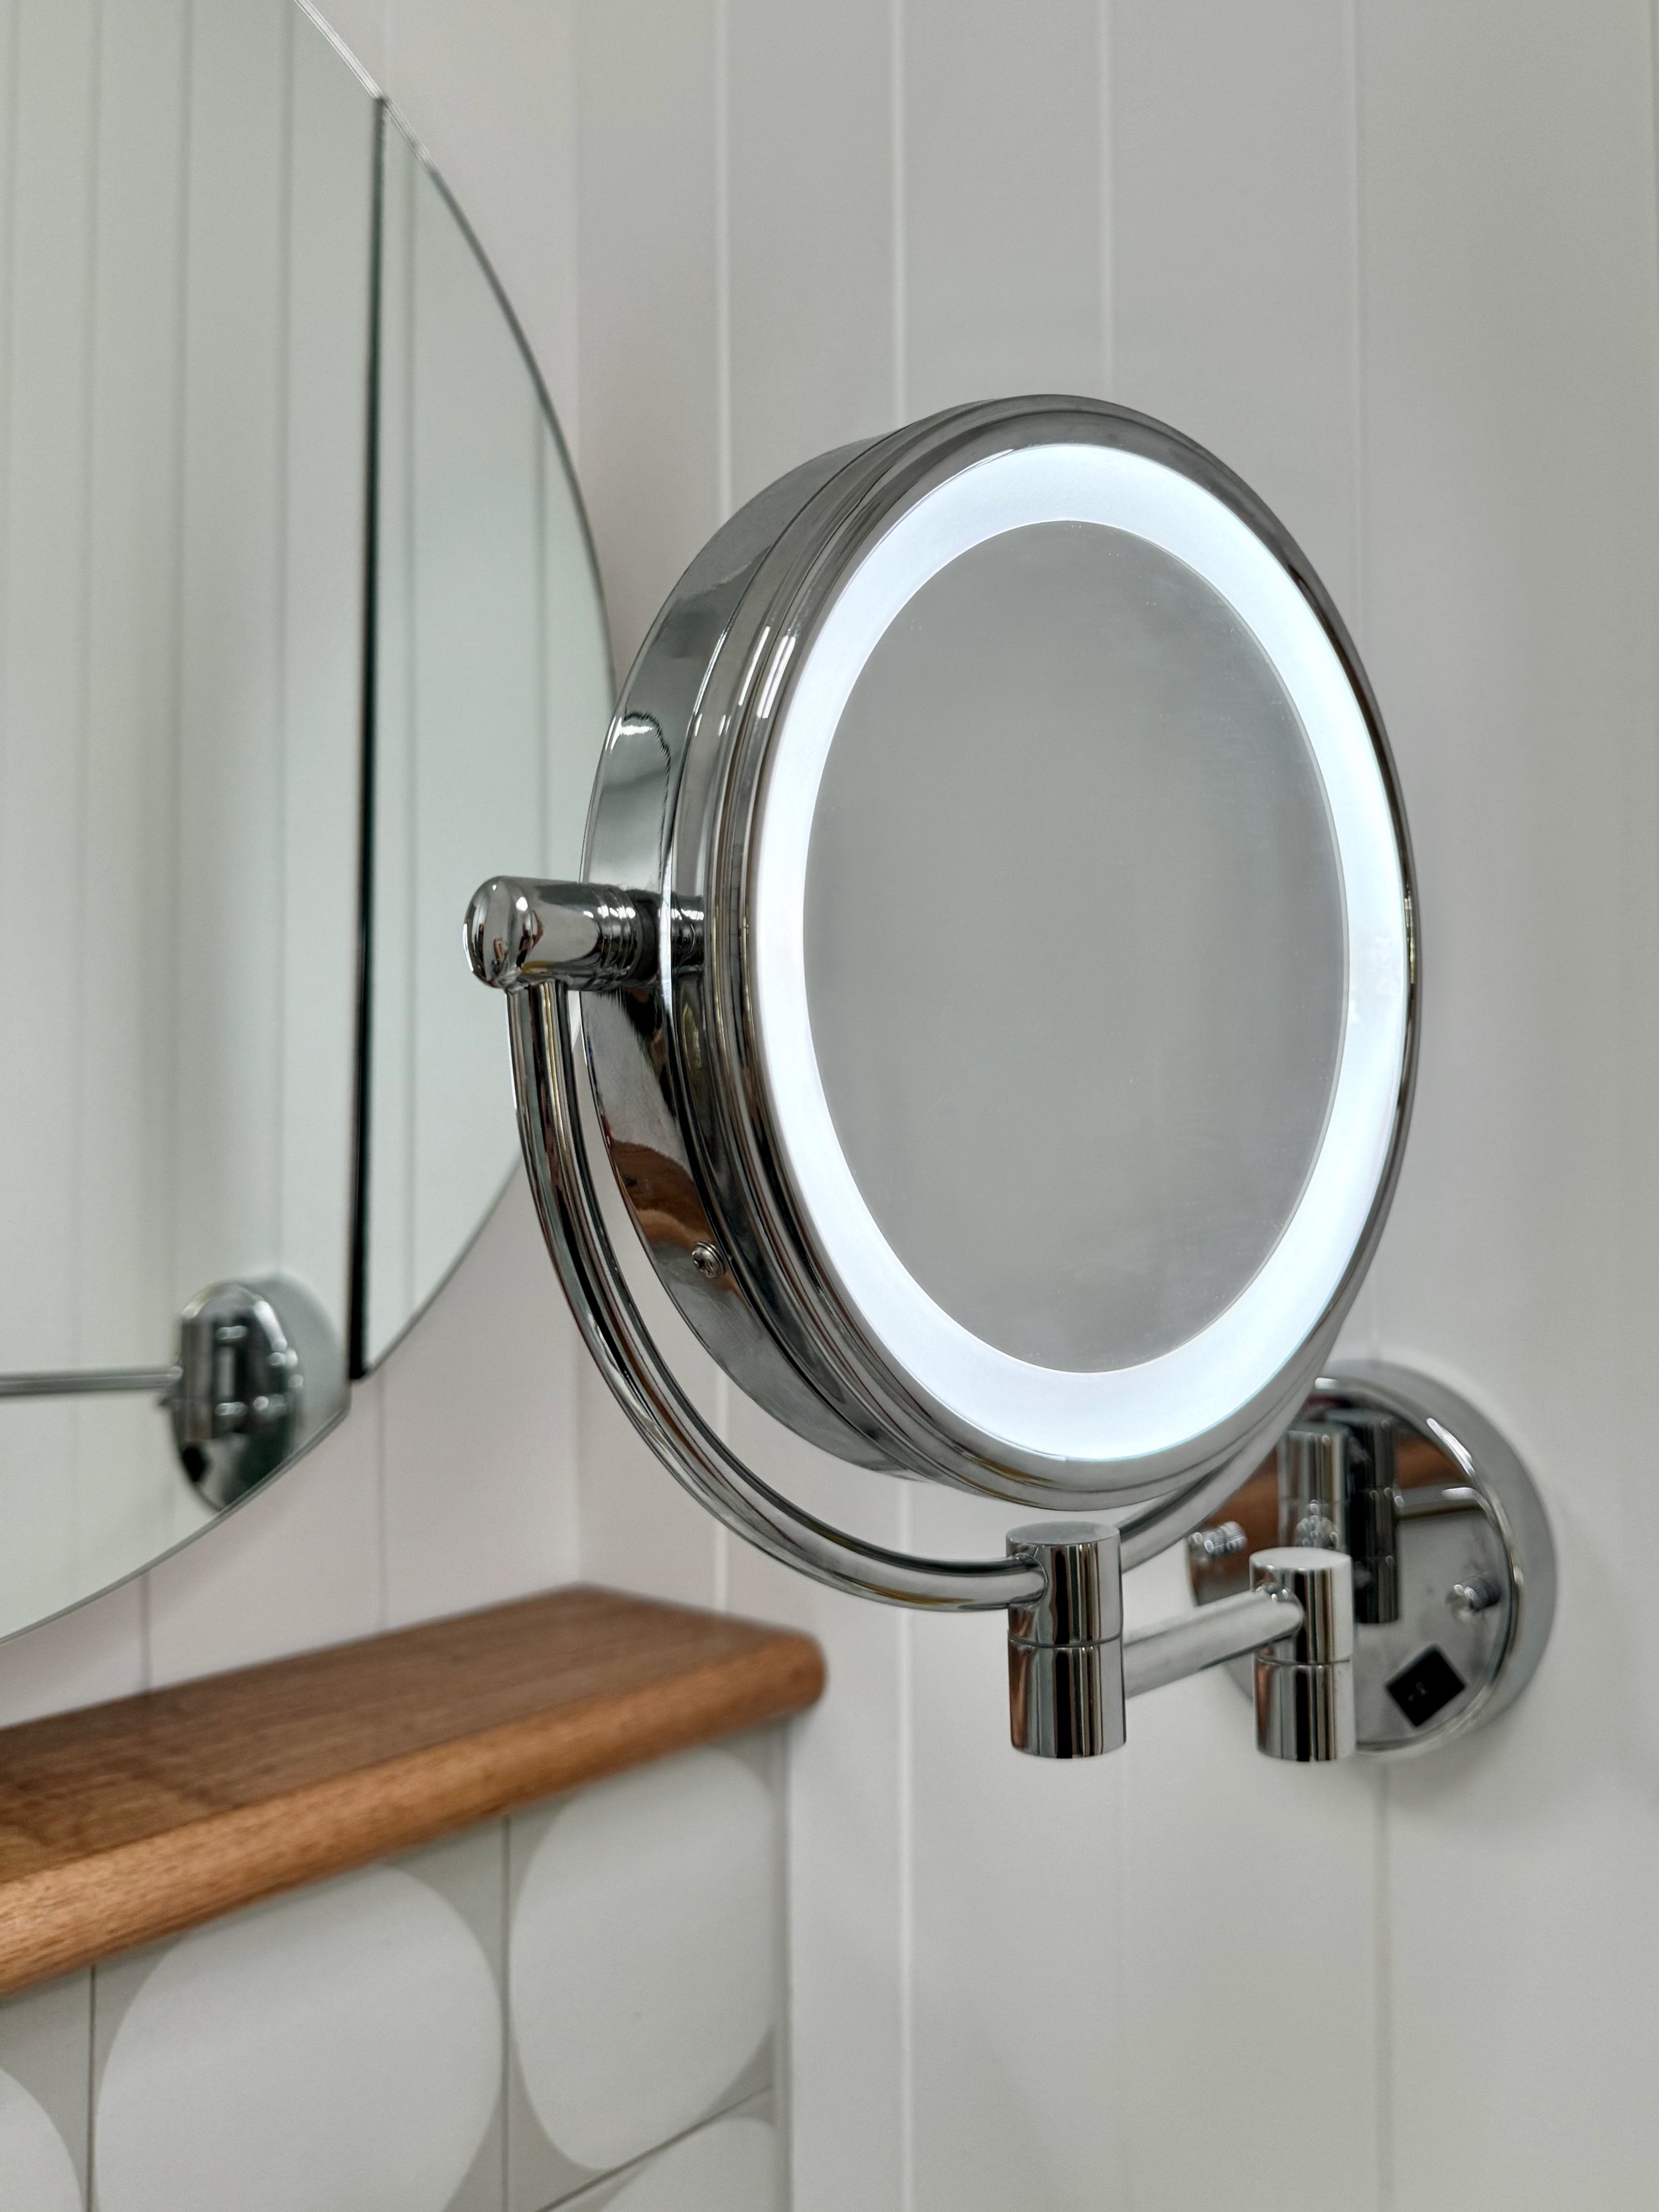
MAGNIFICENTLY MAGNIFIED
One essential item I didn’t compromise on was a magnifying mirror with LED light. This one is 8x. Although it cost more than $400 and required installation by an electrician, it gets used every day and is priceless.
HANDCRAFTED SUPER STORAGE
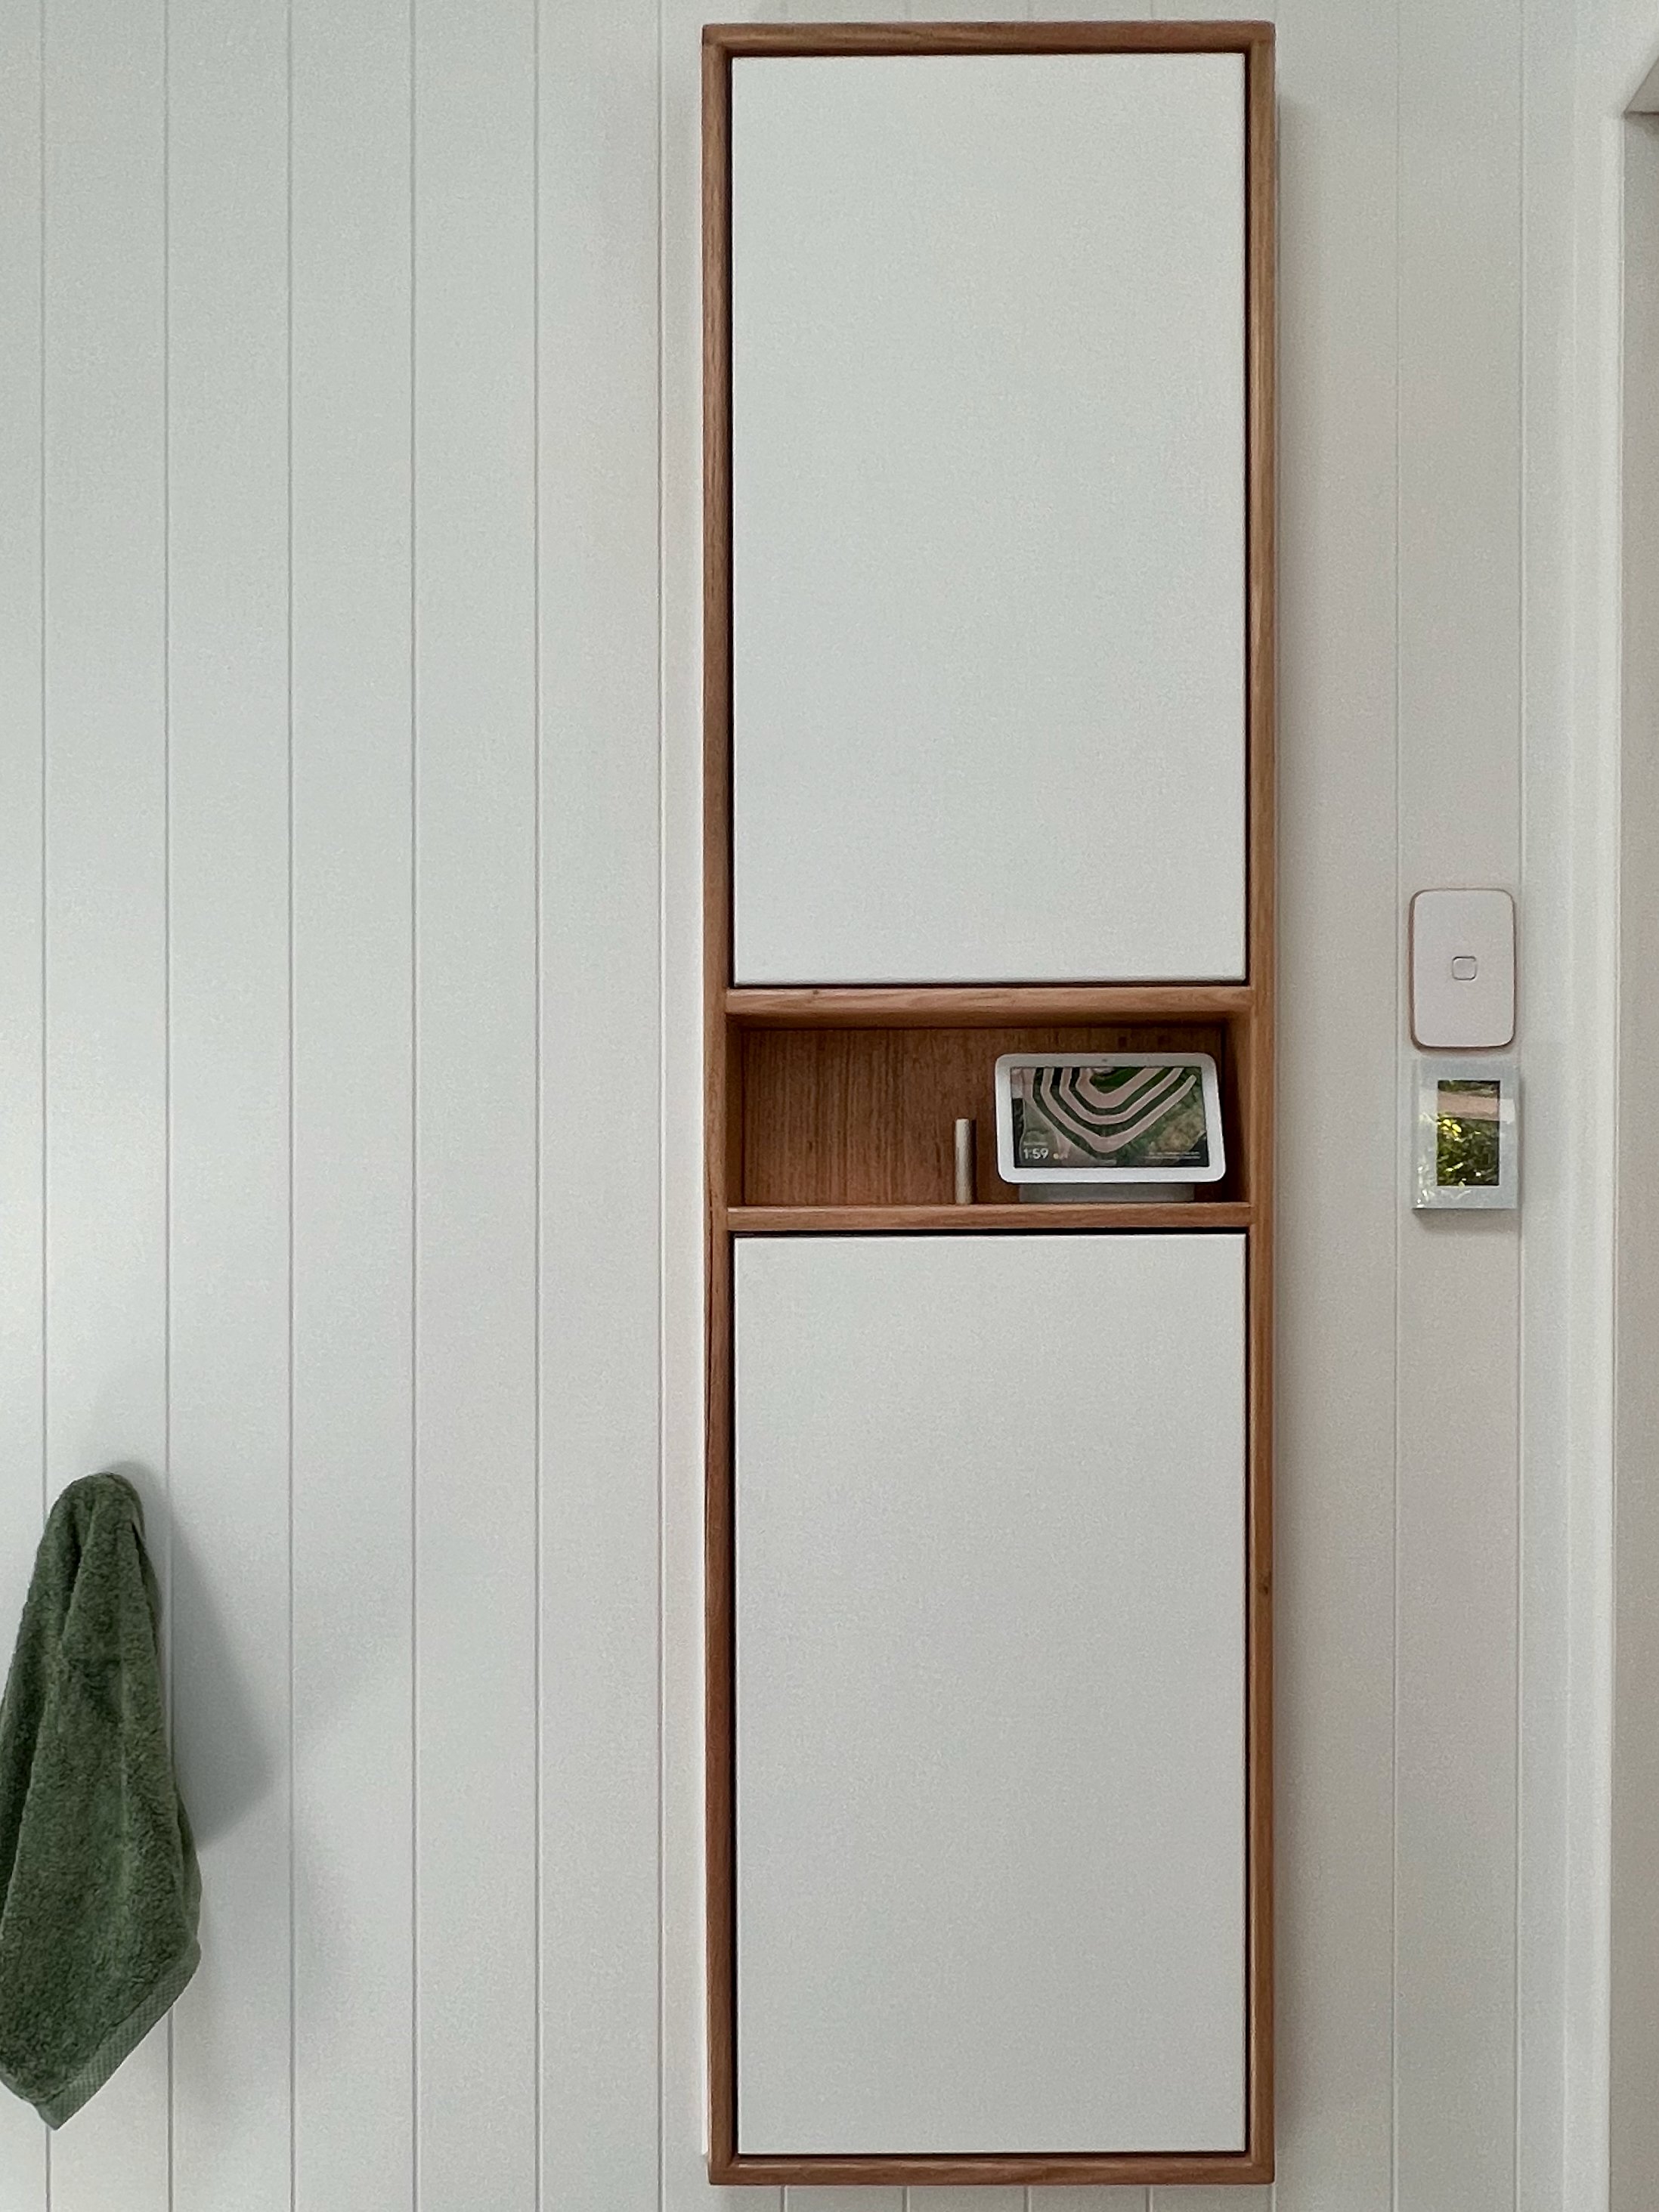
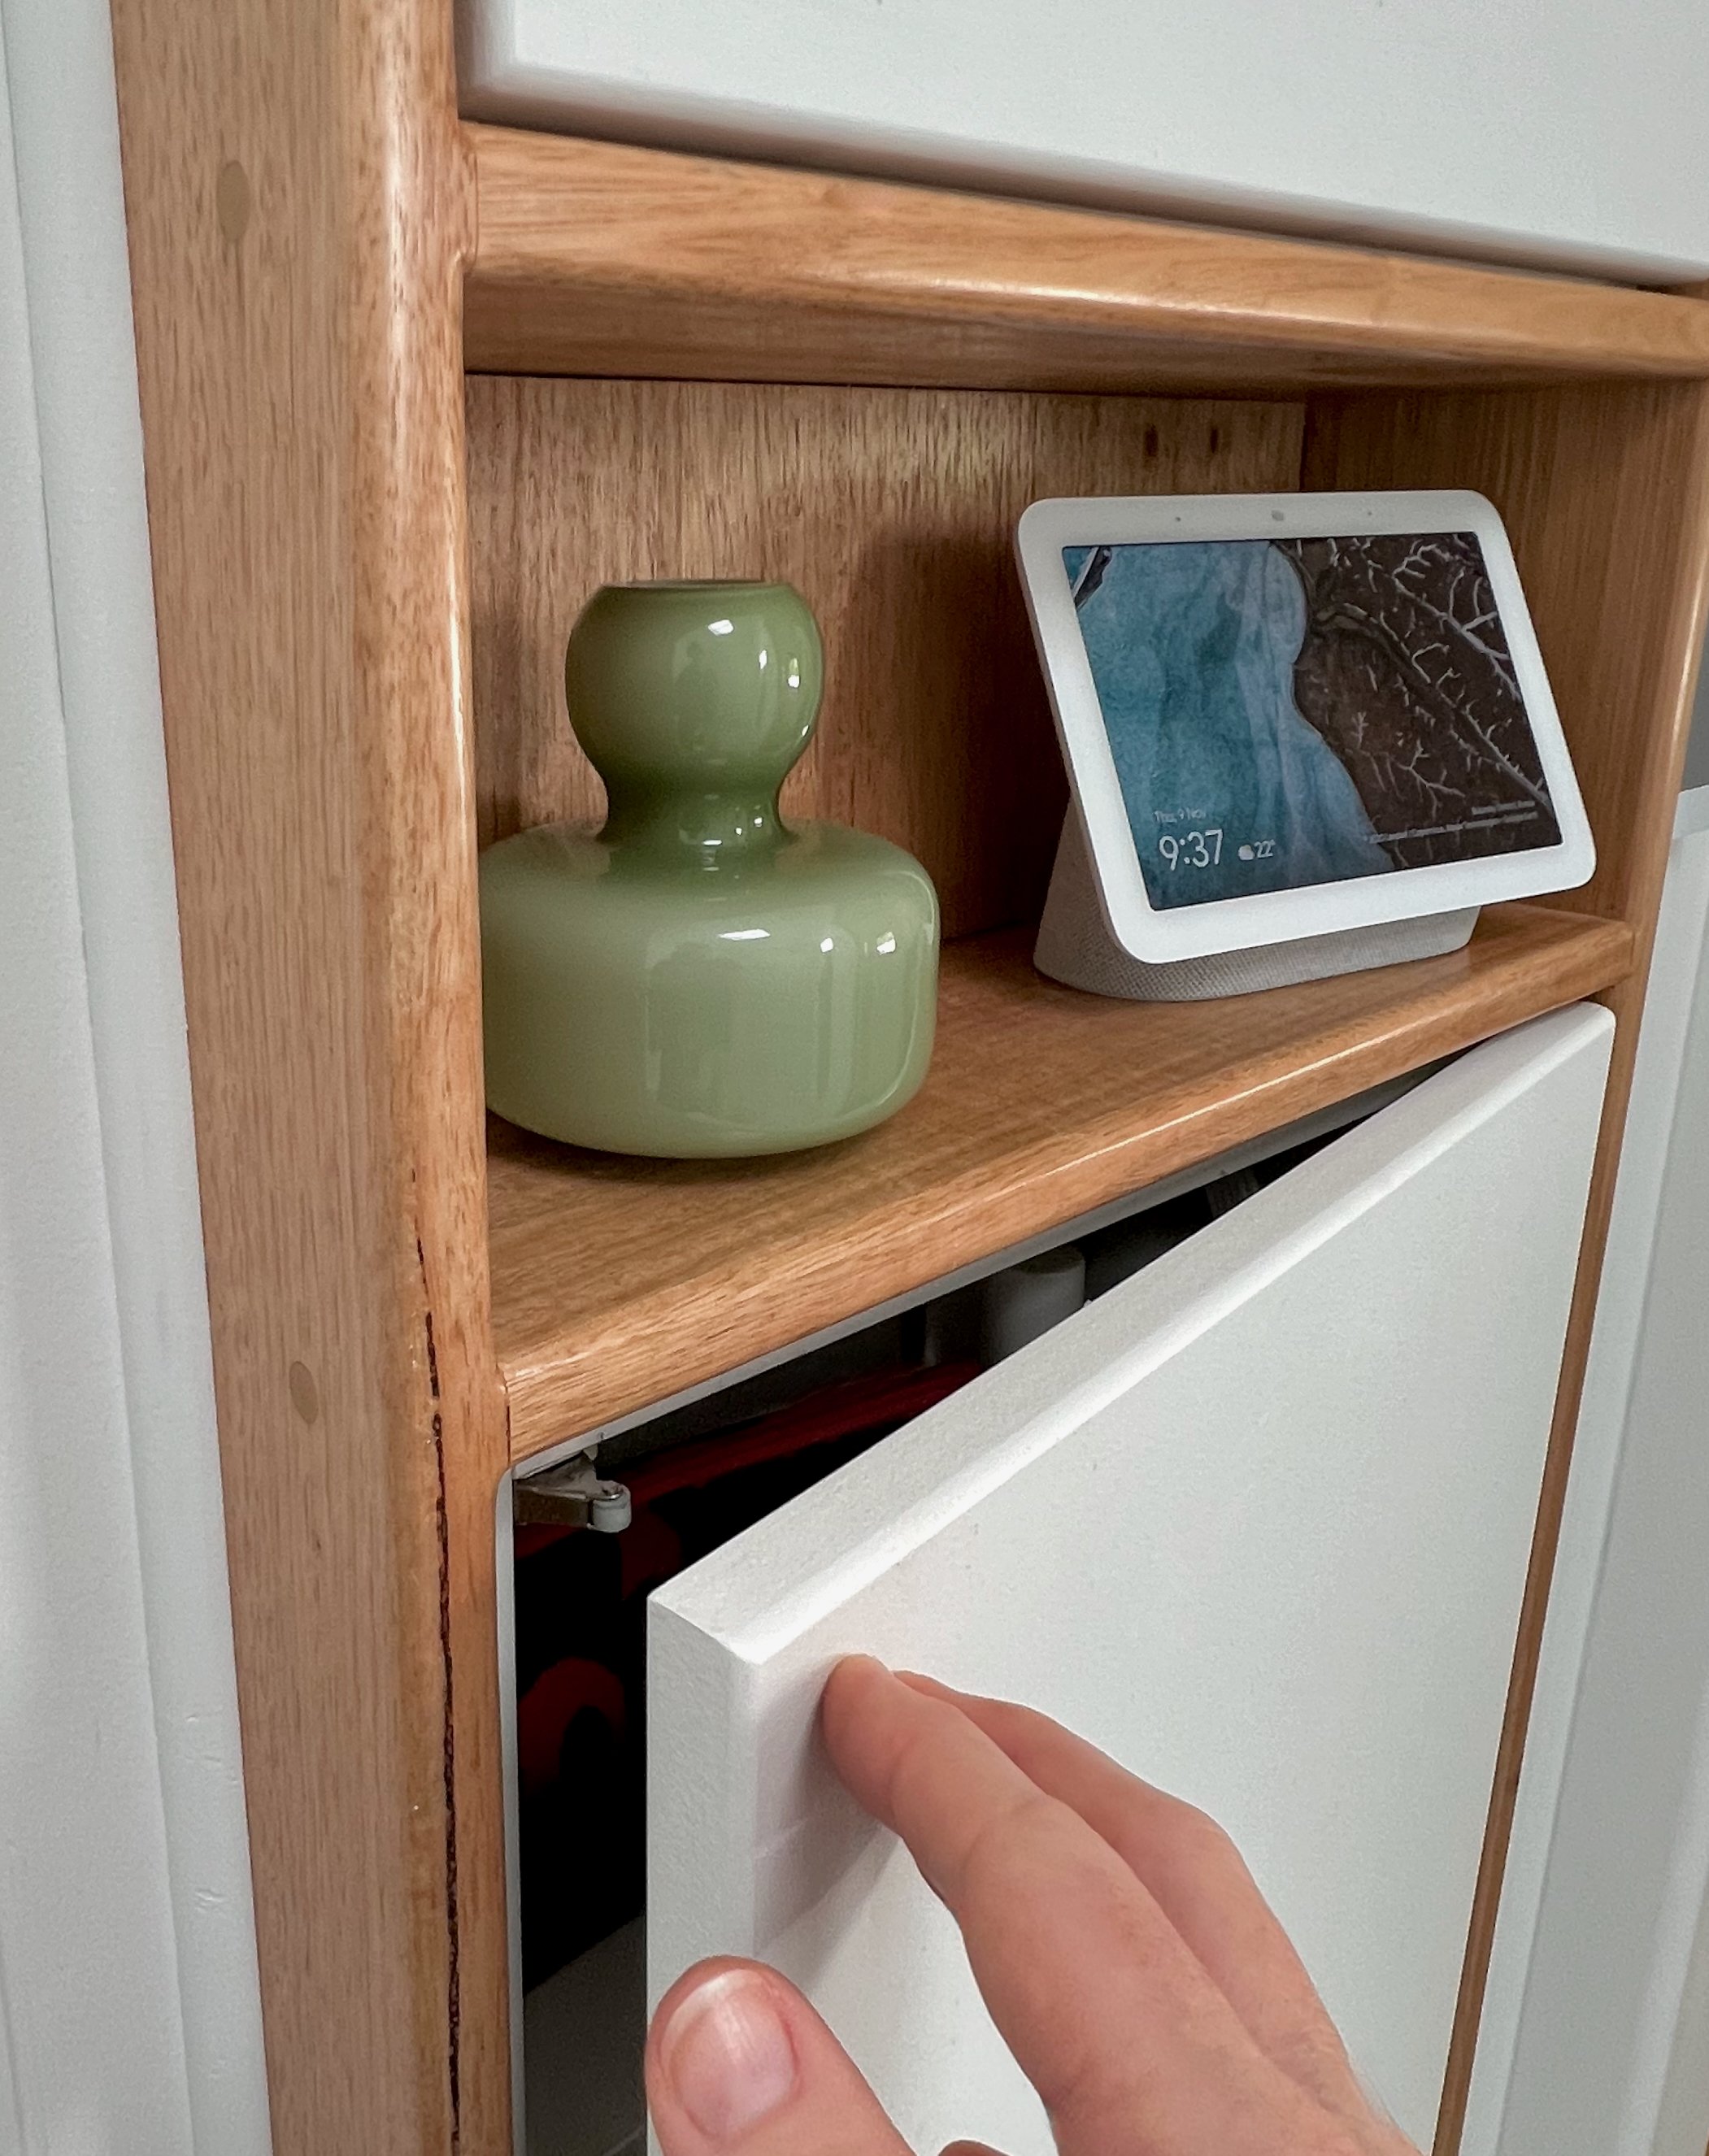
The wall to the left of the doorway was a blank canvas, perfect for adding a slimline, two-door cabinet with display shelf and hidden power points.
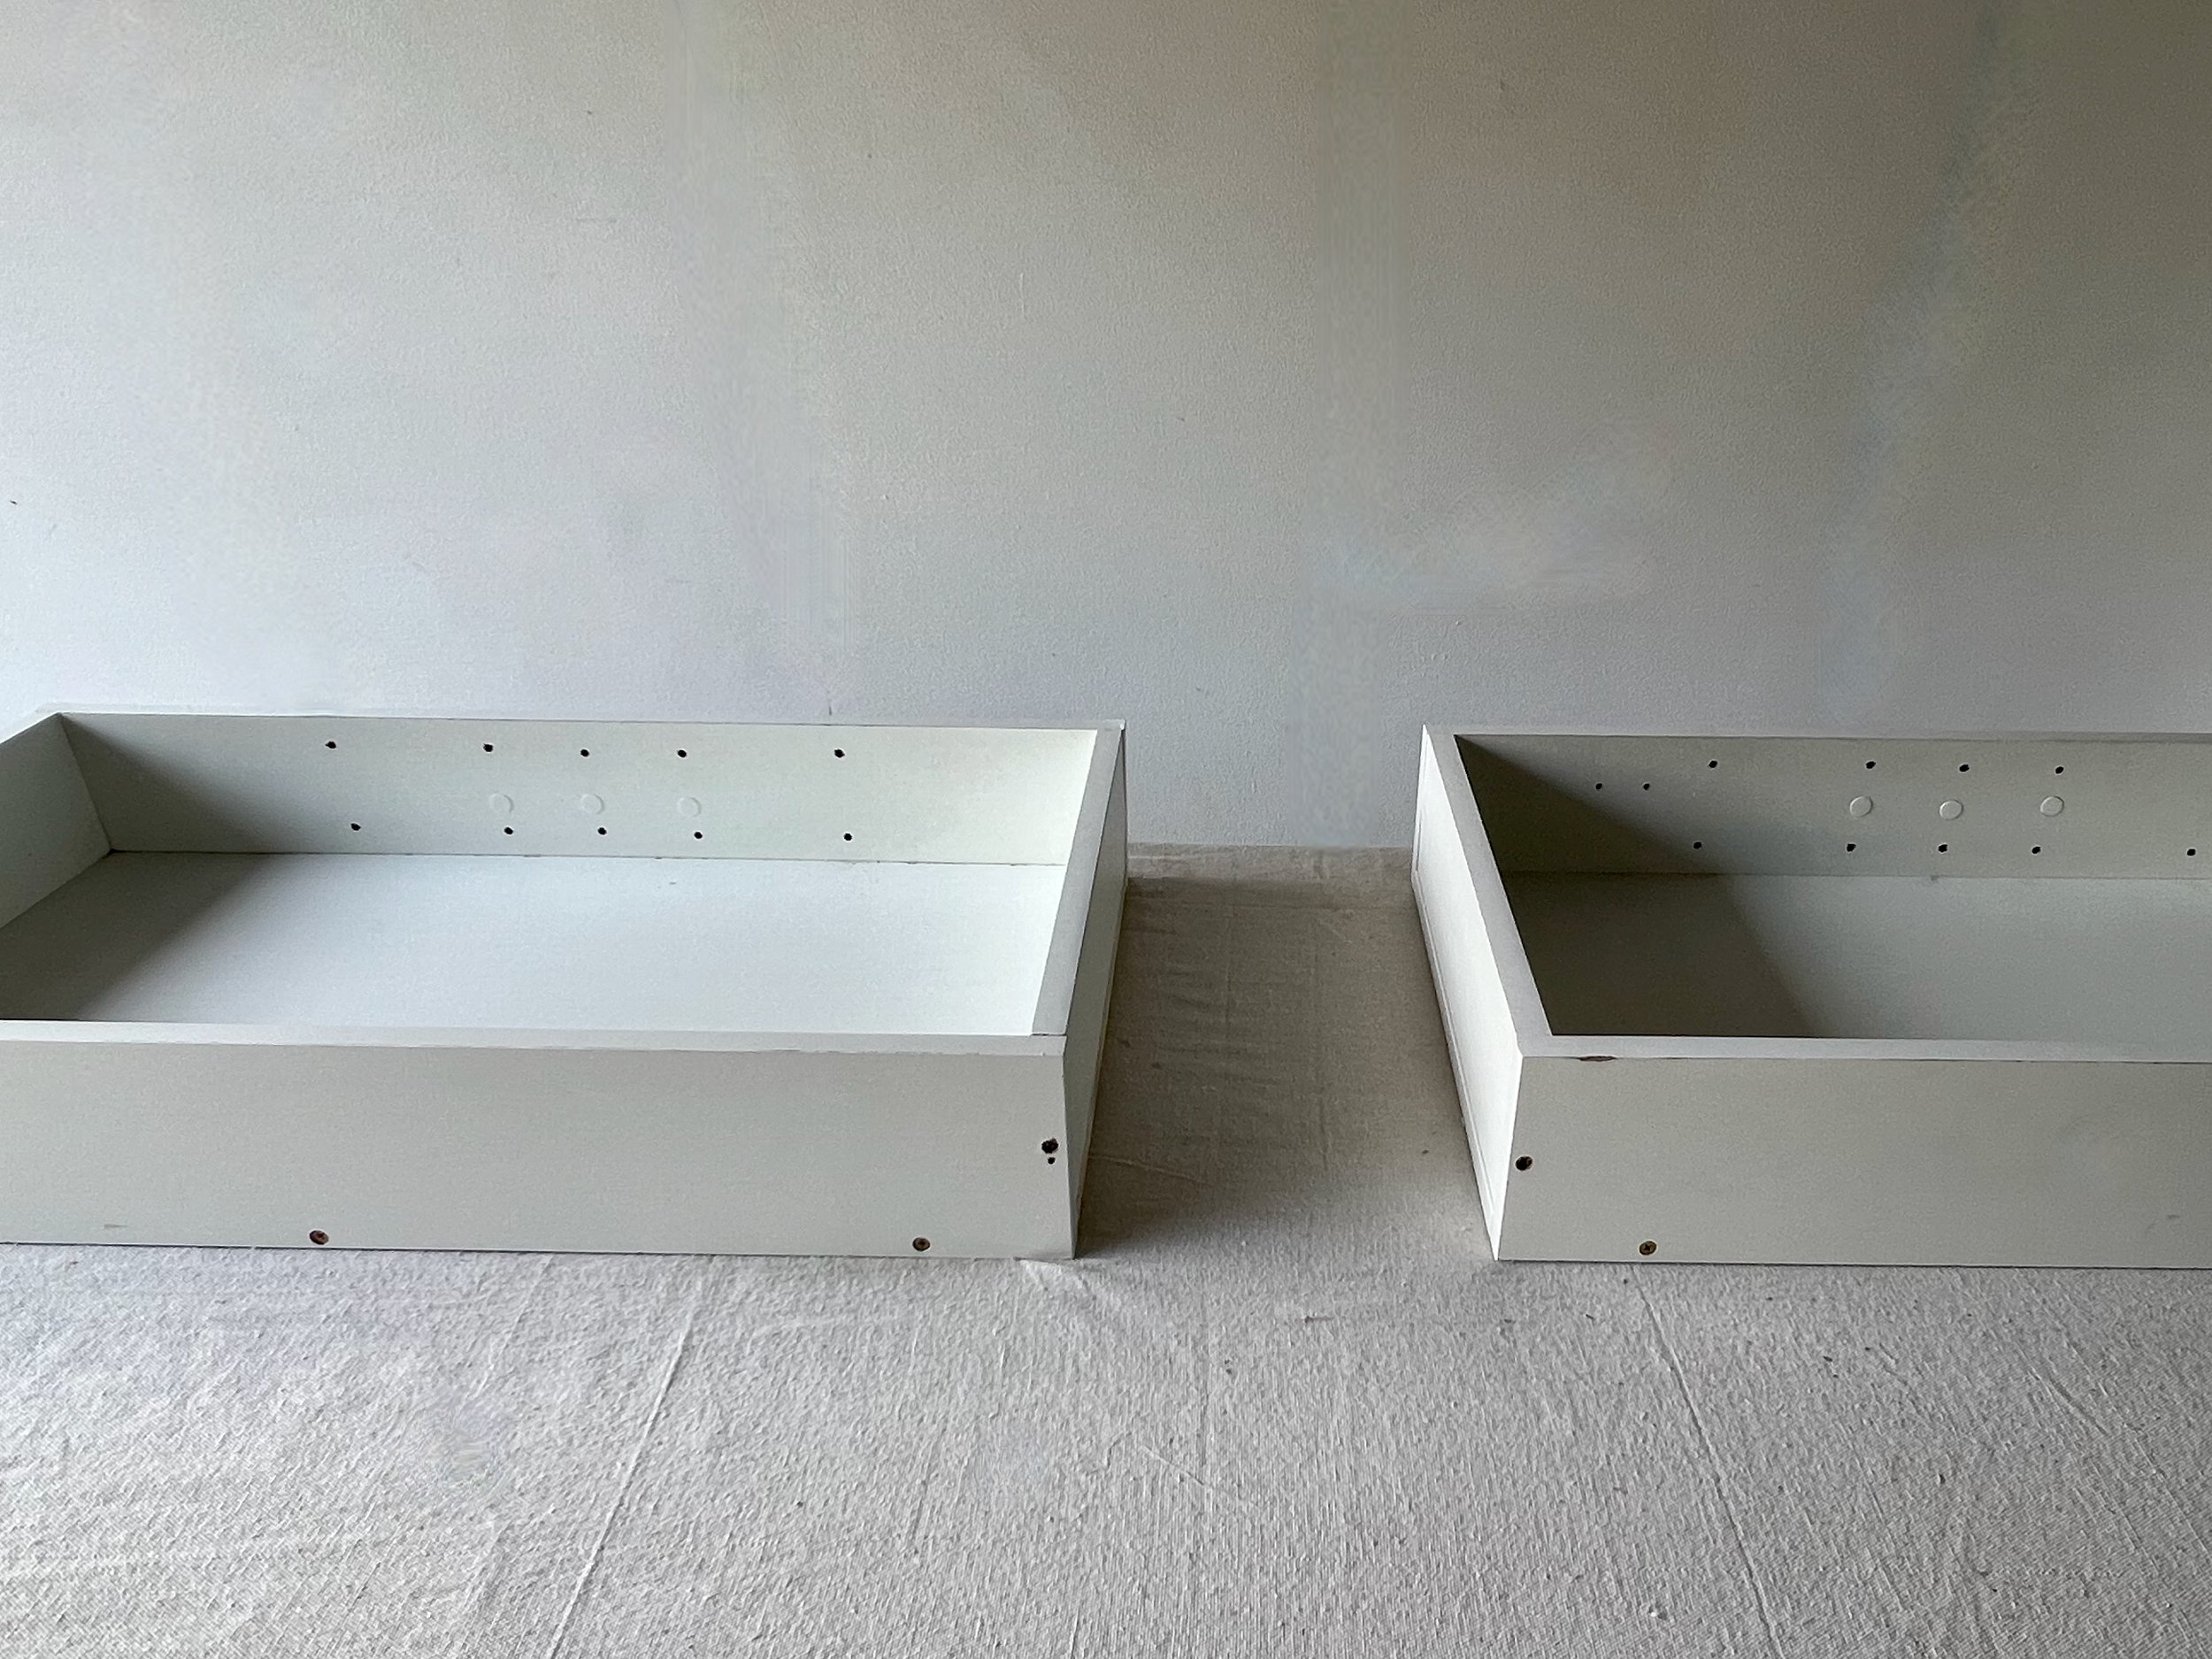
MY FLAT-PACK CABINET HACK
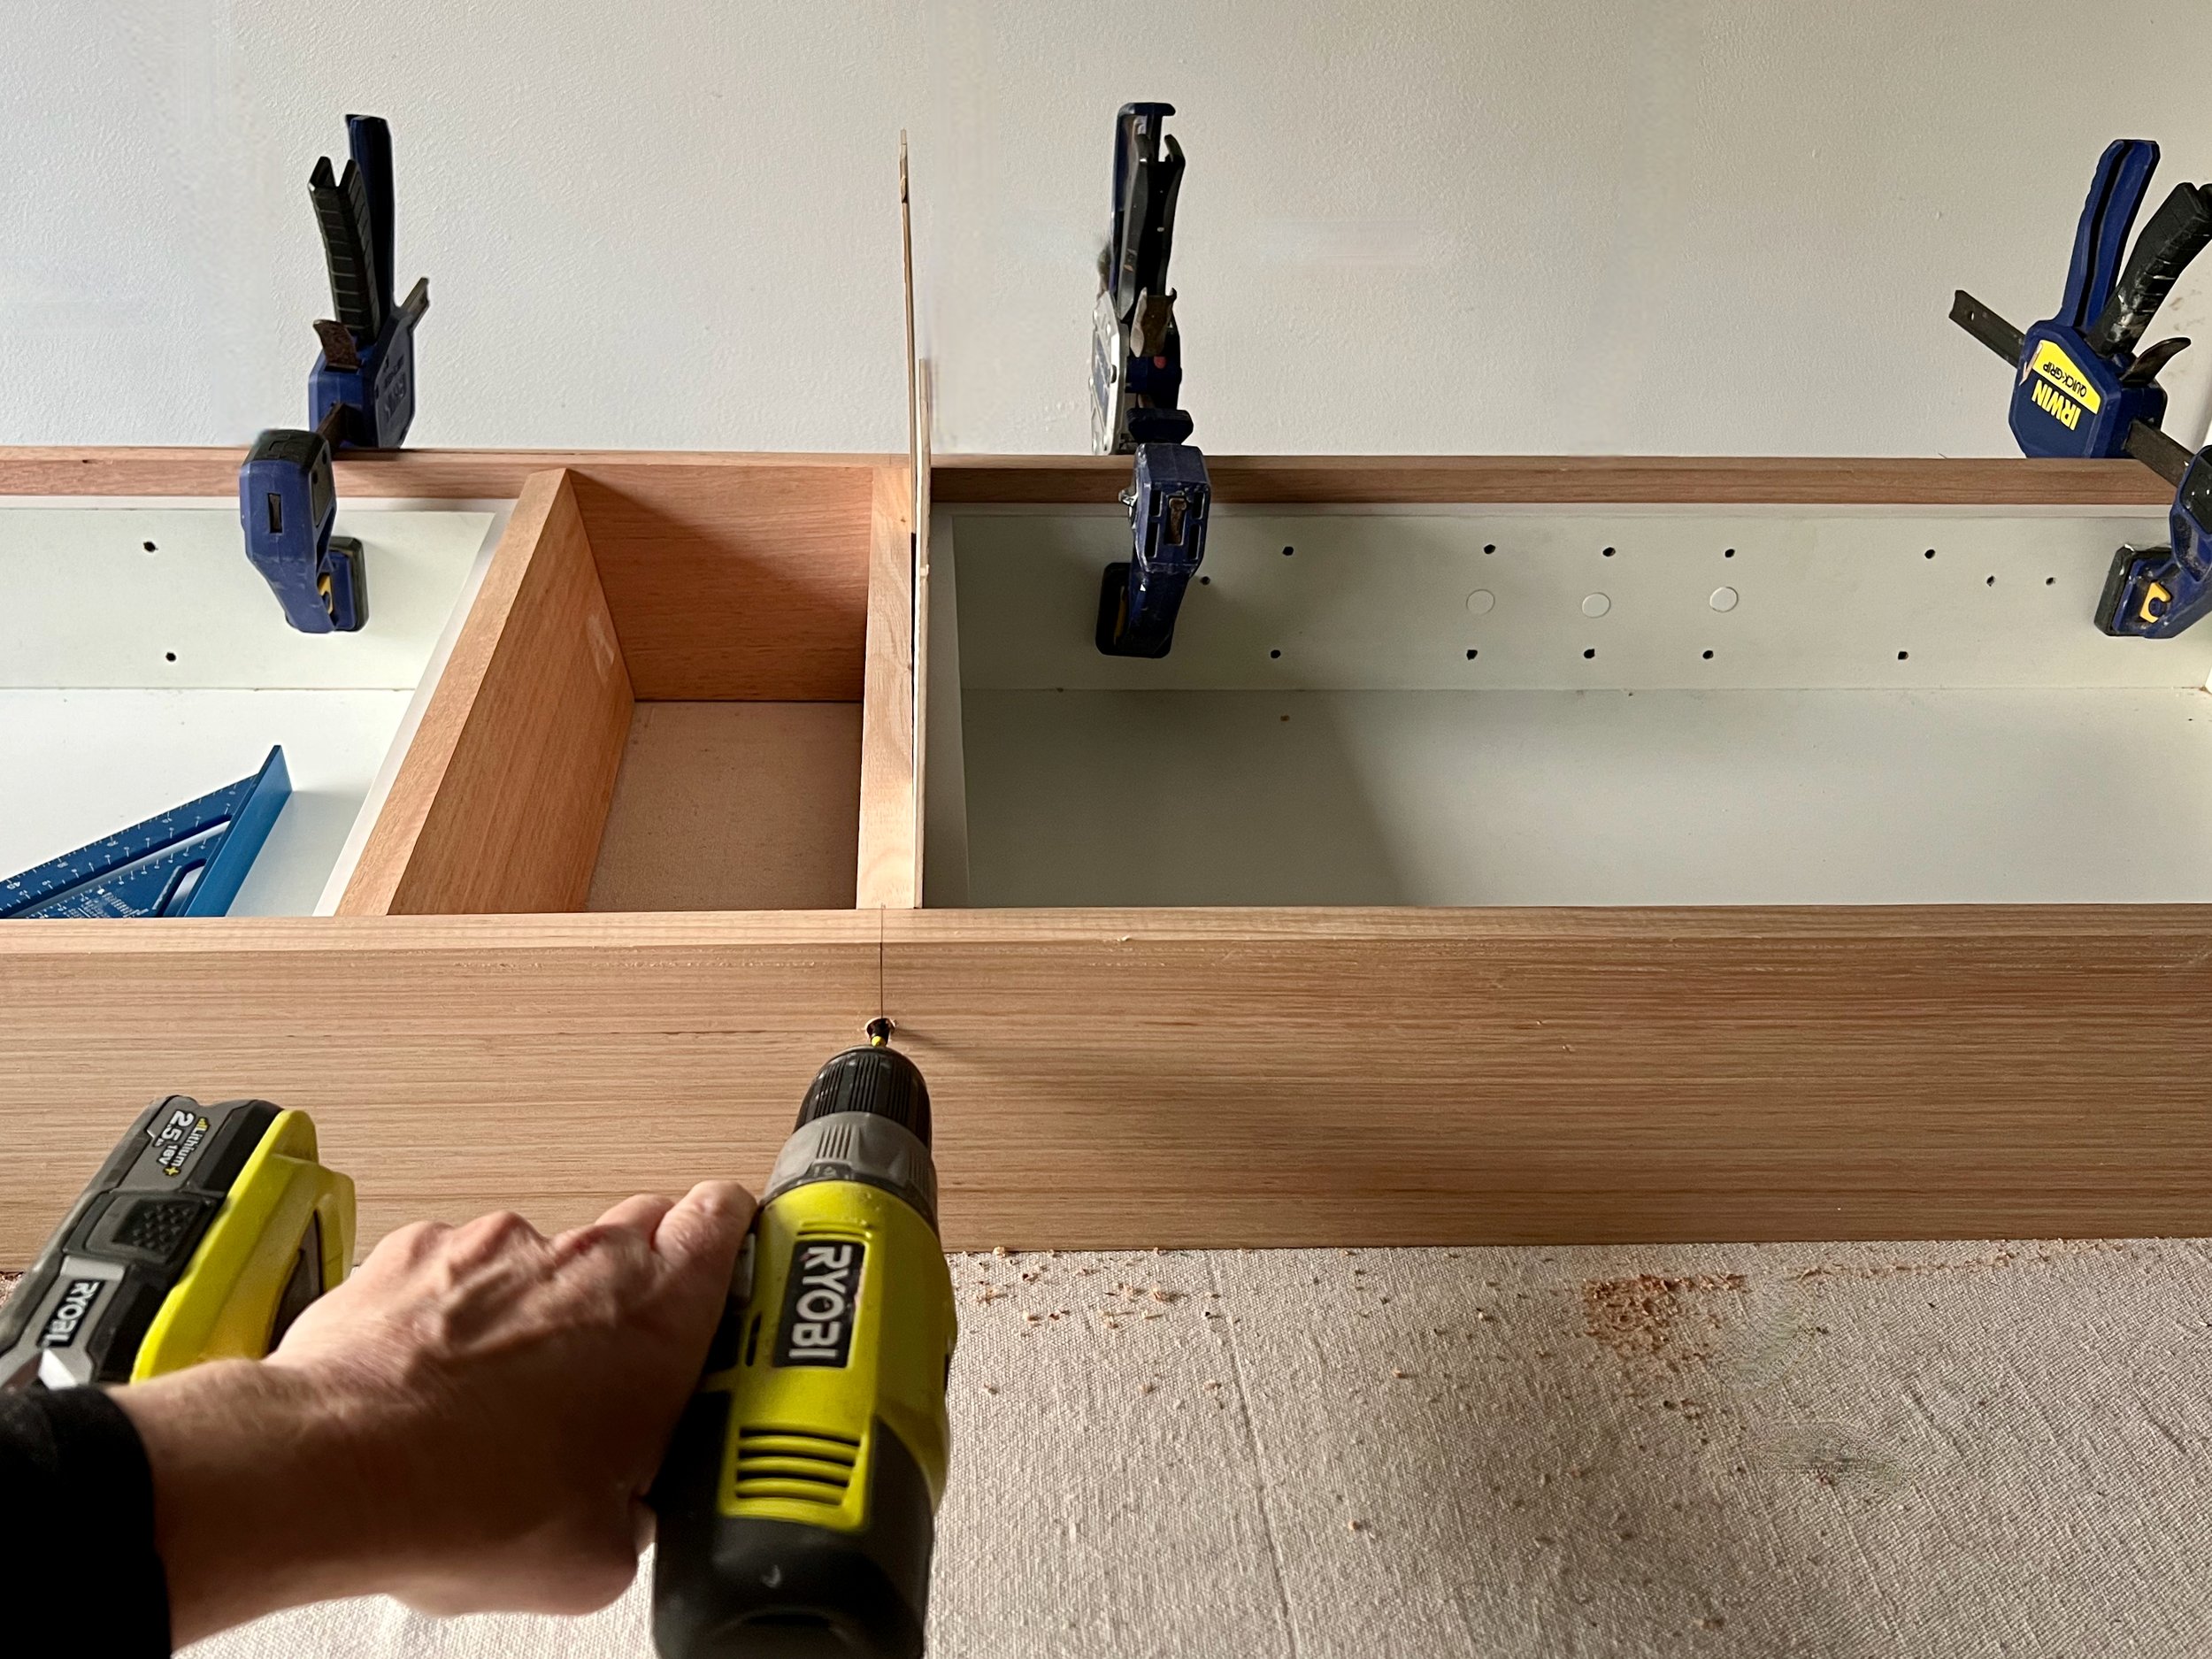
I cut a 720mm high x 400mm wide x 300mm deep flatpack unit in half depth-ways then reassembled it as two slim cabinets. I clad around it with a timber frame made from the same Tasmanian oak as the bench joinery.
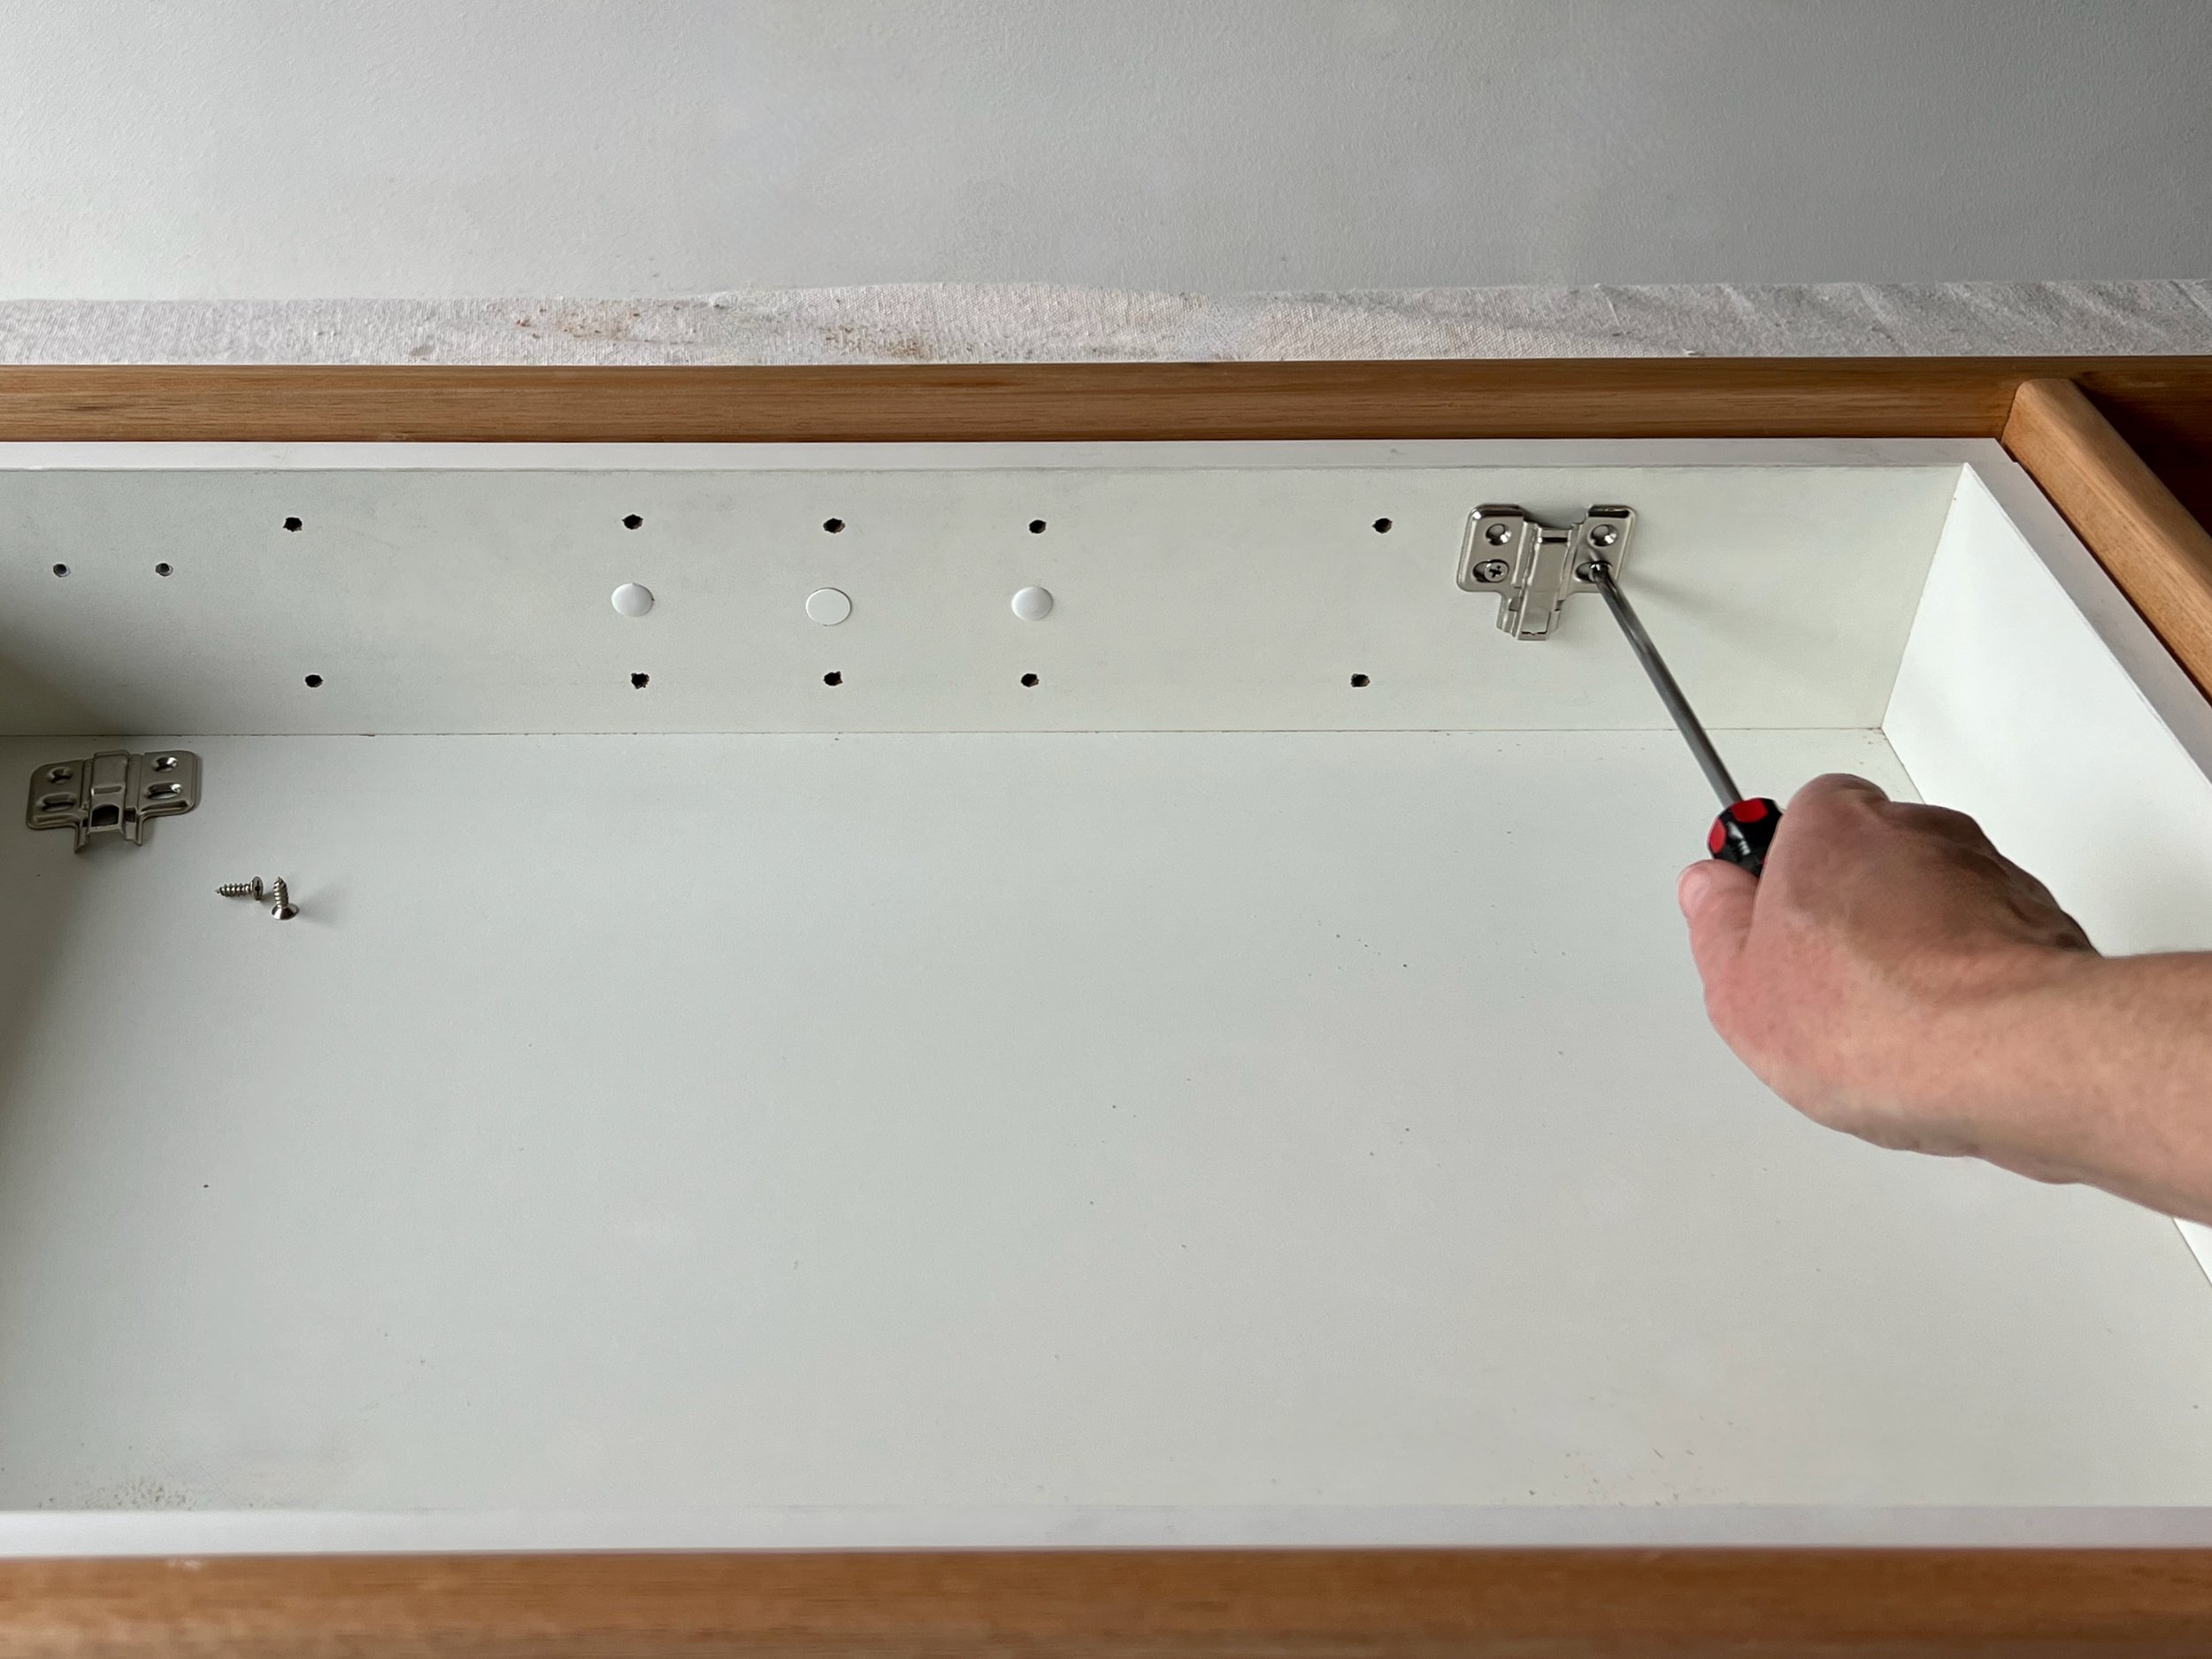
Adding push-to-open hinges eliminates the need for handles, and the raw MDF doors are finished in the same paint as the walls for a seamless finish.
Using the same method as the shaving cabinet, the builder constructed wall framing to accomodate the cabinet, then I sheeted the wall, installed and added painted moulding to hide the join.
The flatpack cabinet cost about $95 and the doors $35 each. See my step-by-step DIY process here.
POWER PLAY
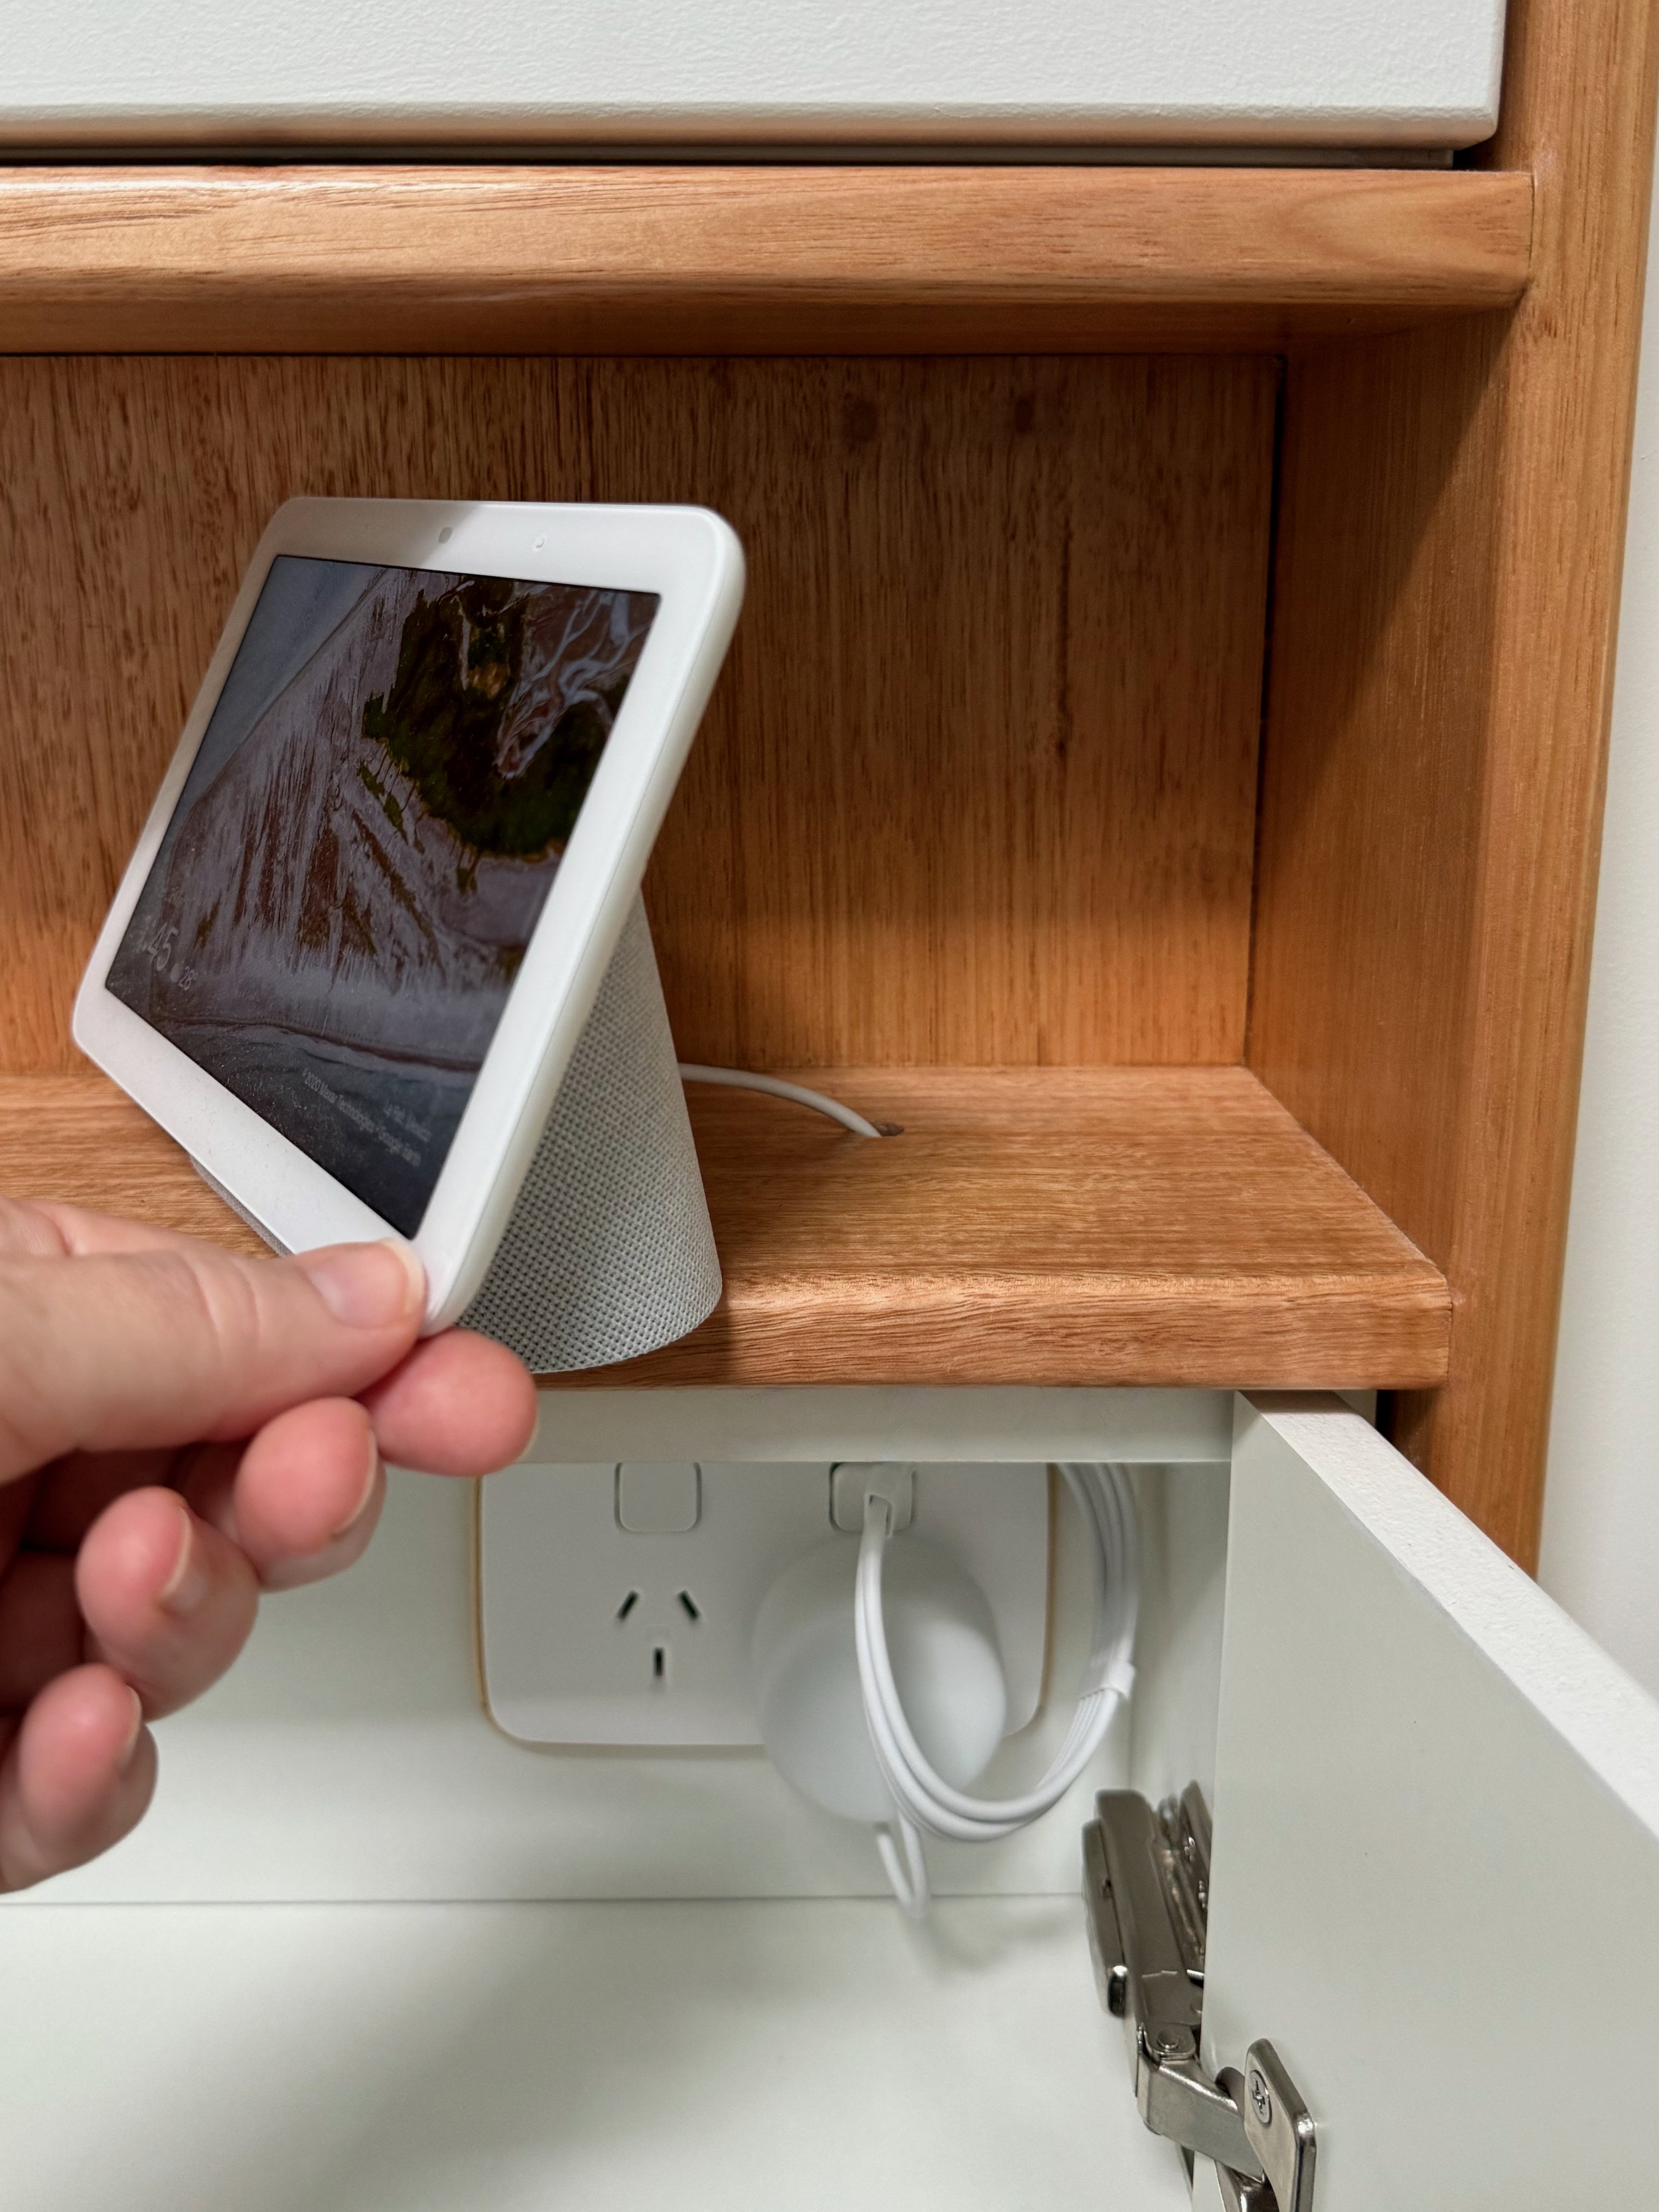
A shelf at the middle of the built-in cabinet is the perfect height for a Google Nest display screen plugged into the power point below via a hidden hole.
A double power point is also in the top cabinet for recharging USB appliances such as a hair straightener and shaver.
LOVELY LIGHTING
I’d planned for just one voice-activated ceiling lamp over the basin, but while the electrician had access to the roof they ran extra wiring to above the shower recess in case this wasn’t enough light and I decided to add another down the track.
For now, the ceiling and sensor lights, magnifying mirror and a little shelf lamp all add up to a well-lit room.

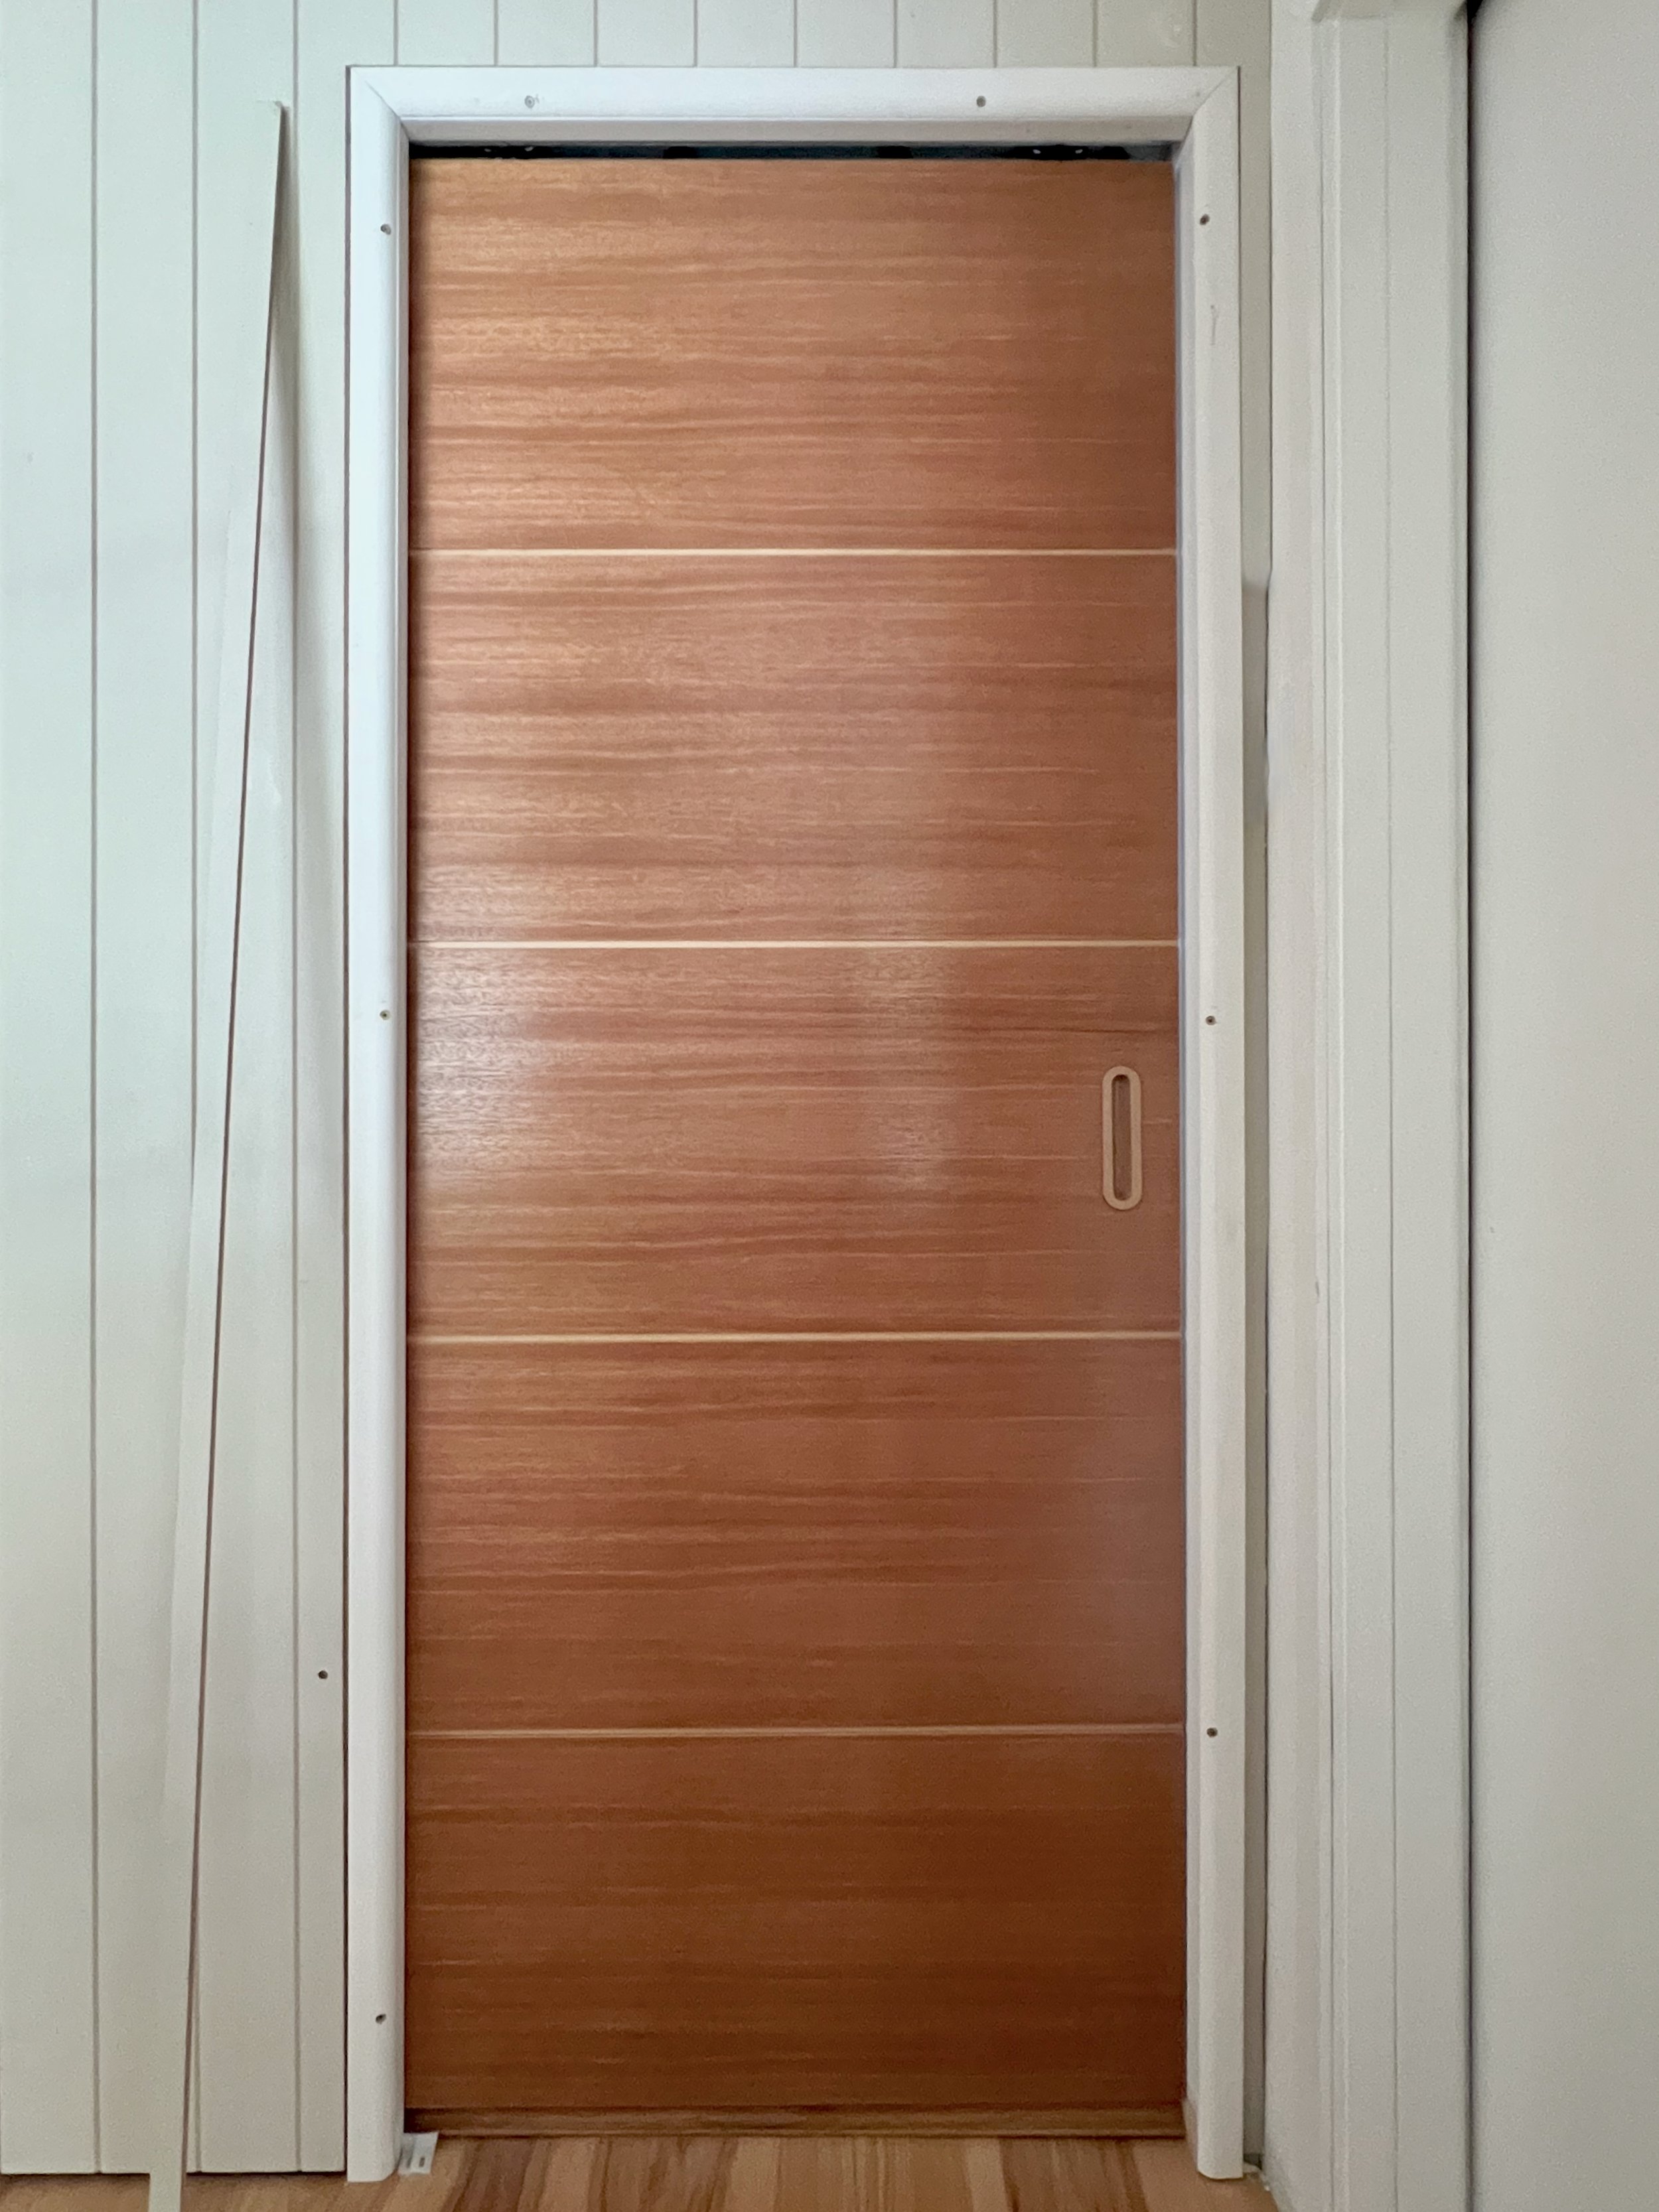
SPACE-SAVING SLIDING DOOR
I love the beautiful handcrafted look of this sliding Hume Doors door with customised flush pull handles. It simply glides into the wall cavity, swapping out the original swinging door to reclaim floor space.
INSTALLING THE DOOR
For the sliding door, the builder assembled a store-bought cavity unit and integrated it into the framing along with a jamb, then sheeted it as part of the wall.
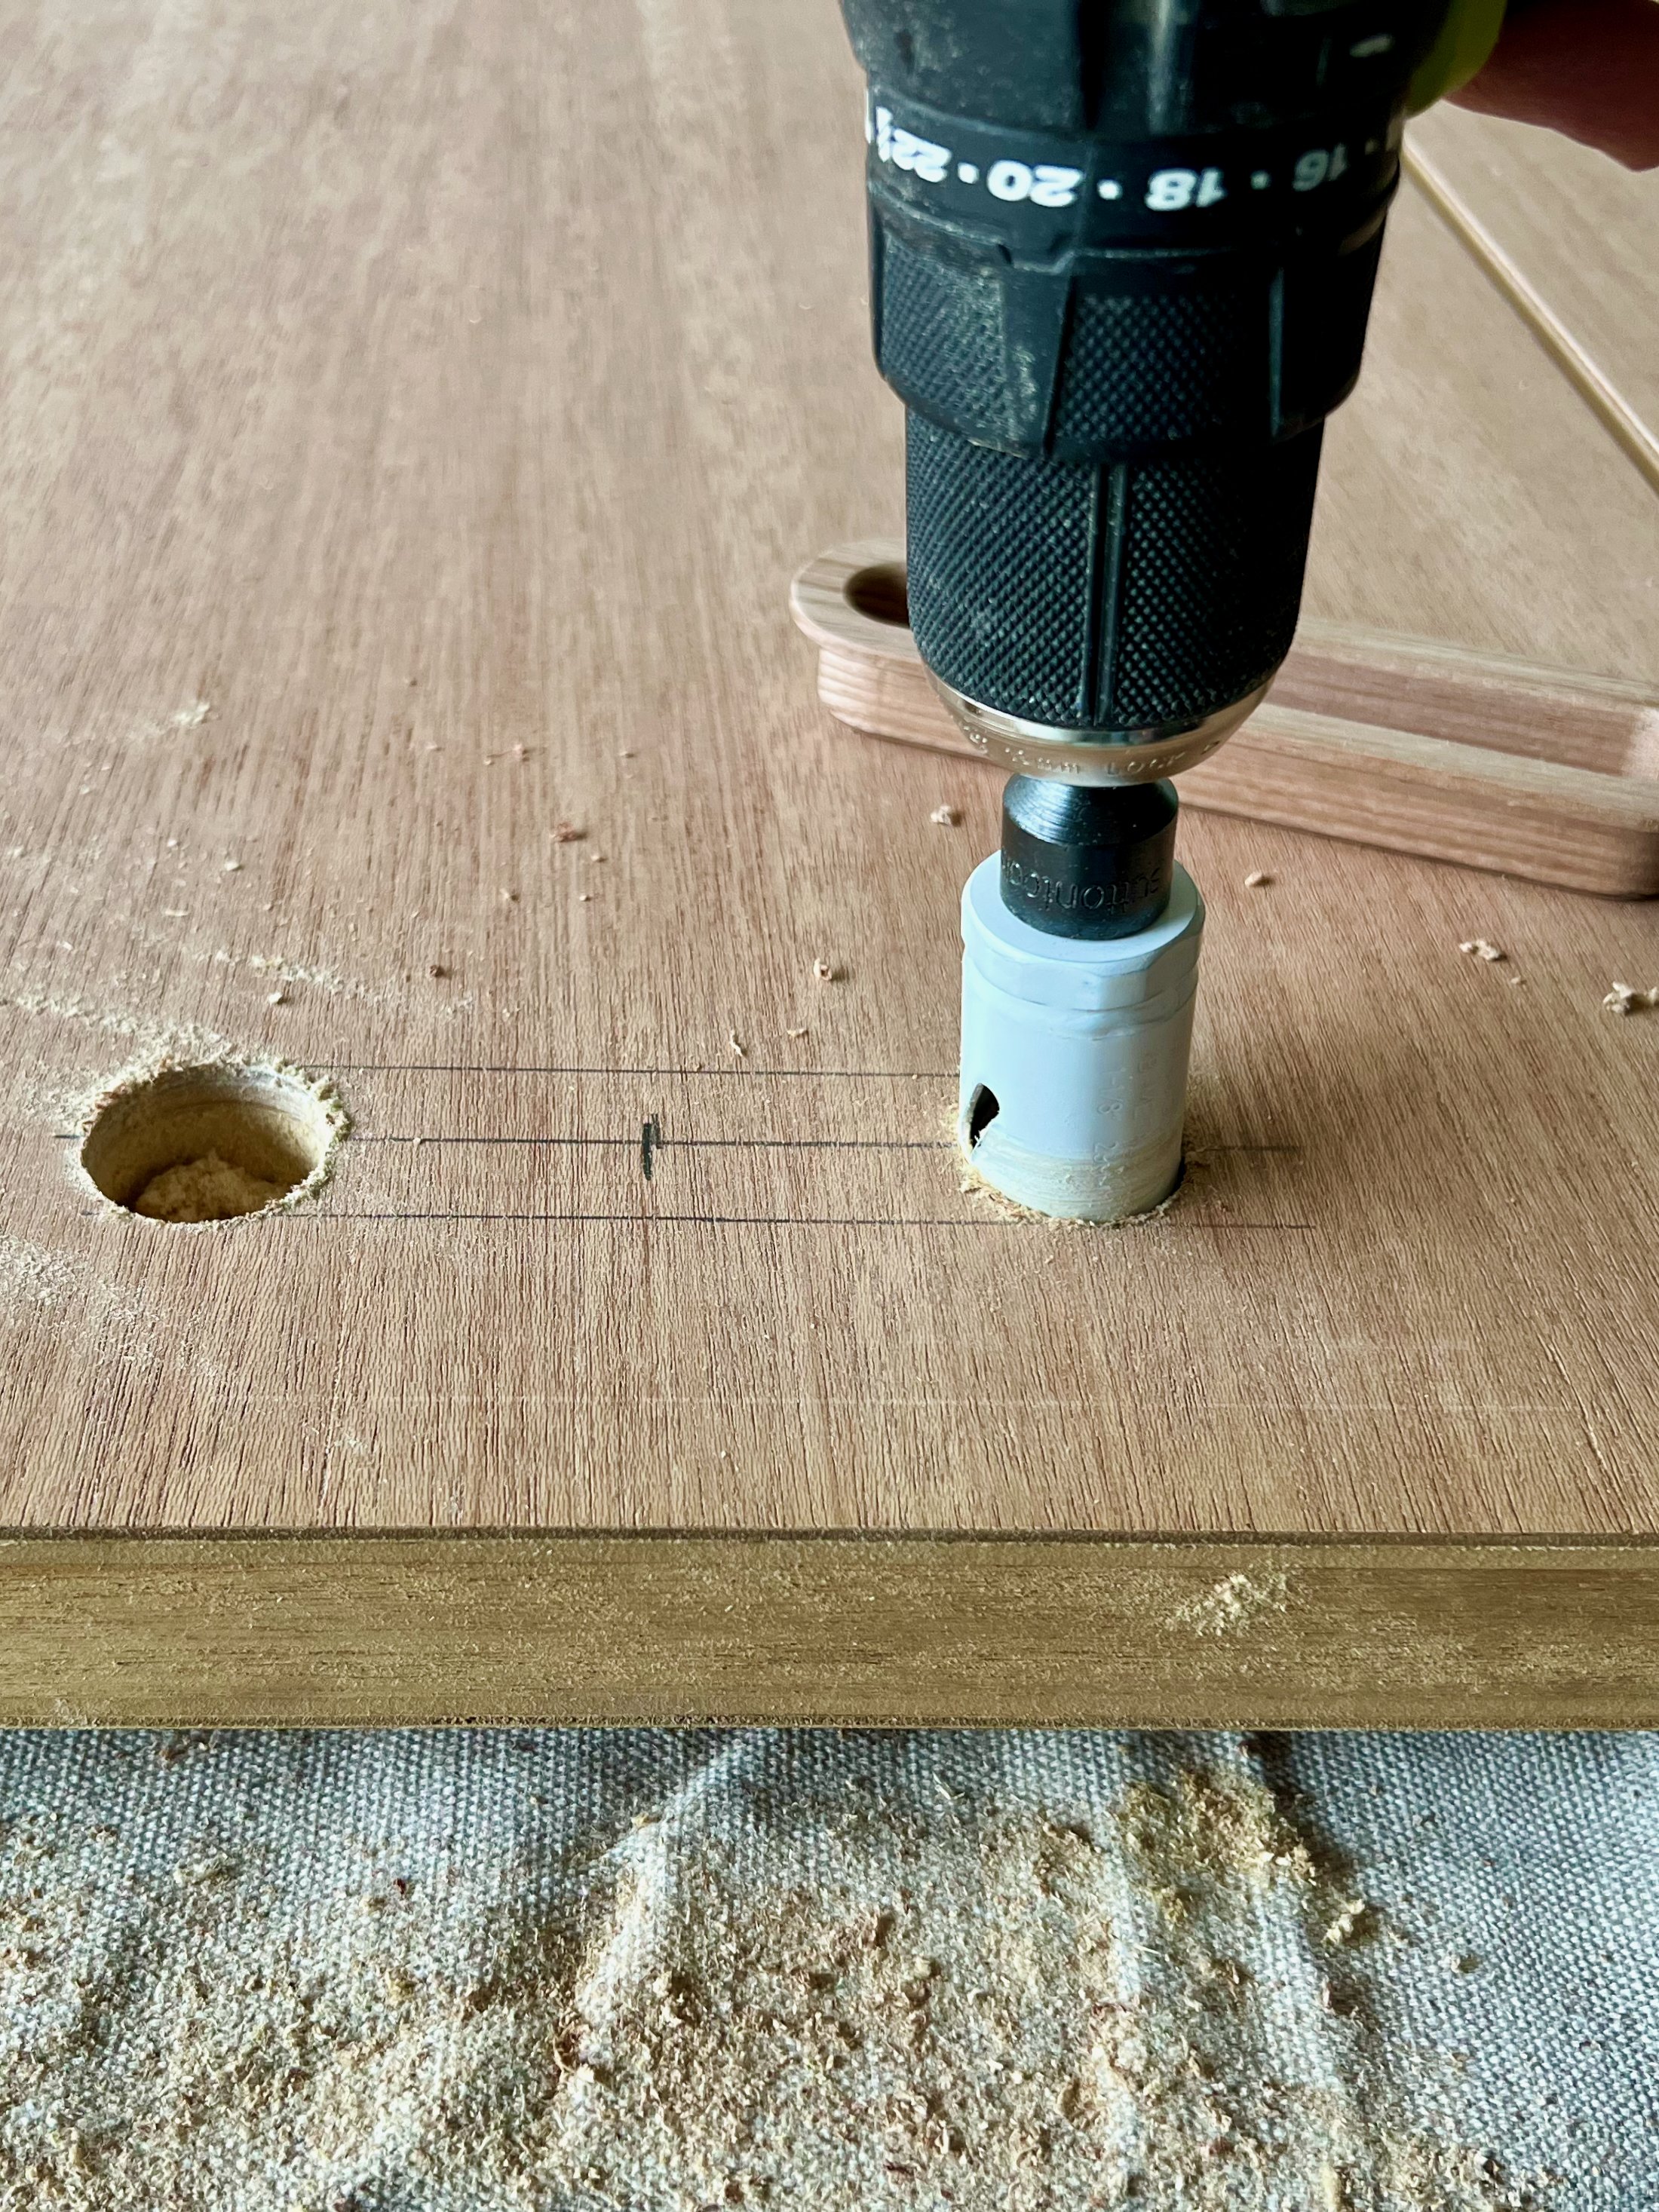
I installed the handle set before hanging the door, sealing them in a matt Monocel Waterbased Clear Varnish in Satin for a lovely tactile finish.
The 150mm-long Auburn Woodturning flush pull handles are big enough for all hands to operate but small enough to fit elegantly into the linear design.
I have yet to install this sliding door end pull along with a concealed magnetic catch.
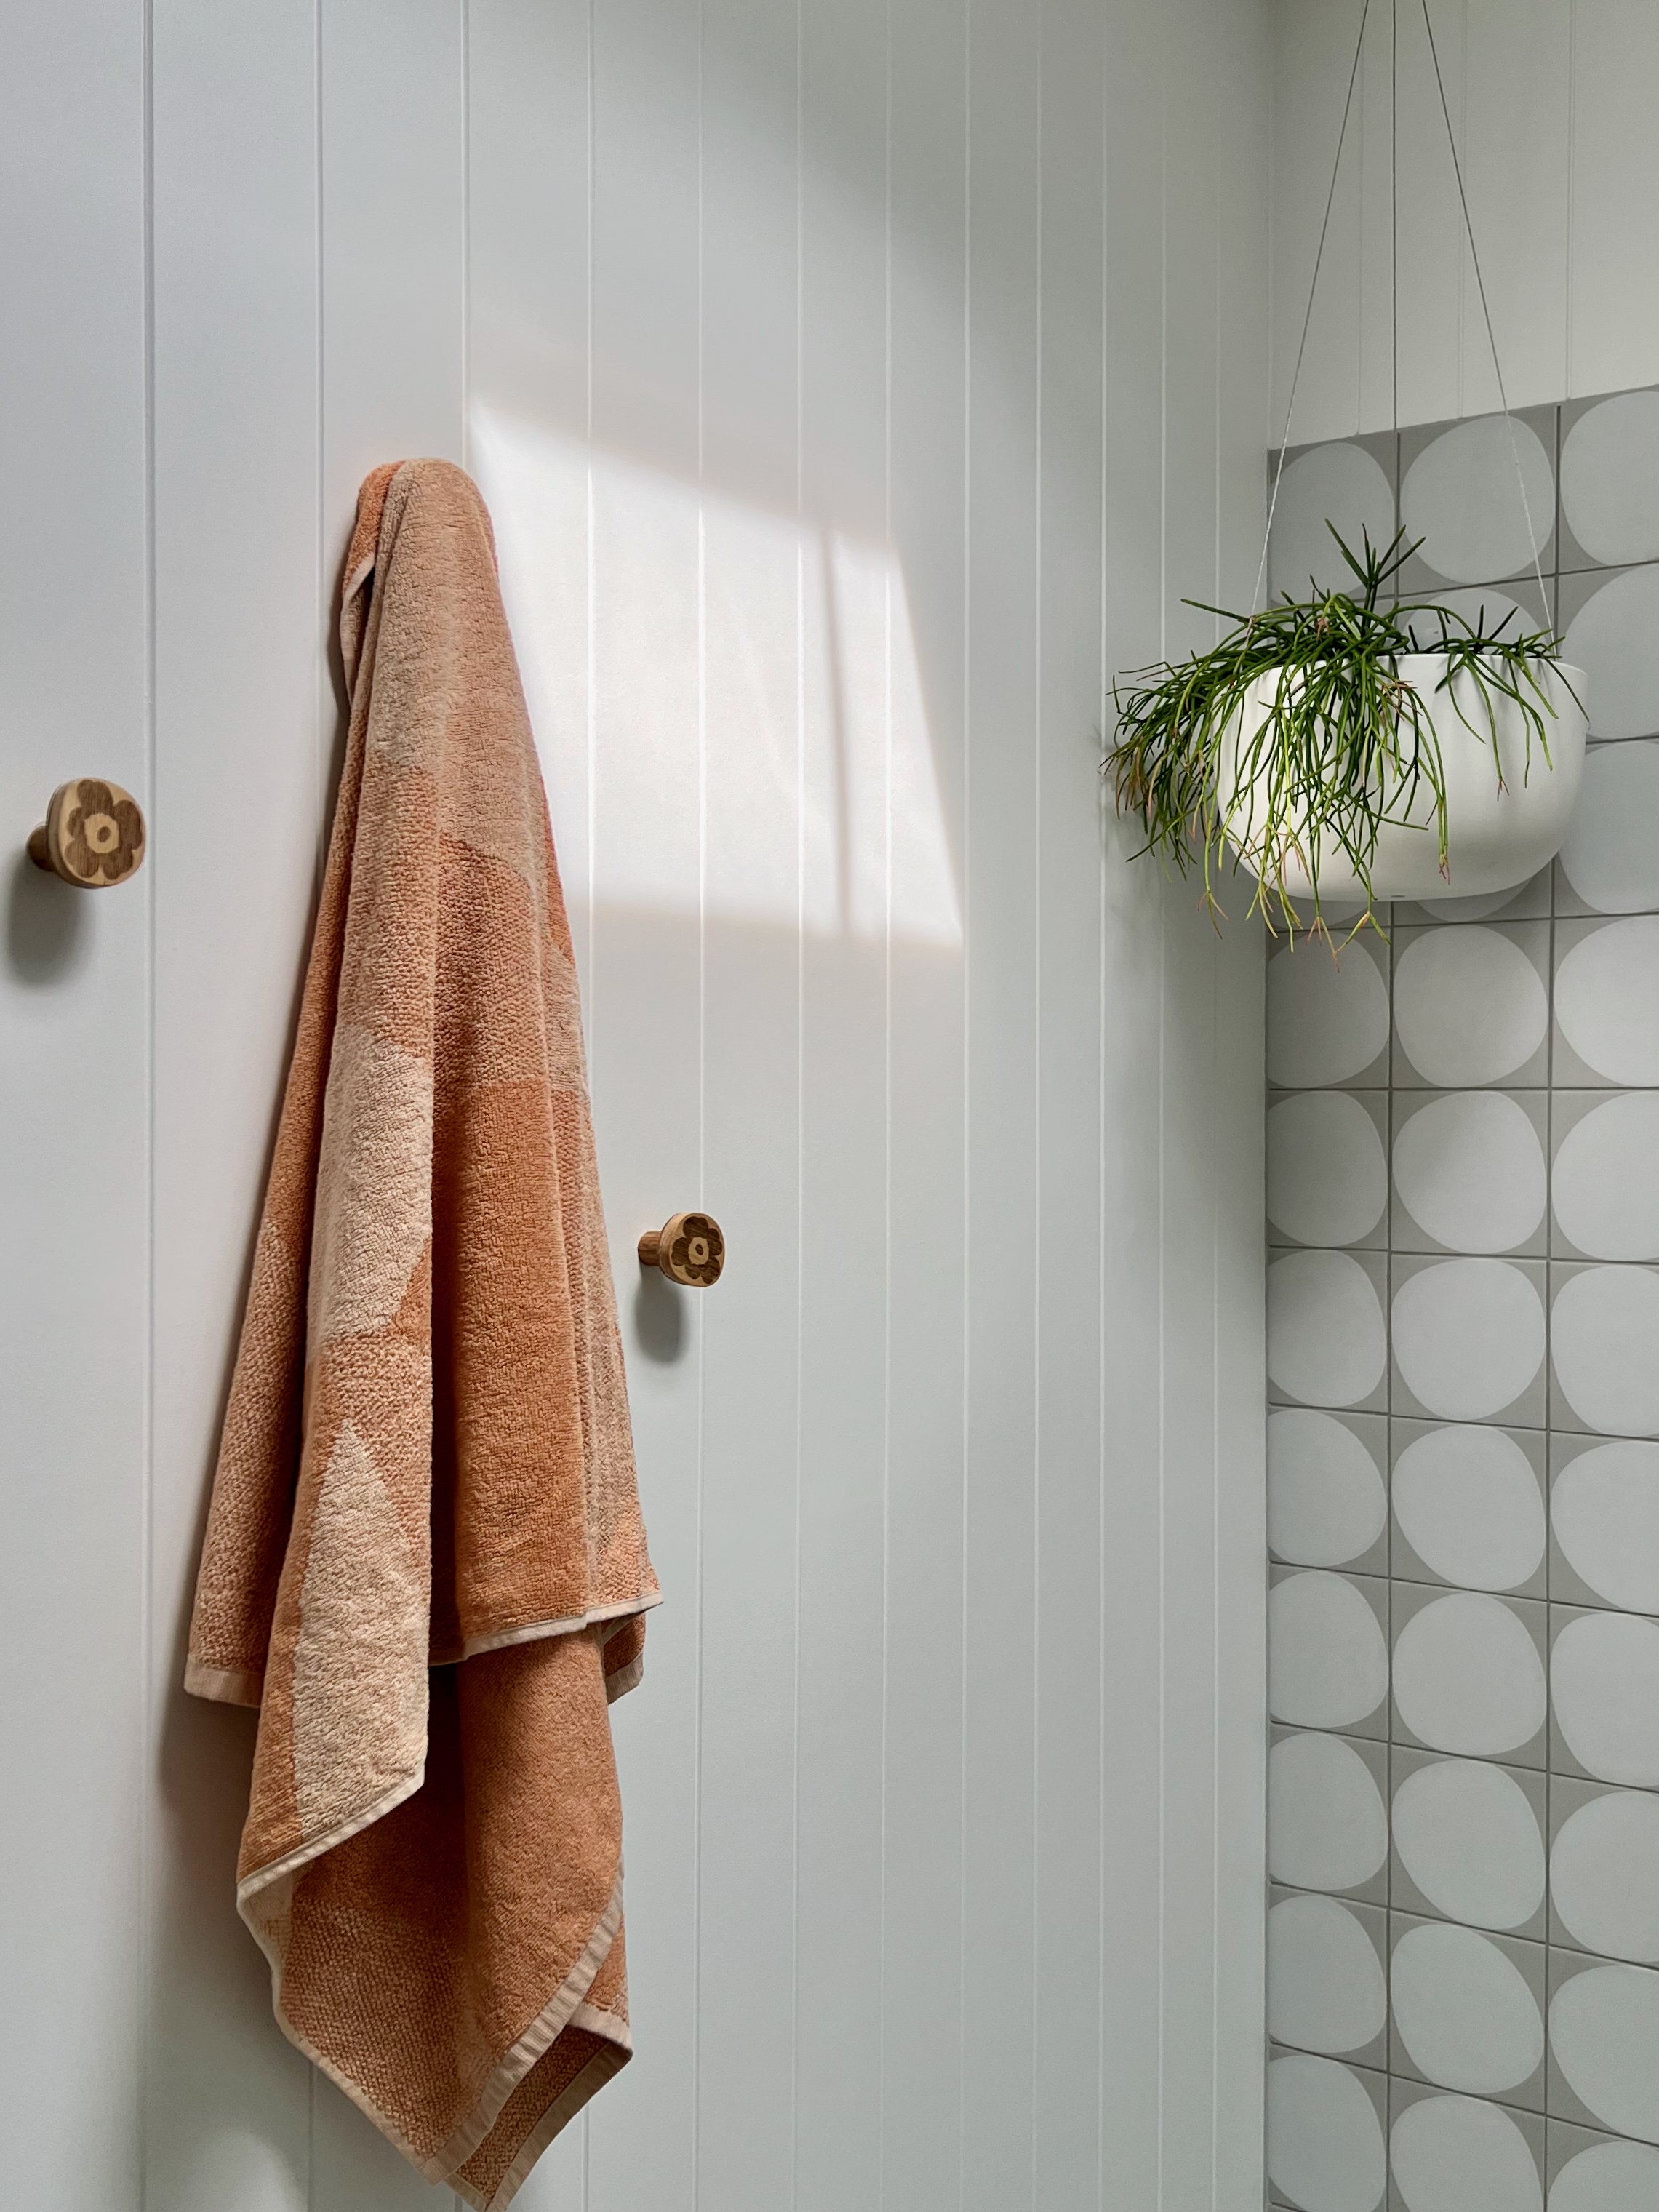
FASHIONABLE WALL PEGS
I combined my favourite label logo with my fave pastime of woodworking to make these wall pegs. Yes, they work perfectly. No the towels don’t slip off.

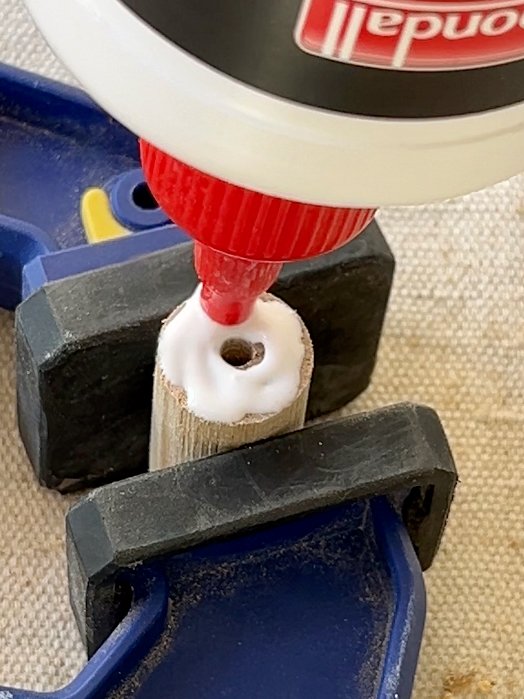

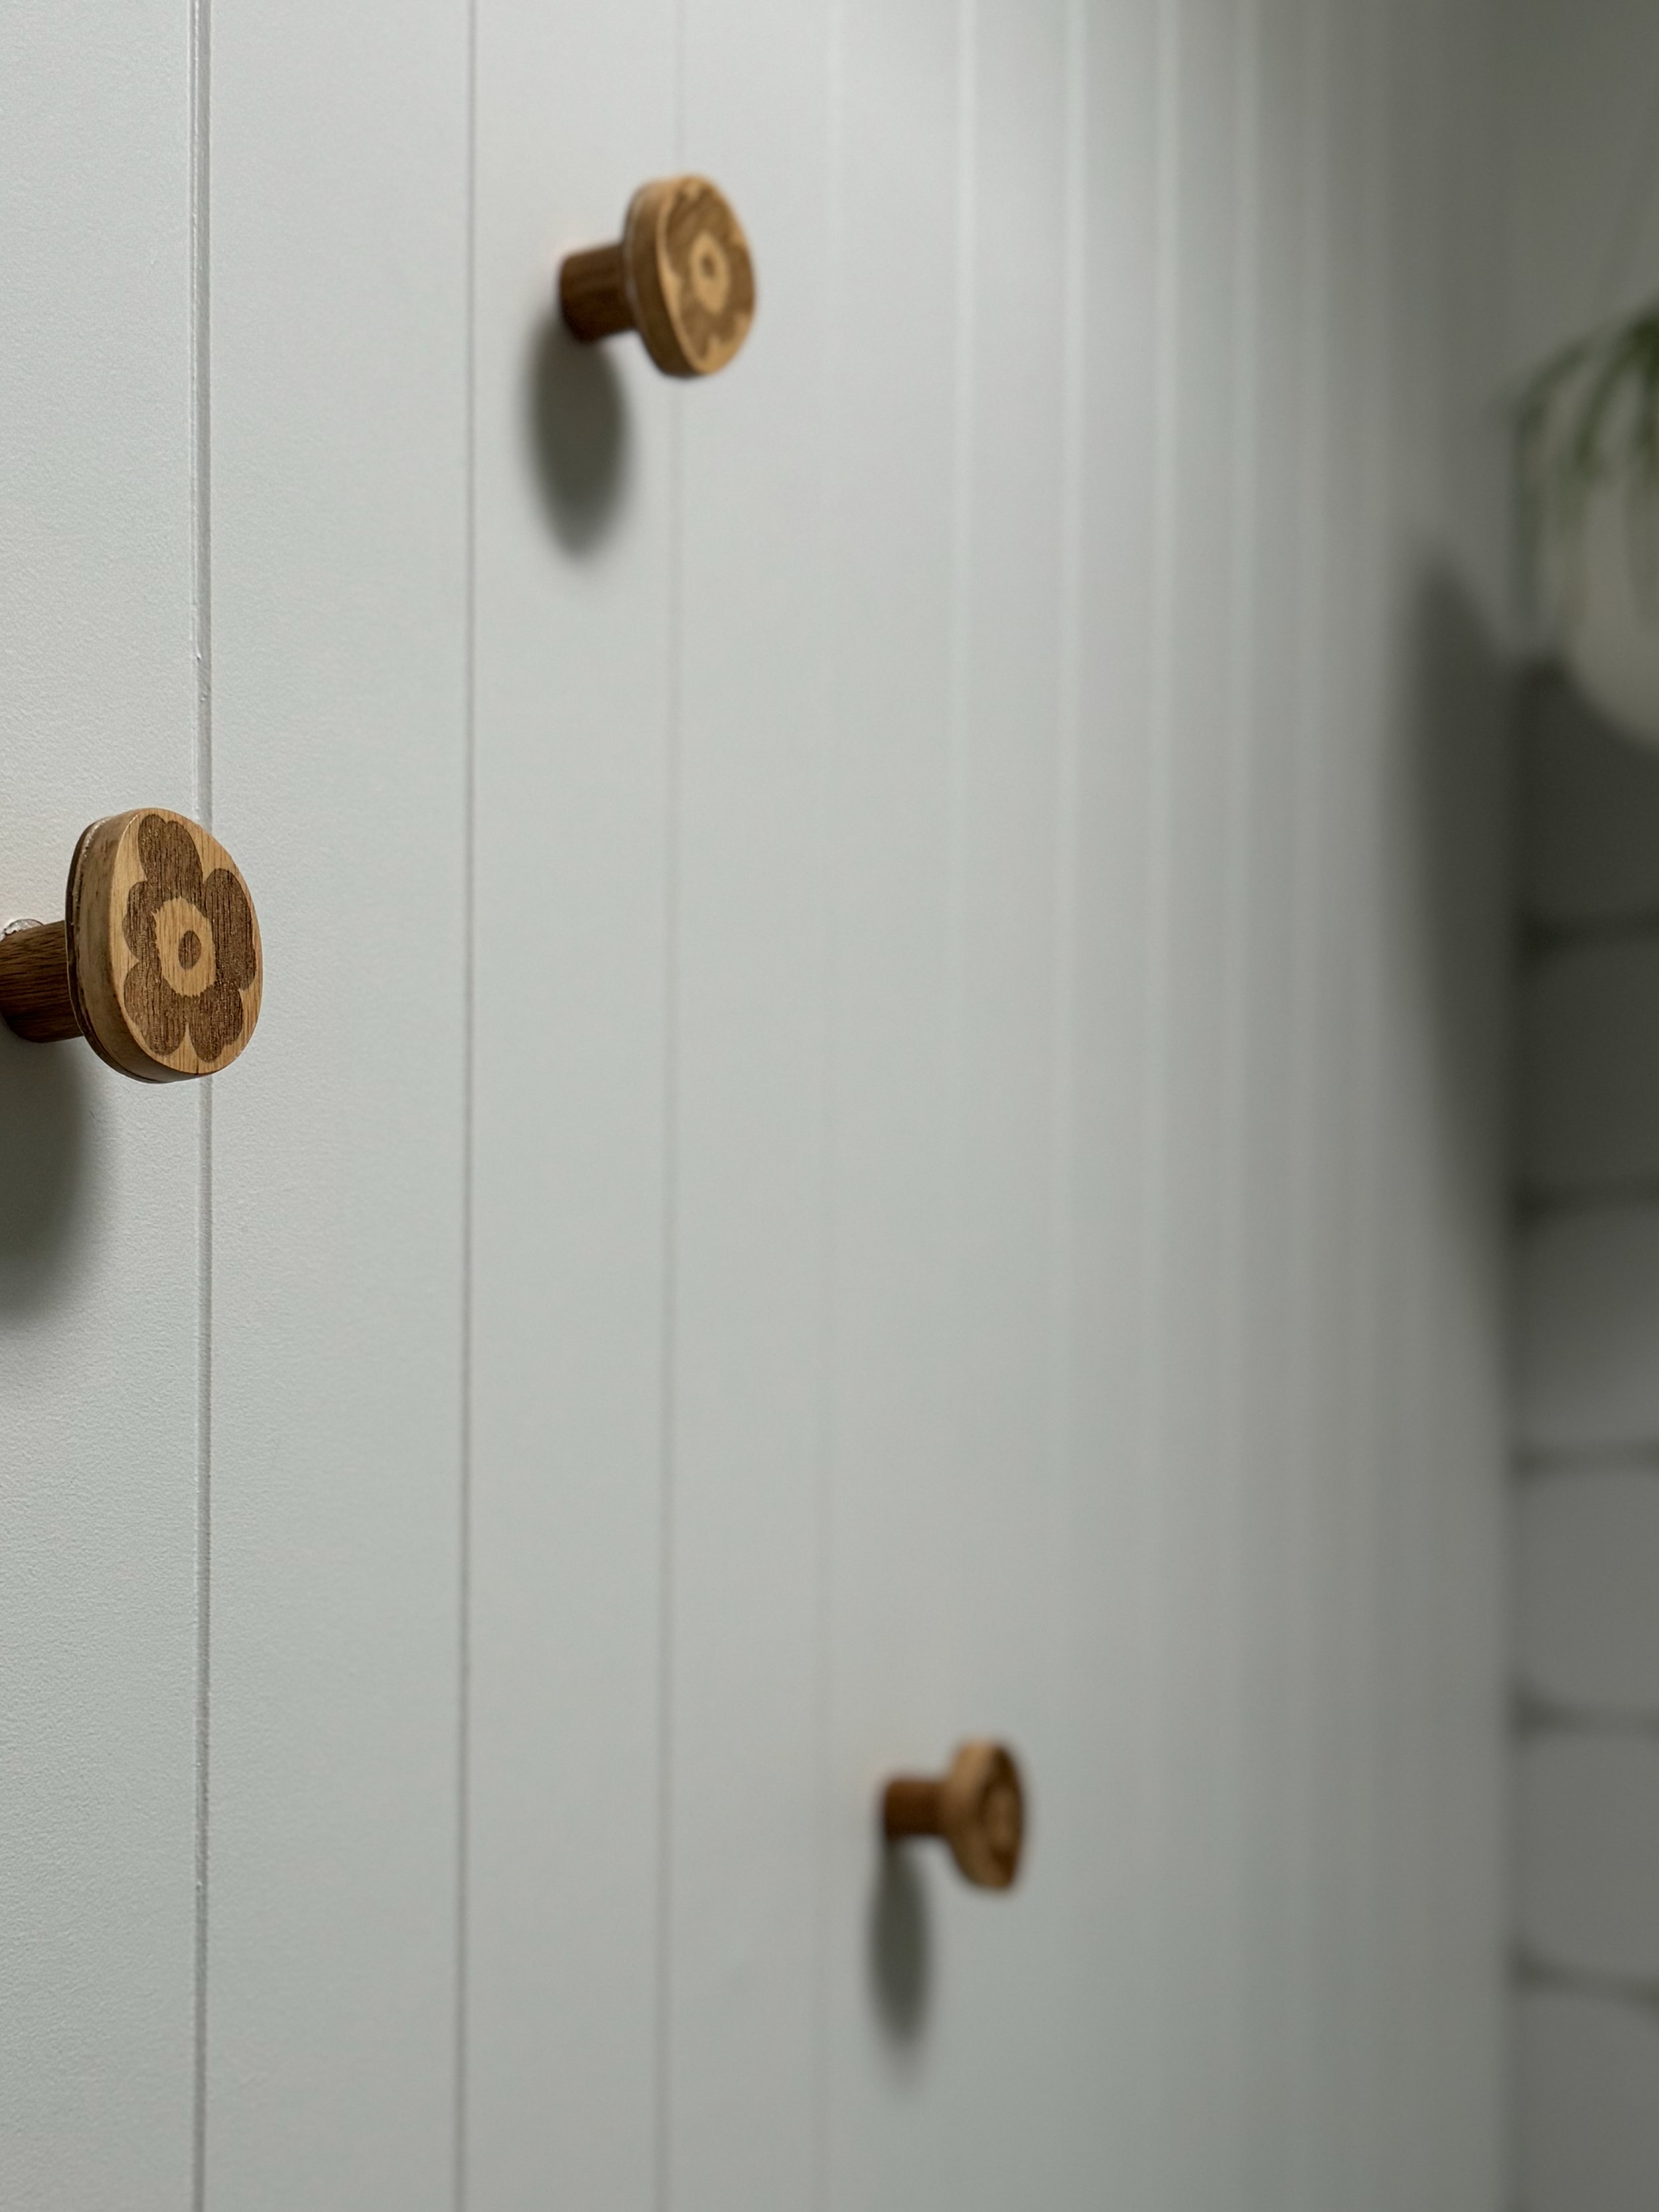
MY CHOPSTICK-REST HACK
I attached Marimekko chopstick rests to plywood backing and dowel then secured them into the wall studs with long screws.
Three are positioned for towels close to the shower, and another near the basin for a hand towel.

ADDING GREENERY
Lastly, I added a beautiful 300mm-diameter porcelain pot with the supplied stainless steel hanging system and a trailing succulent that survives on the shower steam and doesn’t require much watering.
TIP Before sheeting the ceiling, the builder added a batten between the rafters so I could hang this 200mm away from the walls using a white swivel ceiling hook so the plant can be rotated.
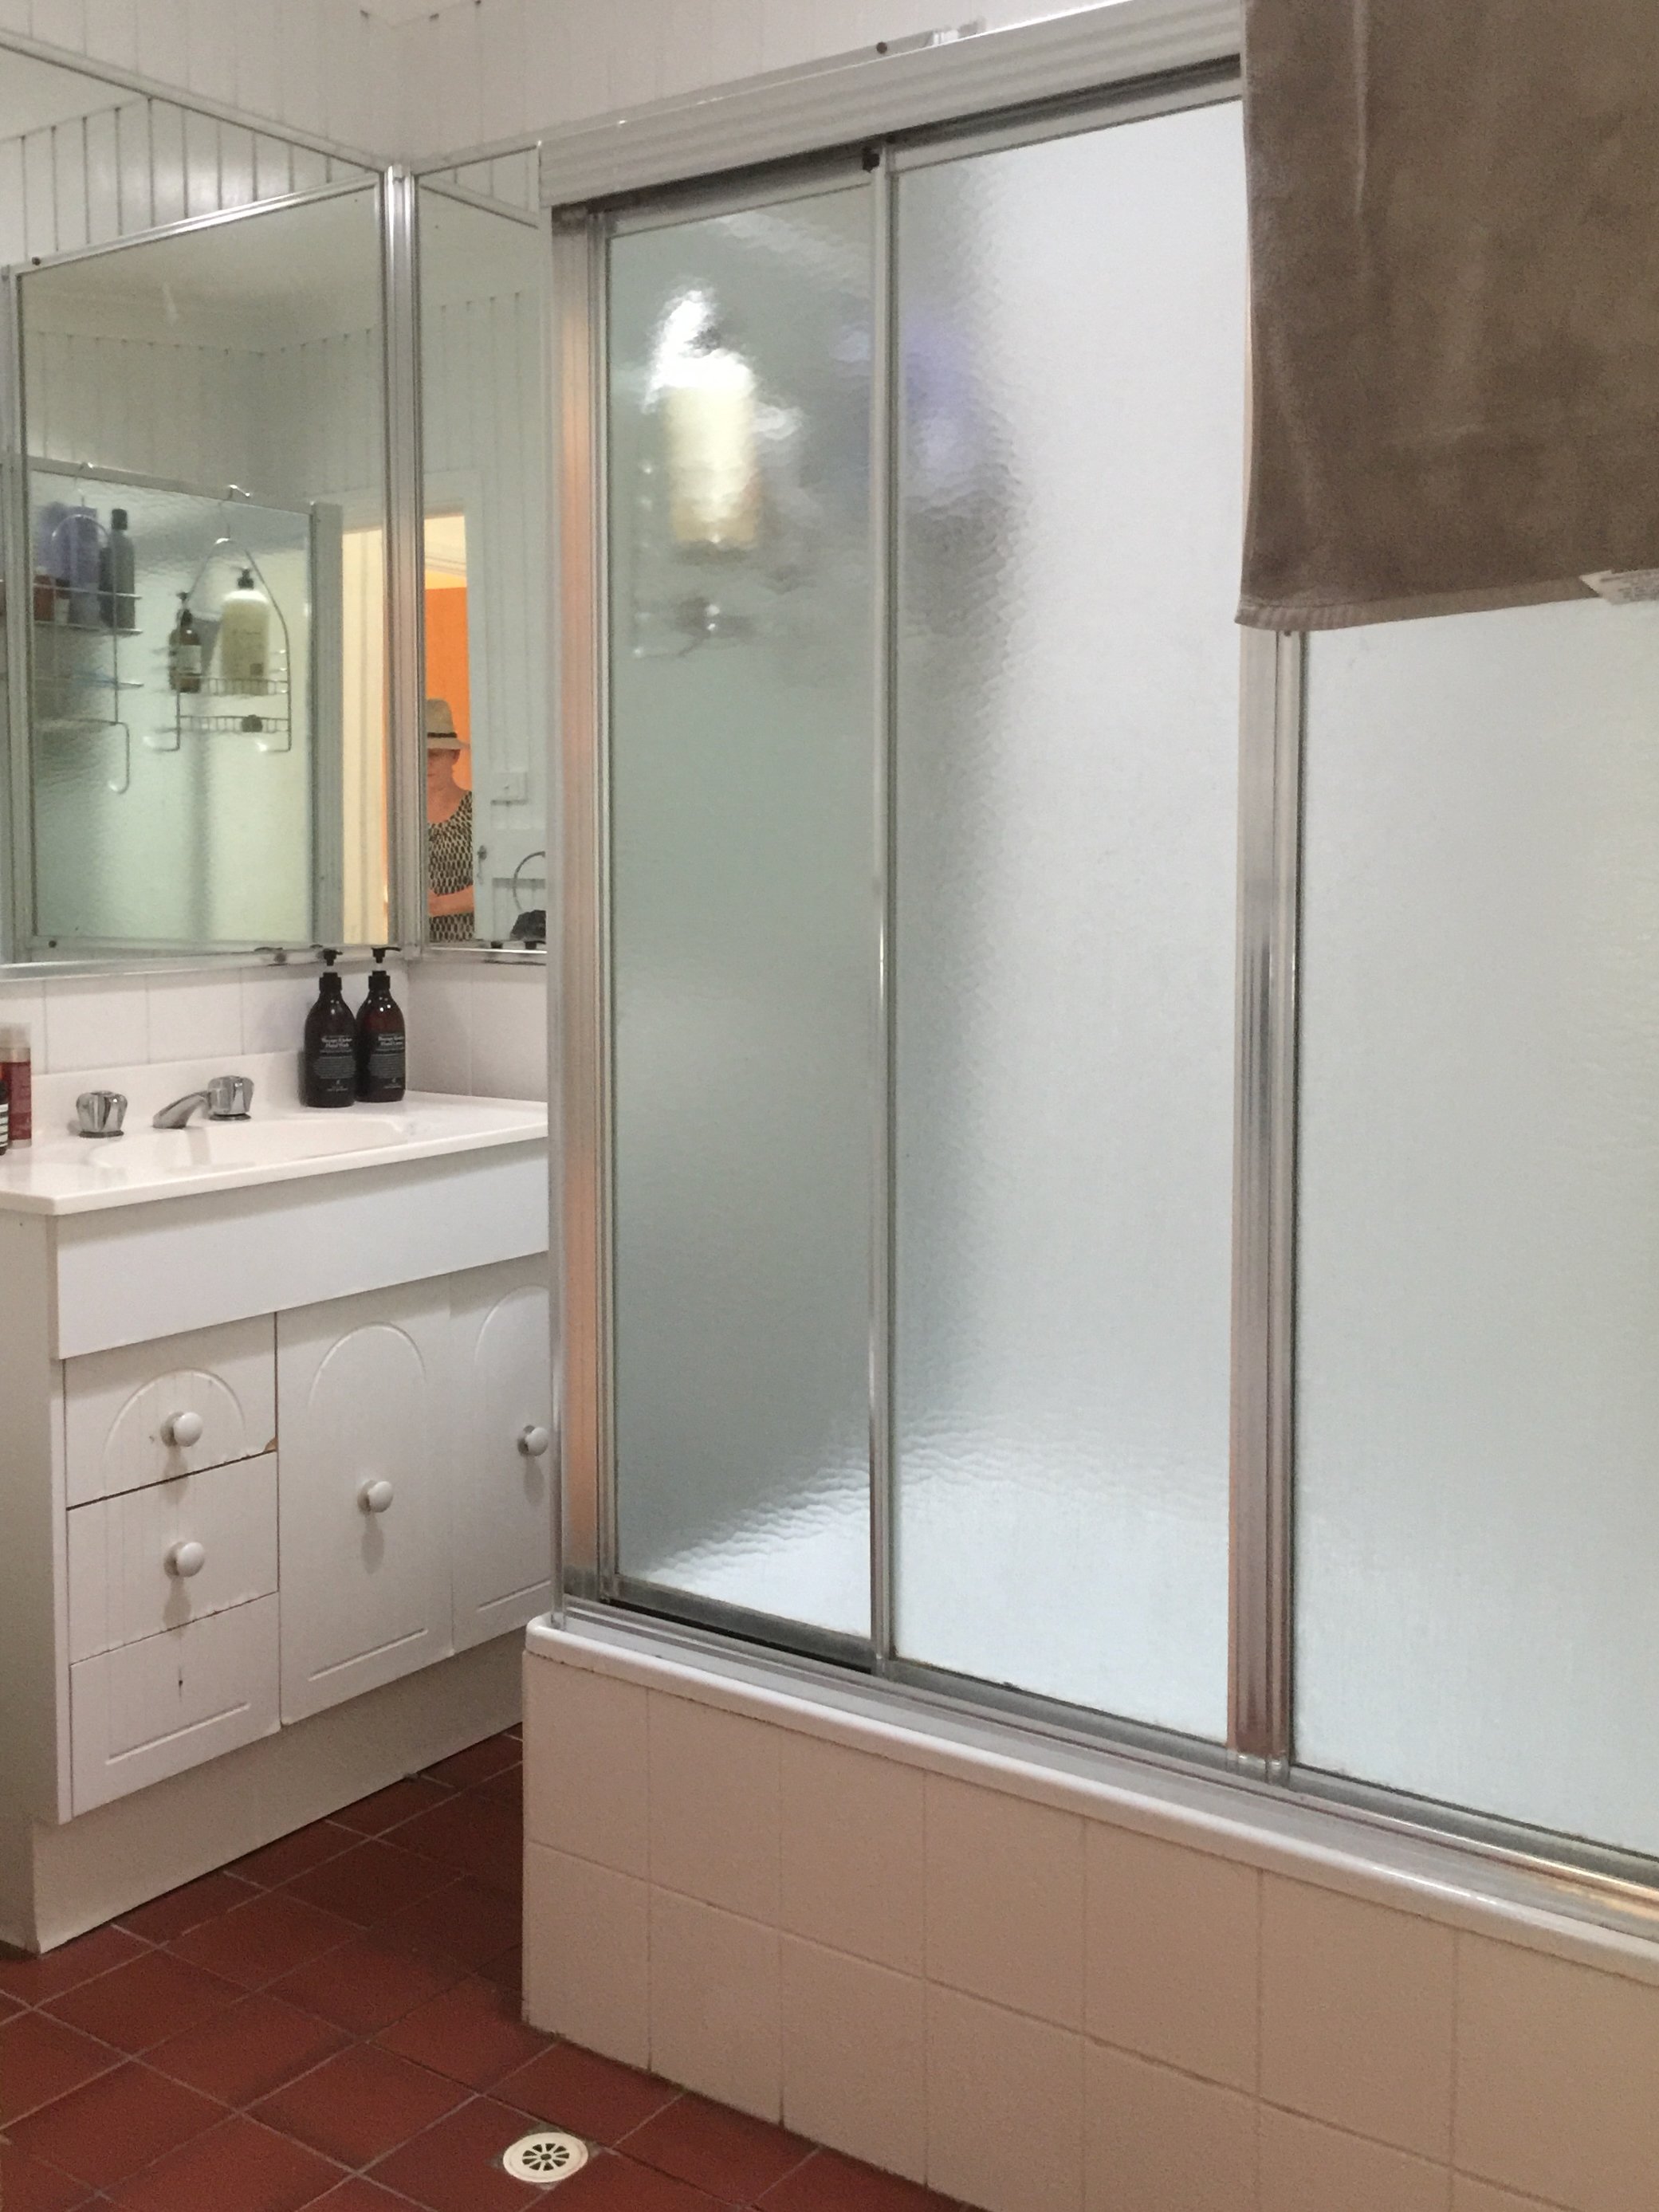
The original cosmetic makeover of this bathroom was done on a shoestring, over a couple of days (above, left).
Living with it for a few years helped me plan and make informed design choices for the new renovation (above, right).
The result is transforming.
What unique design choices would you make in your bathroom renovation?
Tag me on your project and follow more of my DIY journey on Instagram for tool tips, home improvement and simple building projects.