Rendered Block Bench
Alun Machin
I built this concrete bench from humble besser blocks. It’s a simple DIY that looks super-professional, but the rendering process ensures that it’s just as much fun to make as mud pies…

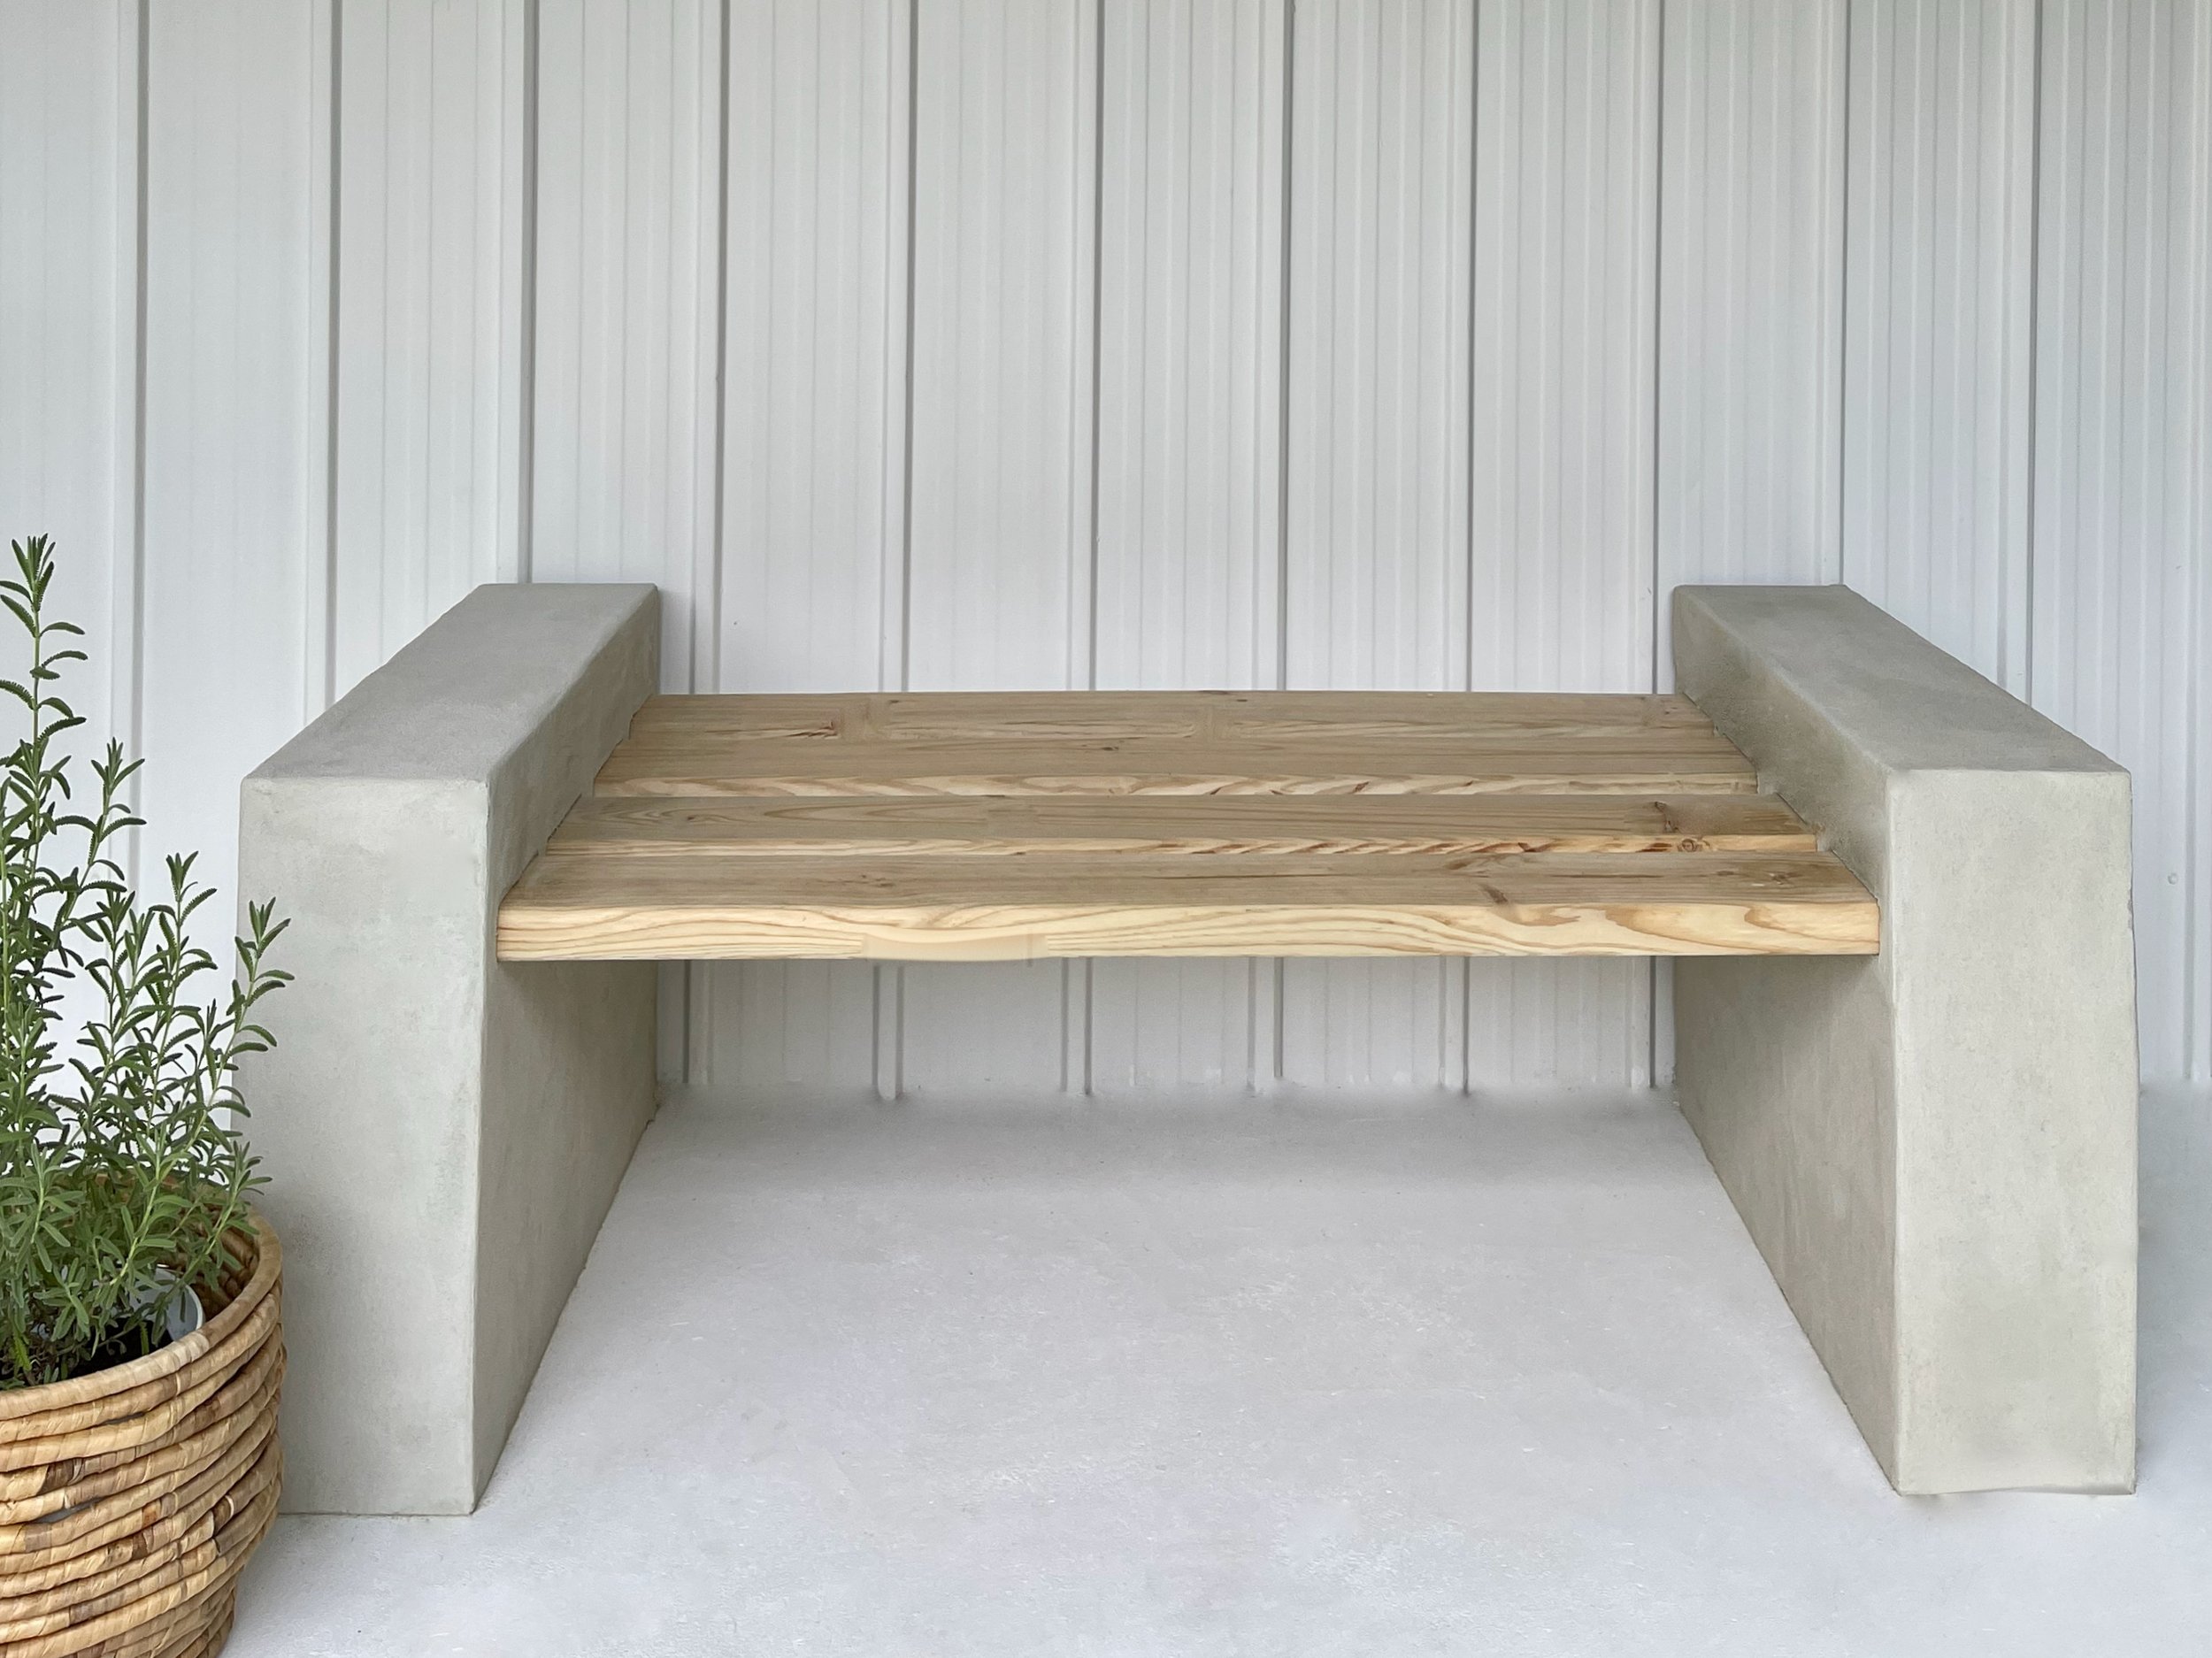
It began as a bench seat project for Bunnings Magazine, designed to fit two 600mm-square floor cushions.
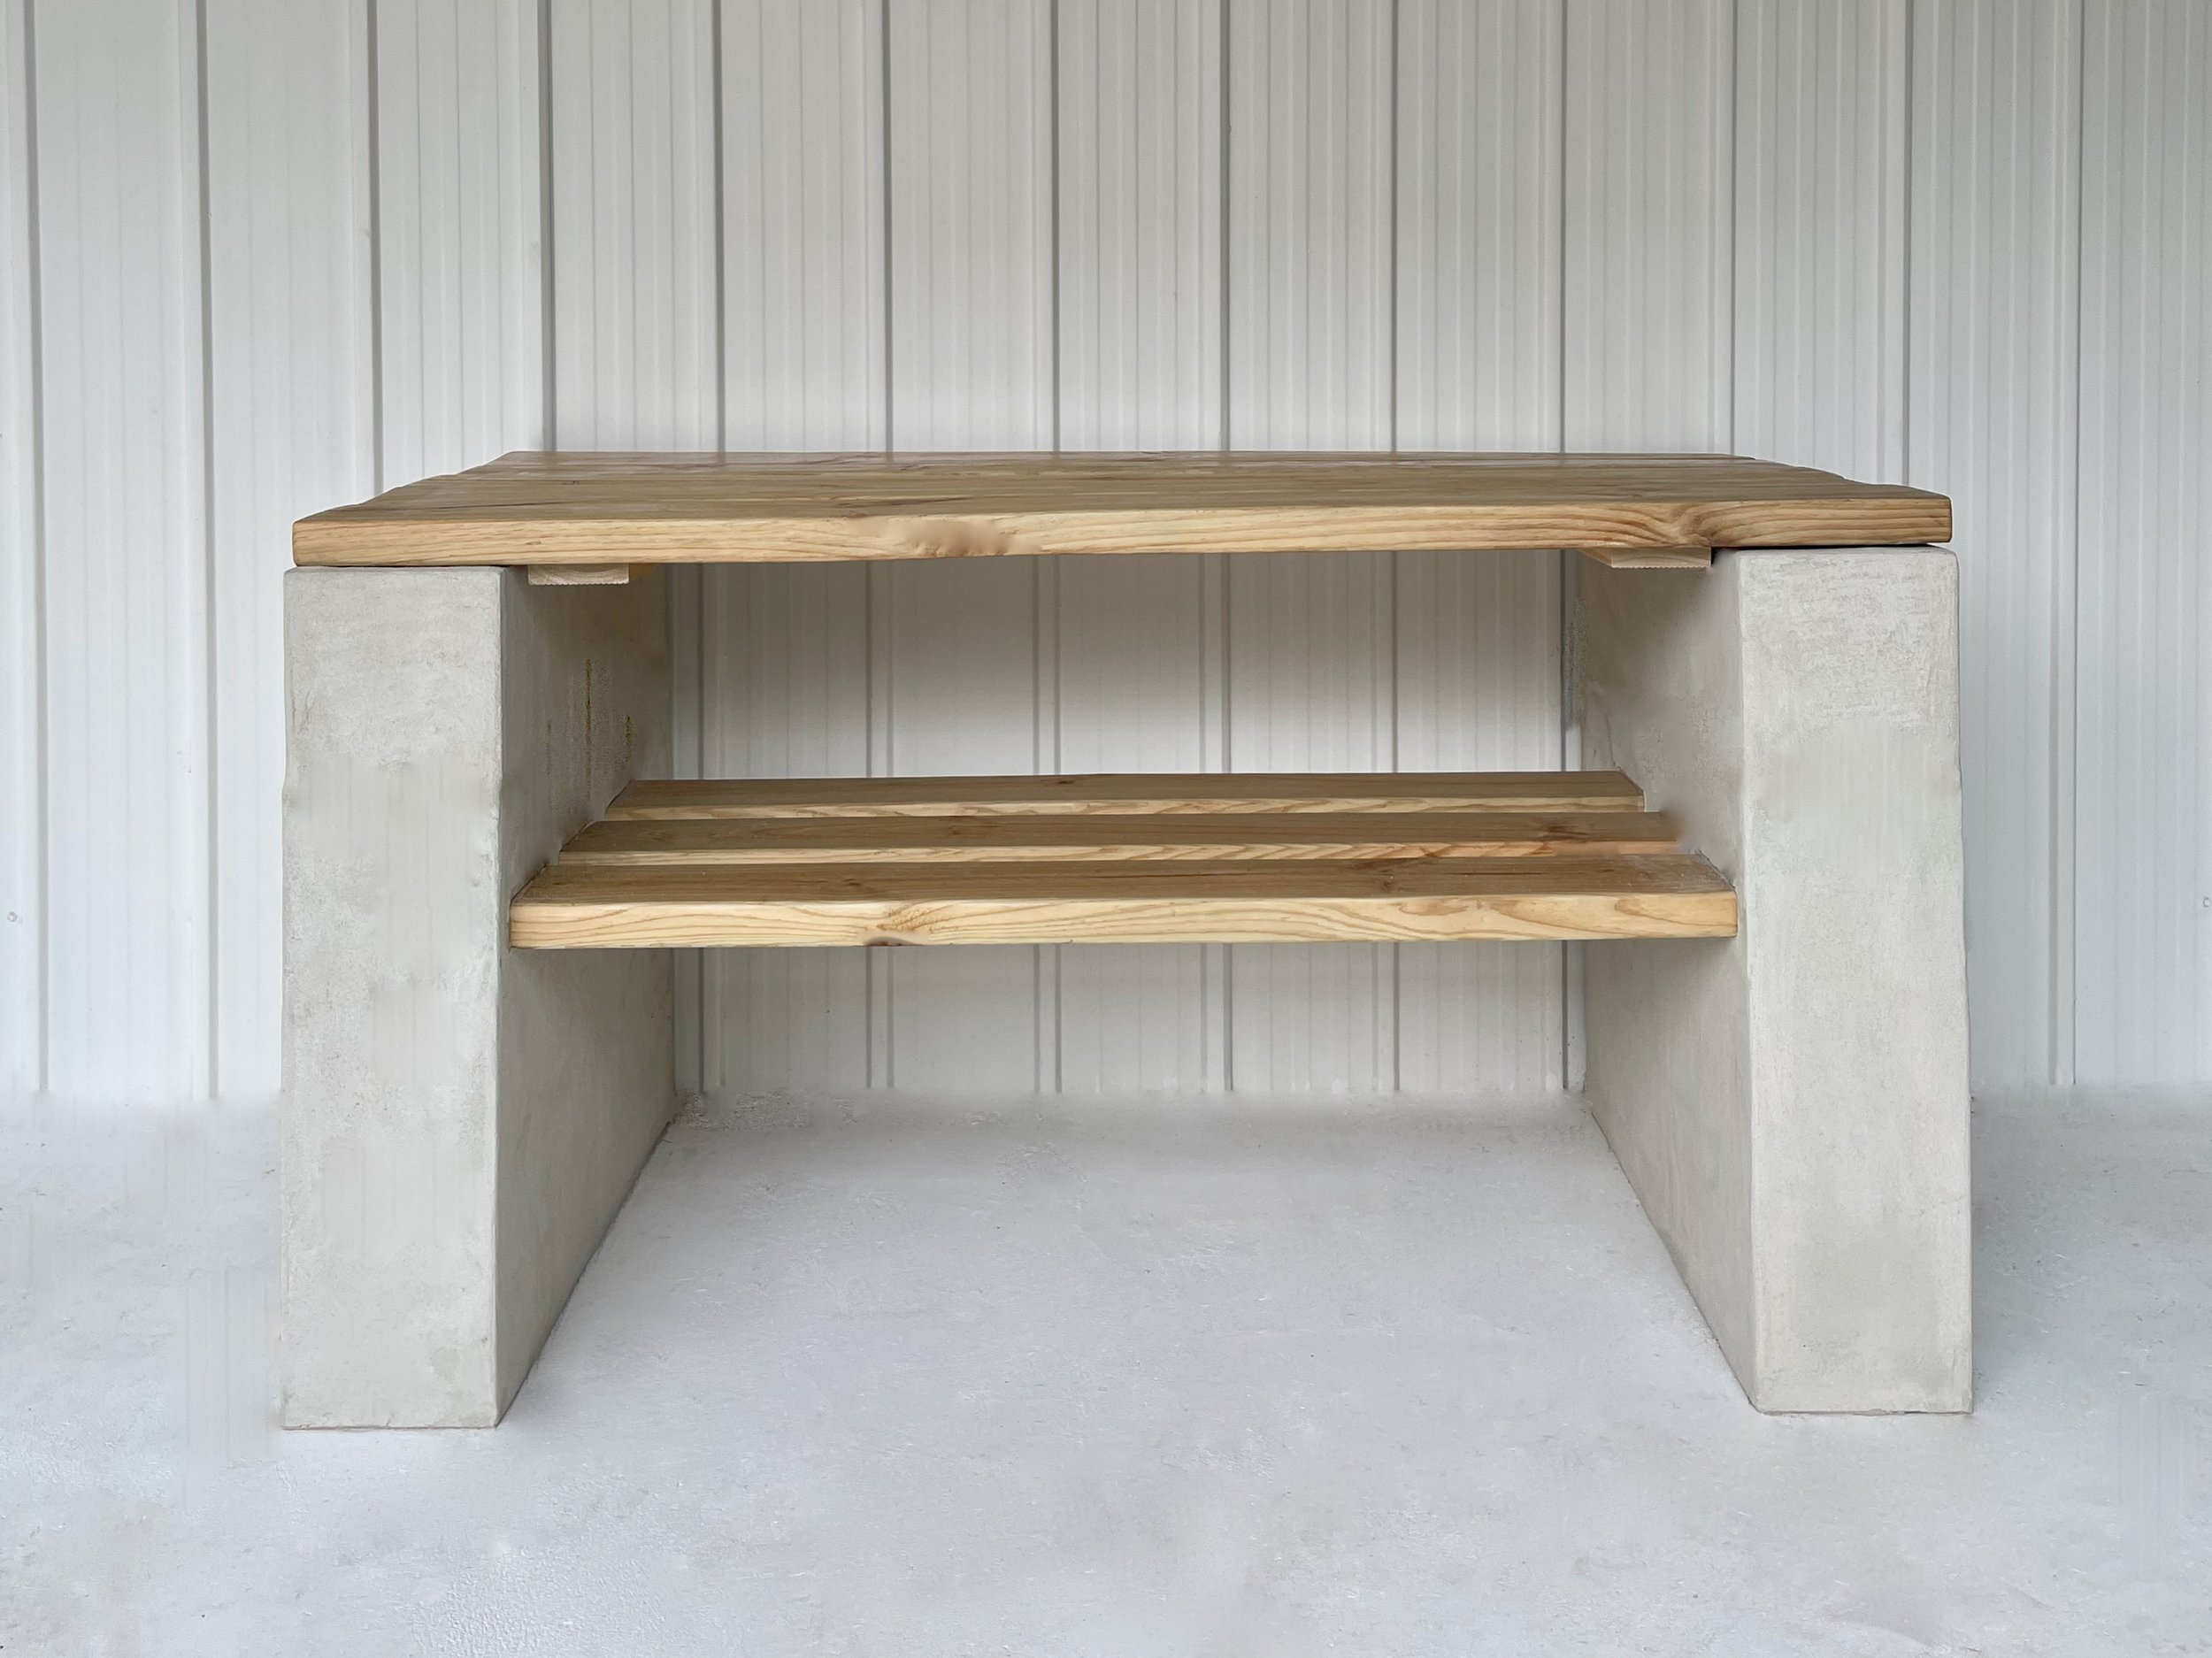
But I could see the potential for a workbench, so installed another row of blocks and a slatted top to make it just the right height…
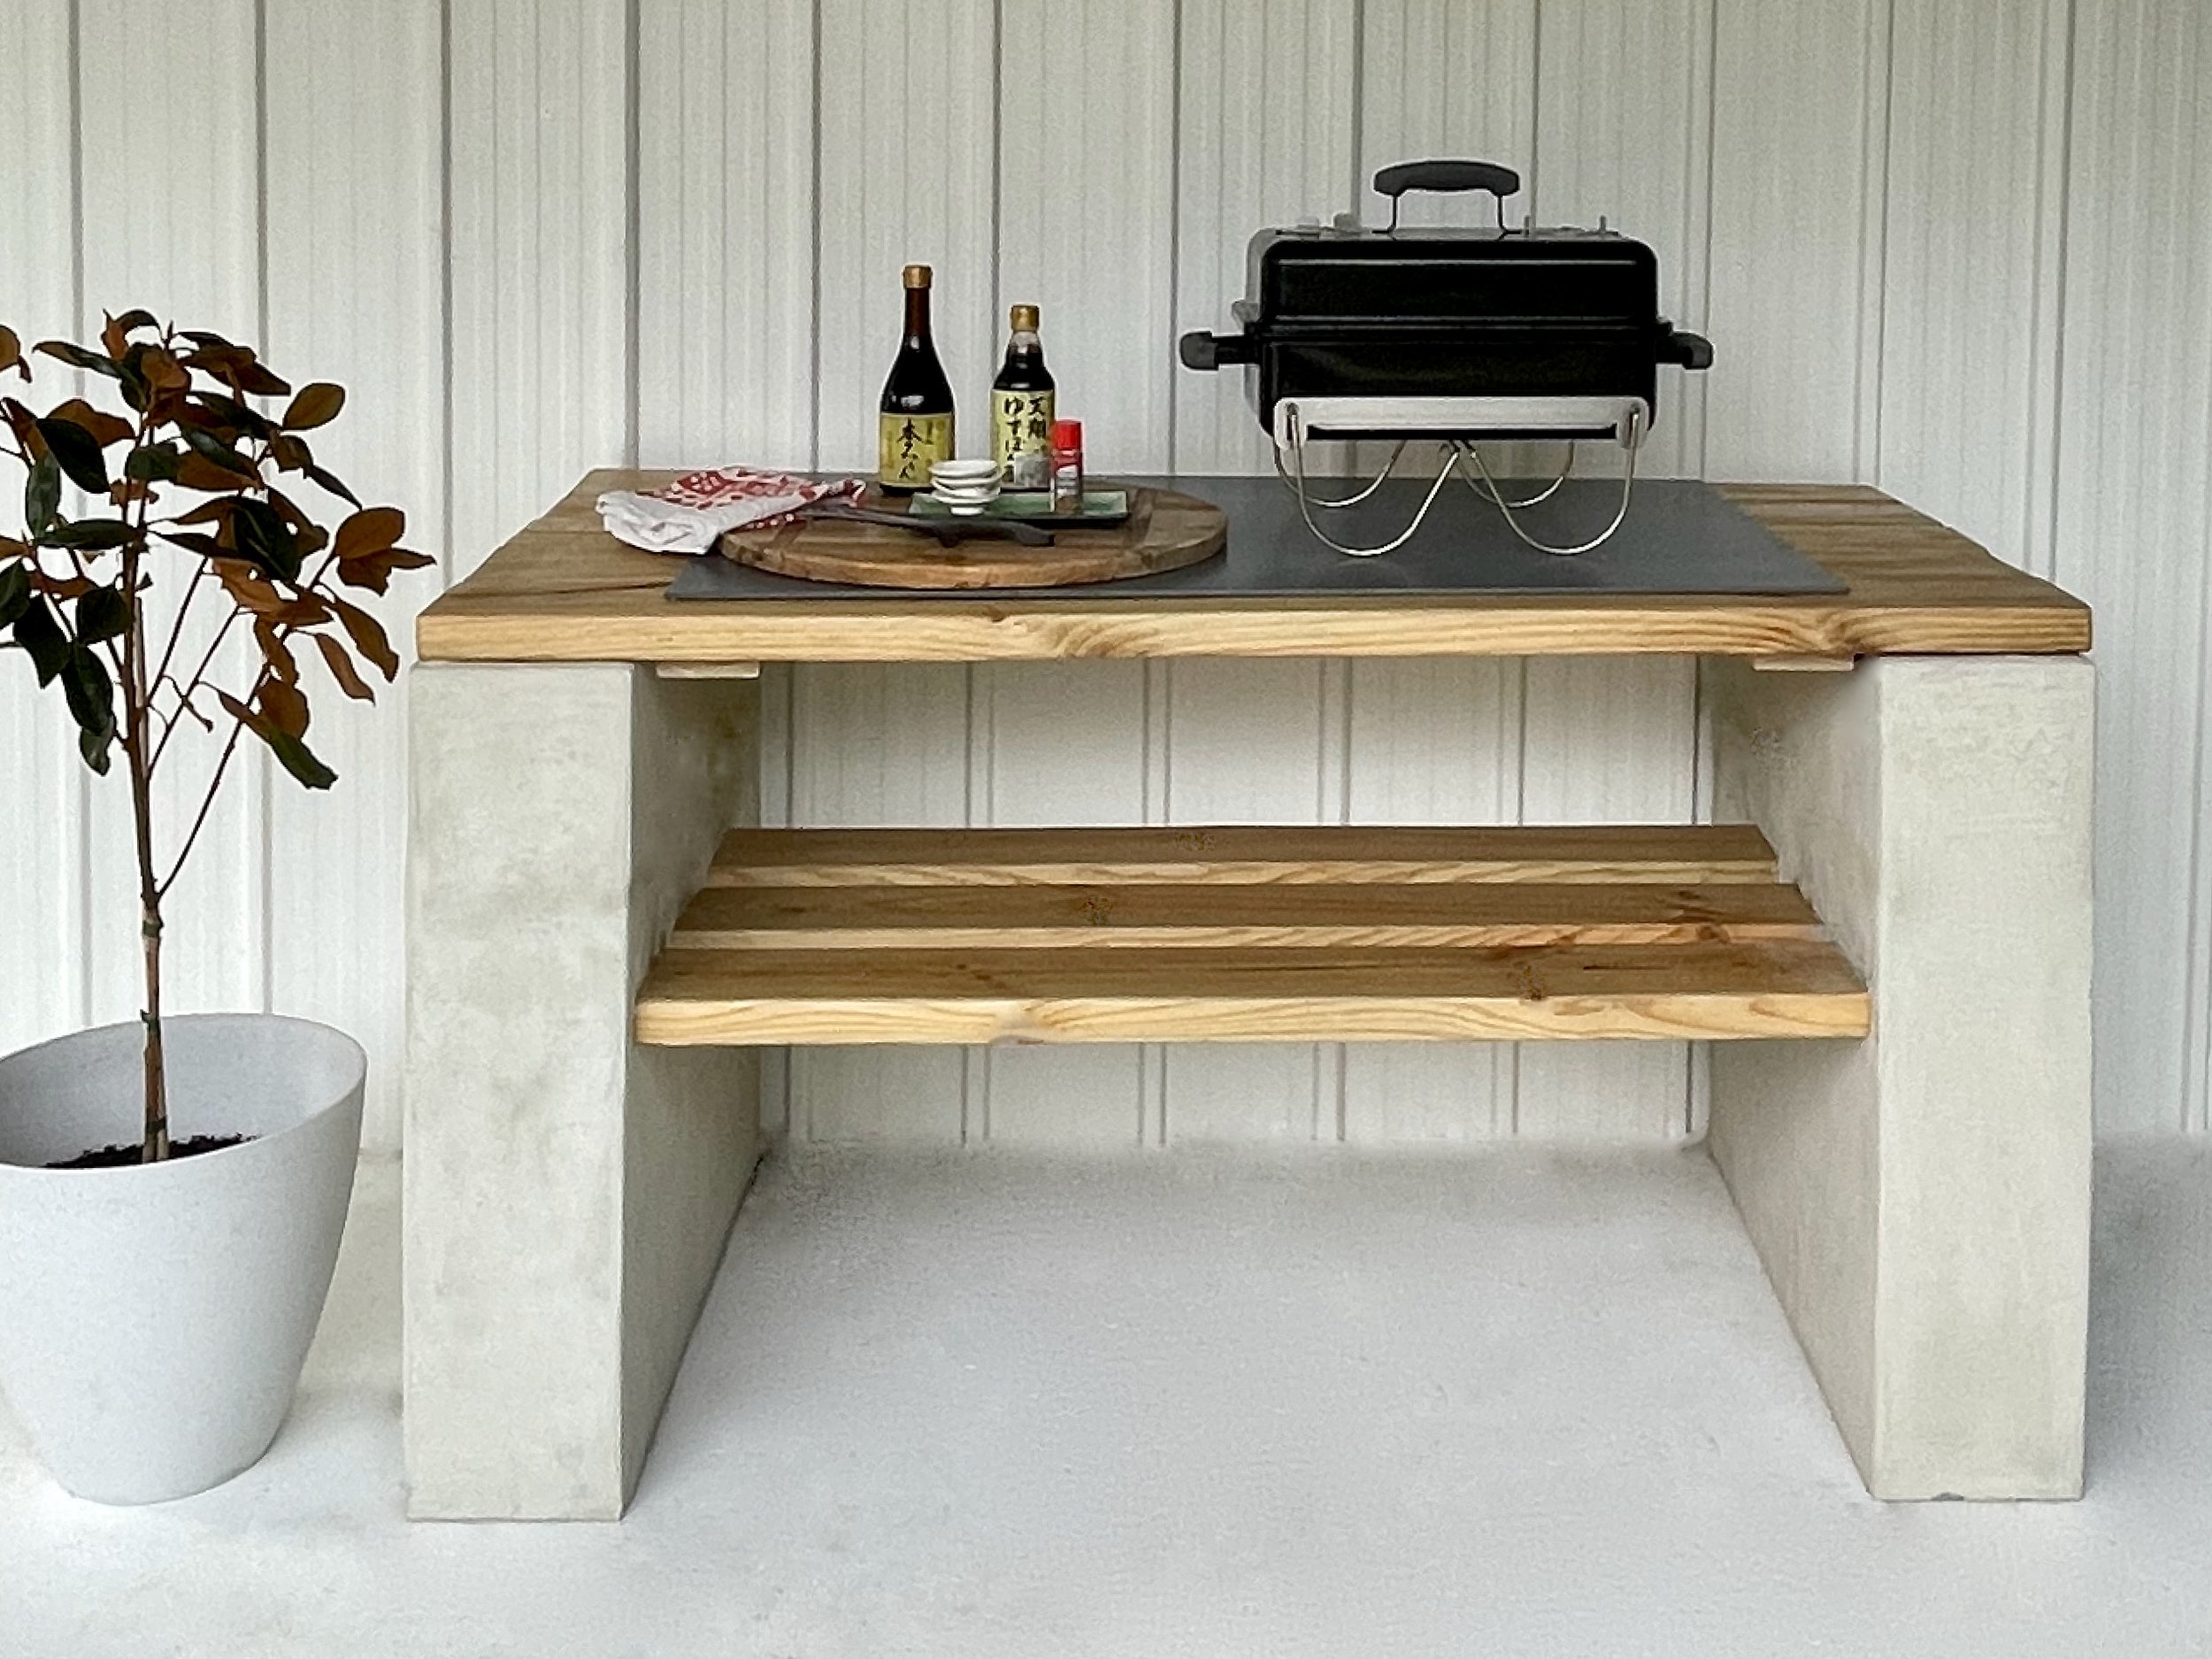
Adding a fibre-cement sheet as a fire-retardant barrier turns it into the perfect outdoor cooking area.
“While the blocks are easy to move one at a time, the completed pillars are heavy, so I recommend building on site and over a concrete slab or well-embedded pavers.”
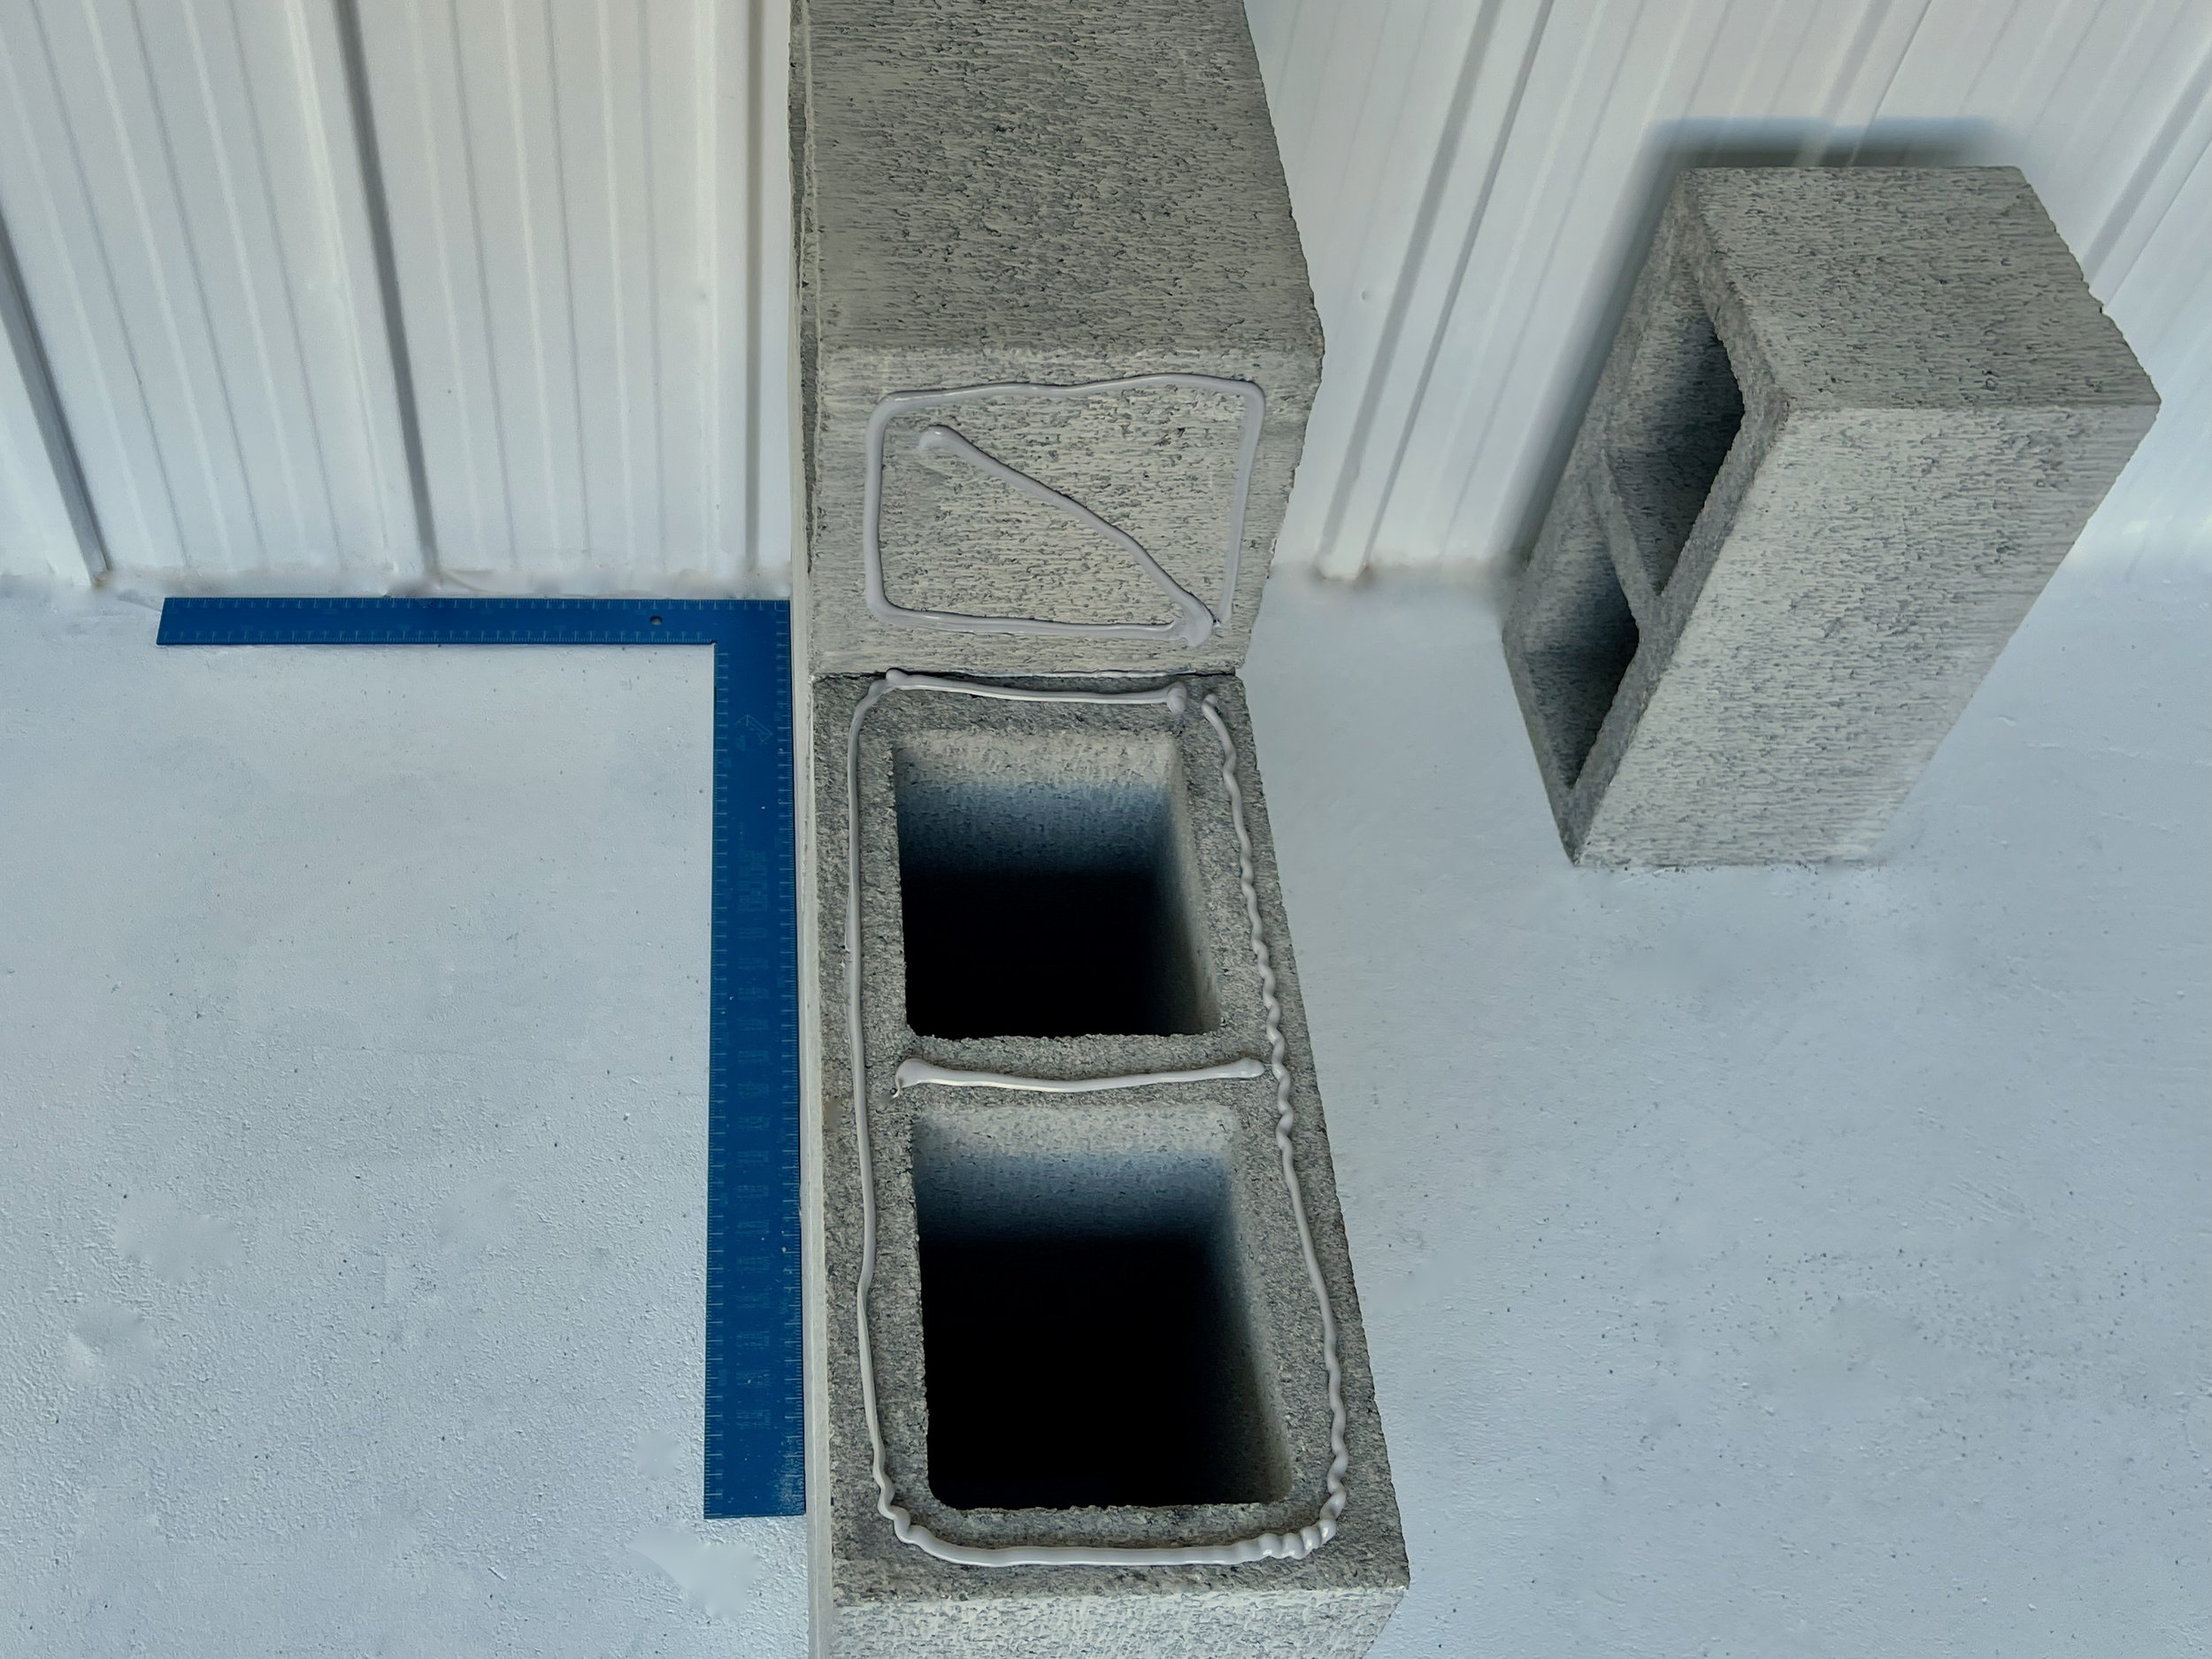
I set out rows of 390mm x 190mm x 190mm full besser blocks, which cost about $4 each. The pillars for the seat have three rows and use 12 blocks. The barbecue bench uses 16 blocks in four-row pillars.
TIP Ensure the pillars are straight and perpendicular to the wall by taping the outline on the ground.
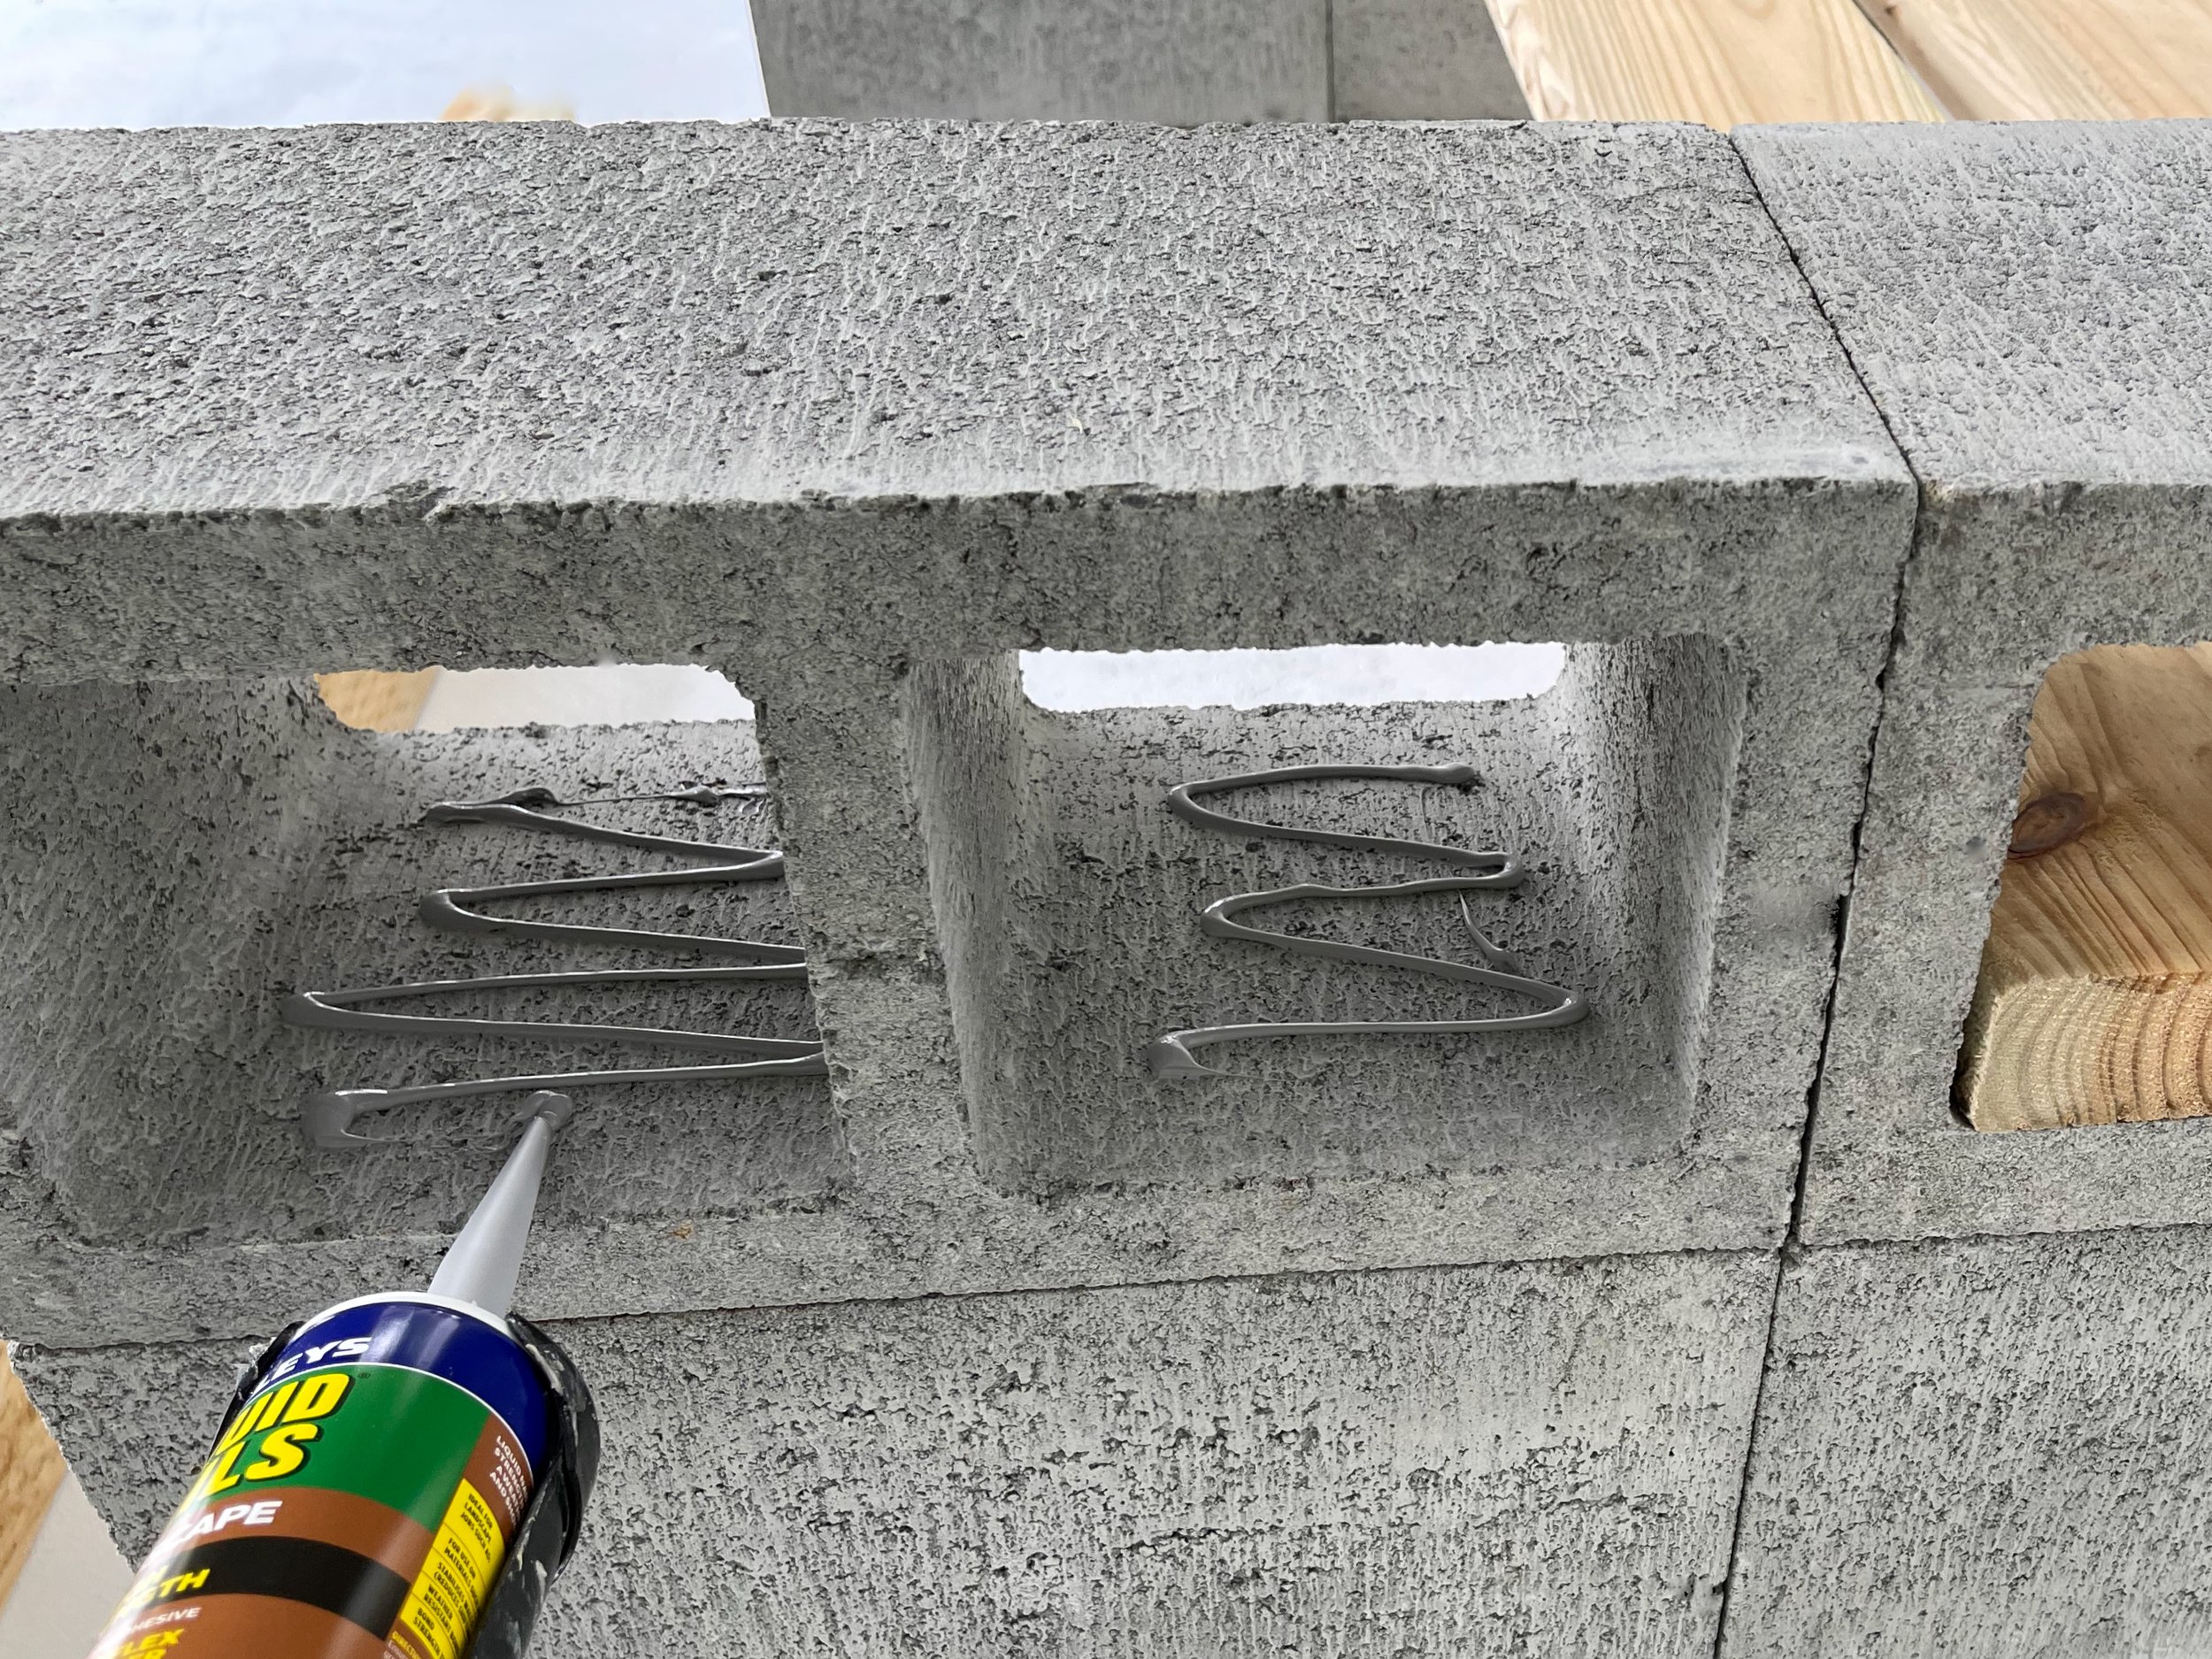
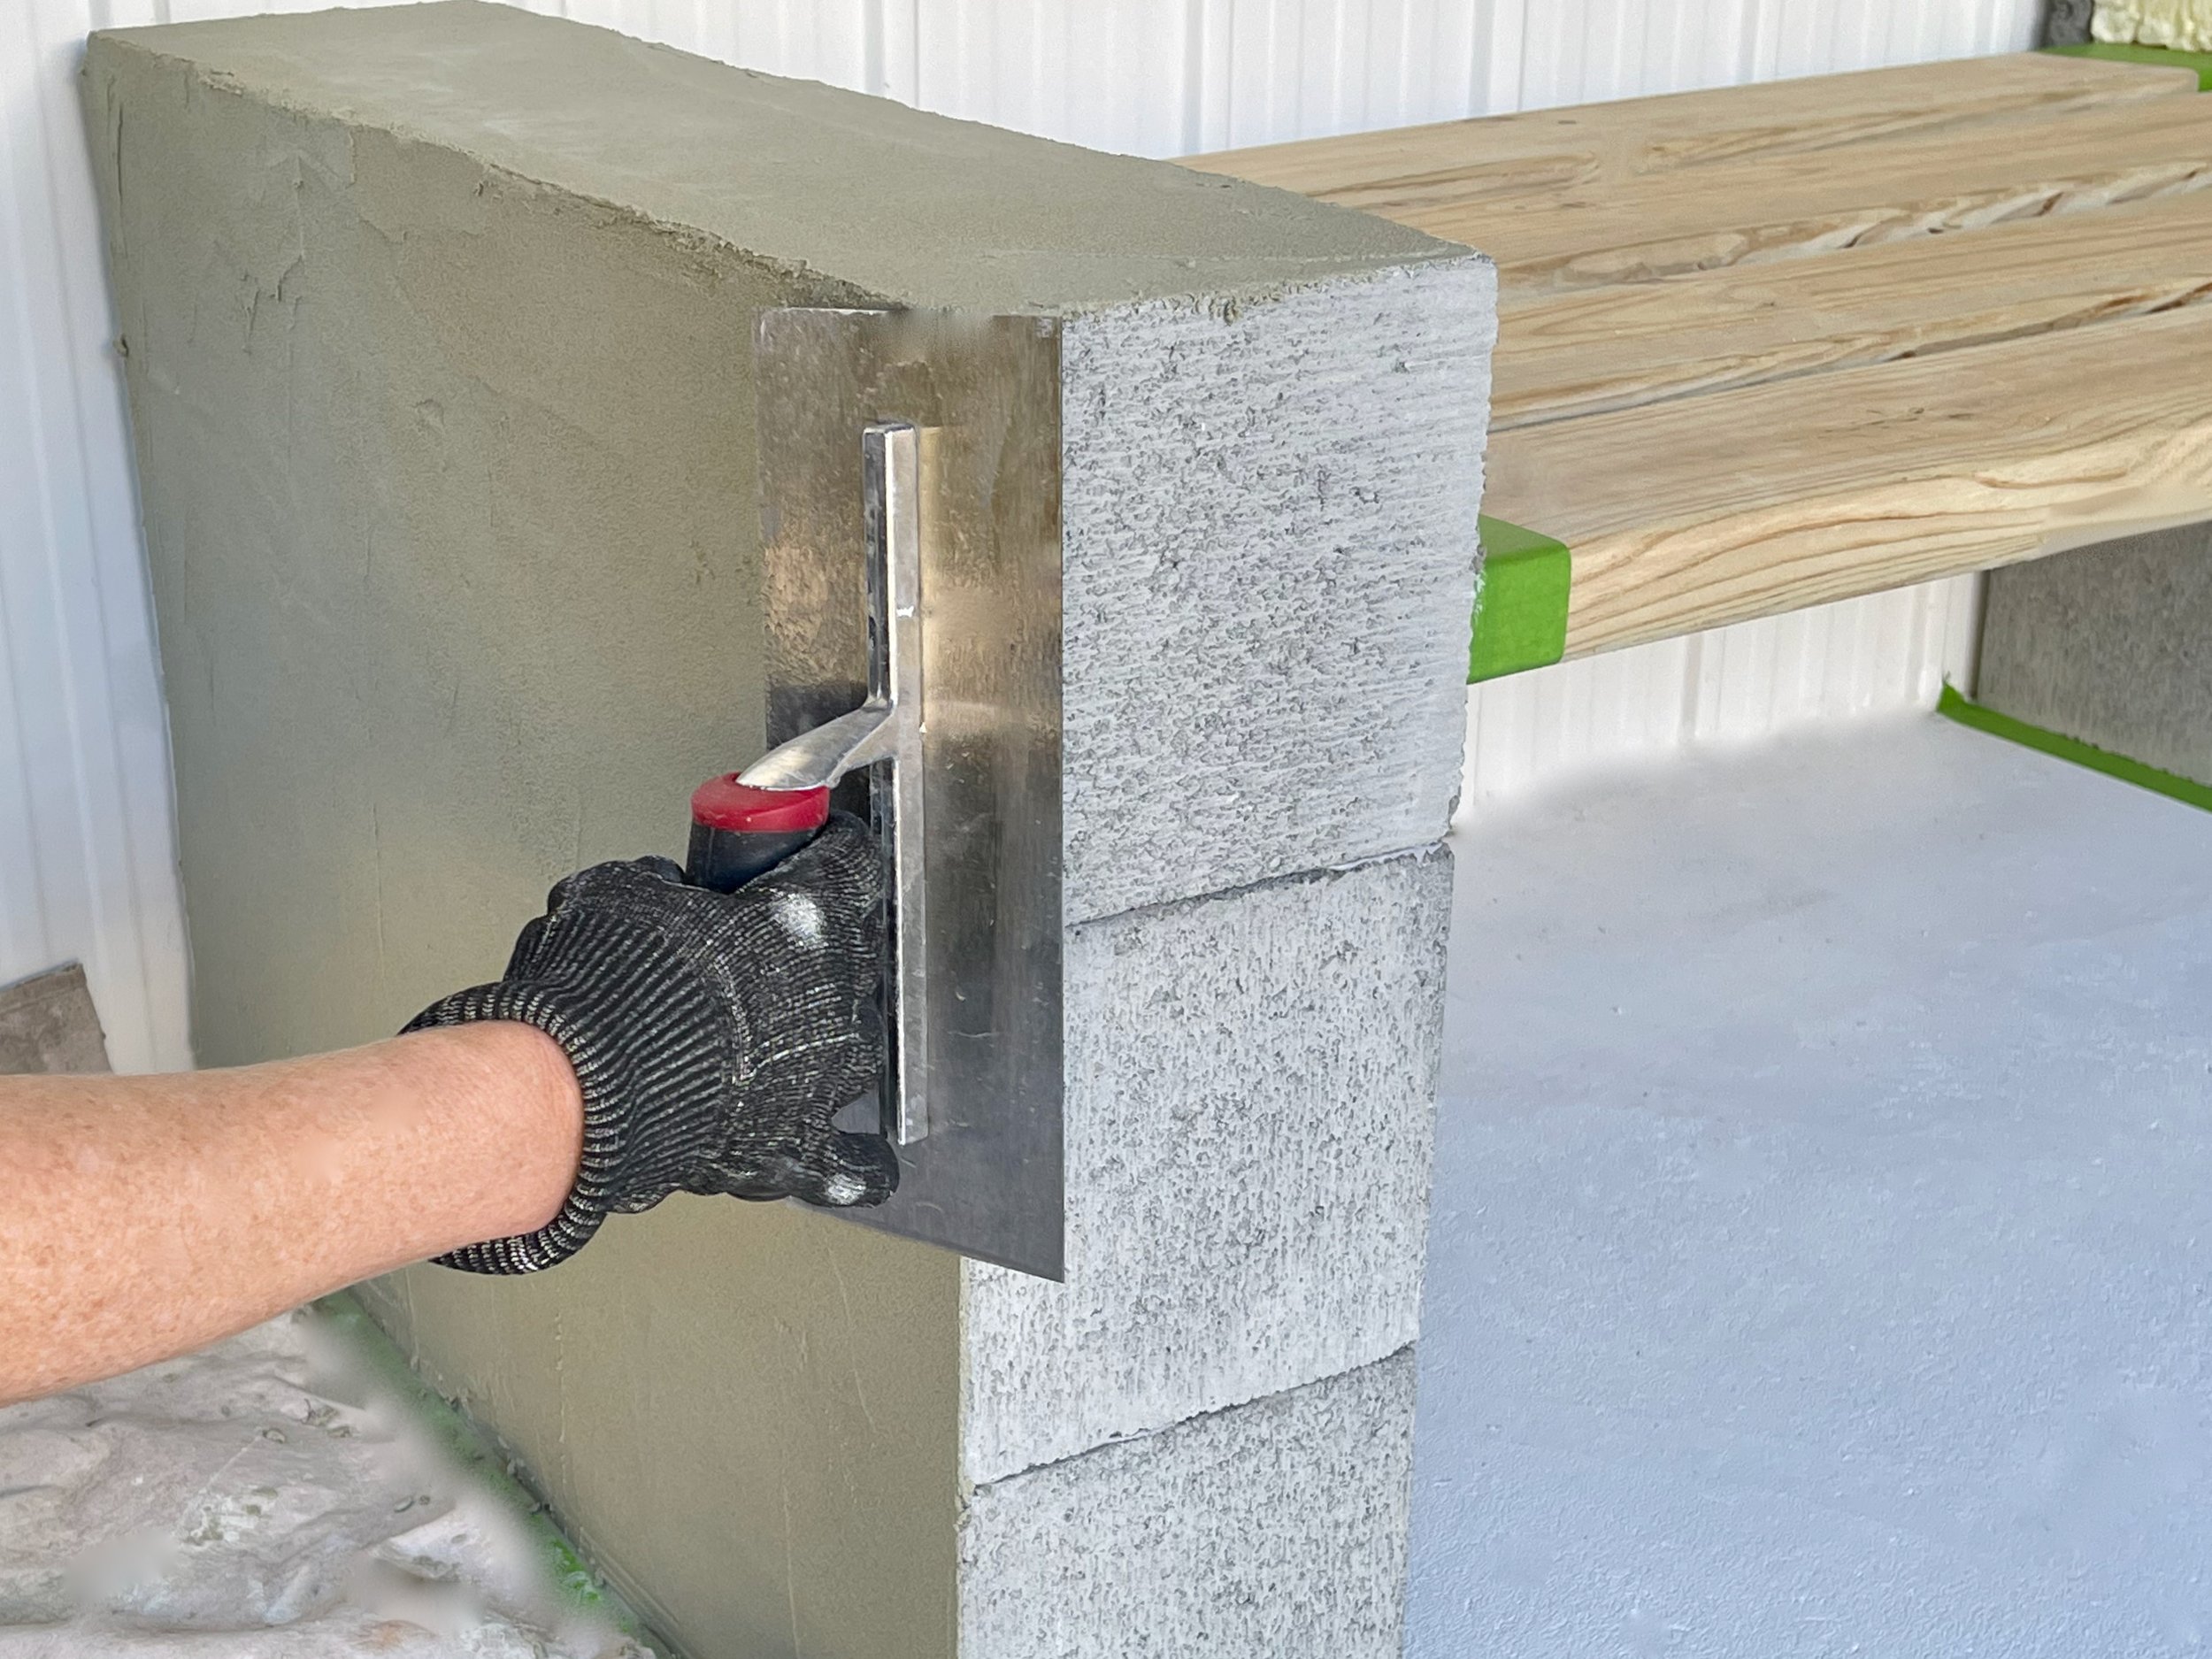
The third row of blocks is positioned sideways to hold slats for the seat, which is 1200mm wide. I secured them with Selleys Liquid Nails Landscape Adhesive. It’s tough and nothing it touches will budge once it has cured, which takes about an hour.
TIP You could use a regular caulking tool or invest in on of my workshop favourites – a battery-operated Ryobi caulking gun.
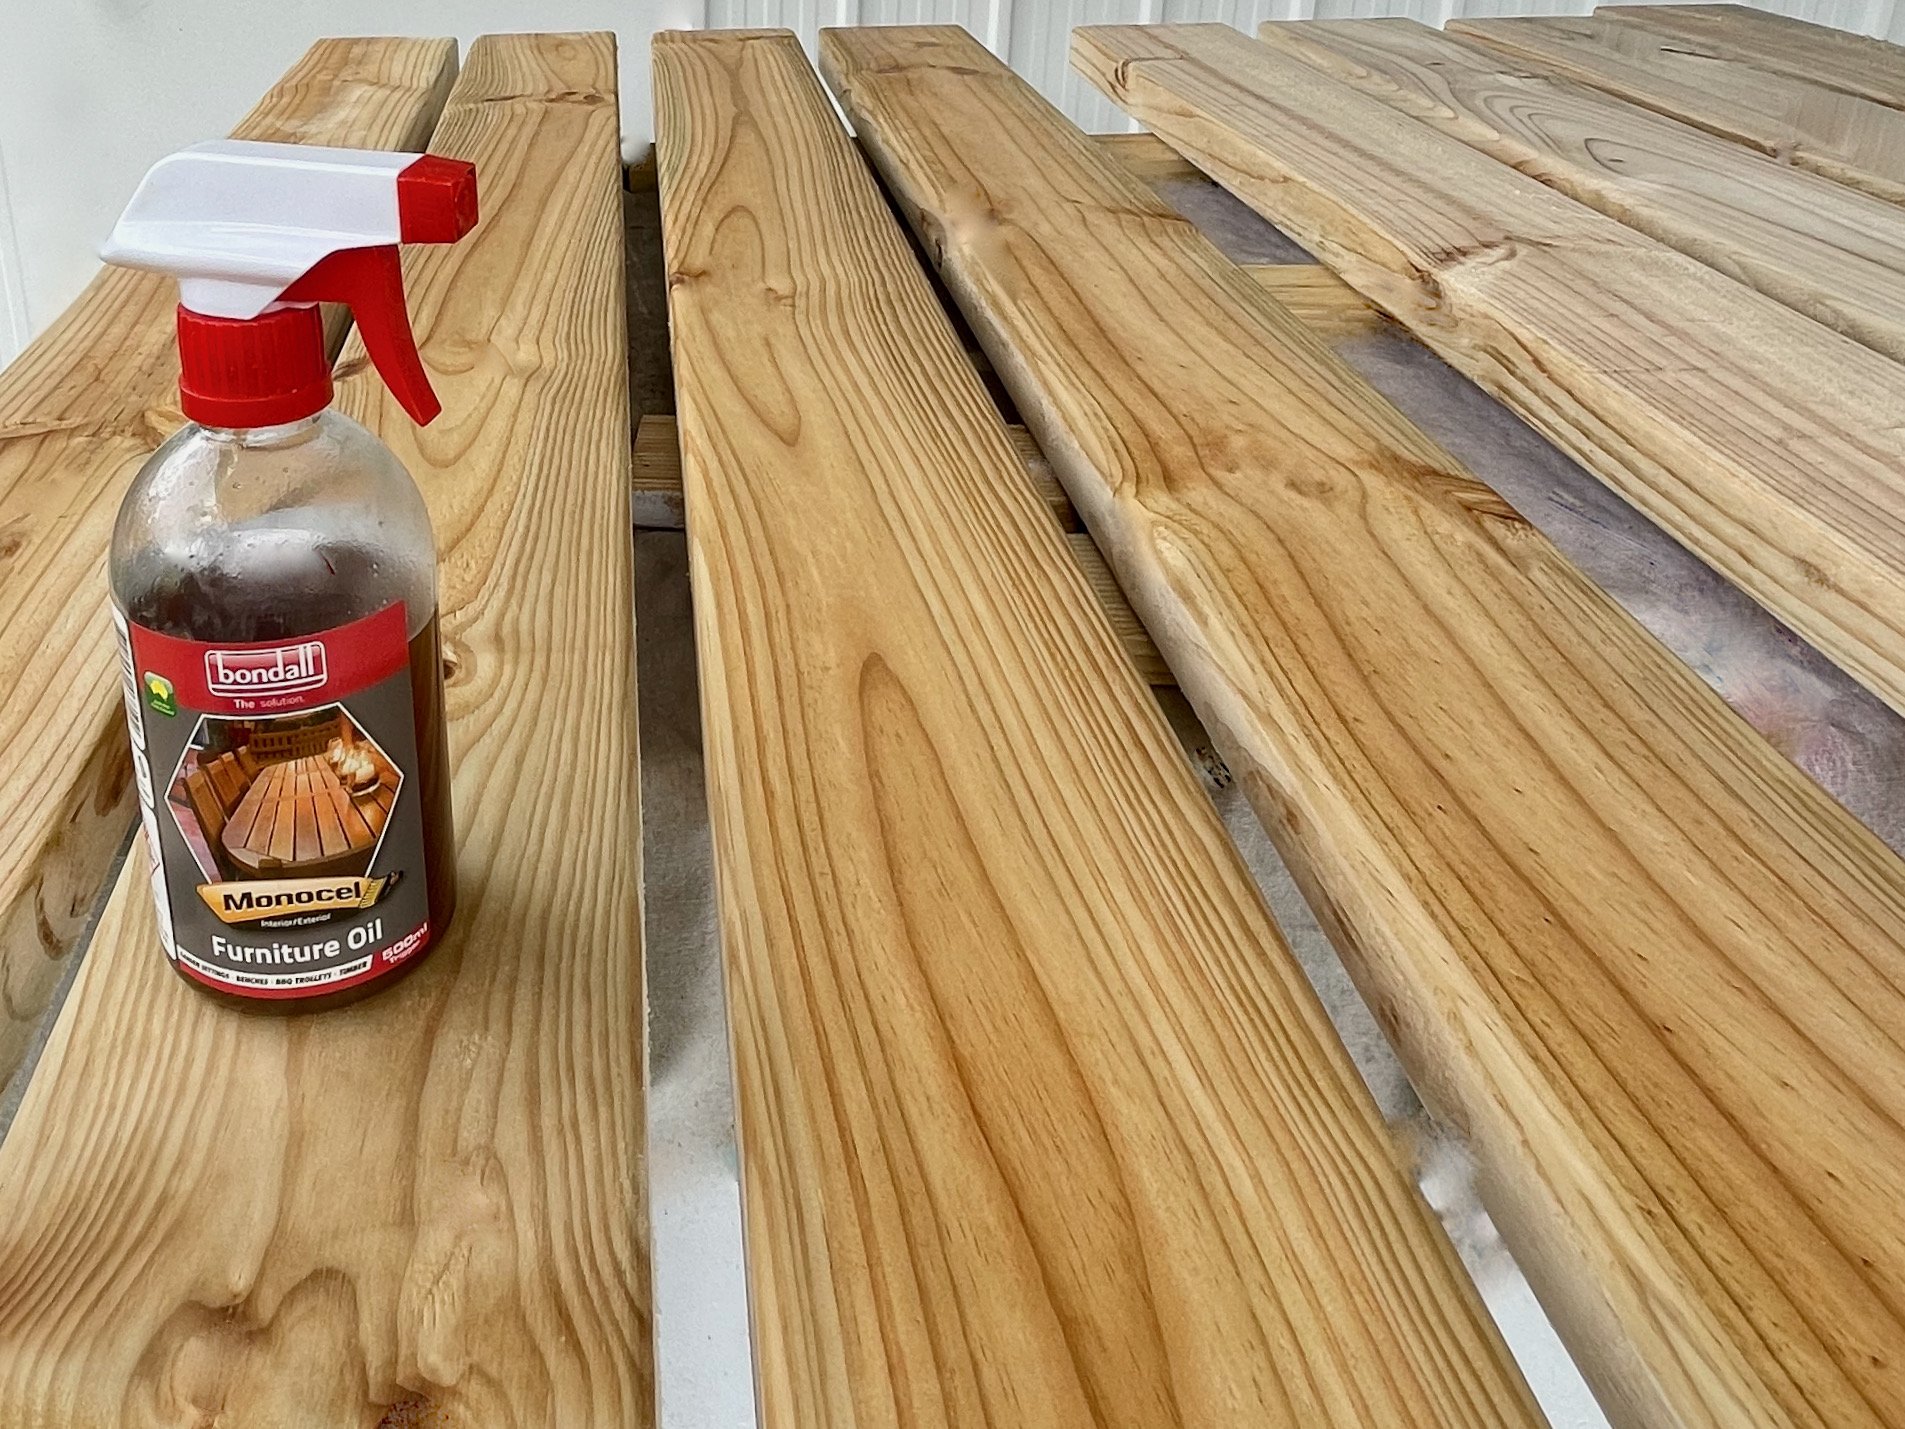
After trimming down 140mm x 45mm pine sleepers with a thicknesser, I cut them to be just under 1500mm long for the seat and just over 1500mm for the bench top.
TIP The seat is sealed in Monocel furniture oil, but the top is in marine-grade Monocel Gold varnish, which has a smoother finish that’s easier to keep clean than an oiled surface.
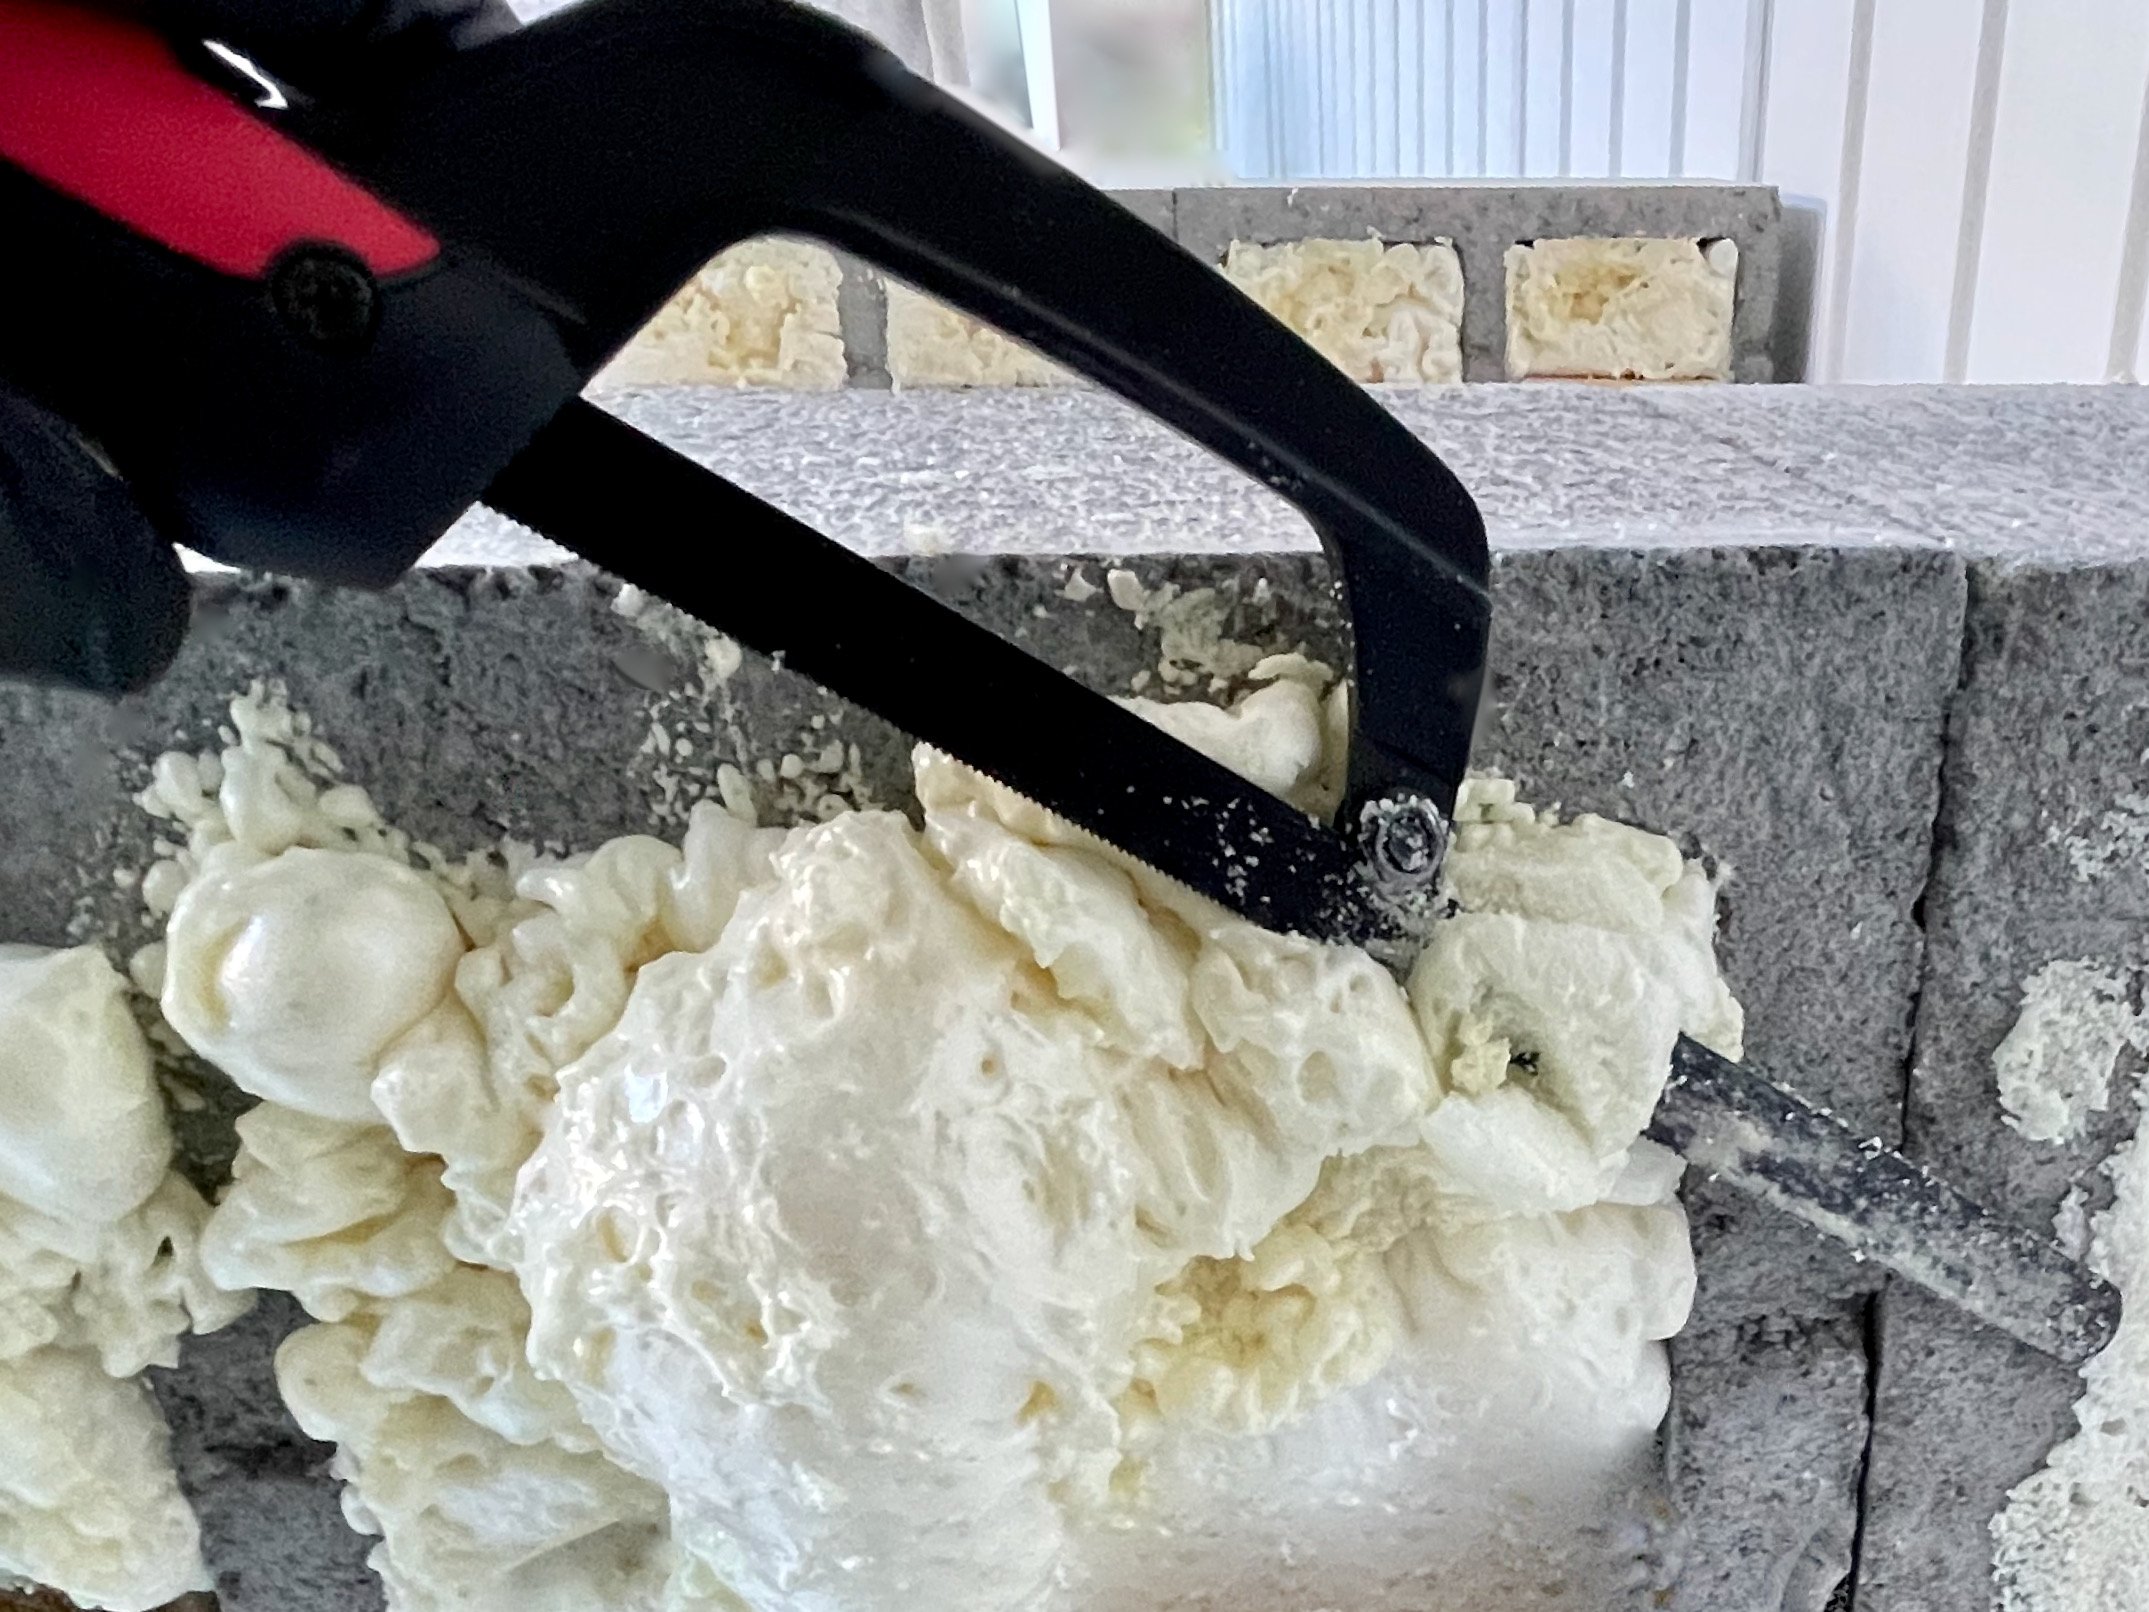
I filled the block holes with expanding filler, leaving it to harden for about an hour, then used a mini hacksaw blade to cut away the cured foam and sanded the area smooth.
TIP Initially the foam is sticky and messy so leave it untouched to dry. It doubles in size and cures into a hard honeycomb-like substance.
Rending is the fun part! After taping around the slats and the floor, I combined the render with water, then used a scraper with a 279mm rendering trowel to apply an even layer all over the pillars.
TIP Wear a mask to mix the powder into a toothpaste-like consistency. If it’s too wet, it flops off the spatula. Too dry and it goes on rough. I used a basin-type bucket as it’s easier to get into, refilling it six times to complete the project and not using the full bag of Dunlop Fine Coat Render 20kg.
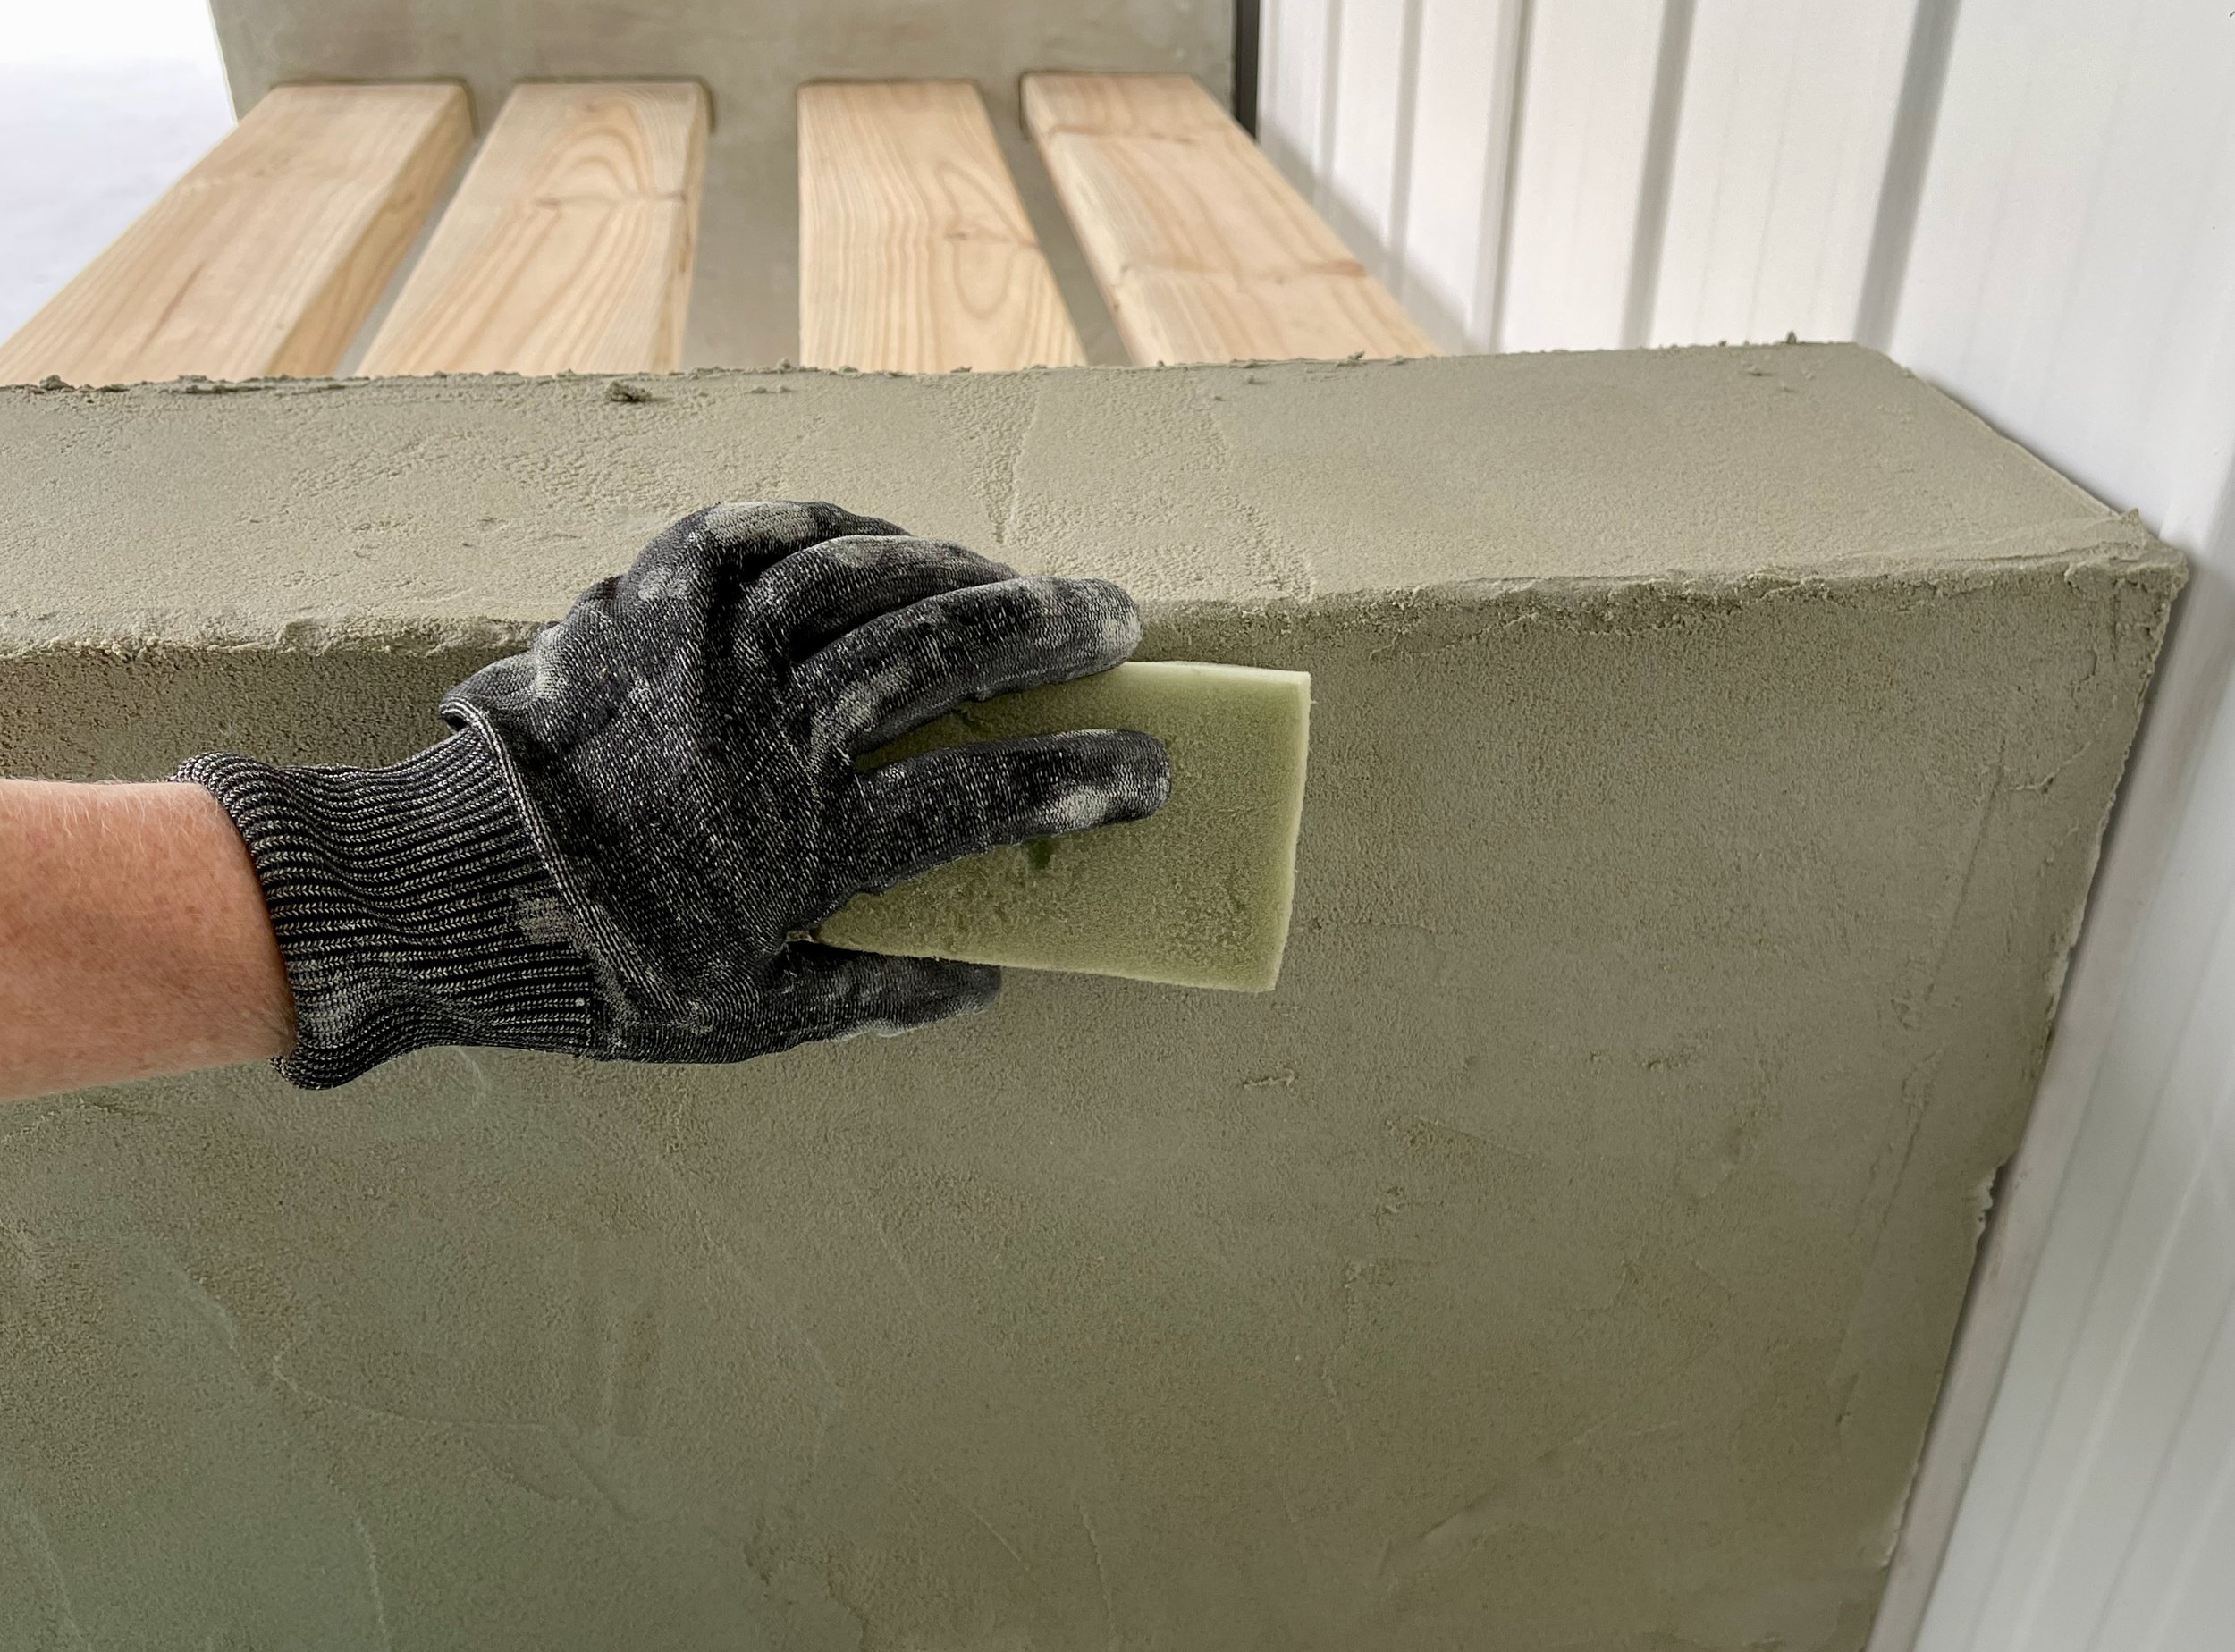
By the time I’d covered both pillars, washed the equipment and tidied up, the render had dried just enough for me to smooth over it with a damp sponge to remove trowel marks, clean up the edges and round-over the corners.
TIP Position a drop sheet around the pillars, wear gloves and continually rinse out the sponge to remove the excess render, extracting as much water as possible before lightly rubbing over the surface.
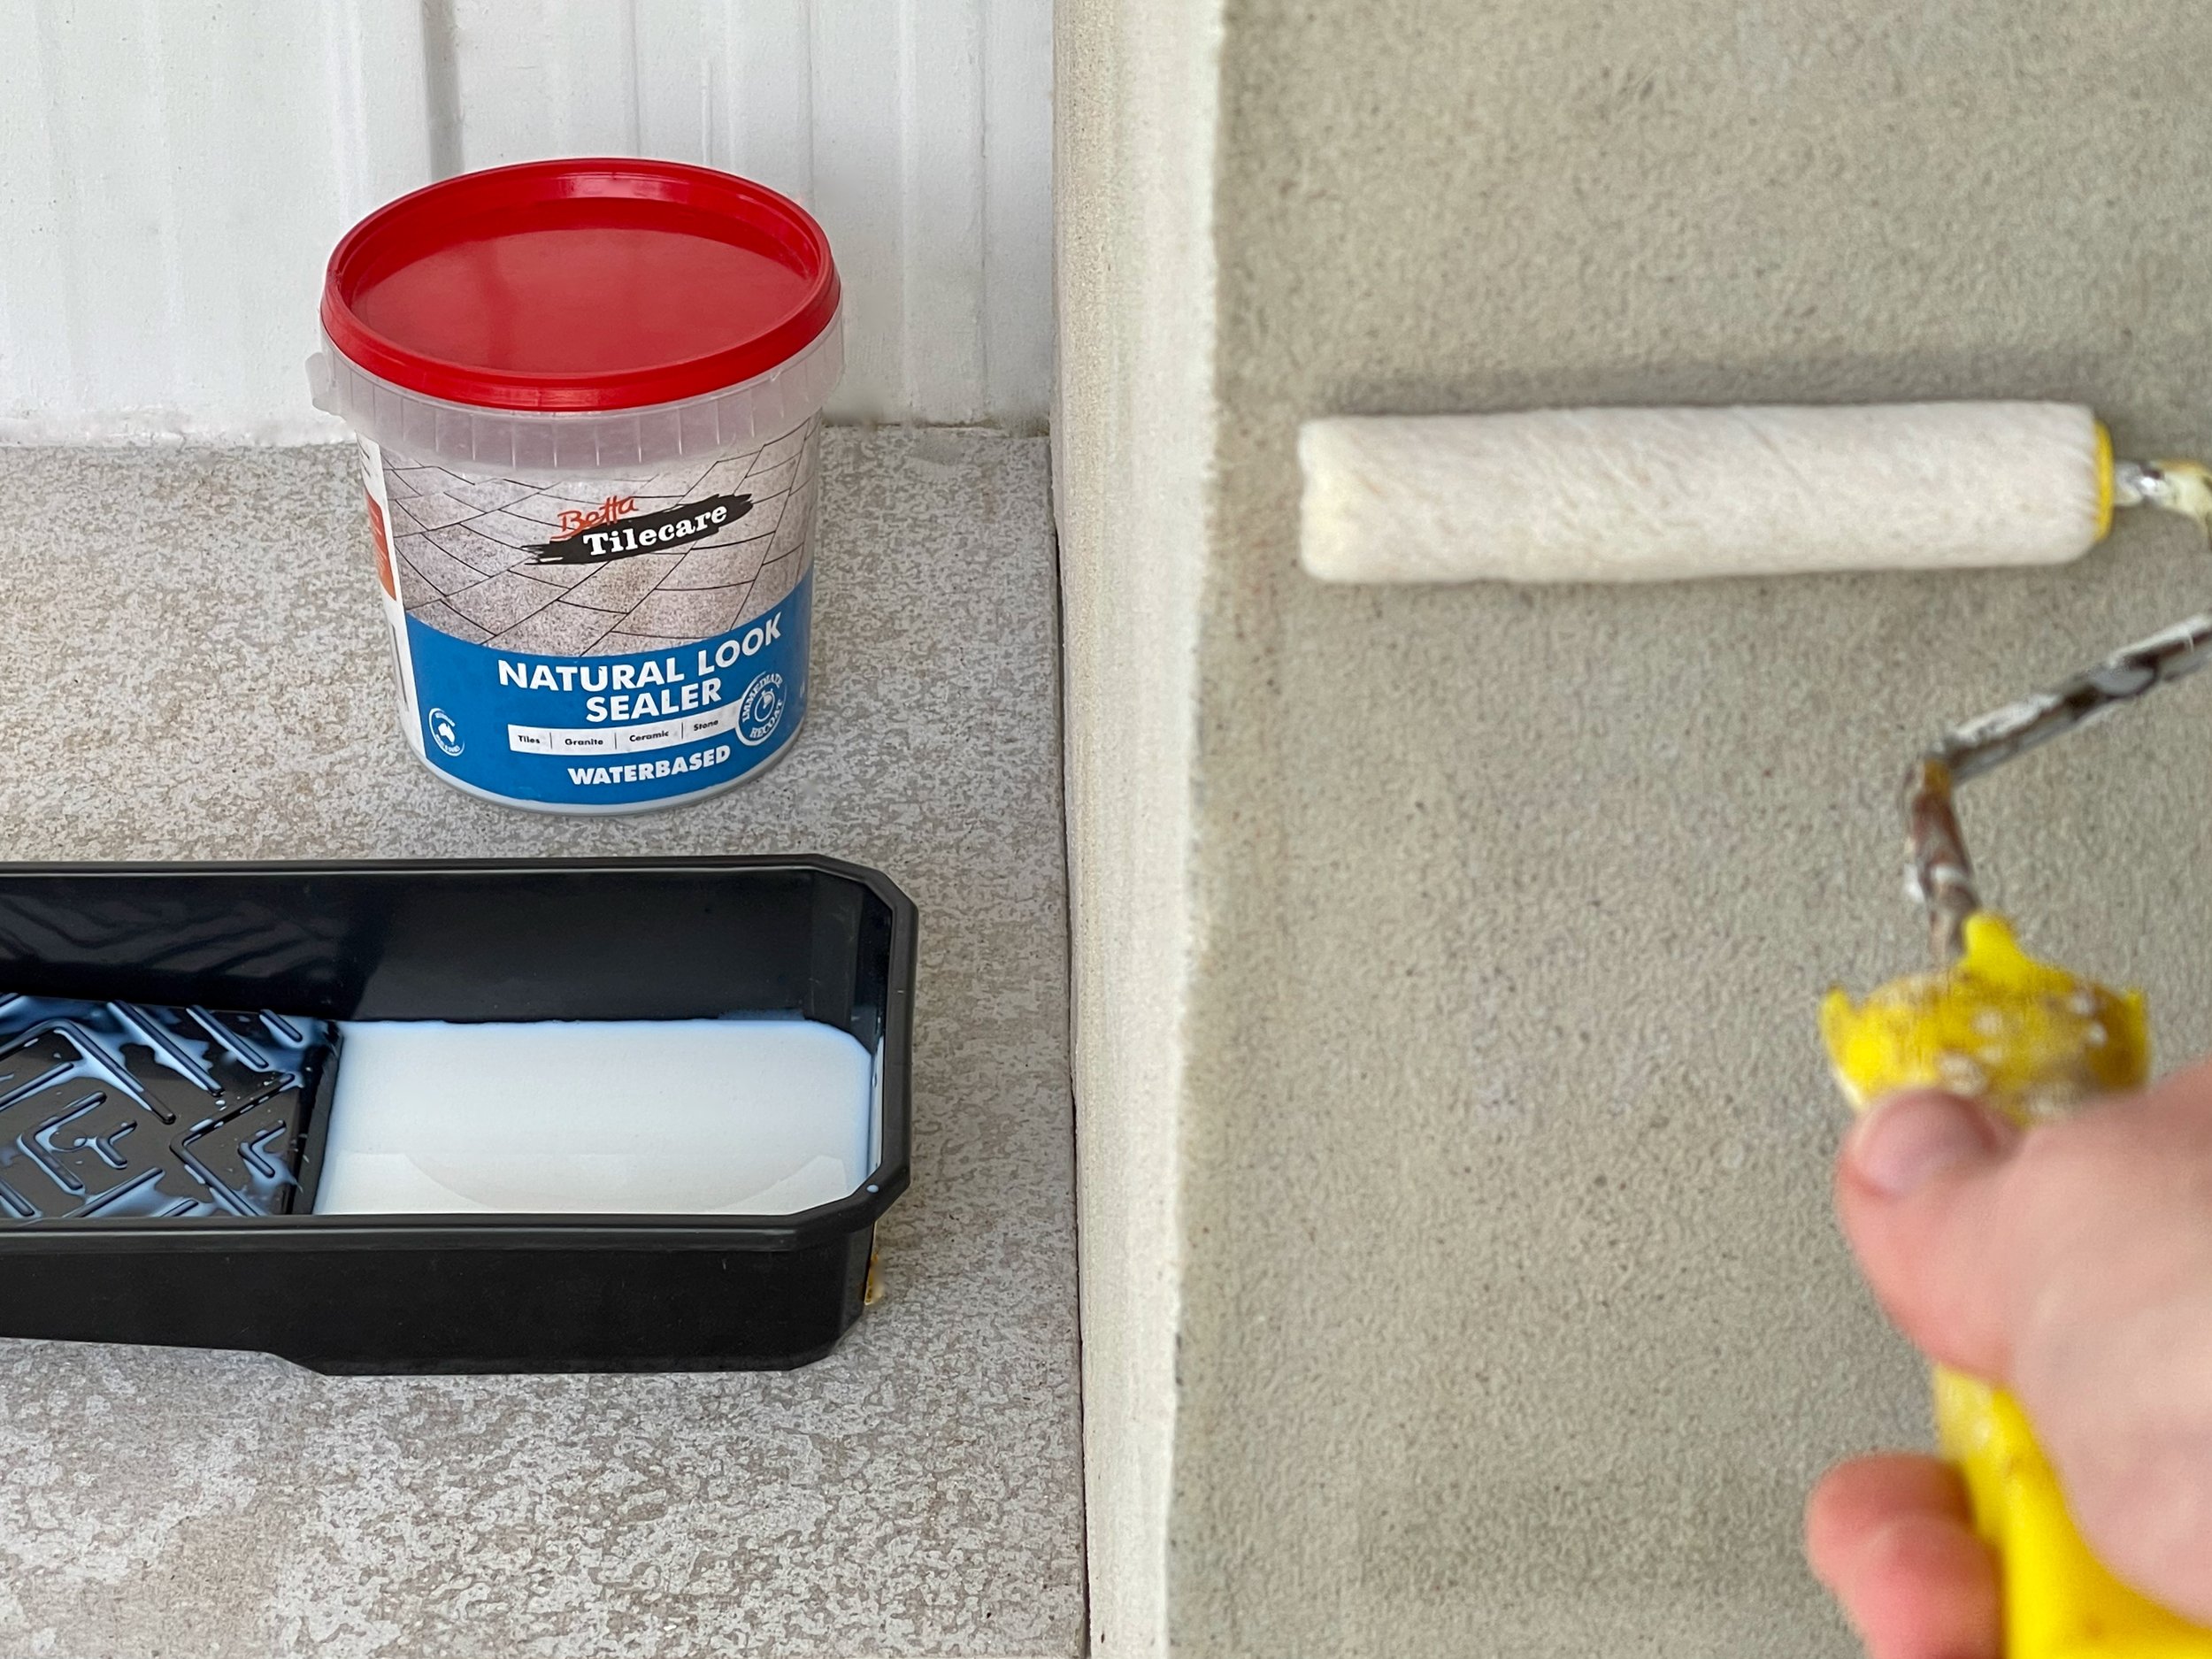
The render took a couple of days to dry completely. I brushed it down to remove loose sand and particles, then finished with two coats of Bondall’s Betta Tilecare Natural Look Sealer using a mini microfibre roller.
TIP The render lightens in colour as it dries, so wait for the entire surface to appear uniform before sealing.

For the tools and materials list, and more details on how to make the bench, click through to the full project in Bunnings Magazine.

Are you planning to get stuck into some rendering?
Tag me on your project and follow more of my DIY journey on Instagram for tool tips, home improvement and simple building projects.