Tiled fireplace hearth
Natasha Dickins
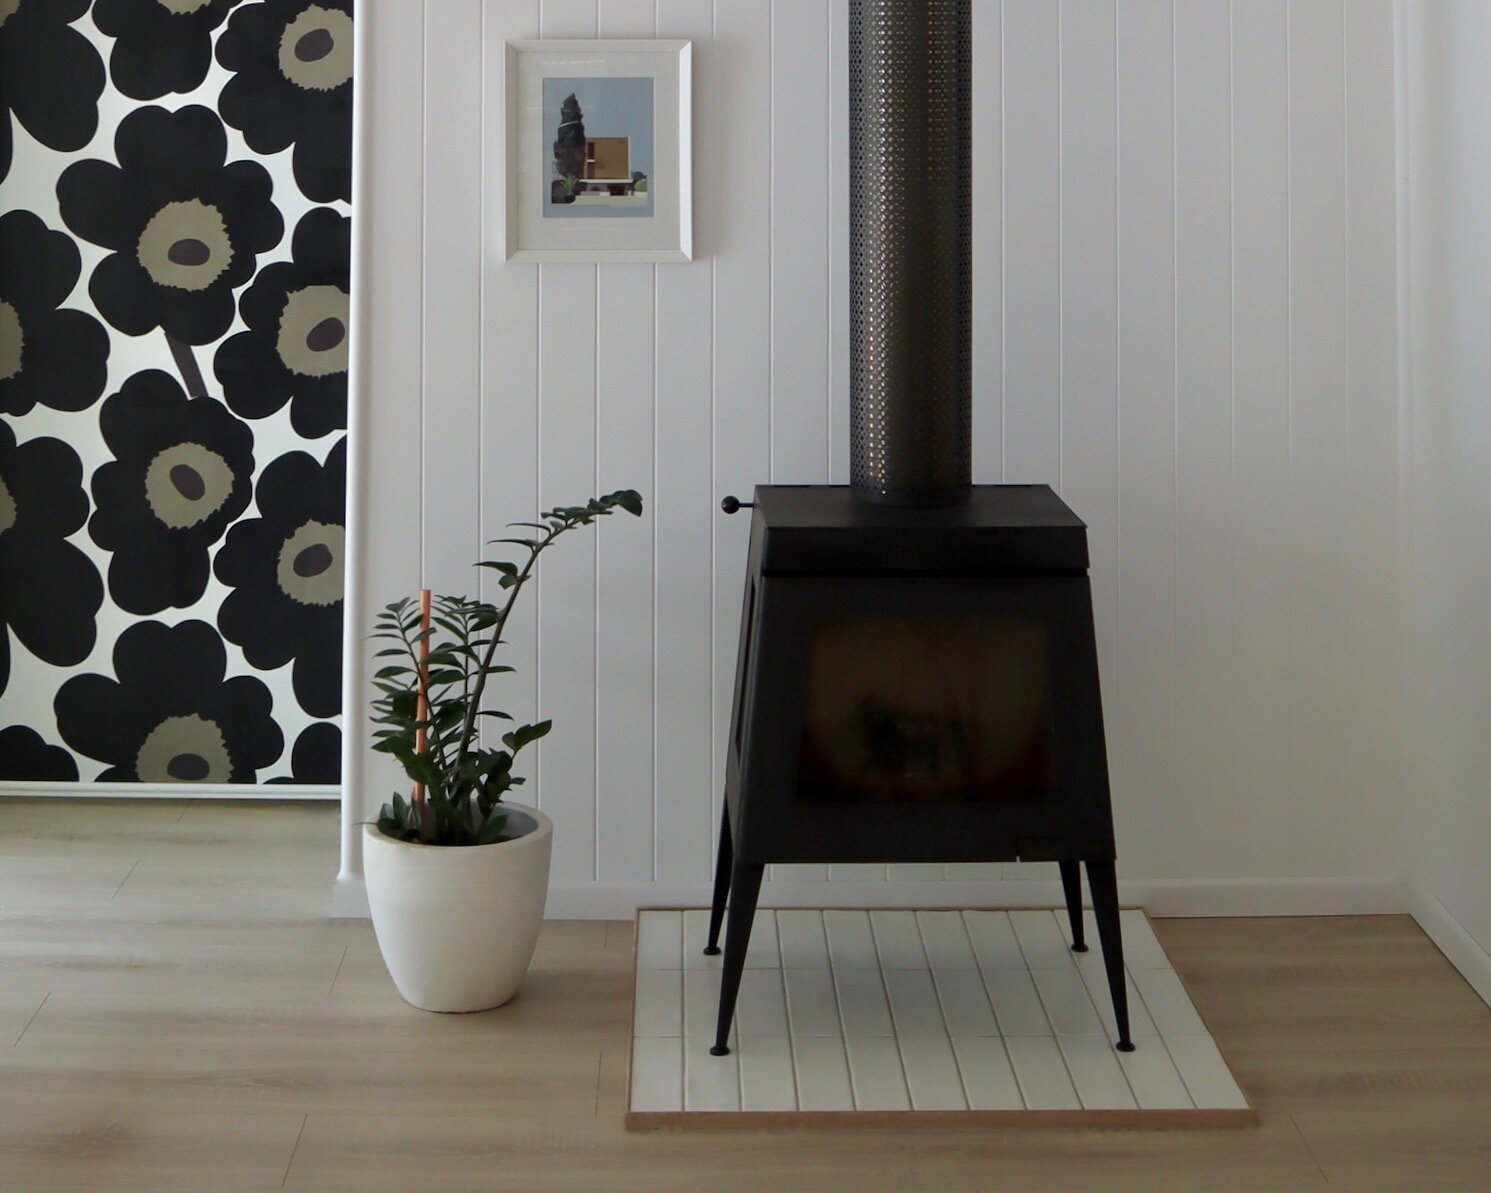
The installation of a new wood-burning heater gave me the opportunity personalise the fireplace area by customising the hearth.
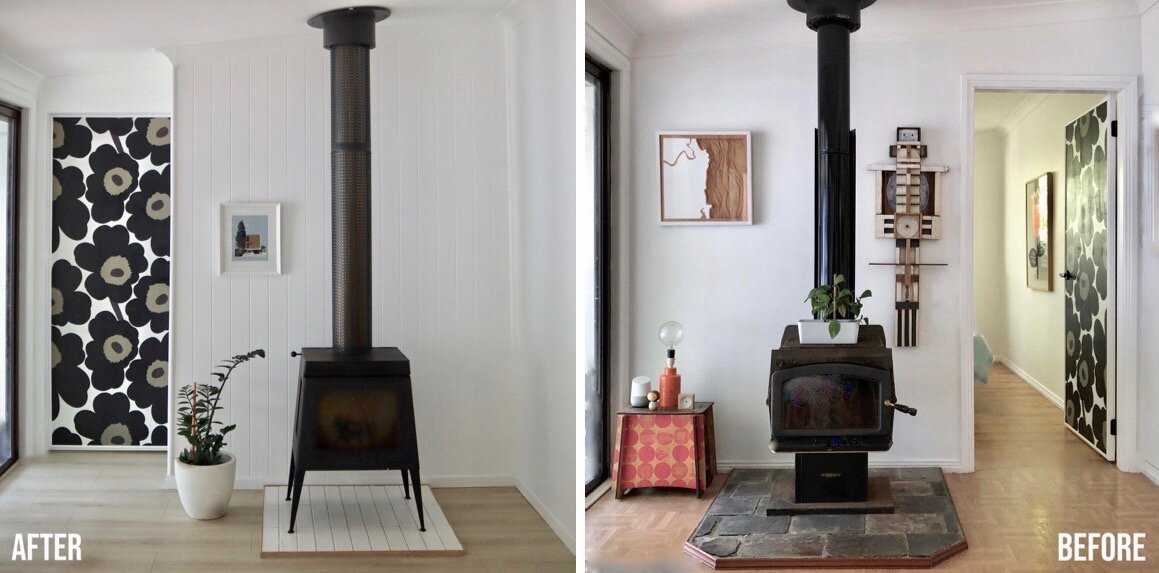
While renovating the bedroom behind this area I knocked out the wall and moved the bedroom door to the other side to make way for a built-in robe. After removing the old fireplace to install a new one slightly to the right, I lay new flooring.

There were many upgrades to this space, but my favourite is the Scandia Edge 50 radiant wood-burning heater. The midcentury-inspired shape is compact, and the elegant feet help minimise the footprint.
While I love the fireplace in winter, this coastal Aussie home heats up to 45°C in summer. To visually cool and soften how it fits into the room, I skipped the usual off-the-shelf hearth for one made of white tiles.

Conscious of ensuring everything about this project was legal and safe, I applied for council approval, which took just a couple of days.
HEATER PLACEMENT must be a certain distance from the walls. The Scandia installation guide lists the minimum clearances and hearth size to meet building codes.
A HEARTH CHECK with the technical guys at James Hardie ensured the fibre cement underlay provided sufficient fire retardancy.
A CERTIFIED PLUMBER ticked off all the safety boxes as he installed the heater and flue.
COUNCIL APPROVAL began as a quick chat with a council builder to check my unusual concept for the hearth, then the entire installation was inspected and approved.
“I swapped traditional slate with modern subways to brighten the surface under the fireplace so it fits into the room all year round. In summer, a plant sits on top to soften the edges and liven it up.”

I marked out the hearth on a sheet of fire-retardant James Hardie 6mm-thick ceramic tile underlay, clamping pine offcuts around it as formwork. I mixed up Dunlop Wall & Floor Tile Adhesive in a small bucket, then used a small square-notched adhesive spreader to apply in sections about 5mm thick.
TIP Use paper cups to measure, keeping one dry for the adhesive powder and using the other for water, mixing a cup of adhesive to about a third-cup of water.

The first tile is positioned flush with the corner, then I used 3mm cross spacers to set the rest out evenly, applying the adhesive in rows of about two tiles and mixing up more as needed to prevent it from drying out.
TIP I’d measured out the hearth to be 11 tiles wide by three tiles deep, laying them in a stack bond pattern to avoid having to make any cuts.

After laying the tiles, I removed all the spacers and wiped away excess adhesive with a clean damp cloth. I ran a 150mm grout squeegee over the surface to ensure the tiles are flat and even, leaving them to set.
TIP I used 33 Decor8 75mm x 300mm white Devonshire wall tiles with a matt, slightly textured finish.
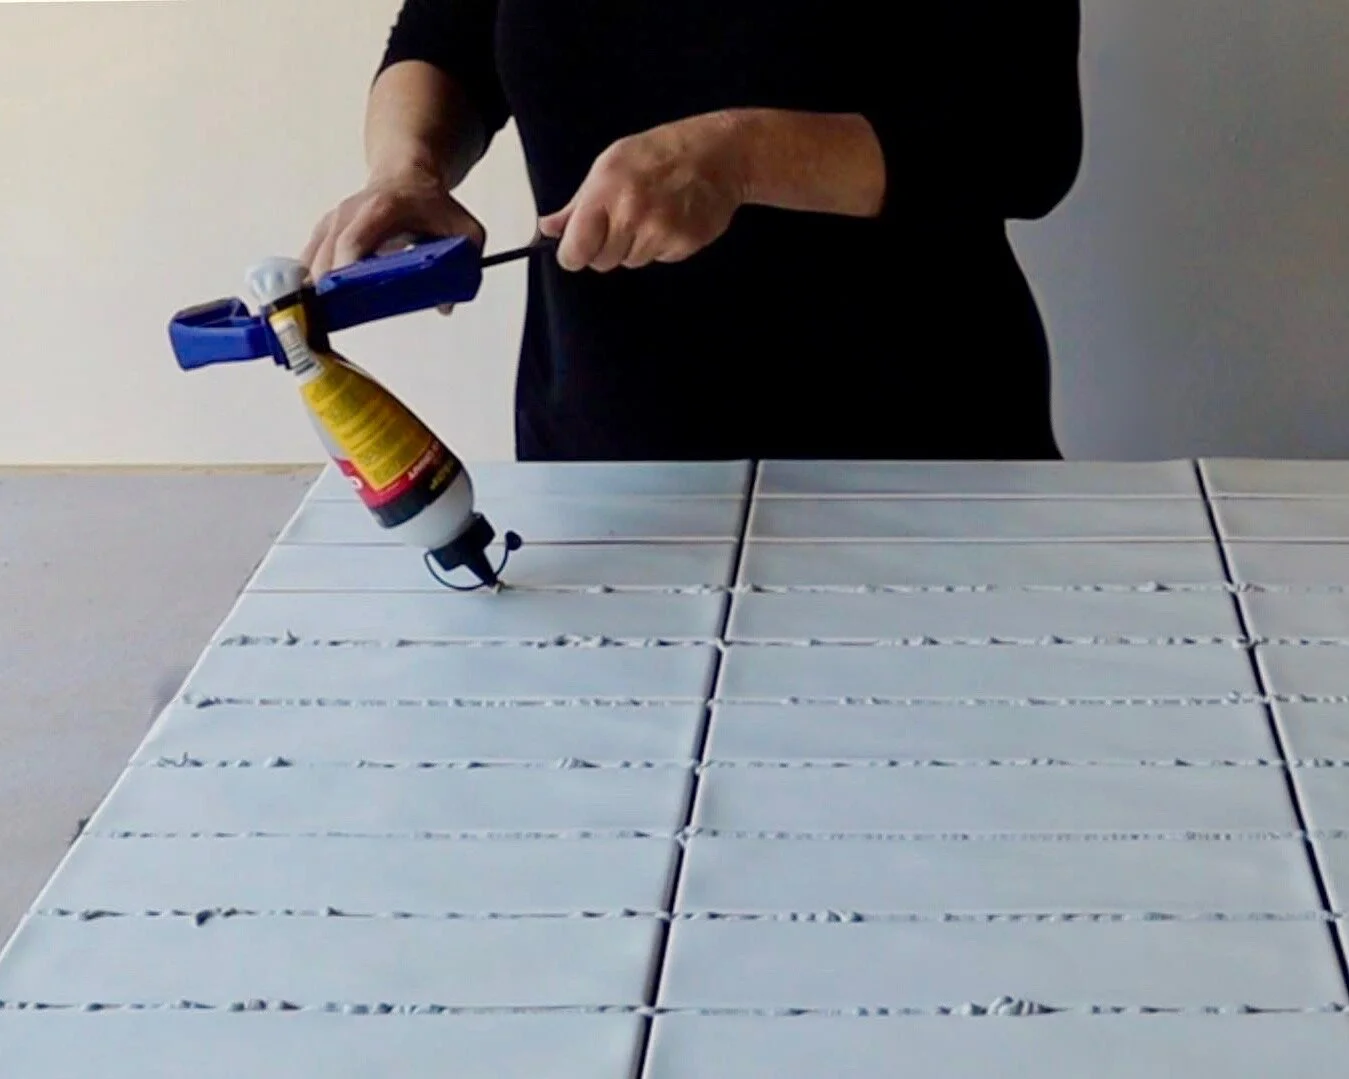
To apply grout, I used an Irwin quick-grip clamp to squeeze the bottle while running the nozzle between the tiles. I smoothed it out with the squeegee, wiped the tiles with a damp sponge to remove the excess, then left the grout to cure overnight.
TIP I used Dunlop ready-to-go coloured grout in Misty Grey, choosing a shade that wouldn’t discolour with ash and soot from from the fireplace.

After buffing the tiles with a dry cloth to remove the grout mist, I sealed it with Bondall Betta TileCare grout sealer, running the wheel applicator over the grout and wiping away excess with a dry cloth.
TIP This sealer is a lovely fast-dry formula that allows you to apply a couple of coats quickly. The finish is matt and clear and doesn’t dull the tiles.

I trimmed the 6mm ceramic tile underlay in line with the tiles, then cut another underlay of 9mm-thick fibre cement sheeting to adhere underneath, making the hearth thicker to protect the floor.
TIP Fibre cement cuts tend to have a rough edge, so smooth around the underlay using 80-grit abrasive paper with a sanding block.

To edge around the hearth I mitred lengths of Porta 22mm x 7mm Tasmanian oak shelf lipping to fit. These were sanded and sealed with three coats of fast-drying Monocel Waterbased Clear Wood Varnish and secured with Selleys Liquid Nails, which I taped to hold while drying.
TIP The moulding was knocked off when the hearth was moved into position, so I had to re-glue it on site. Be generous with the Liquid Nails and don’t move the hearth until it’s completely dry.

When the plumber came to install, we moved the heavy hearth into position and lifted the the Scandia Edge 50 radiant wood heater onto it. He checked the clearances from the wall met code then installed the flue up through the roof.
The combined weight of the heater and hearth ensures it won’t move. I later installed new water- and burn-resistant Floor Select laminate flooring in Palomino Oak around the hearth.
TIP To keep the hearth clean, vacuum or sweep up soot, ash and wood chips, then simply wipe the tiles with a warm damp cloth.

How is your home being heated this winter?
Tag me on your project and follow more of my DIY journey on Instagram for tool tips, home improvement and simple building projects.