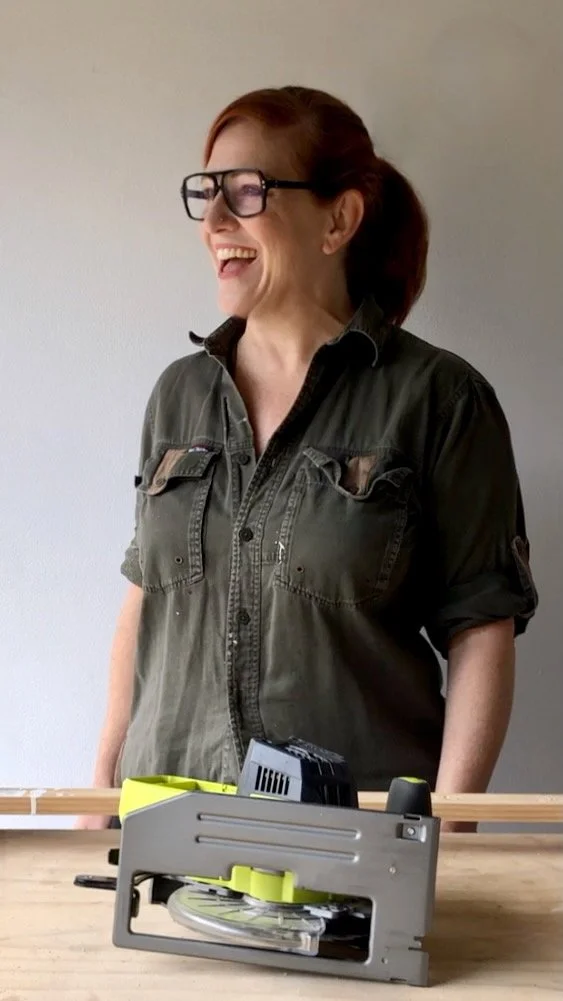
contact Me

Use the form on the right to contact us.

You can edit the text in this area, and change where the contact form on the right submits to, by entering edit mode using the modes on the bottom right.

109 Sydenham Rd
Marrickville, NSW, 2204

+61 (0)410 32 5575

In every Australian garage is an unloved chair... Little Red Industries aims to find them and completely revamp them to last another lifetime. Great design choices, unique finishes and fabrics and smart repairs combine with a guarantee that sturdiness and a solid structure always come first. If you're after a certain style or something special Little Red Industries can source it for you.

Renovate

MY DIY LAUNDRY RENO

Natasha Dickins

Renovating the laundry has turned out to be the most efficient transformation in our home.

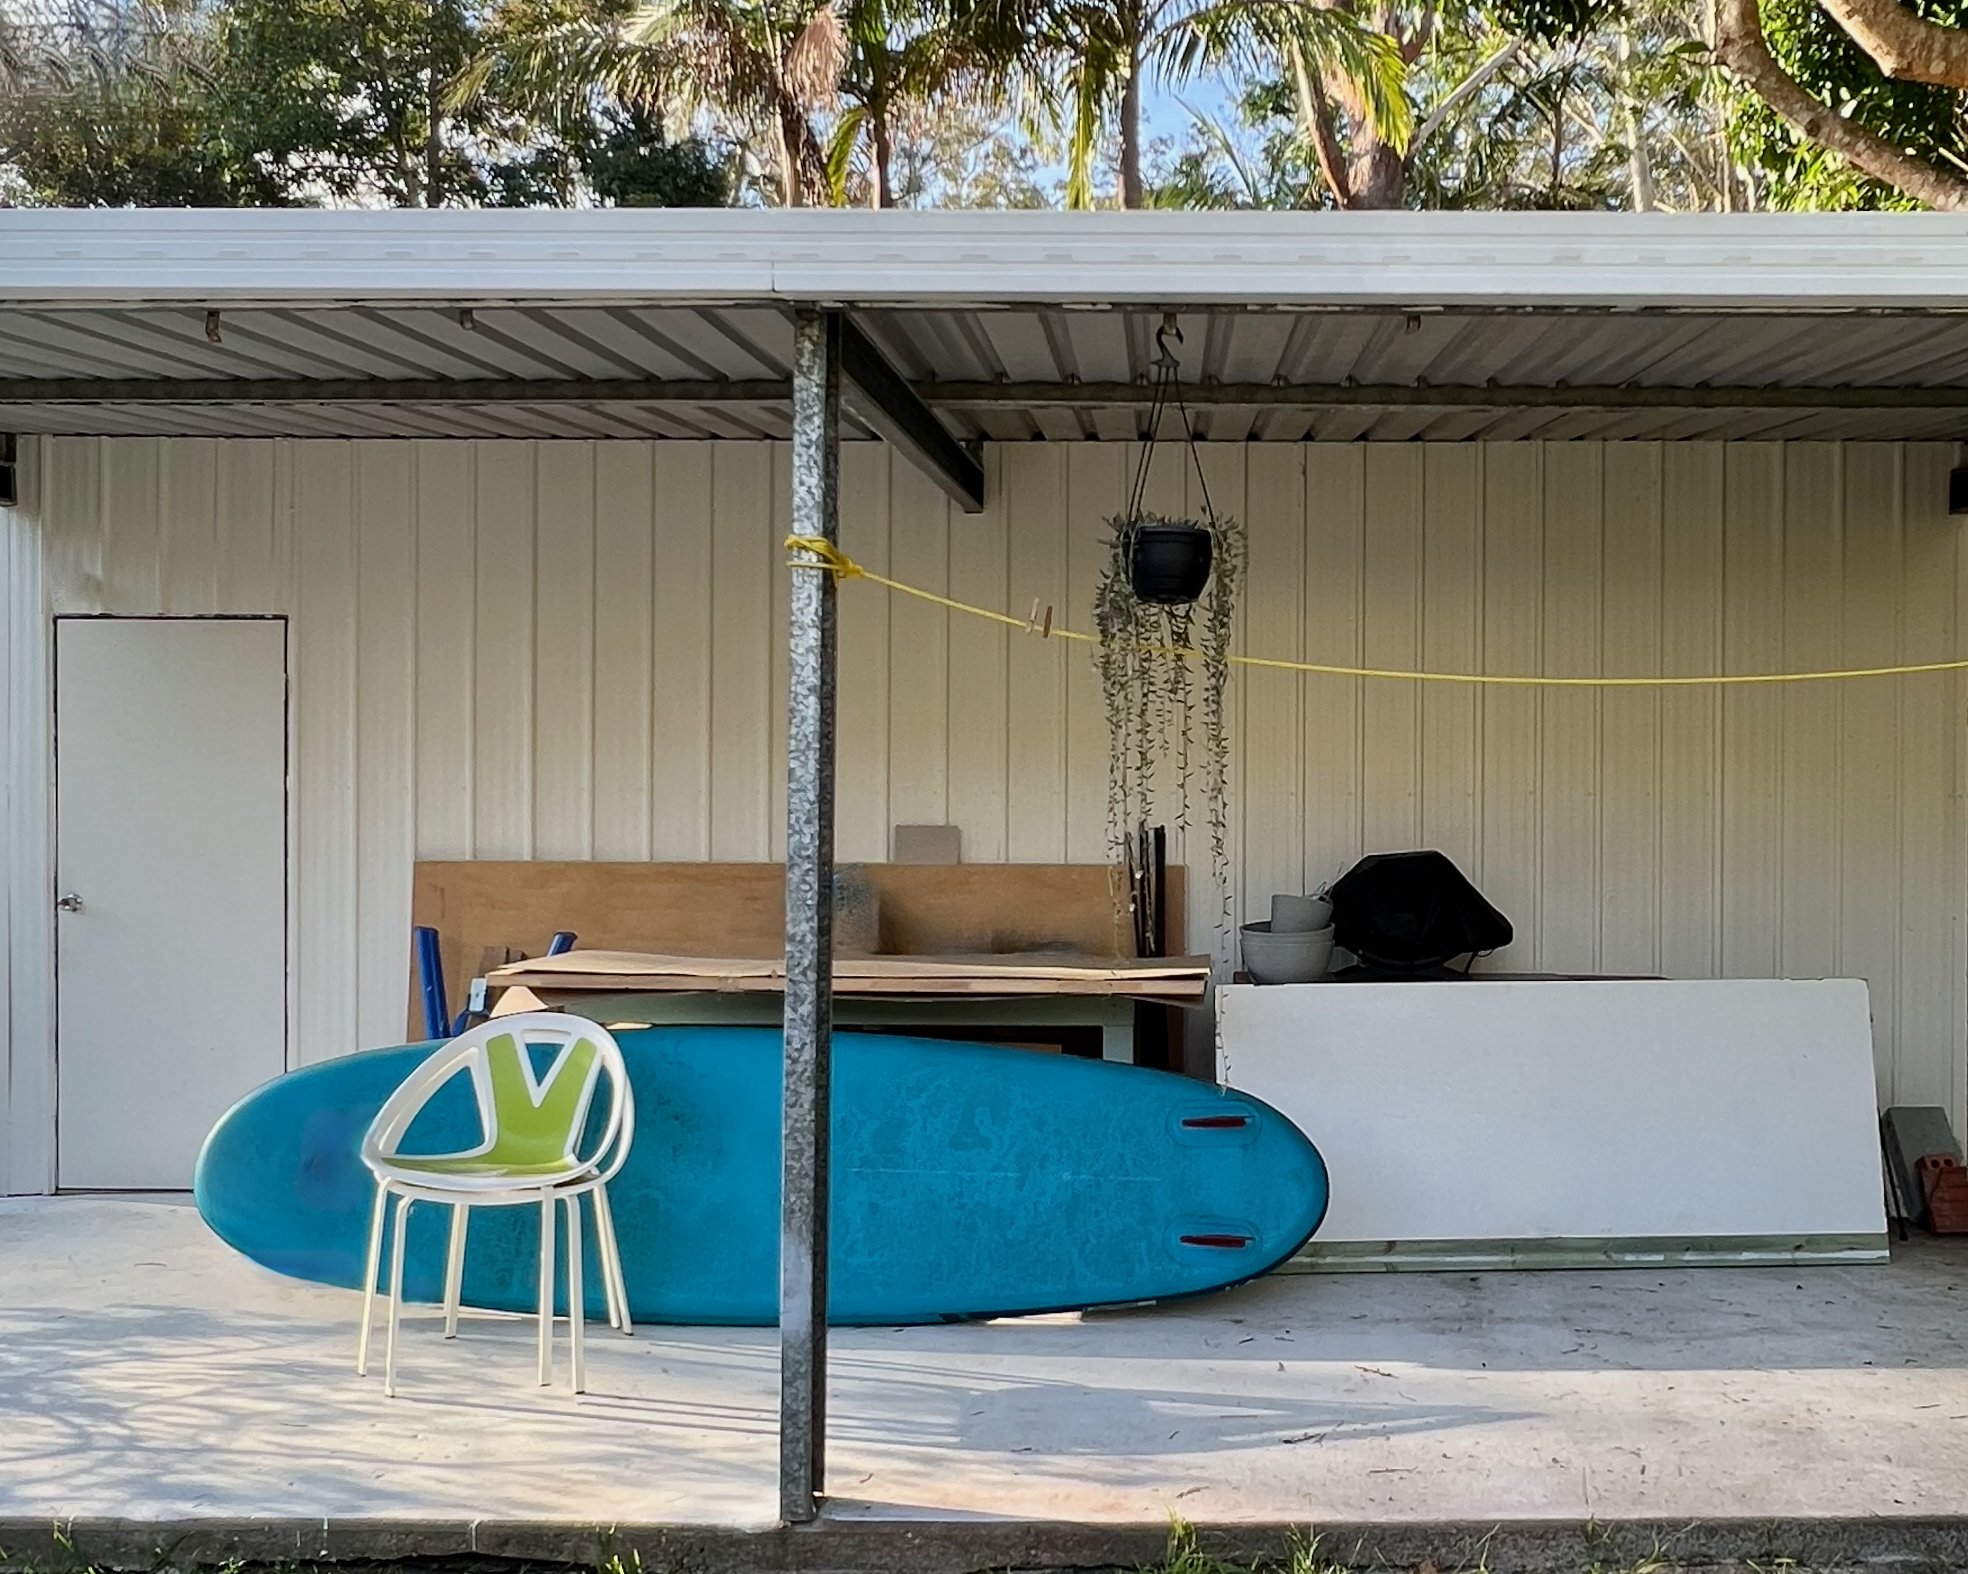
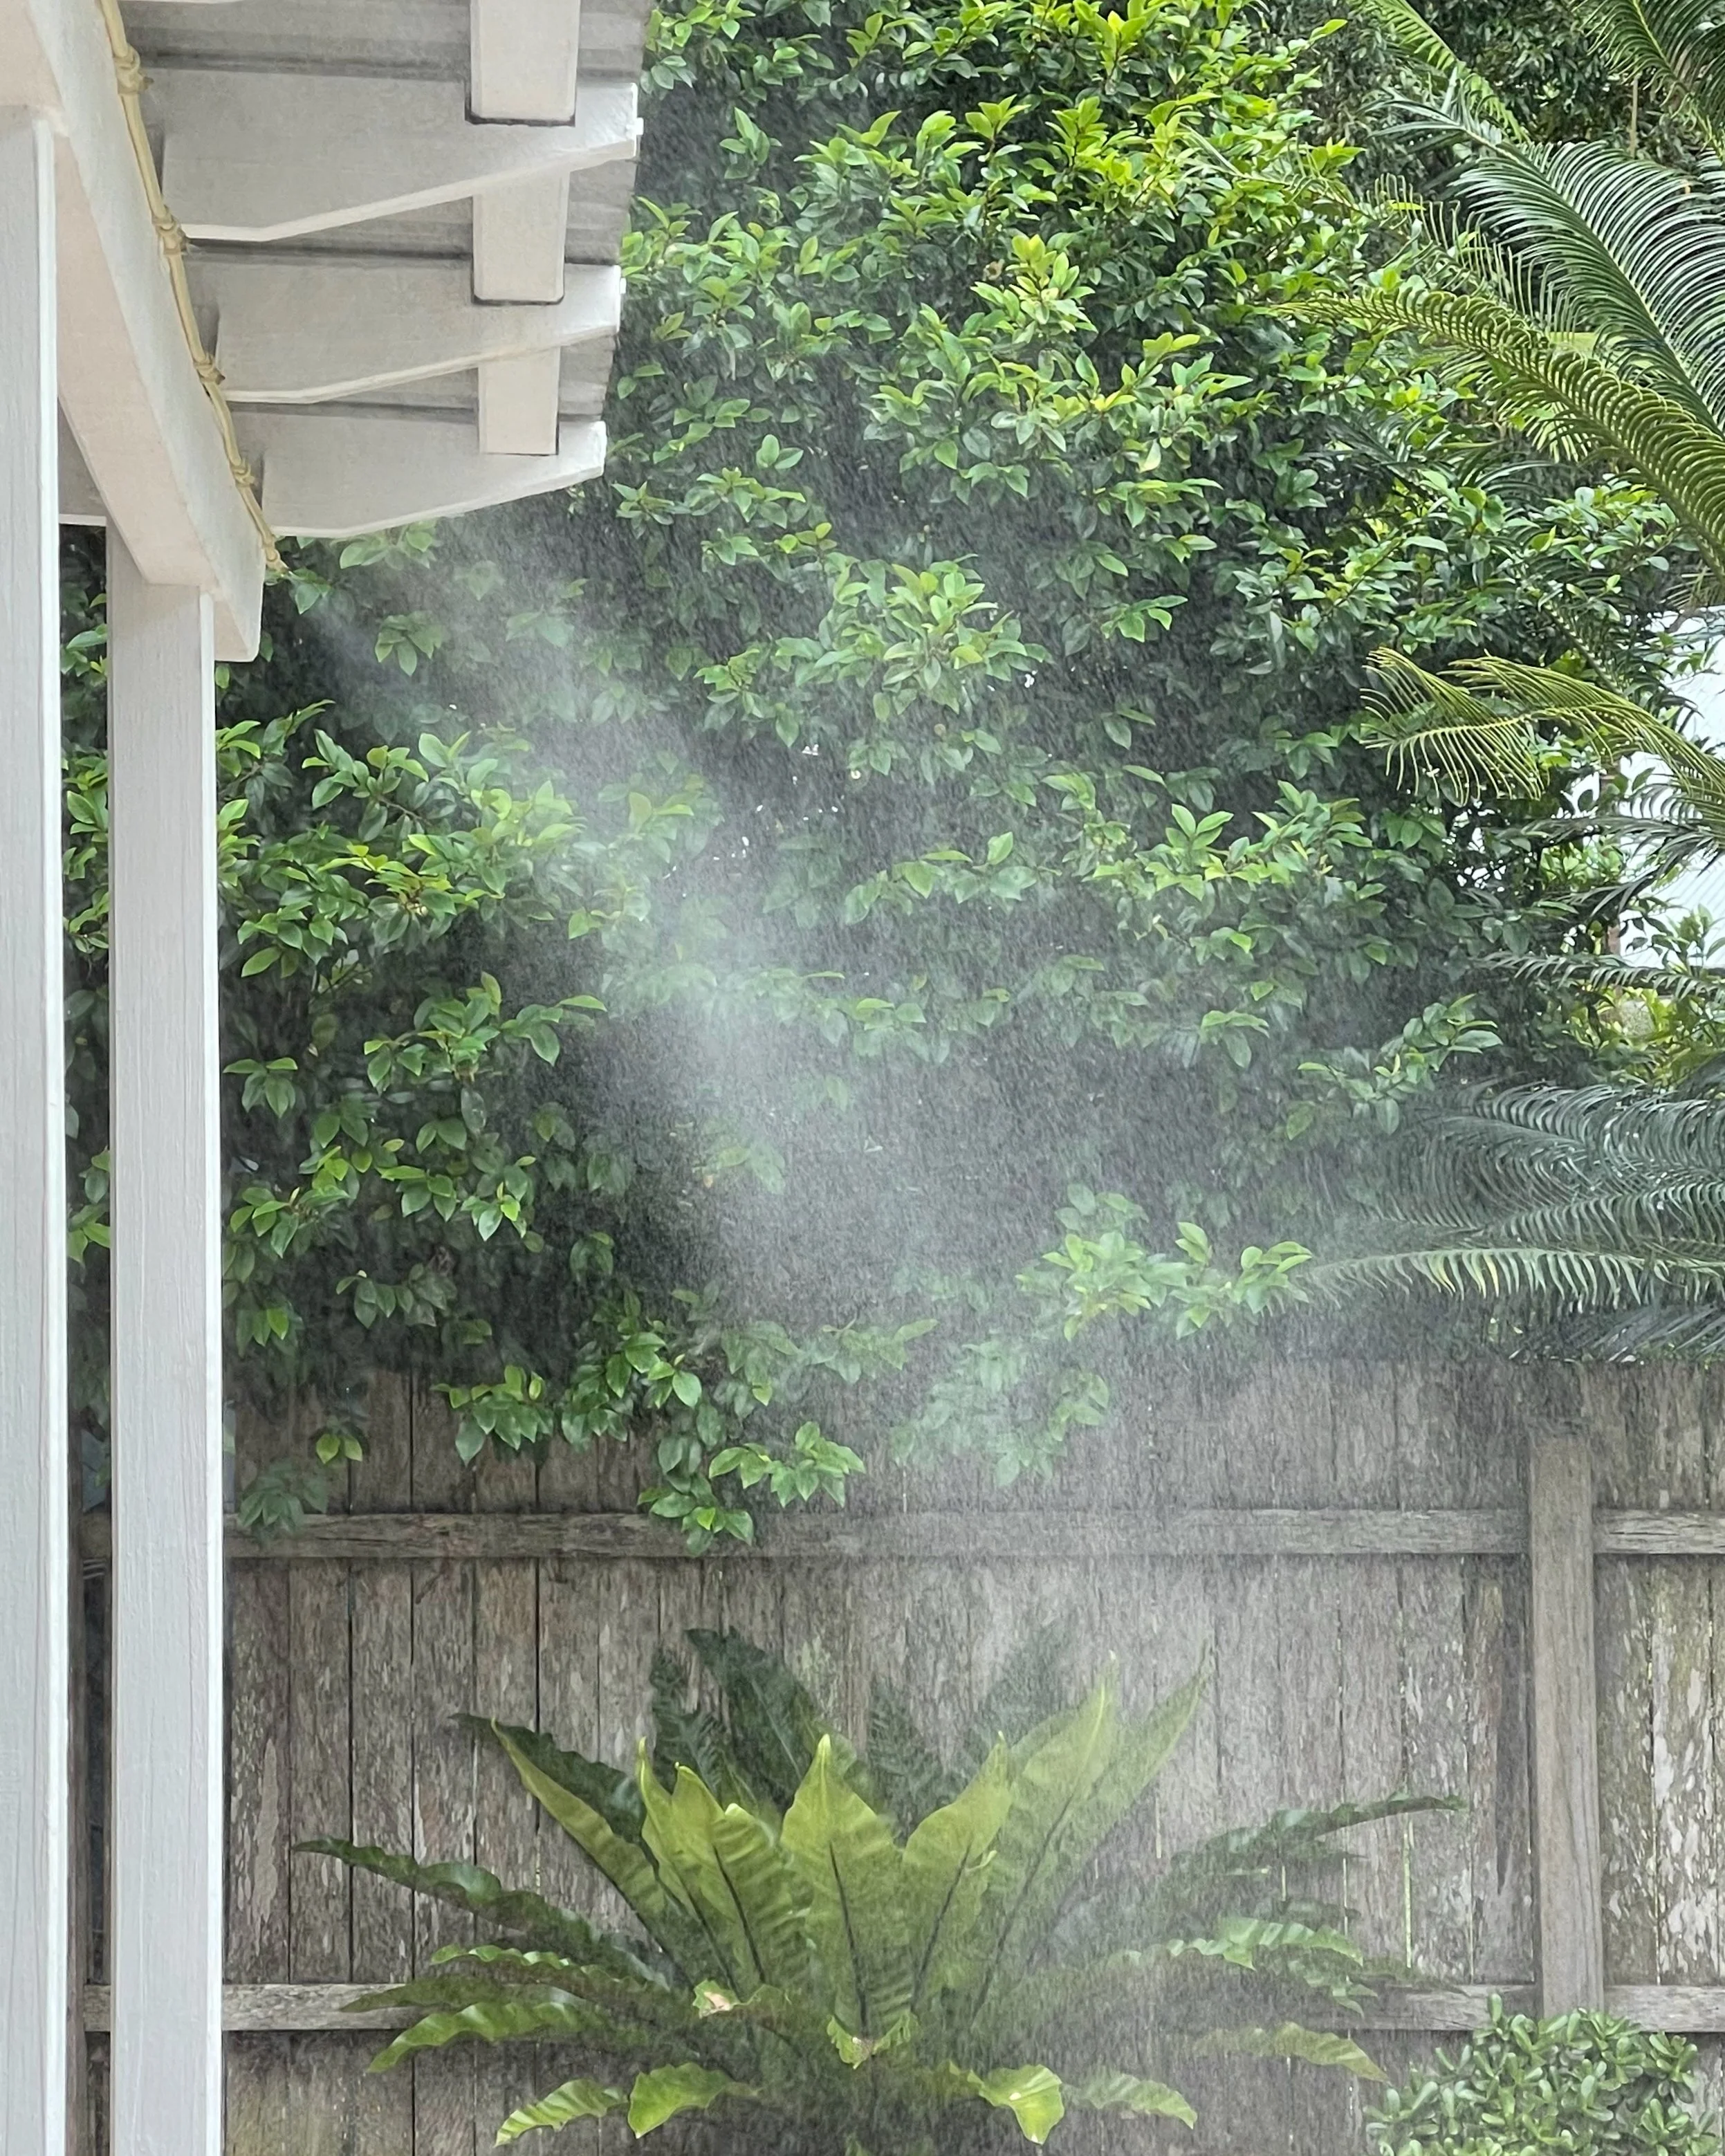
It’s had a few upgrades over the years and is now one of the busiest spaces. It services the deck and surrounding yard as a powder room. The hot-water outdoor shower doubles as a second bathroom and is great after a walk on the nearby beach.


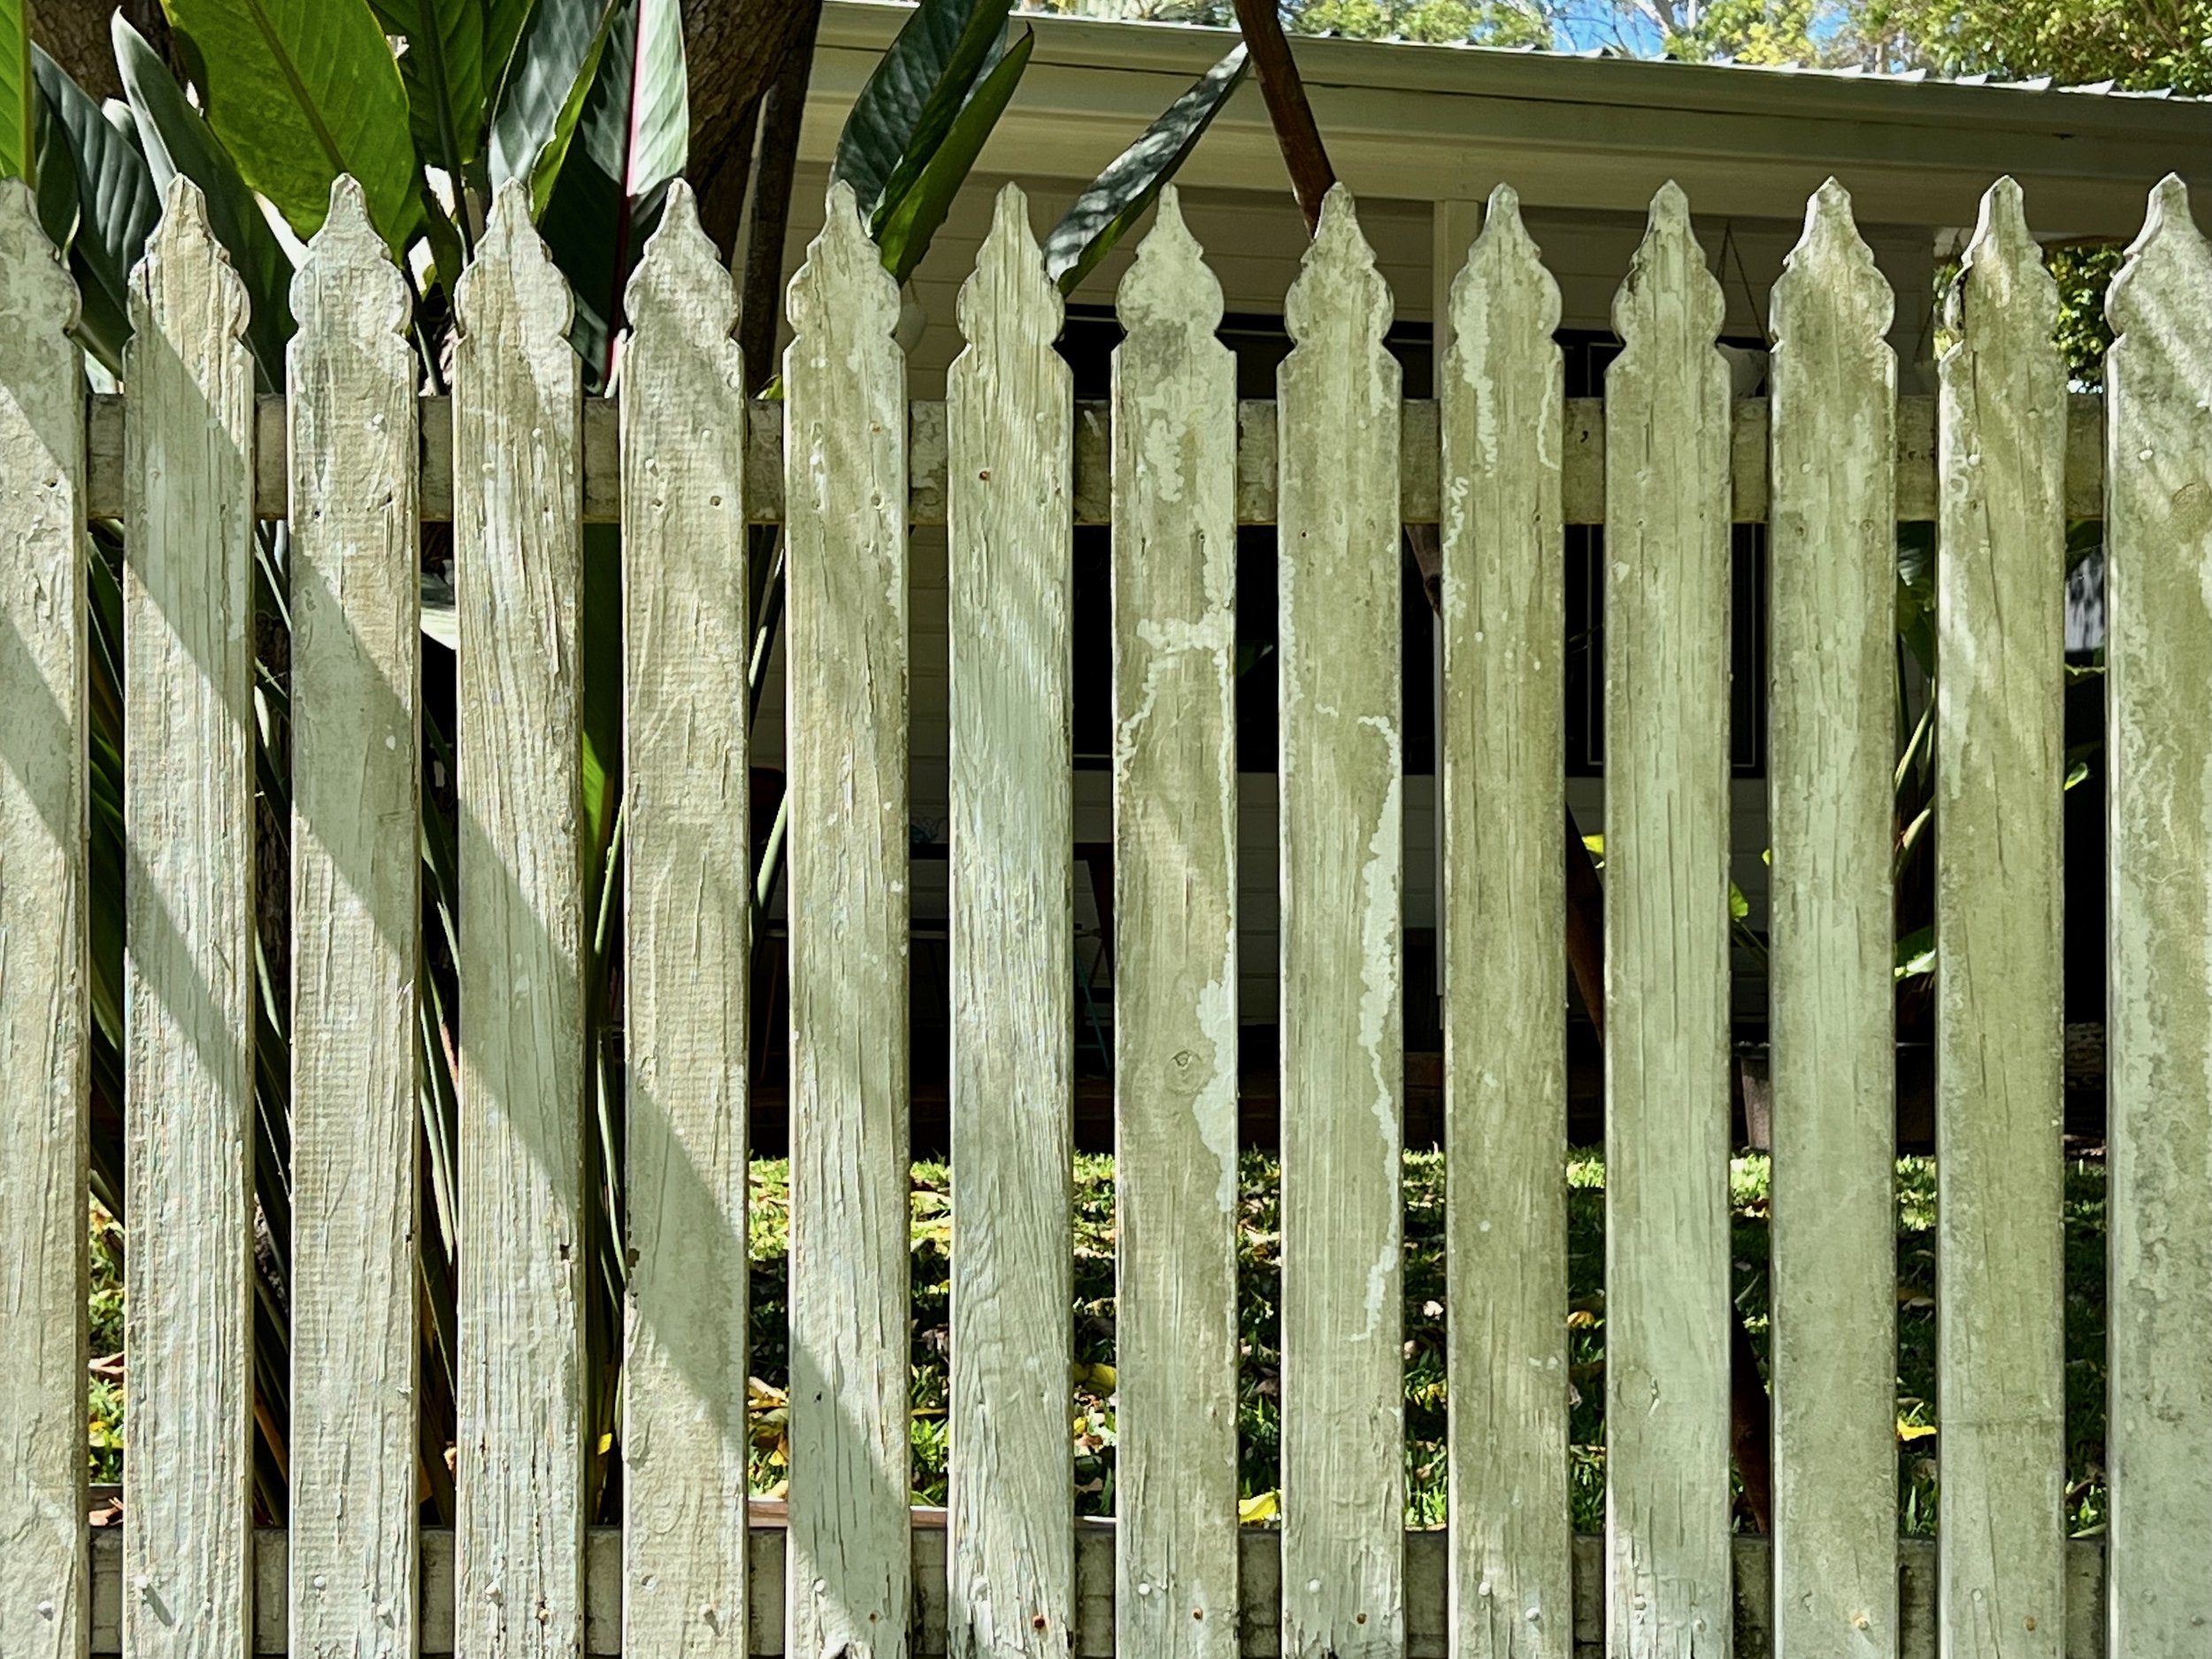
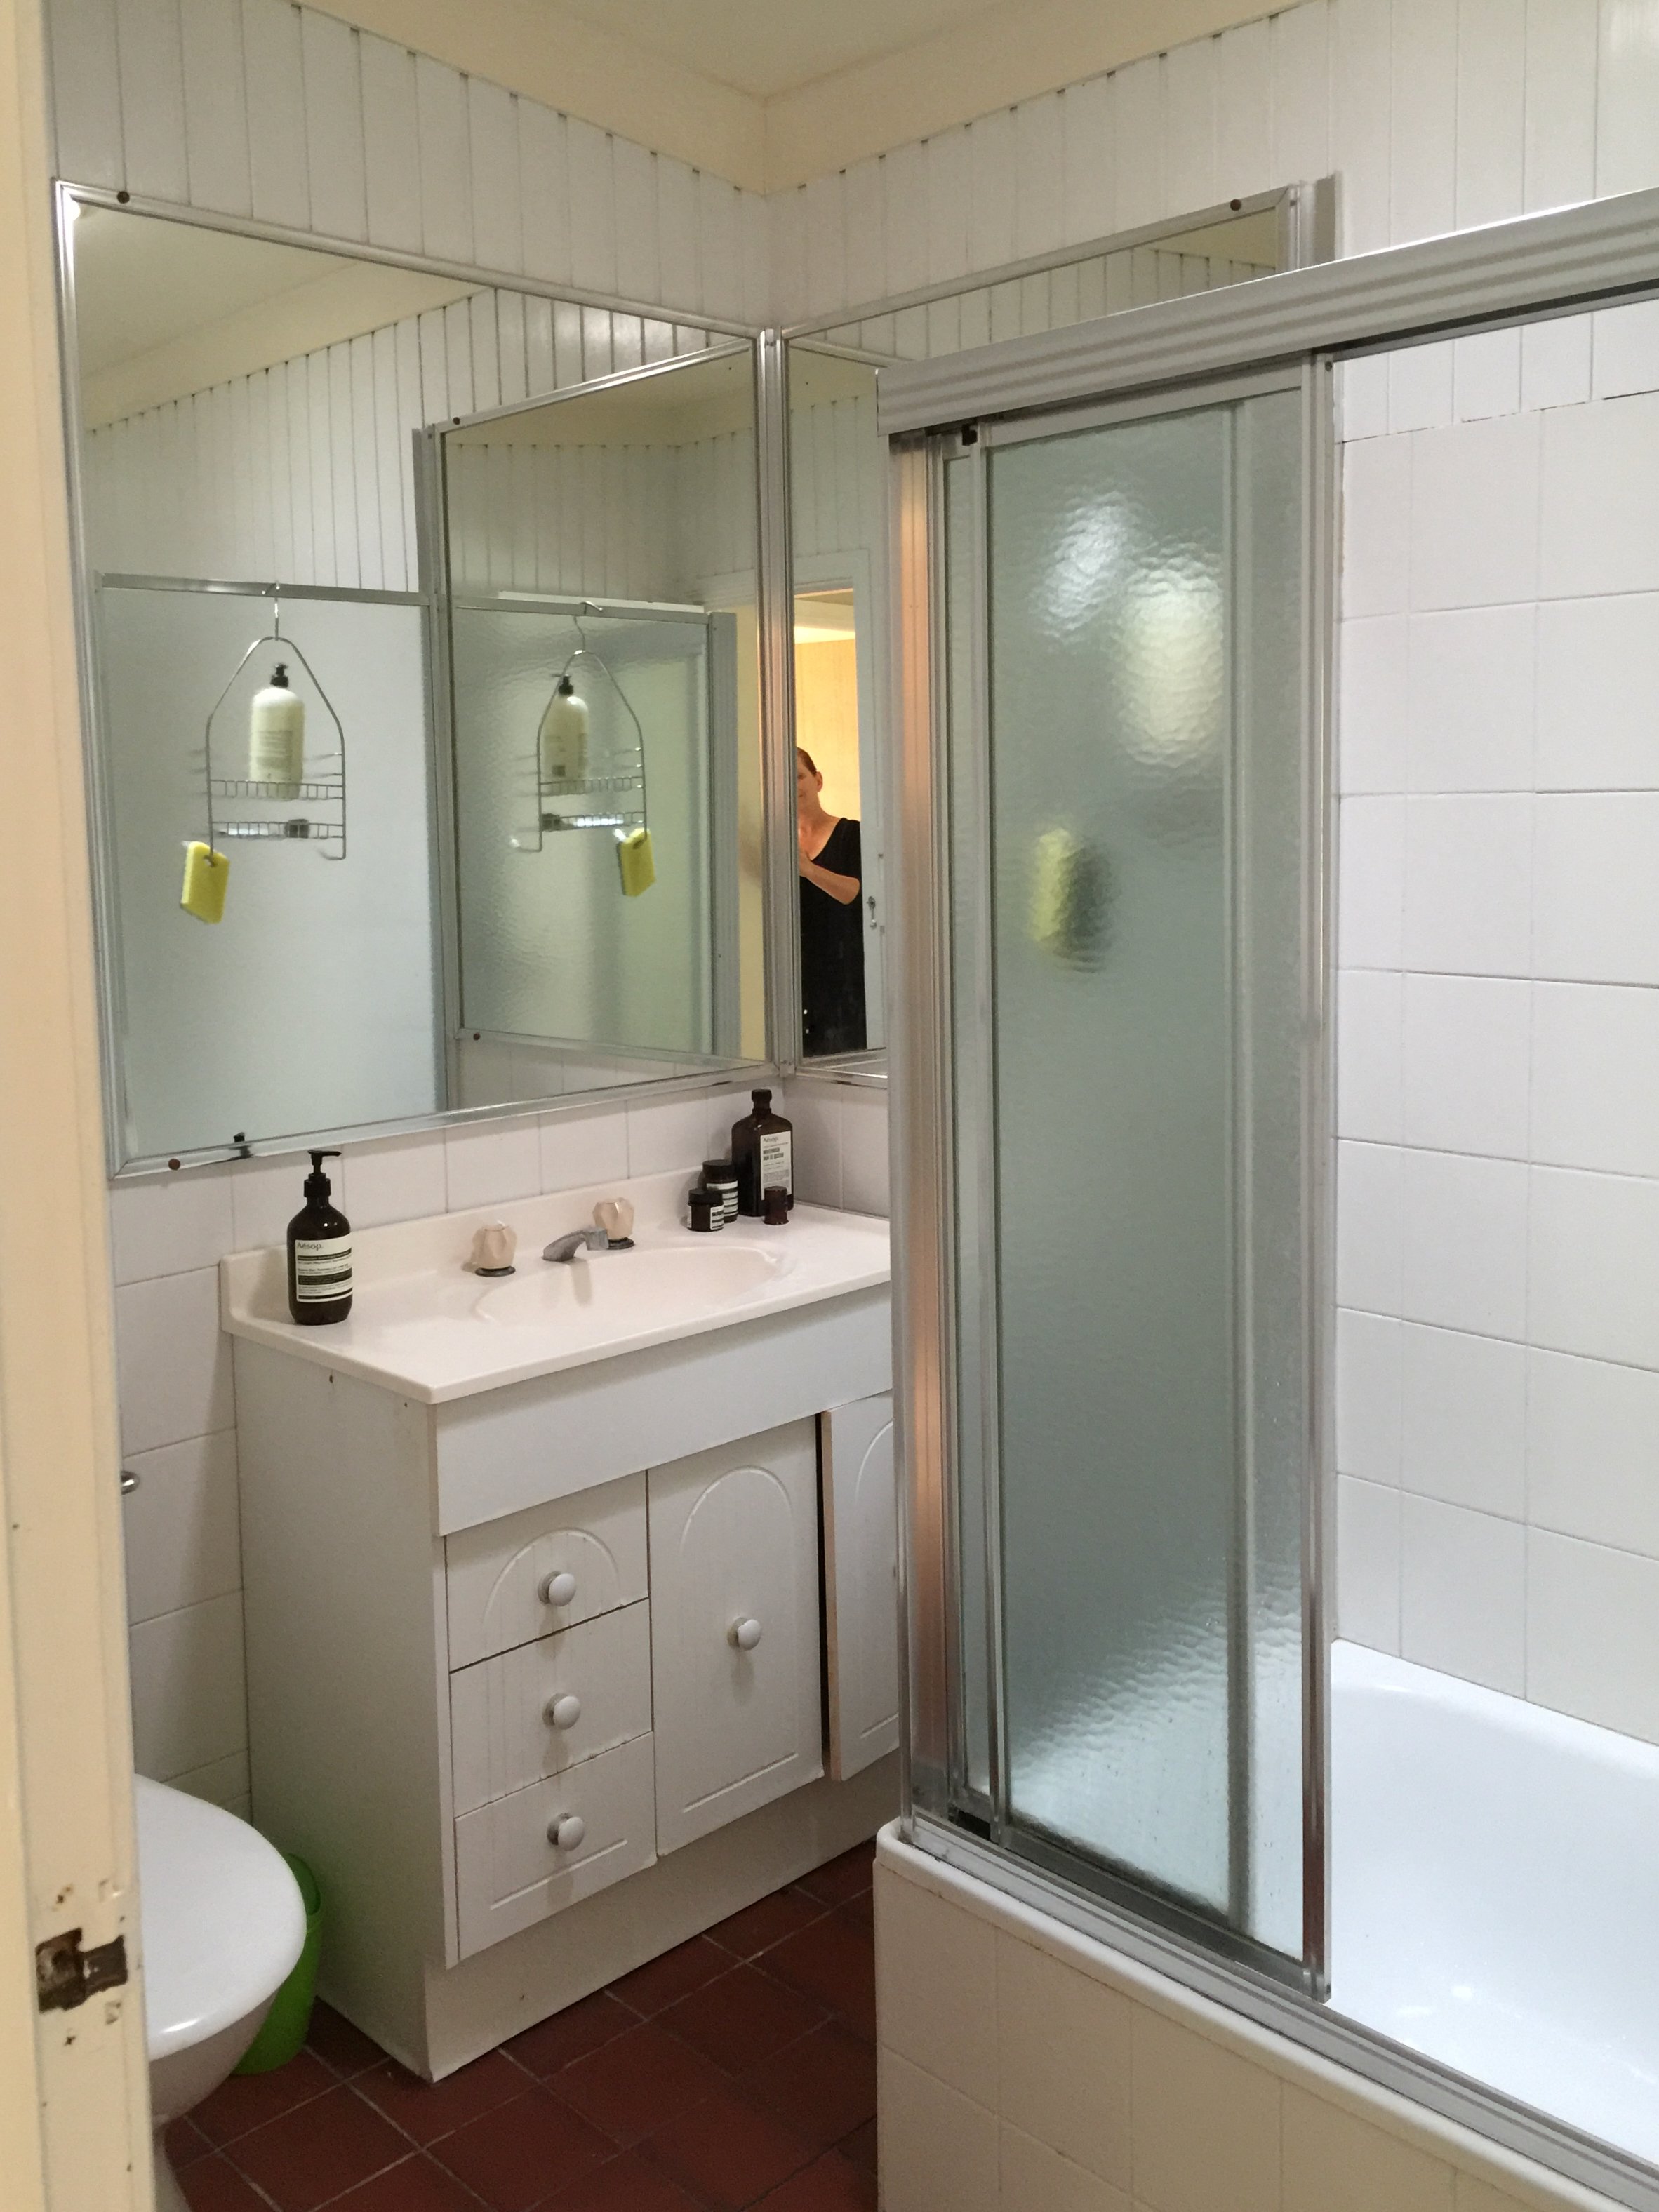
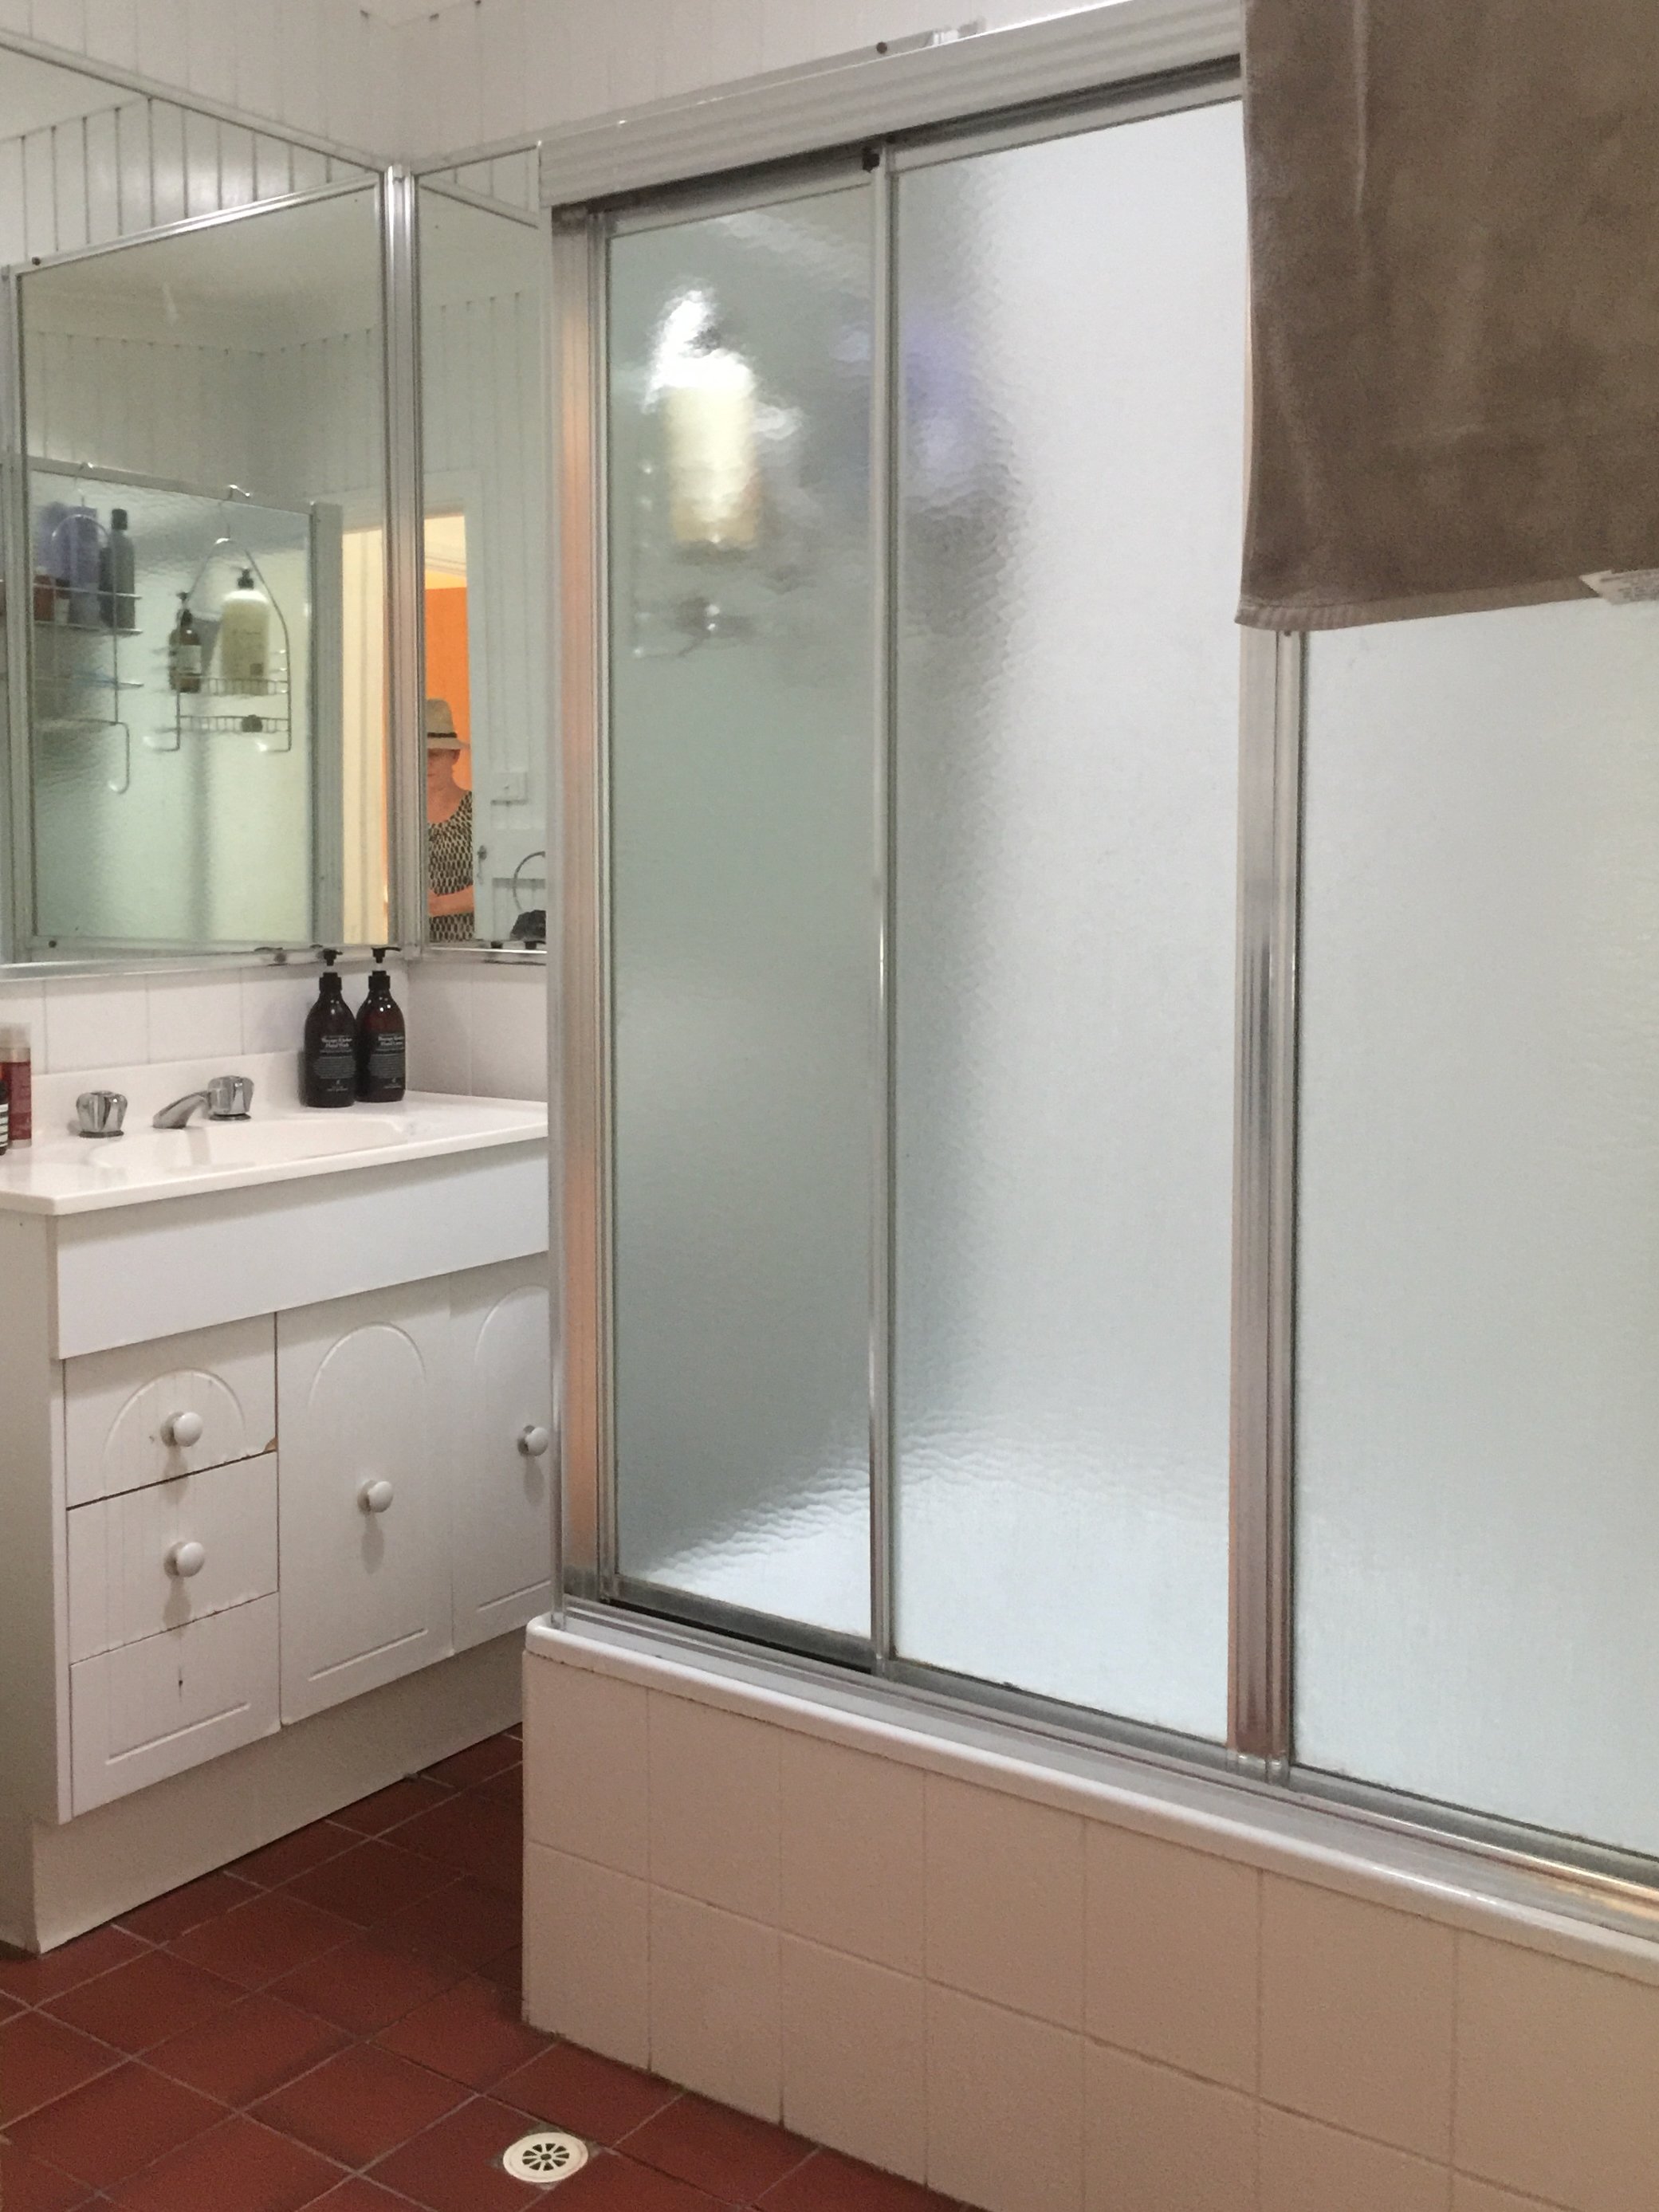
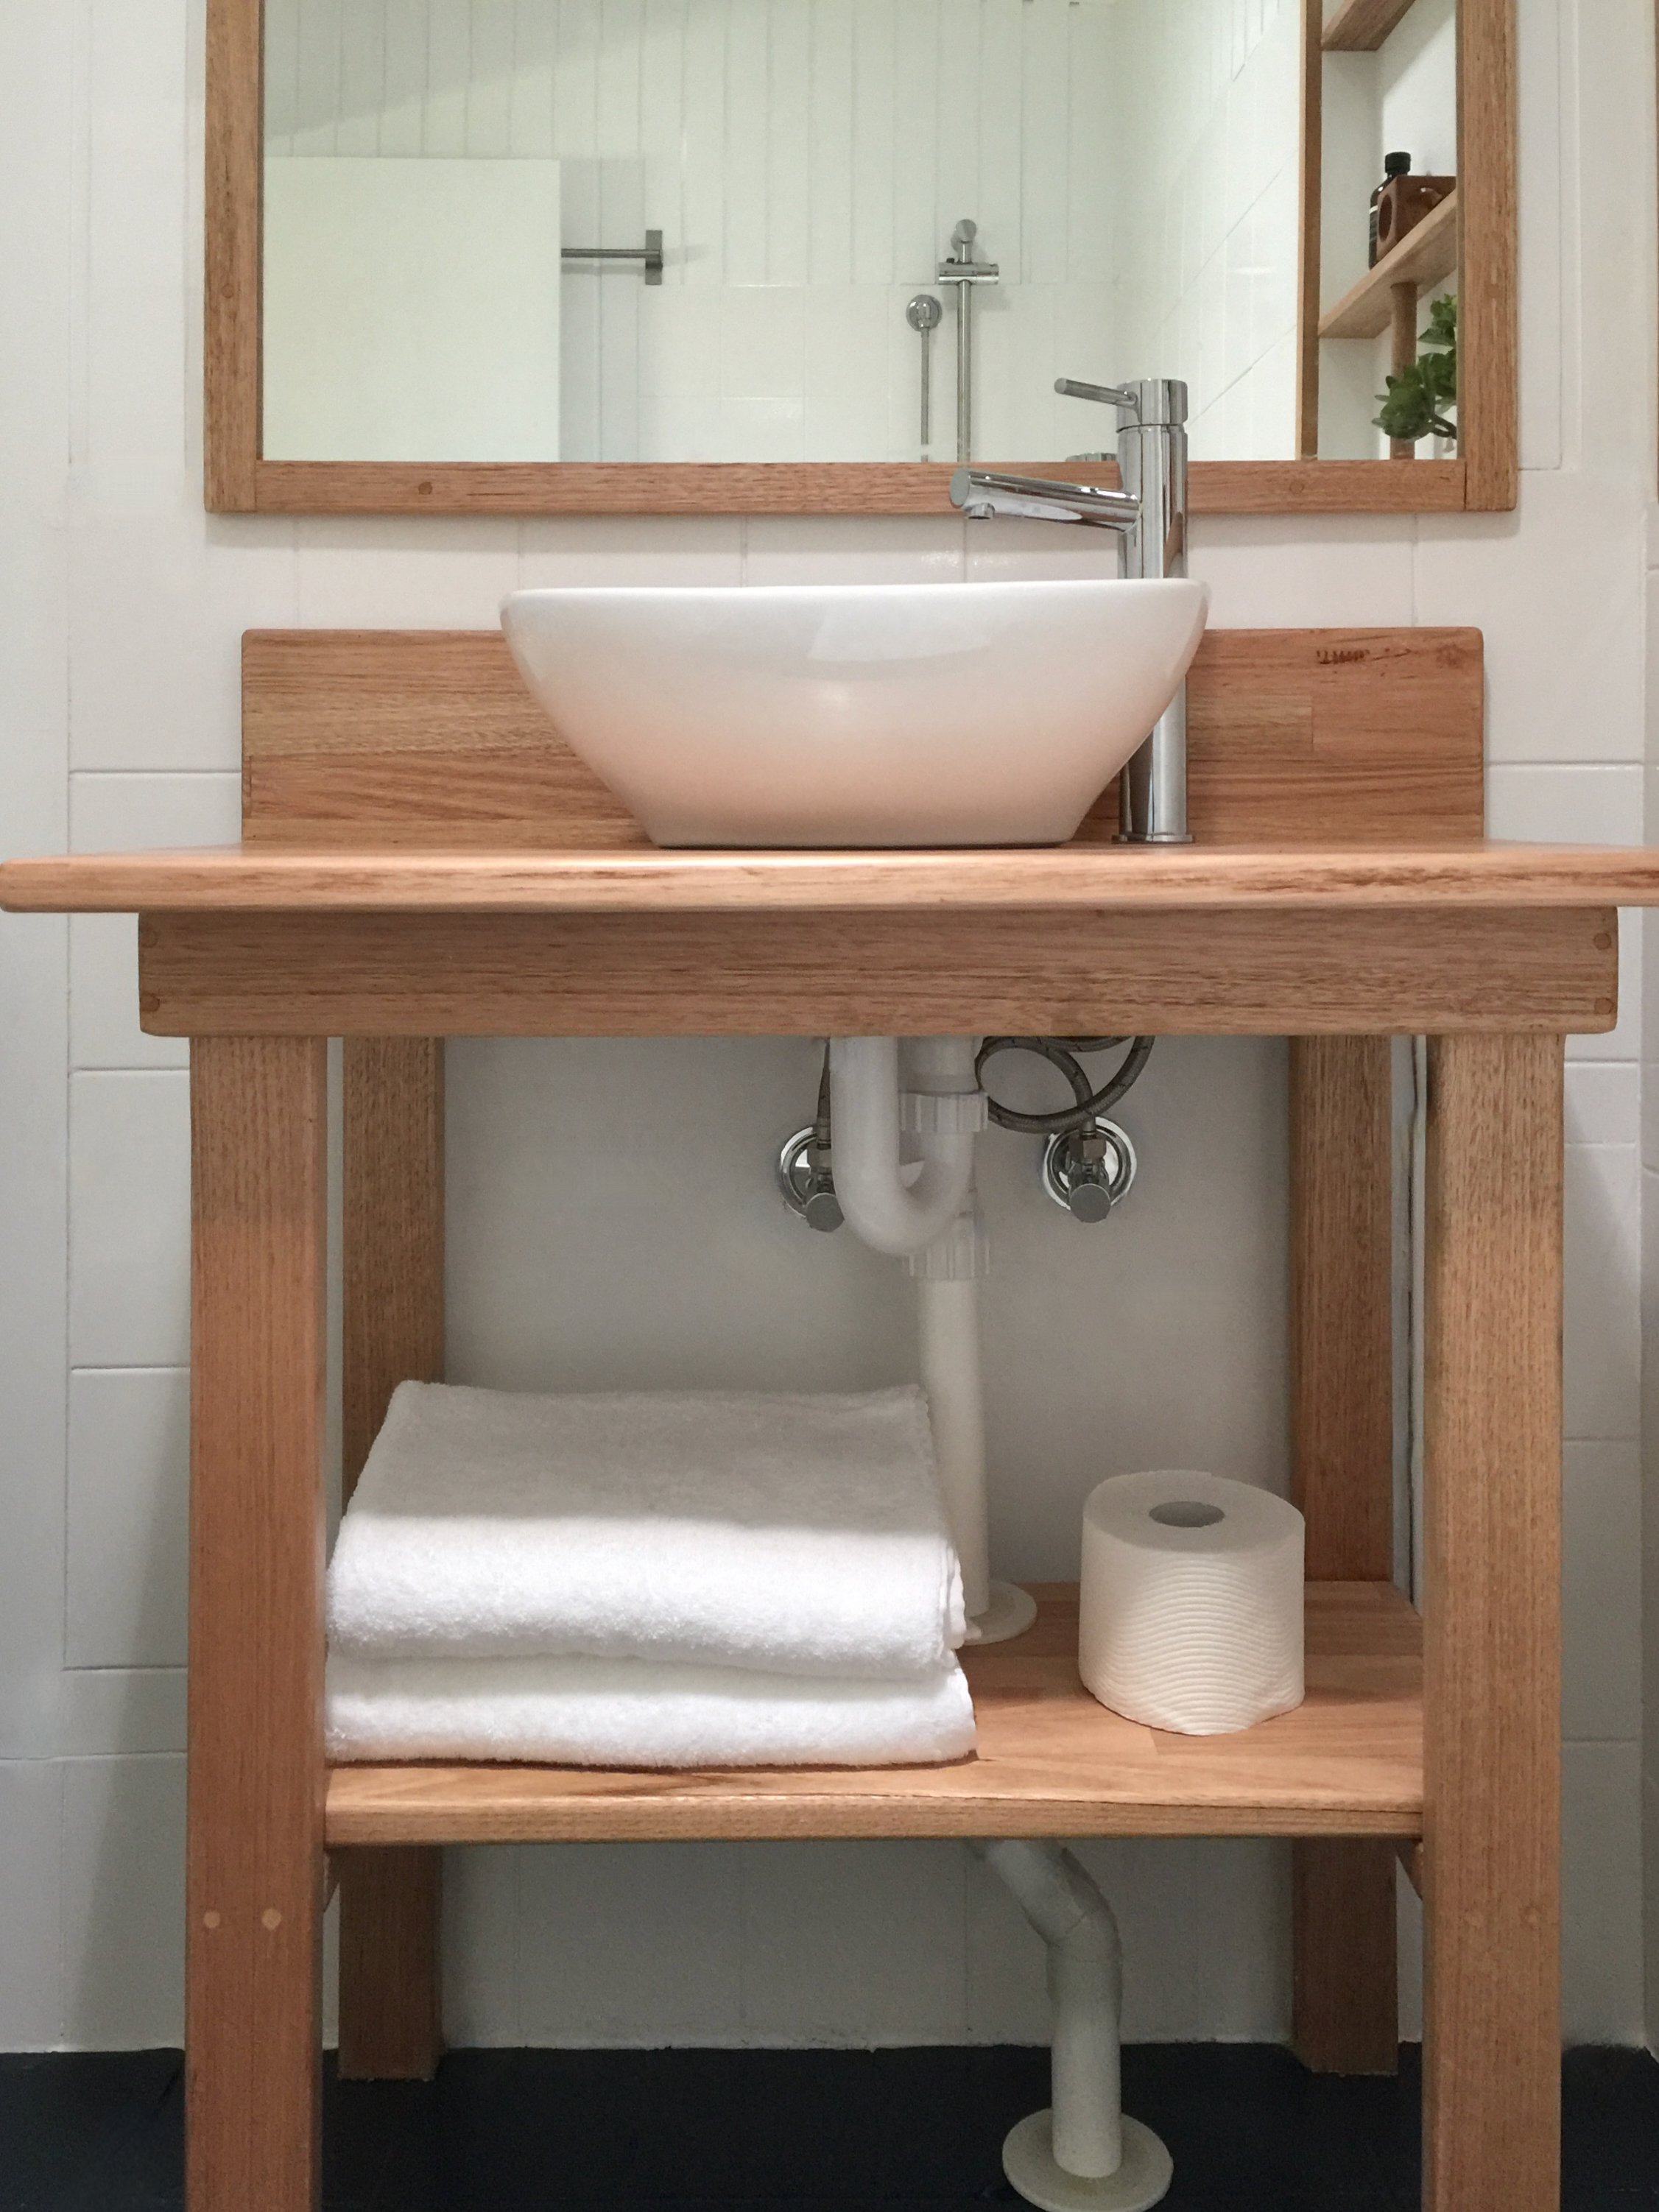
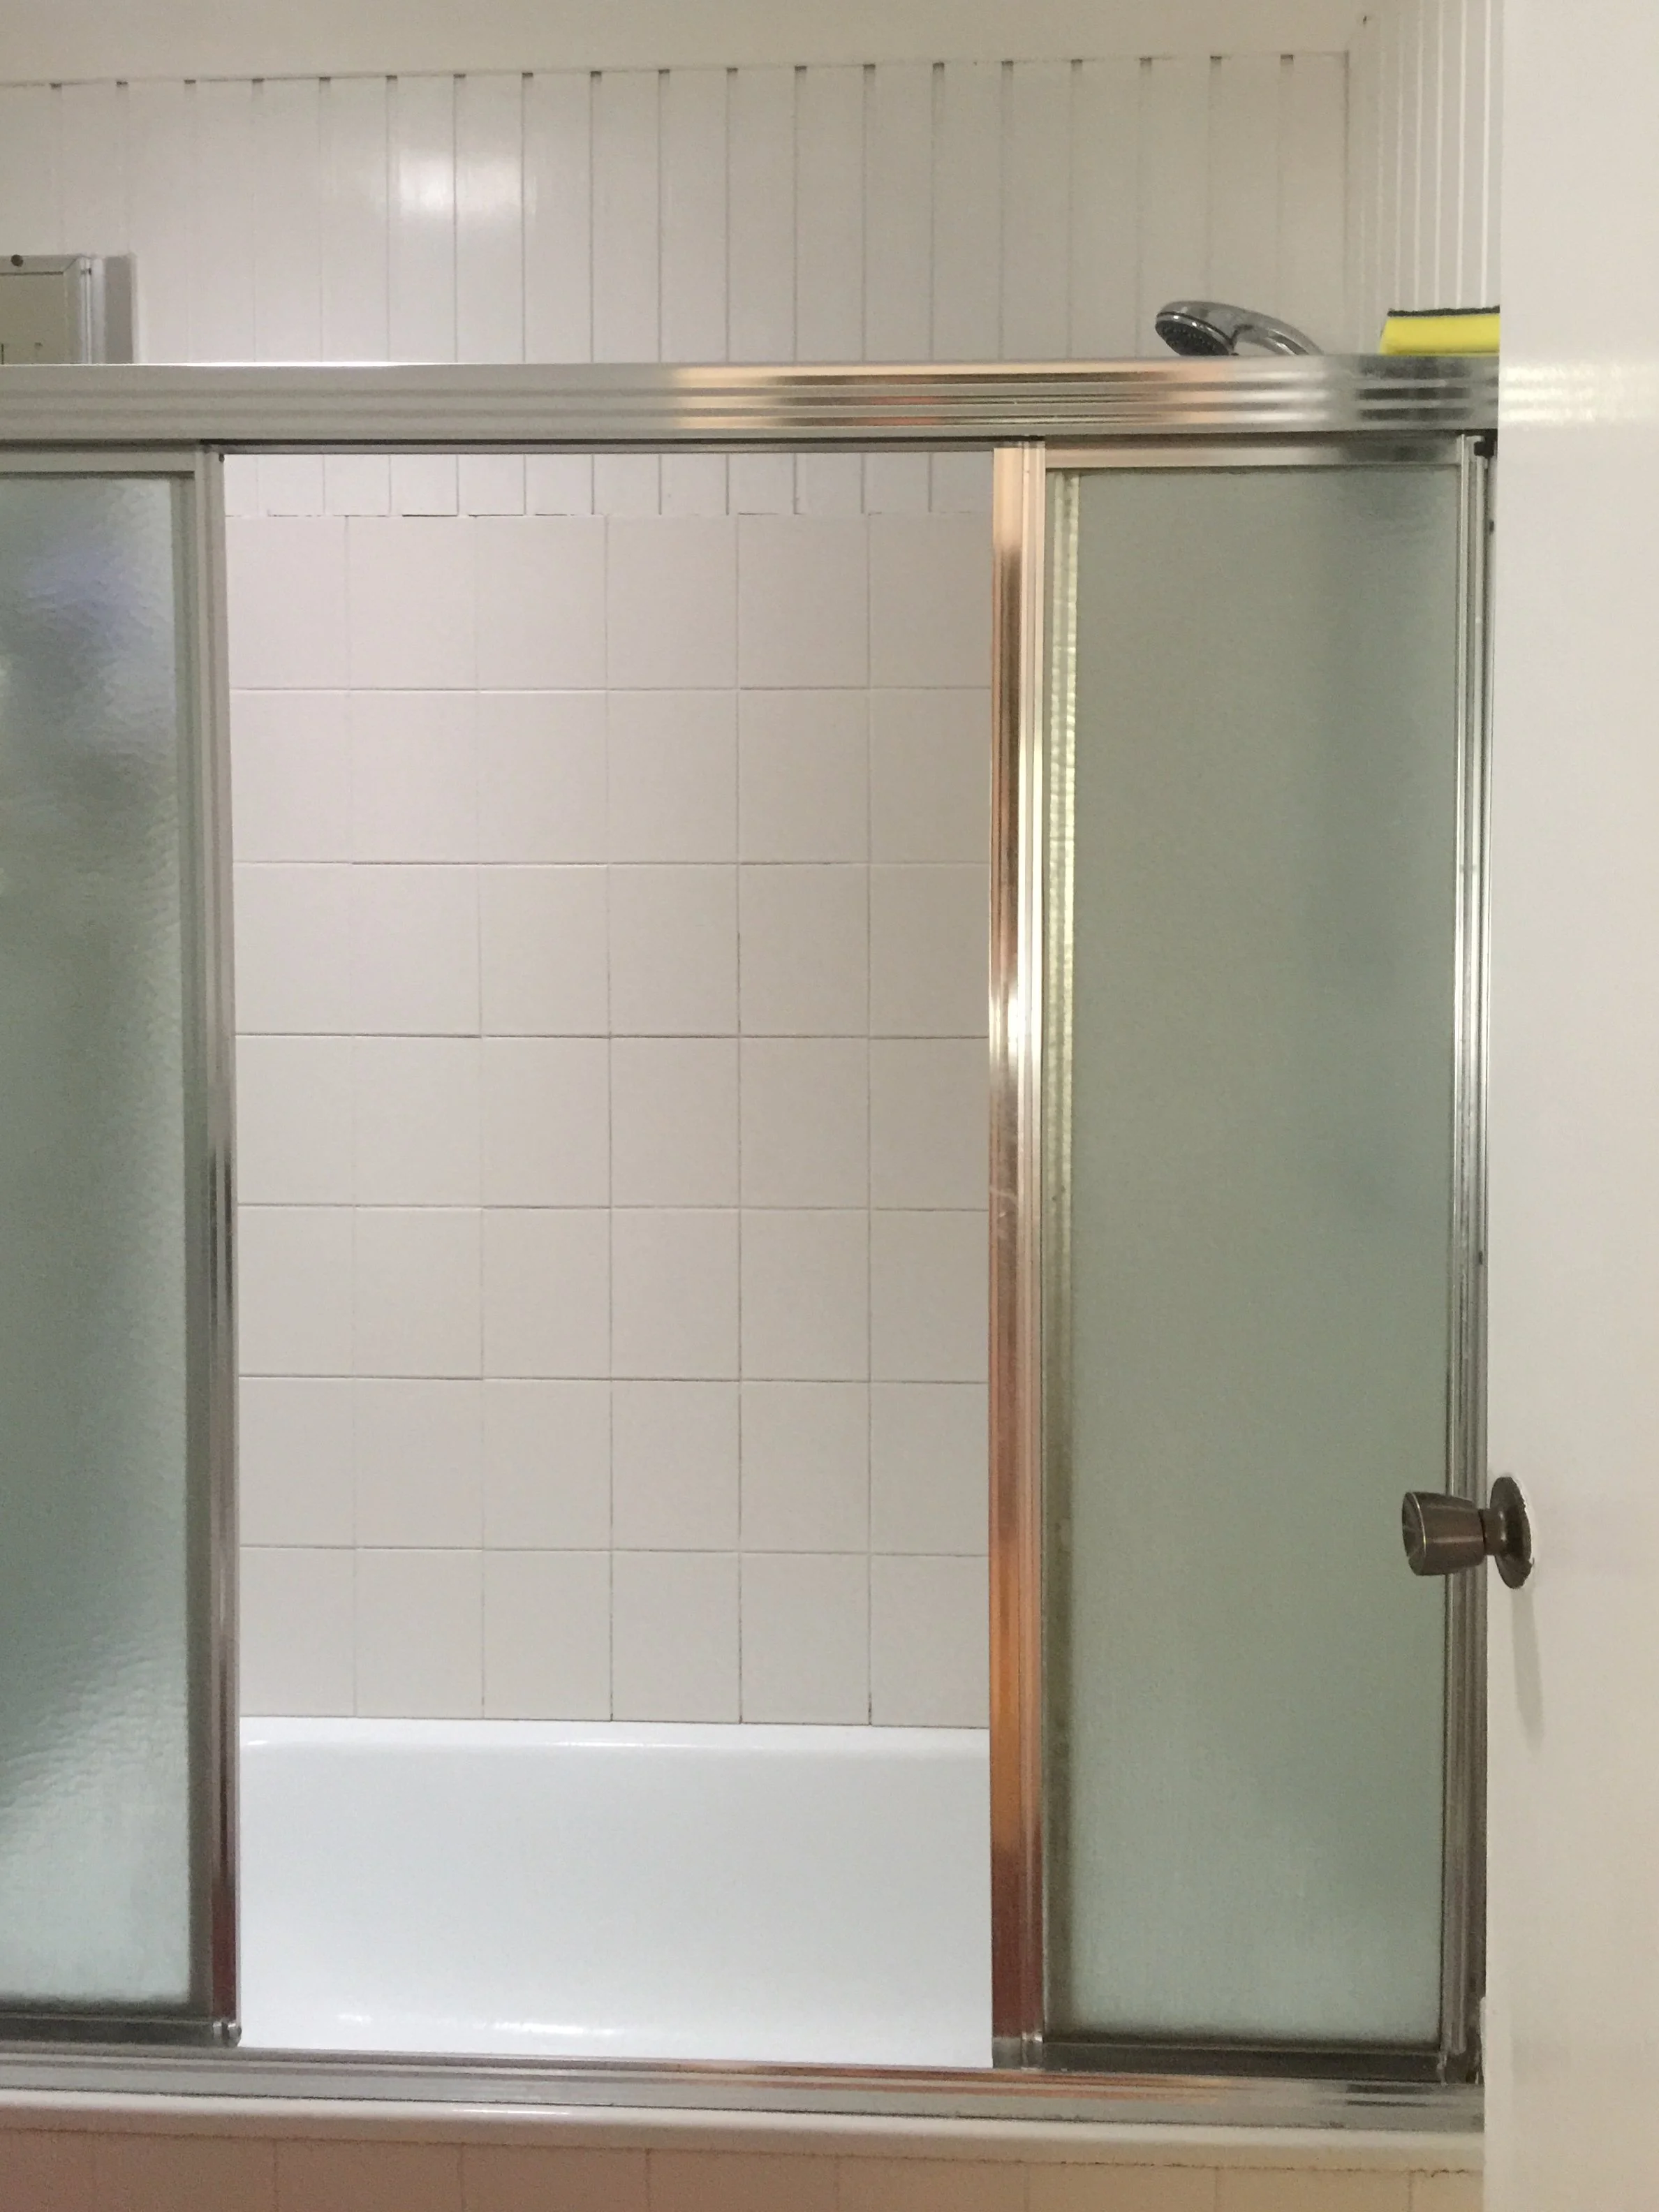
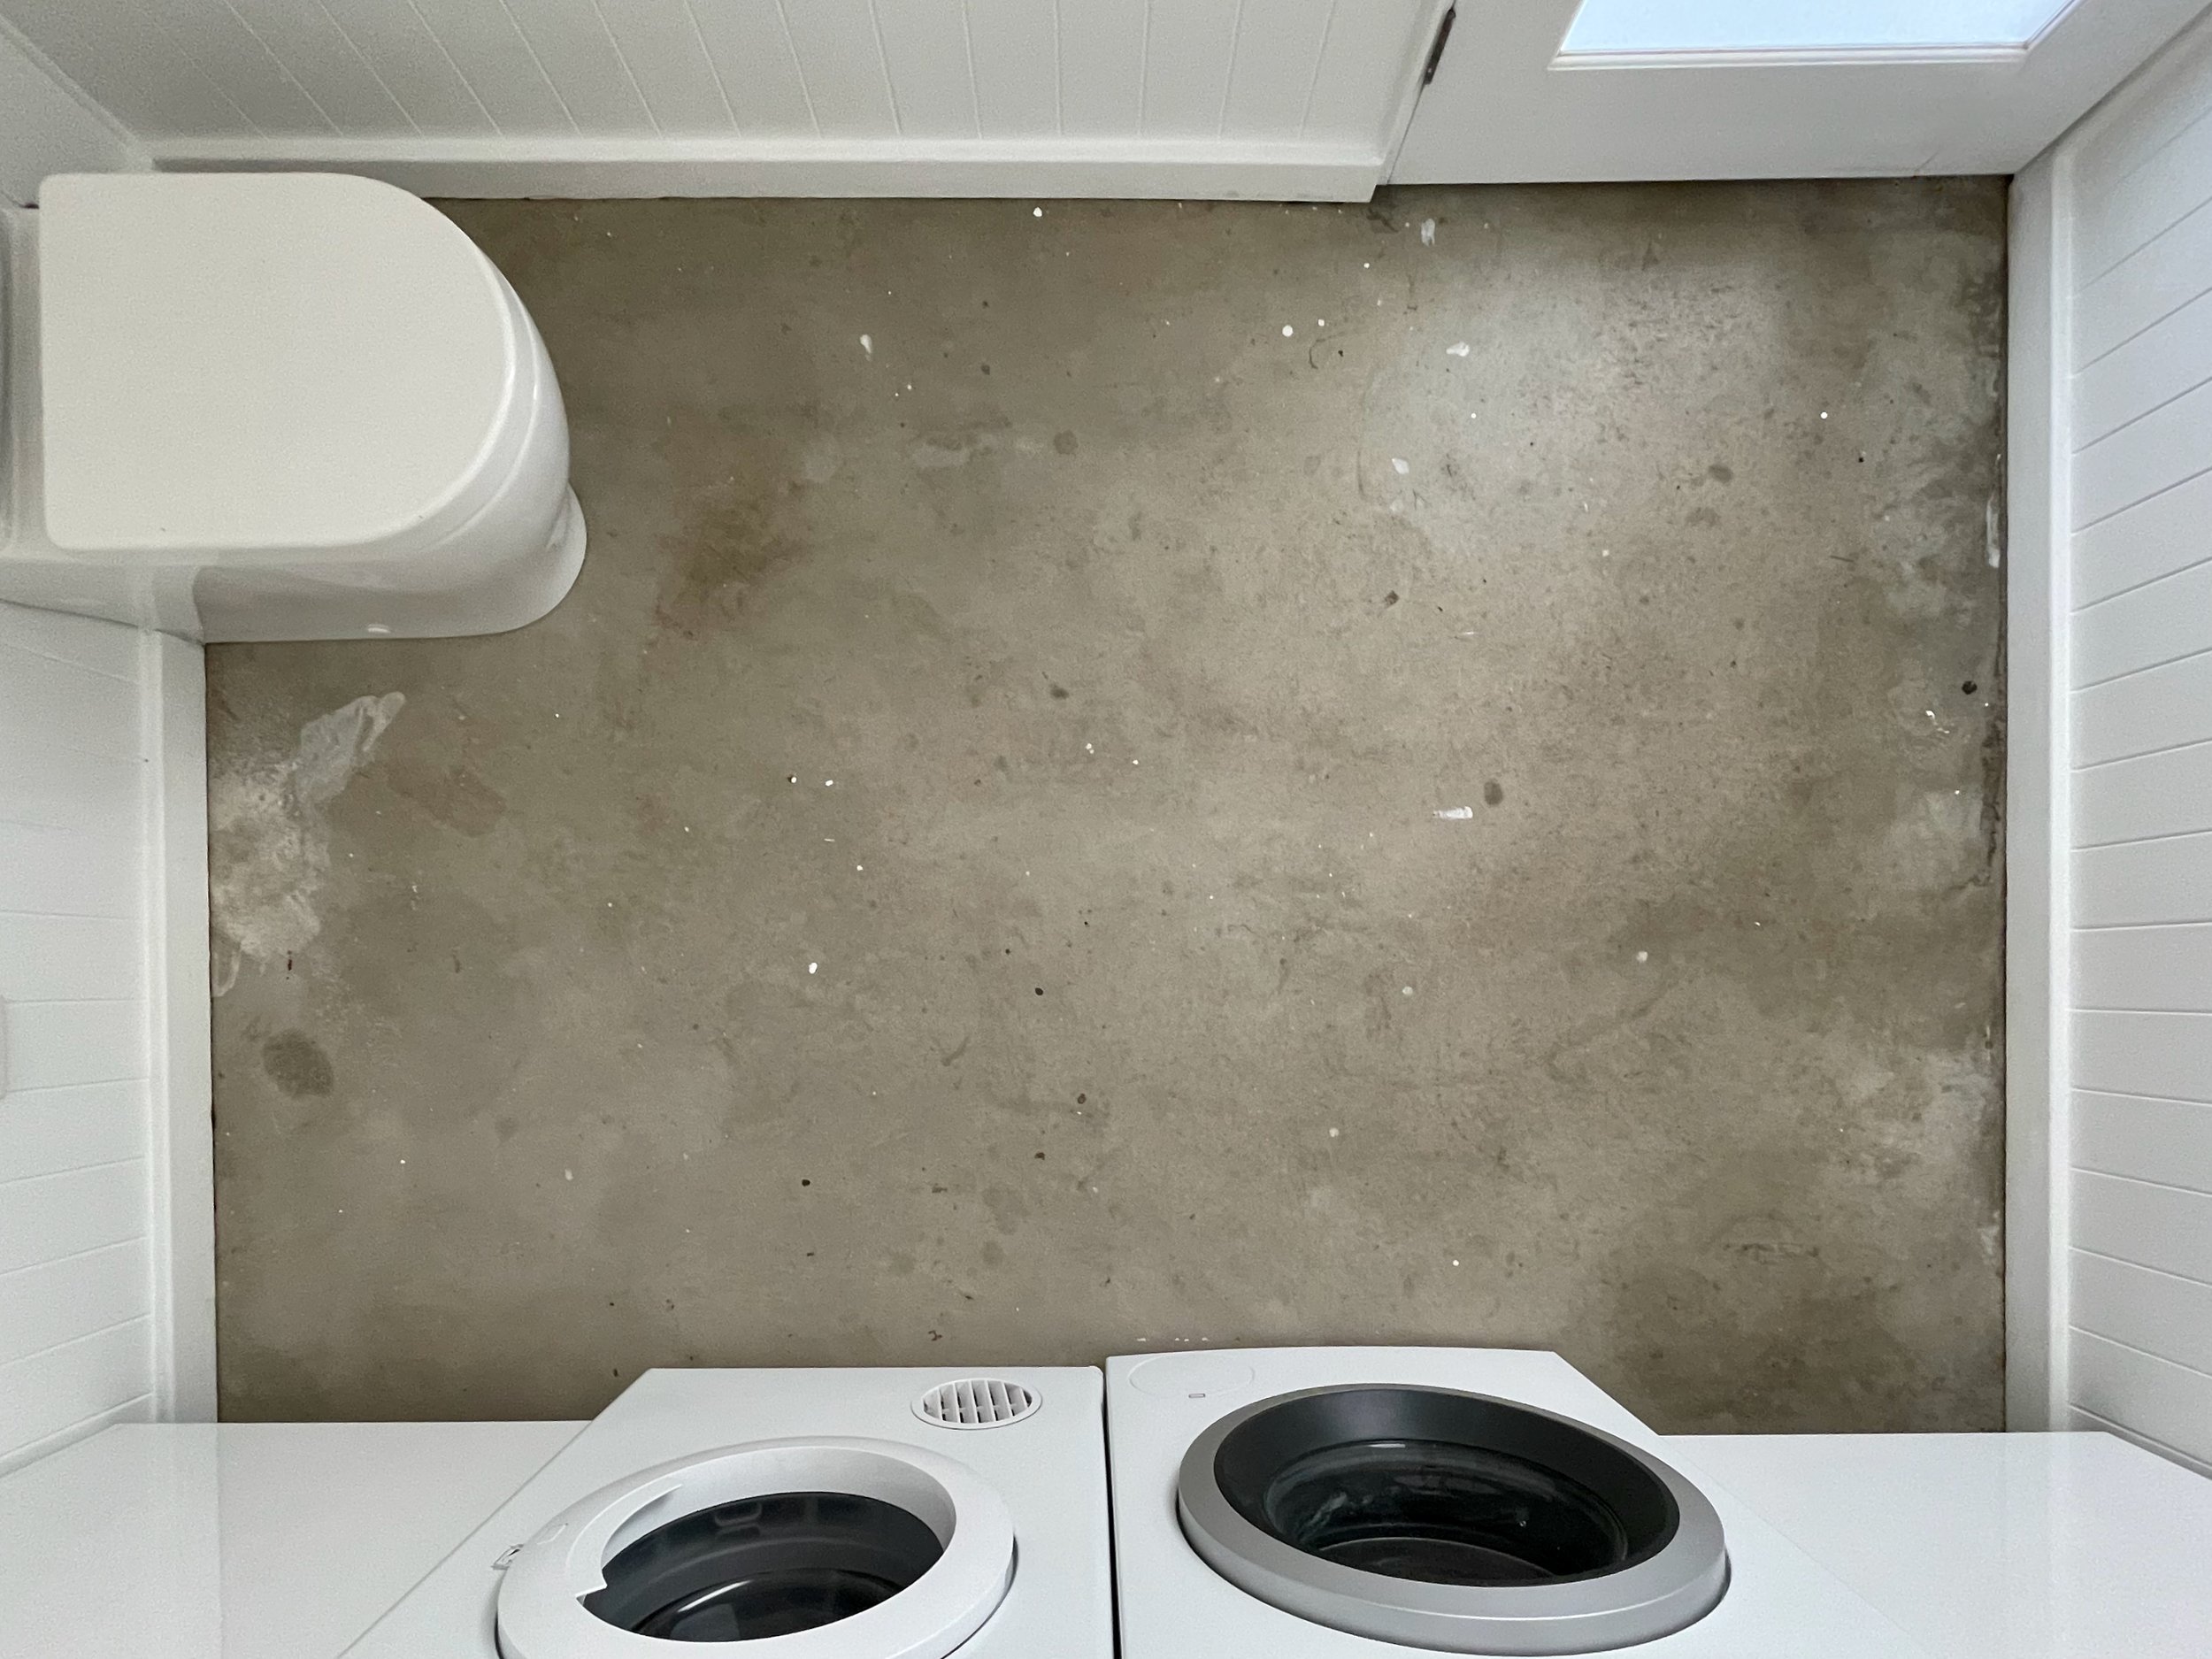
Back in 2016, the original space was open to the elements (above left), with a slatted wall and lean-to roof. There was just a sink unit and an open shelf.


BLUE BEGINNINGS

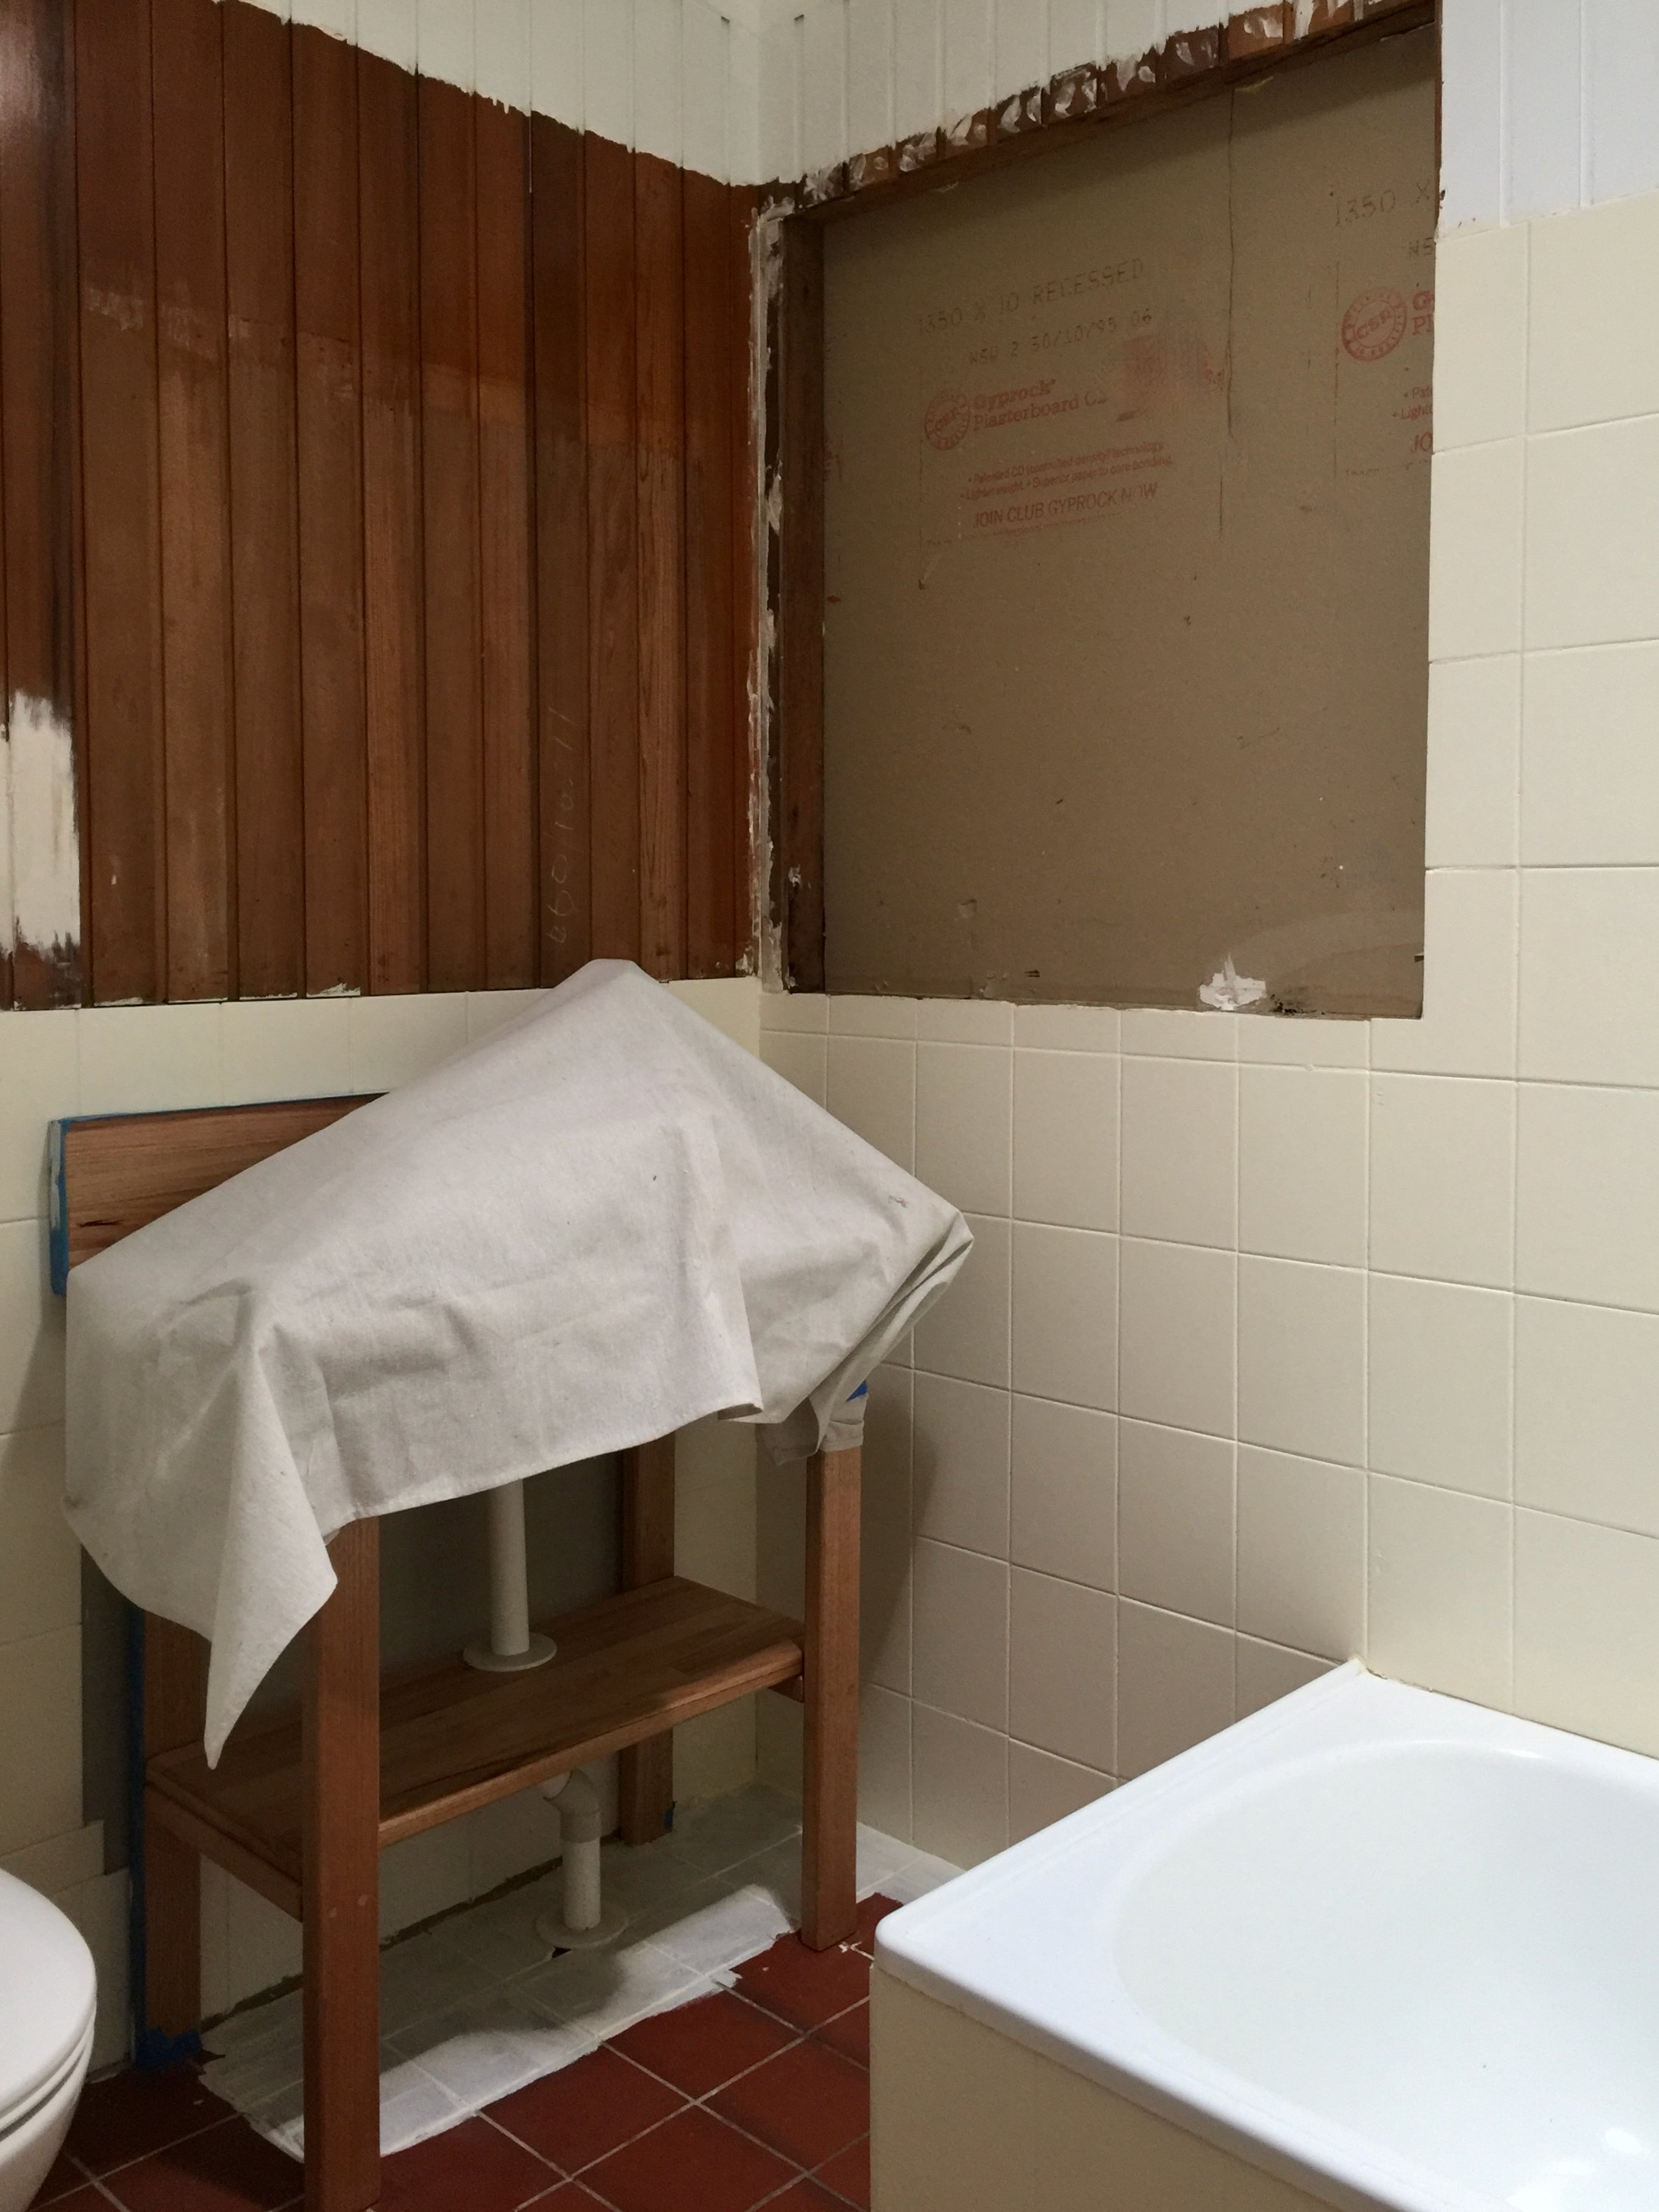
Set on a bare concrete slab, one wall consisted of open slats. Finding a snakeskin under the sink got me fast-tracking plans to convert it into a properly sealed room.


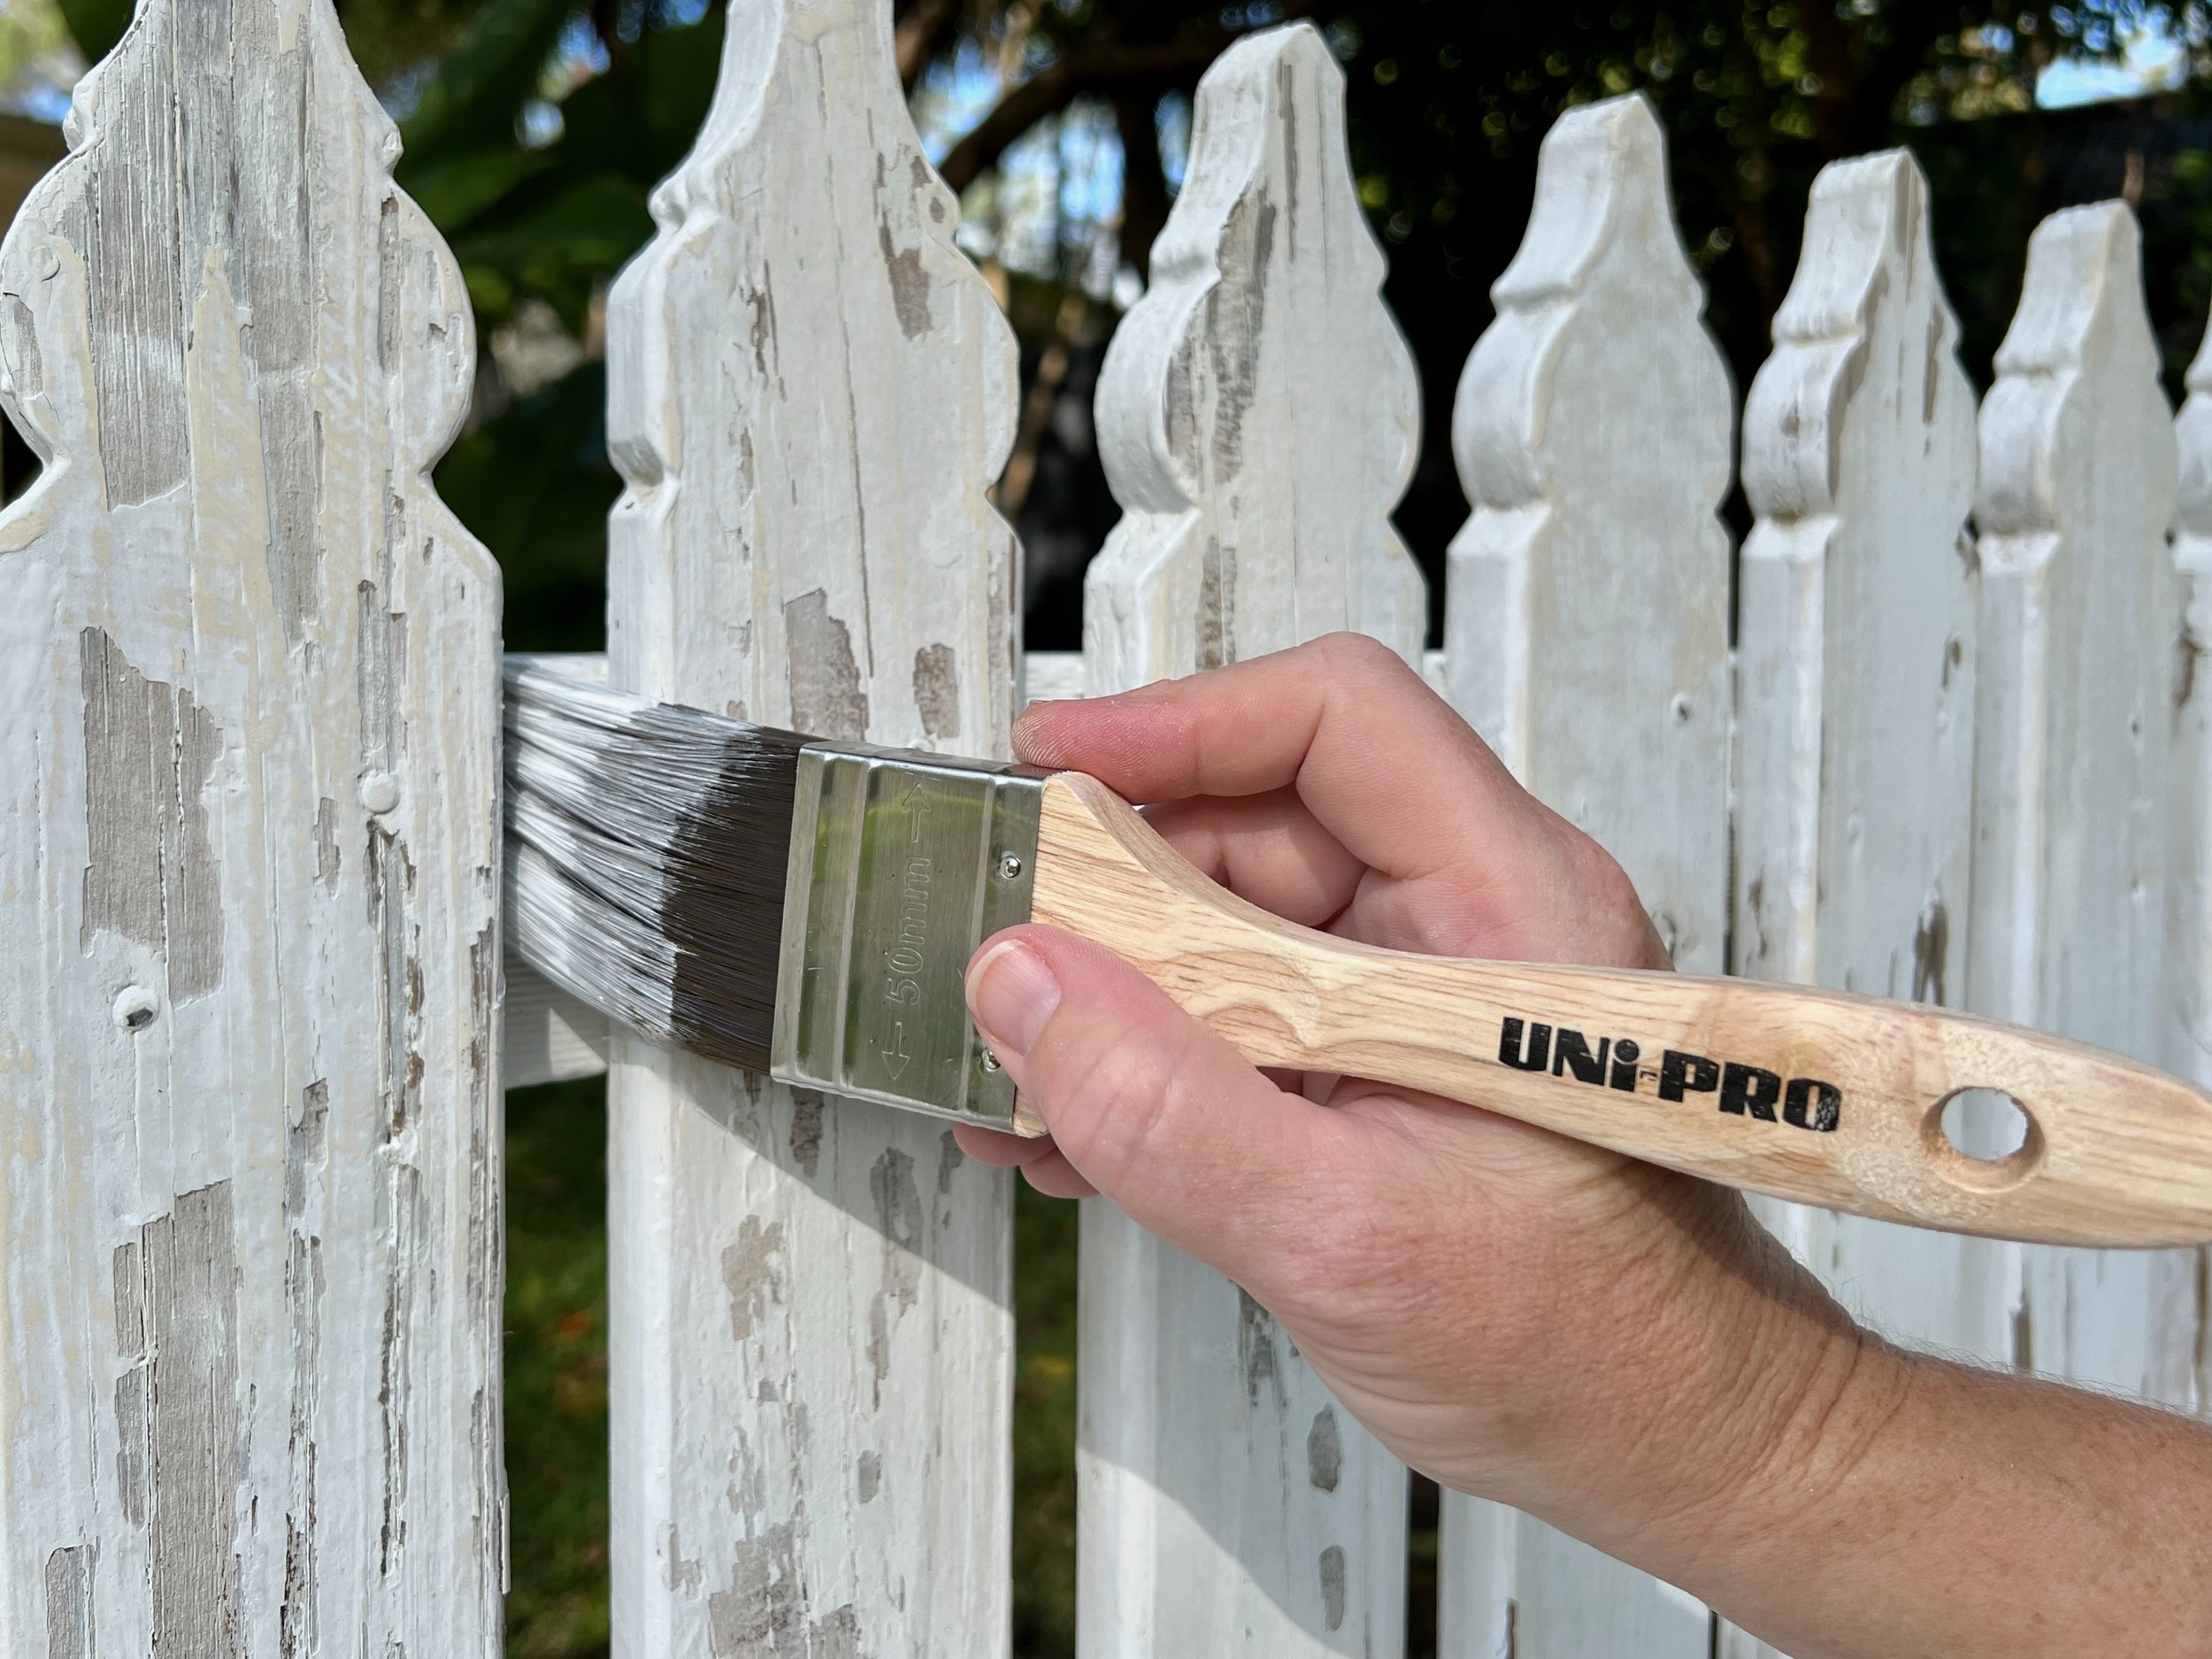
The interior was originally clad in weatherboard, making it feel like an outhouse. Even one coat of primer over the yellowy-beige made the room brighter.

I gave it a quick paint to feel cleaner while coming up with a reno plan to suit my extremely low budget and limited time.


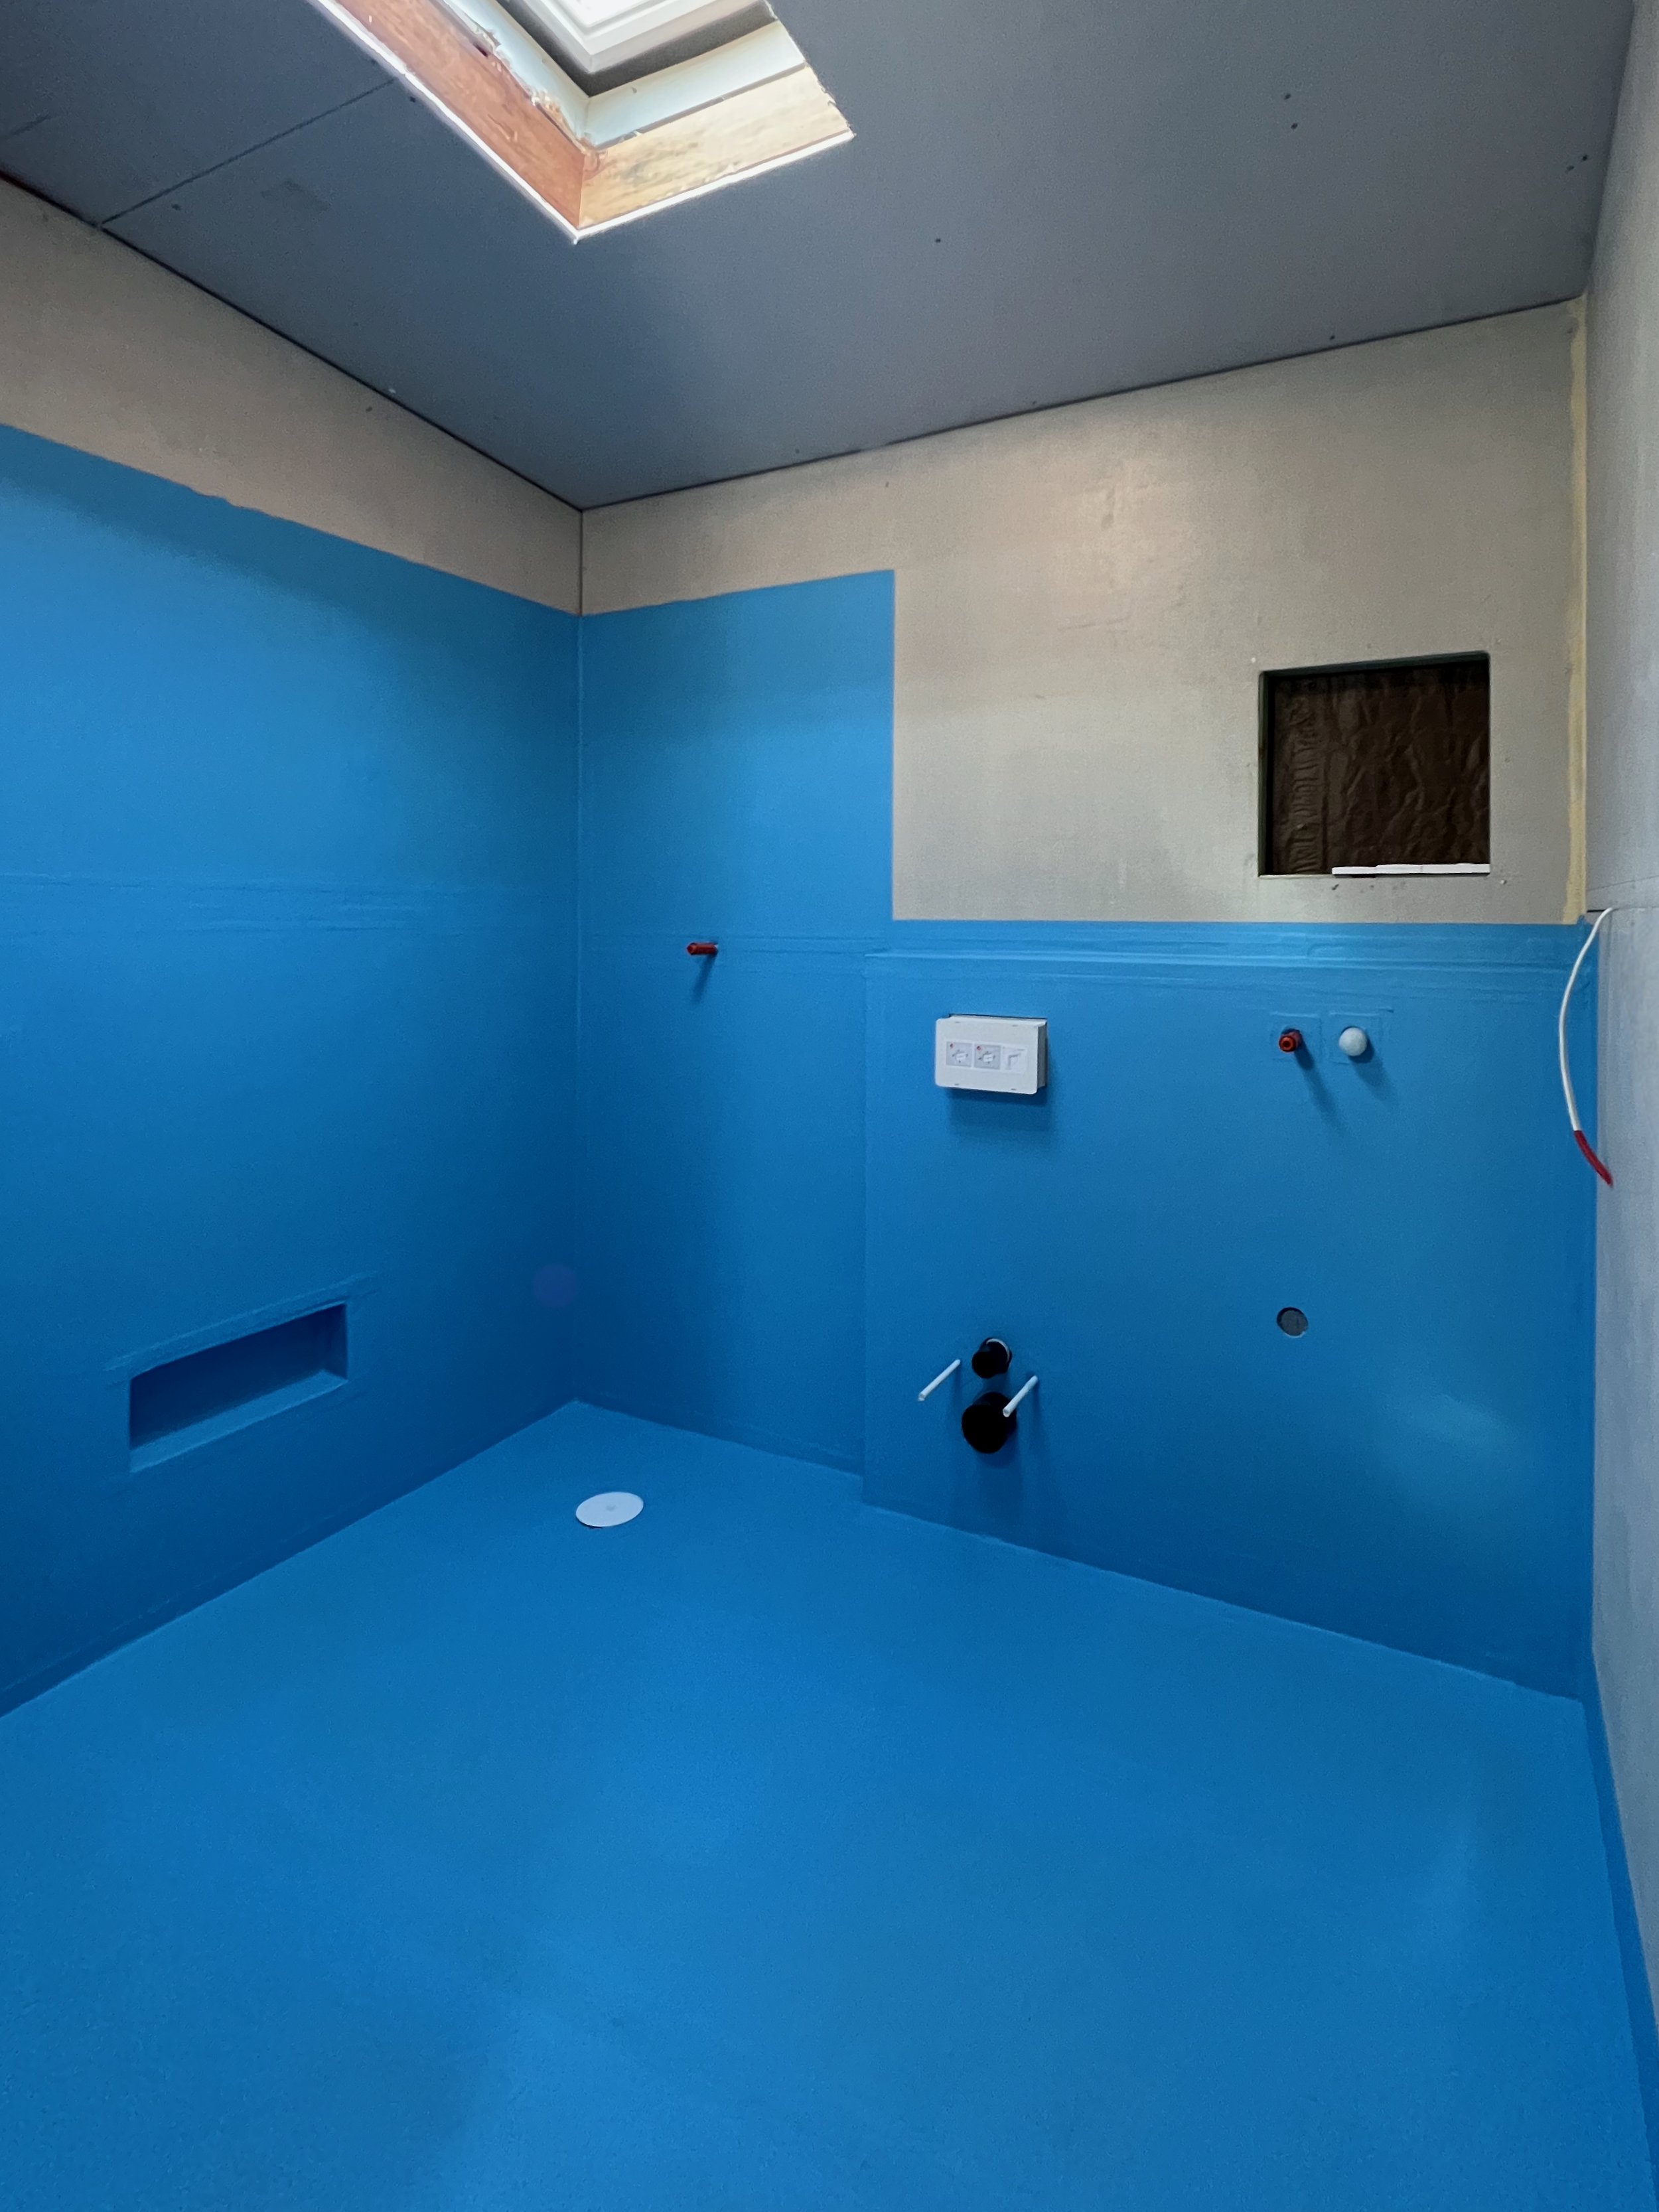
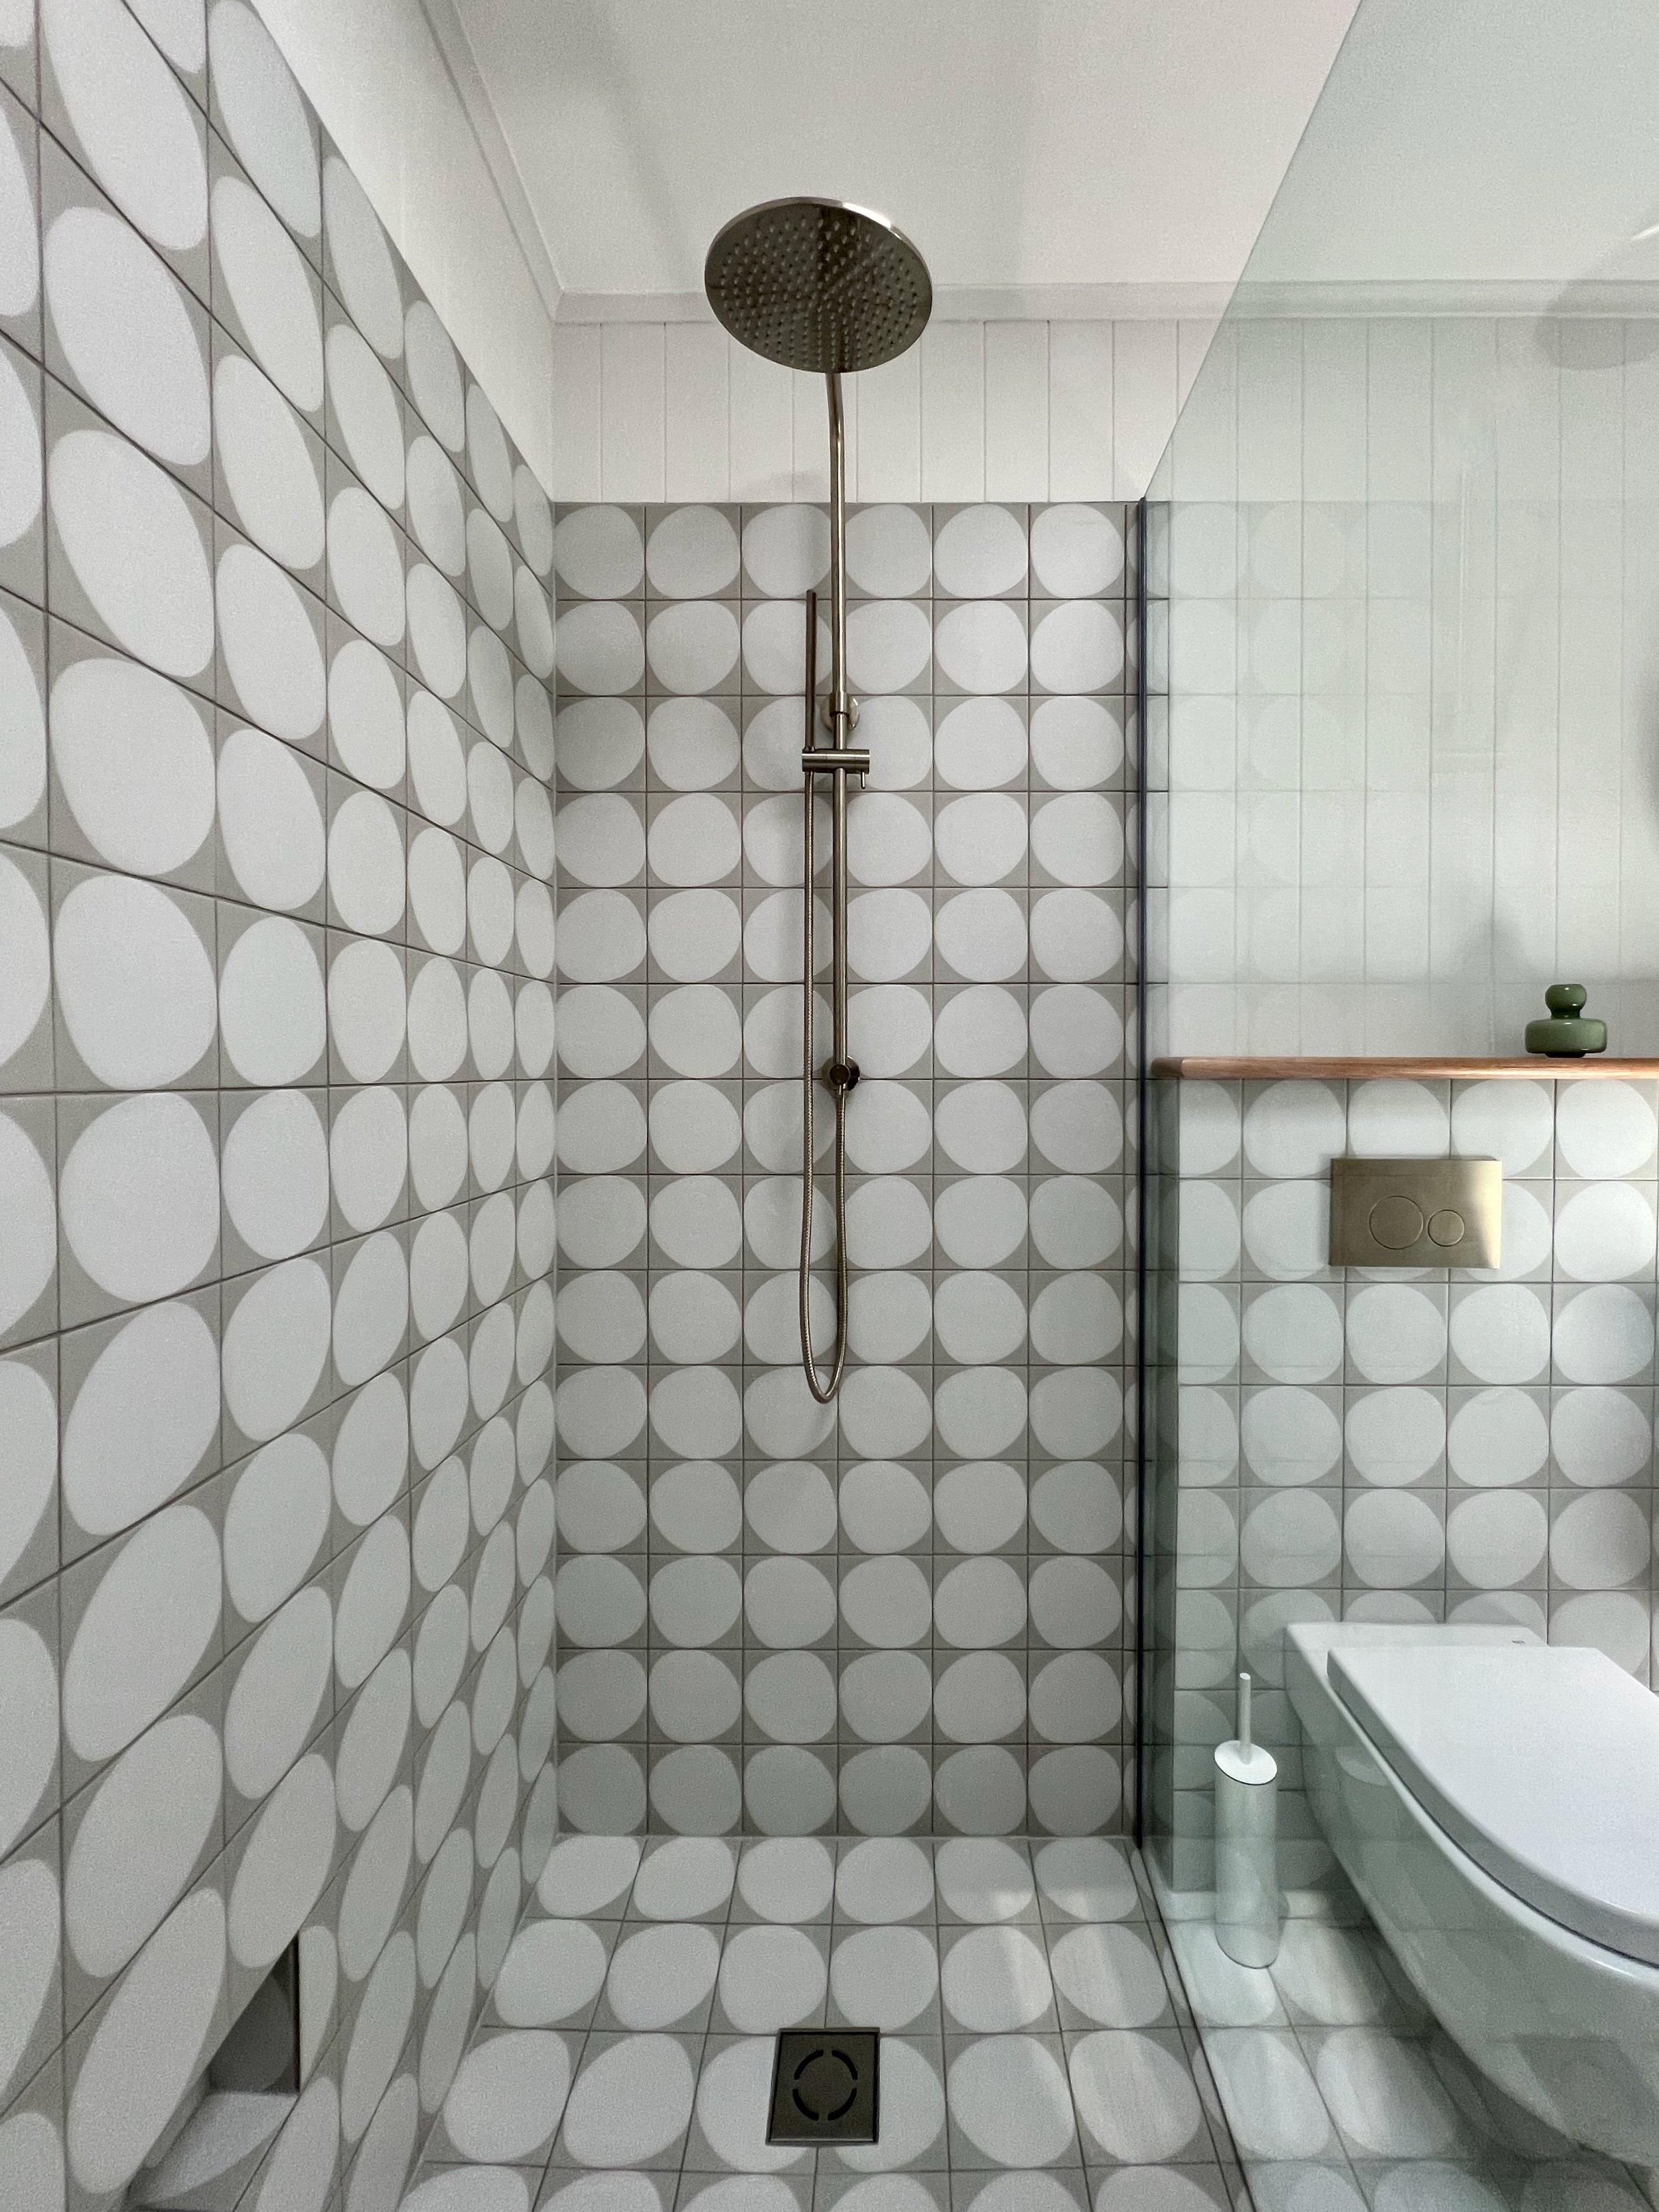
CREATING SPACE FOR A SHOWER

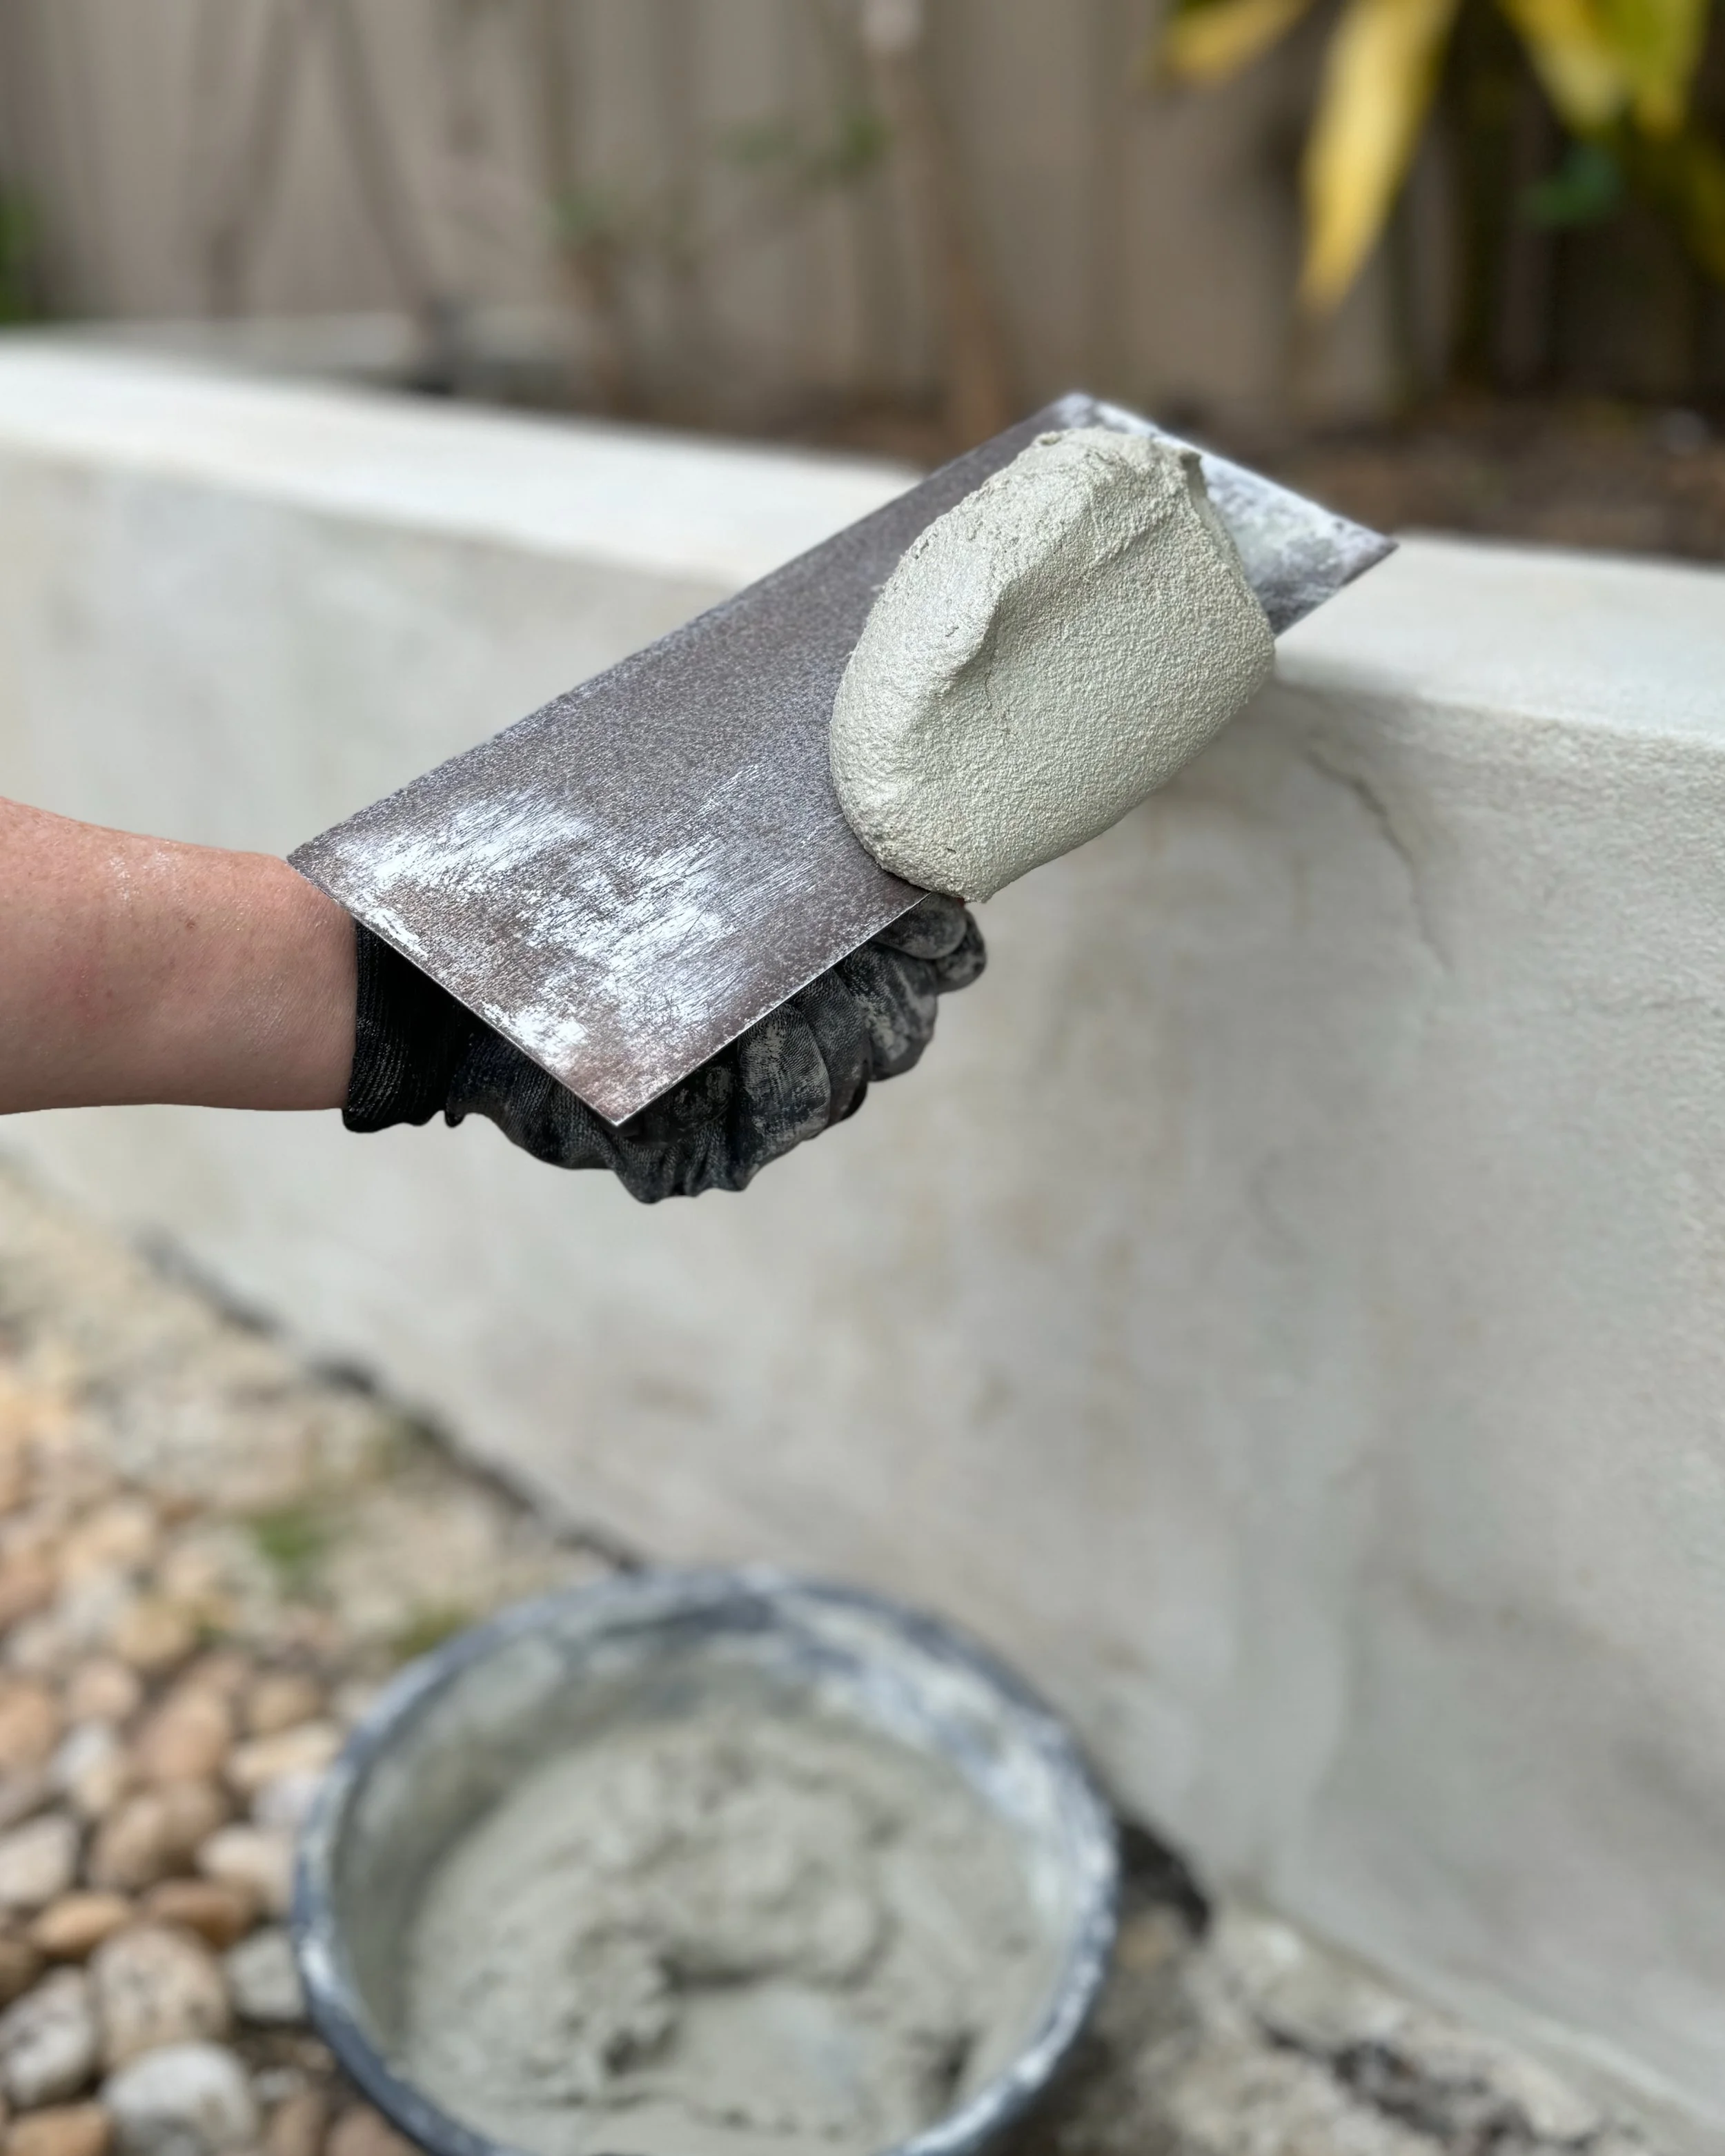
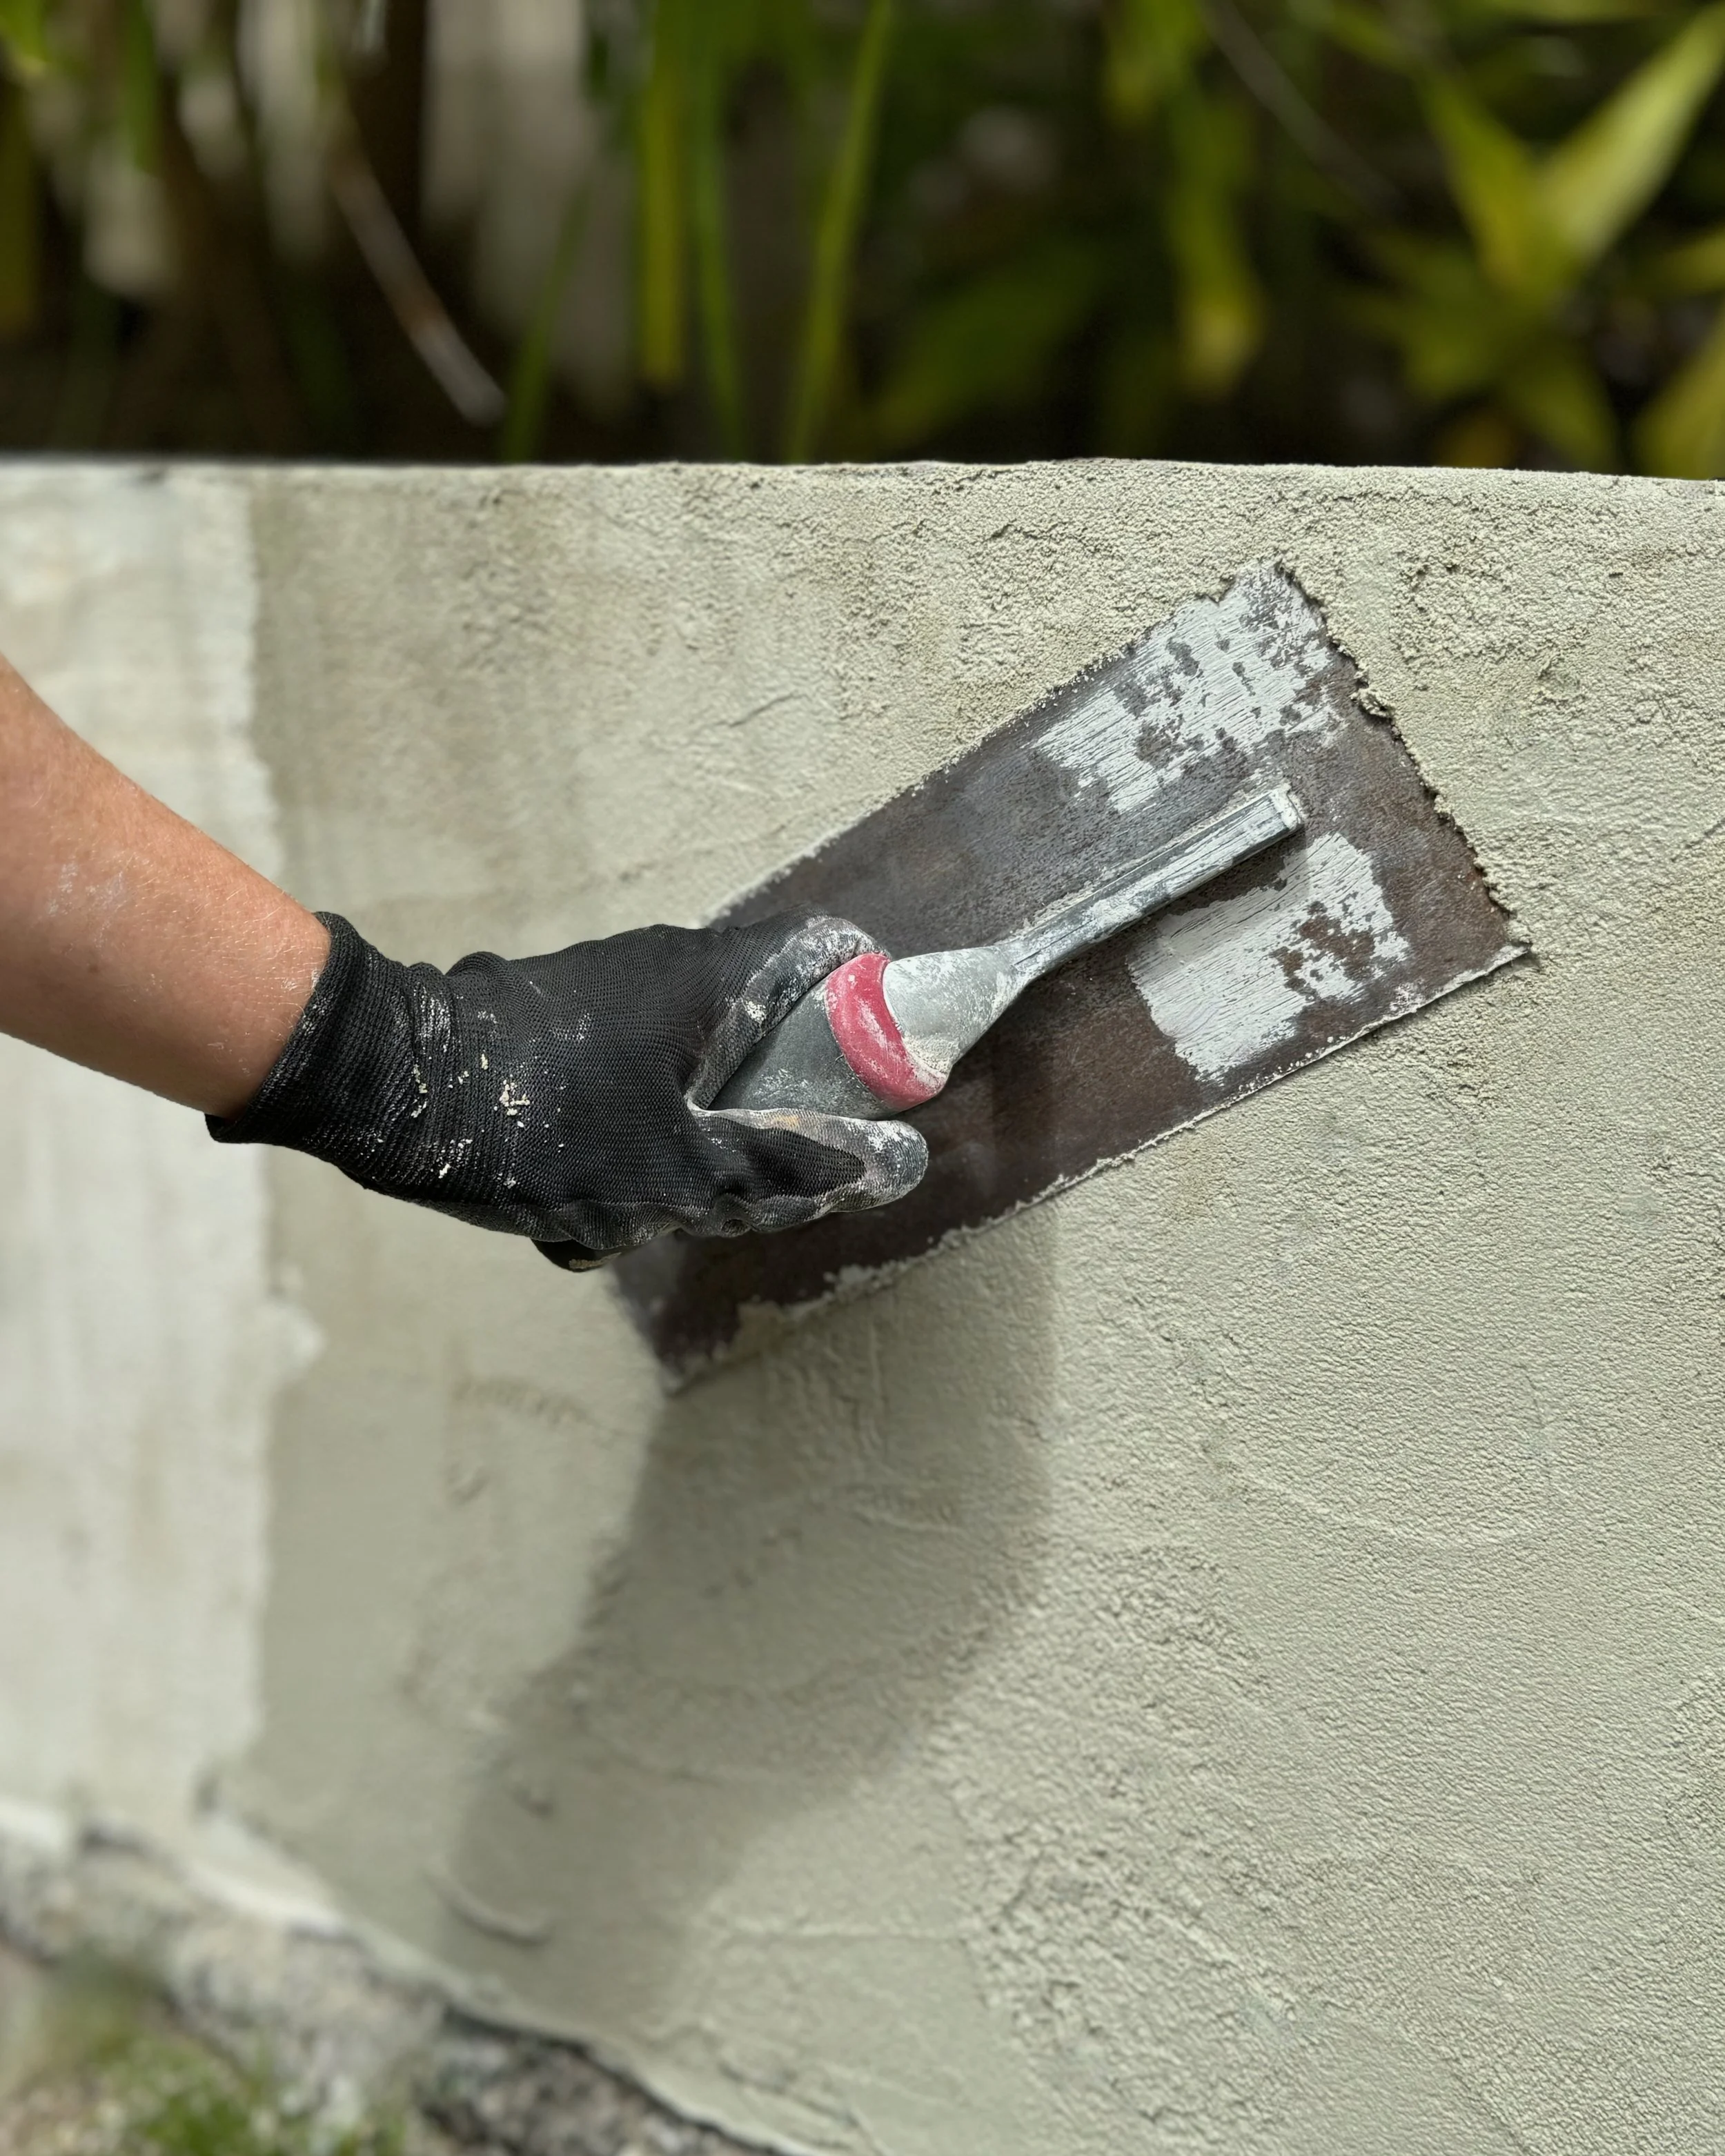
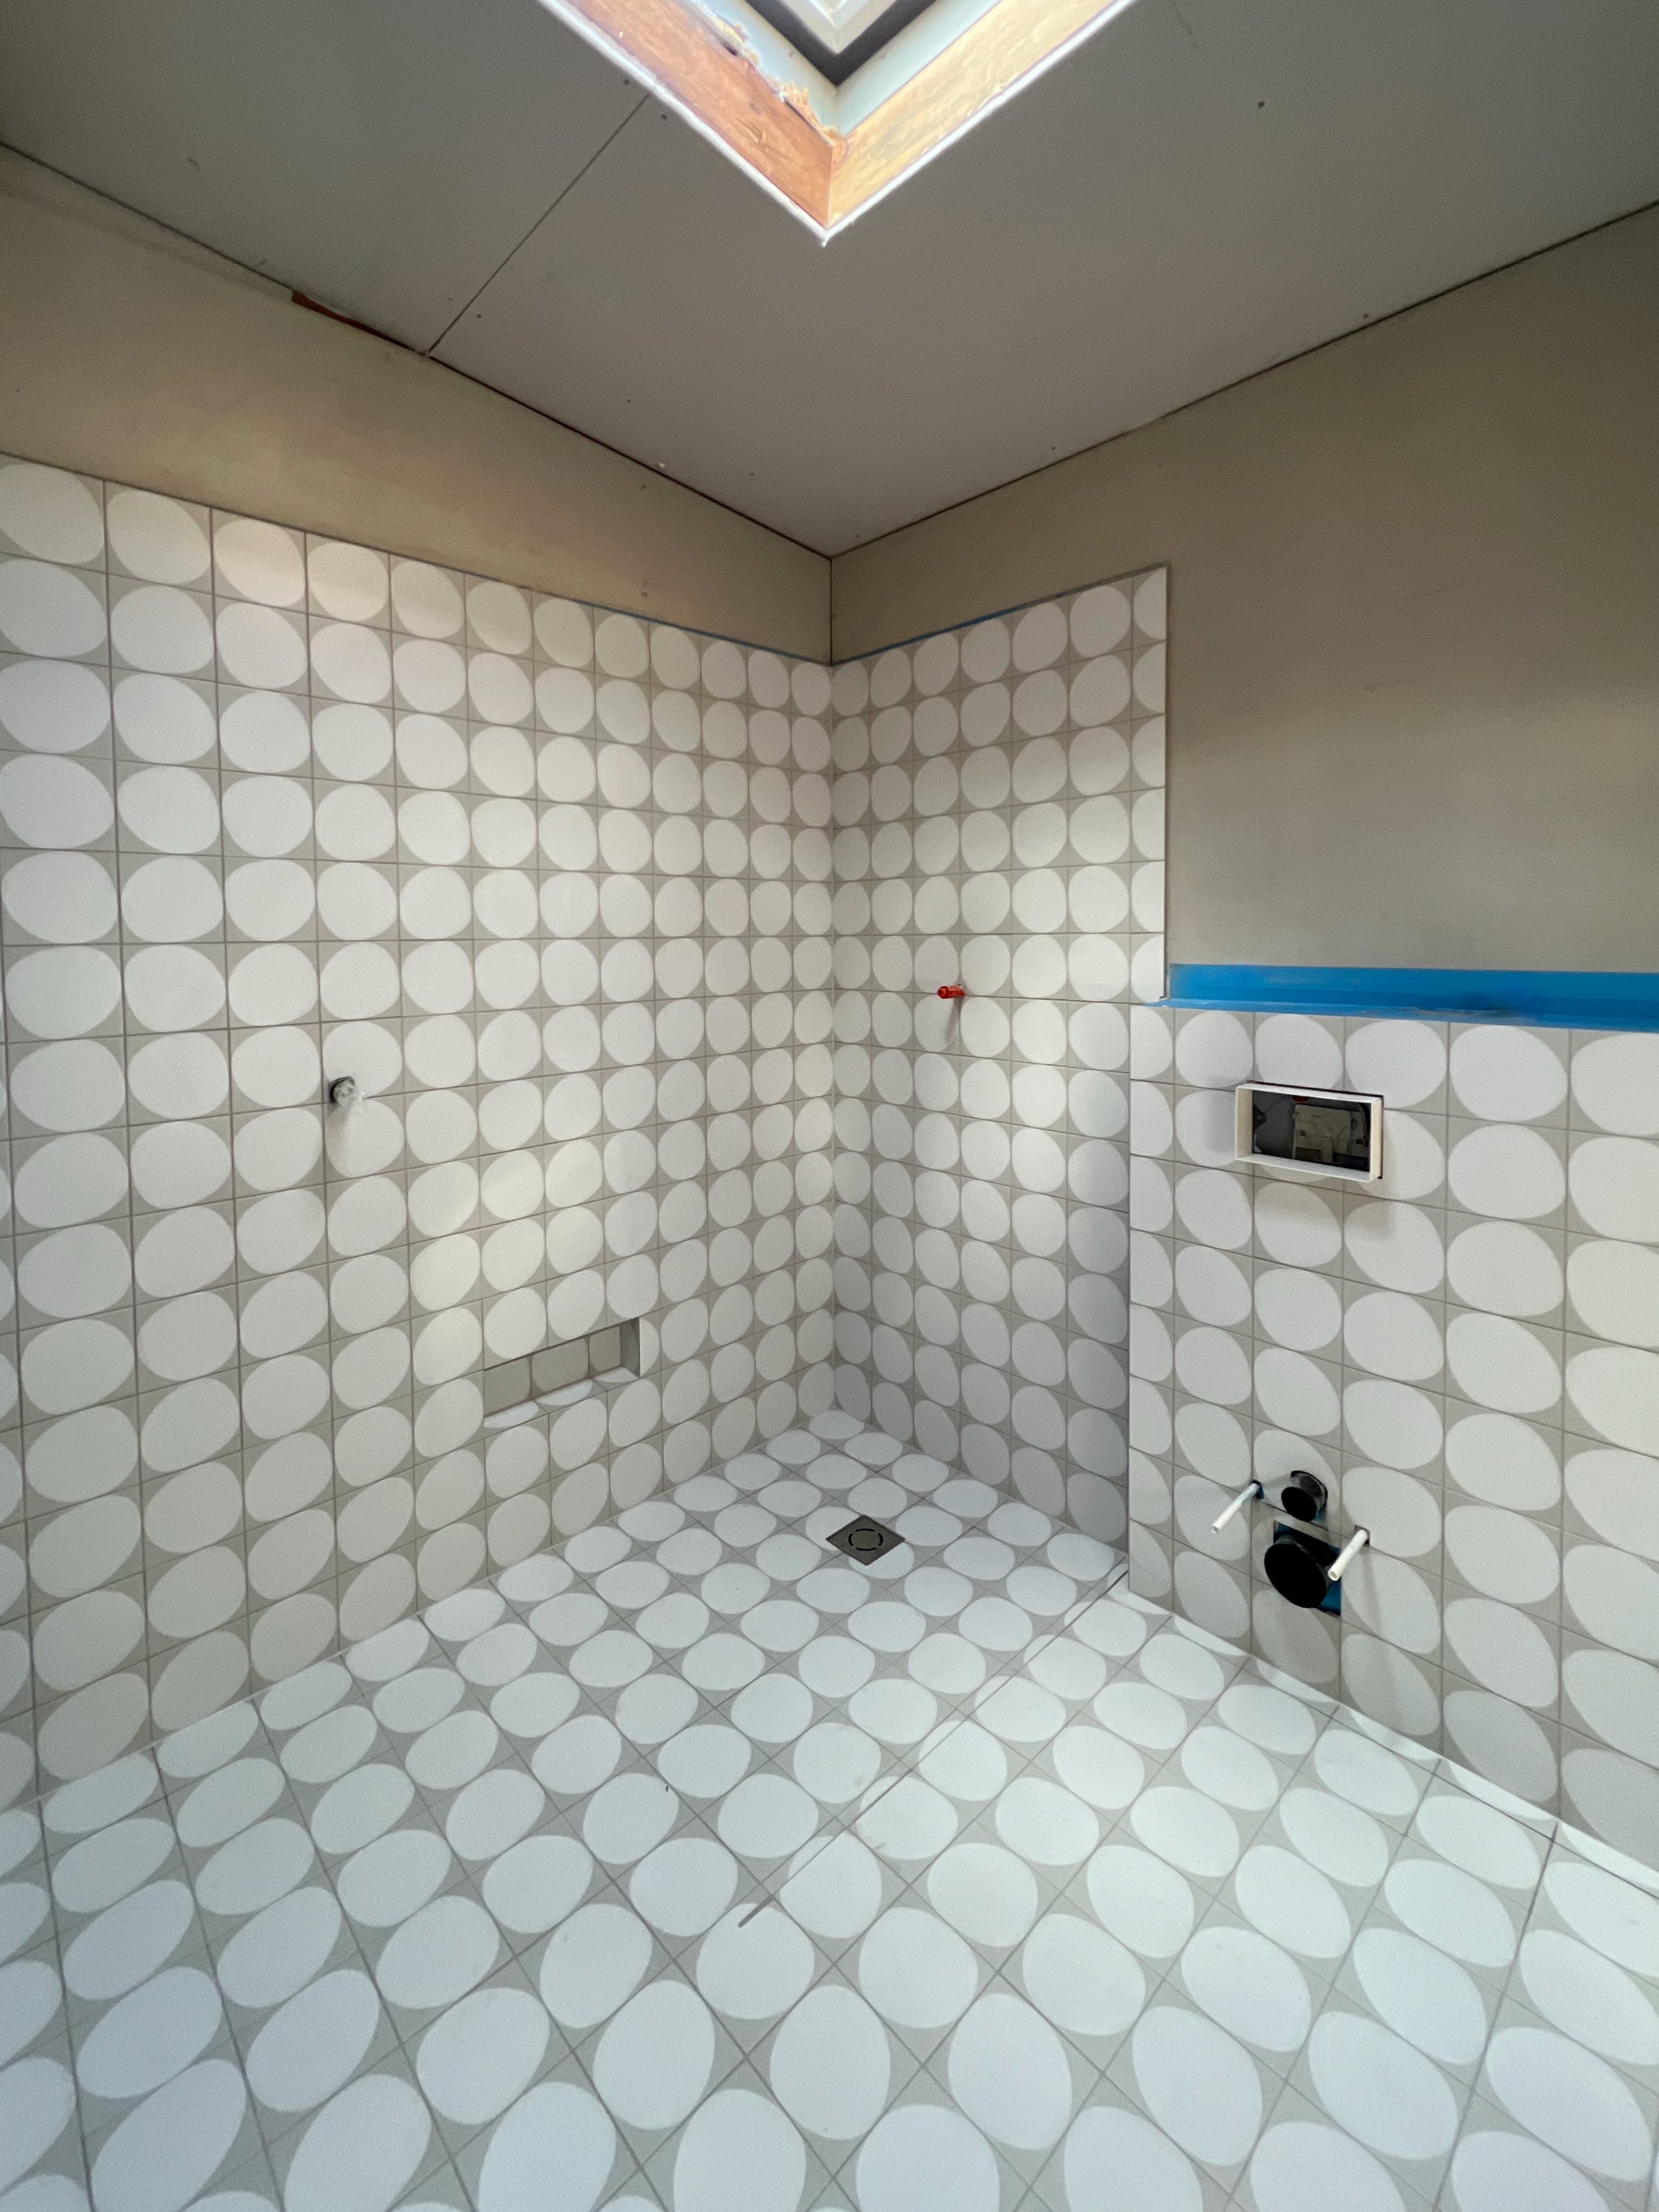
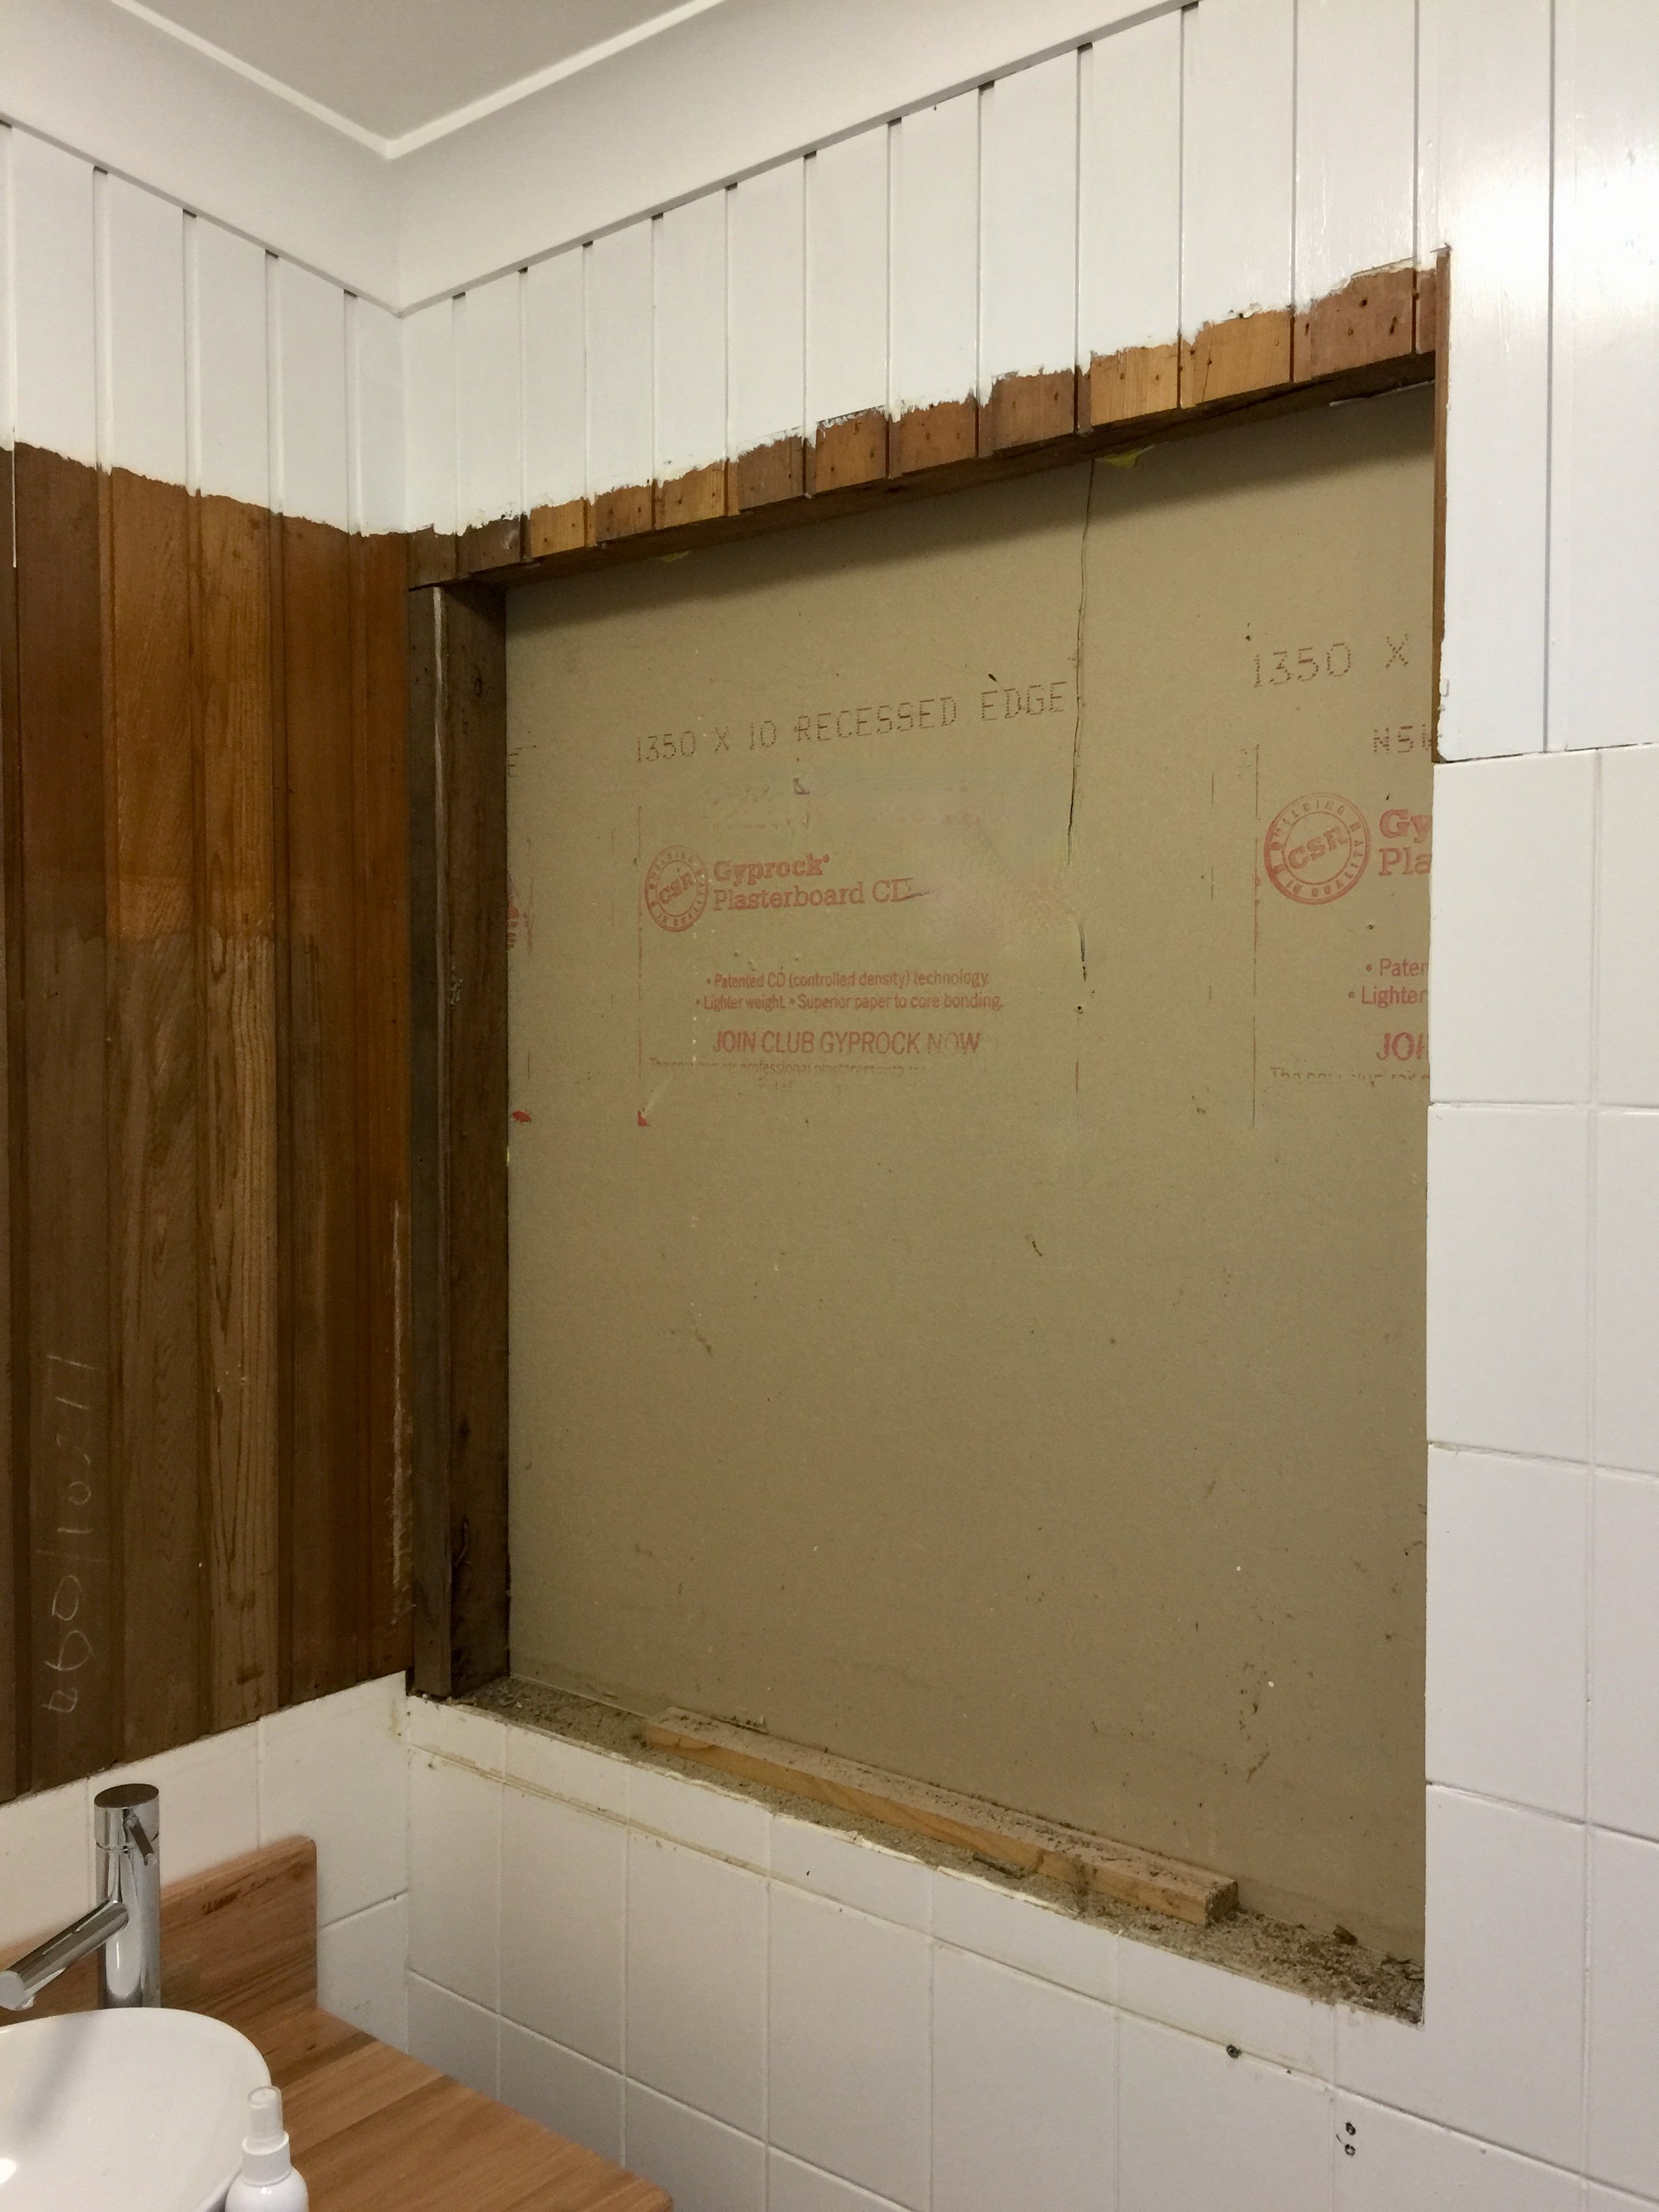
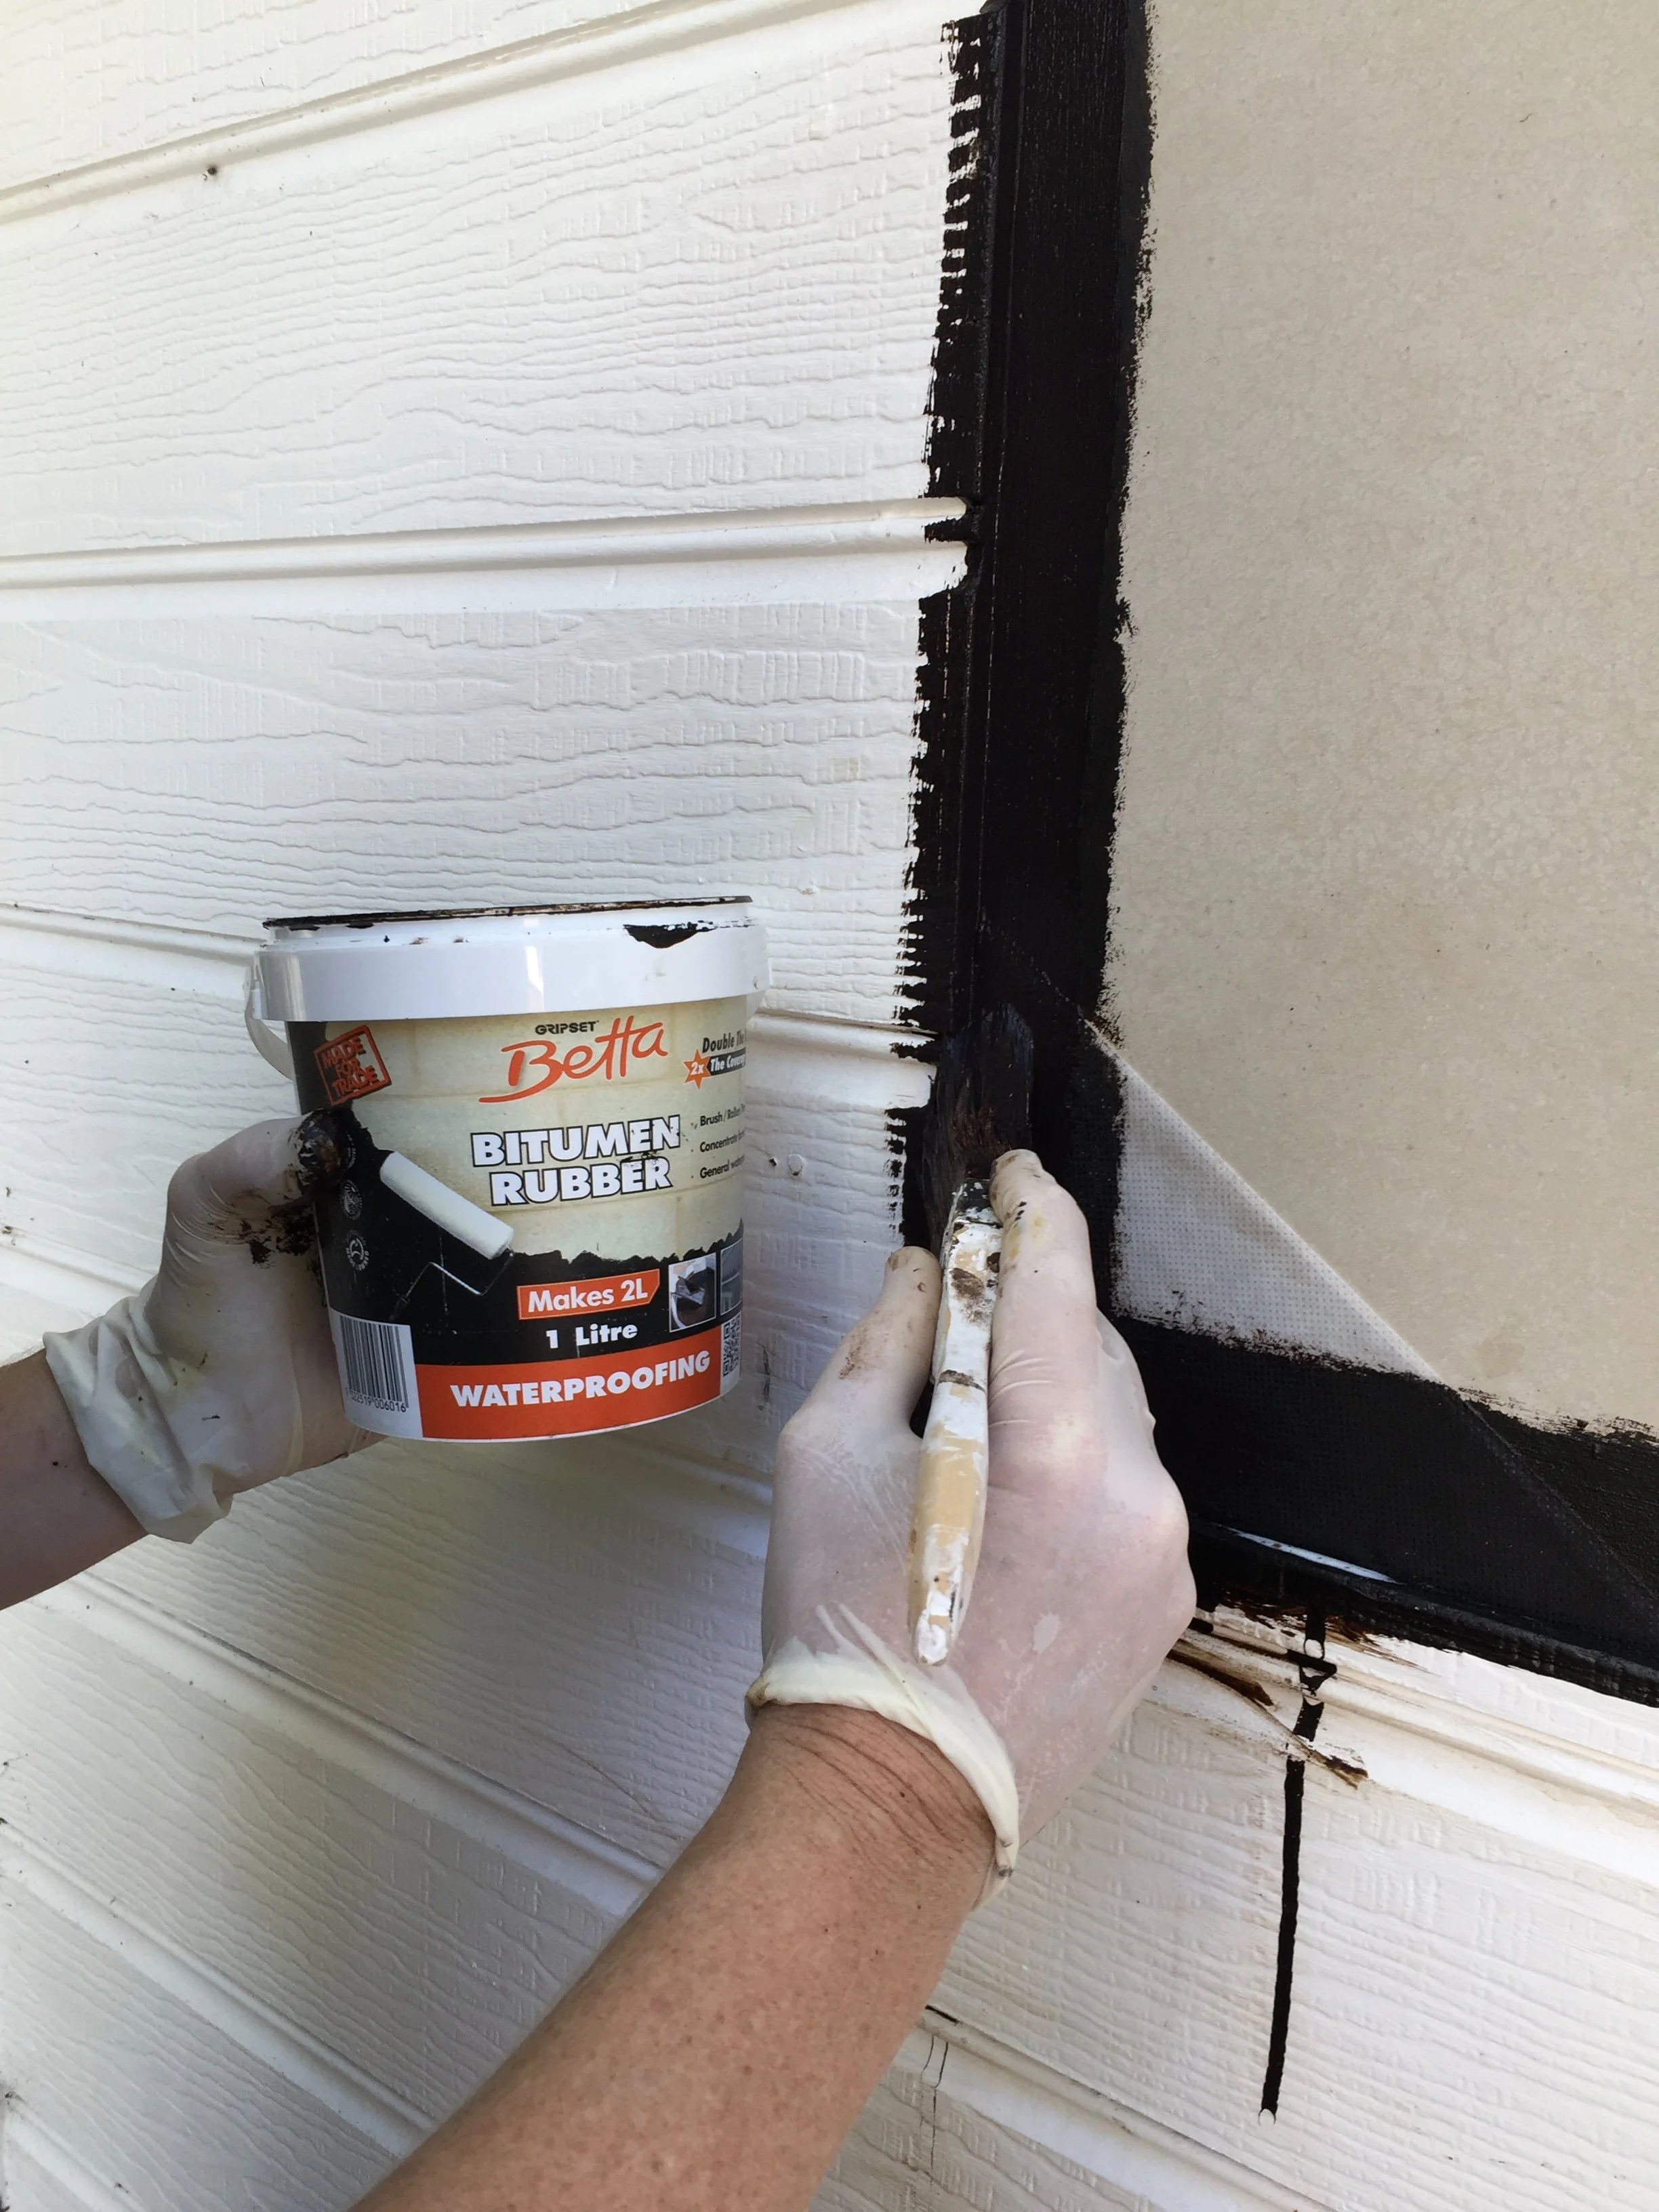
It took until 2018 to tackle the first big job where I knocked out the window, boarded it up and waterproofed the exterior wall to create a new shower area.

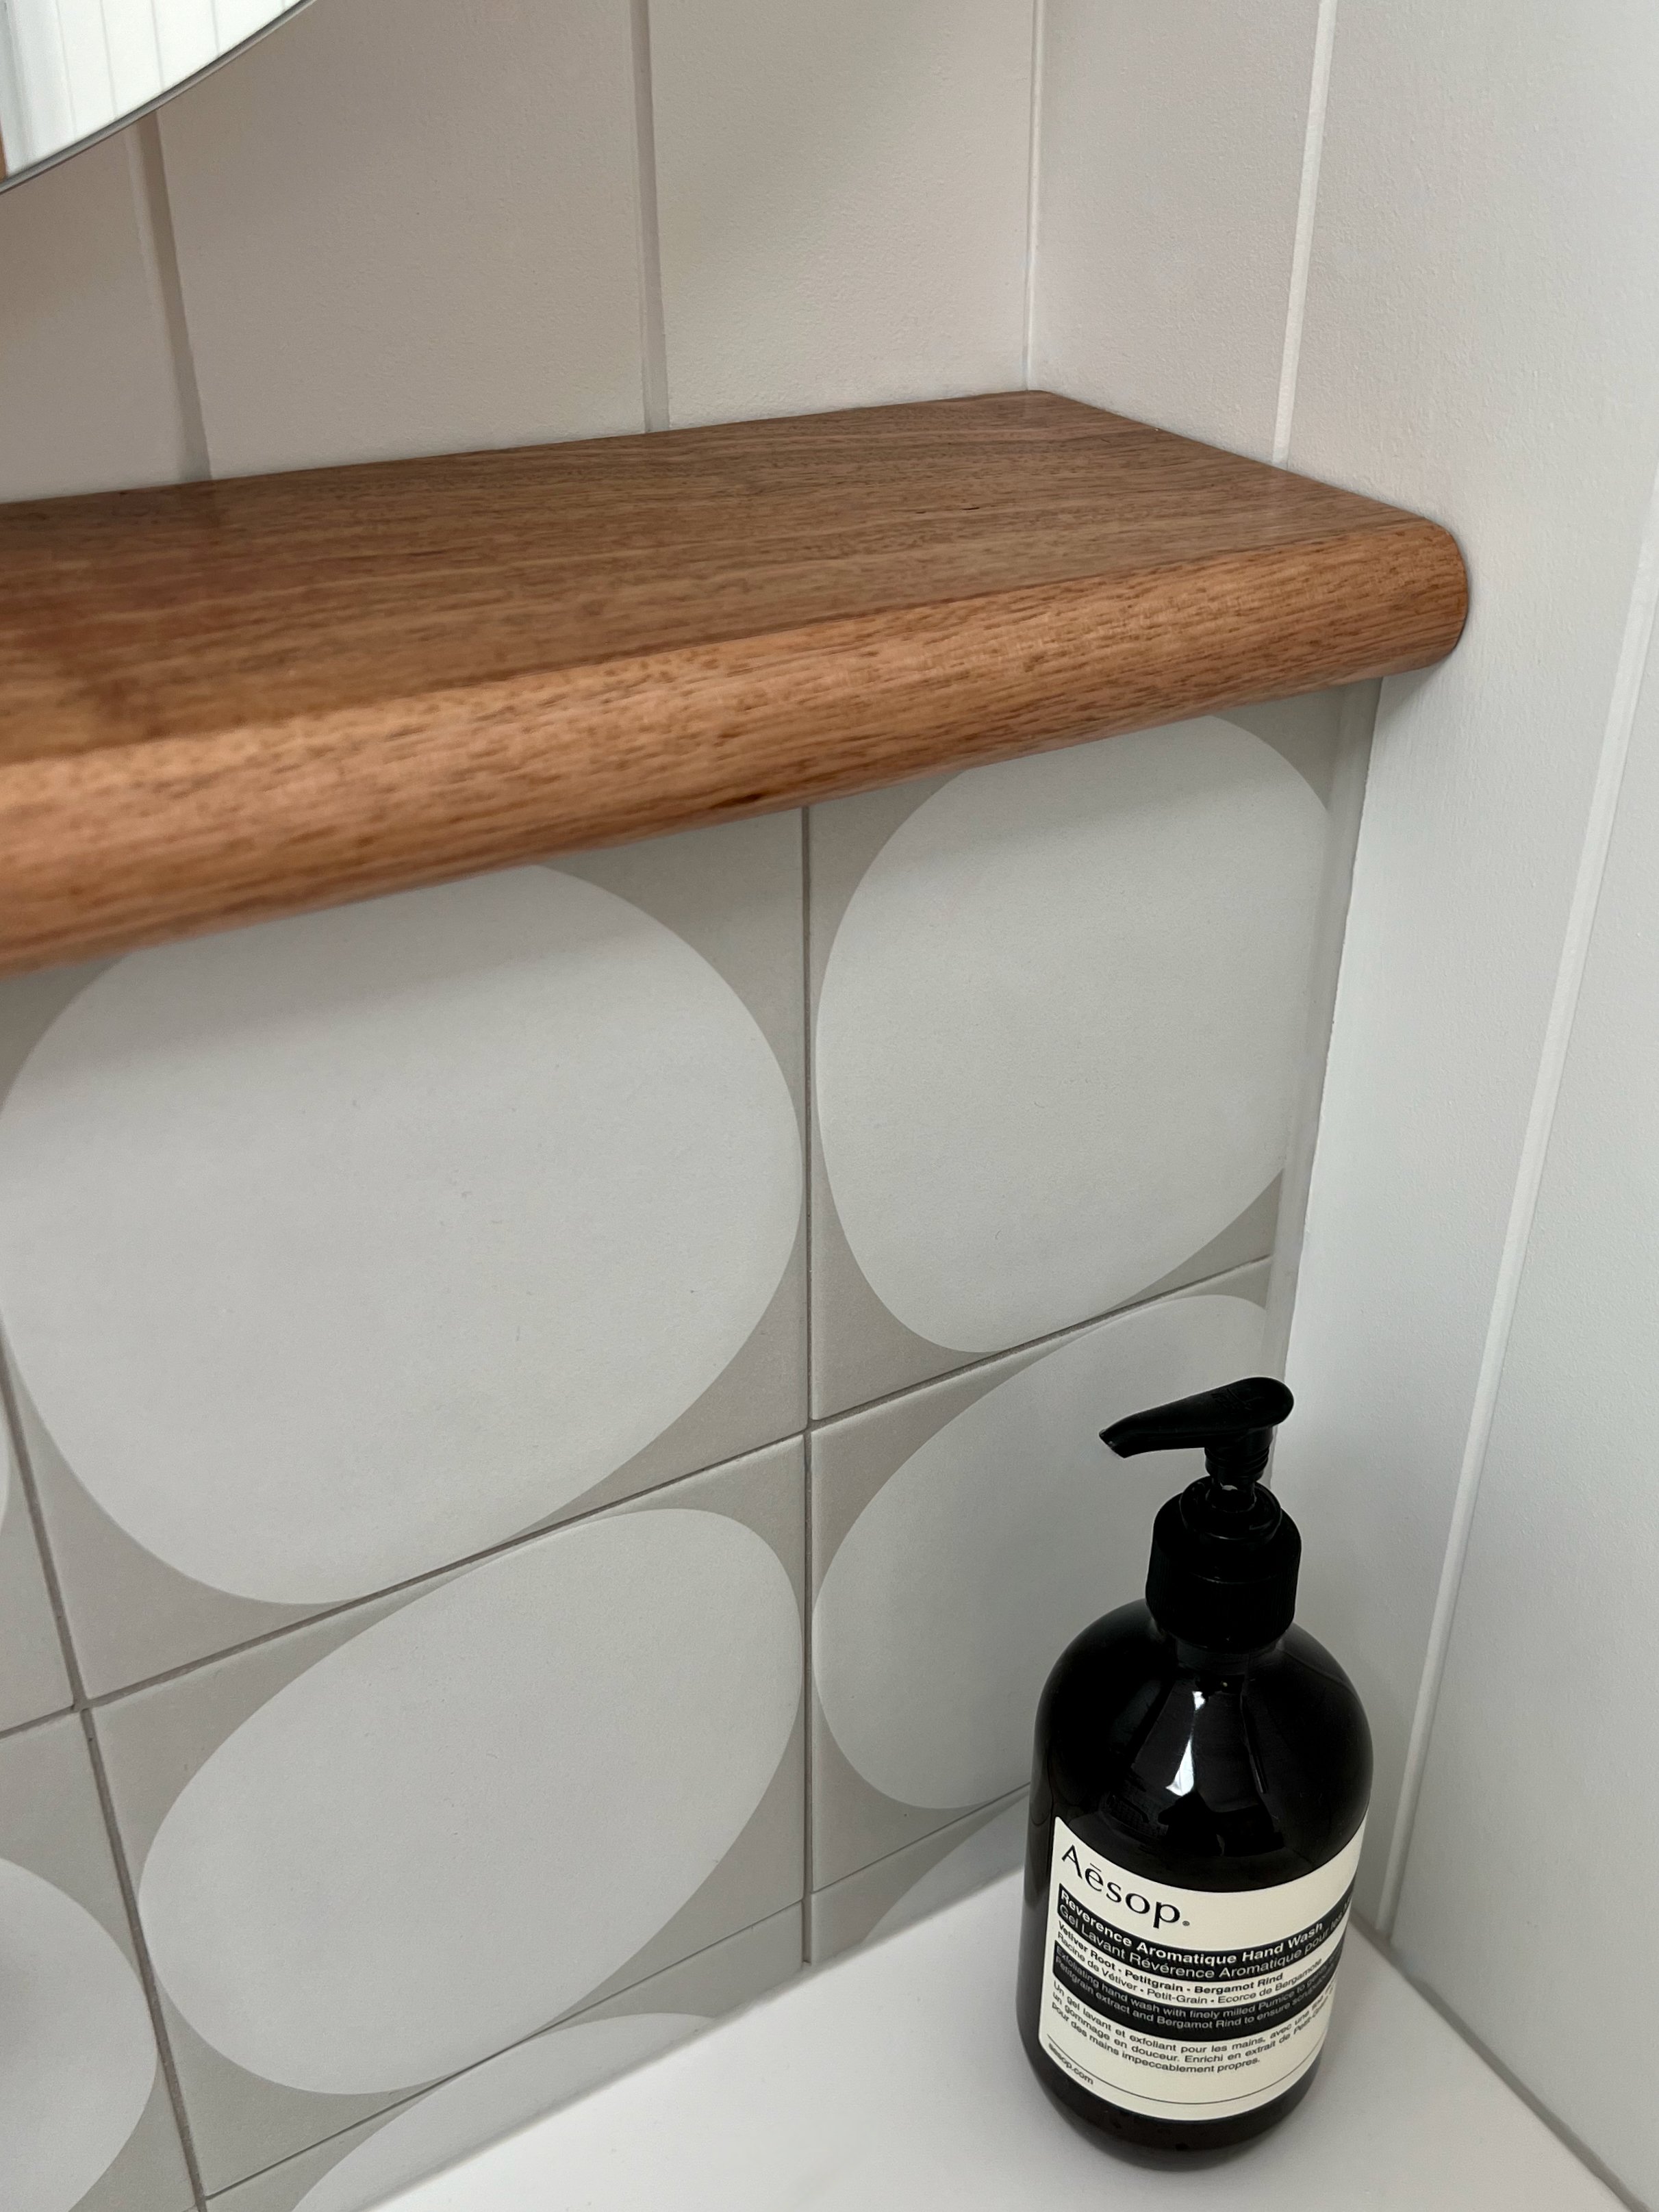
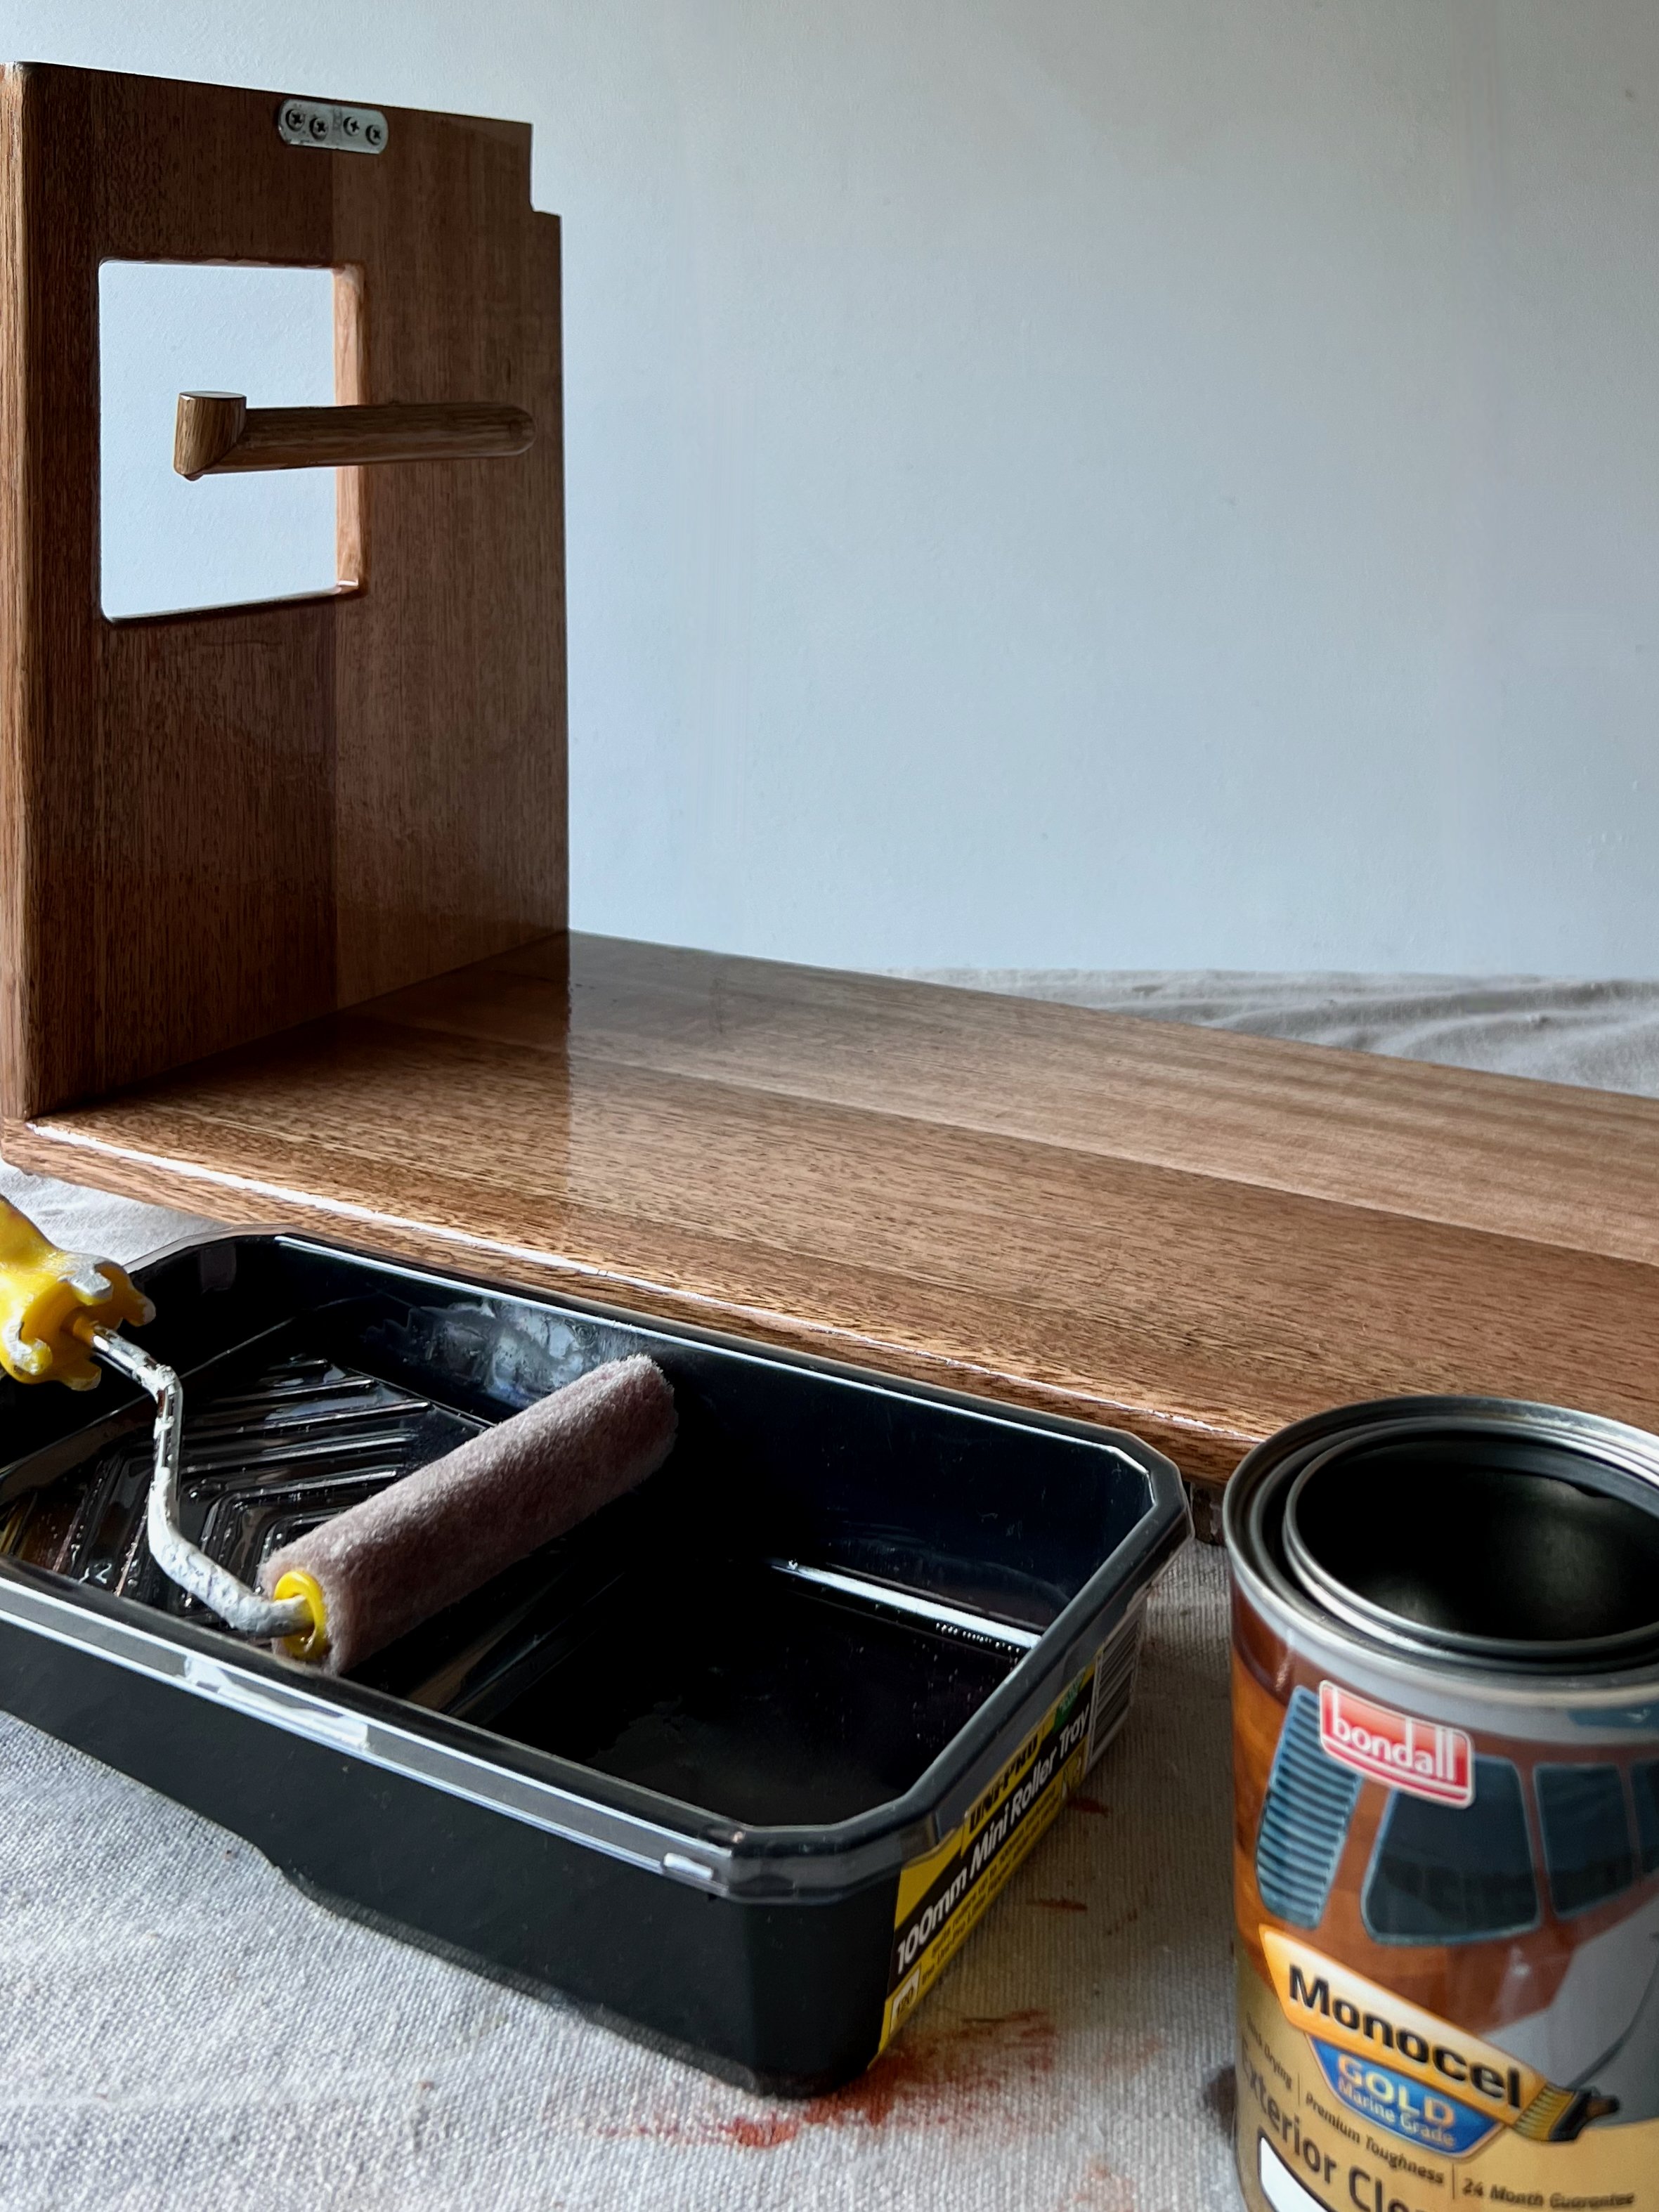
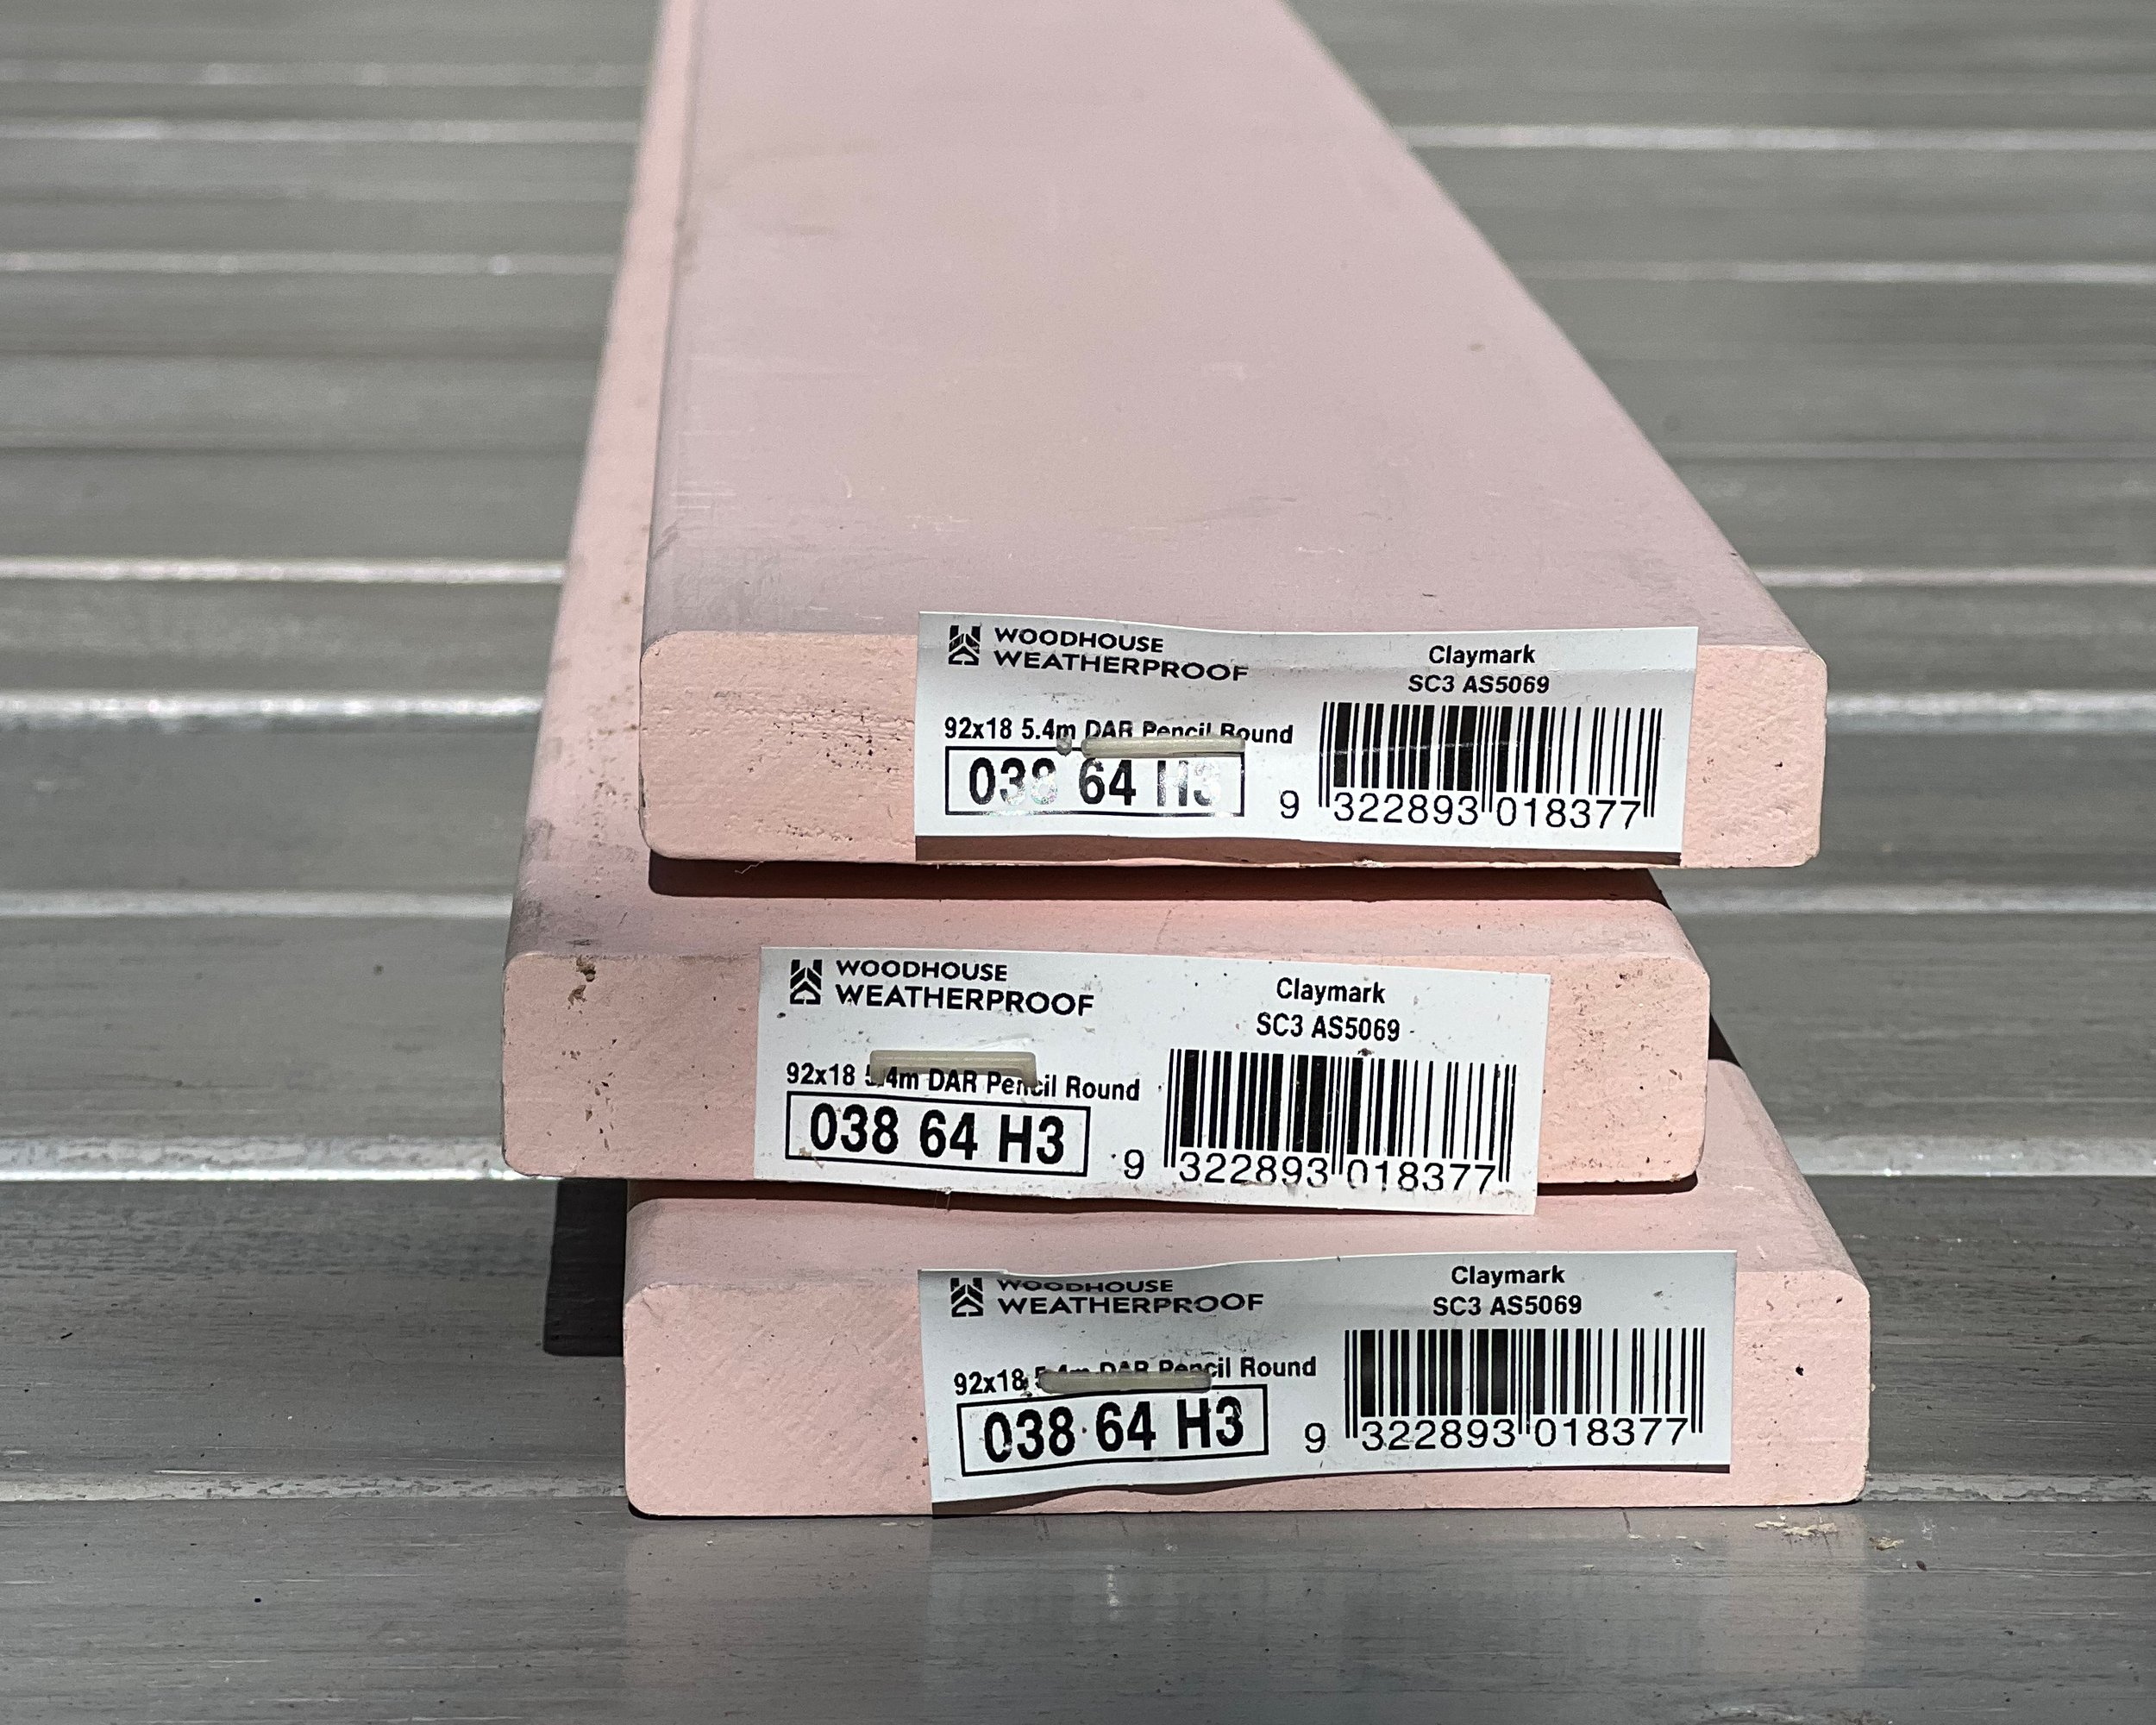
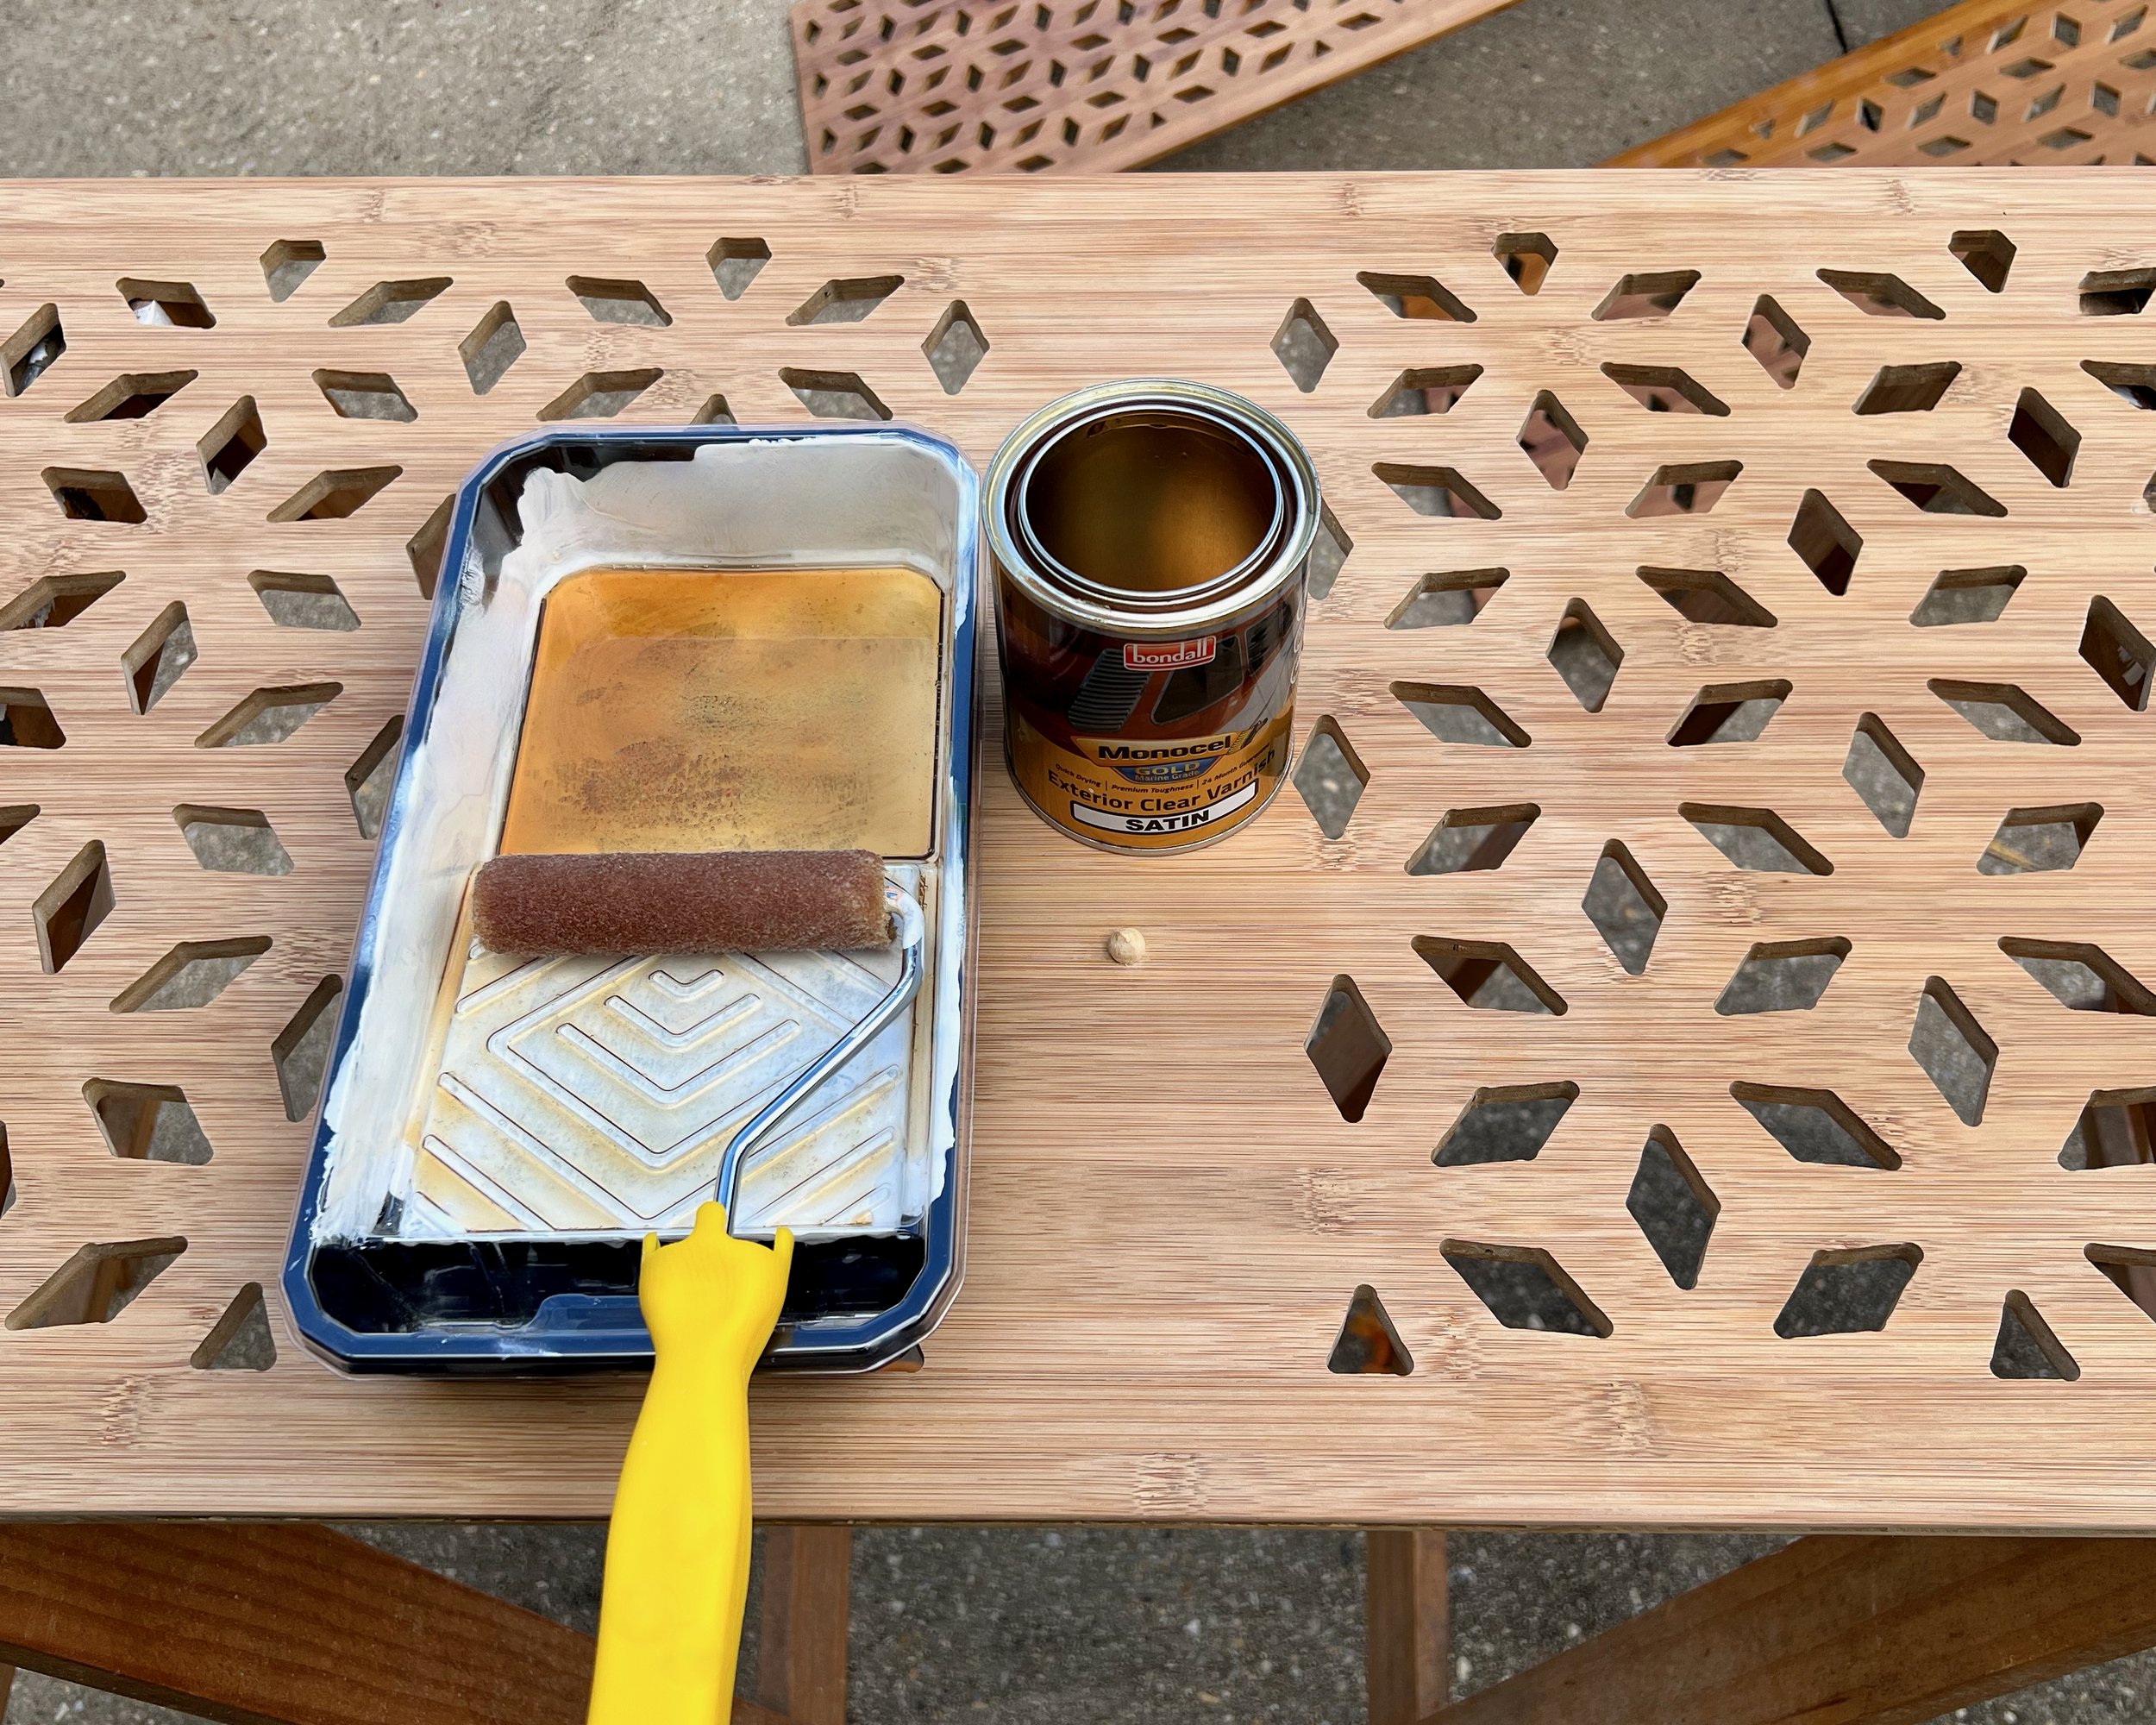
I built the splashback from blackbutt sourced at a local timber yard, sealing it in Monocel Gold marine-grade varnish. The pipes and tap ware were installed by a plumber on the same day I hung the boards so they had full access.

TO DIY Watch the video or follow the tutorial.


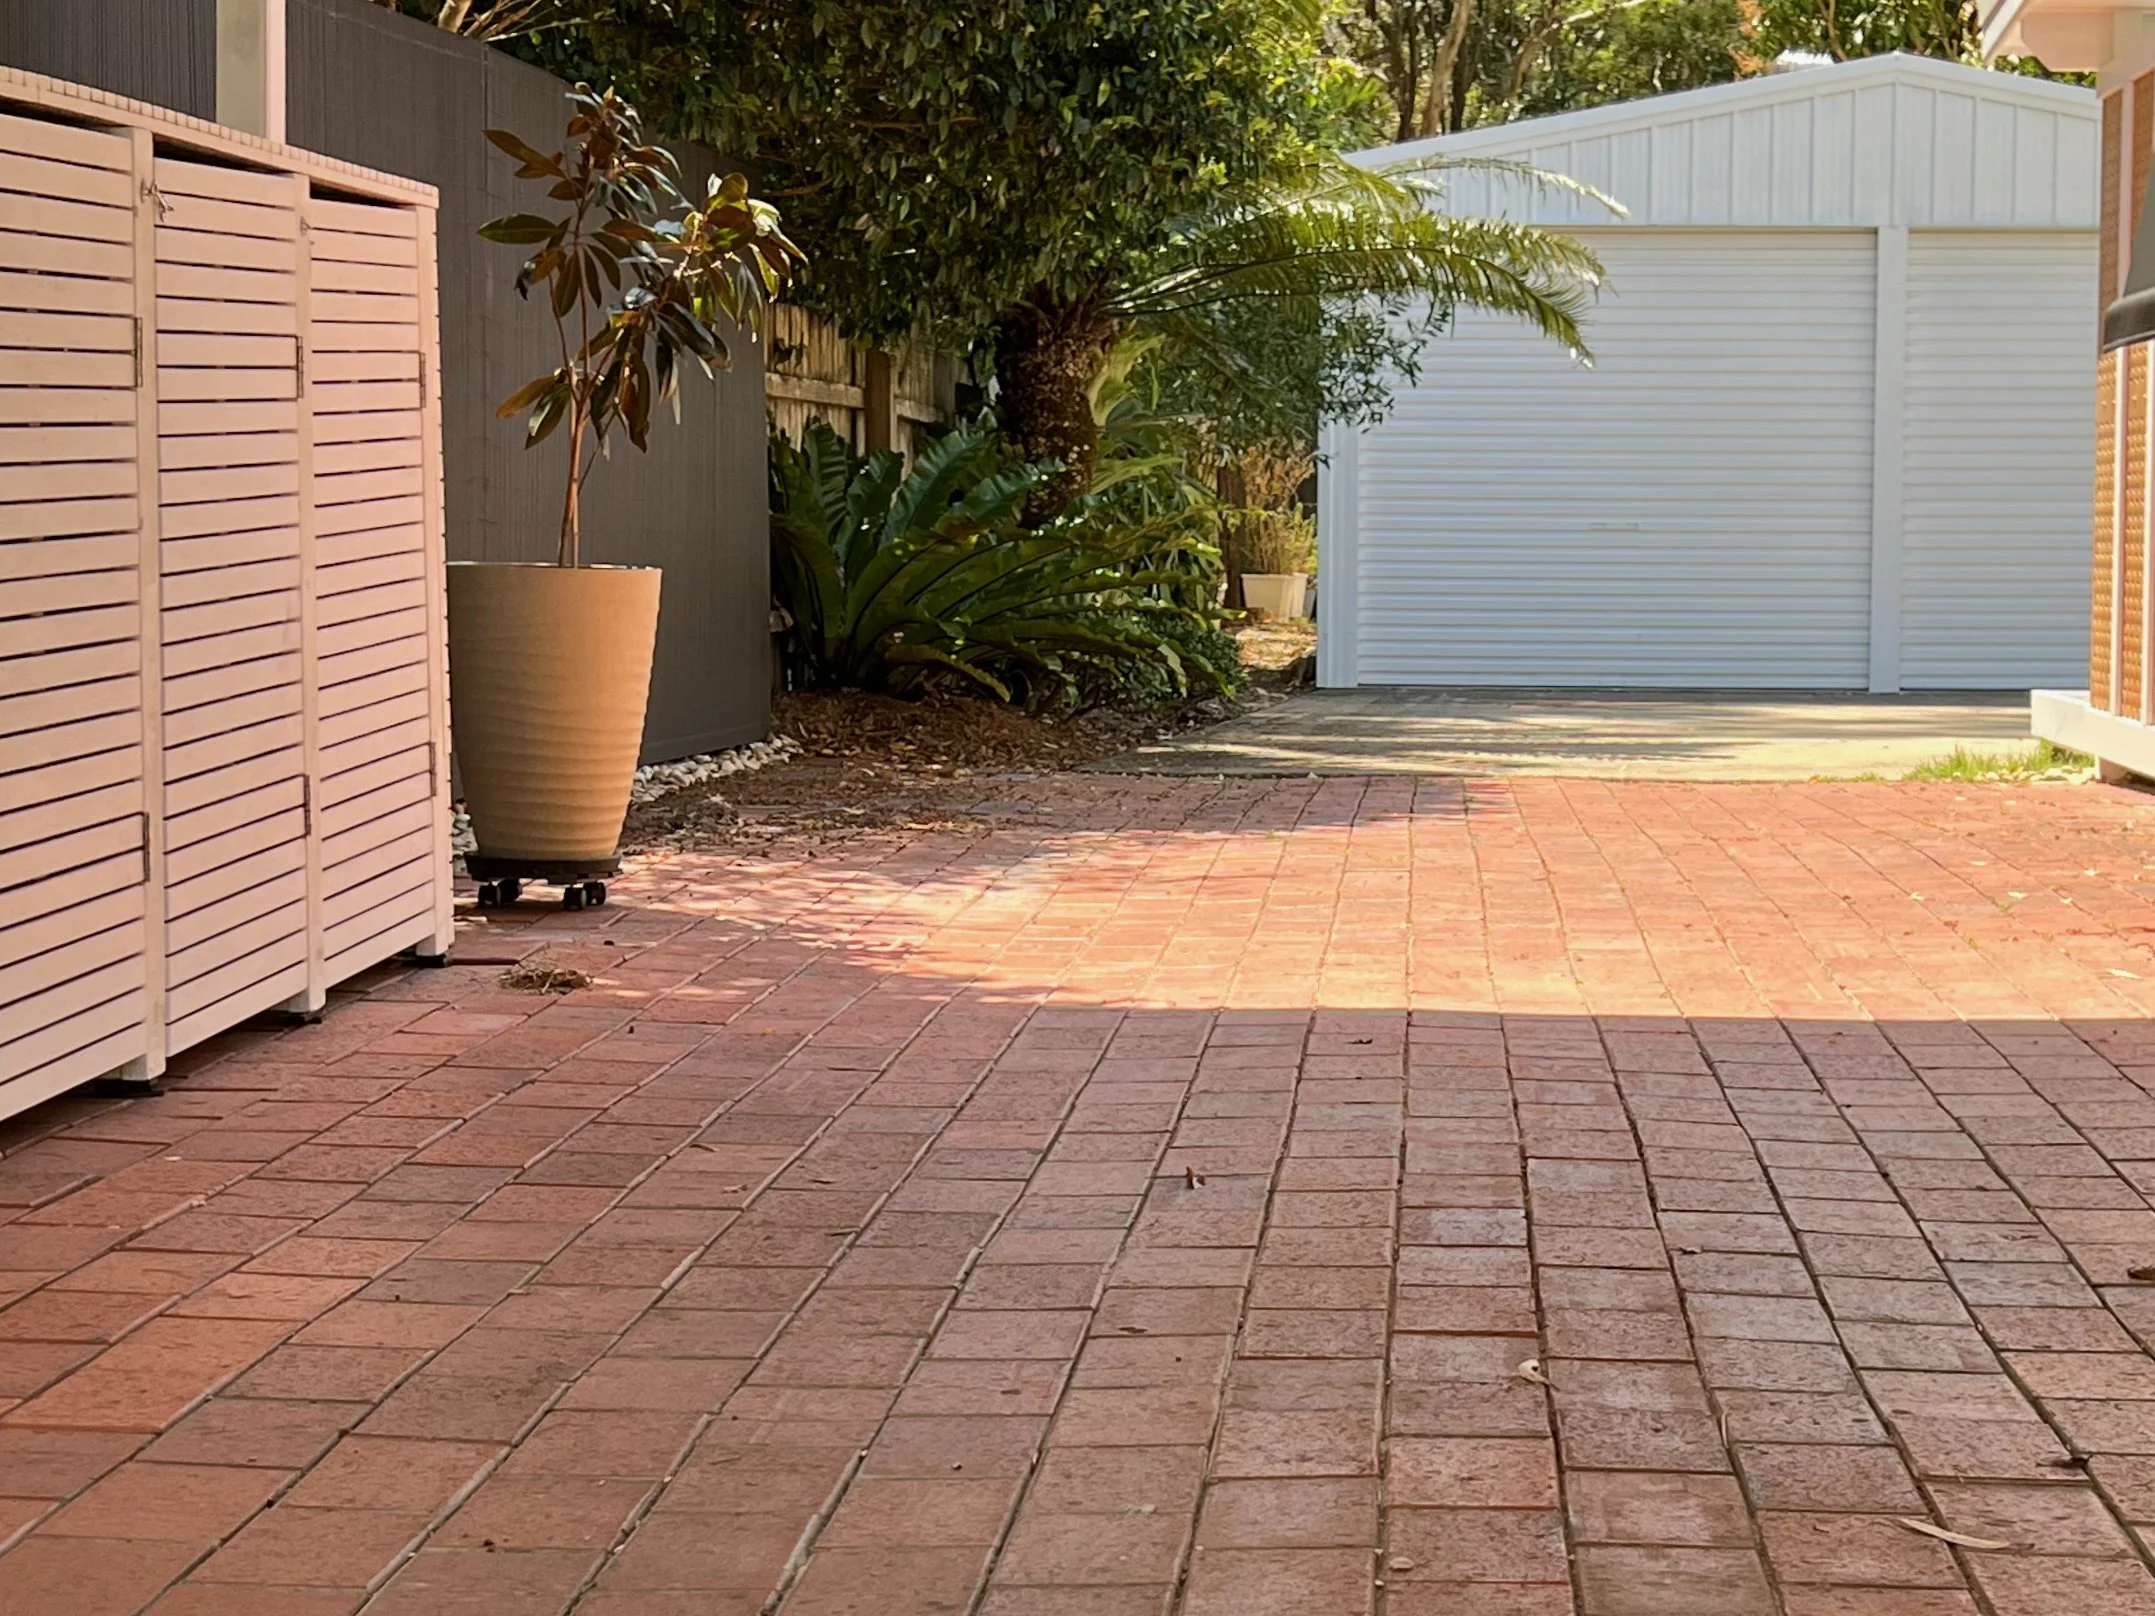
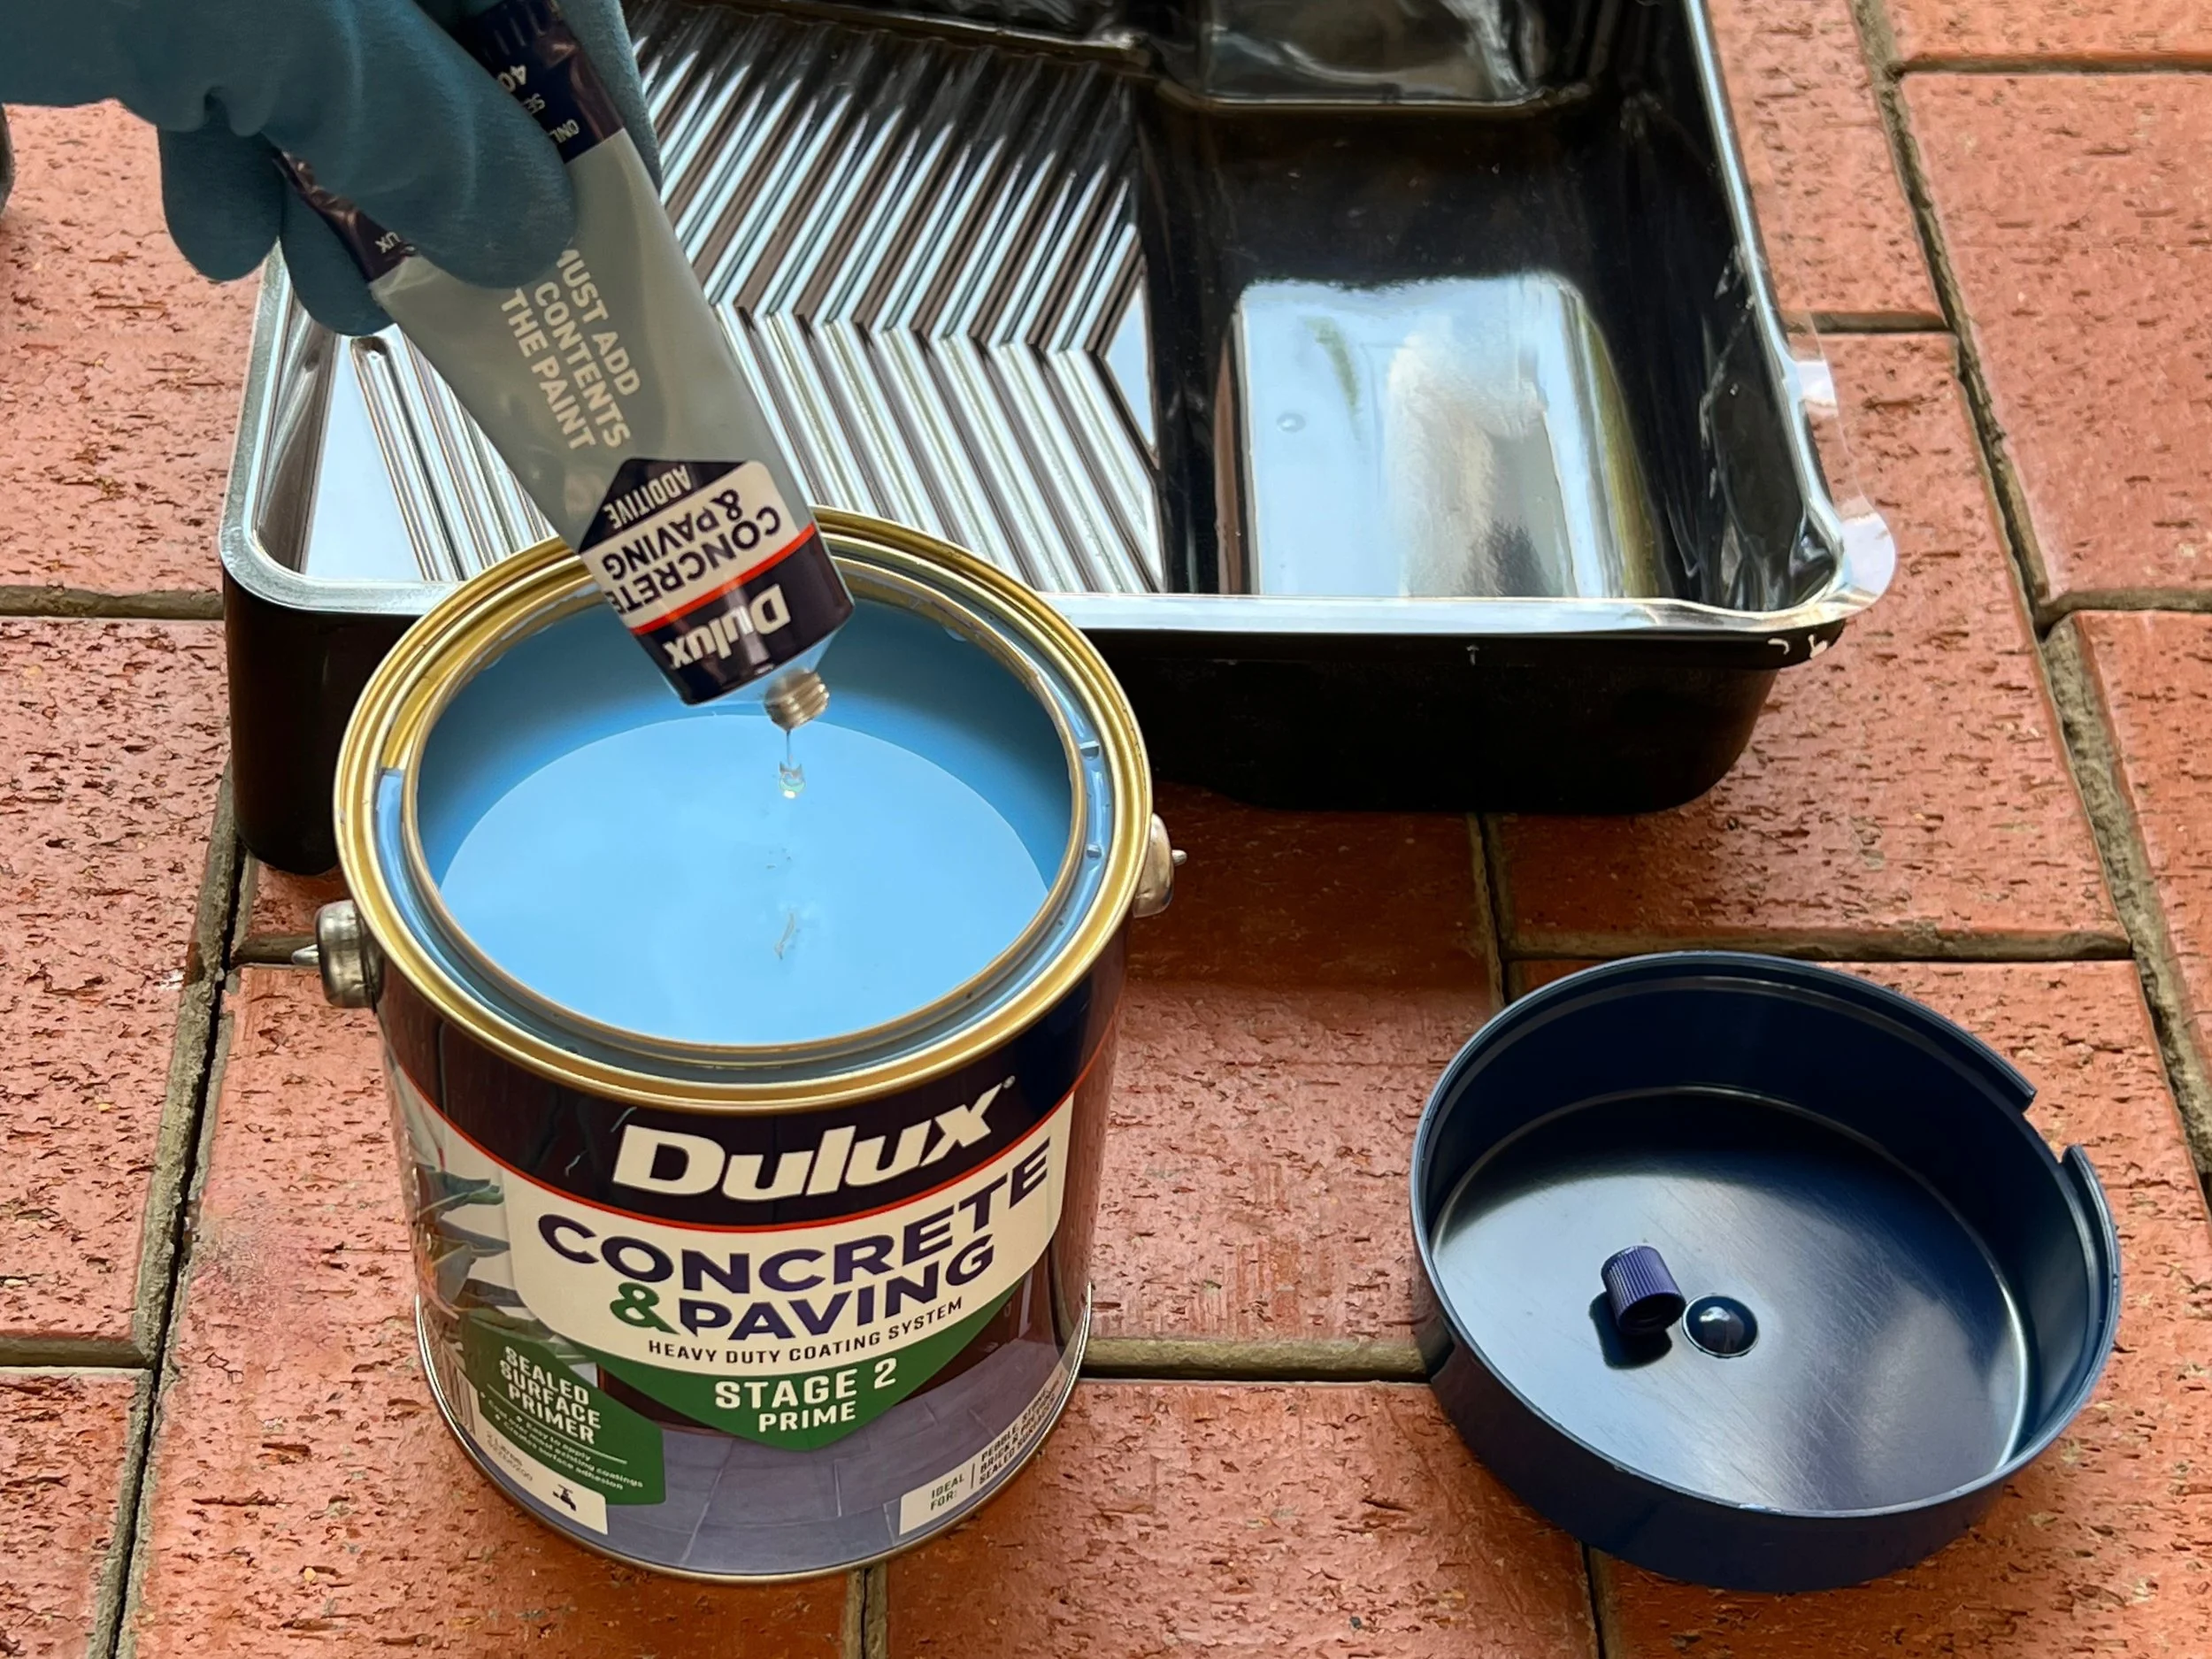
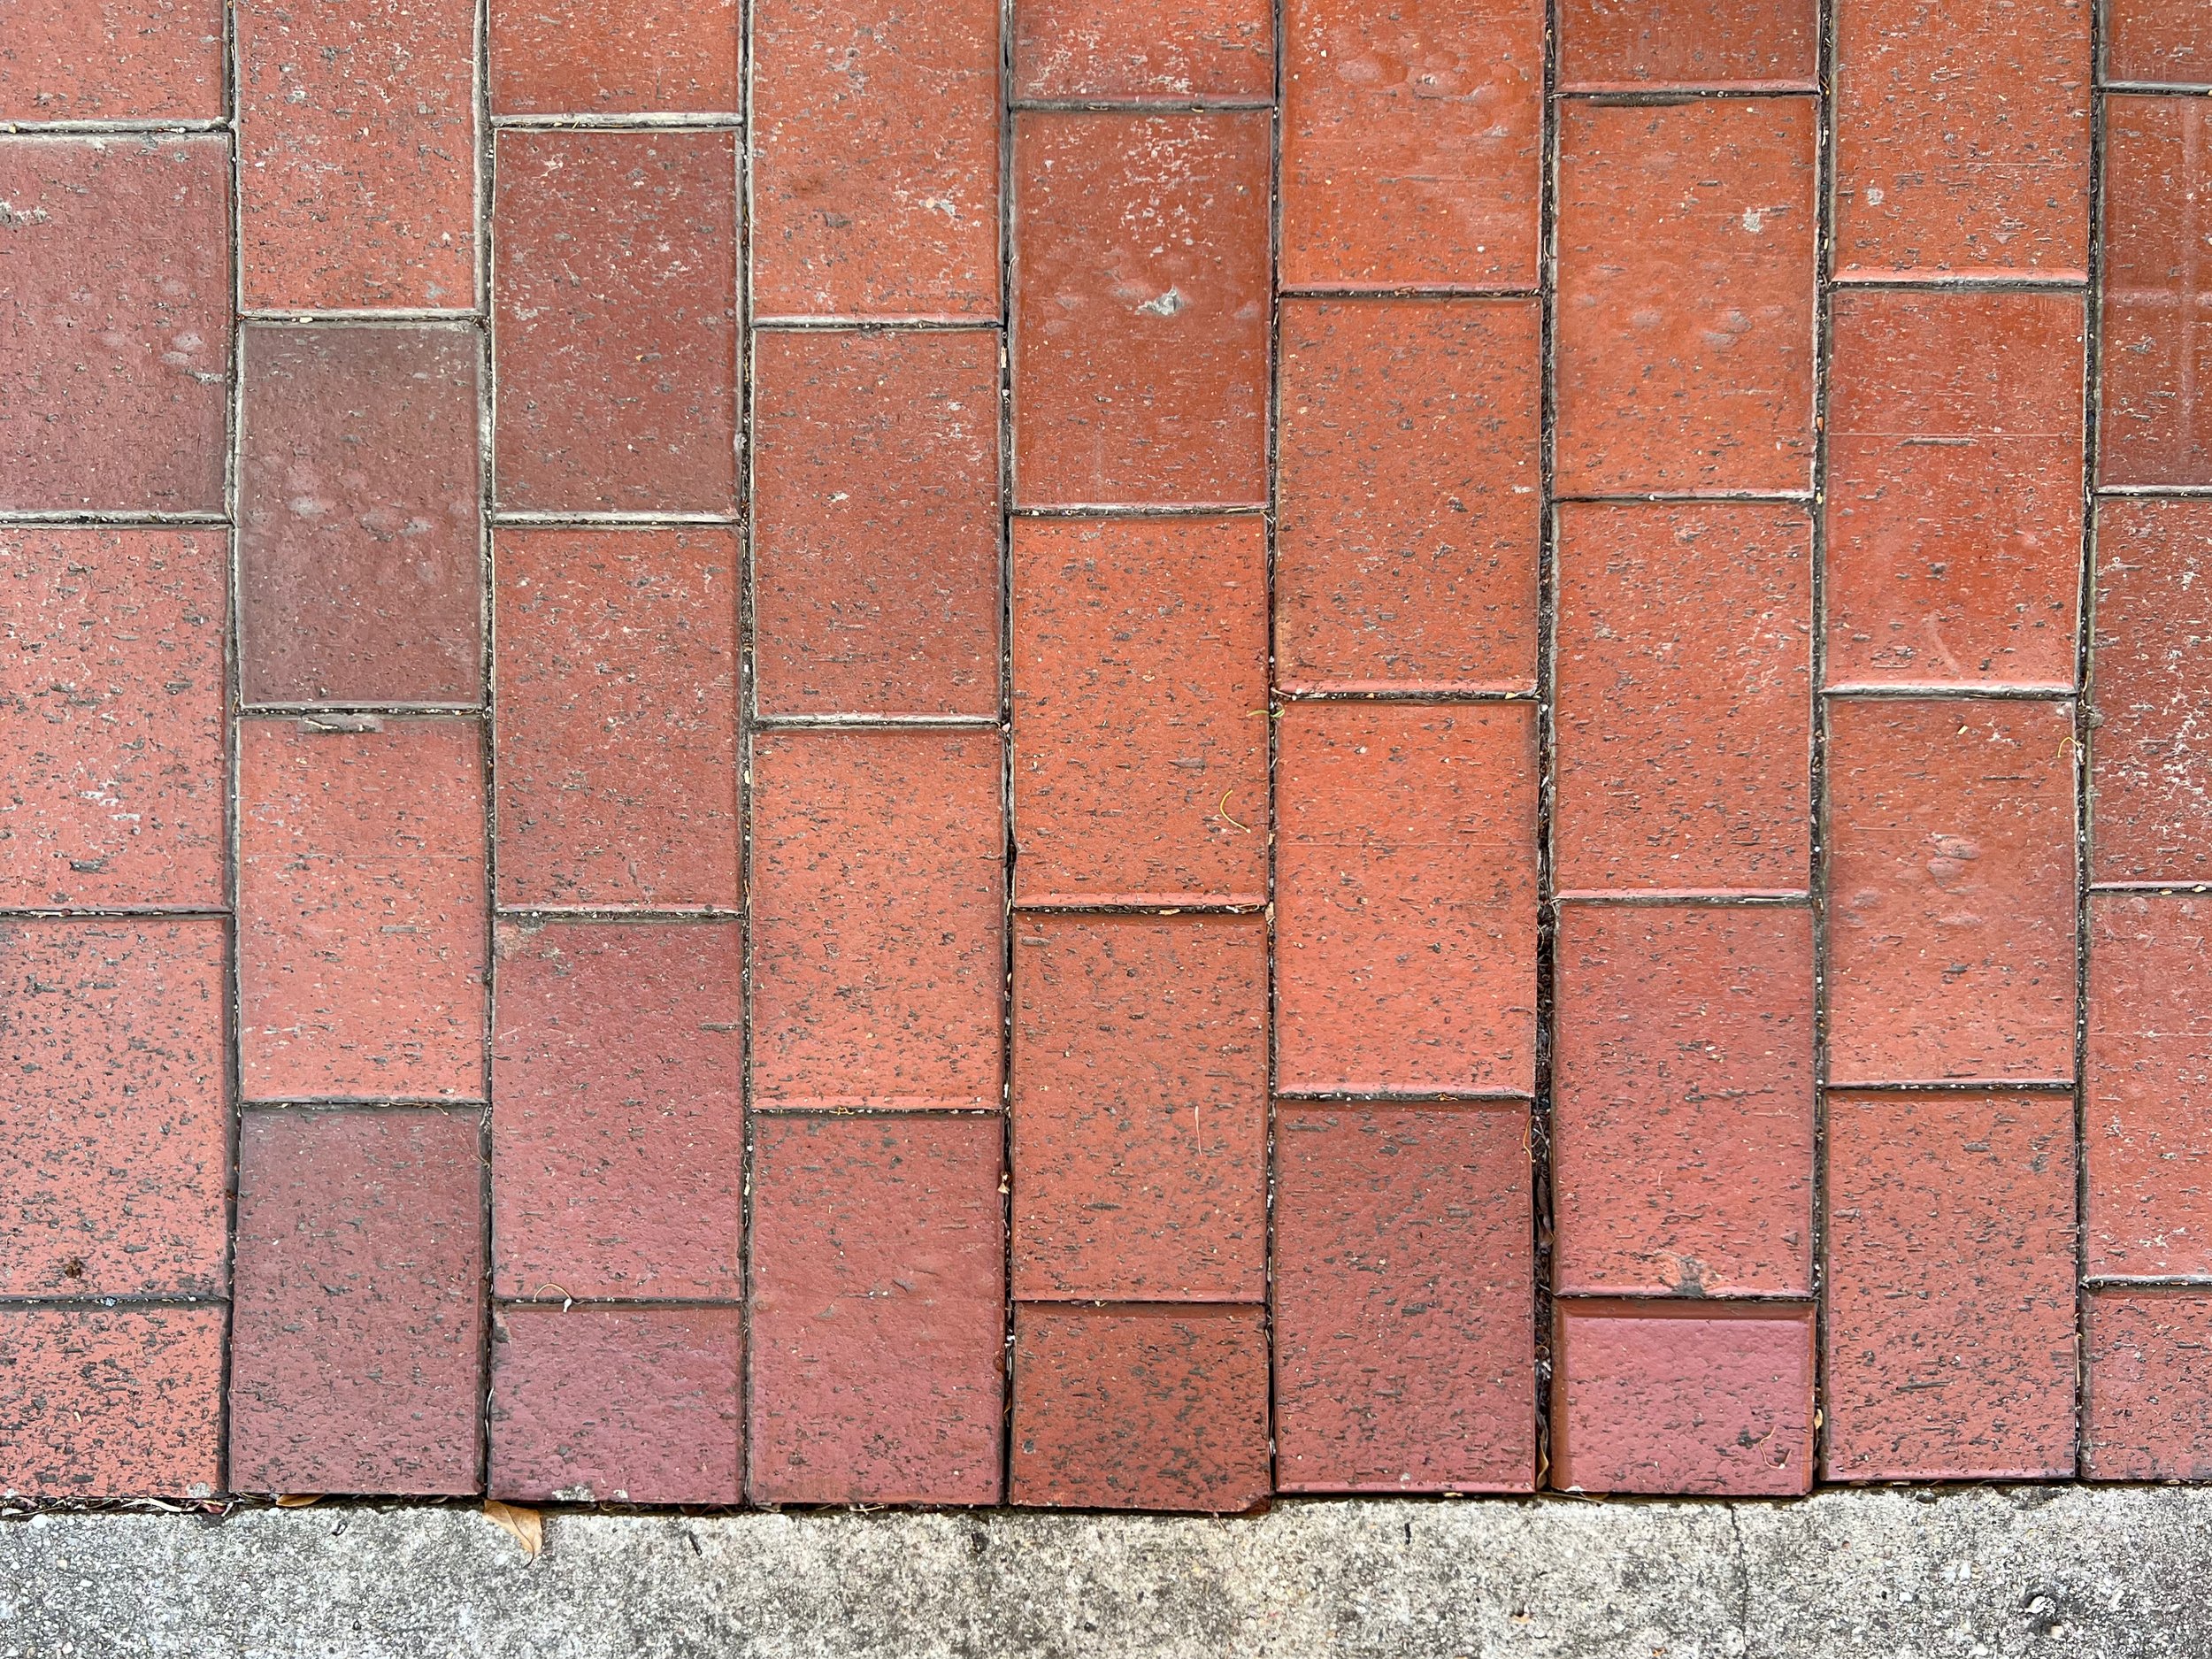
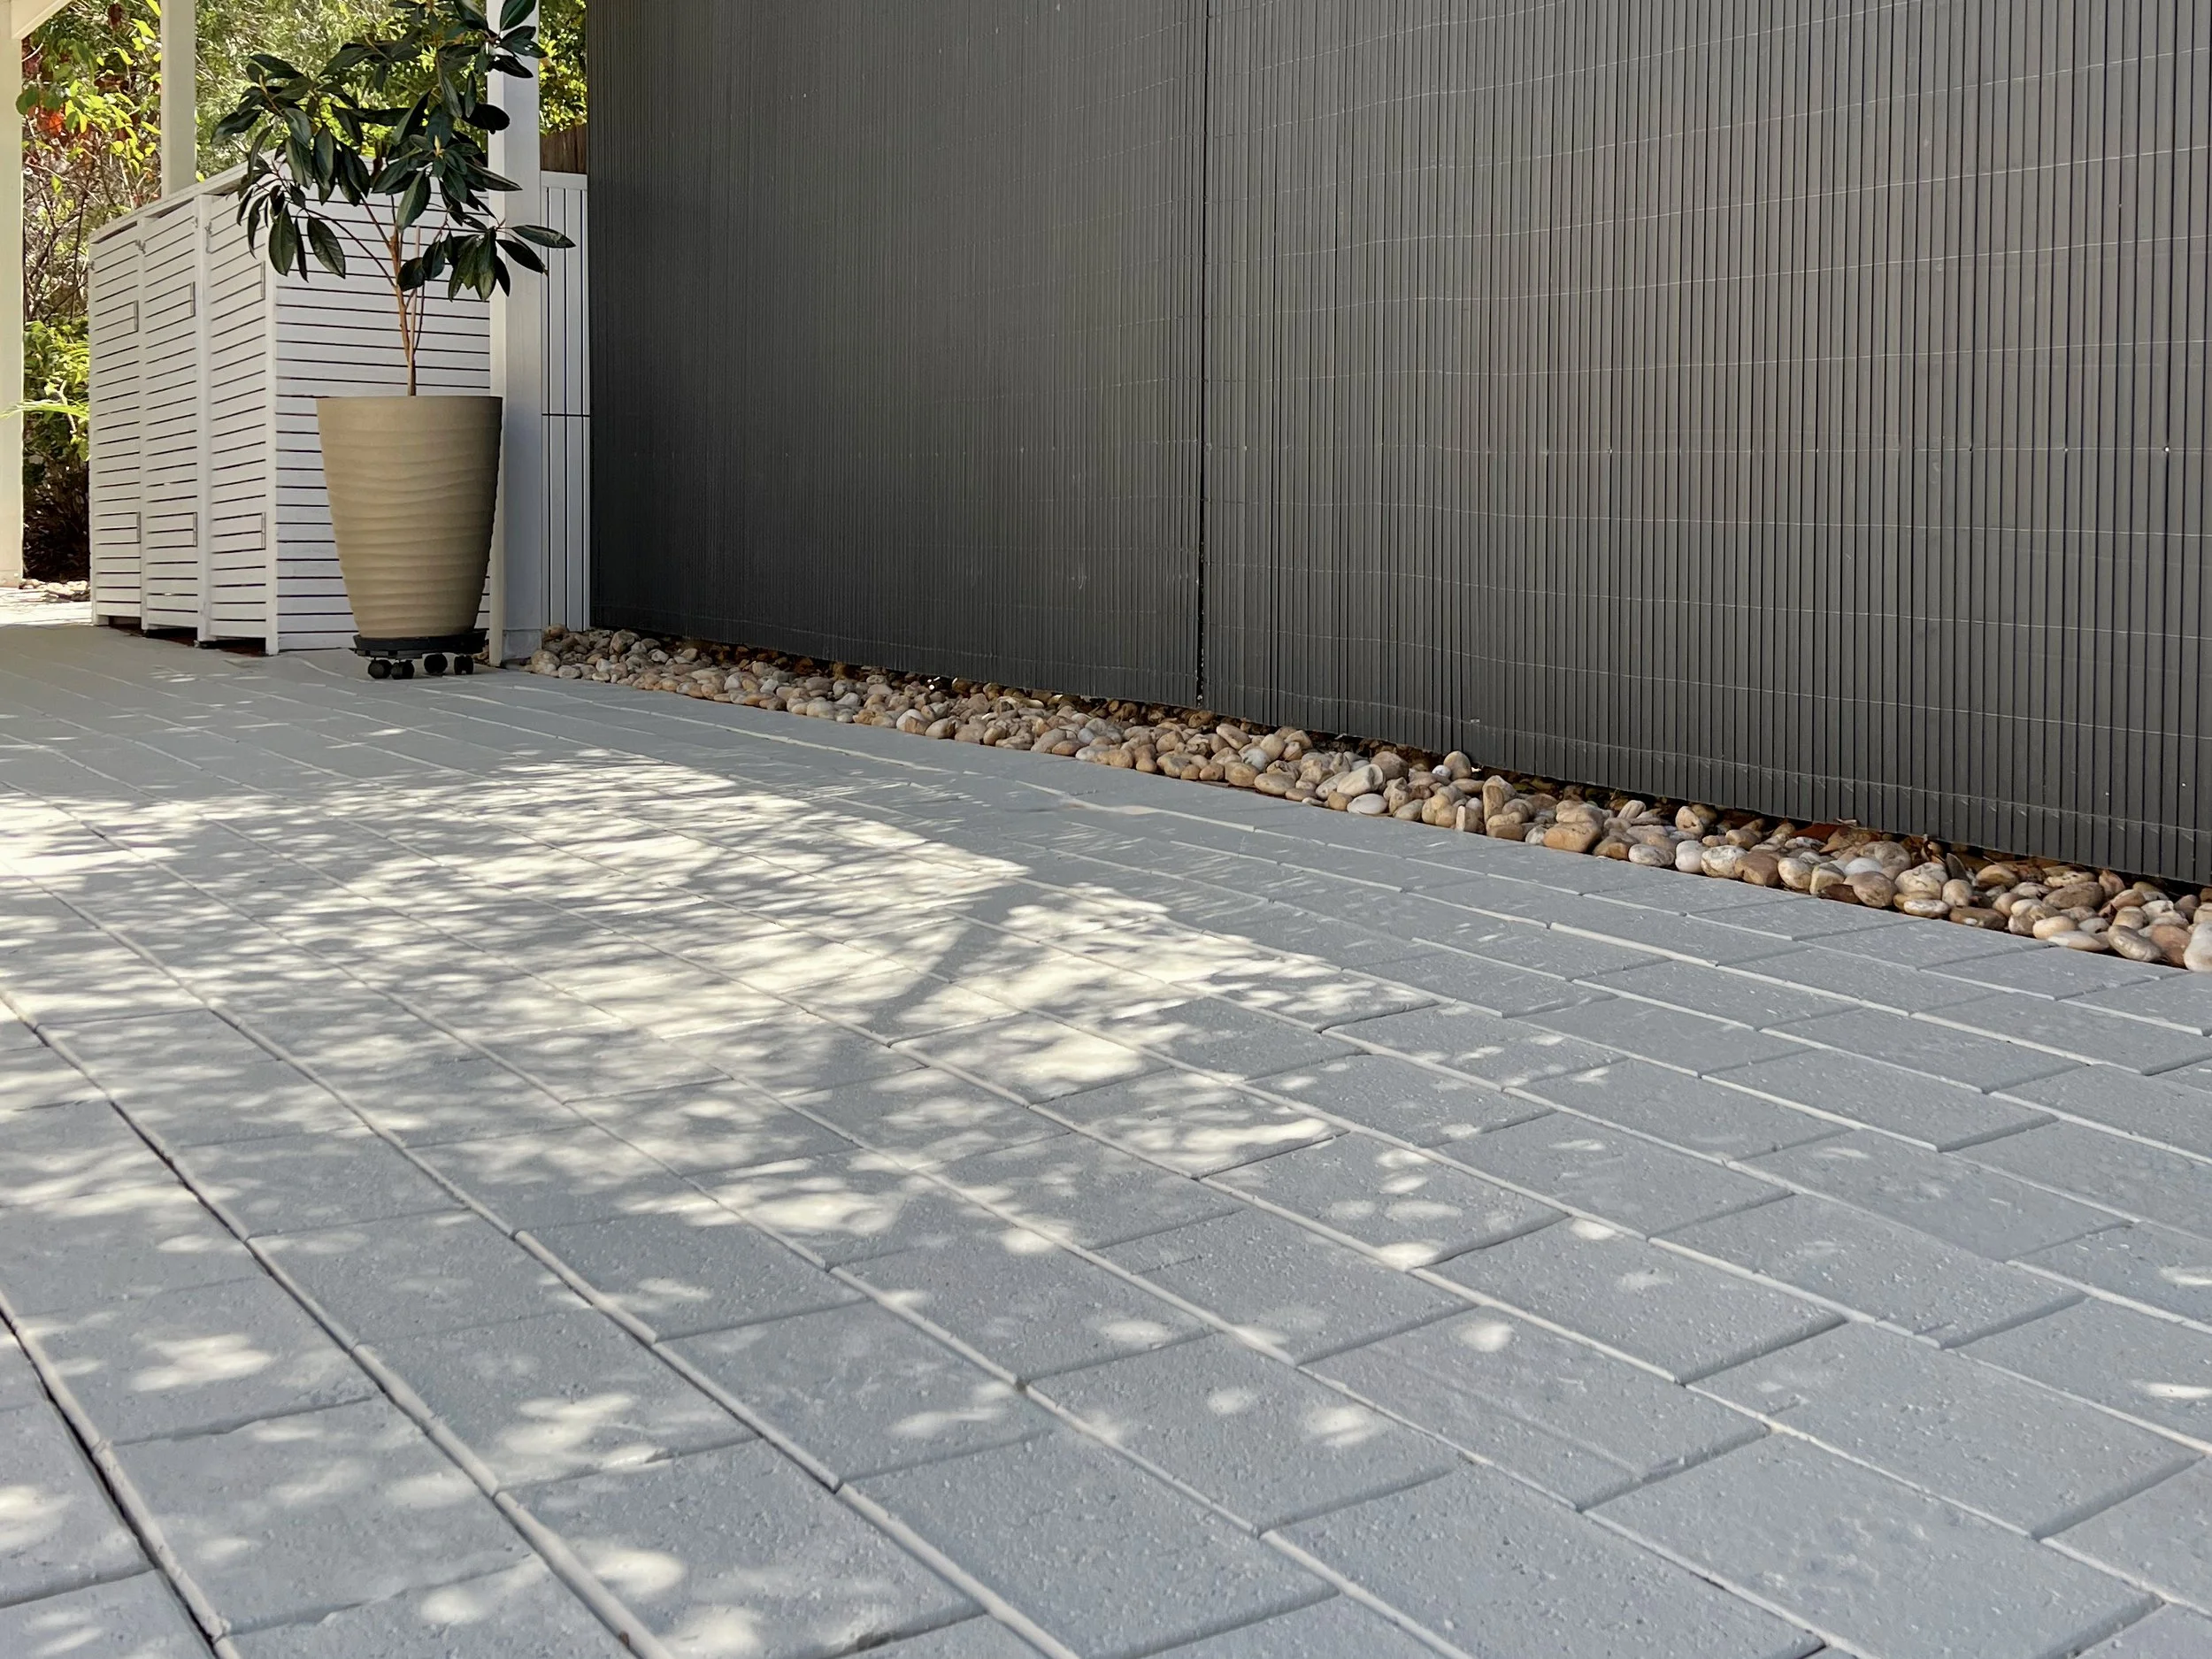
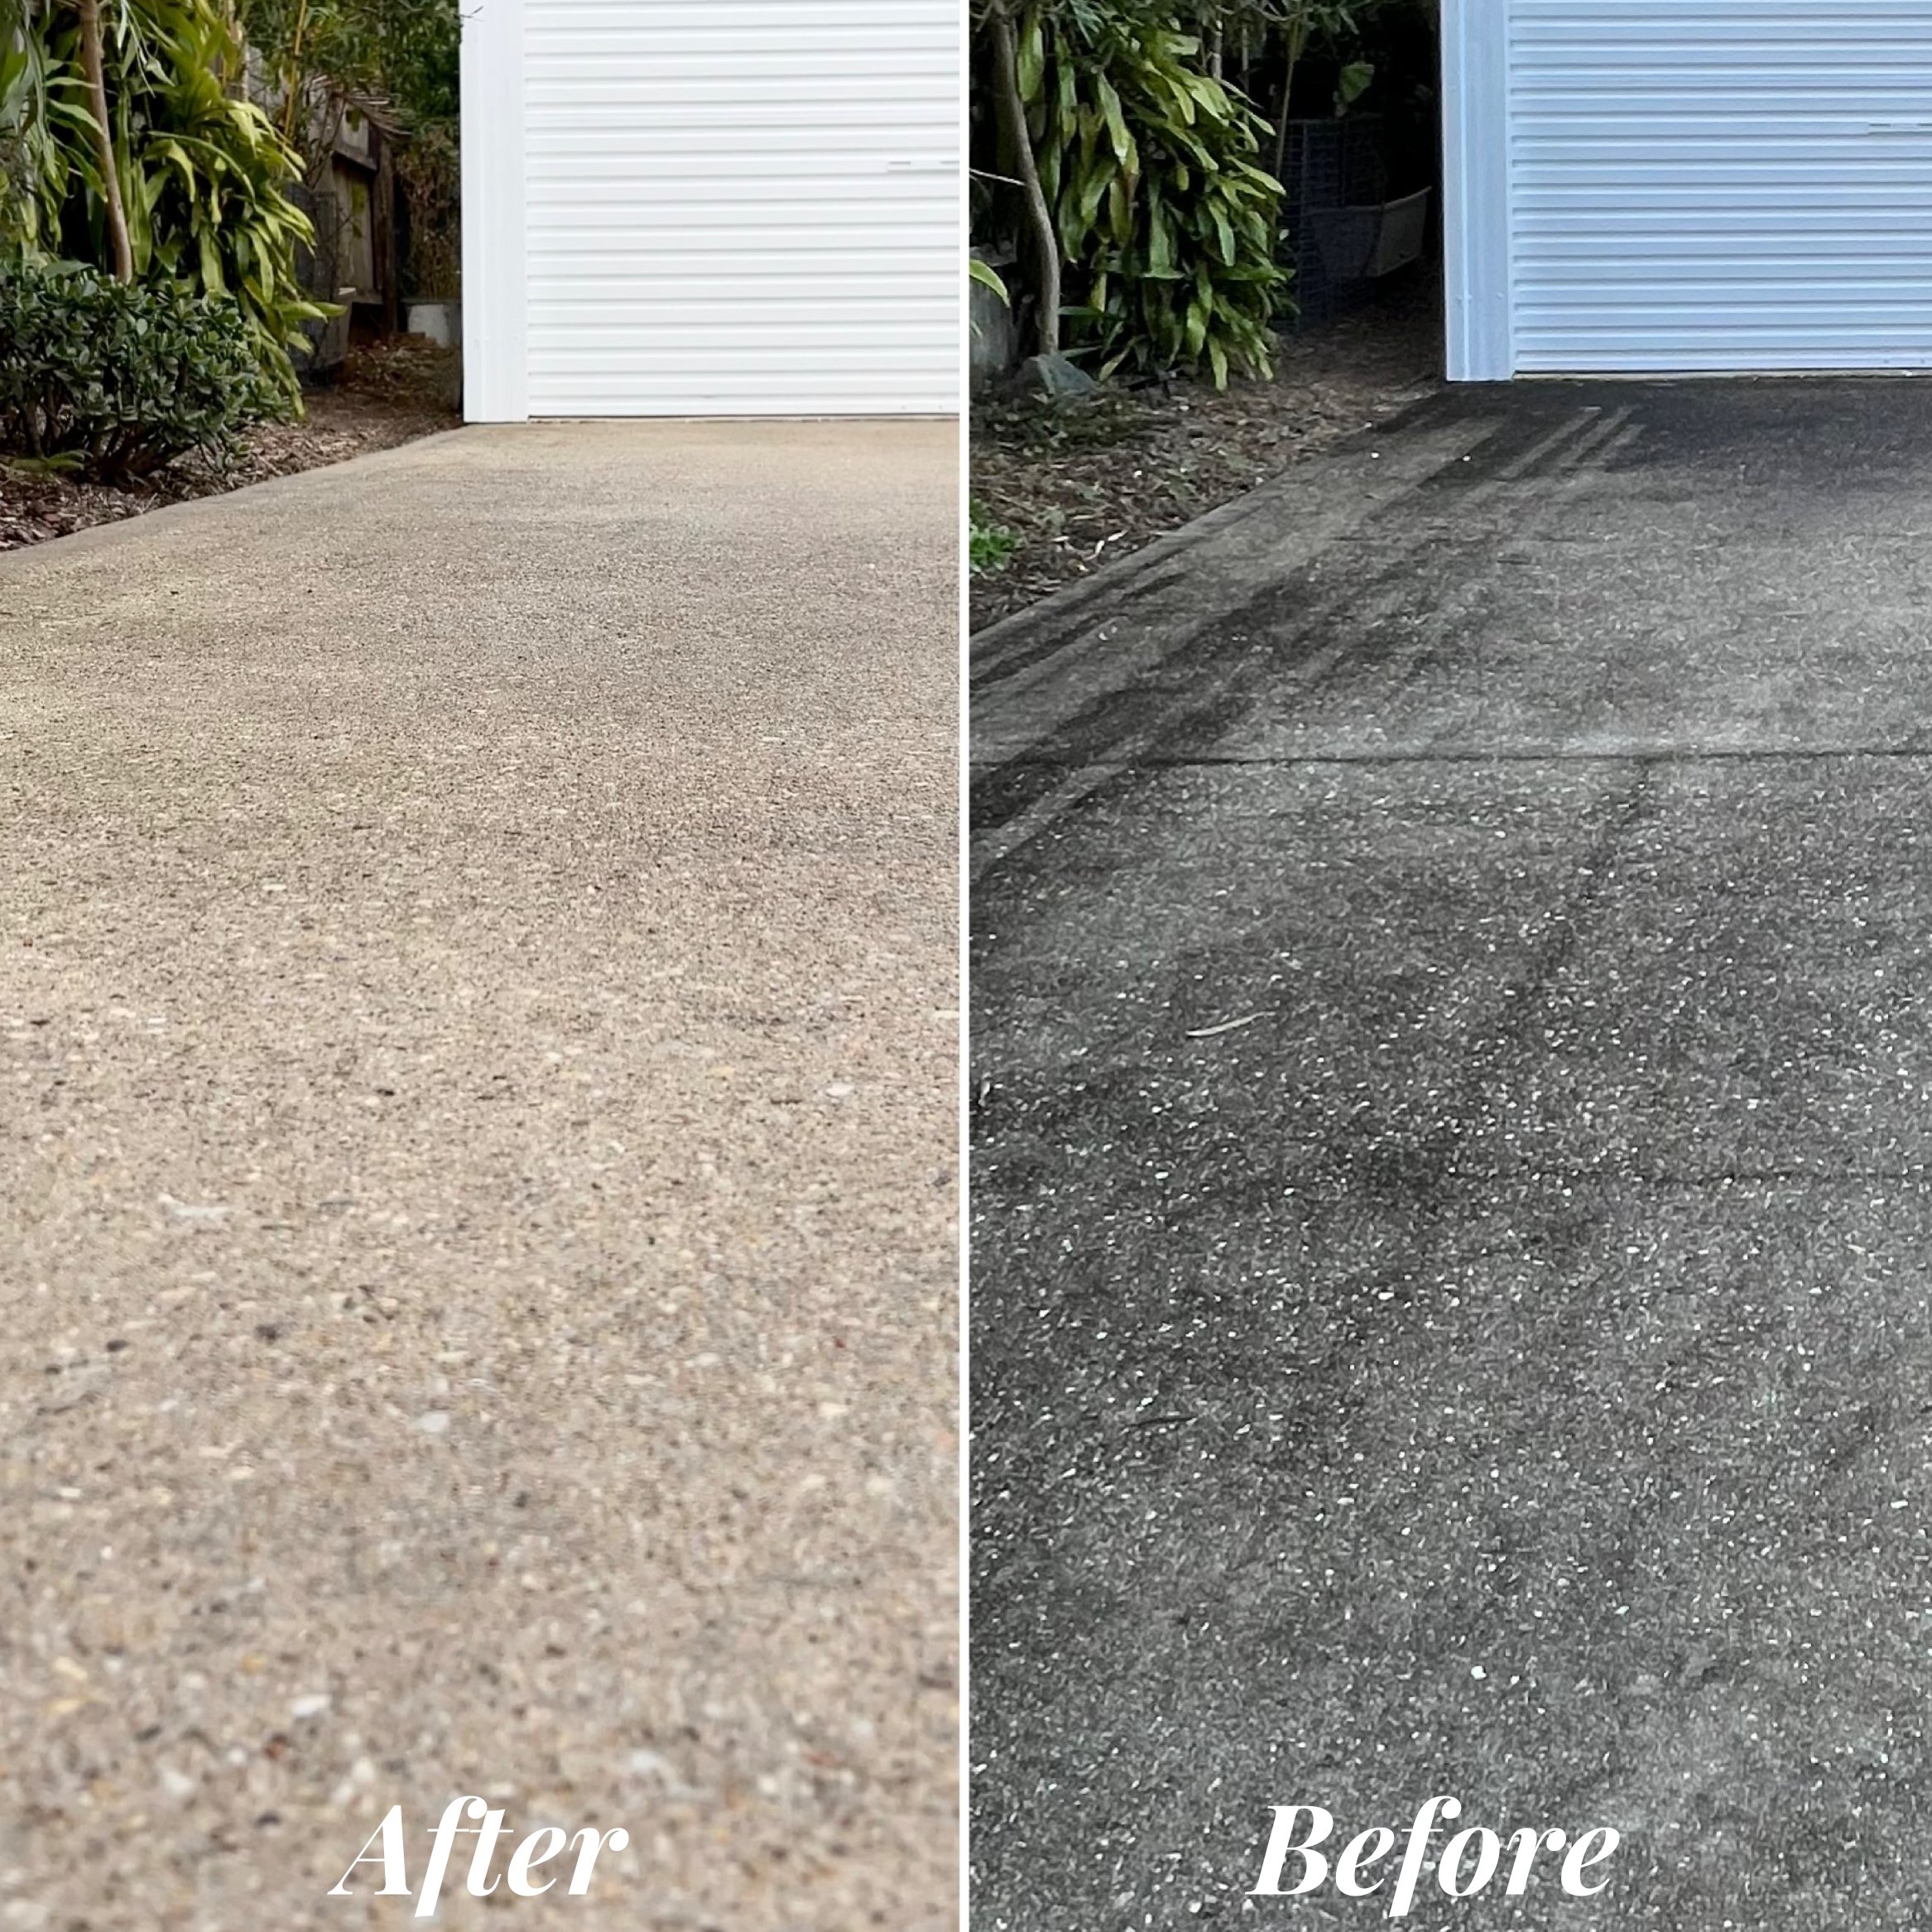
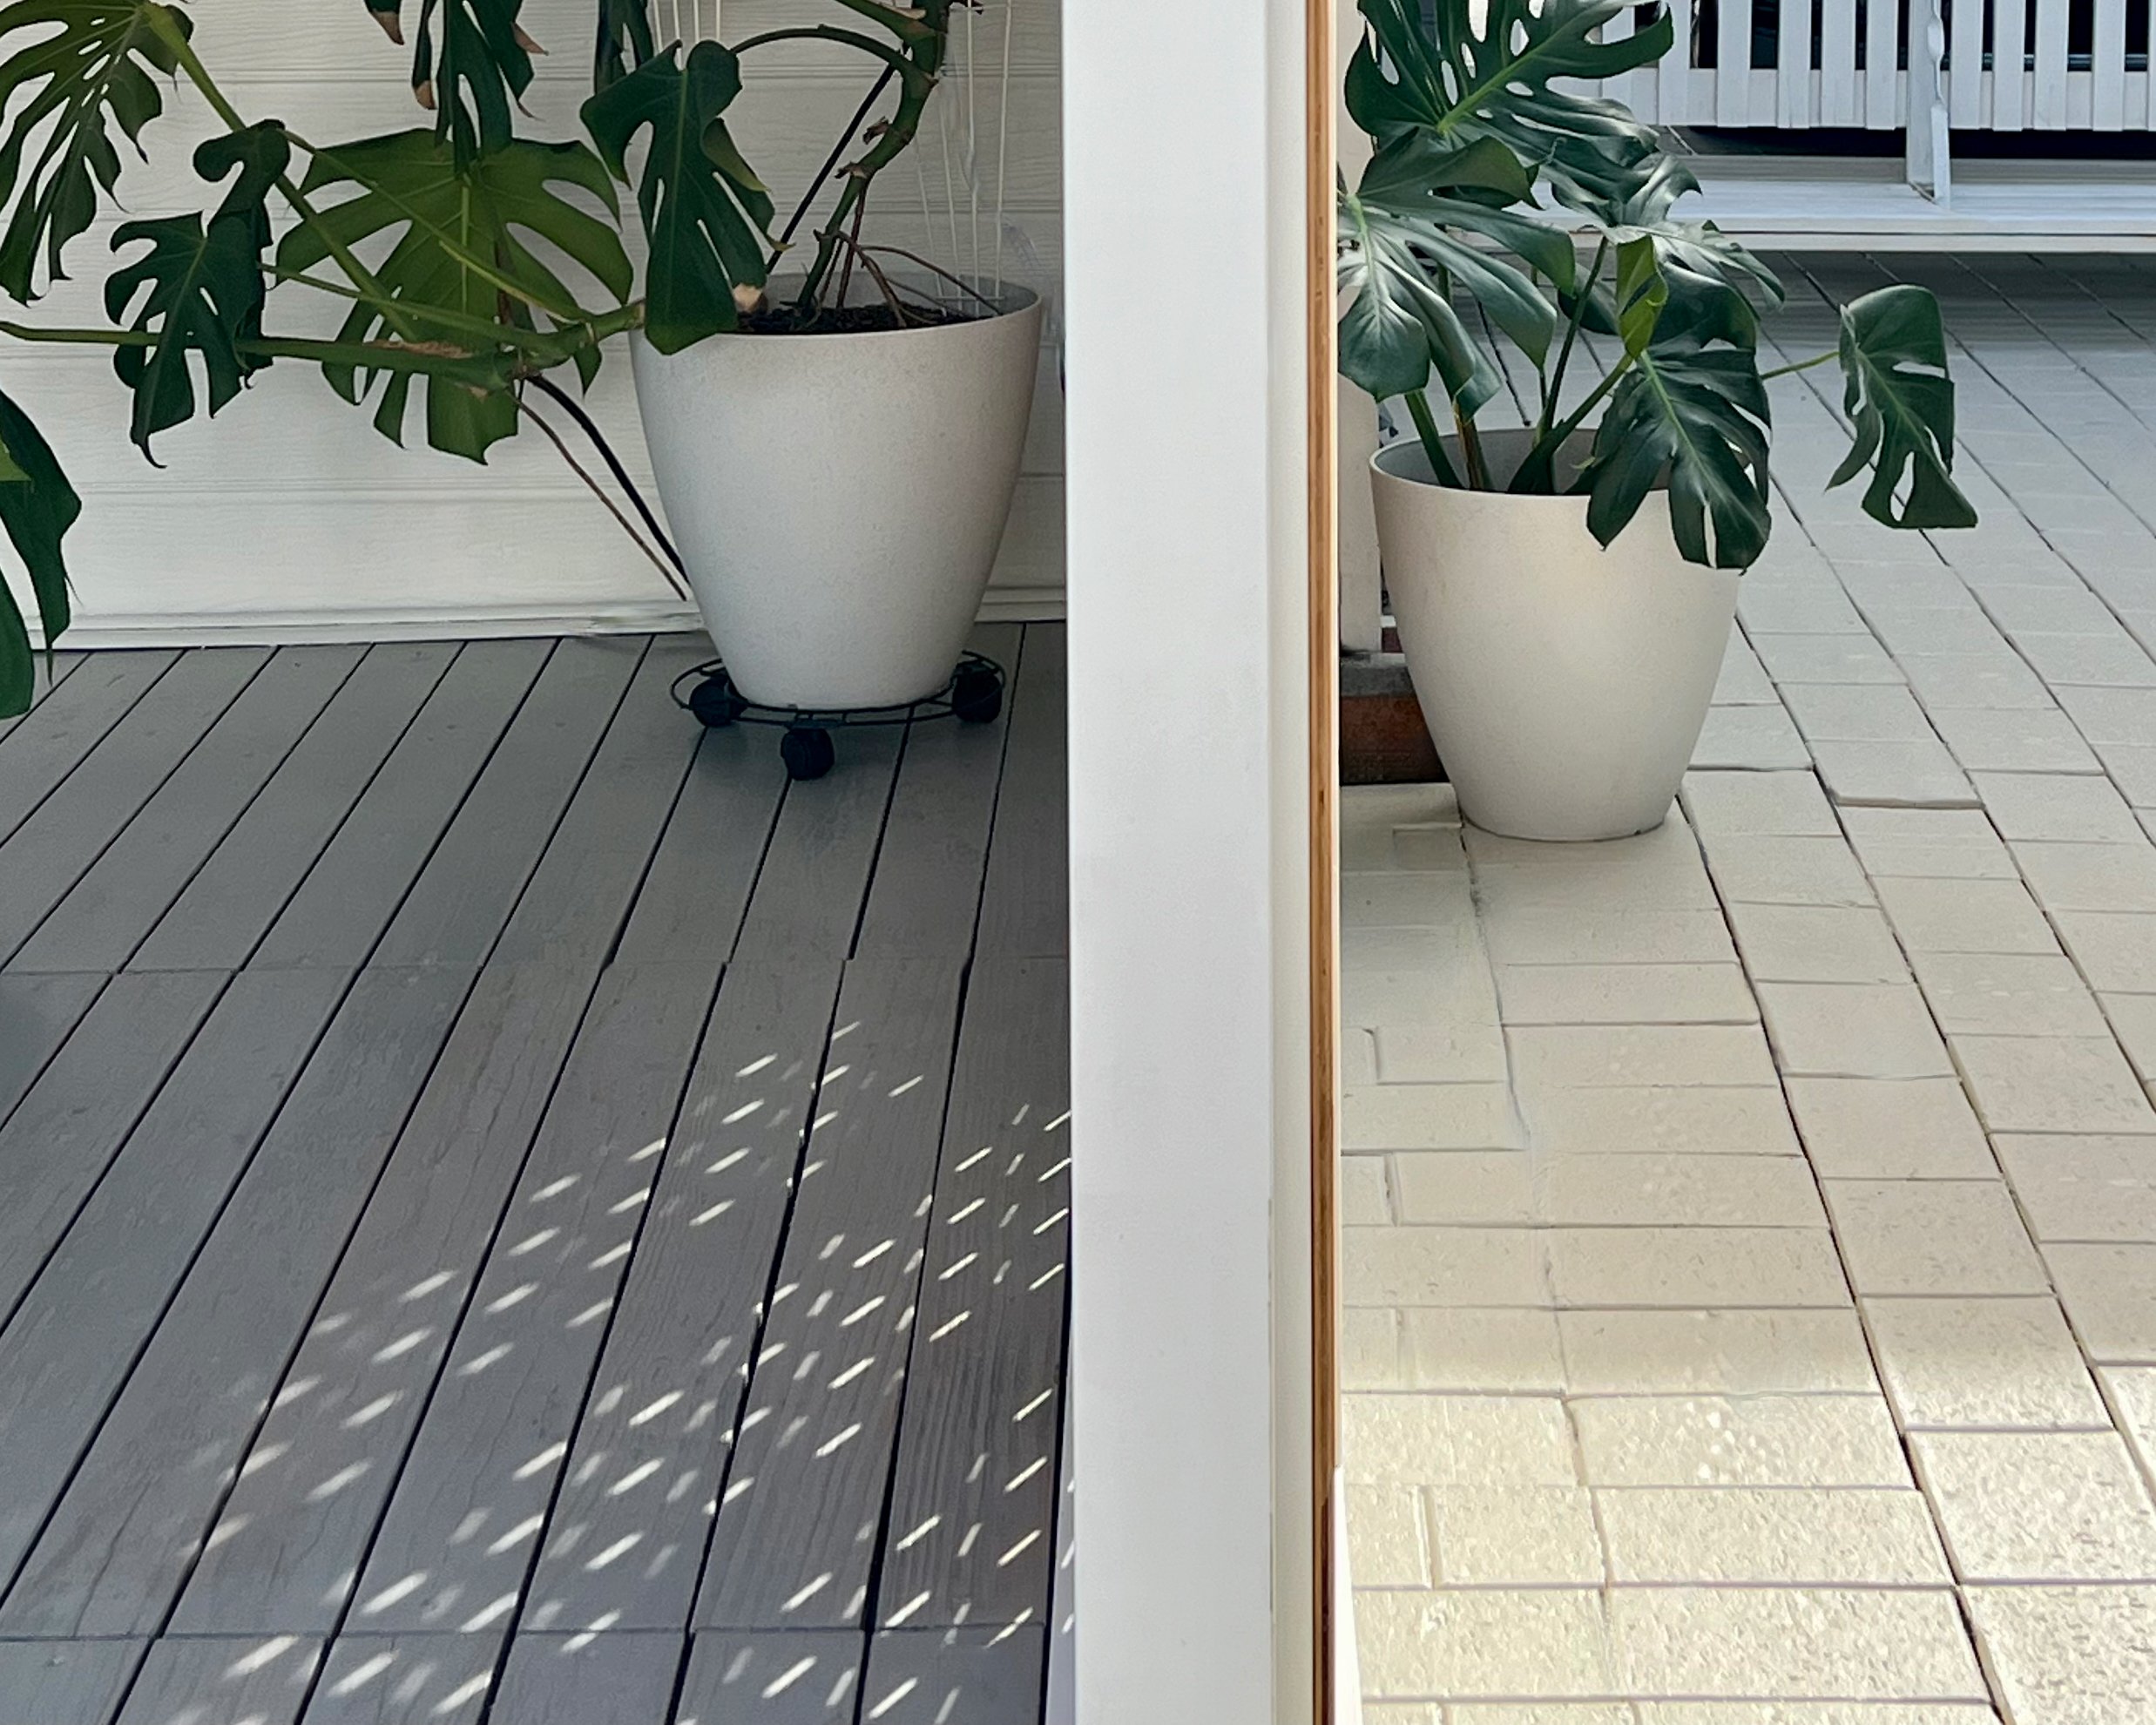
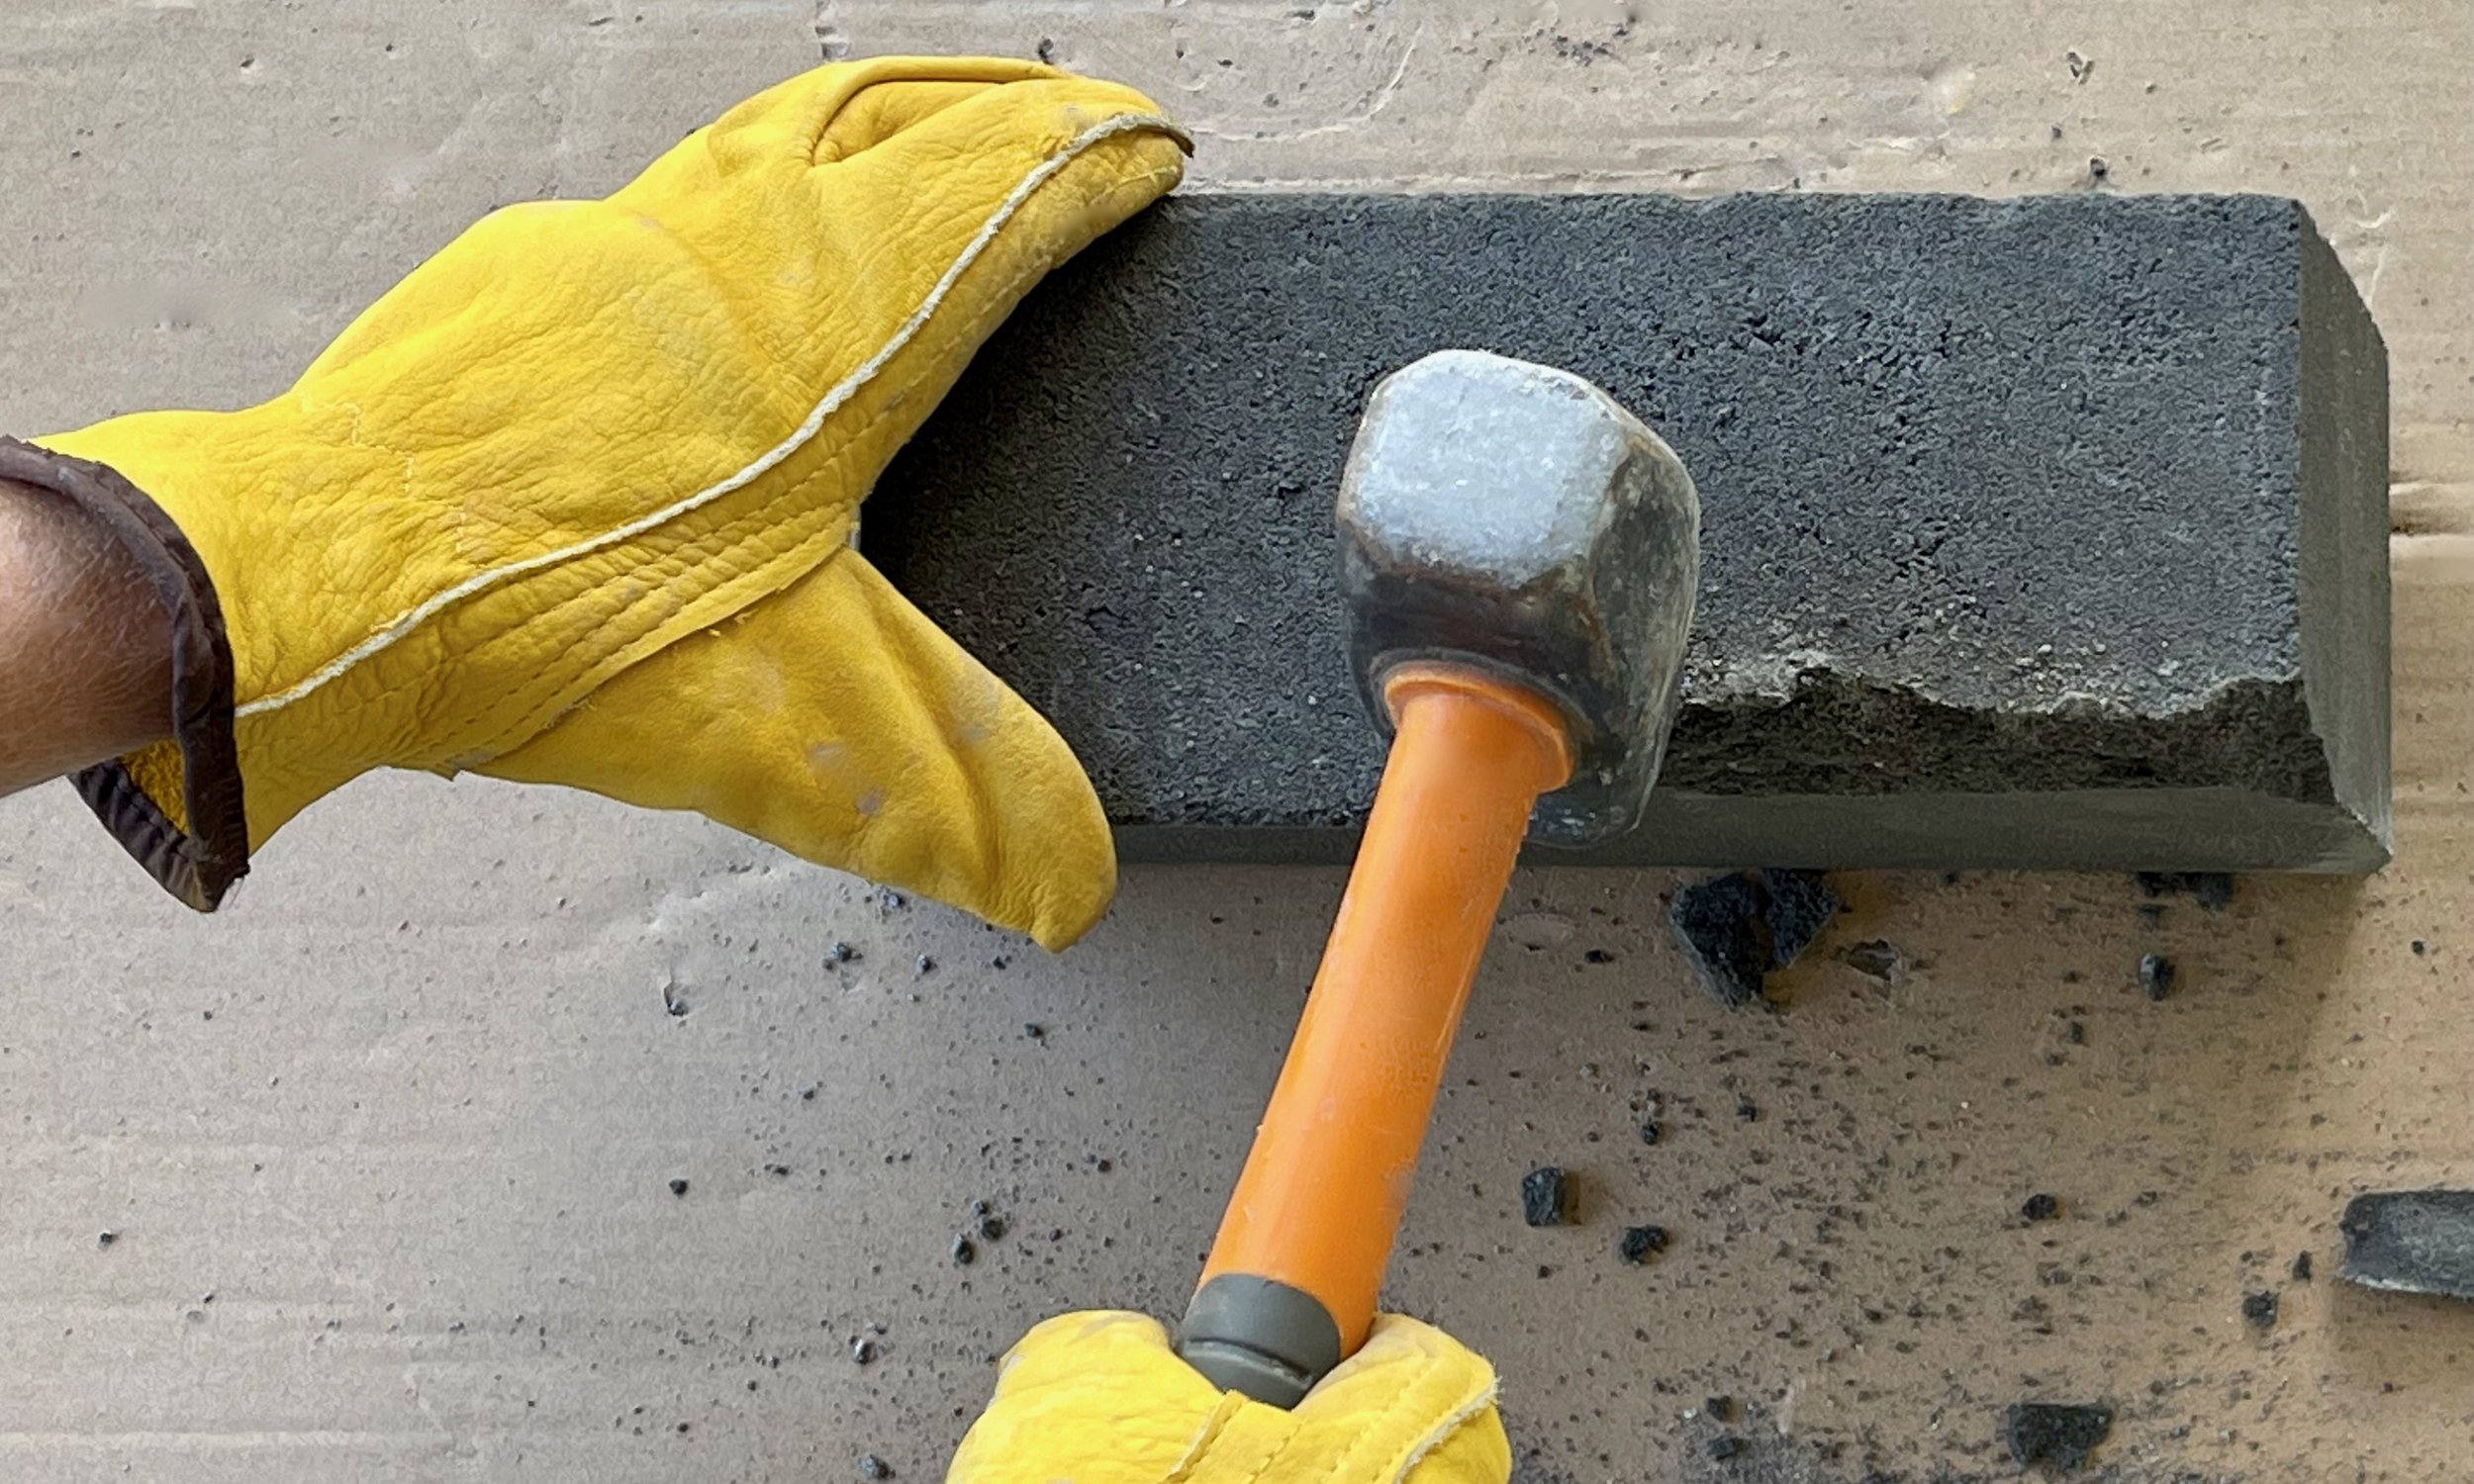
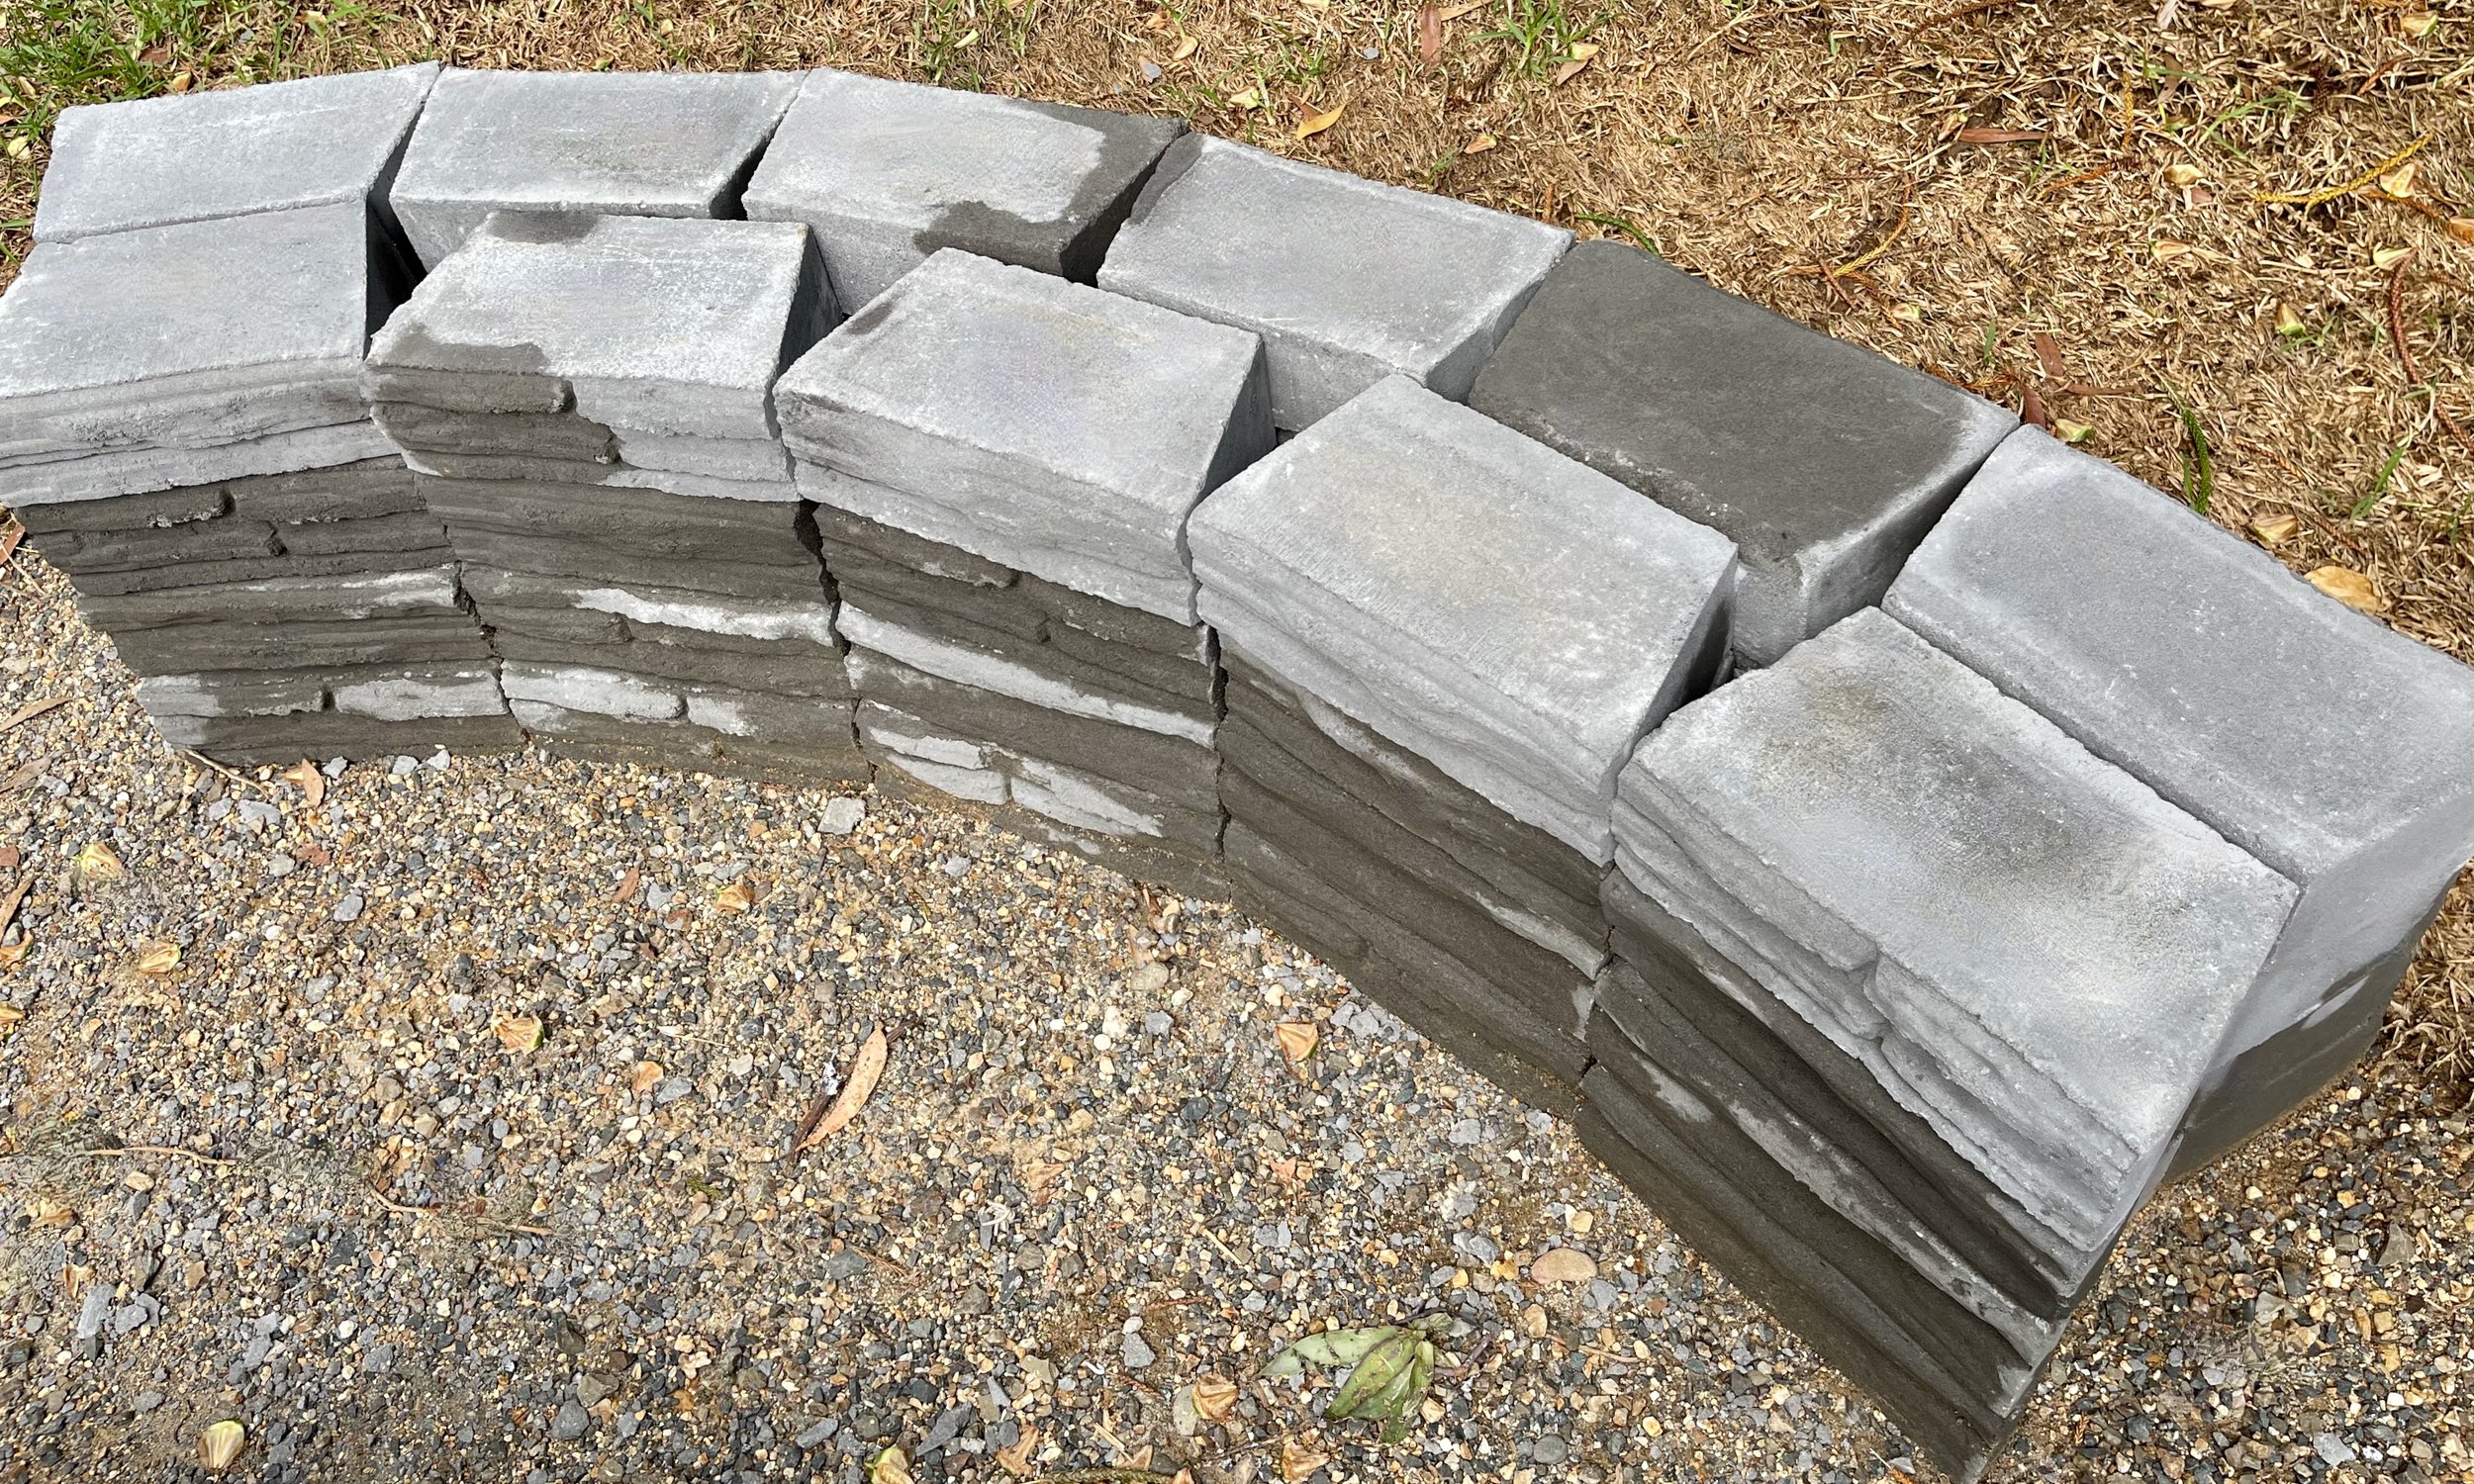
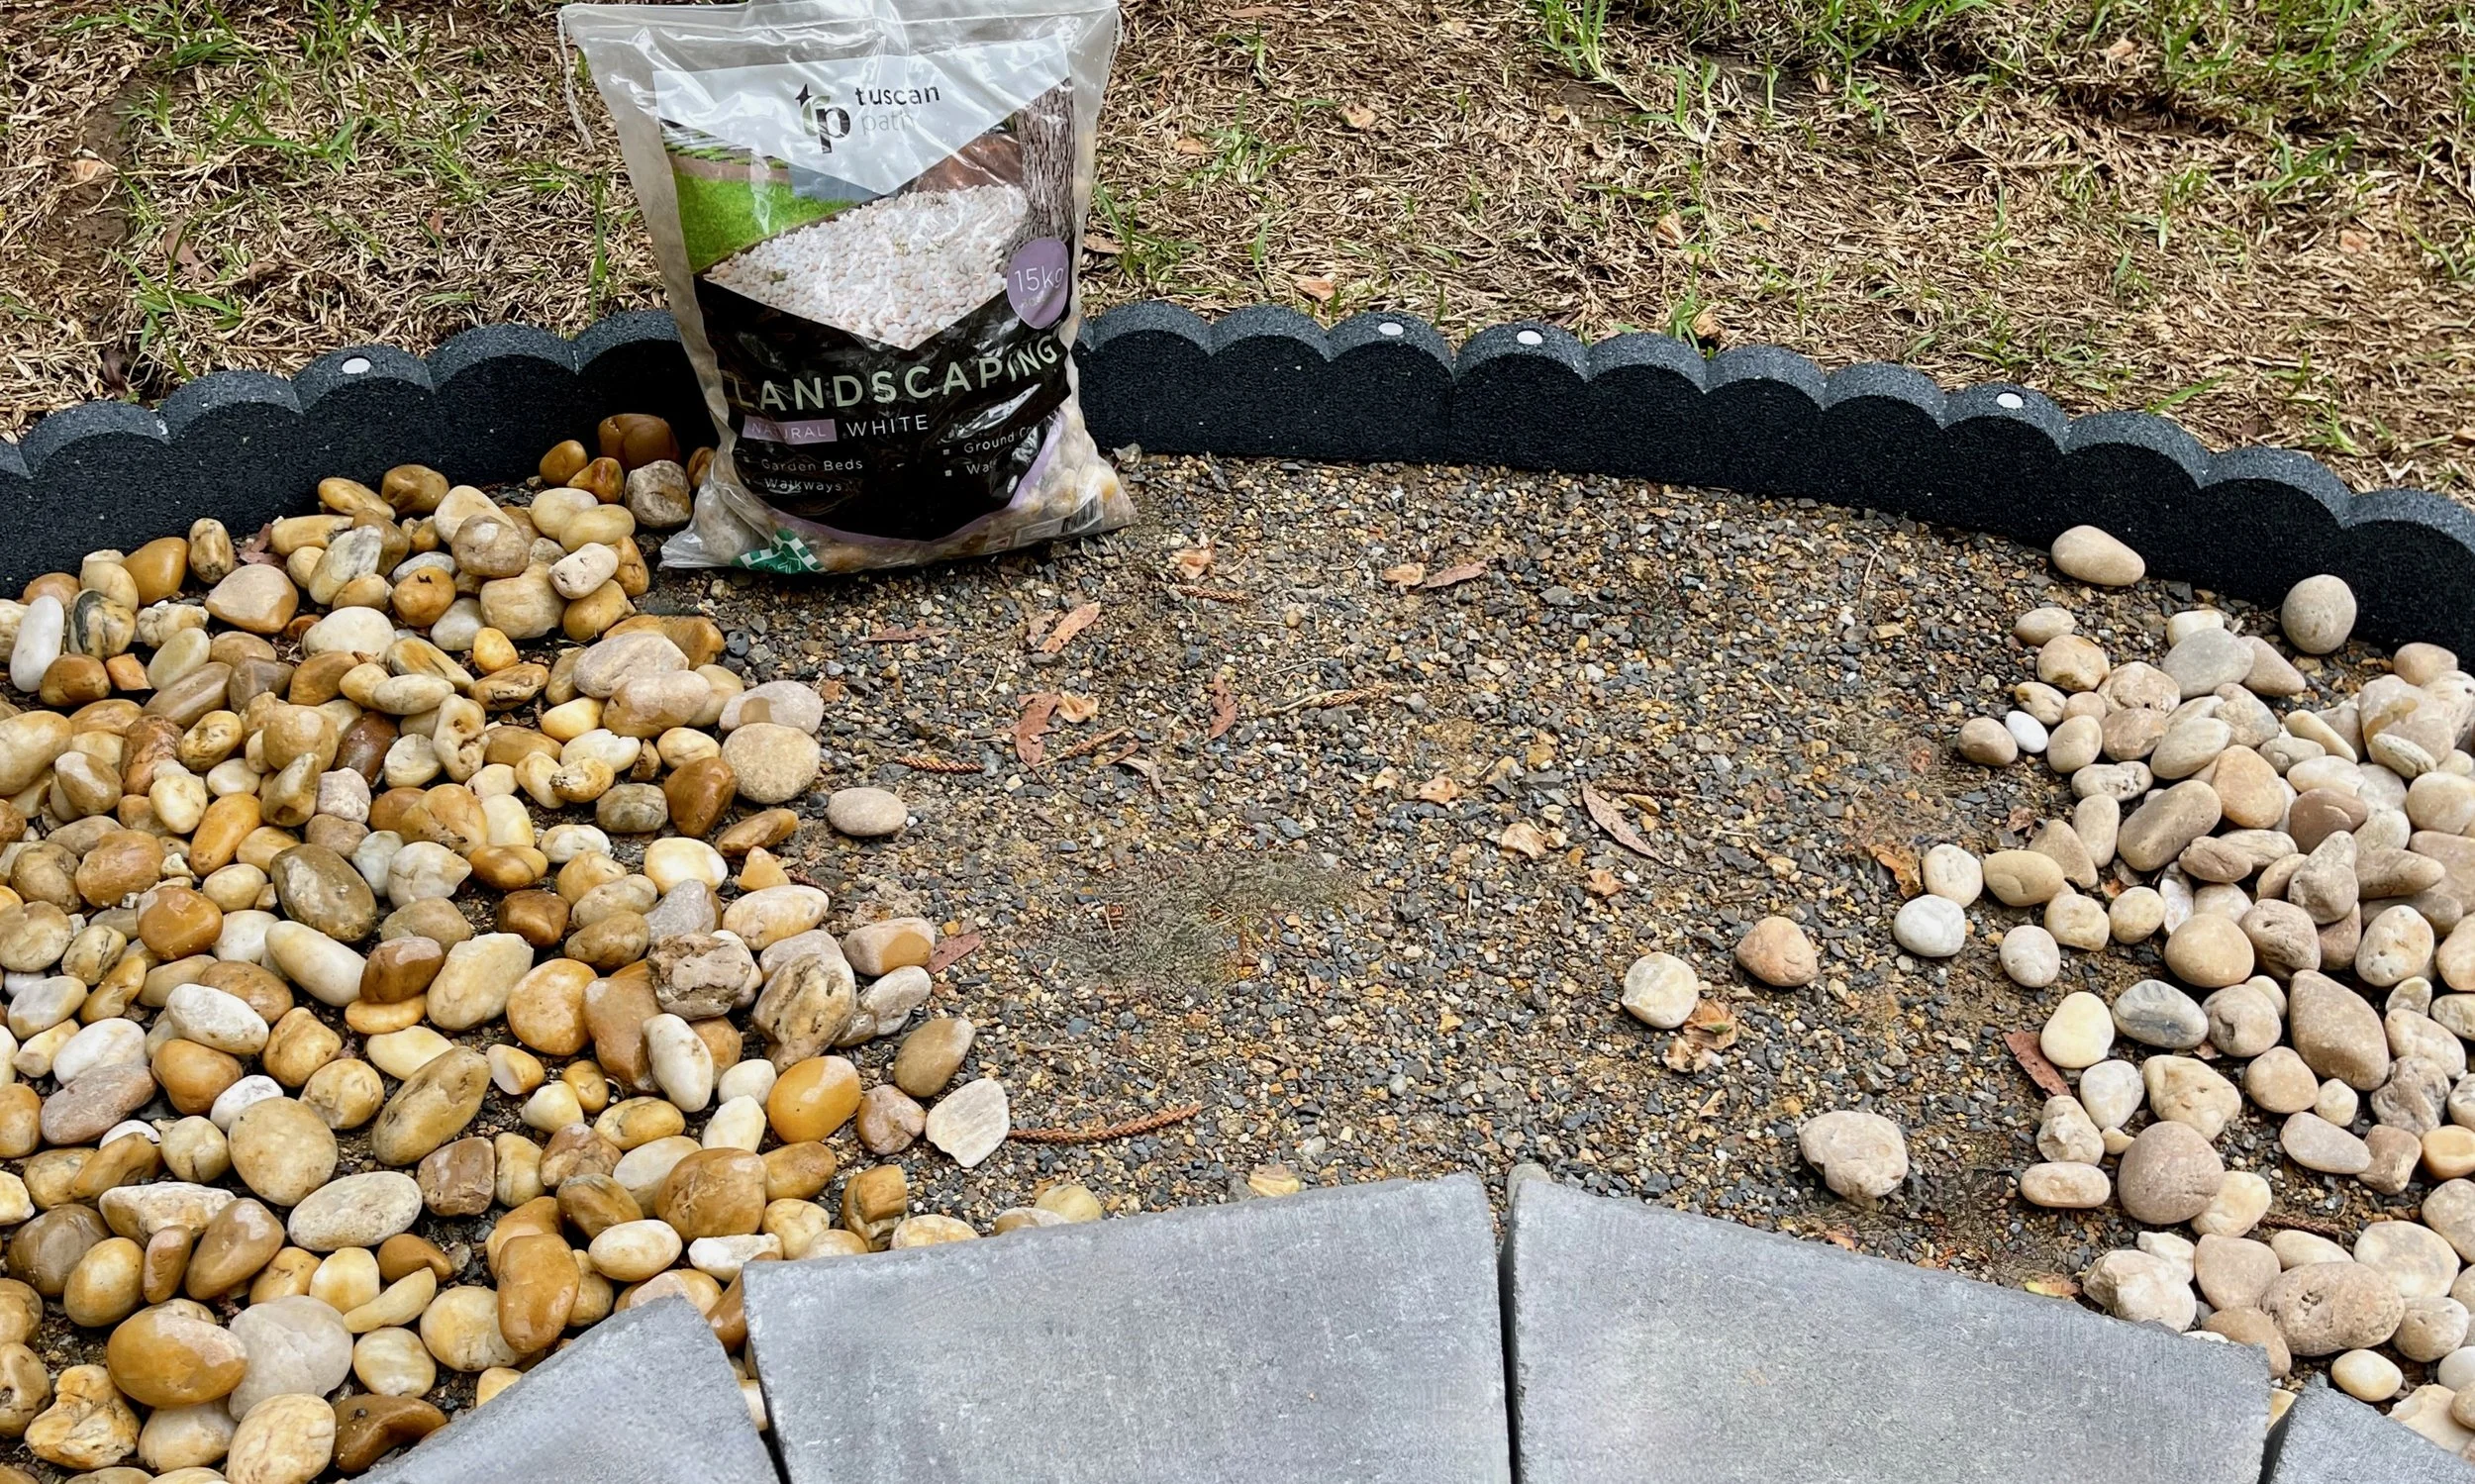
The pavers were laid on quick-set concrete and simply watered in to create a base that drains directly onto the surrounding sand.

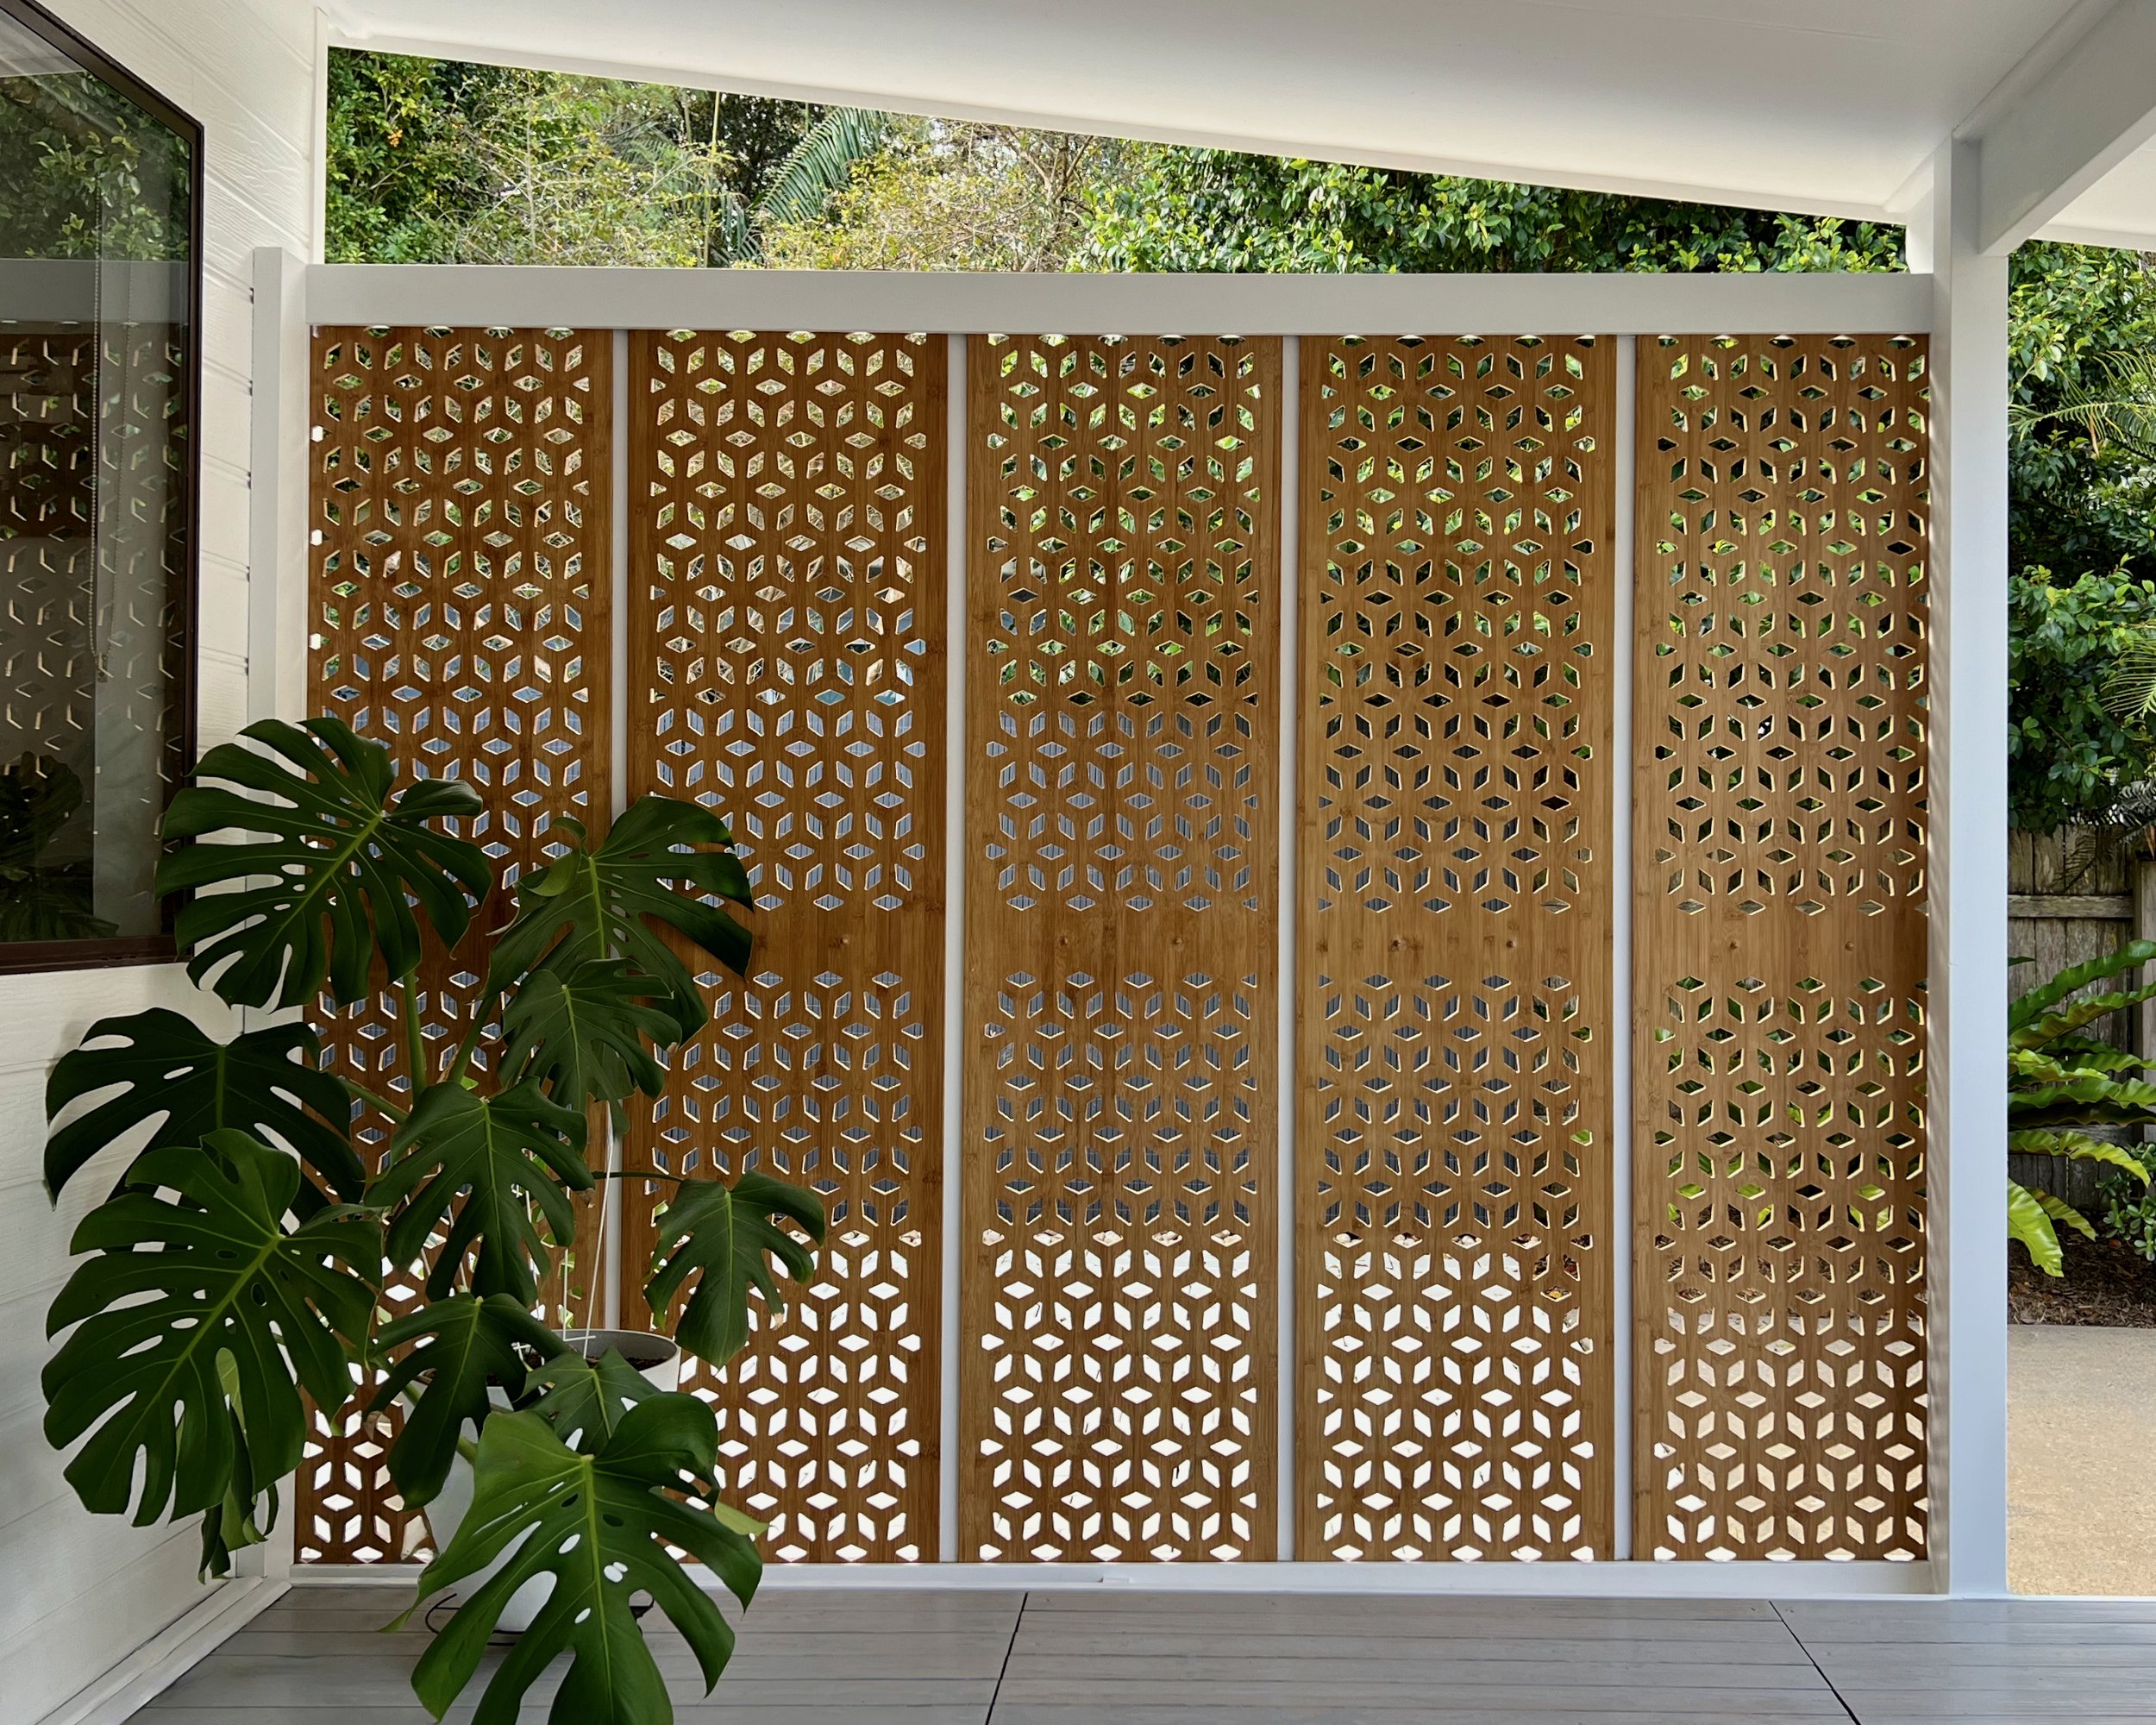
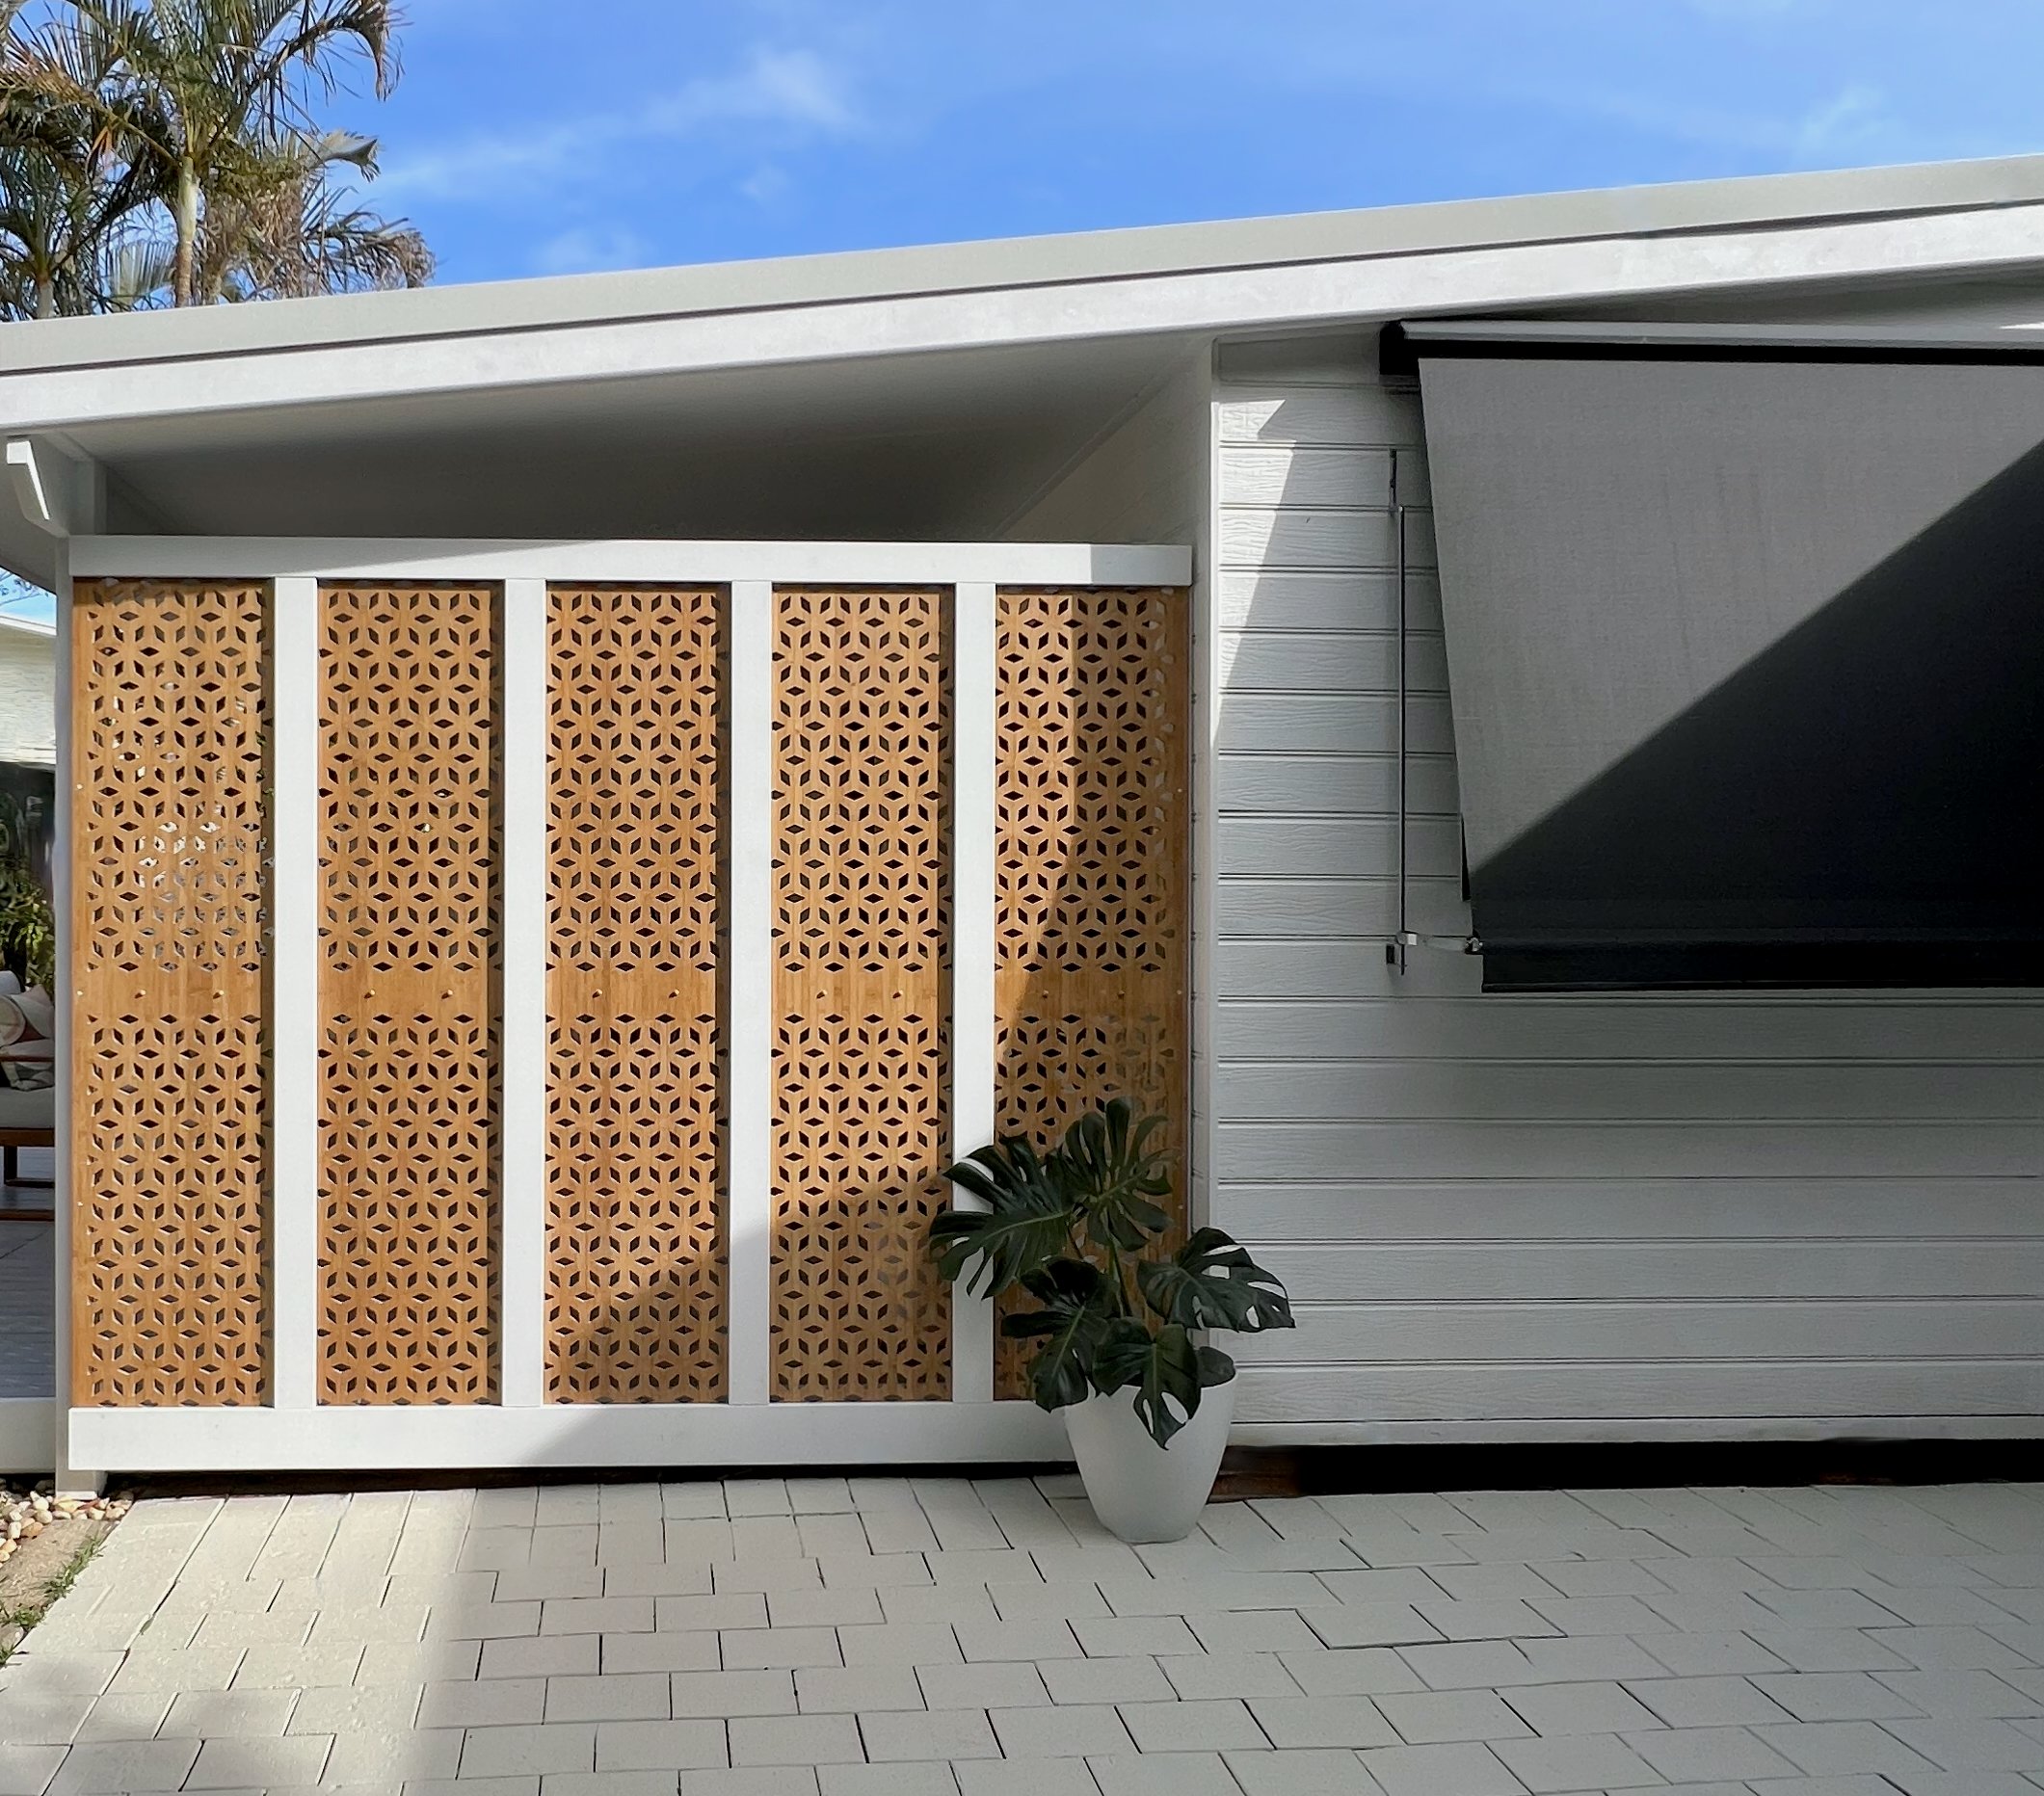
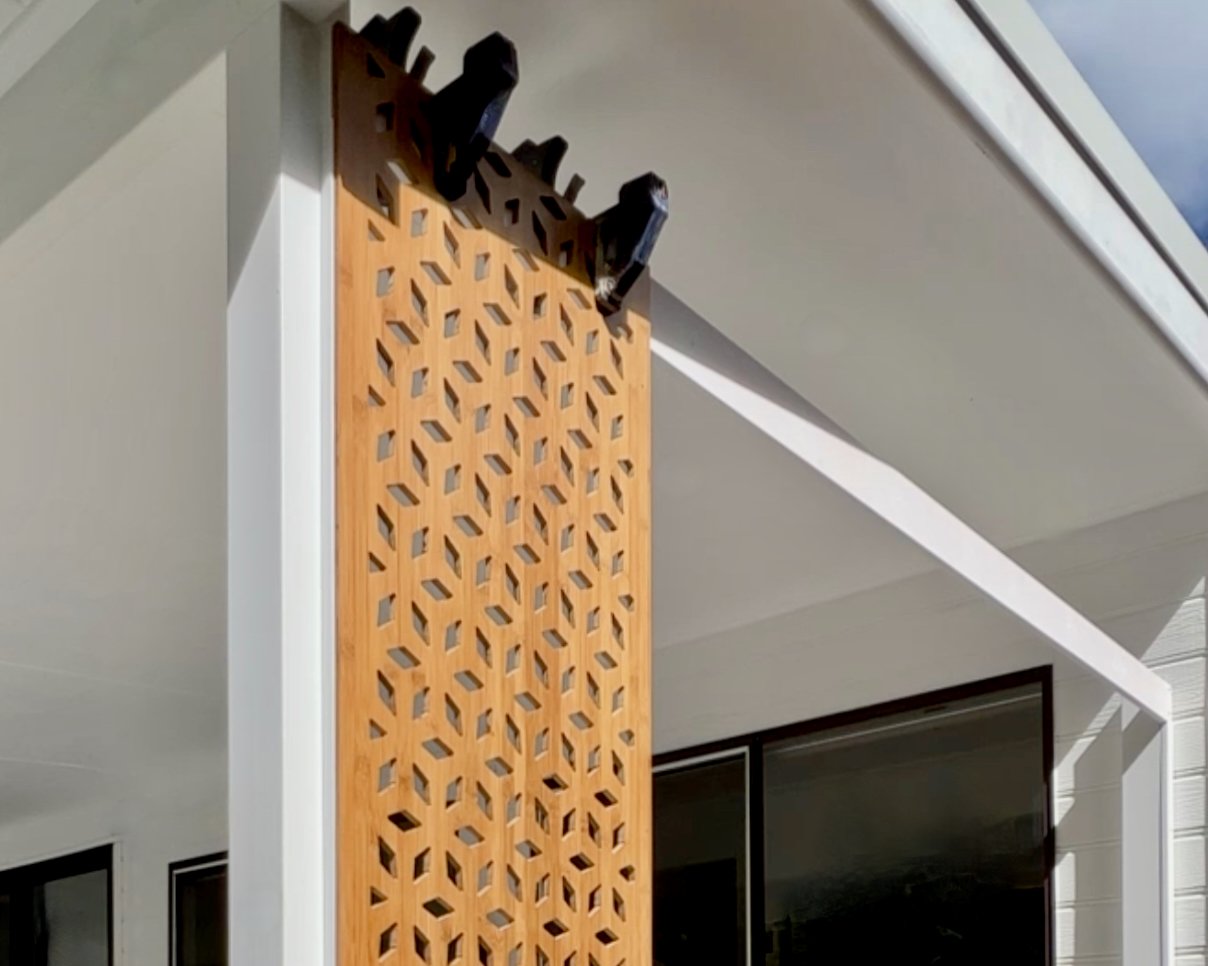
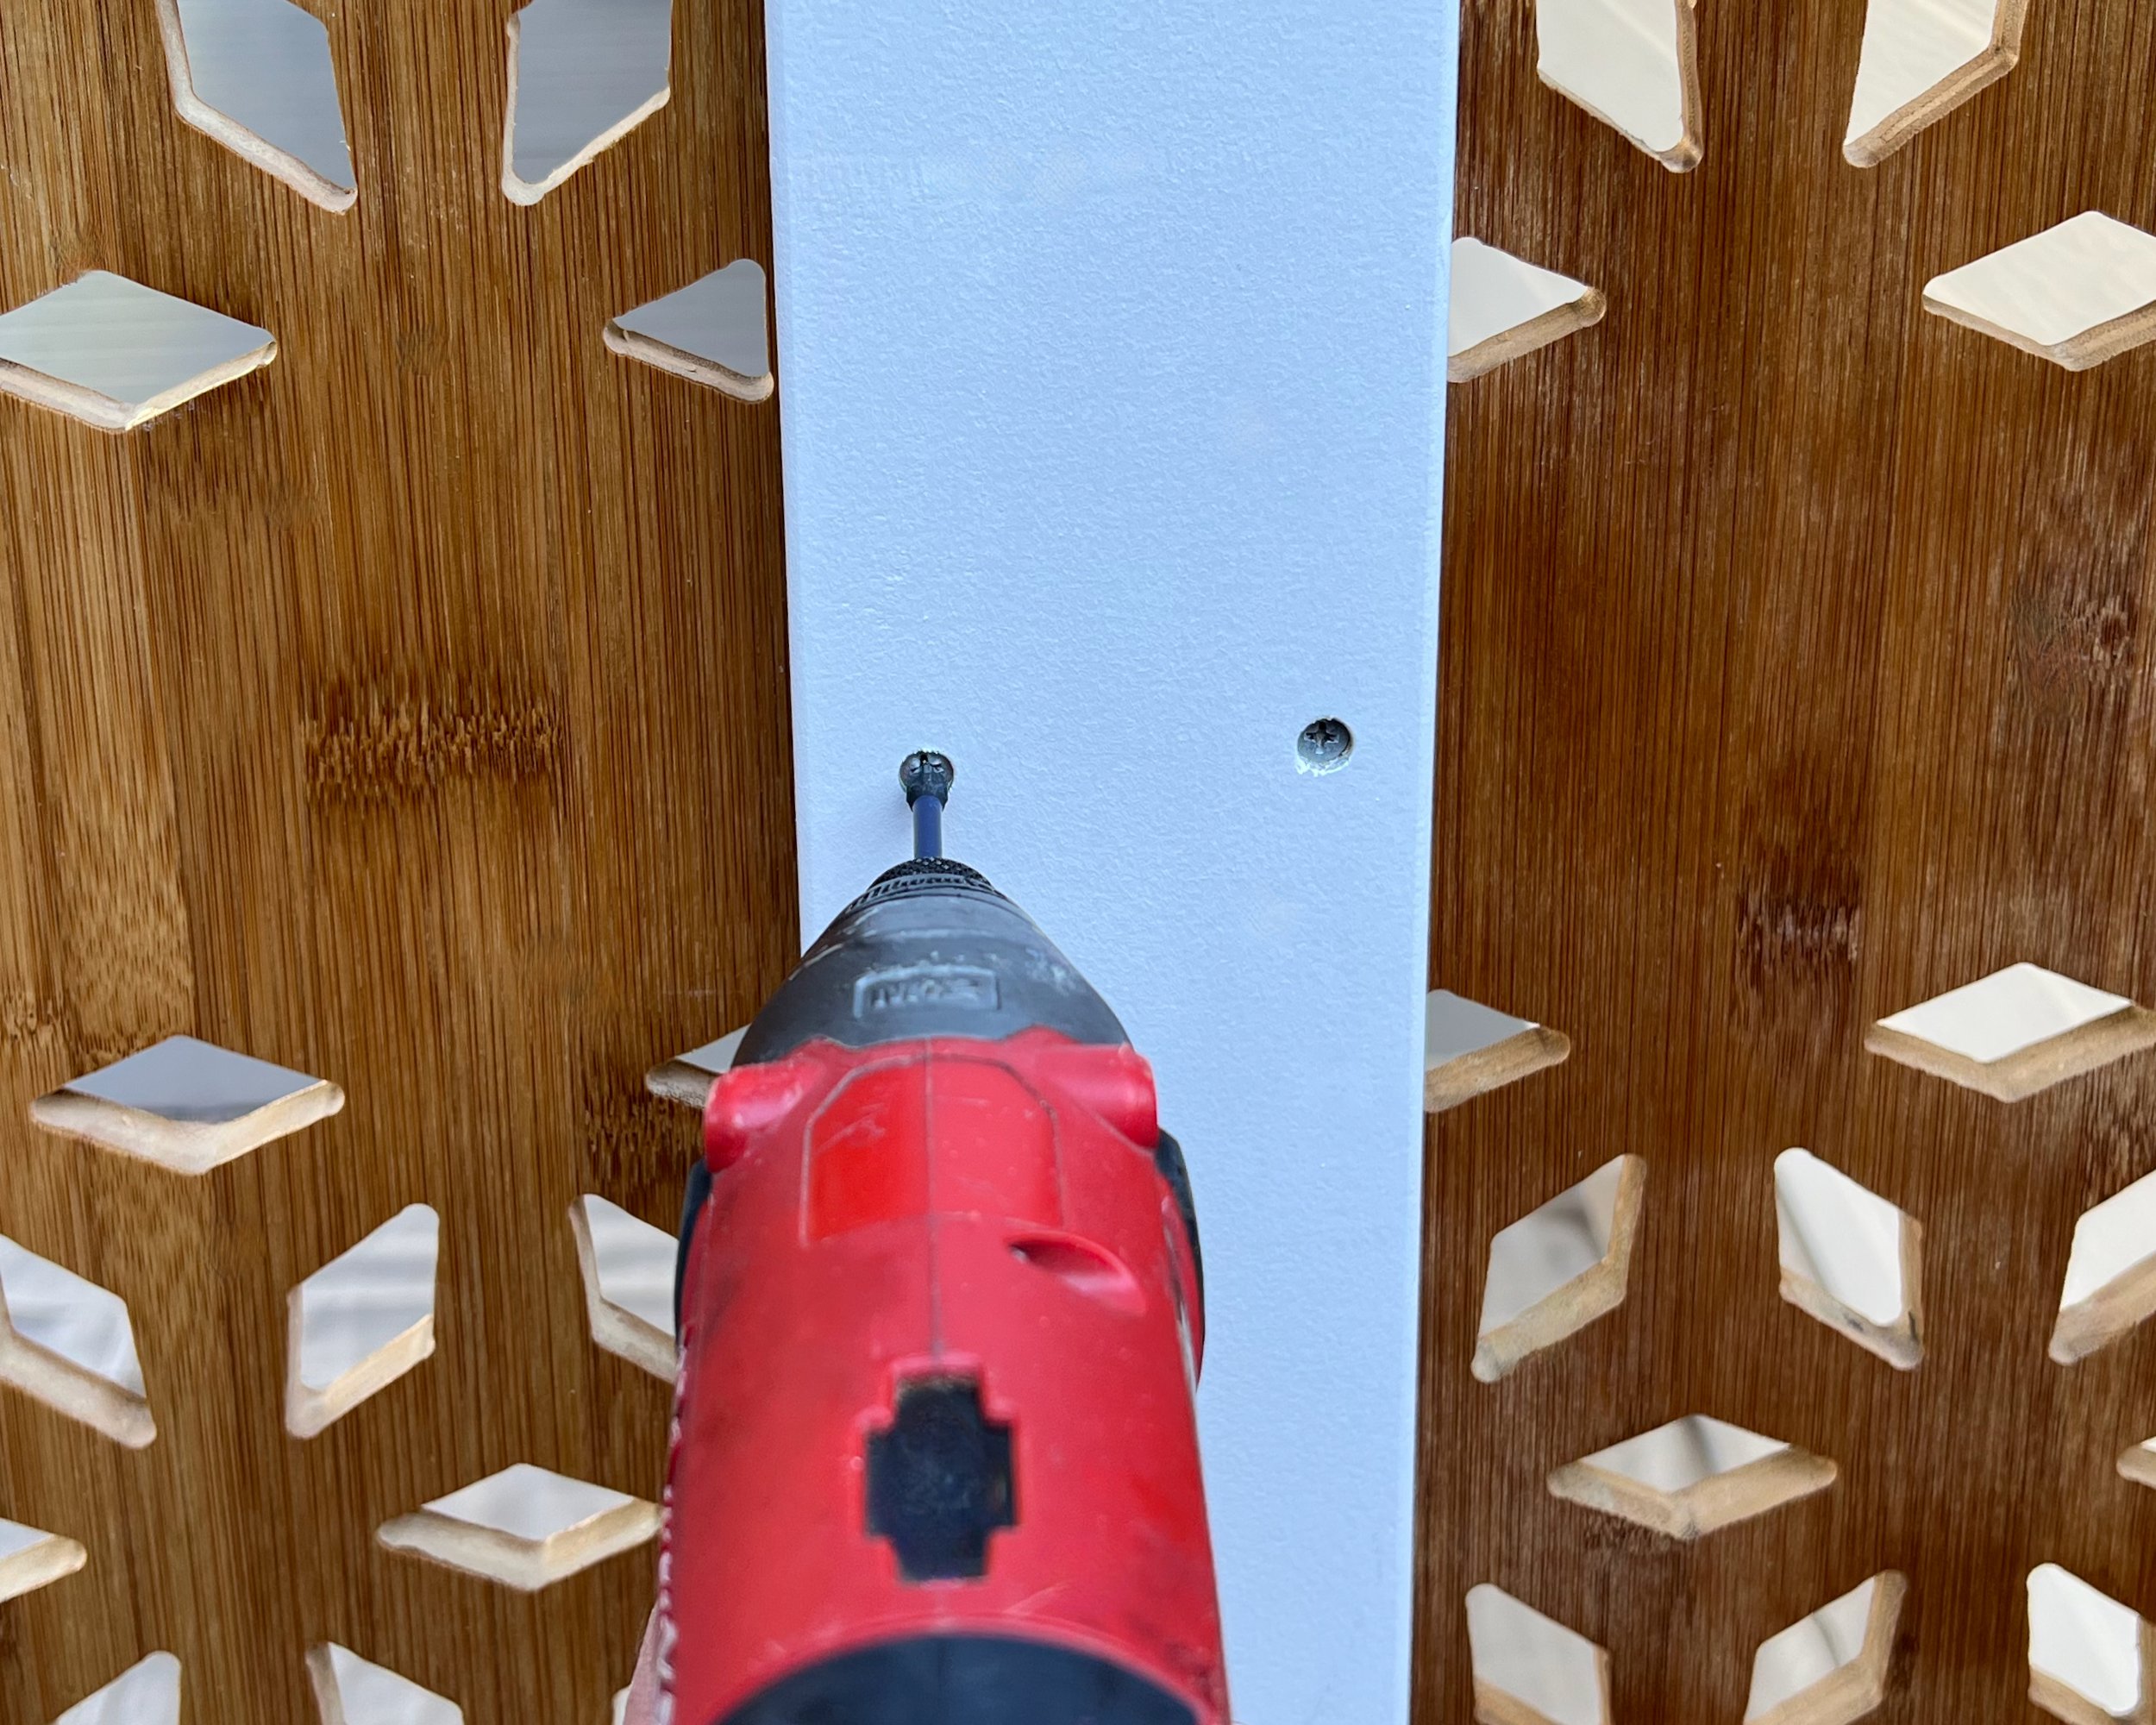
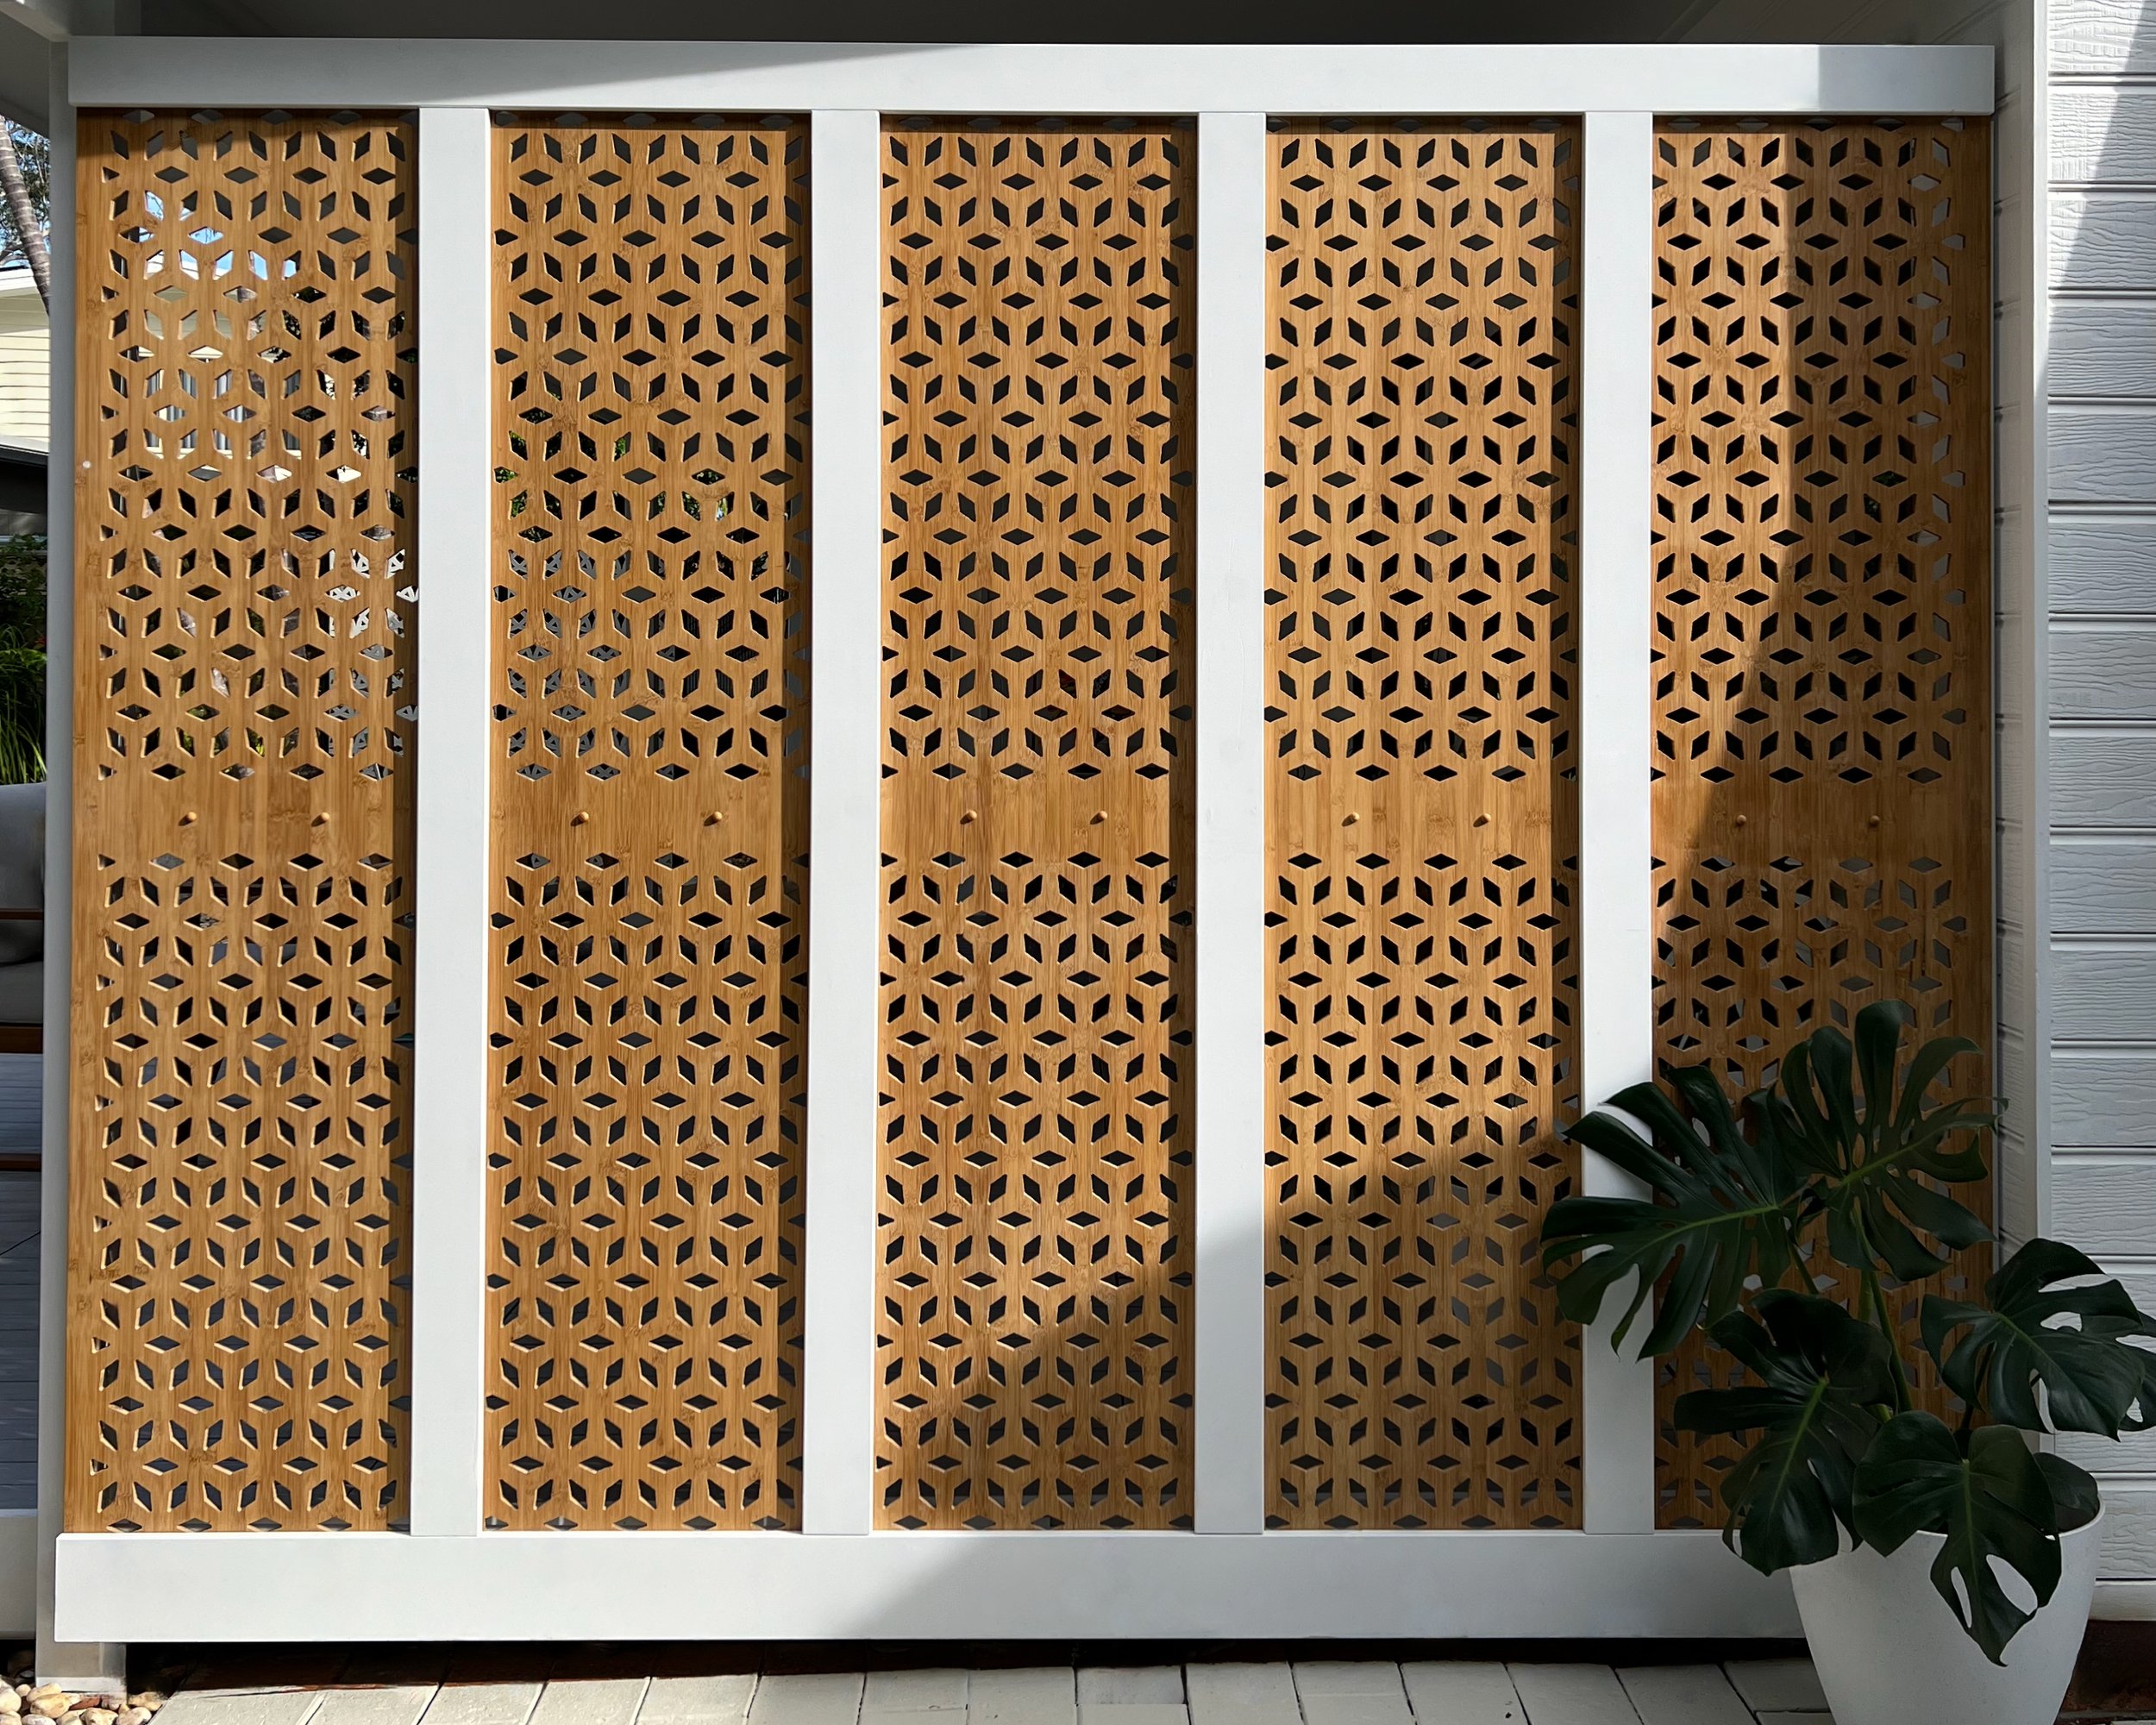
I later installed a privacy screen with the step-by-step project featuring in Bunnings magazine.

TO DIY Follow my tutorial on easy DIY paving.


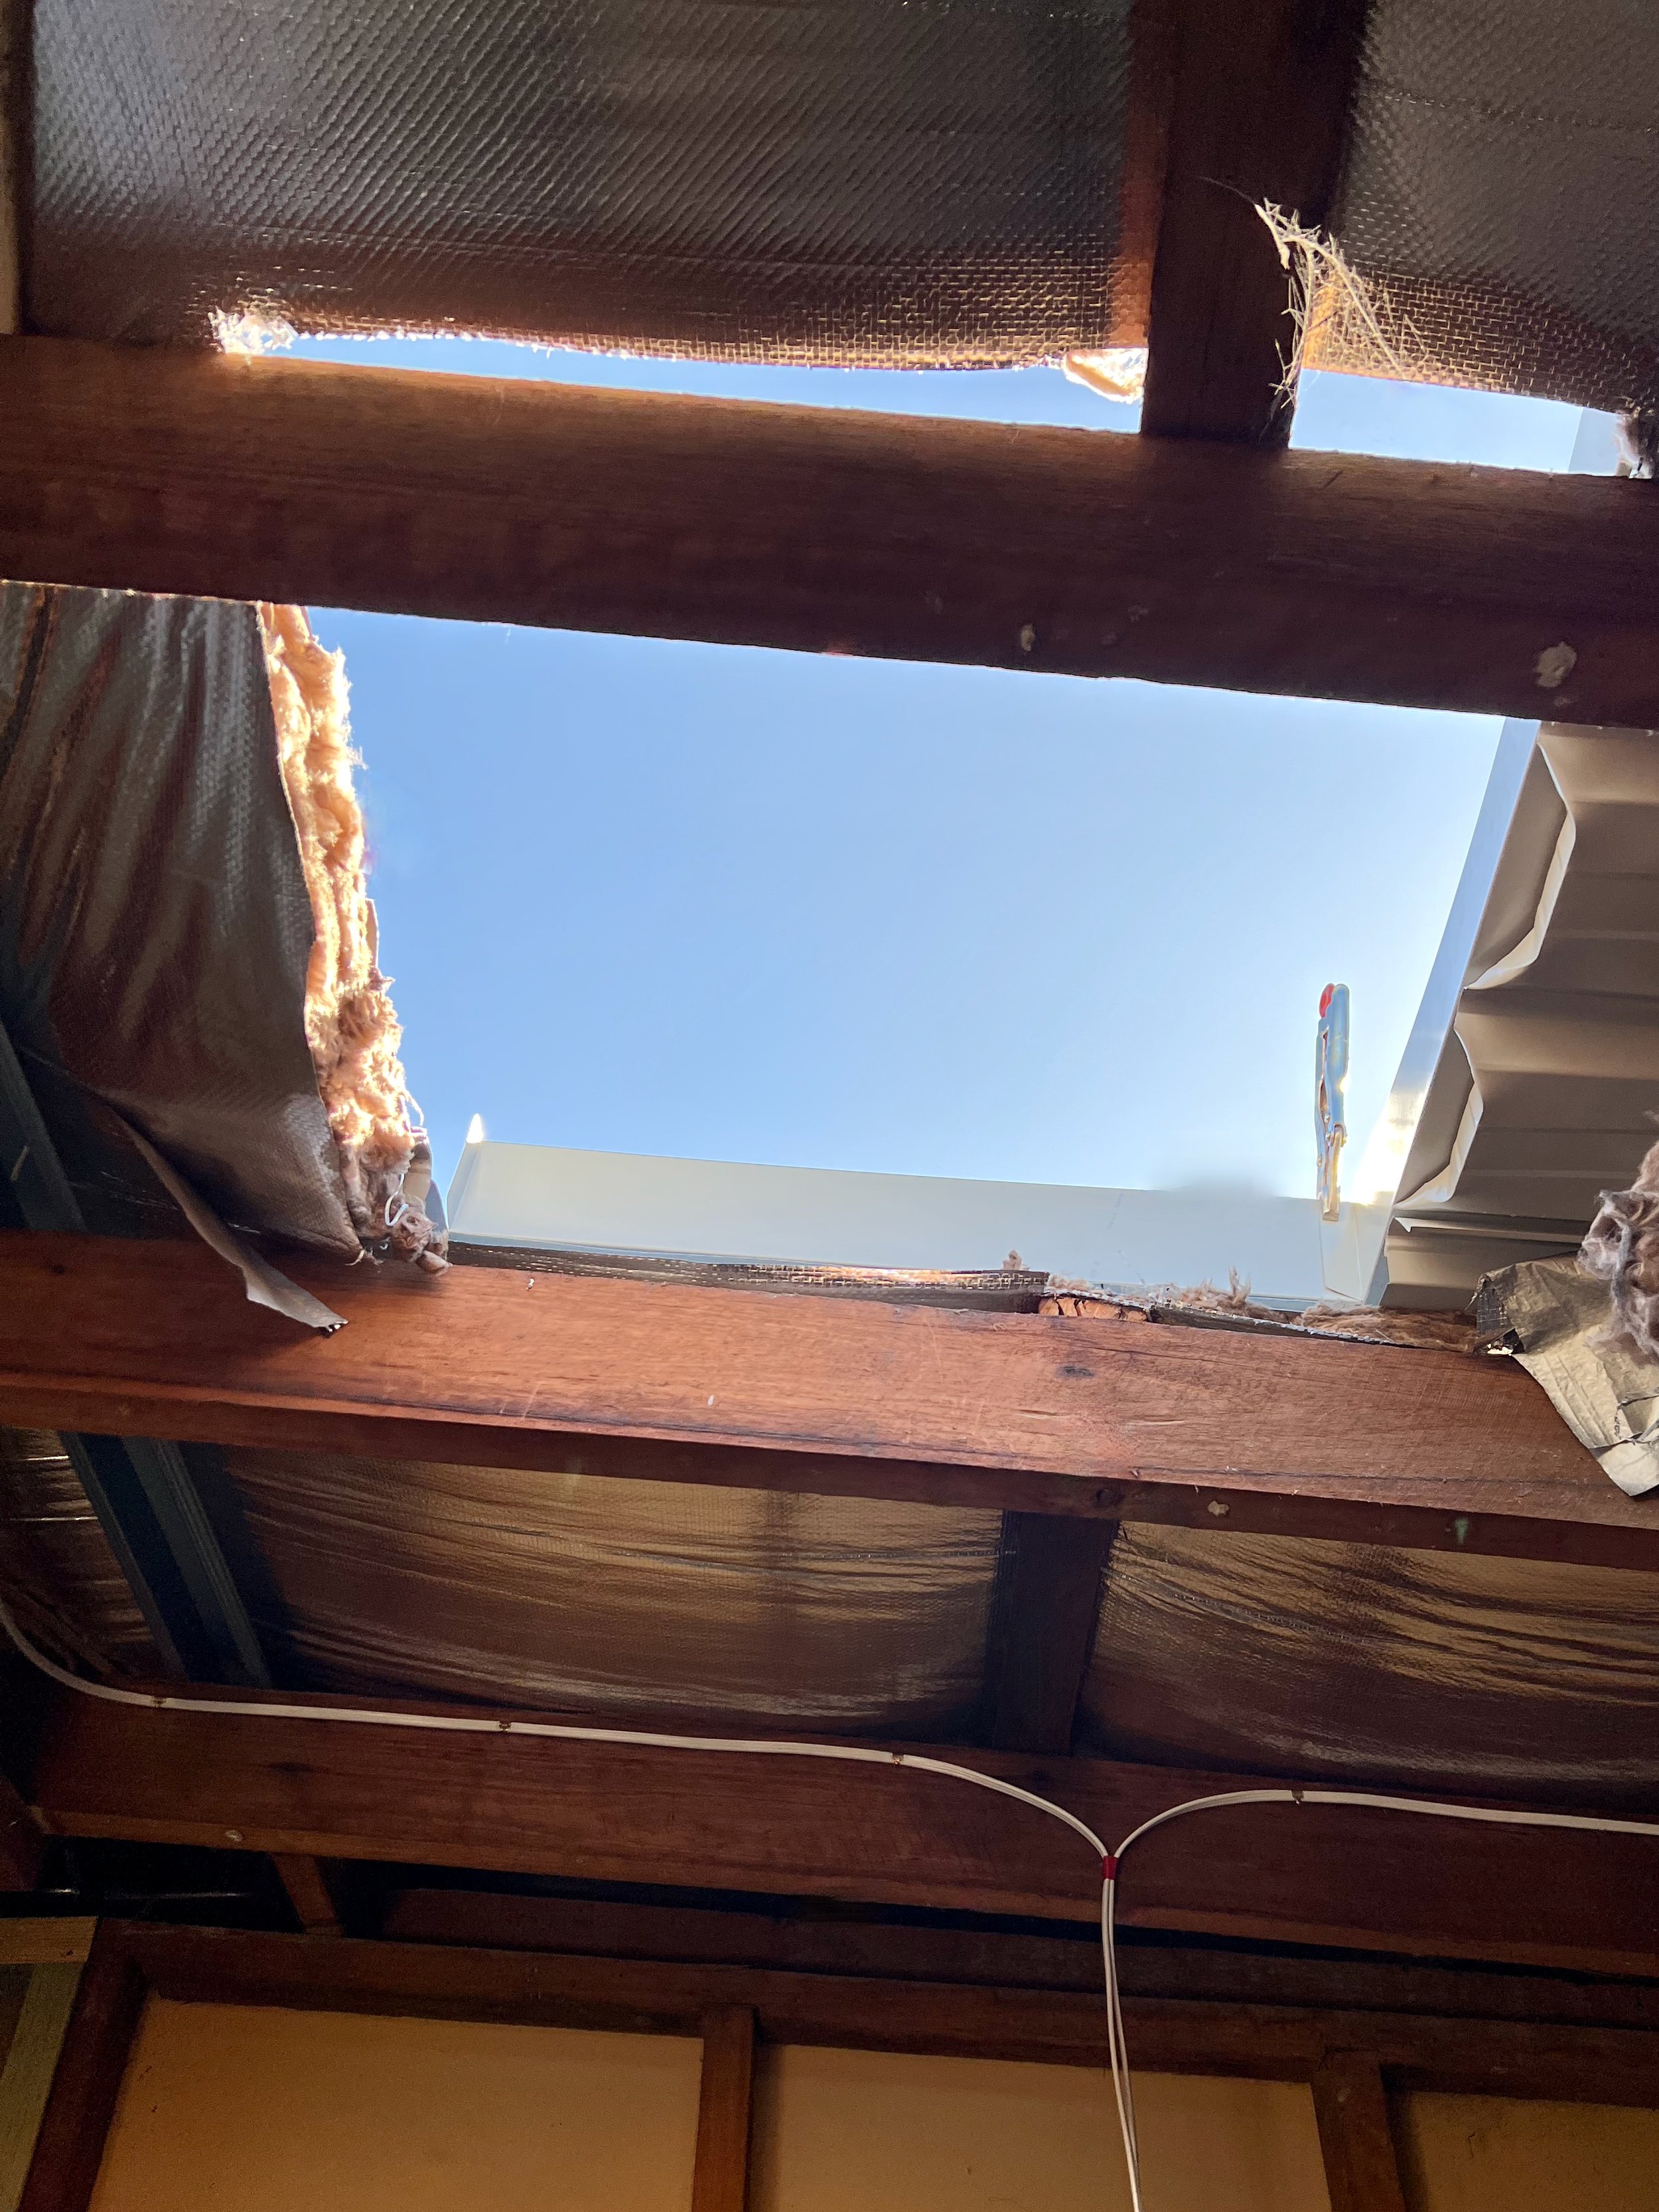
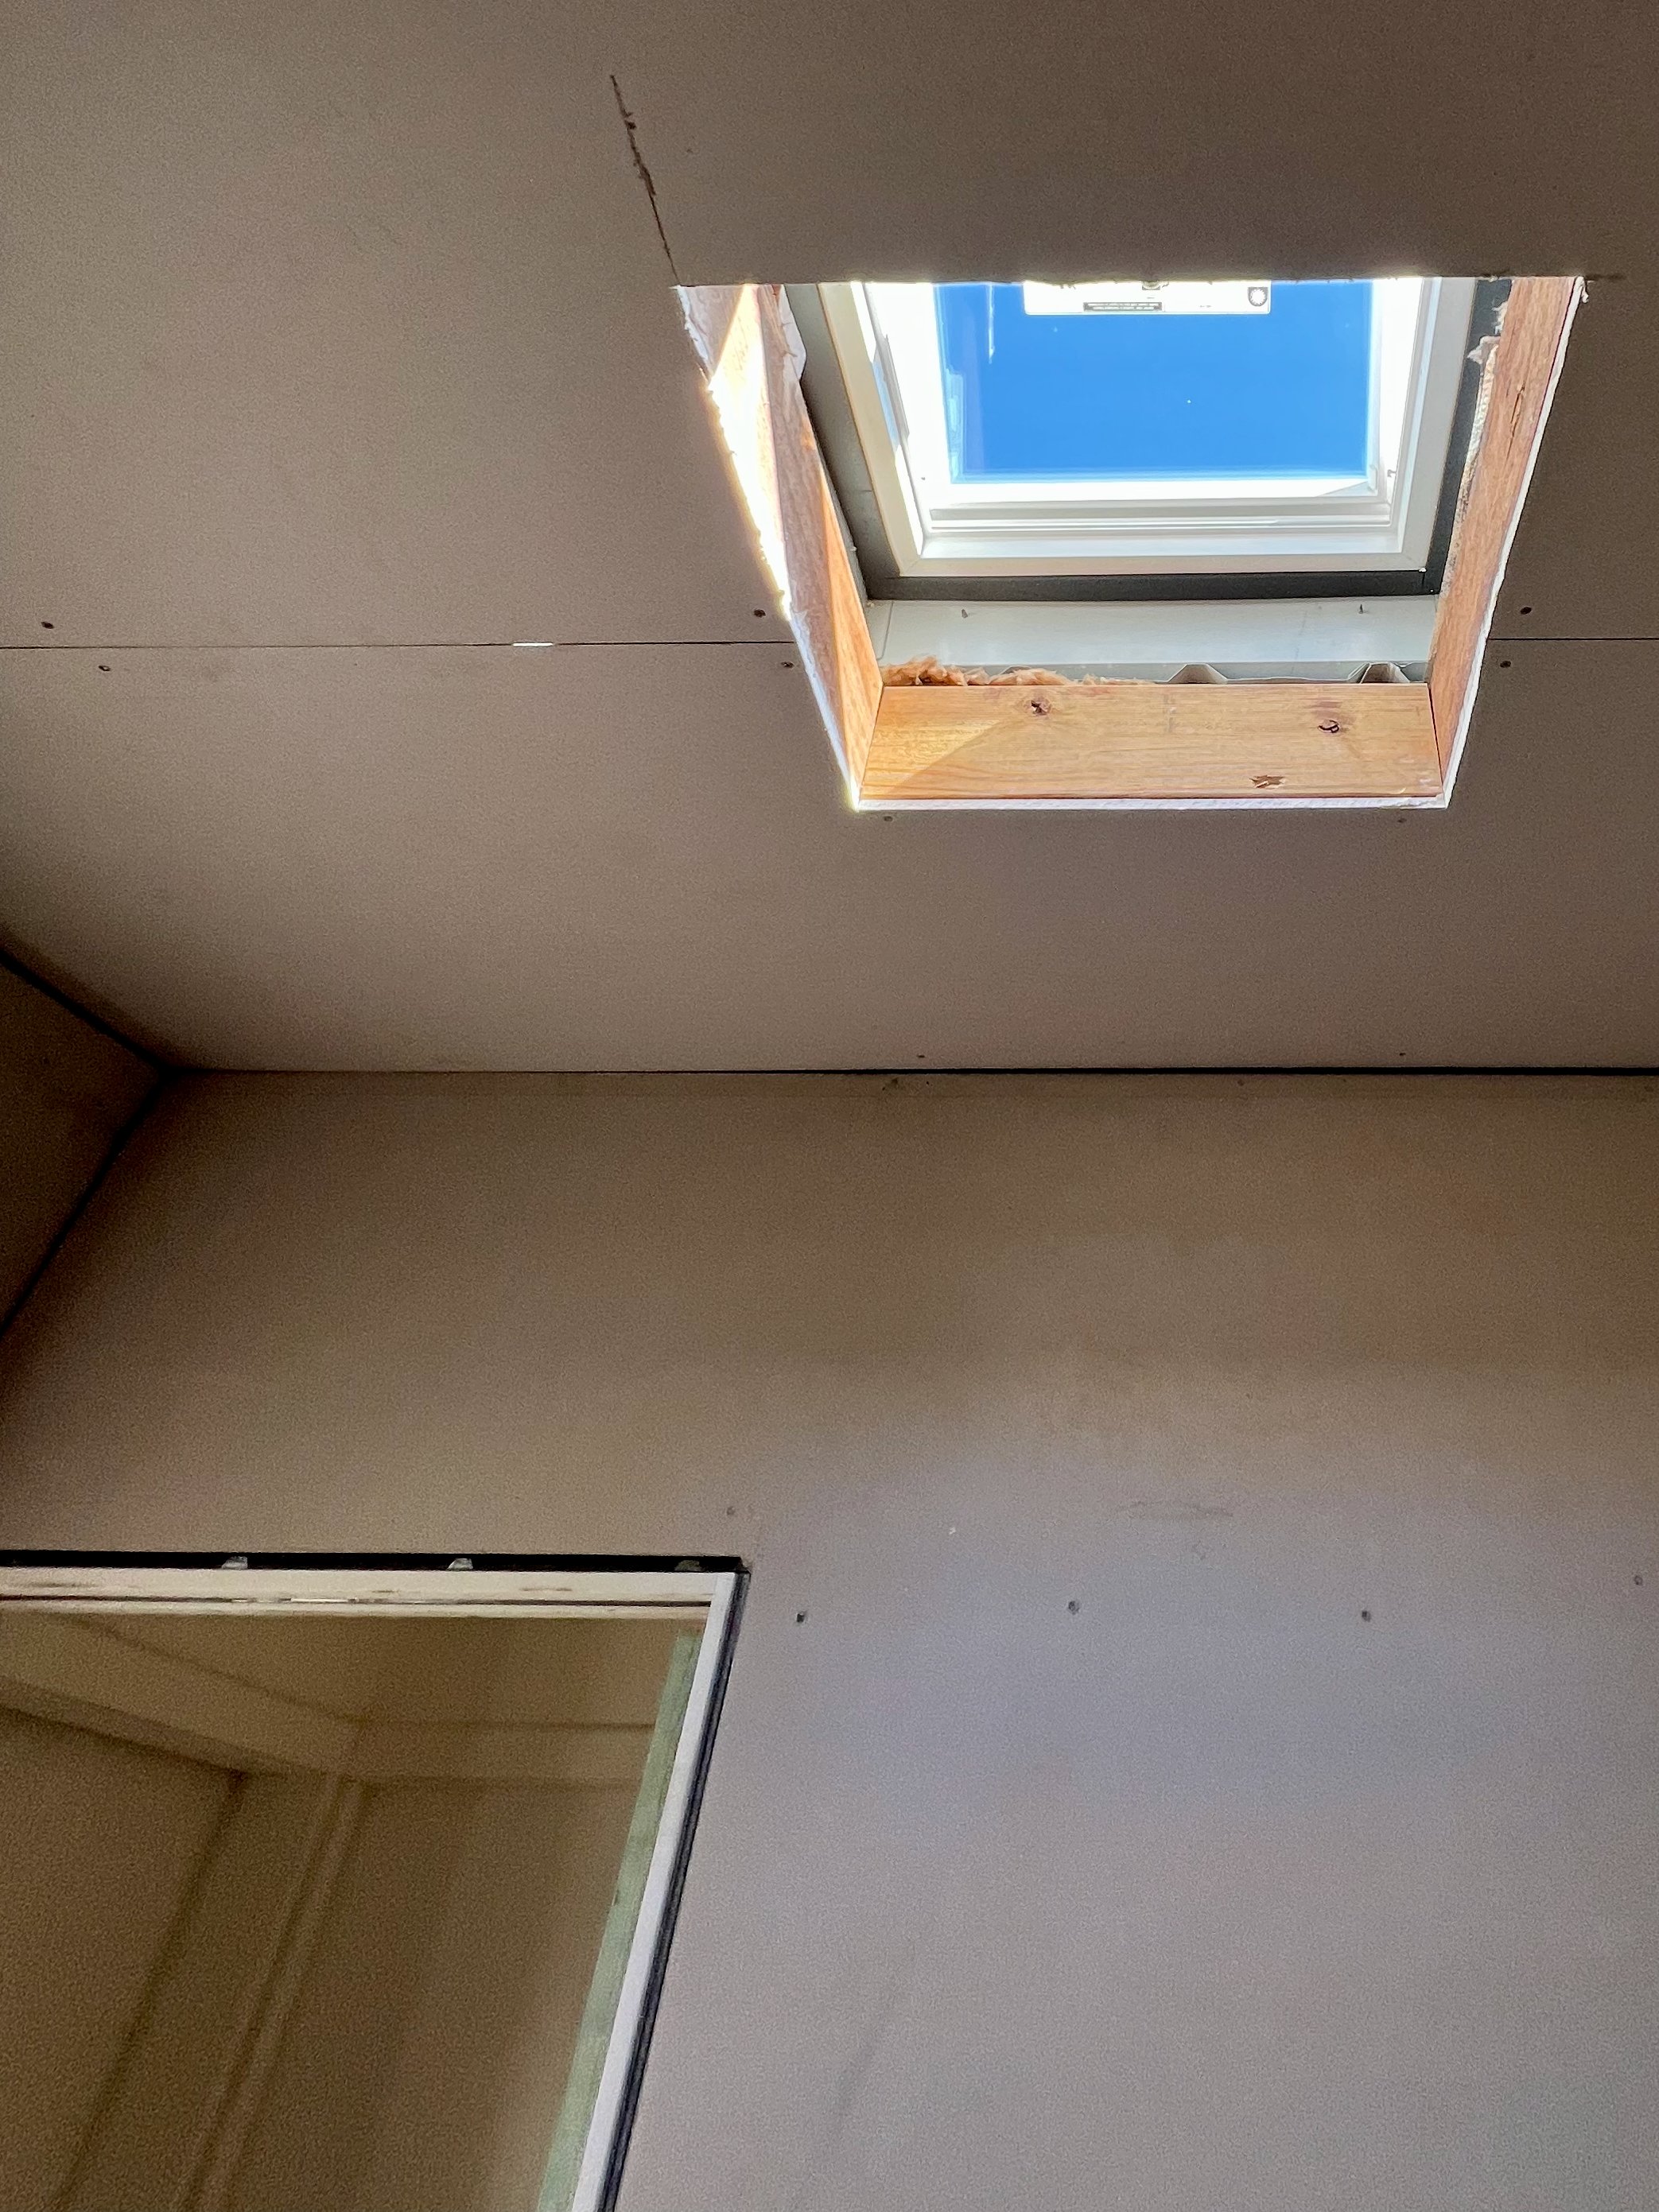
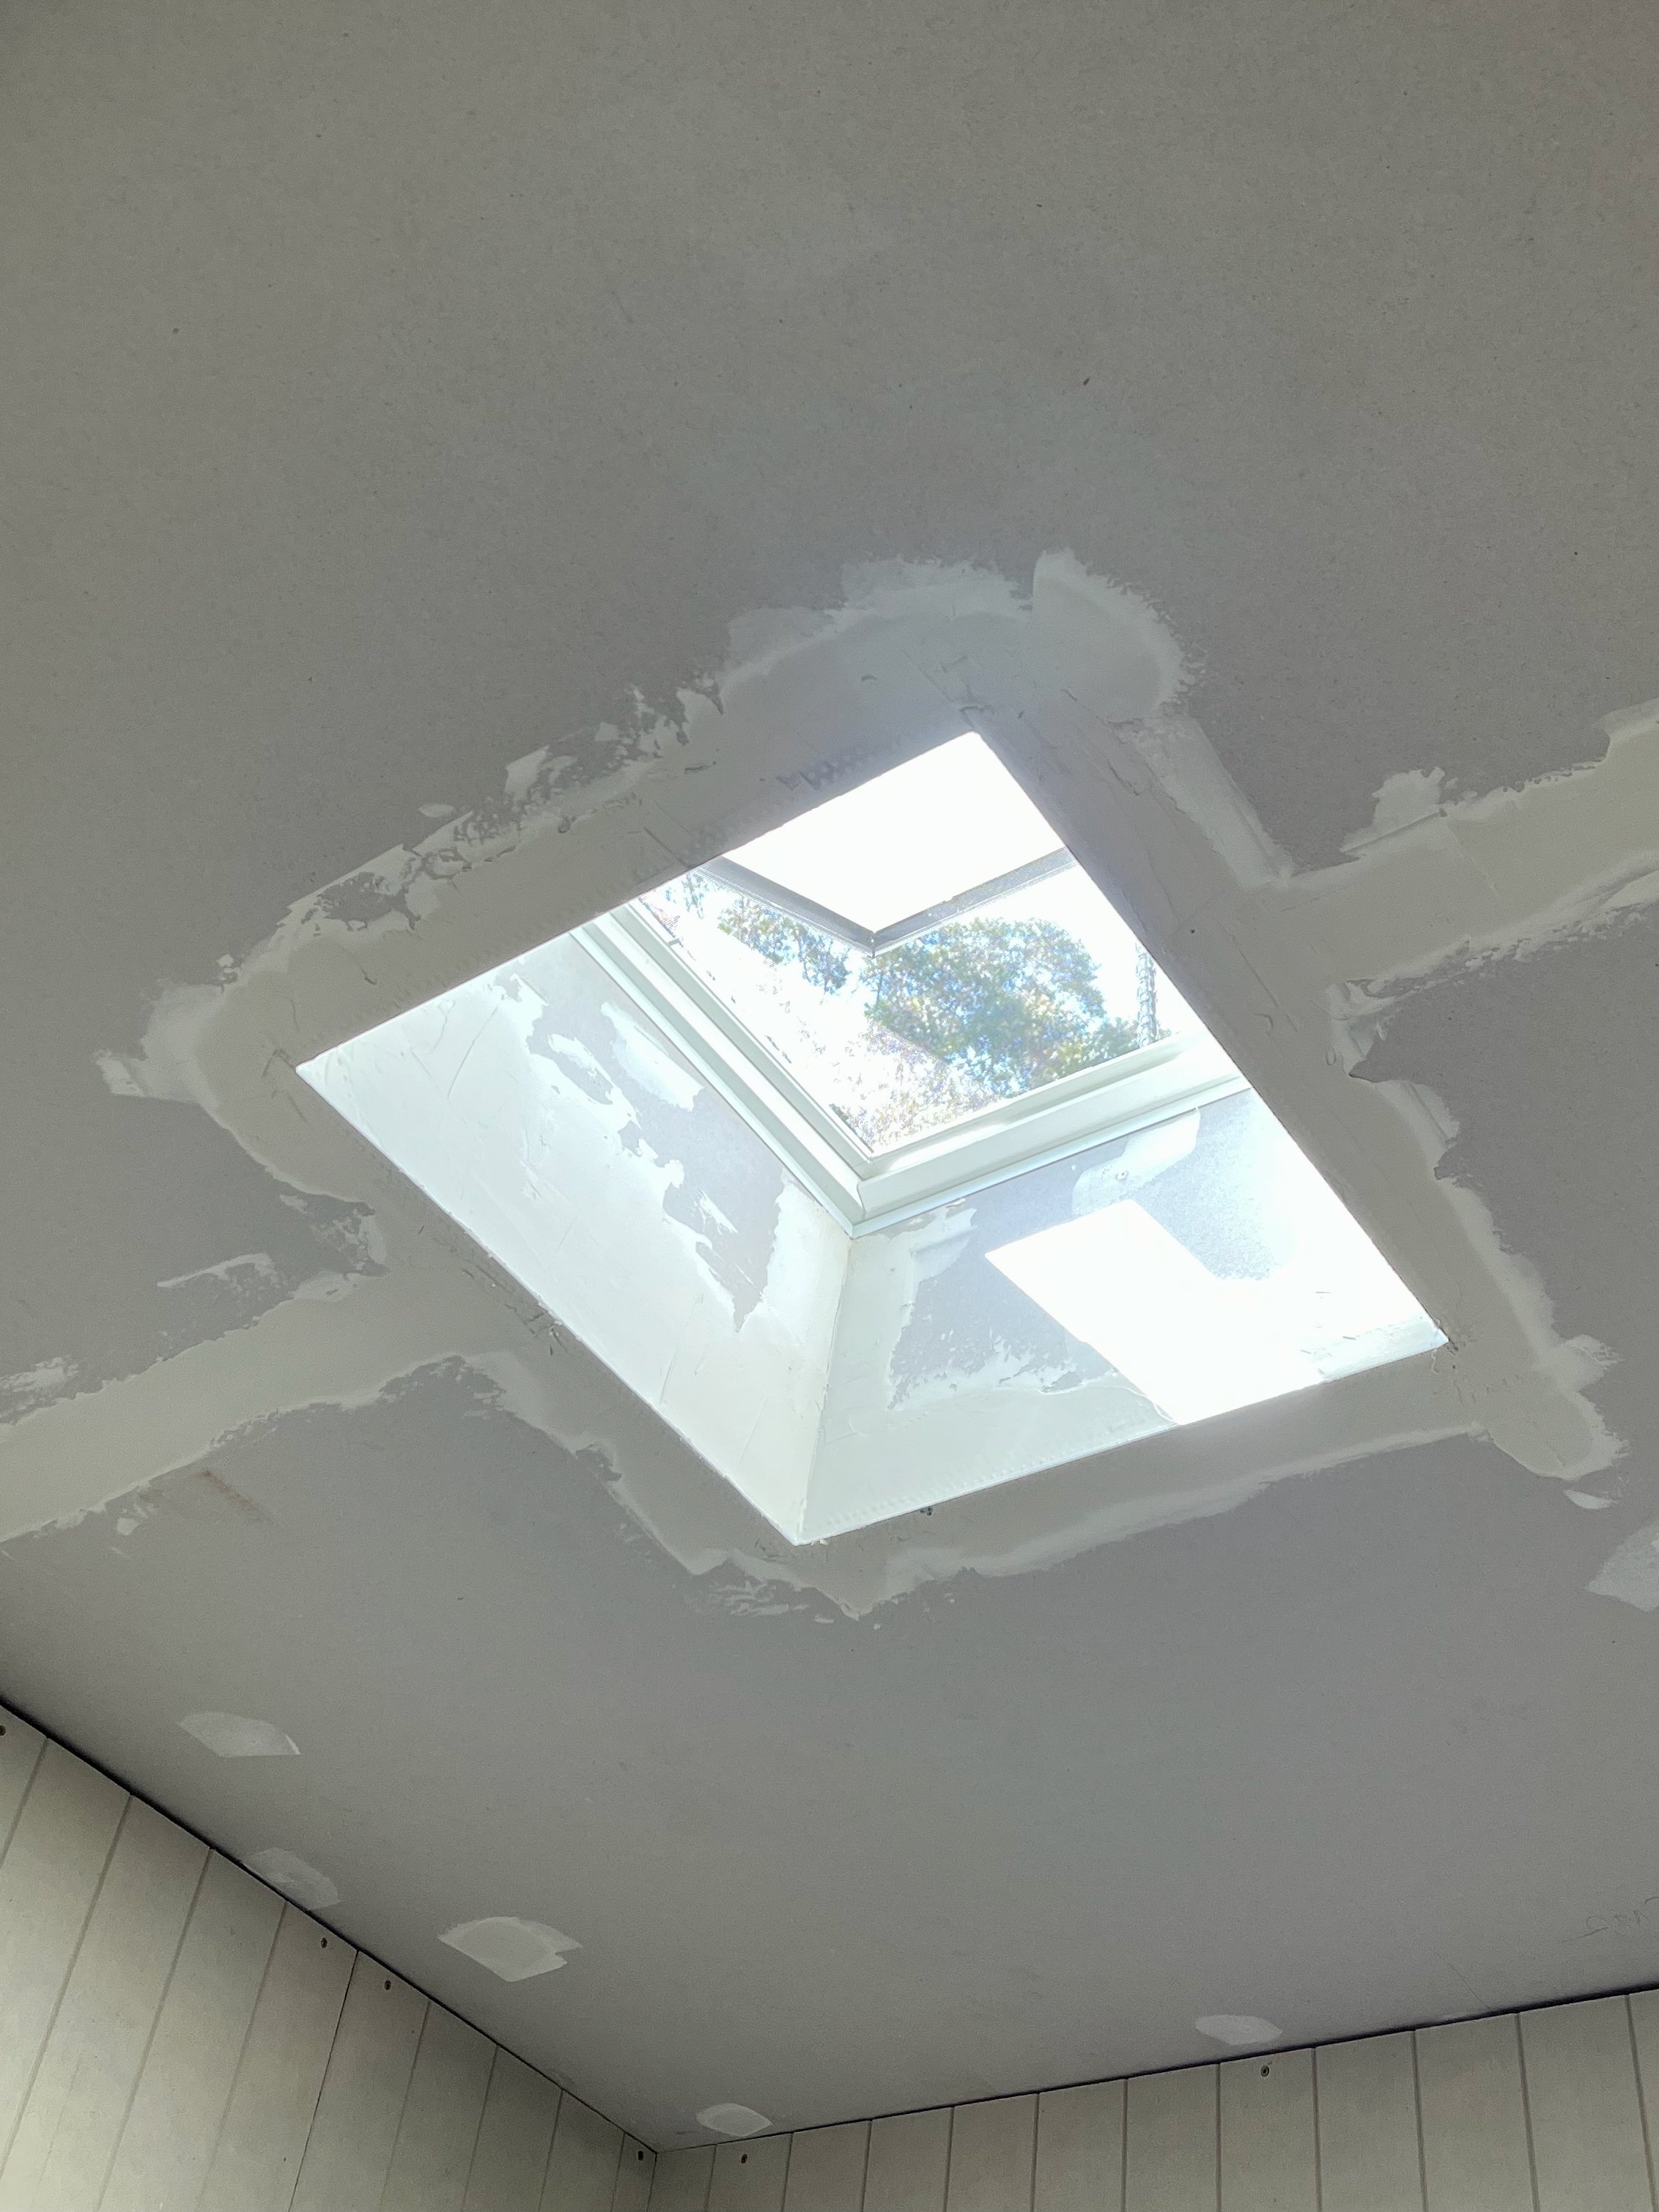
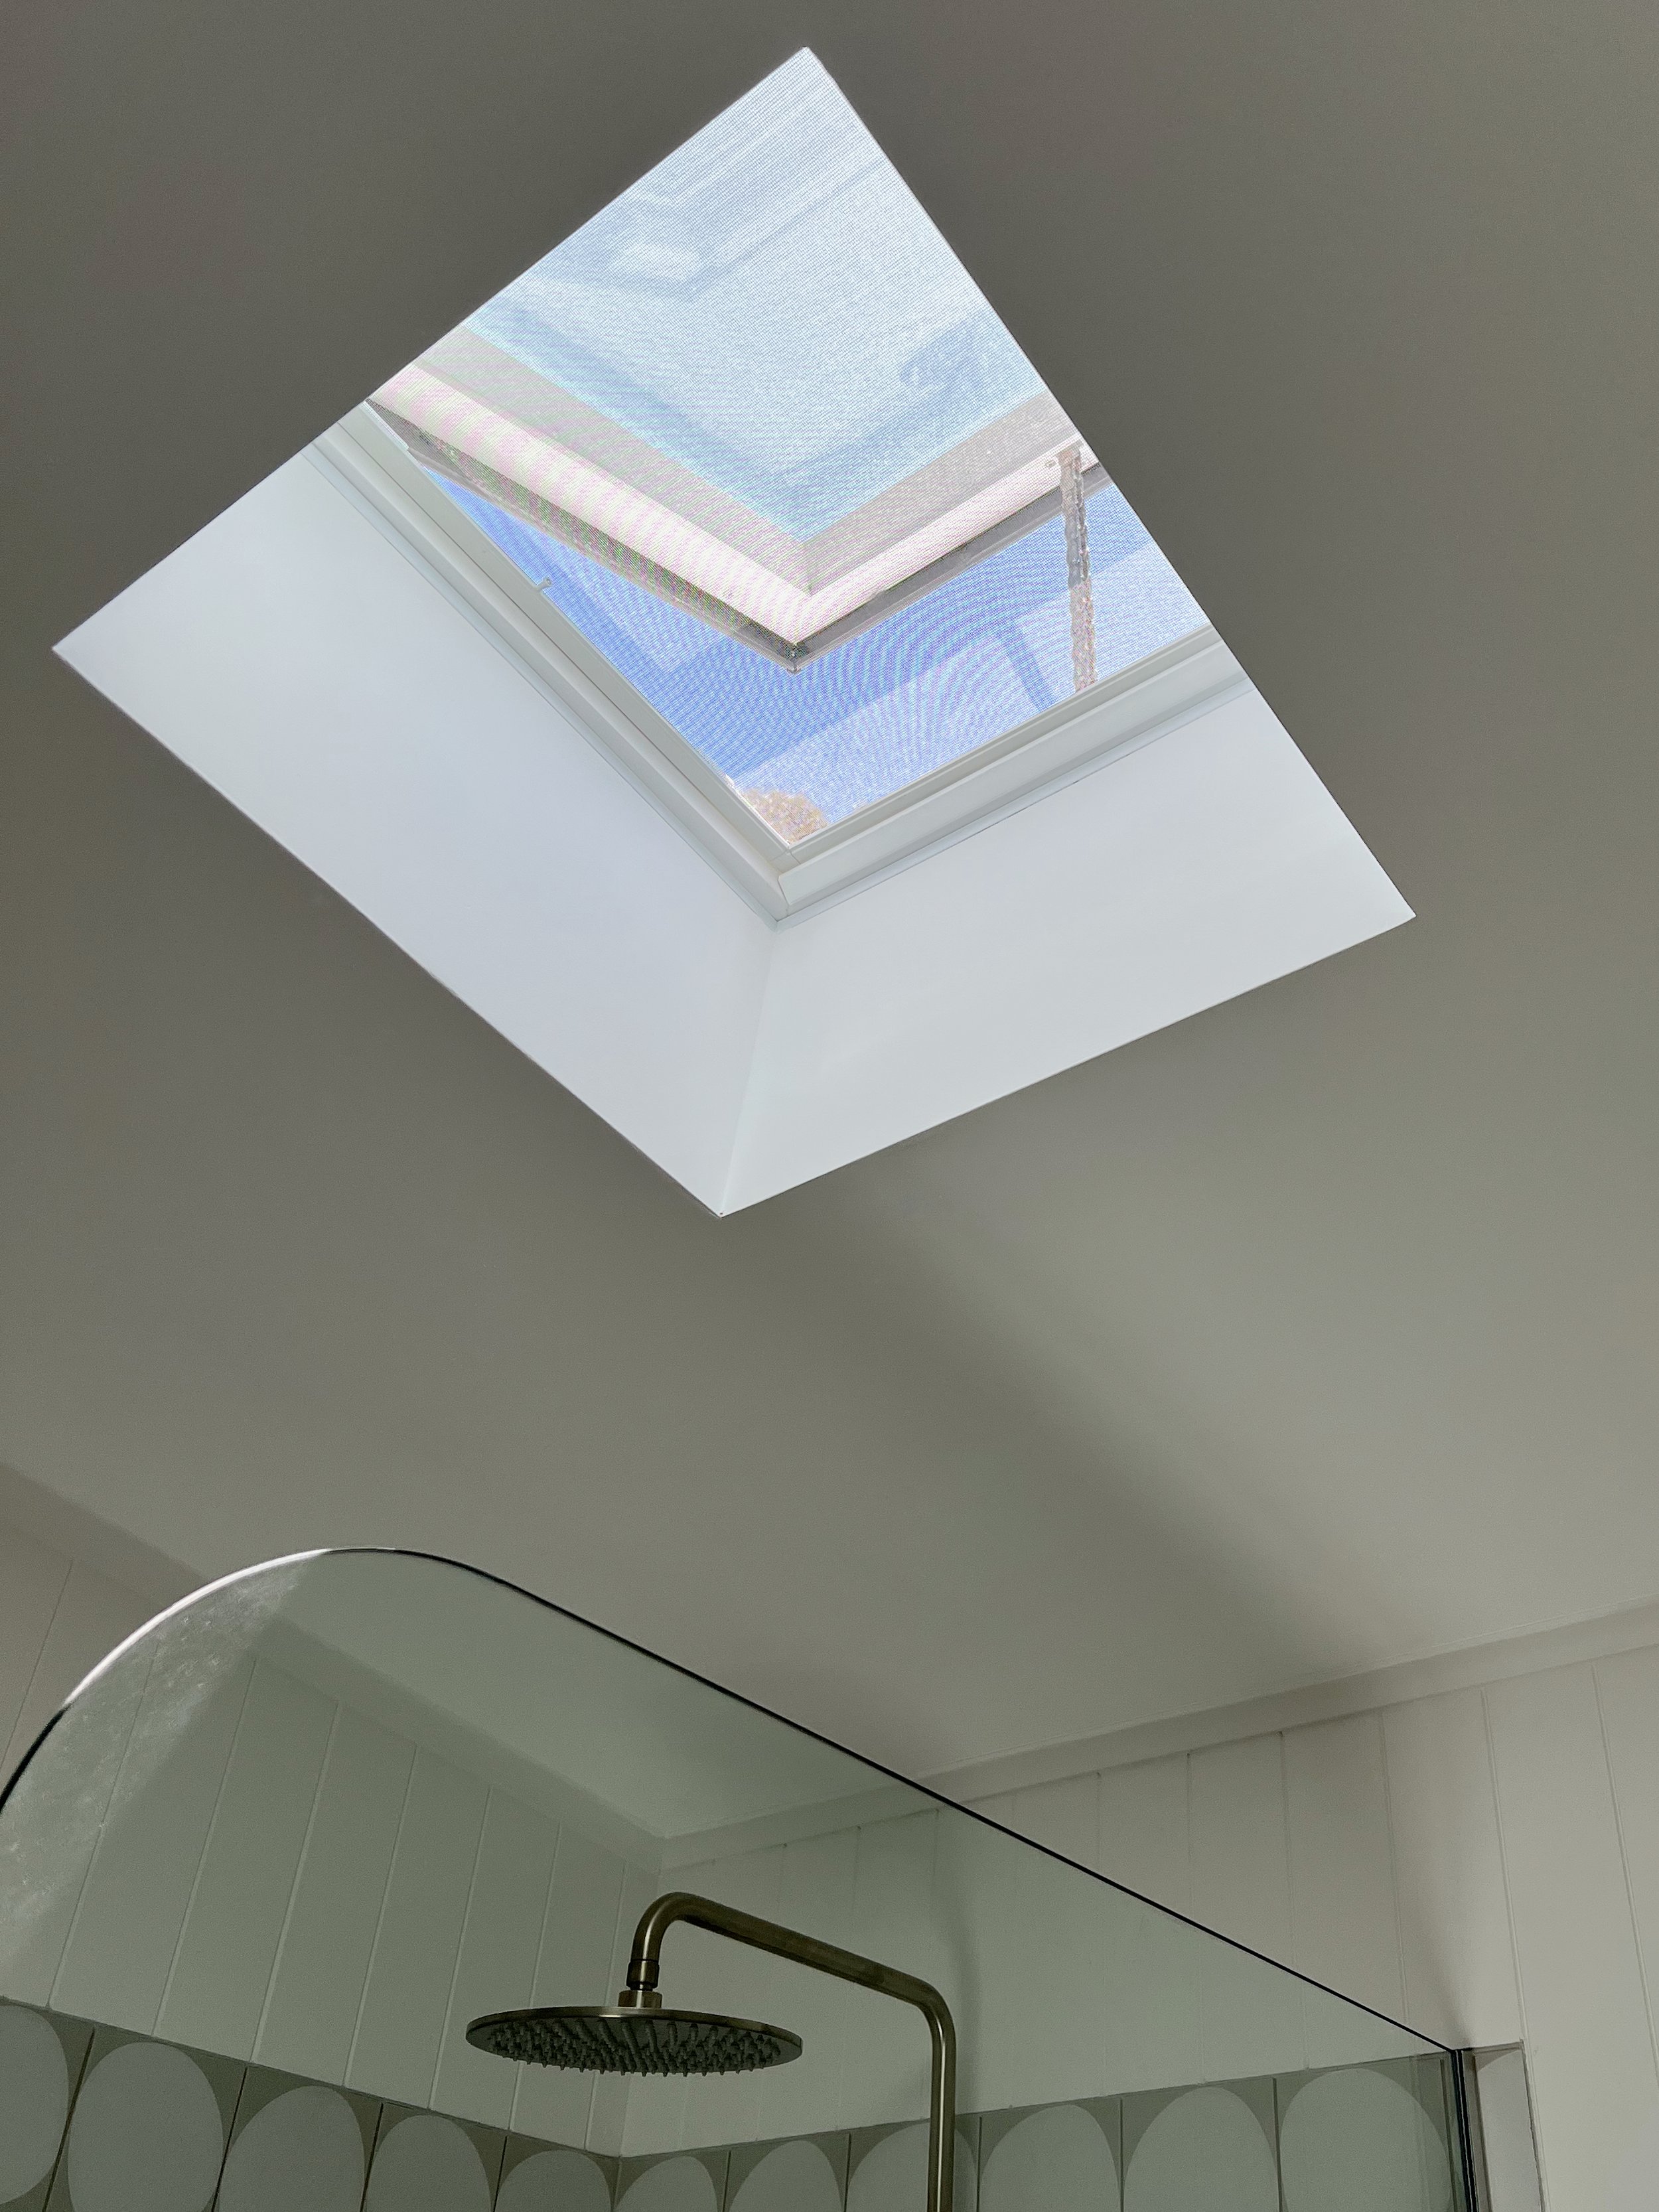
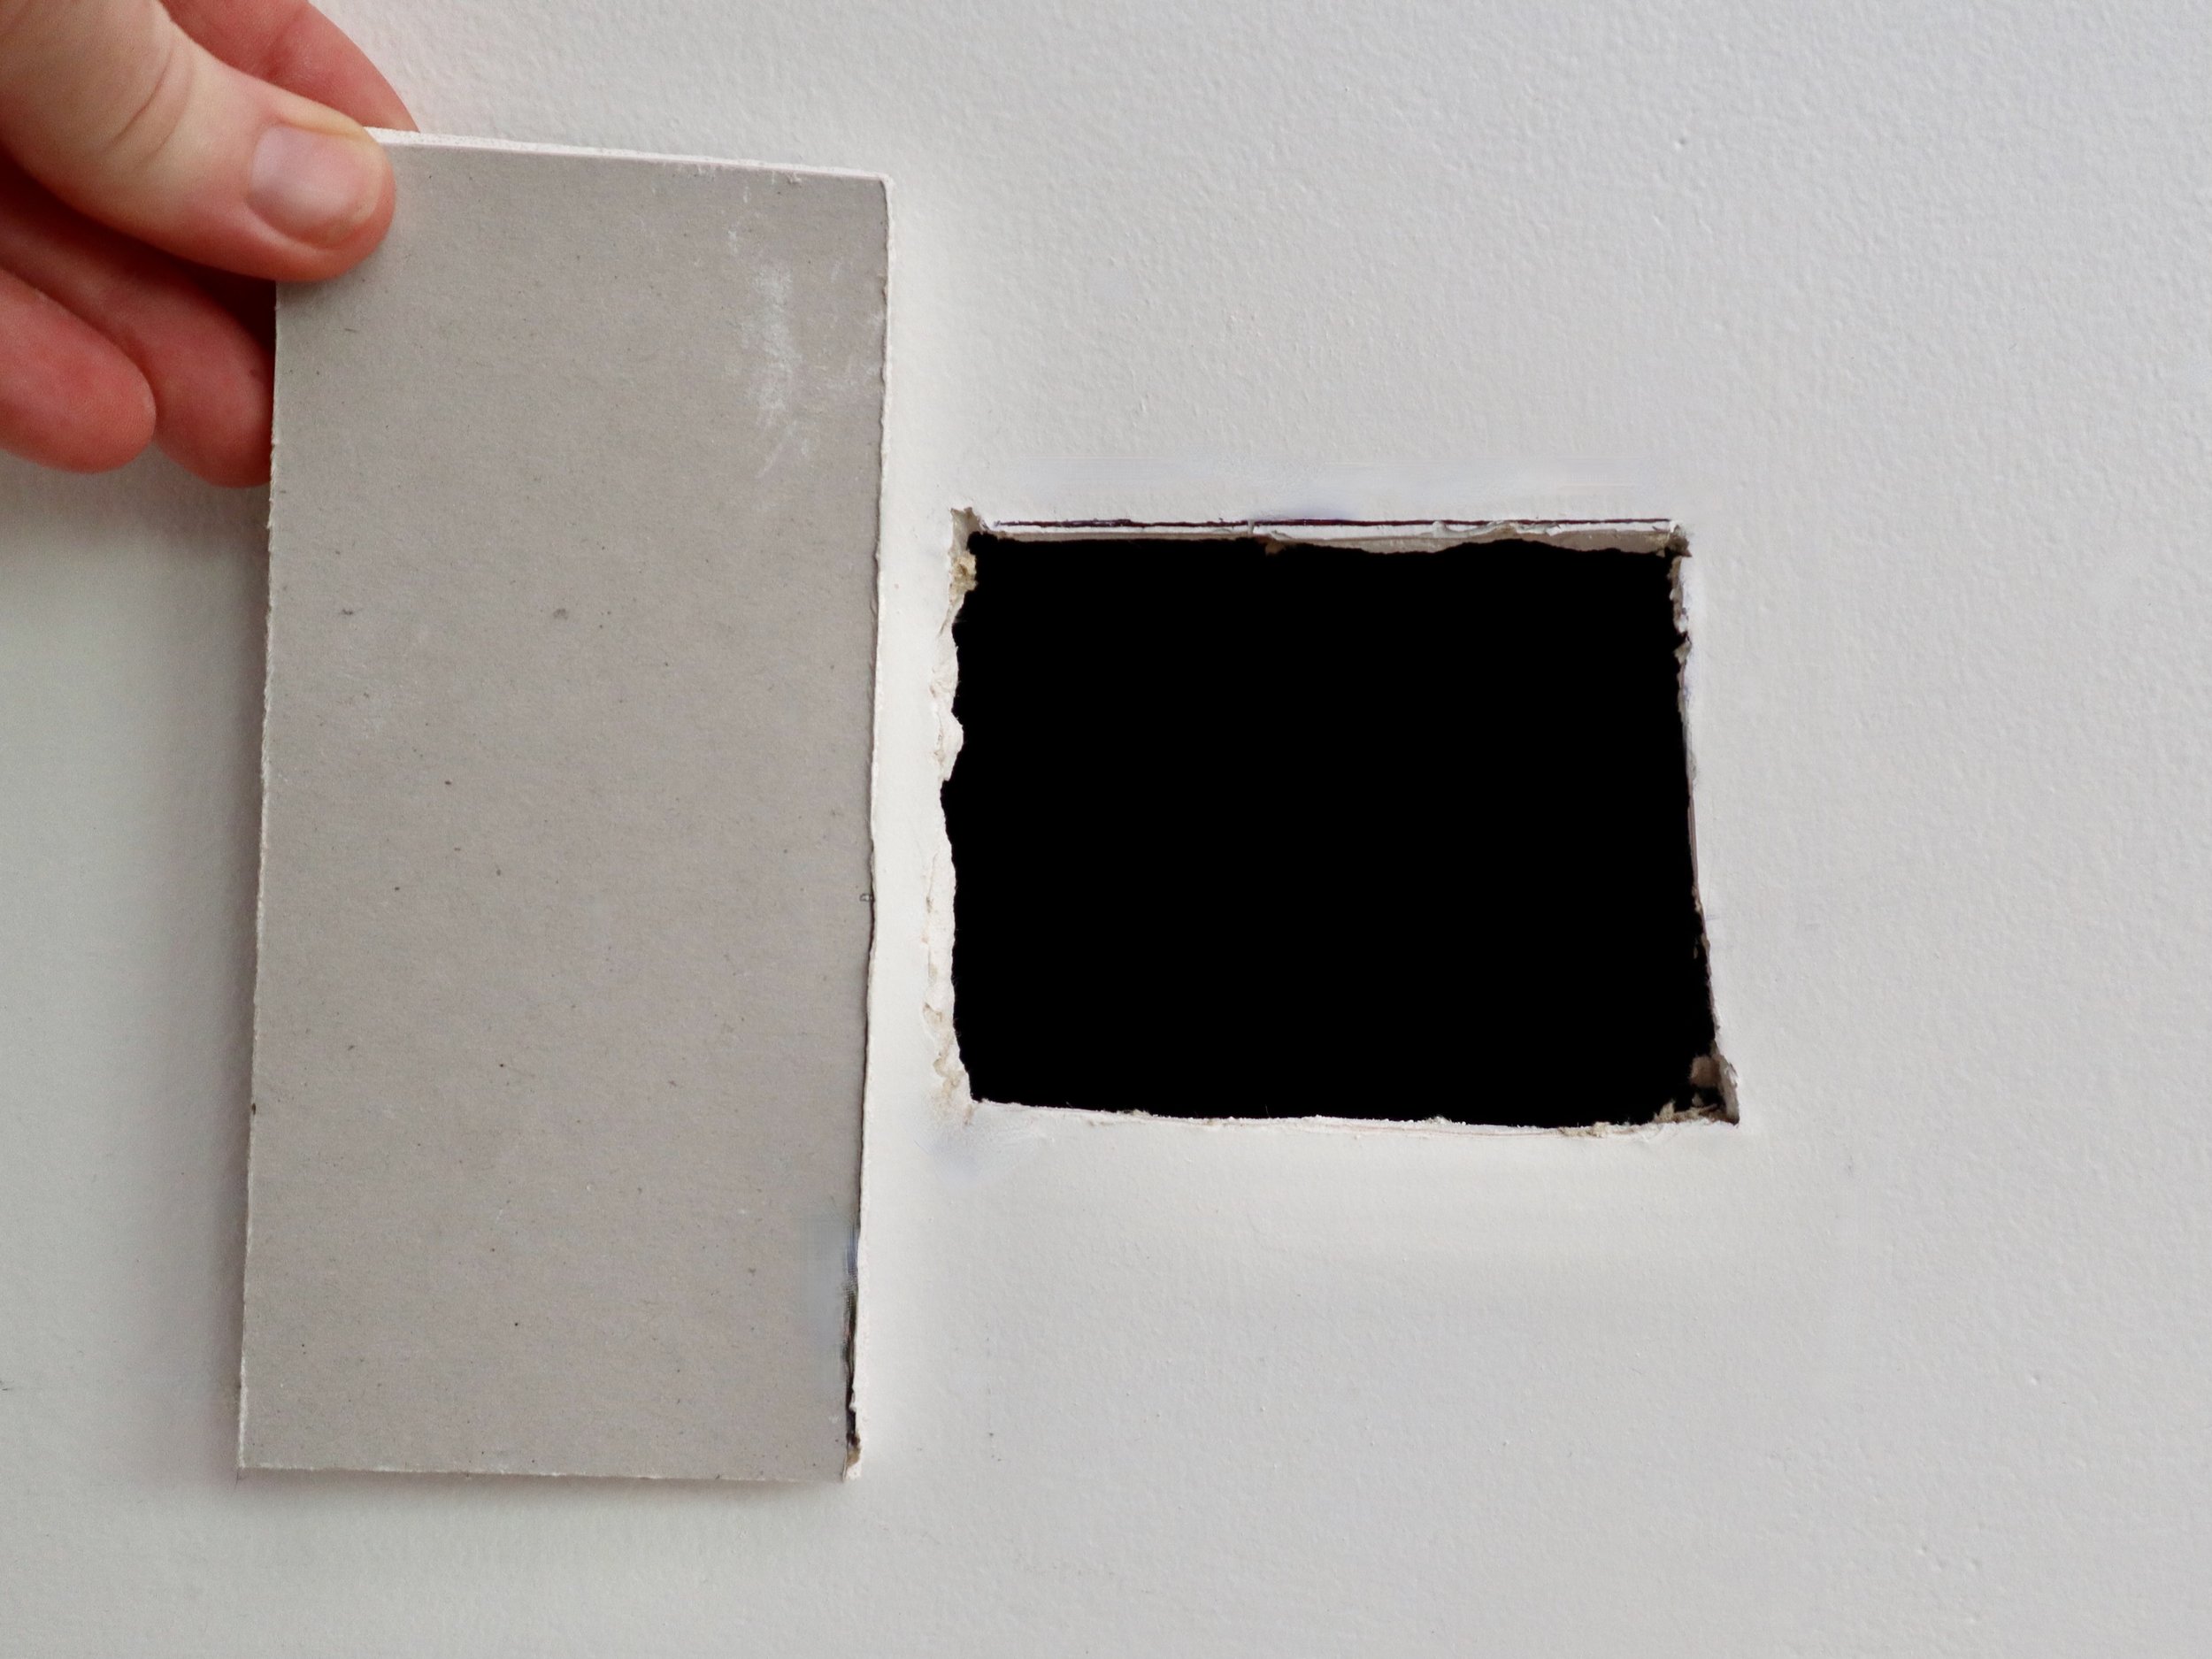
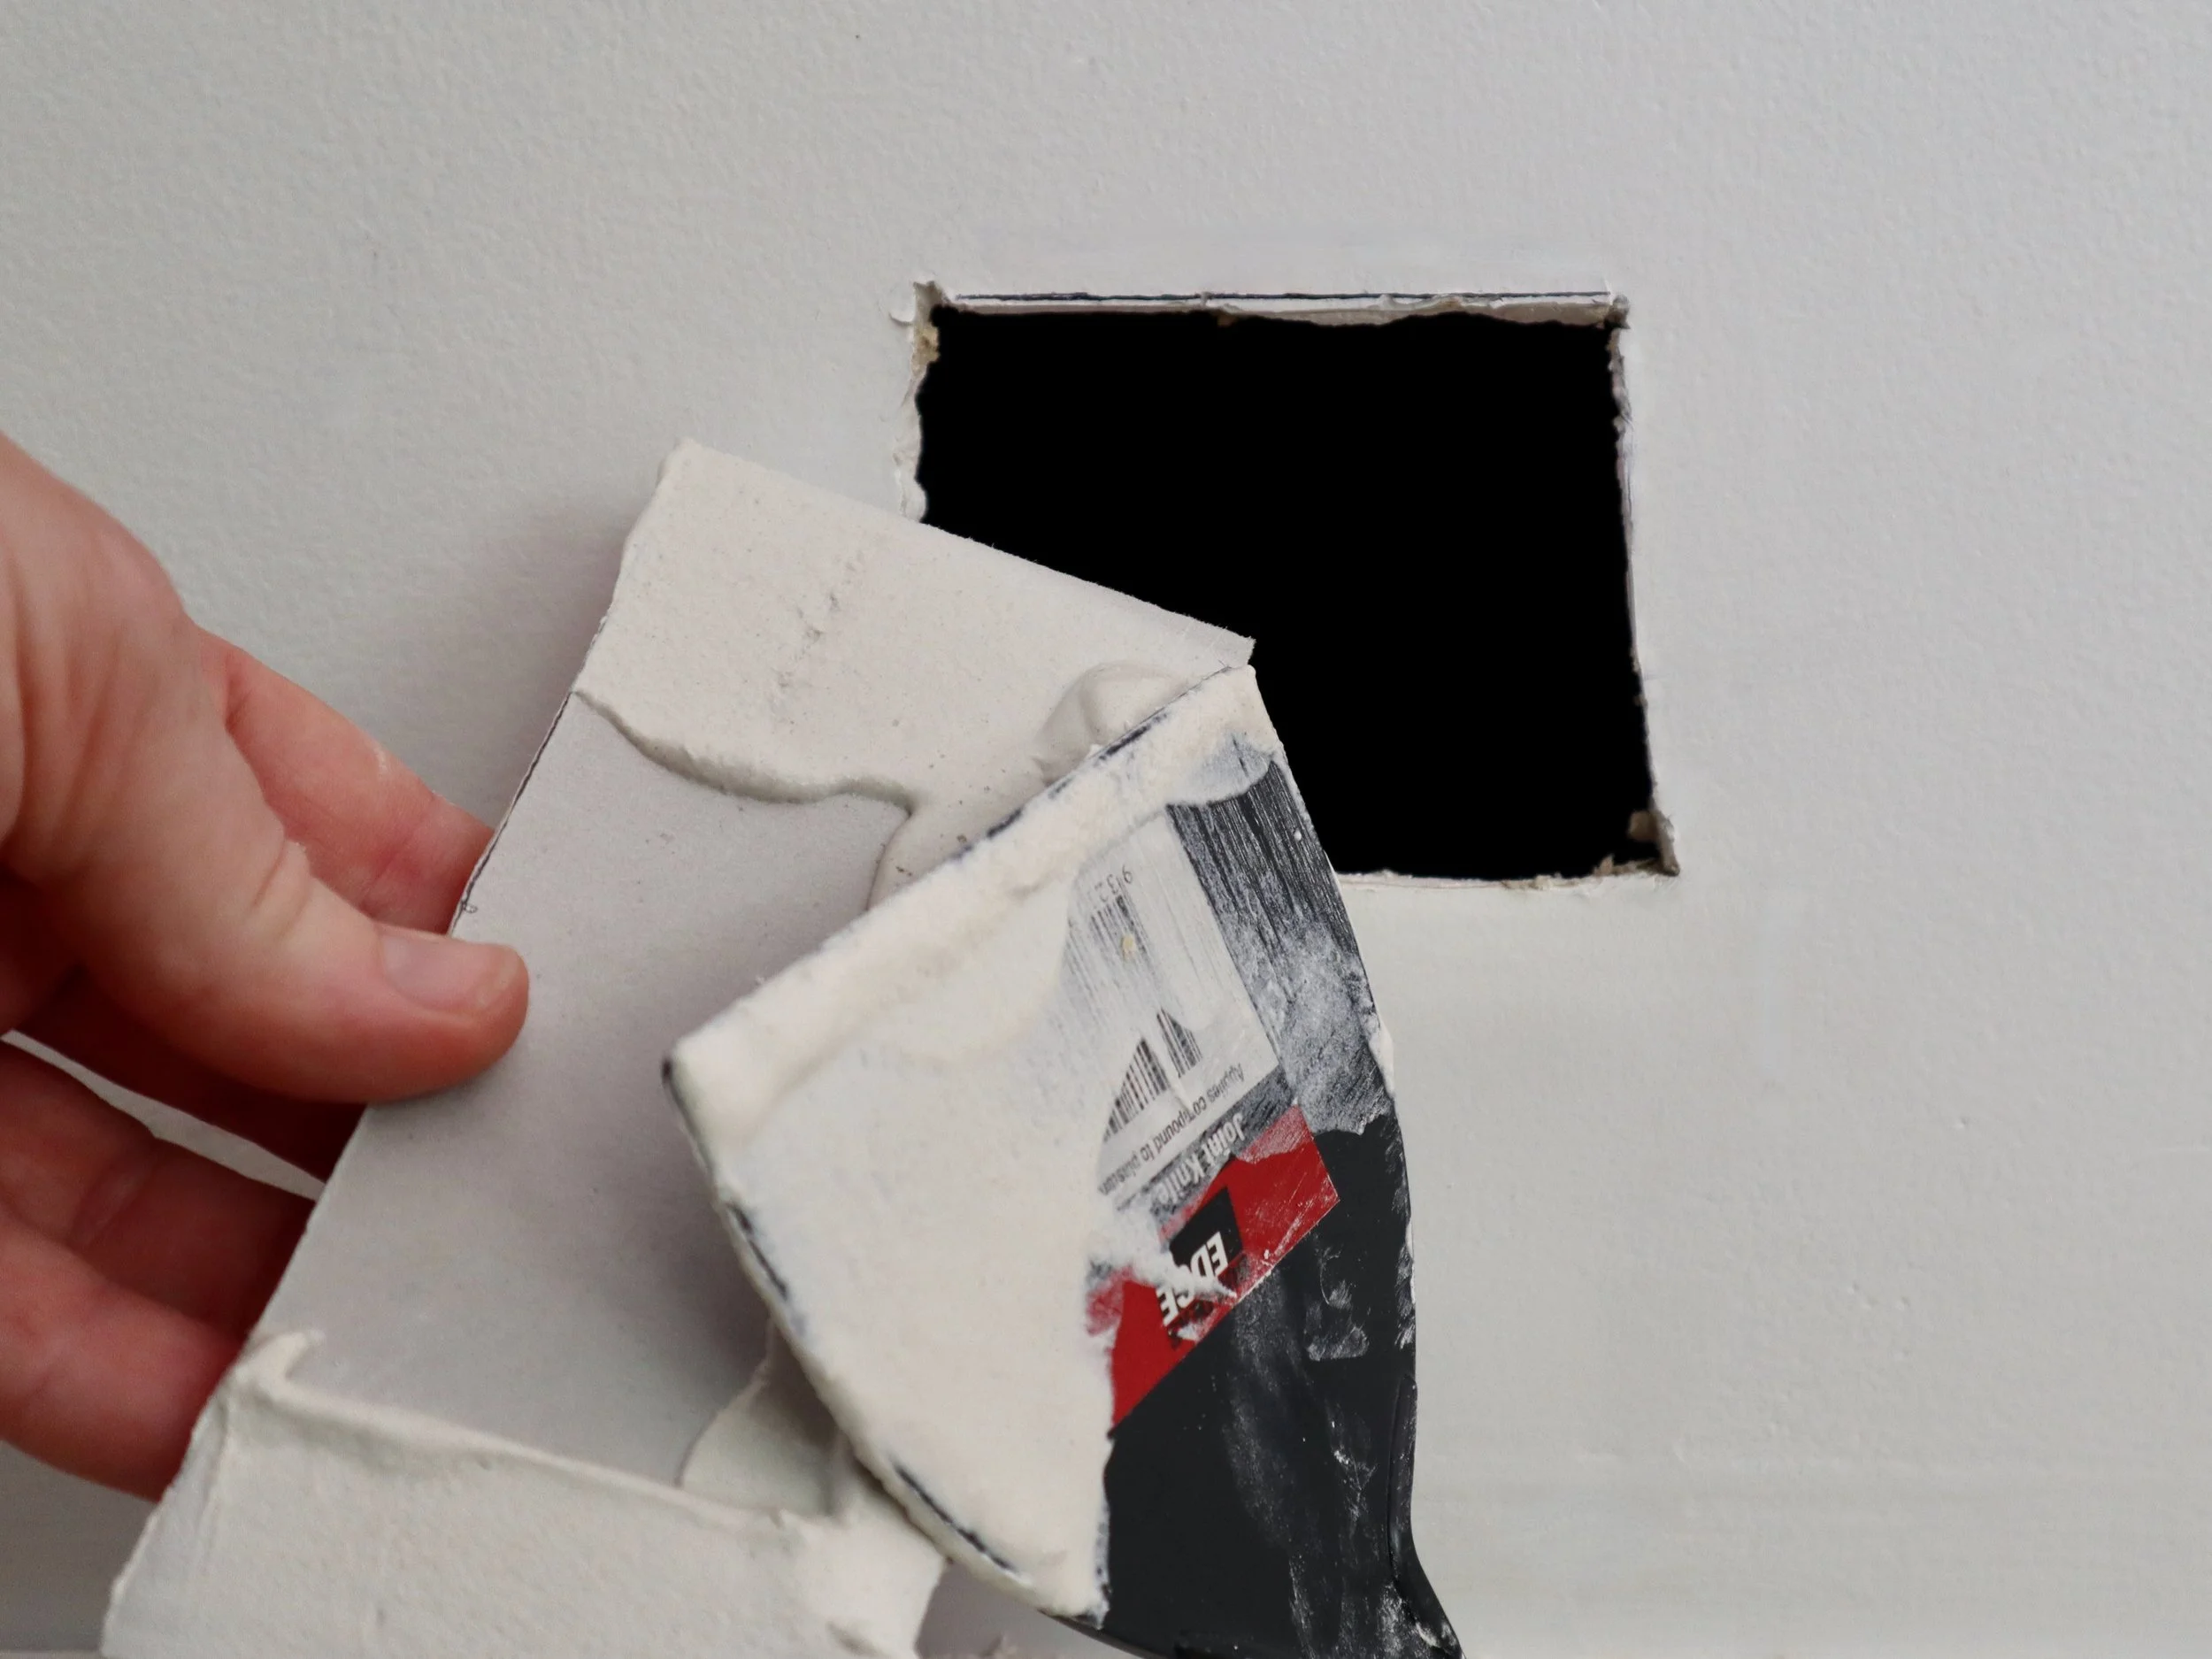
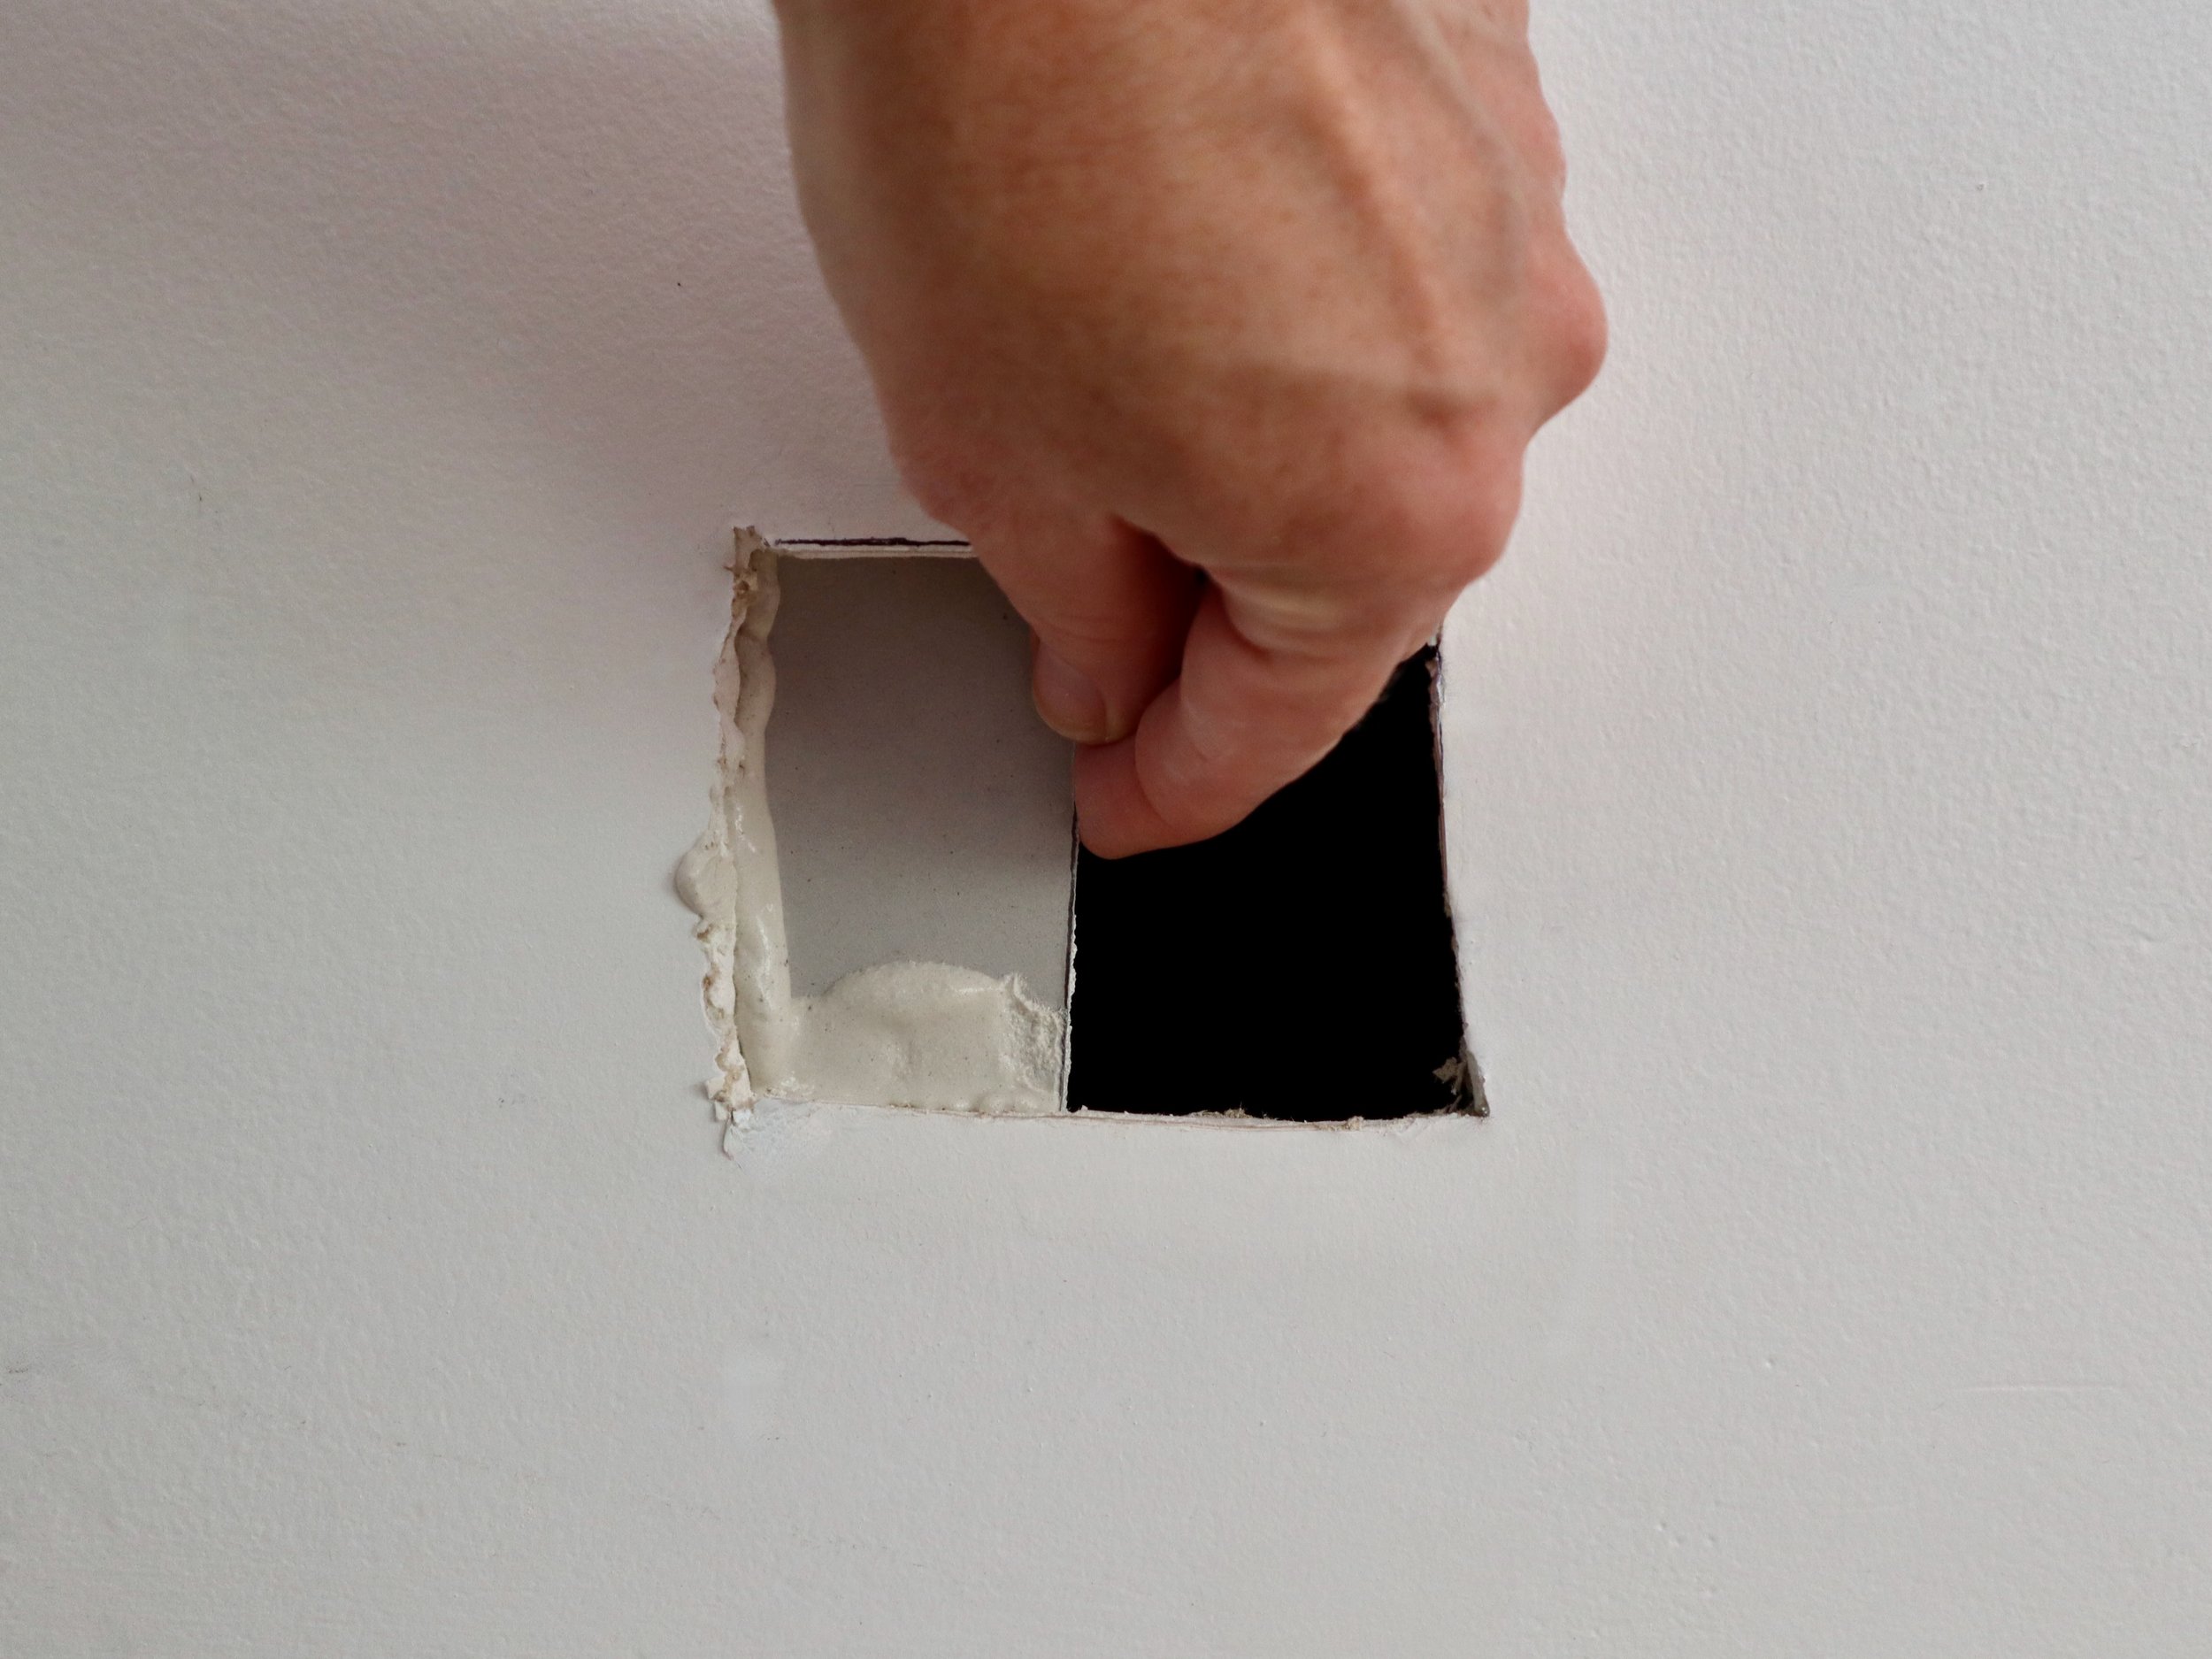
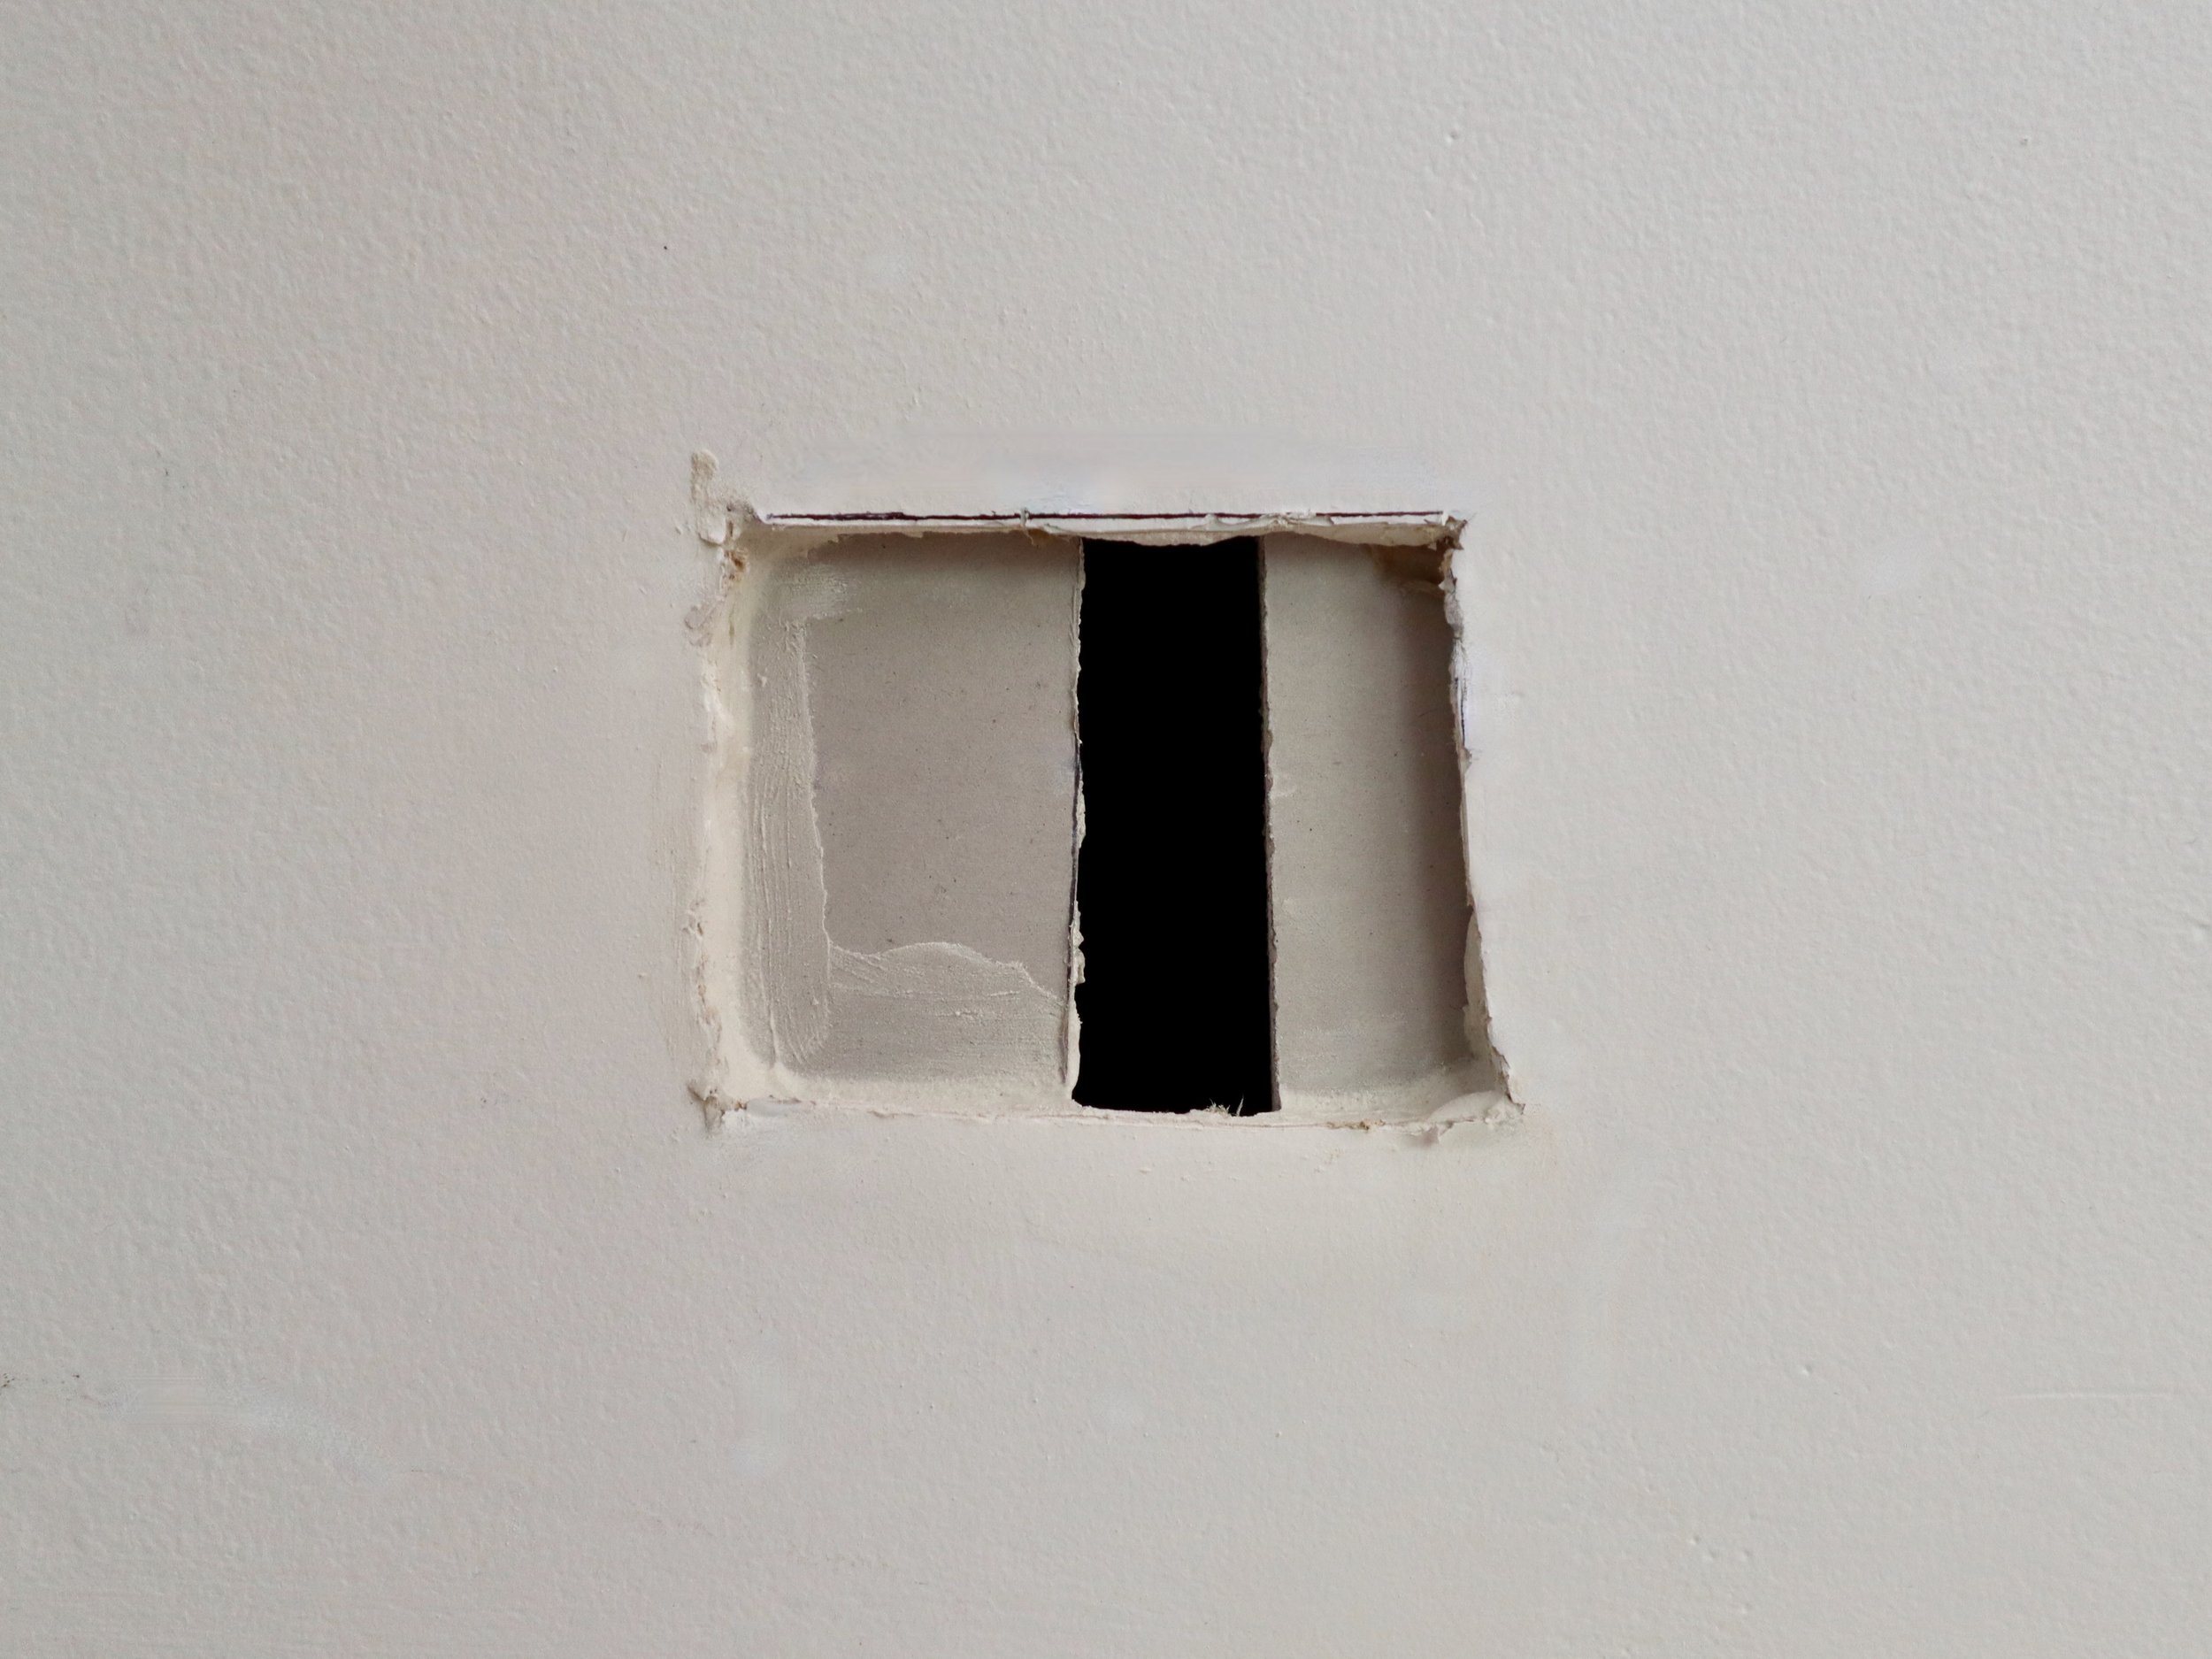
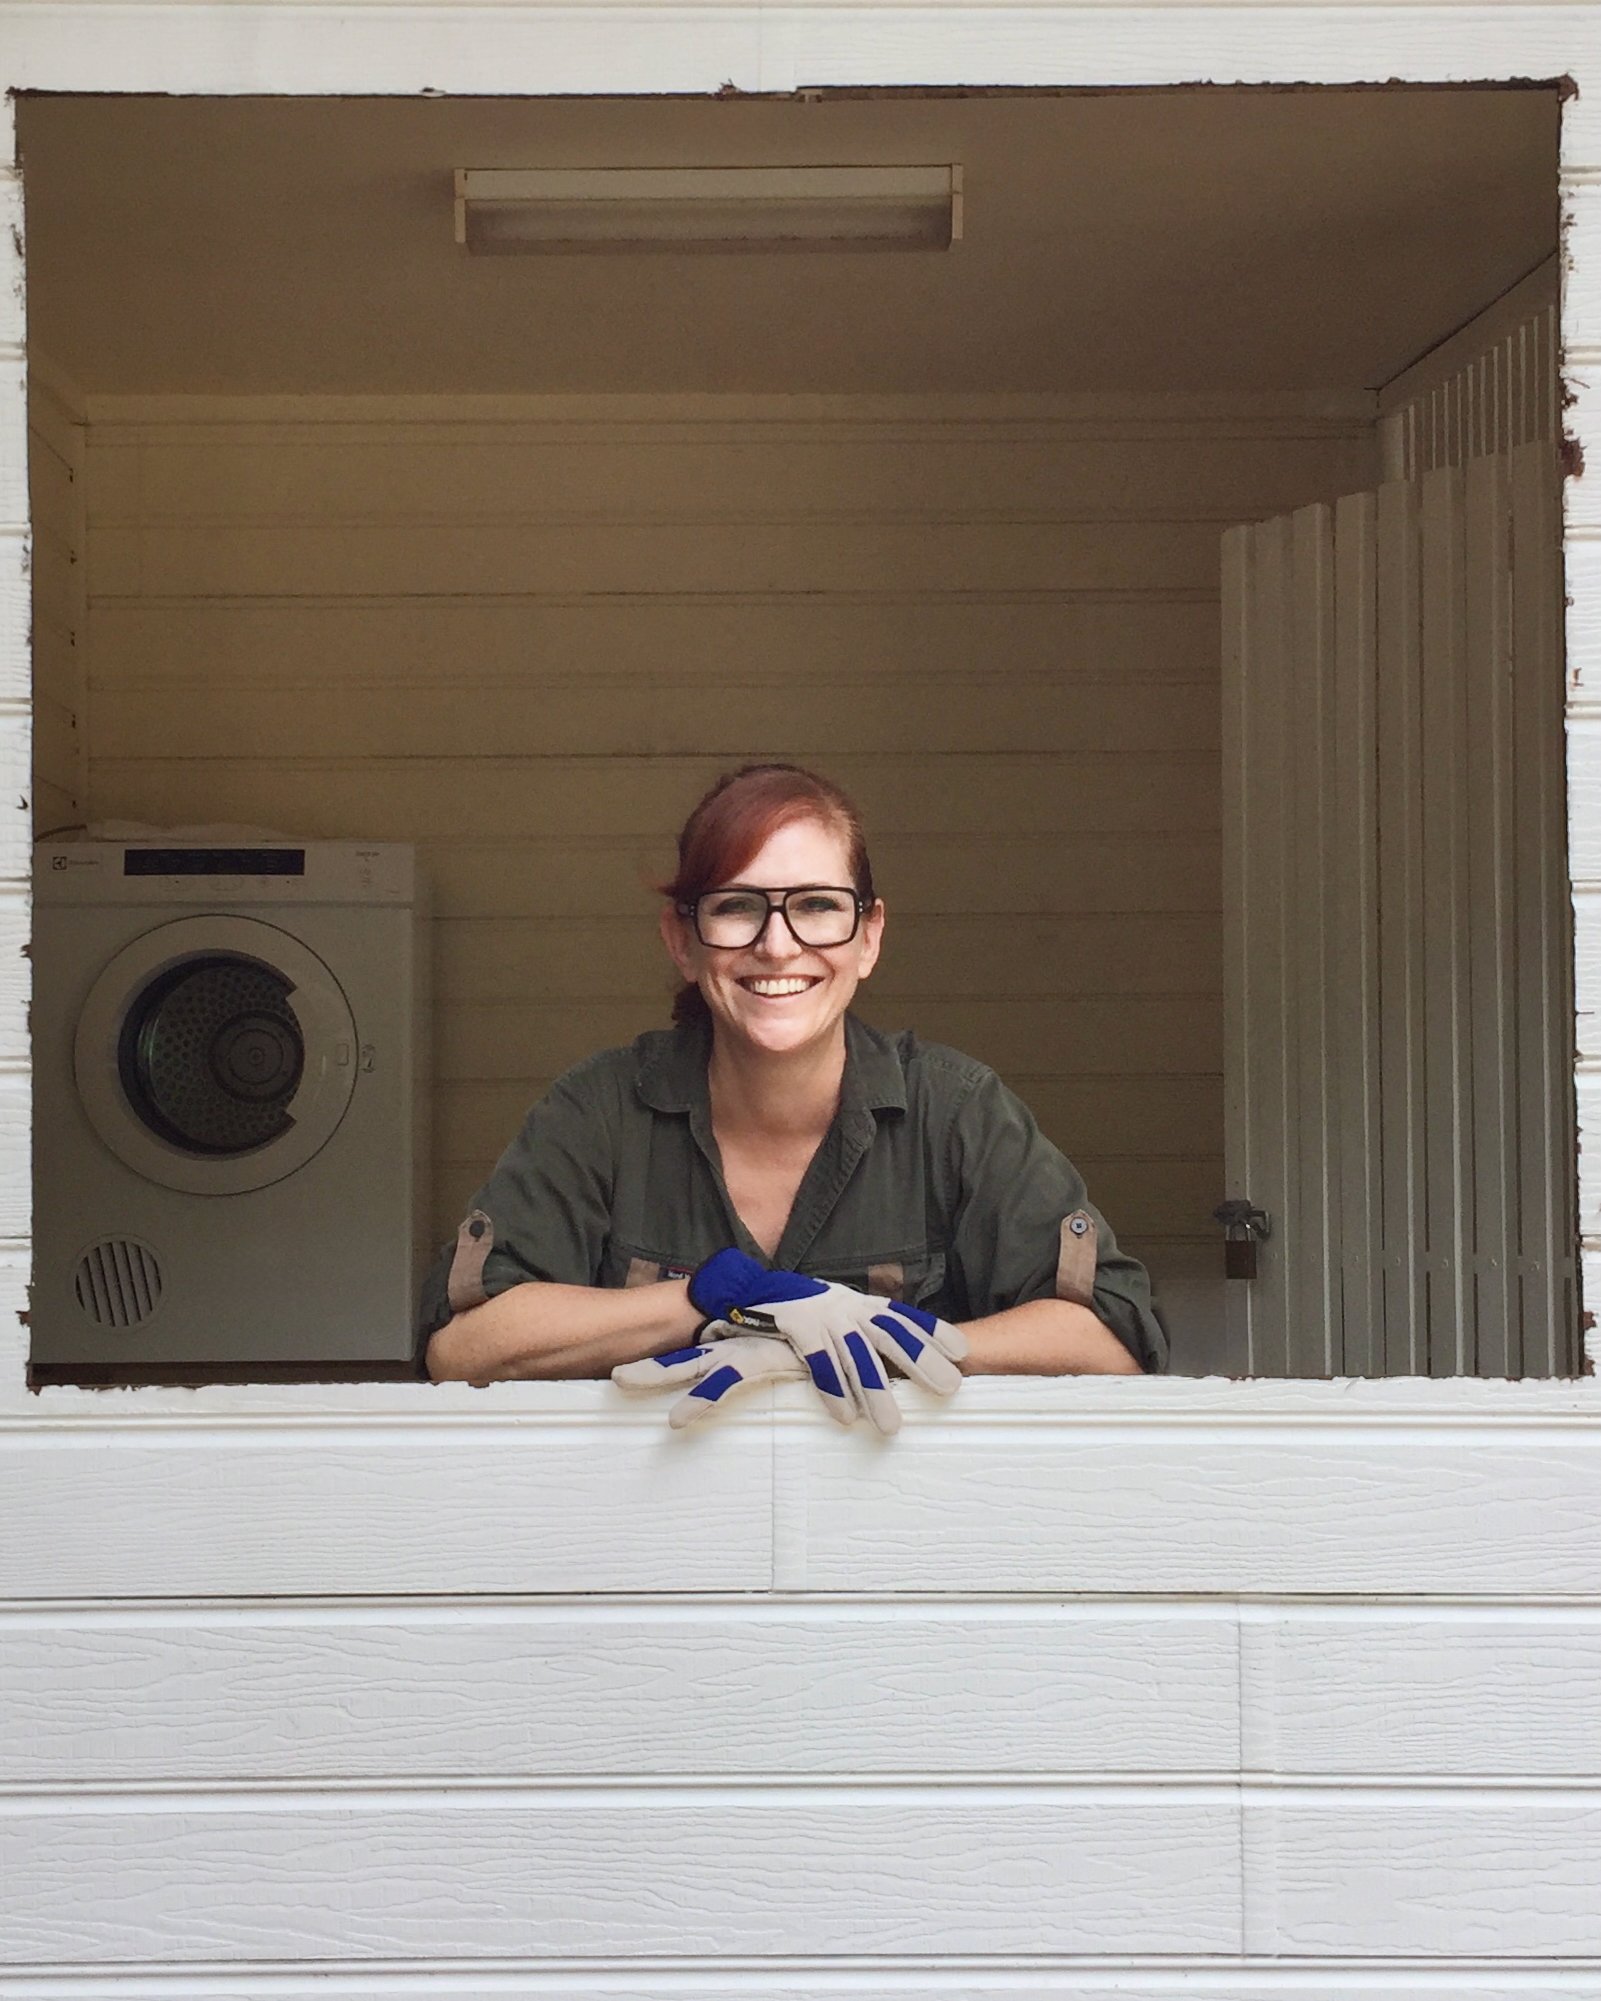
RELOCATING THE WINDOW

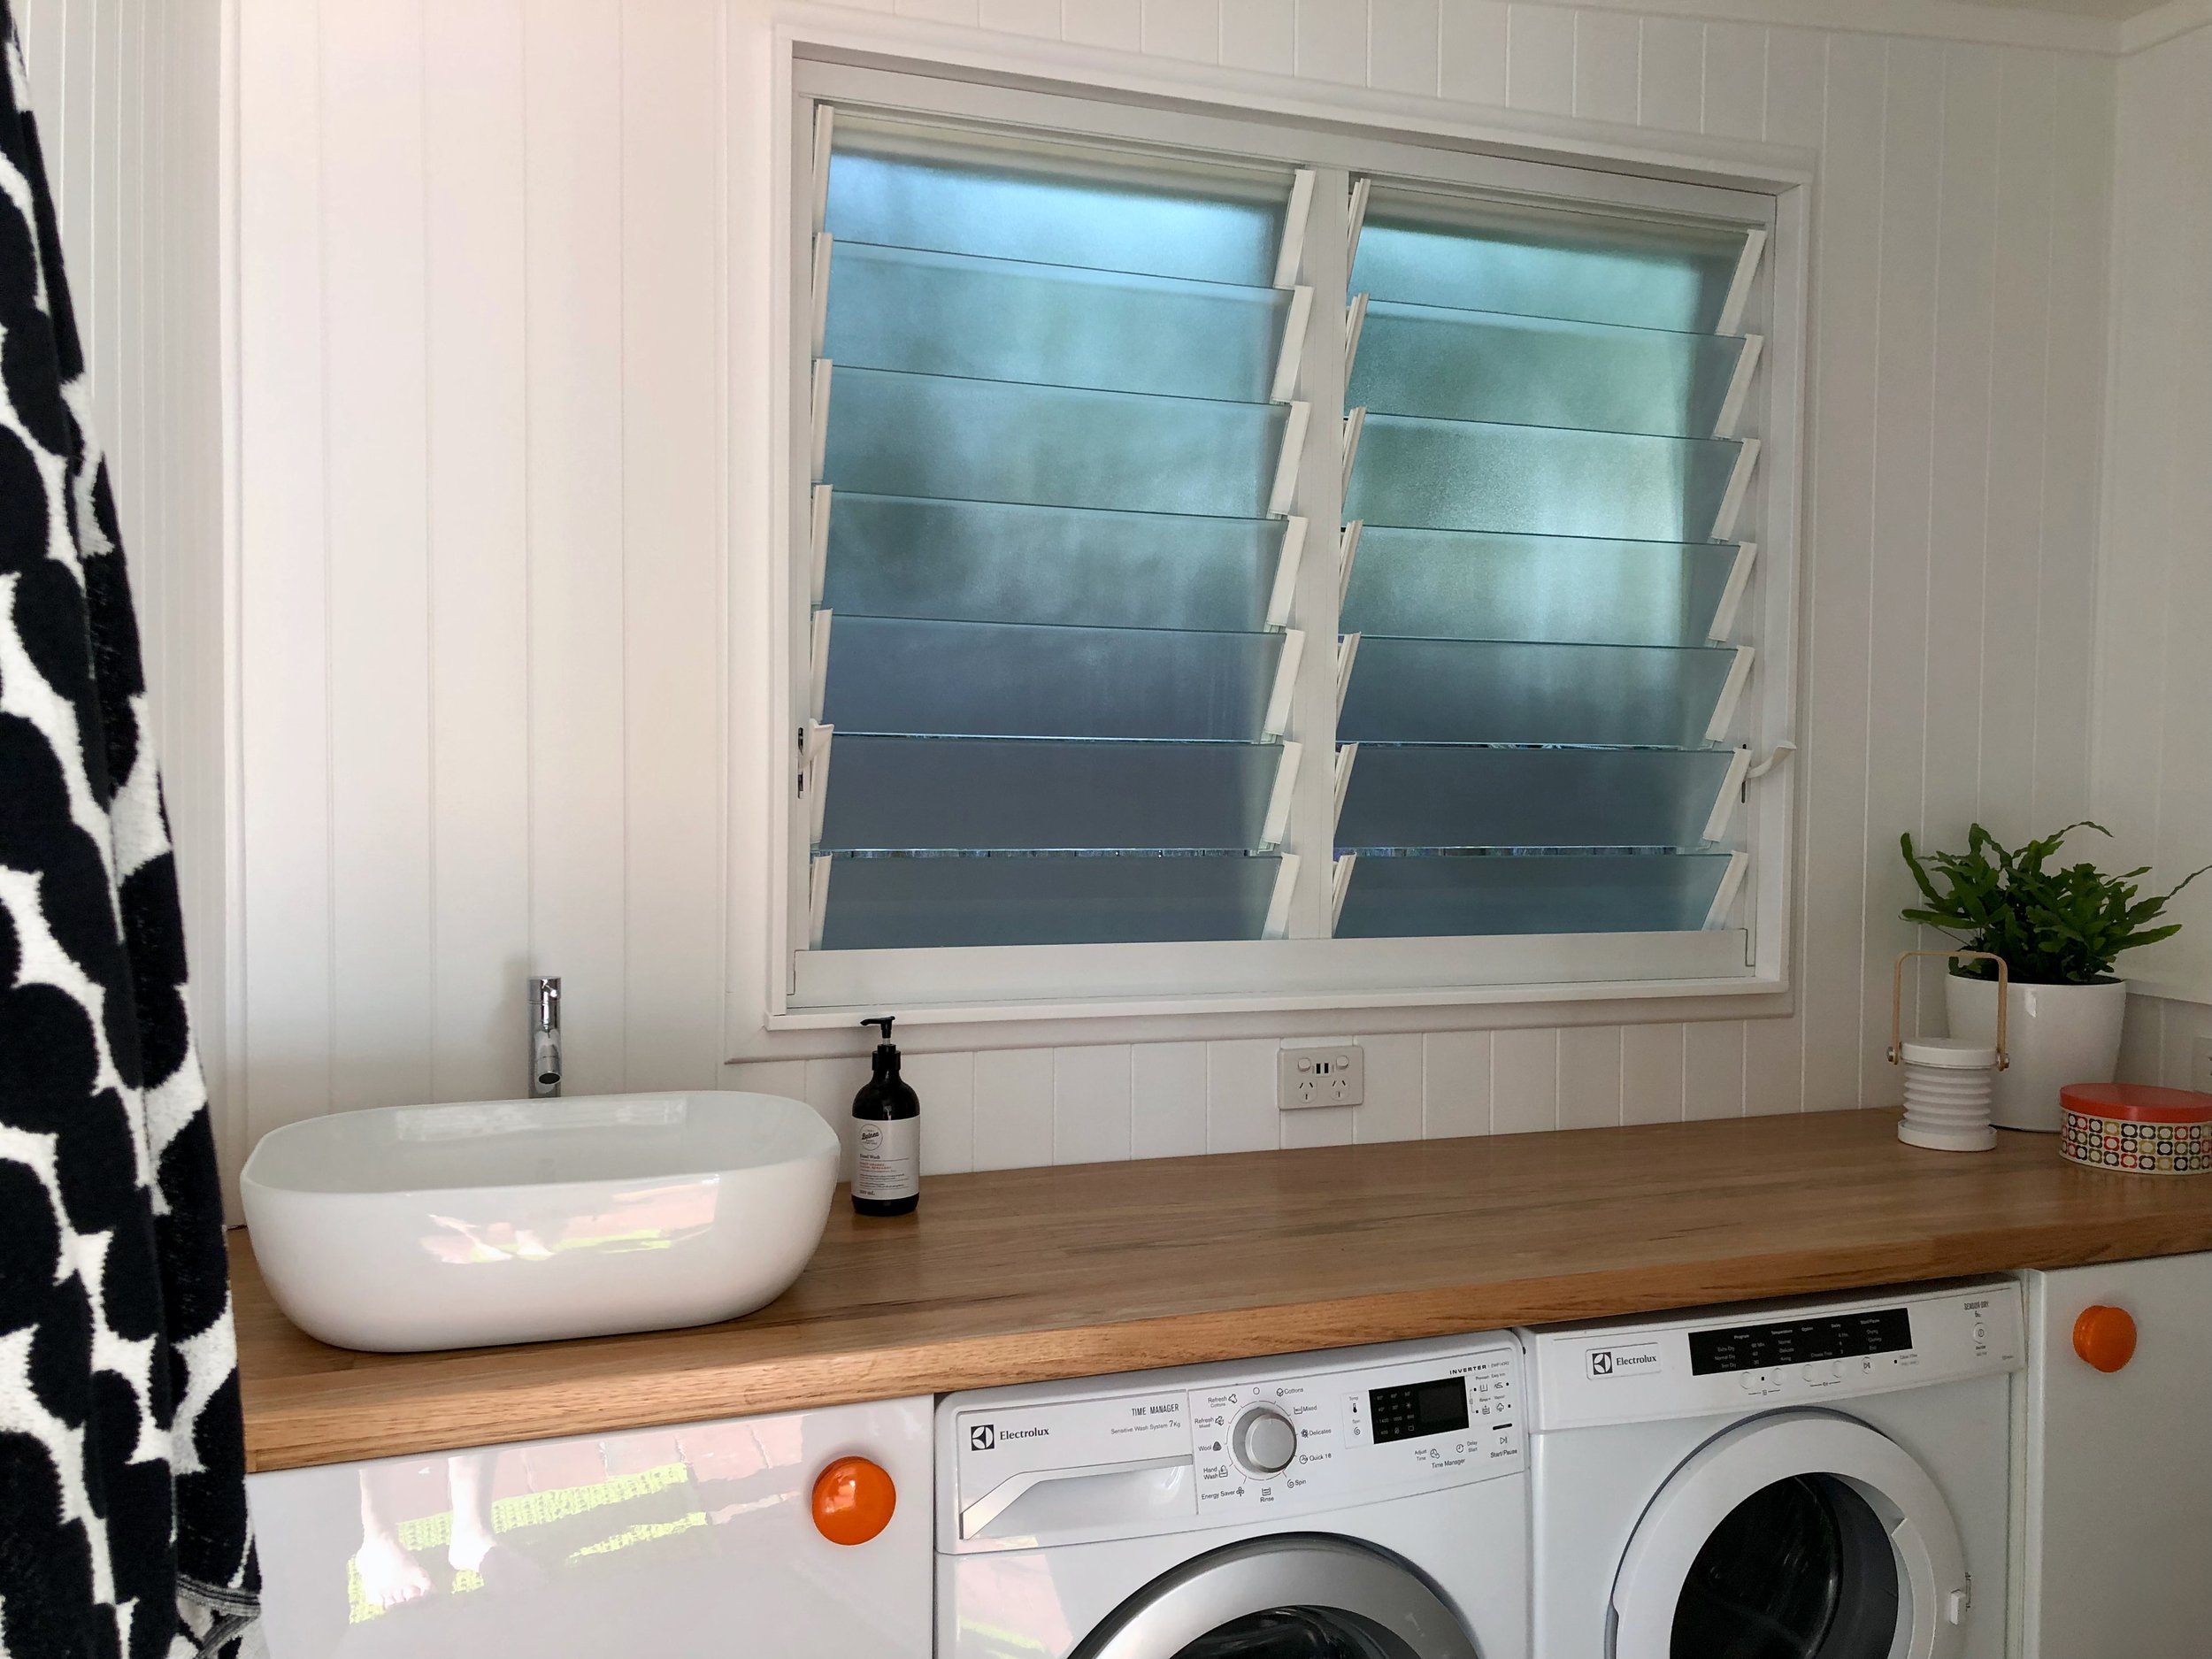
A year later, I finally had time and budget to do a some real upgrades, installing a new Breezway two-bay louvred window for light and ventilation.

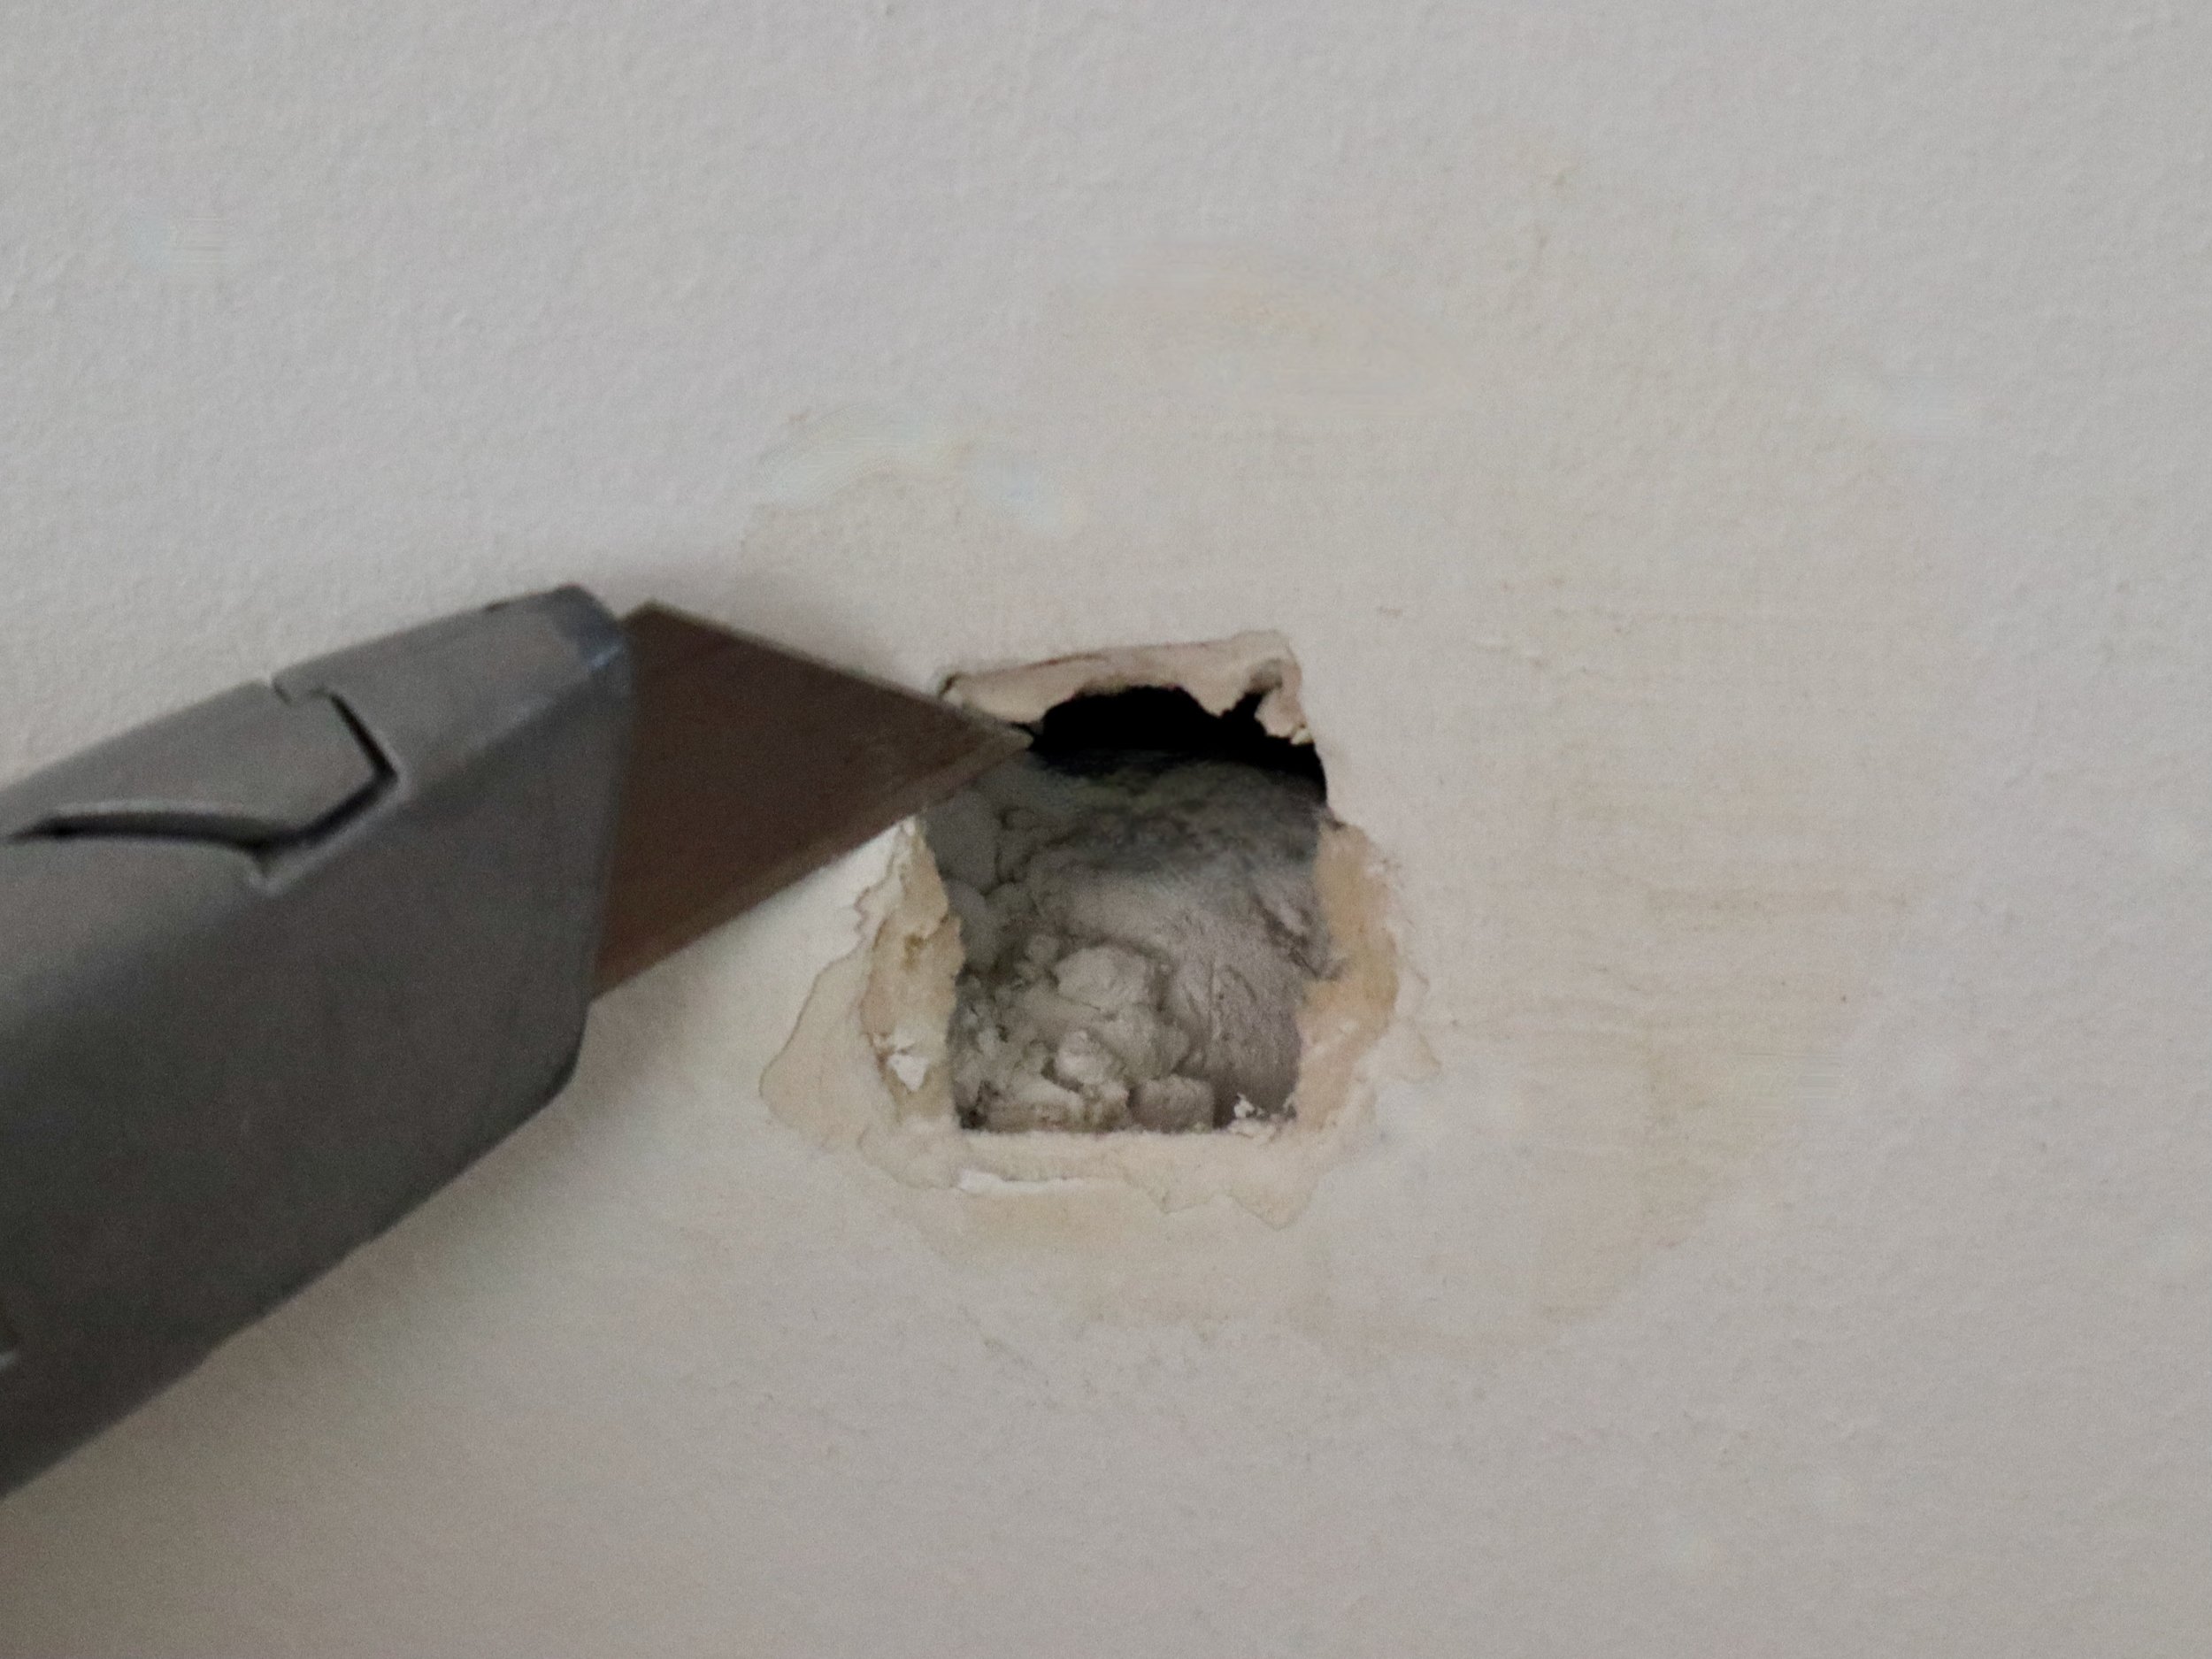
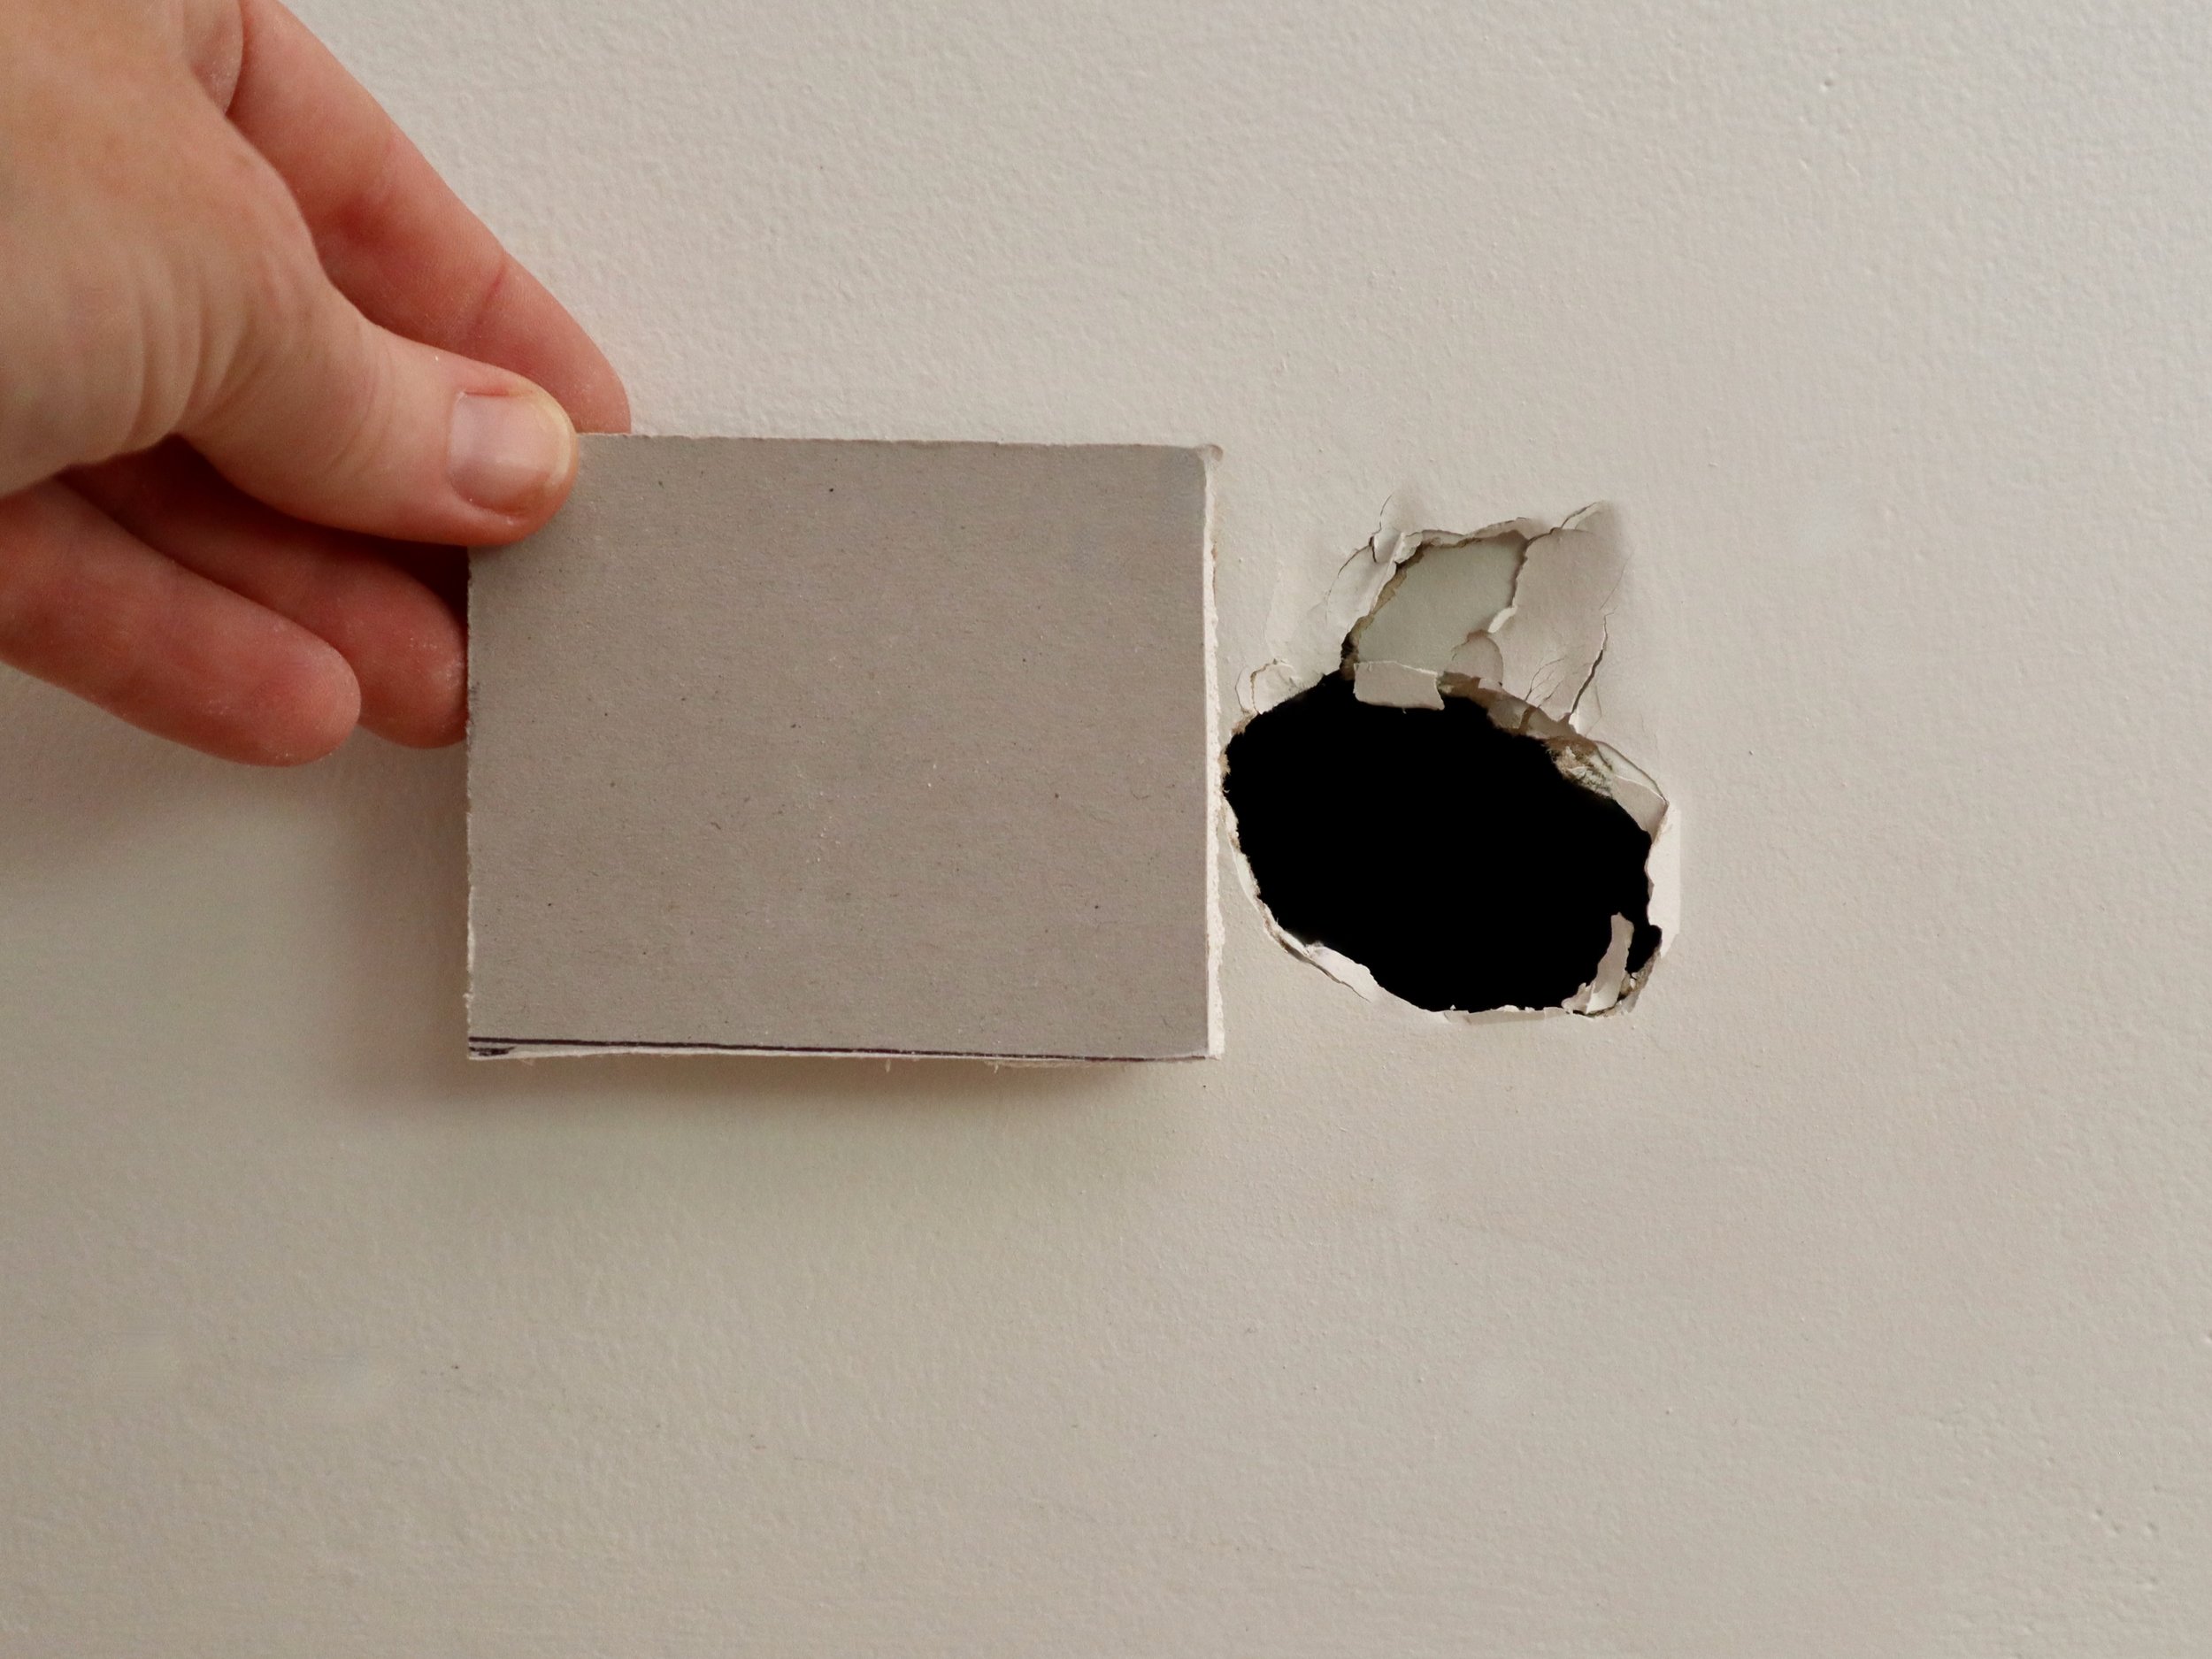
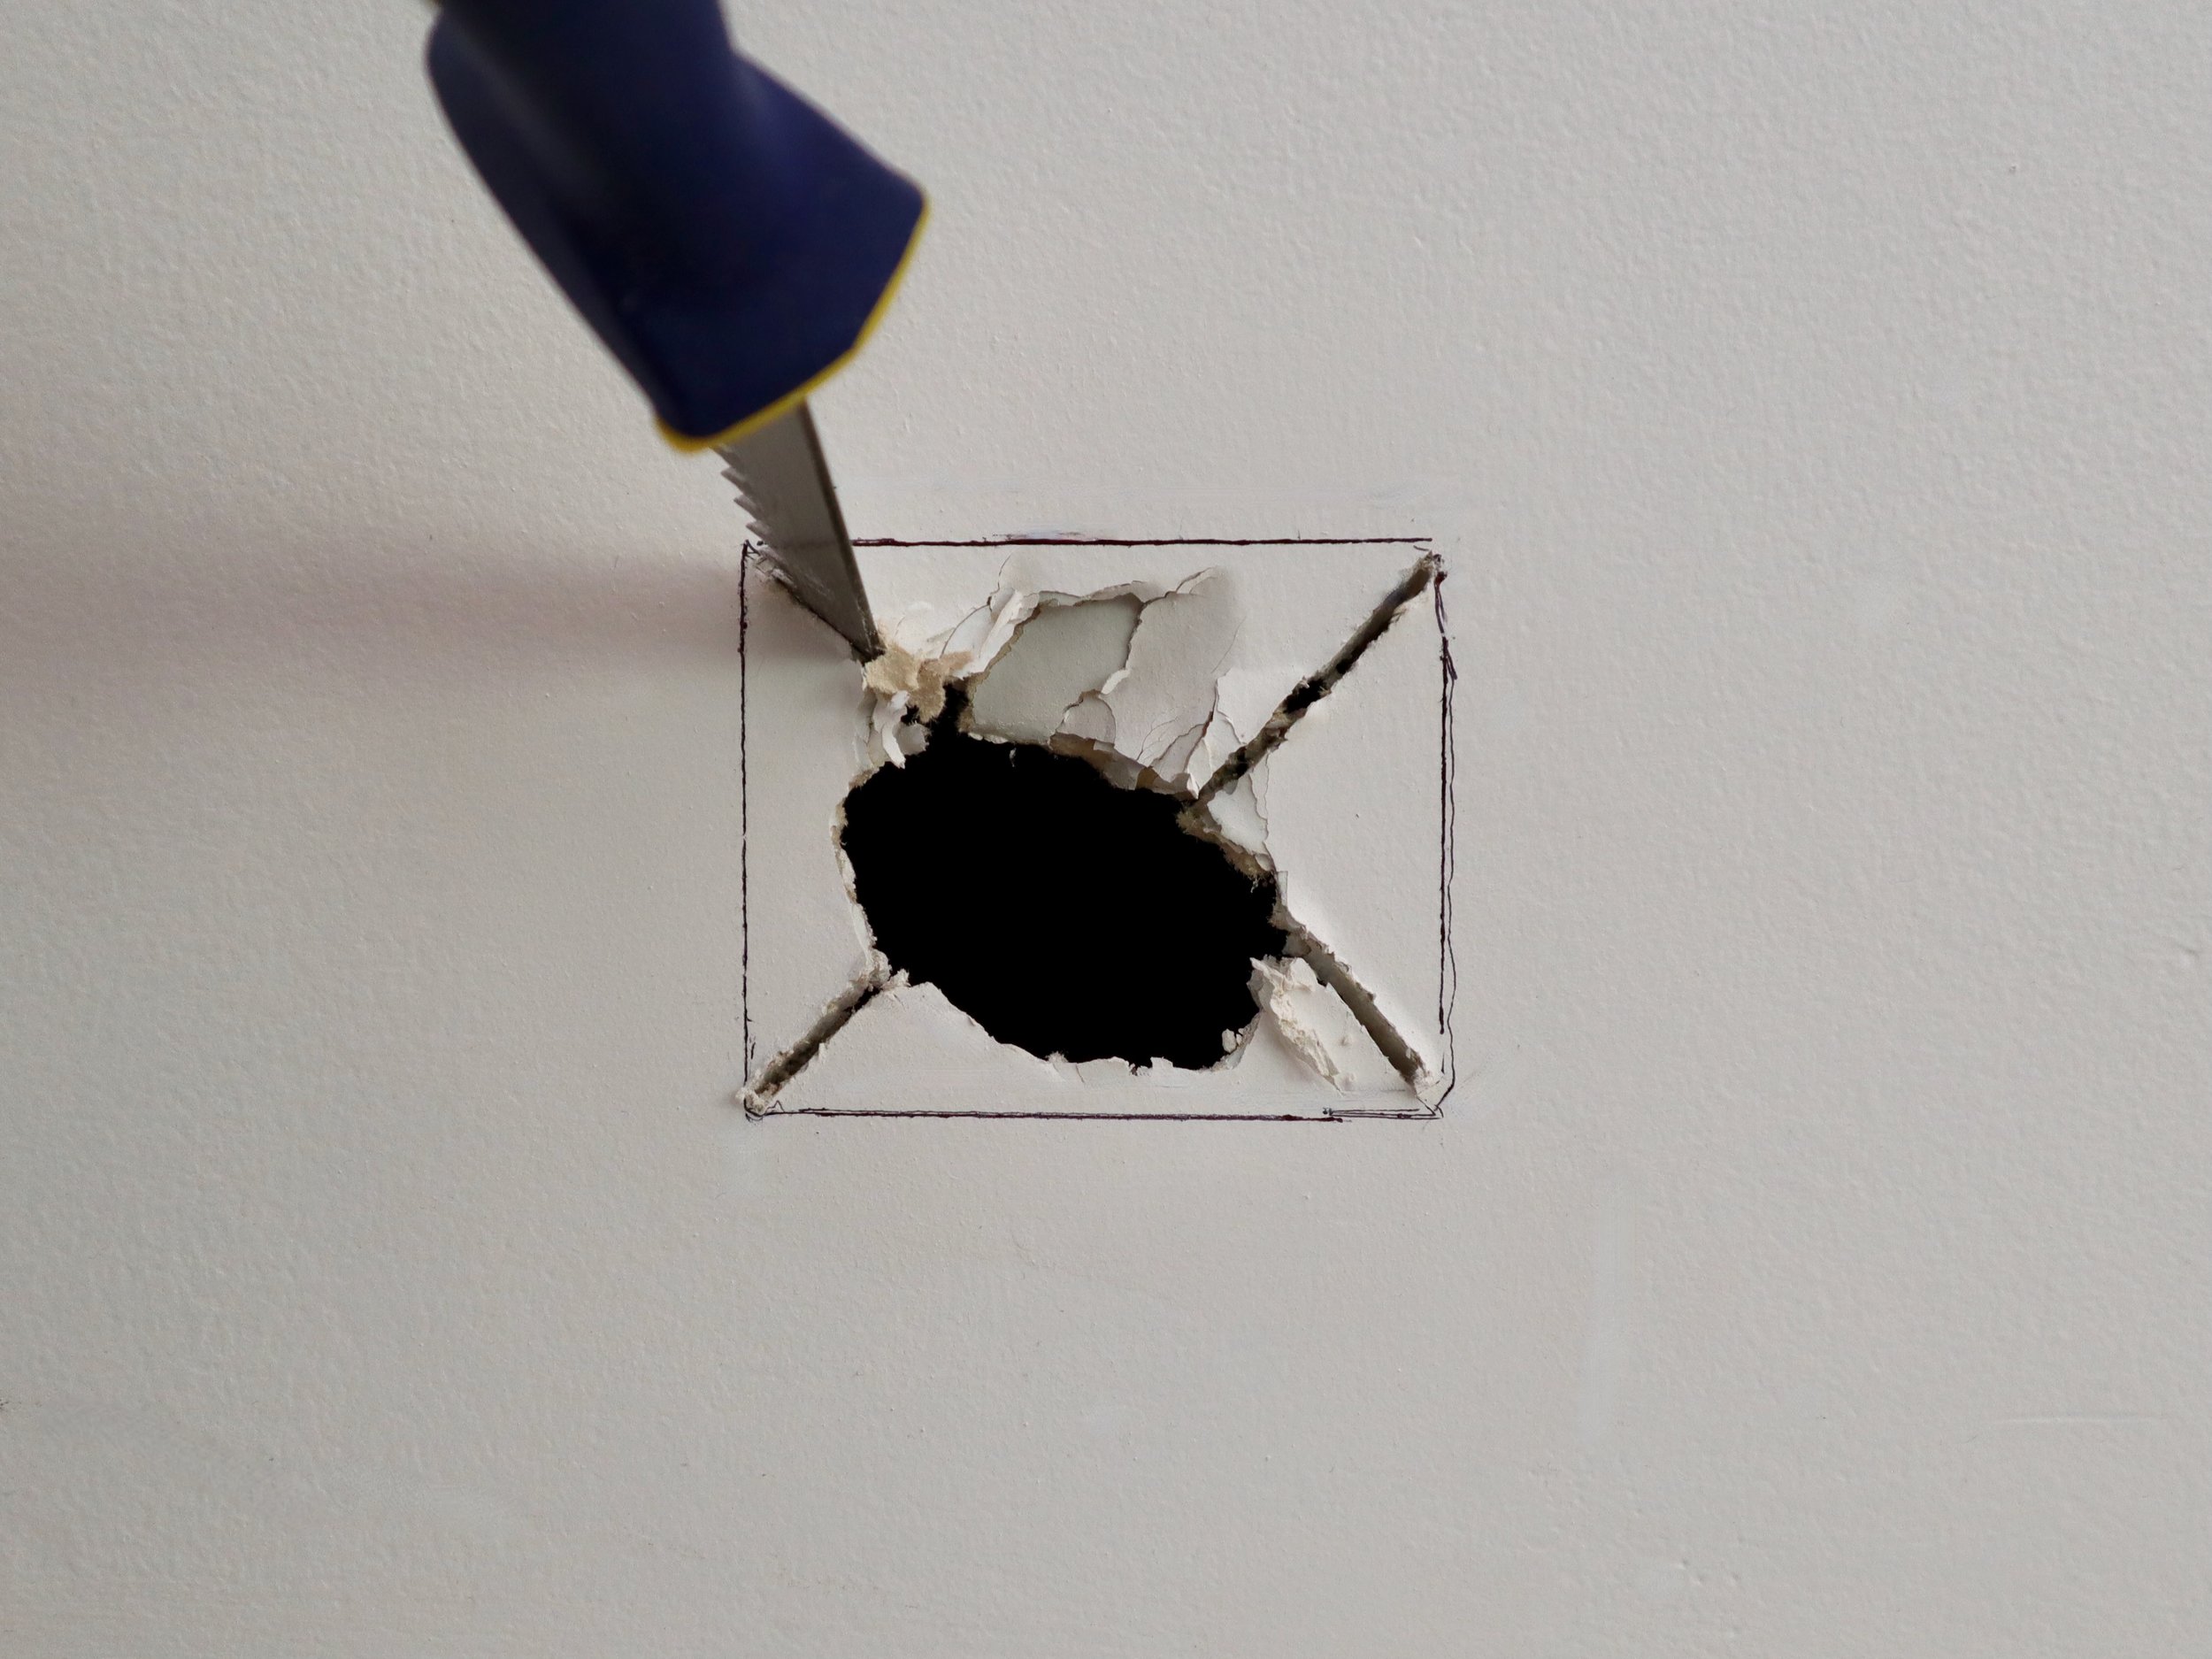
I had an electrician fix off the room and locate the wiring so I could safely cut through the non load-bearing wall. I cut the inside wall and studs first, then the exterior wall. I had some help installing the frame then assemble with the glass louvres and added trim.
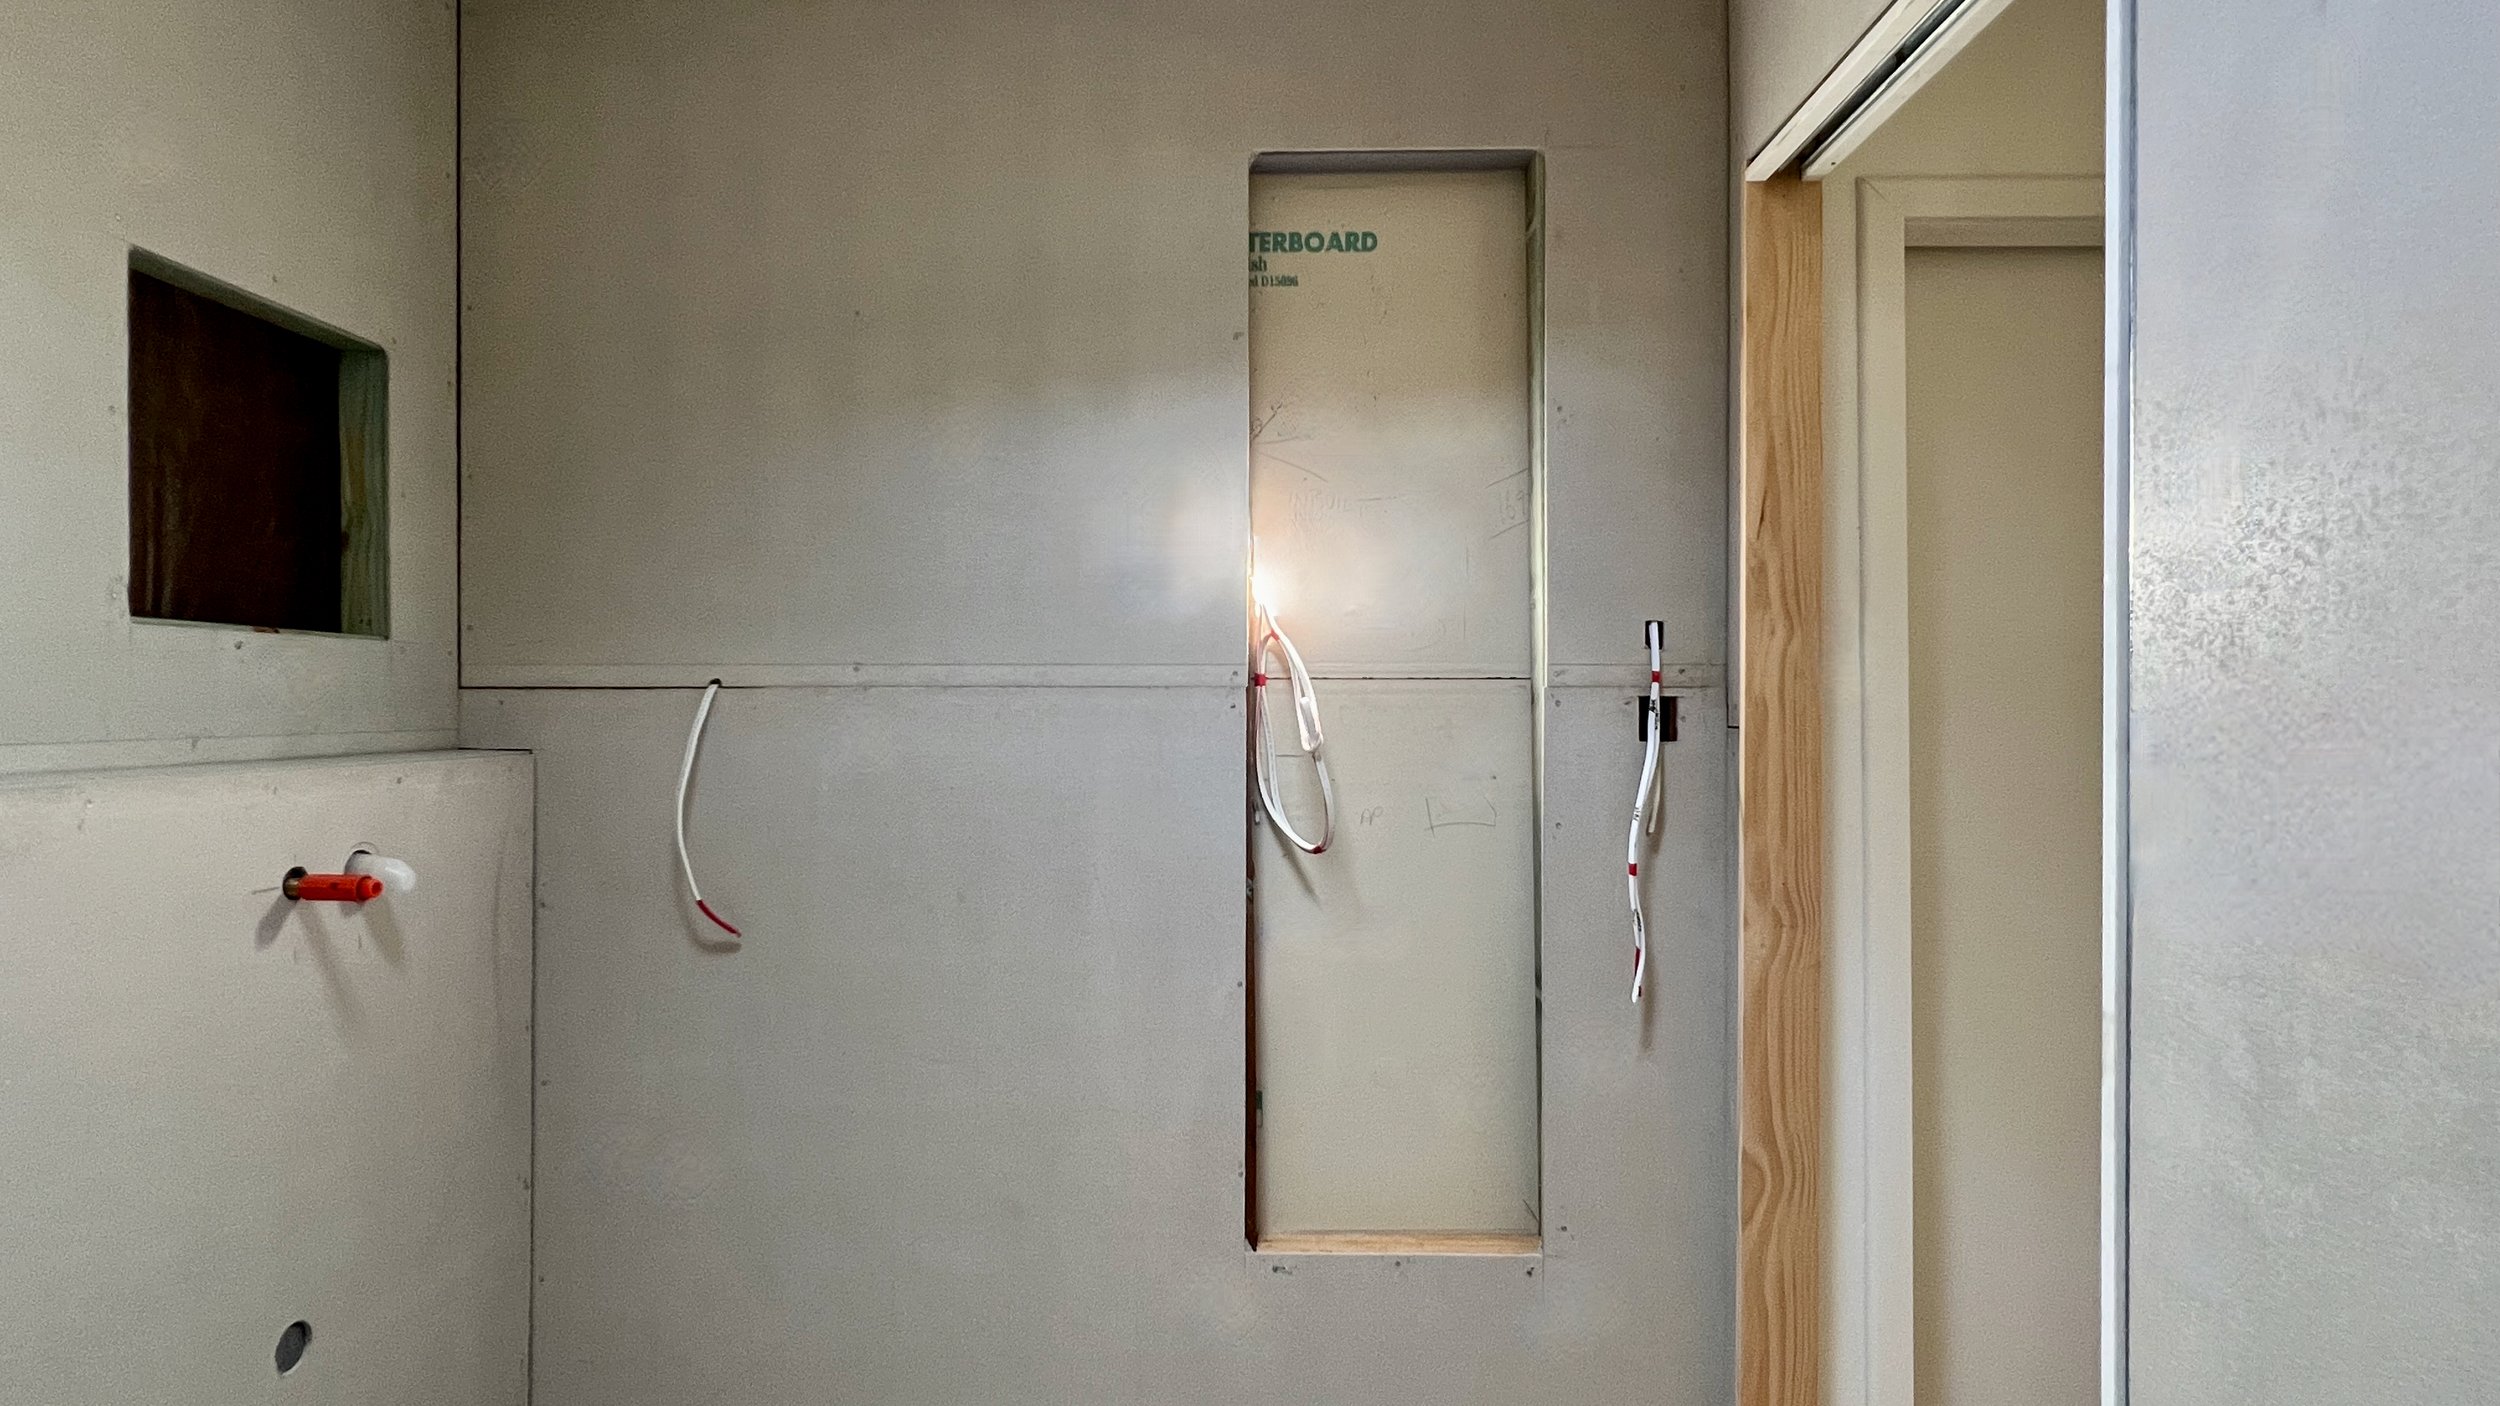
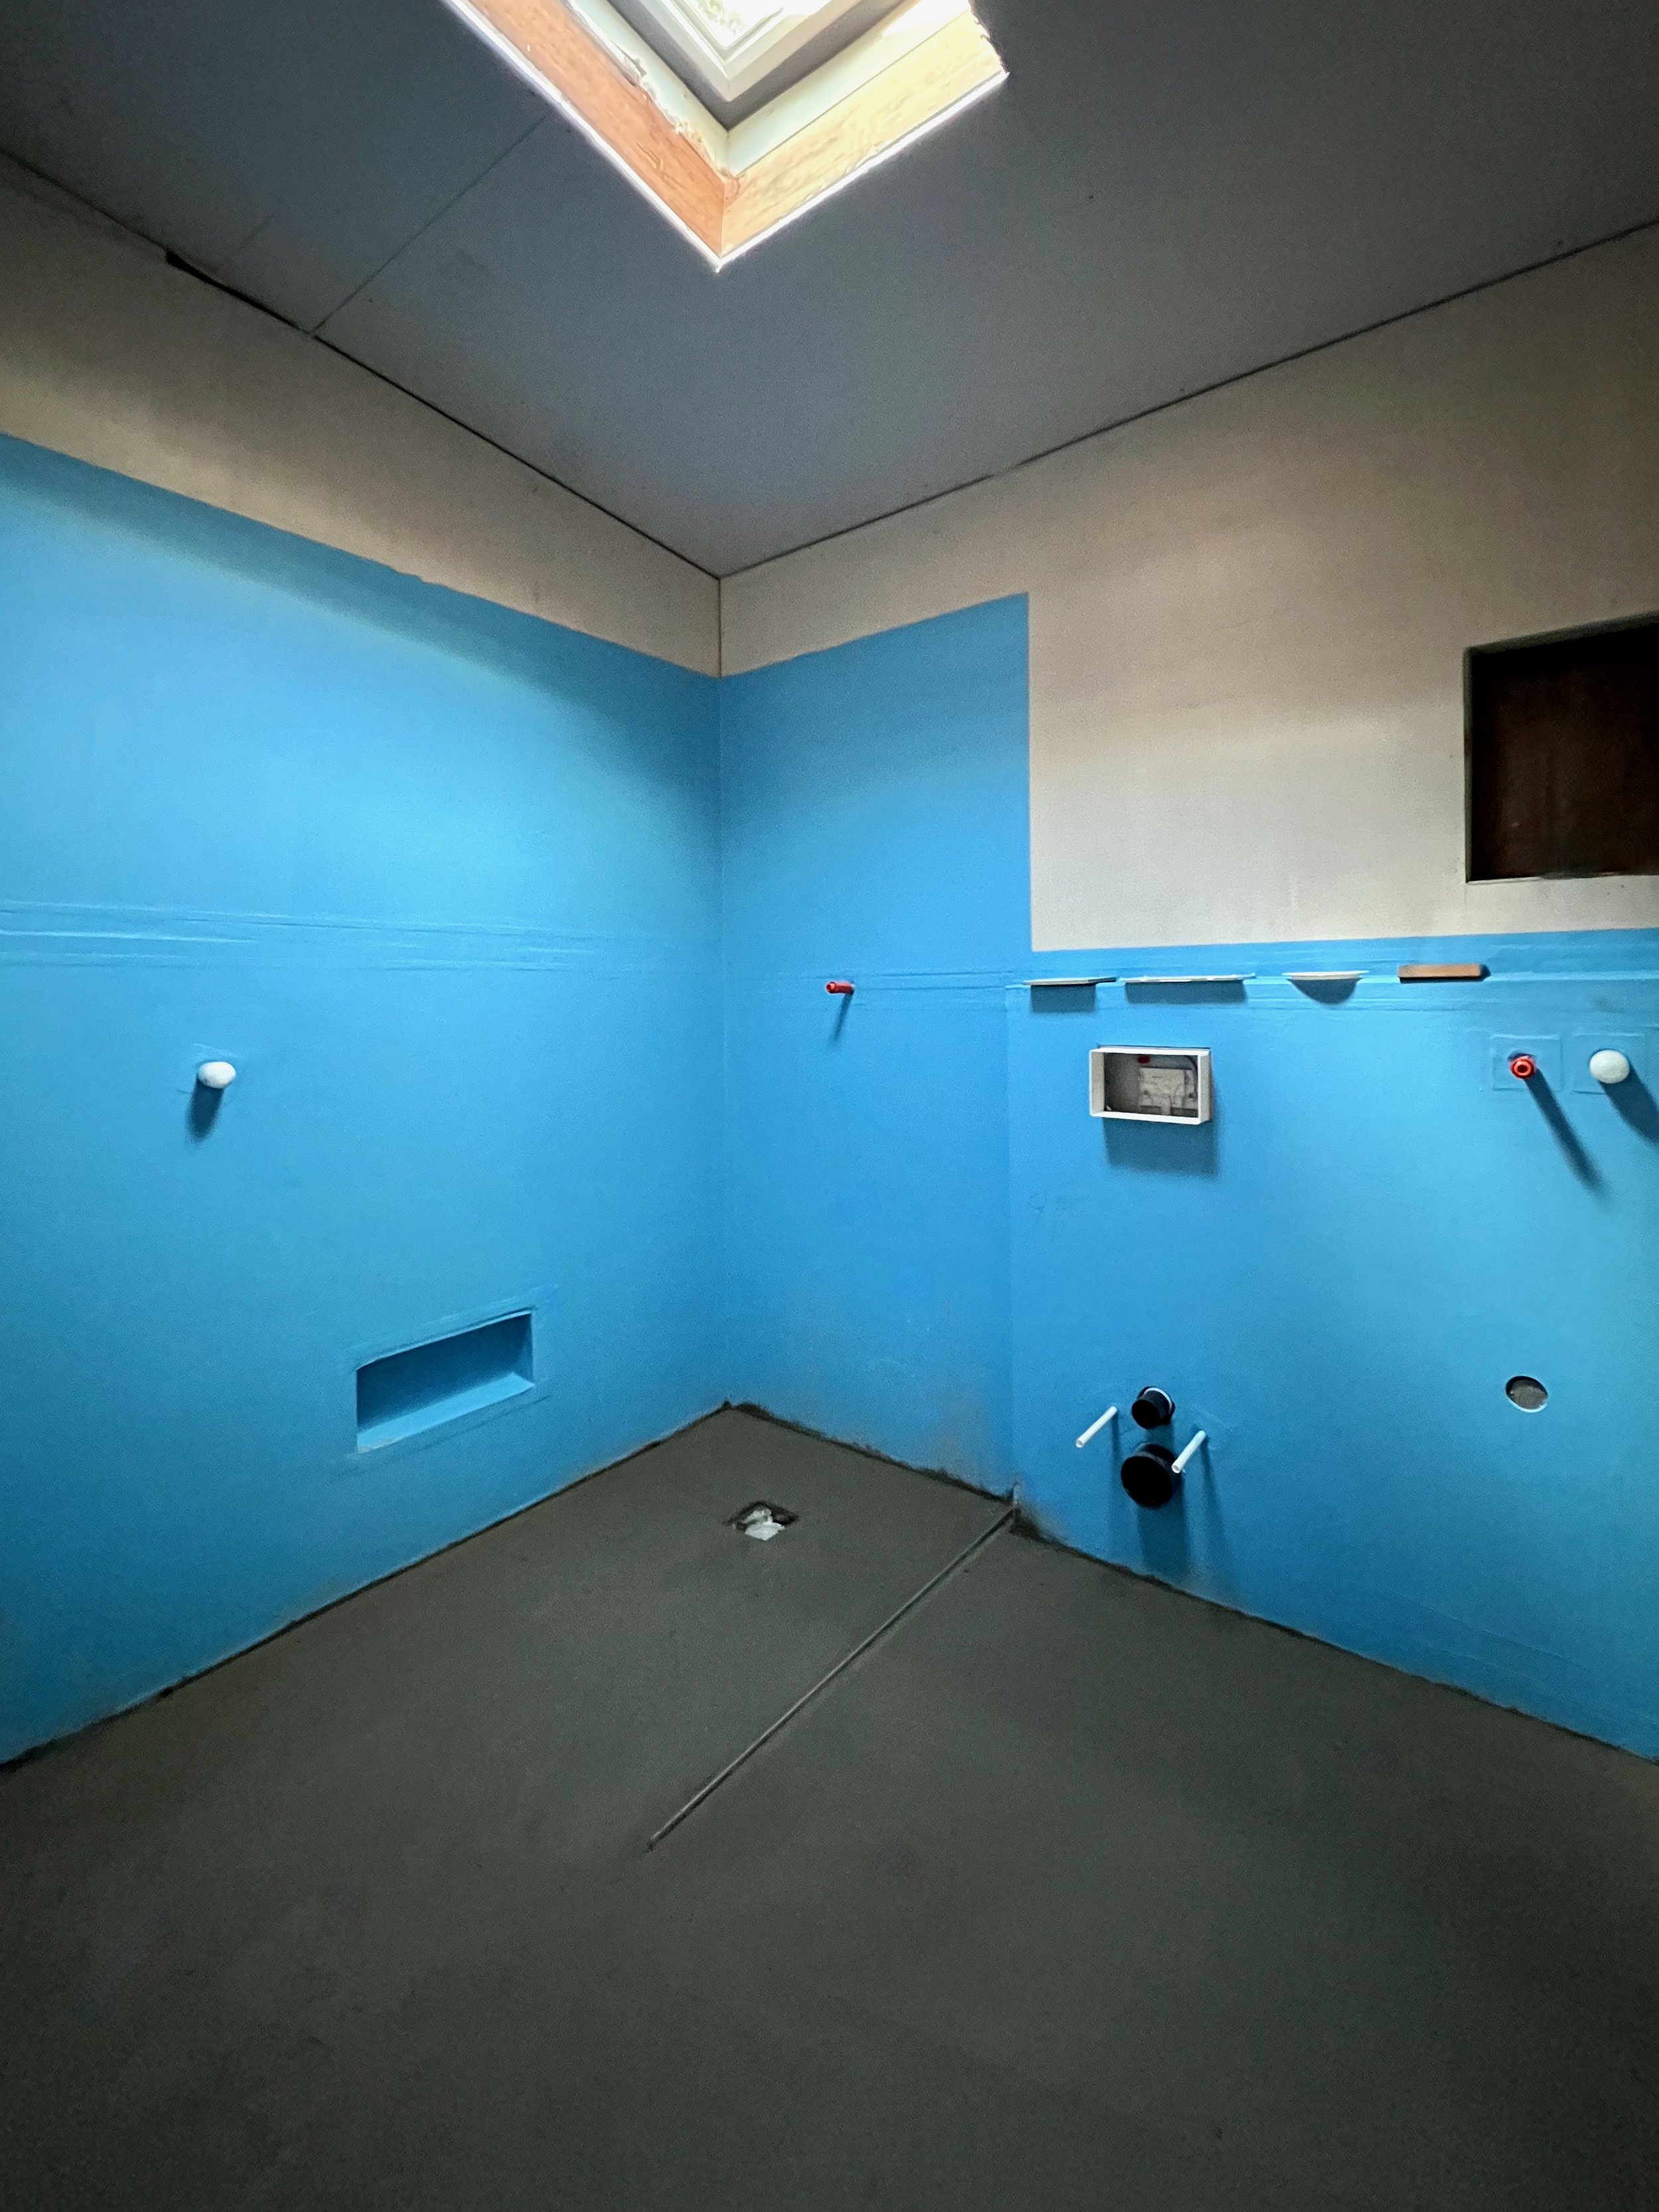
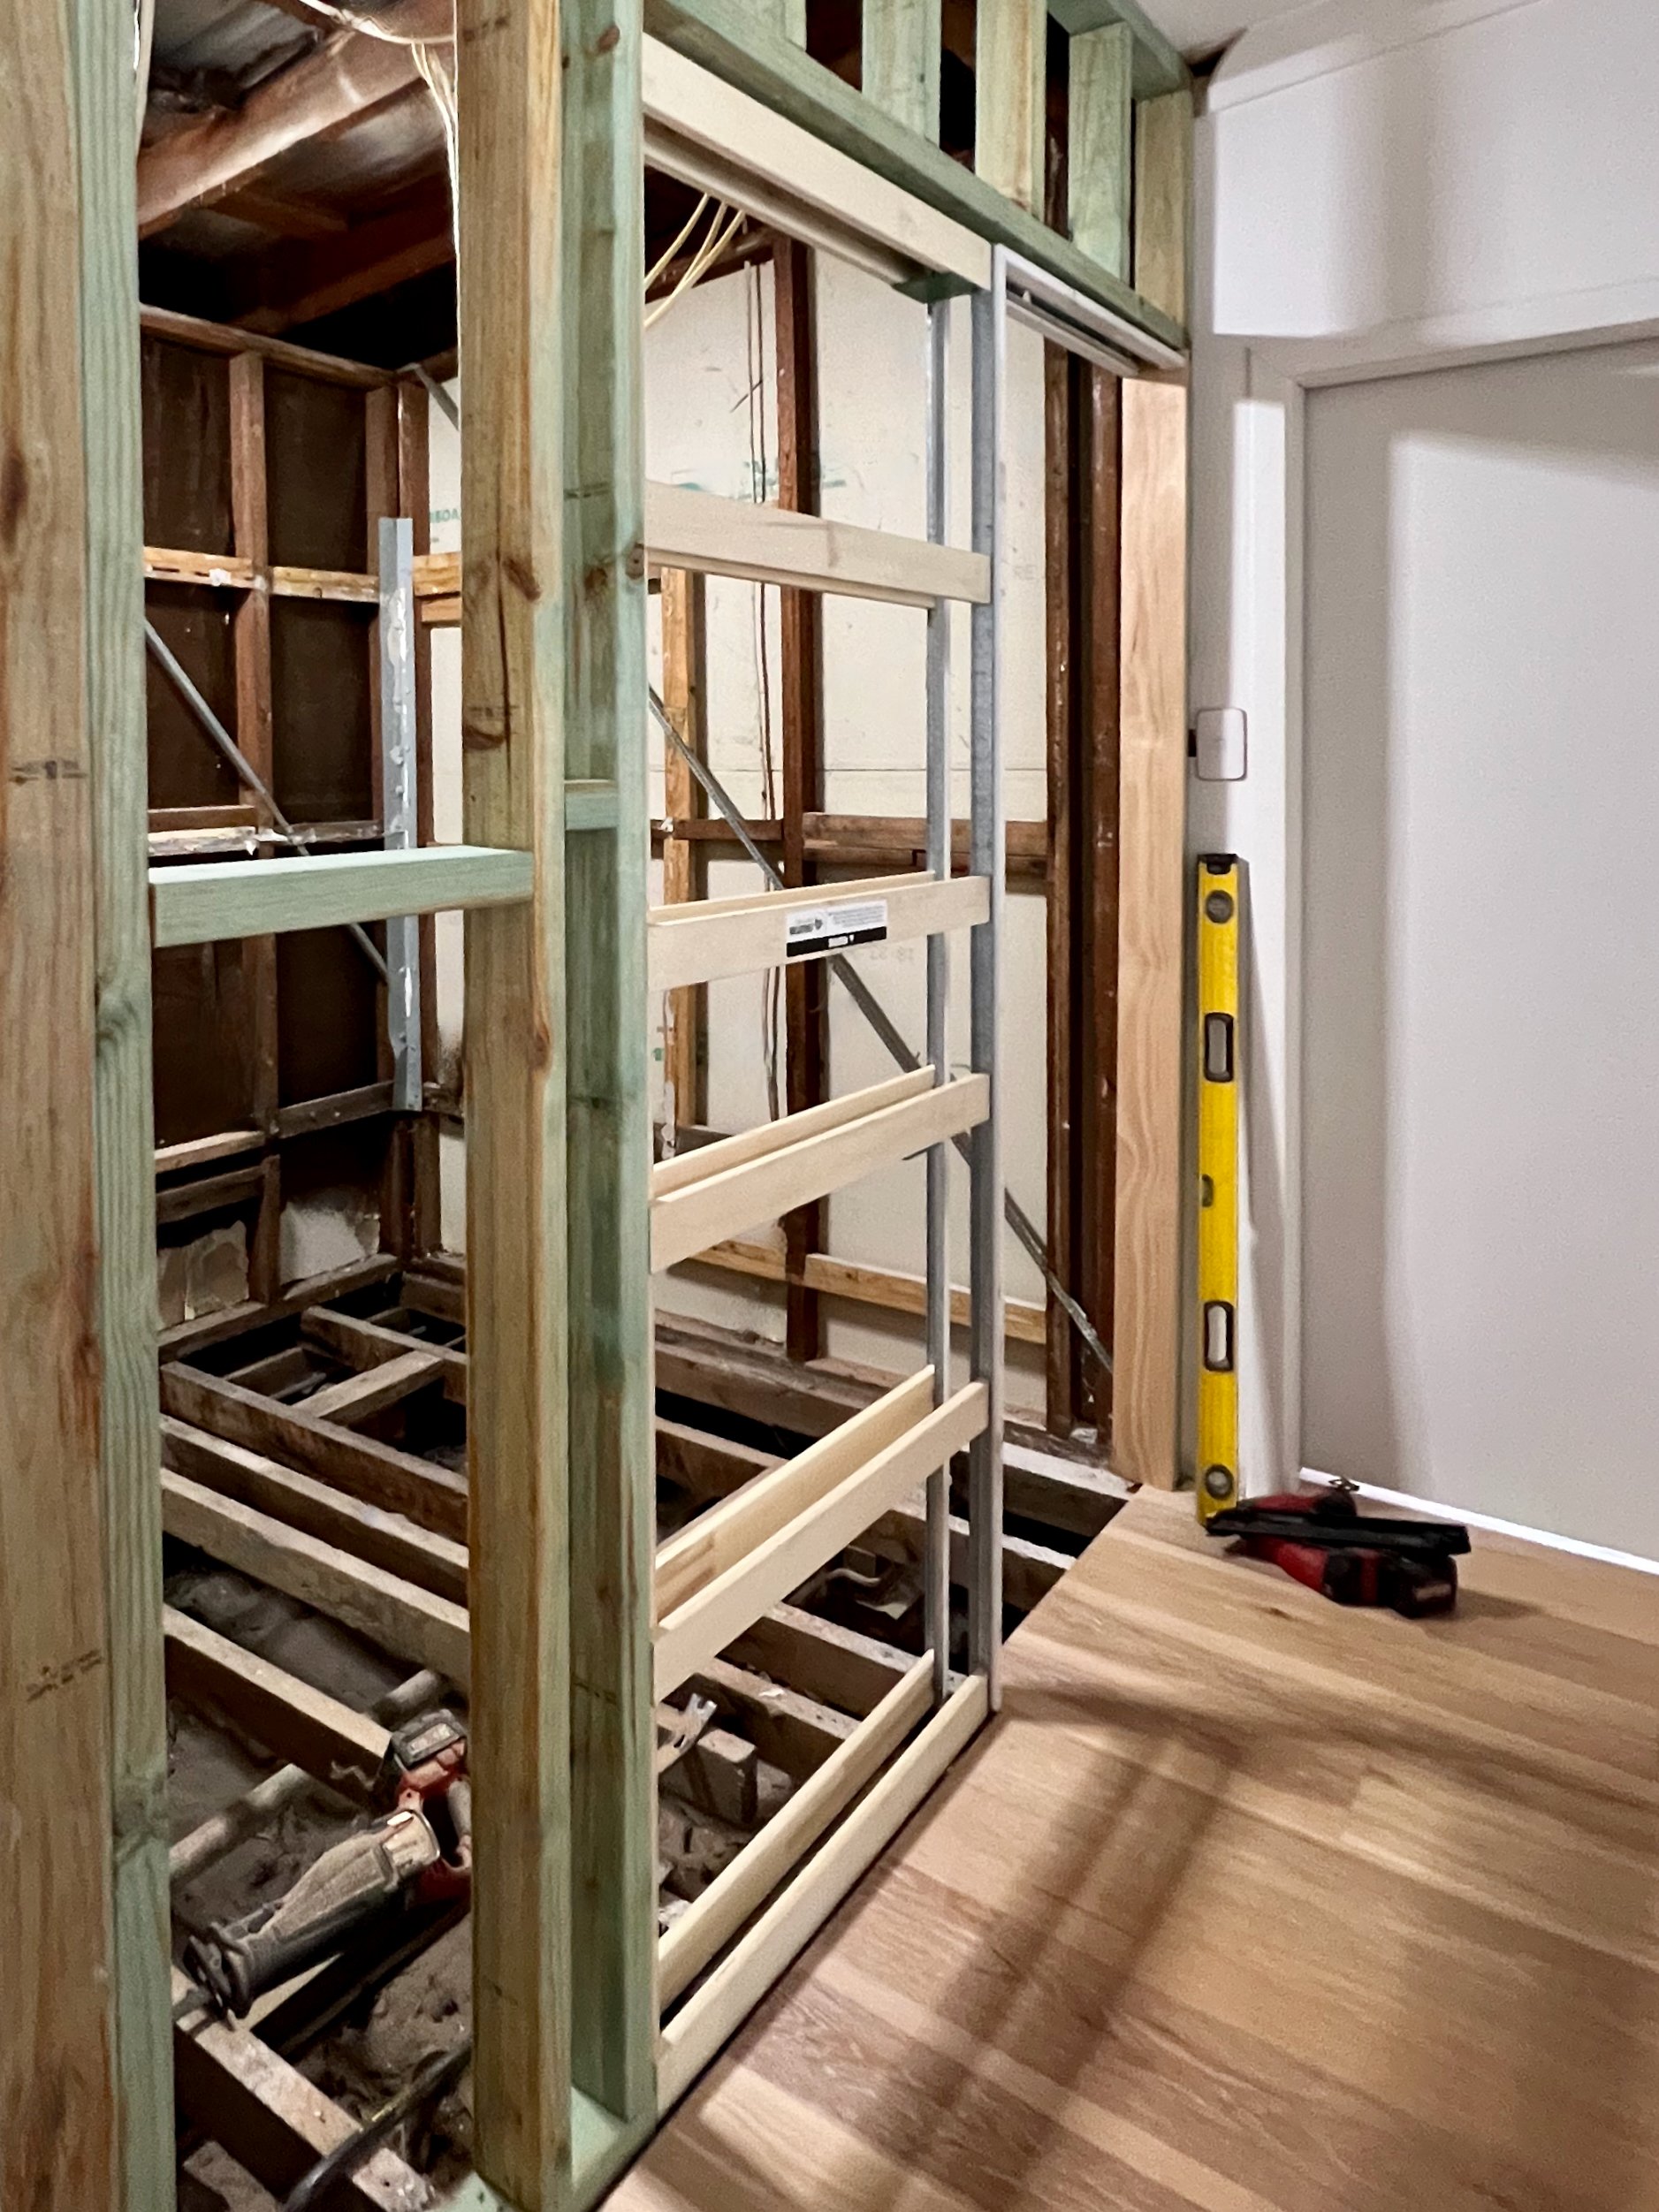
 

BUILDING A NEW WALL

After pulling down the old screening, I built a new wall that integrated the door jamb.

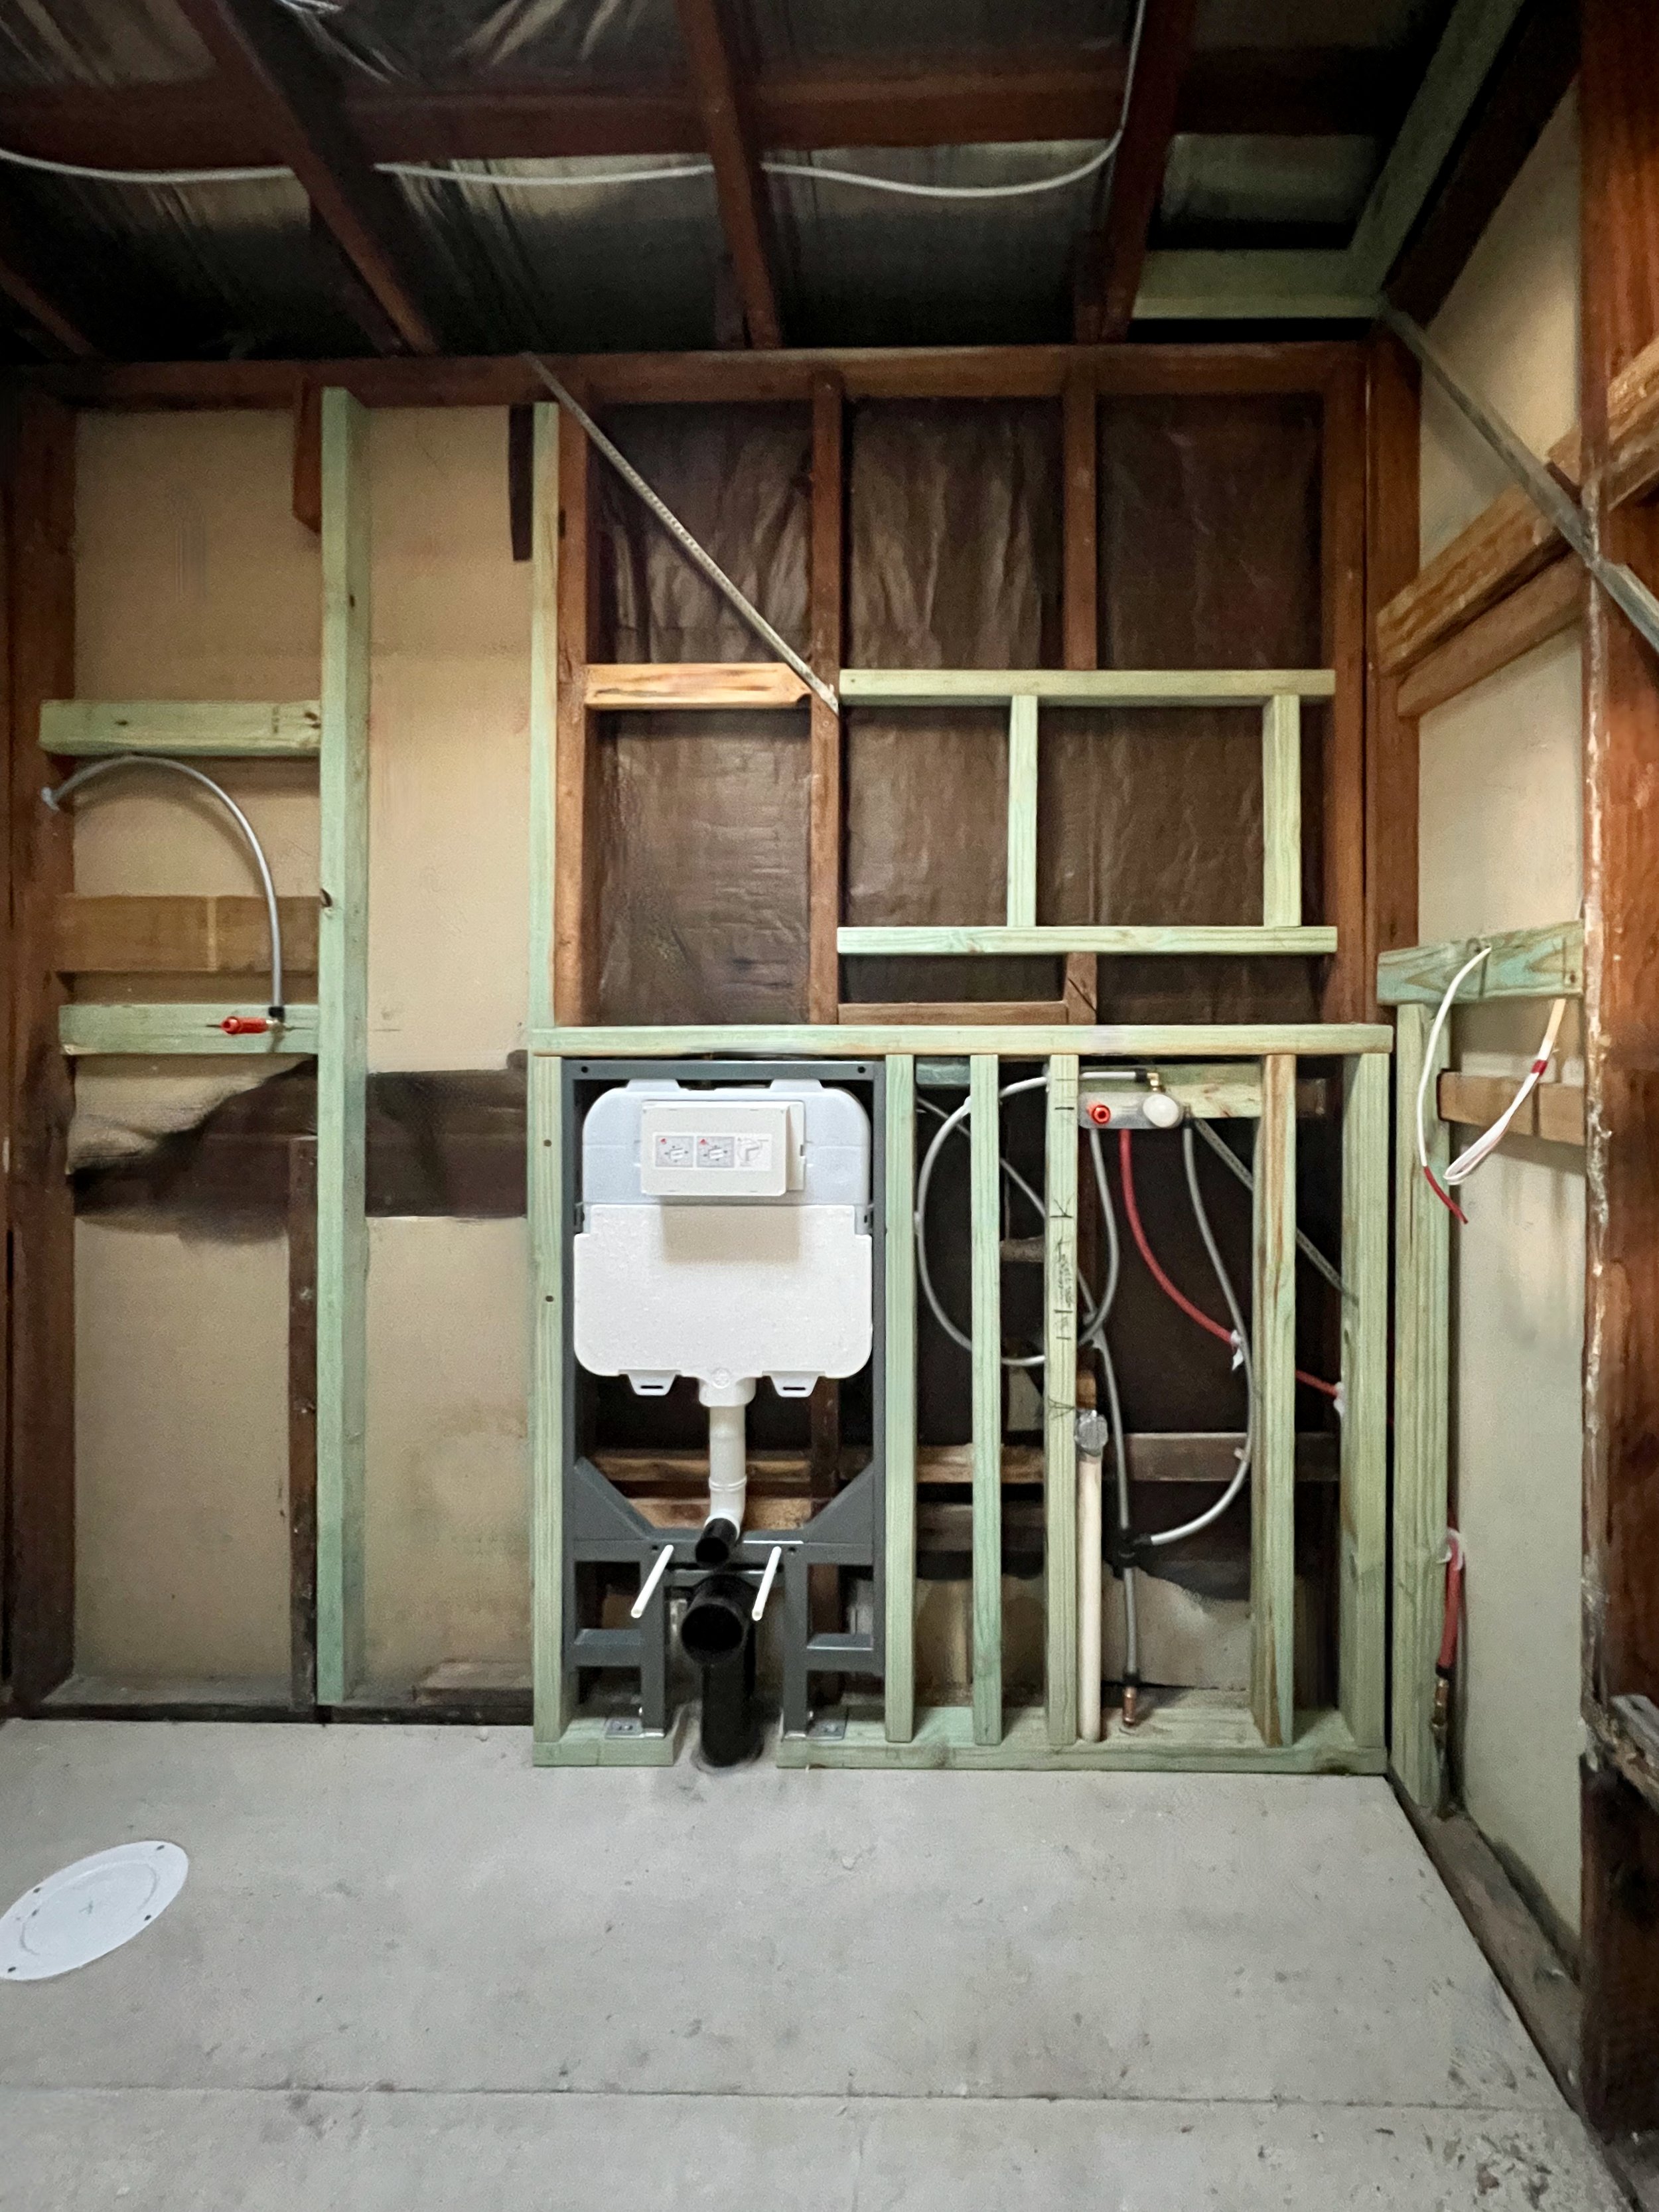
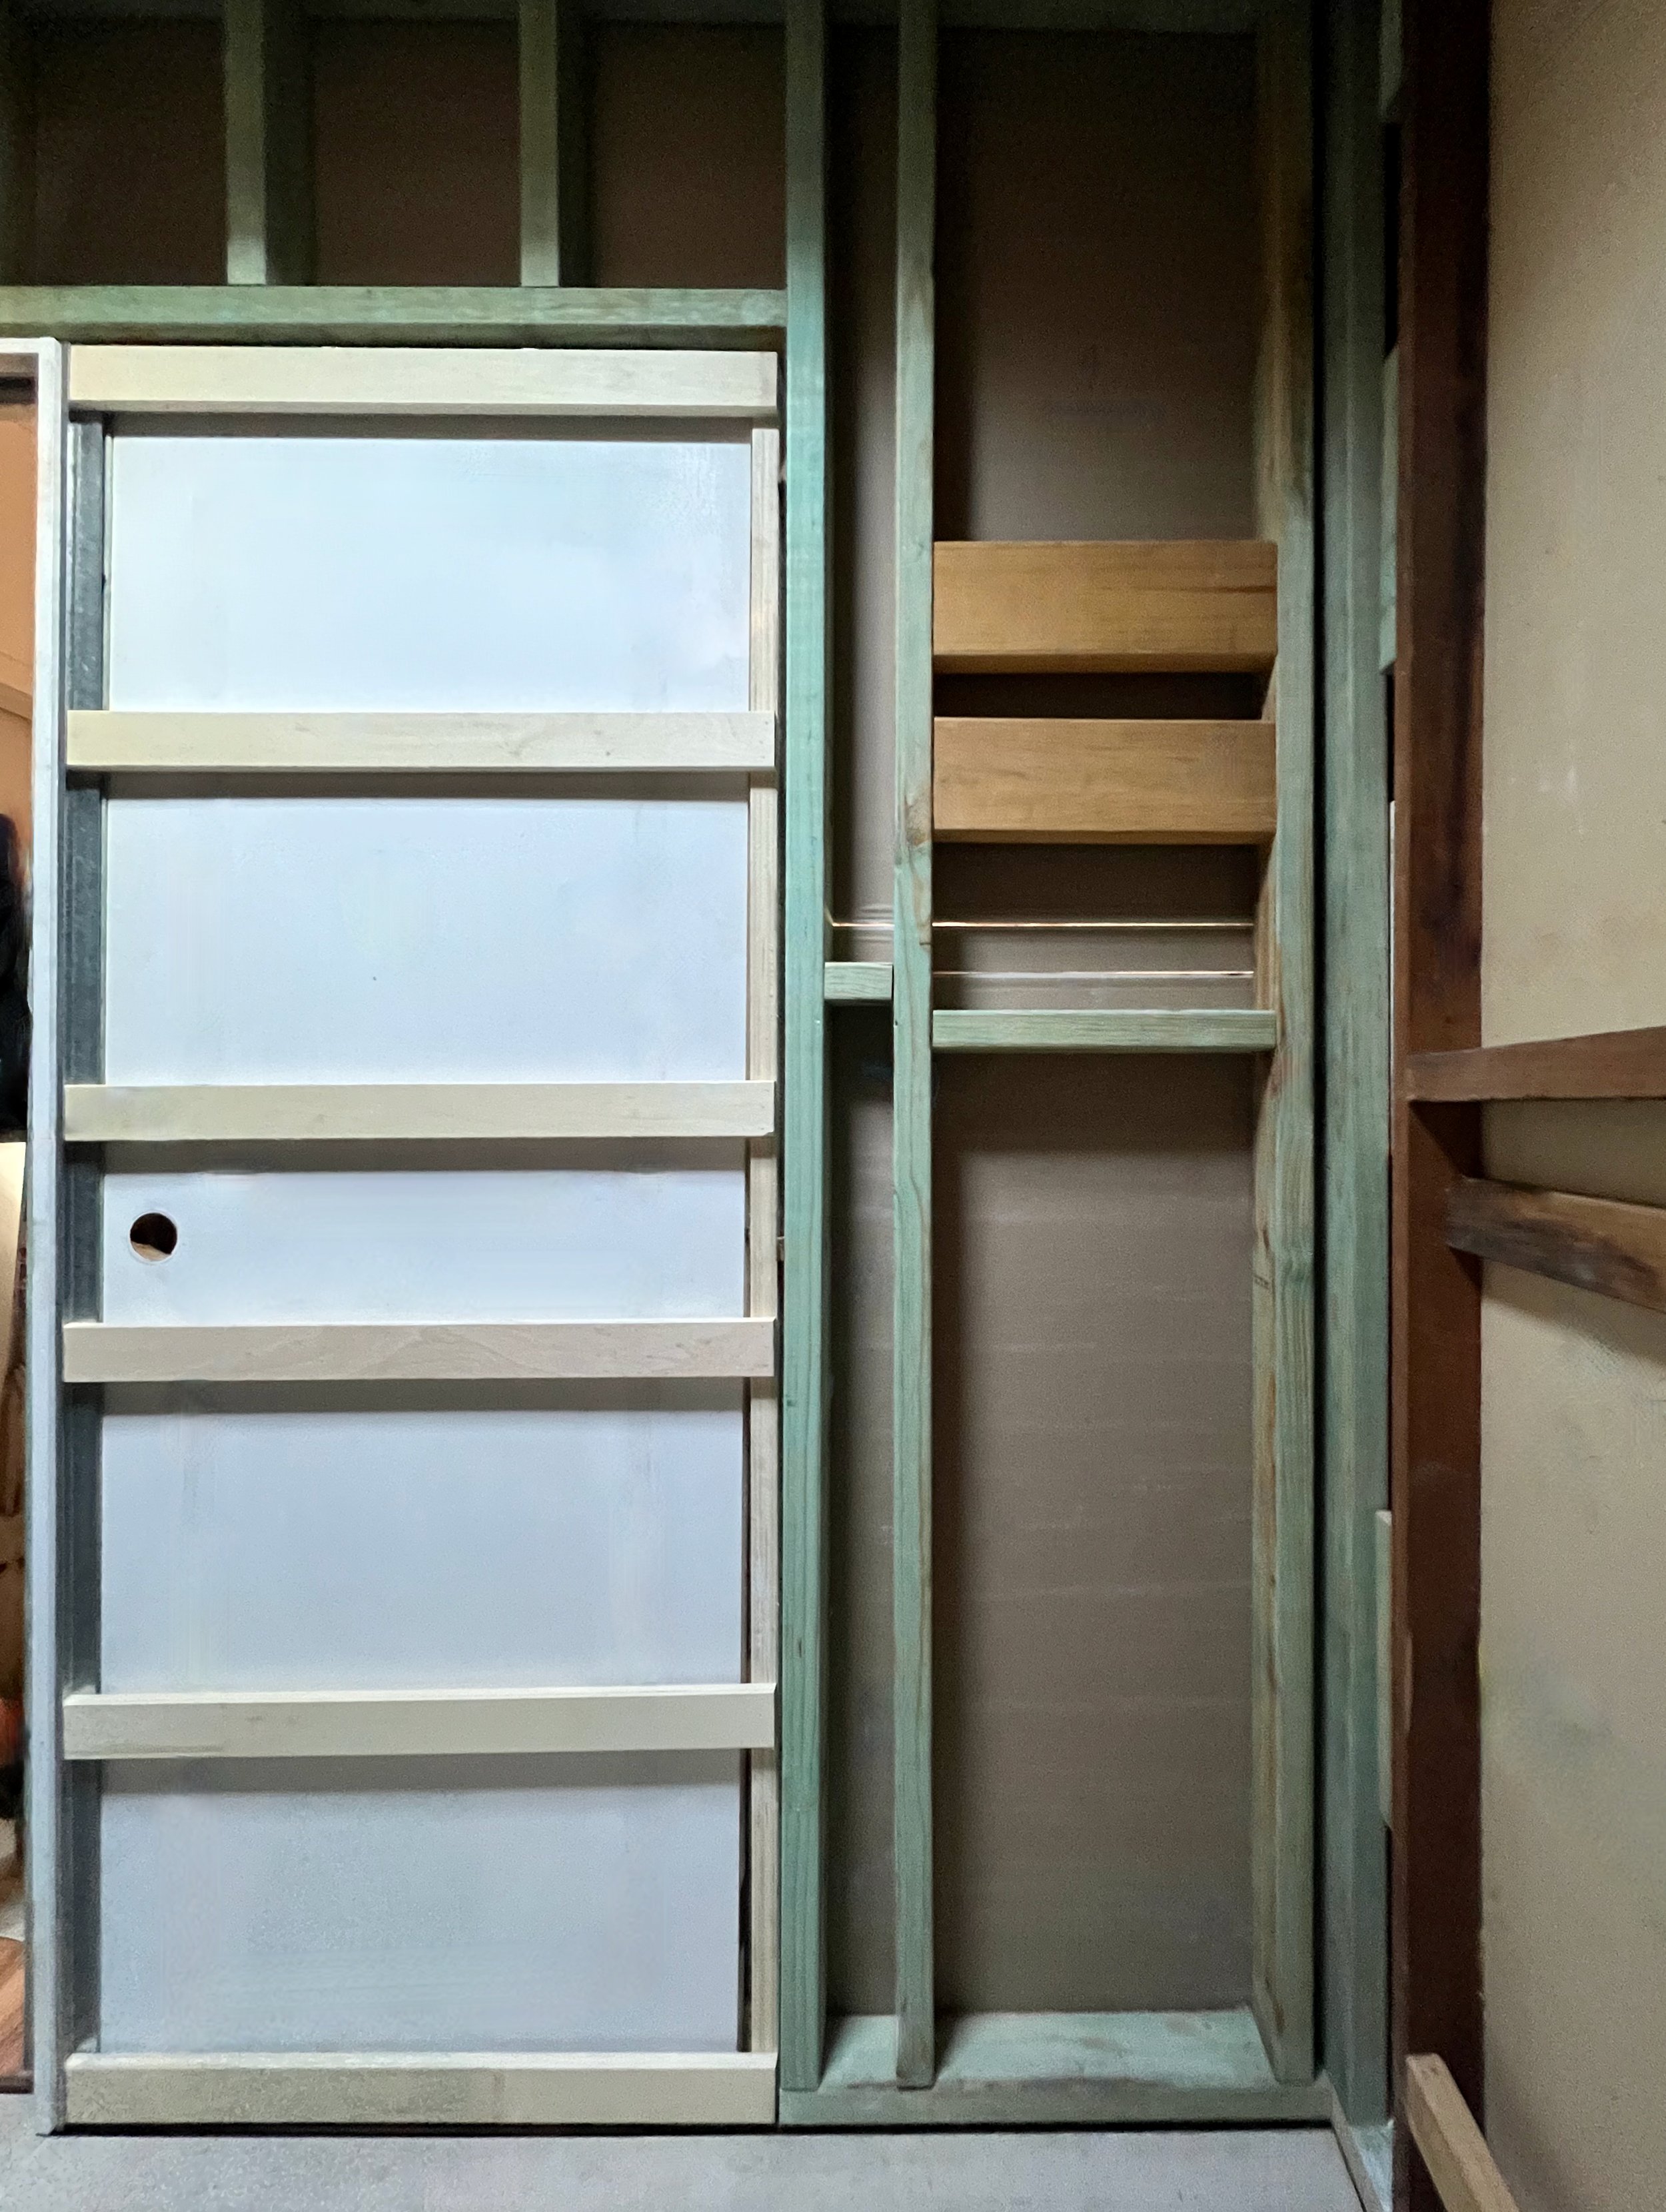
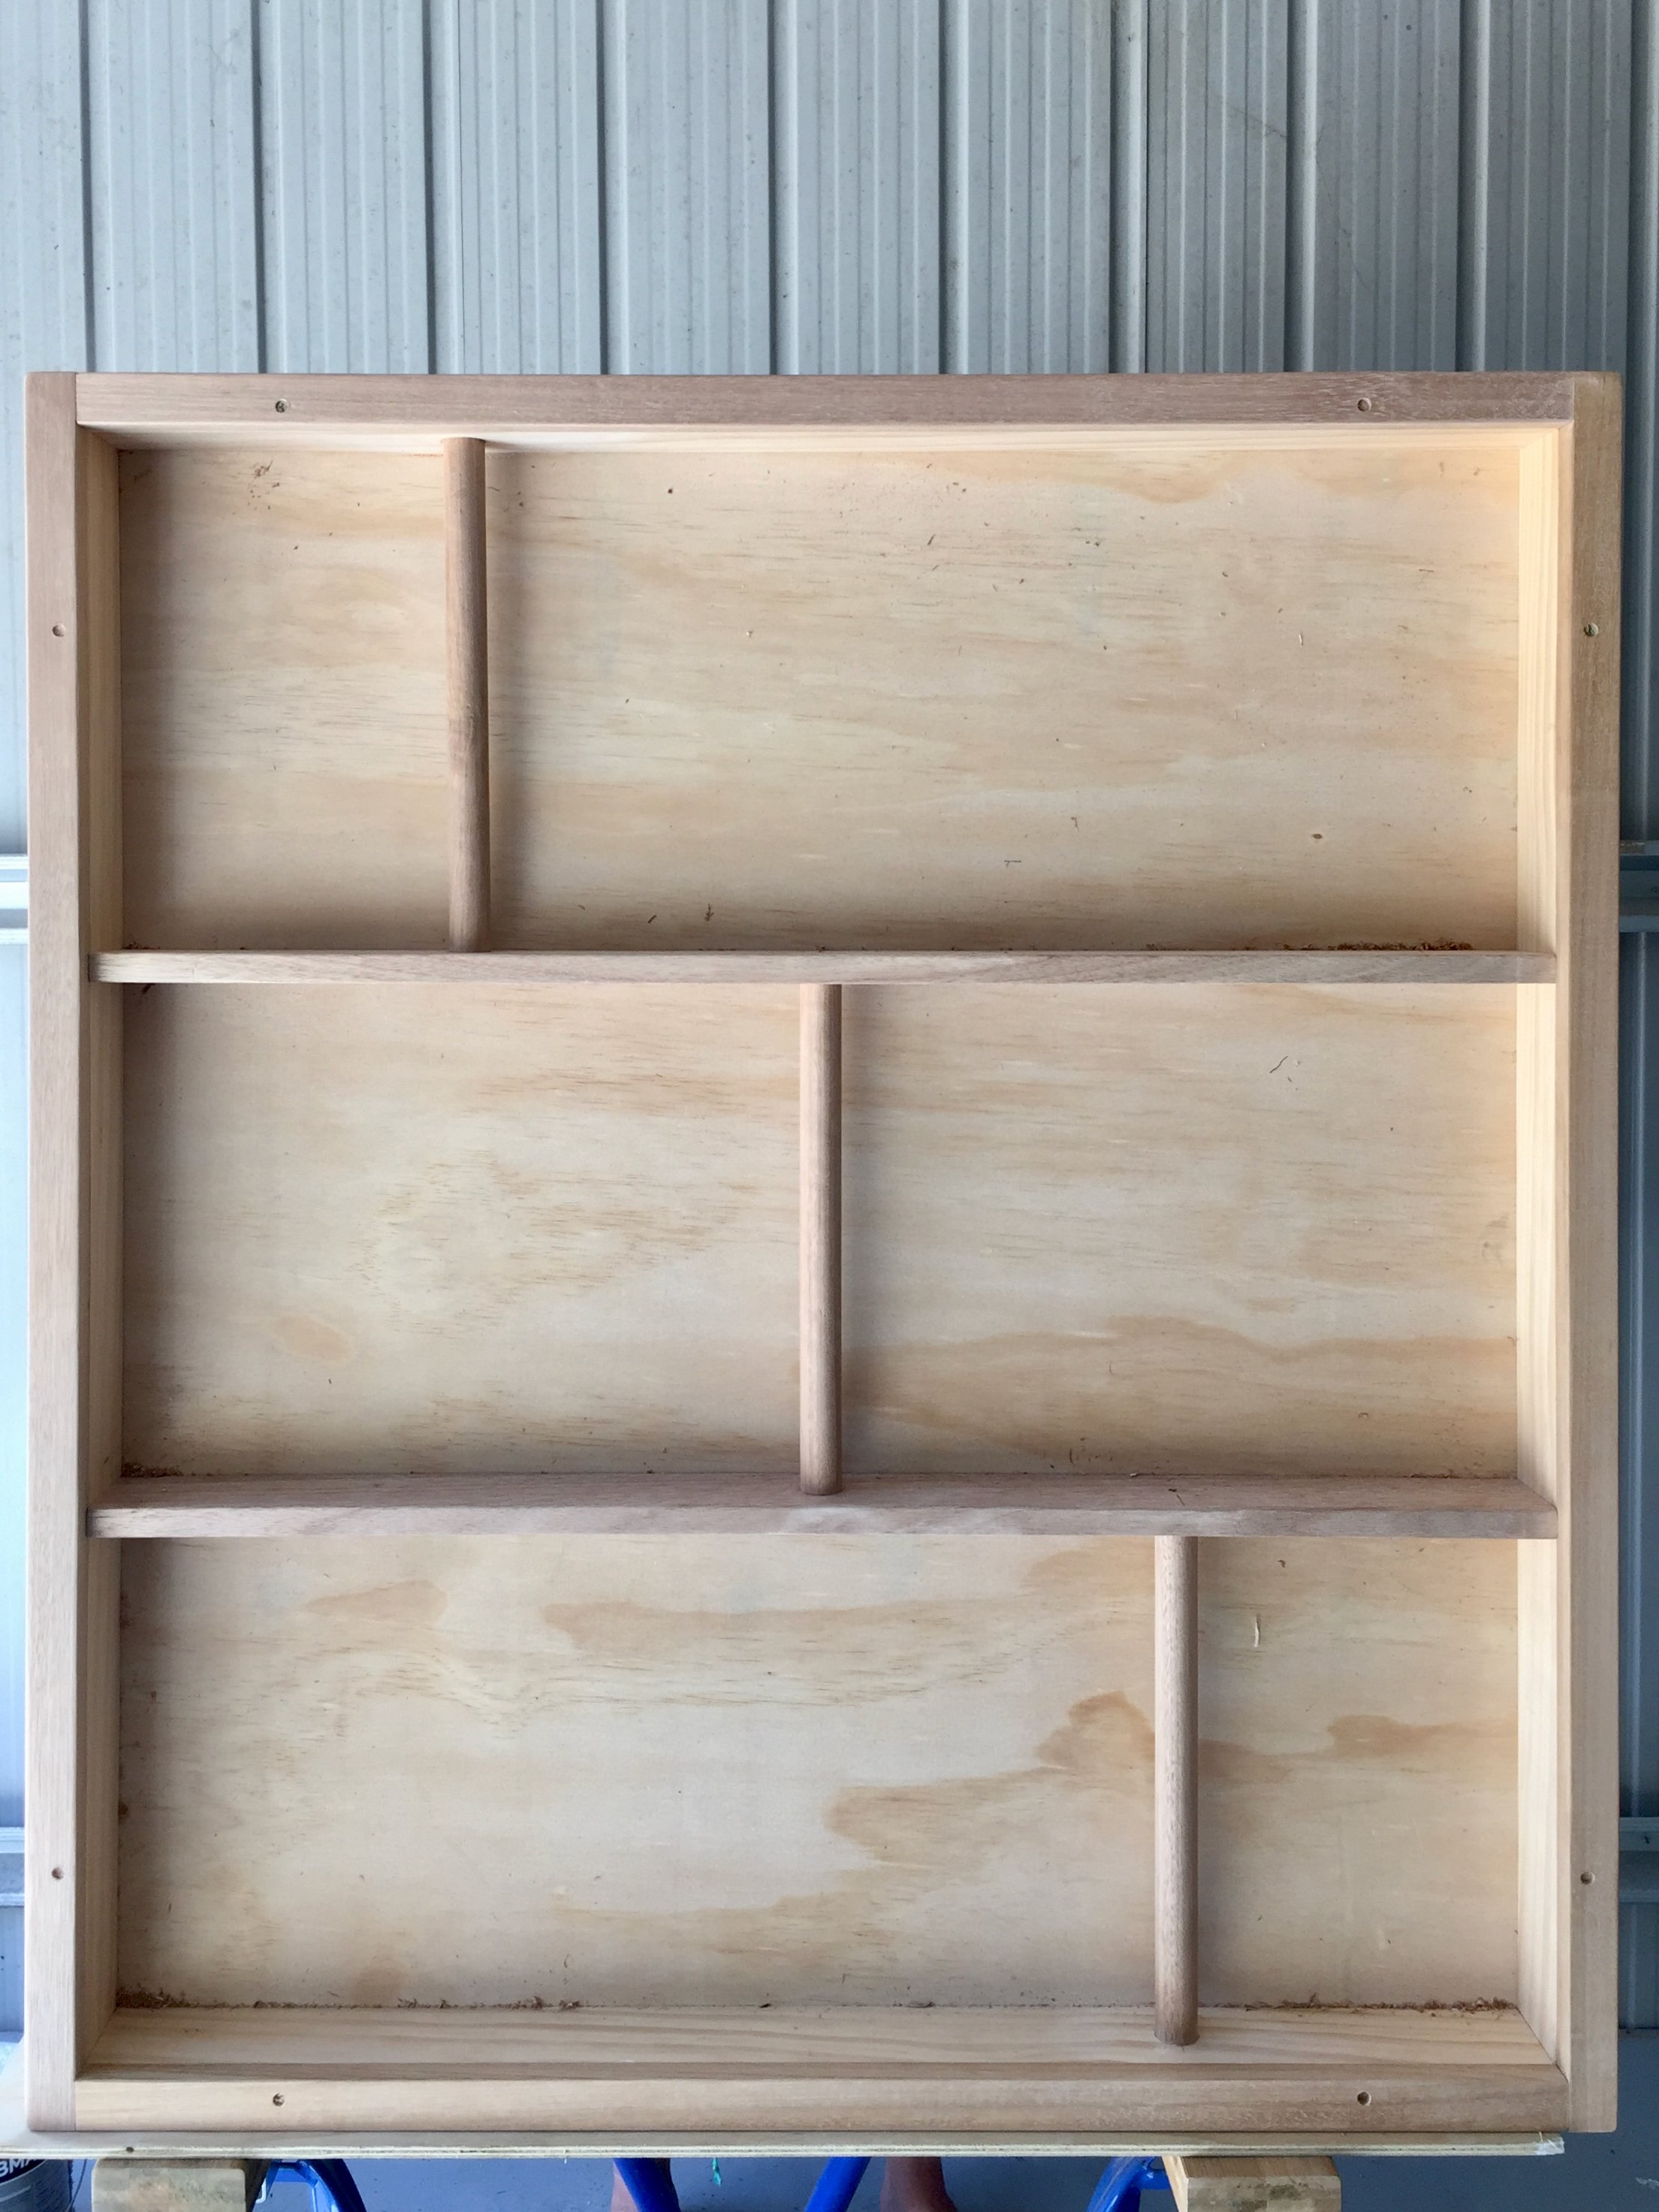
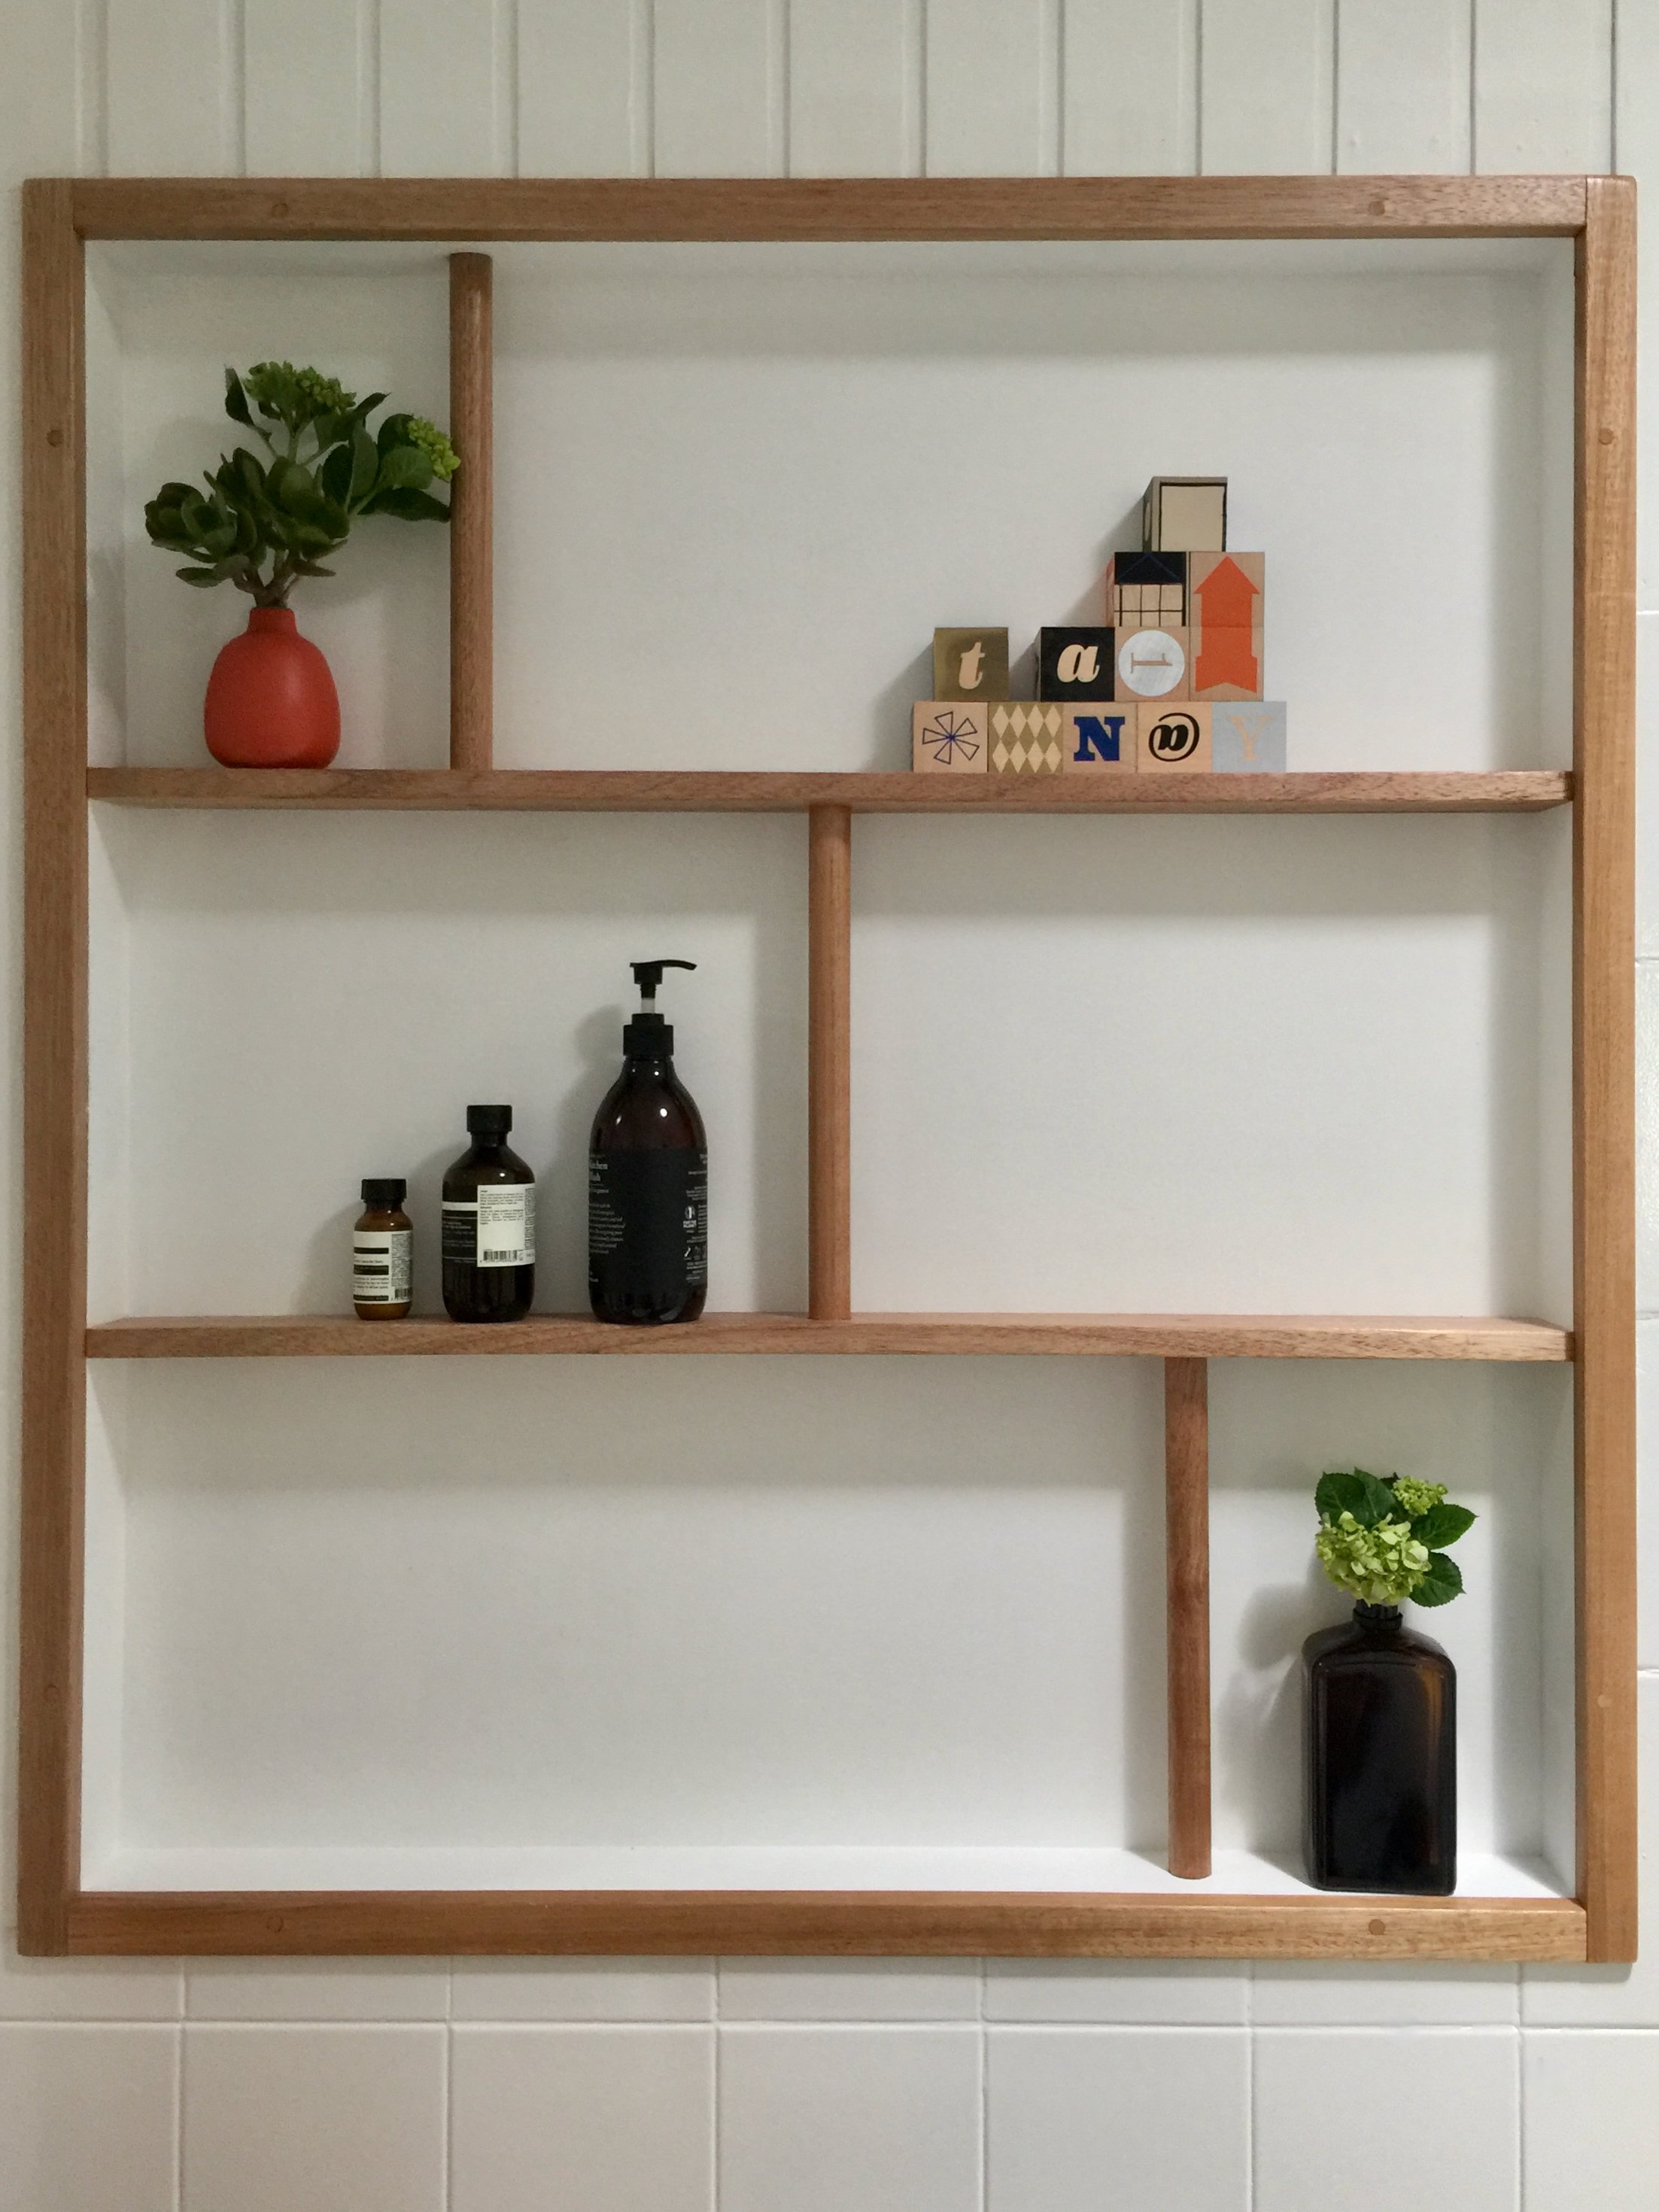
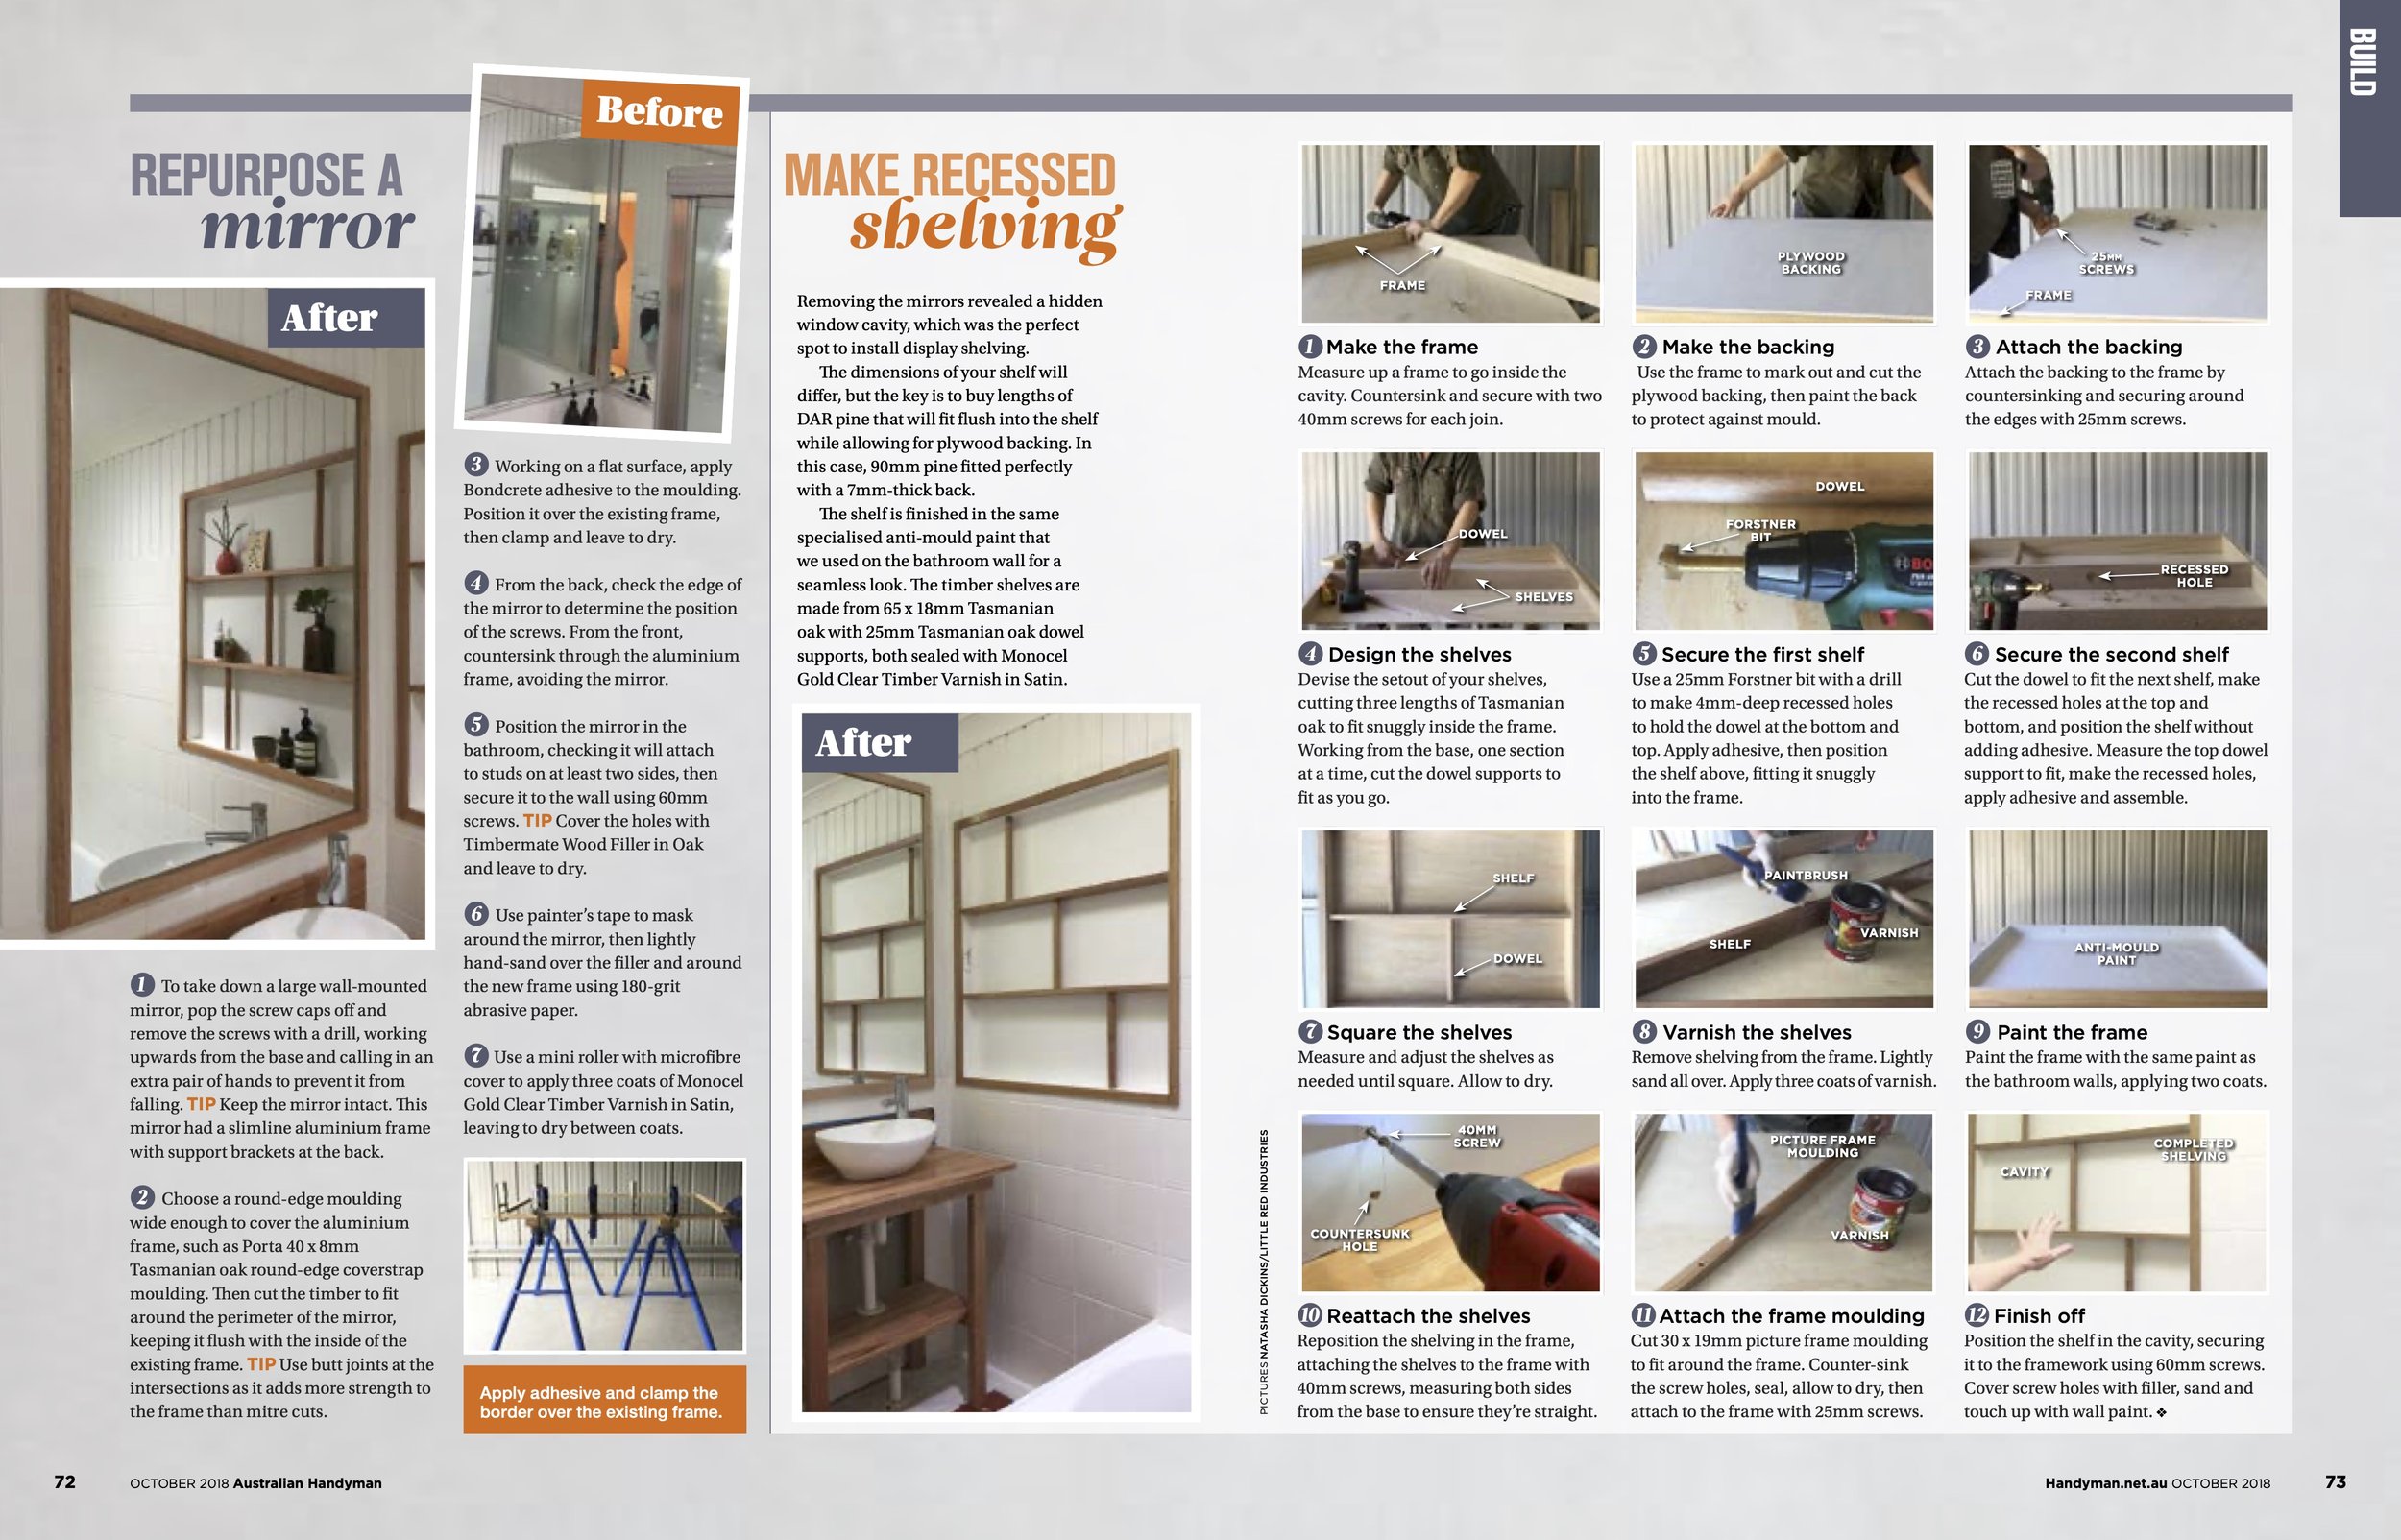
I framed up a nib wall behind the toilet to hide wires and plumbing while creating a shelf to span the wall. I also filled in the old window cavity with framing.

DIY TIP It’s best practice to space stud centres 450mm horizontally, and 600mm vertically between noggins.


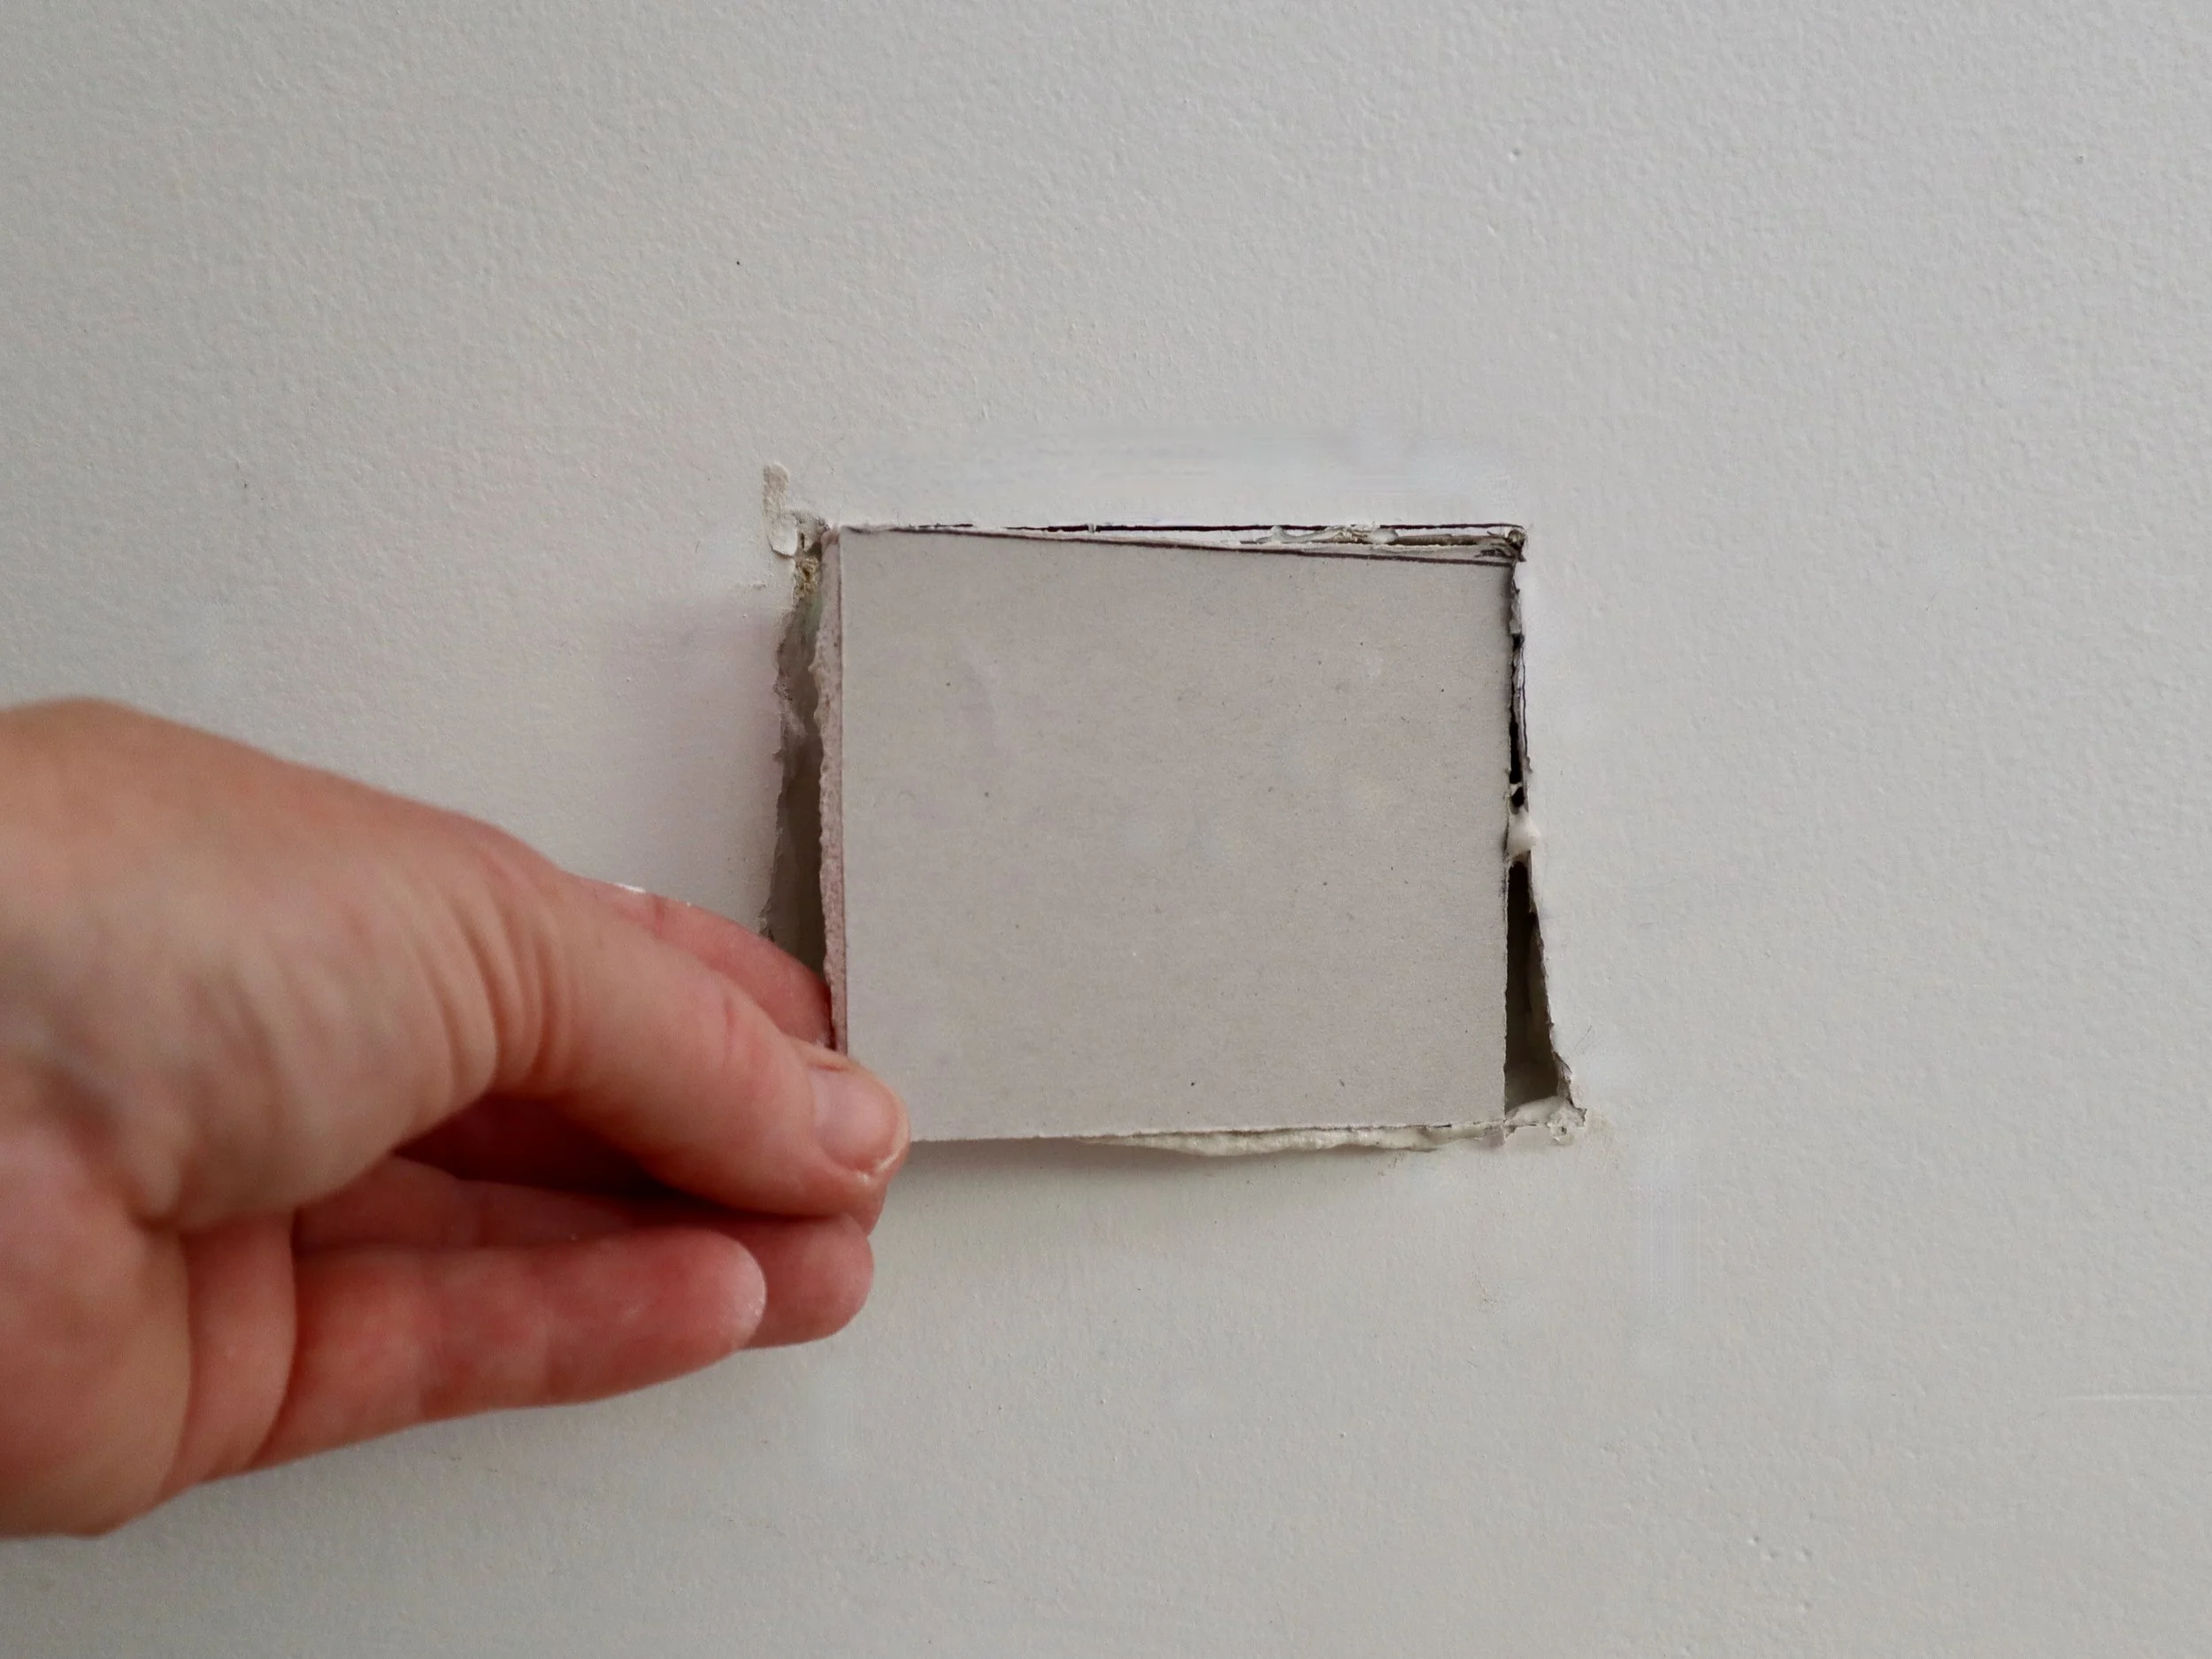
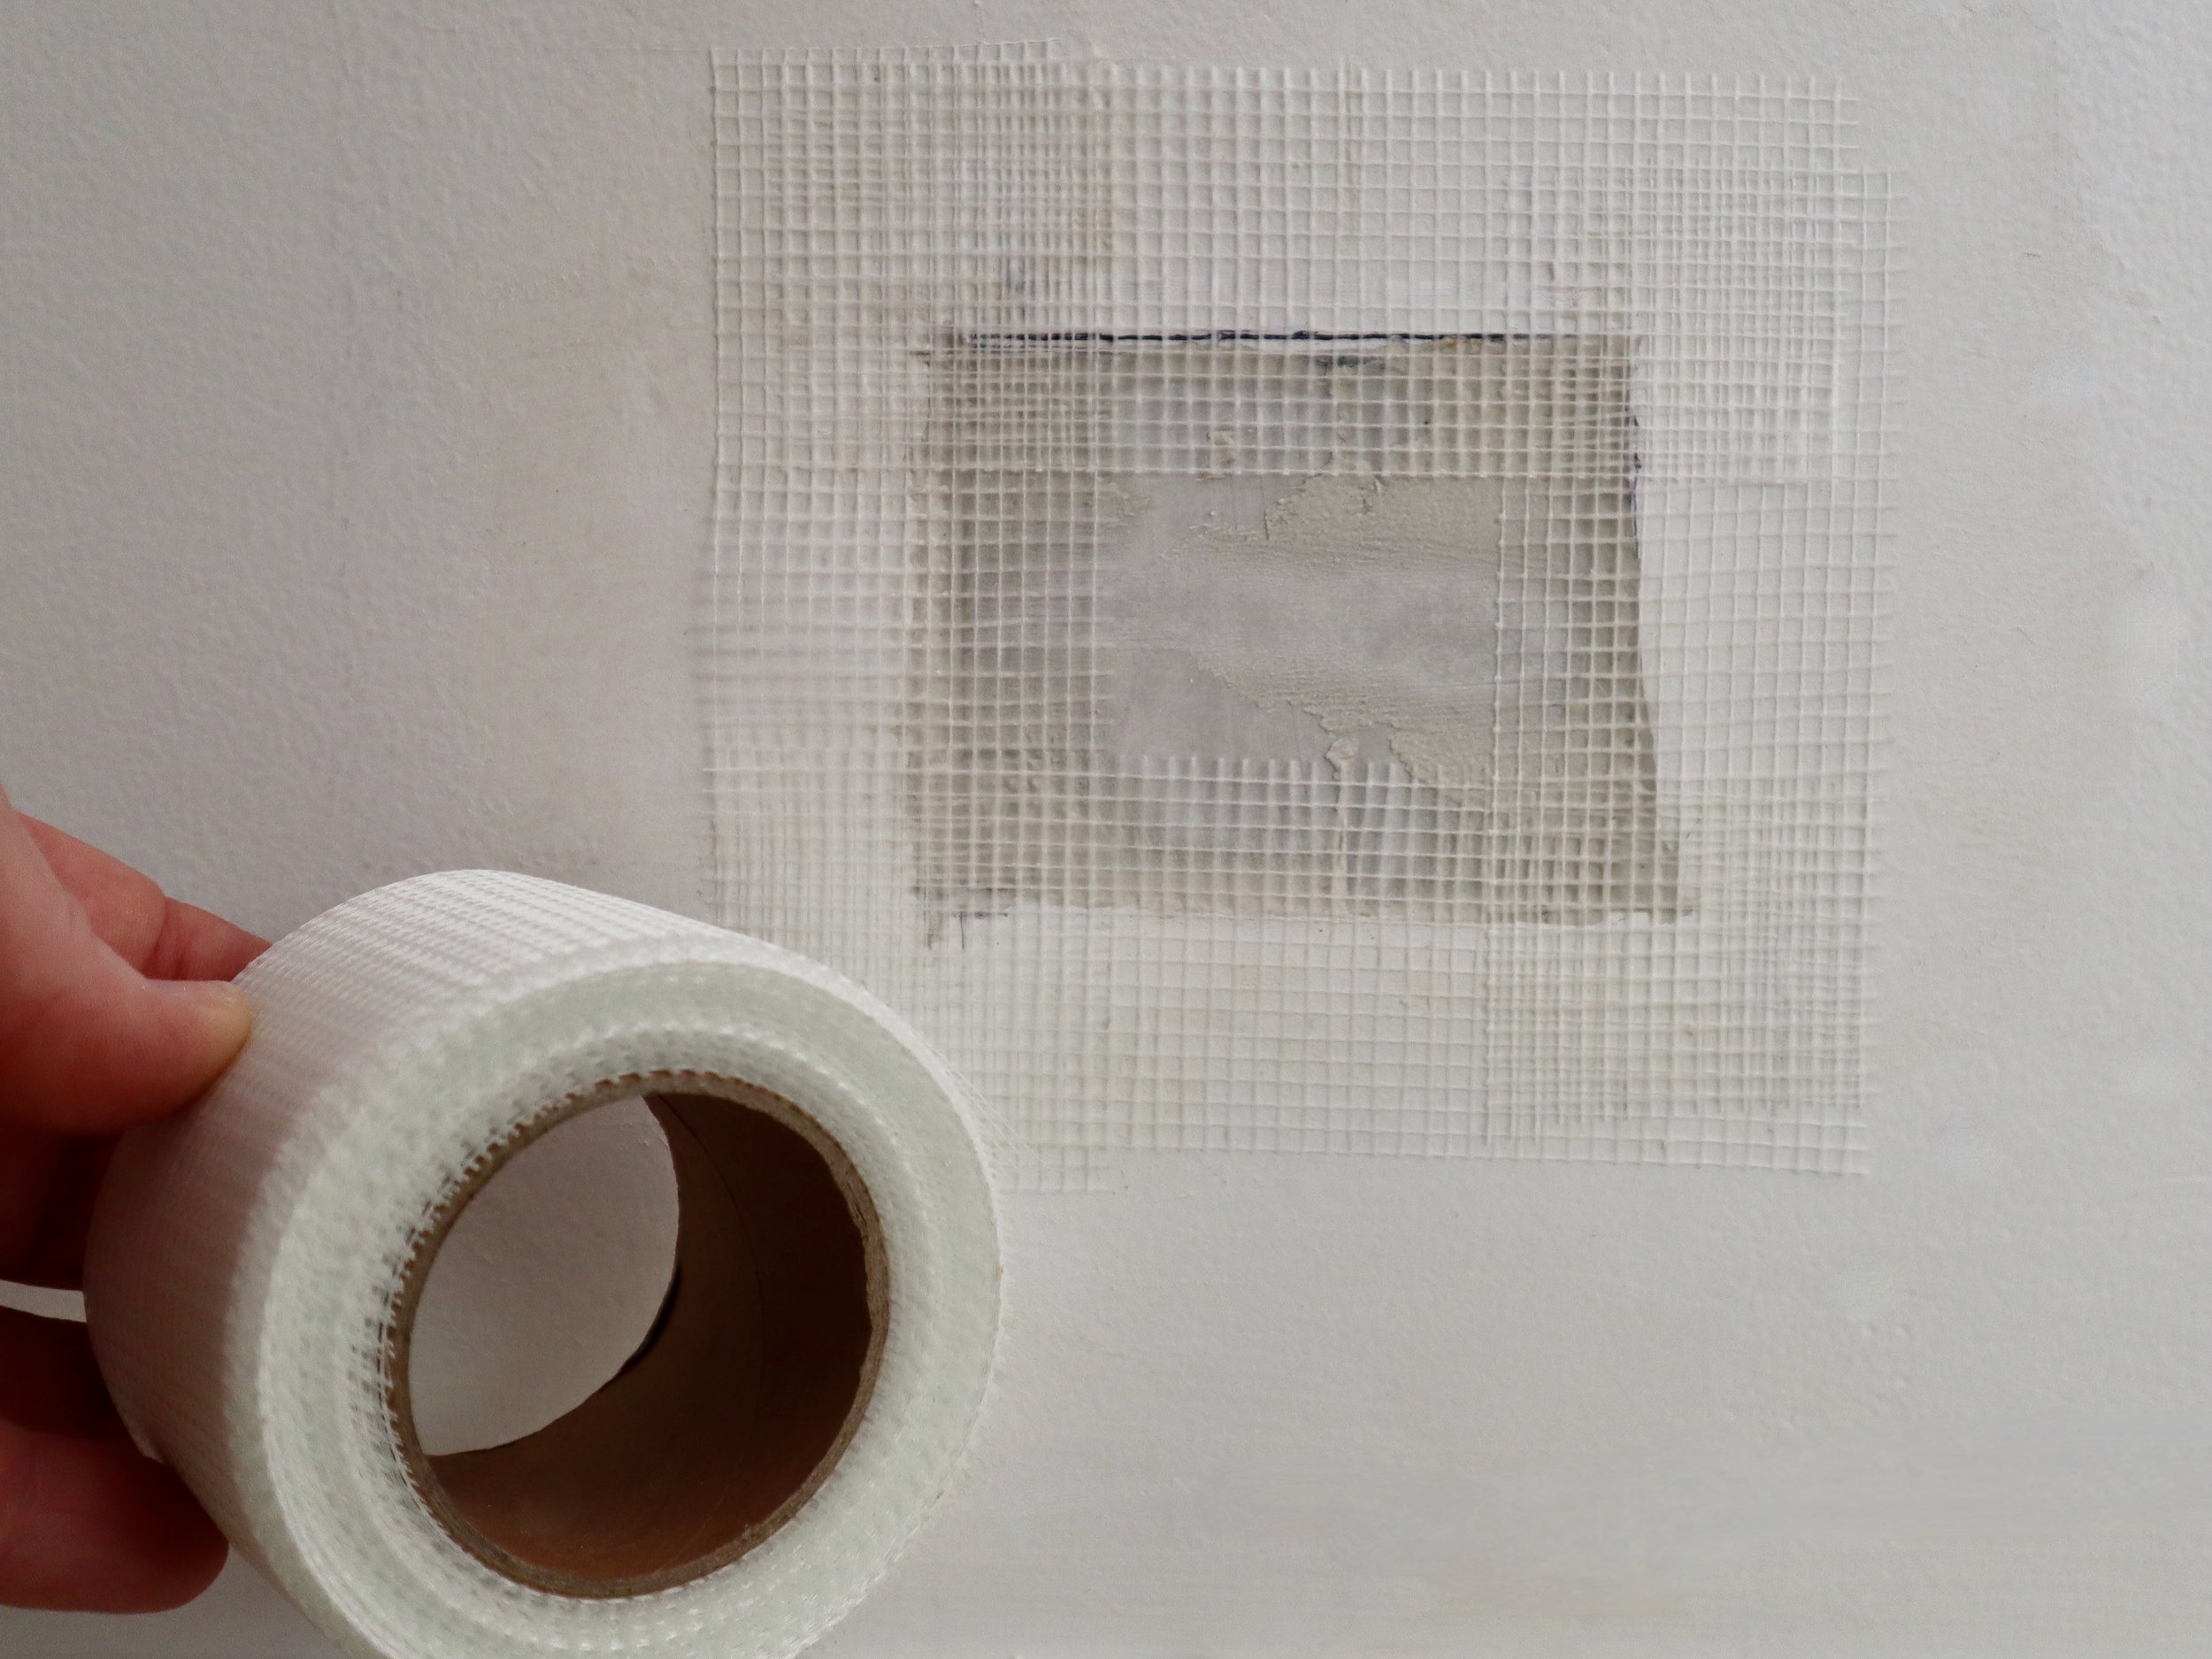
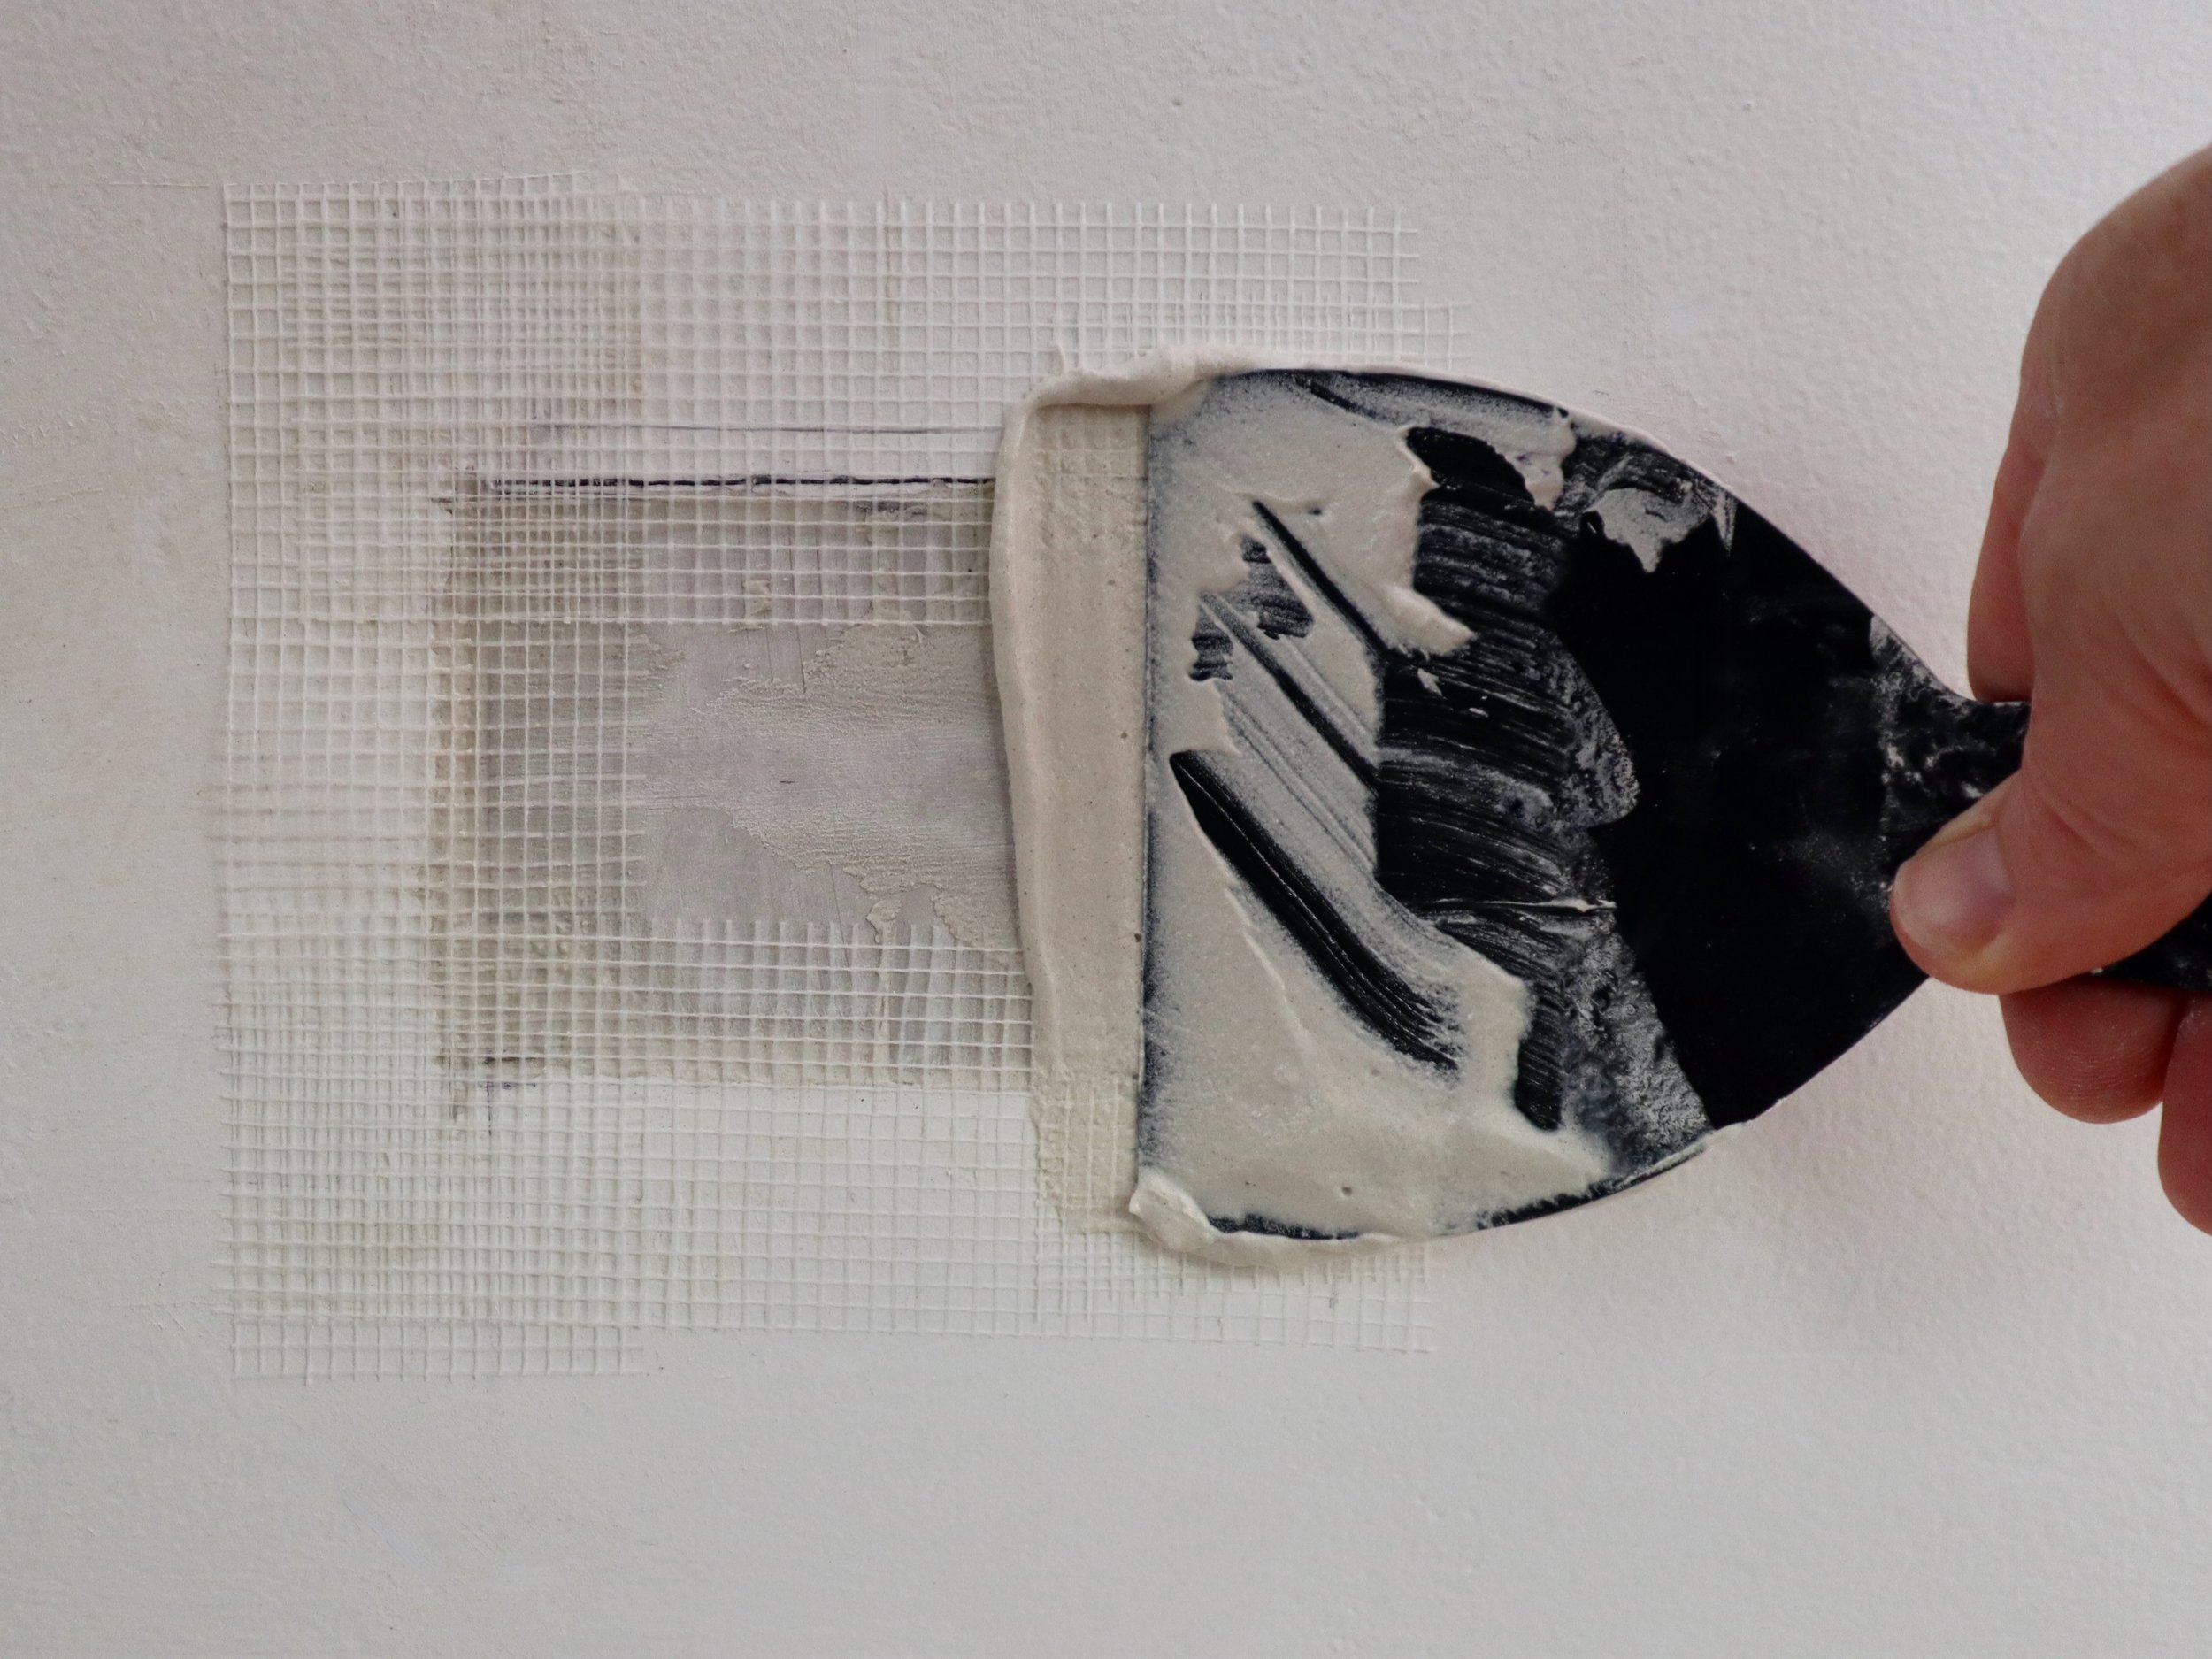
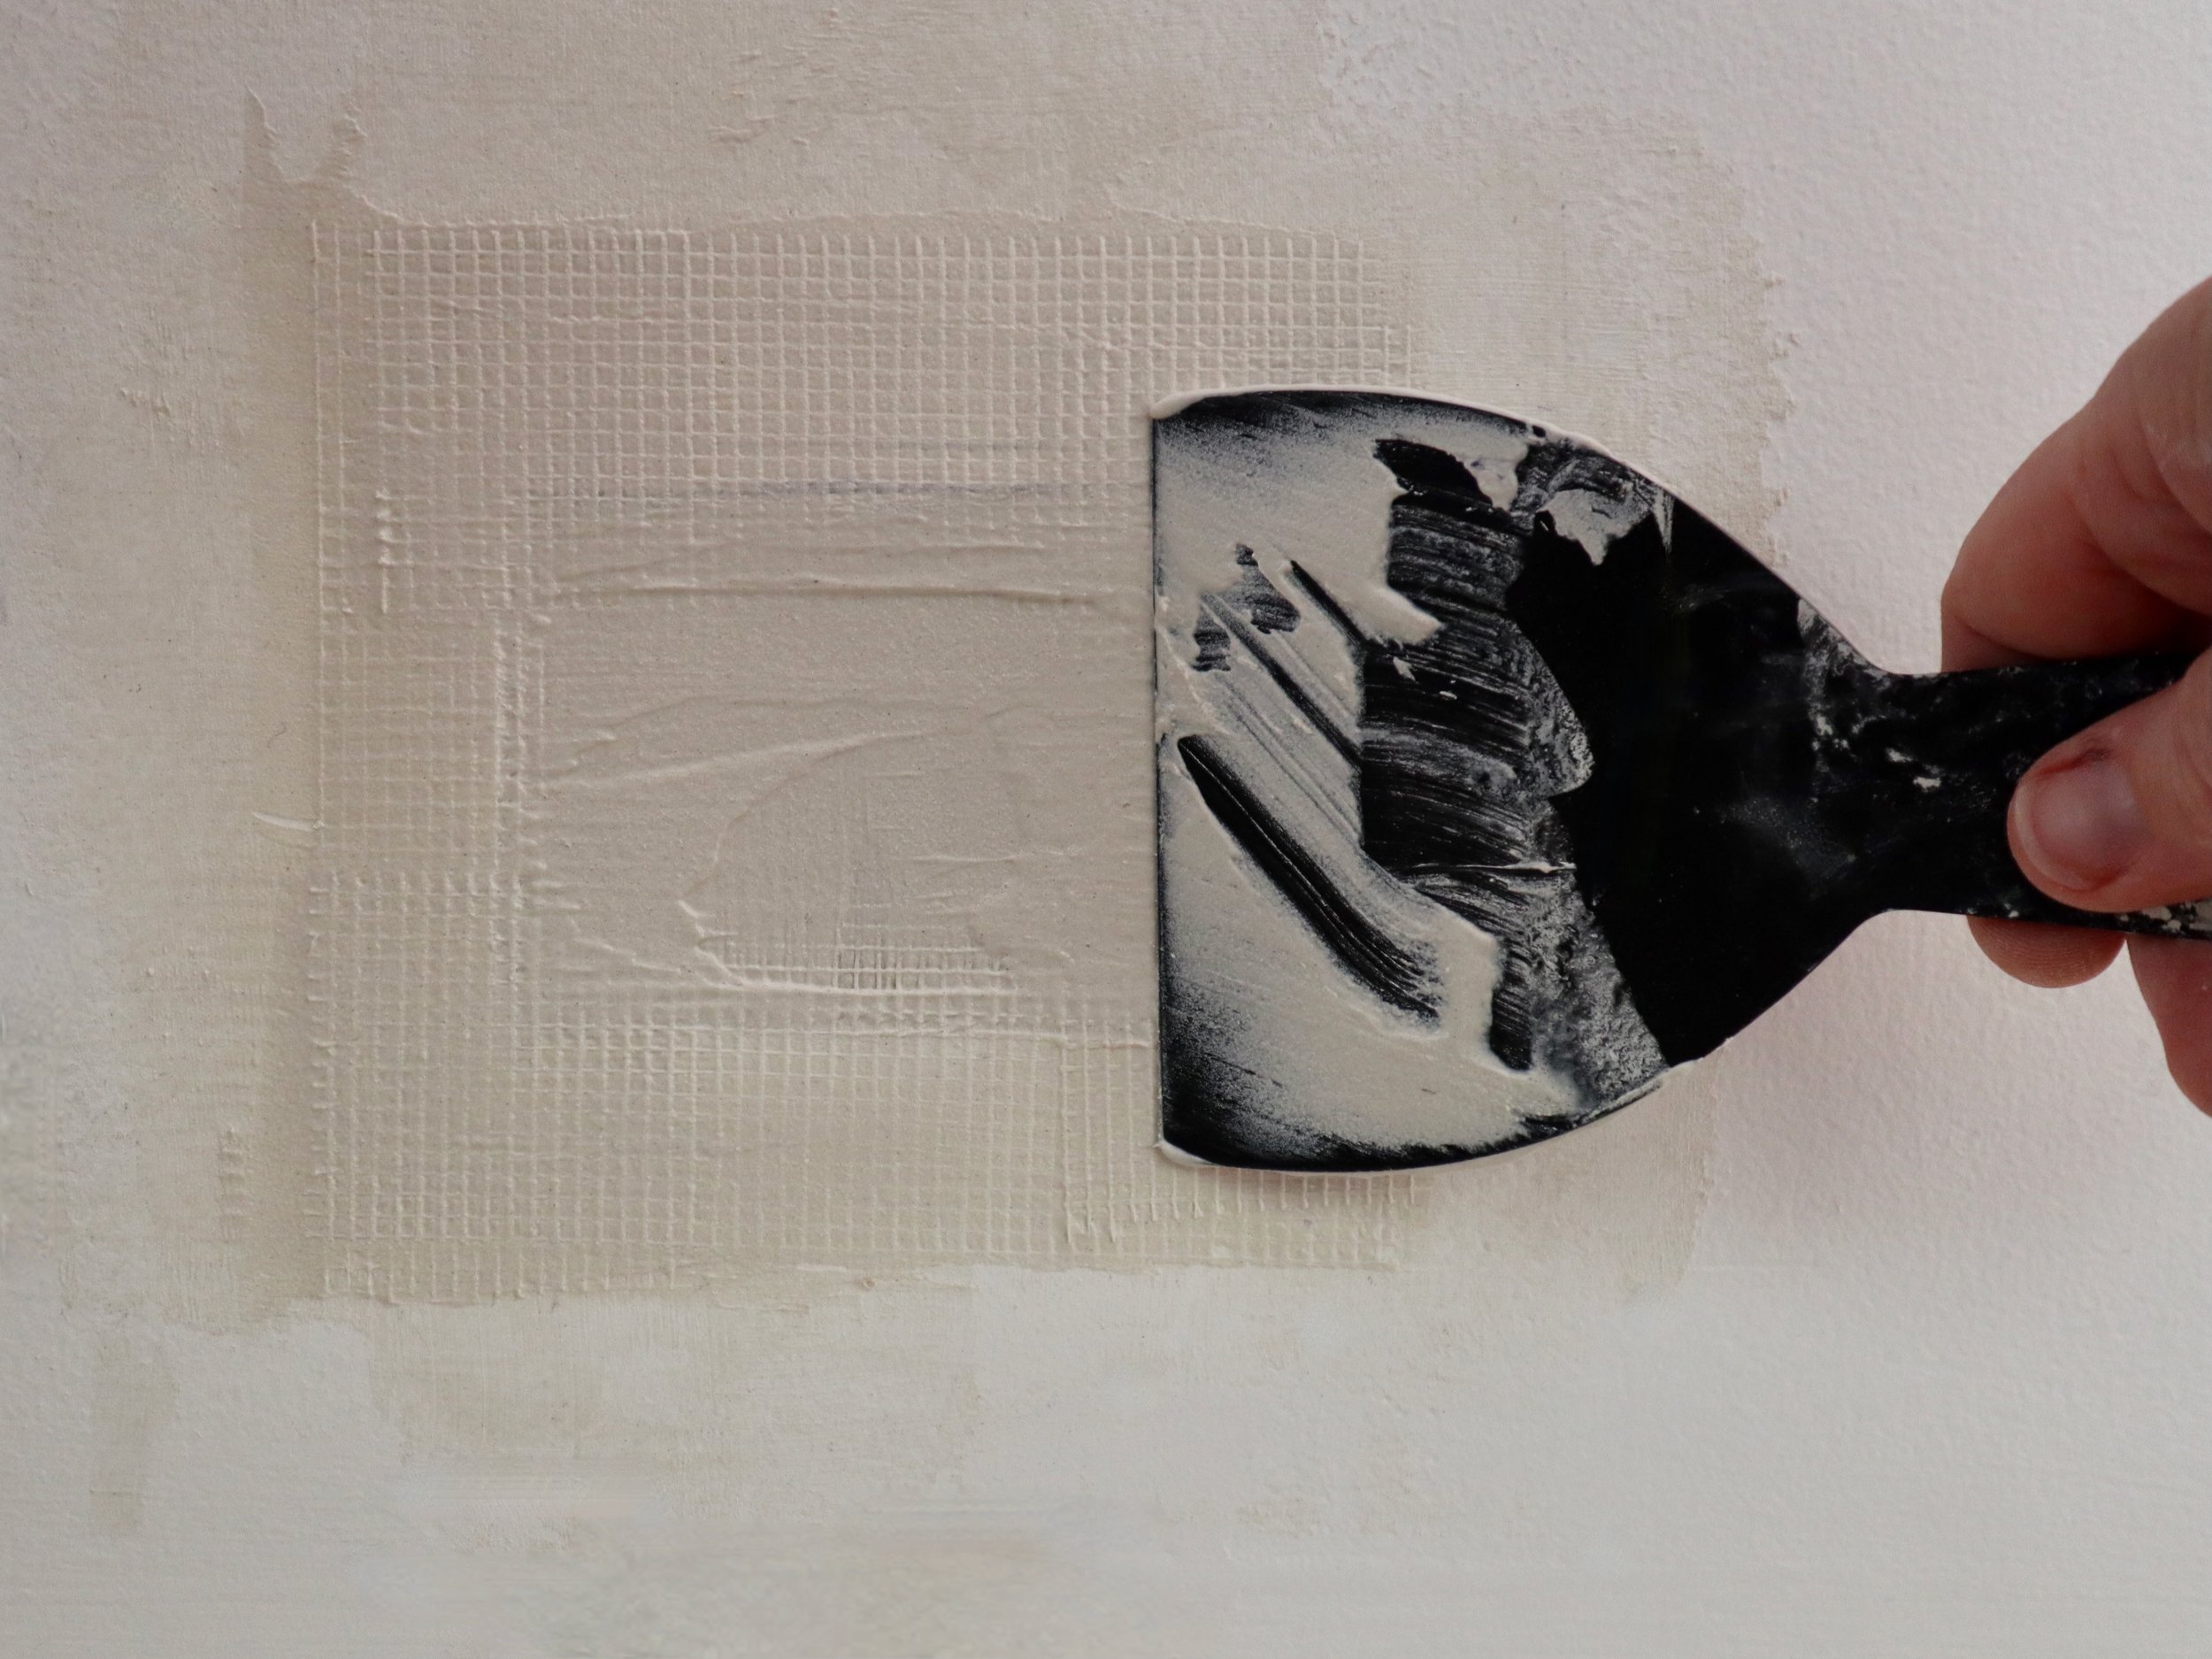
HANGING THE WALL SHEETS

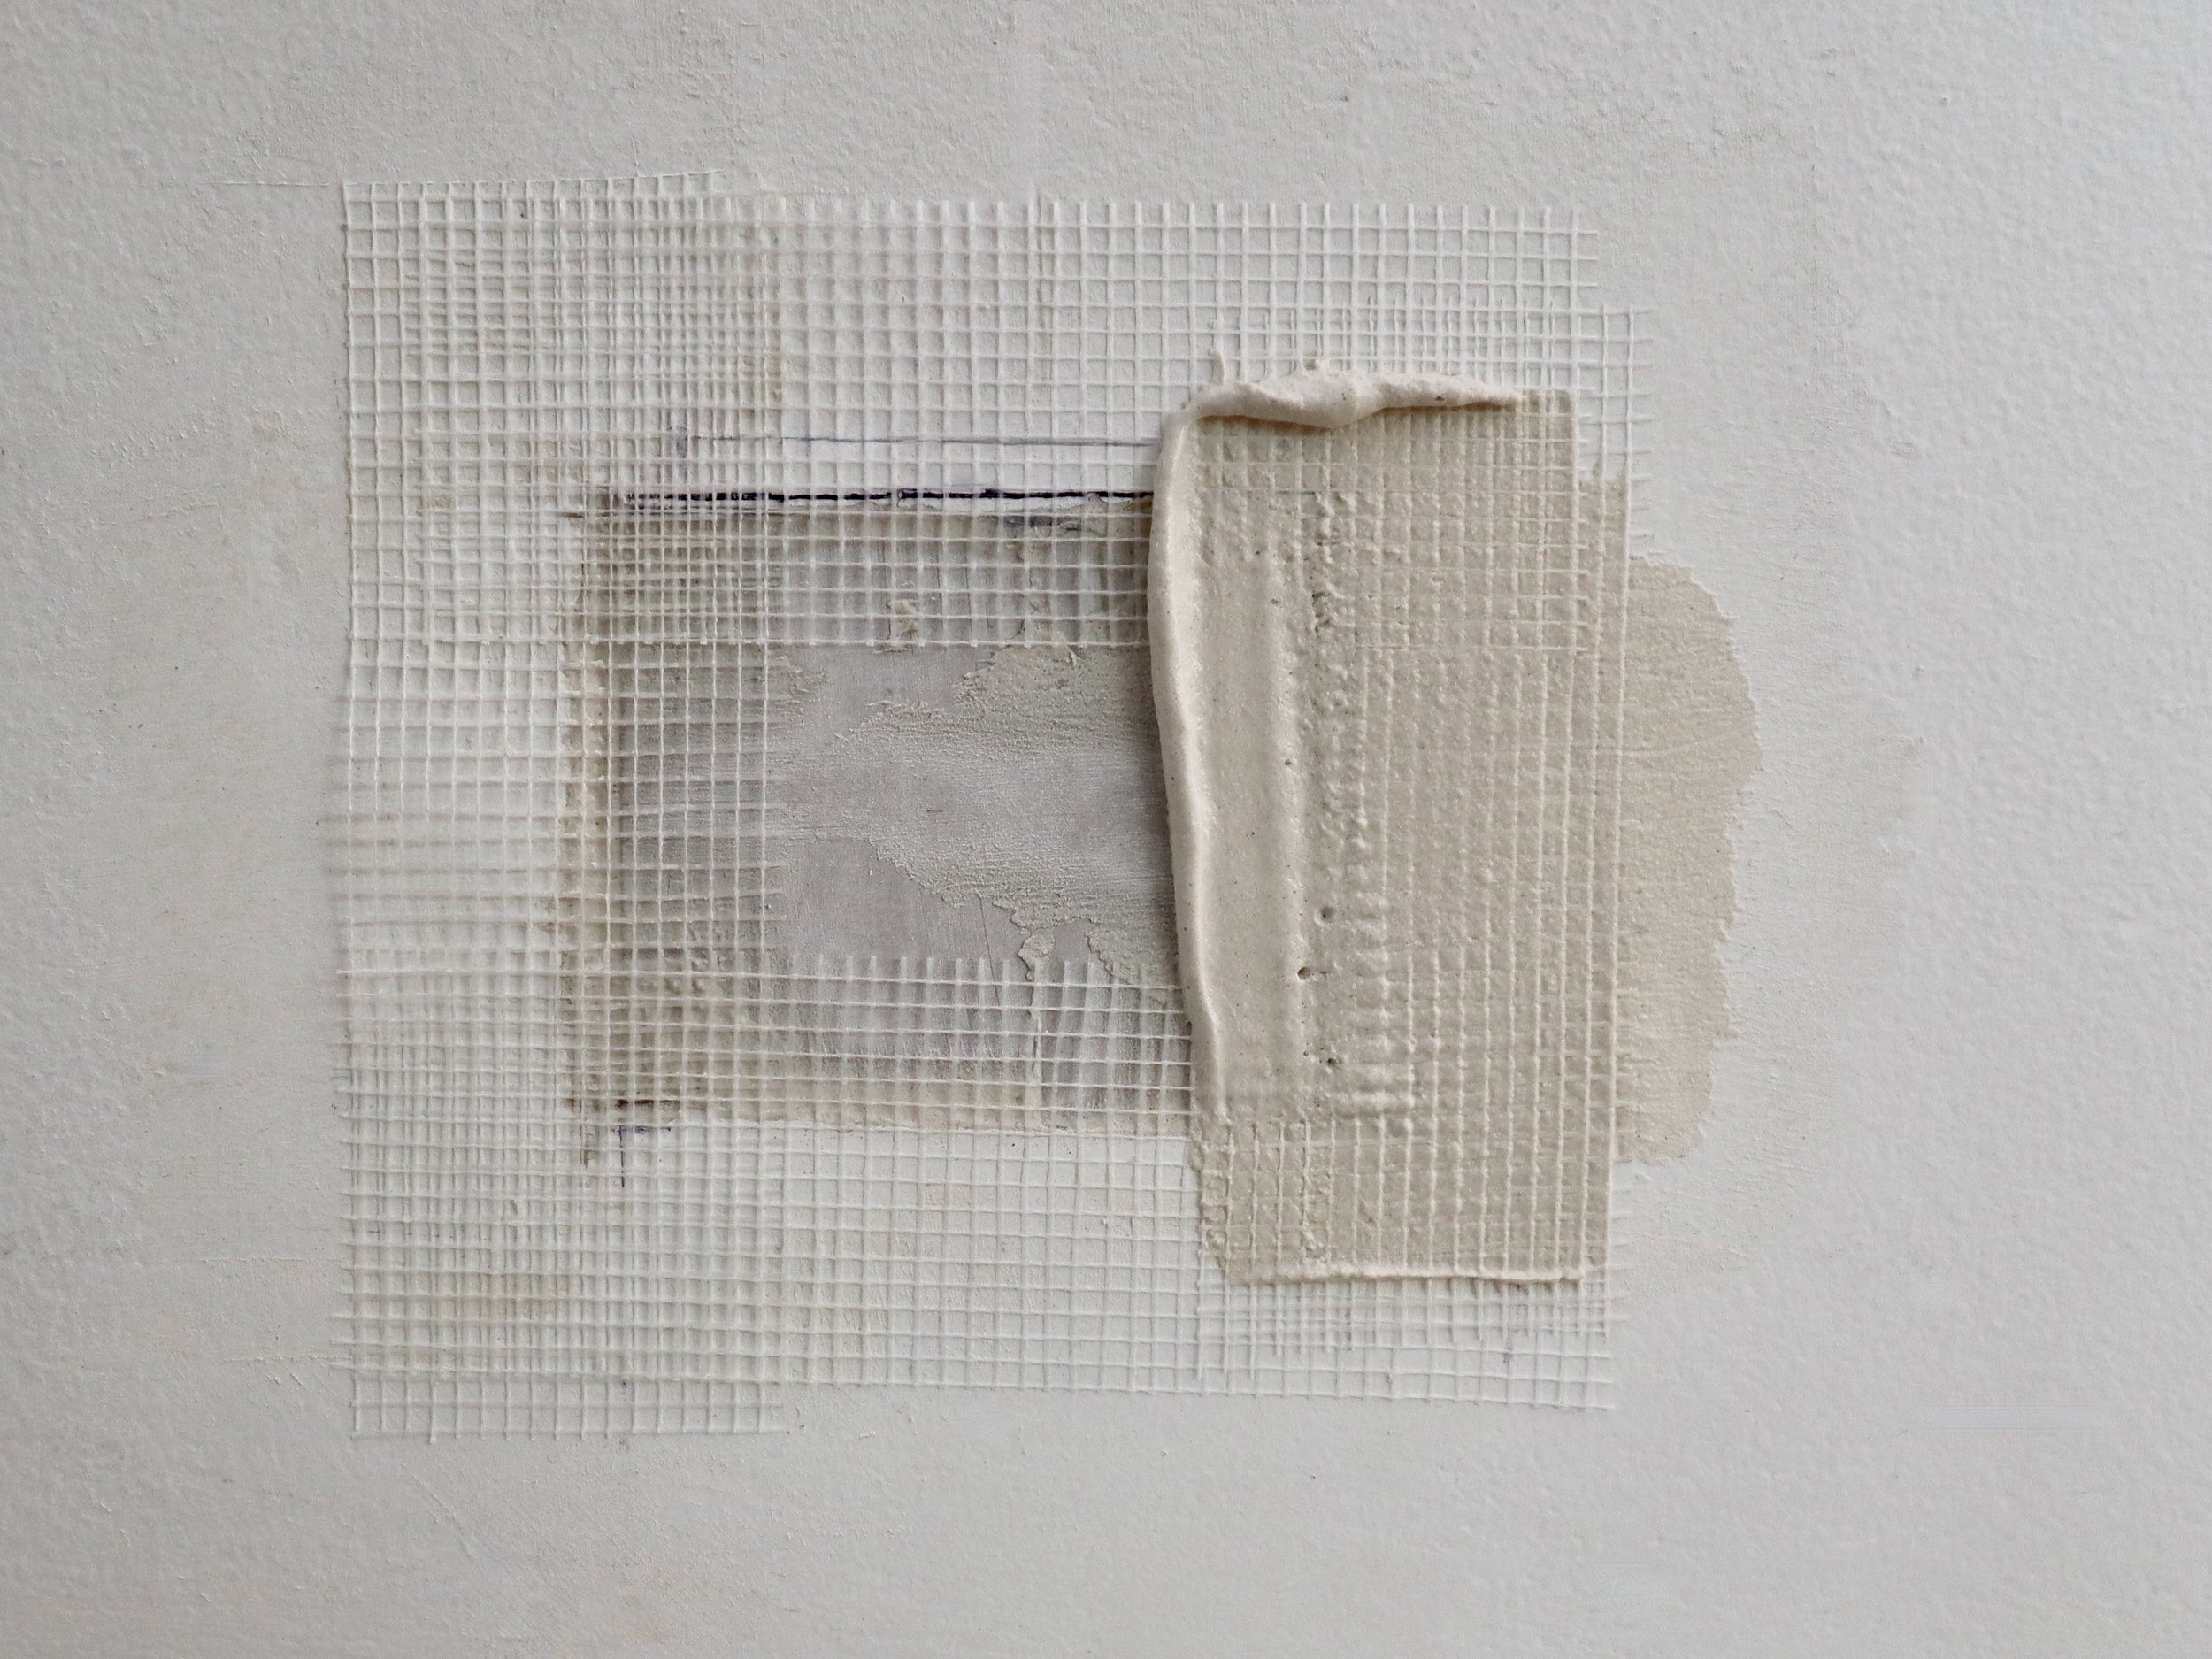
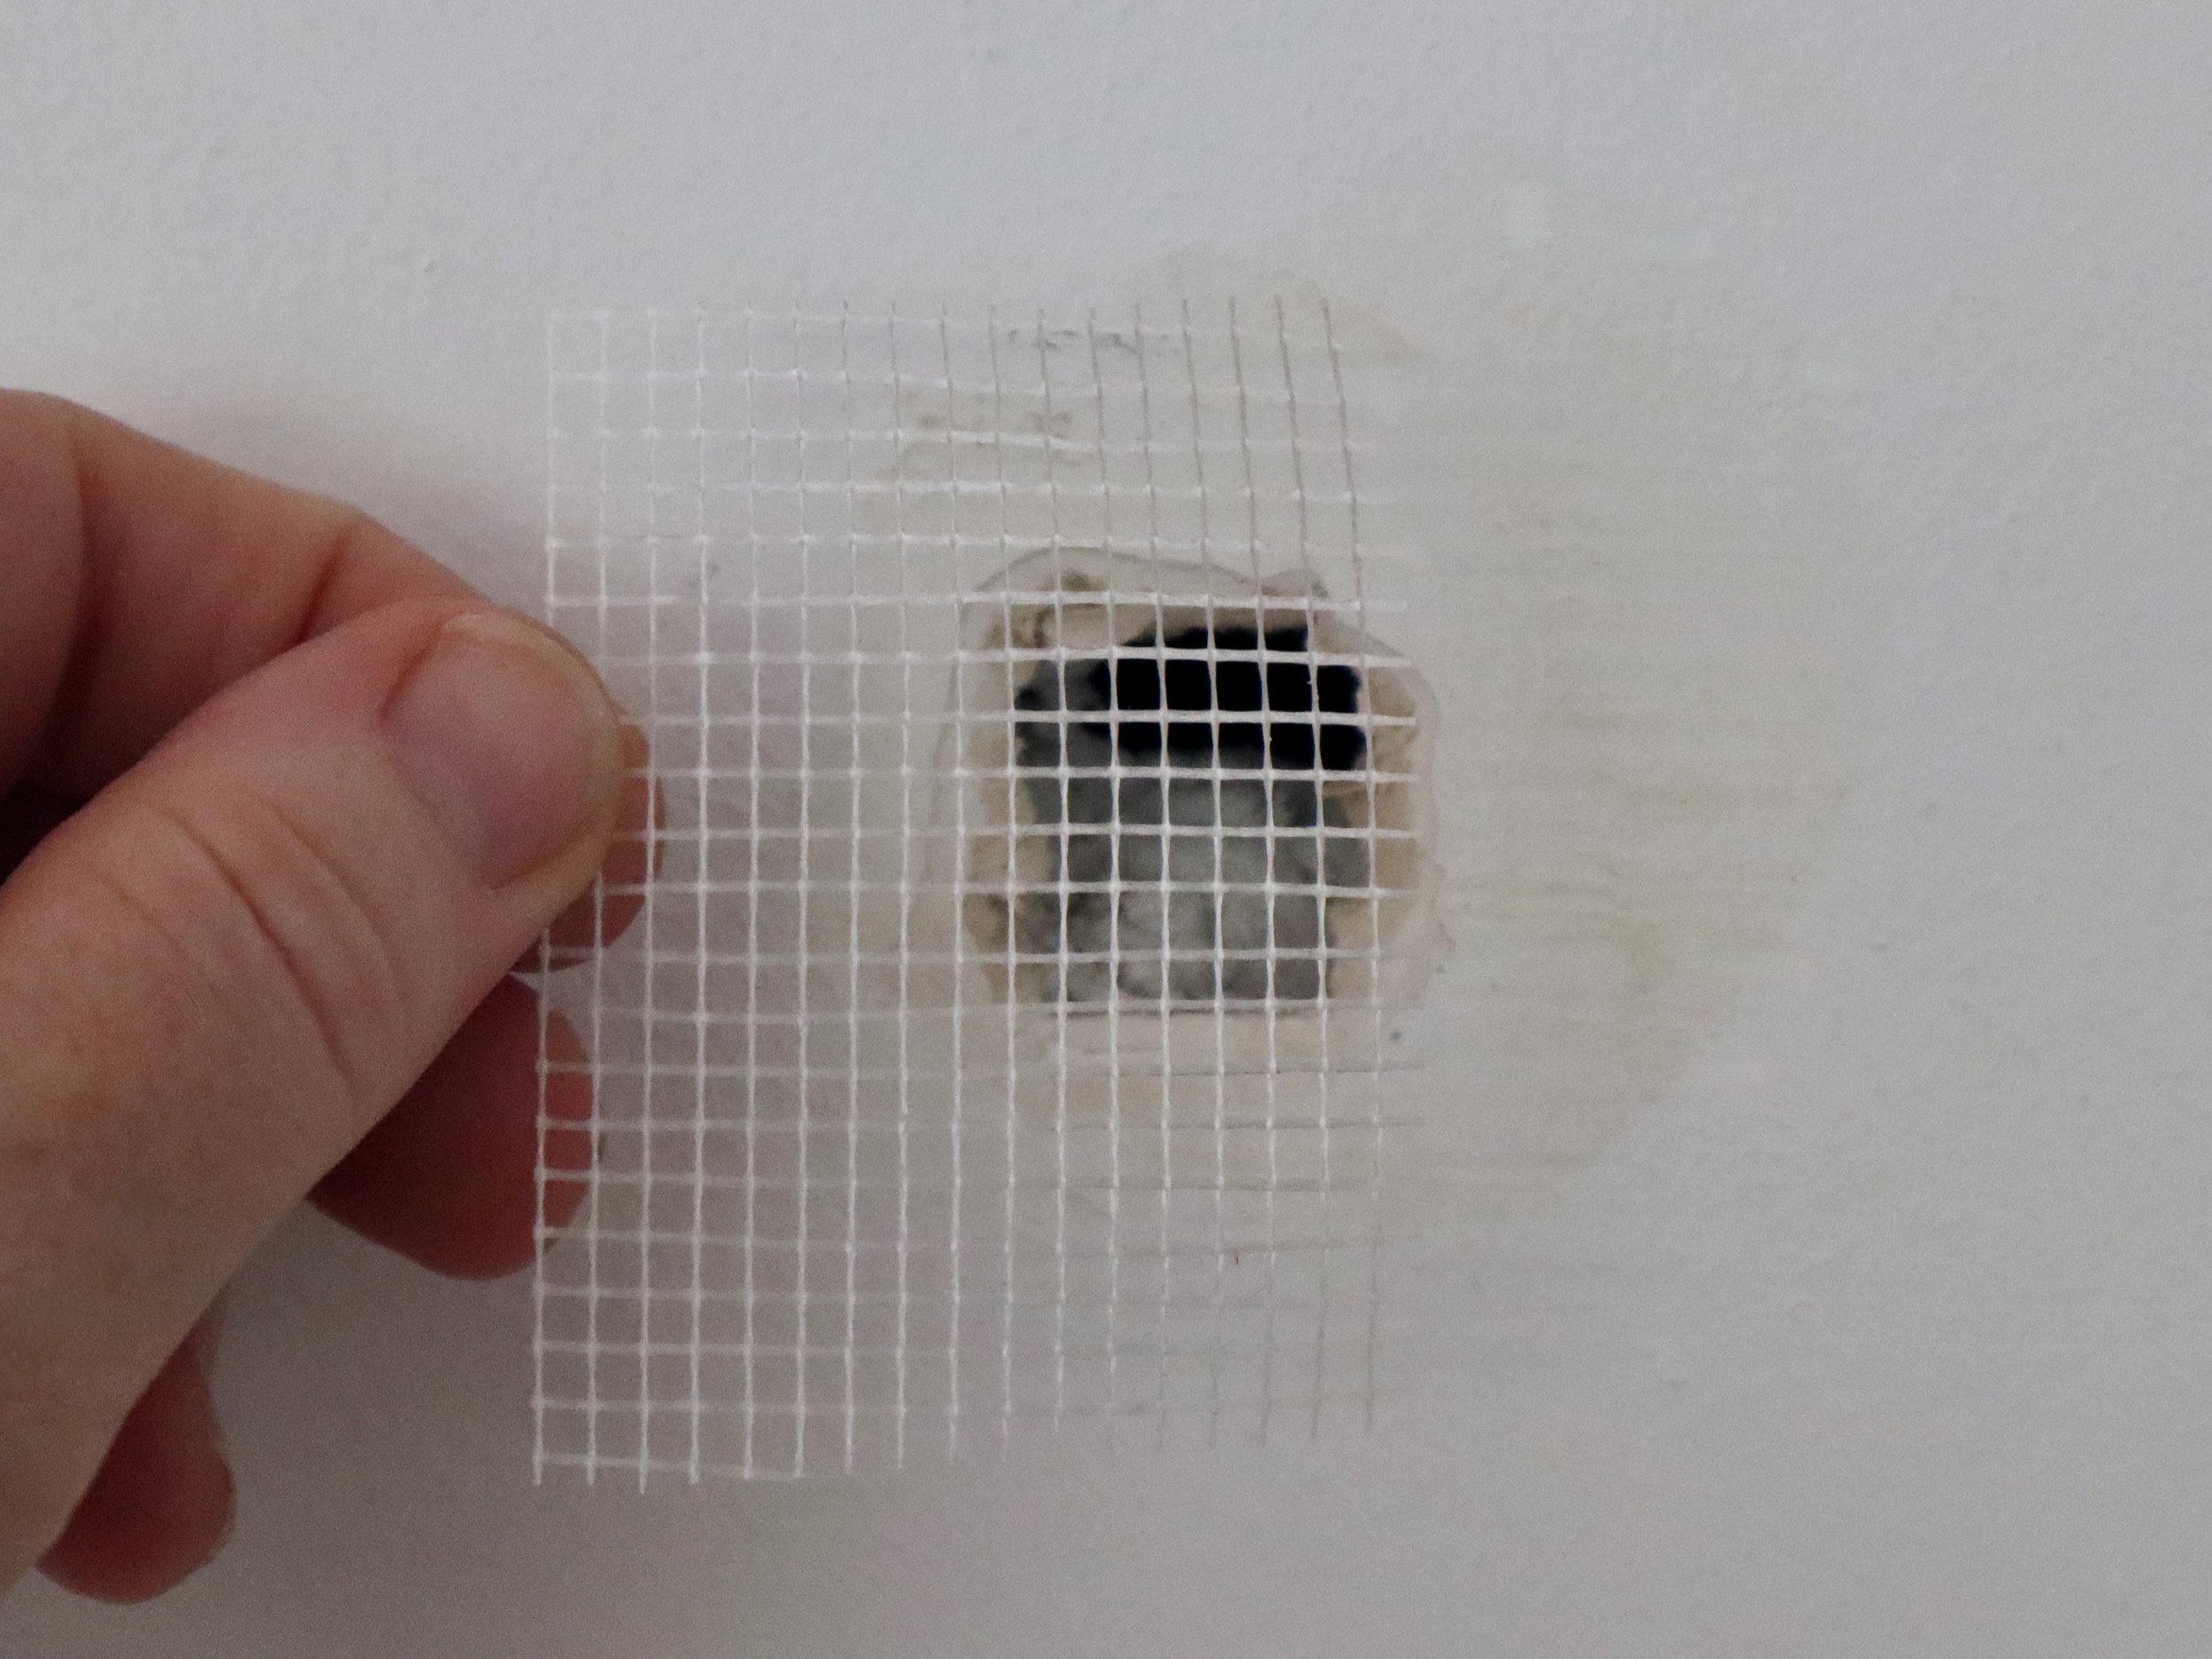
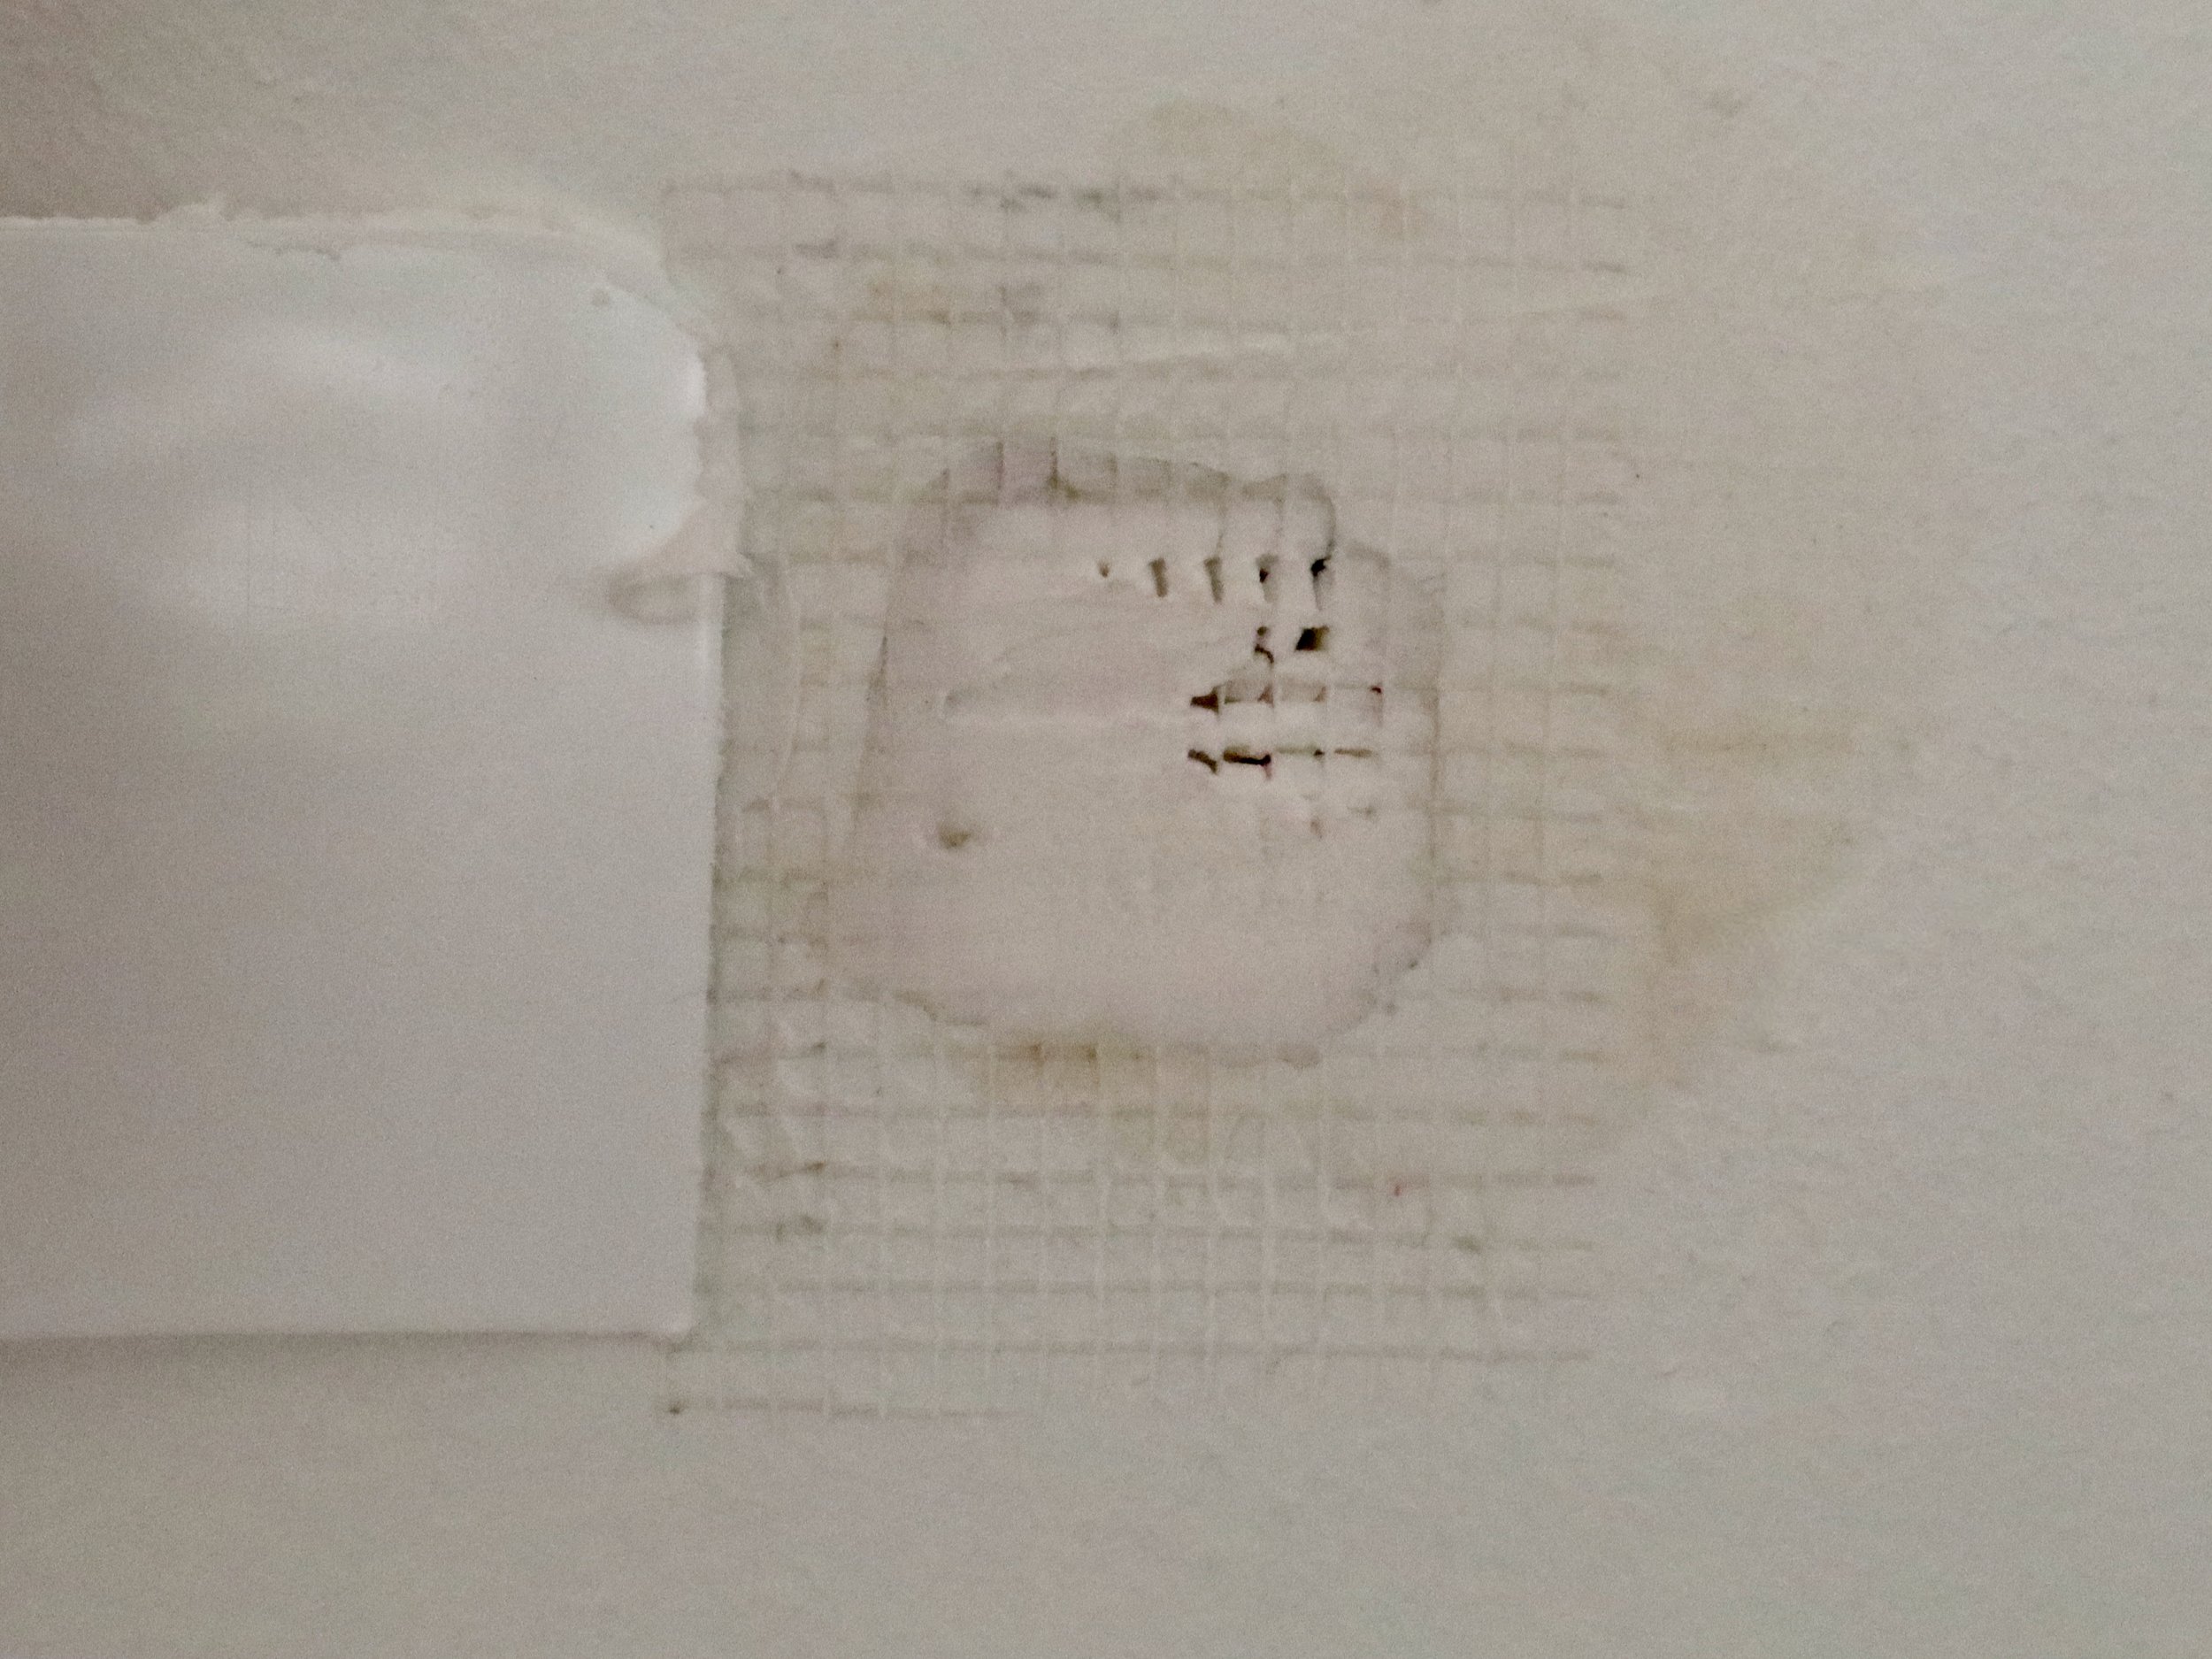
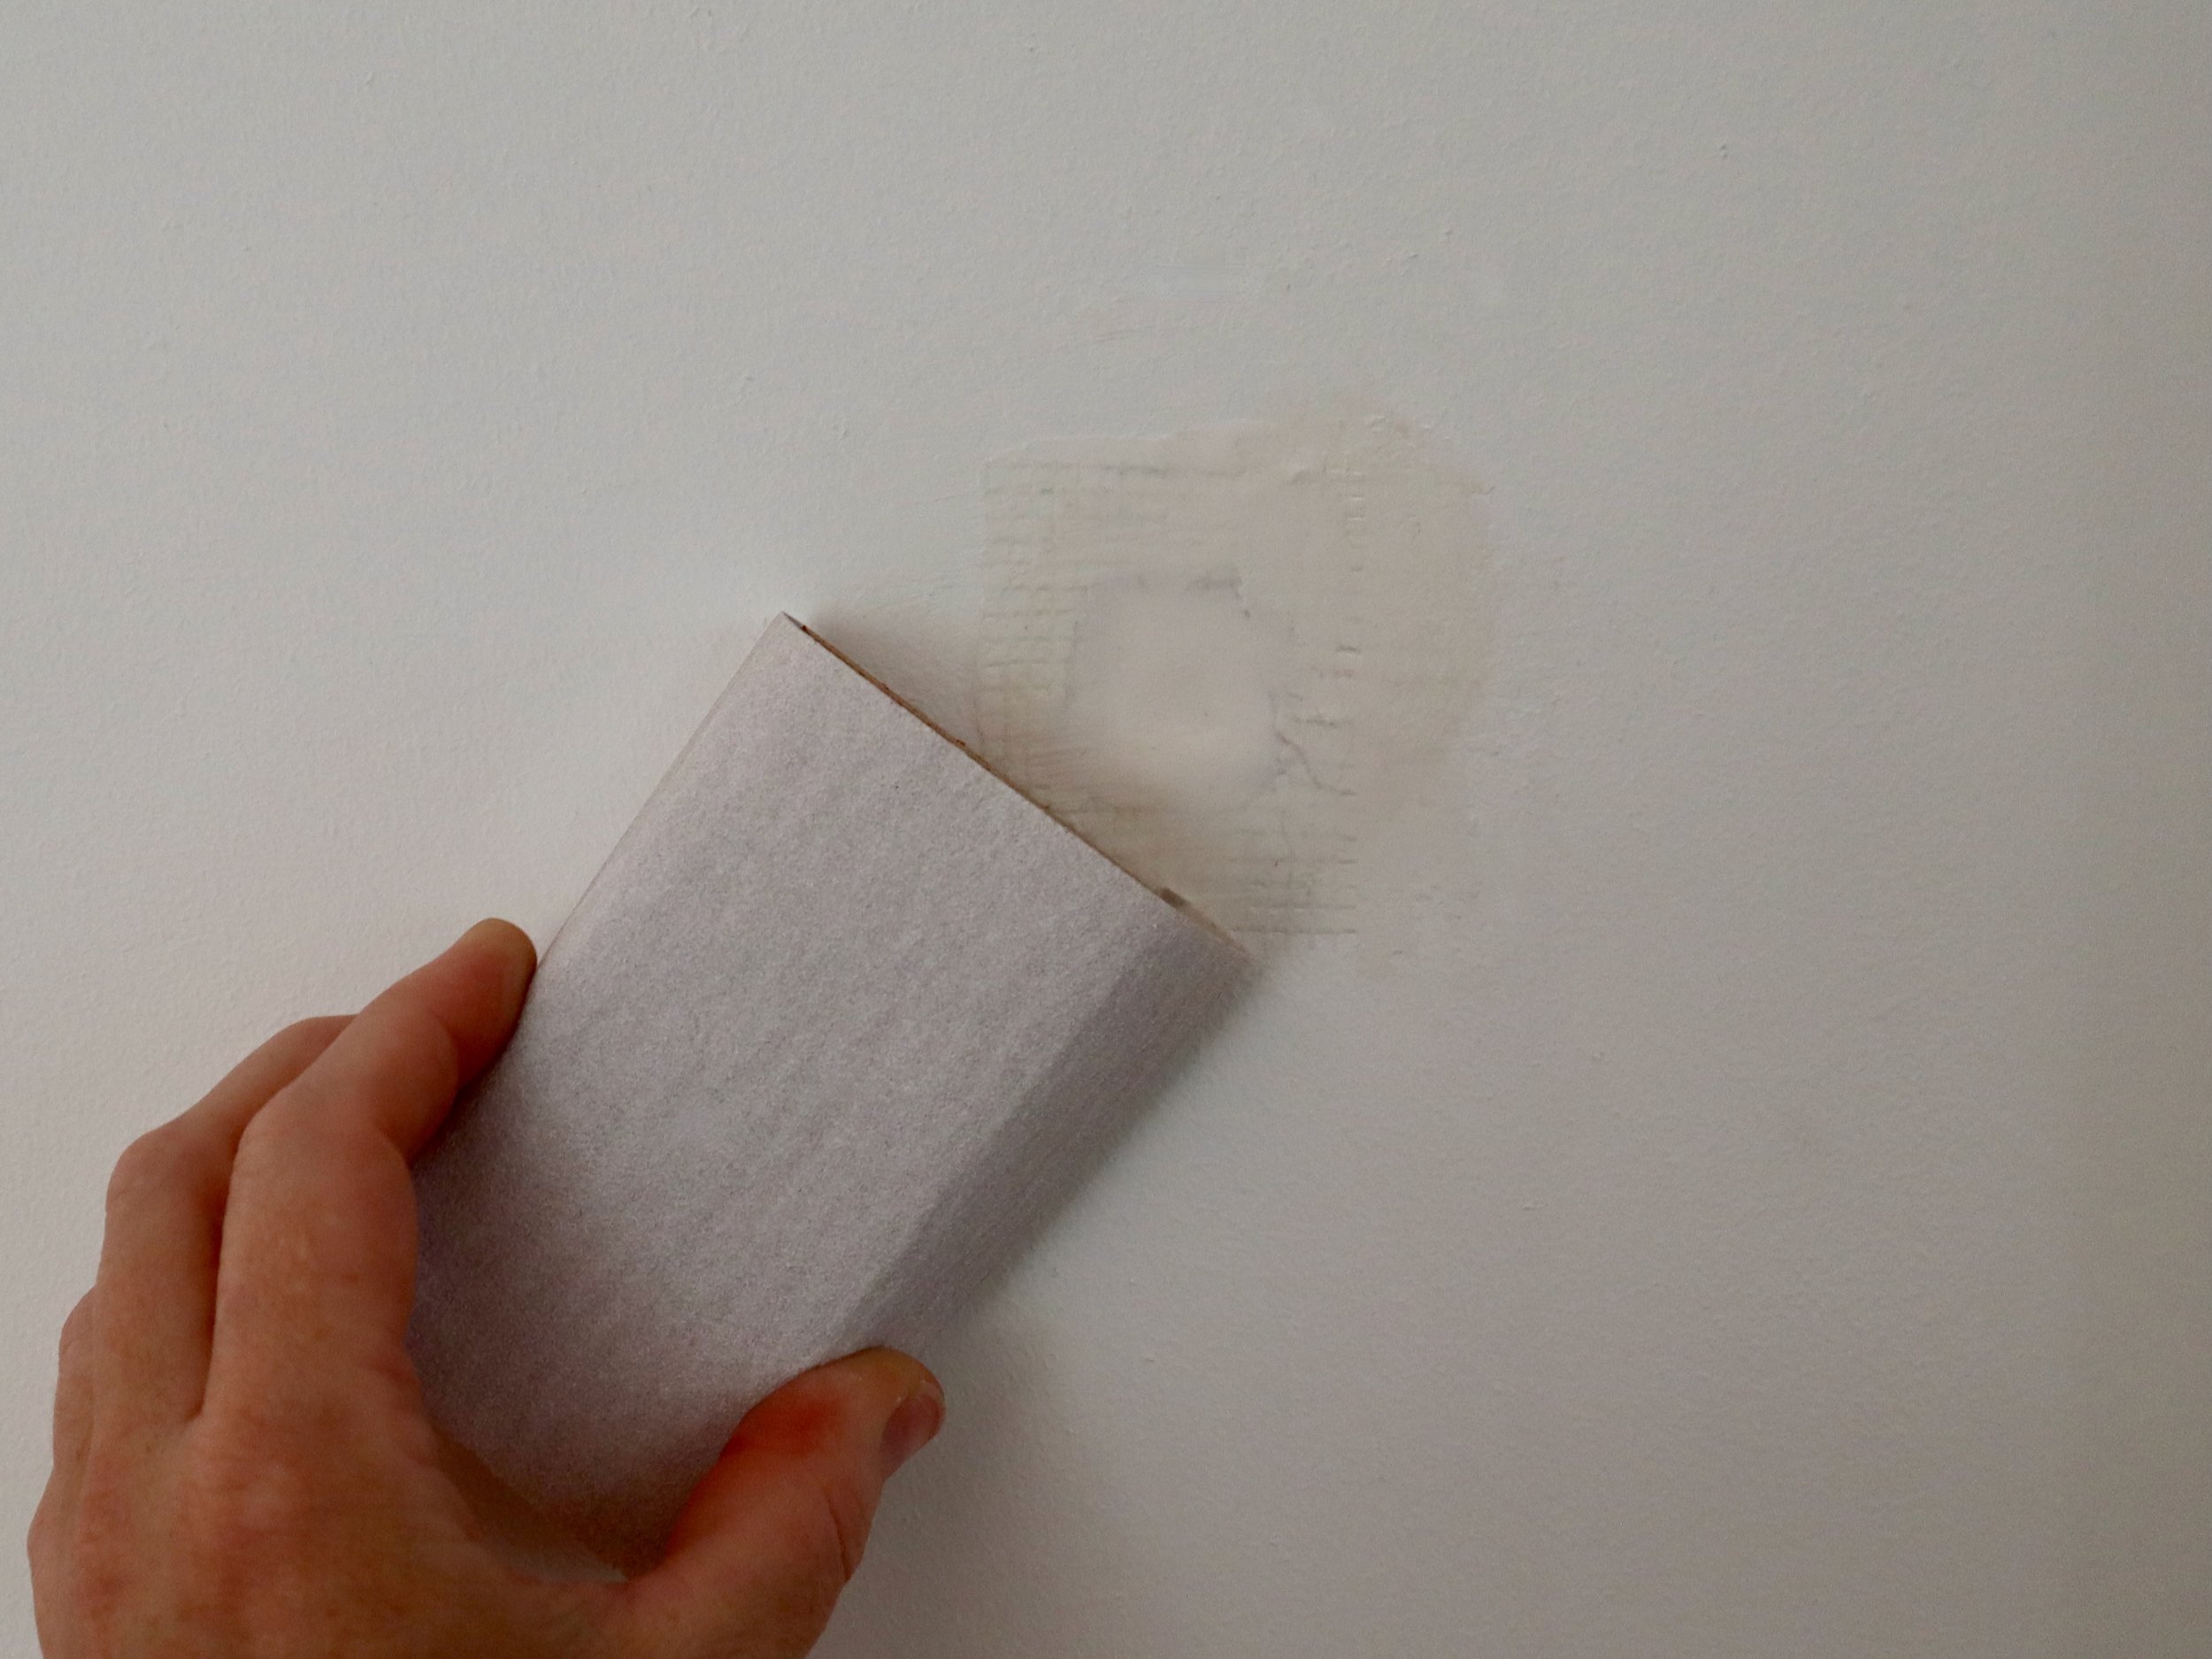
After filling in the old window cavity with framing I hung Easycraft VJ panels on all four walls, cutting each sheet to fit up into the existing cornice and making cutouts for wiring and plumbing.

DIY TIP I chose the MDF VJ panels instead of plasterboard to avoid having to master the art of plastering. Hanging them directly onto the existing weatherboard walls saved me having to start again.


LOTS OF PAINT

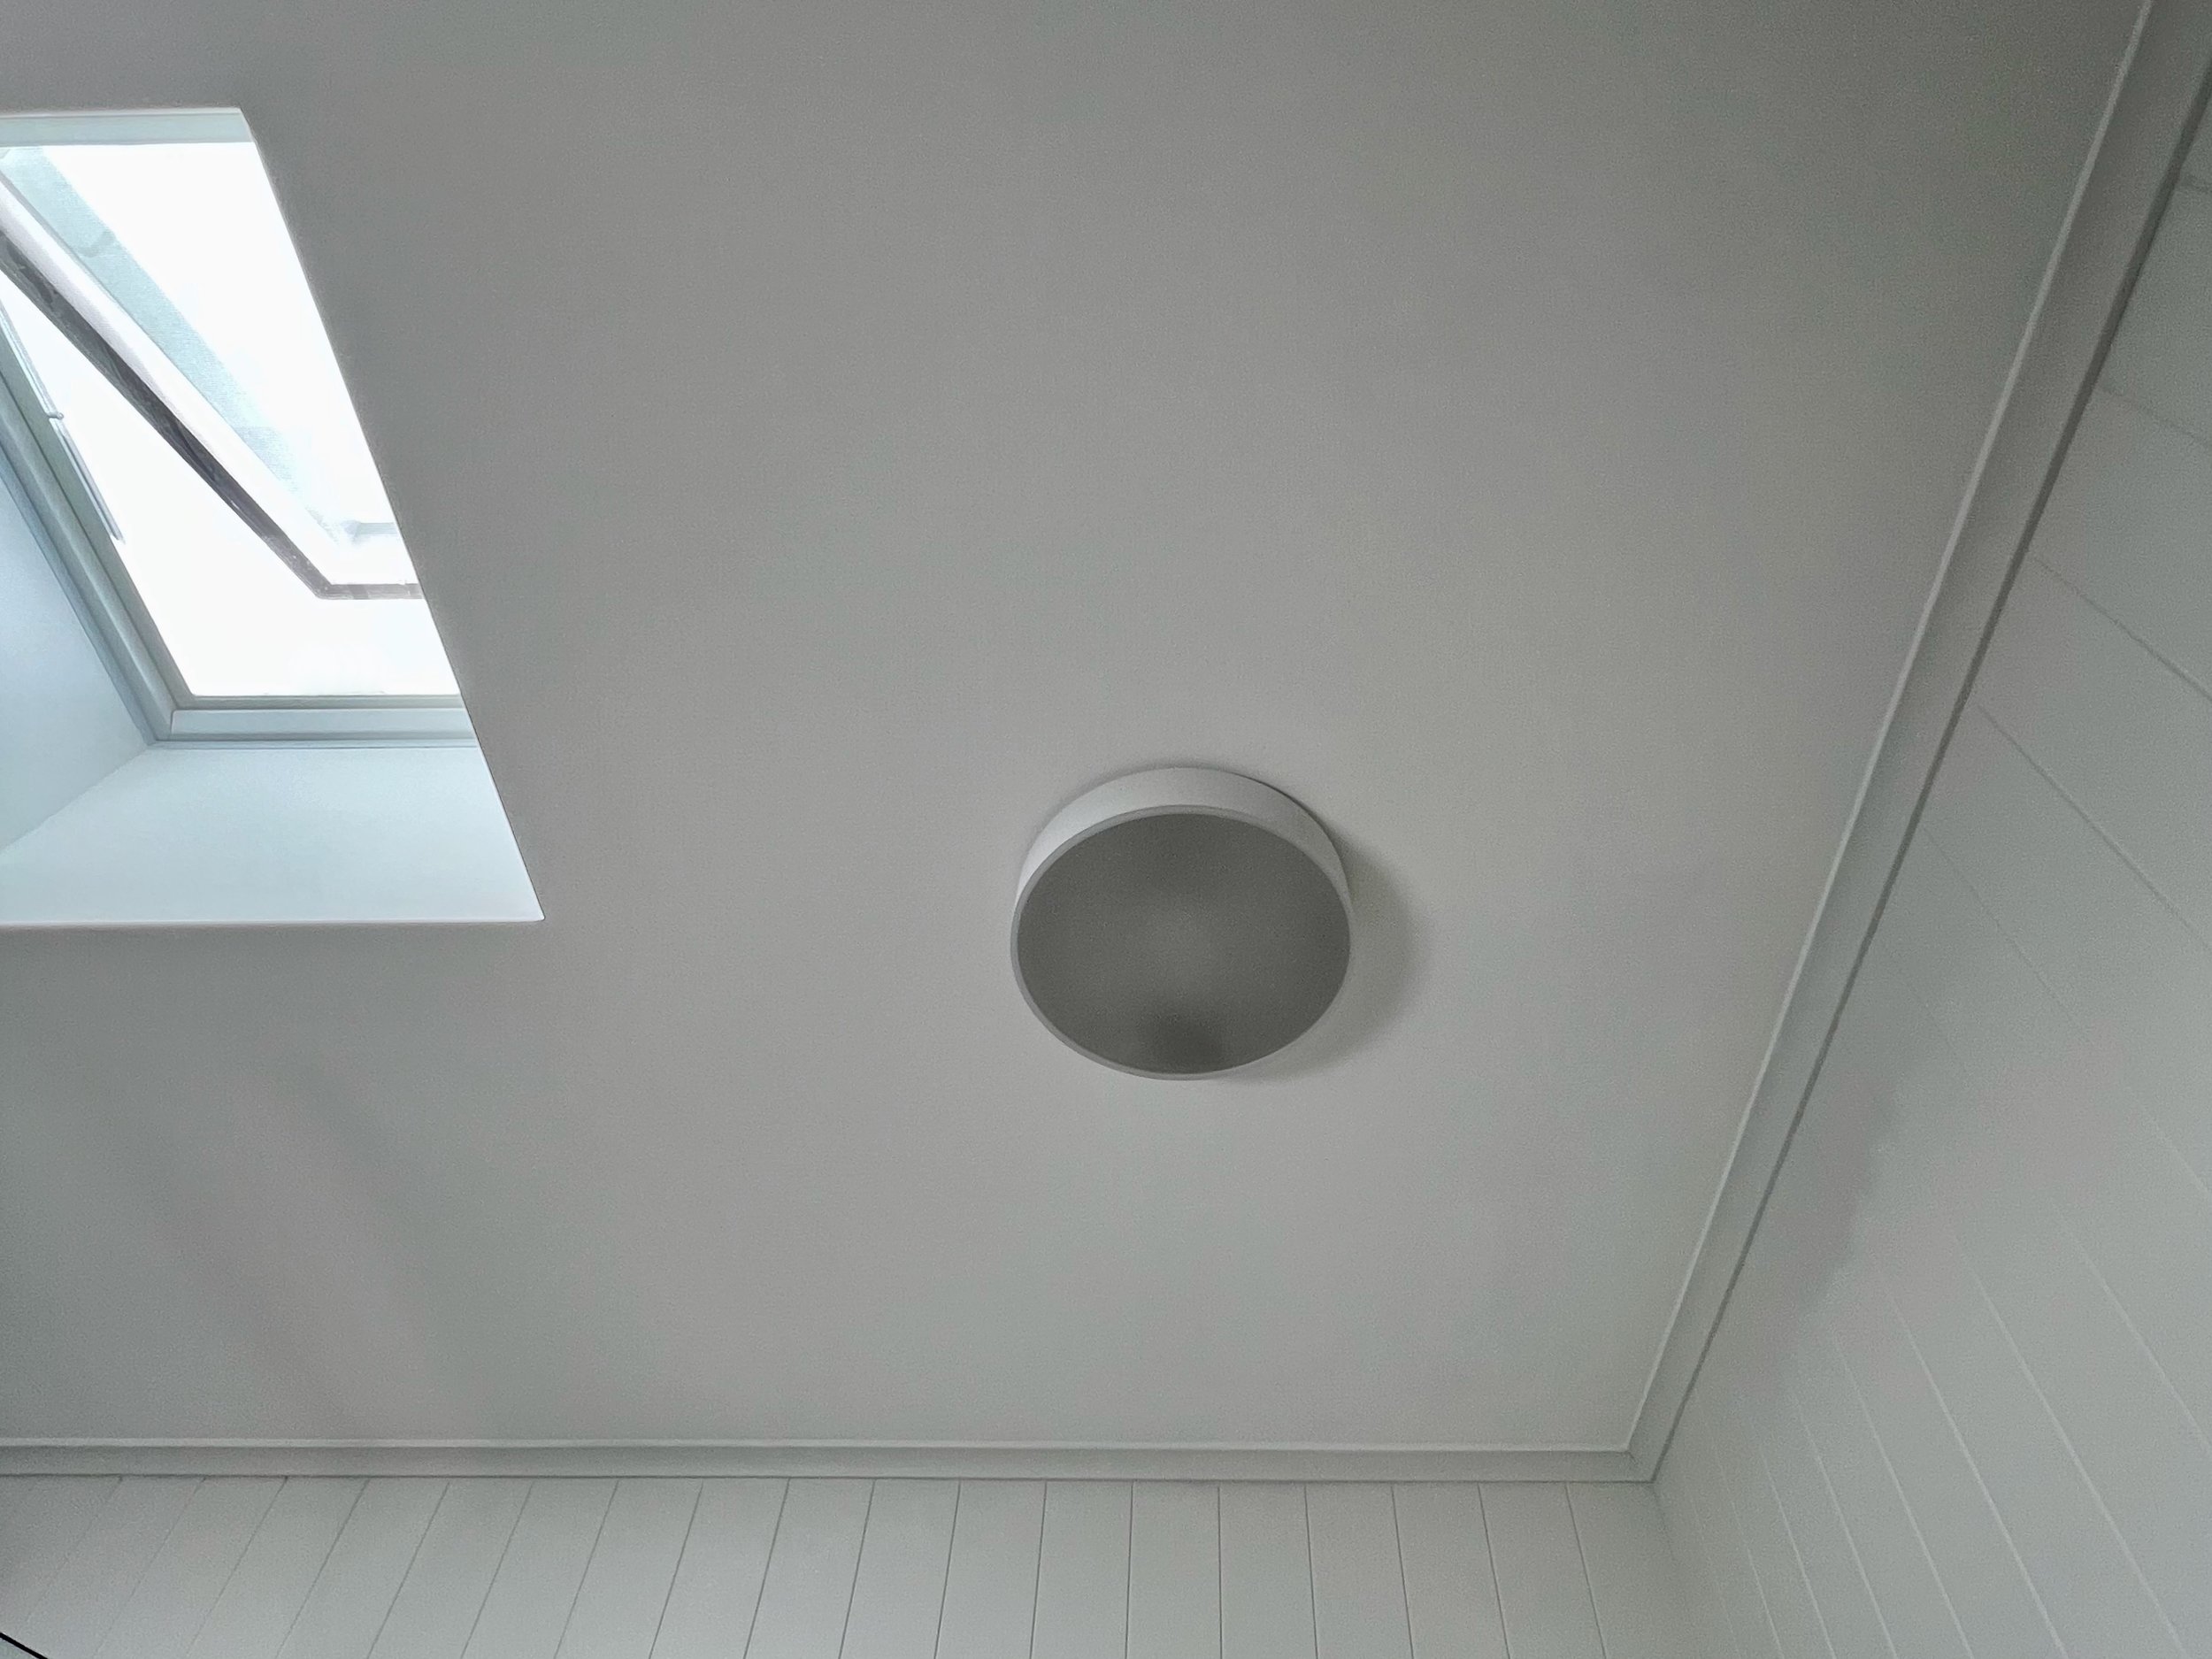
Once the plumber had returned to install the toilet, and the sparkie put in the light, switches and power points I could get on with finishing the room.

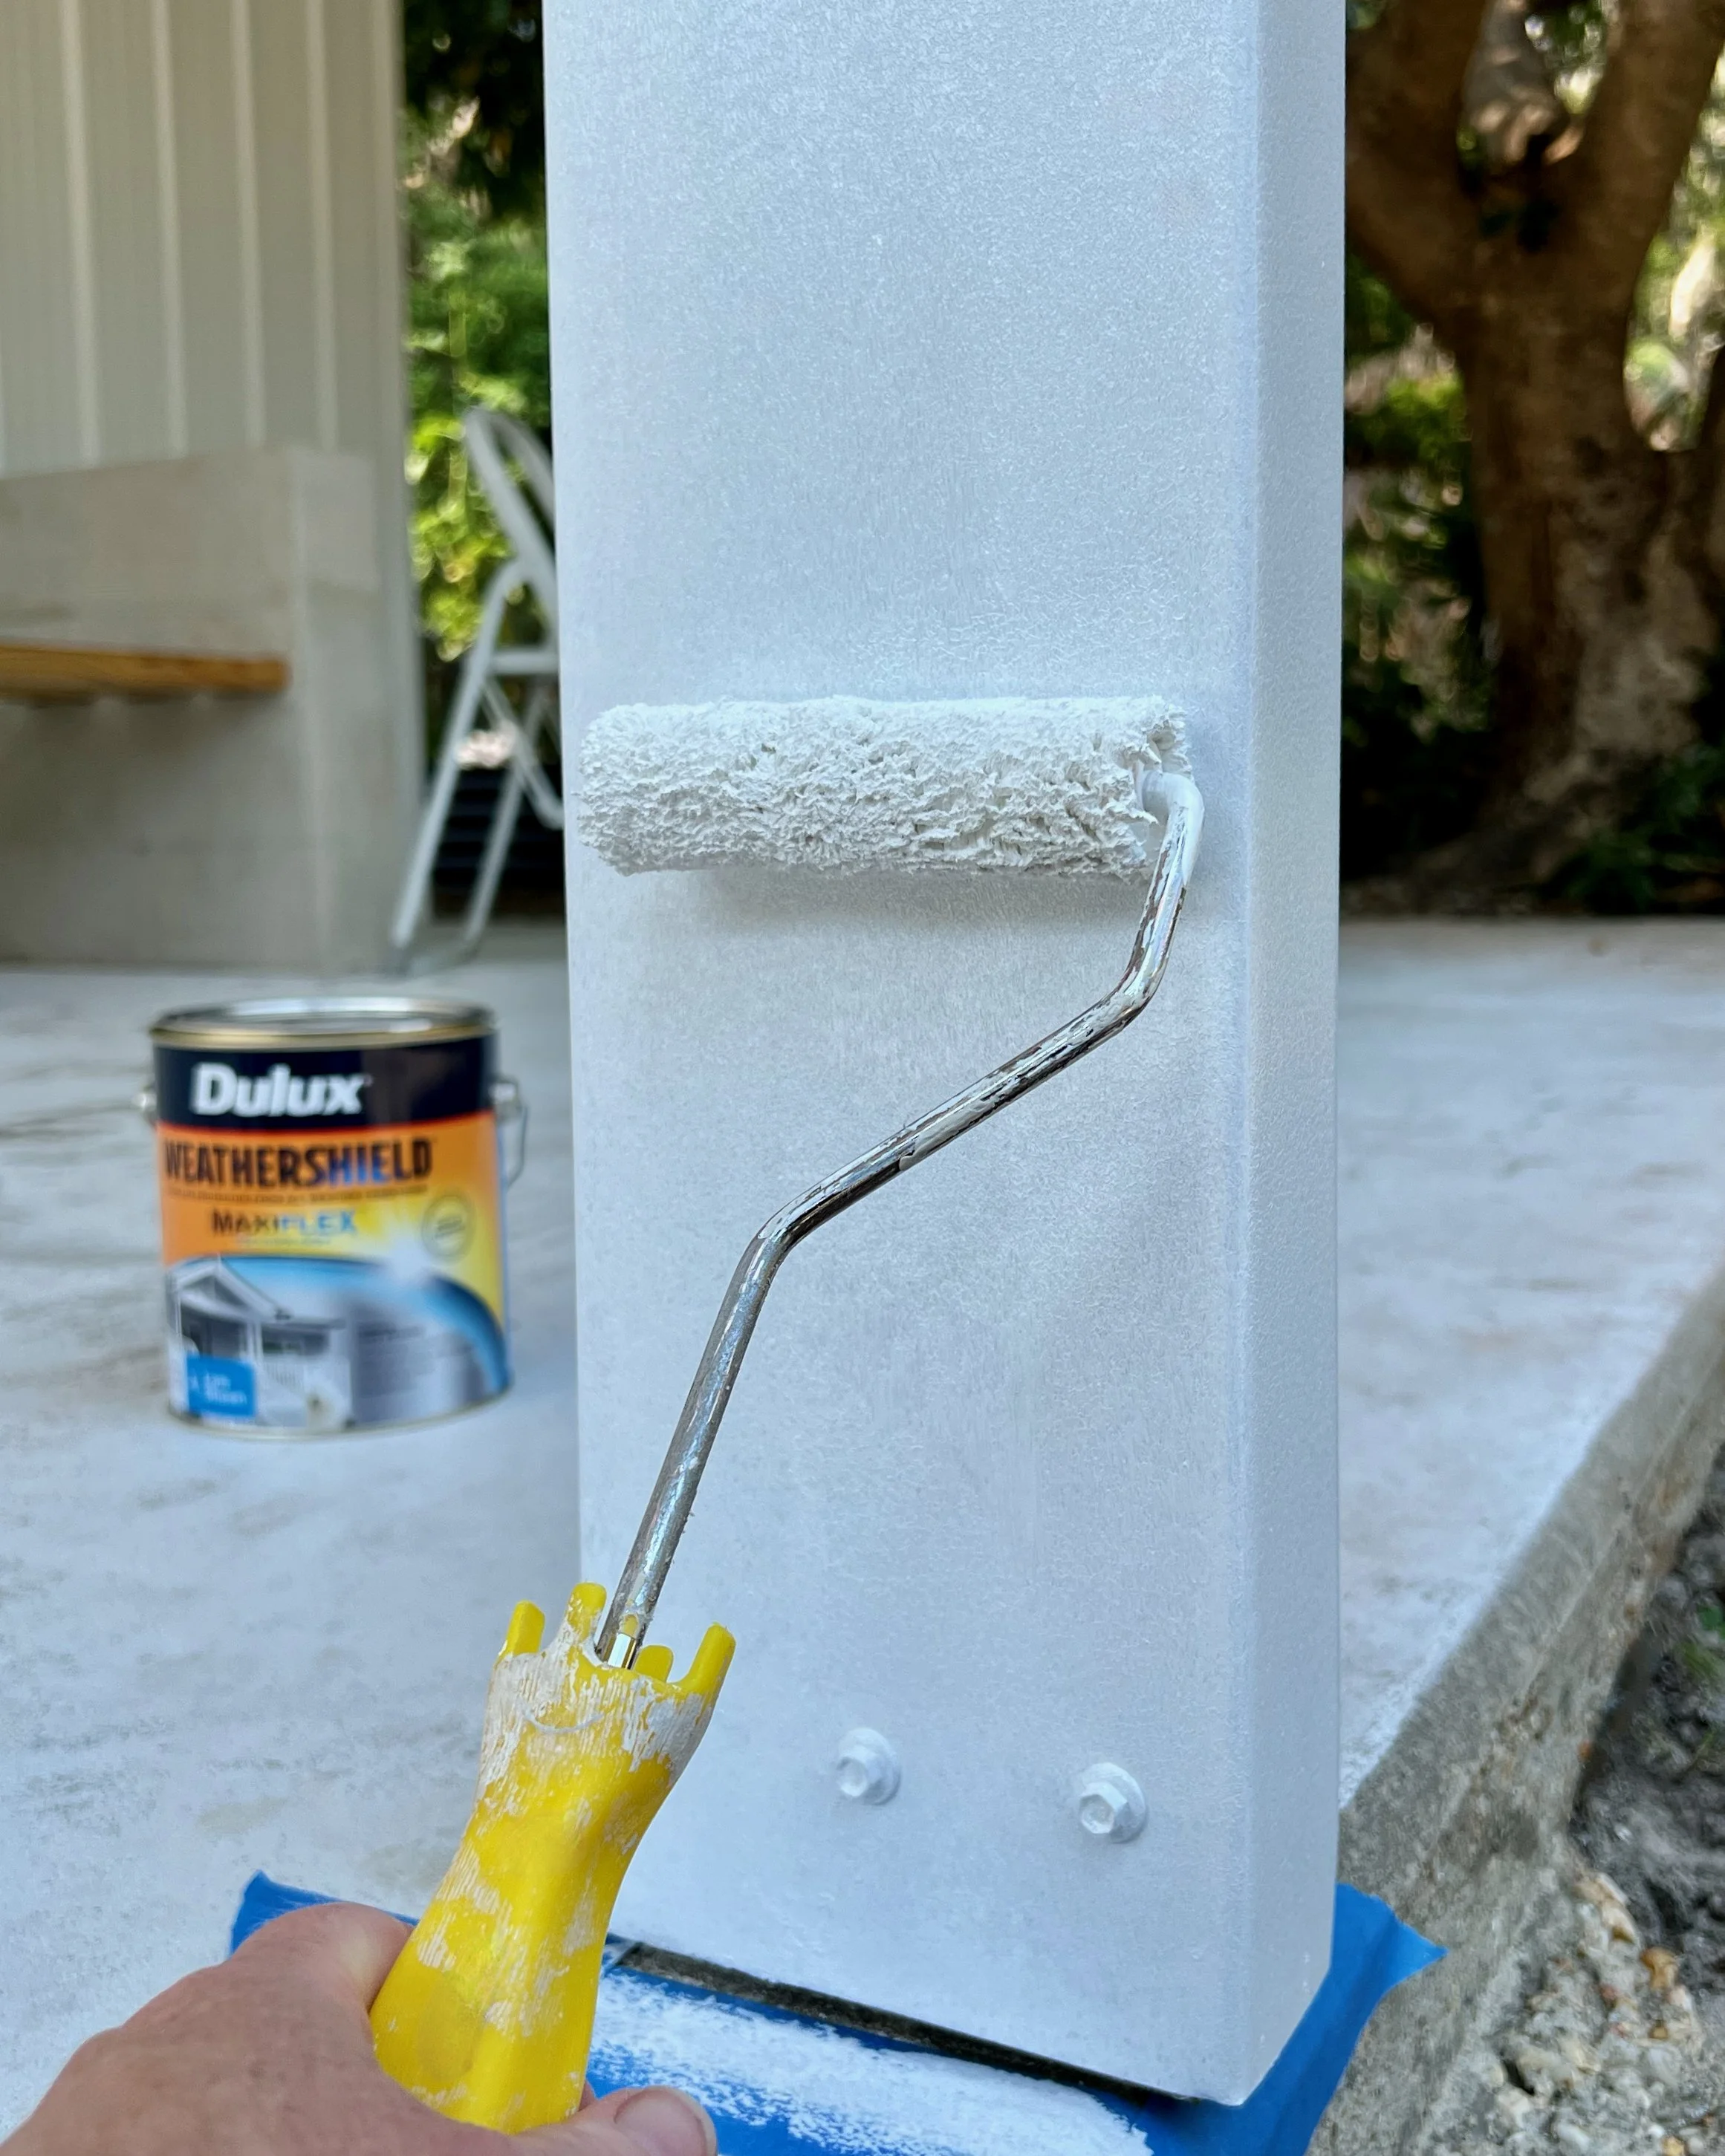
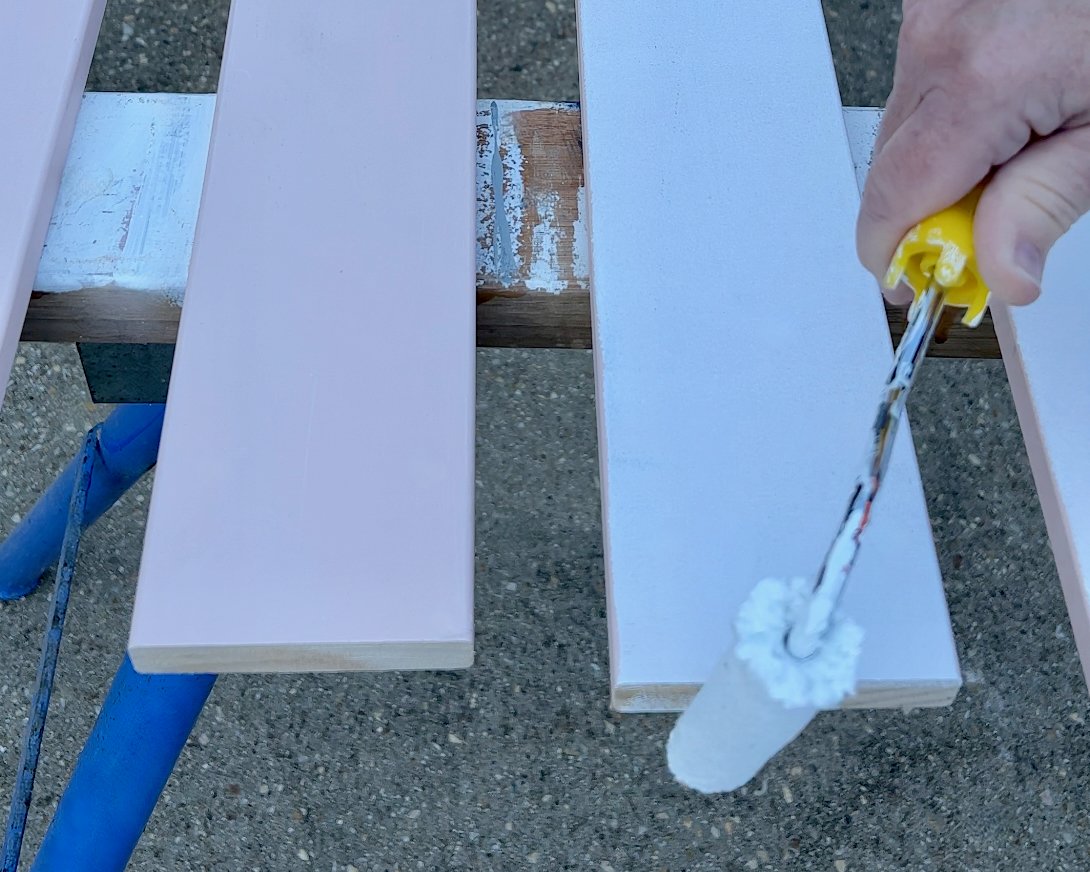
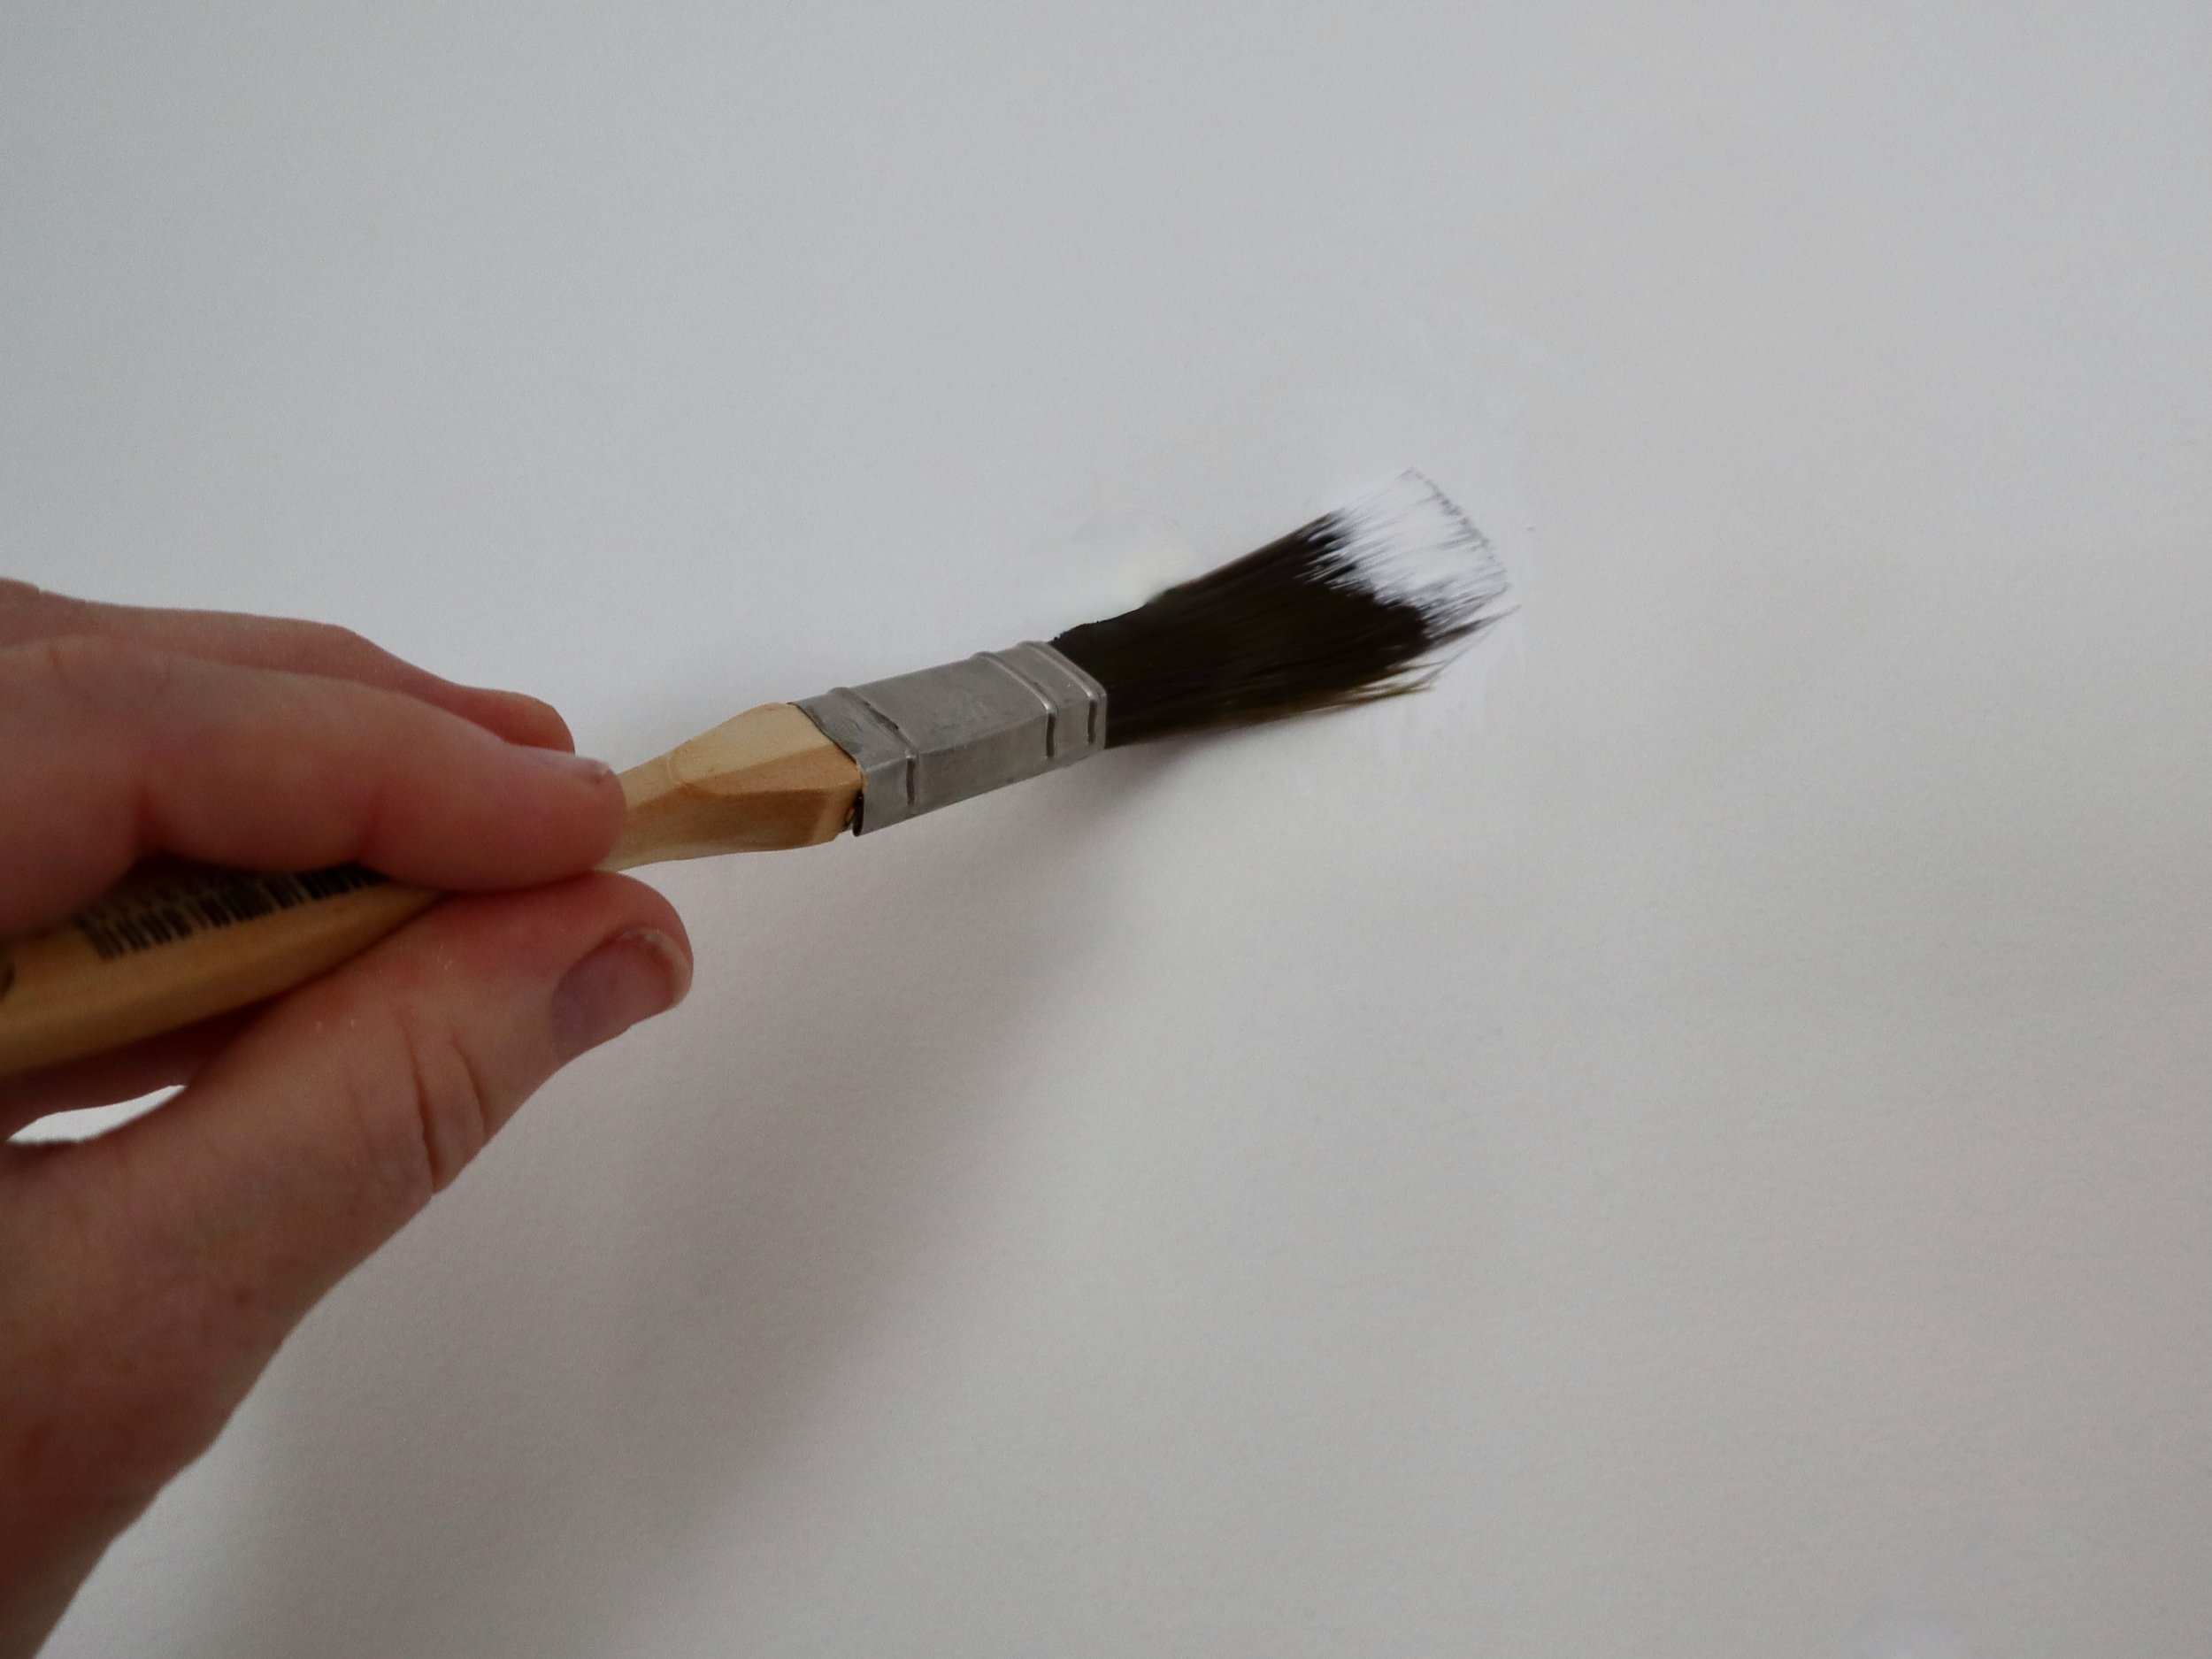
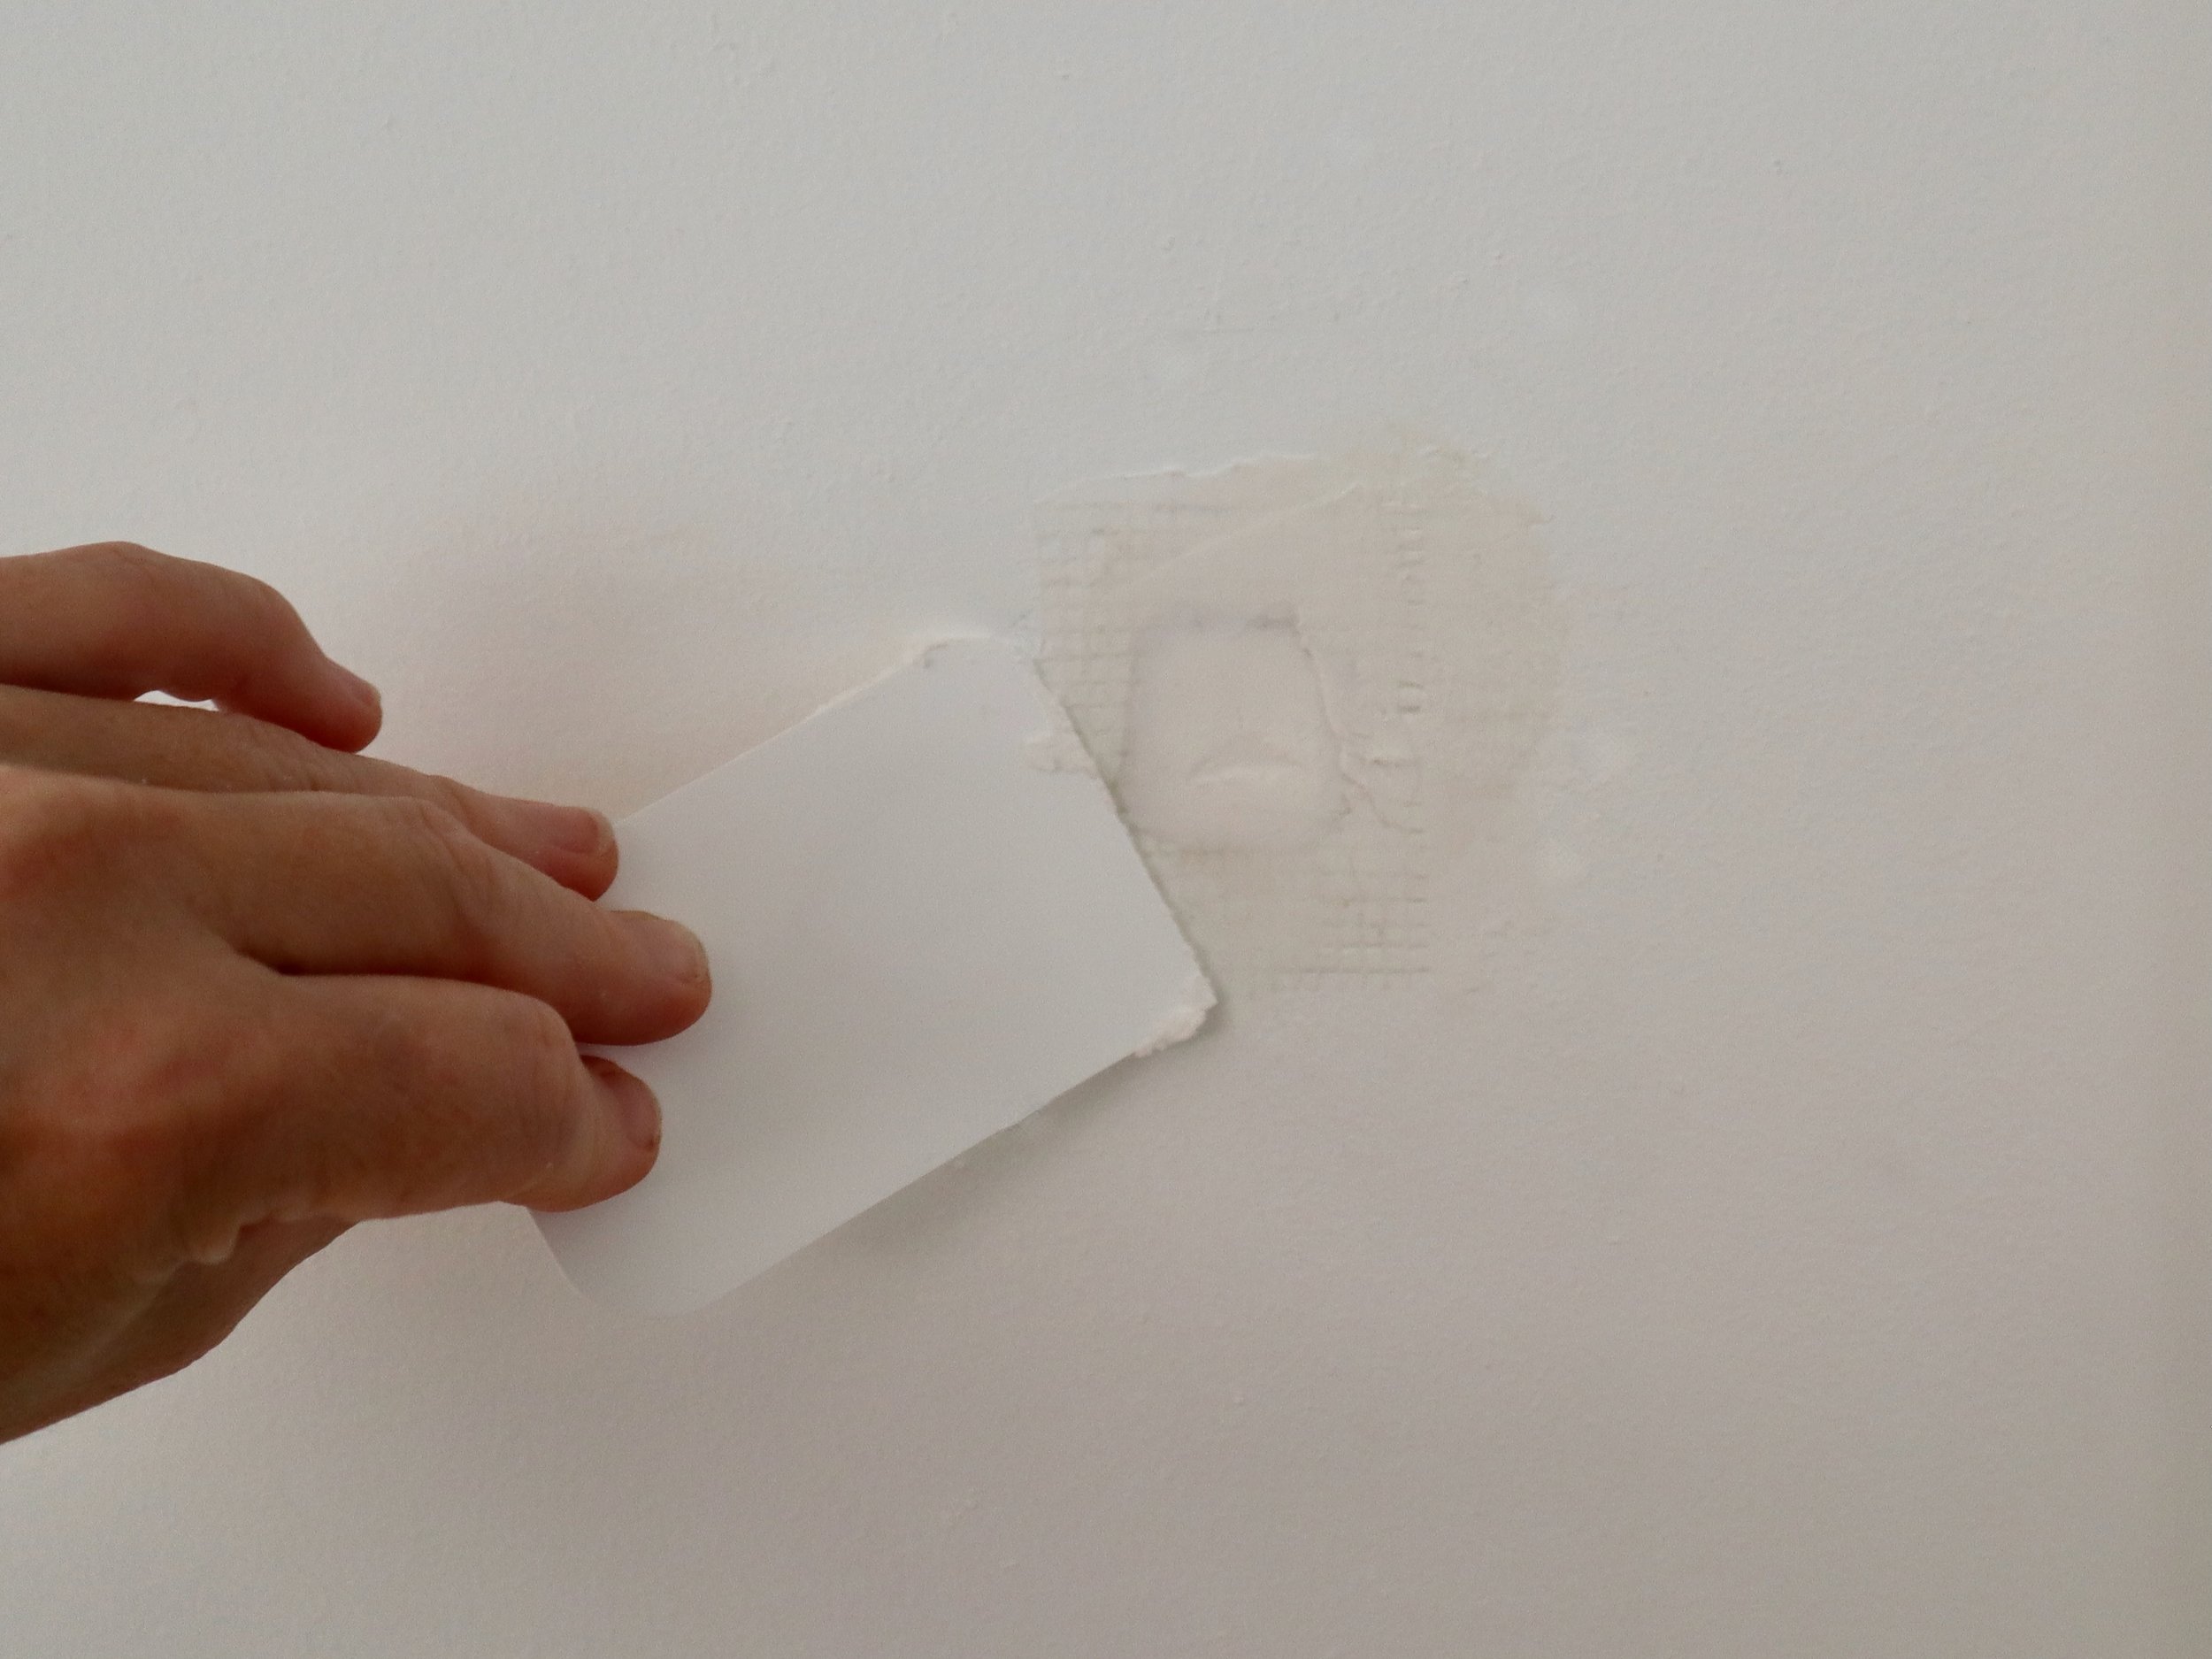
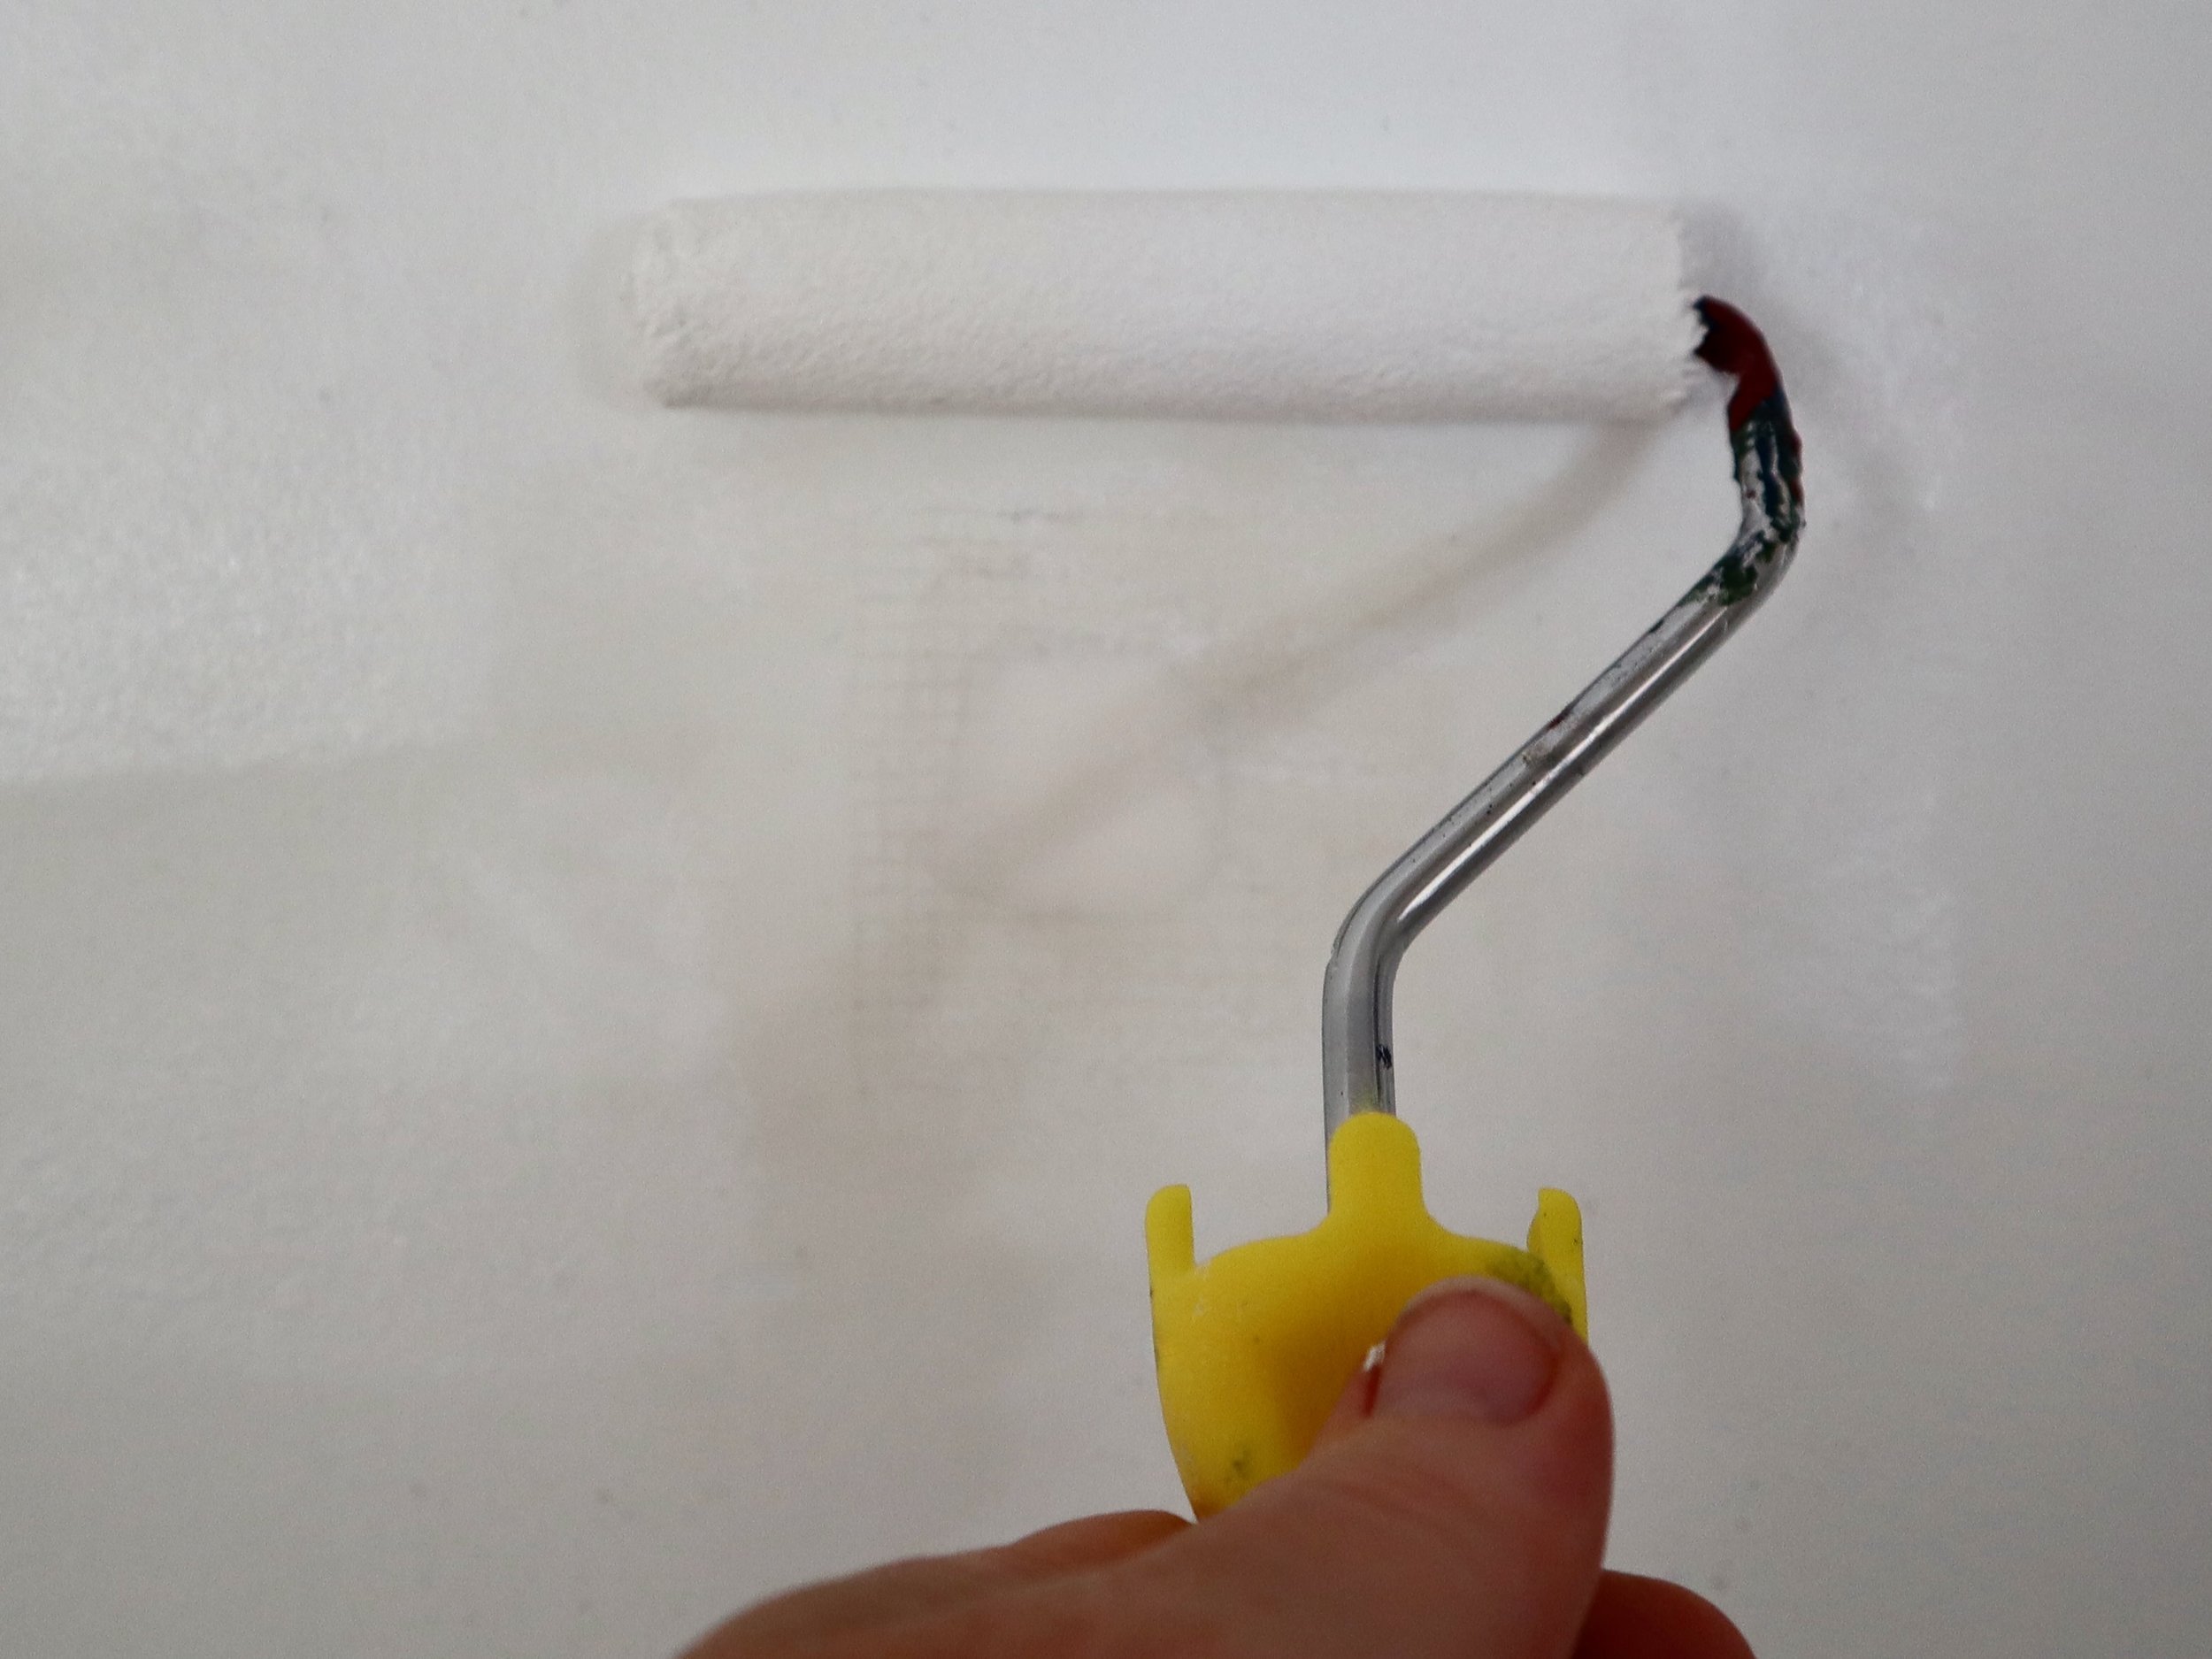
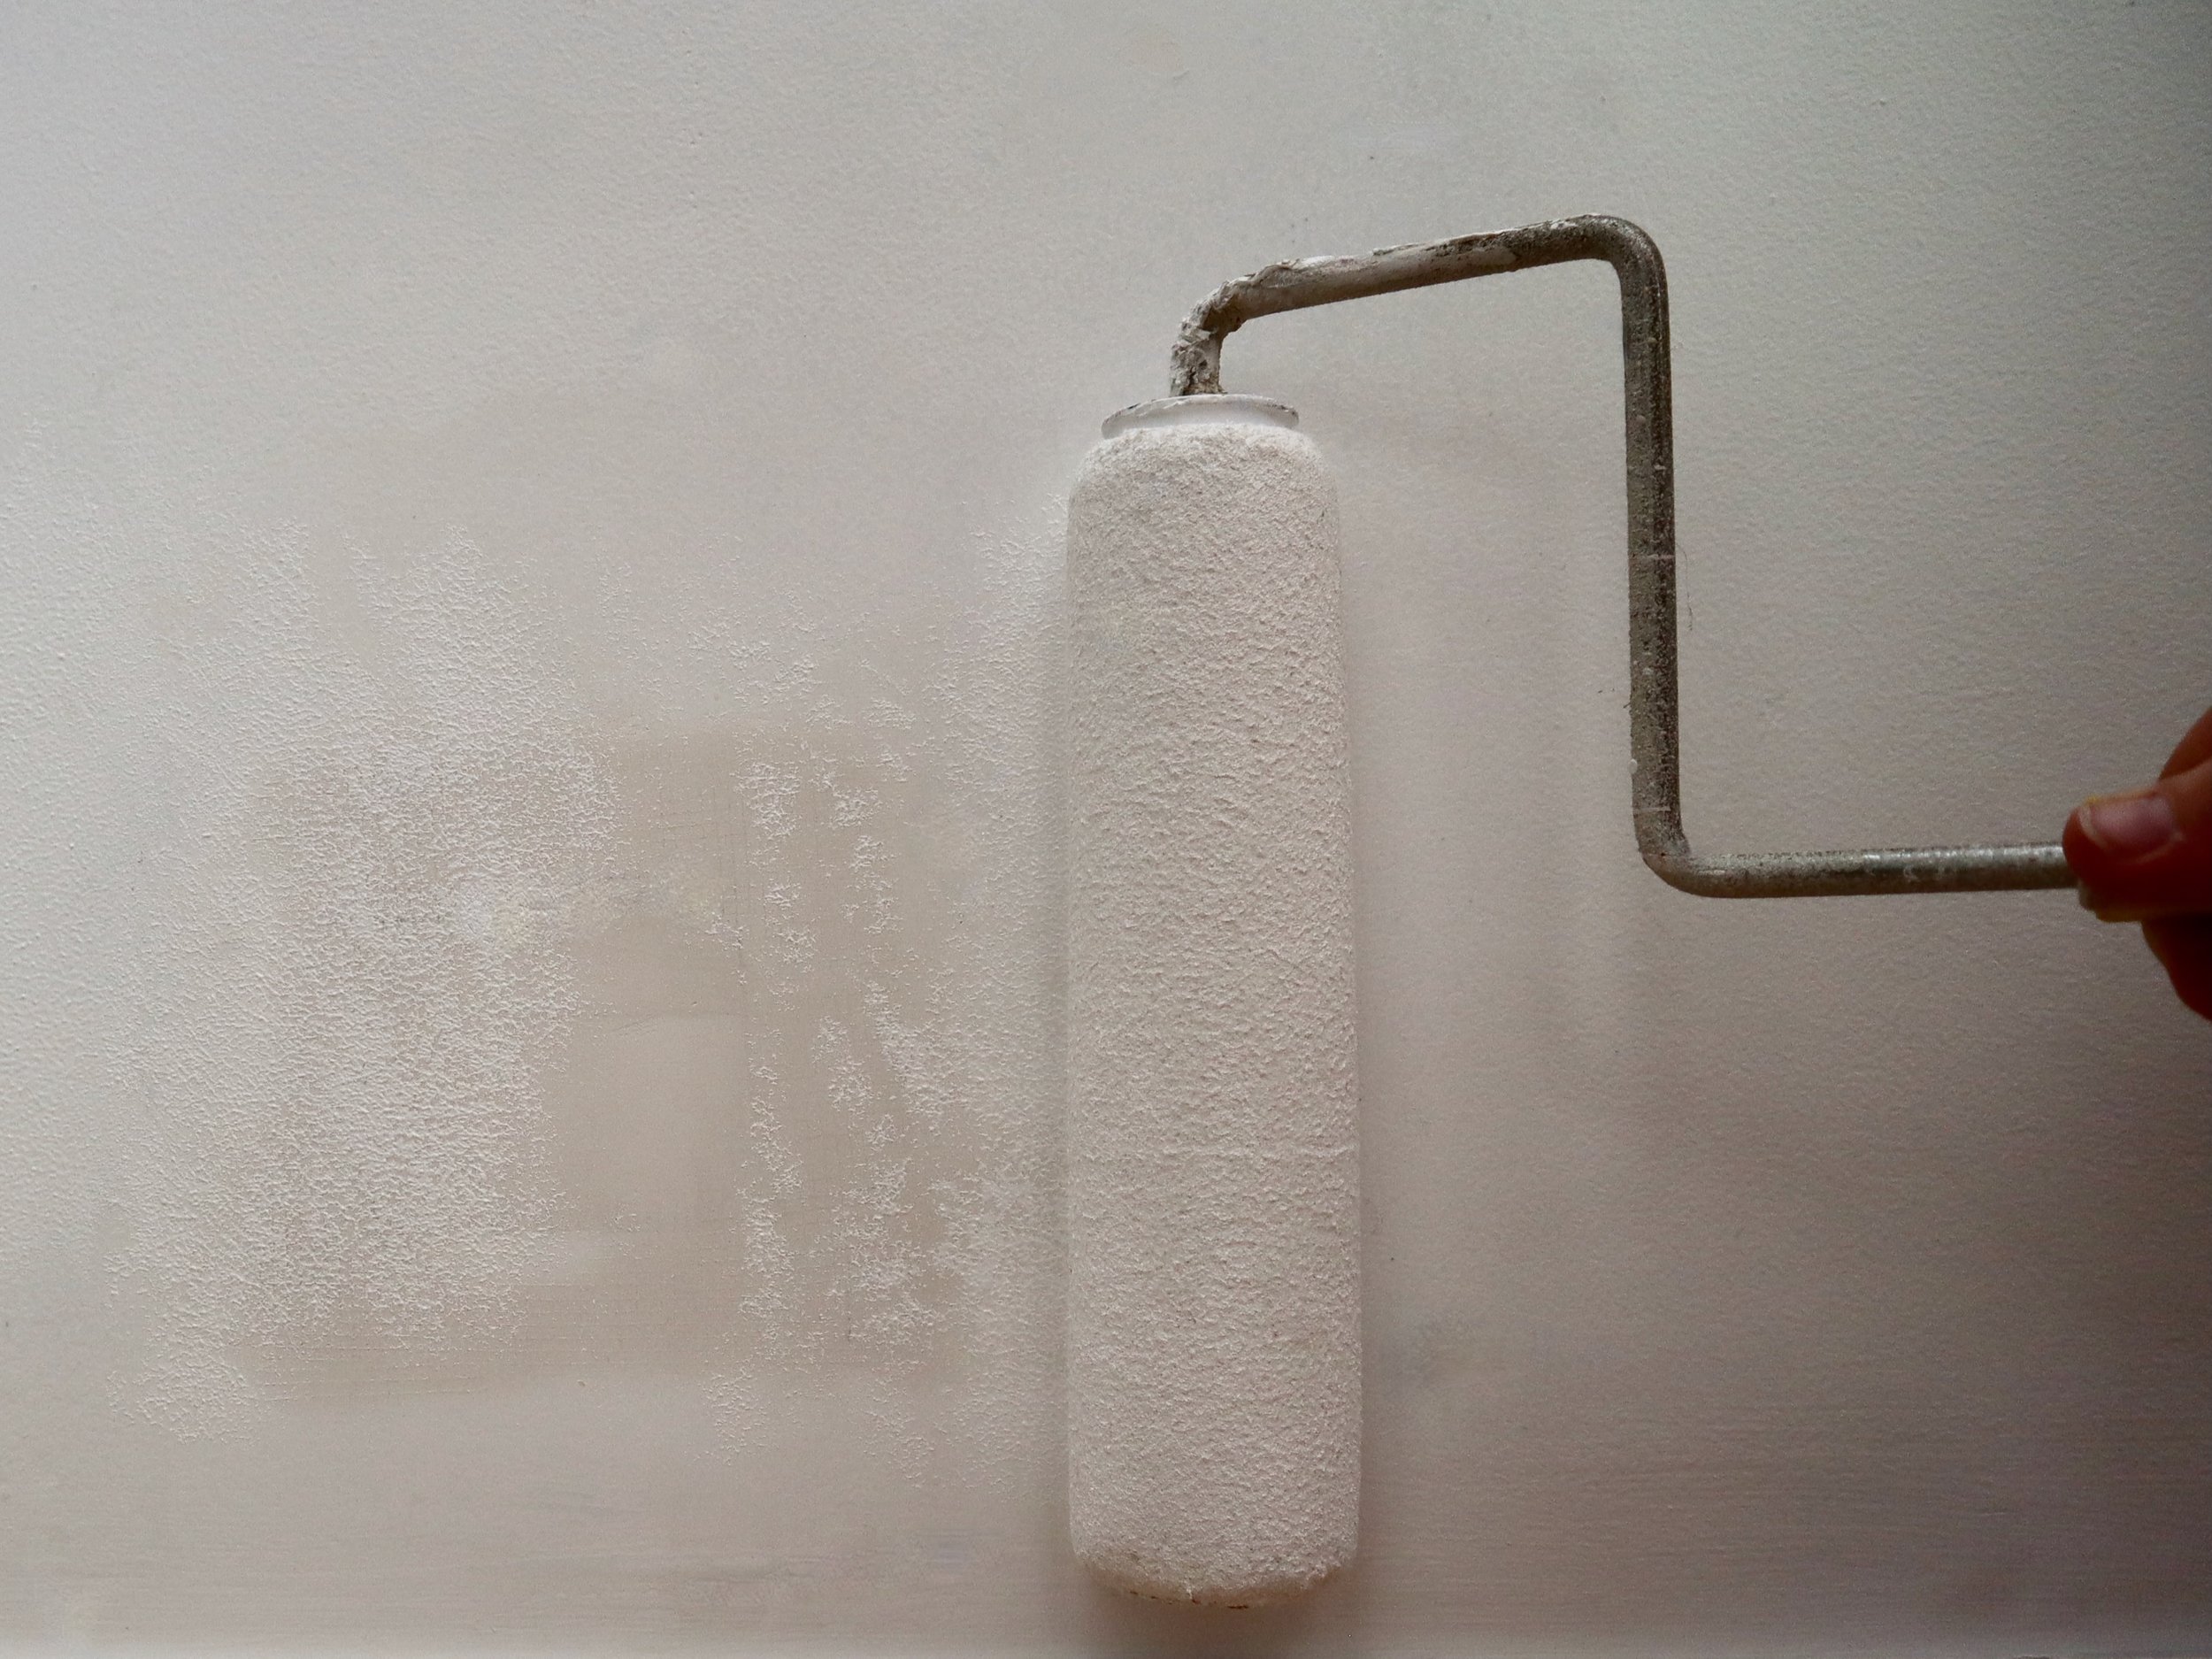
First I primed, then painted the ceiling and walls in Dulux Vivid White to keep the room as bright as possible. Then I cut skirting and window trim to size and painted them with water-based enamel.
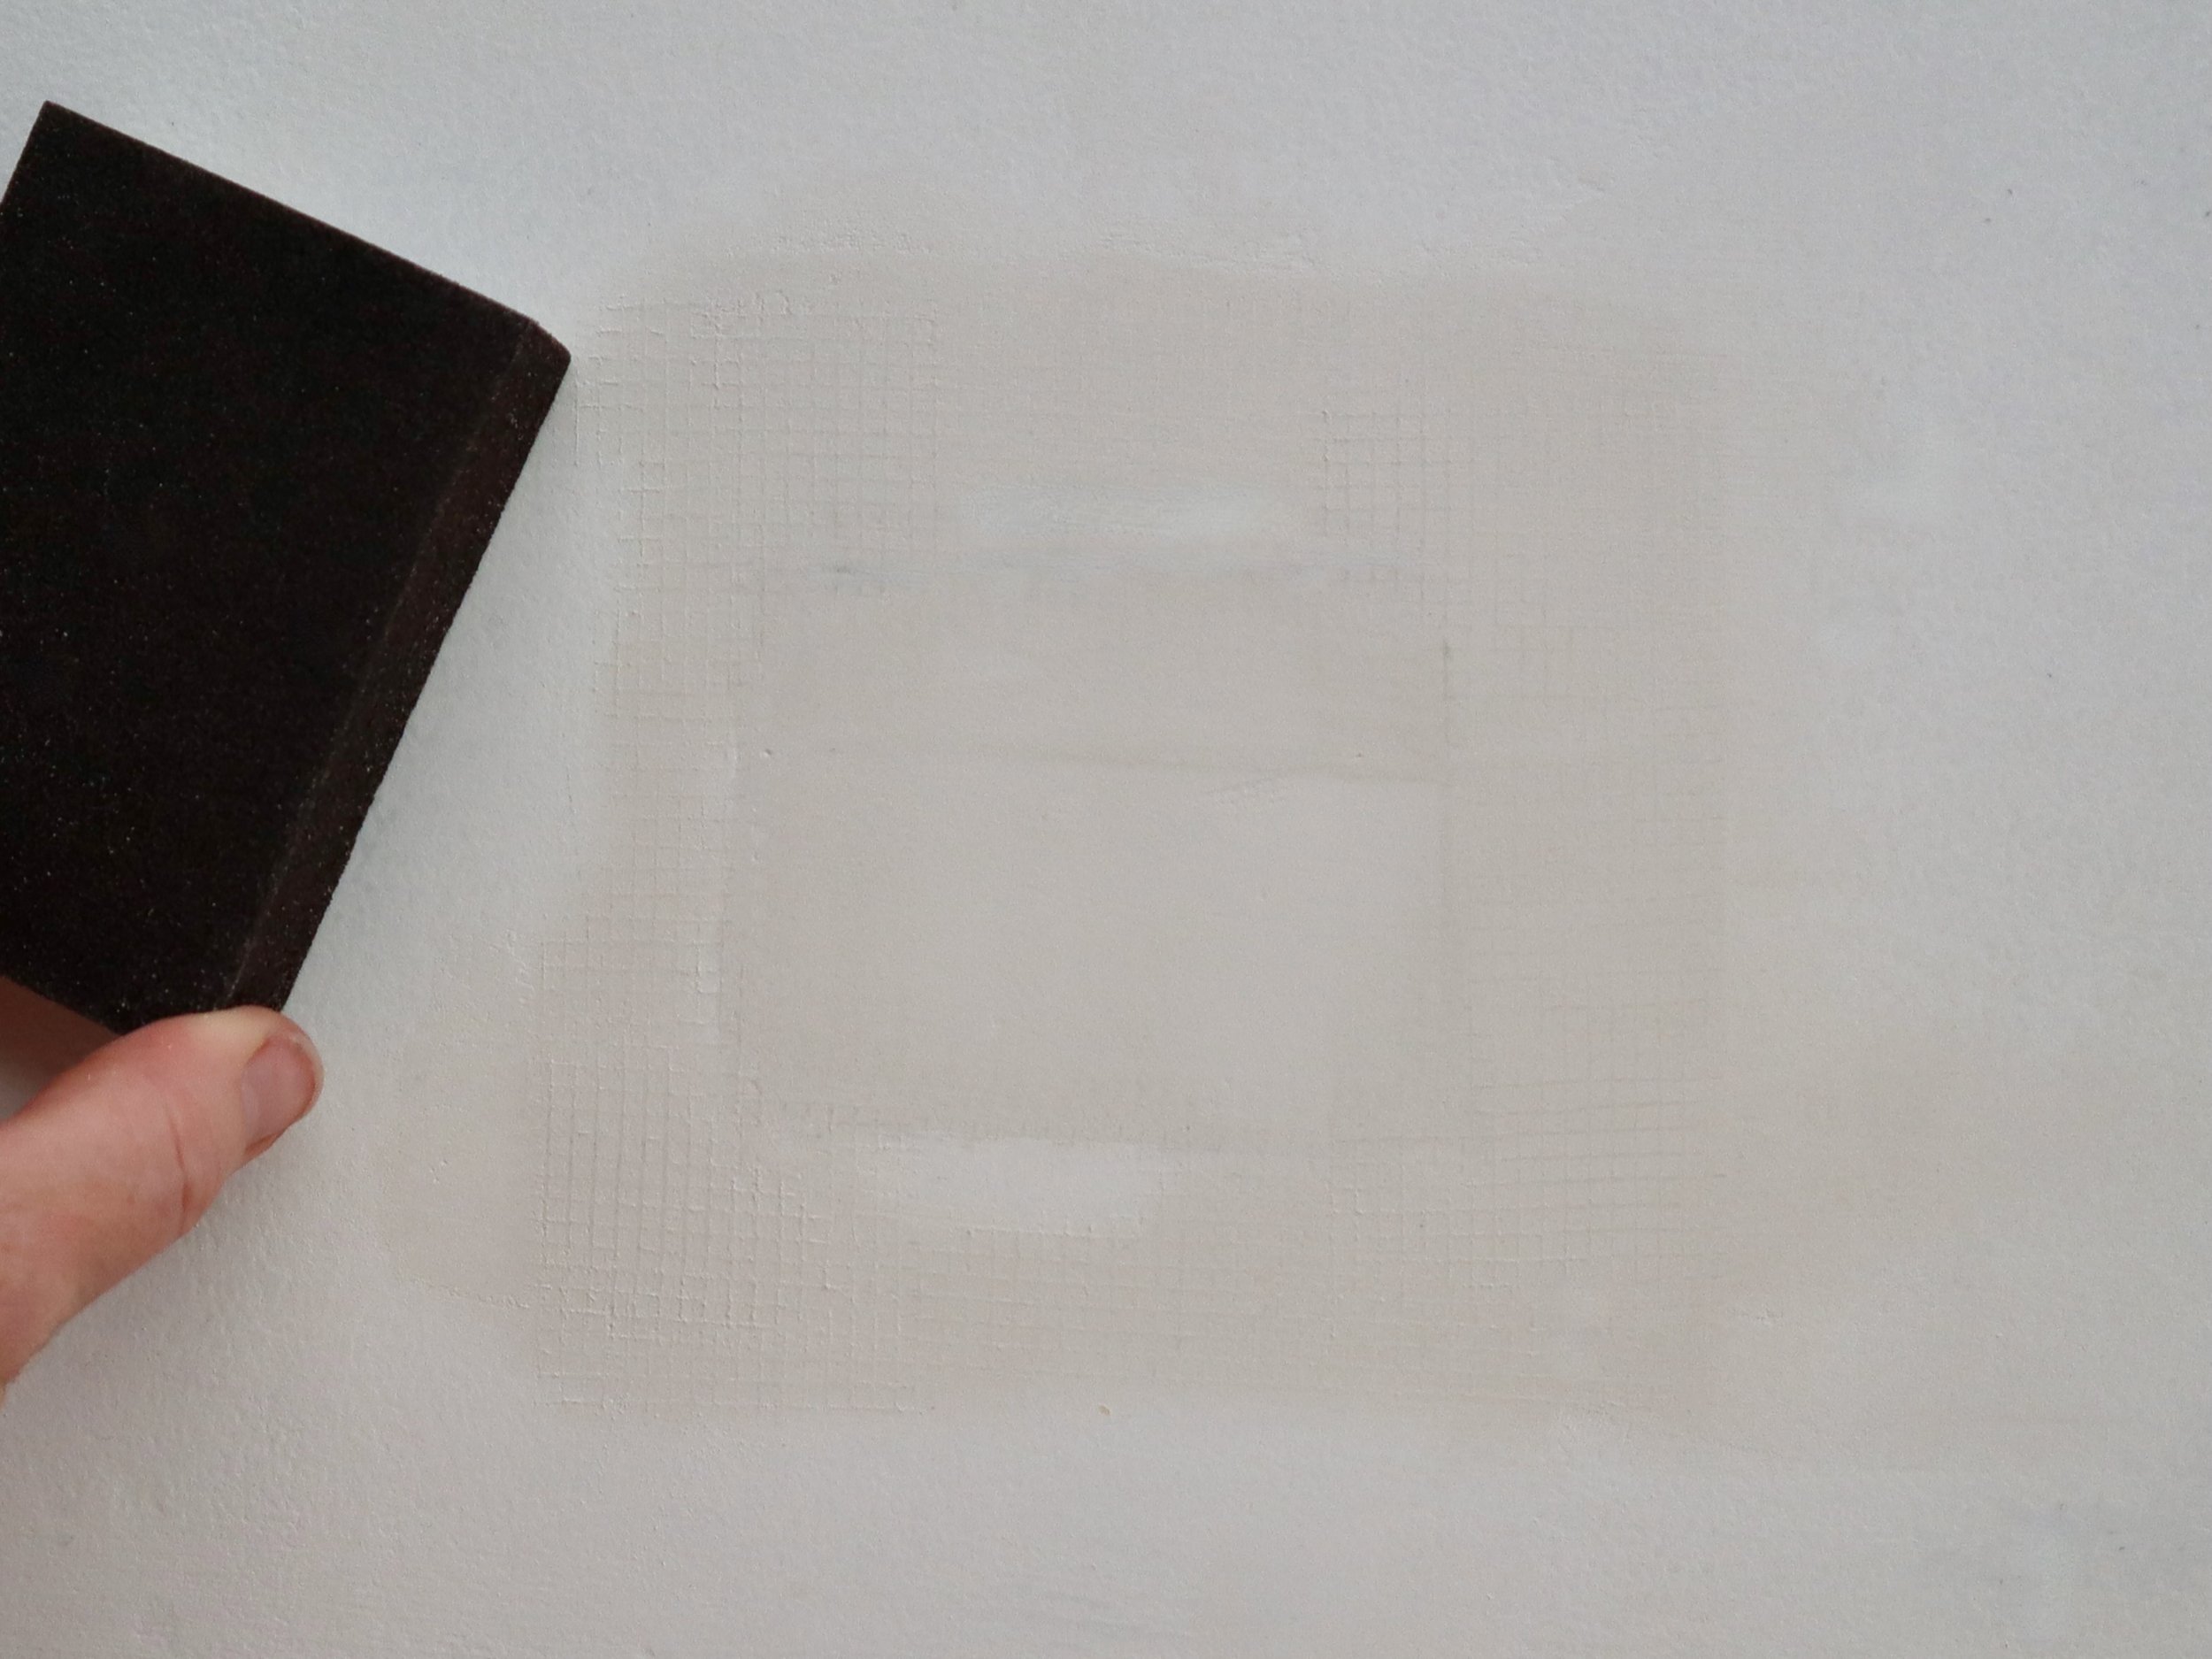
DIY TIP ⁠I can't go past painting grooved wall panels with mini rollers. They're lightweight and only need a small tray, making them easier to use up a ladder. I load the roller then run the tip down the grooves instead of using a brush to cut in. It's faster, with less cleaning up. ⁠
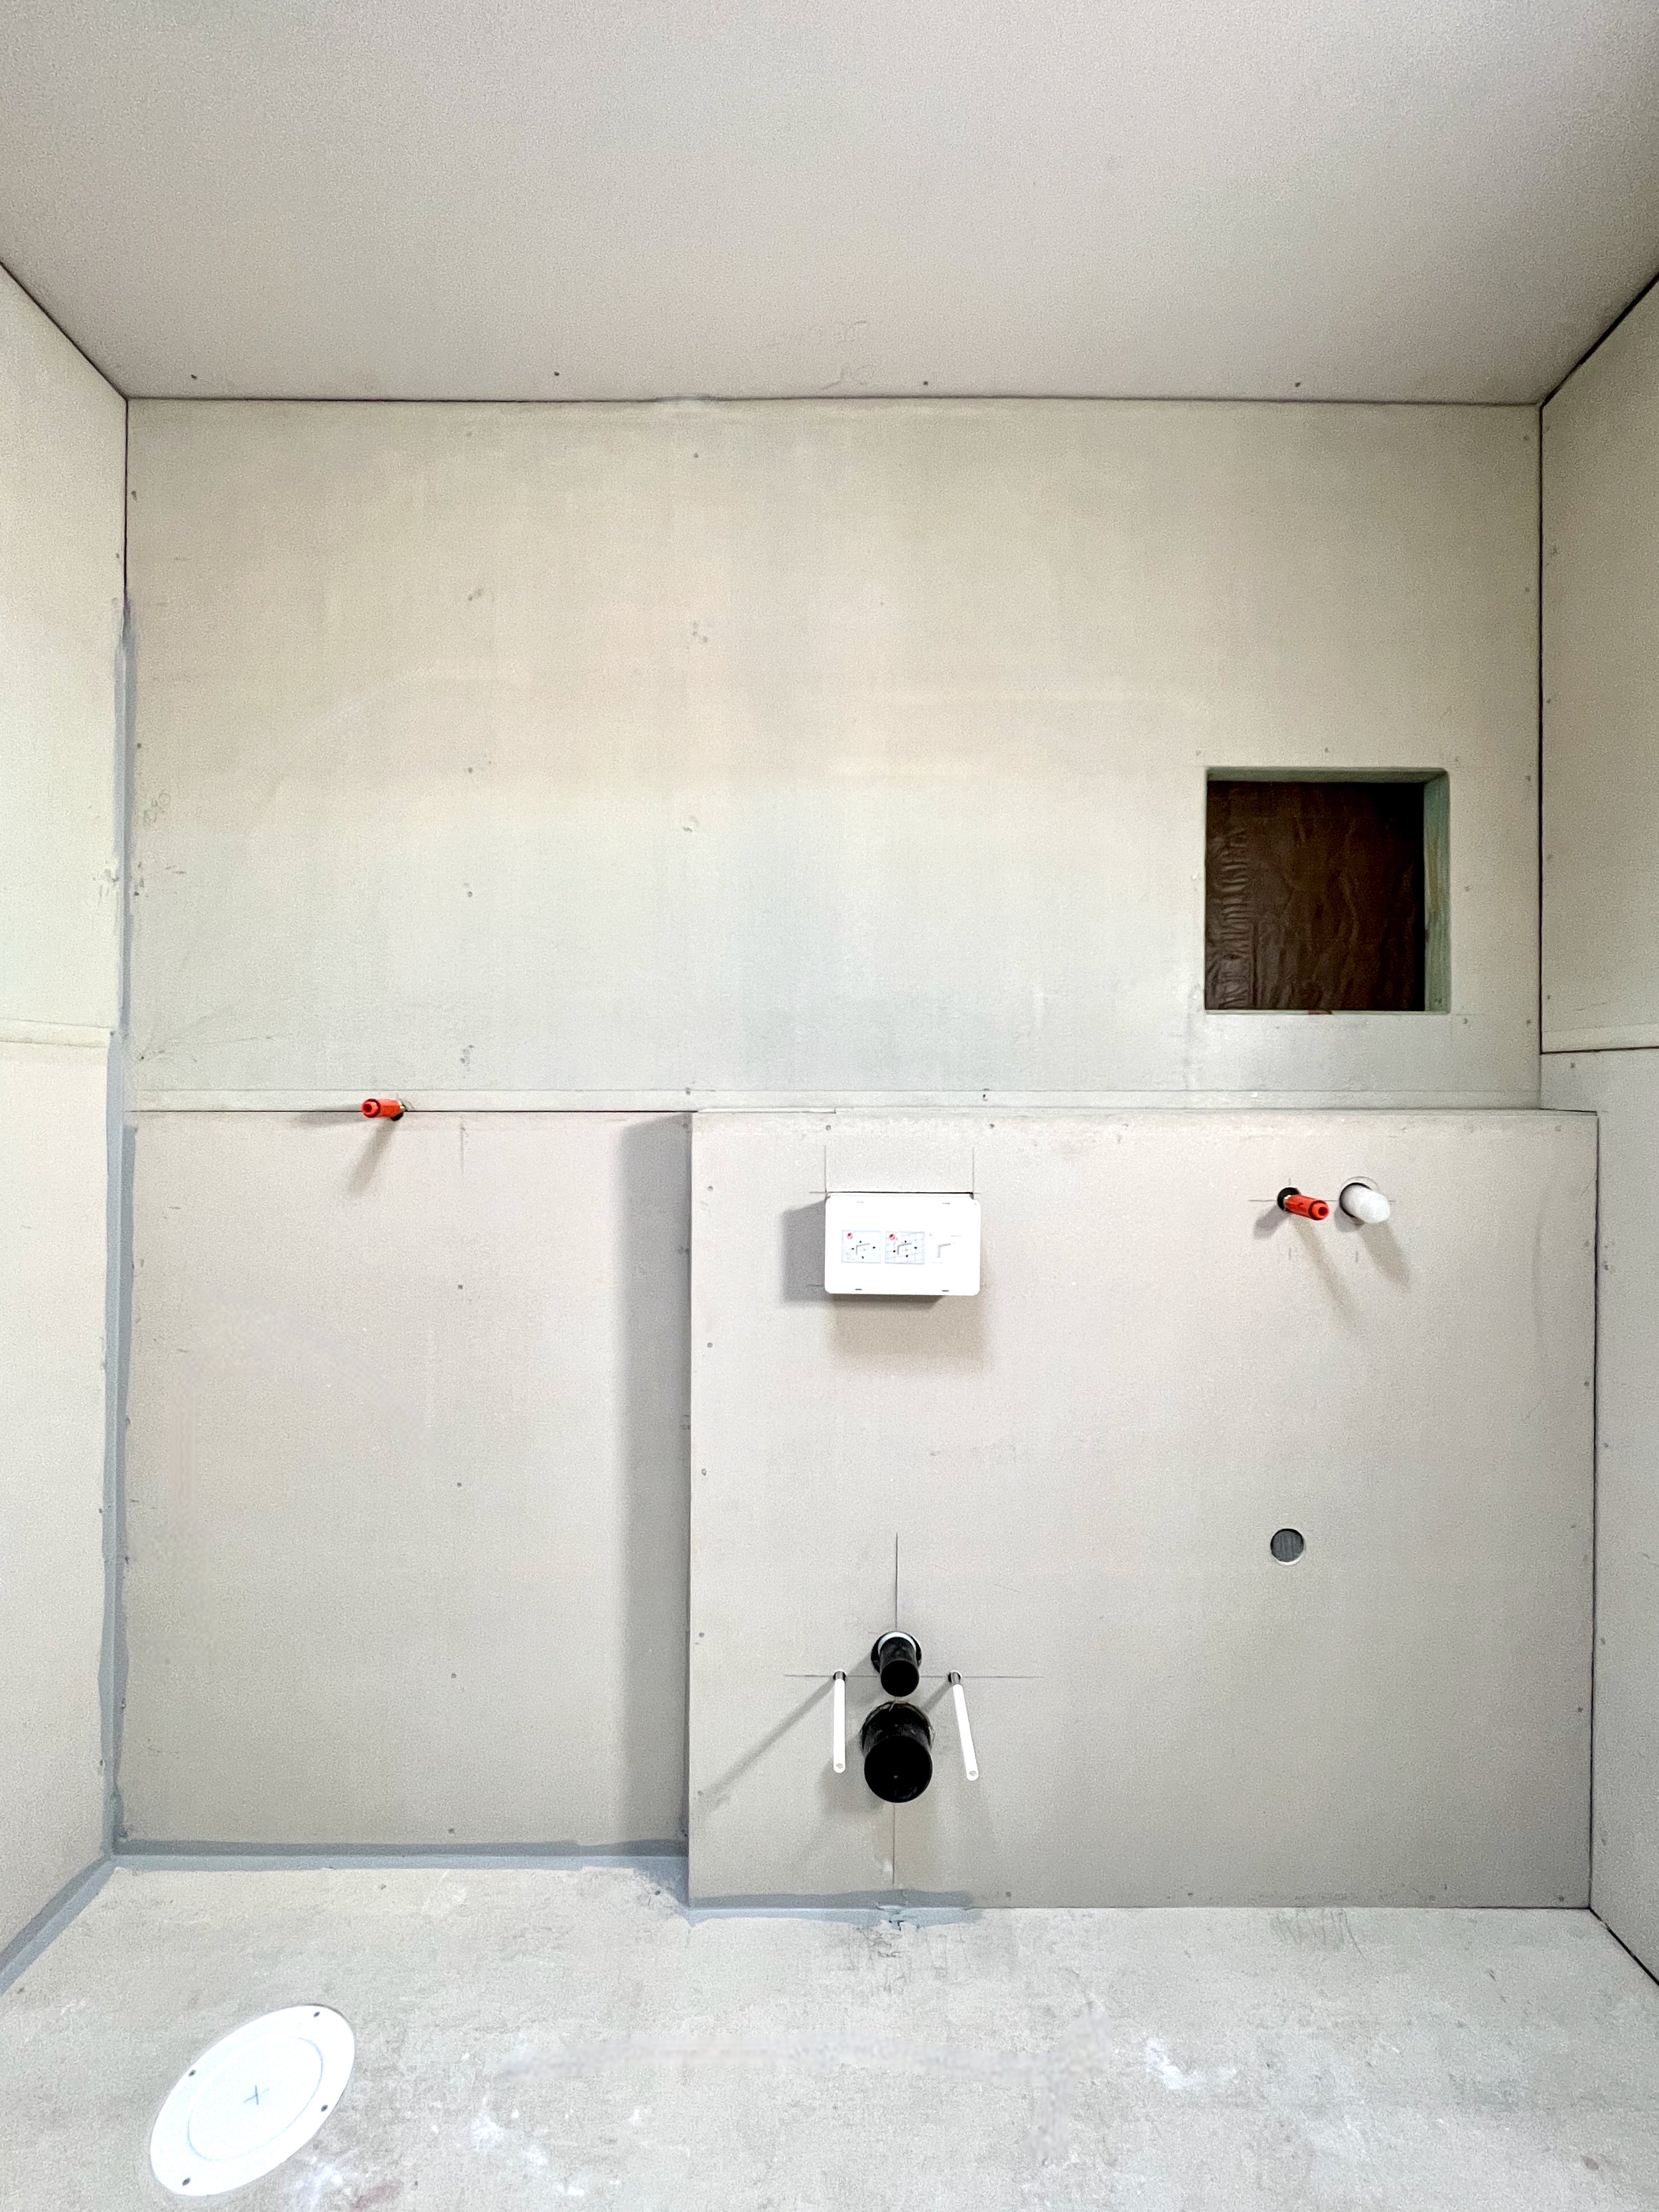
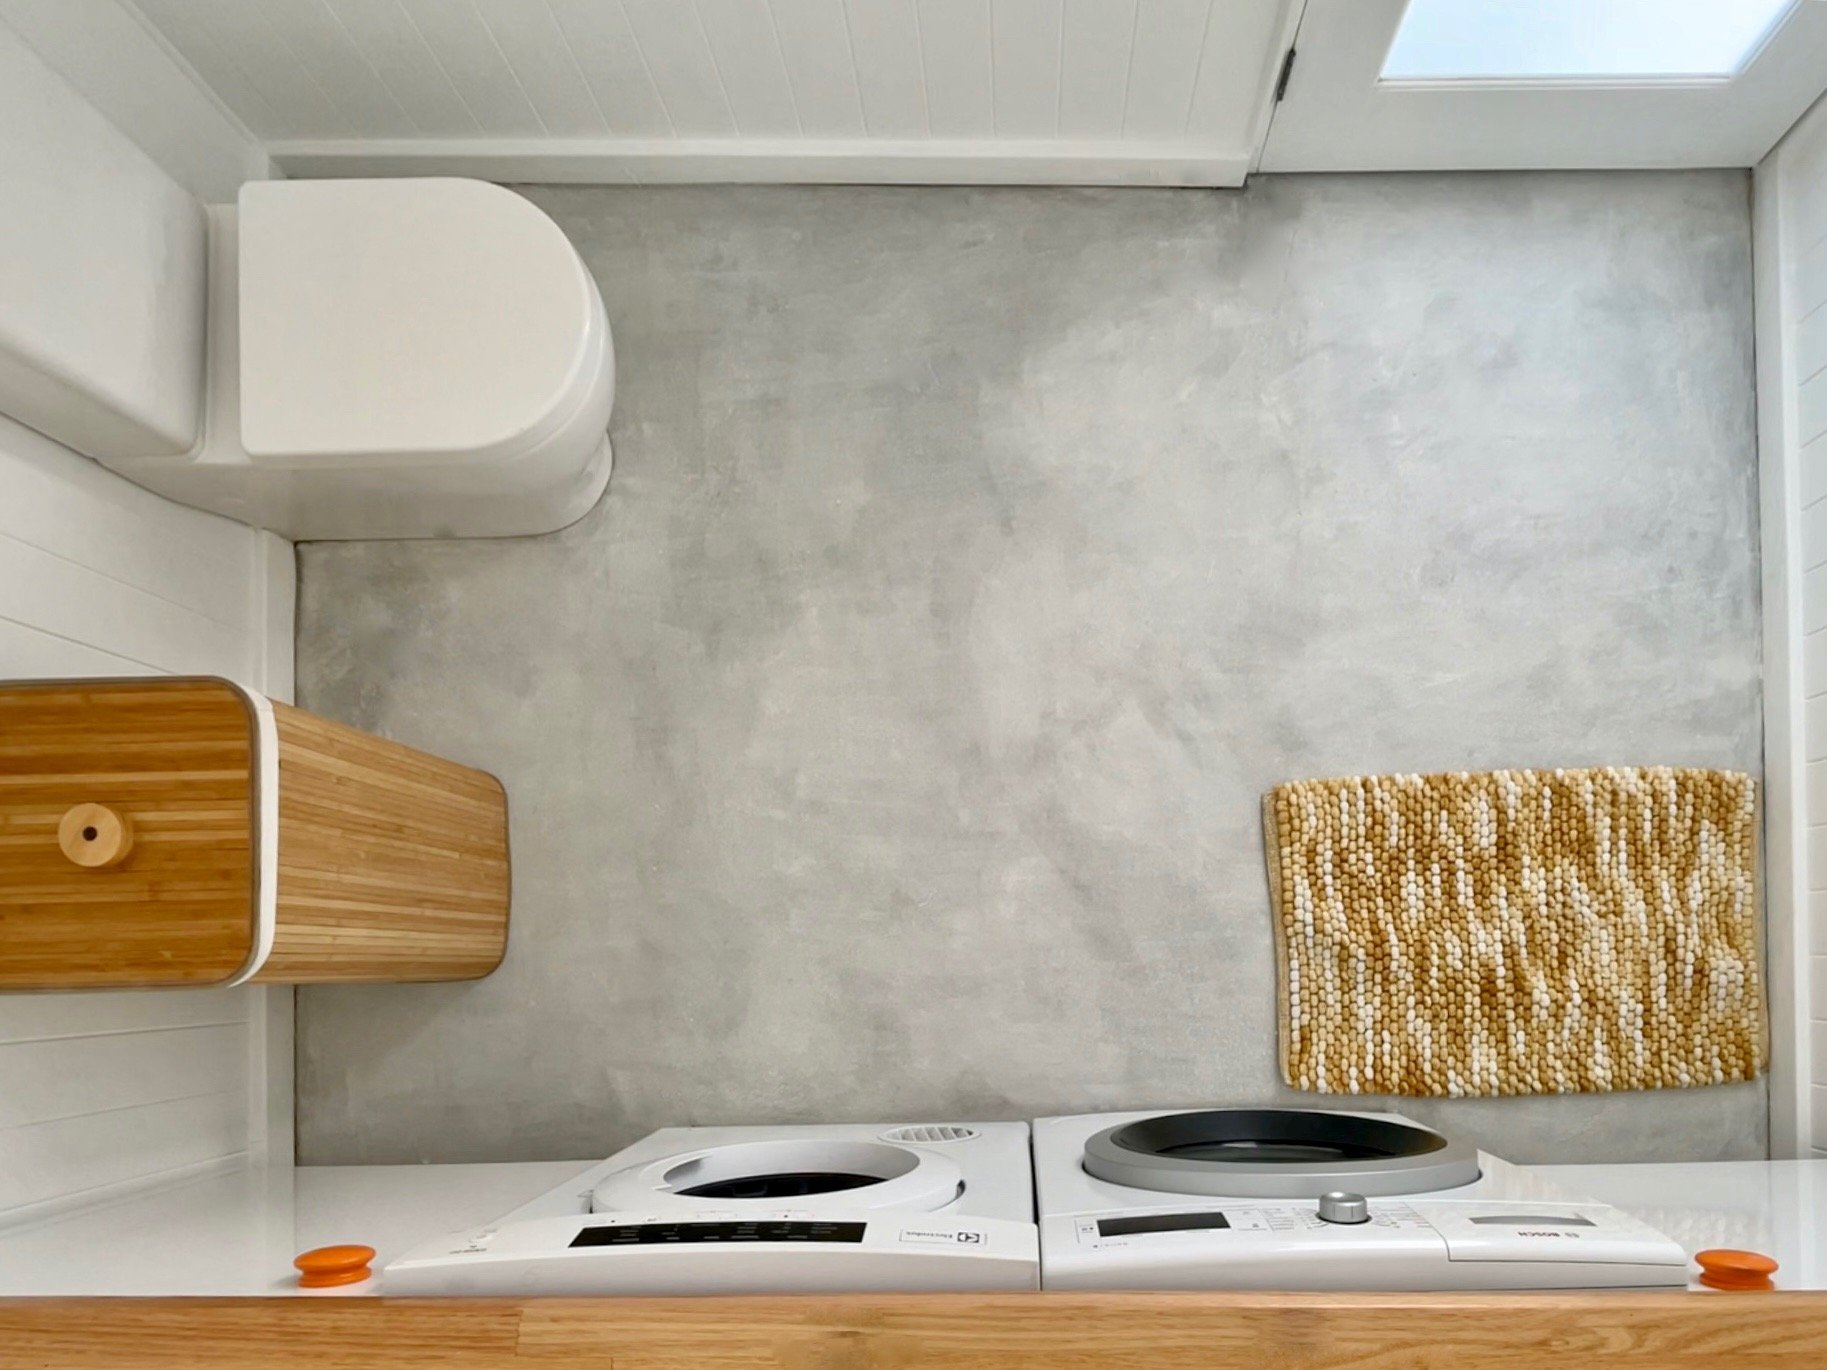
 

THE PLUMBING SETOUT

To avoid moving the sink waste that was plumbed through the concrete slab, I designed the room to keep the sink and washing machine plumbing in the same spot. The toilet was installed via new pipes from underneath the house.
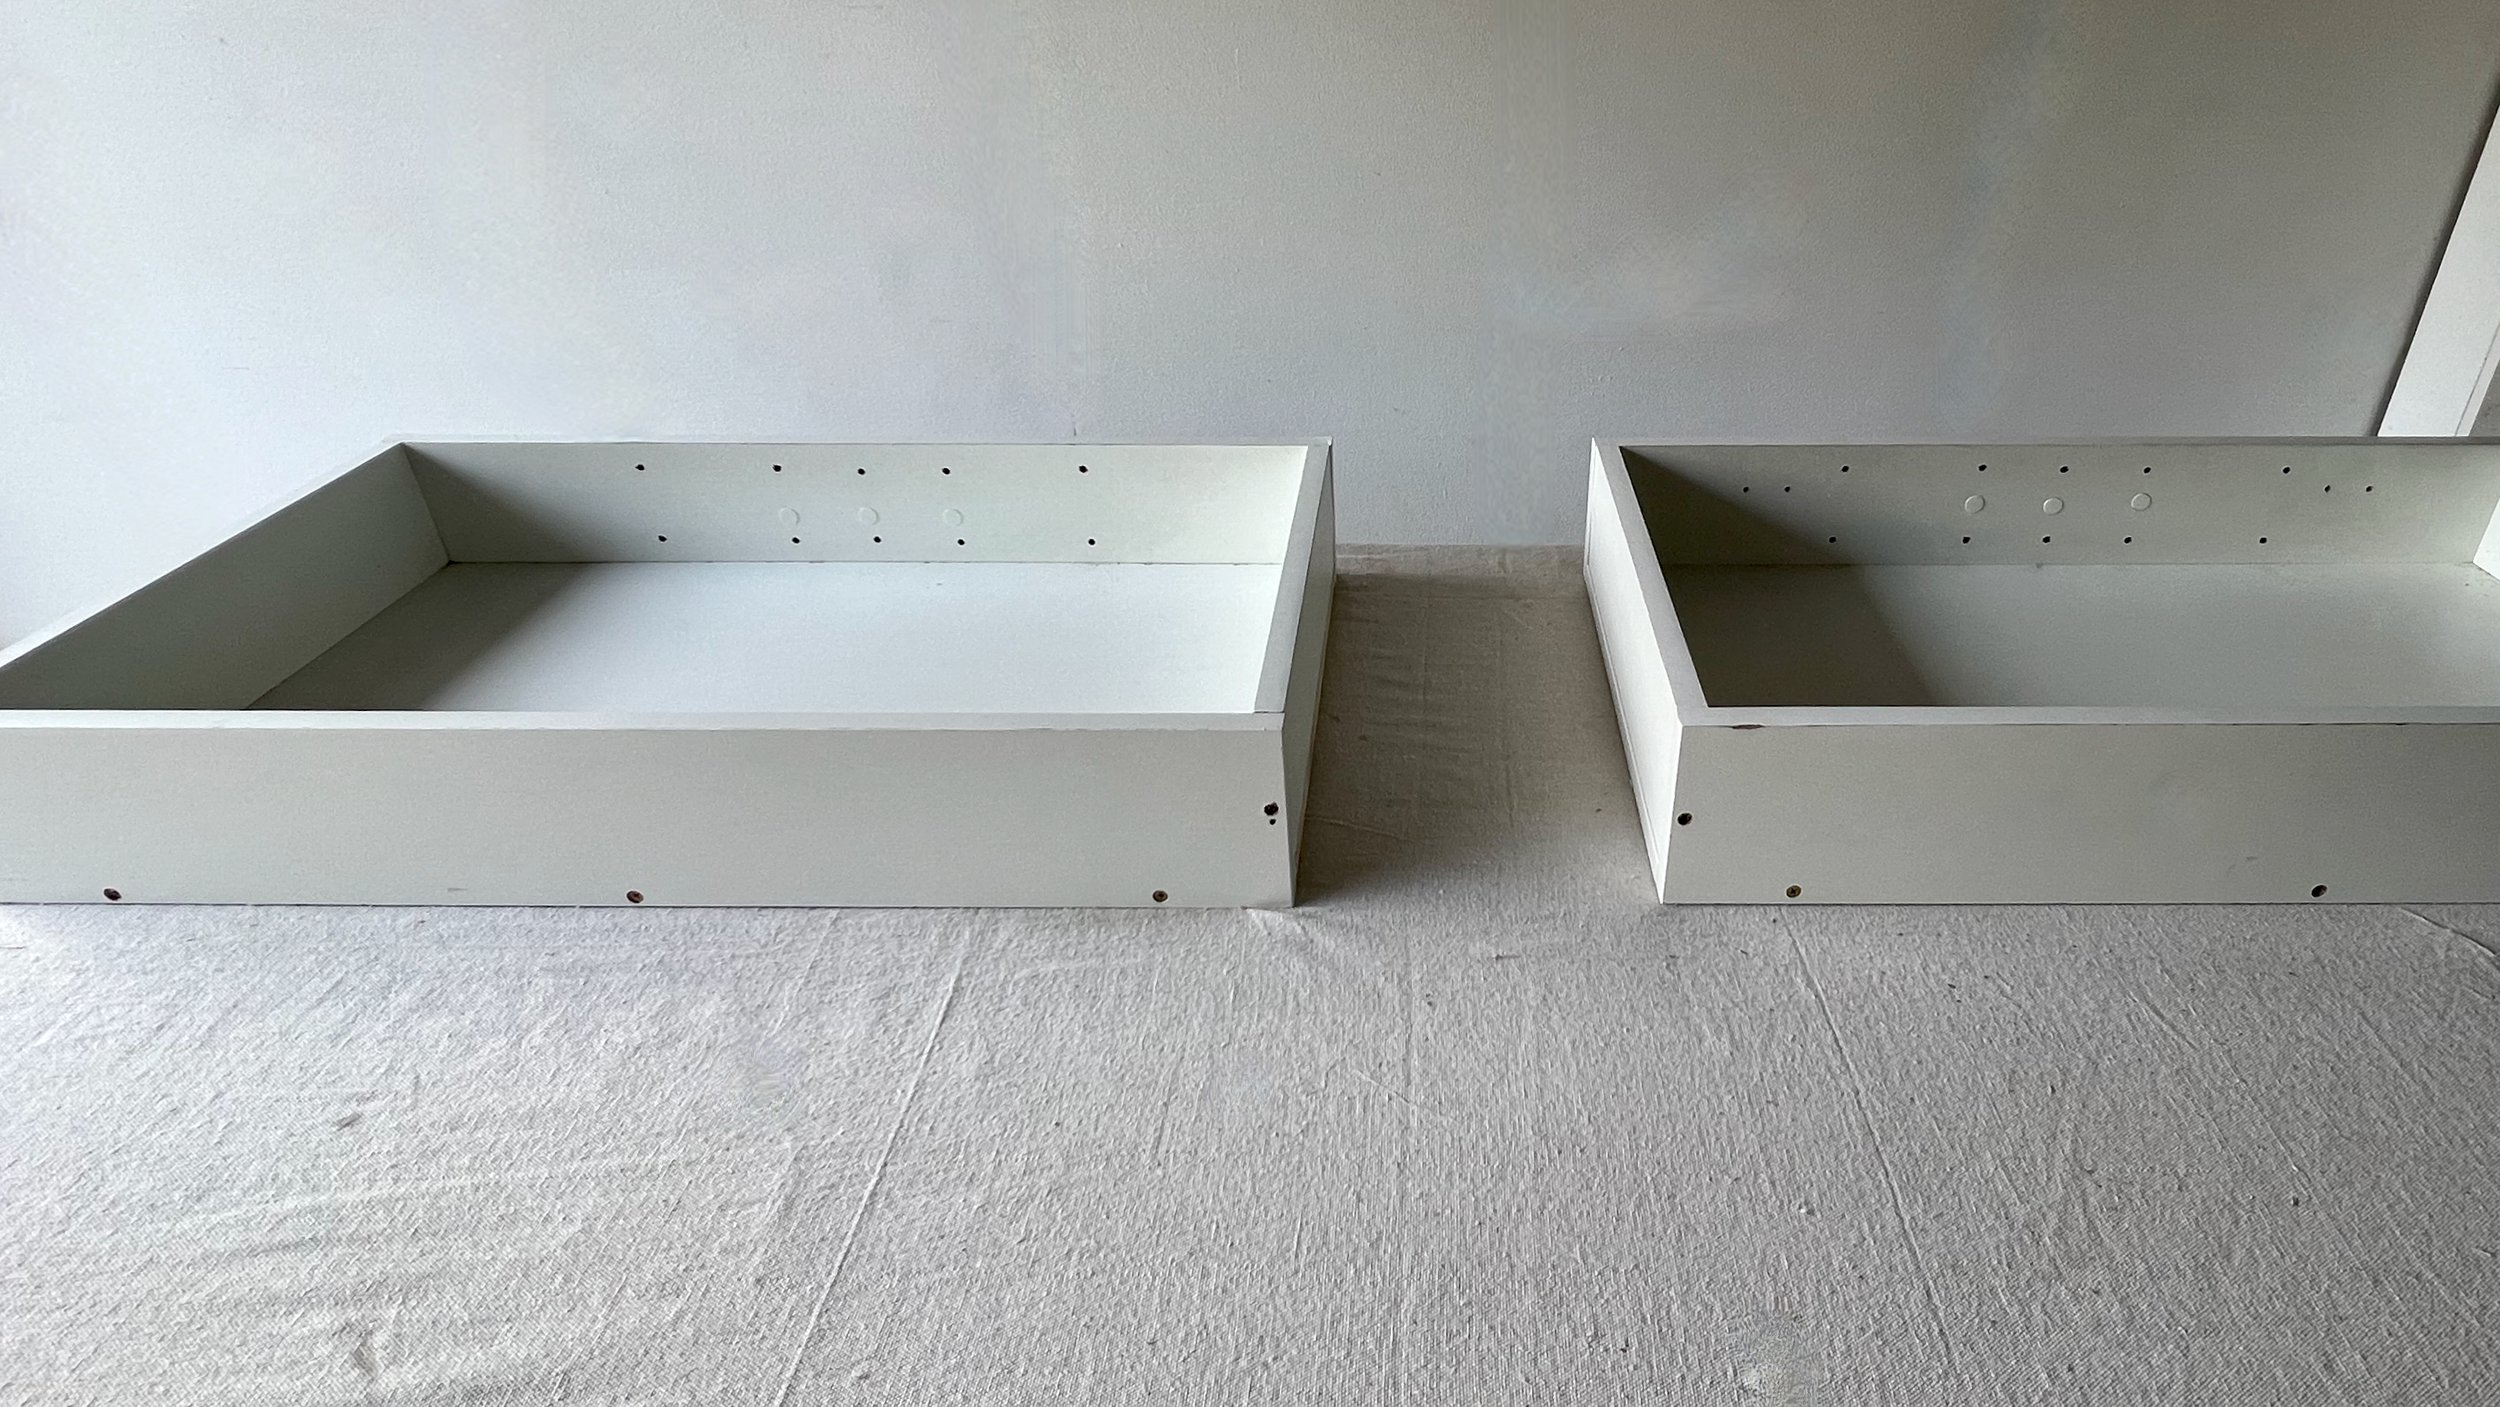
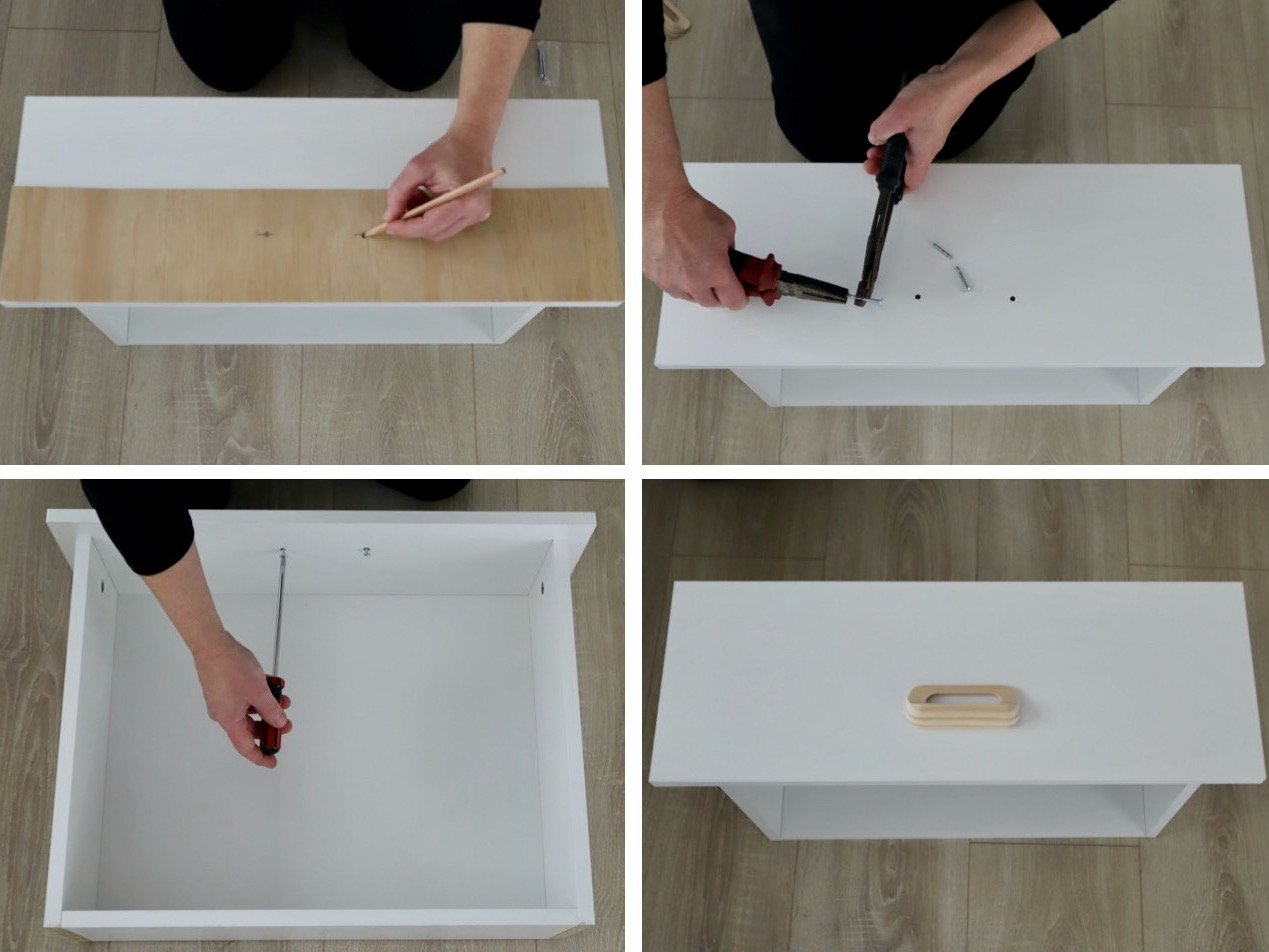
 

INSTALLING JOINERY

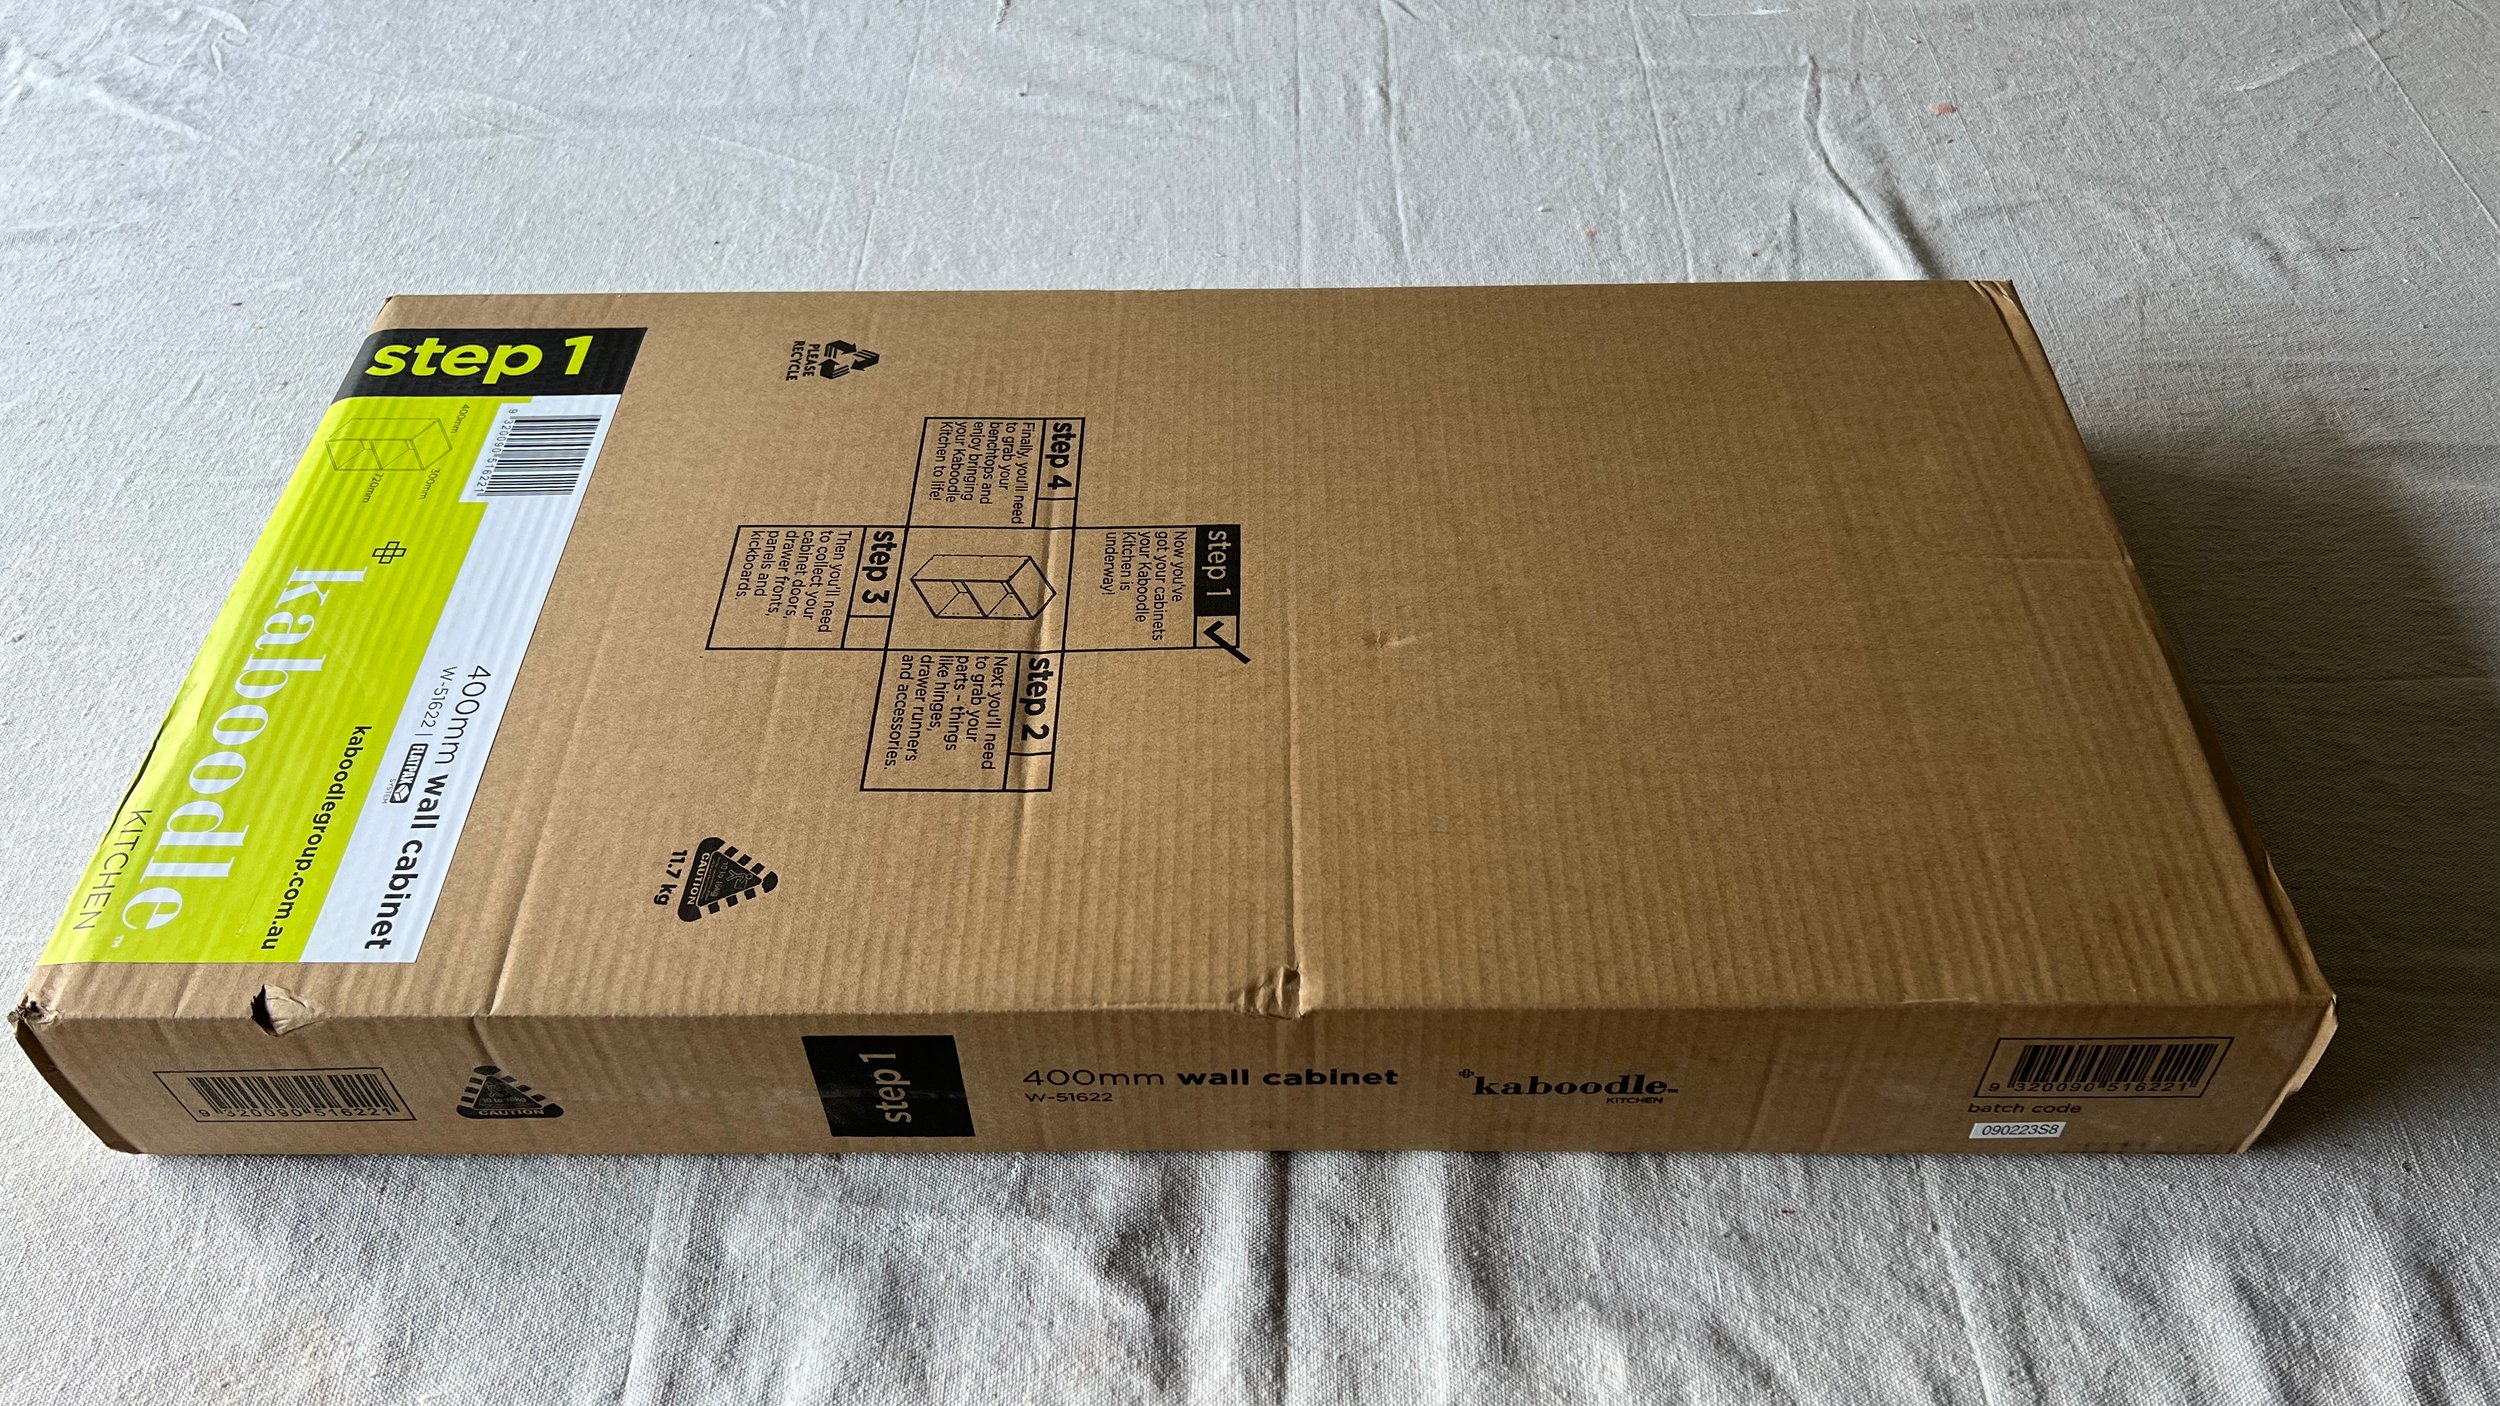
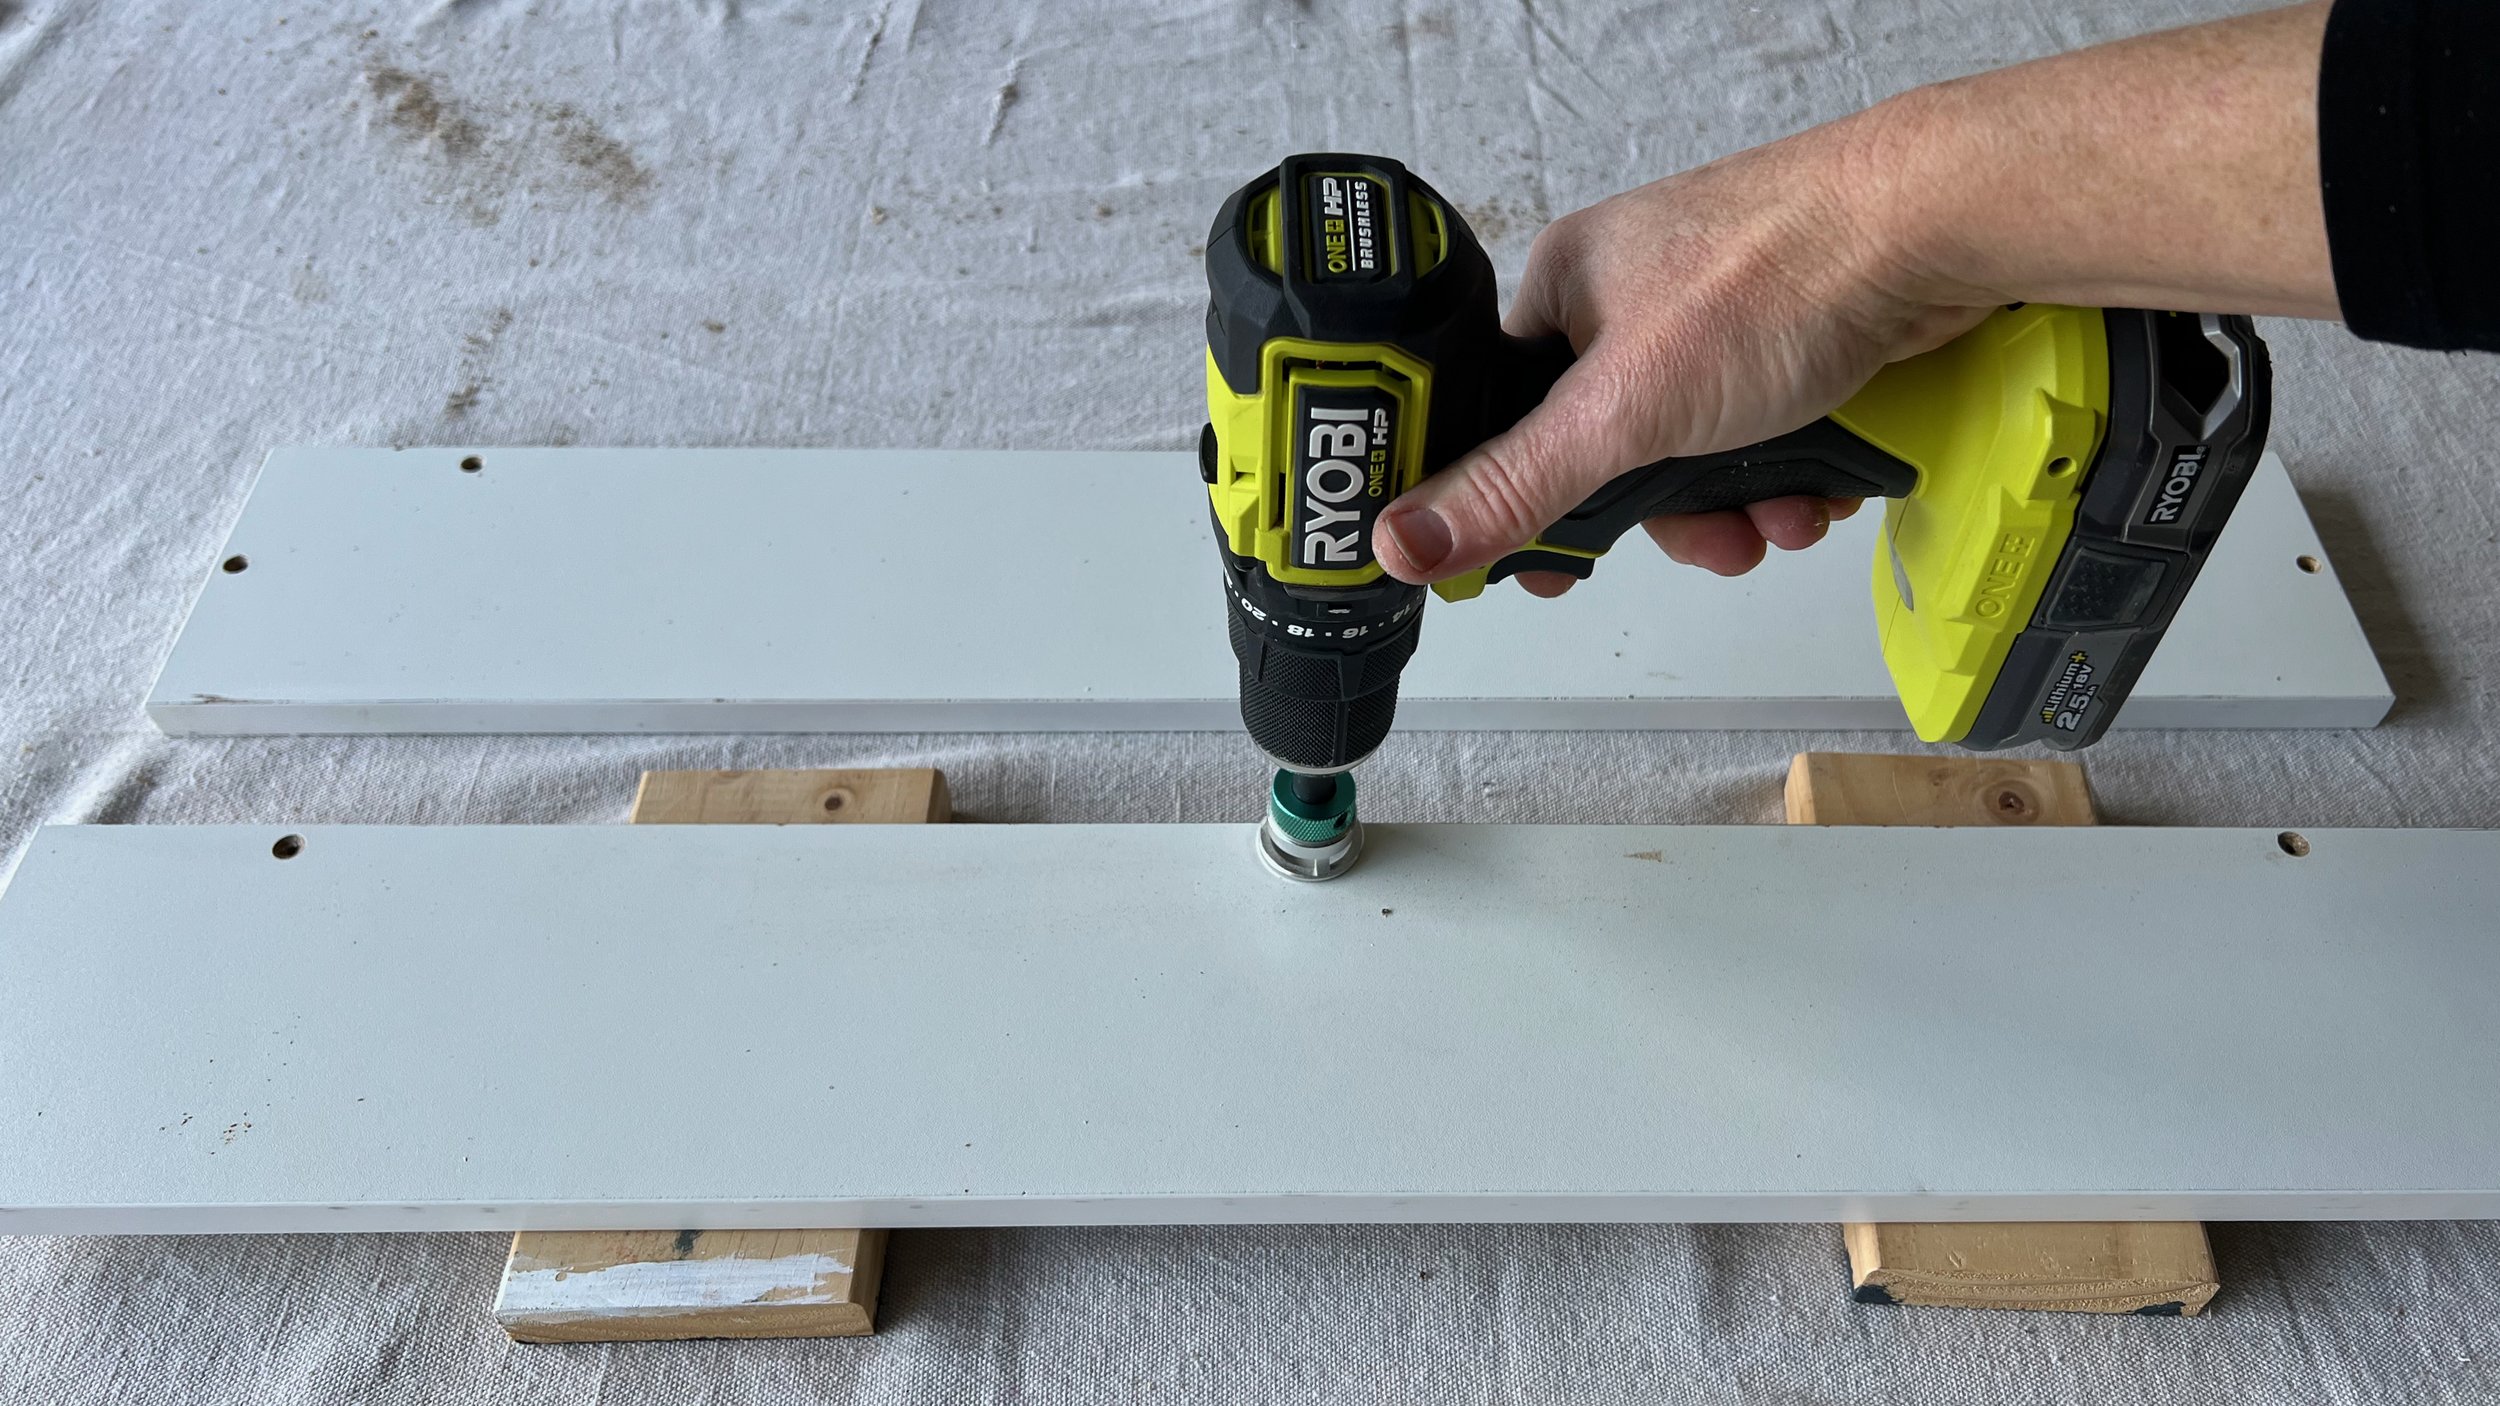
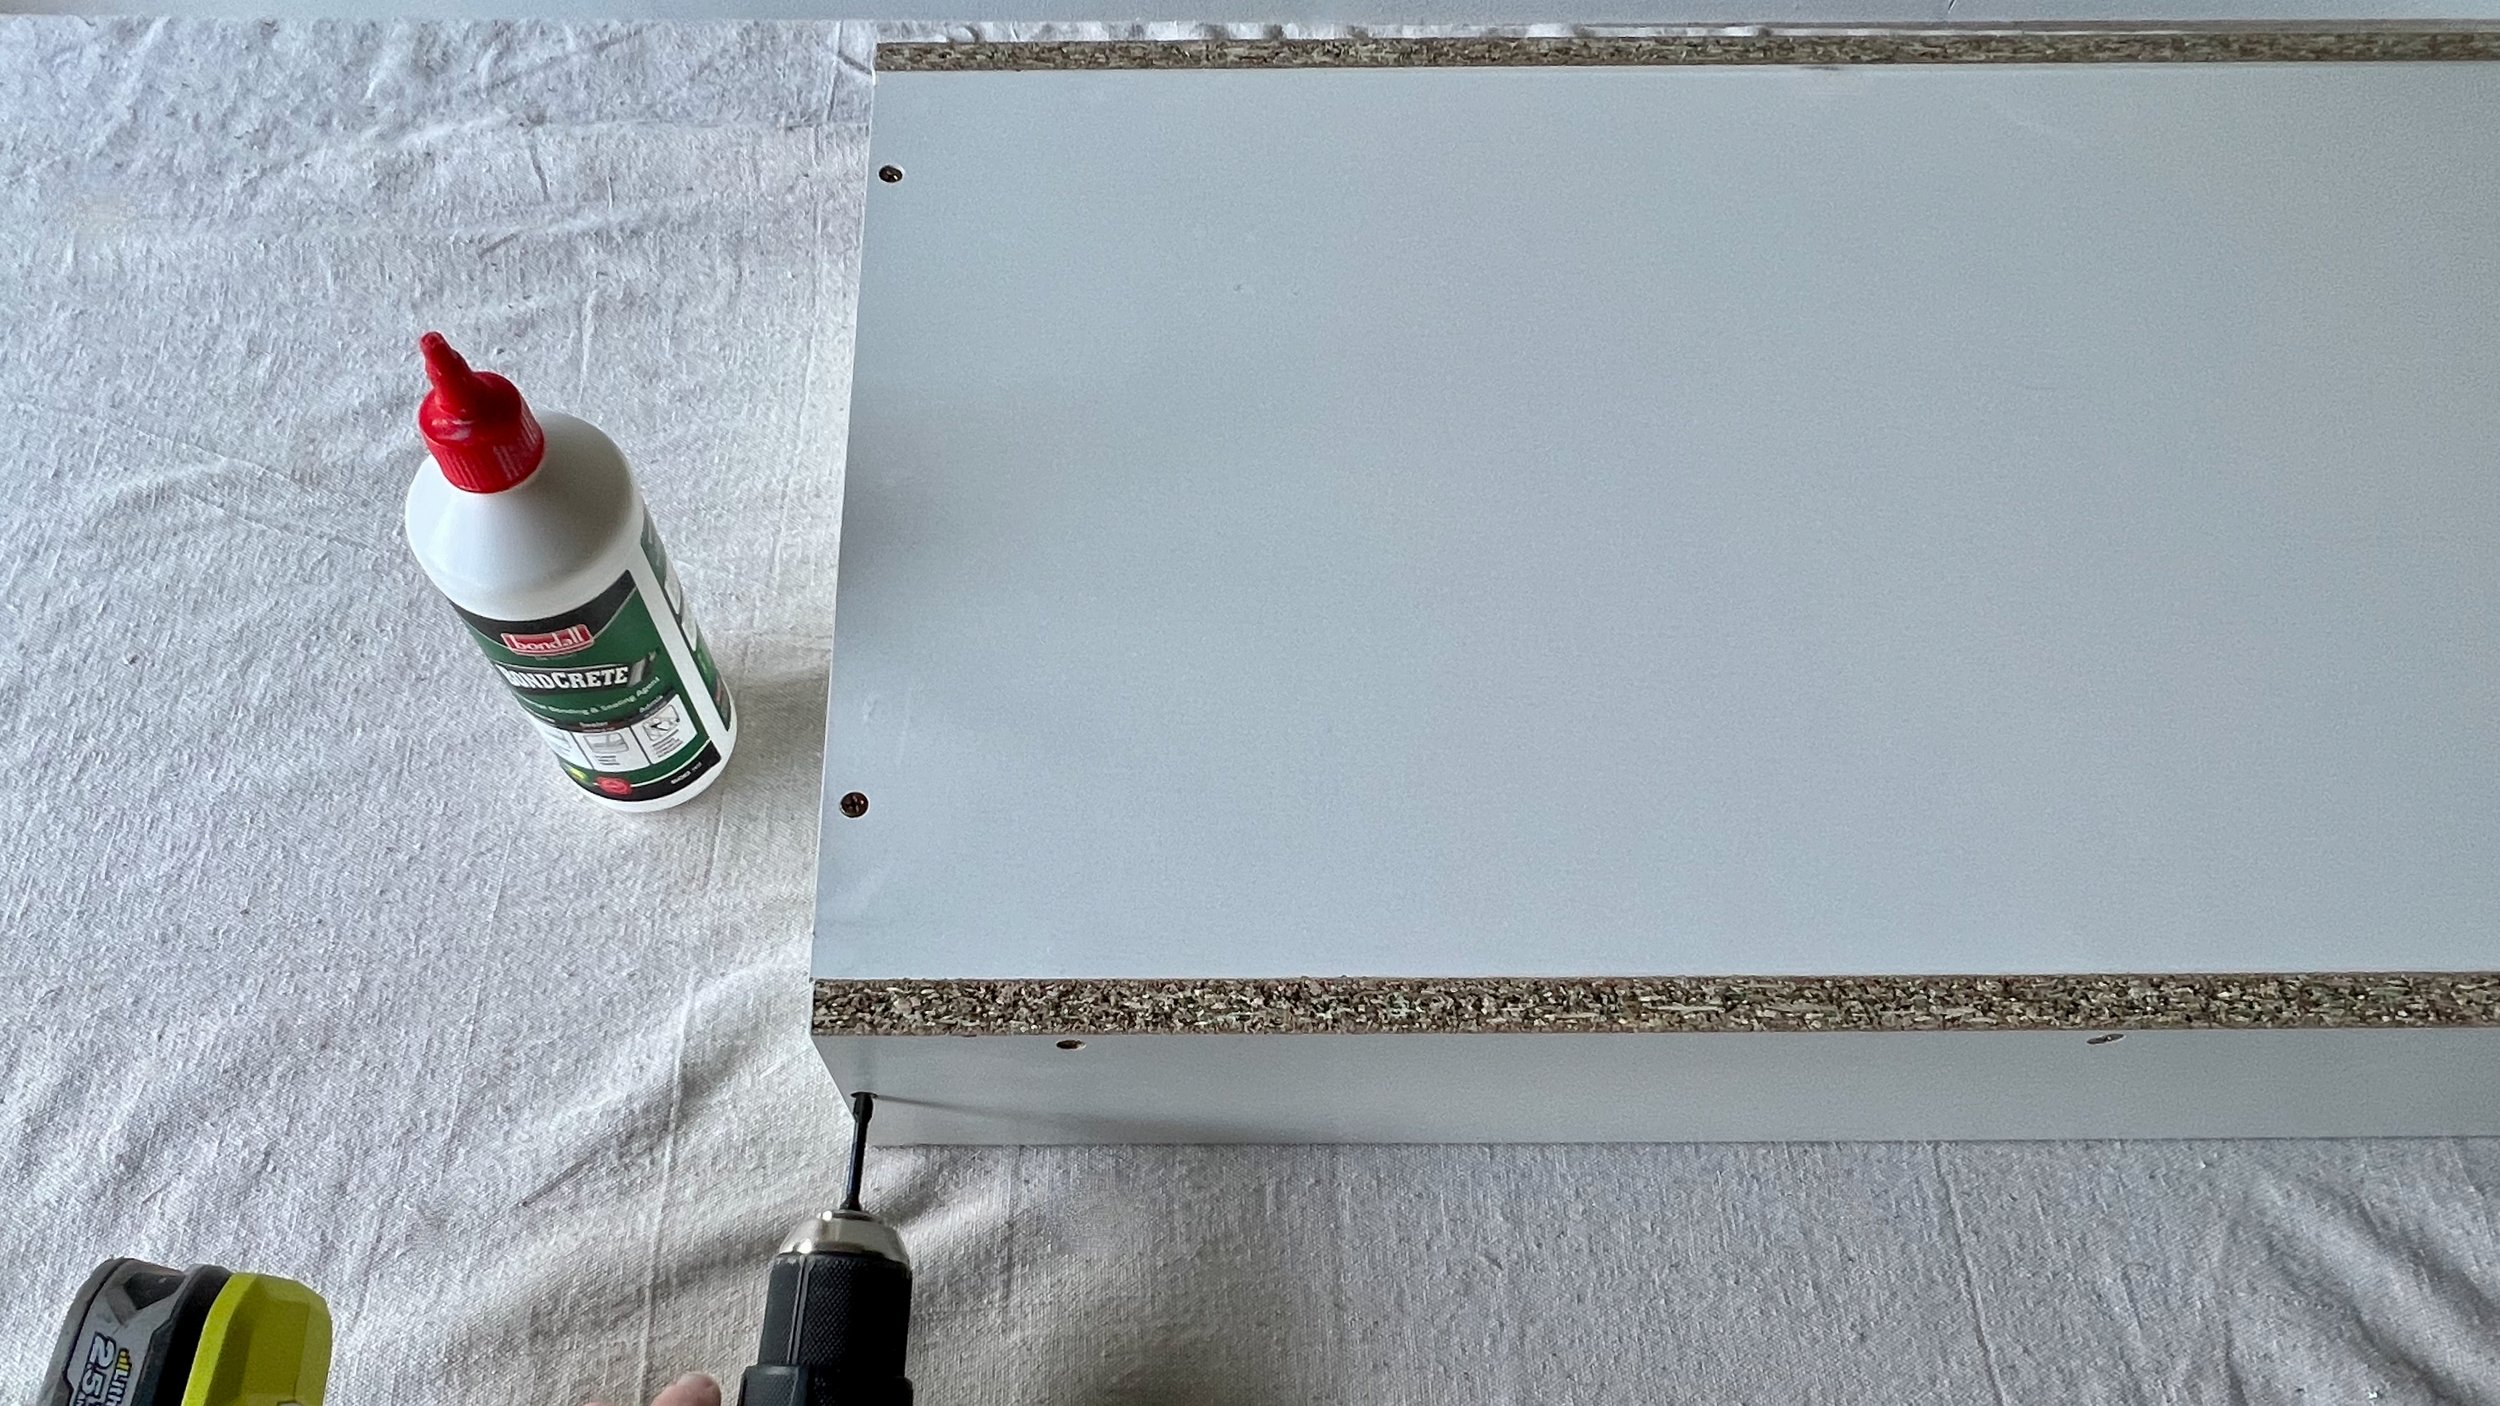
The bench spans from wall to nib wall, with 600mm Kaboodle Kitchen base cabinets either end to leave space for the appliances to slide in. To make the drier the same height as the washing machine I made a plinth painted the same as the kickboards. The gloss white doors went on last so they wouldn’t get knocked.


DIY TIP Raise the adjustable feet high as possible to allow for appliances. The result is slightly higher than a standard kitchen bench.


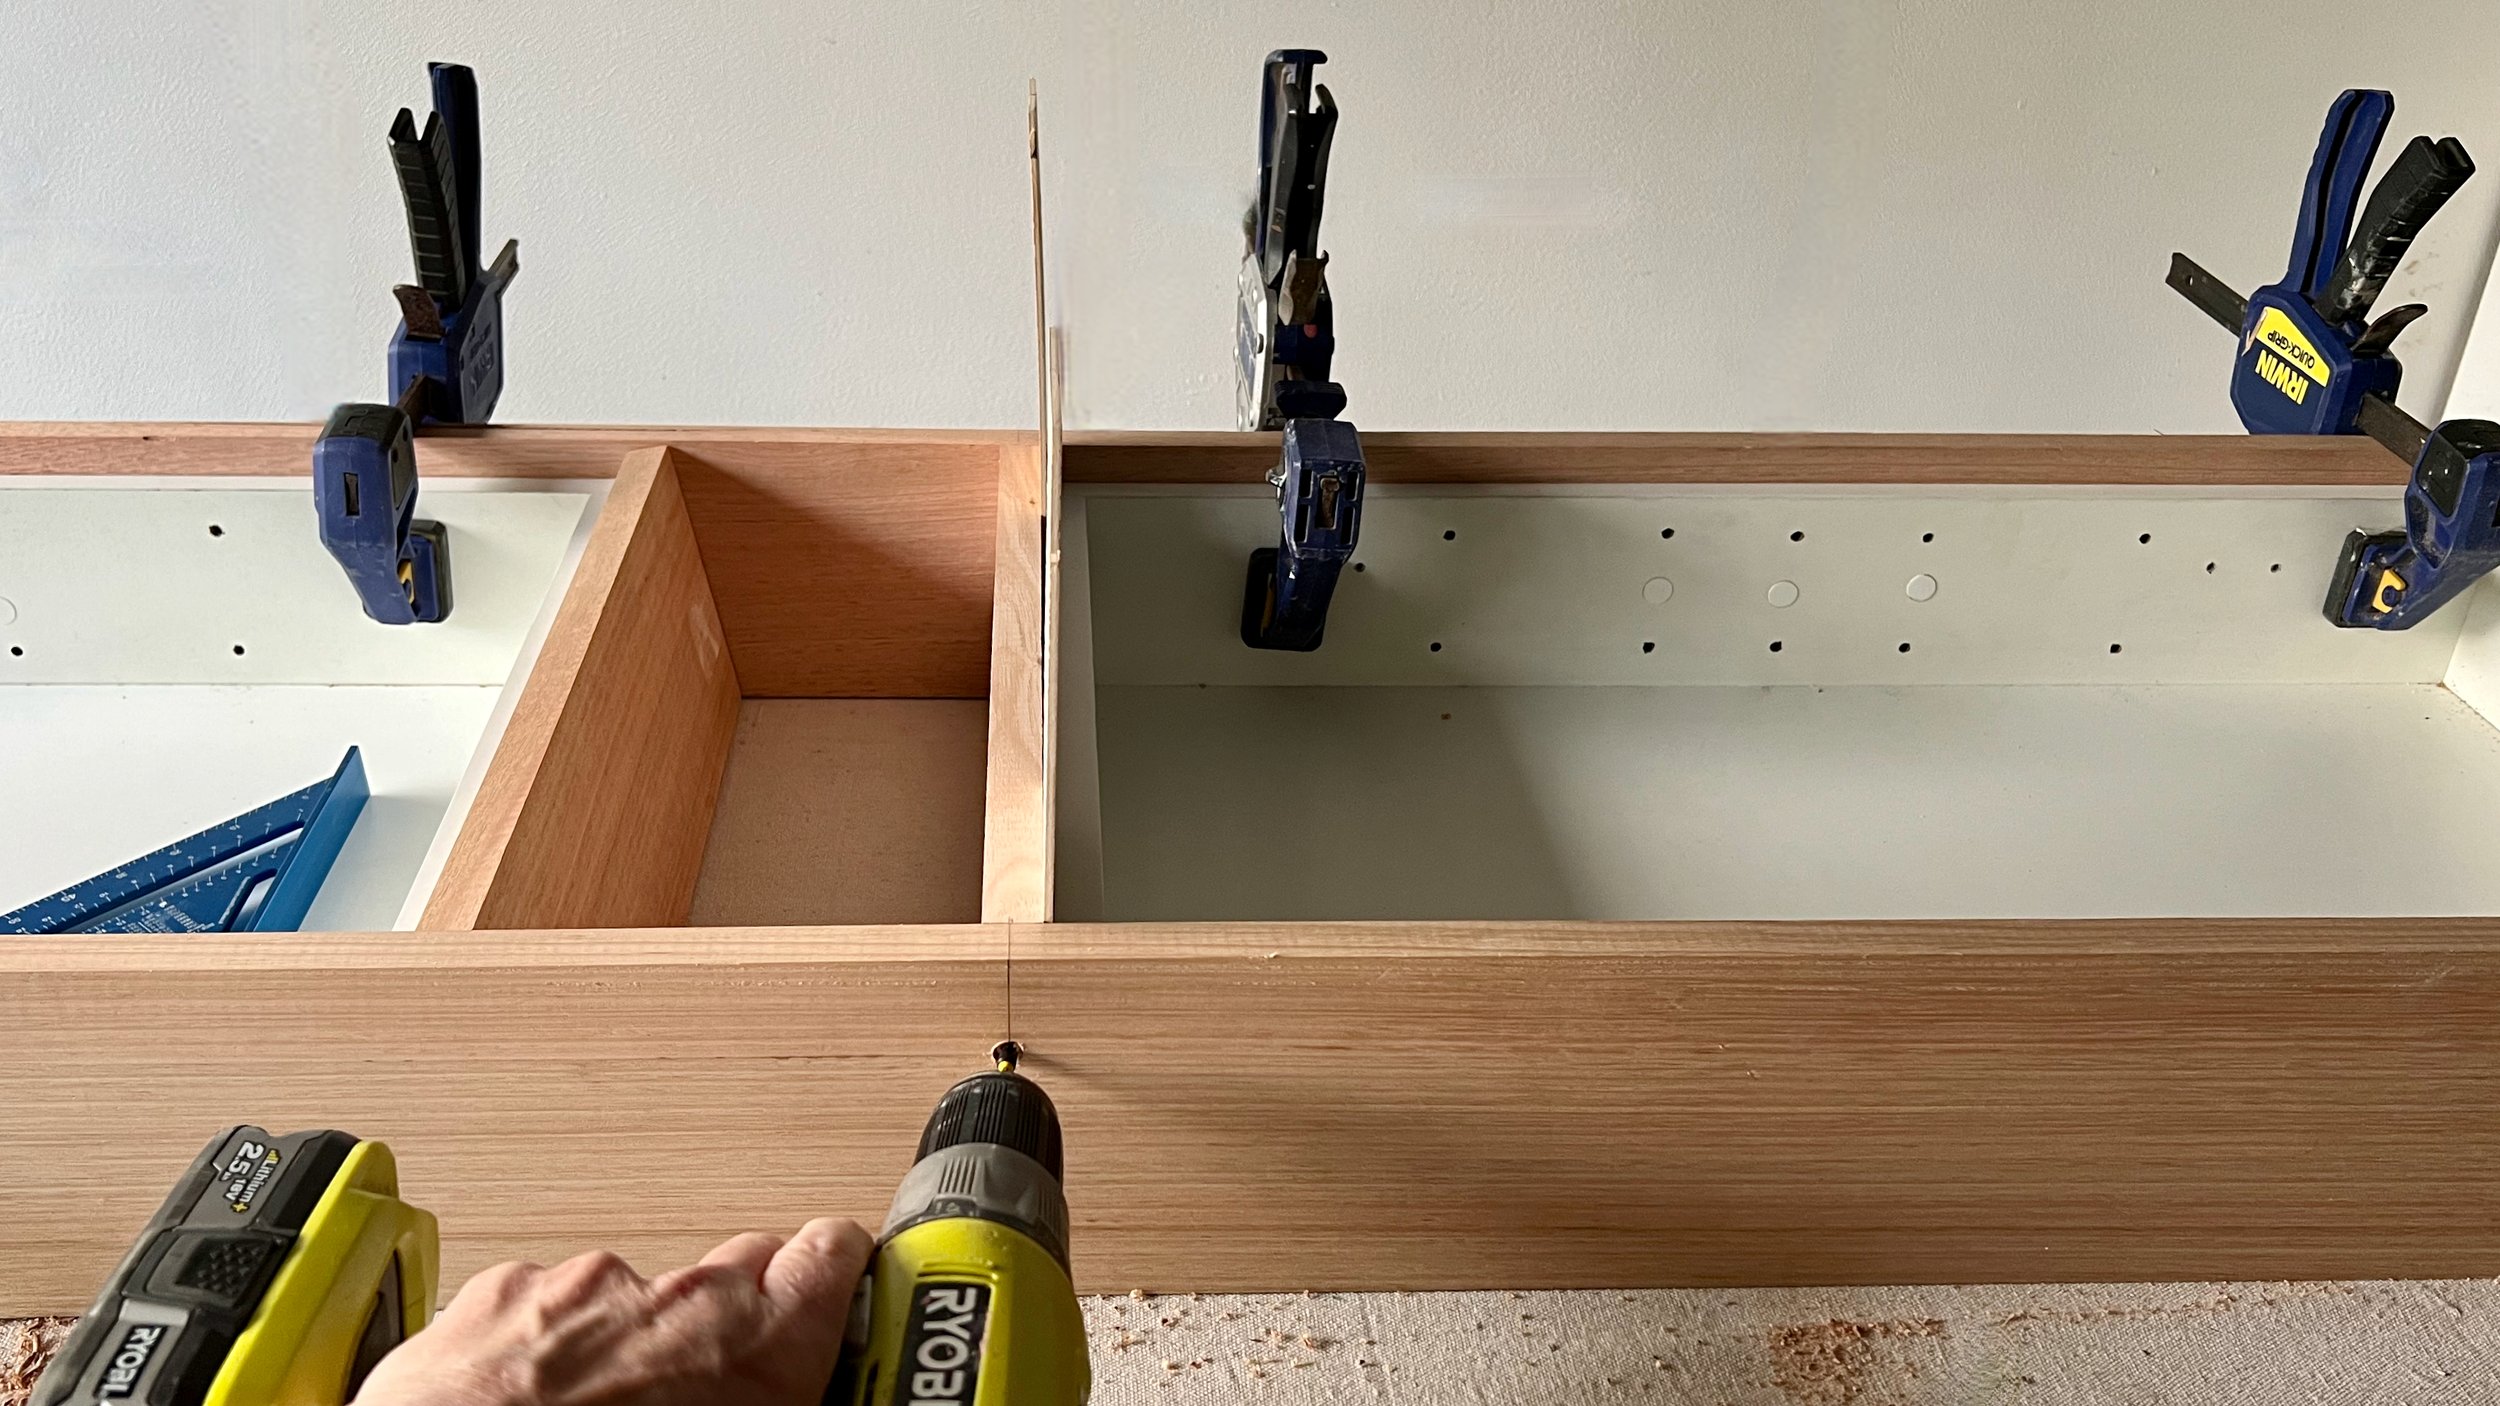
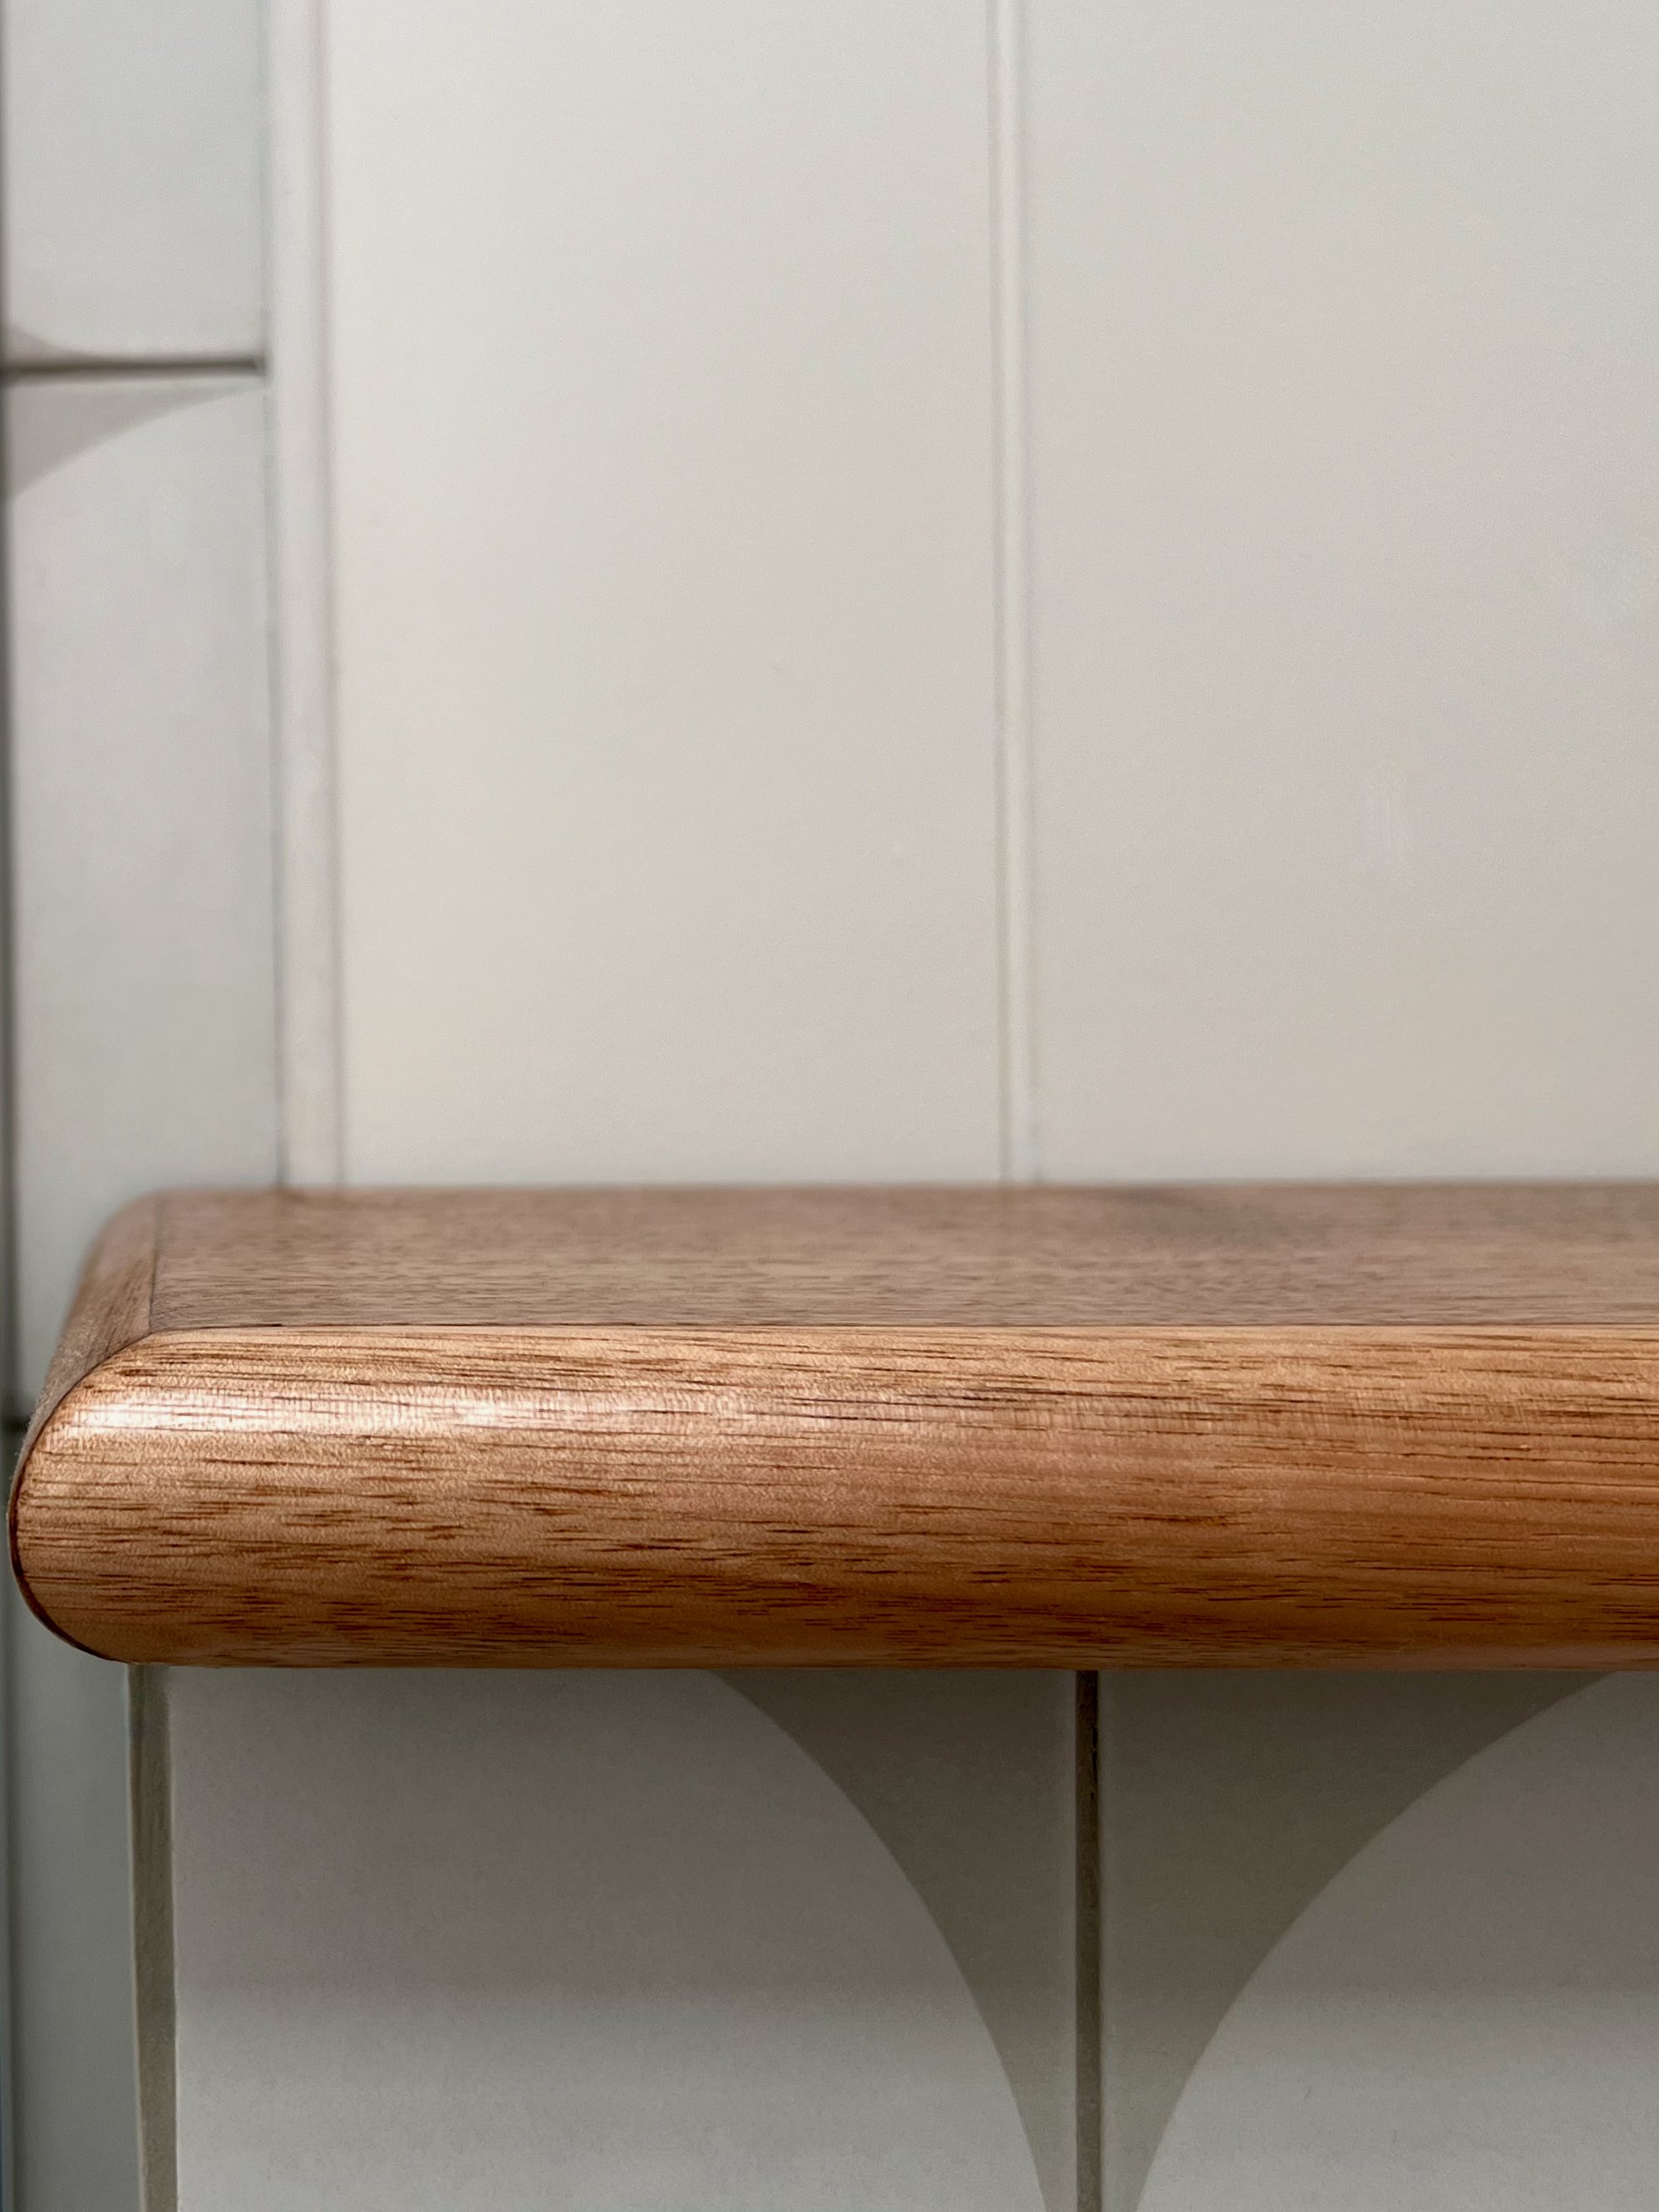
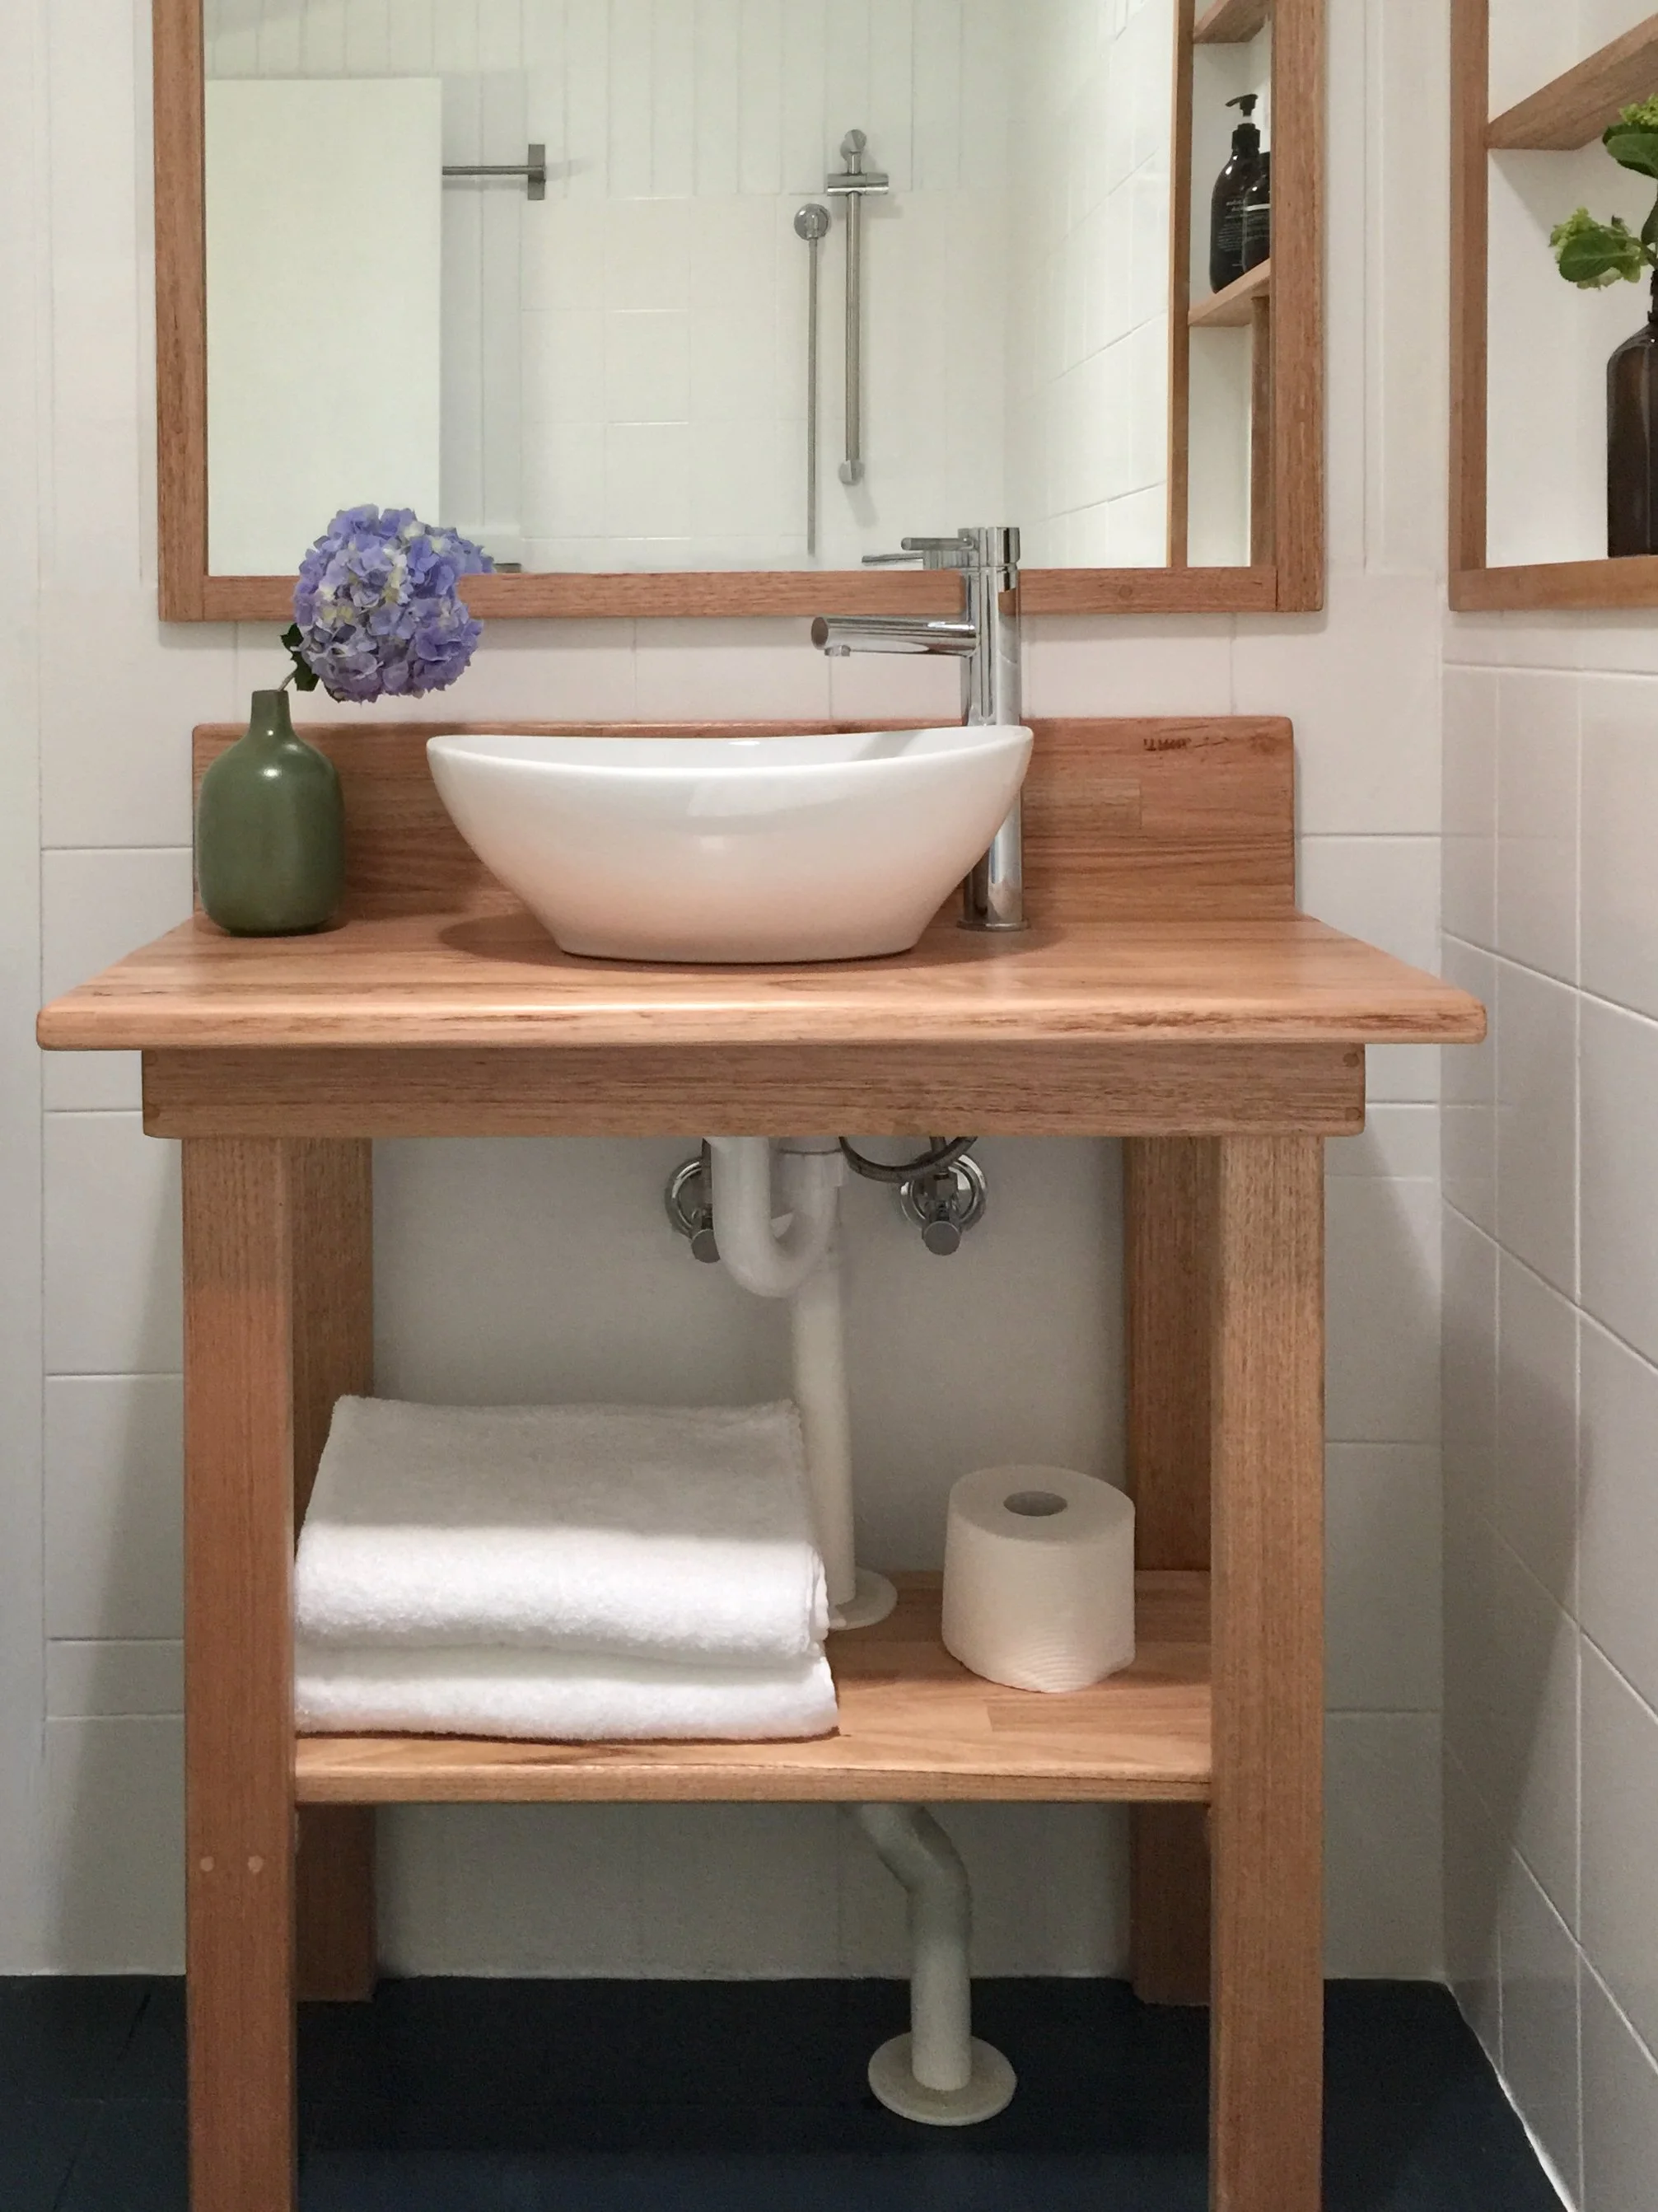
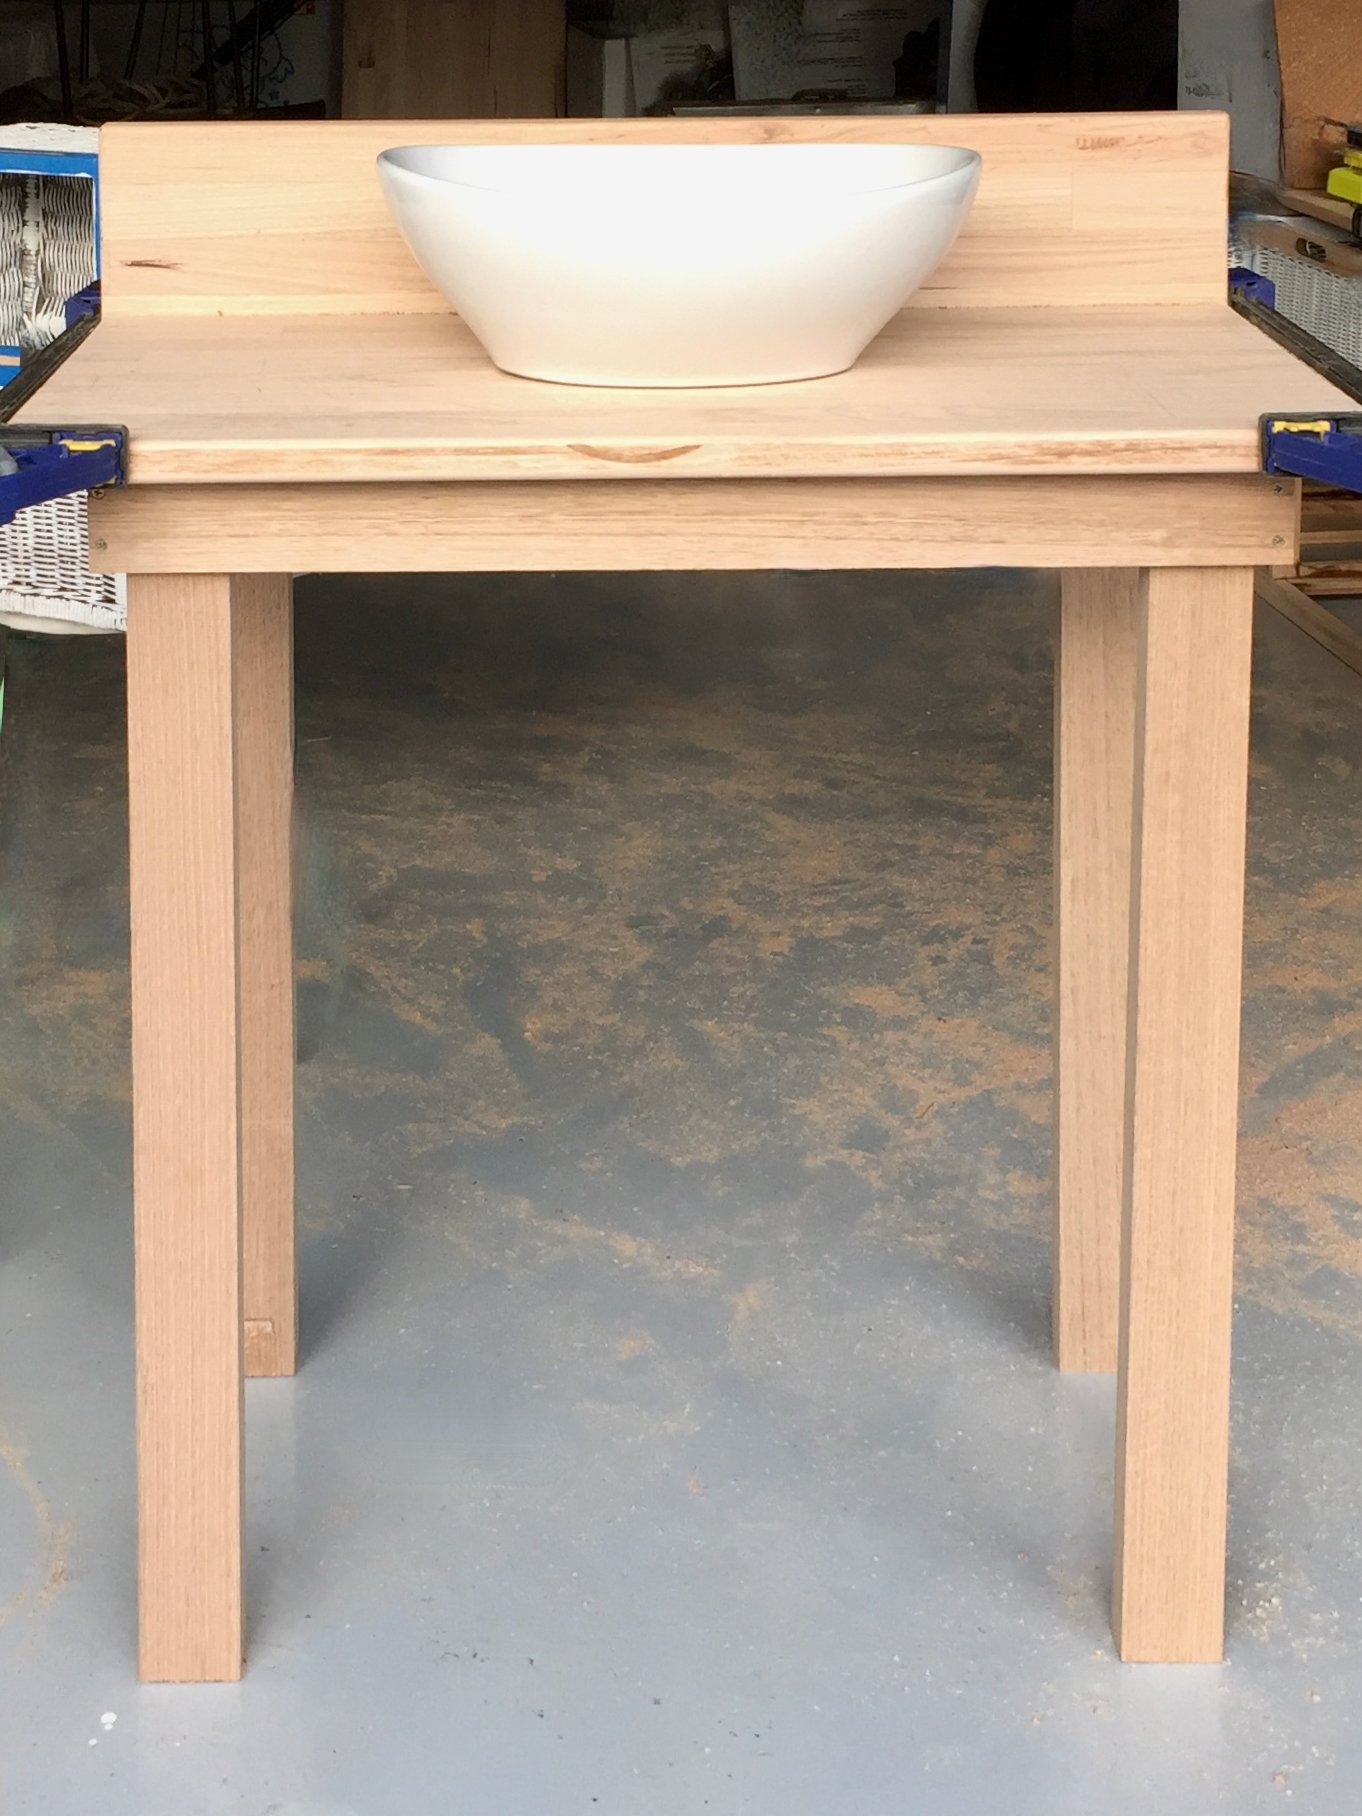
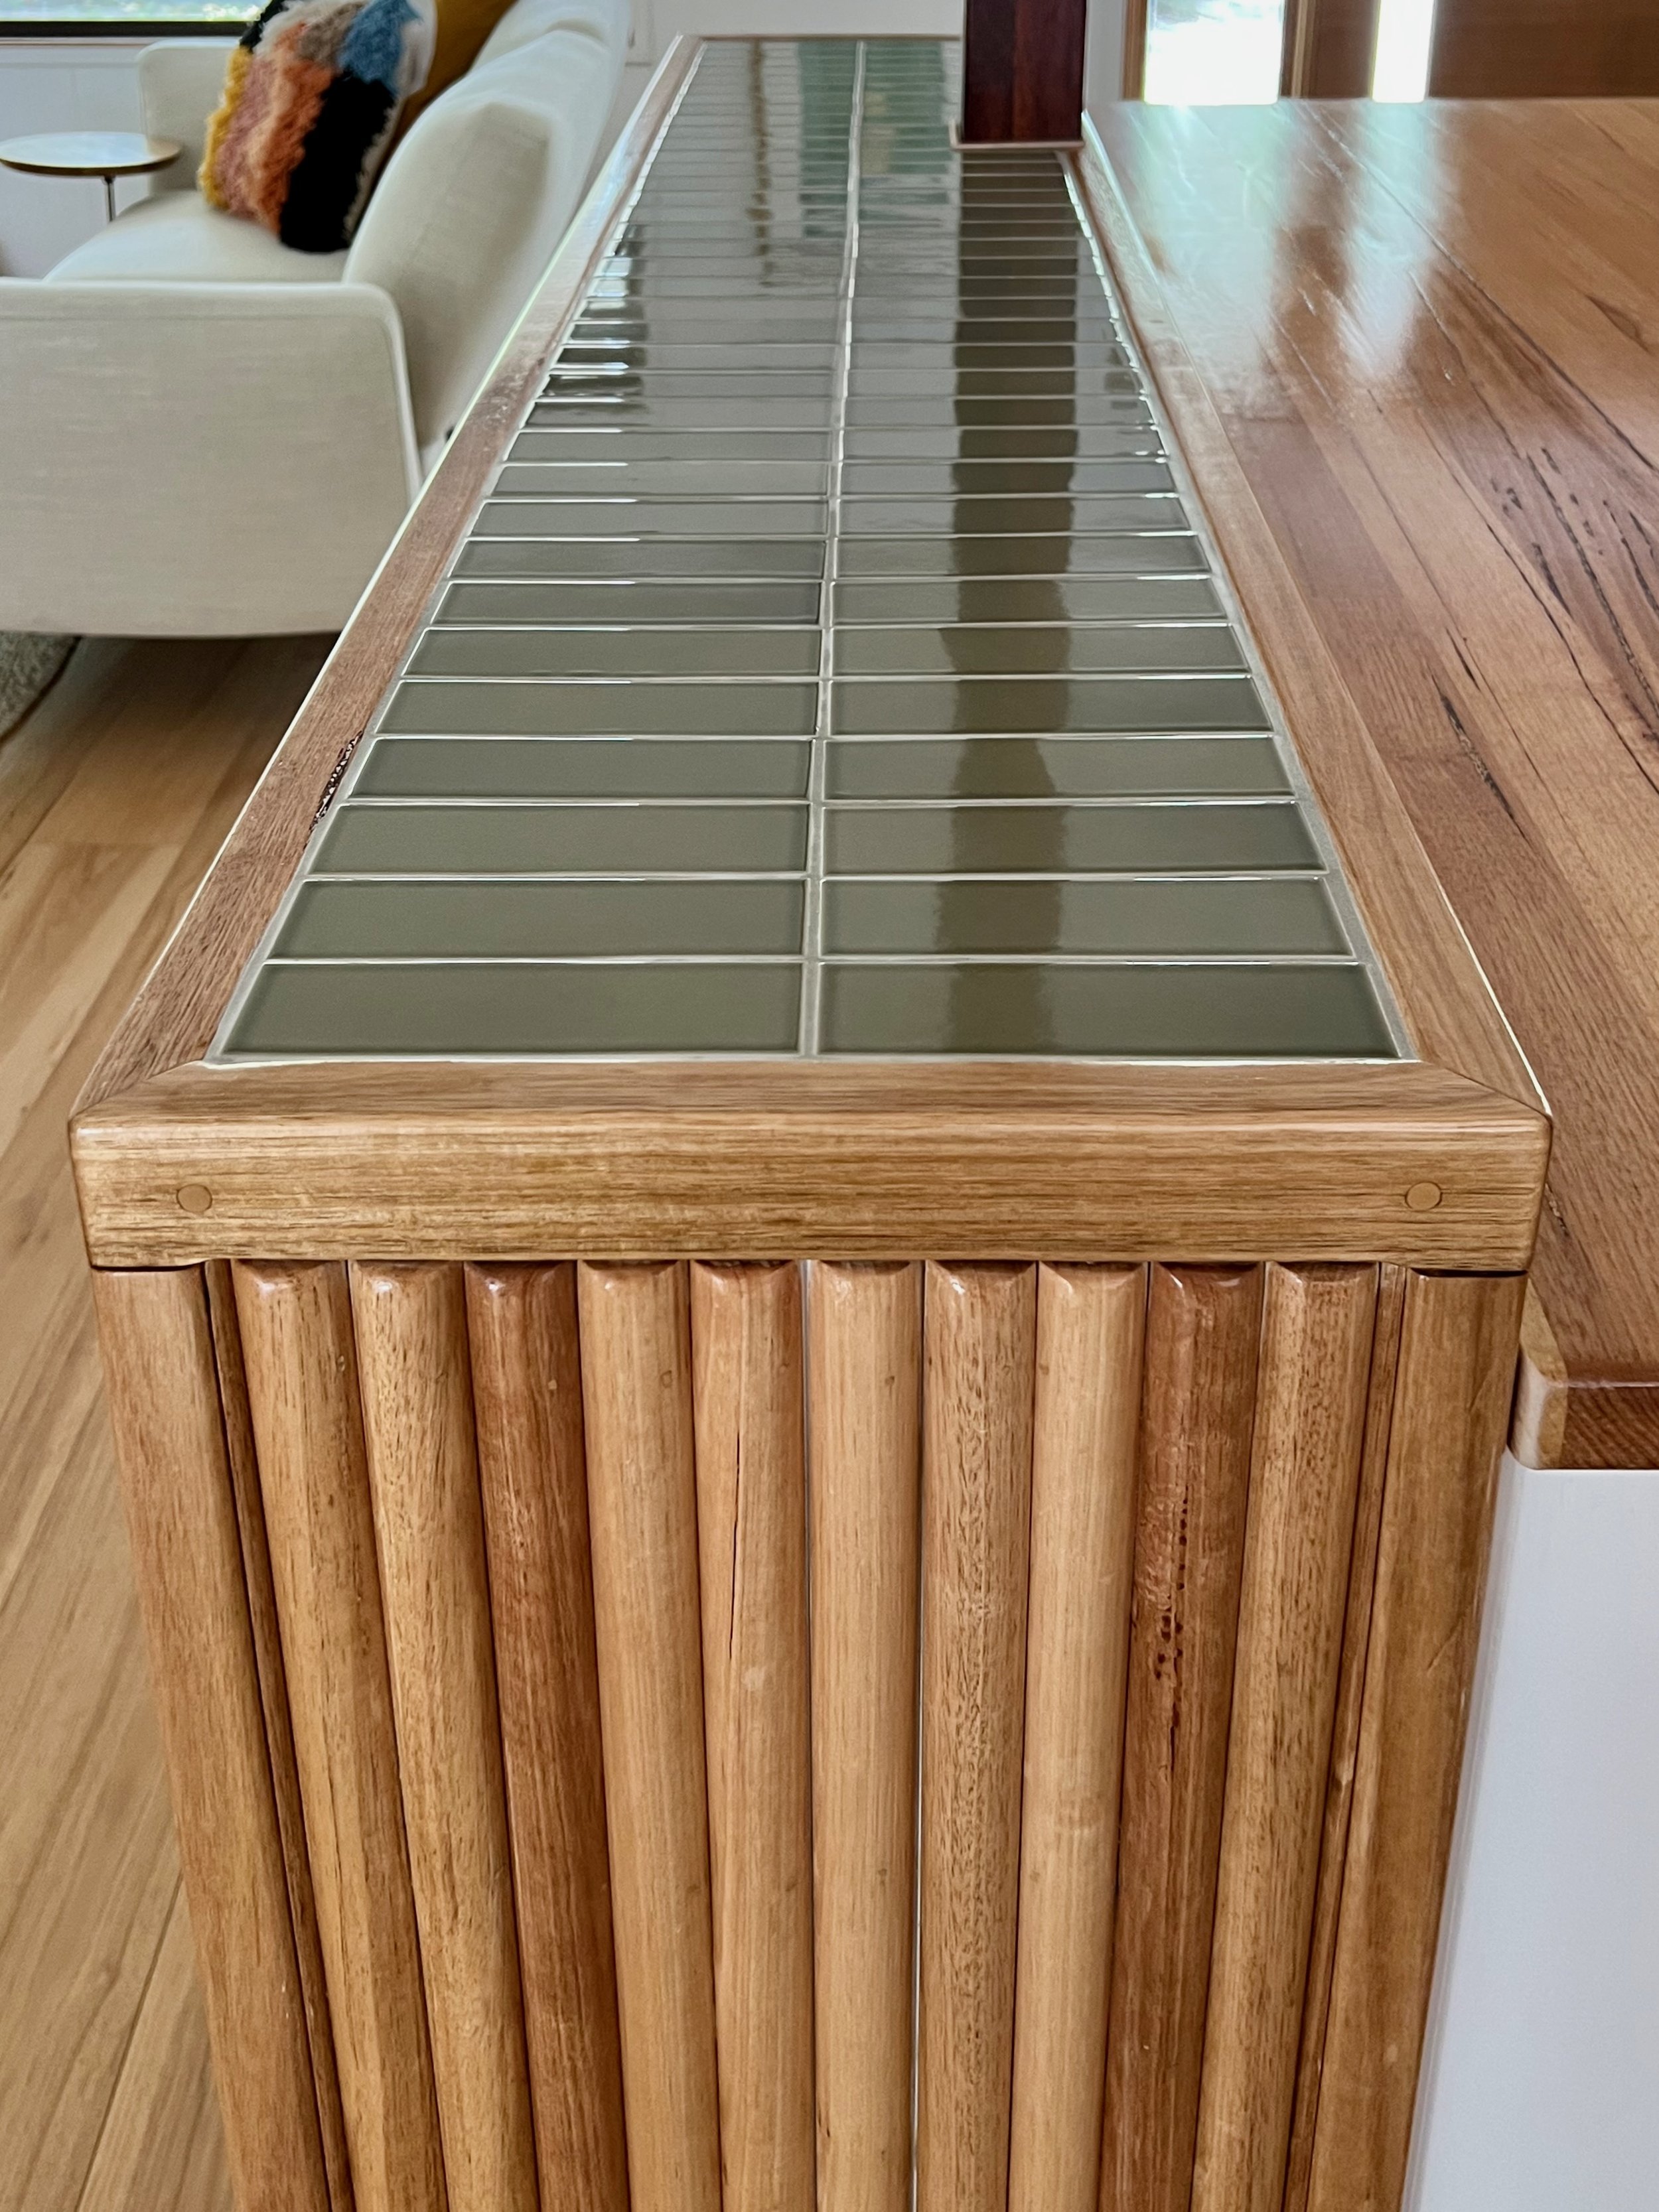
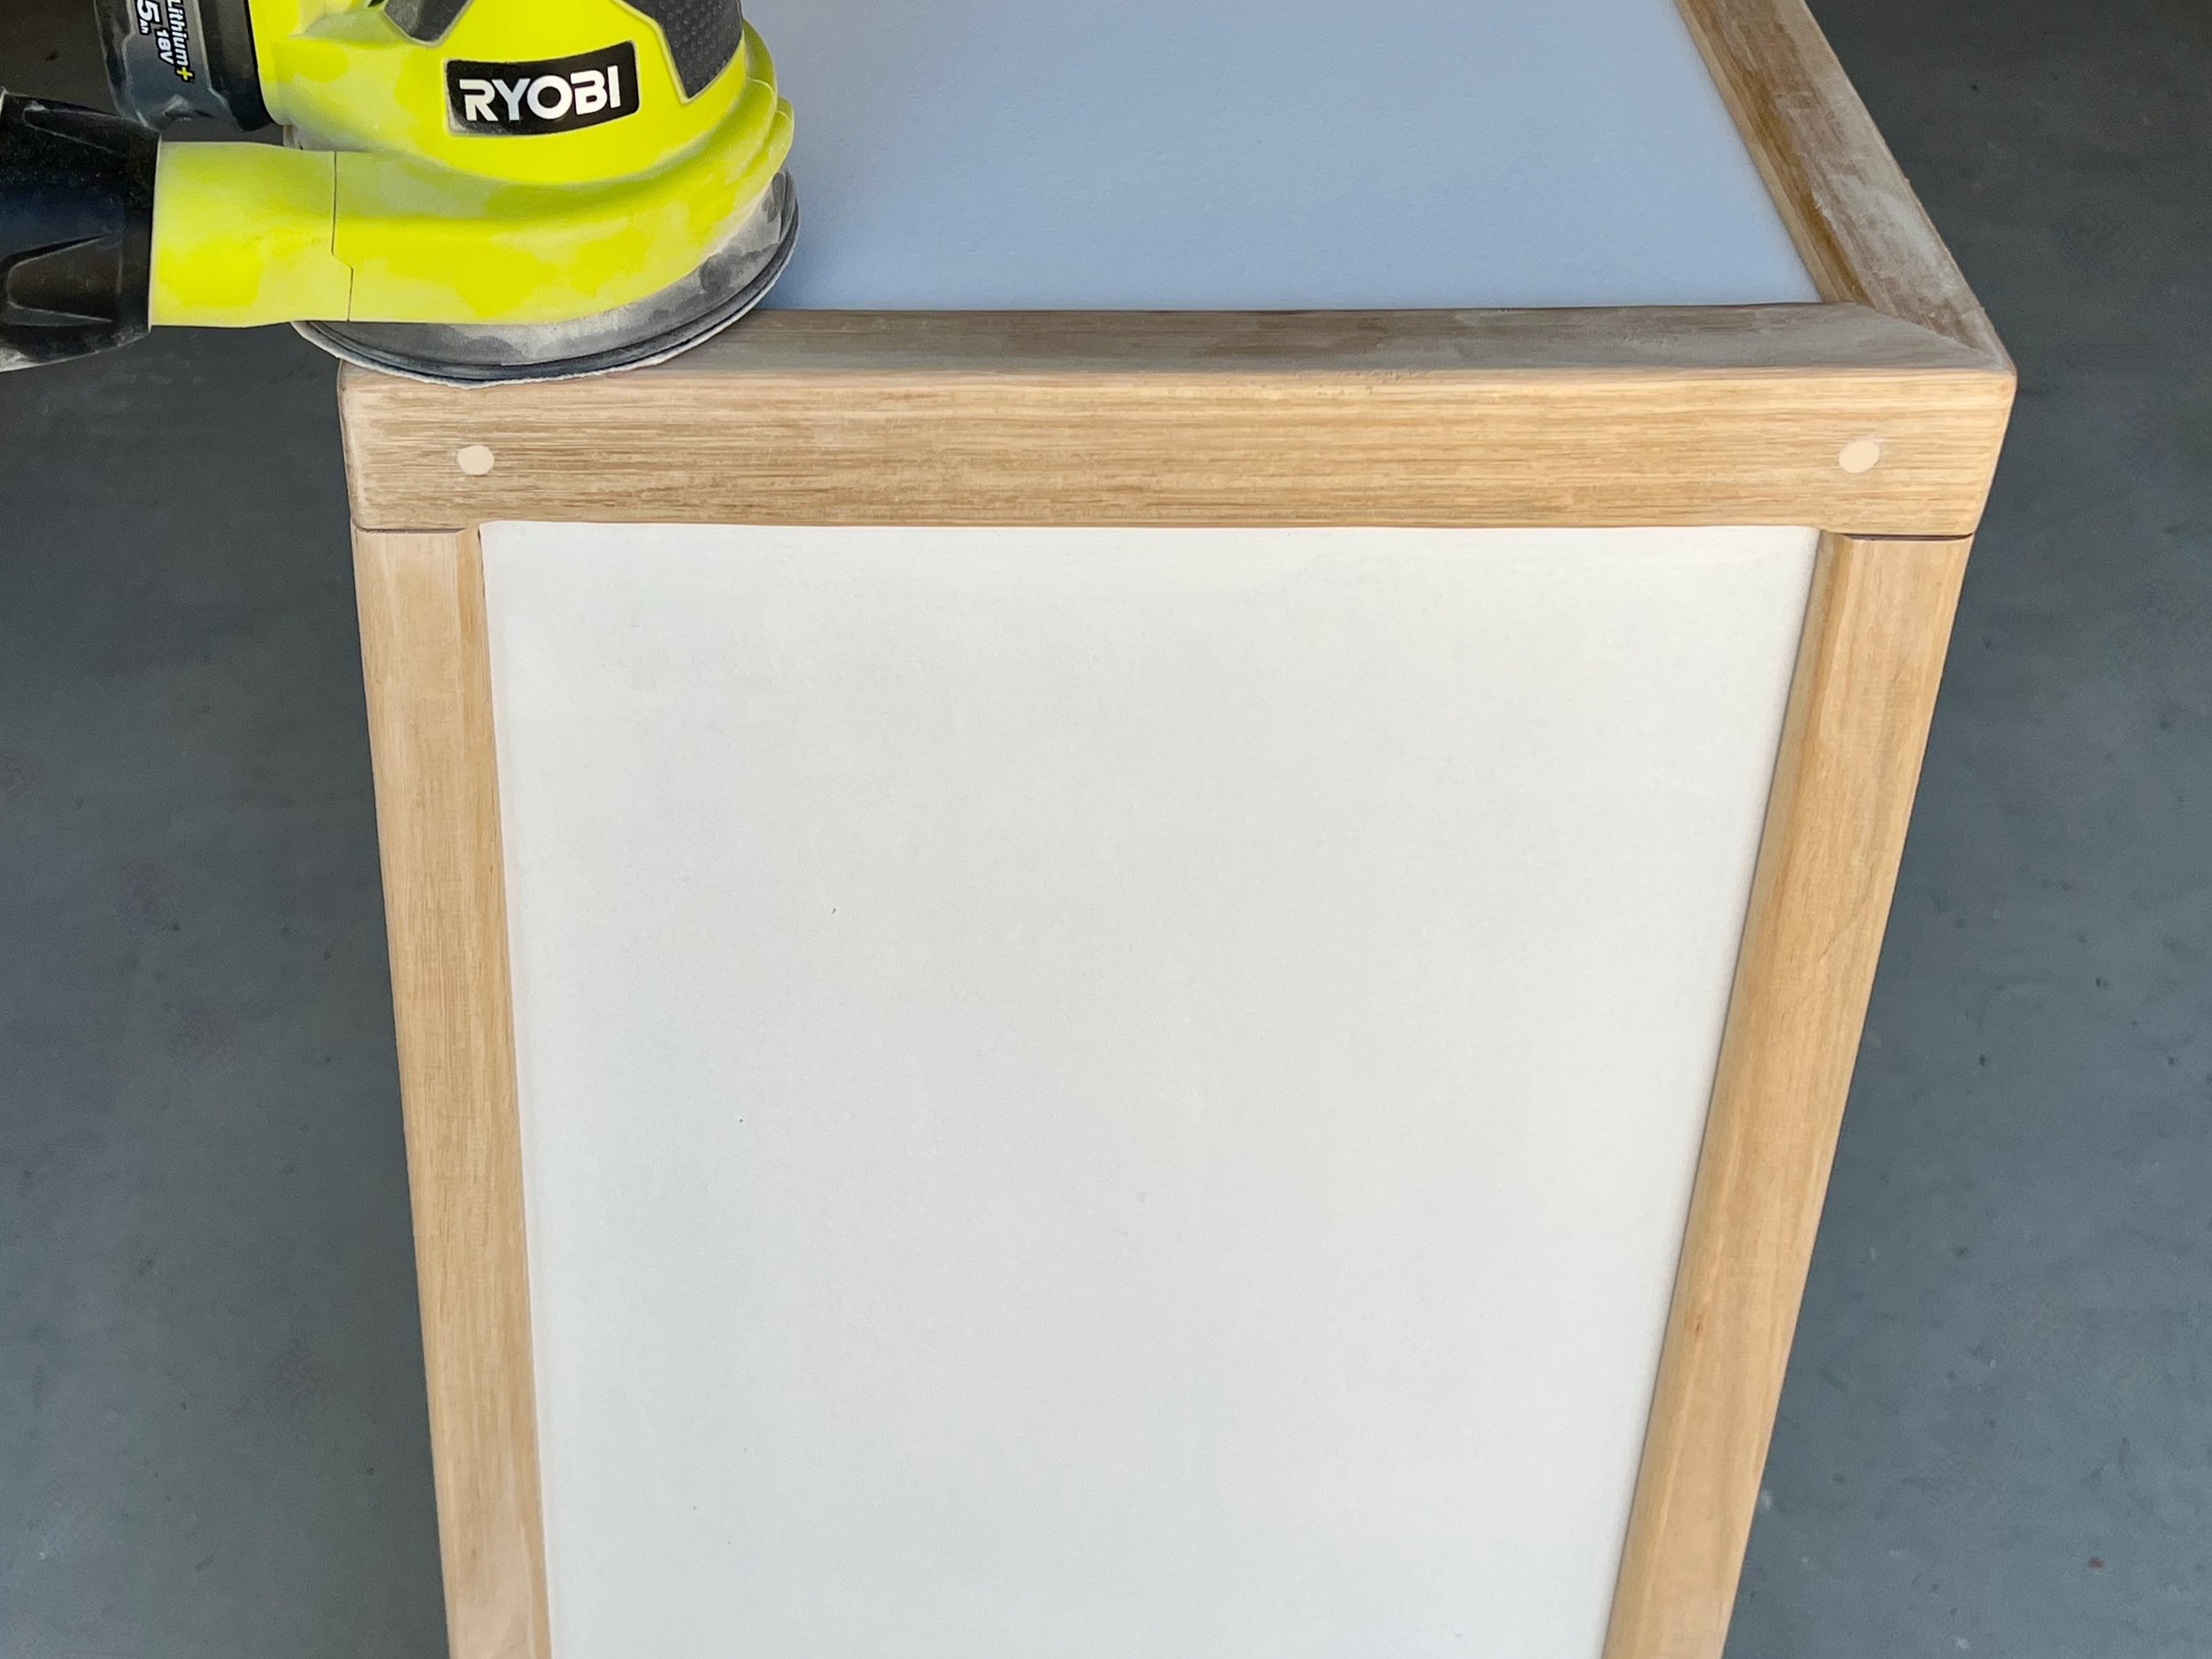
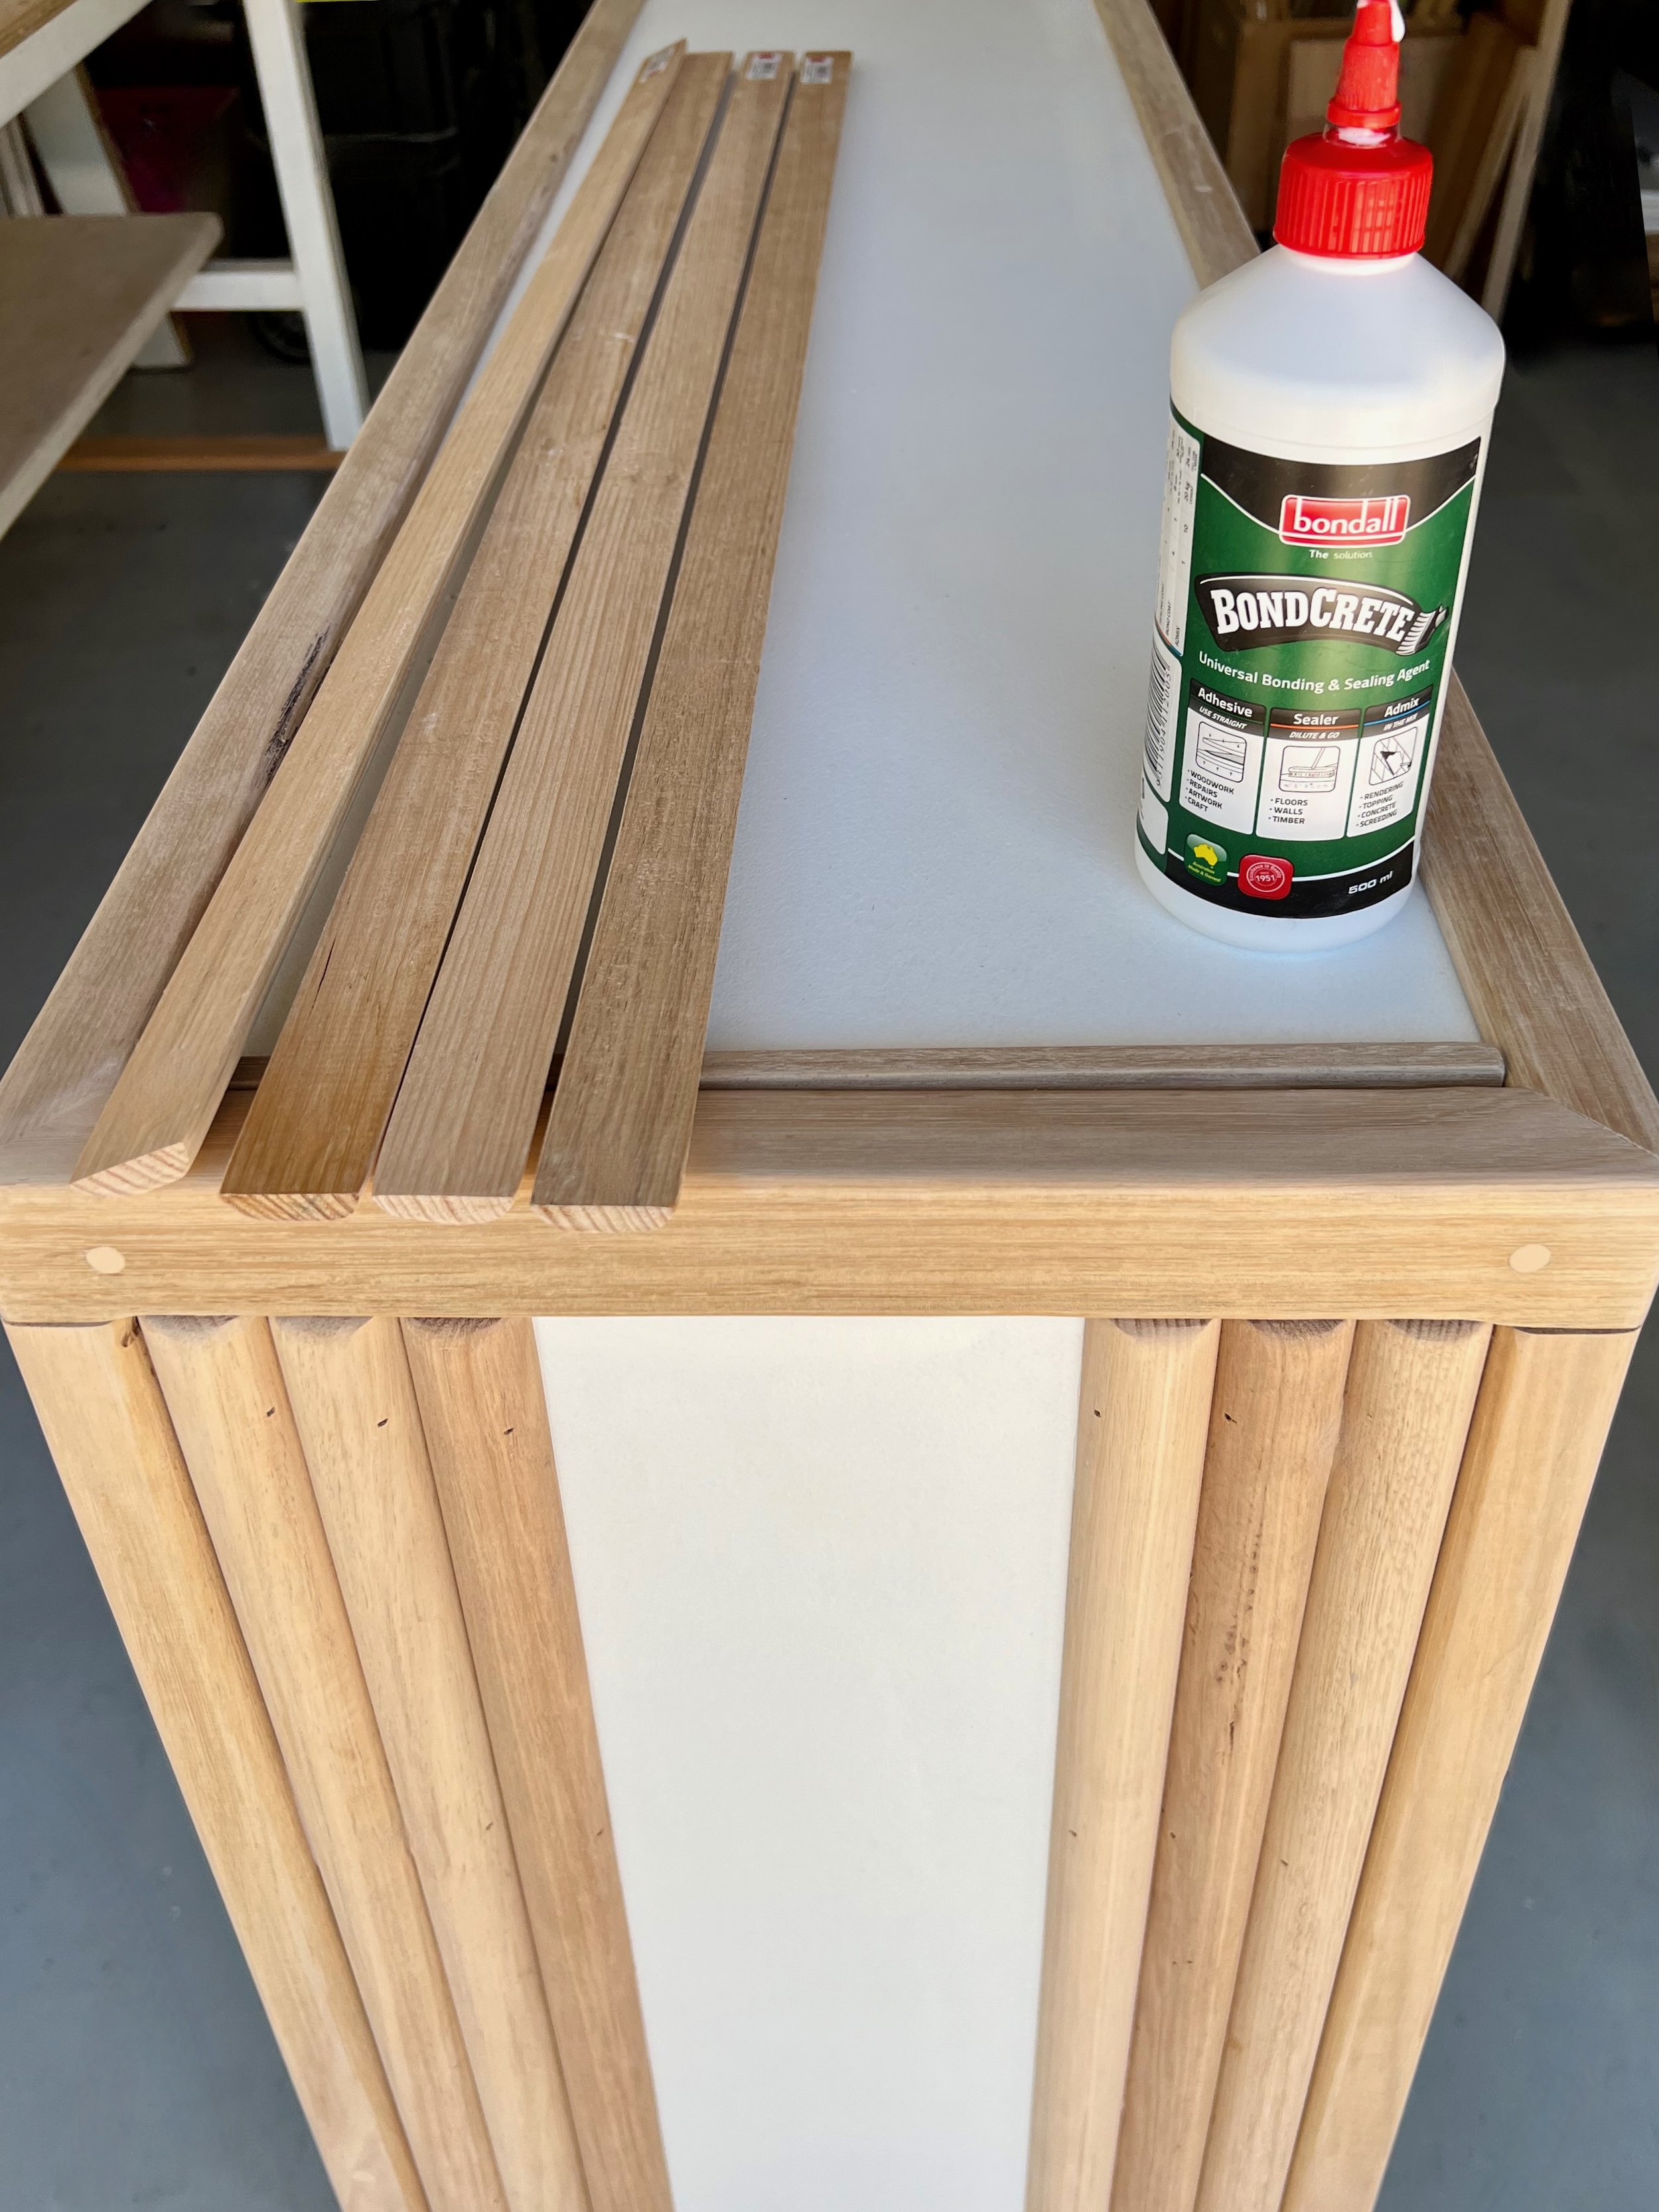
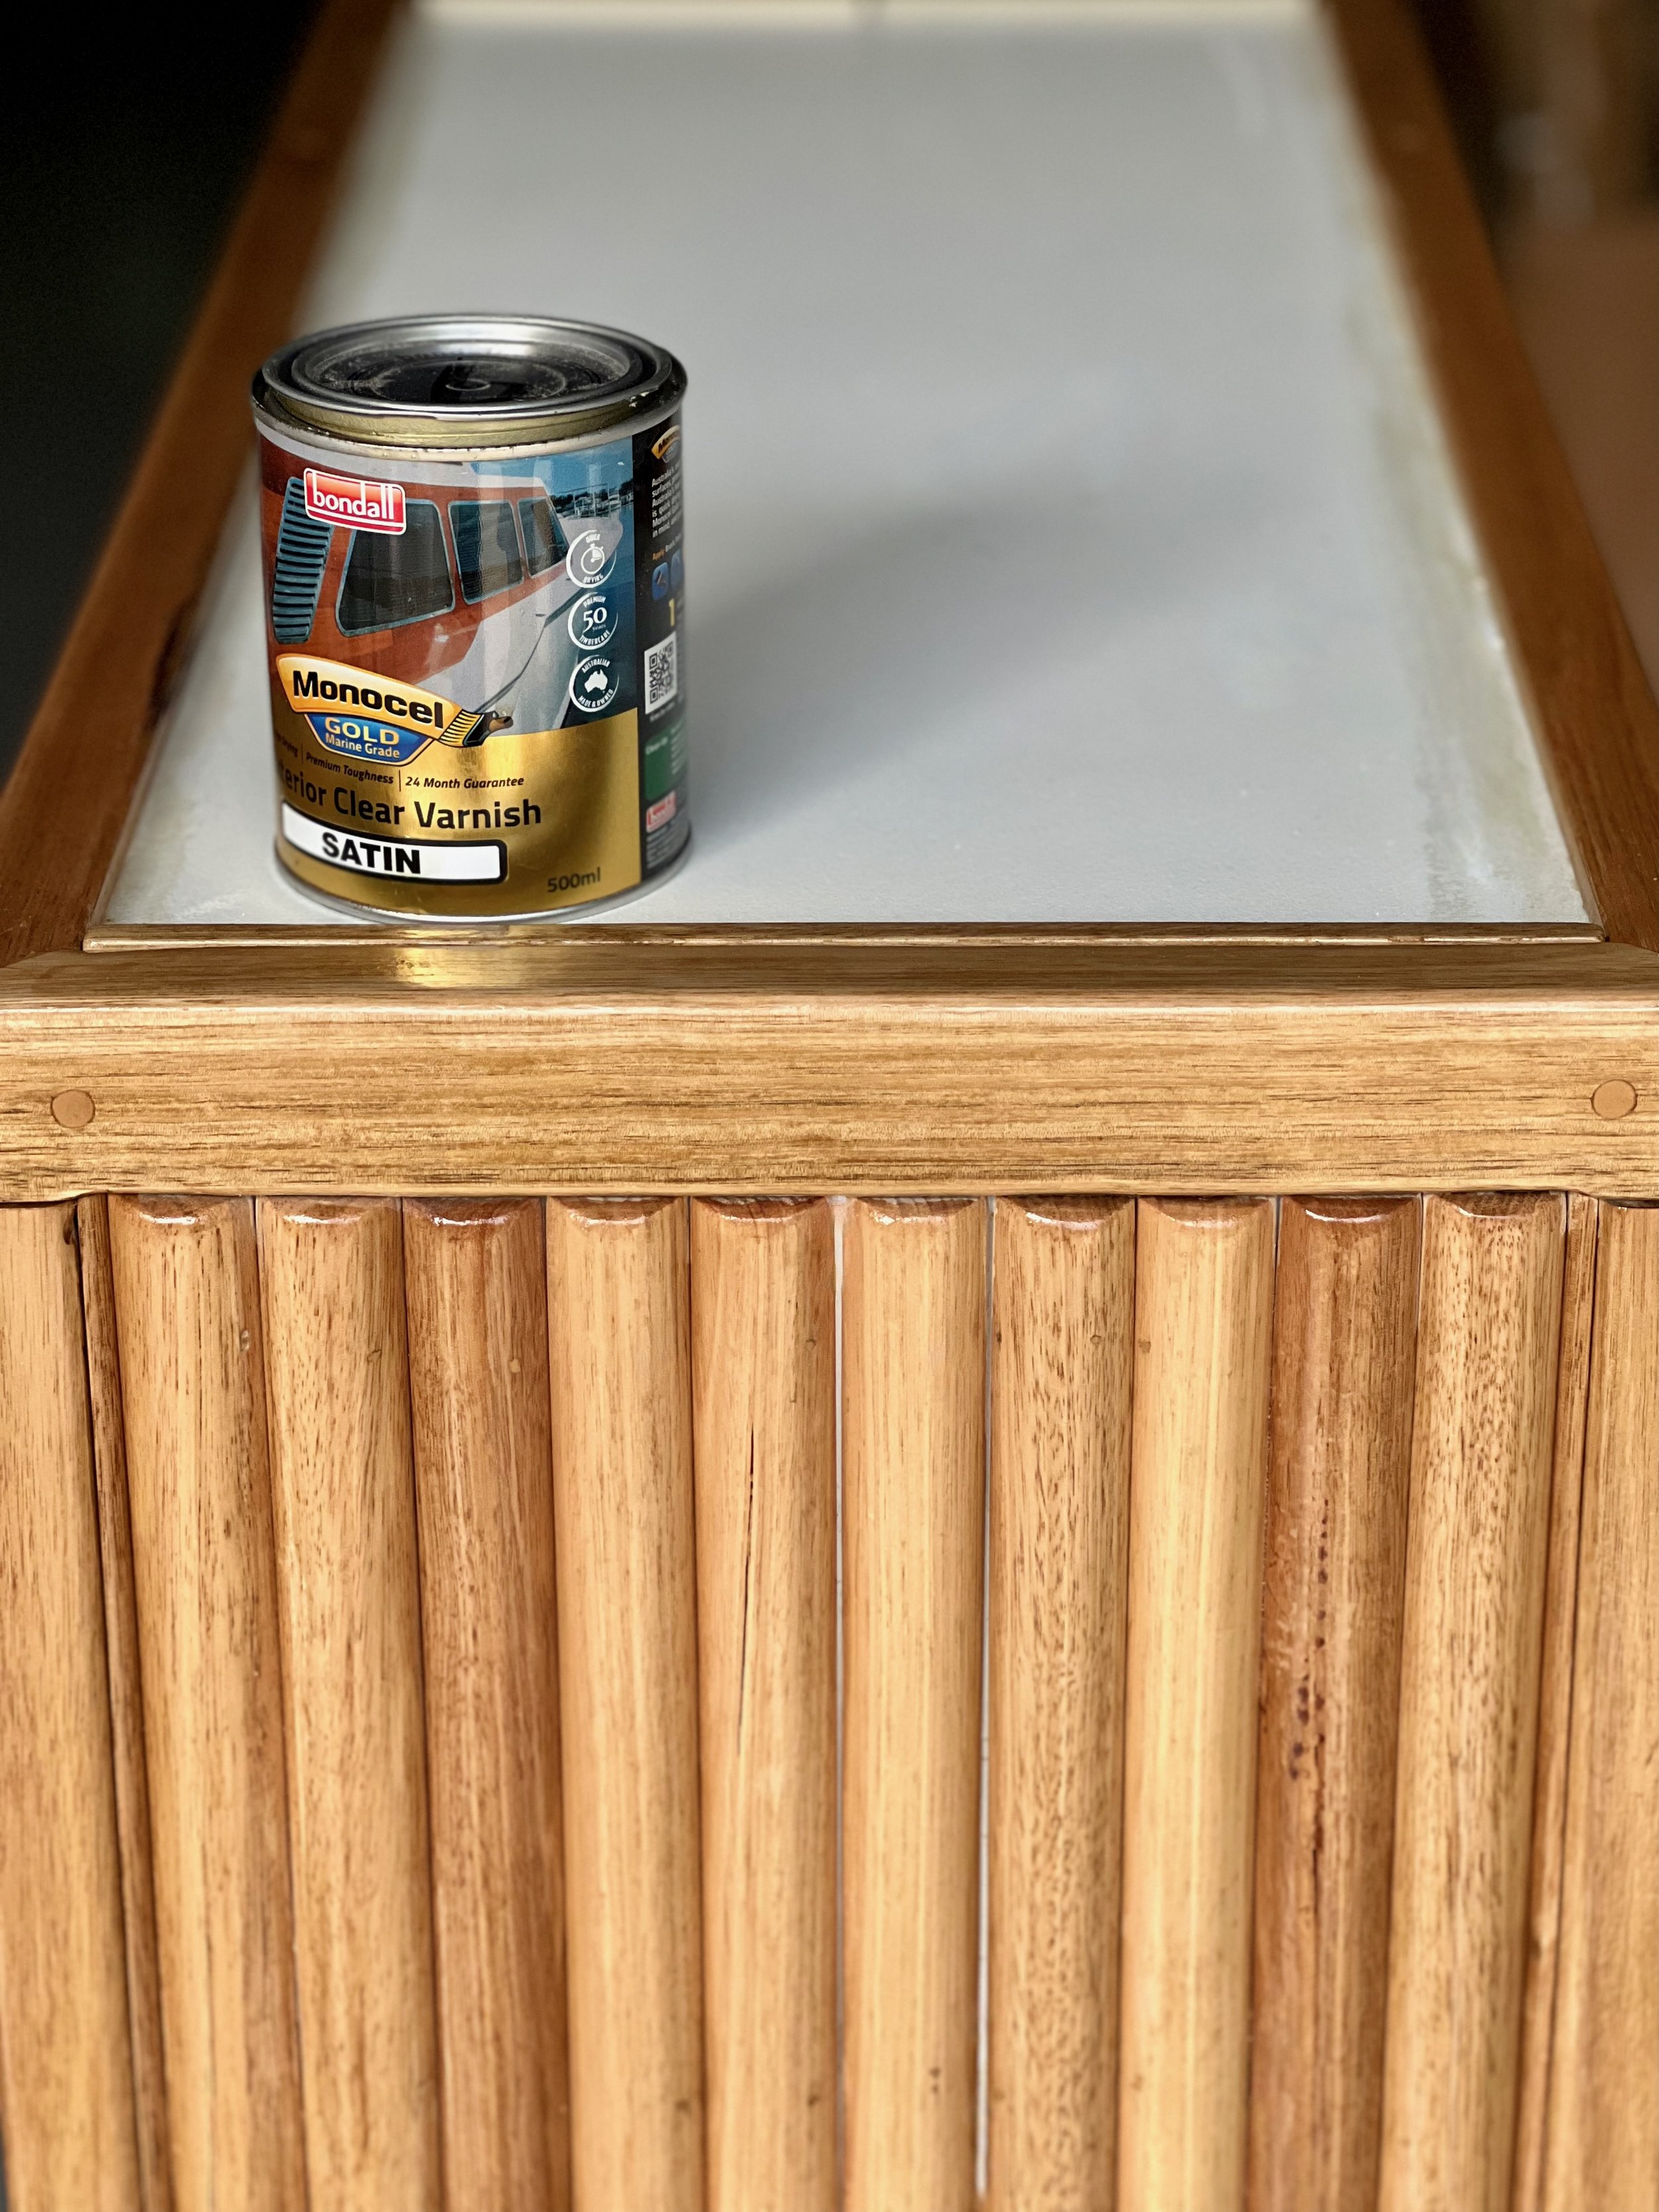
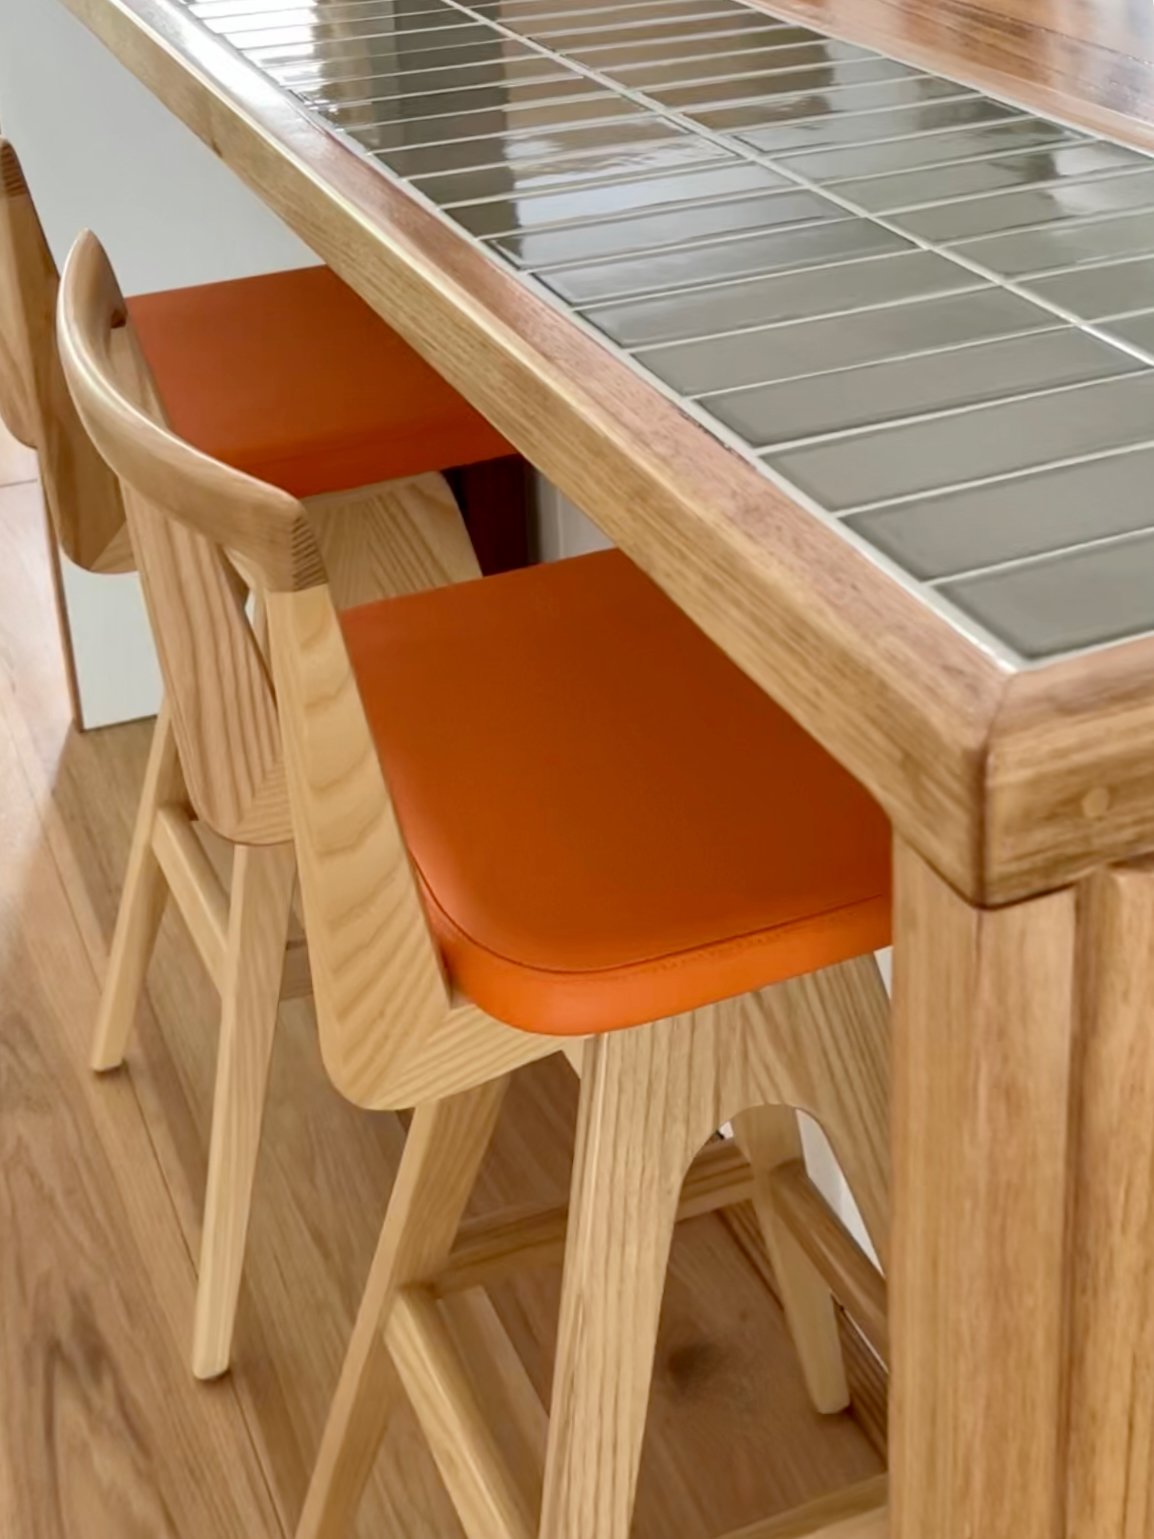
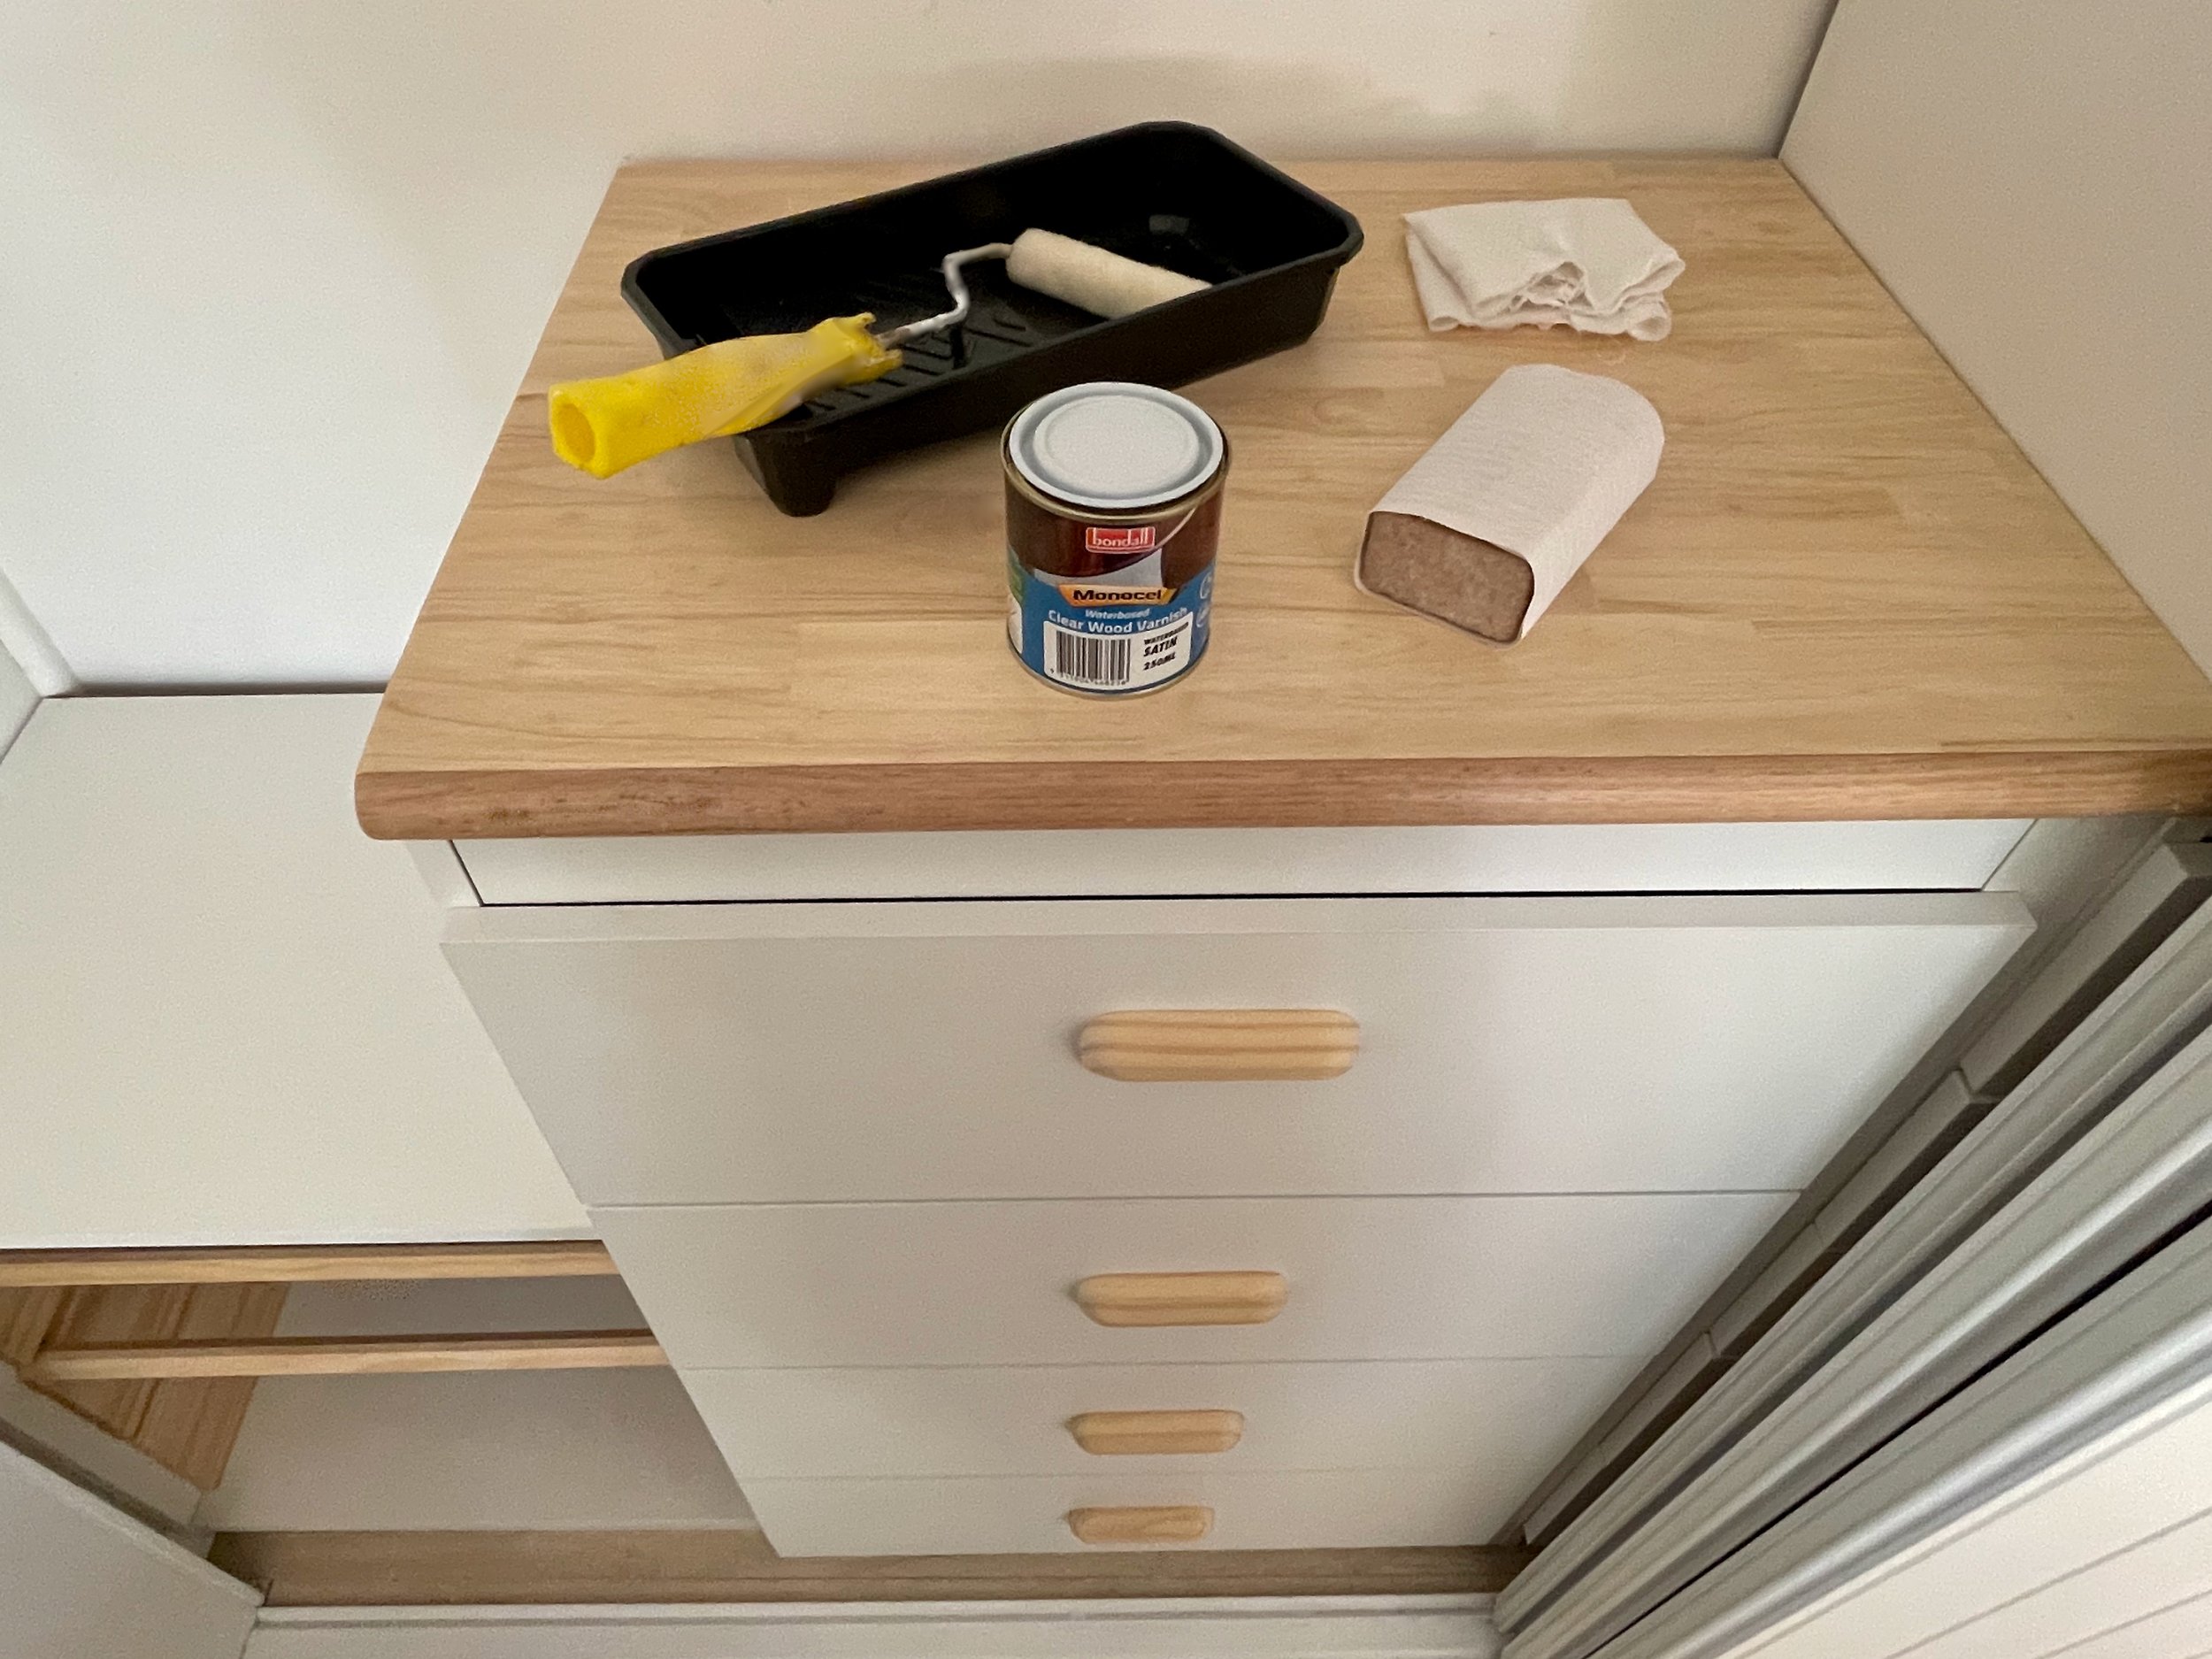
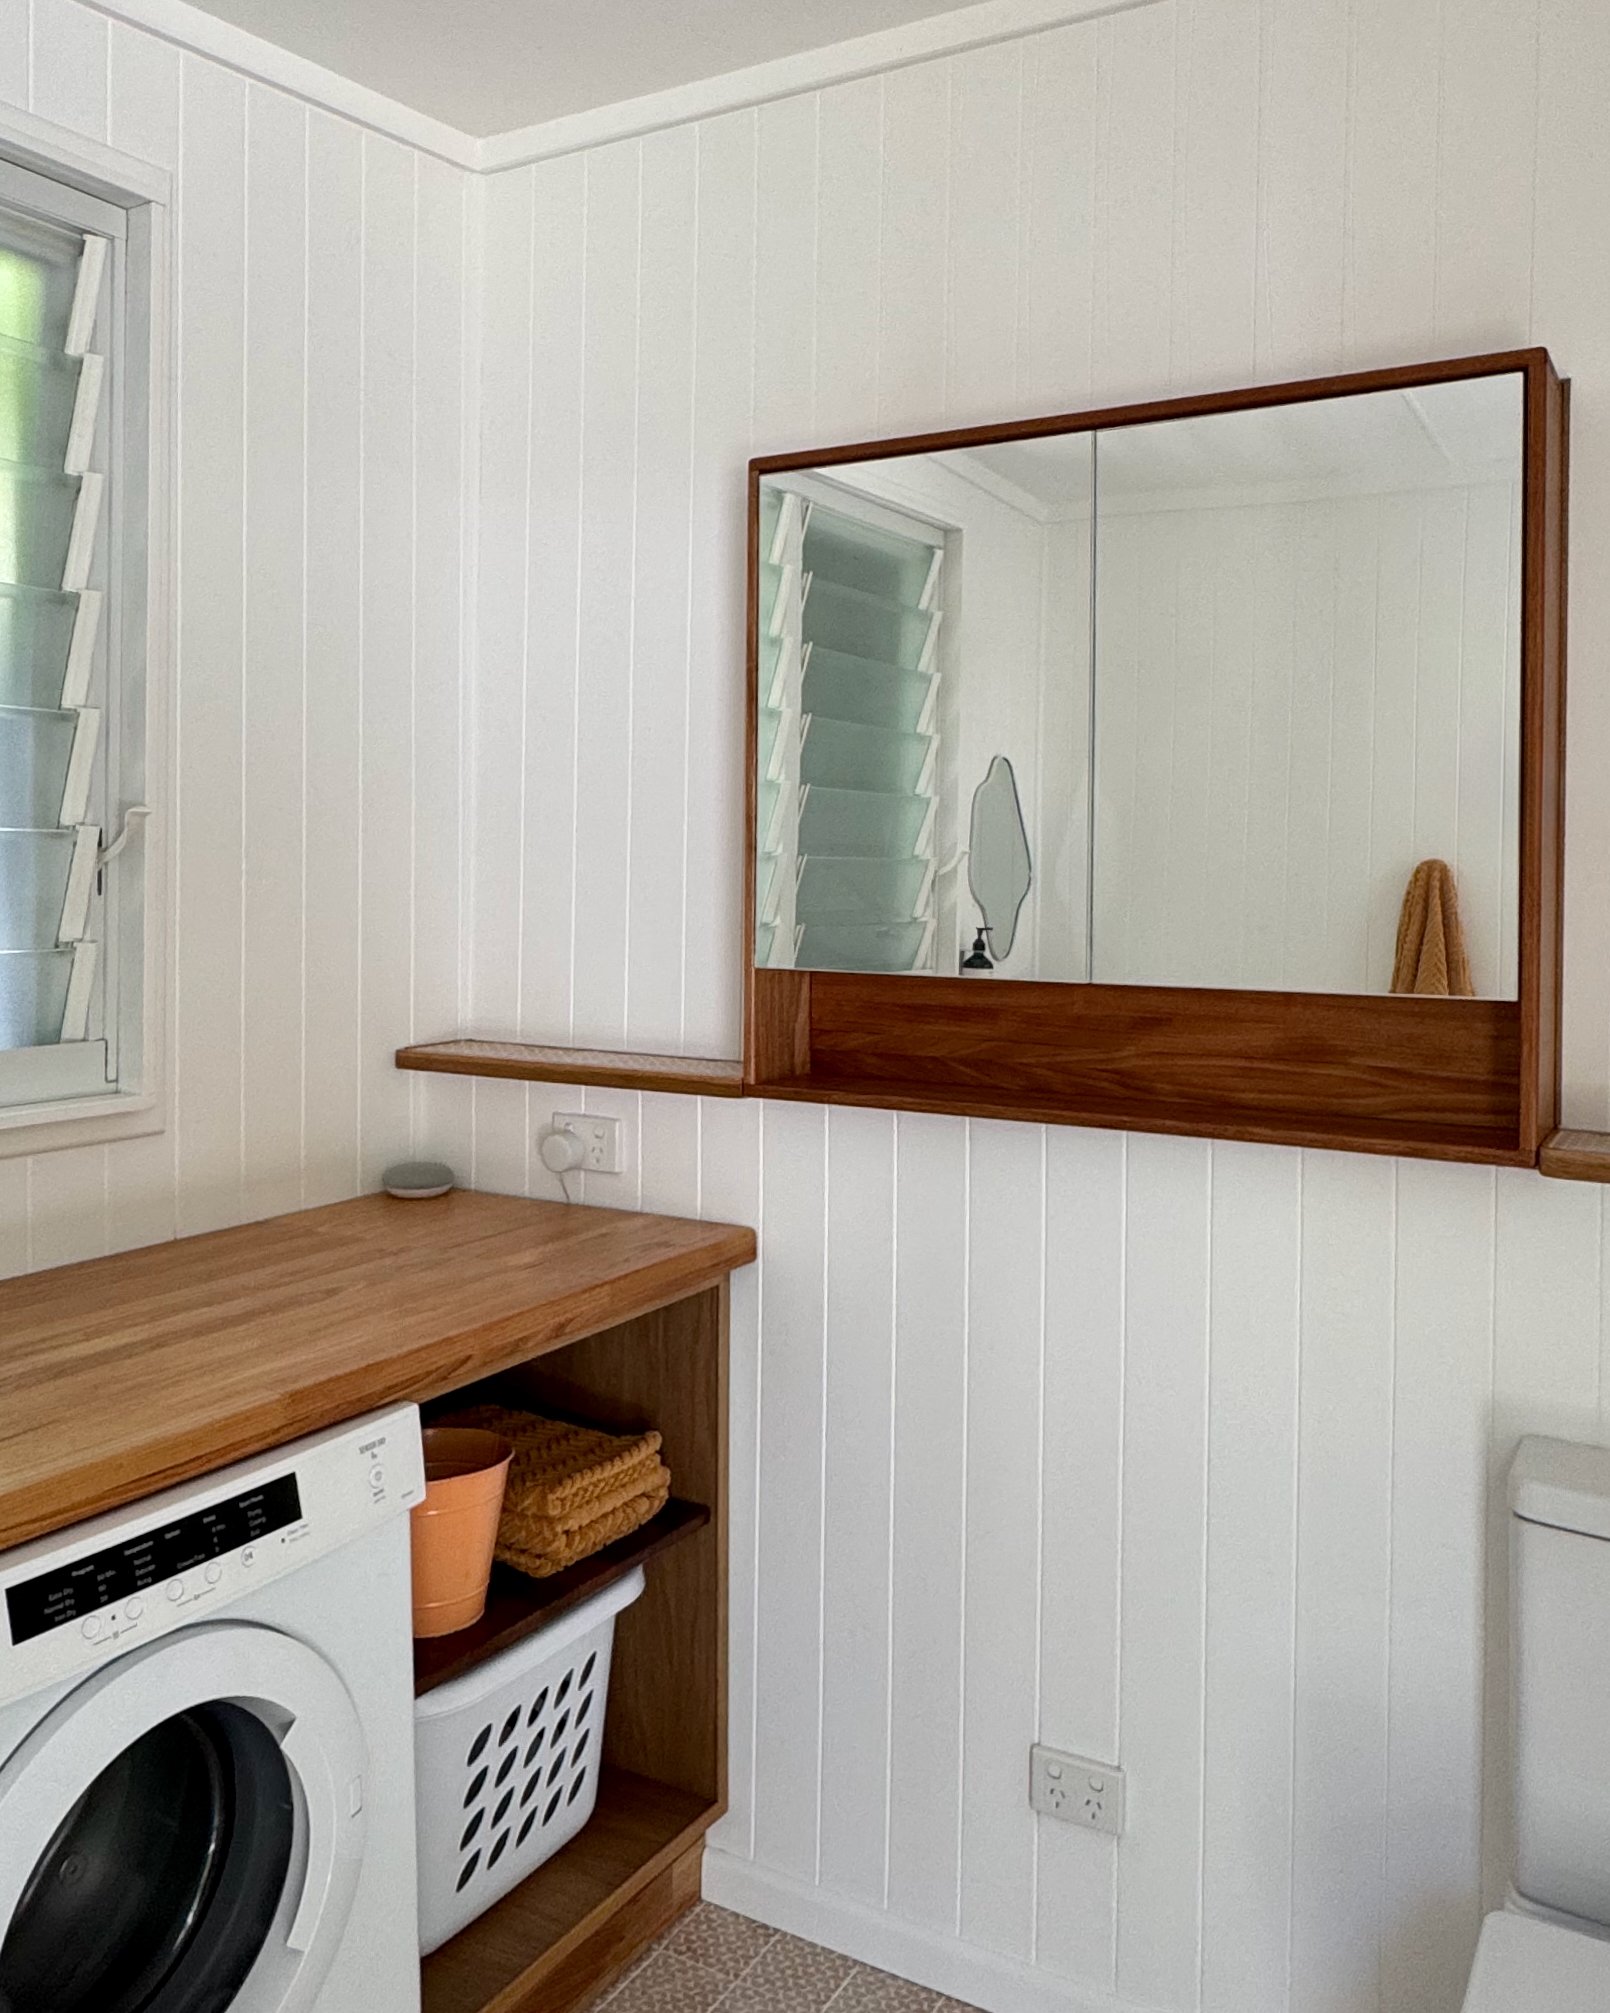
HANDCRAFTED BENCHTOP

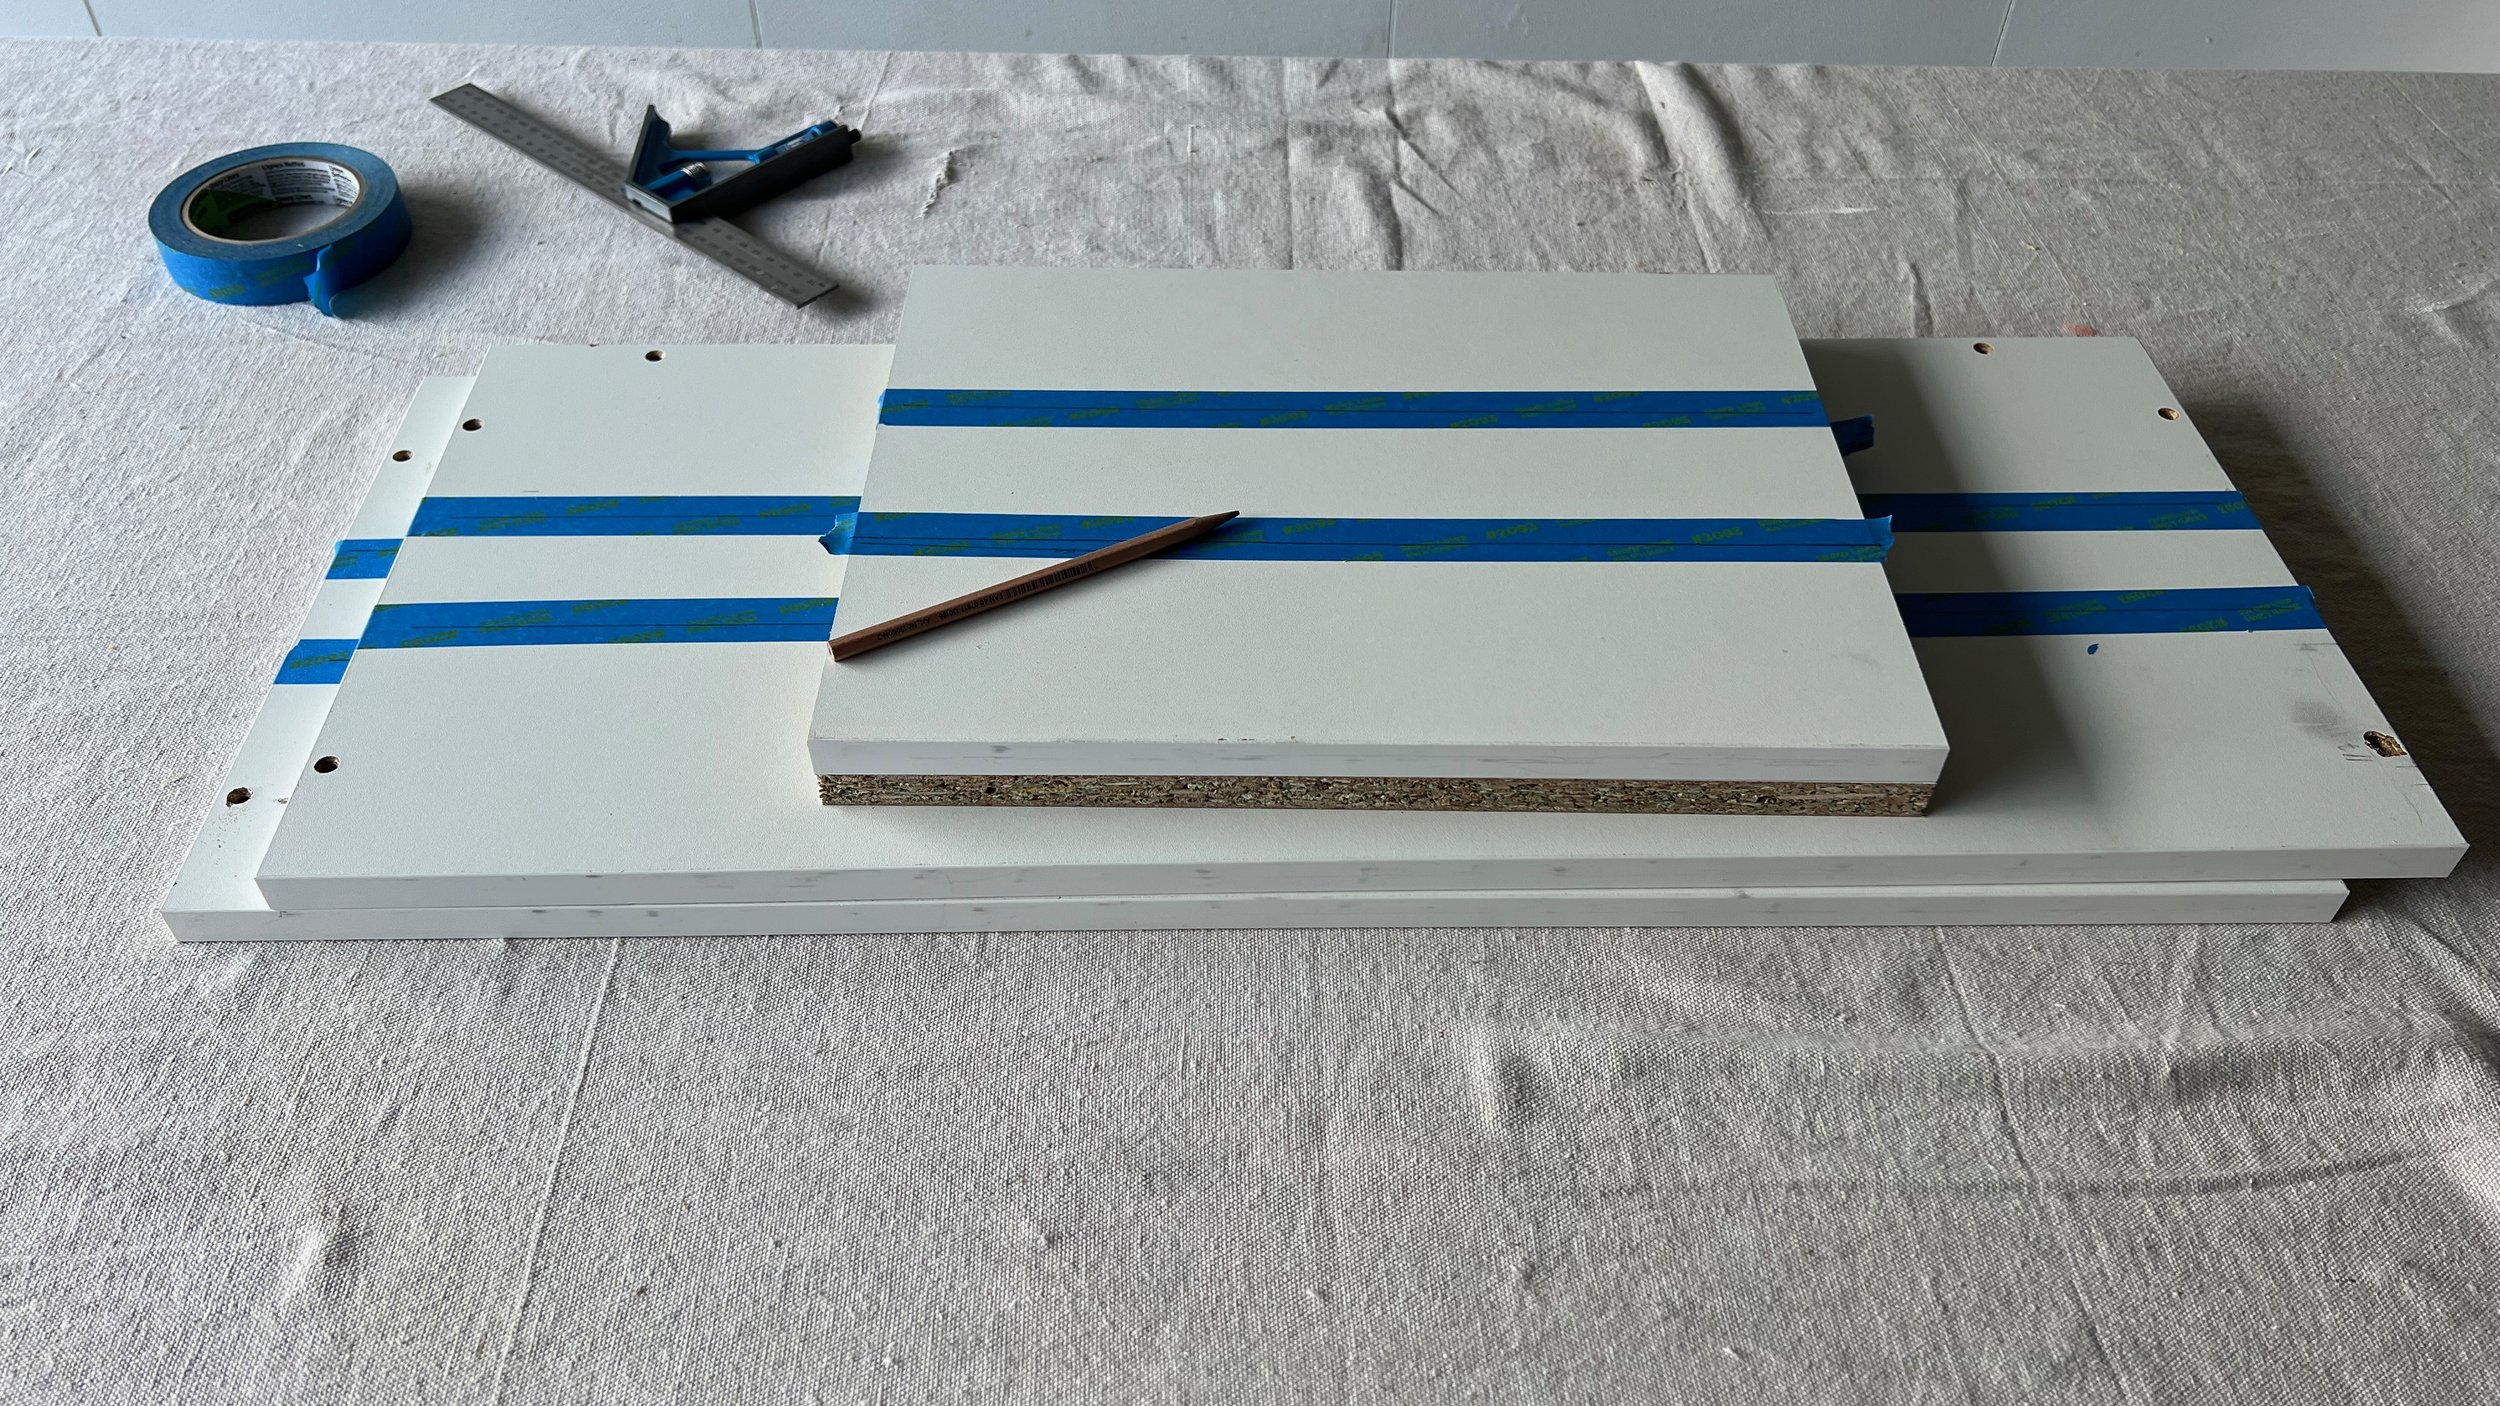
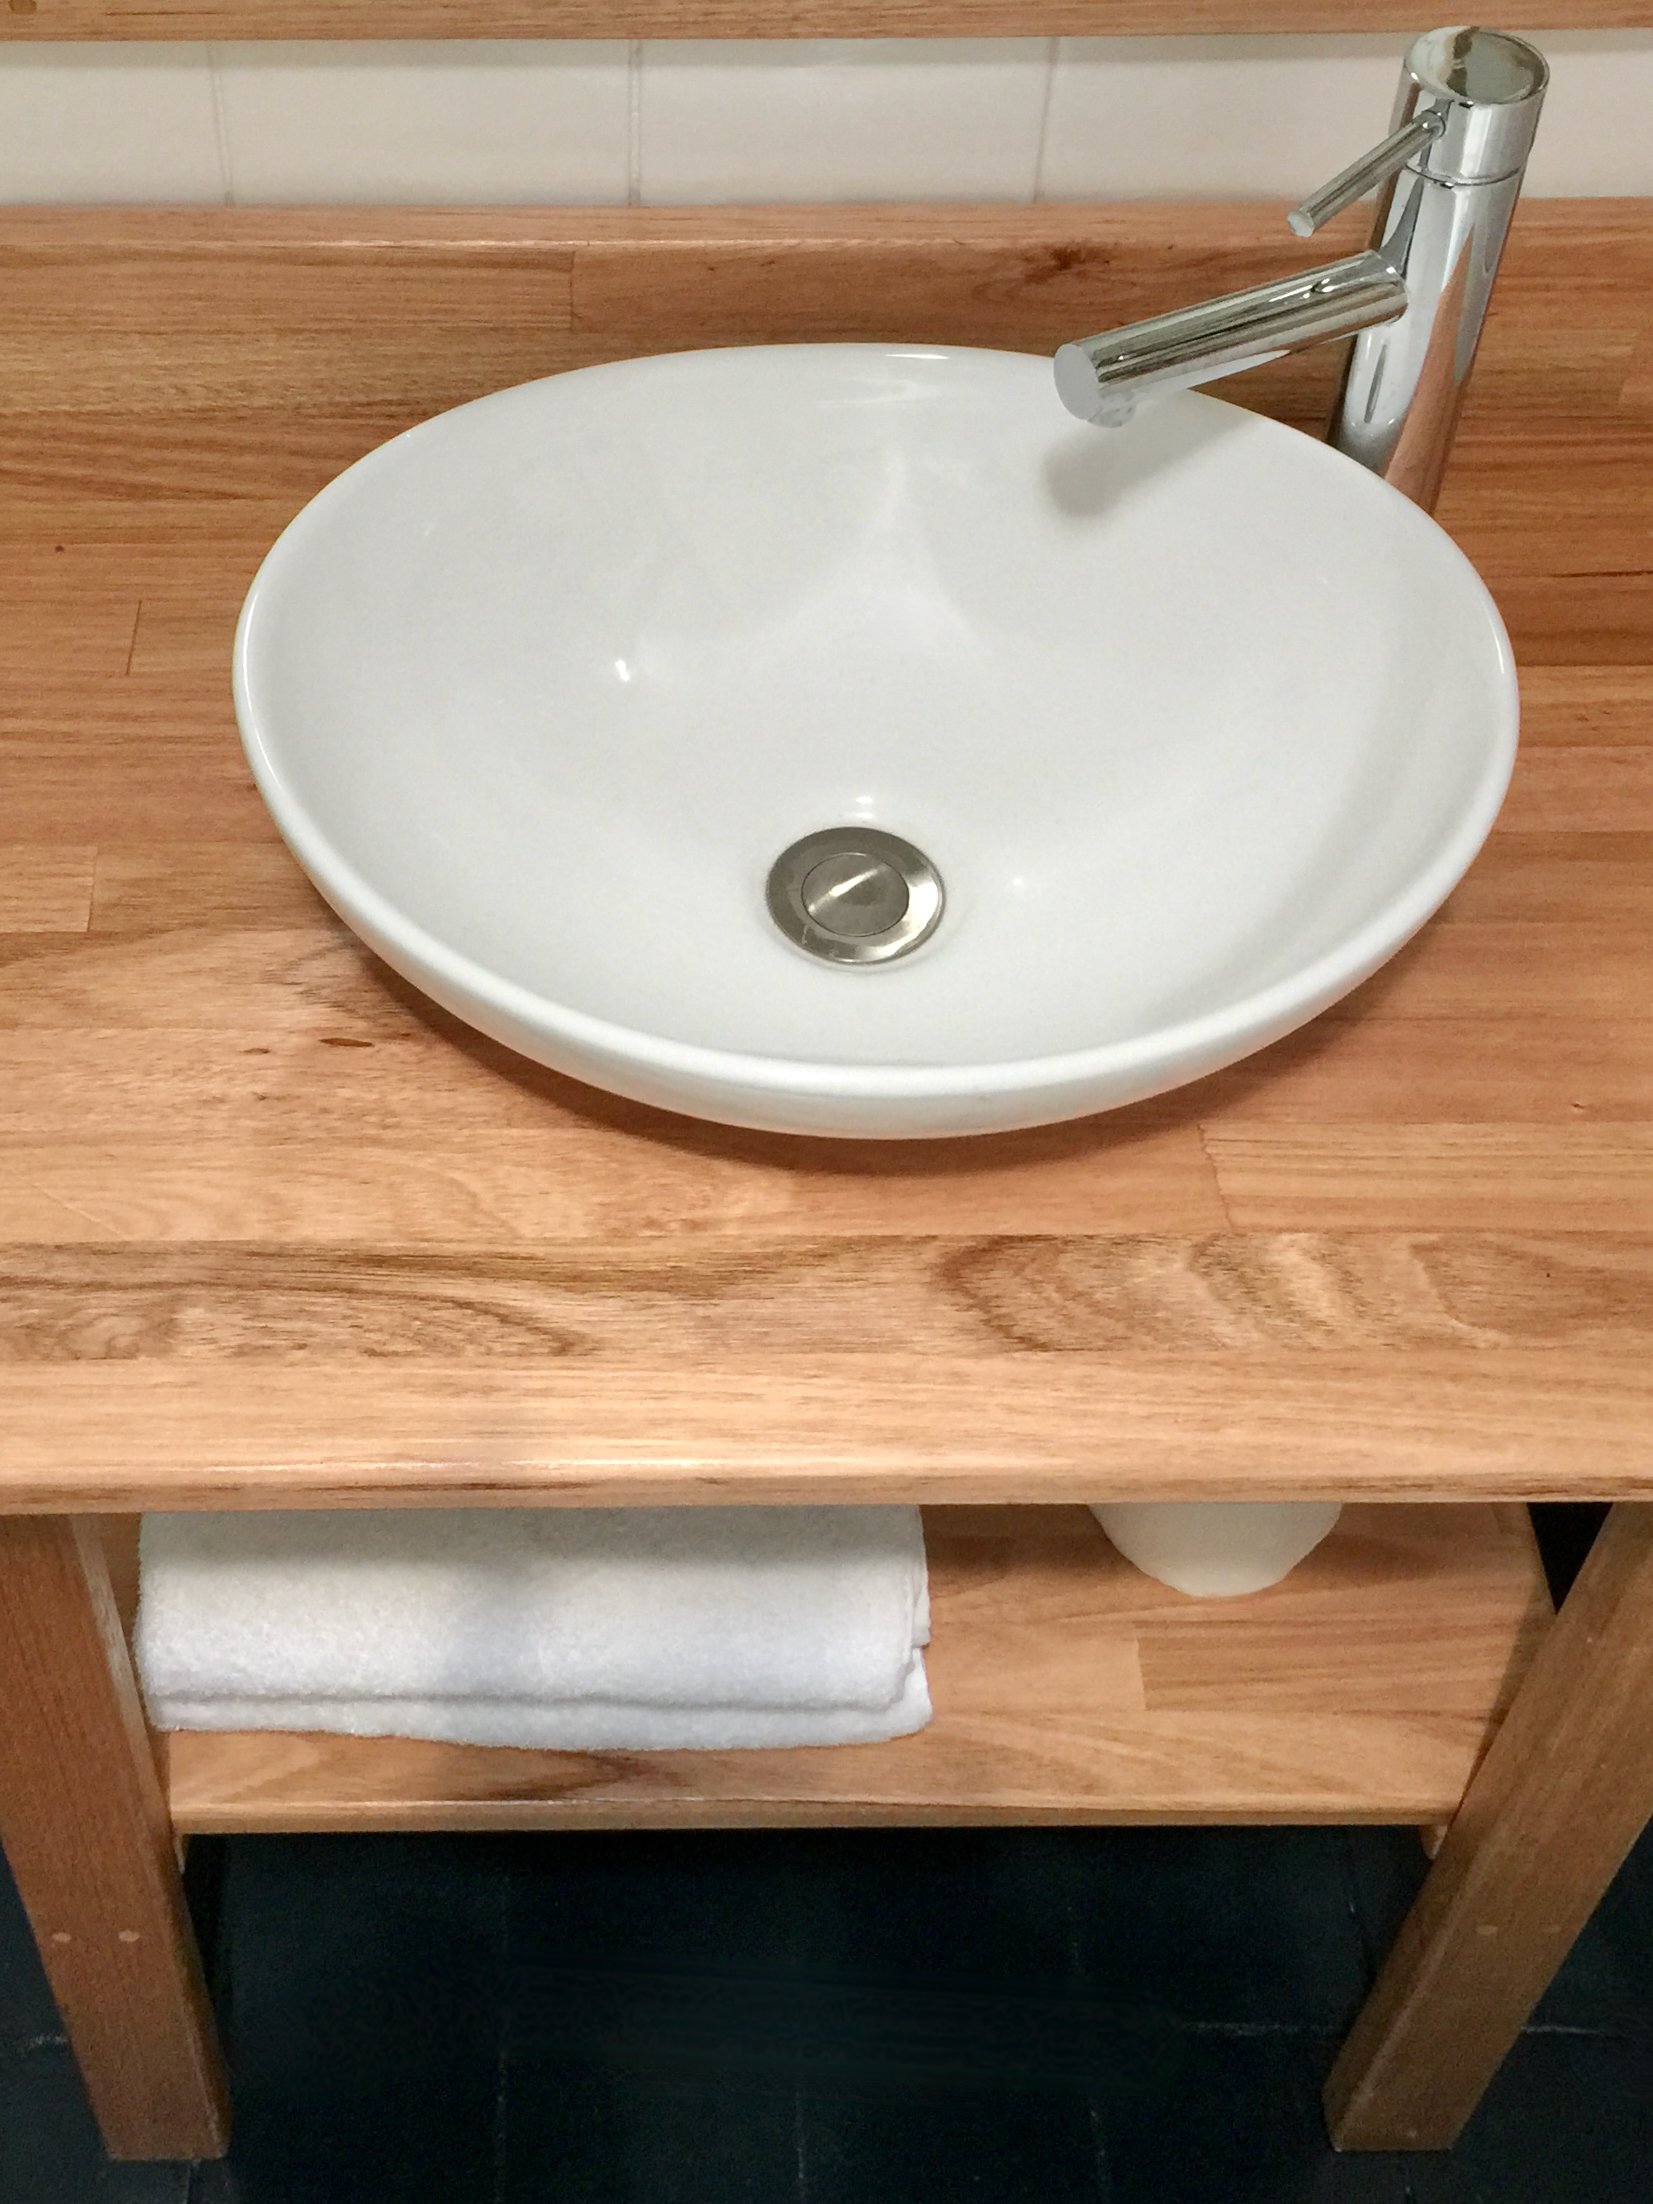
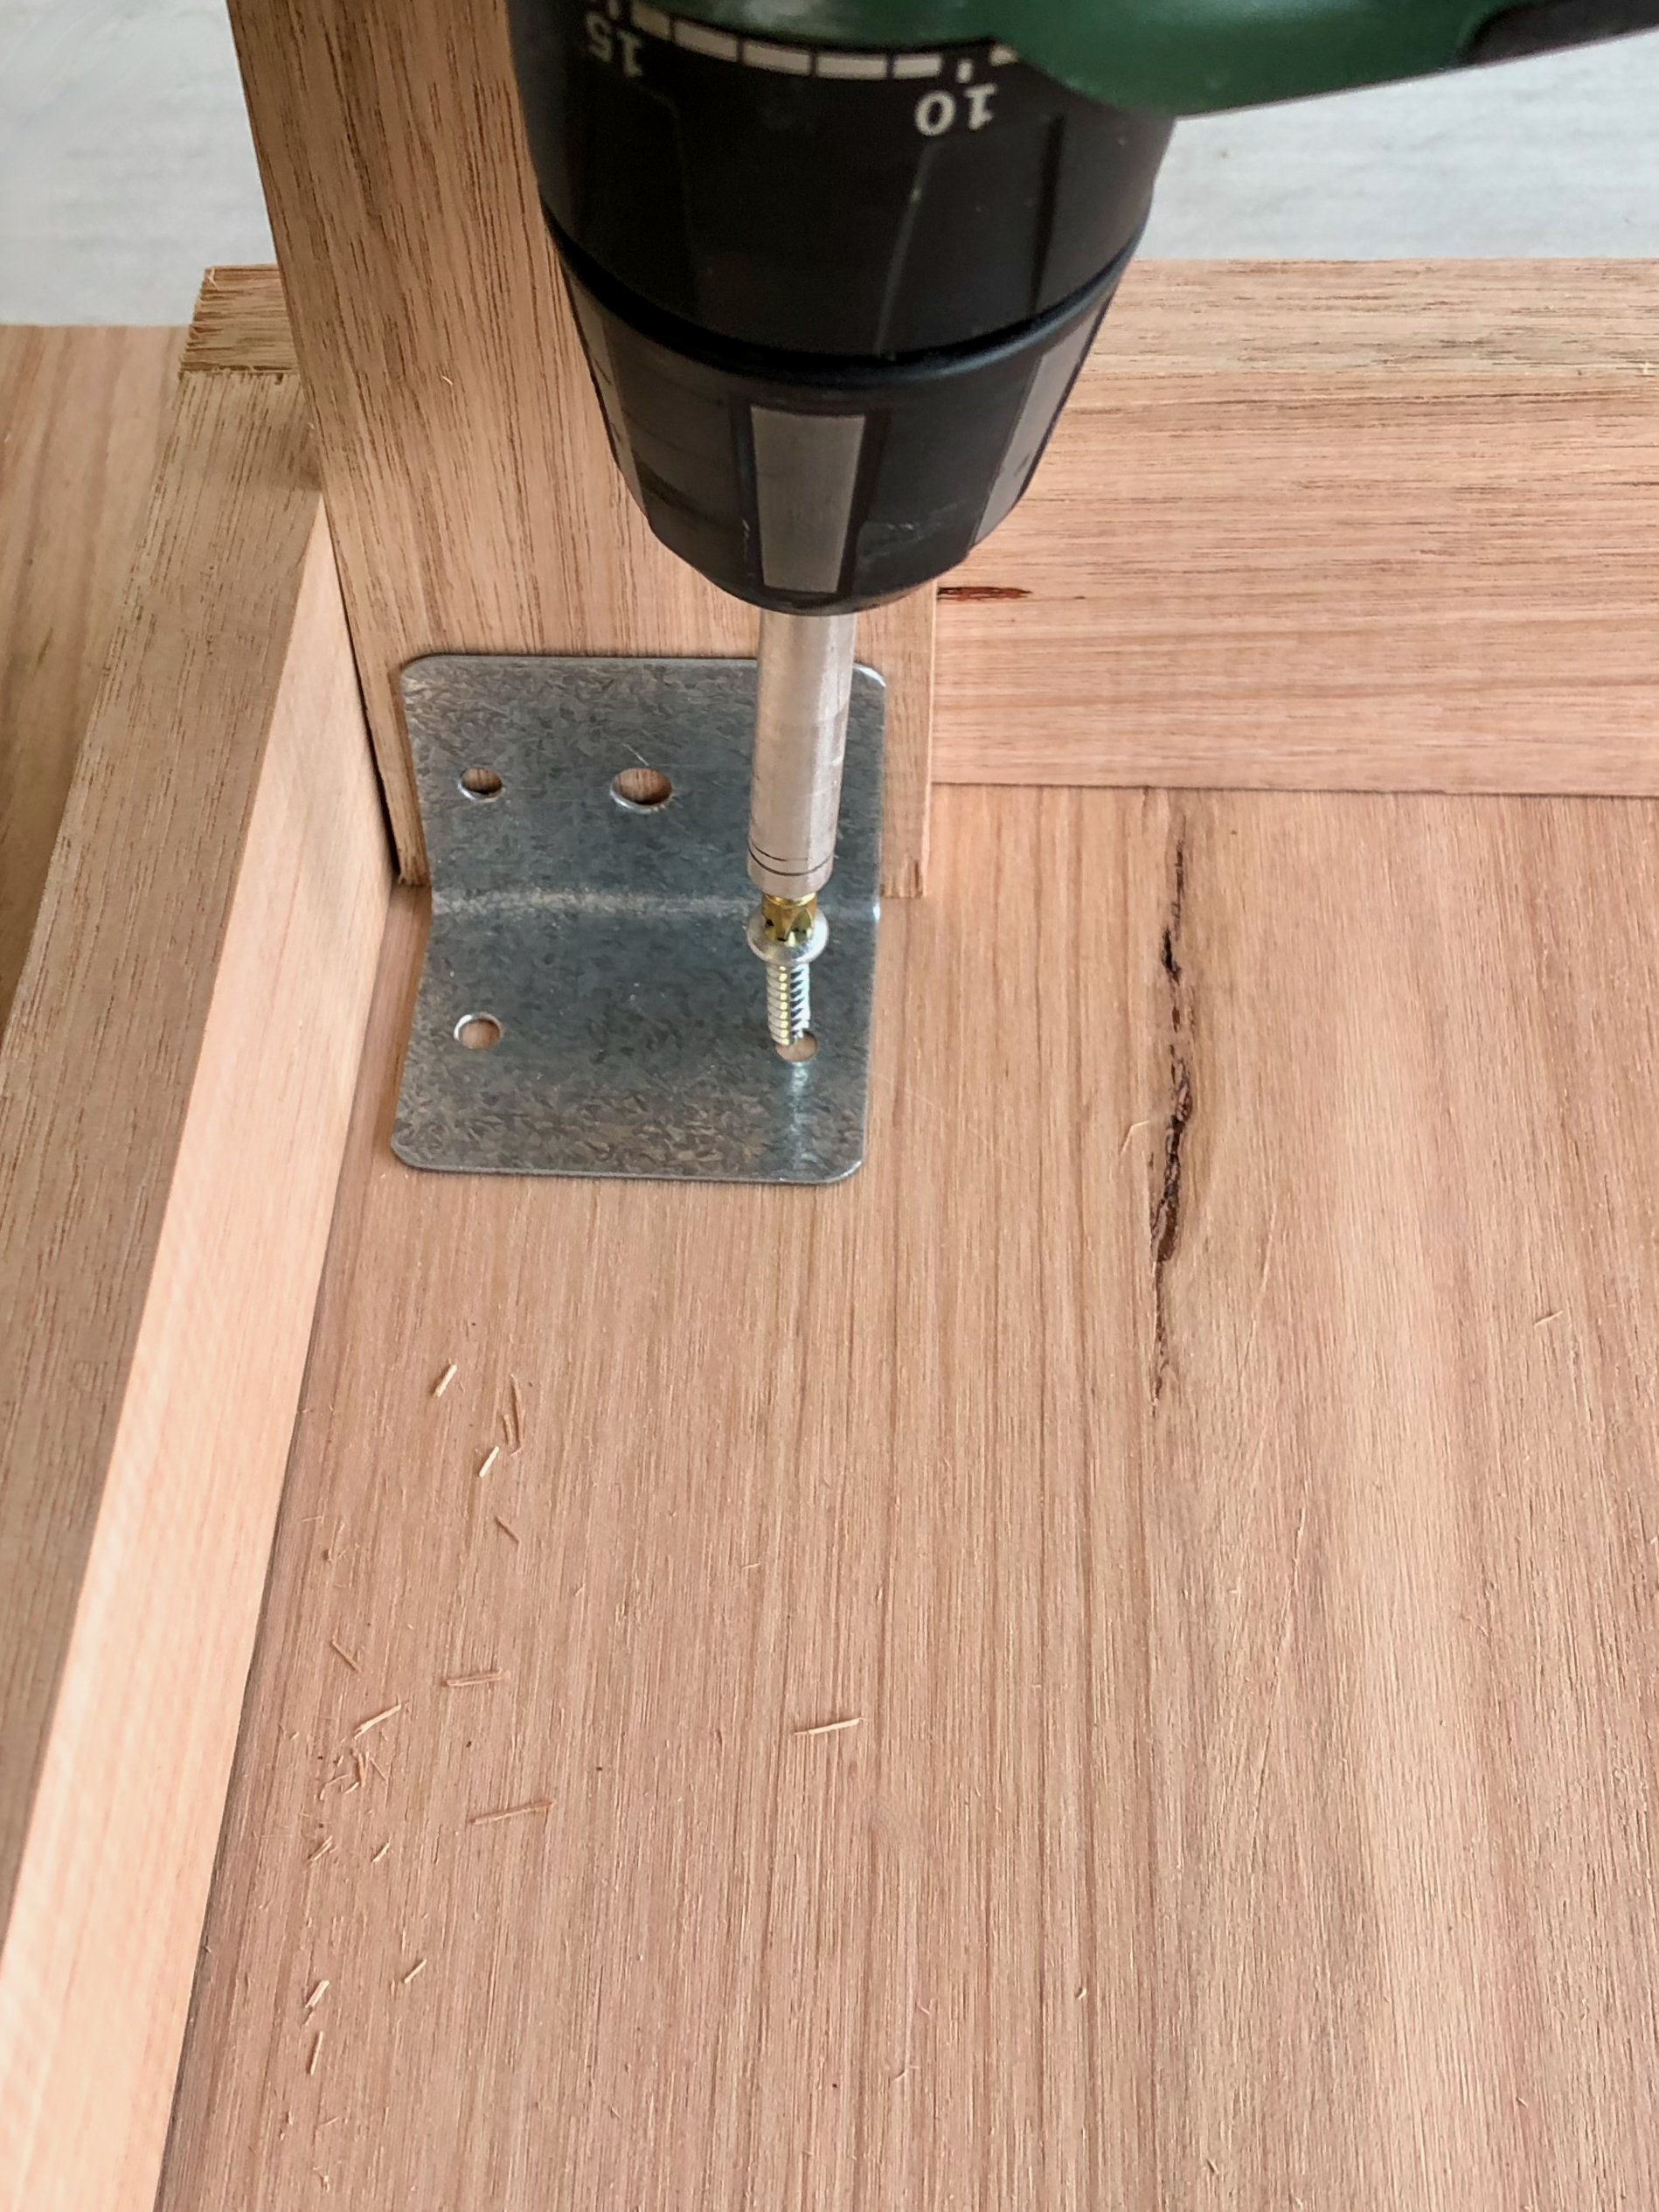
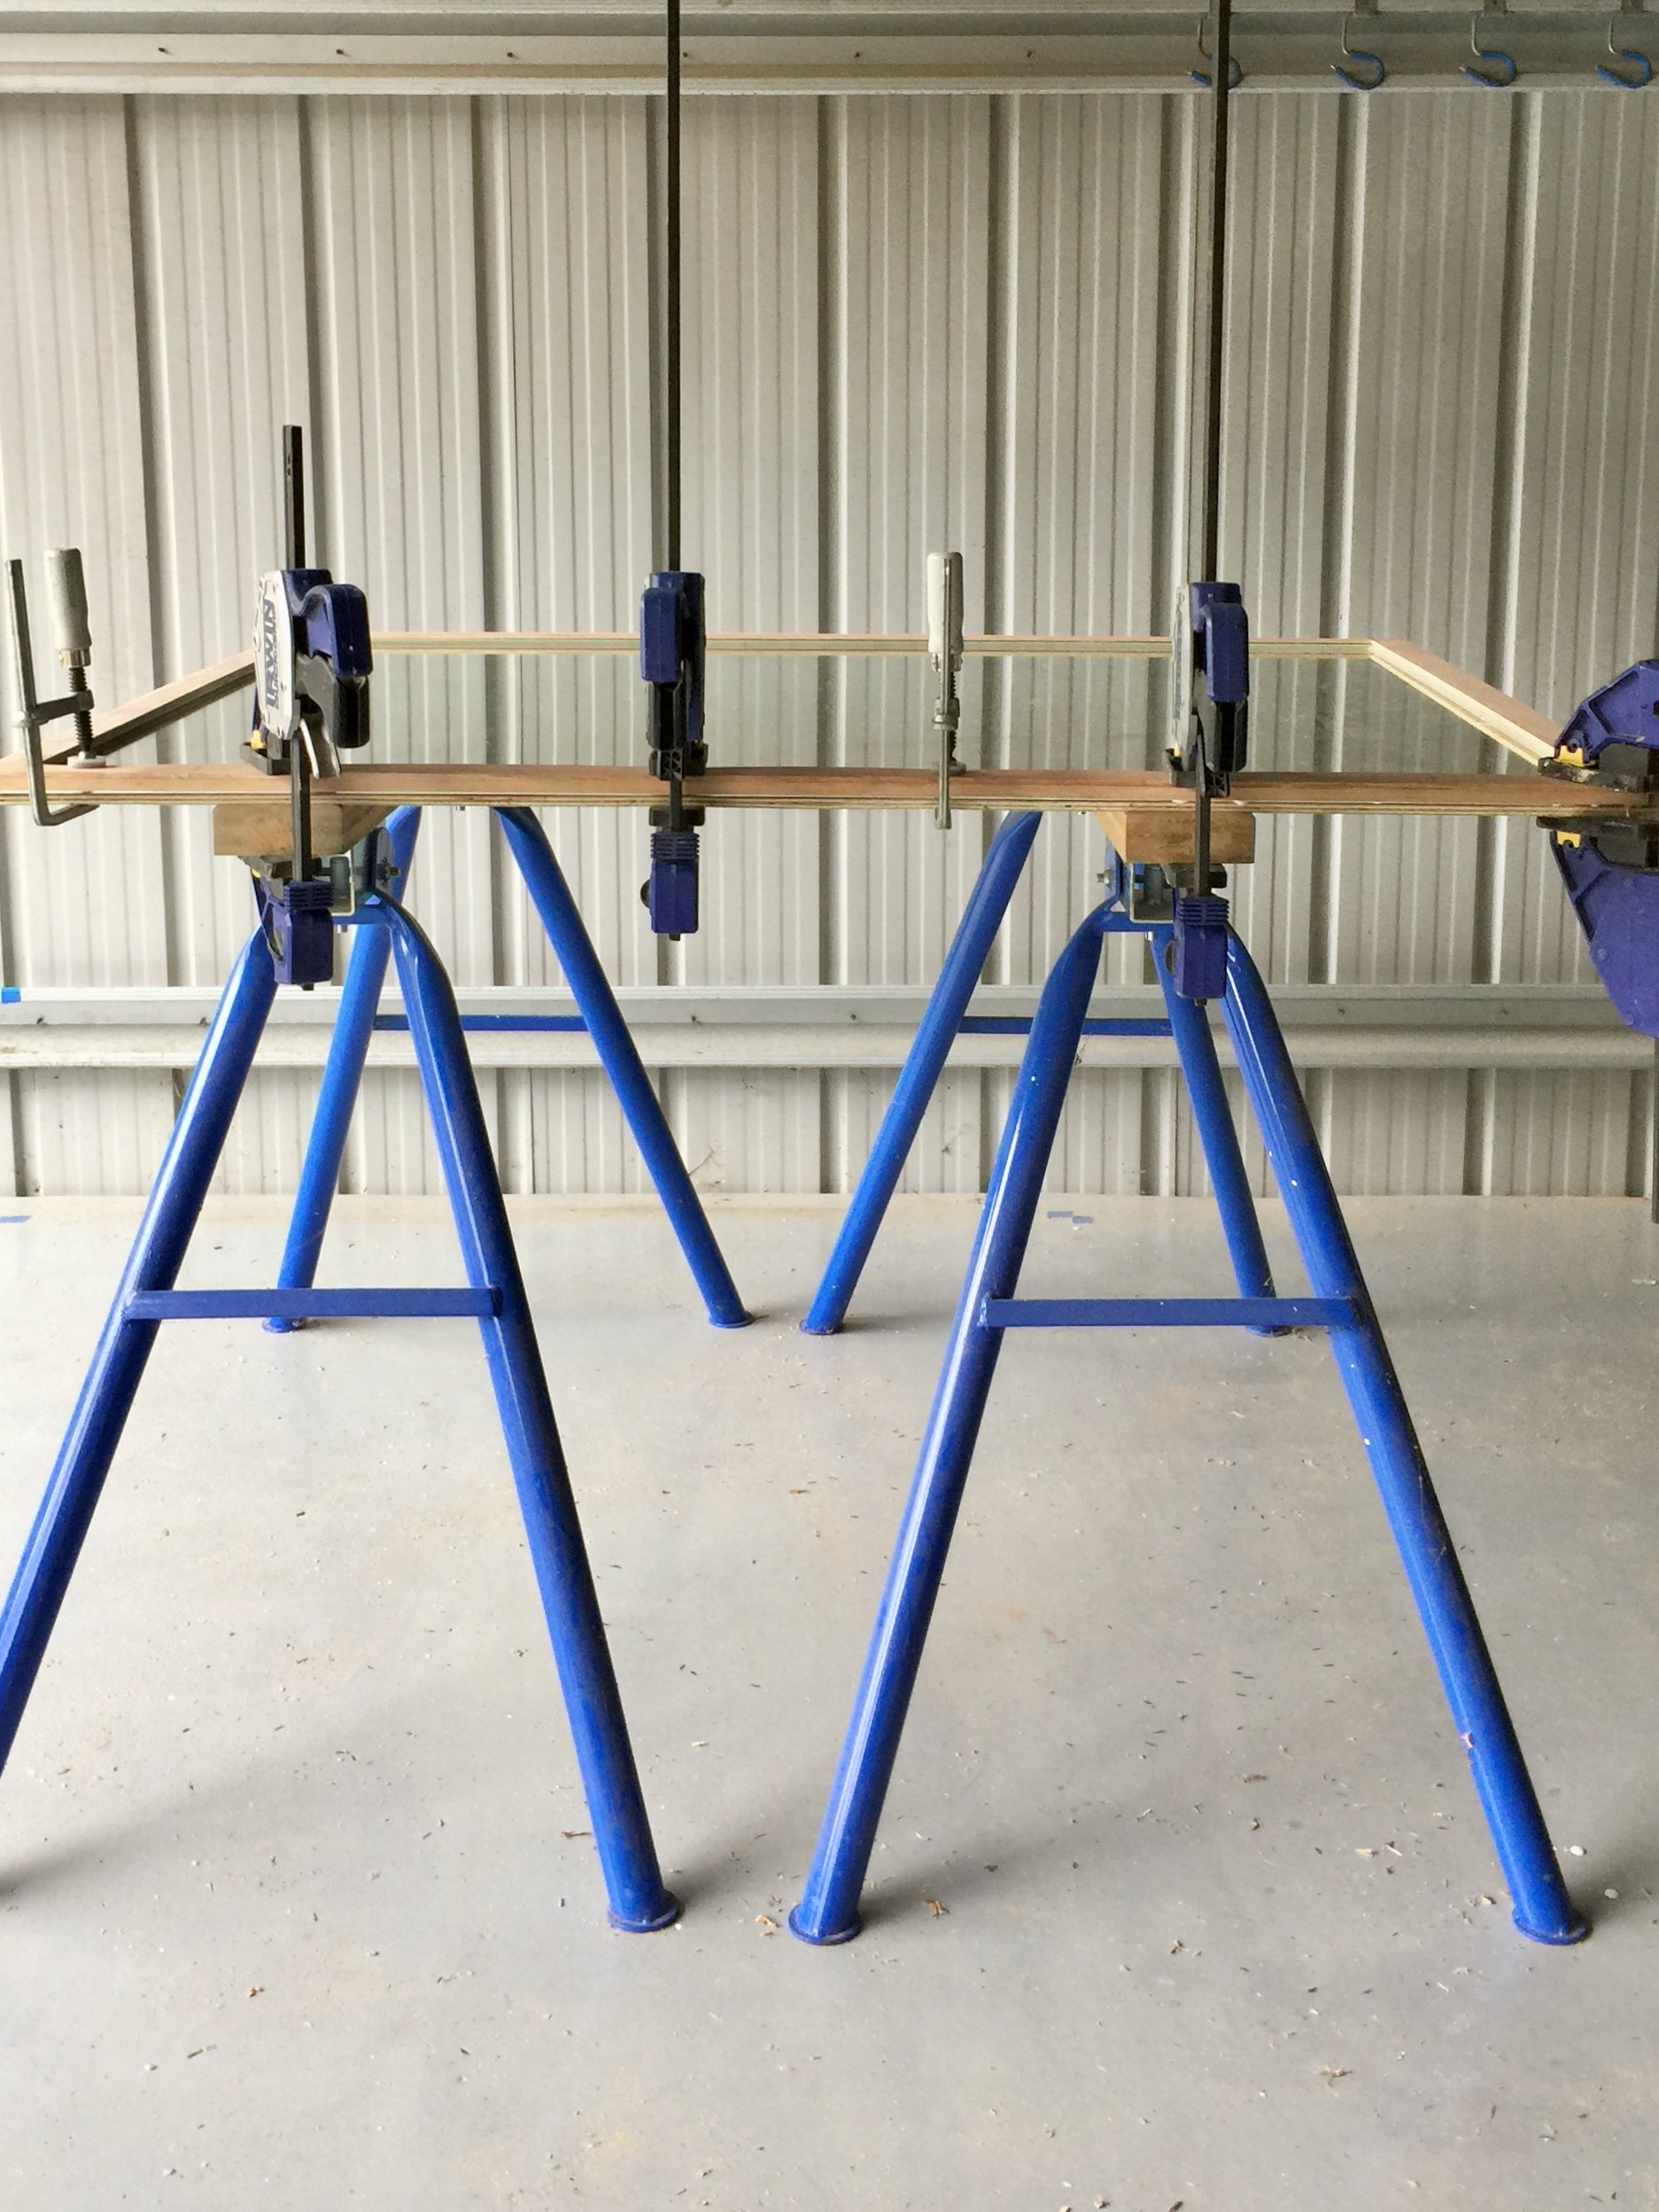
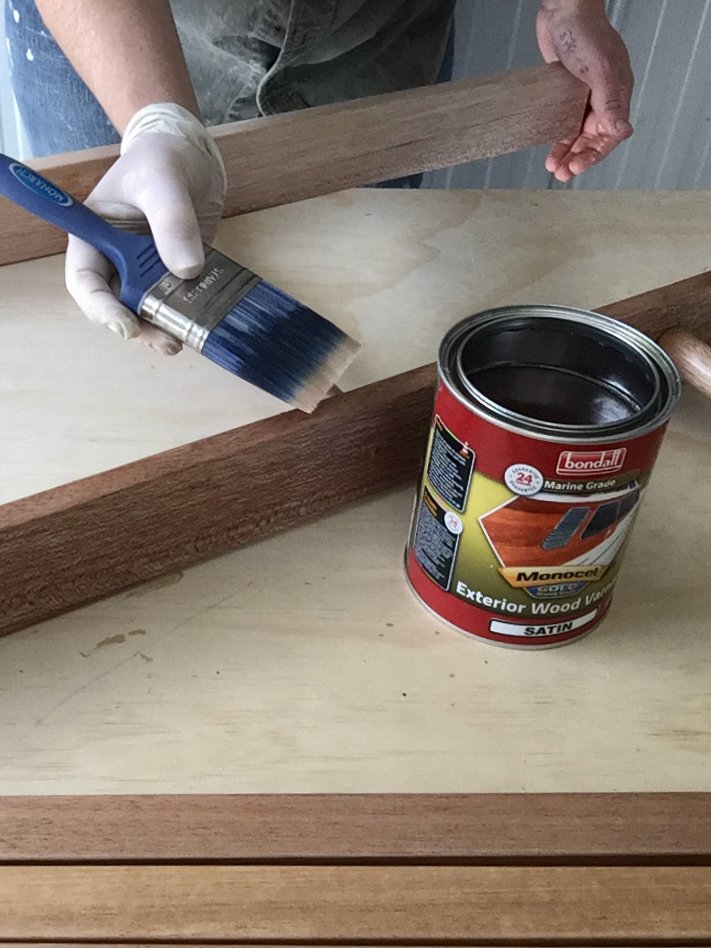
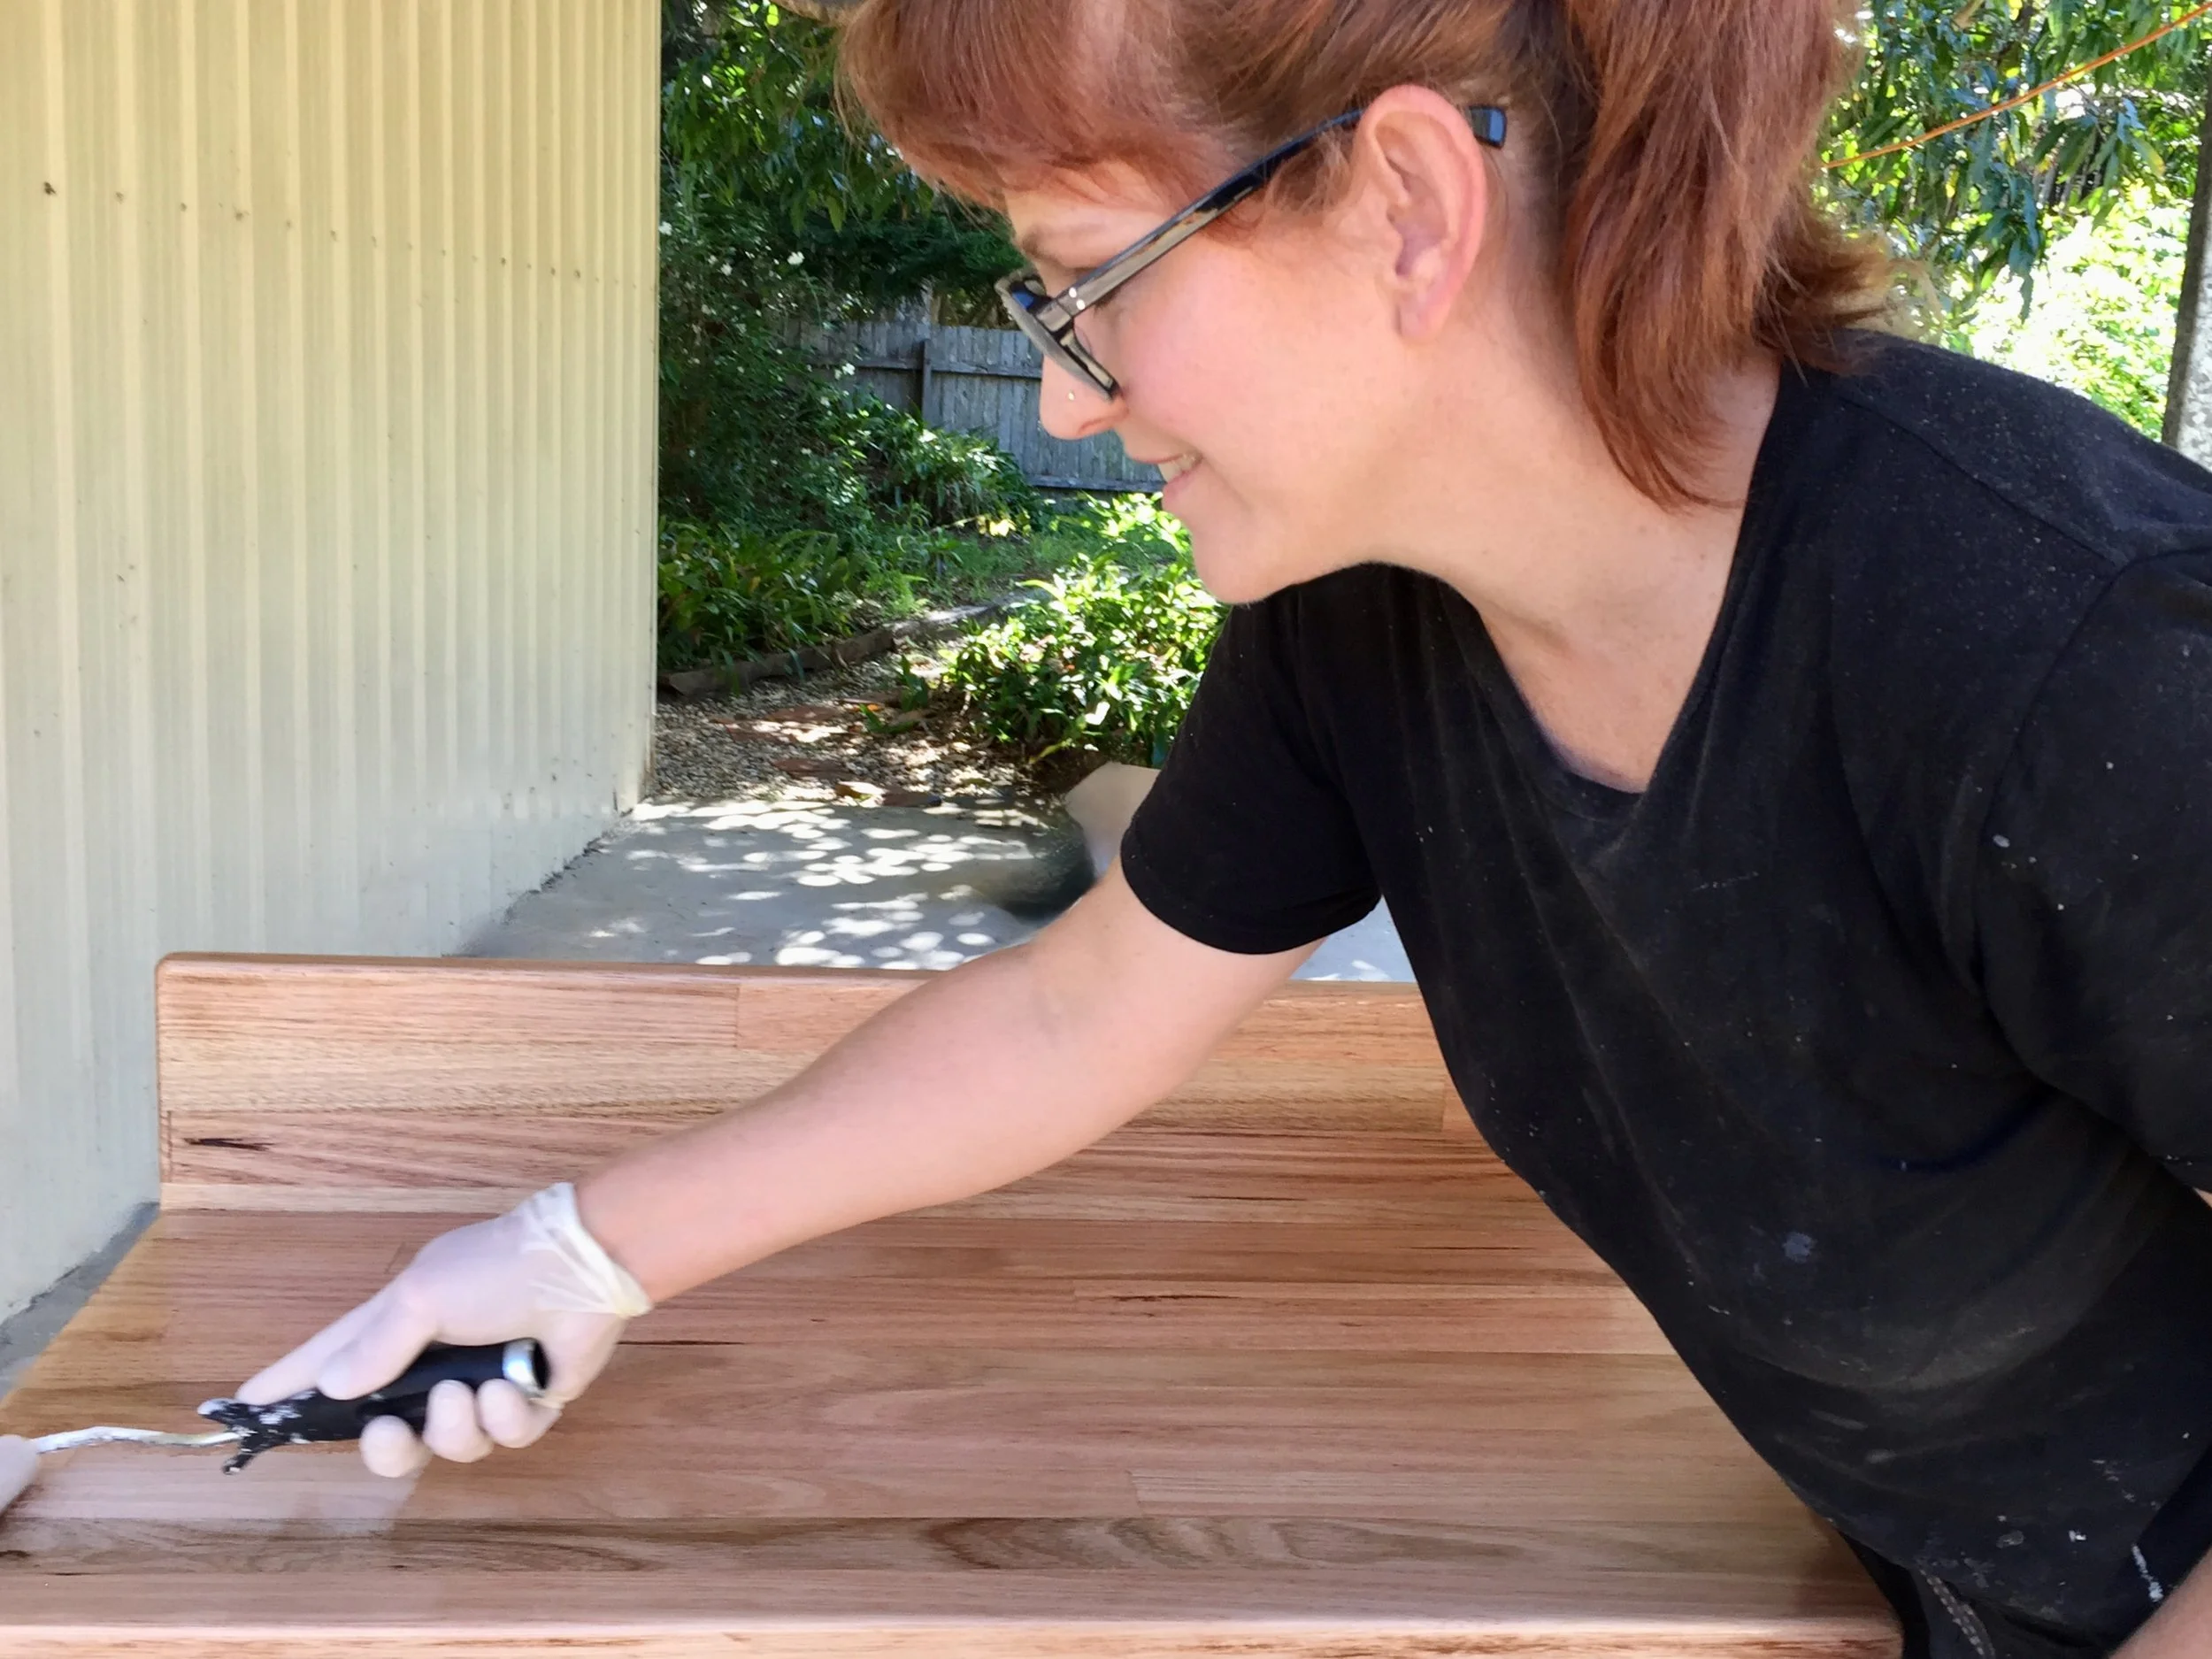
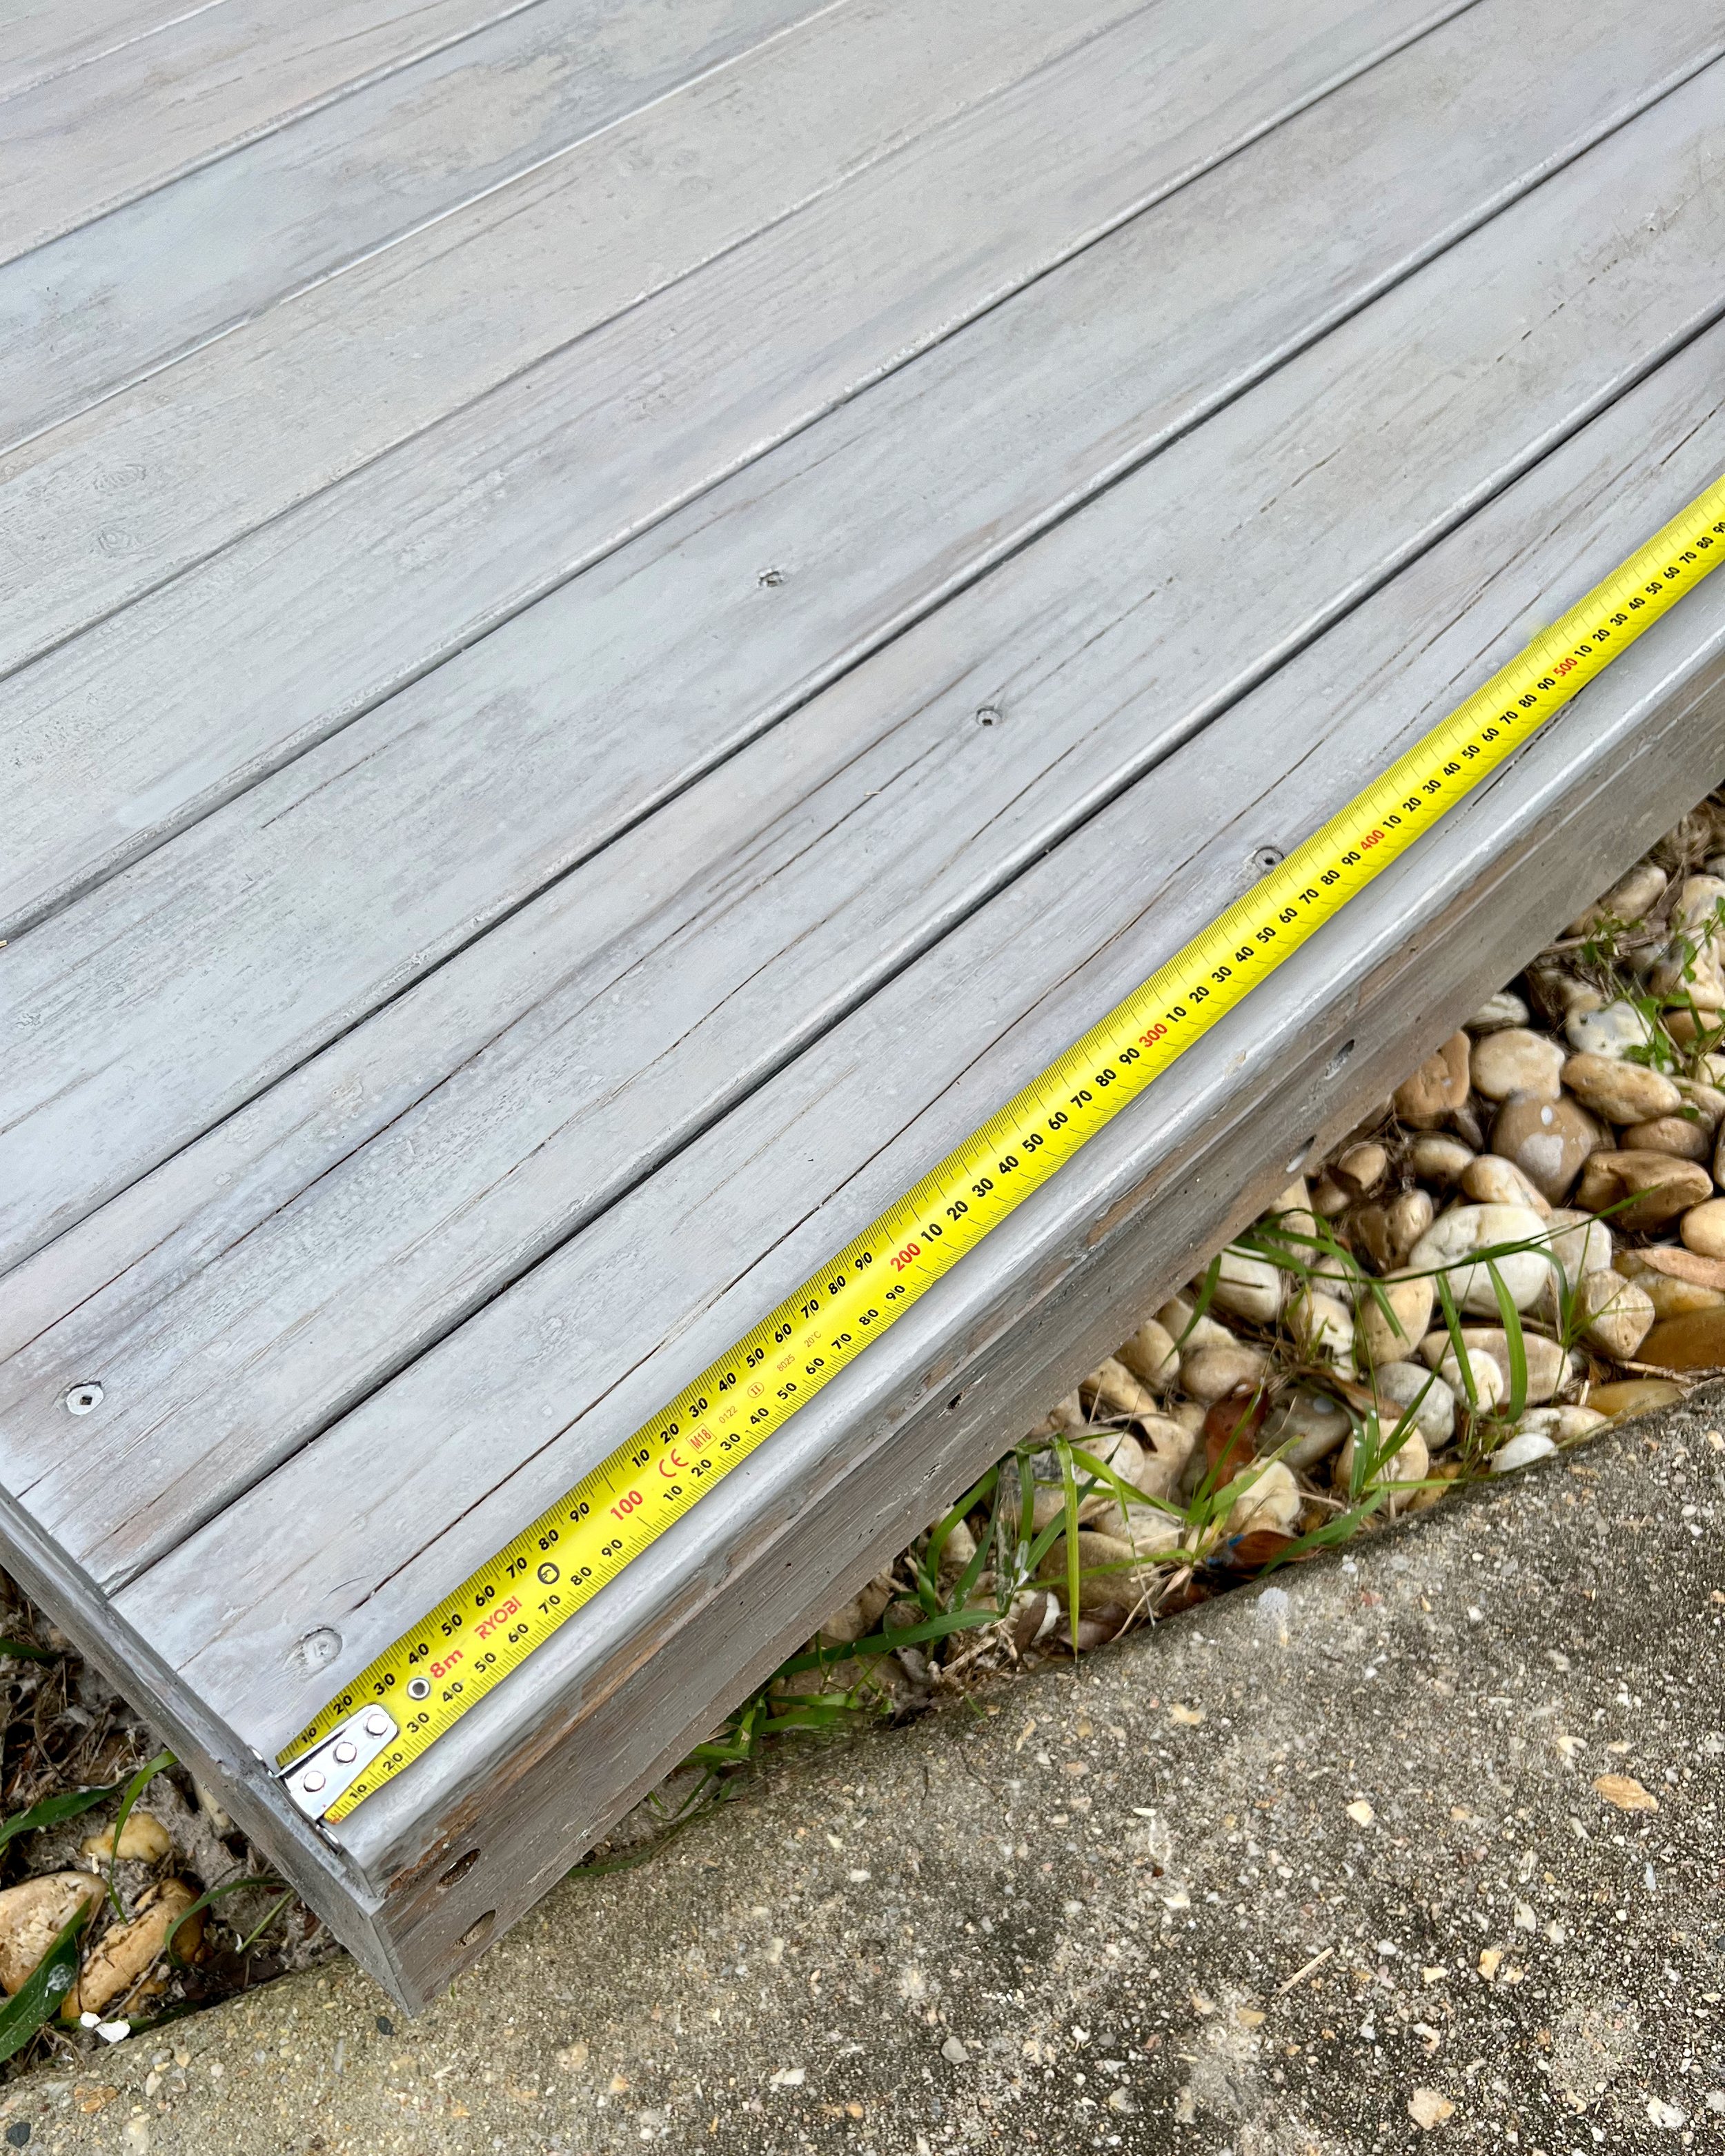
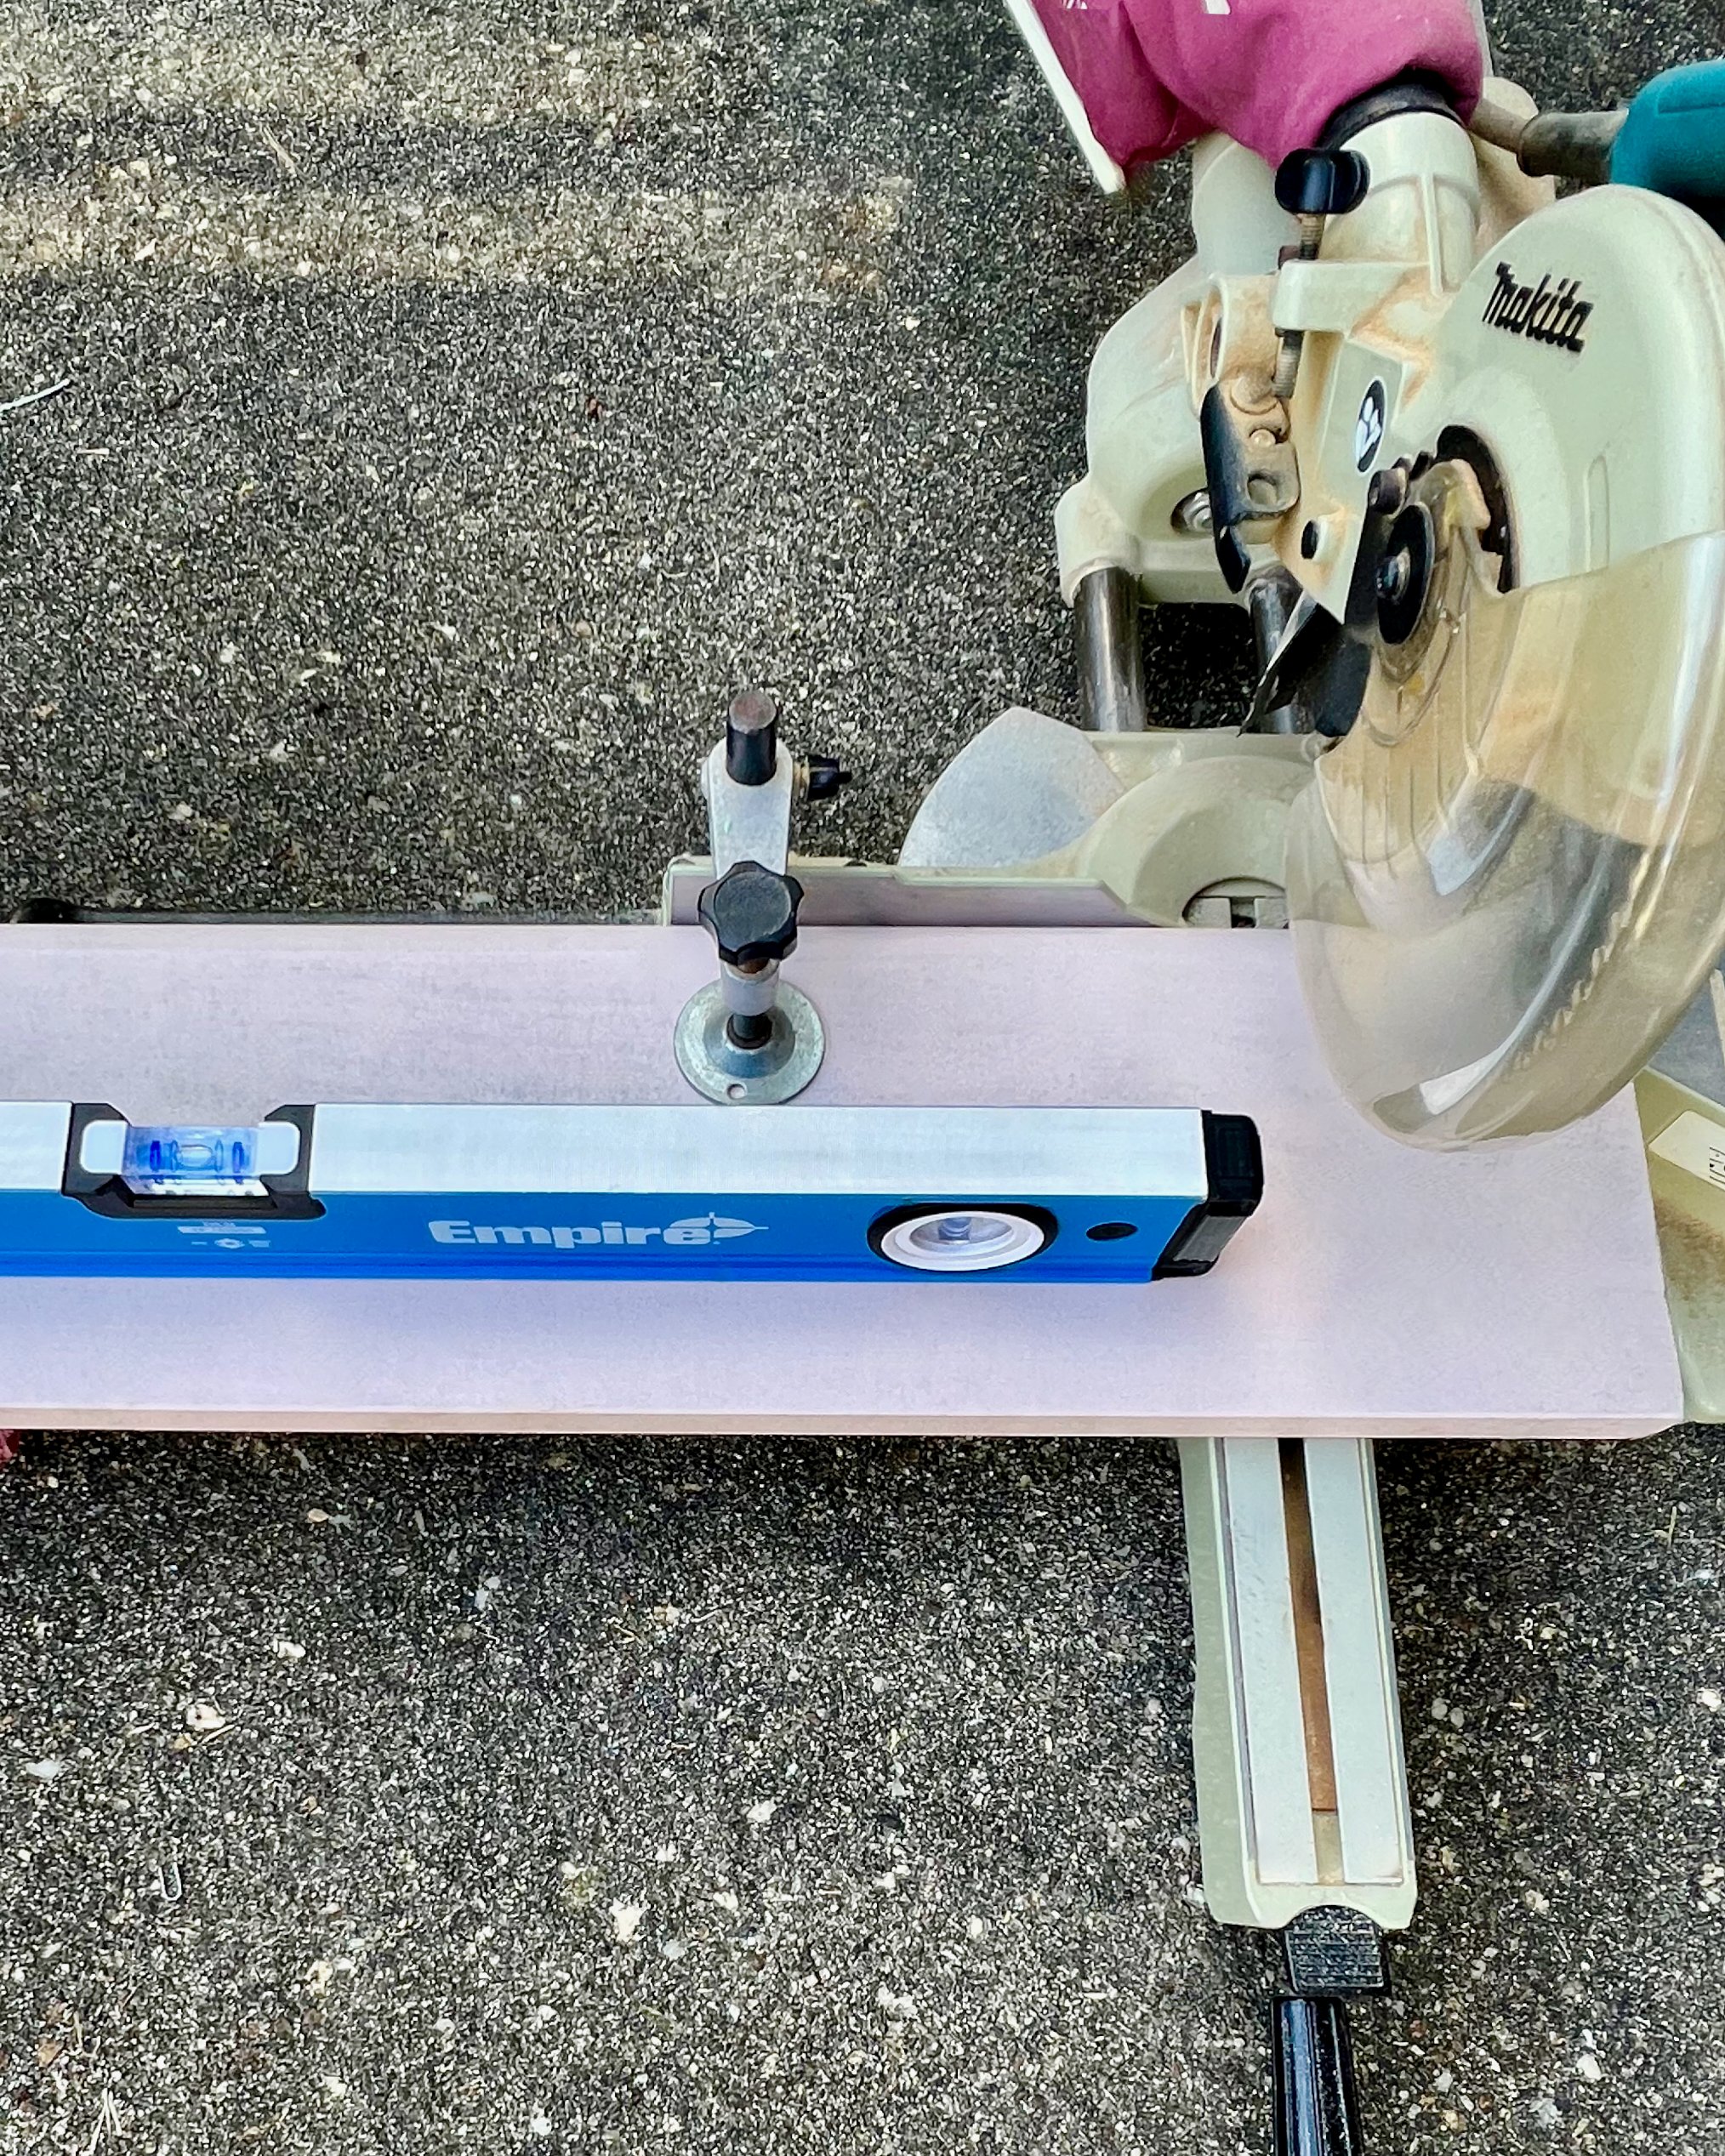
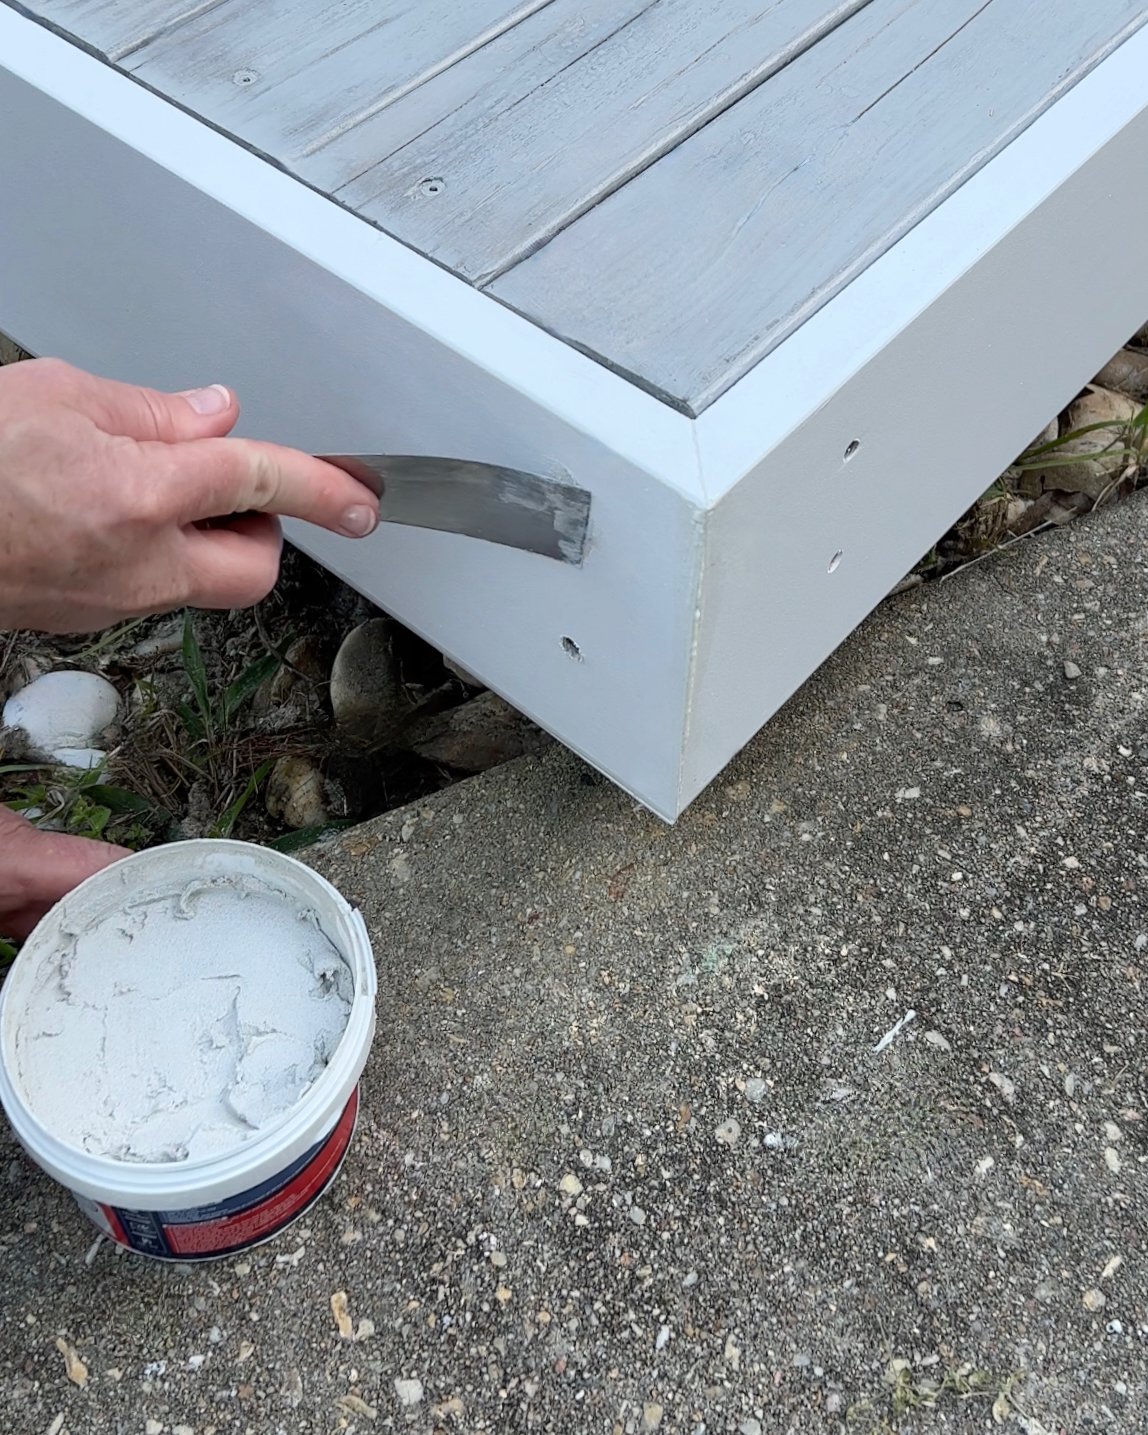
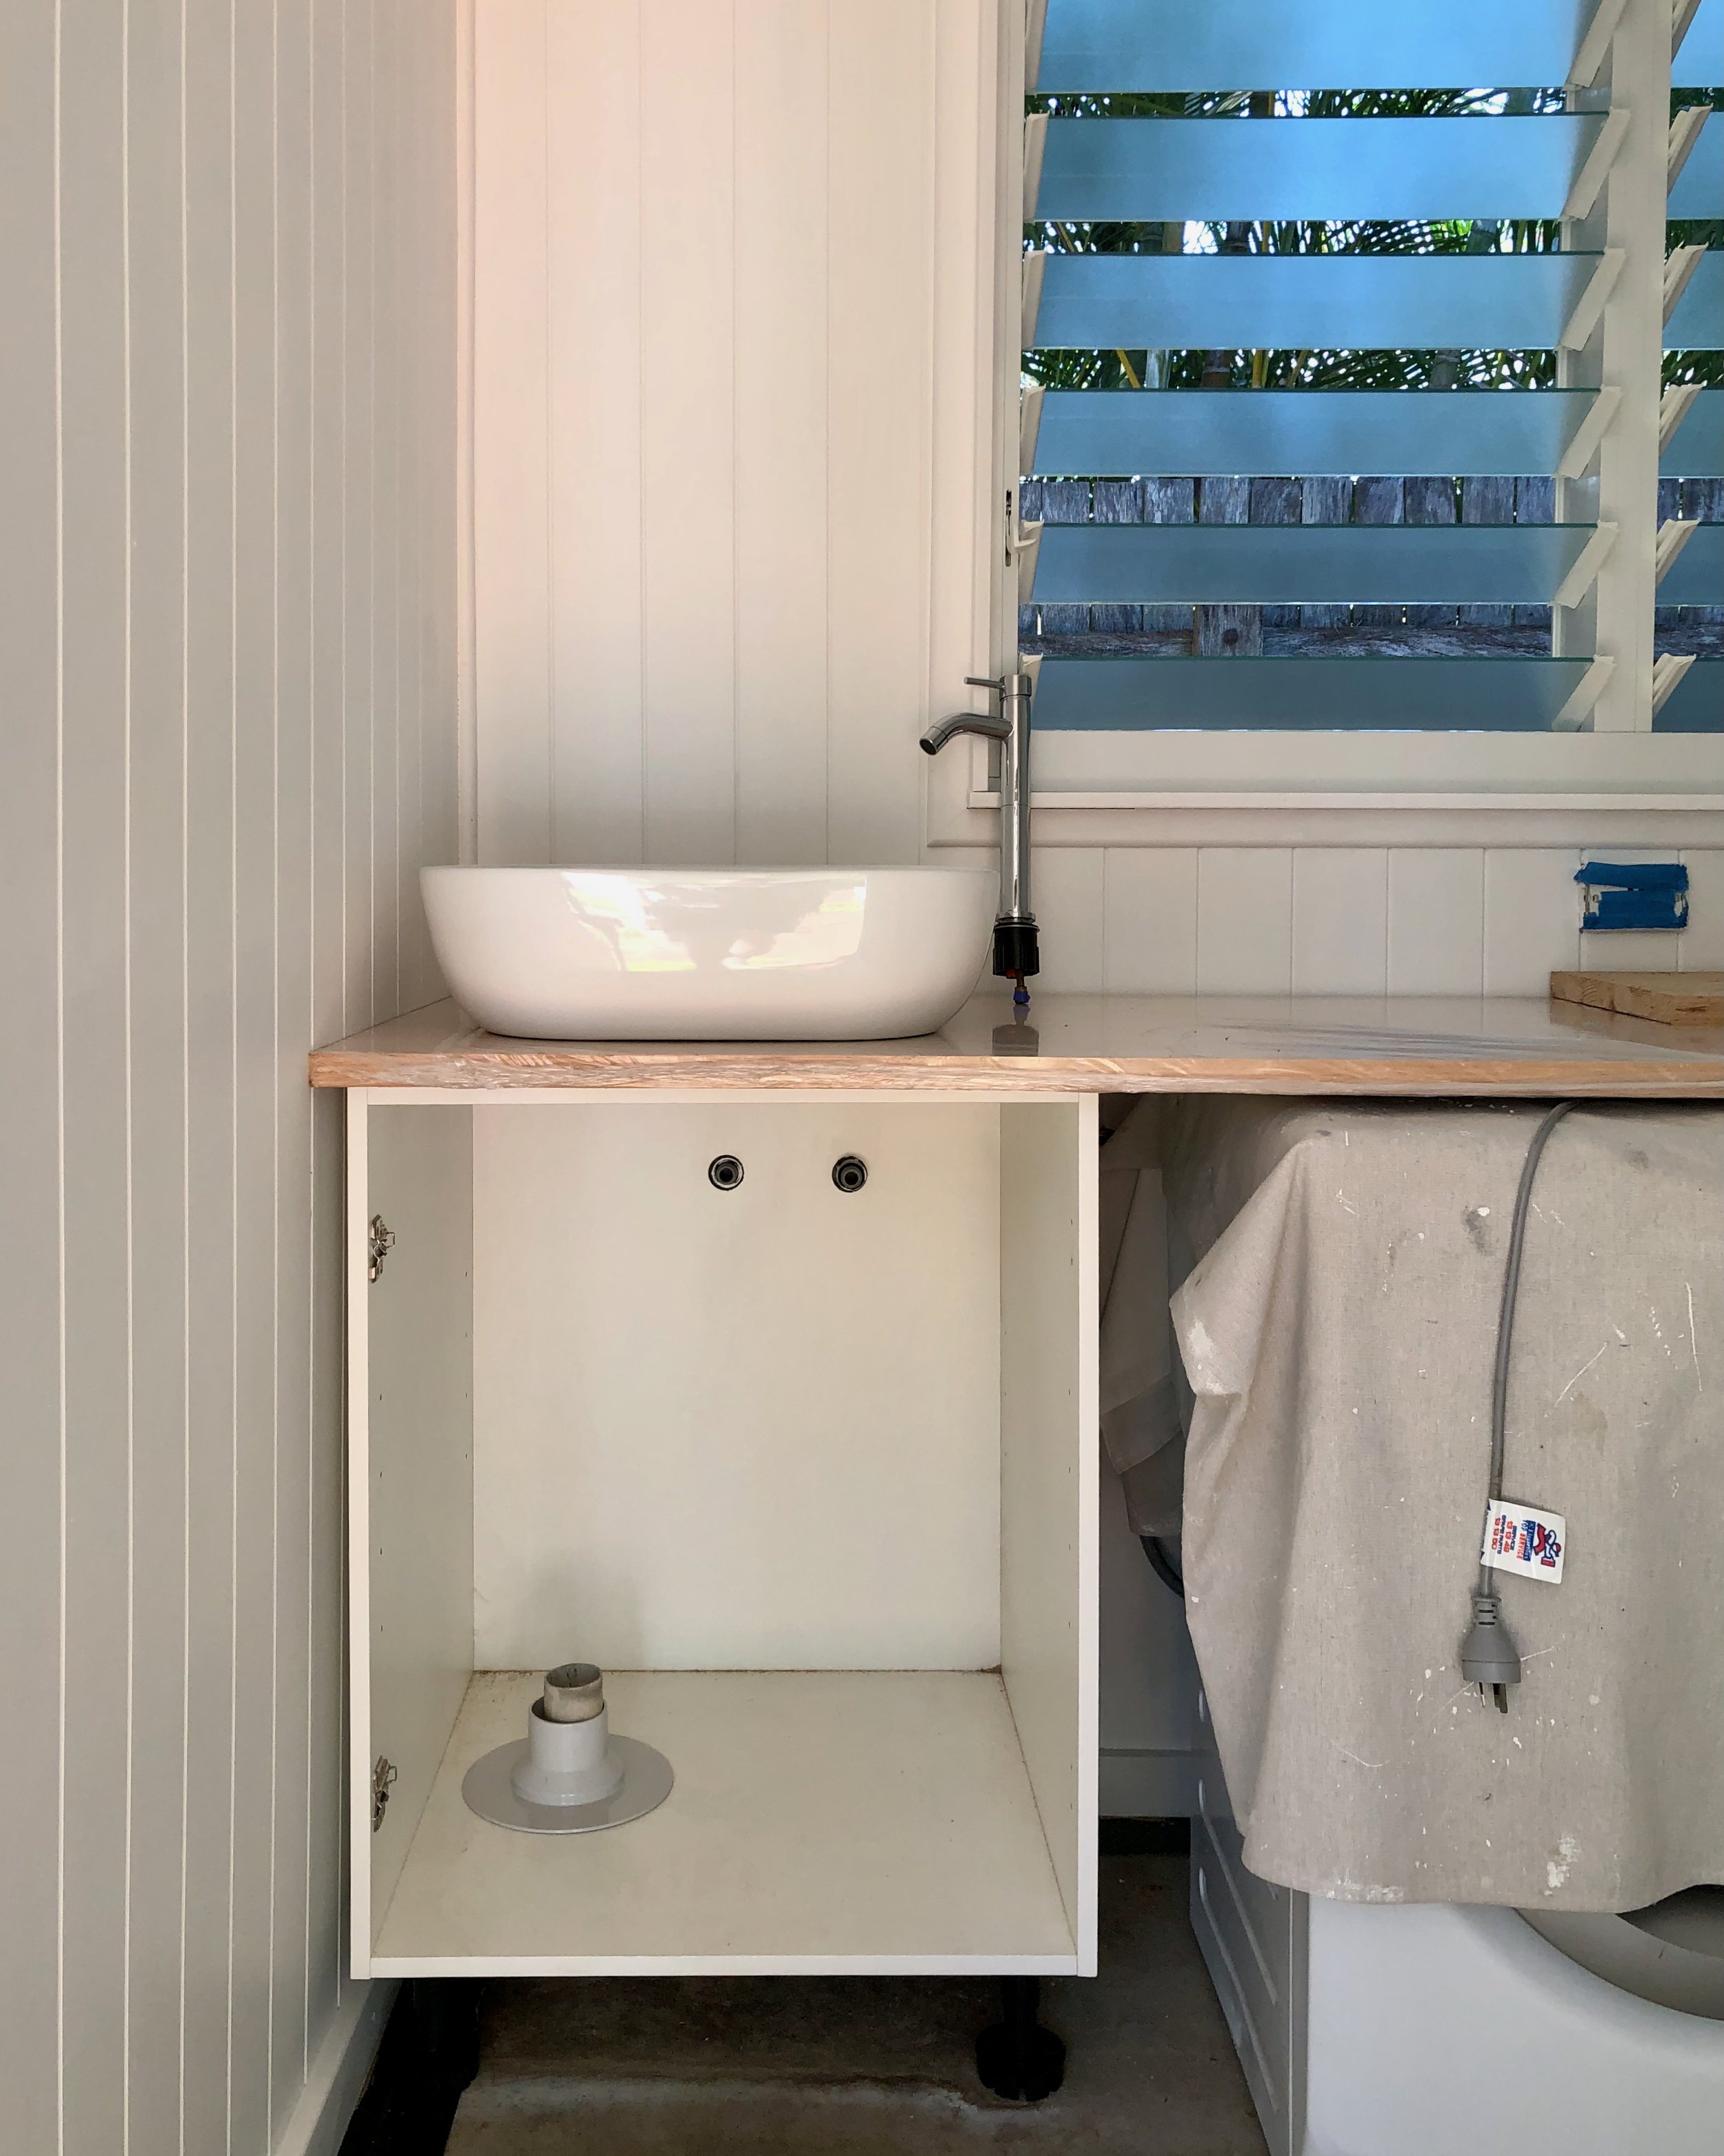
I made the countertop by joining two 1800mm x 600mm x 18mm timber panels lengthways and cut them to the length of the bench. The offcuts were used around the edge underneath to make it look double the thickness and feel more substantial.

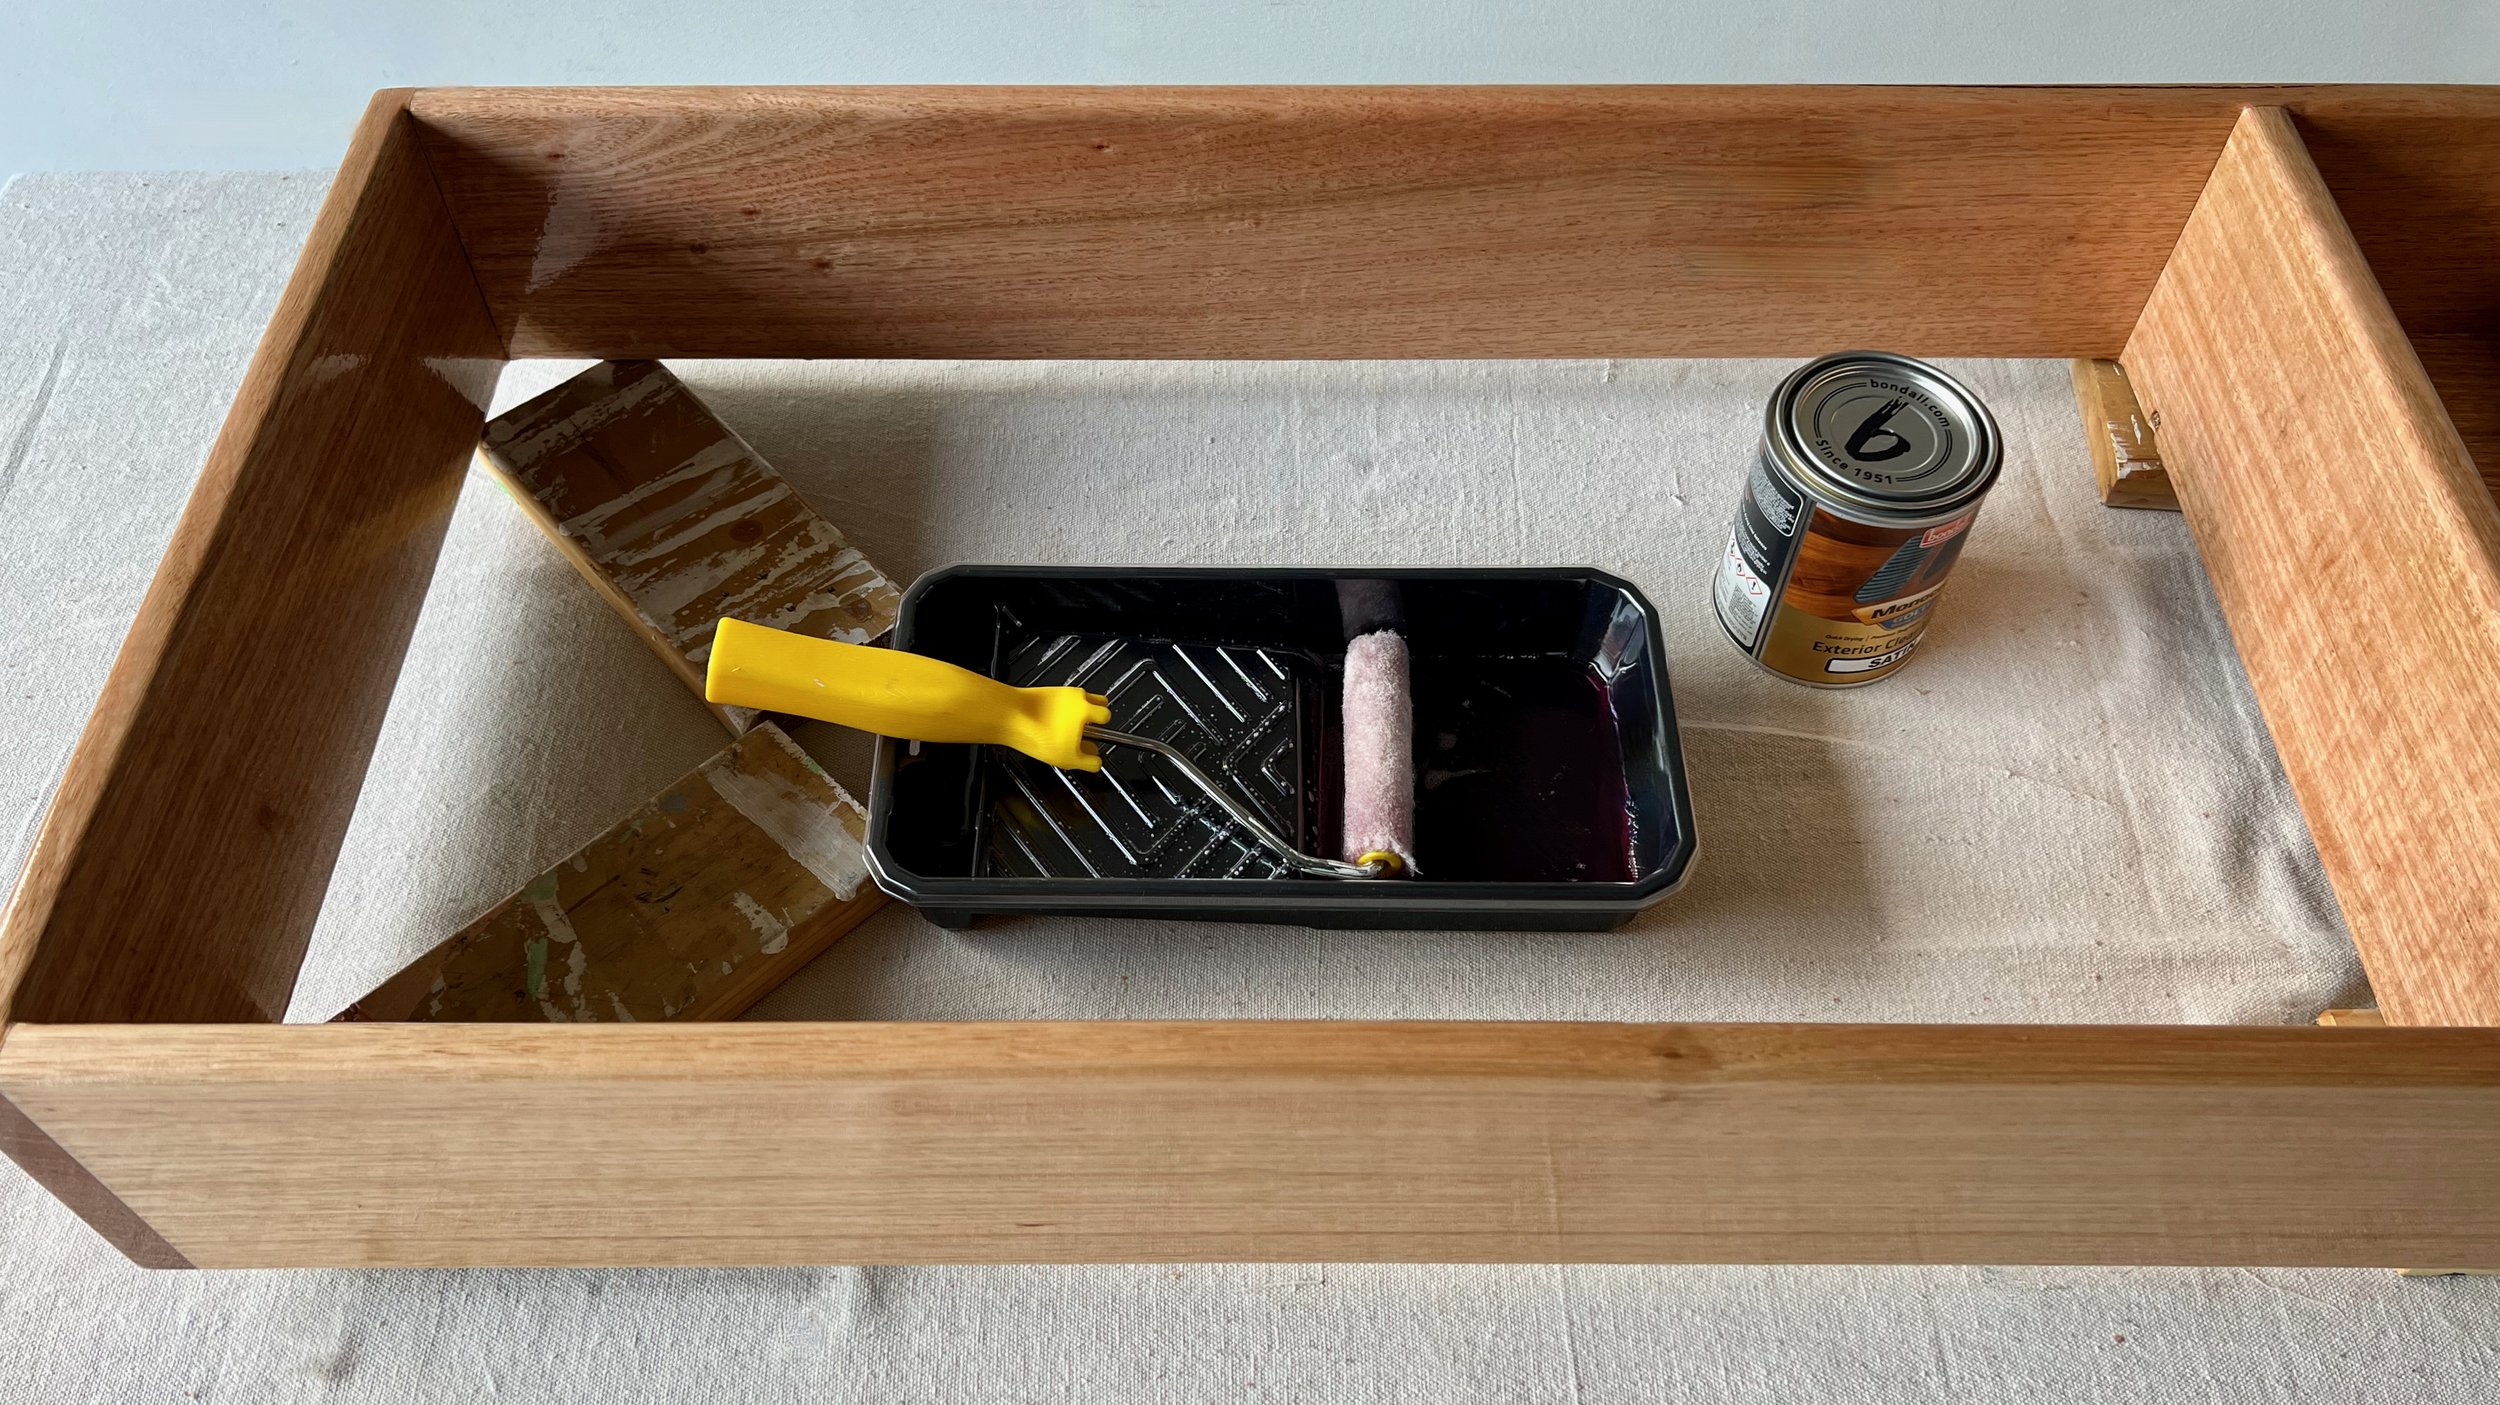
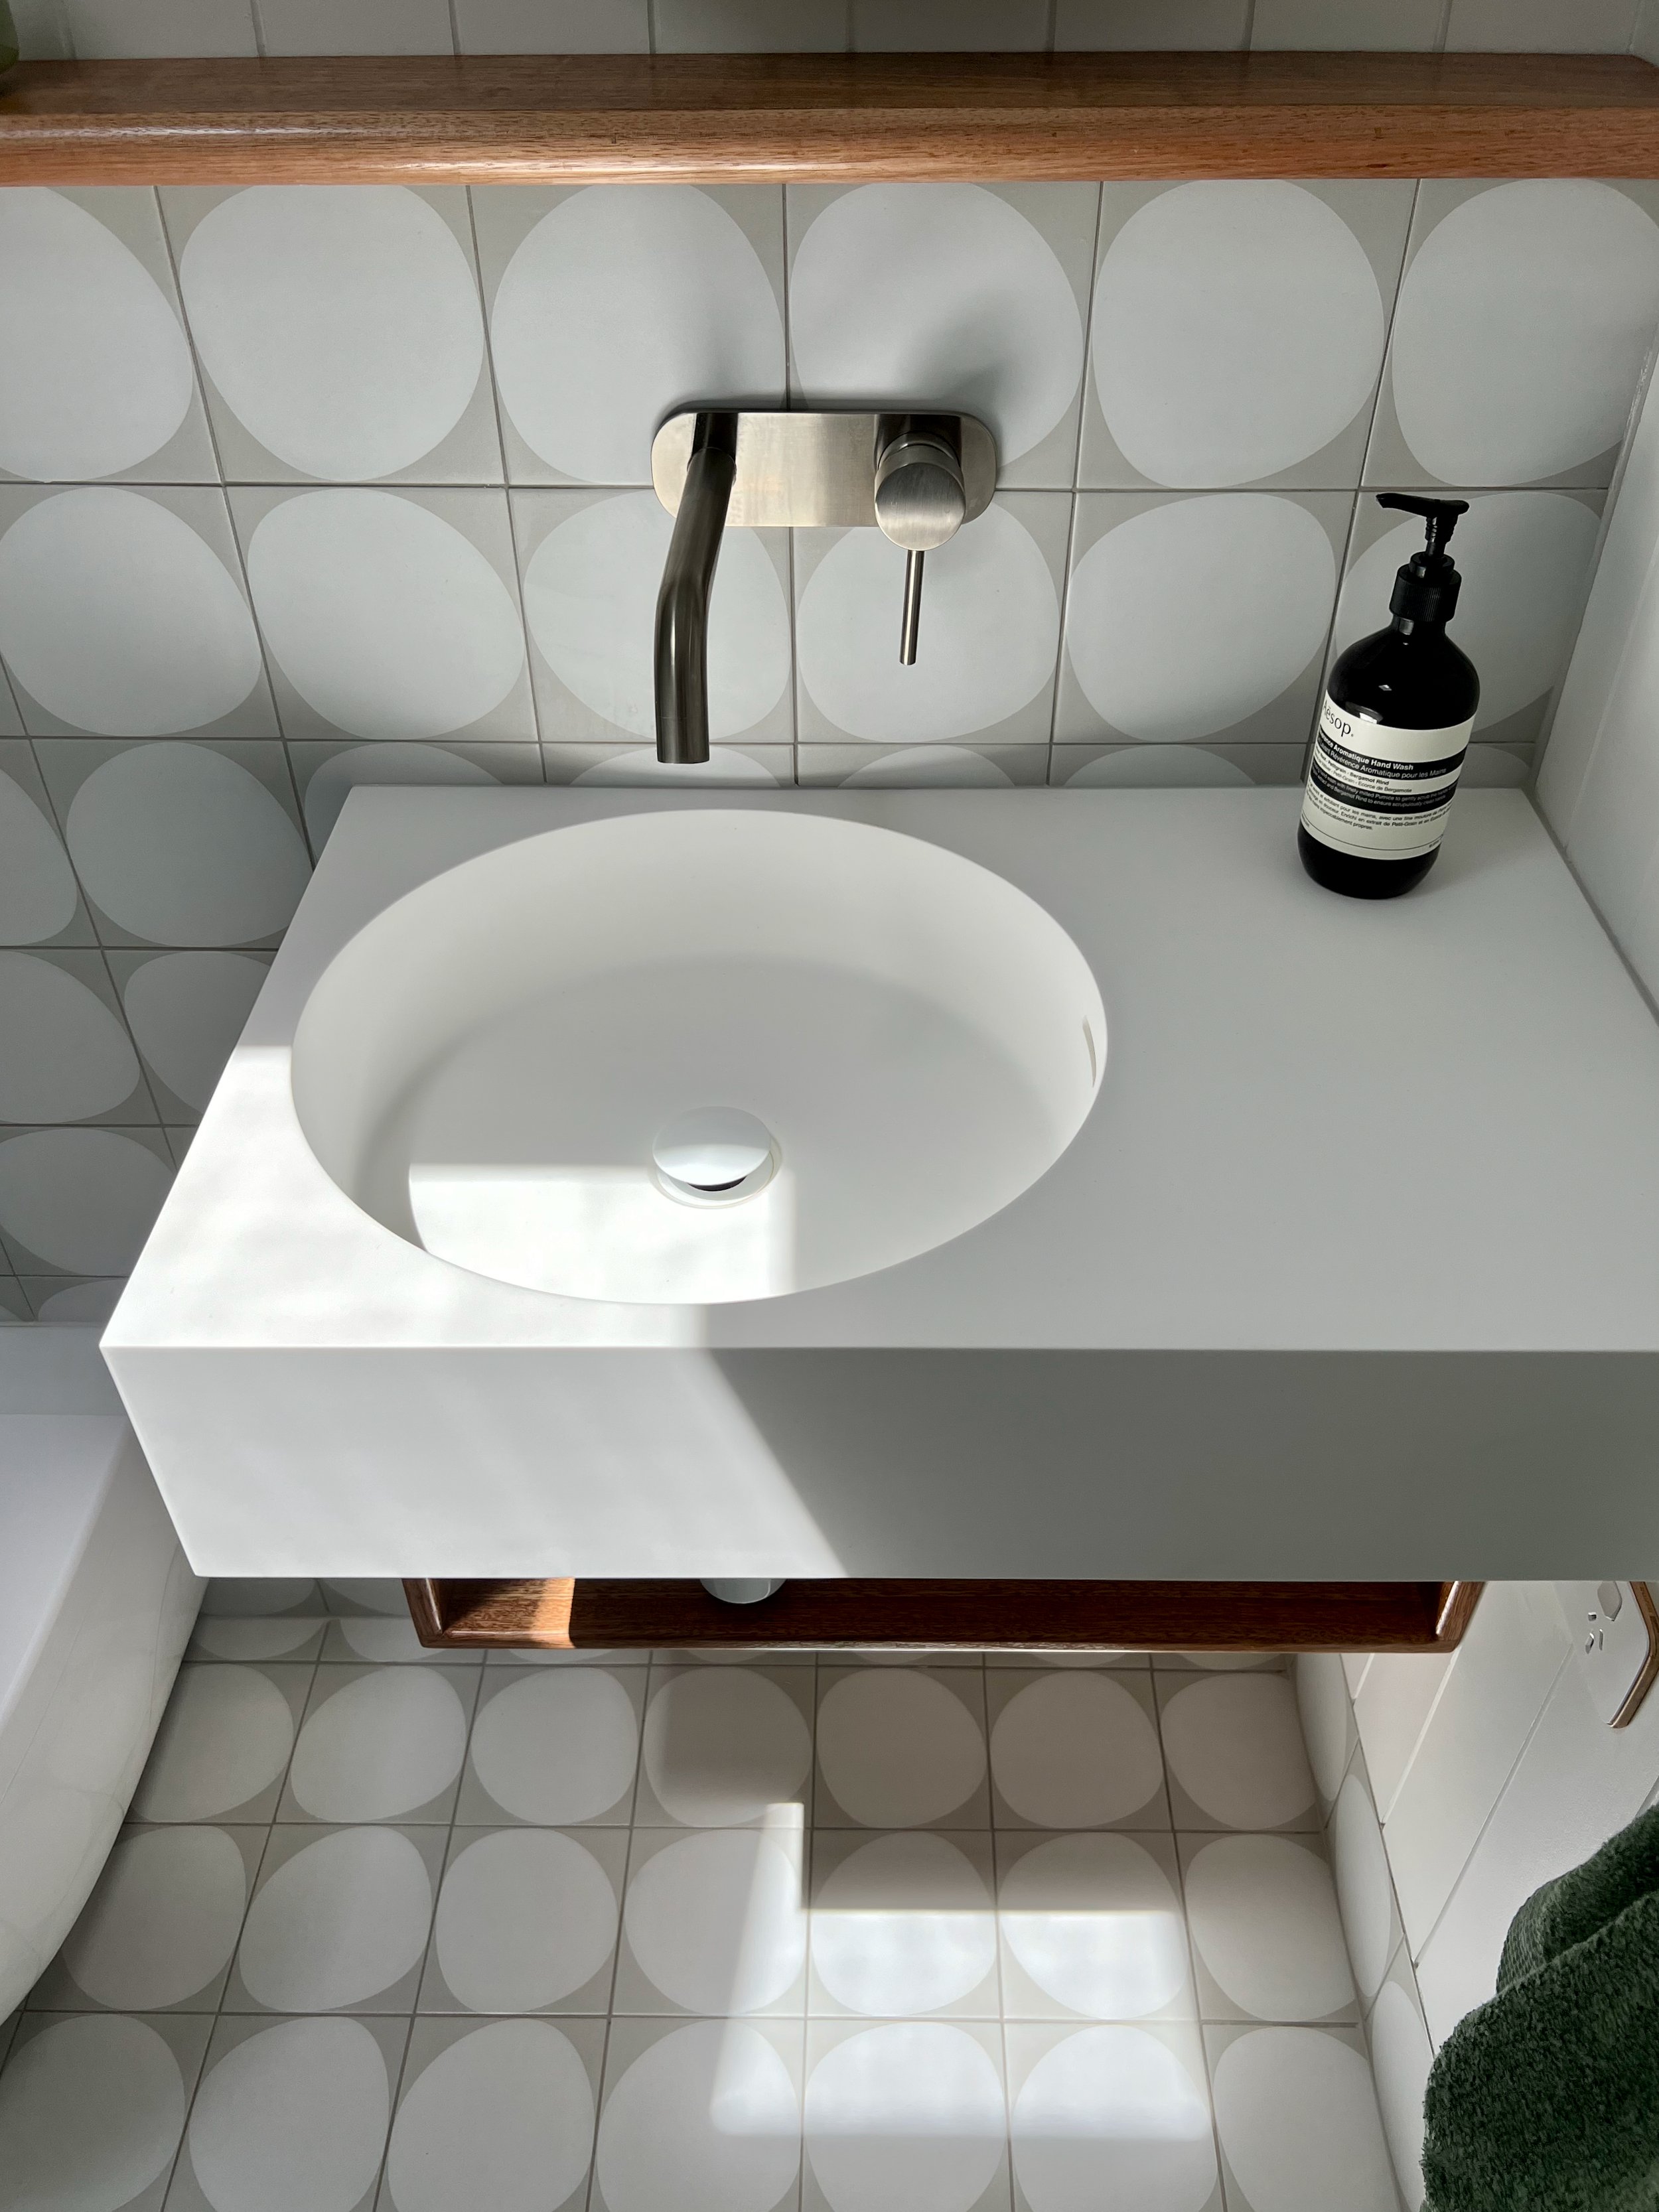
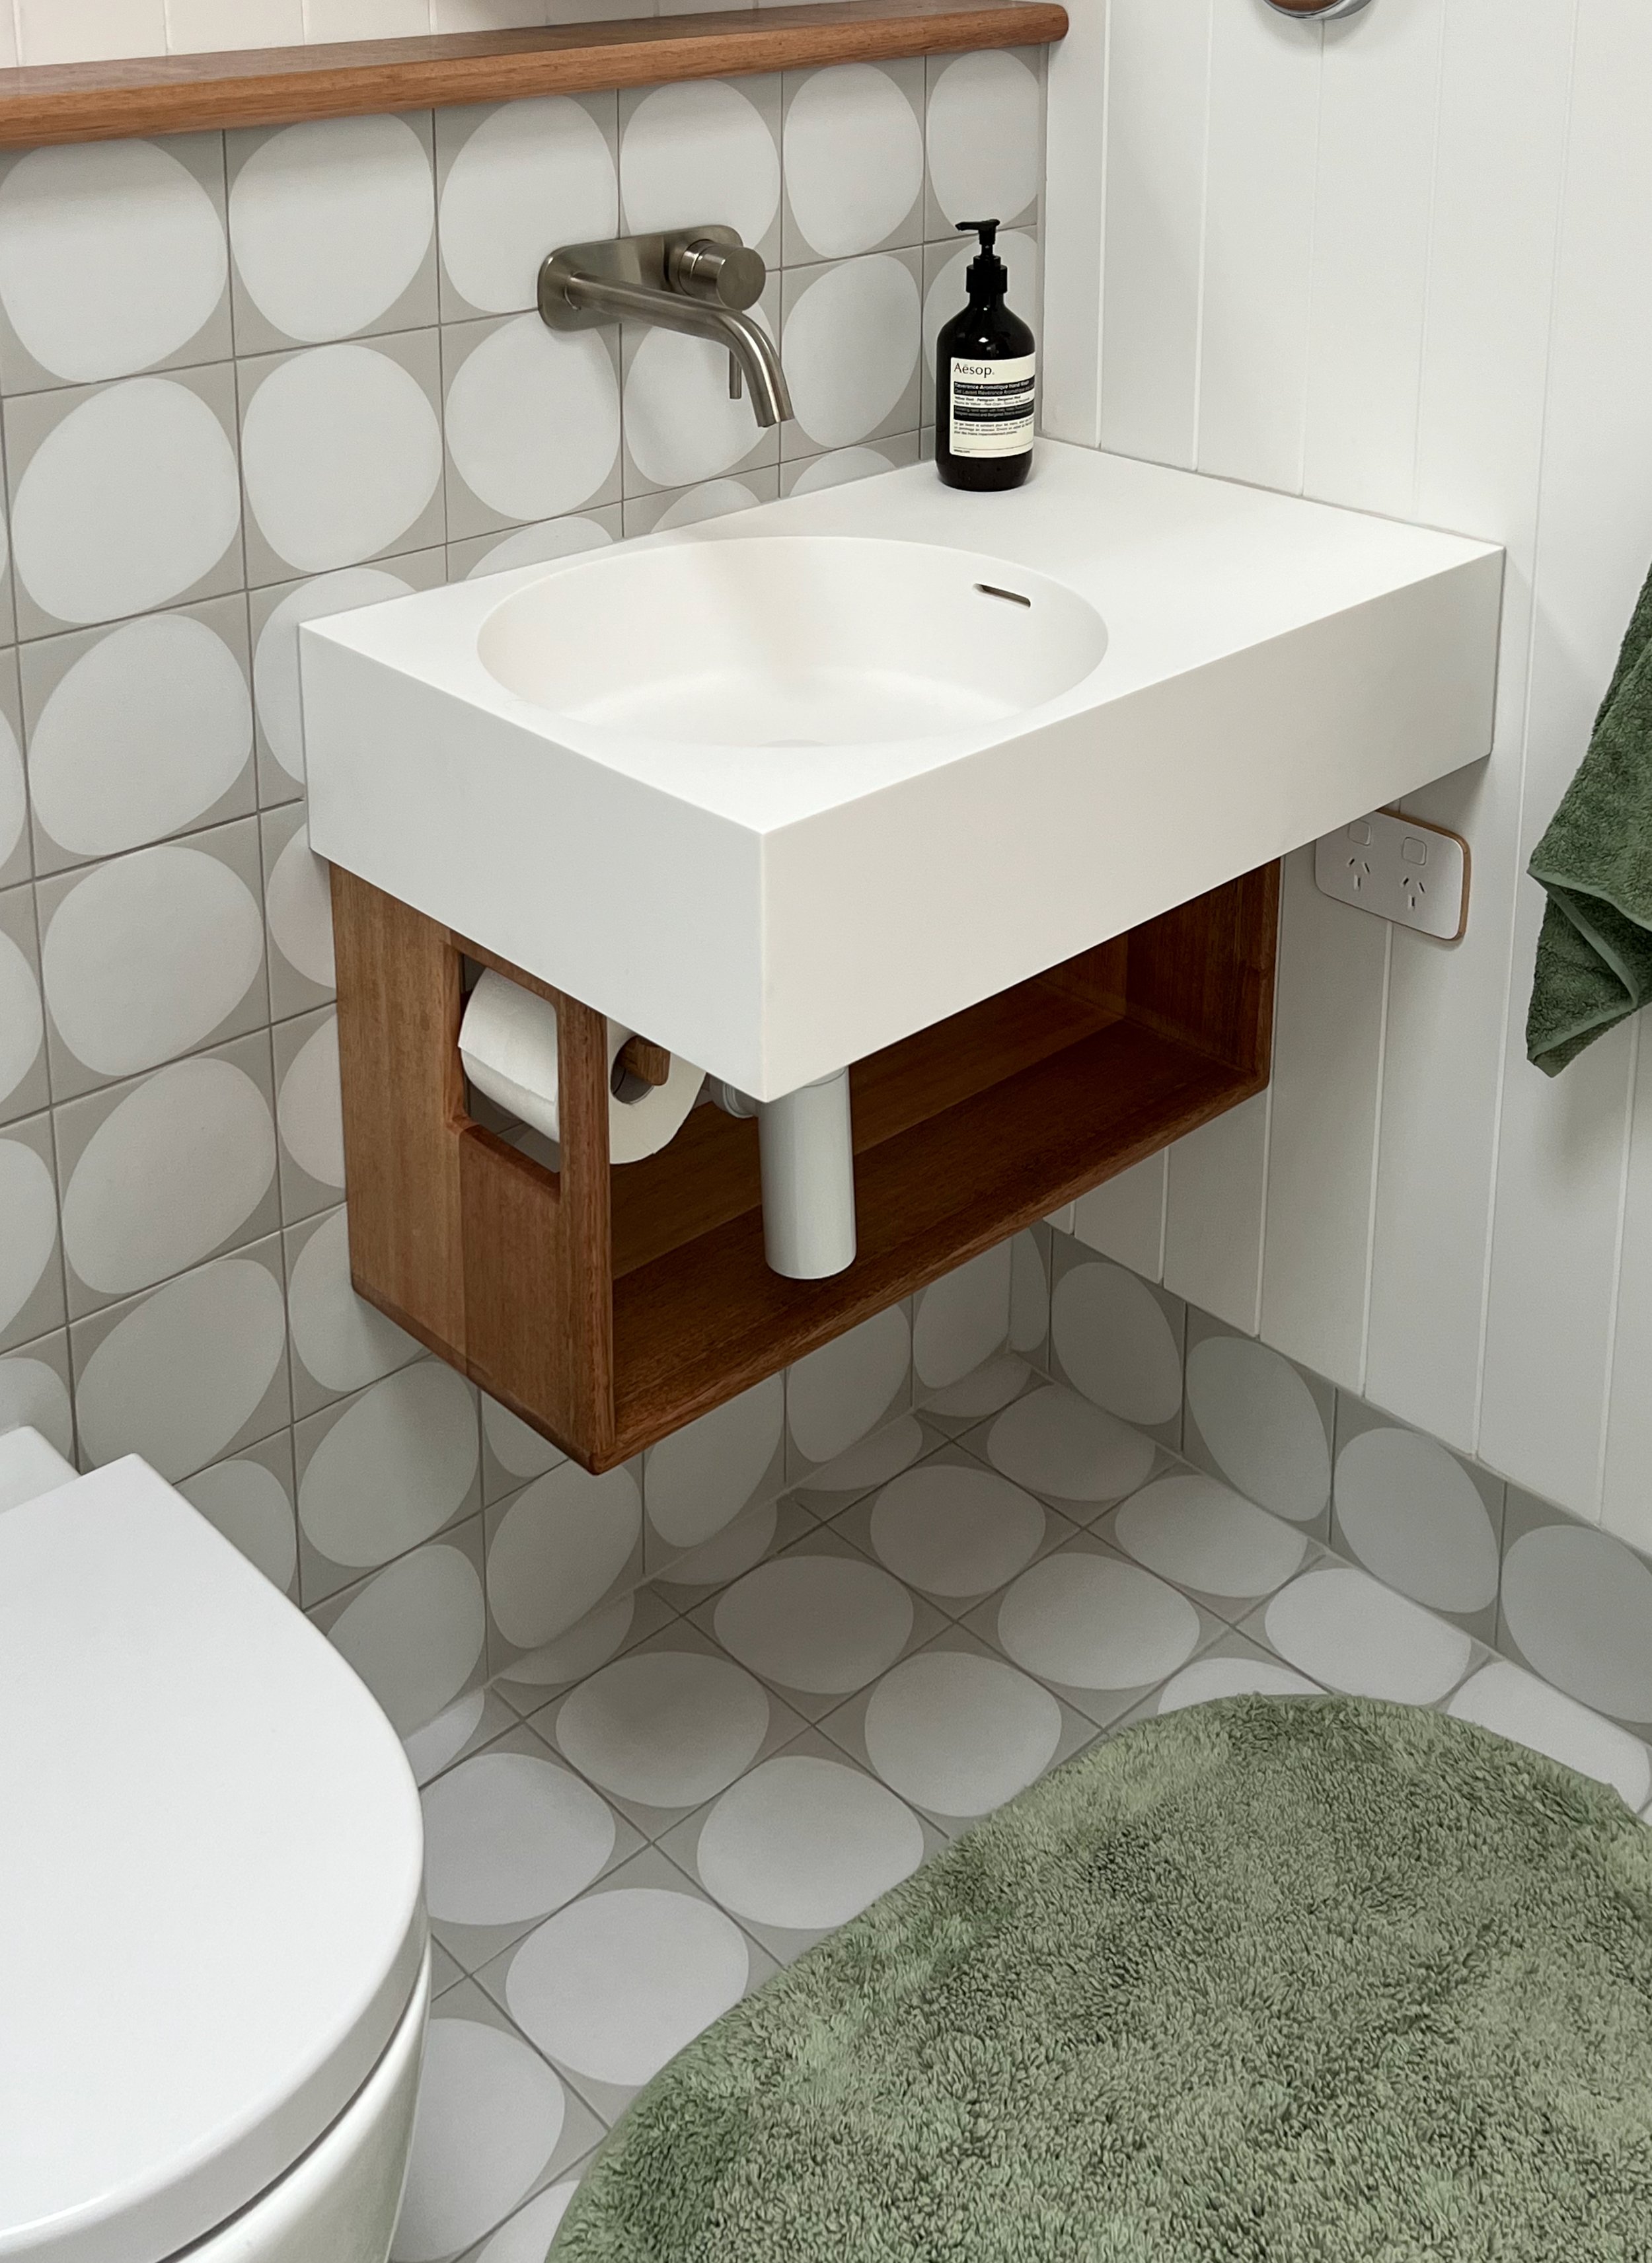
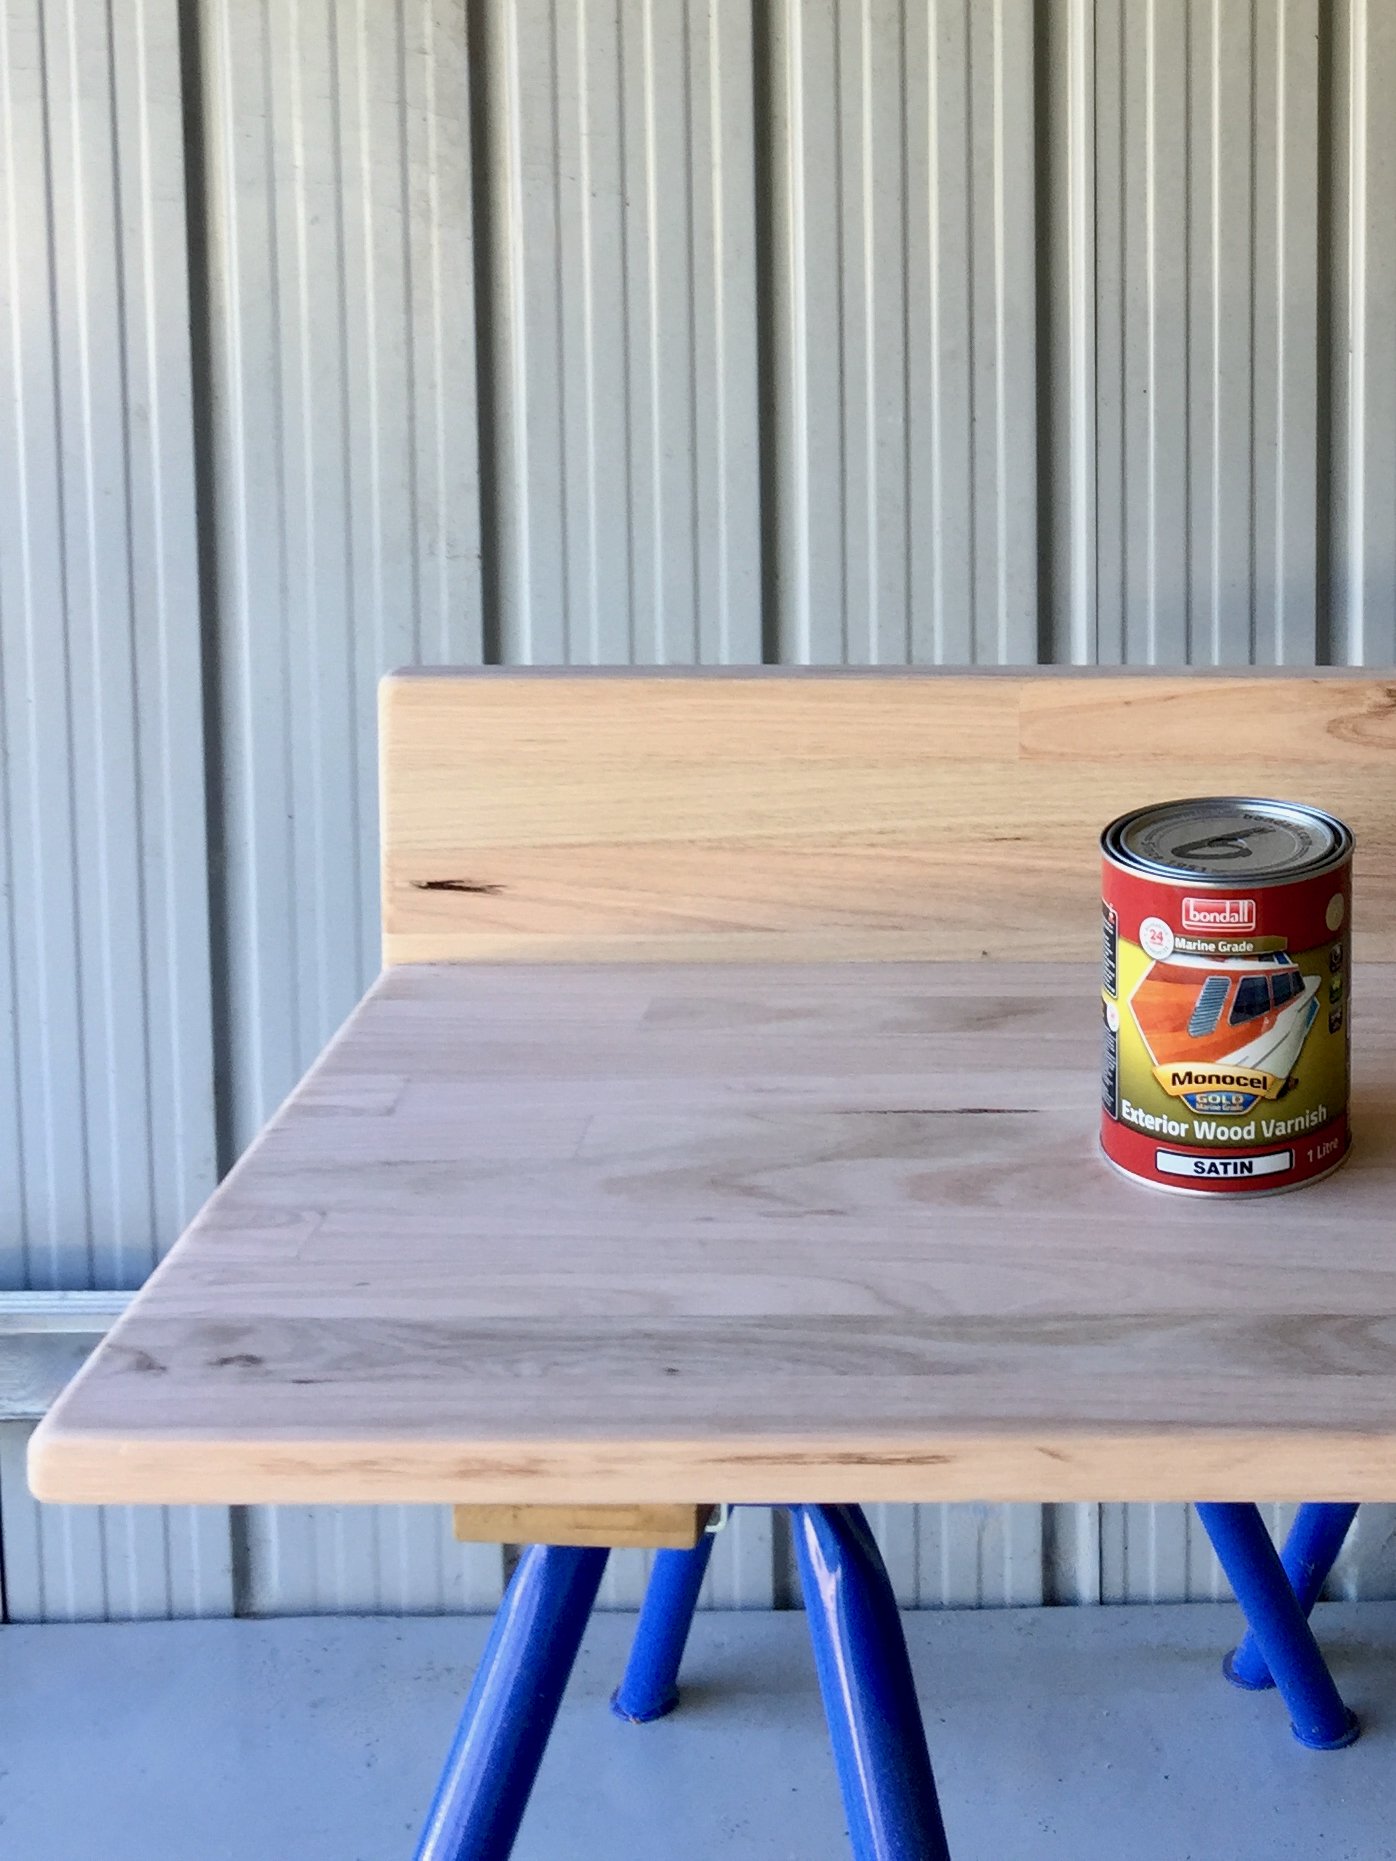
I sealed the bench top with three coats of Monocel marine-grade varnish and had the plumber help me lift it into place when they came to install the sink and mixer.


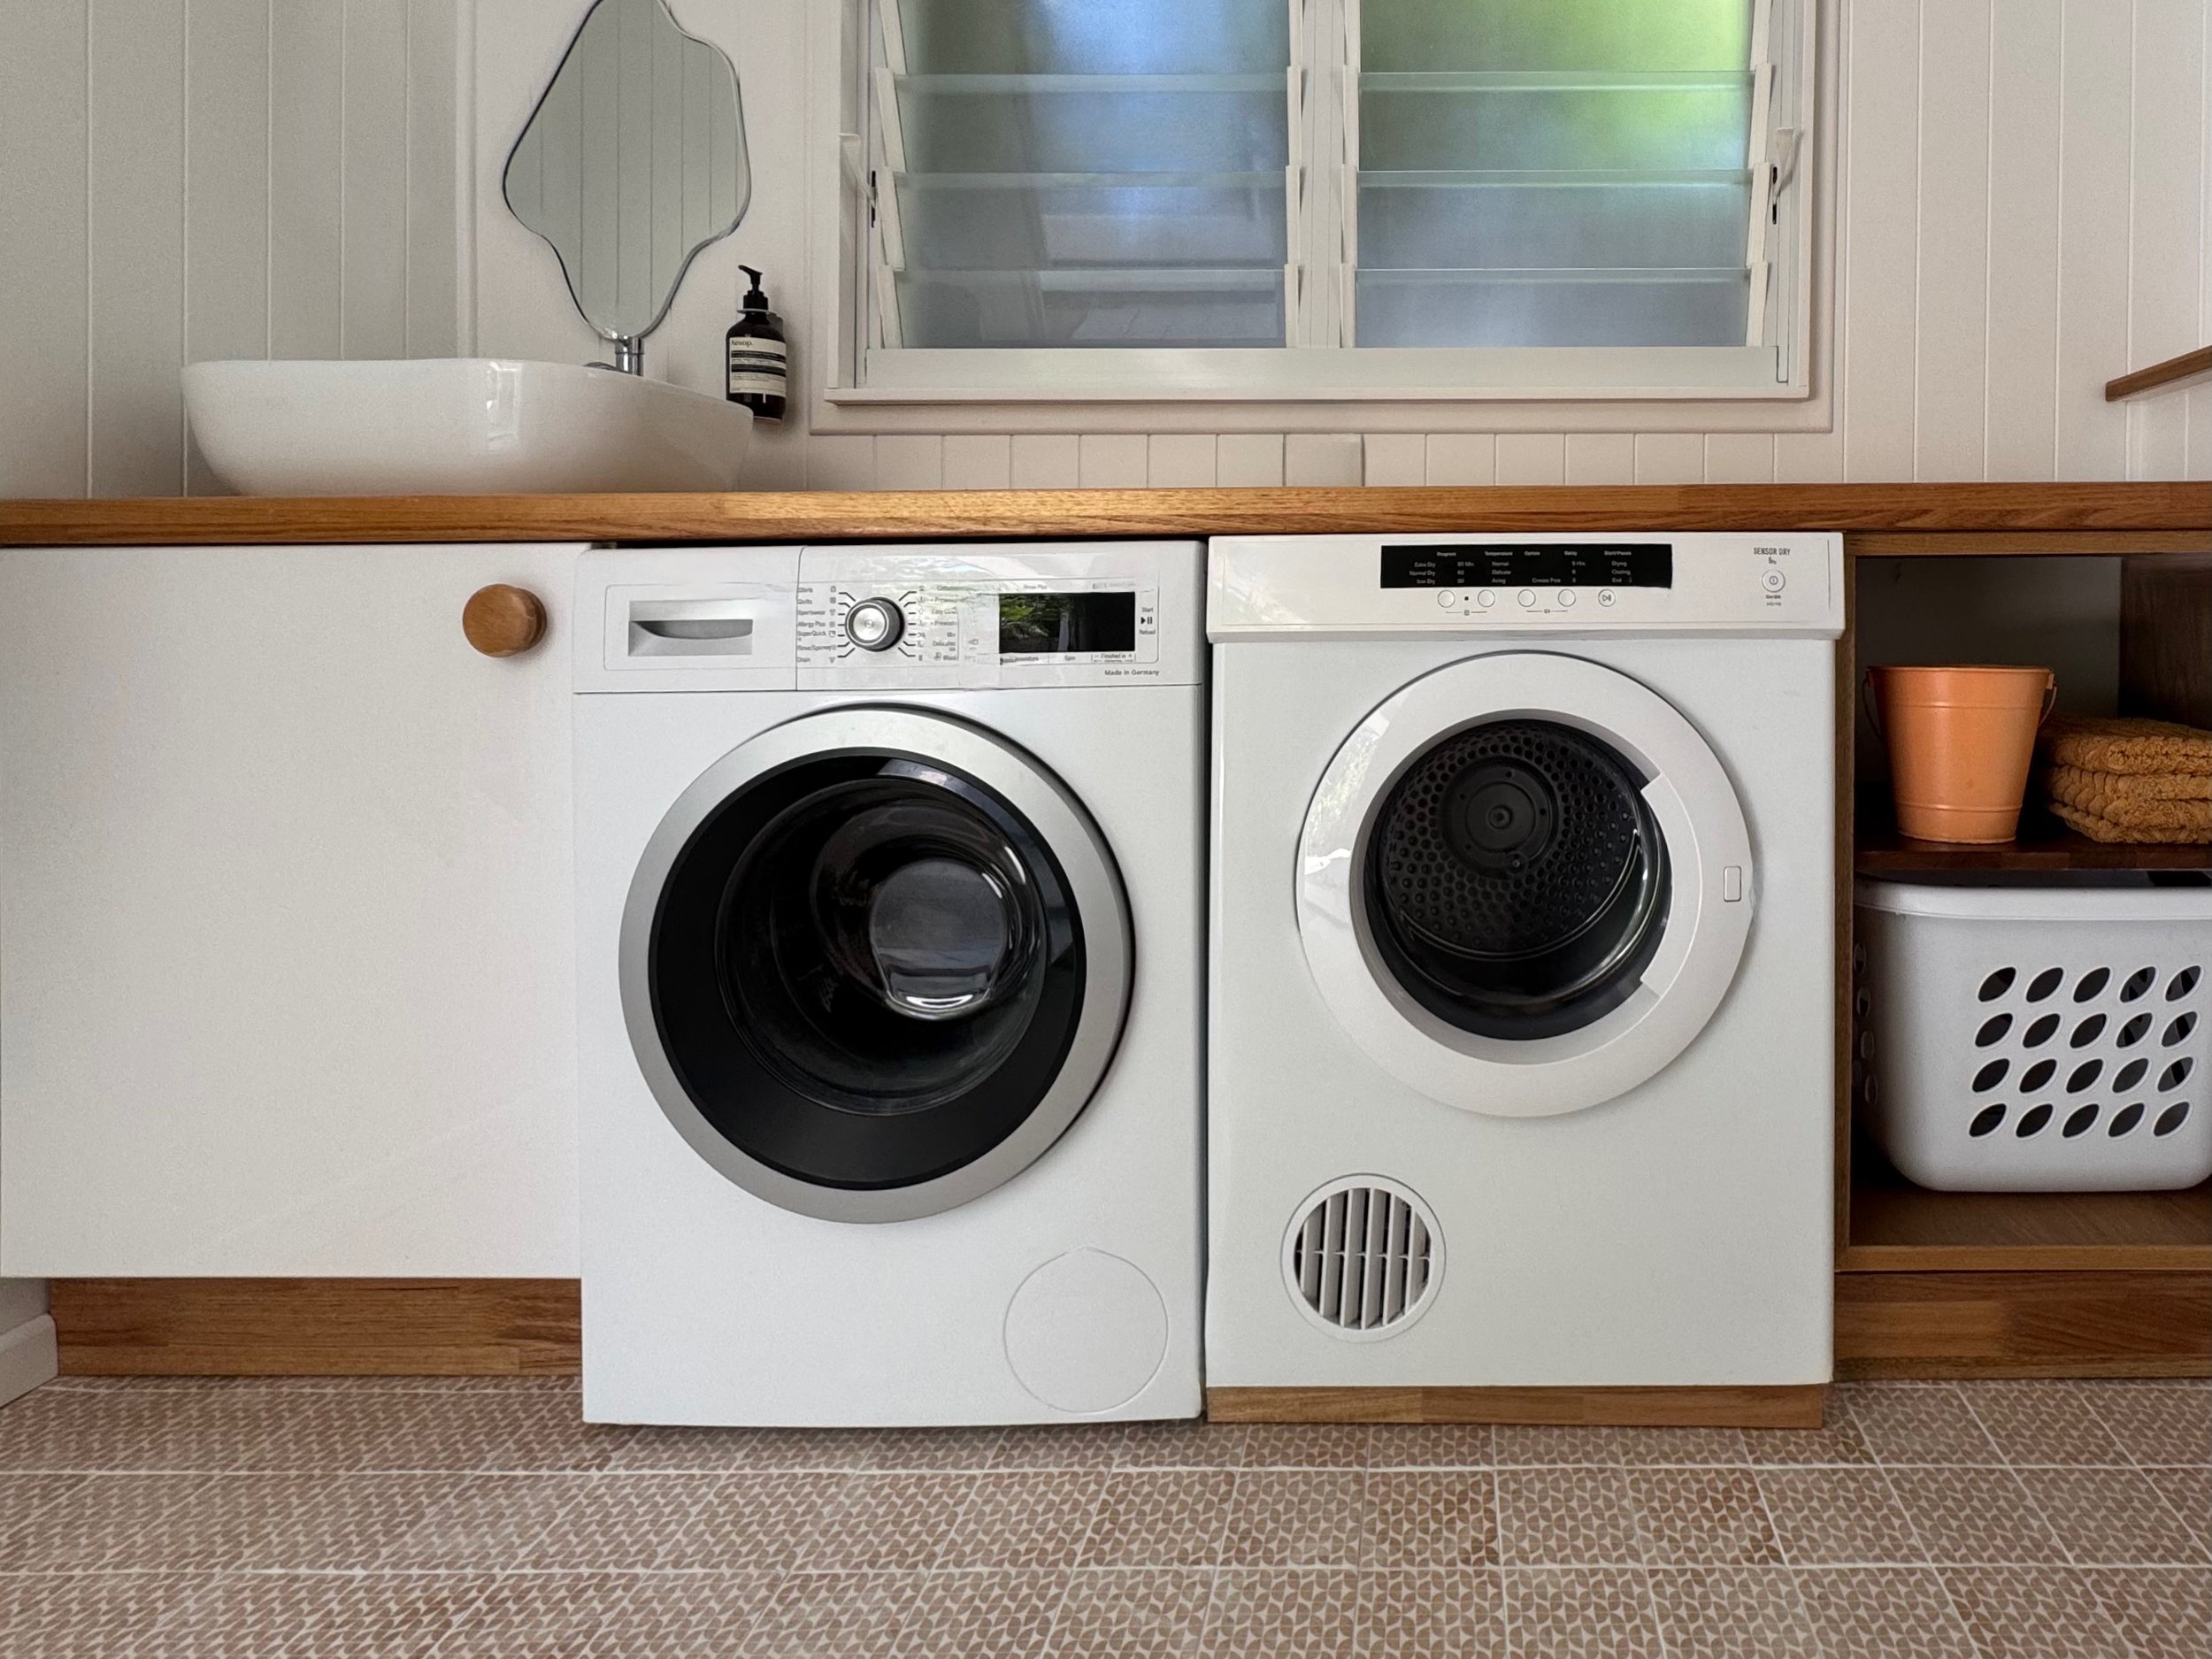
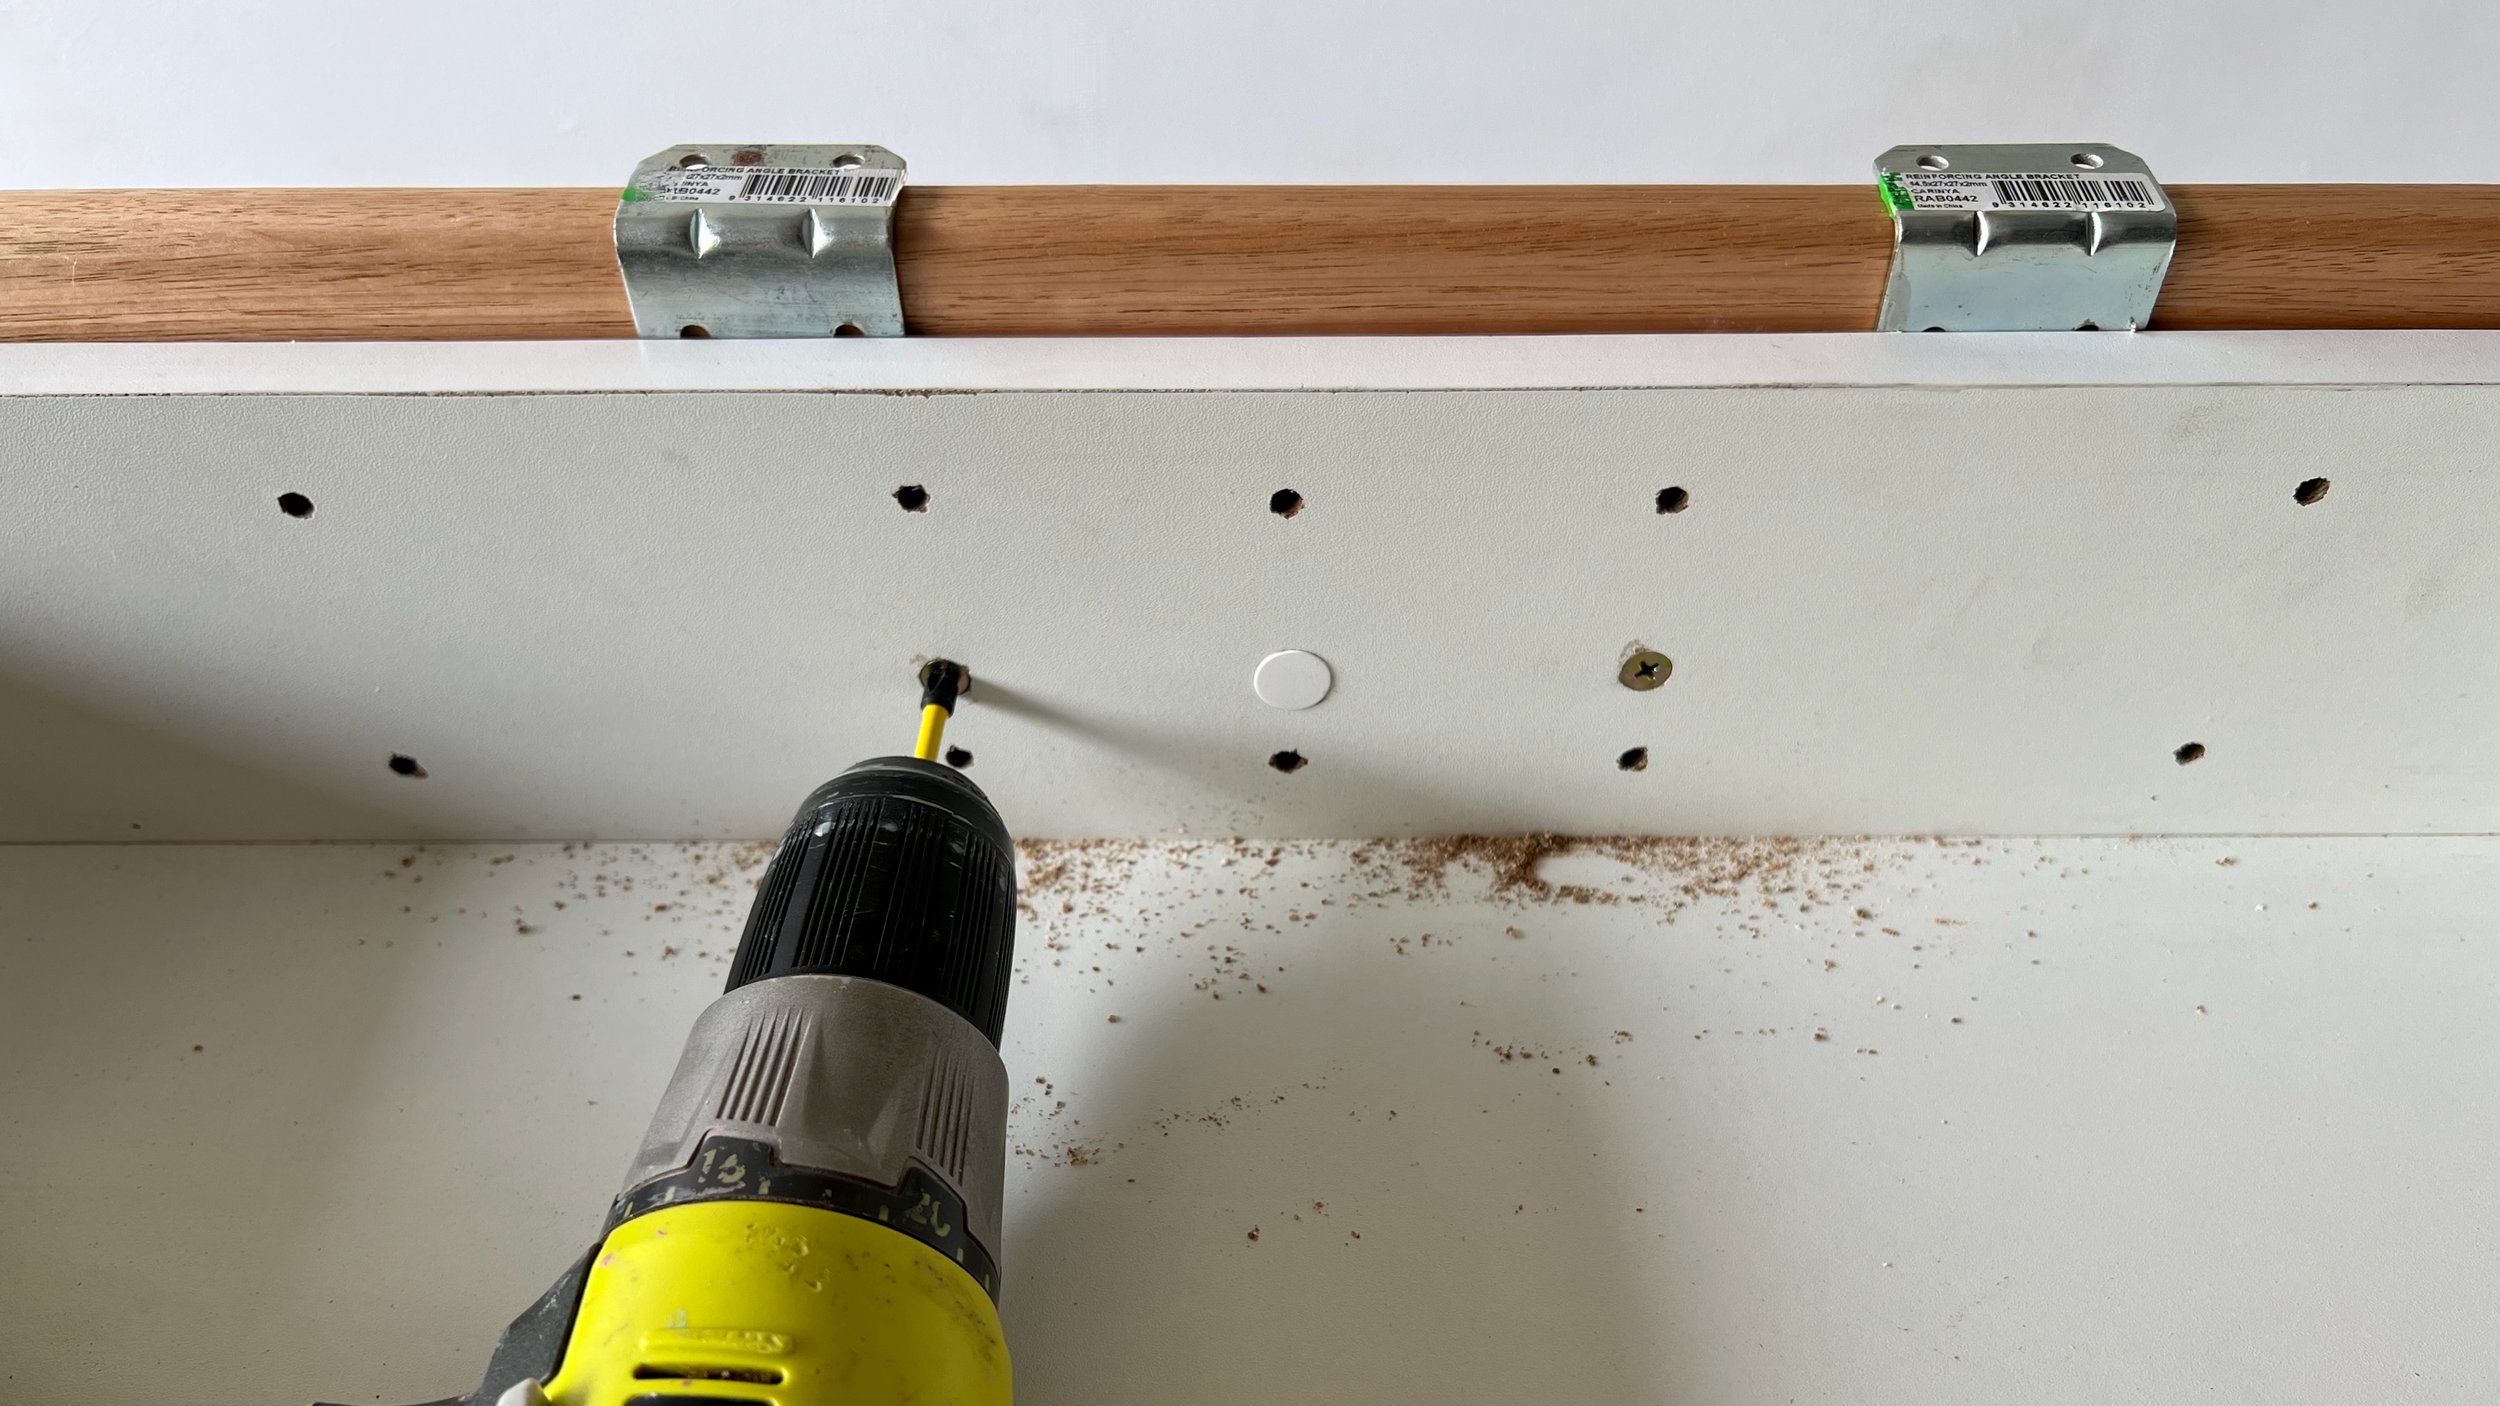
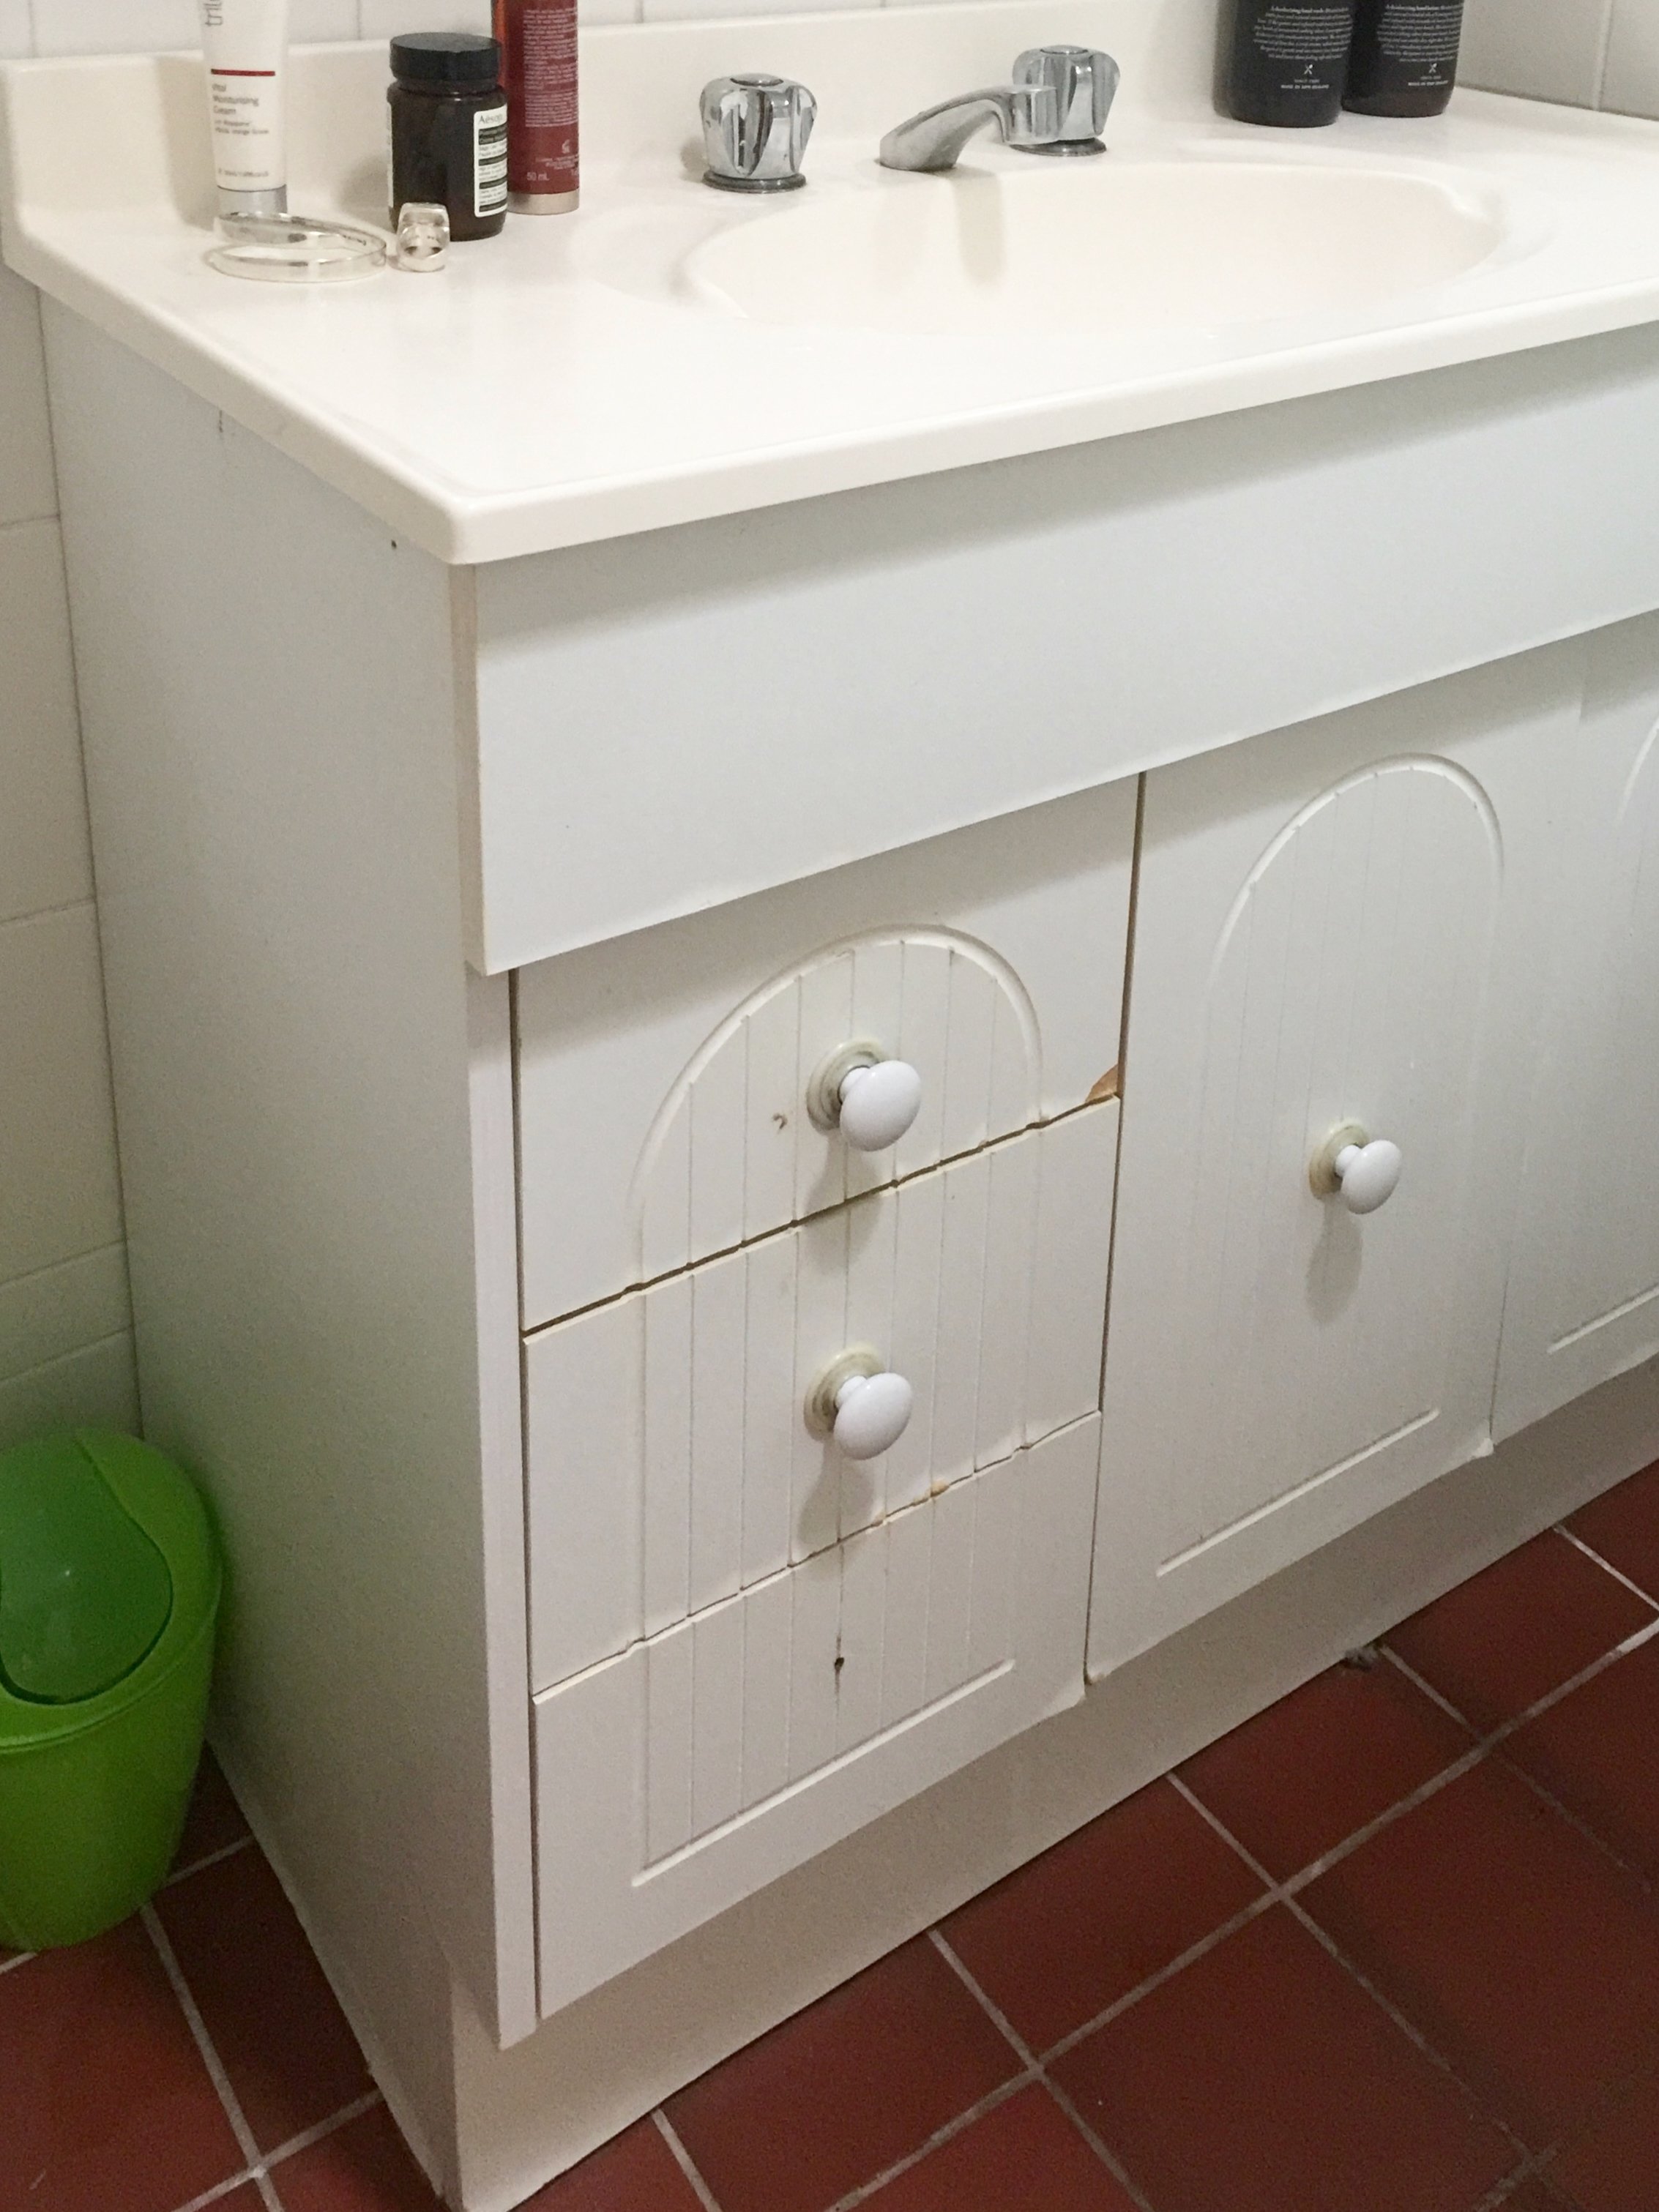
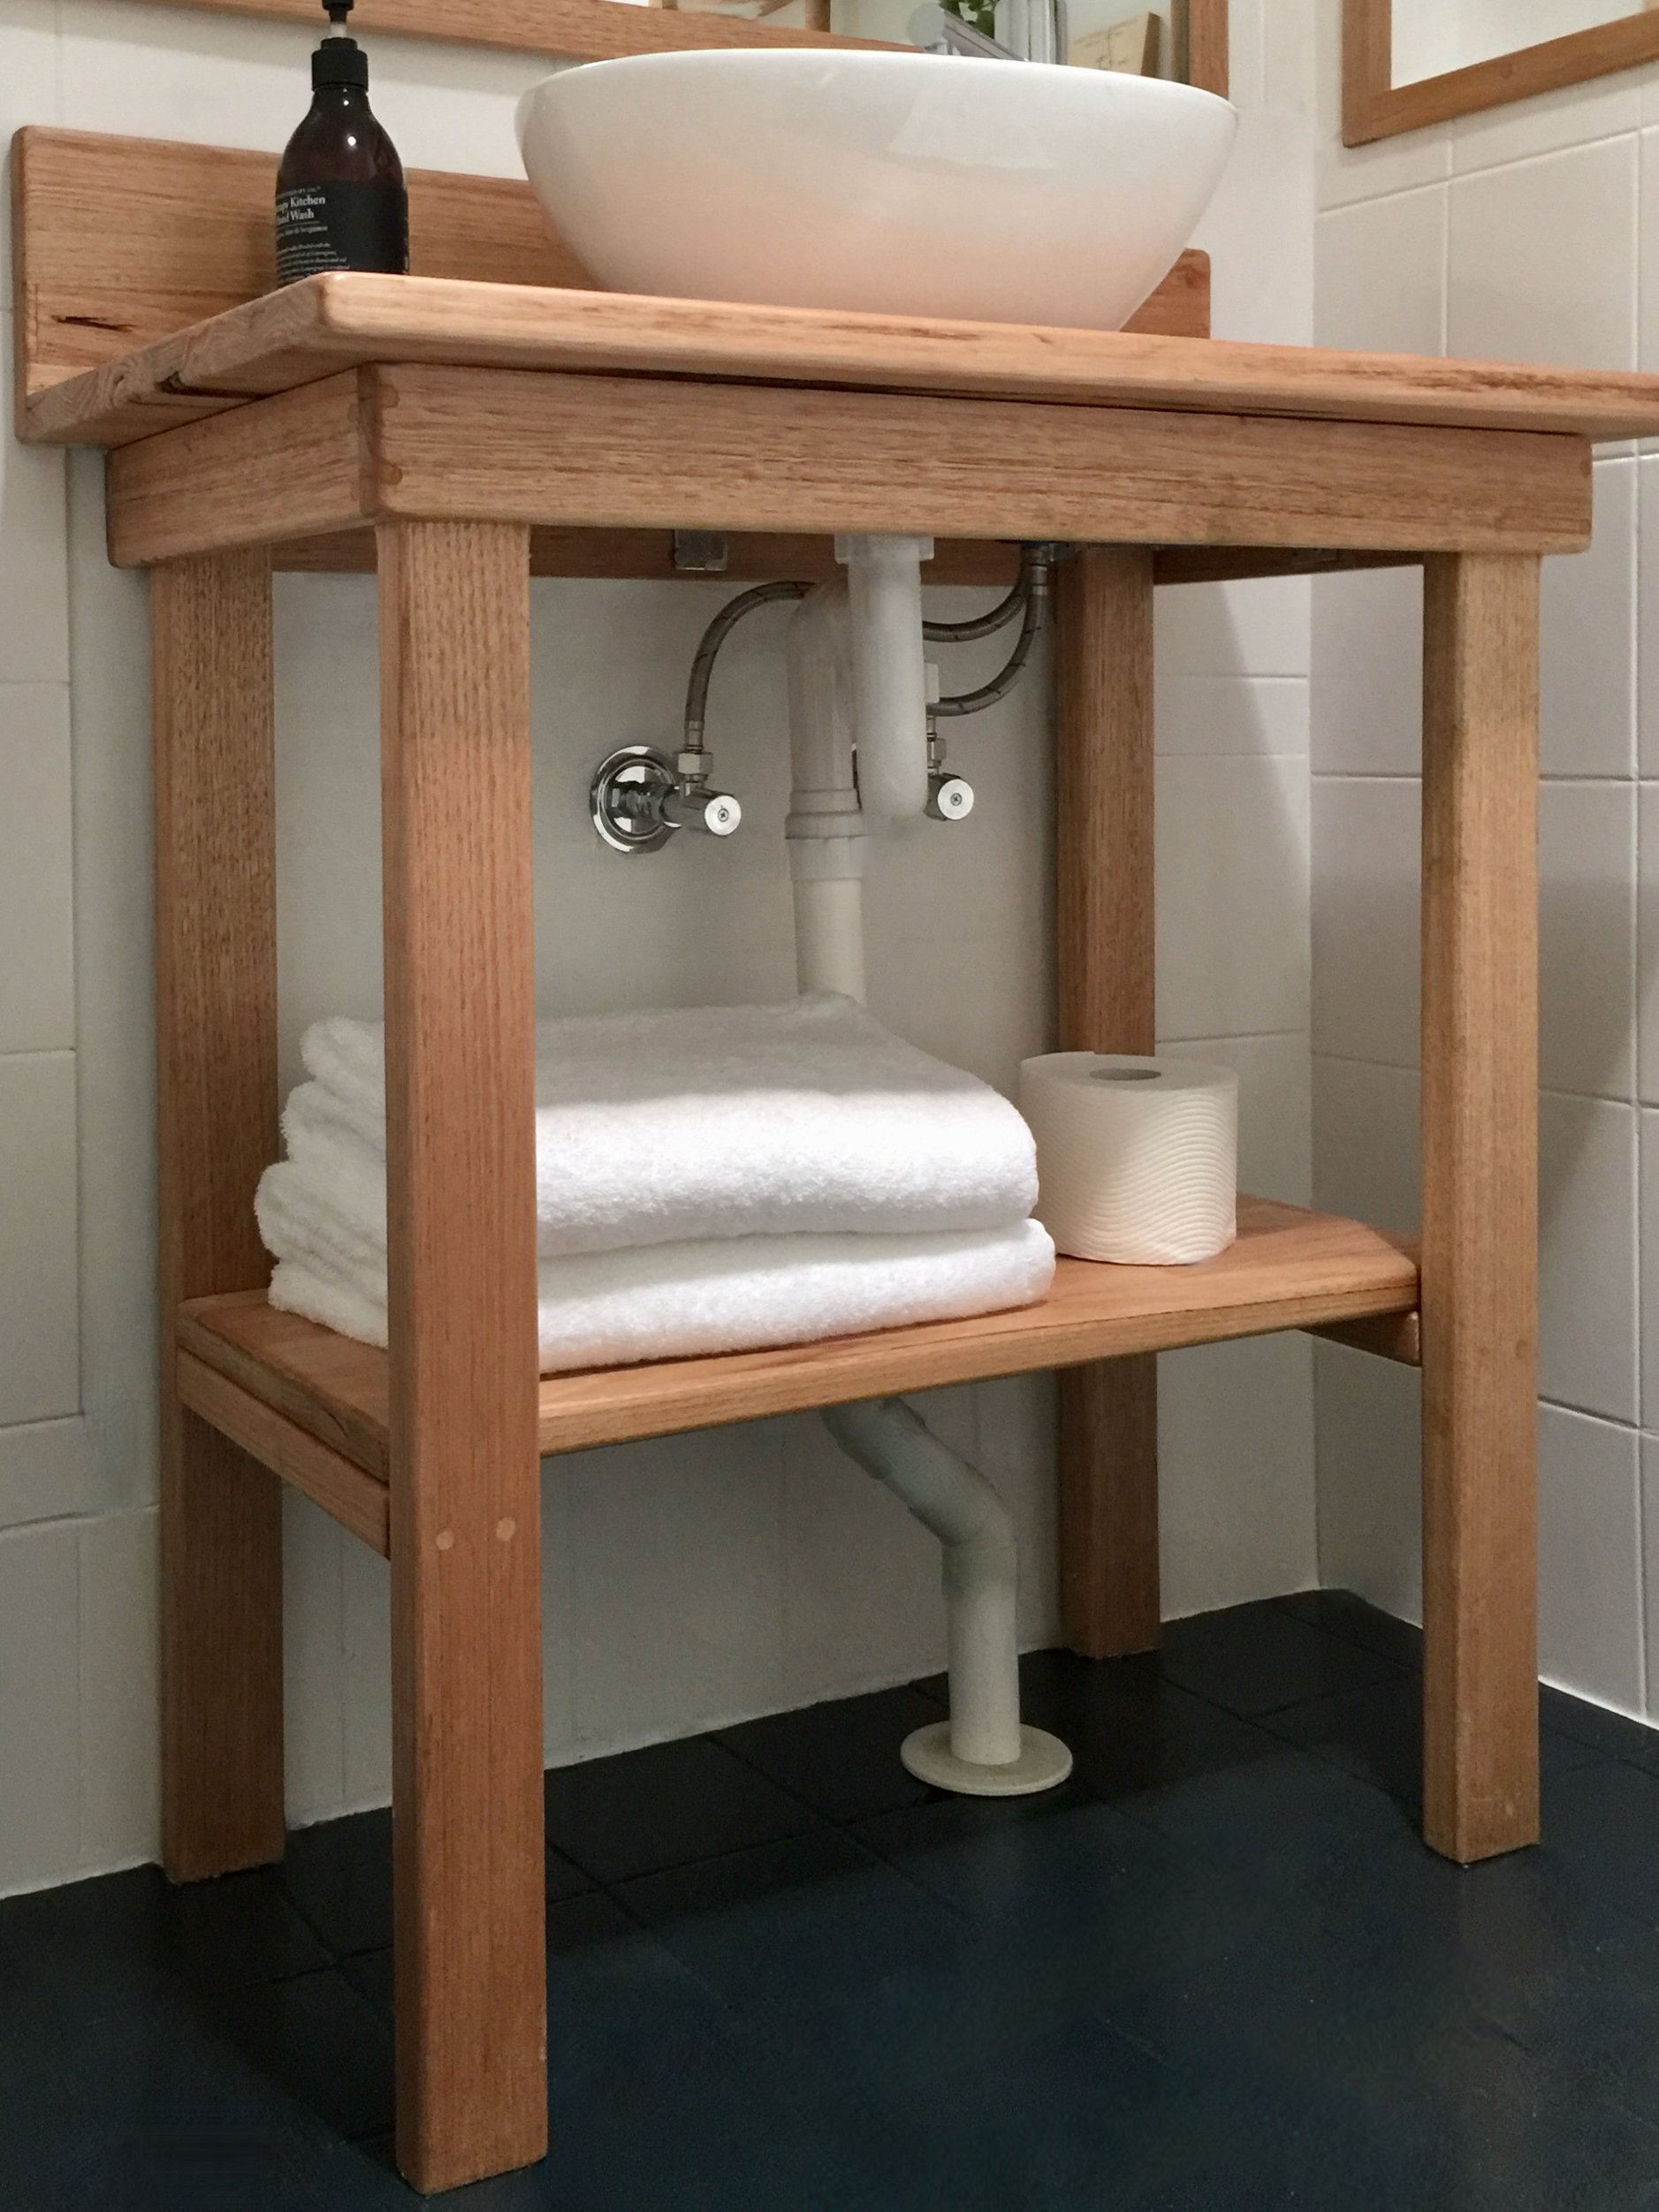
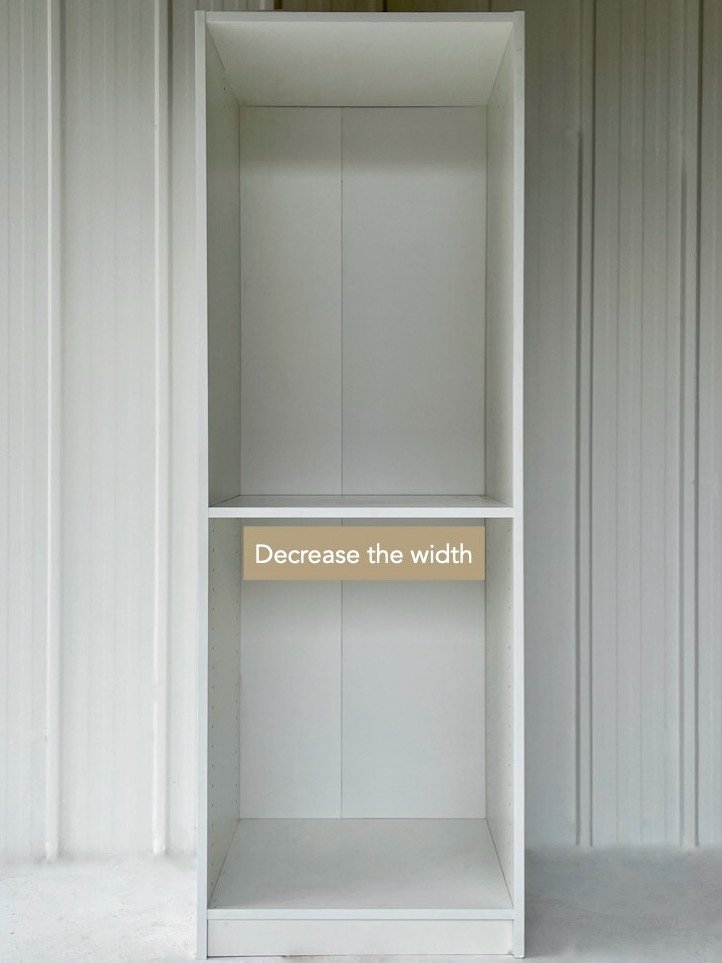
I recently changed the end cabinet (above right) by removing the door, lining the inside with plywood. Then I varnished and added a shelf to create space for the laundry basket. After tiling the floor I also changed the kickboards to timber to help the bench feel more built in.


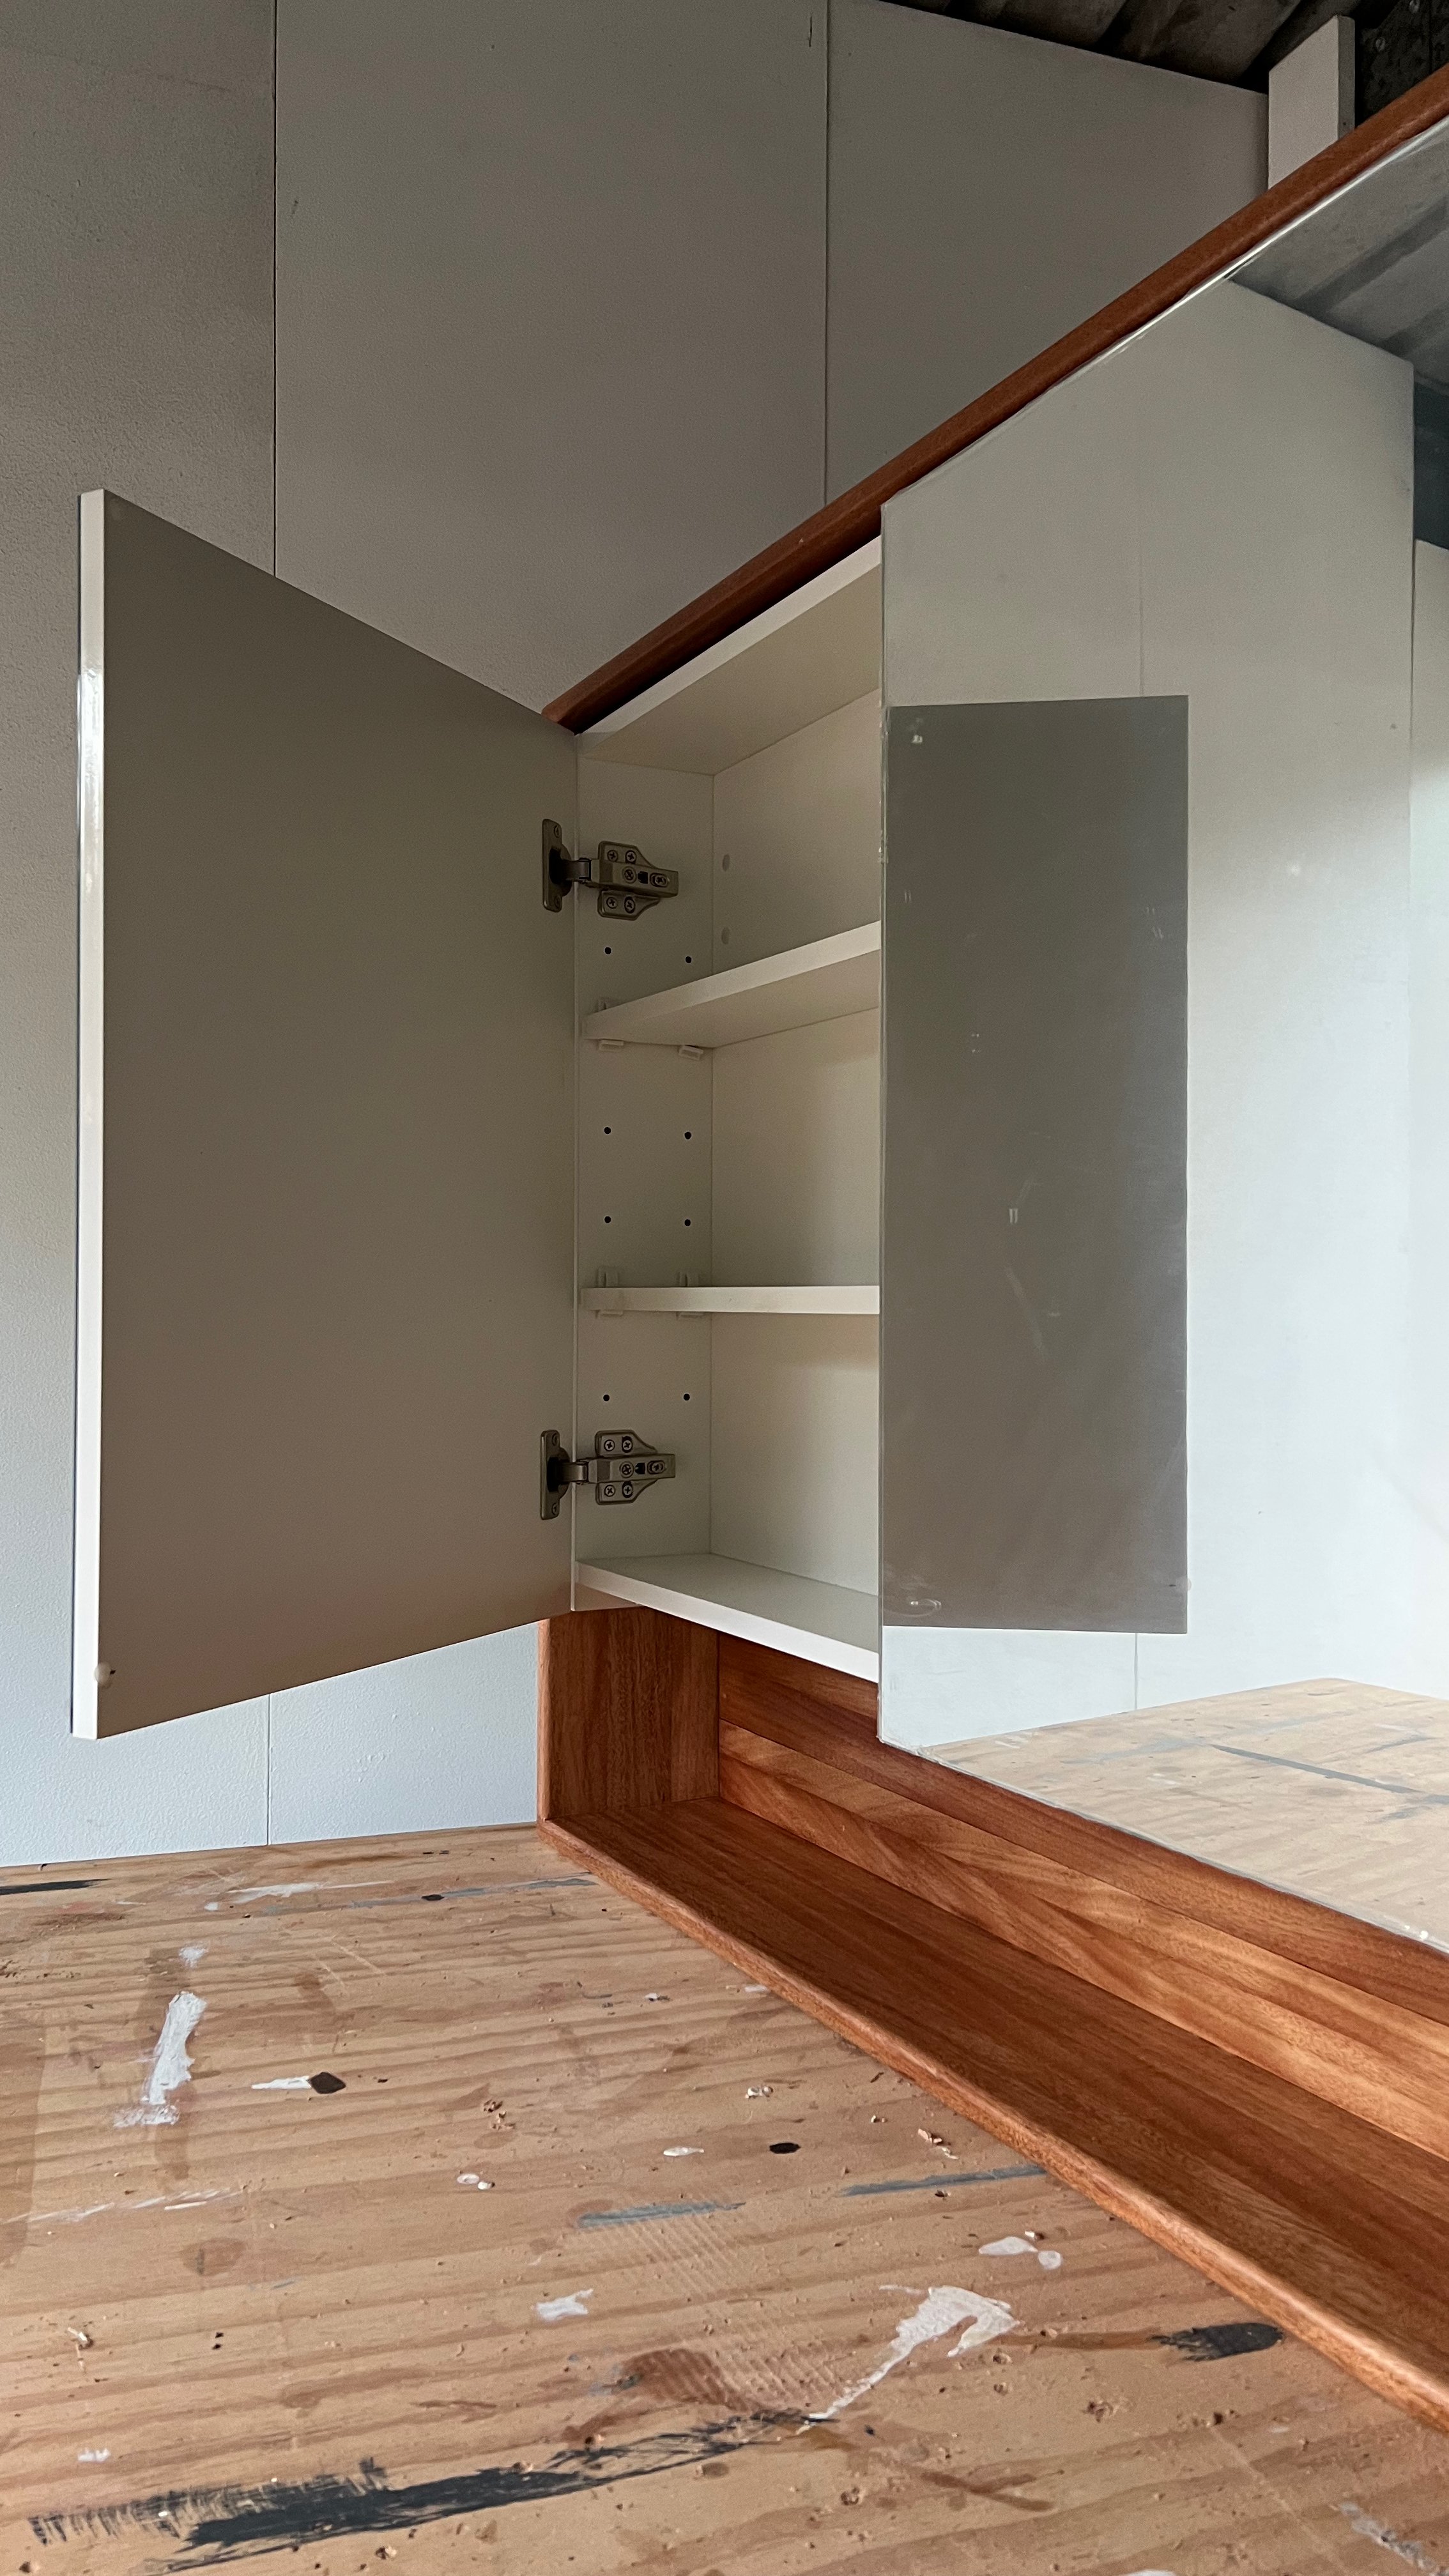
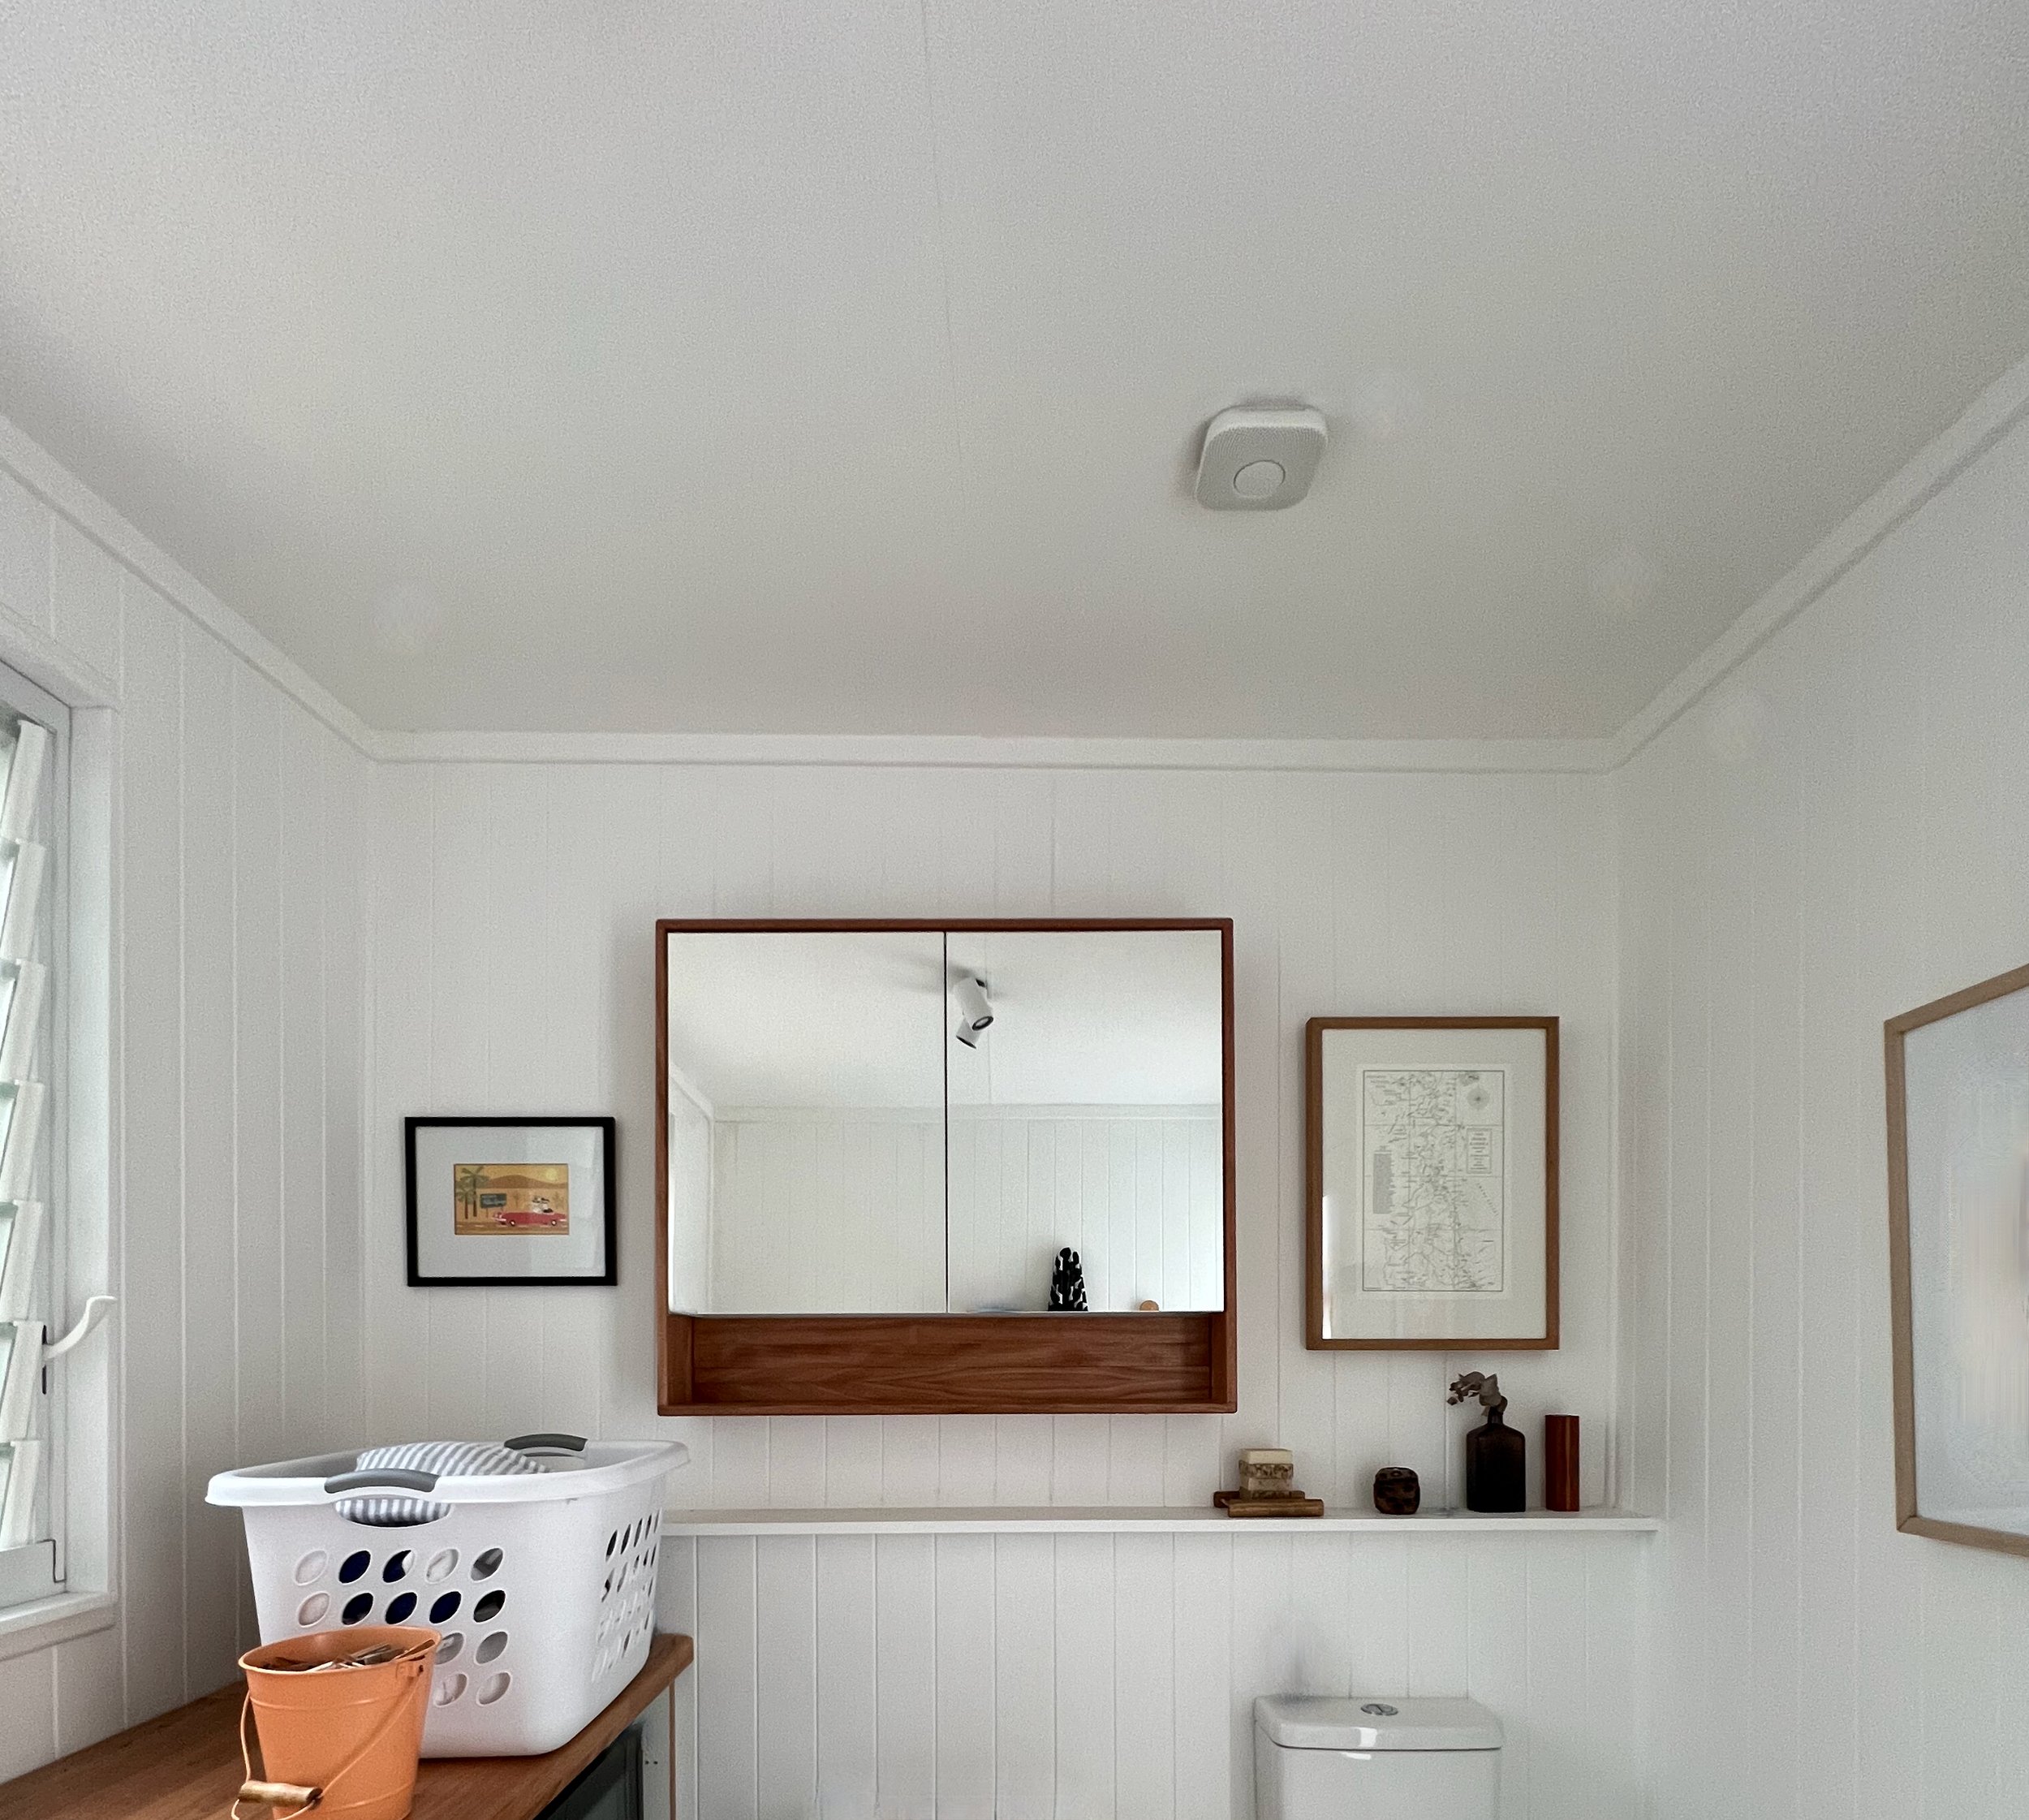
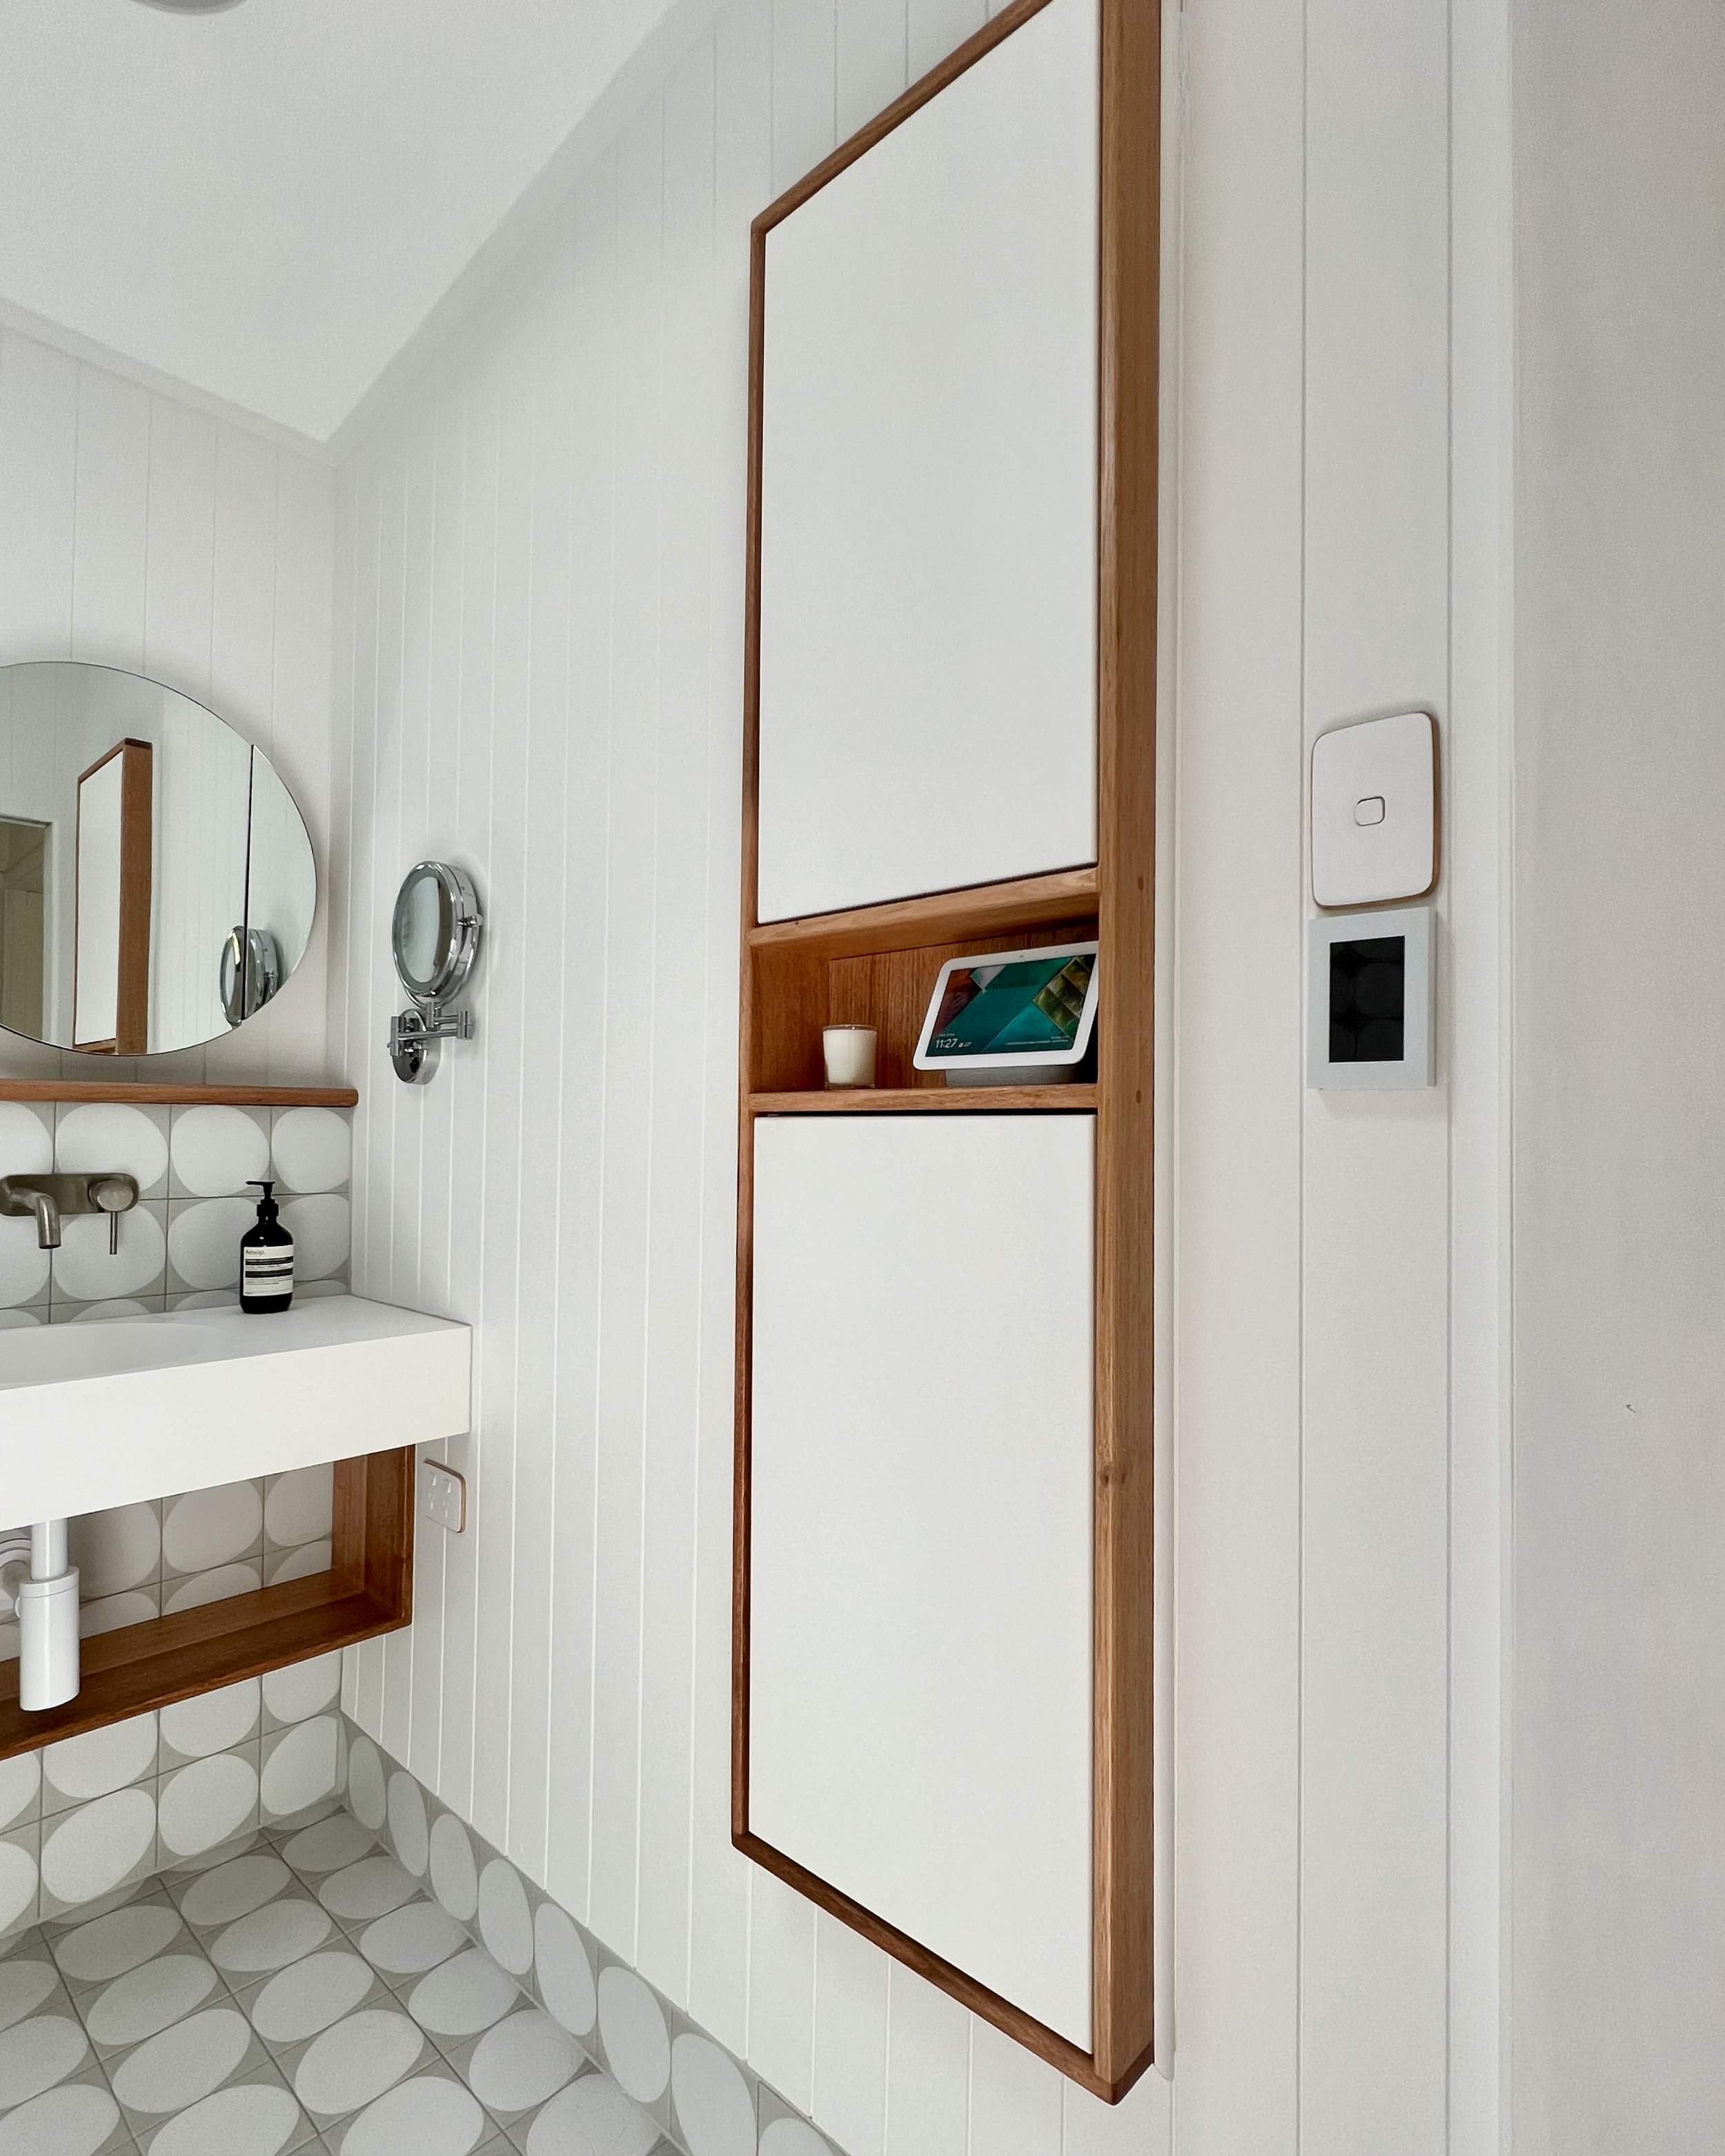
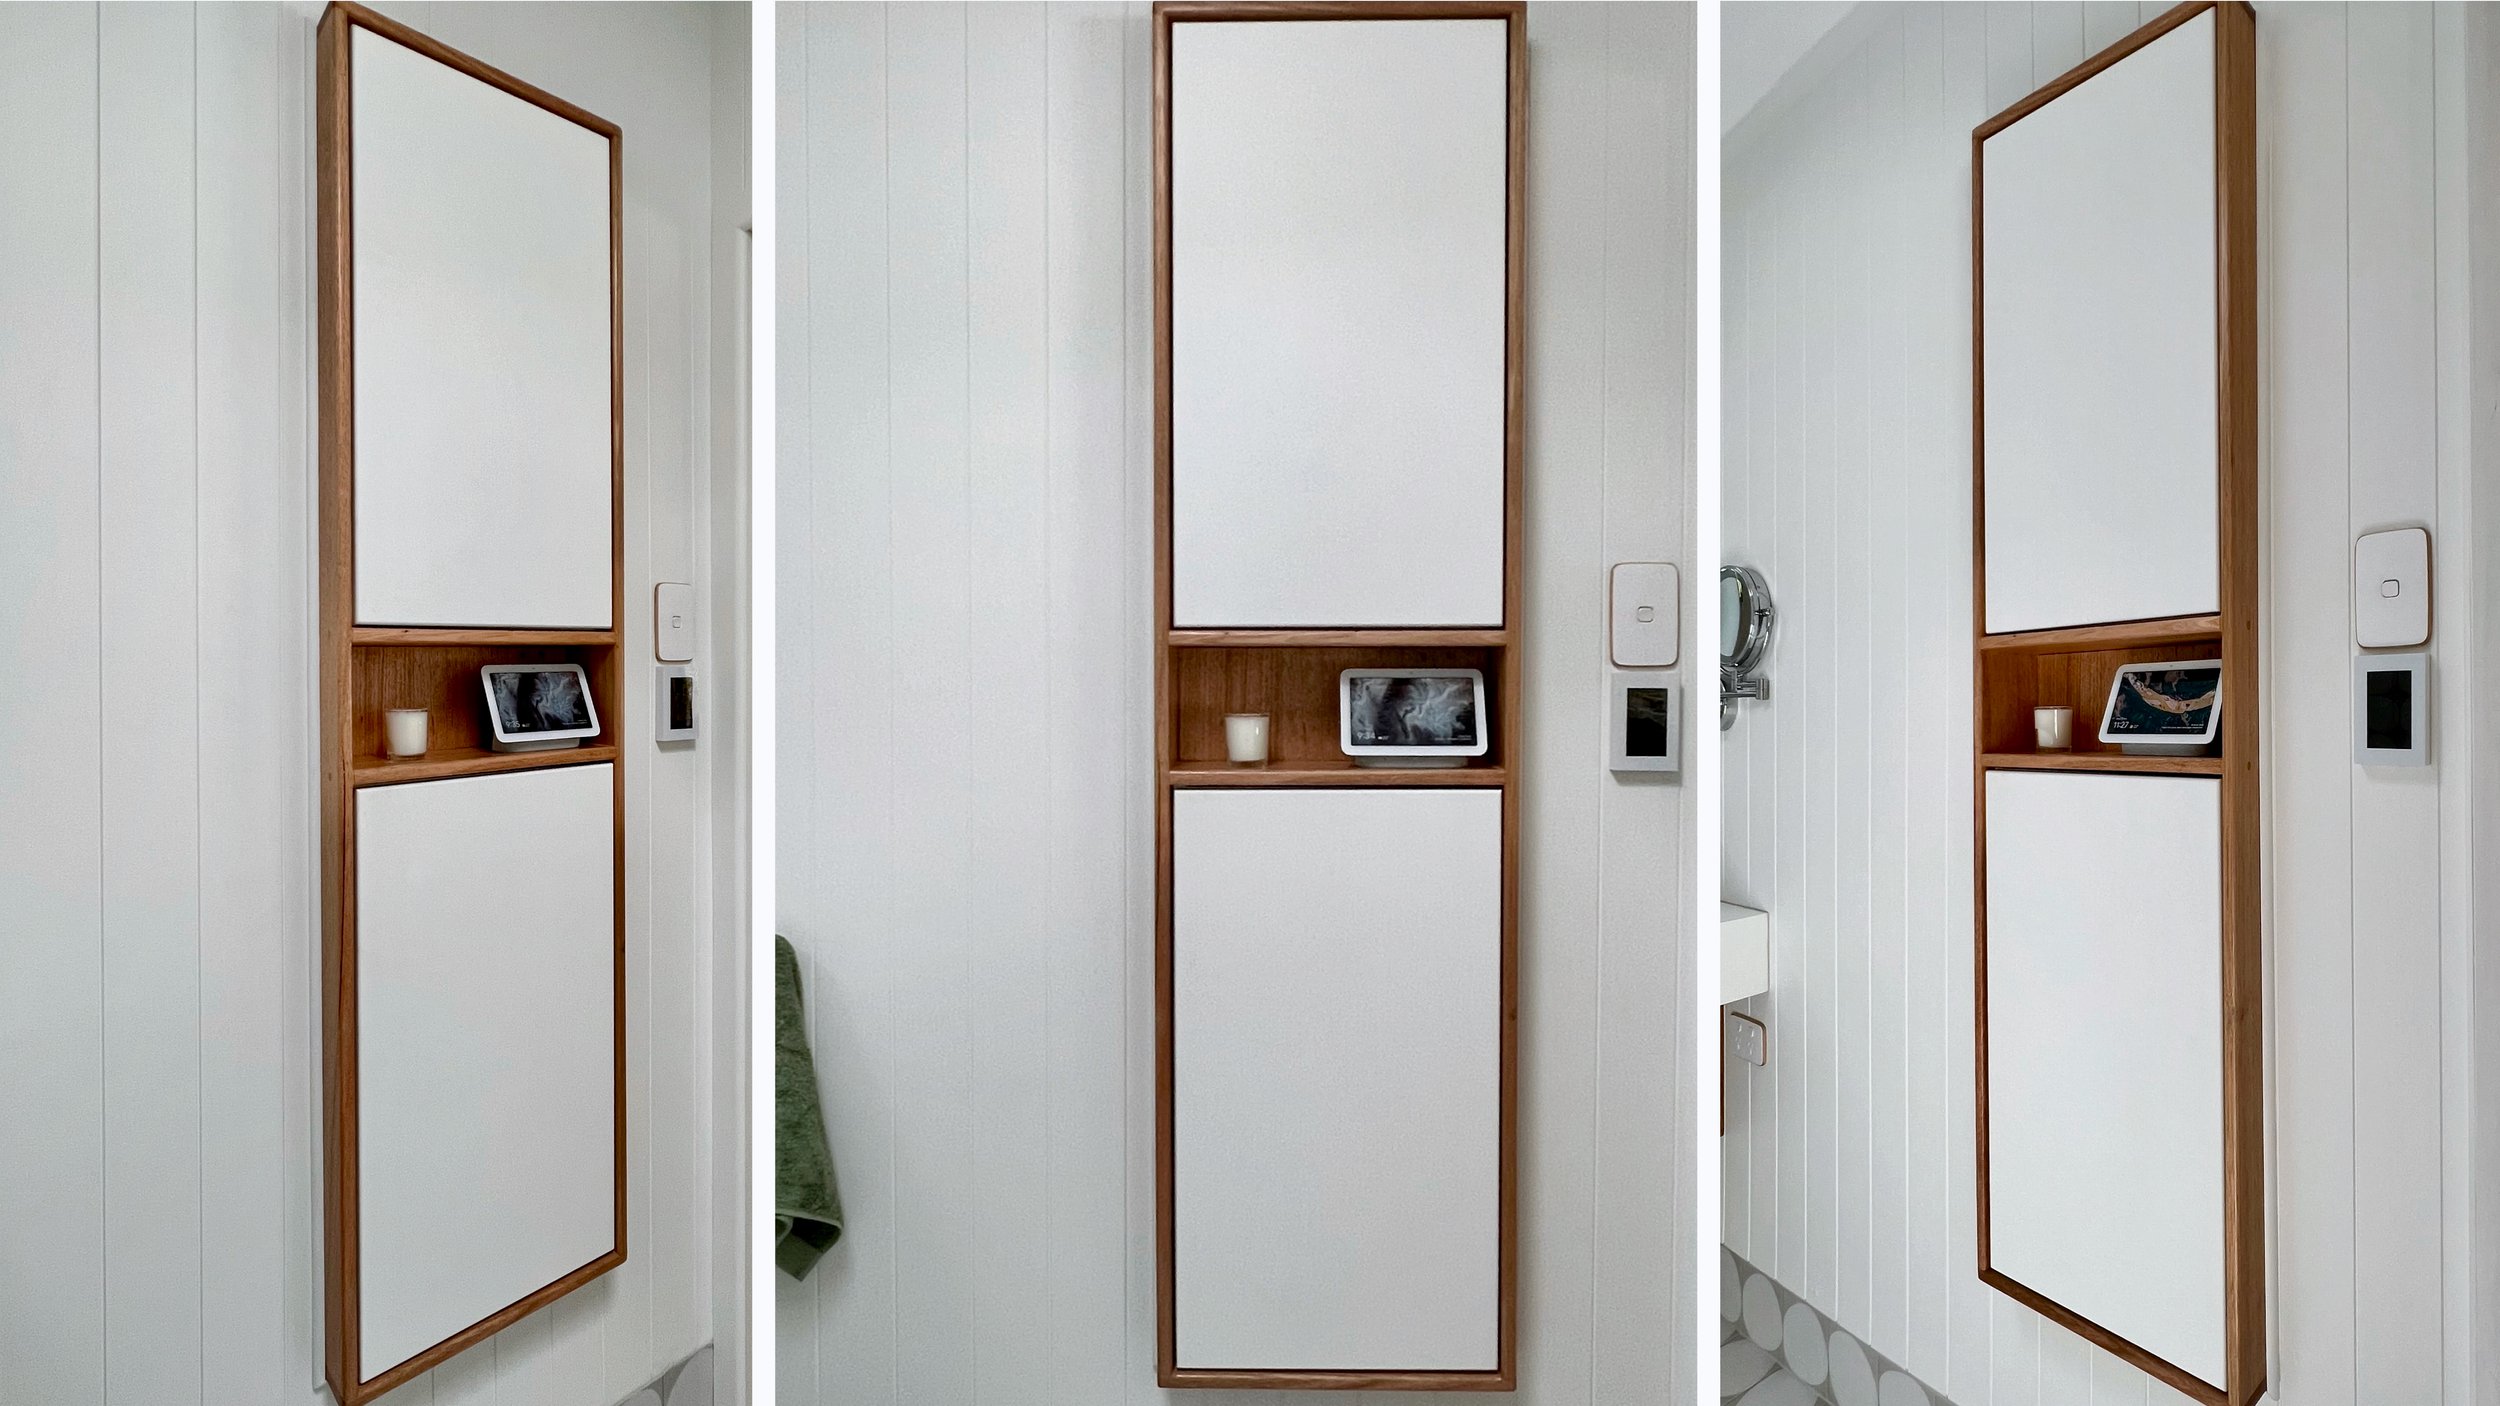
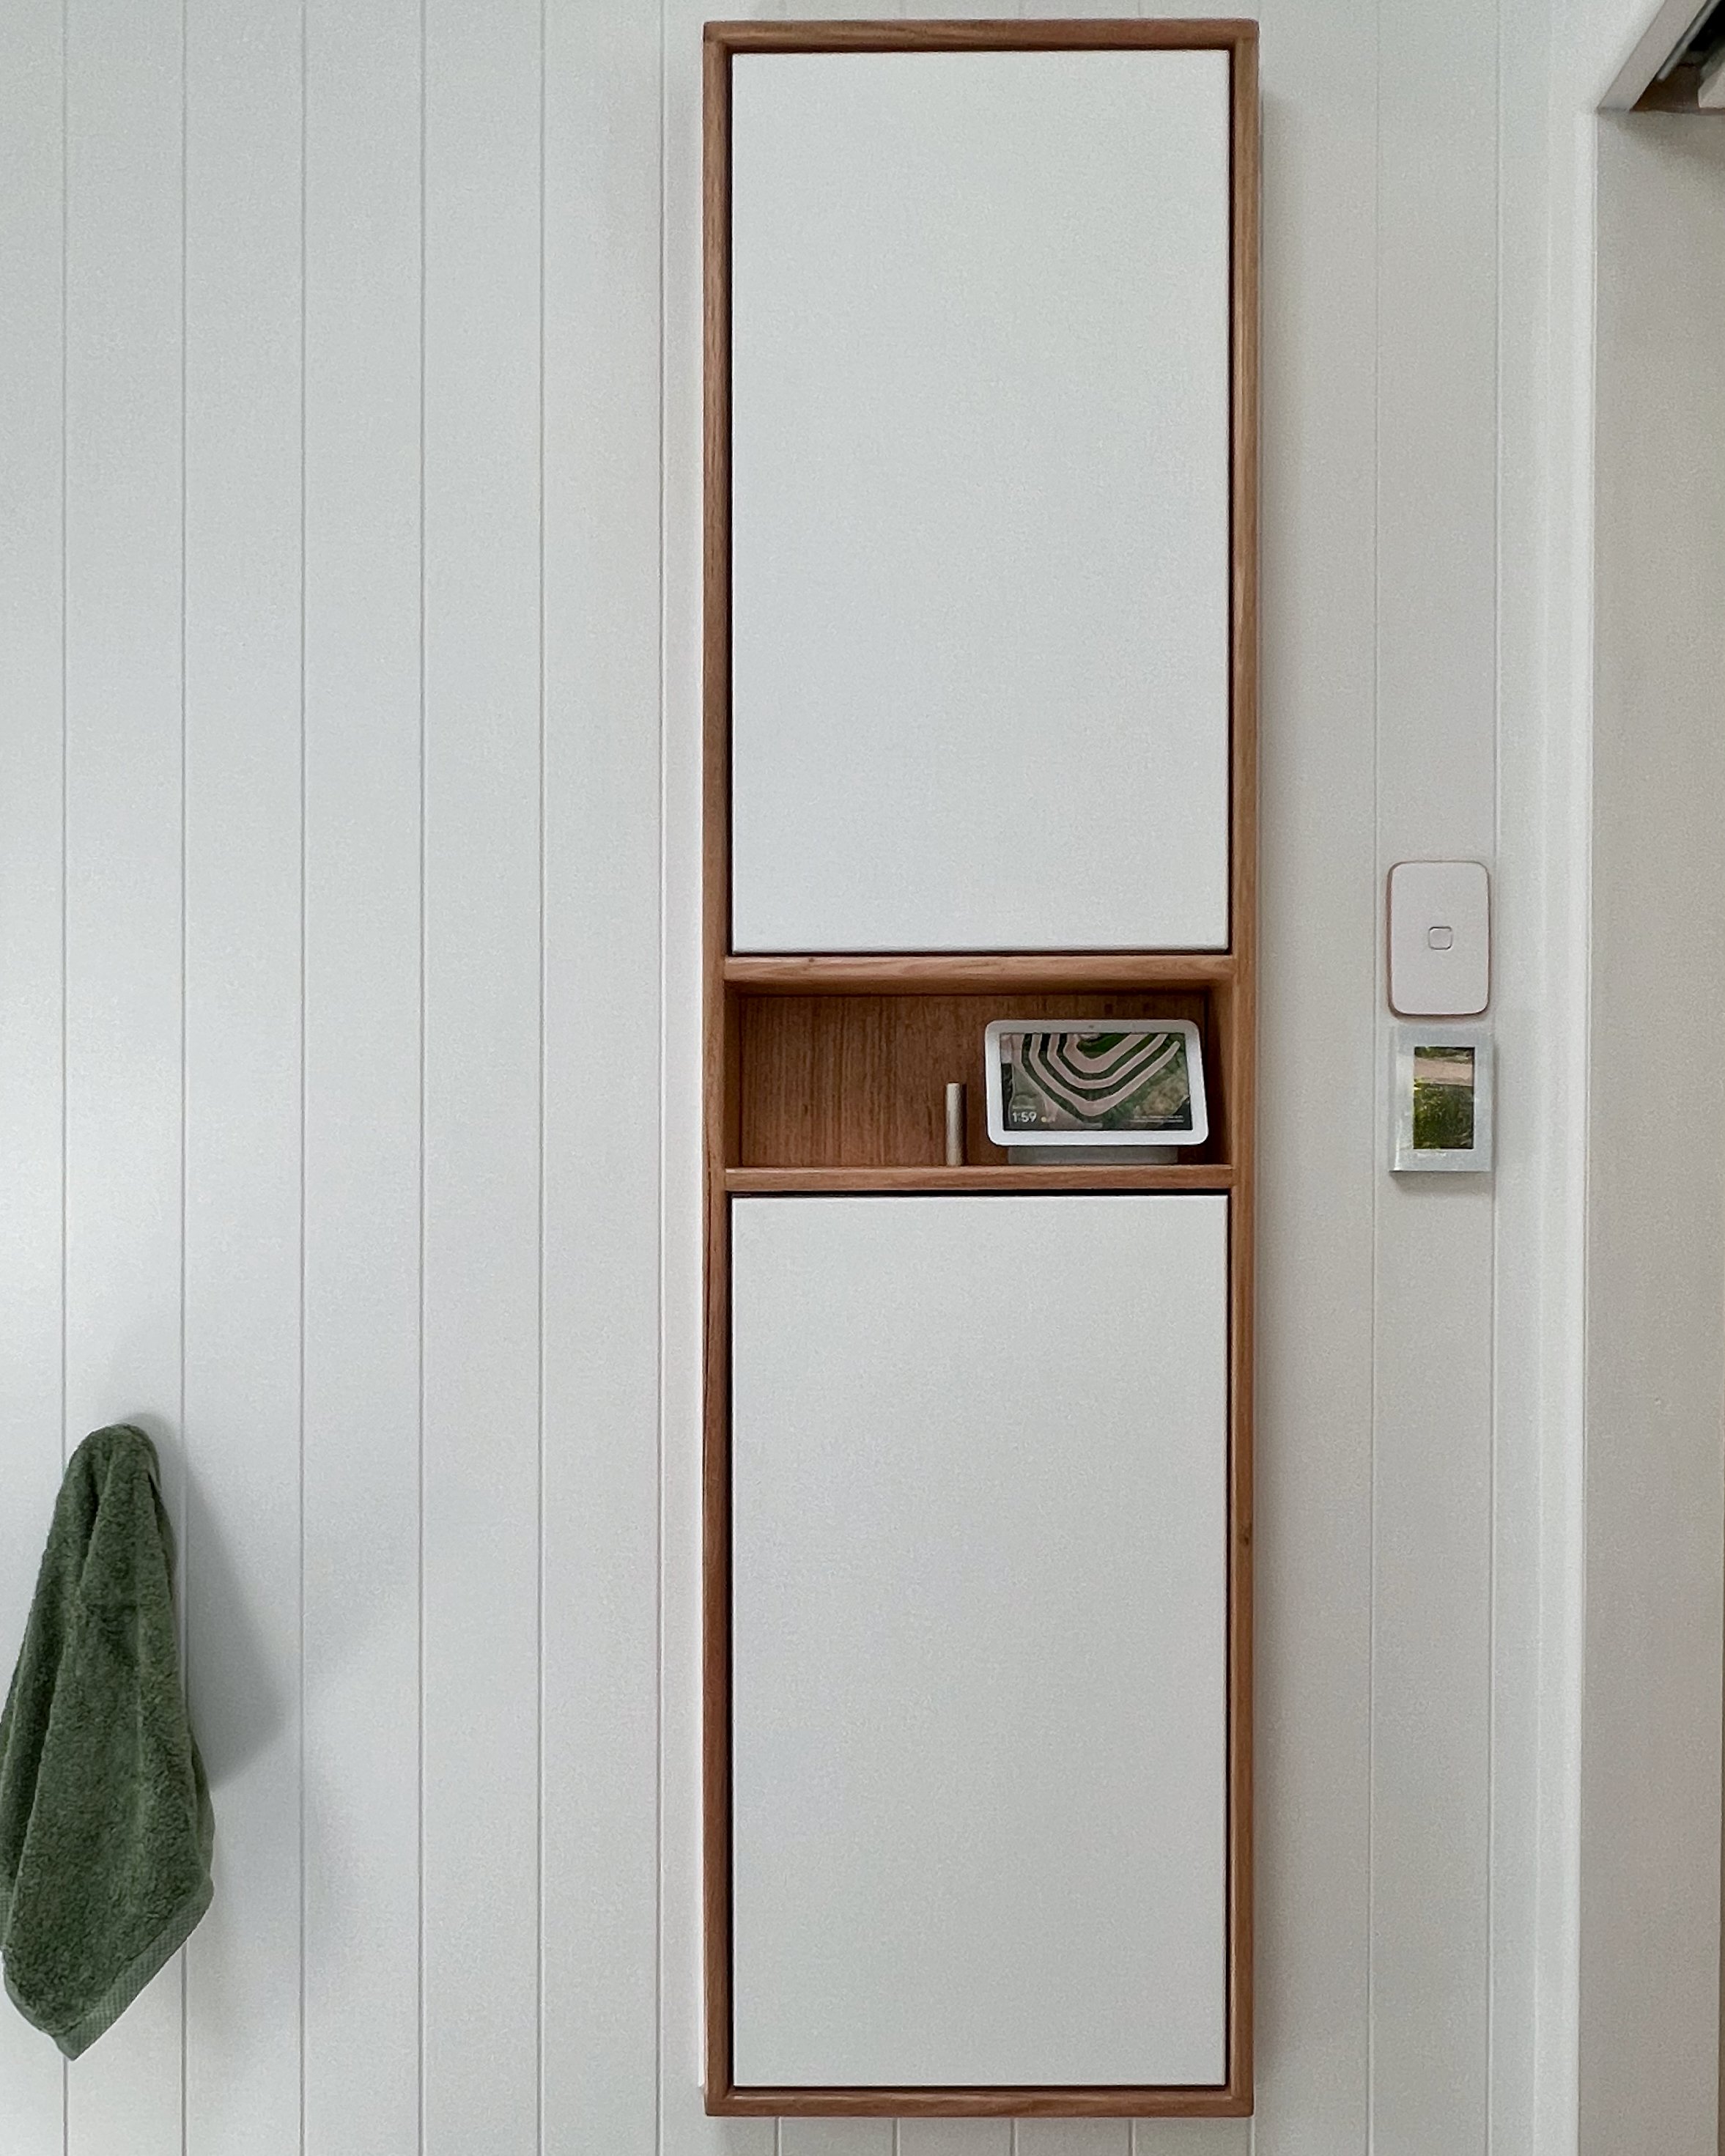
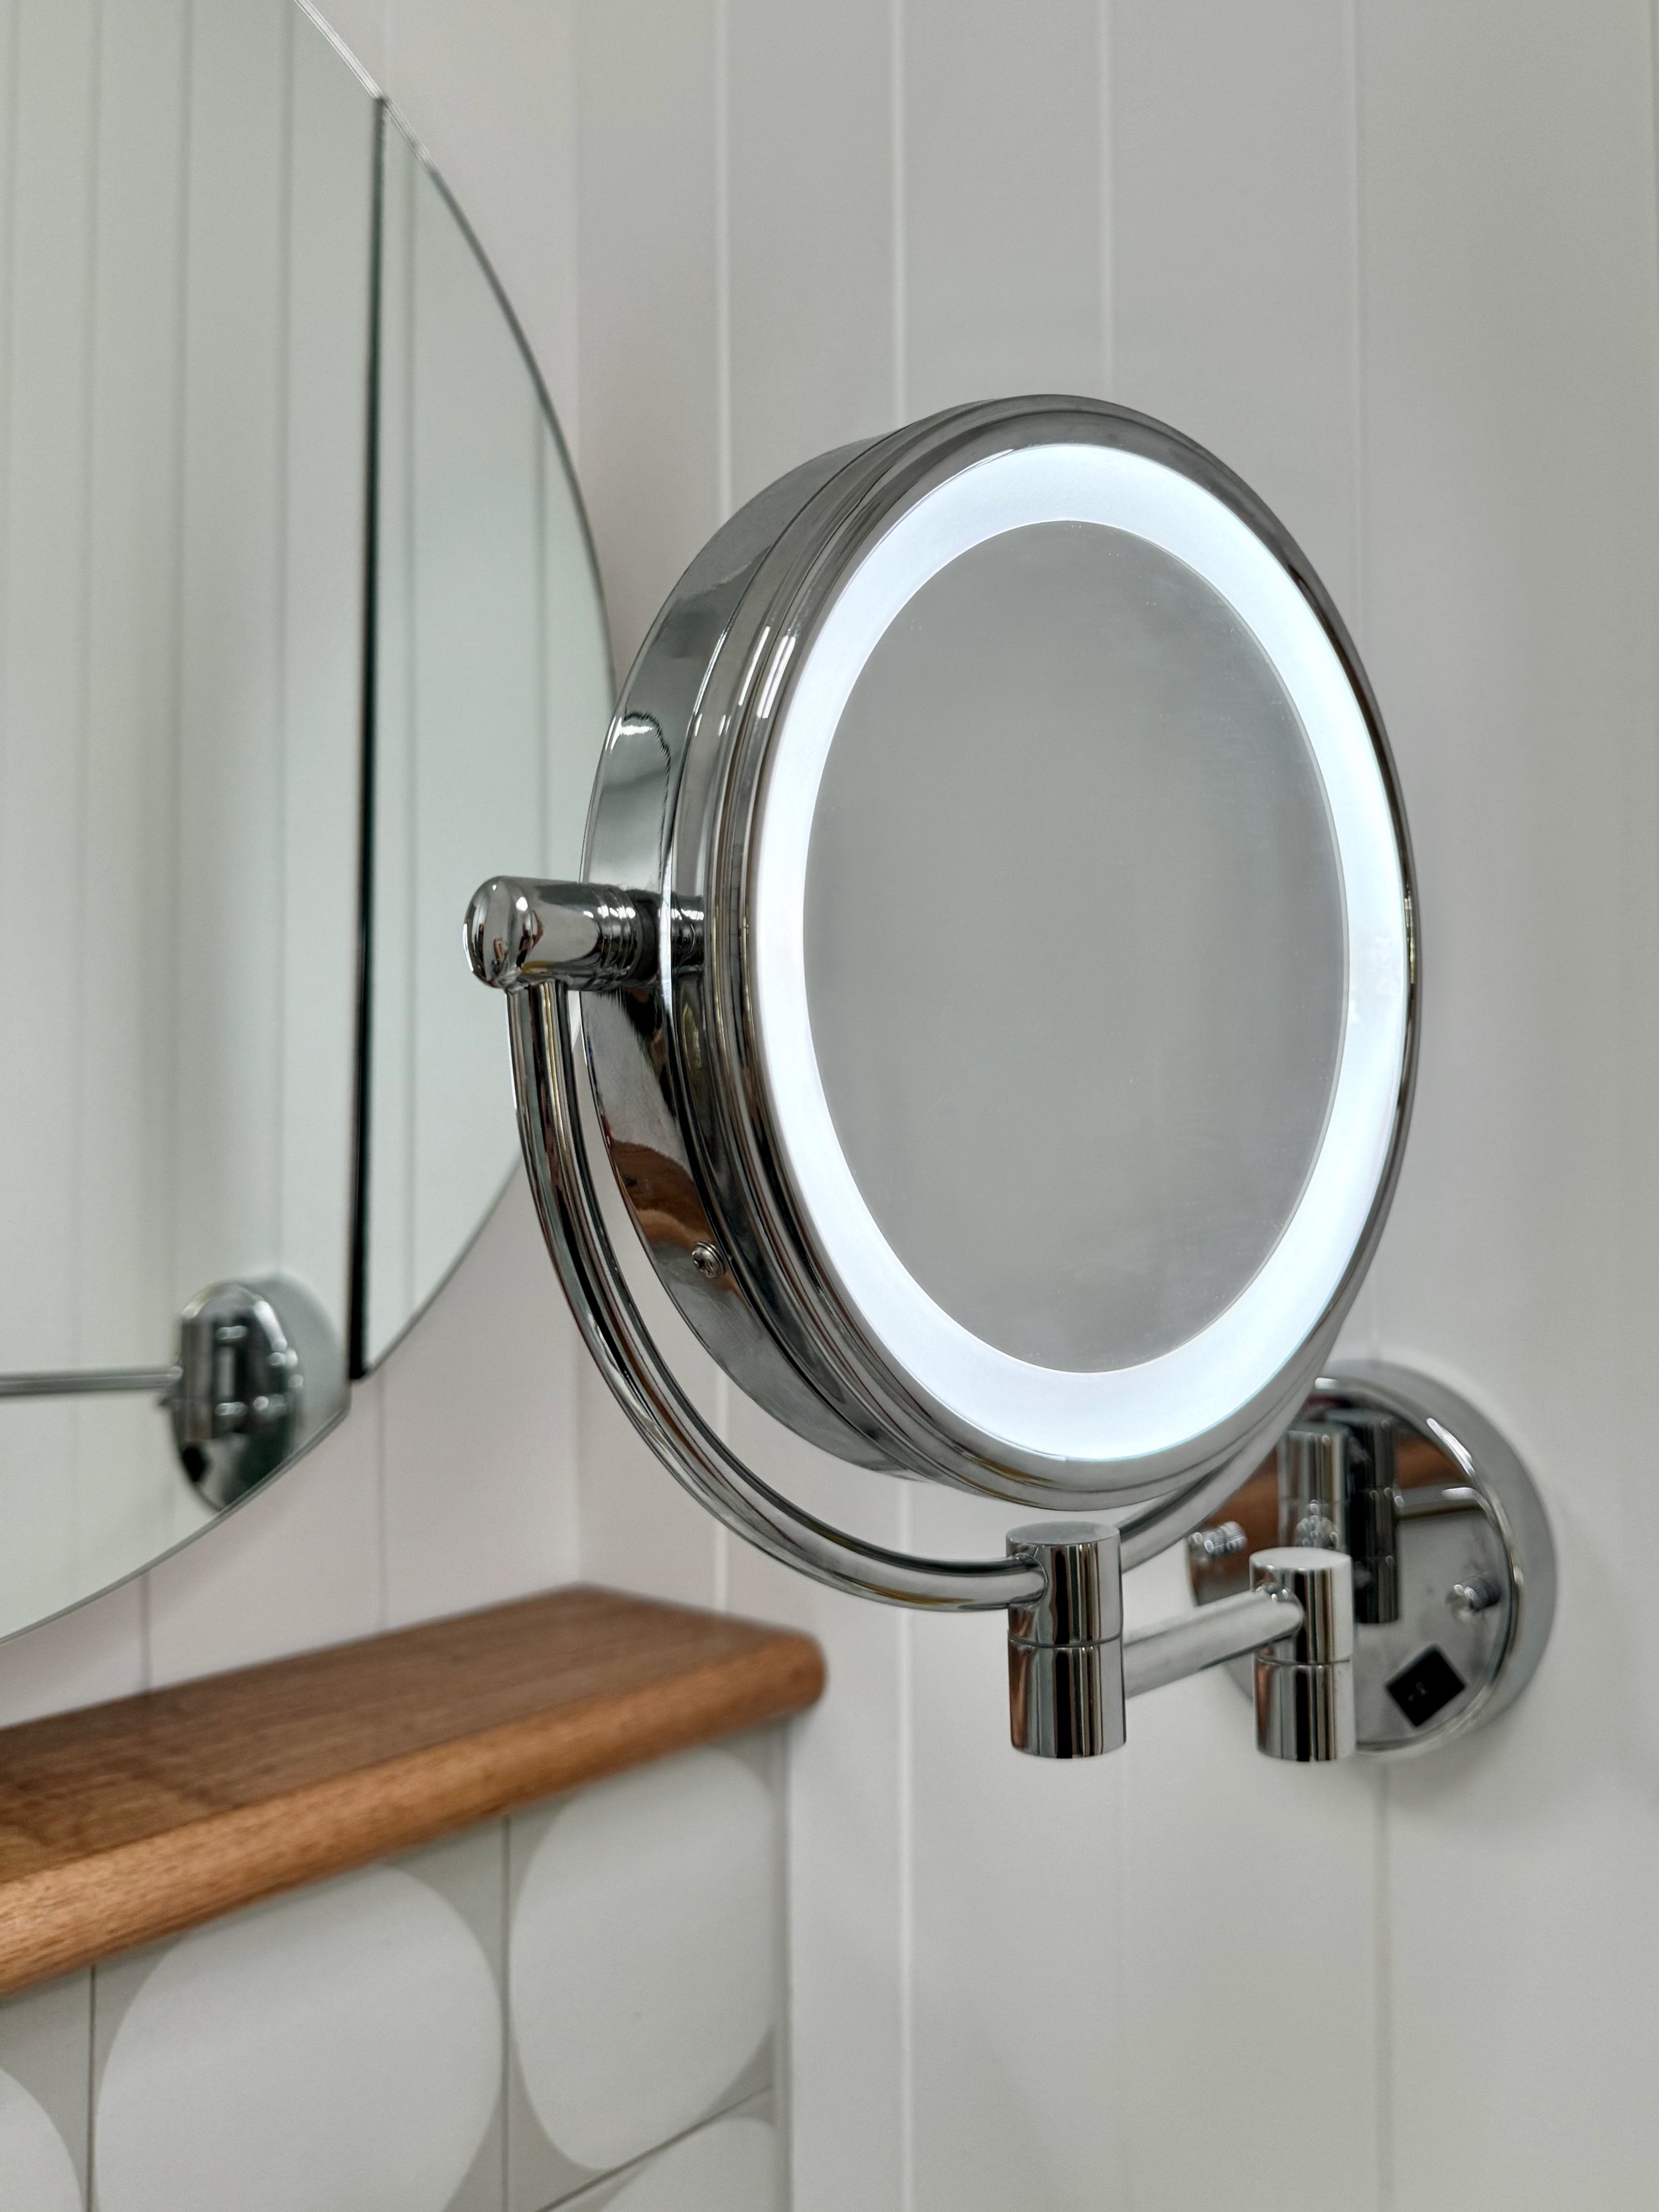
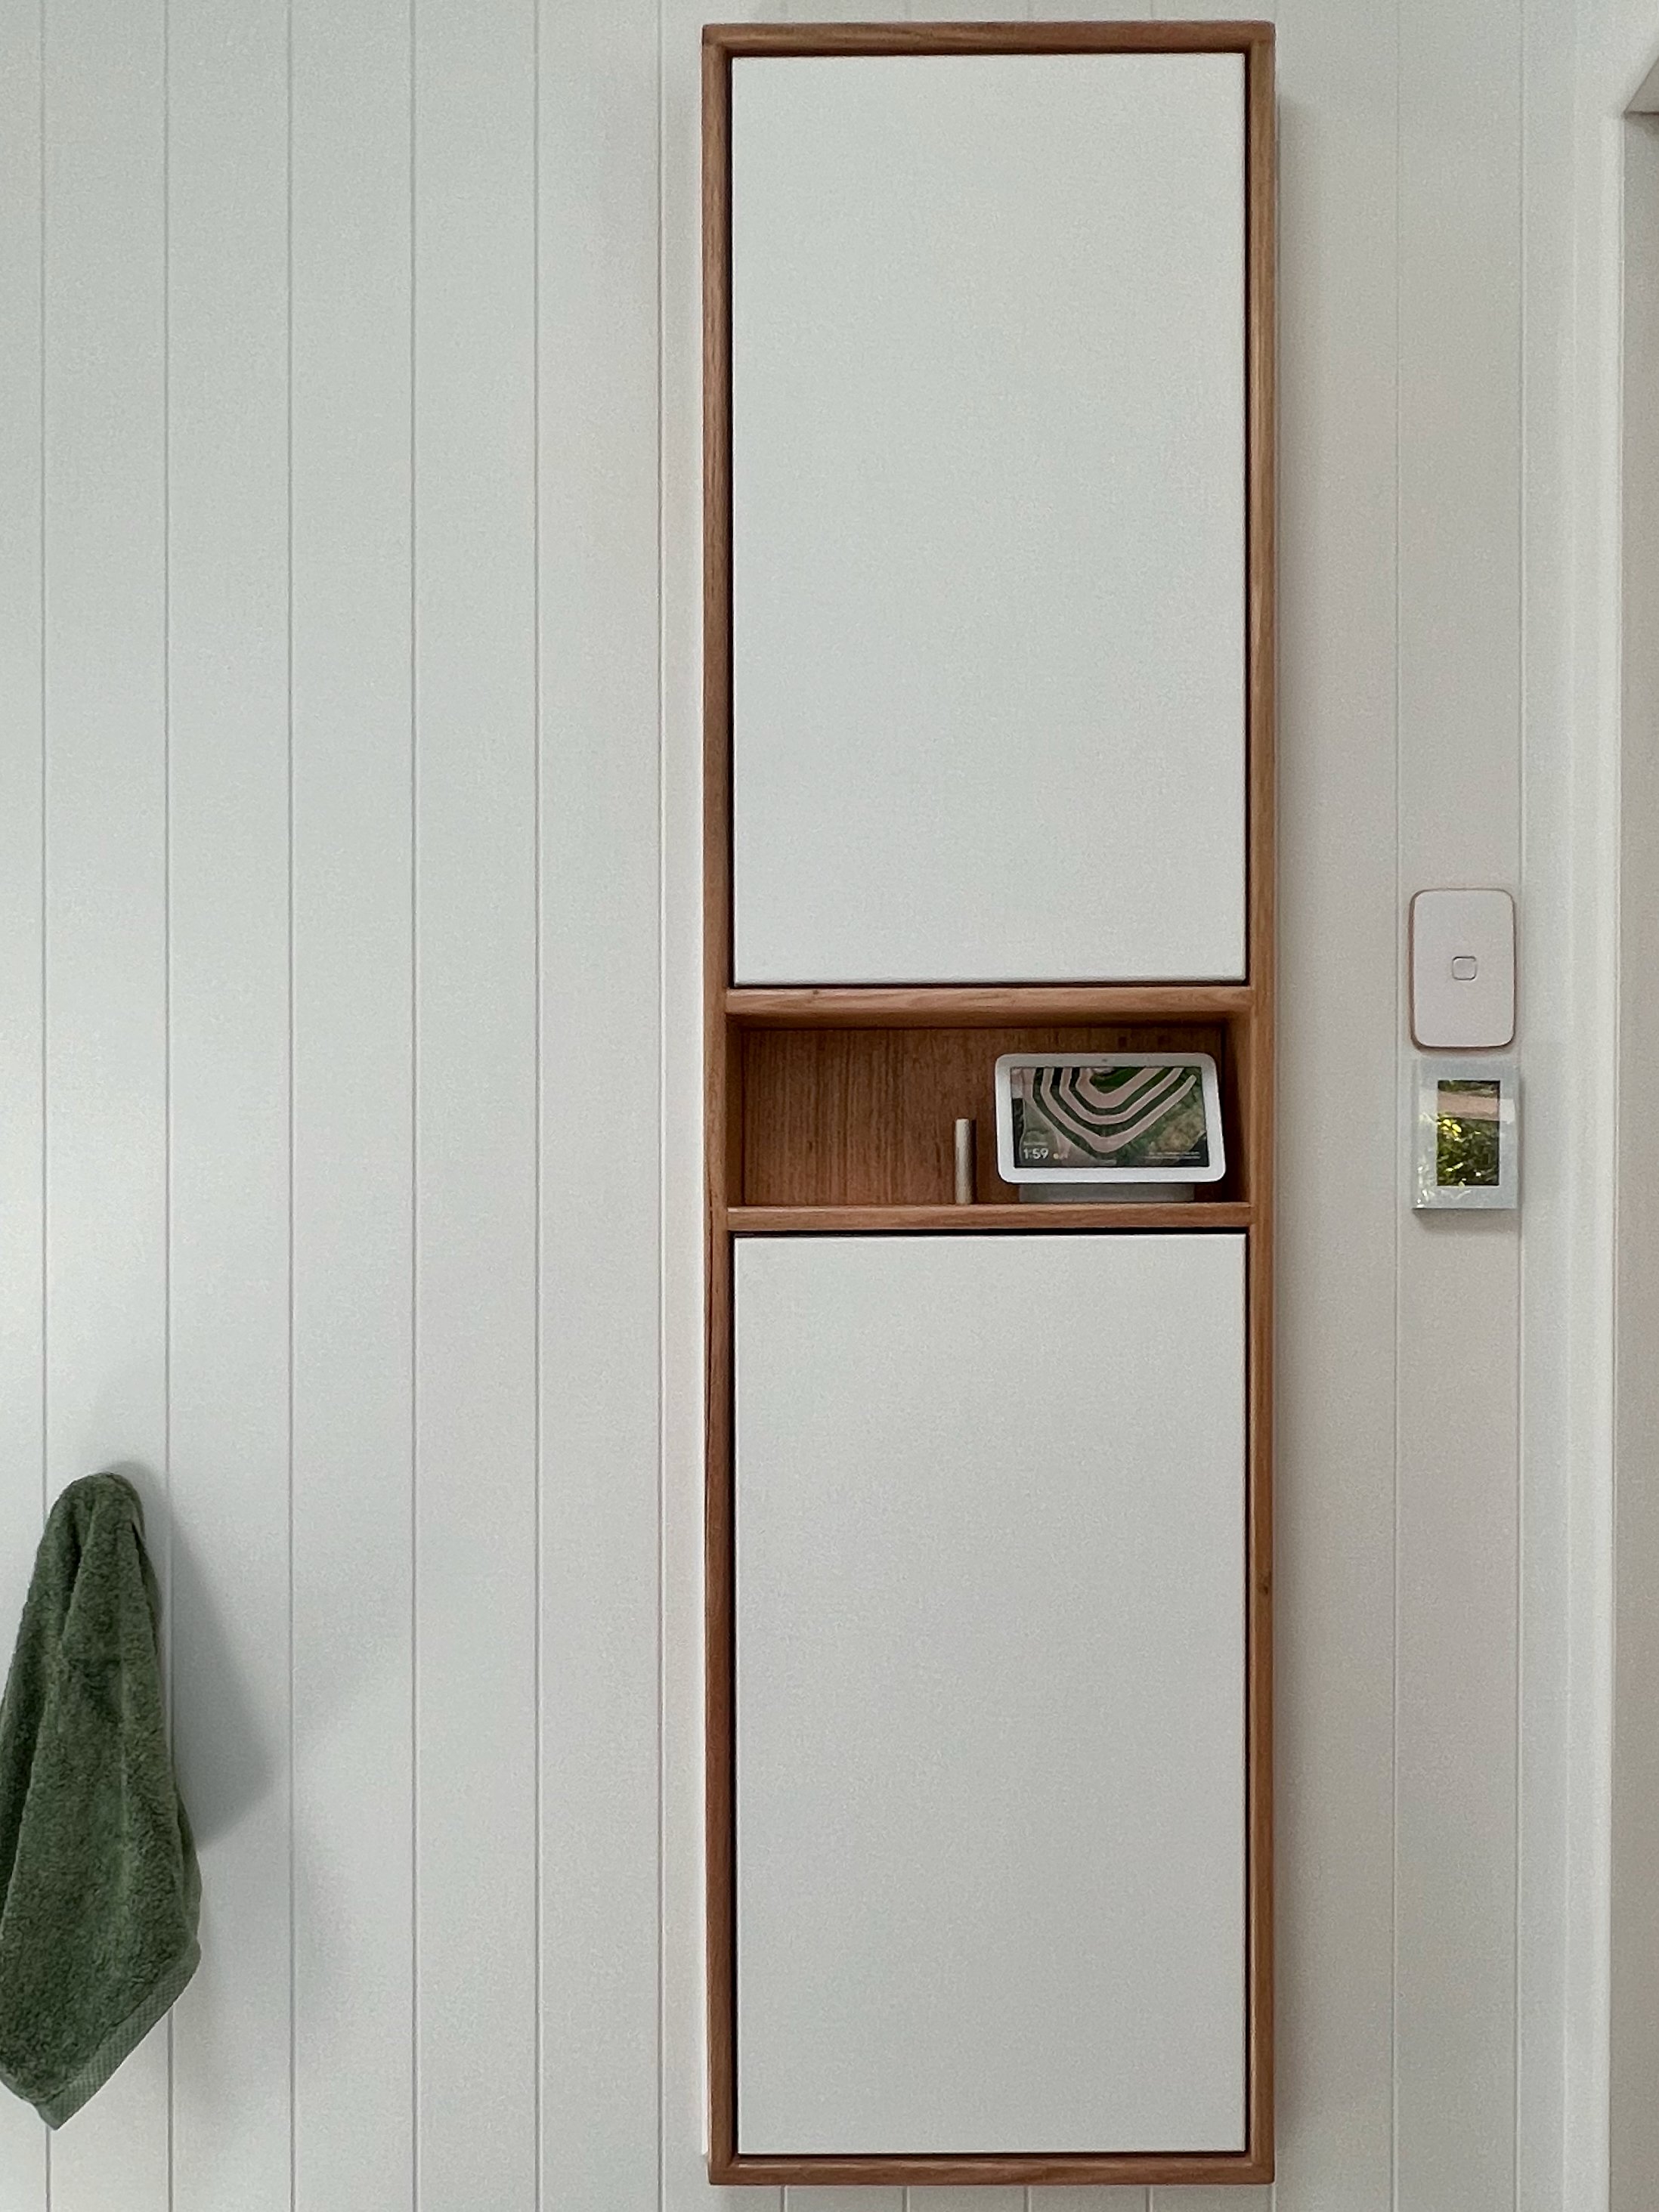
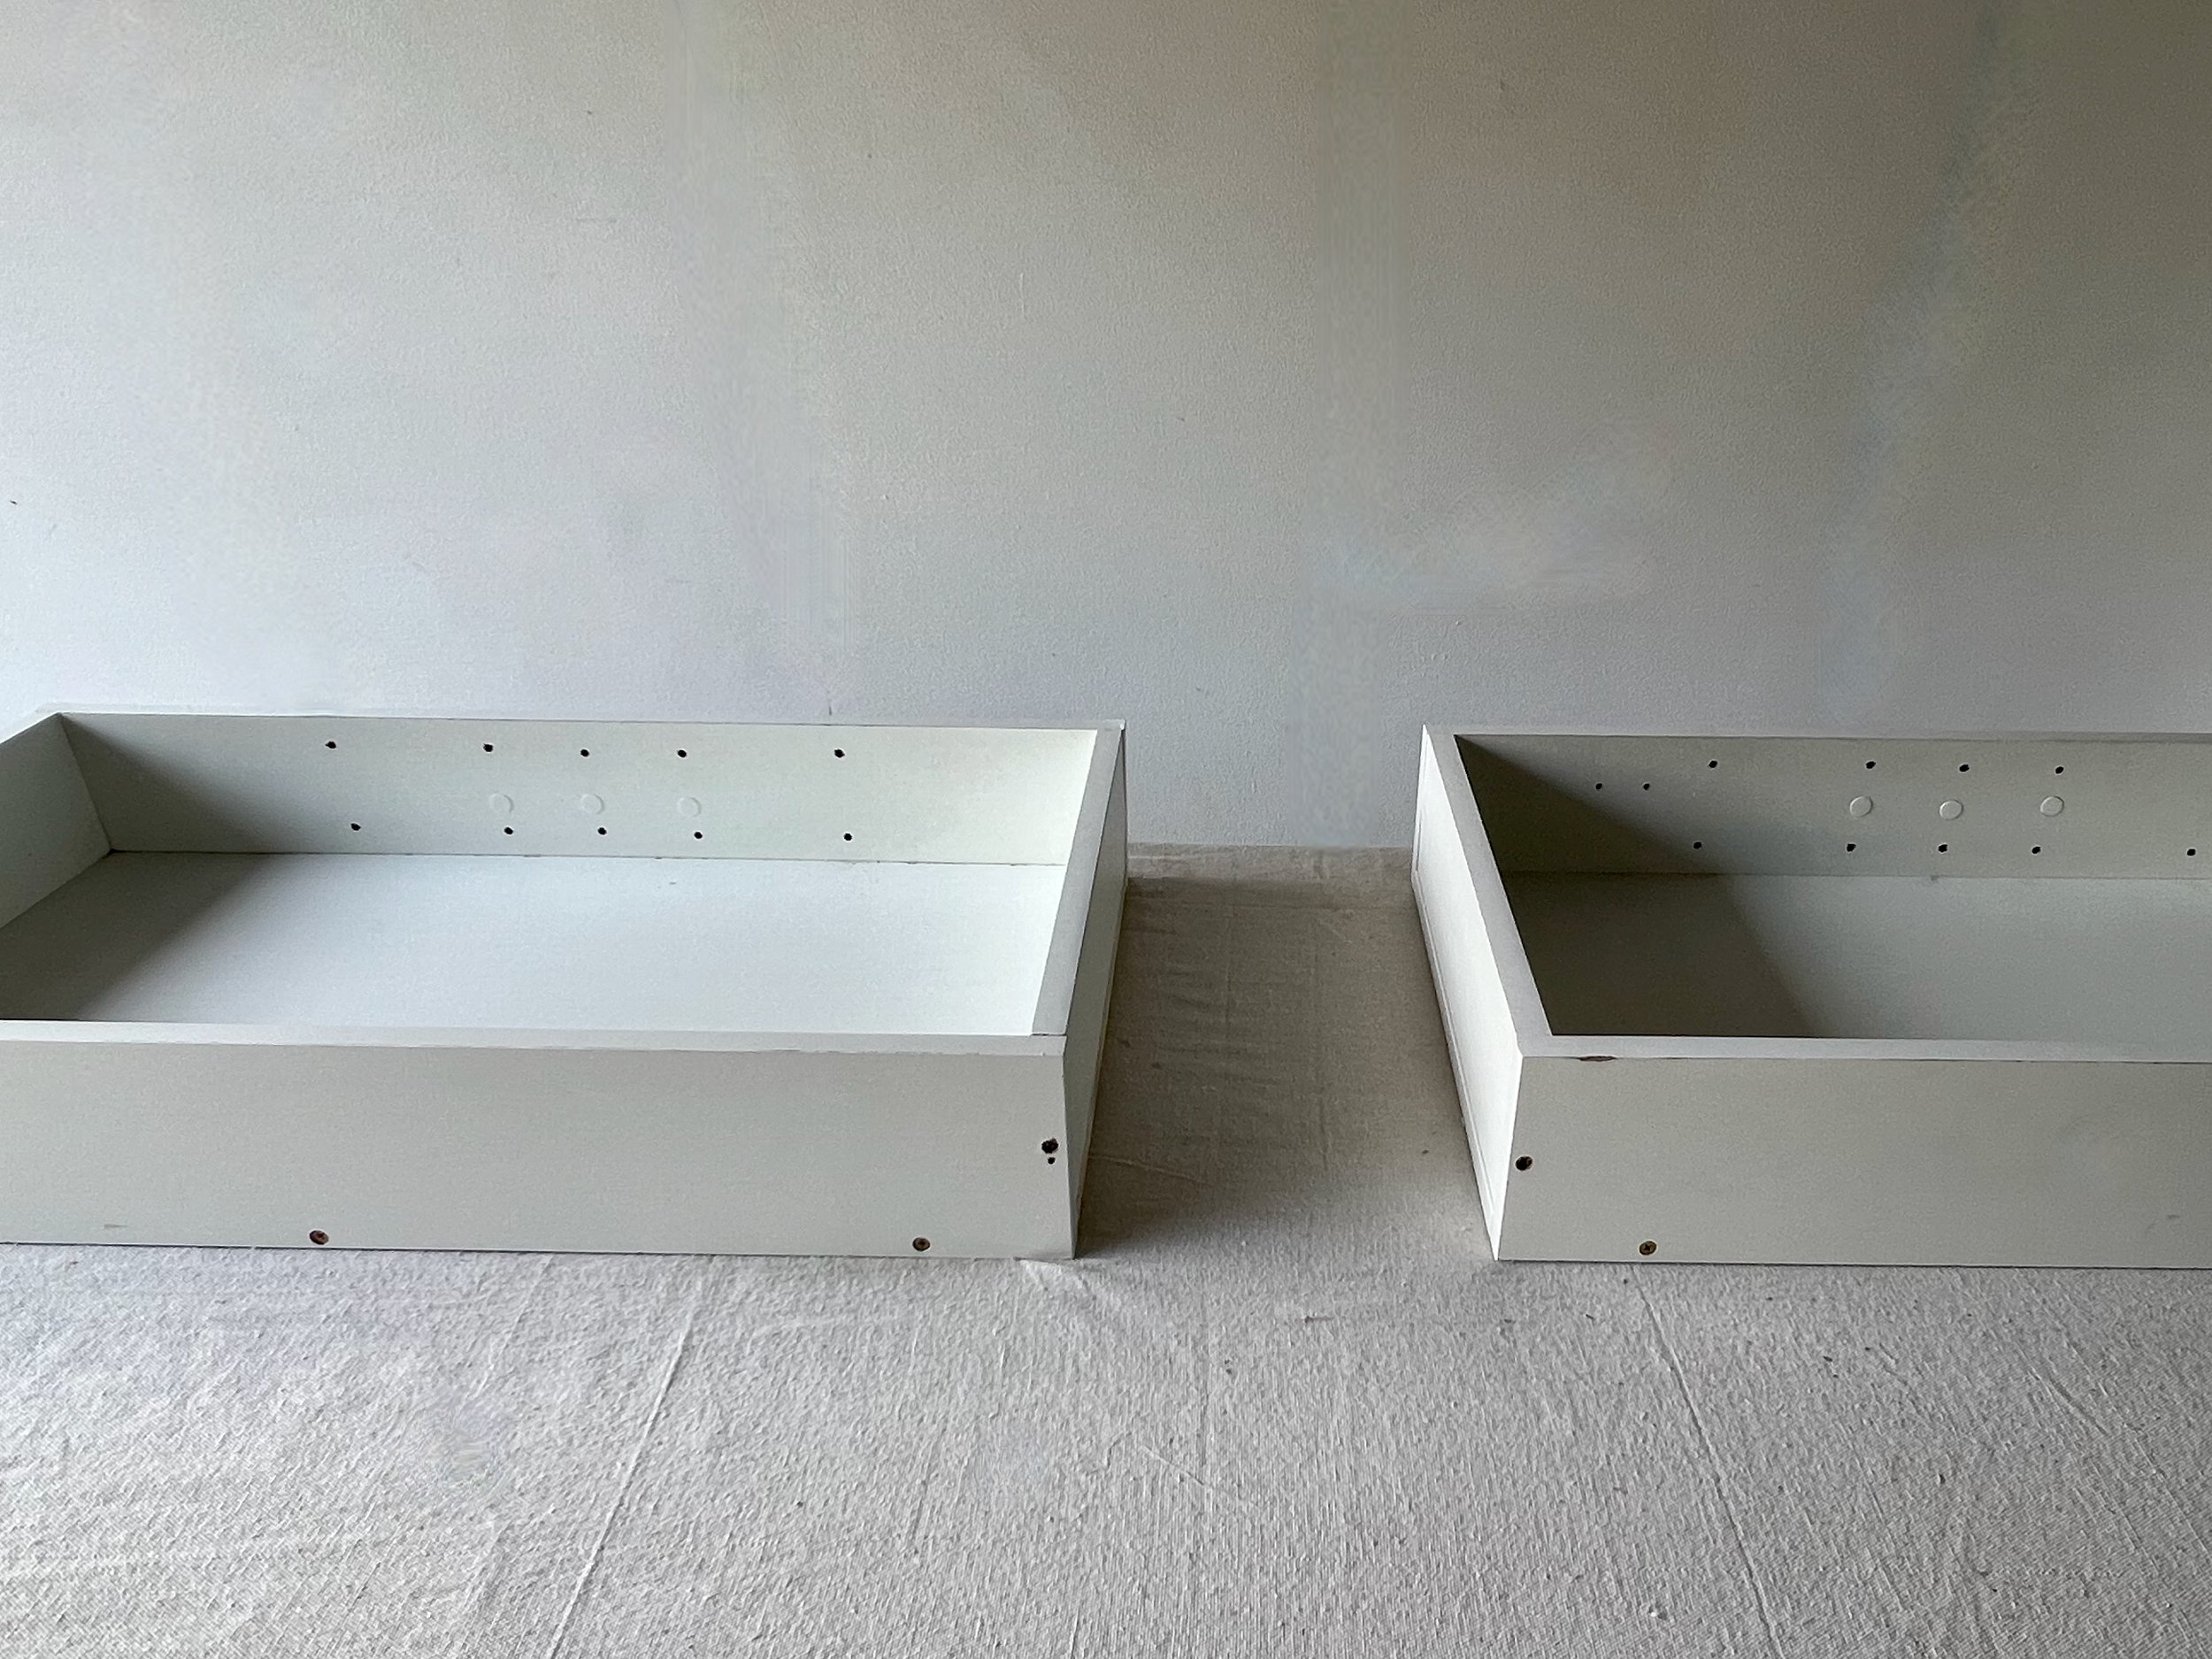
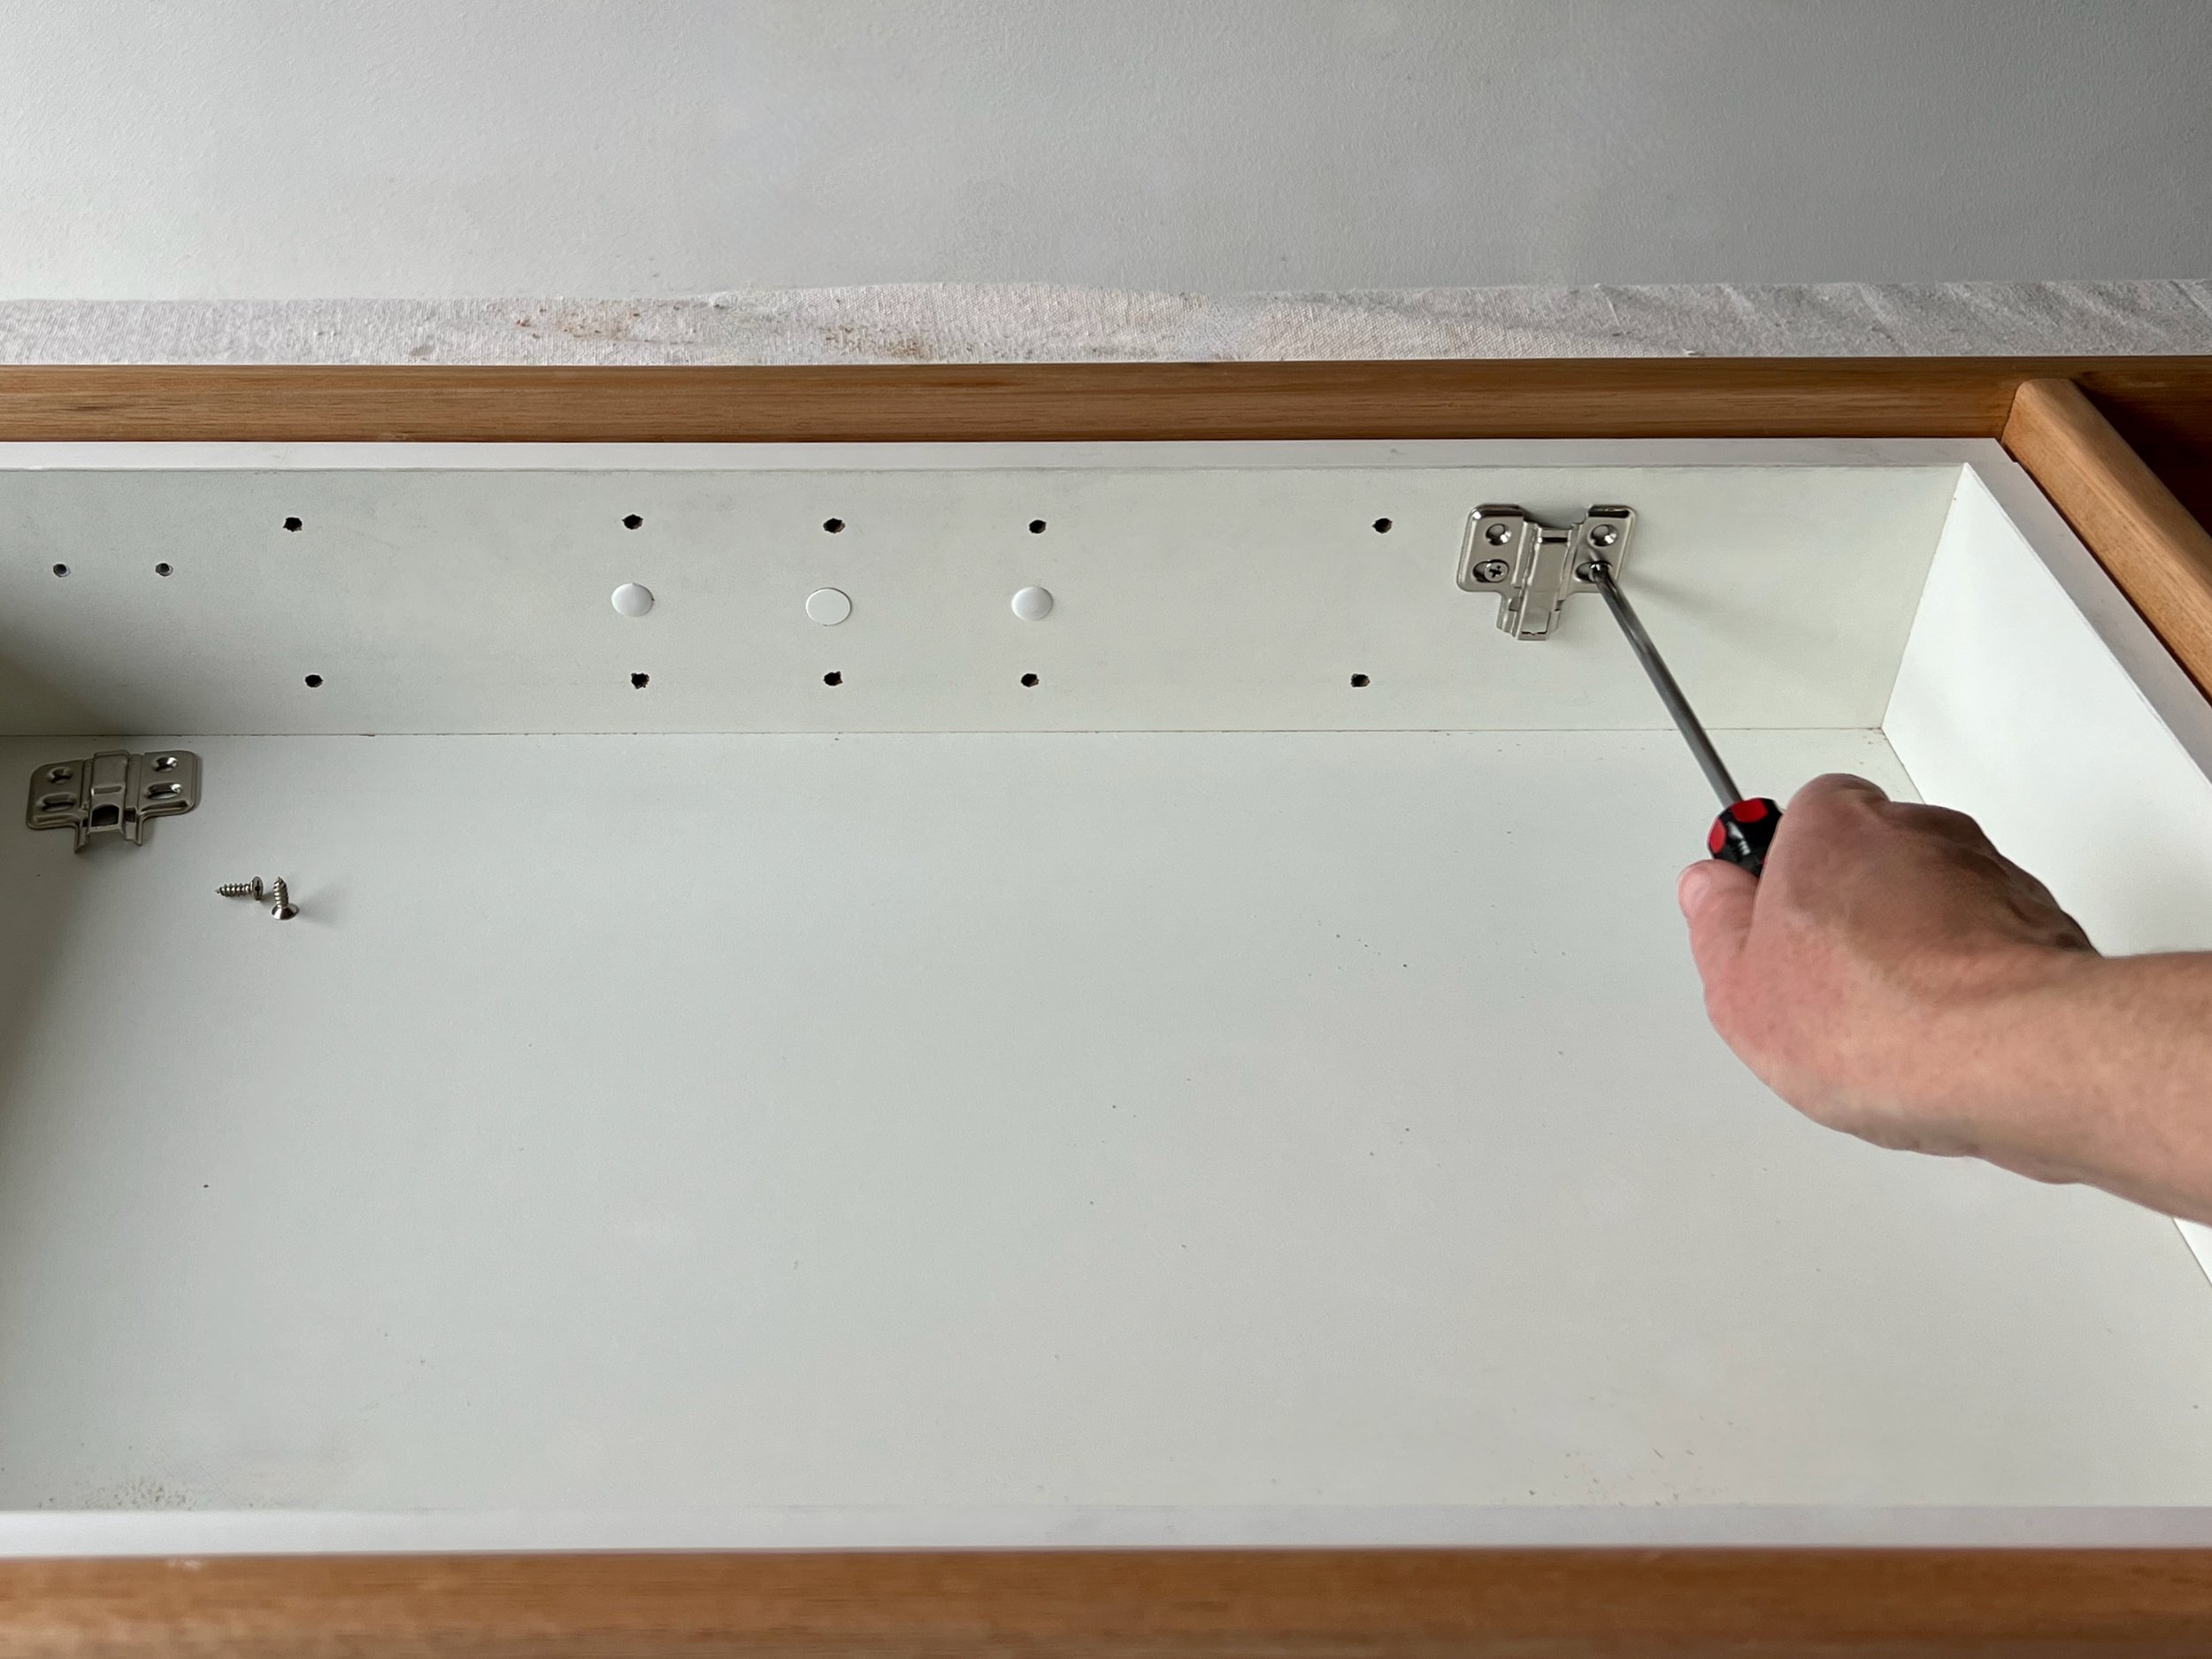
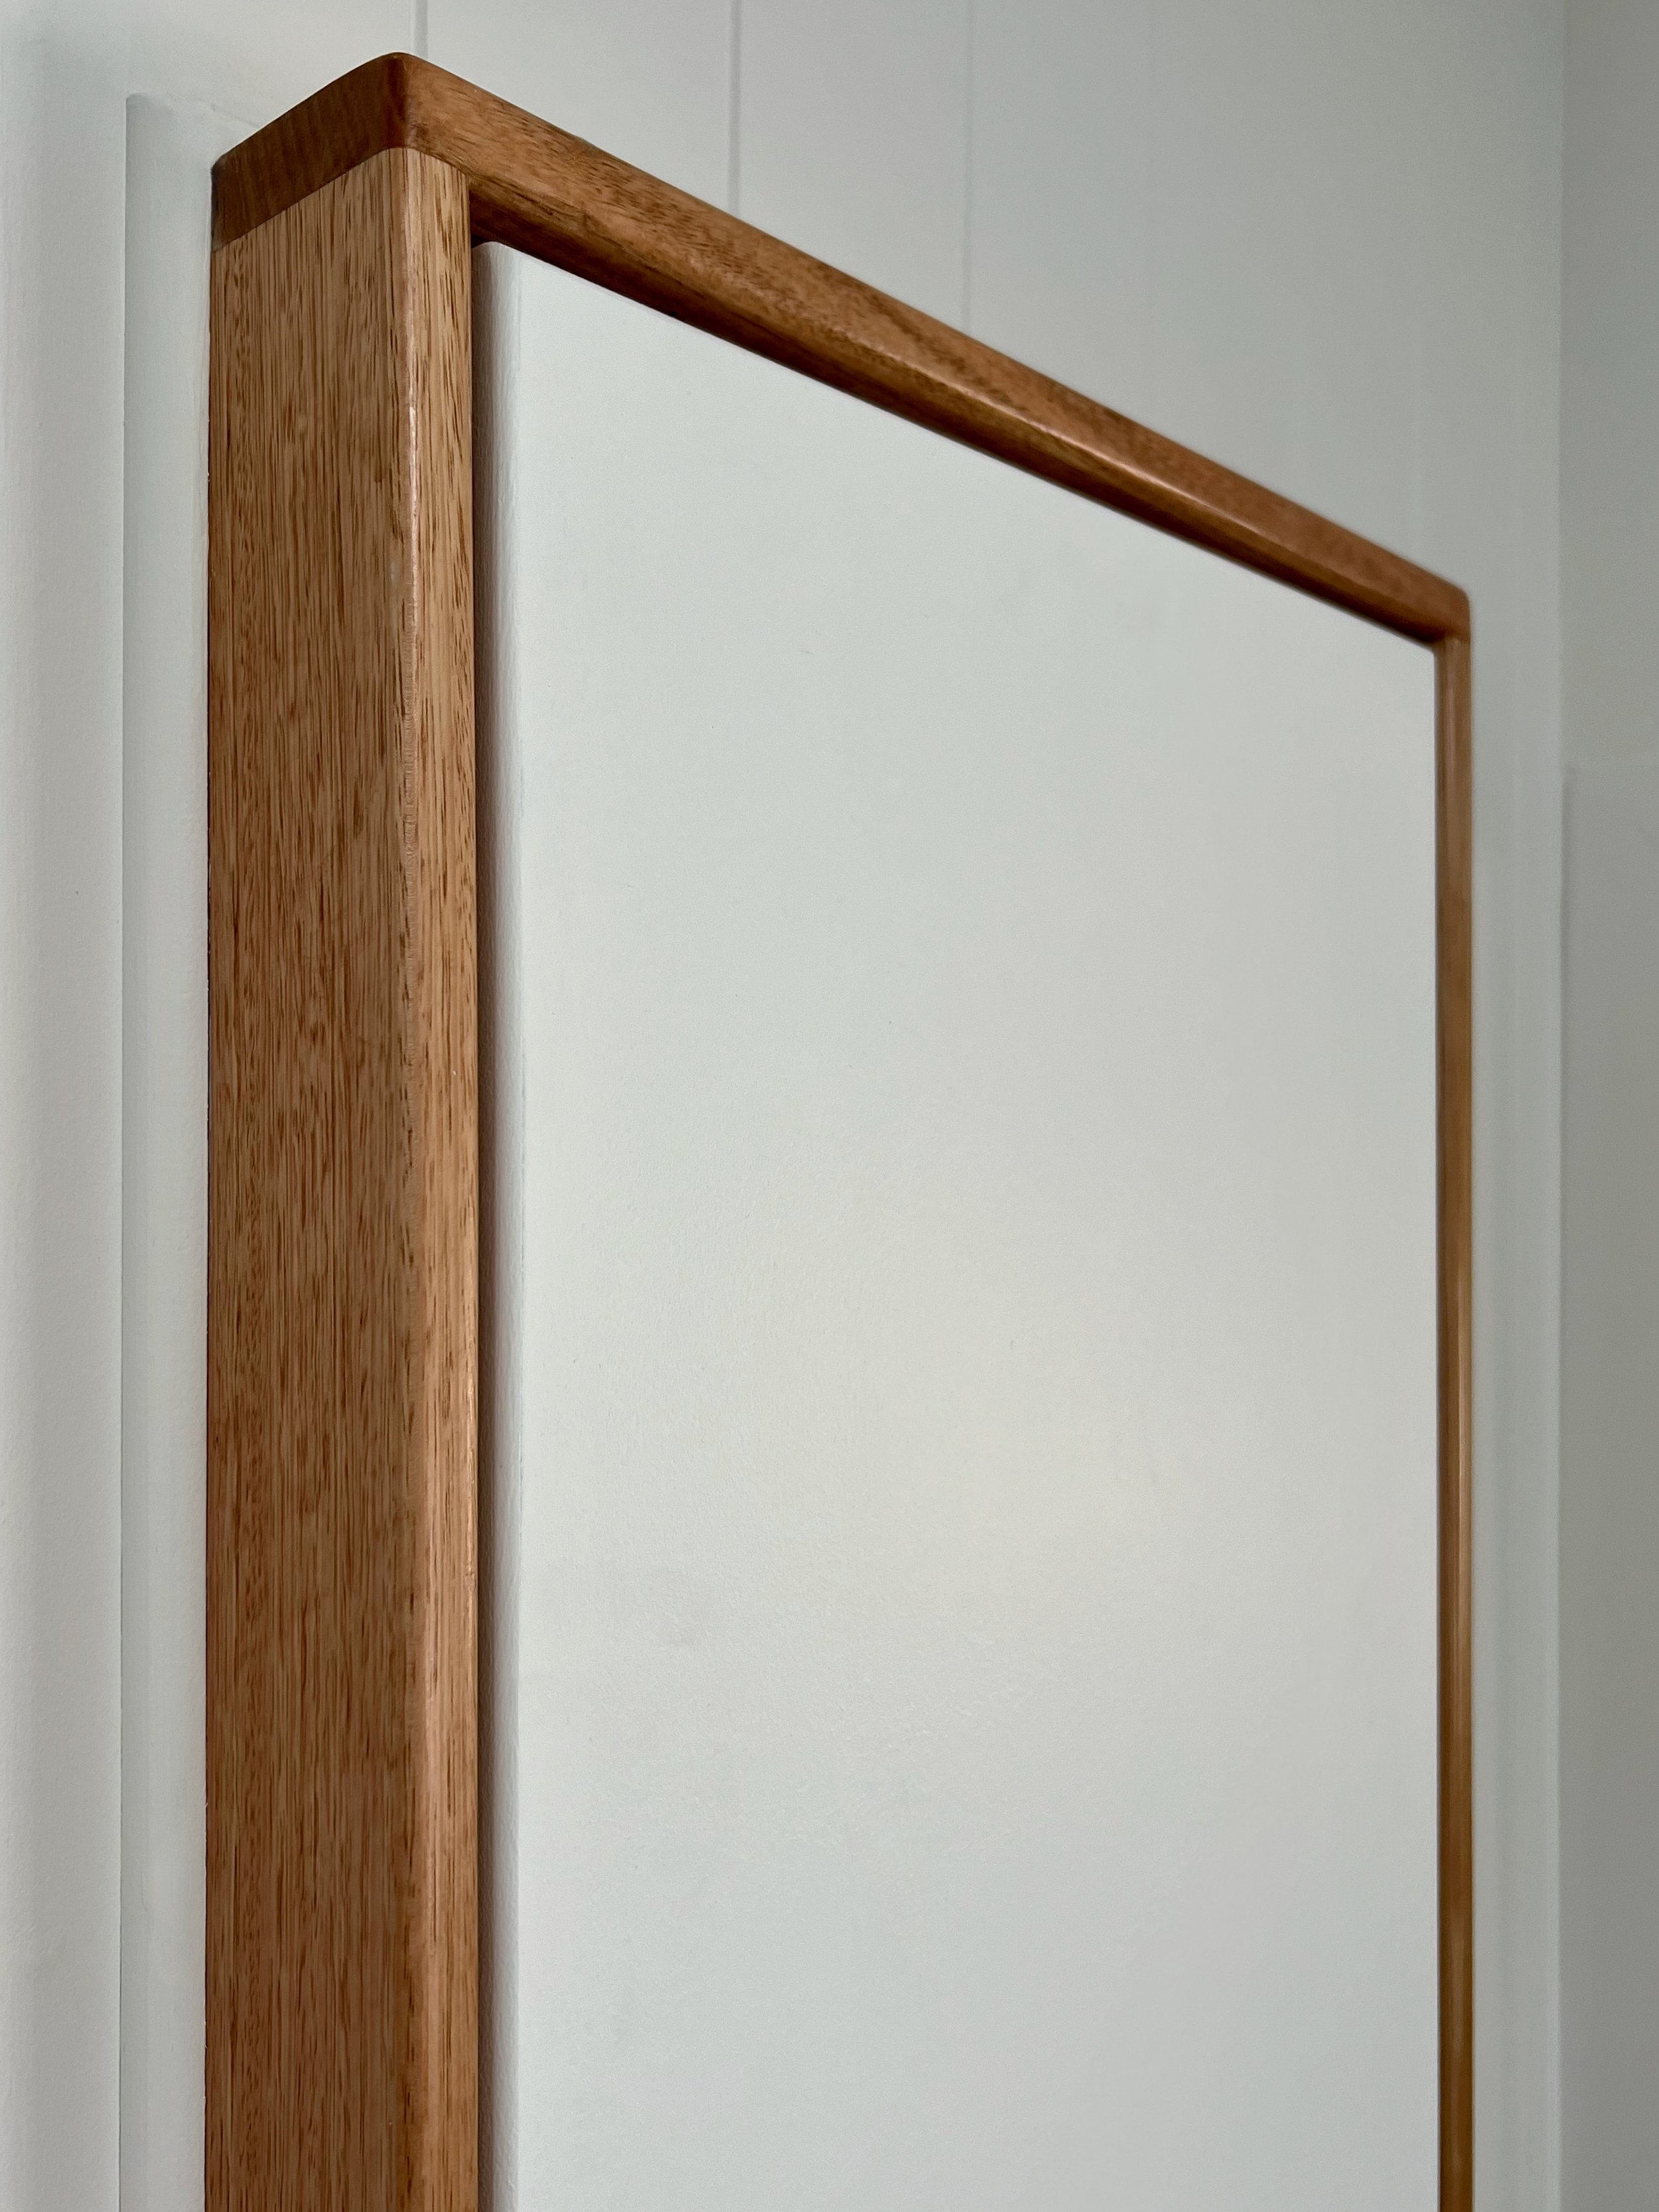
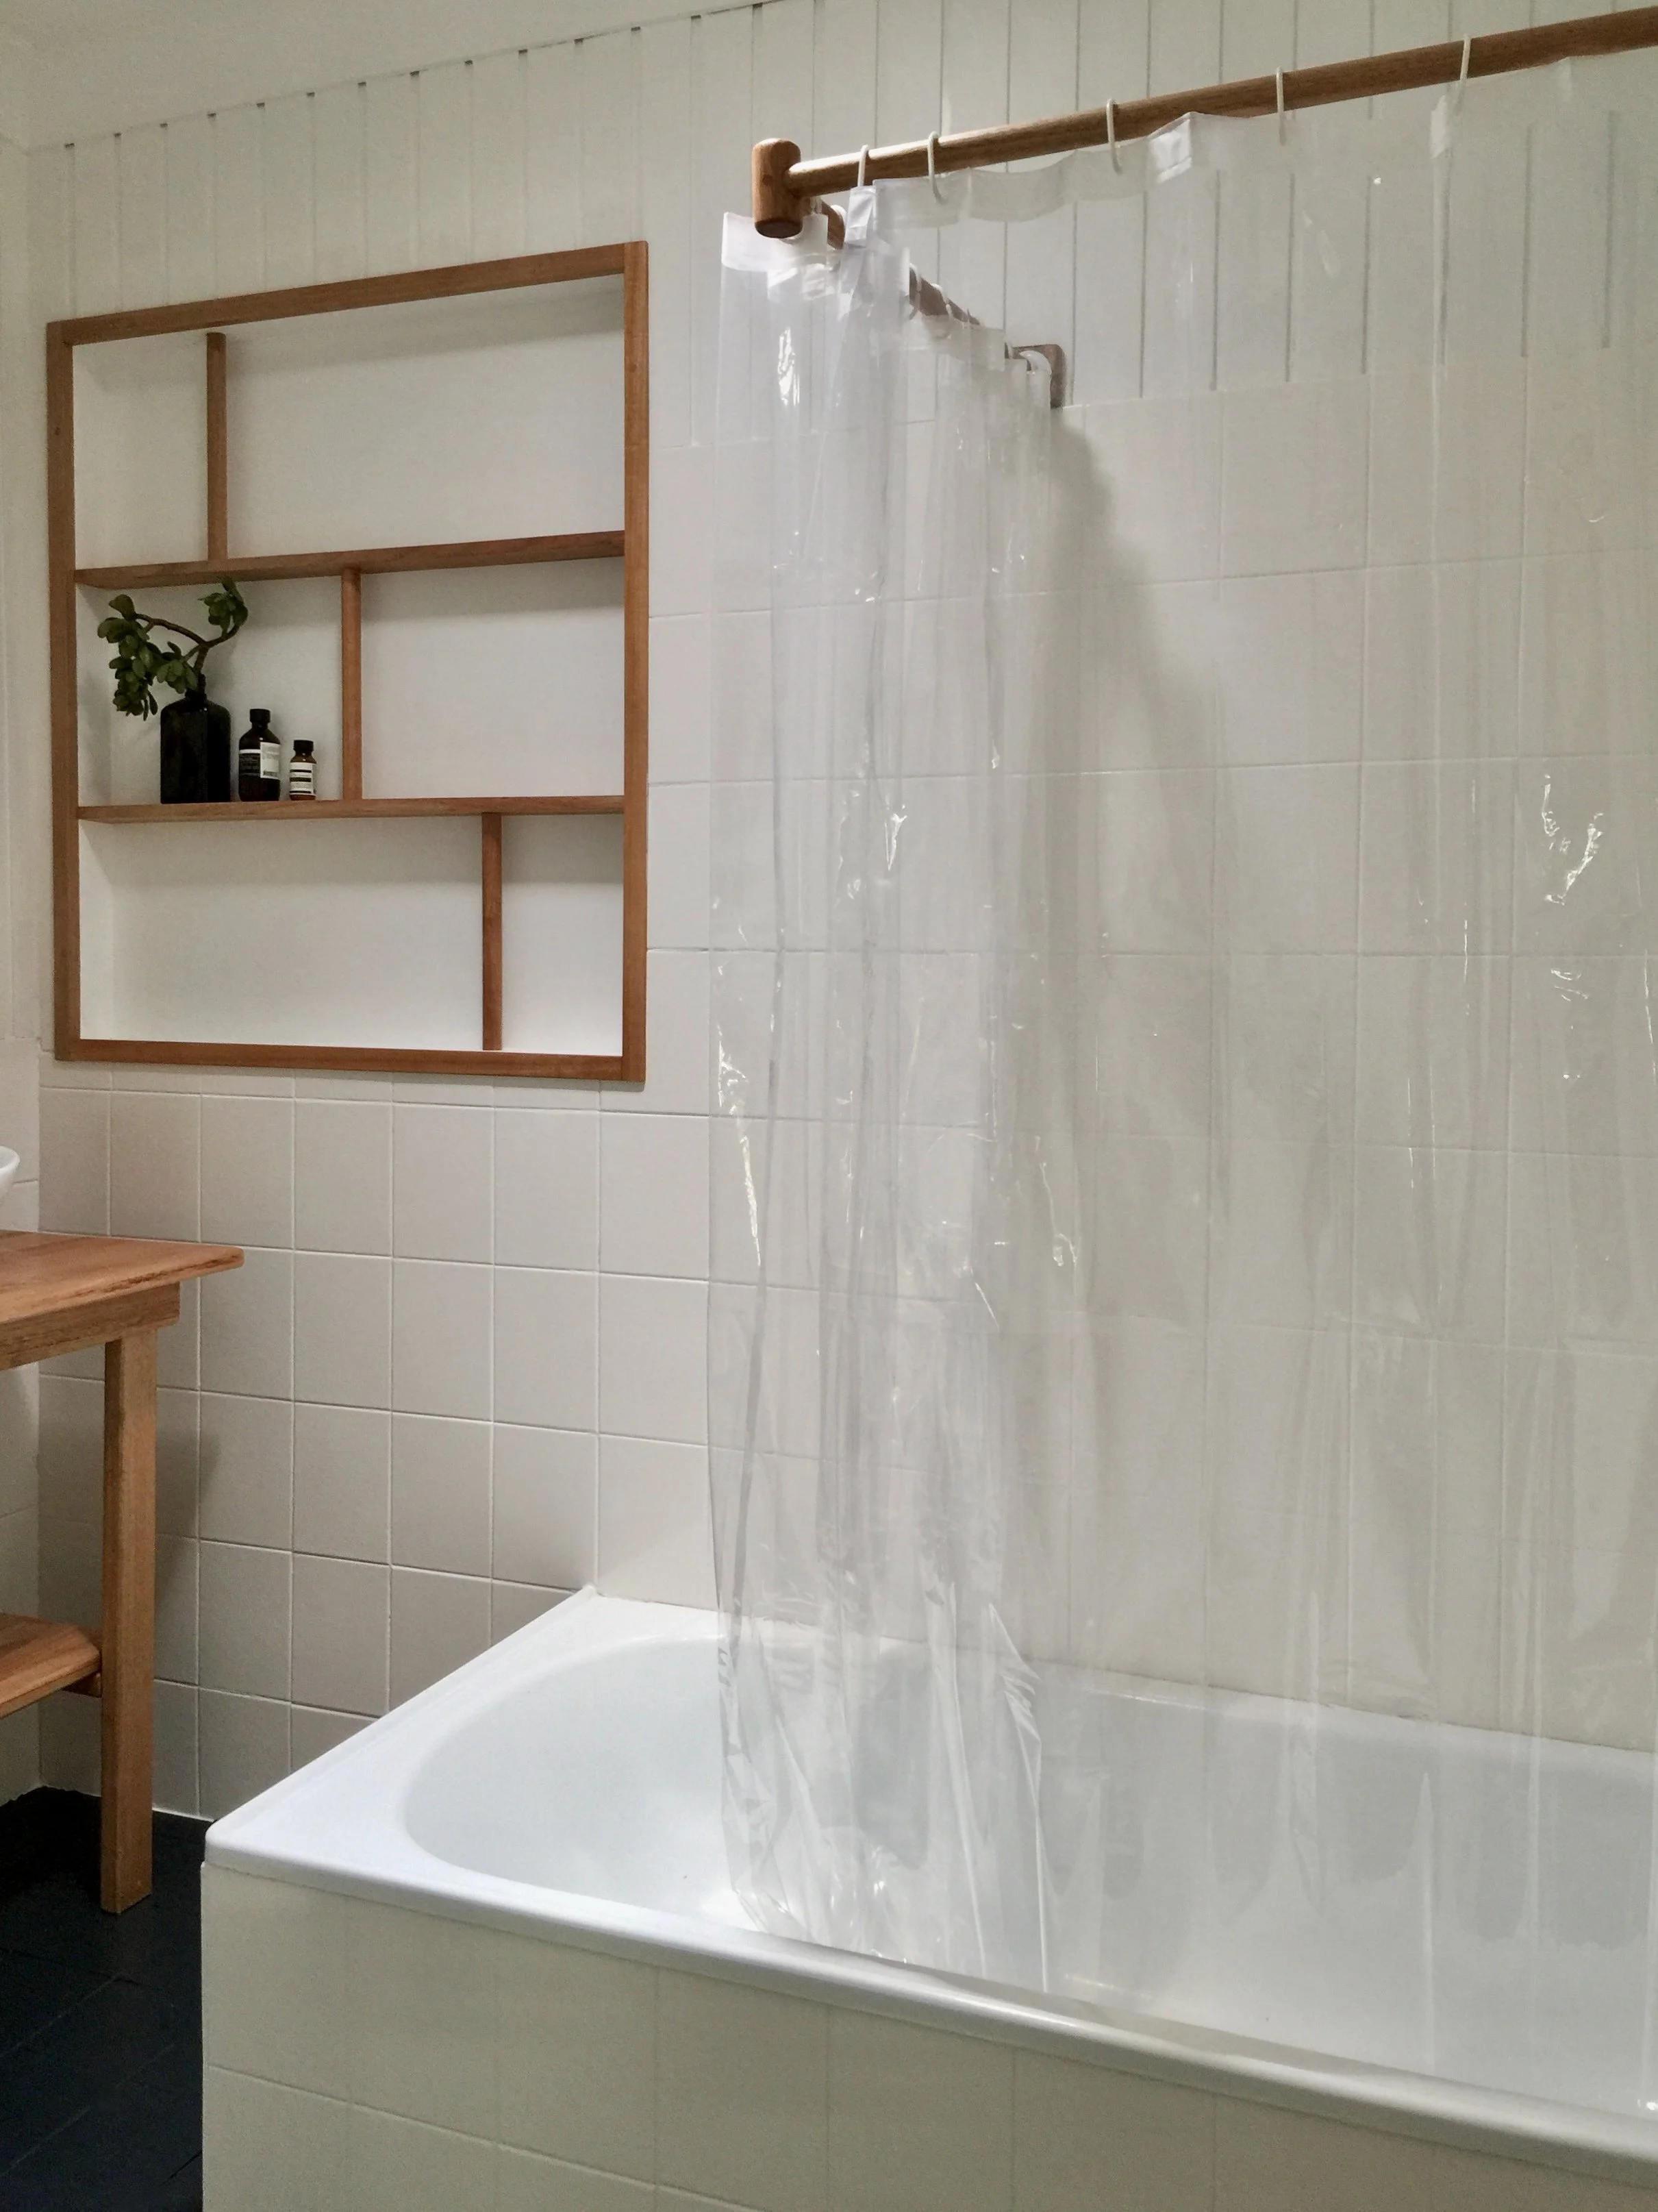
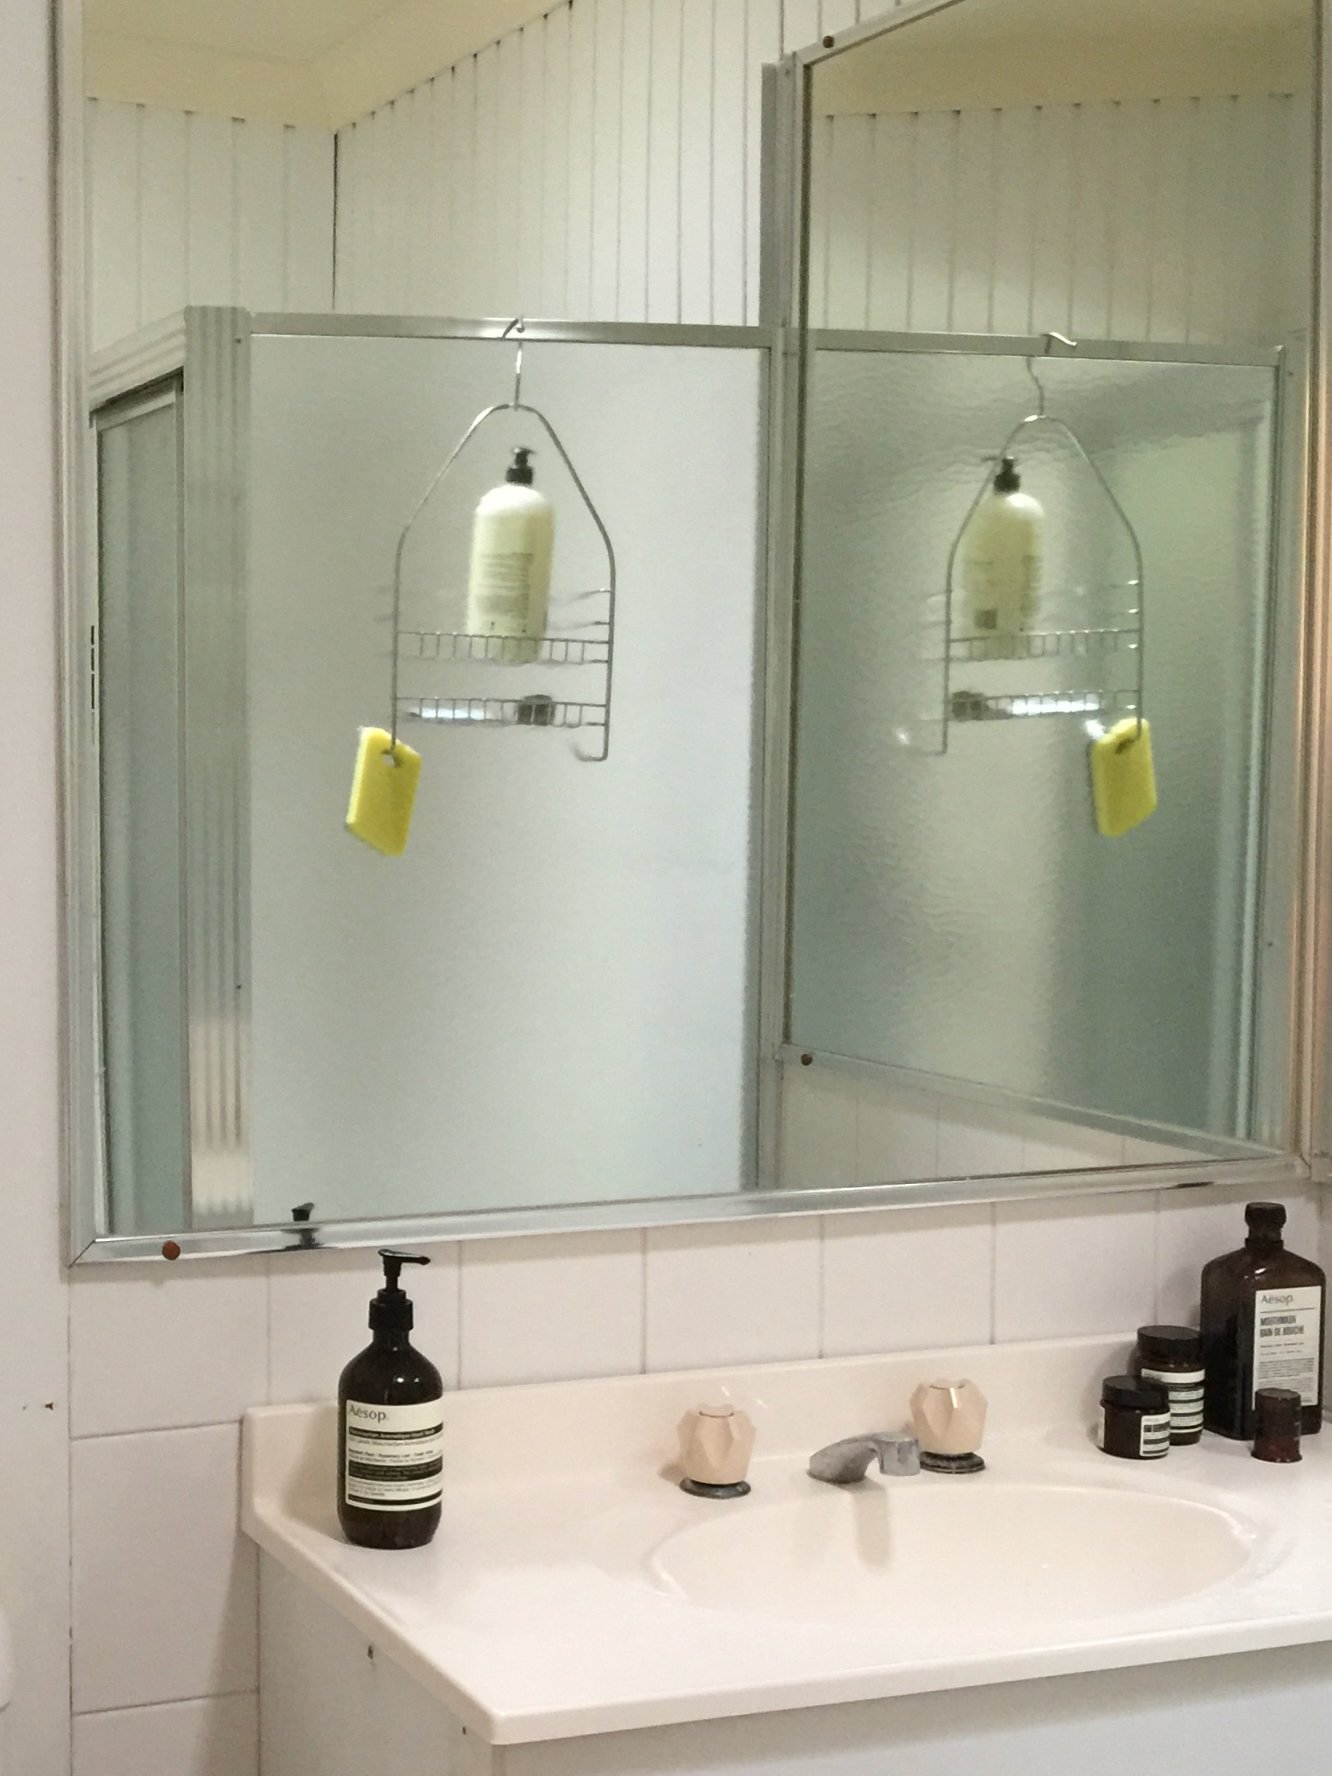
SHAVING CABINET HACK

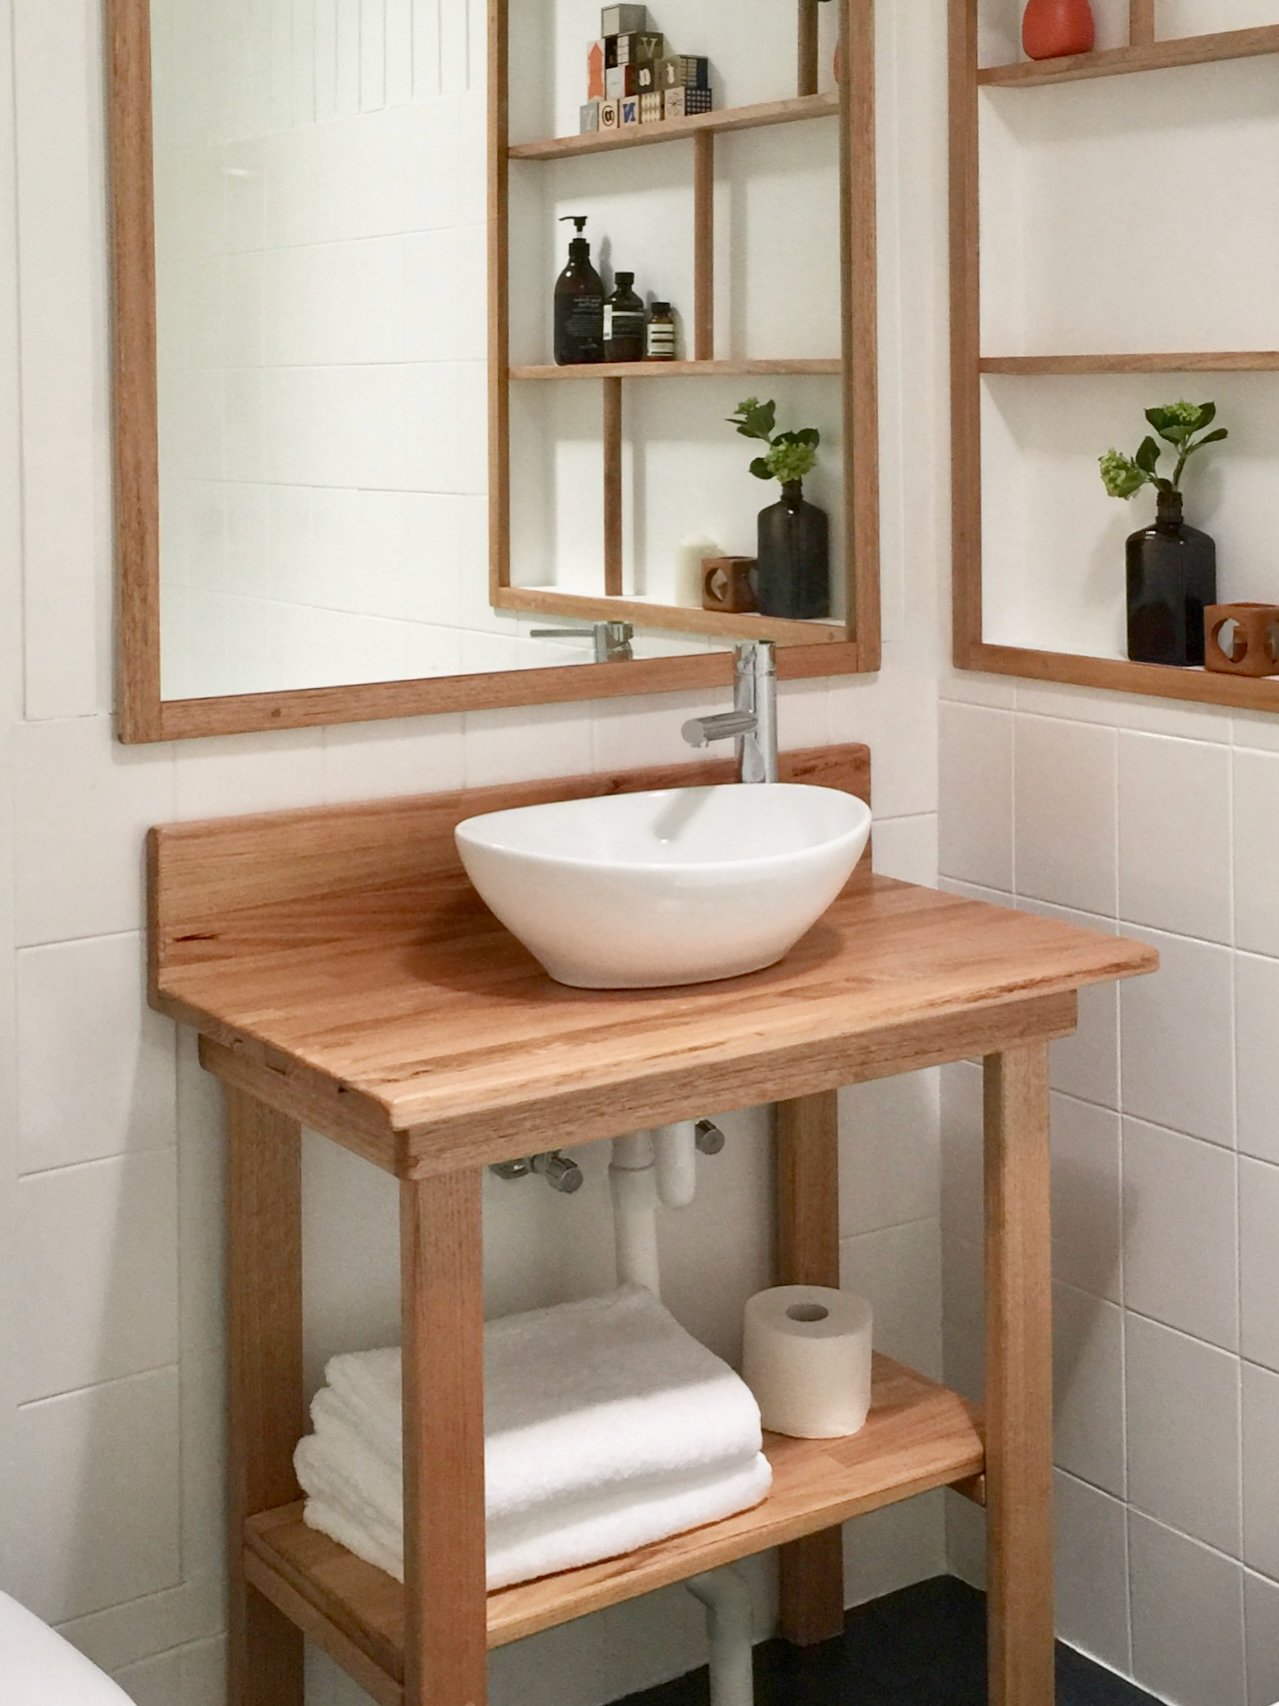
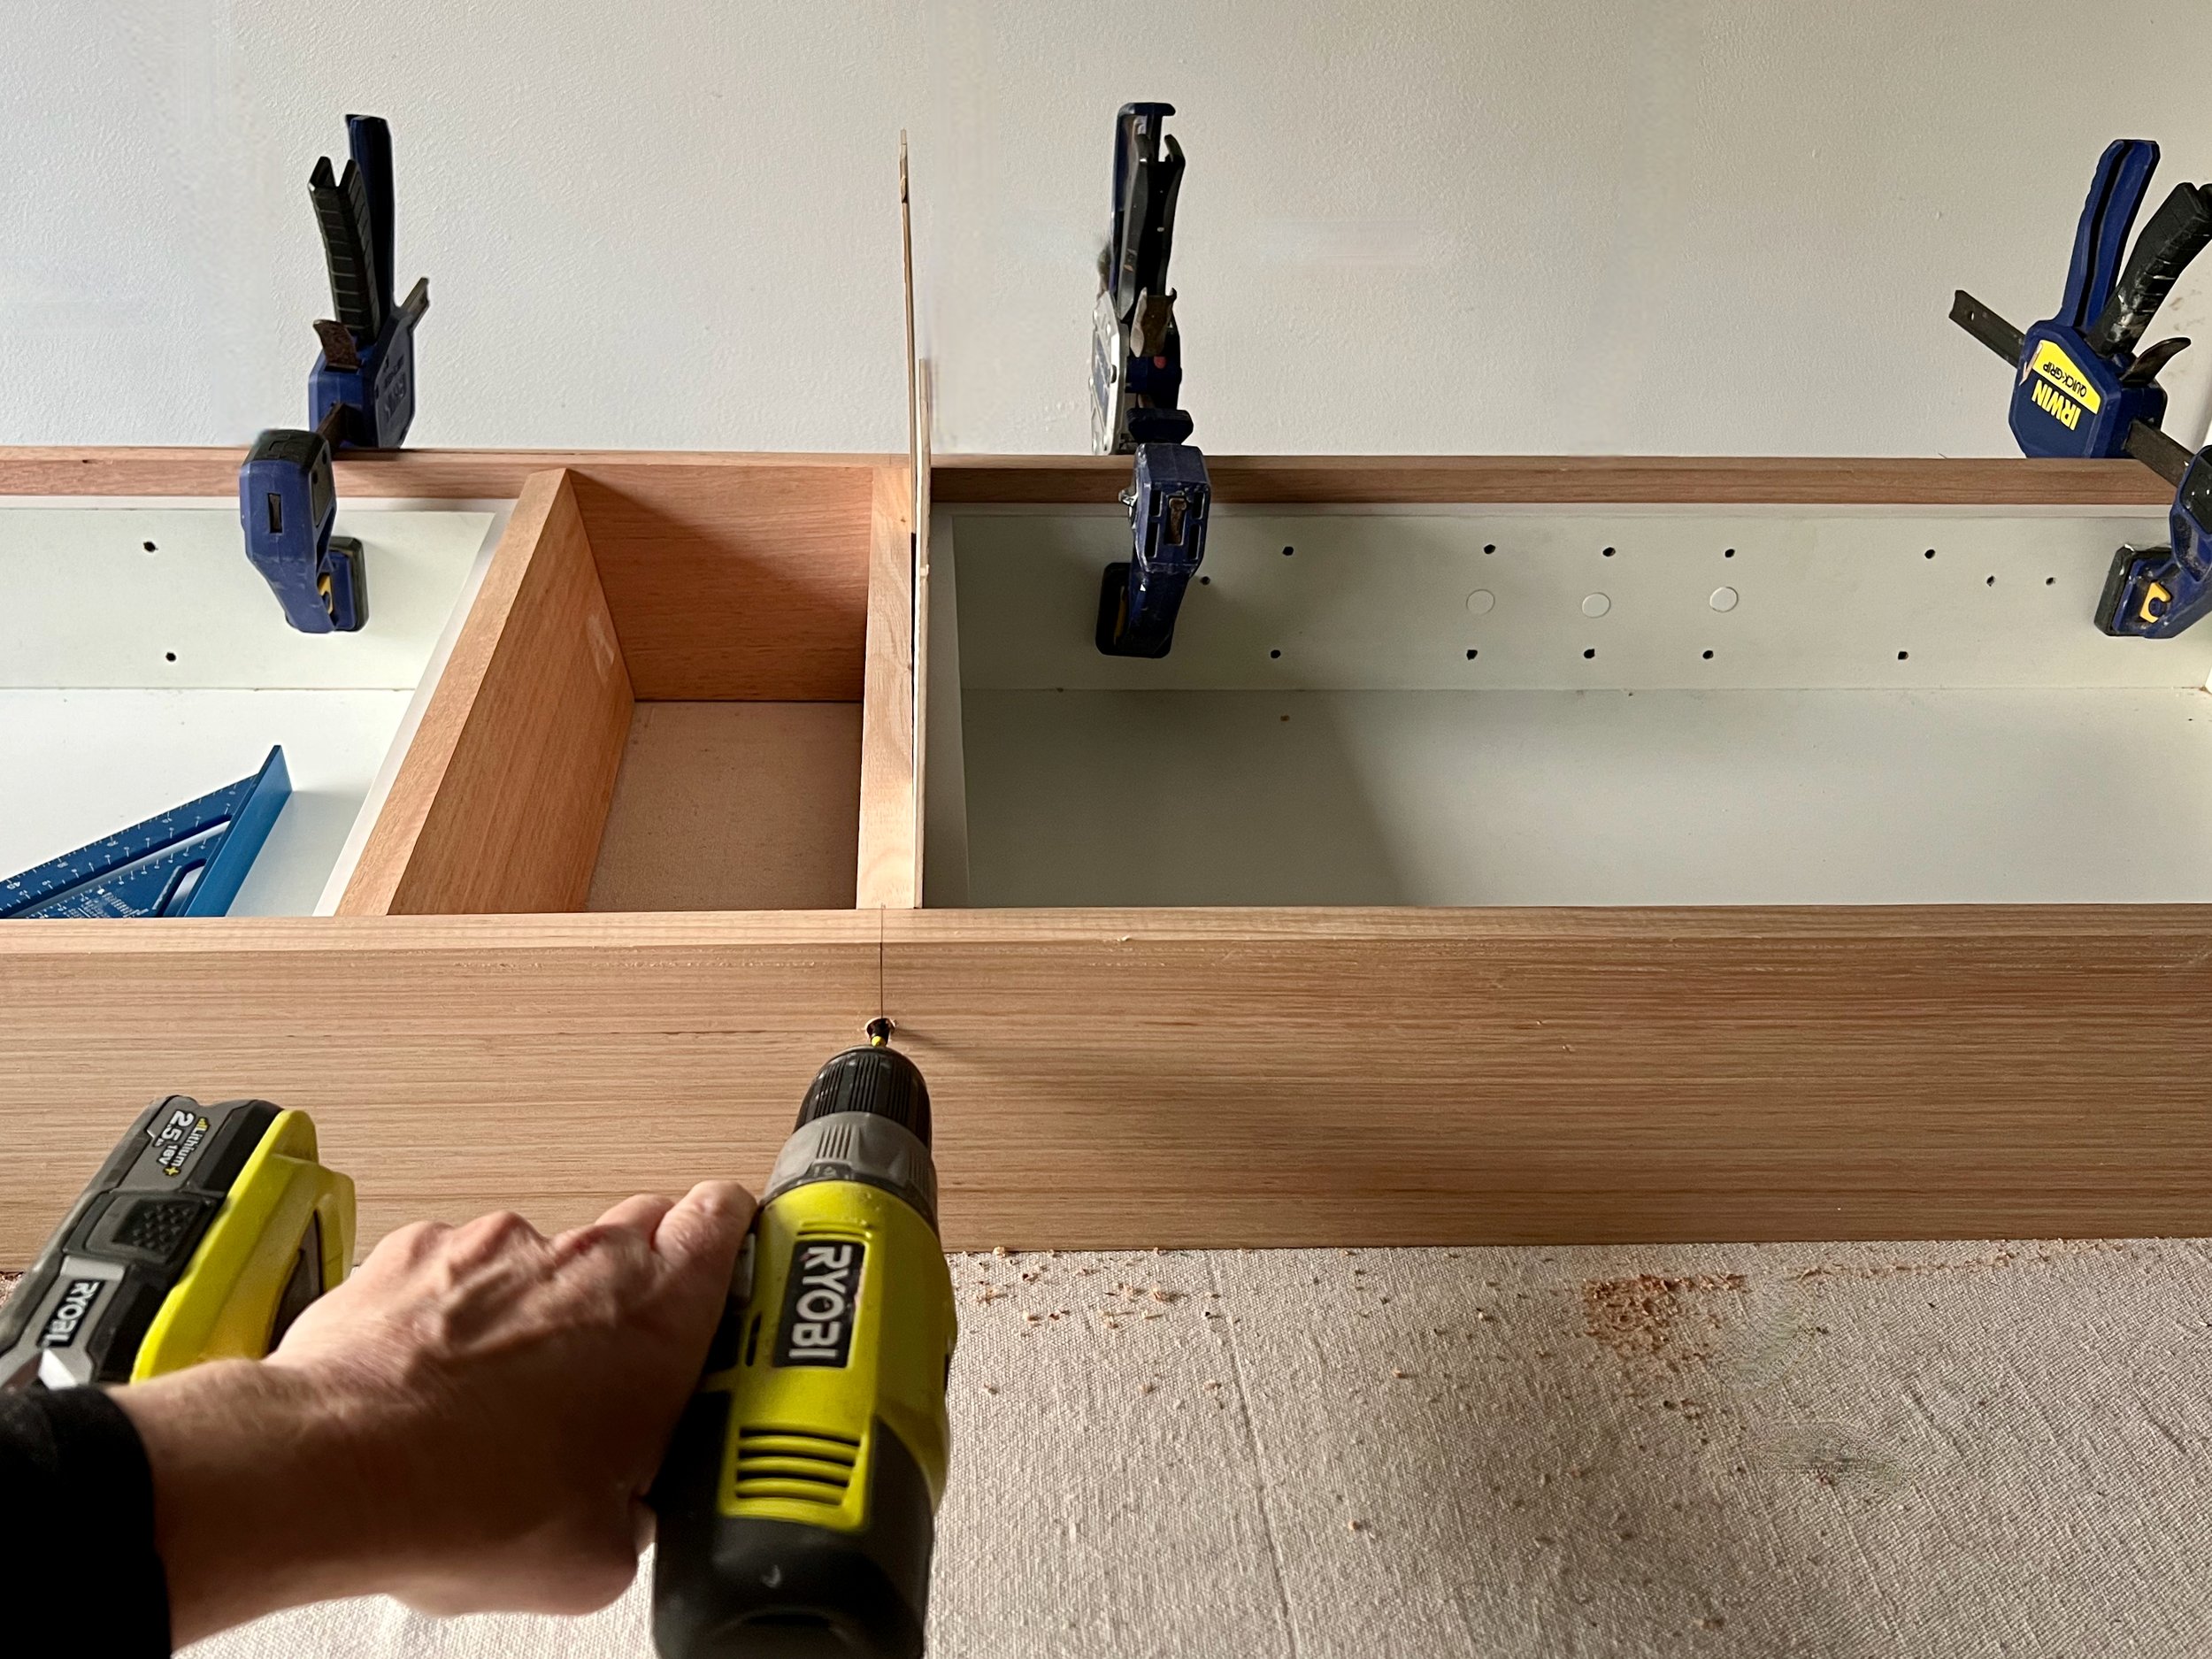
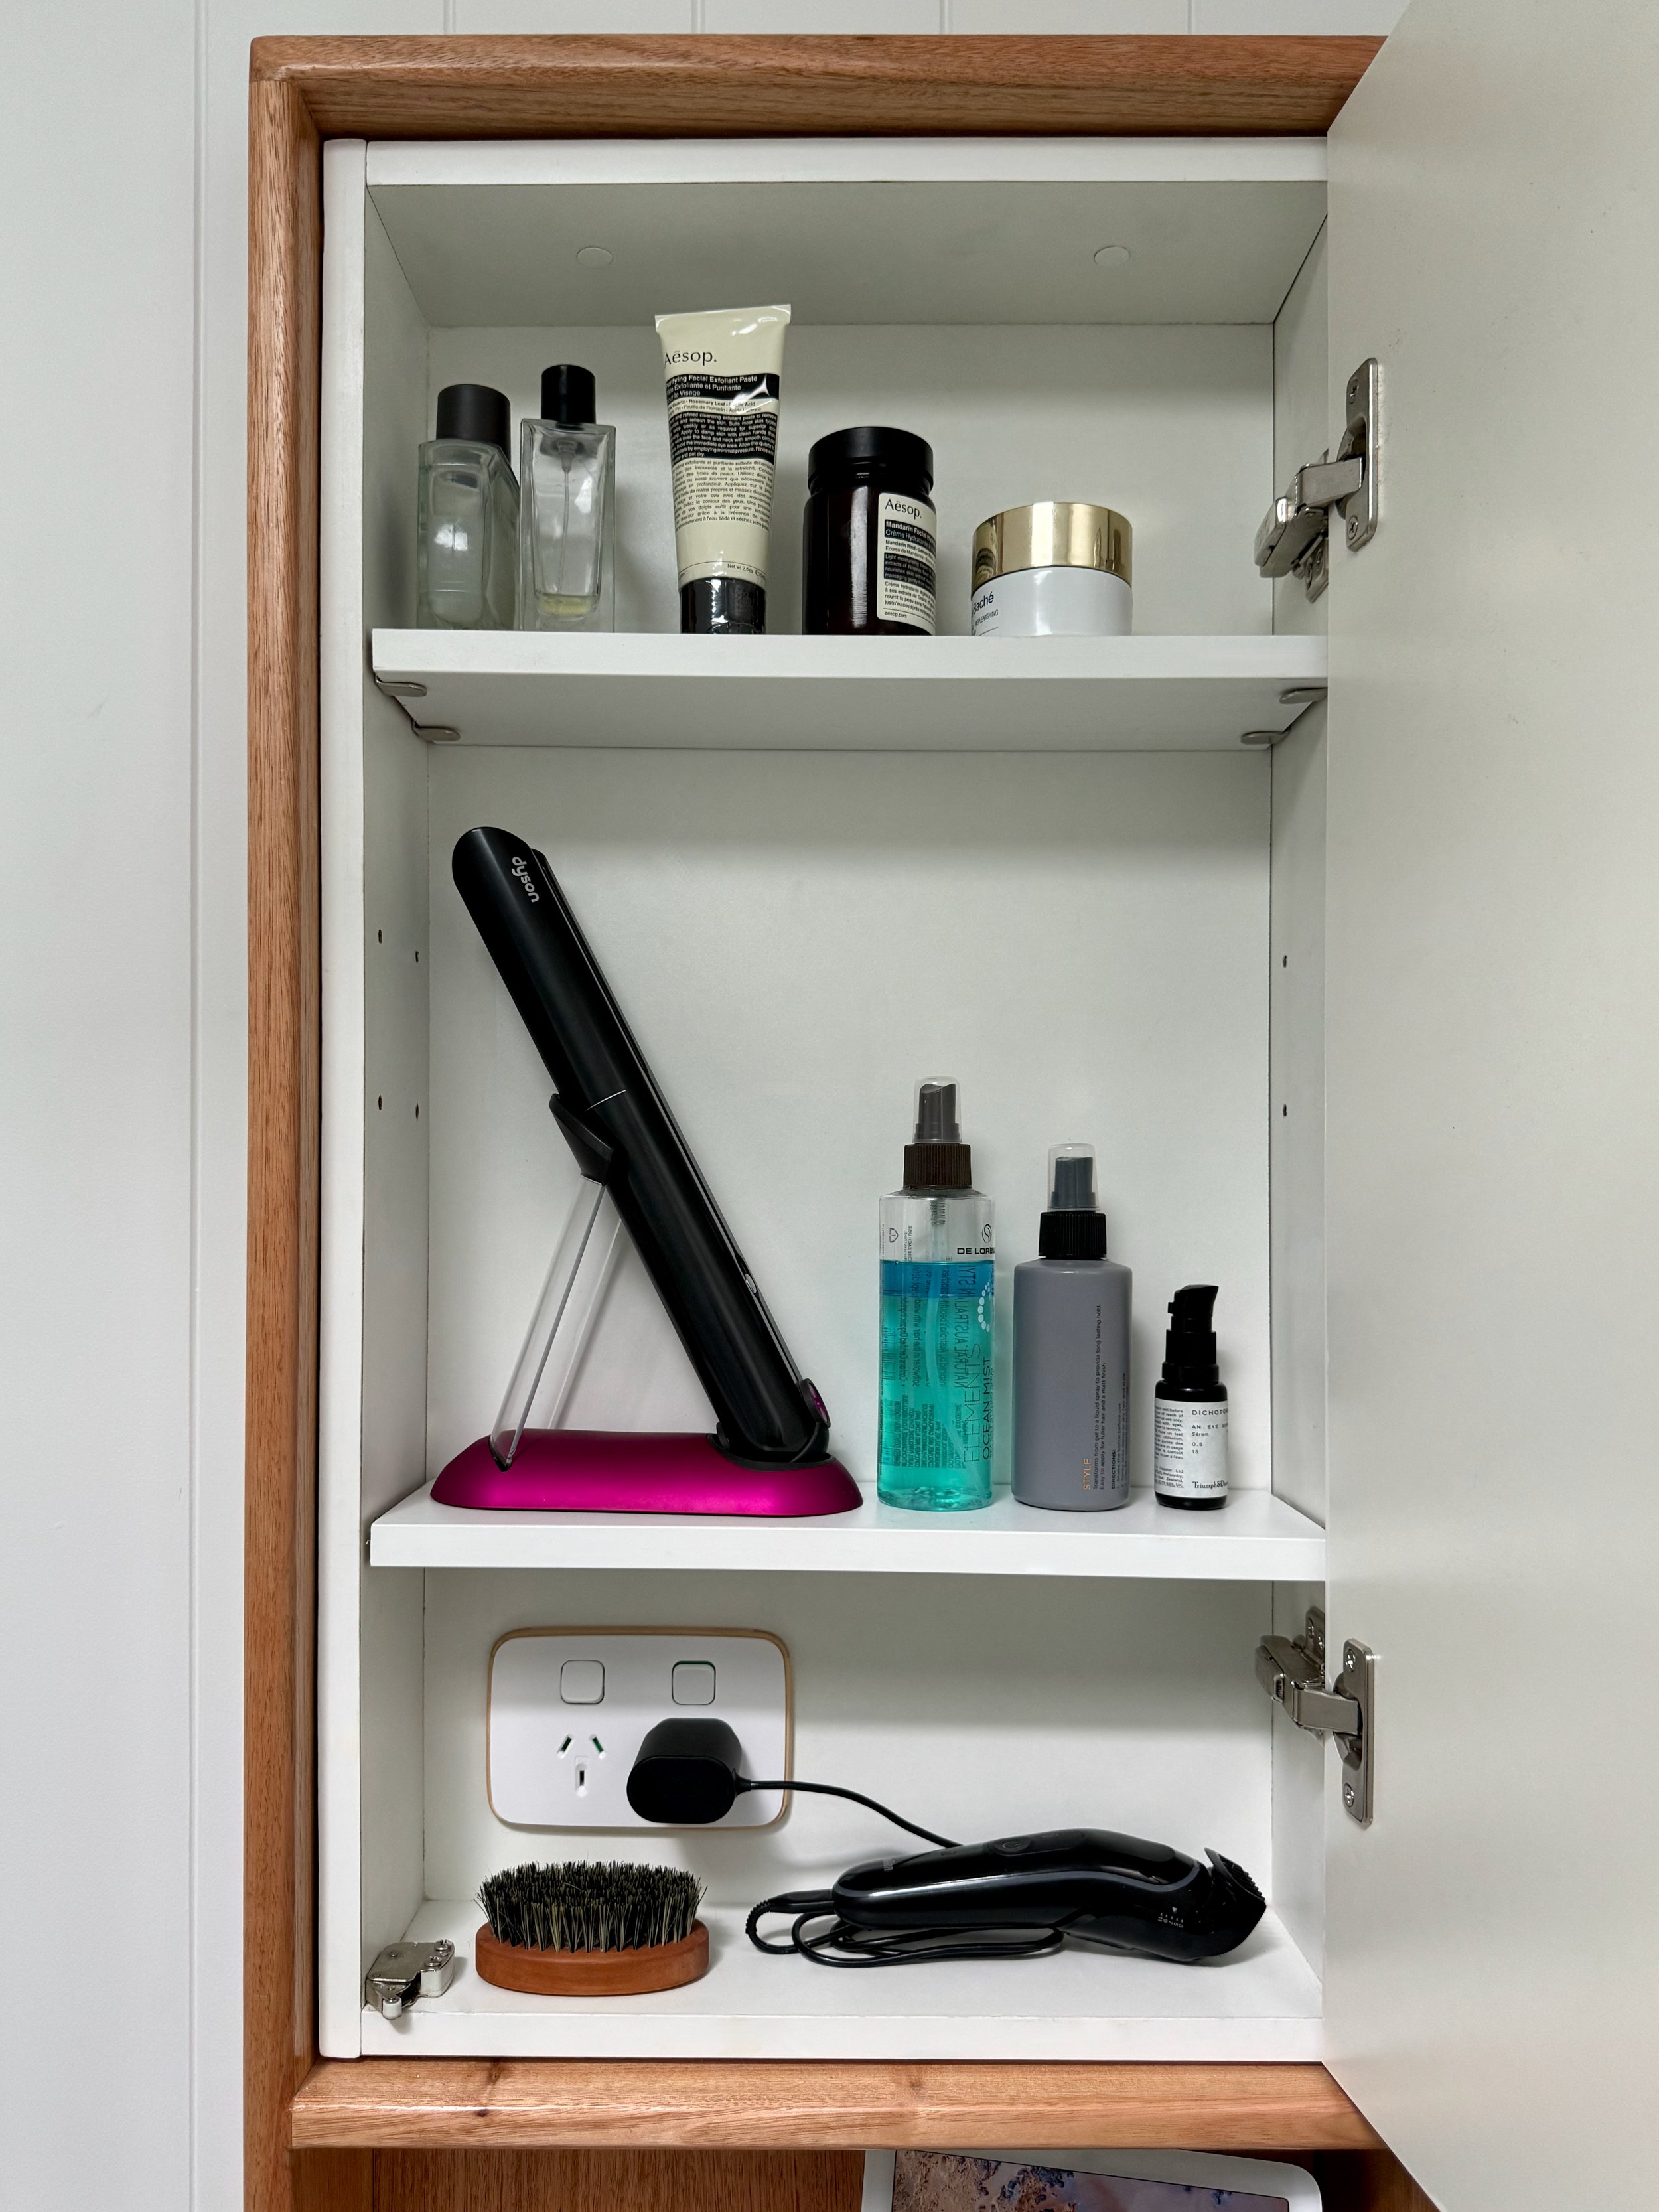
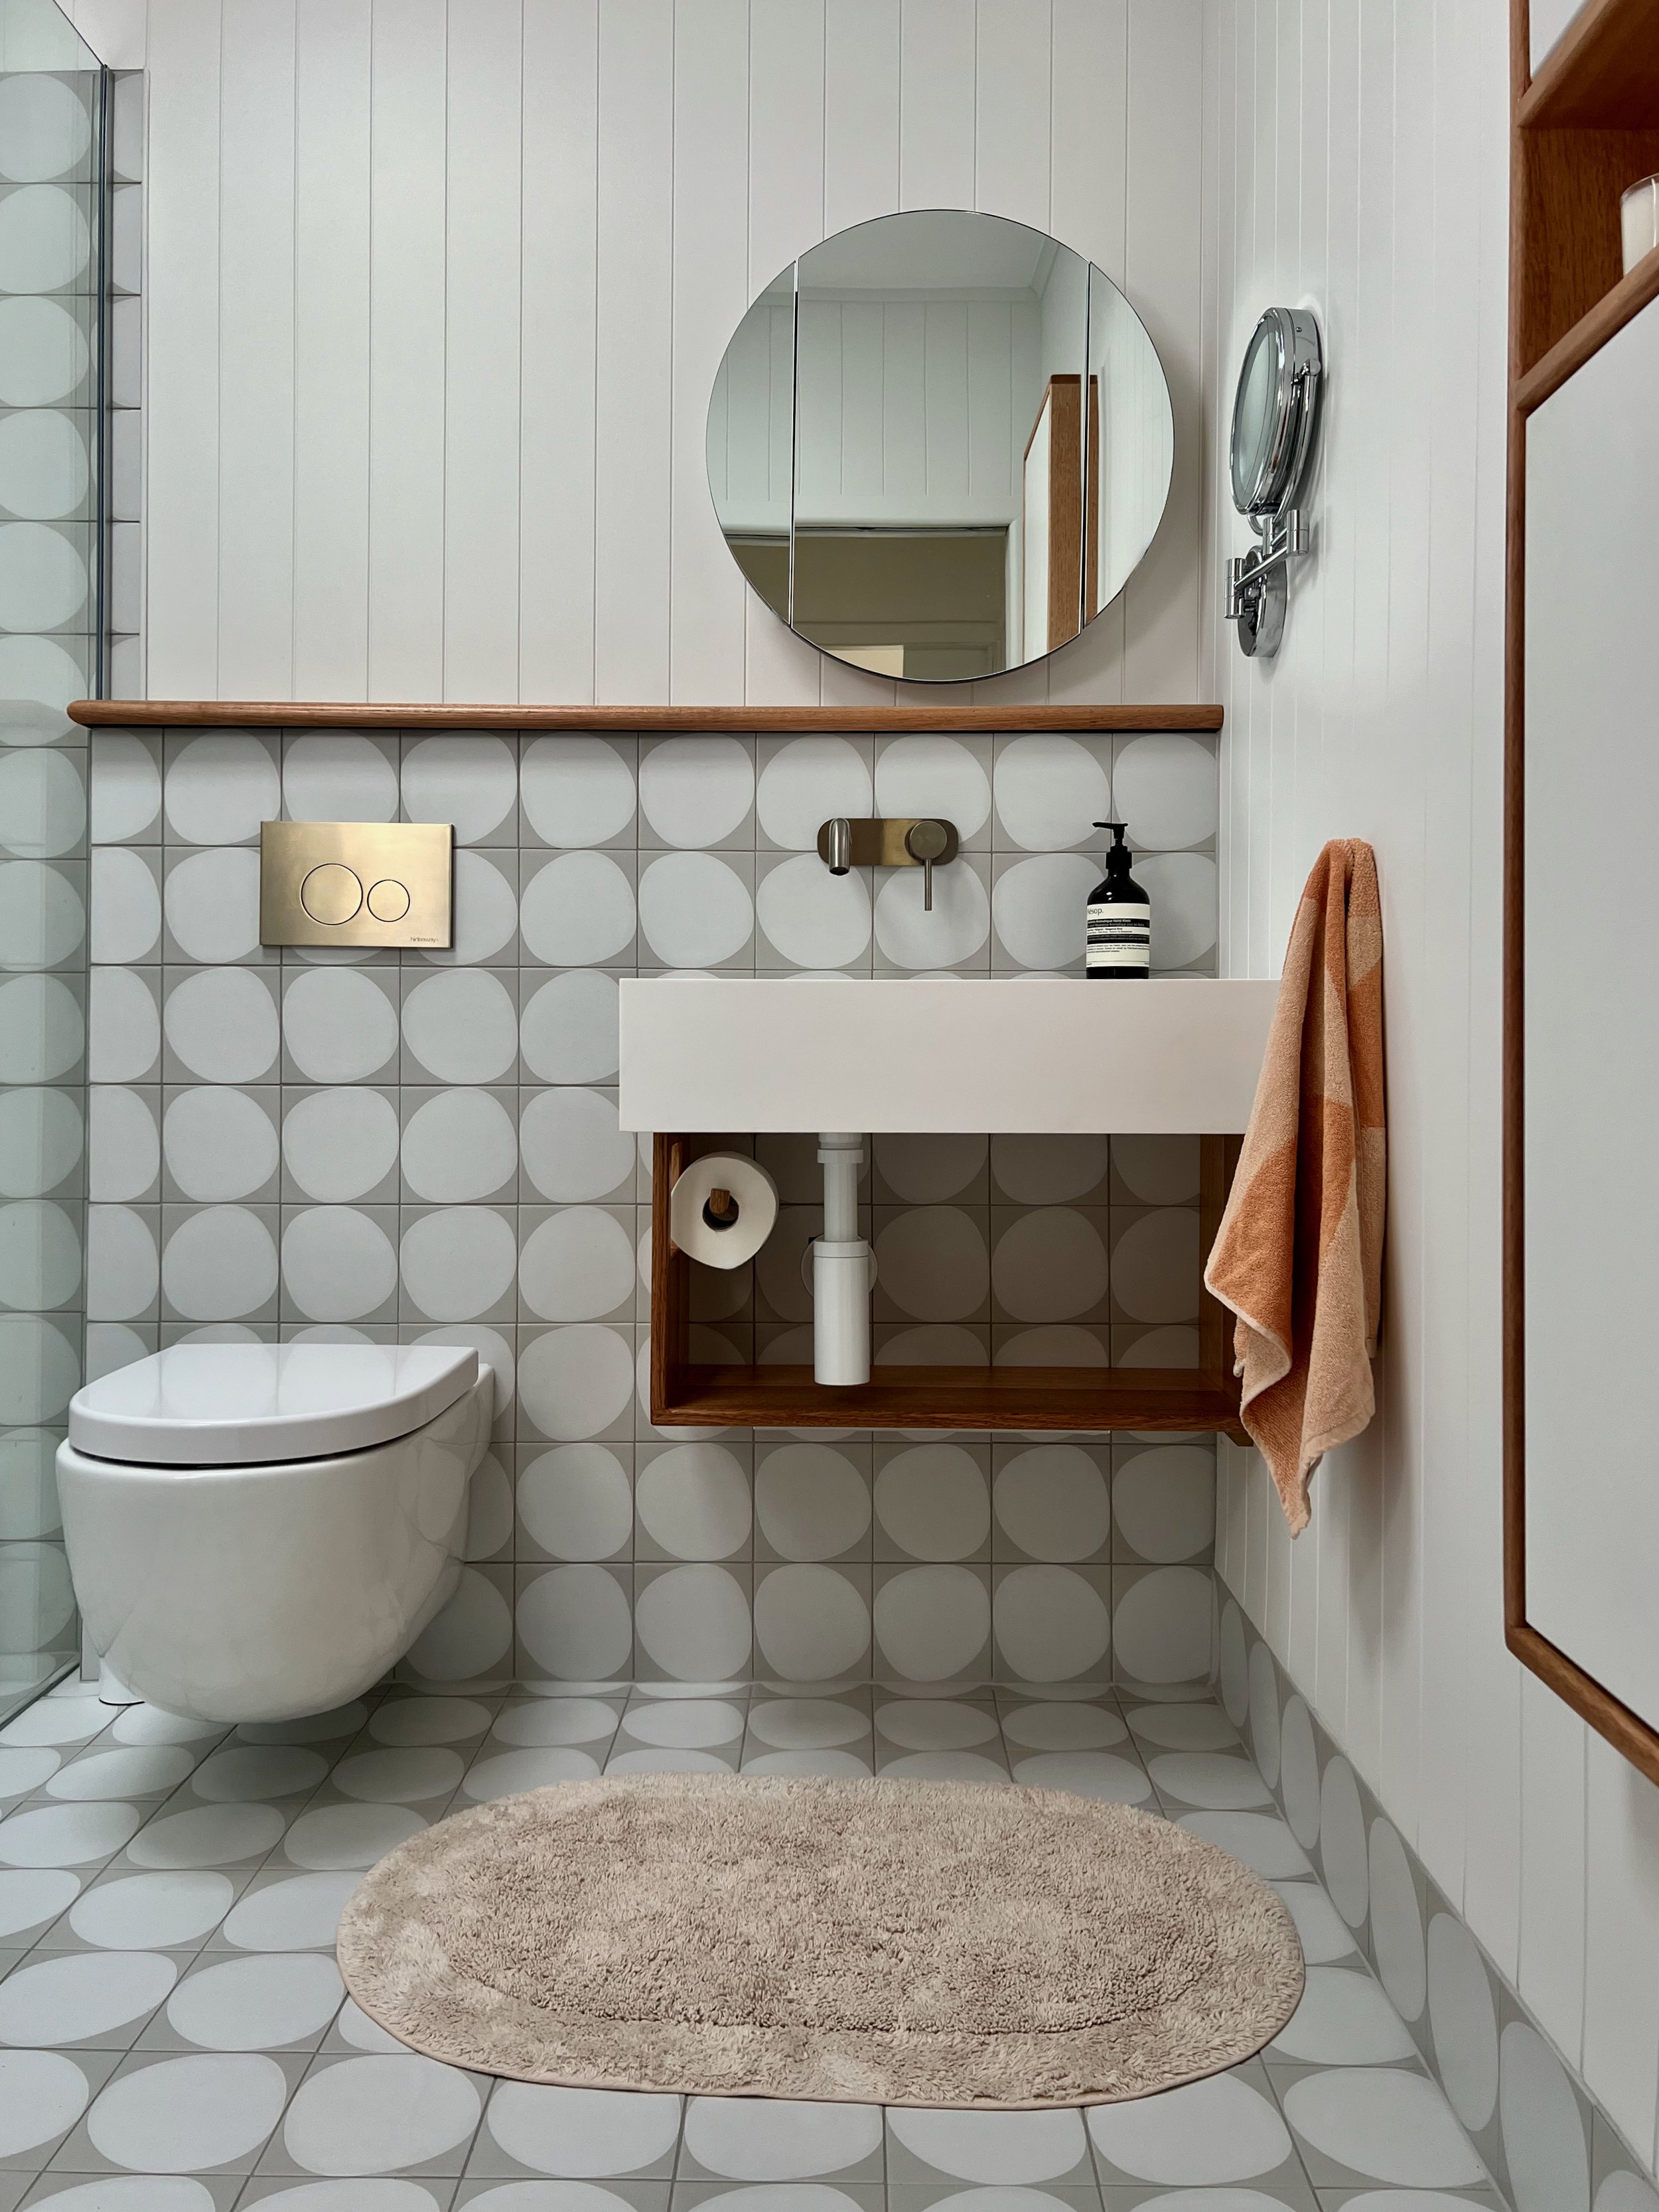
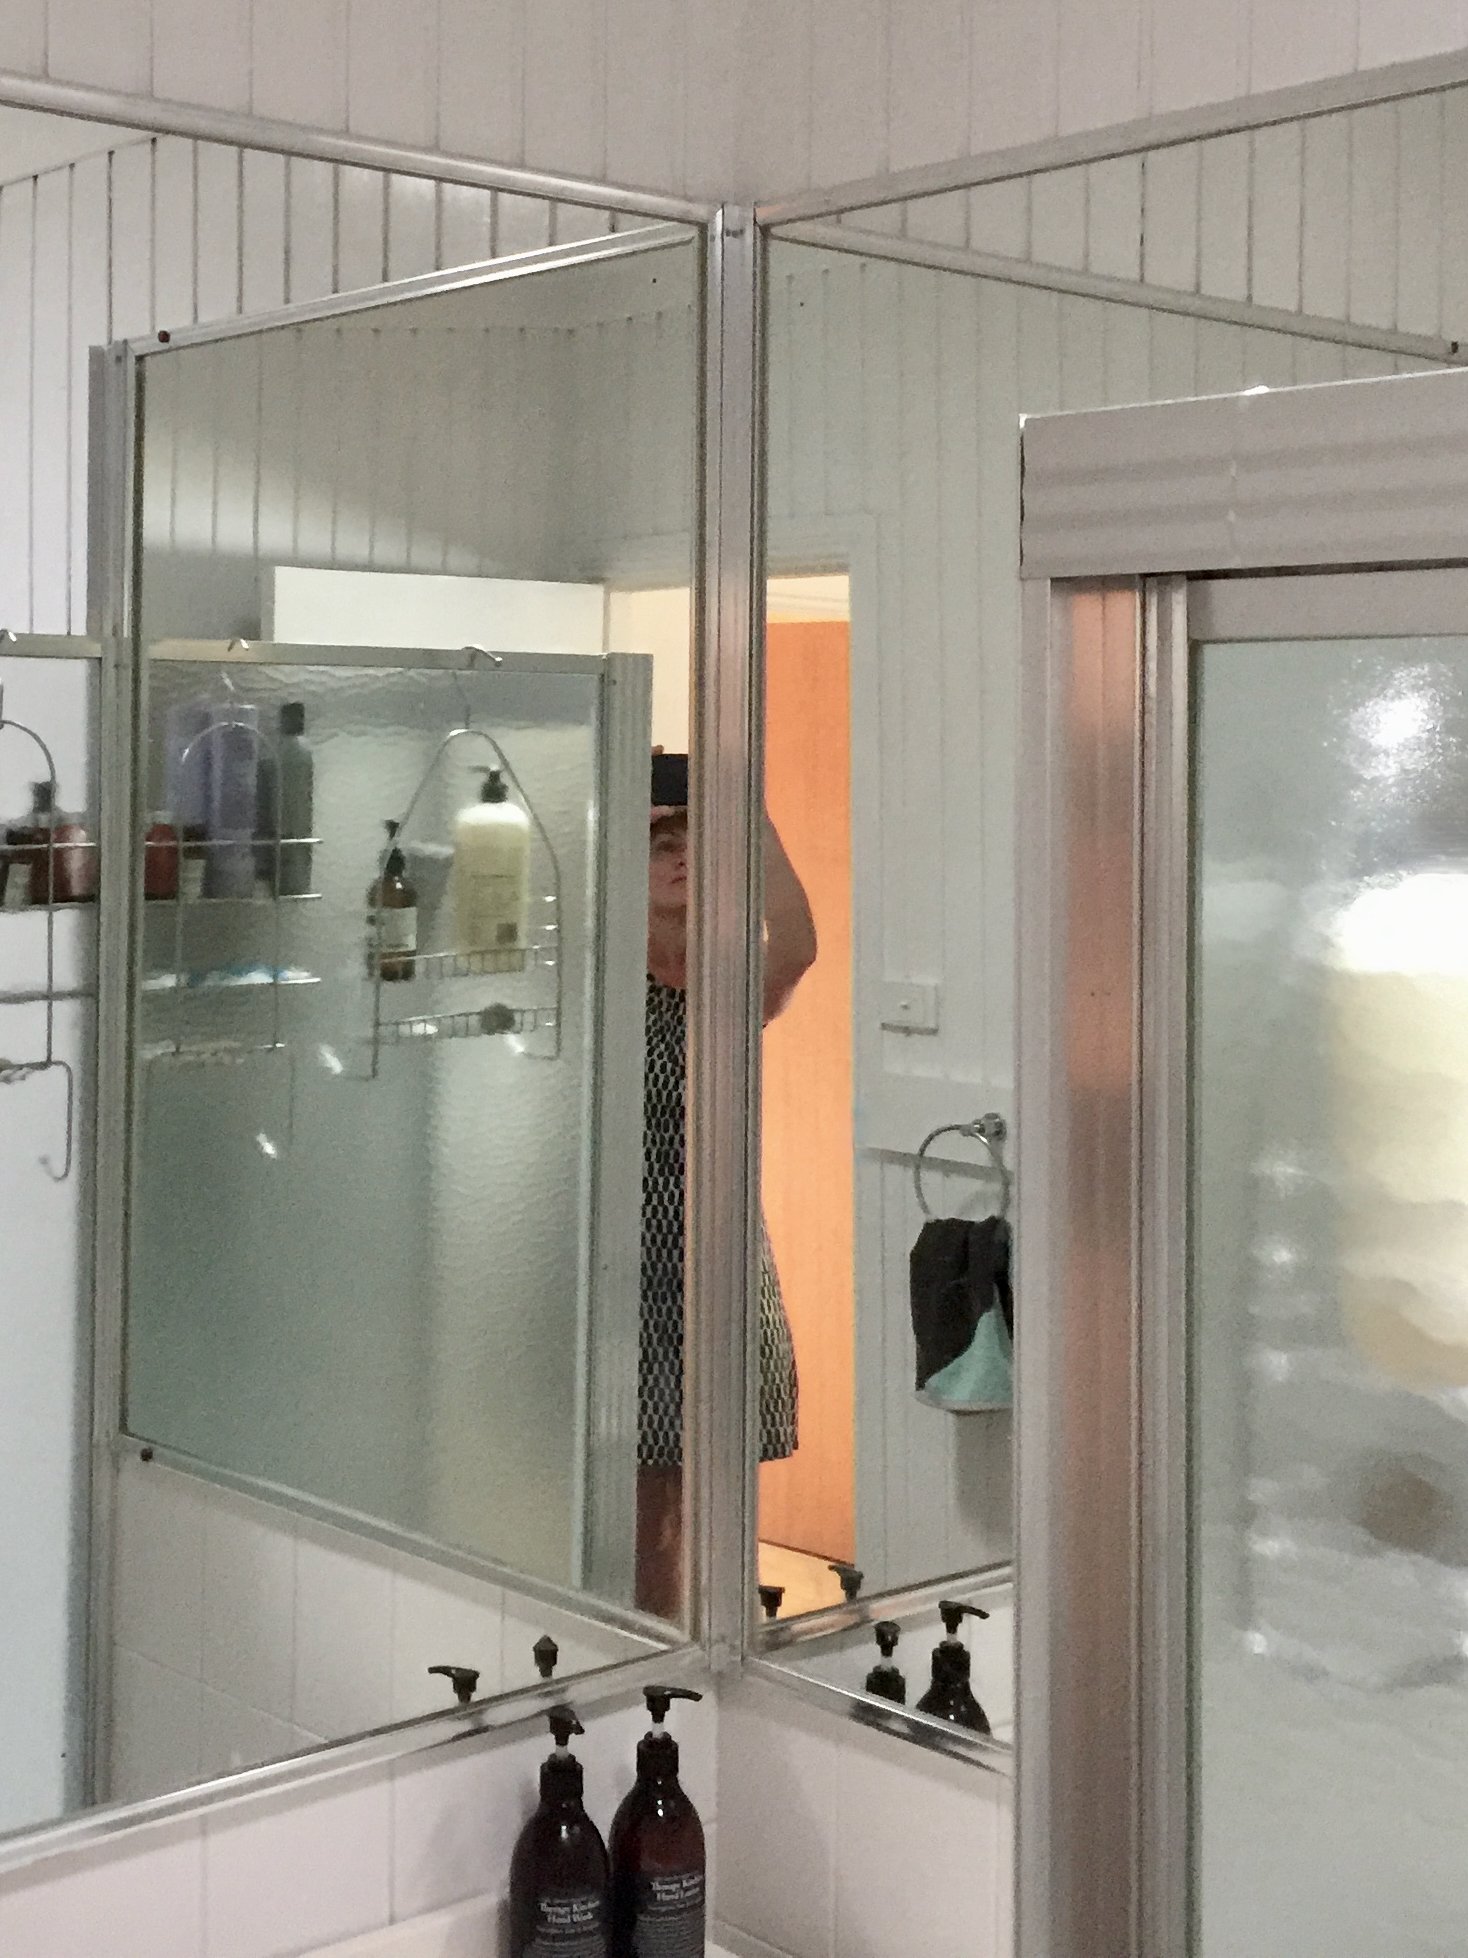
I clad around an inexpensive 900mm, two-door mirrored shaving cabinet to create a designer finish and add an extra shelf. Then I hung it on the wall with the supplied fixings. It holds outdoor essentials like sunscreen and bug spray.


I realised the cabinet was too high on the wall as I couldn’t reach the top shelf and could only just see my head in the mirror. I later moved it down and changed the shelves. Stay tuned for more on this.


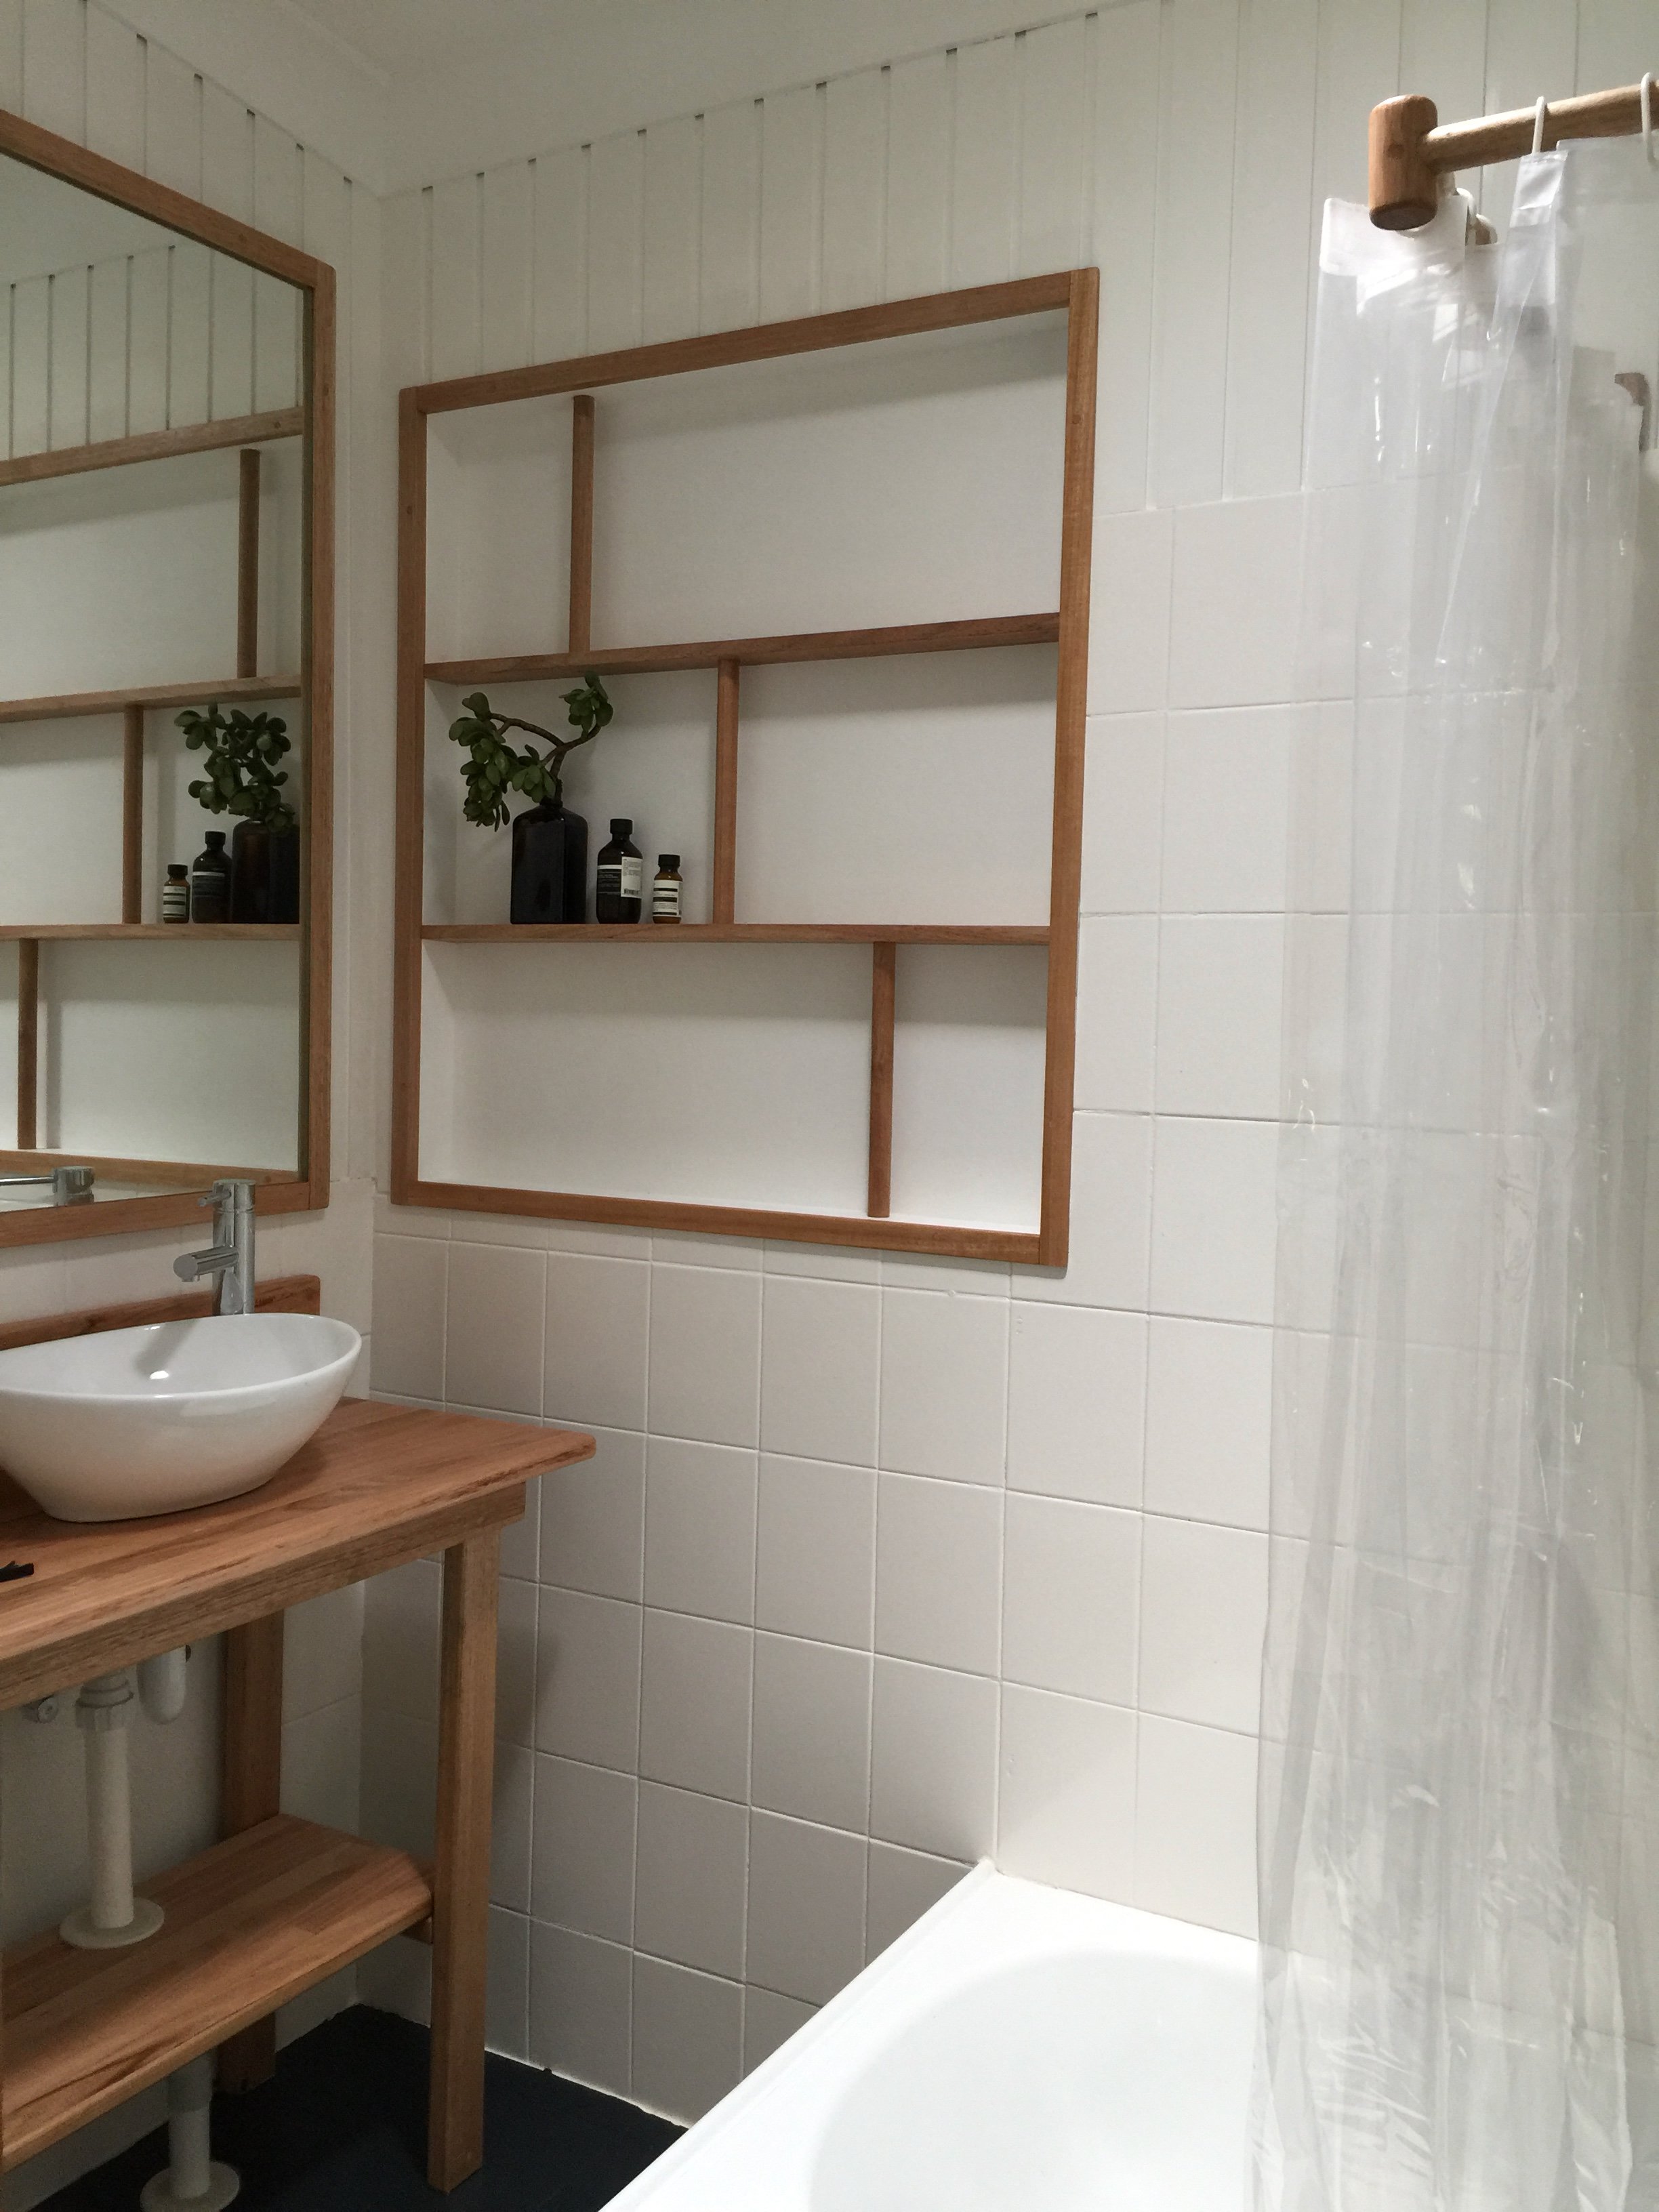
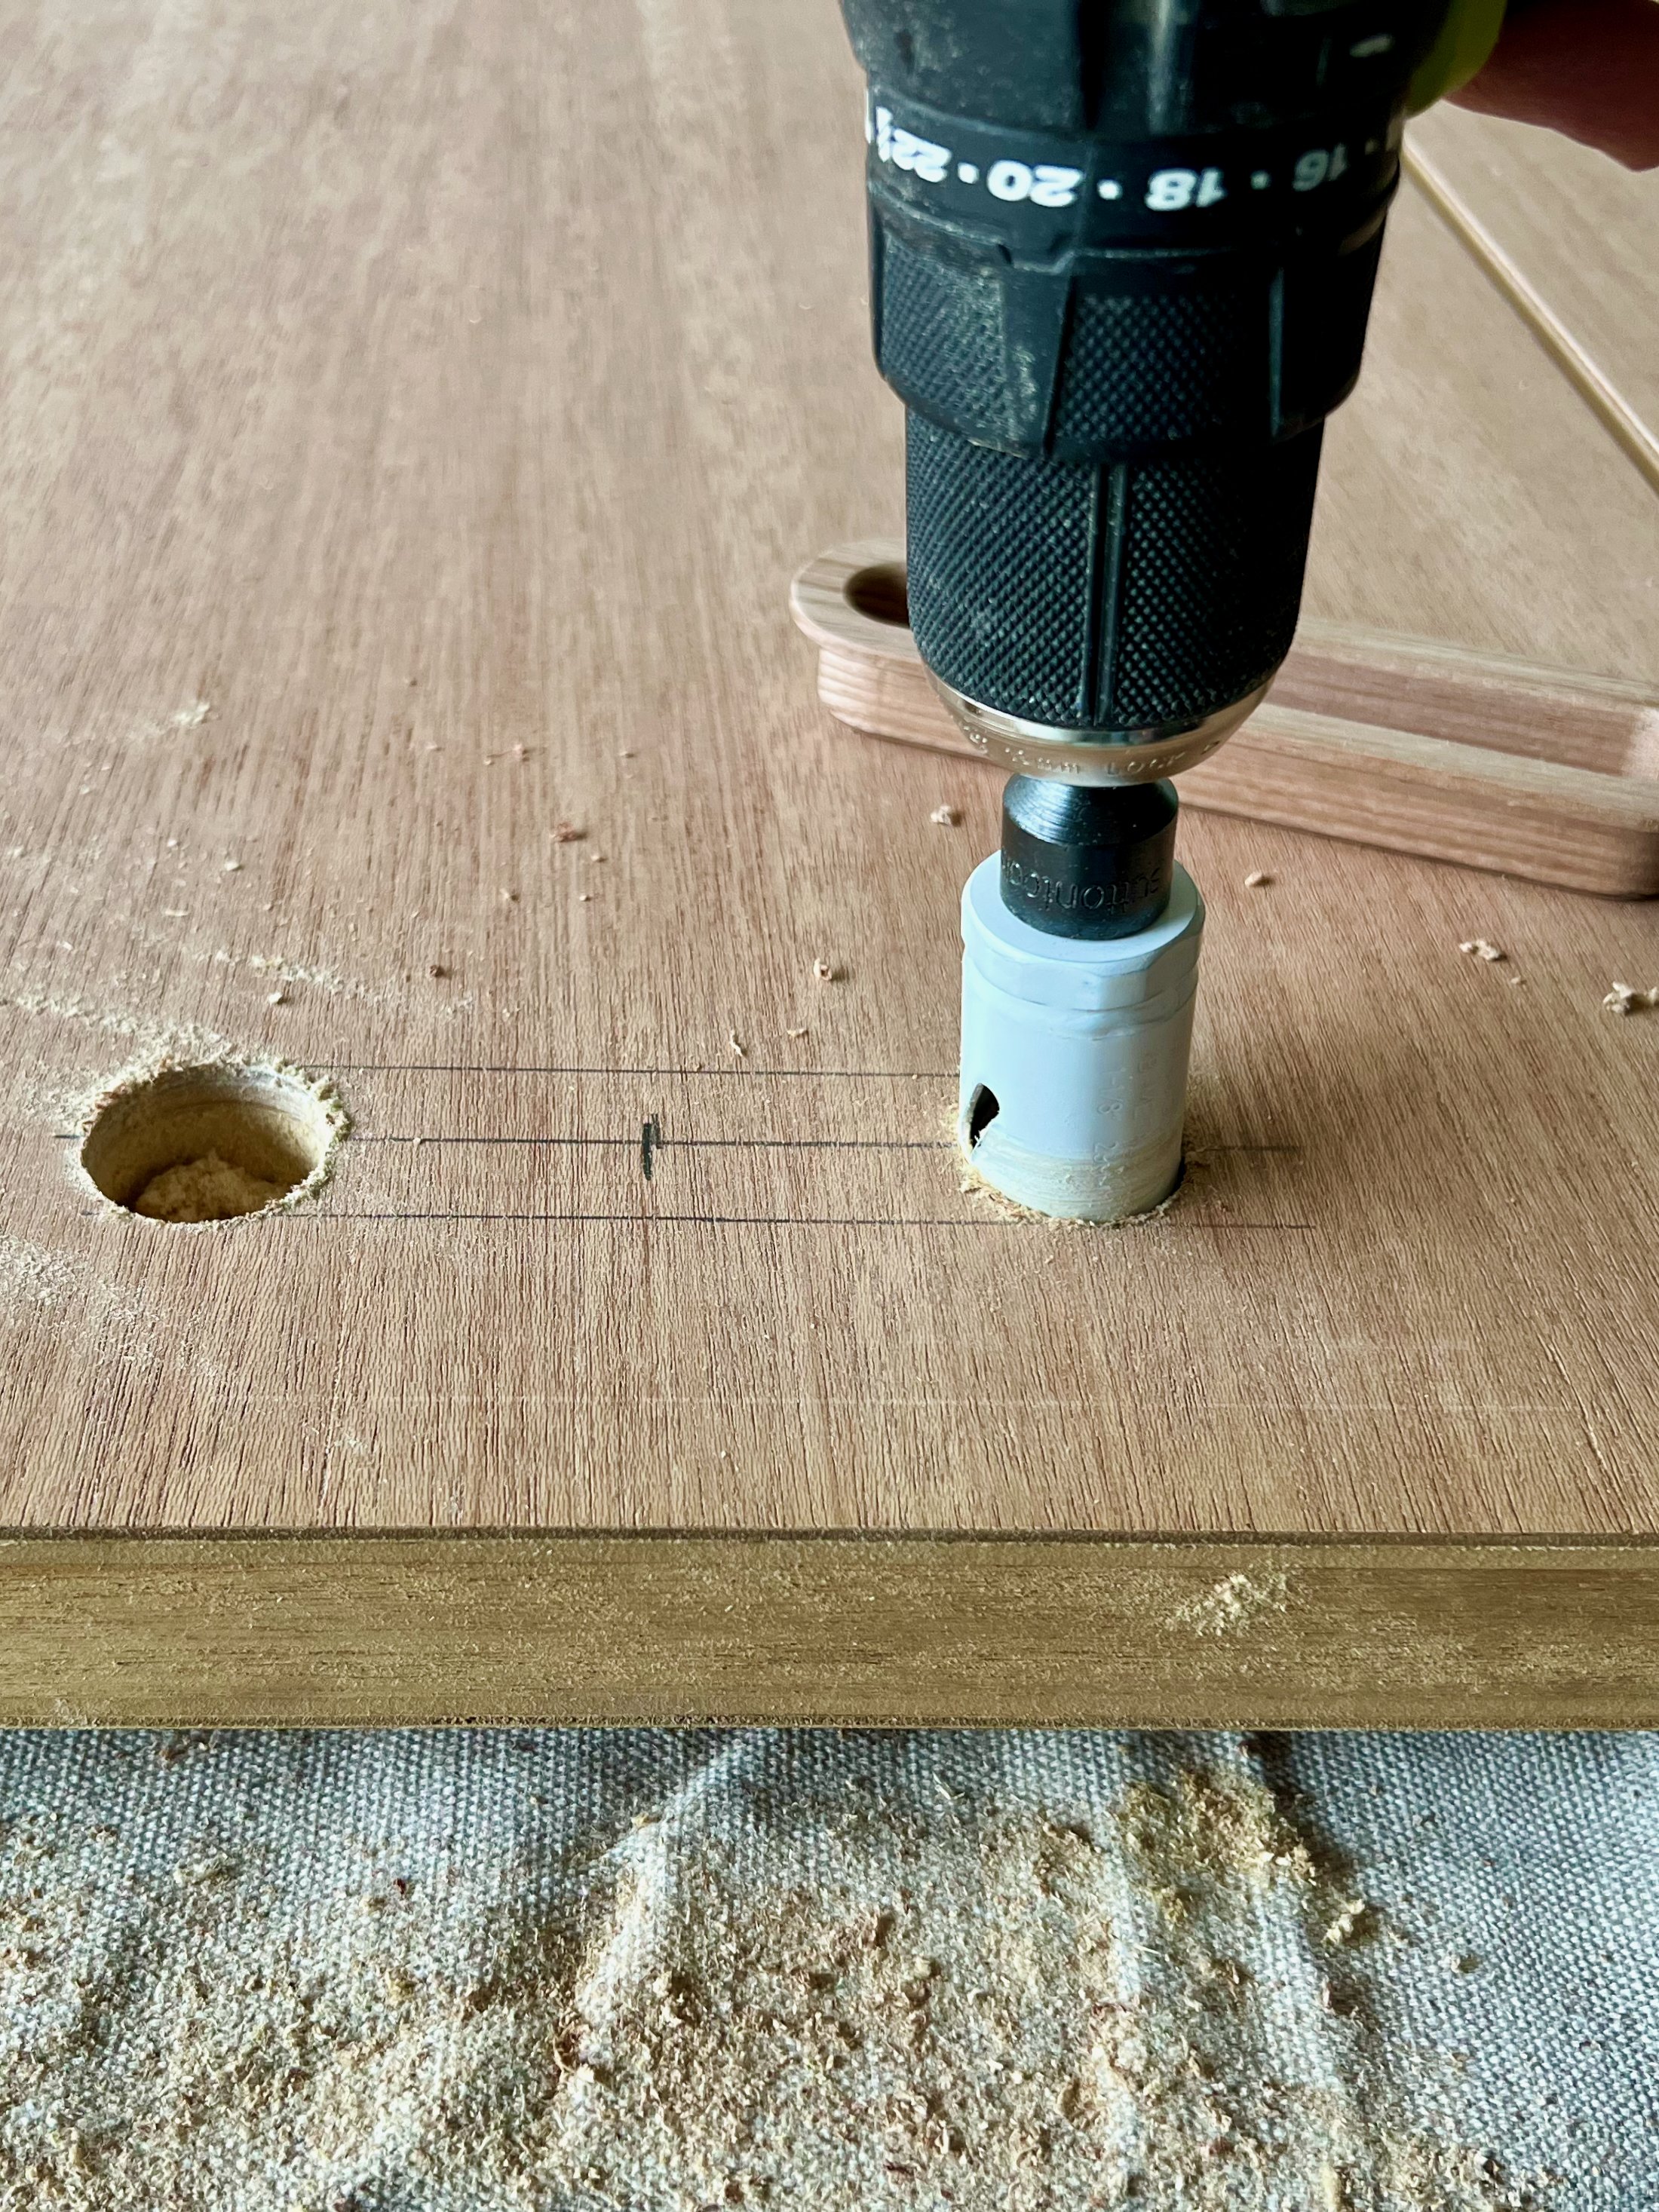
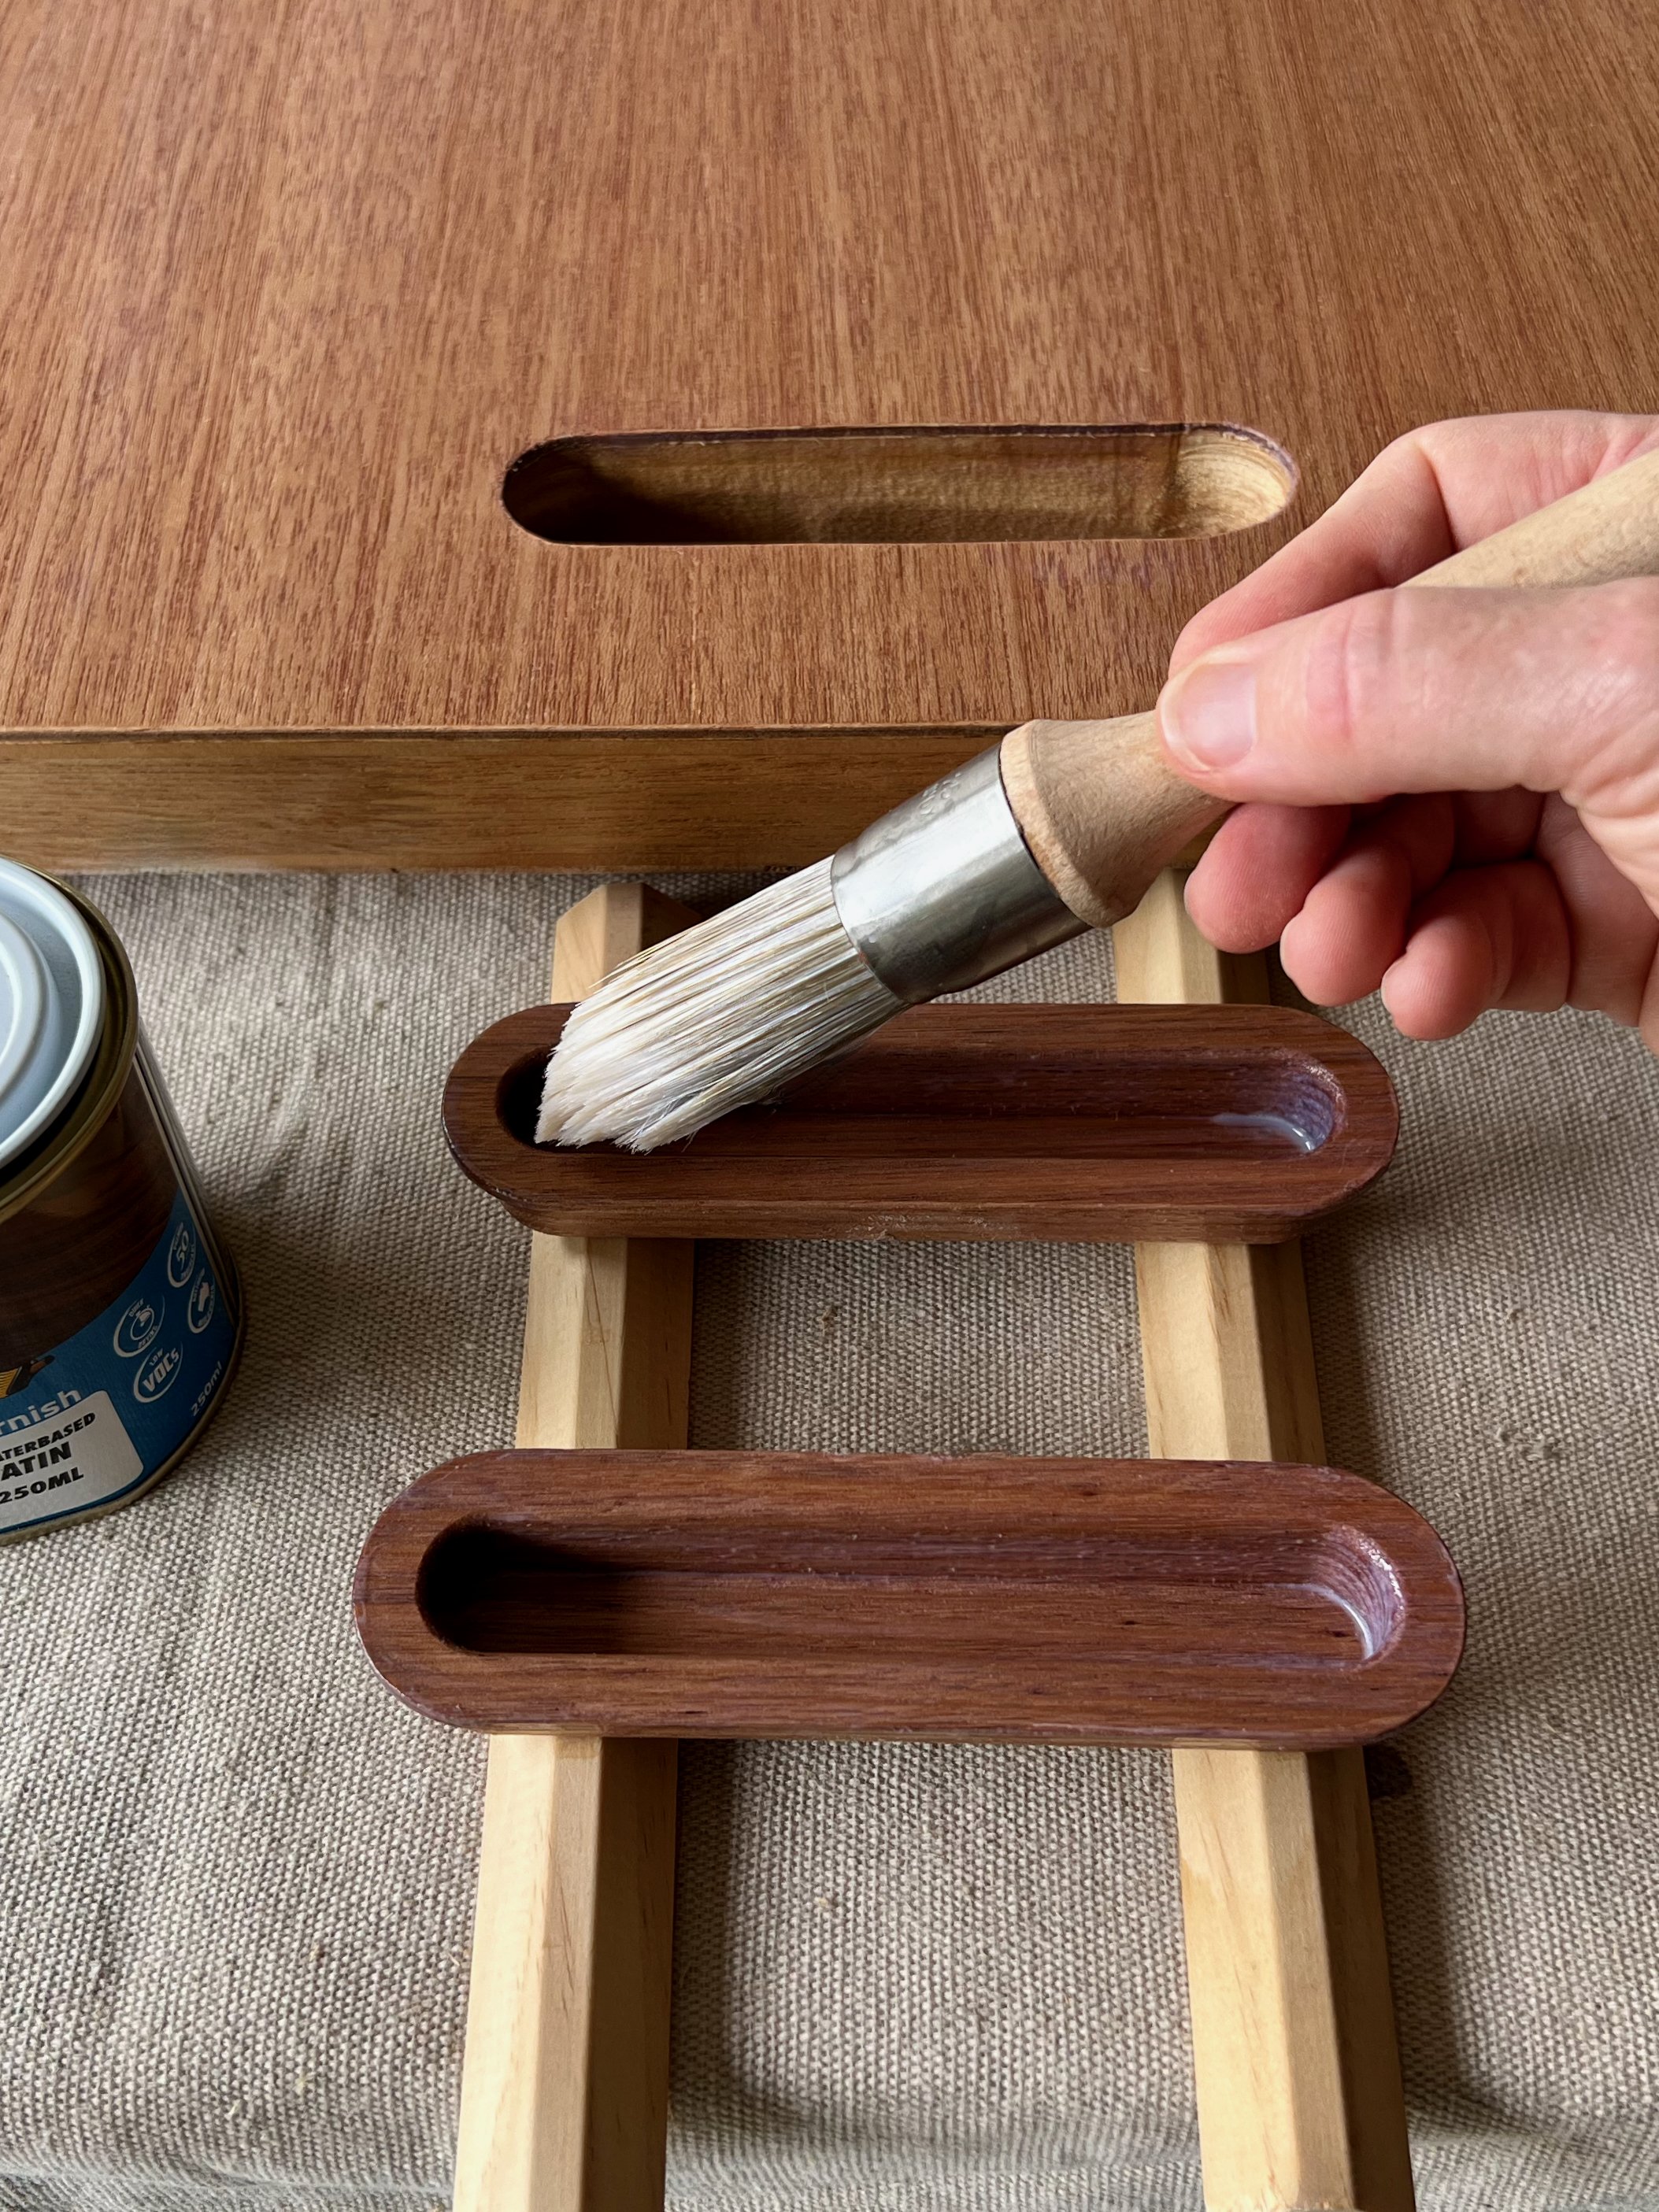
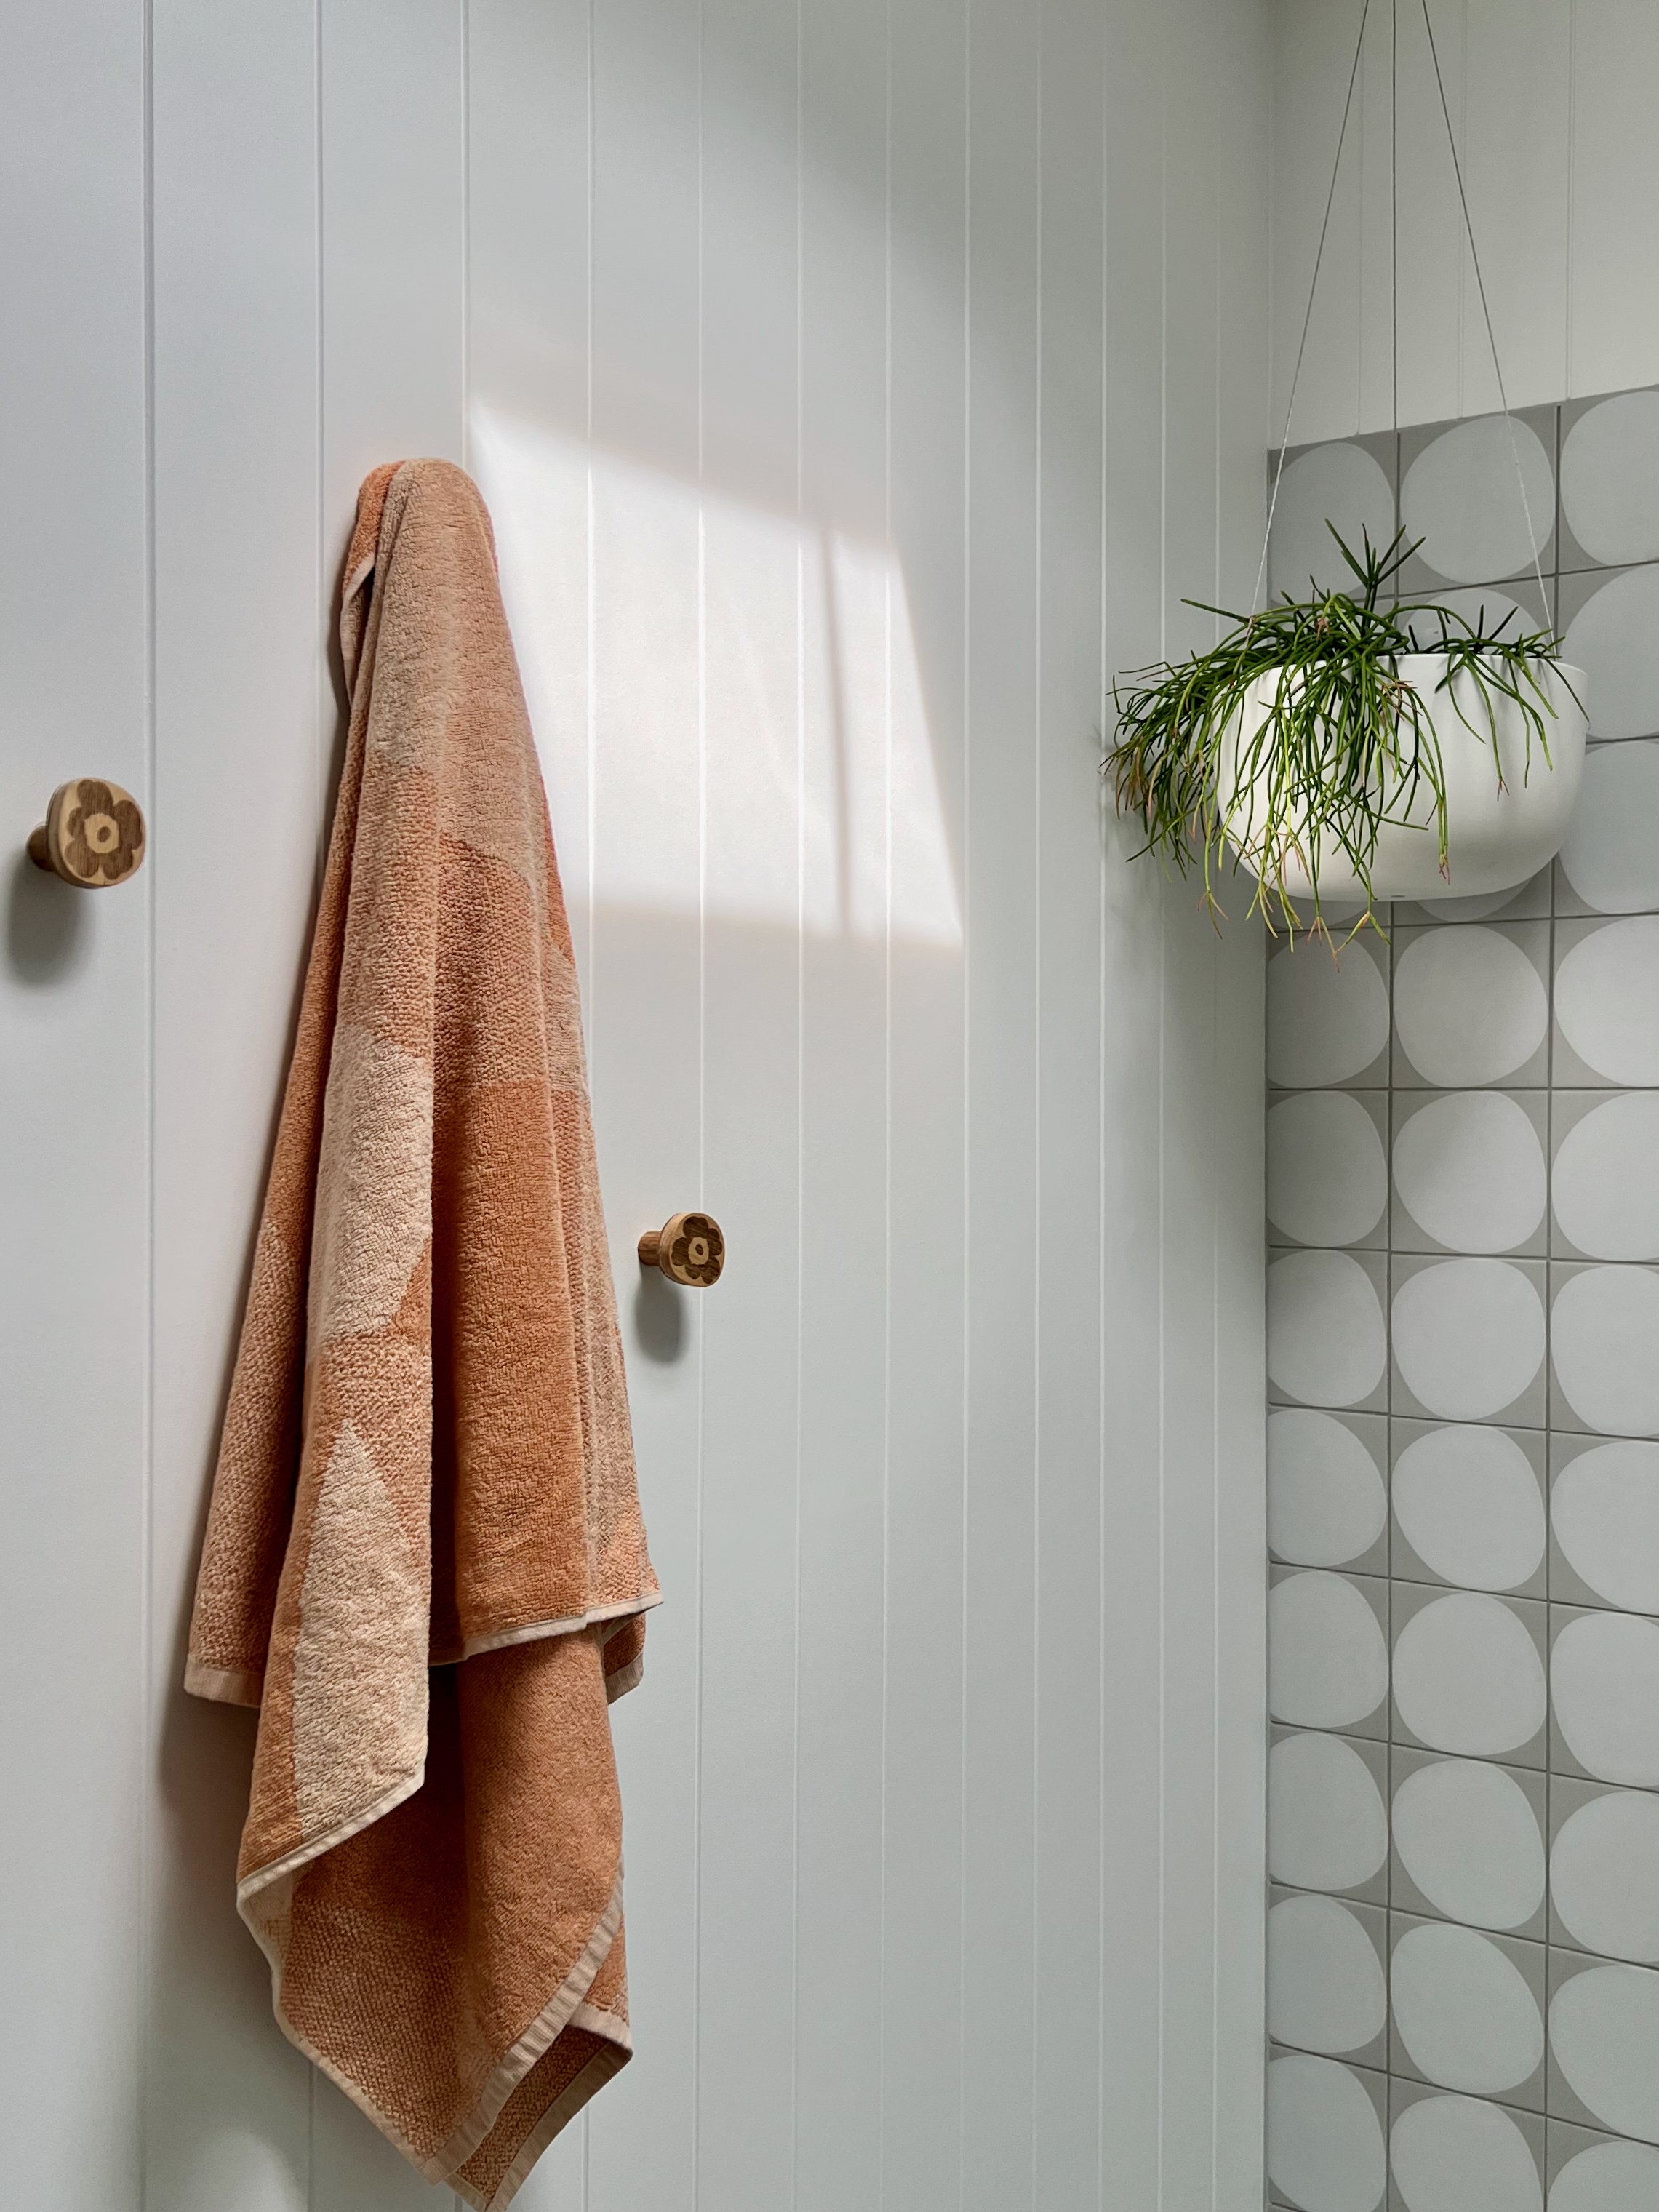
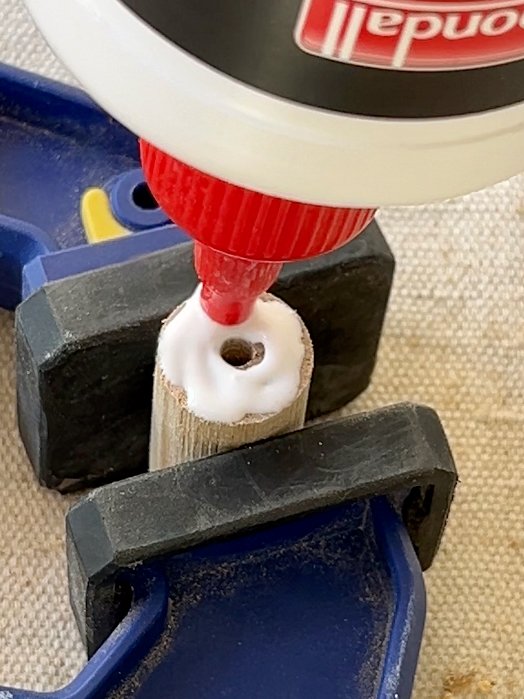
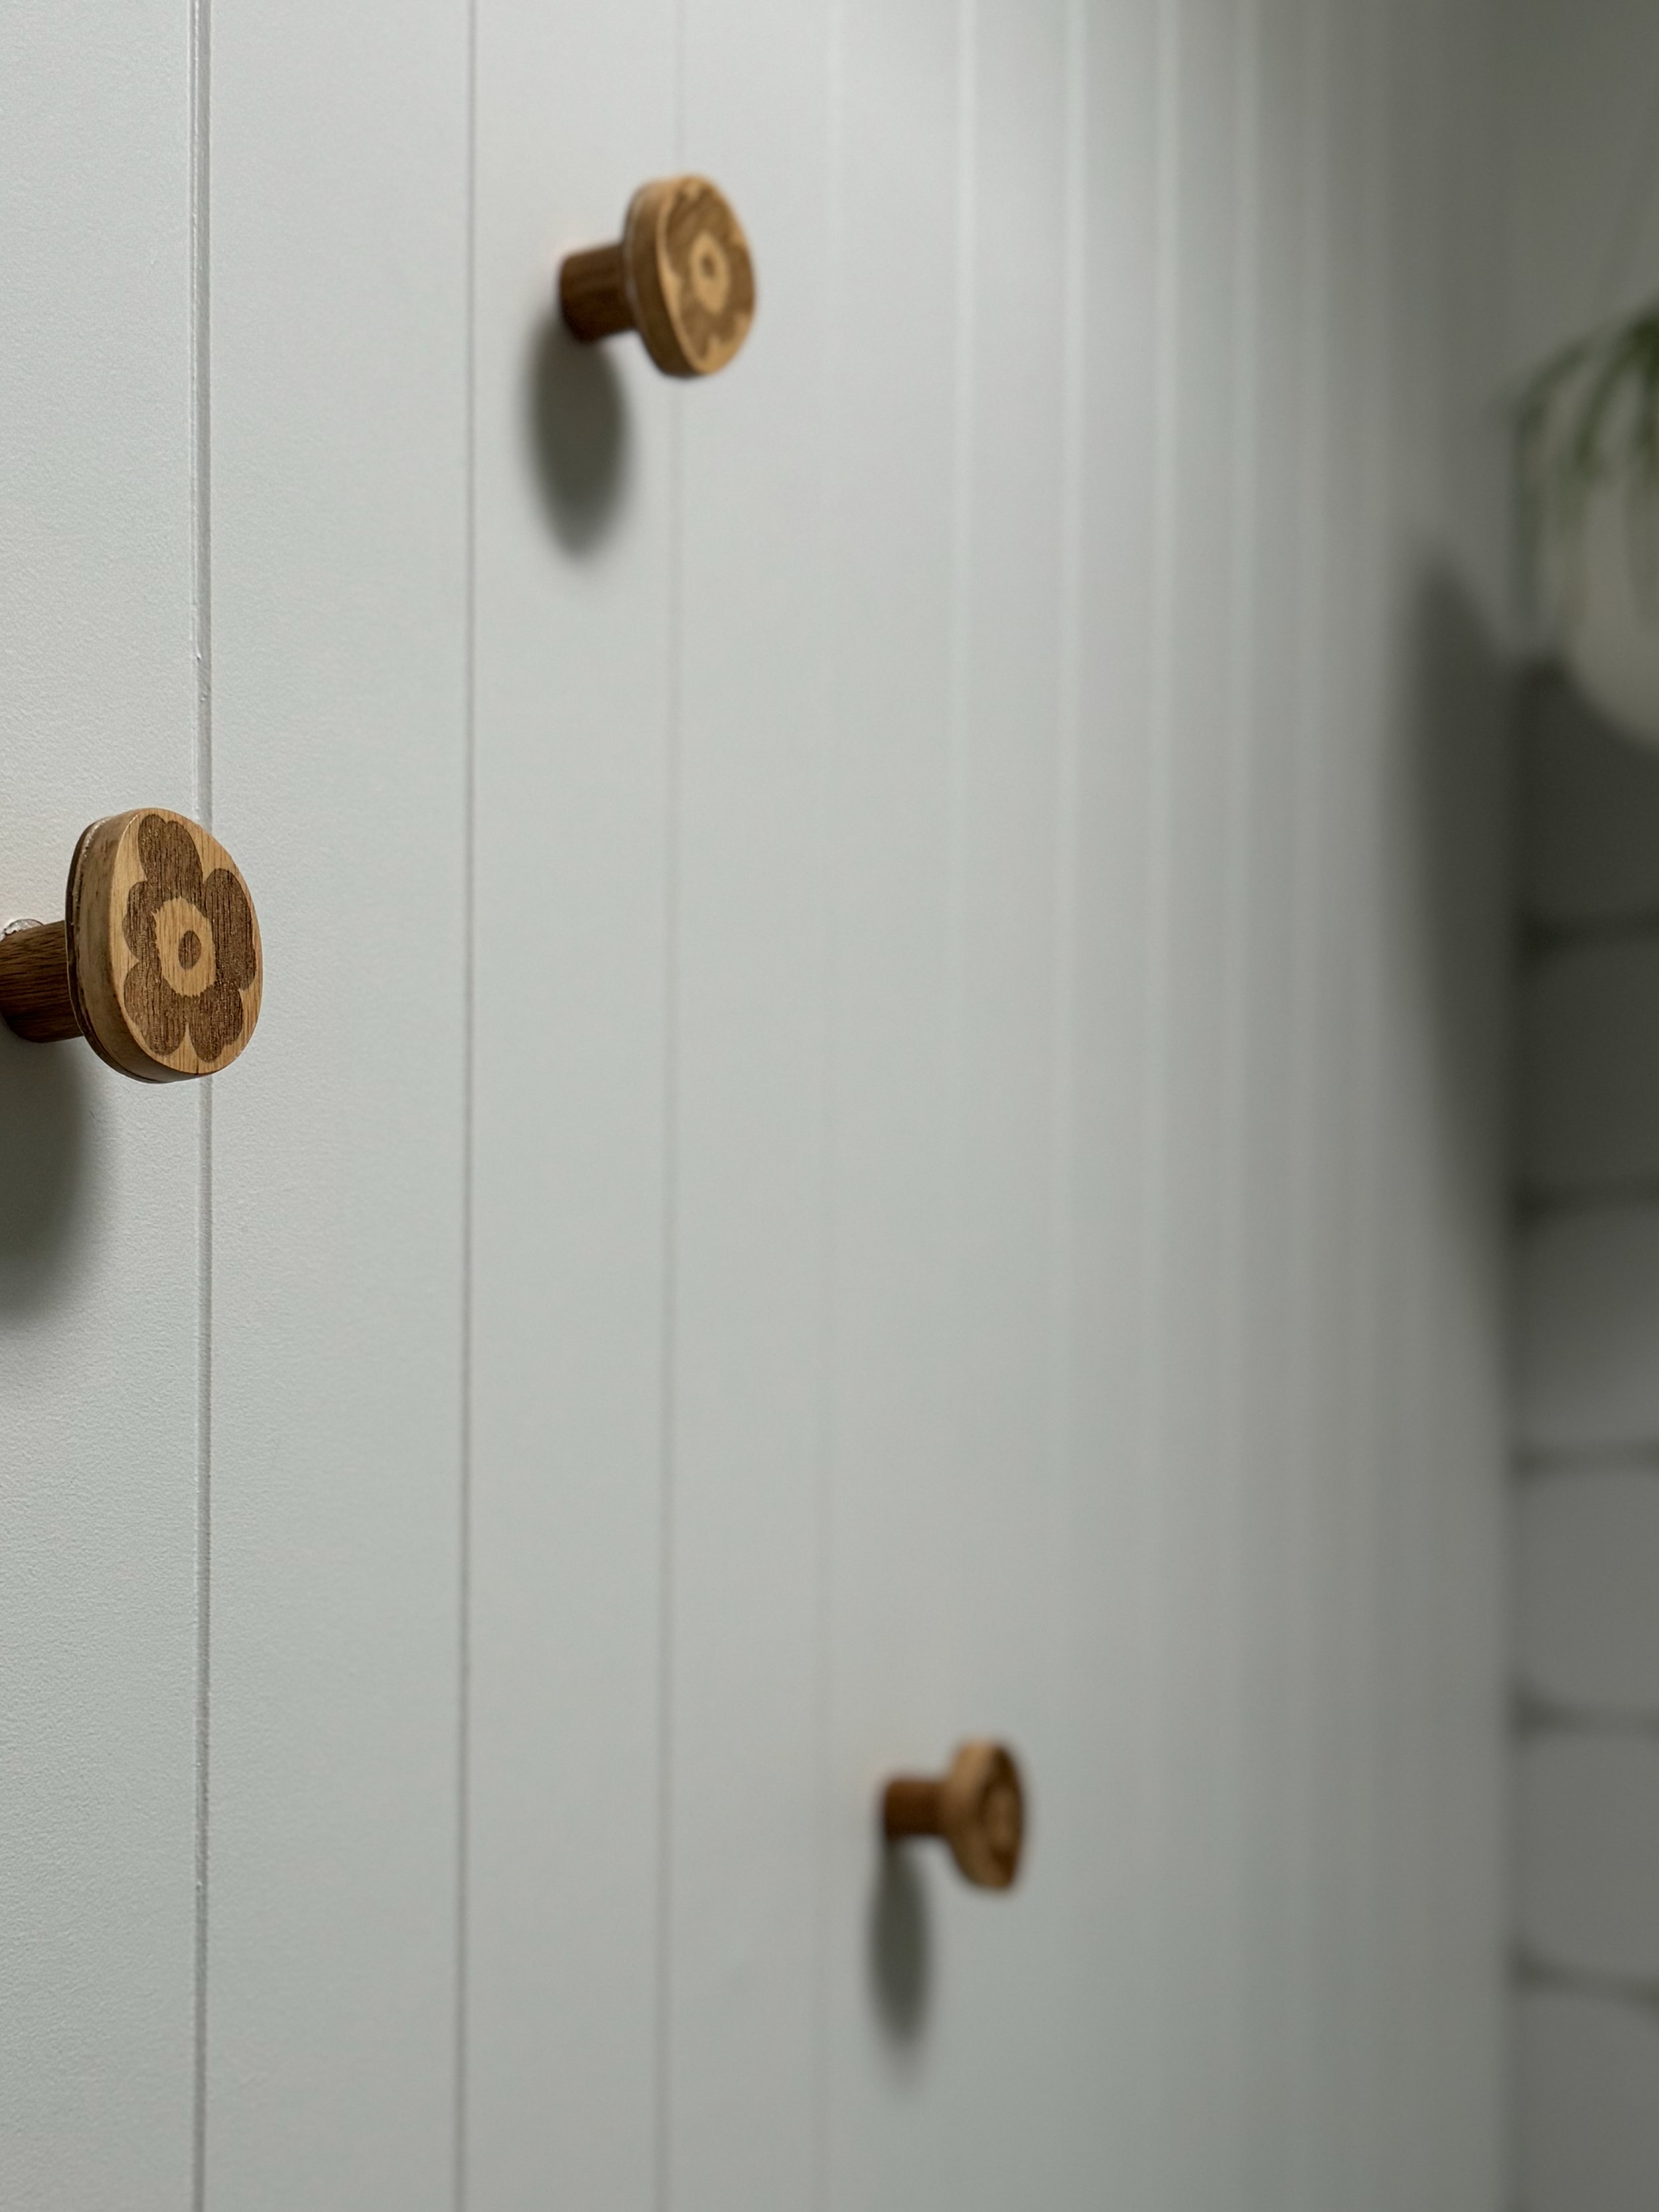
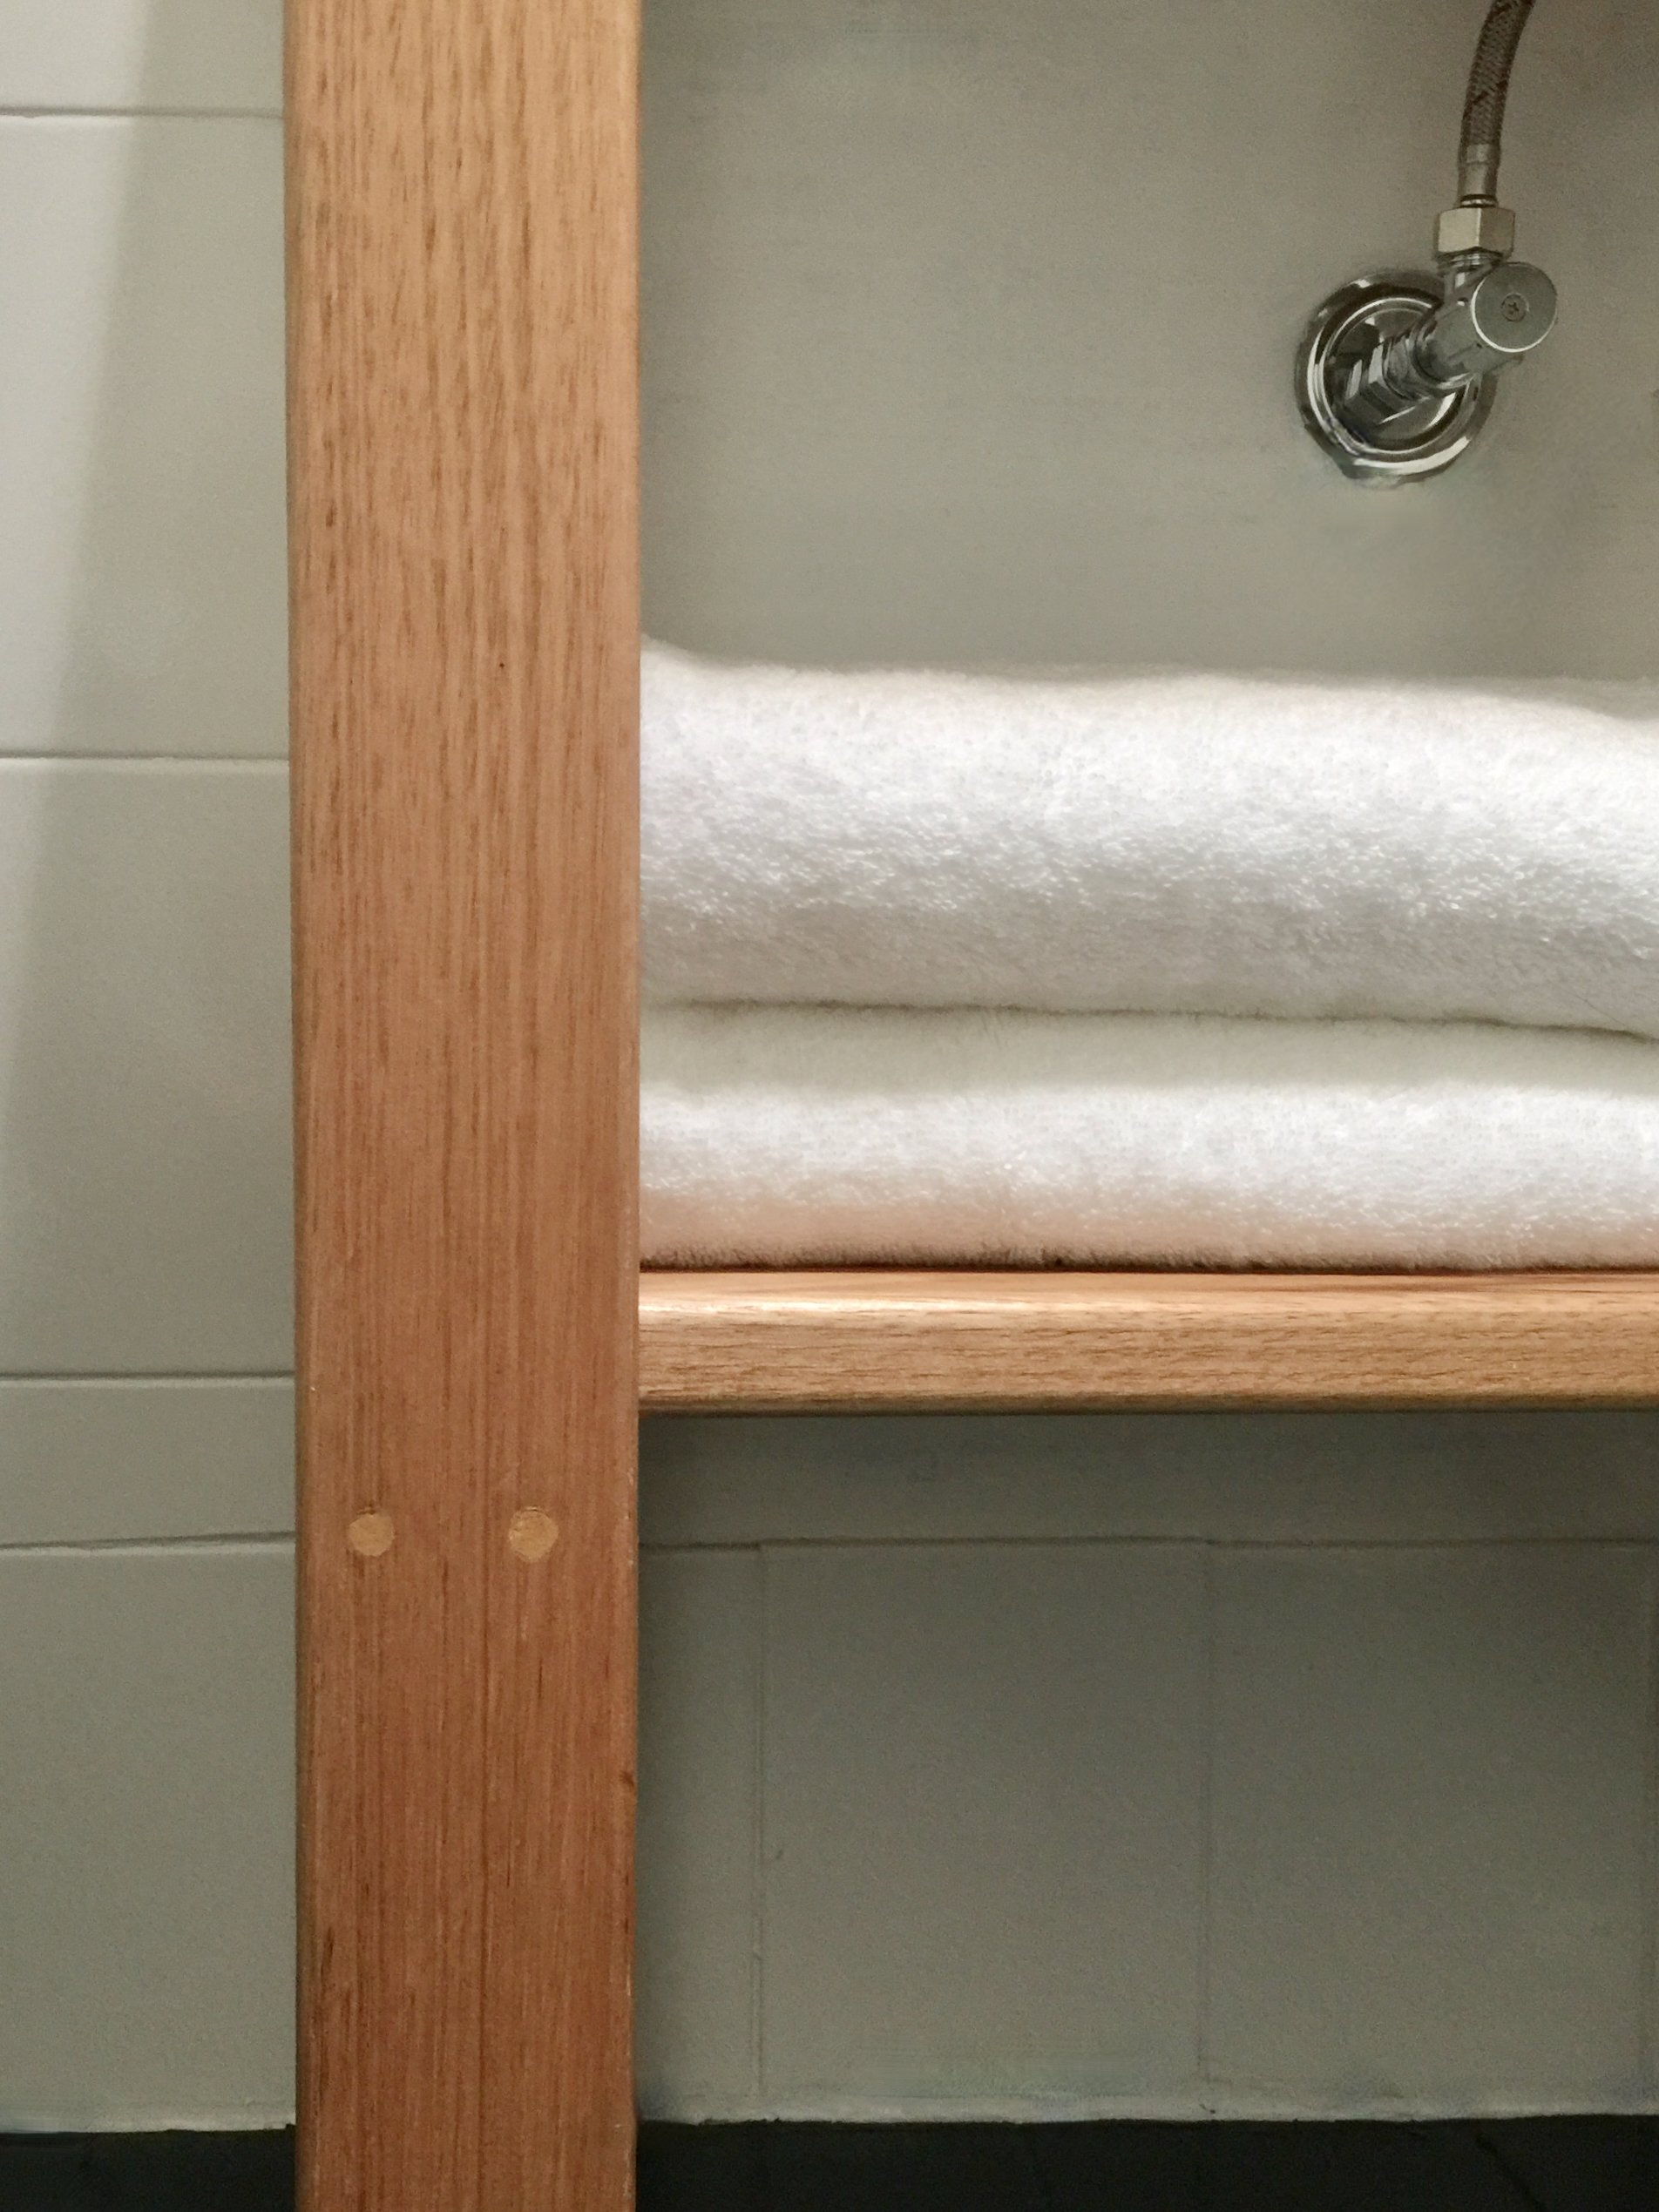
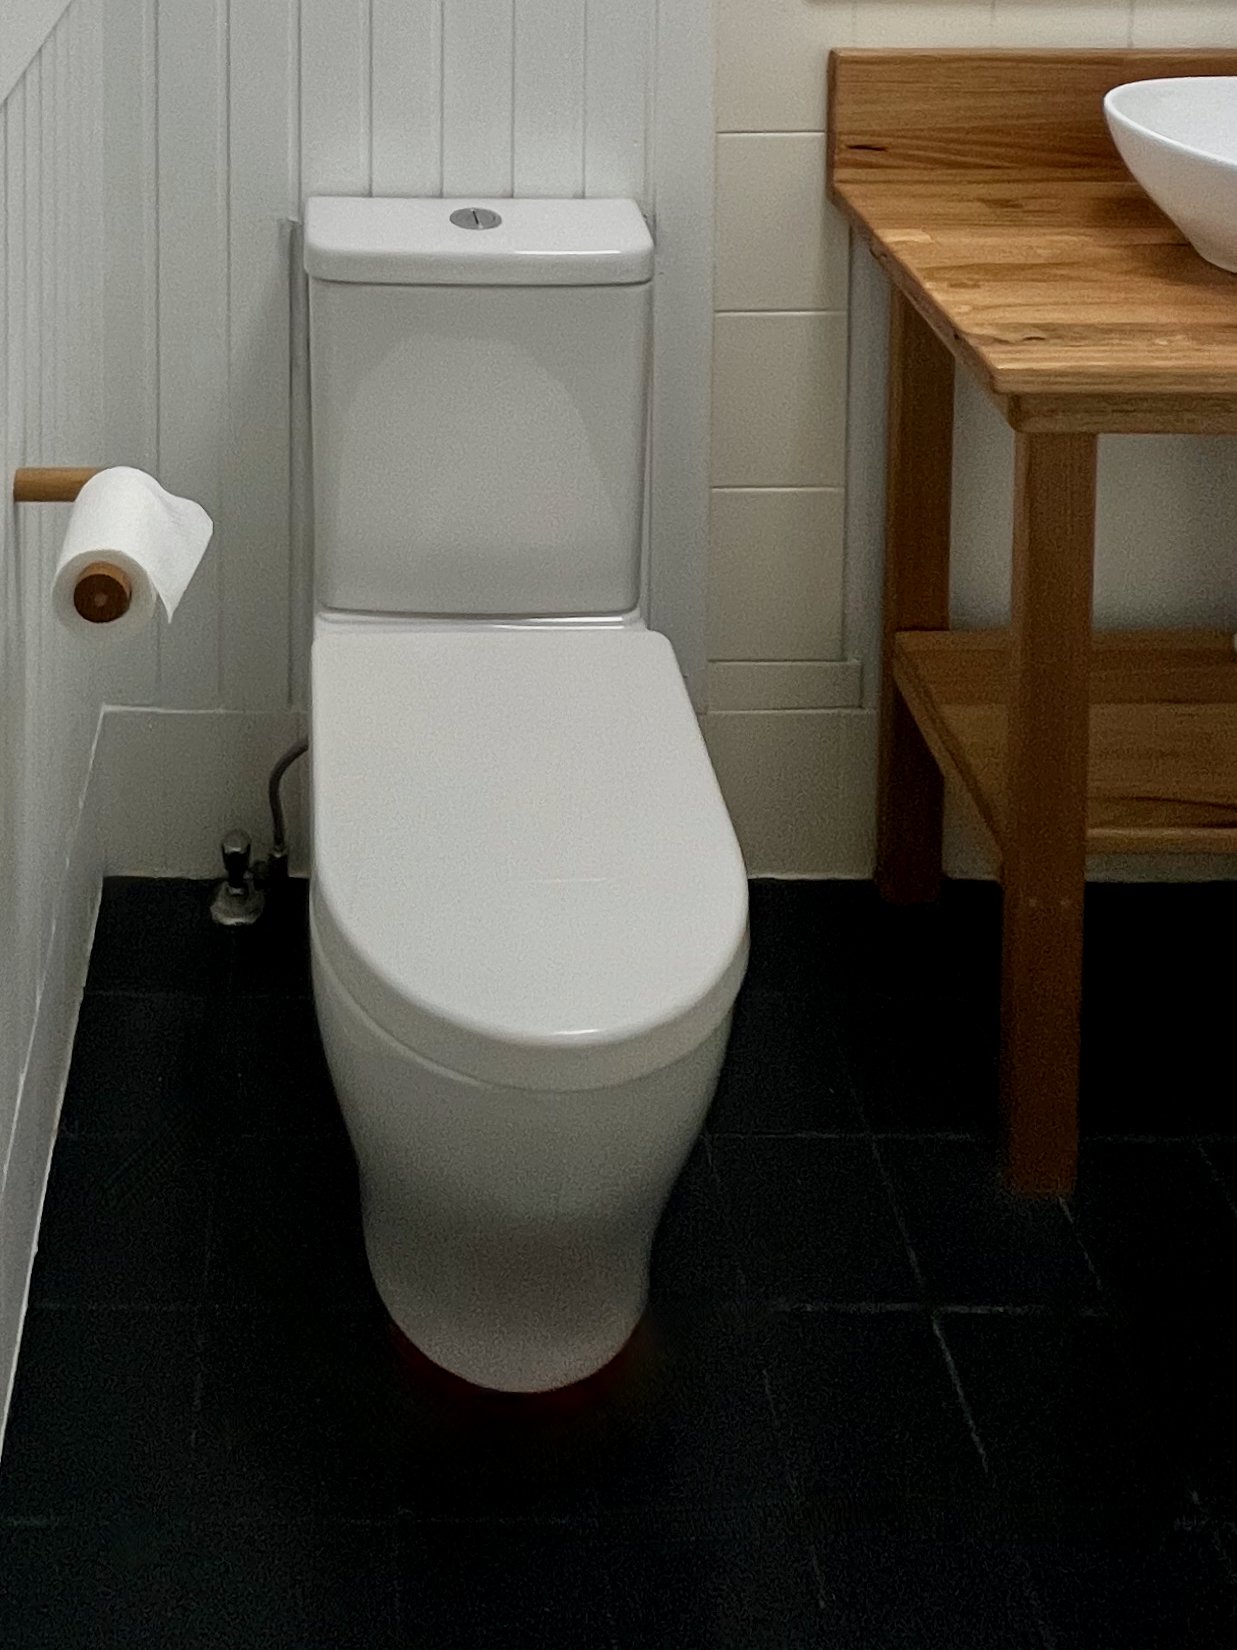
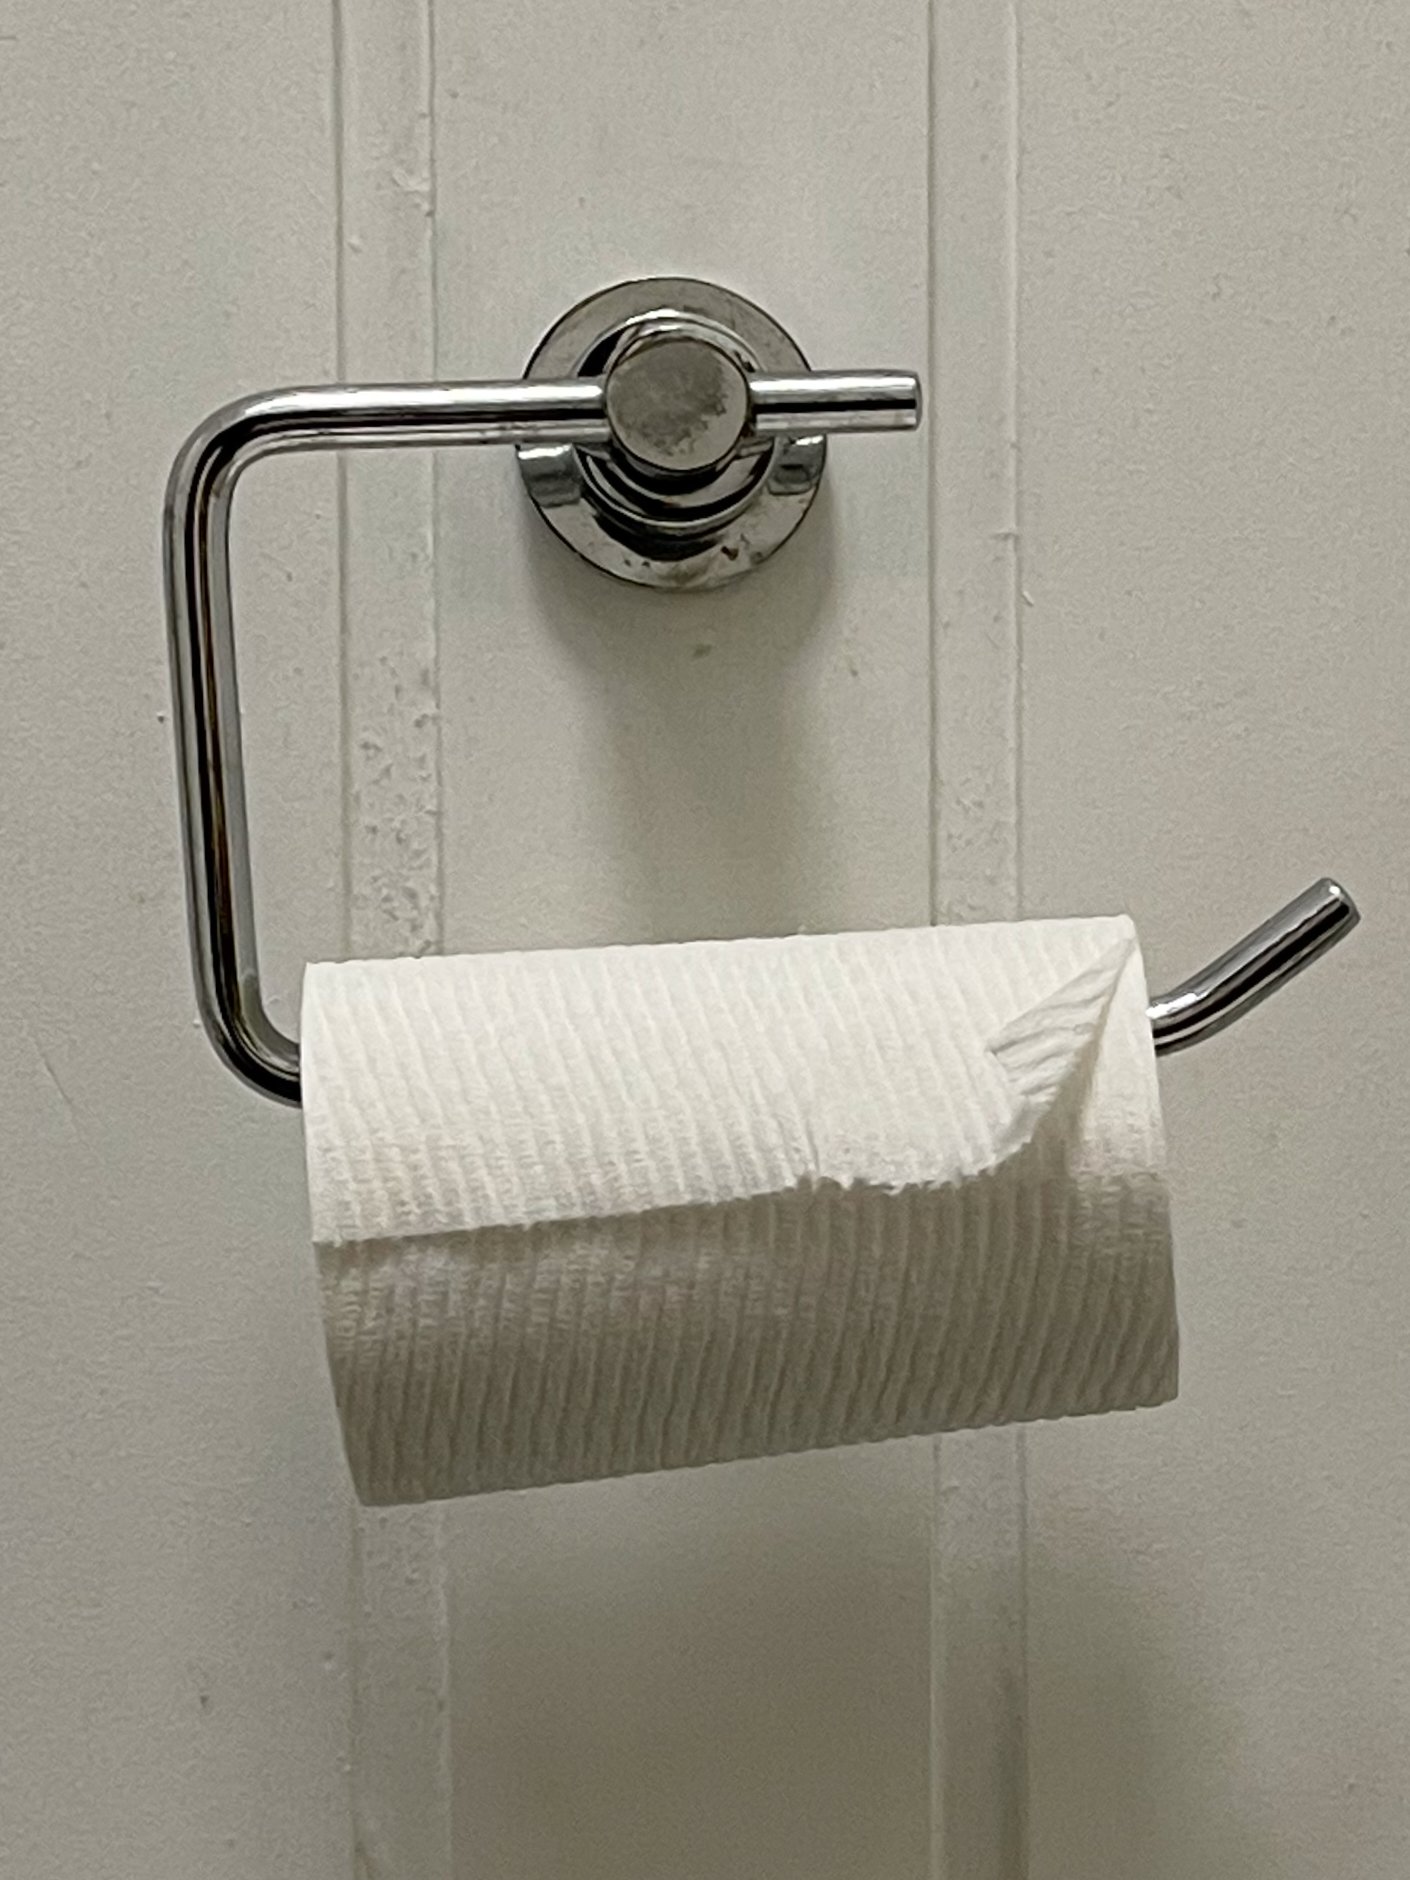
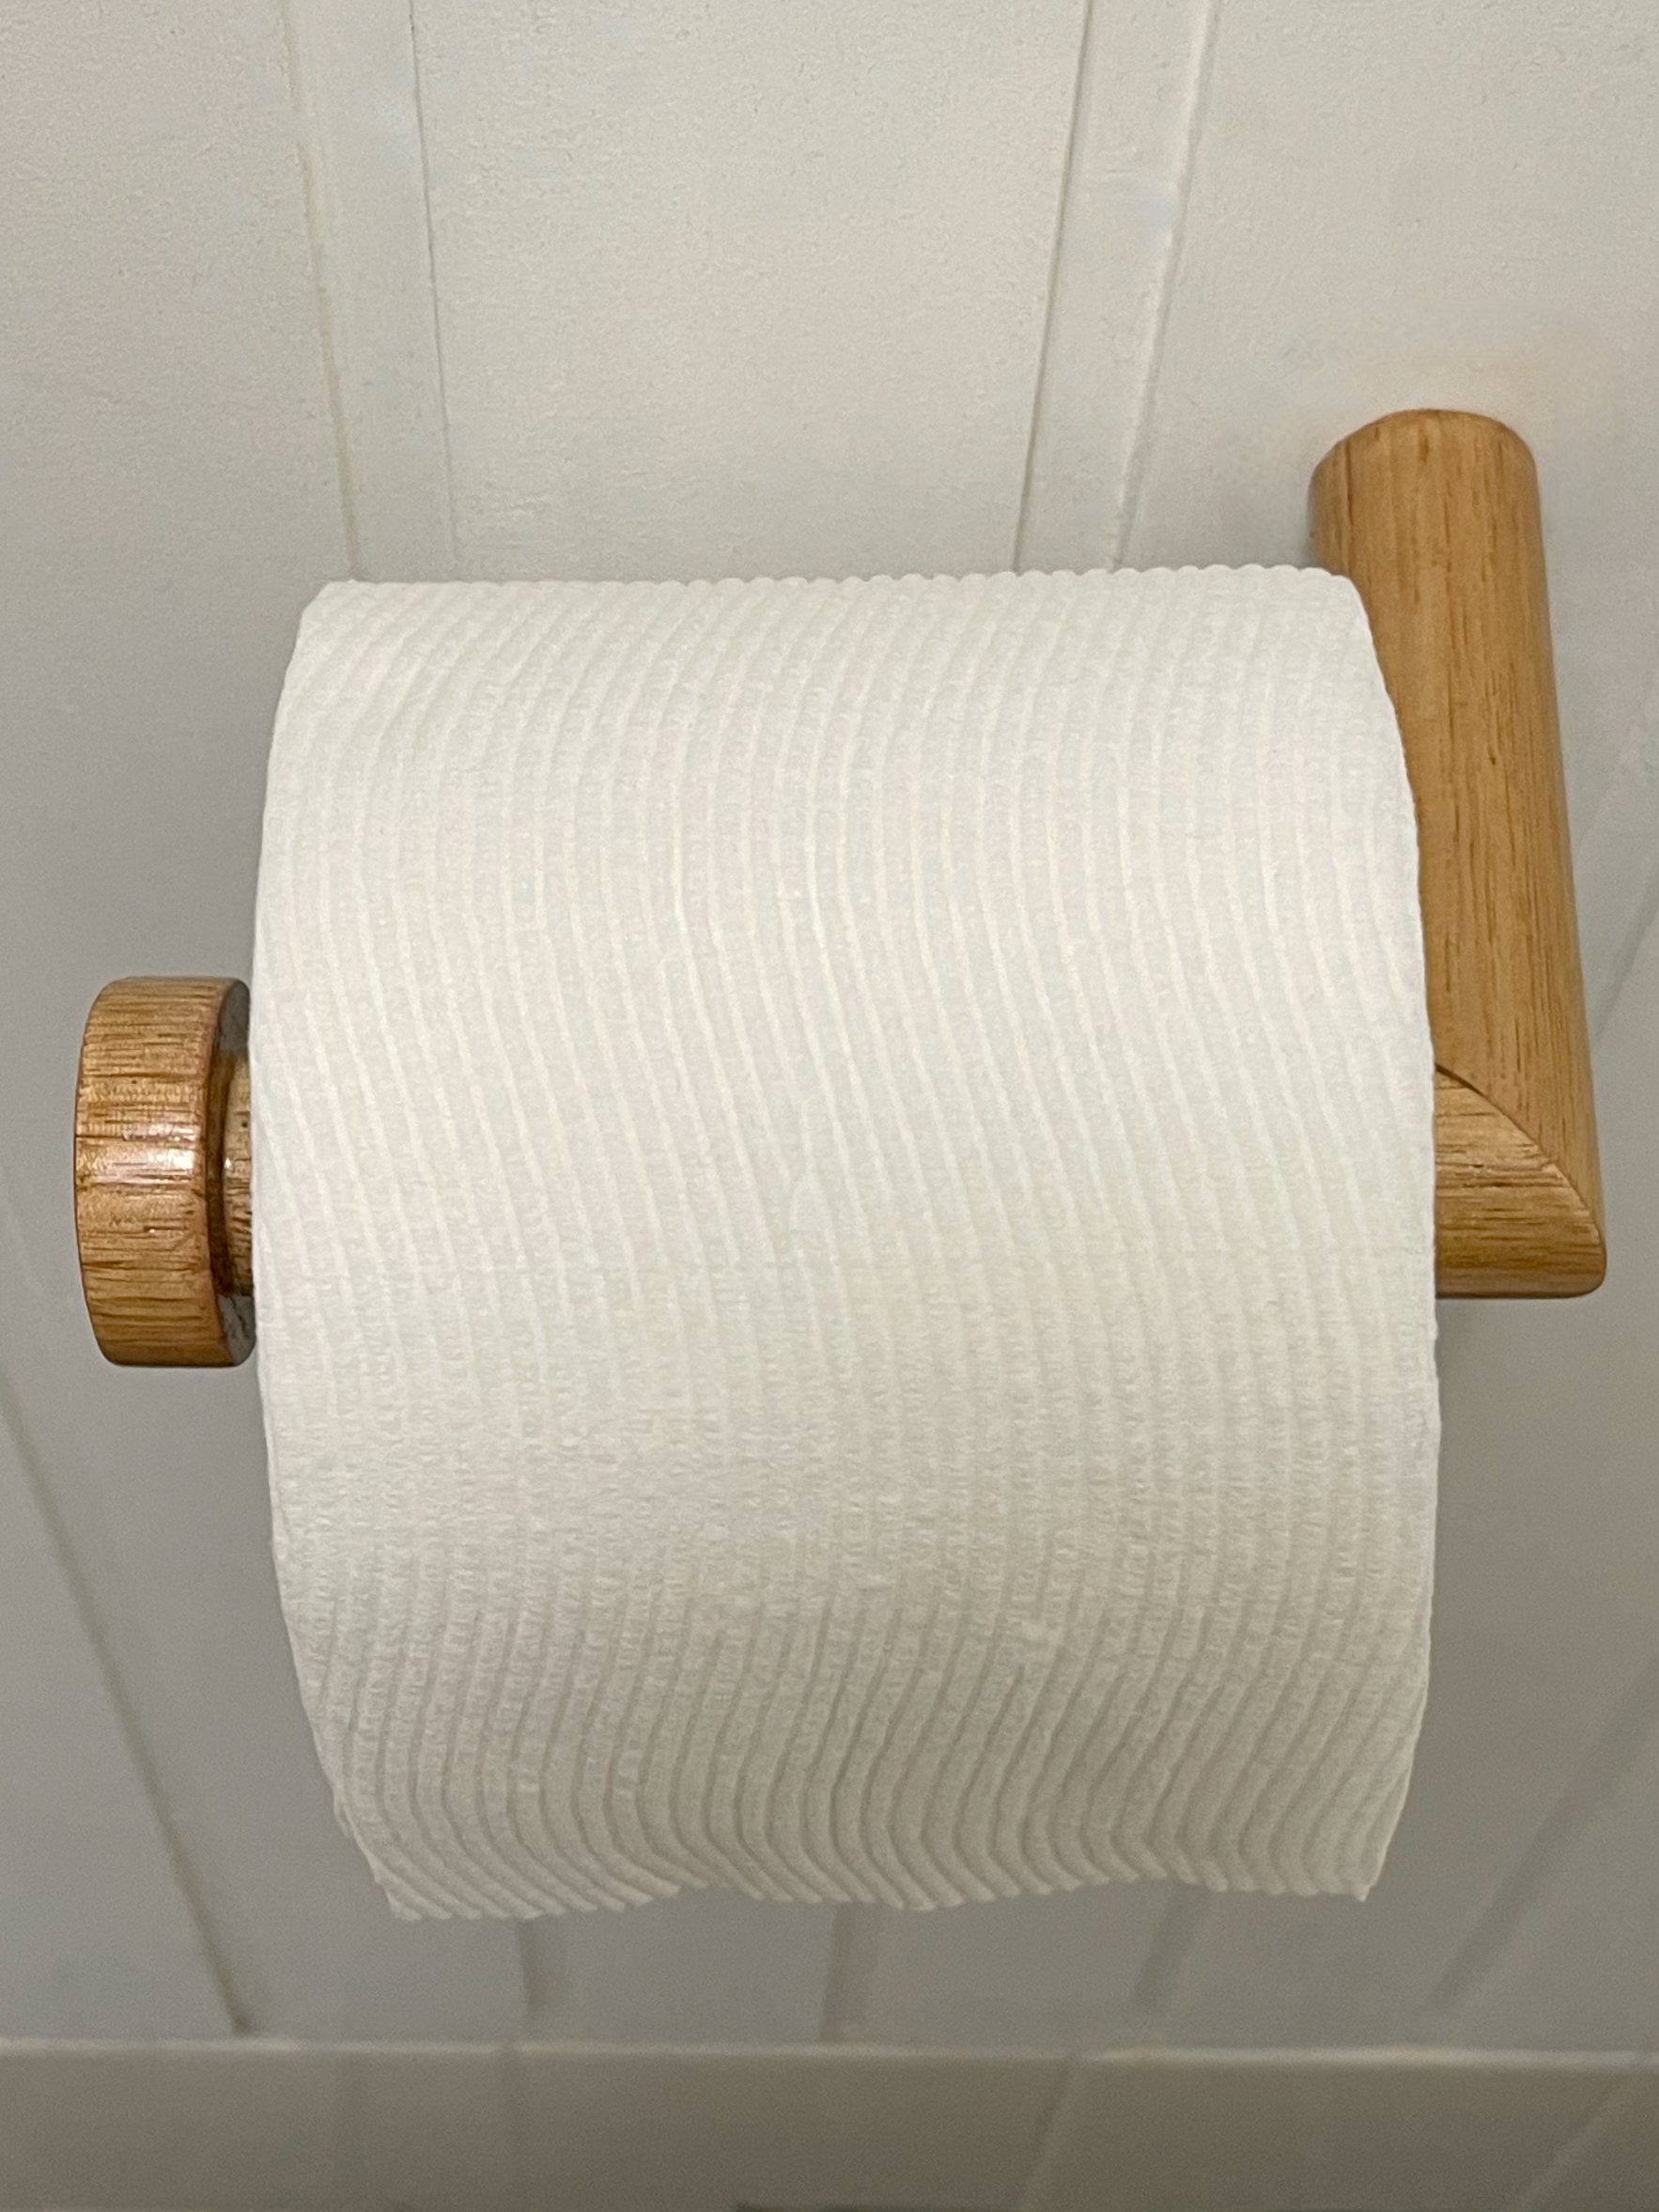
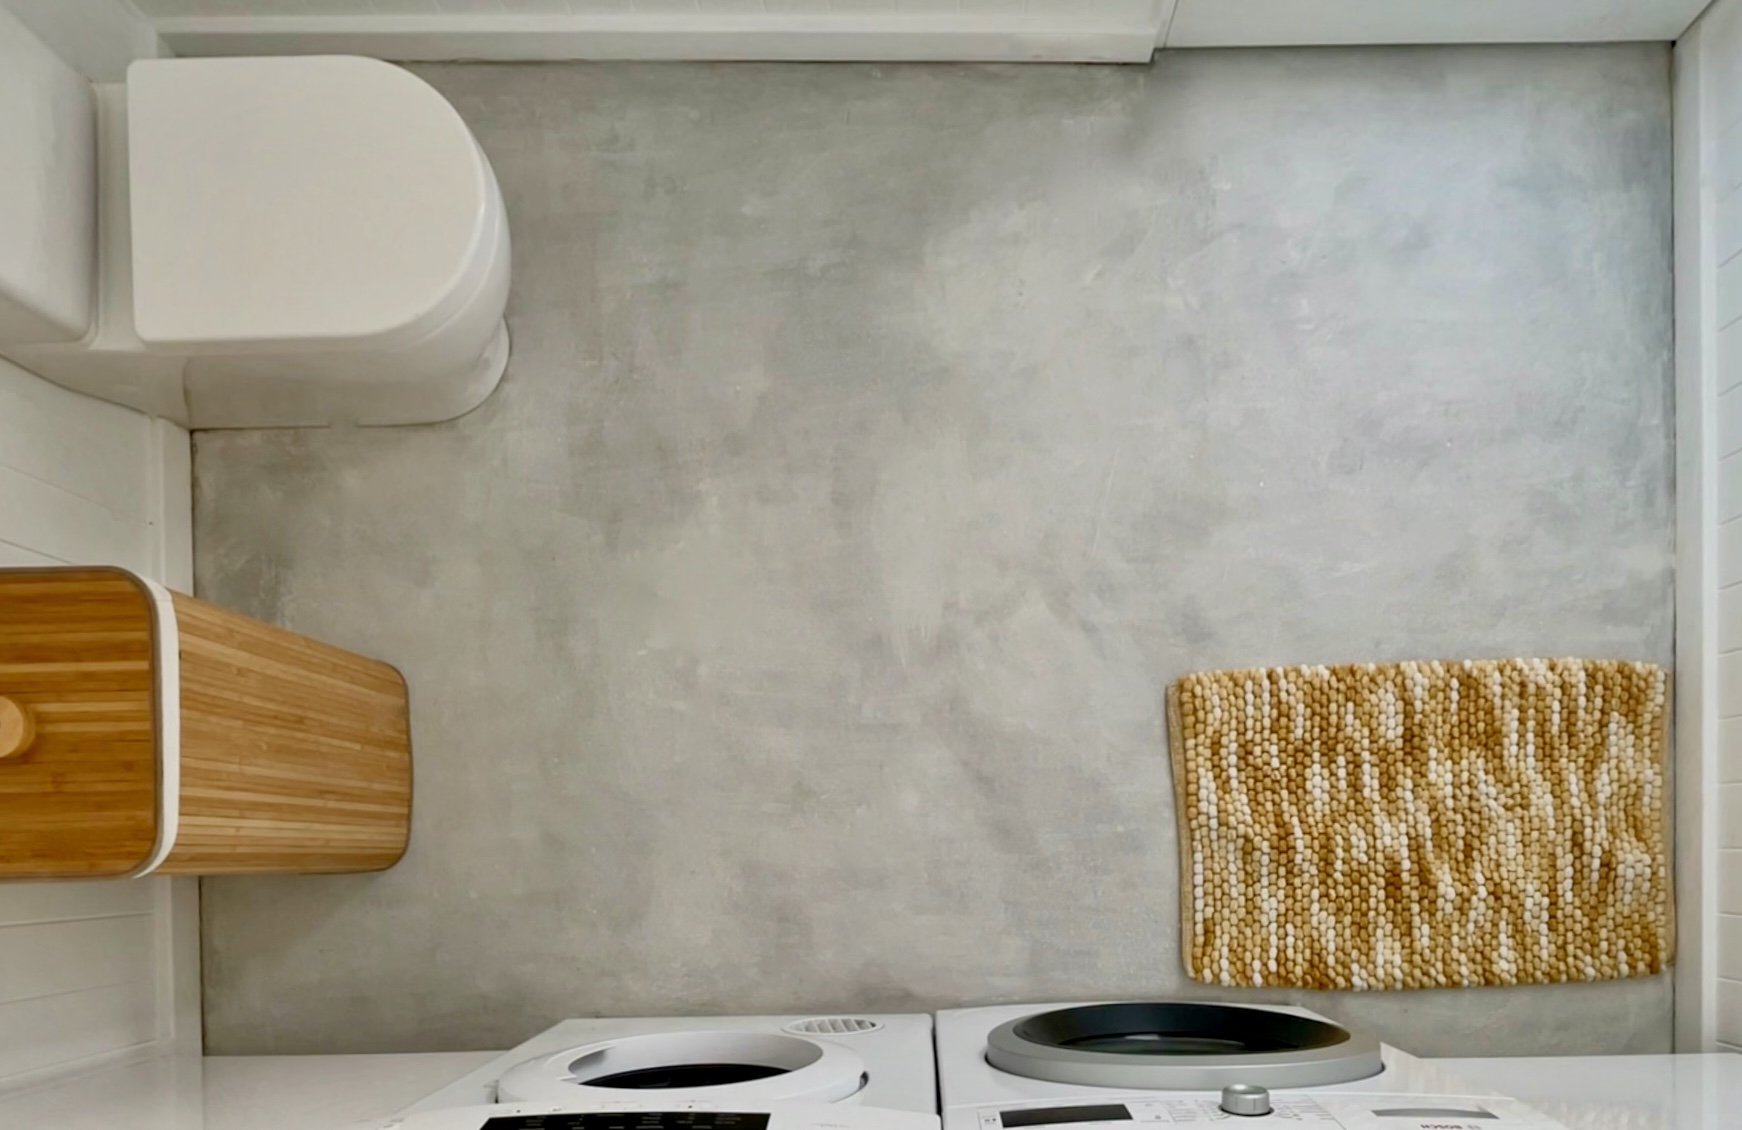
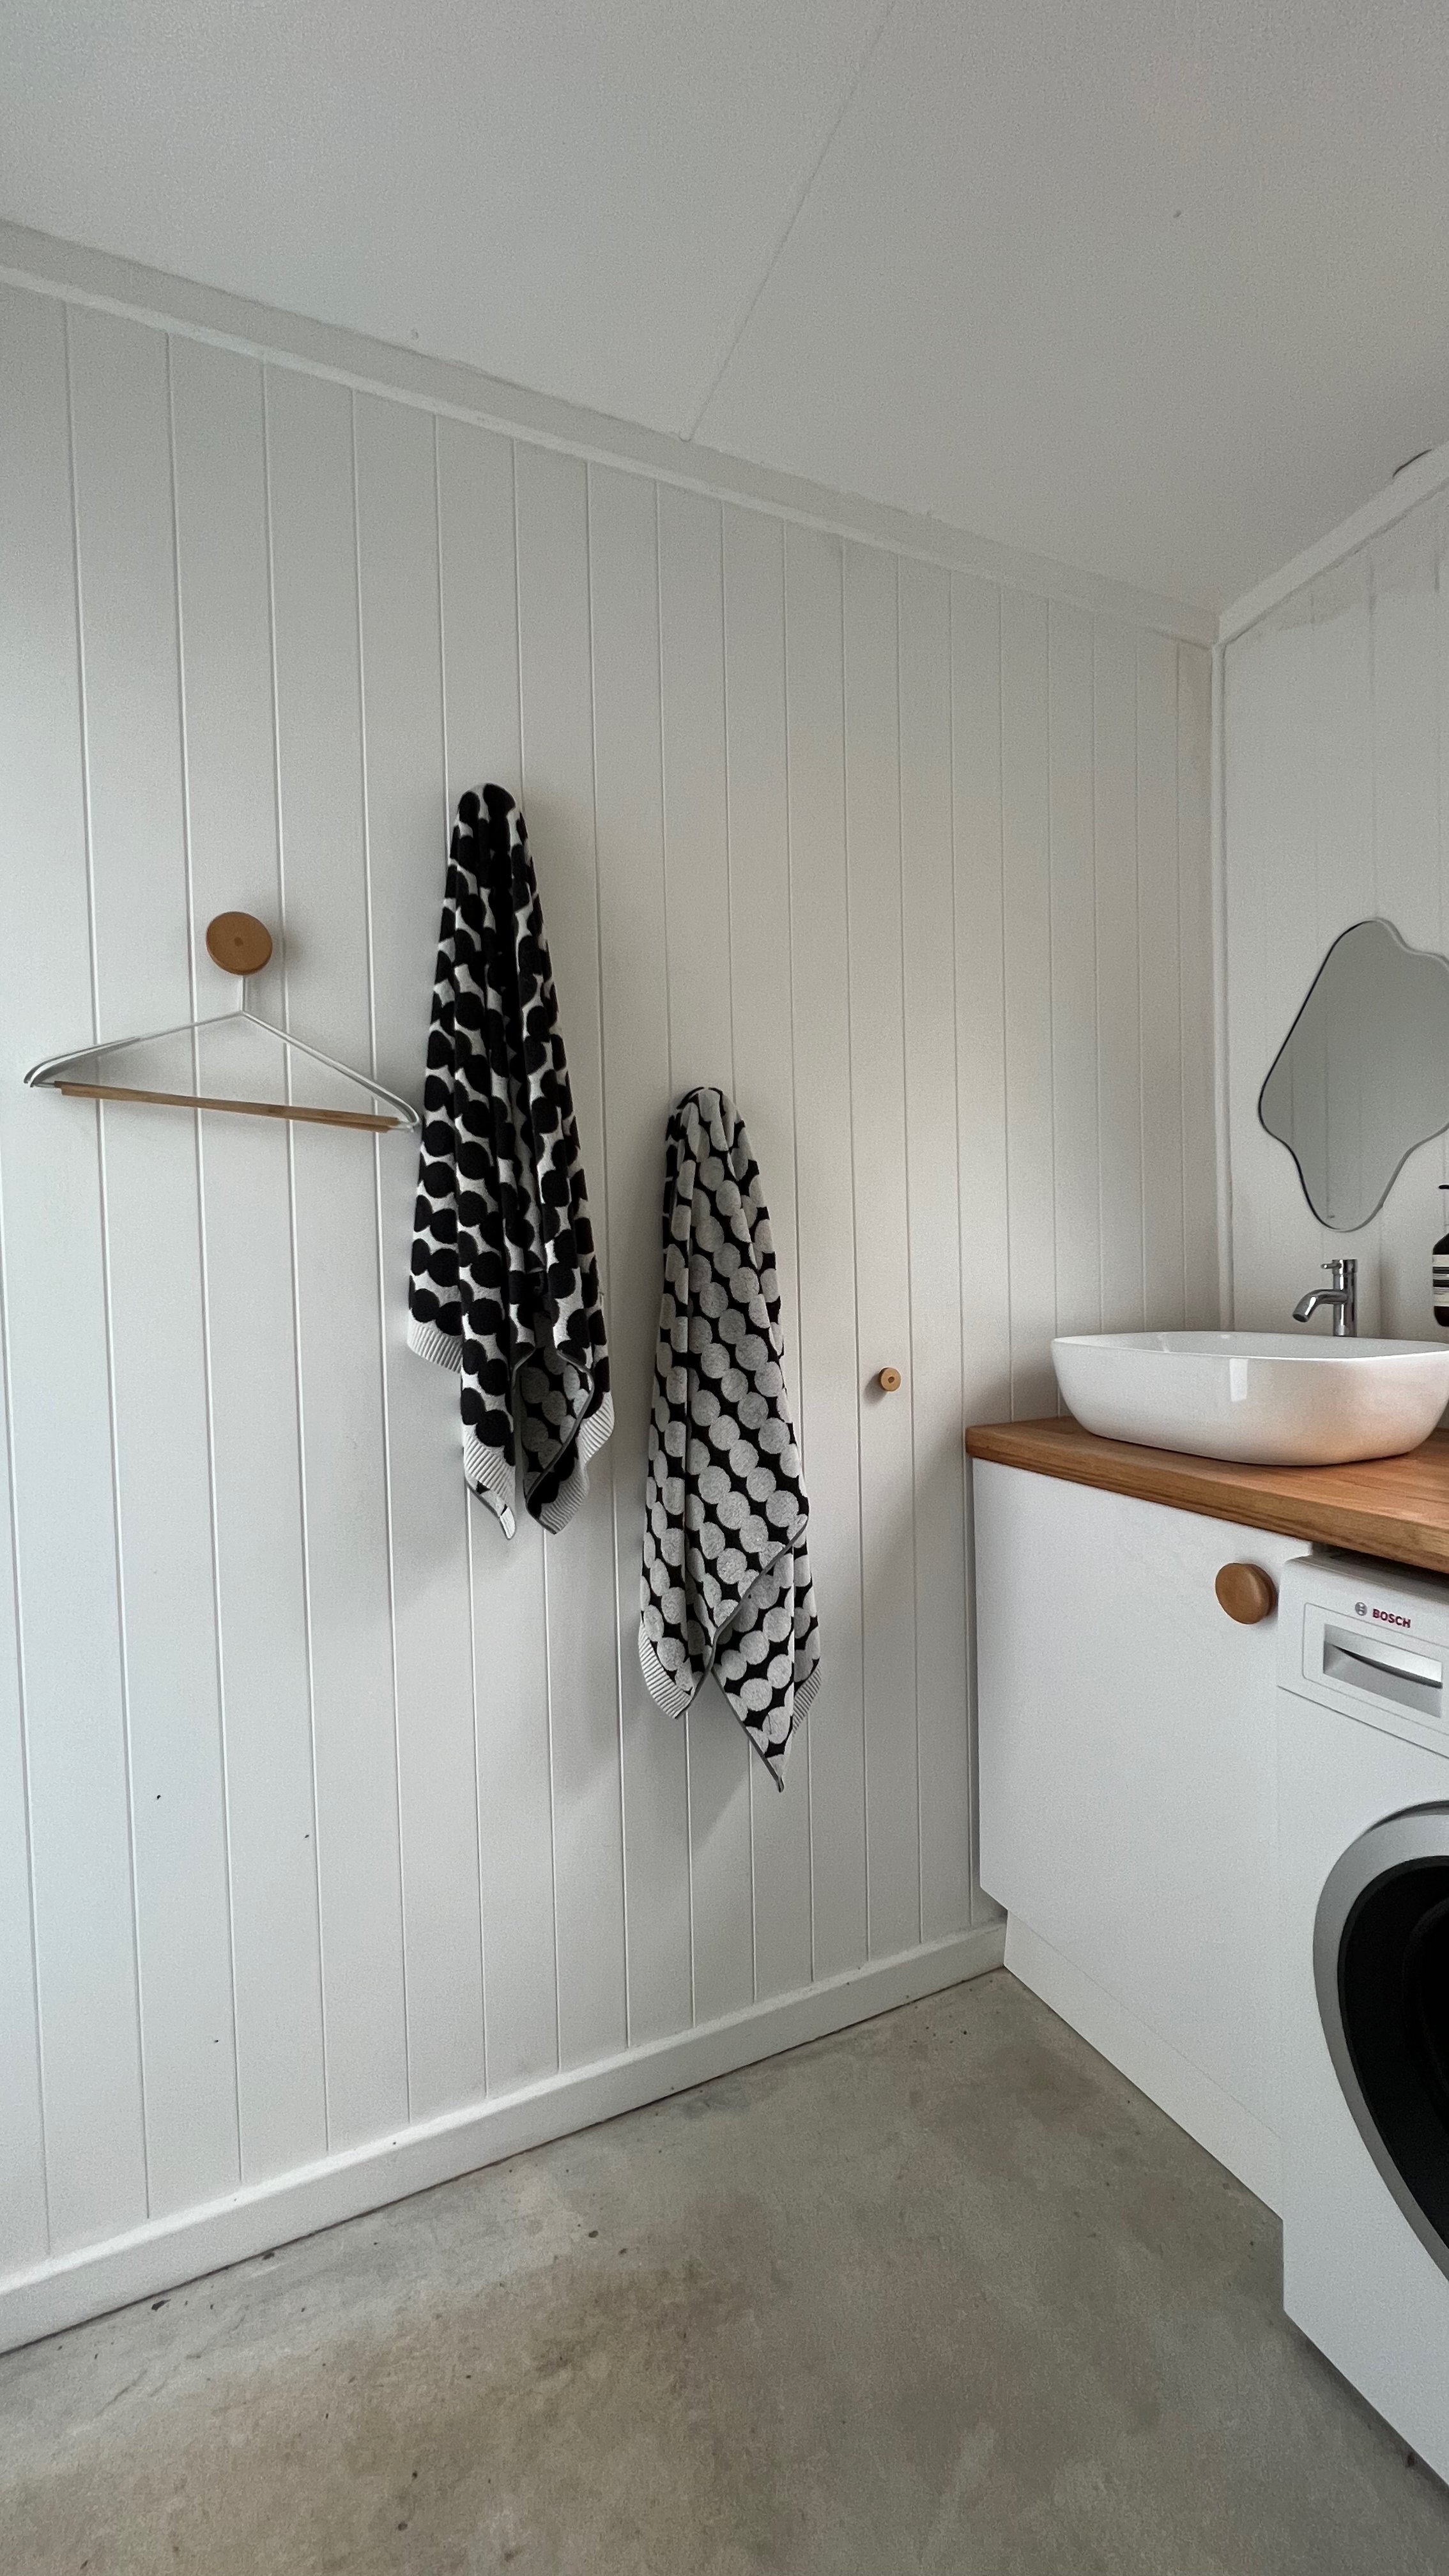
ADDING TIMBER FEATURES

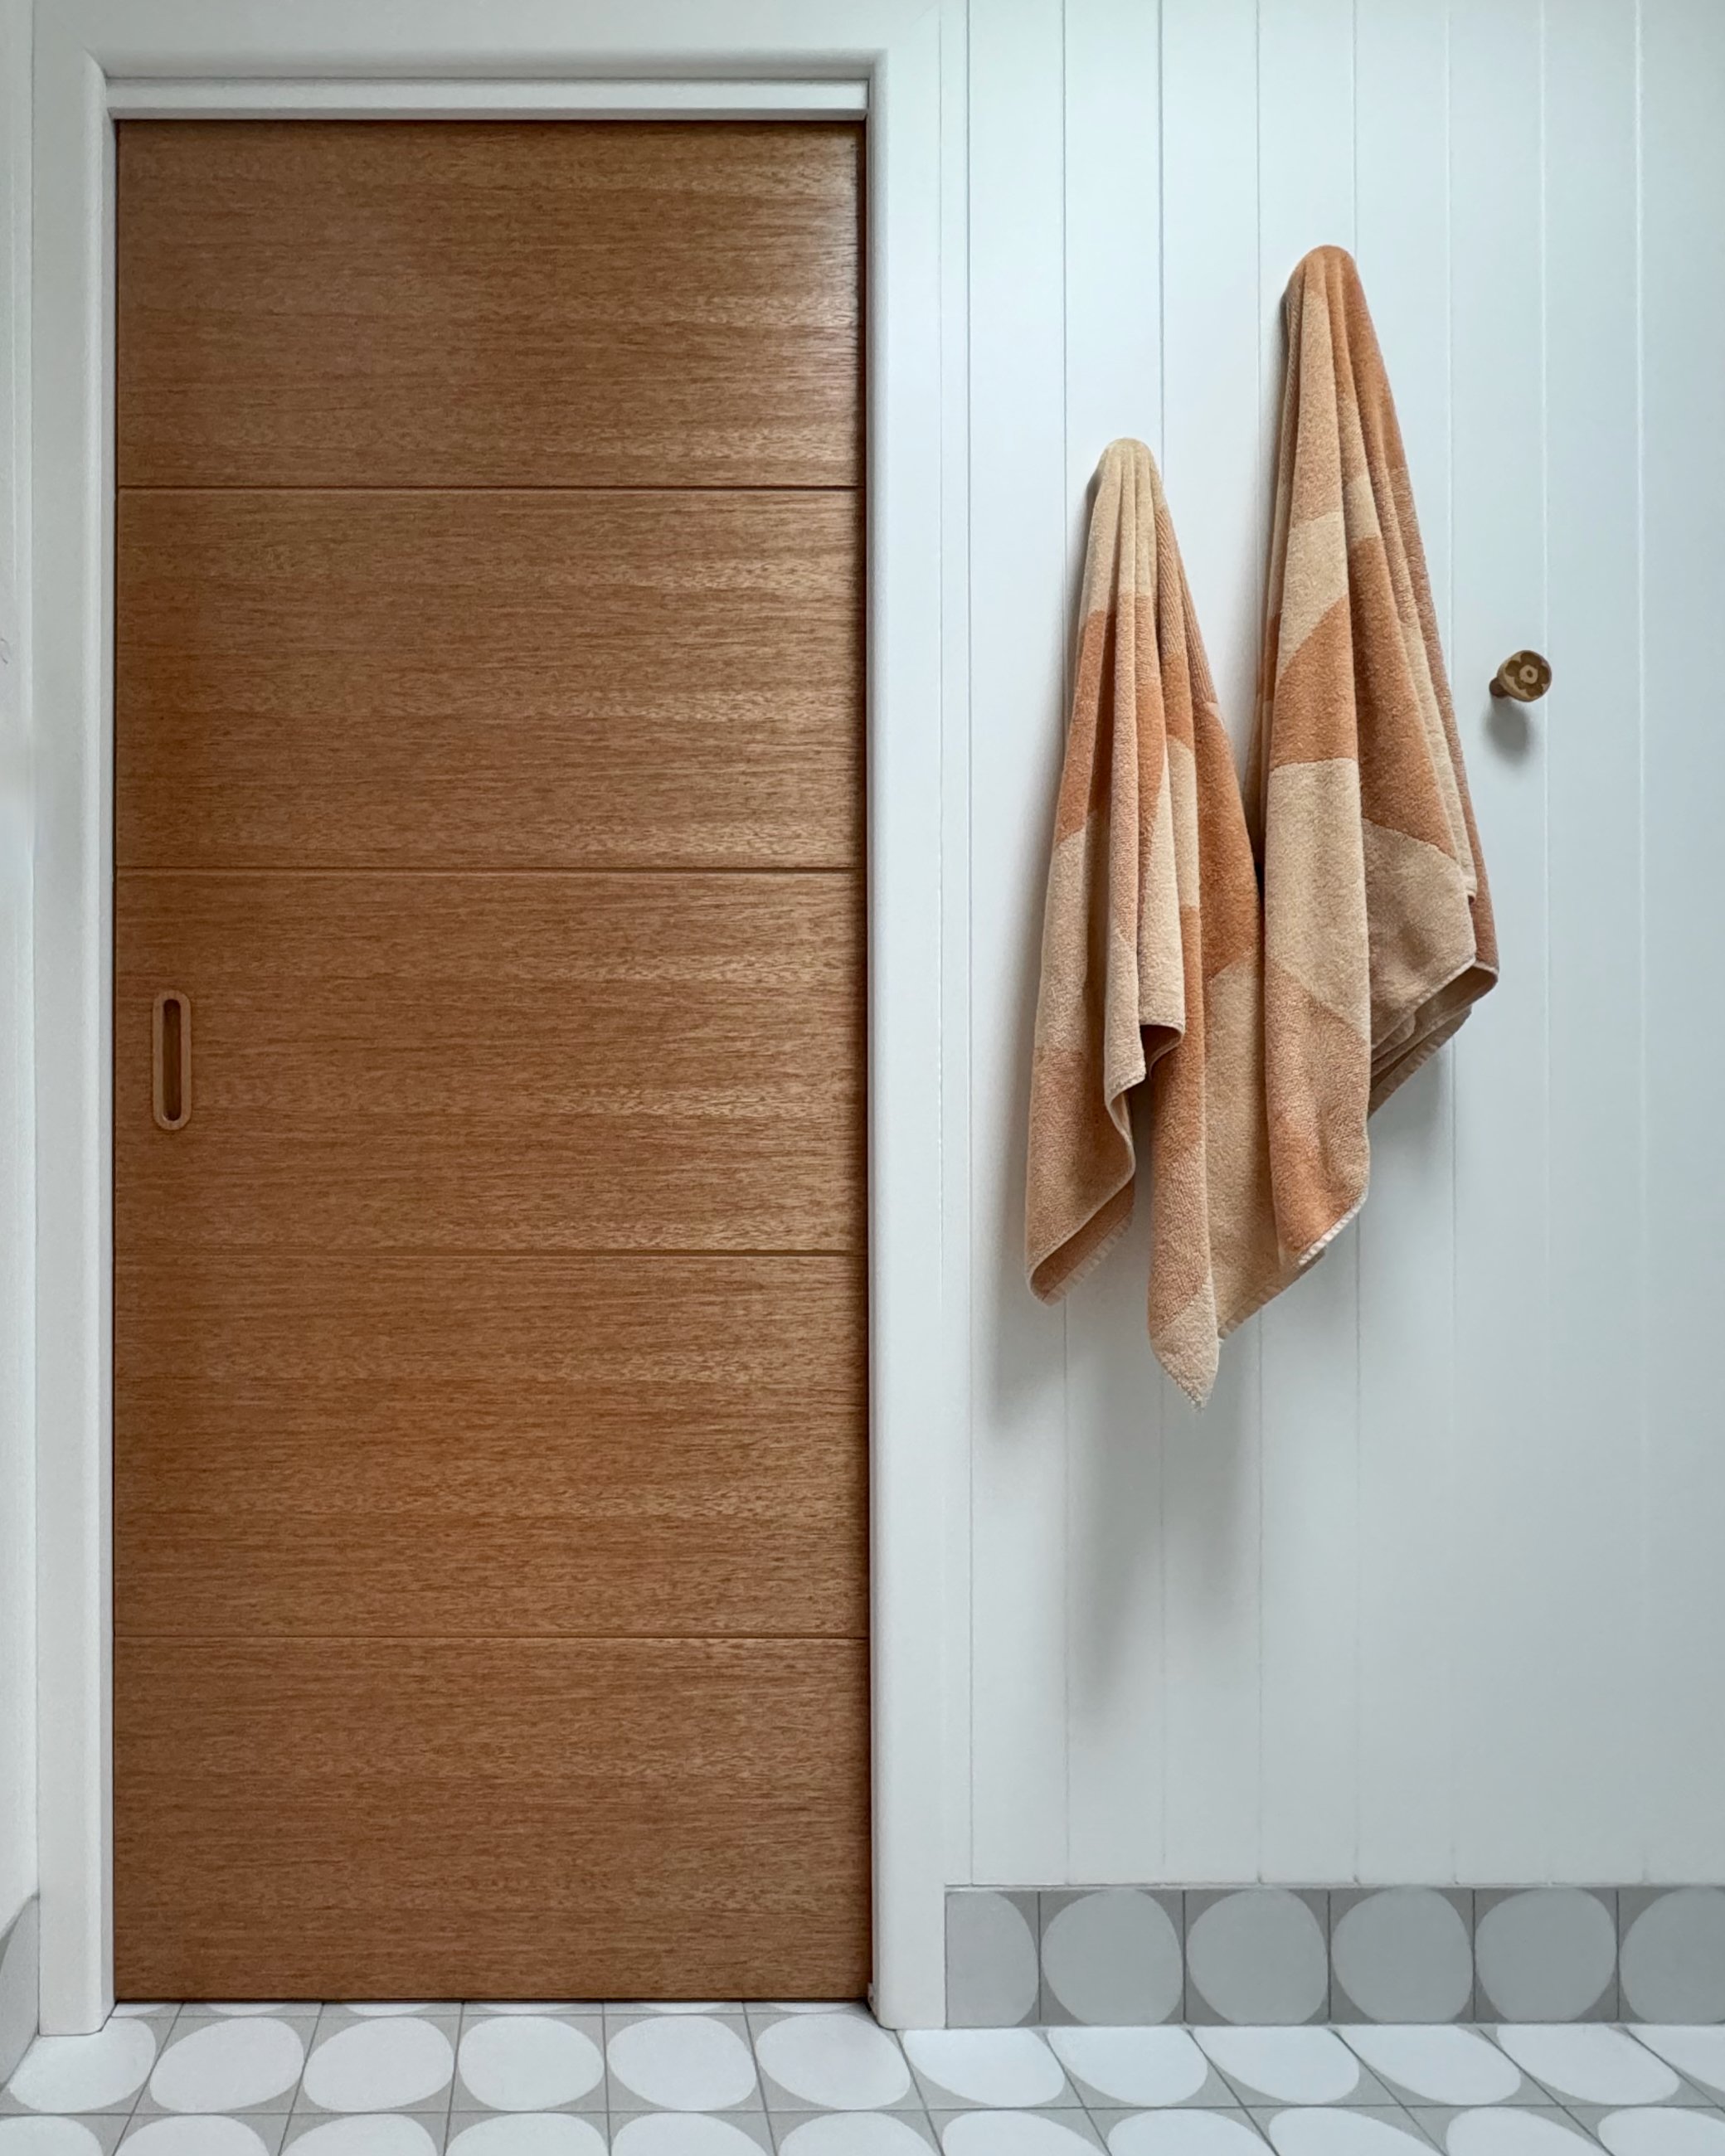
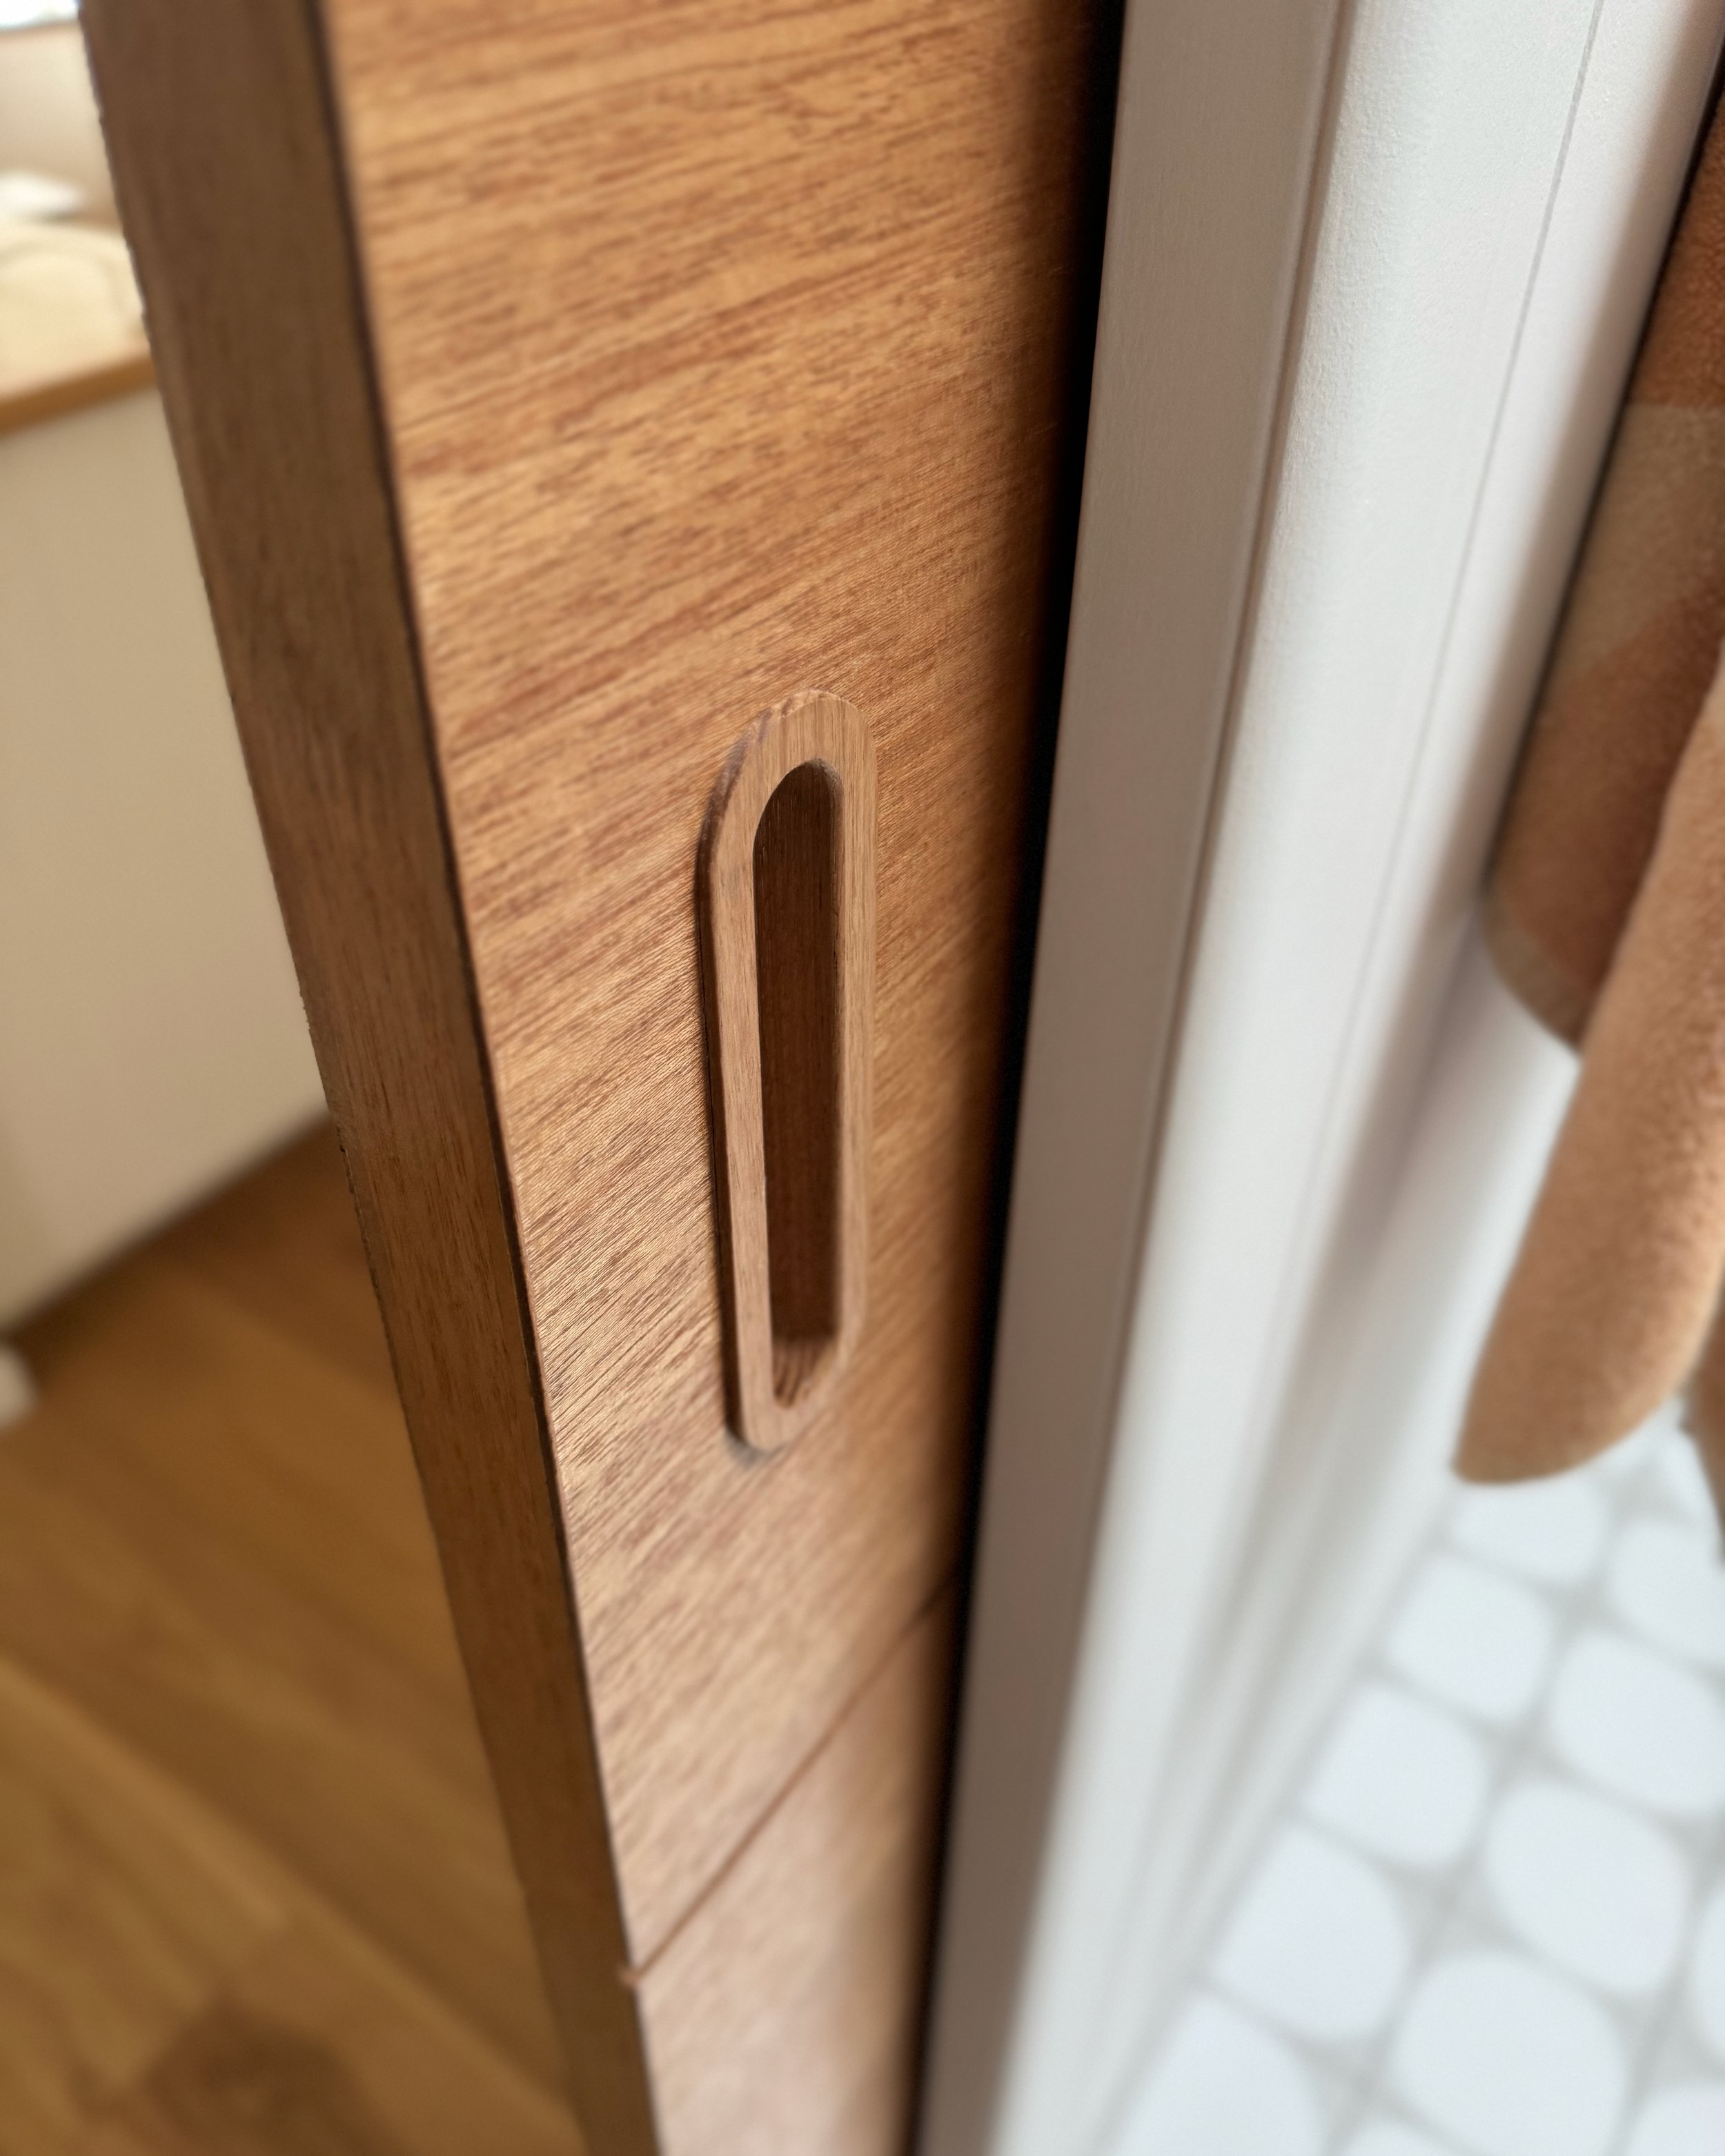
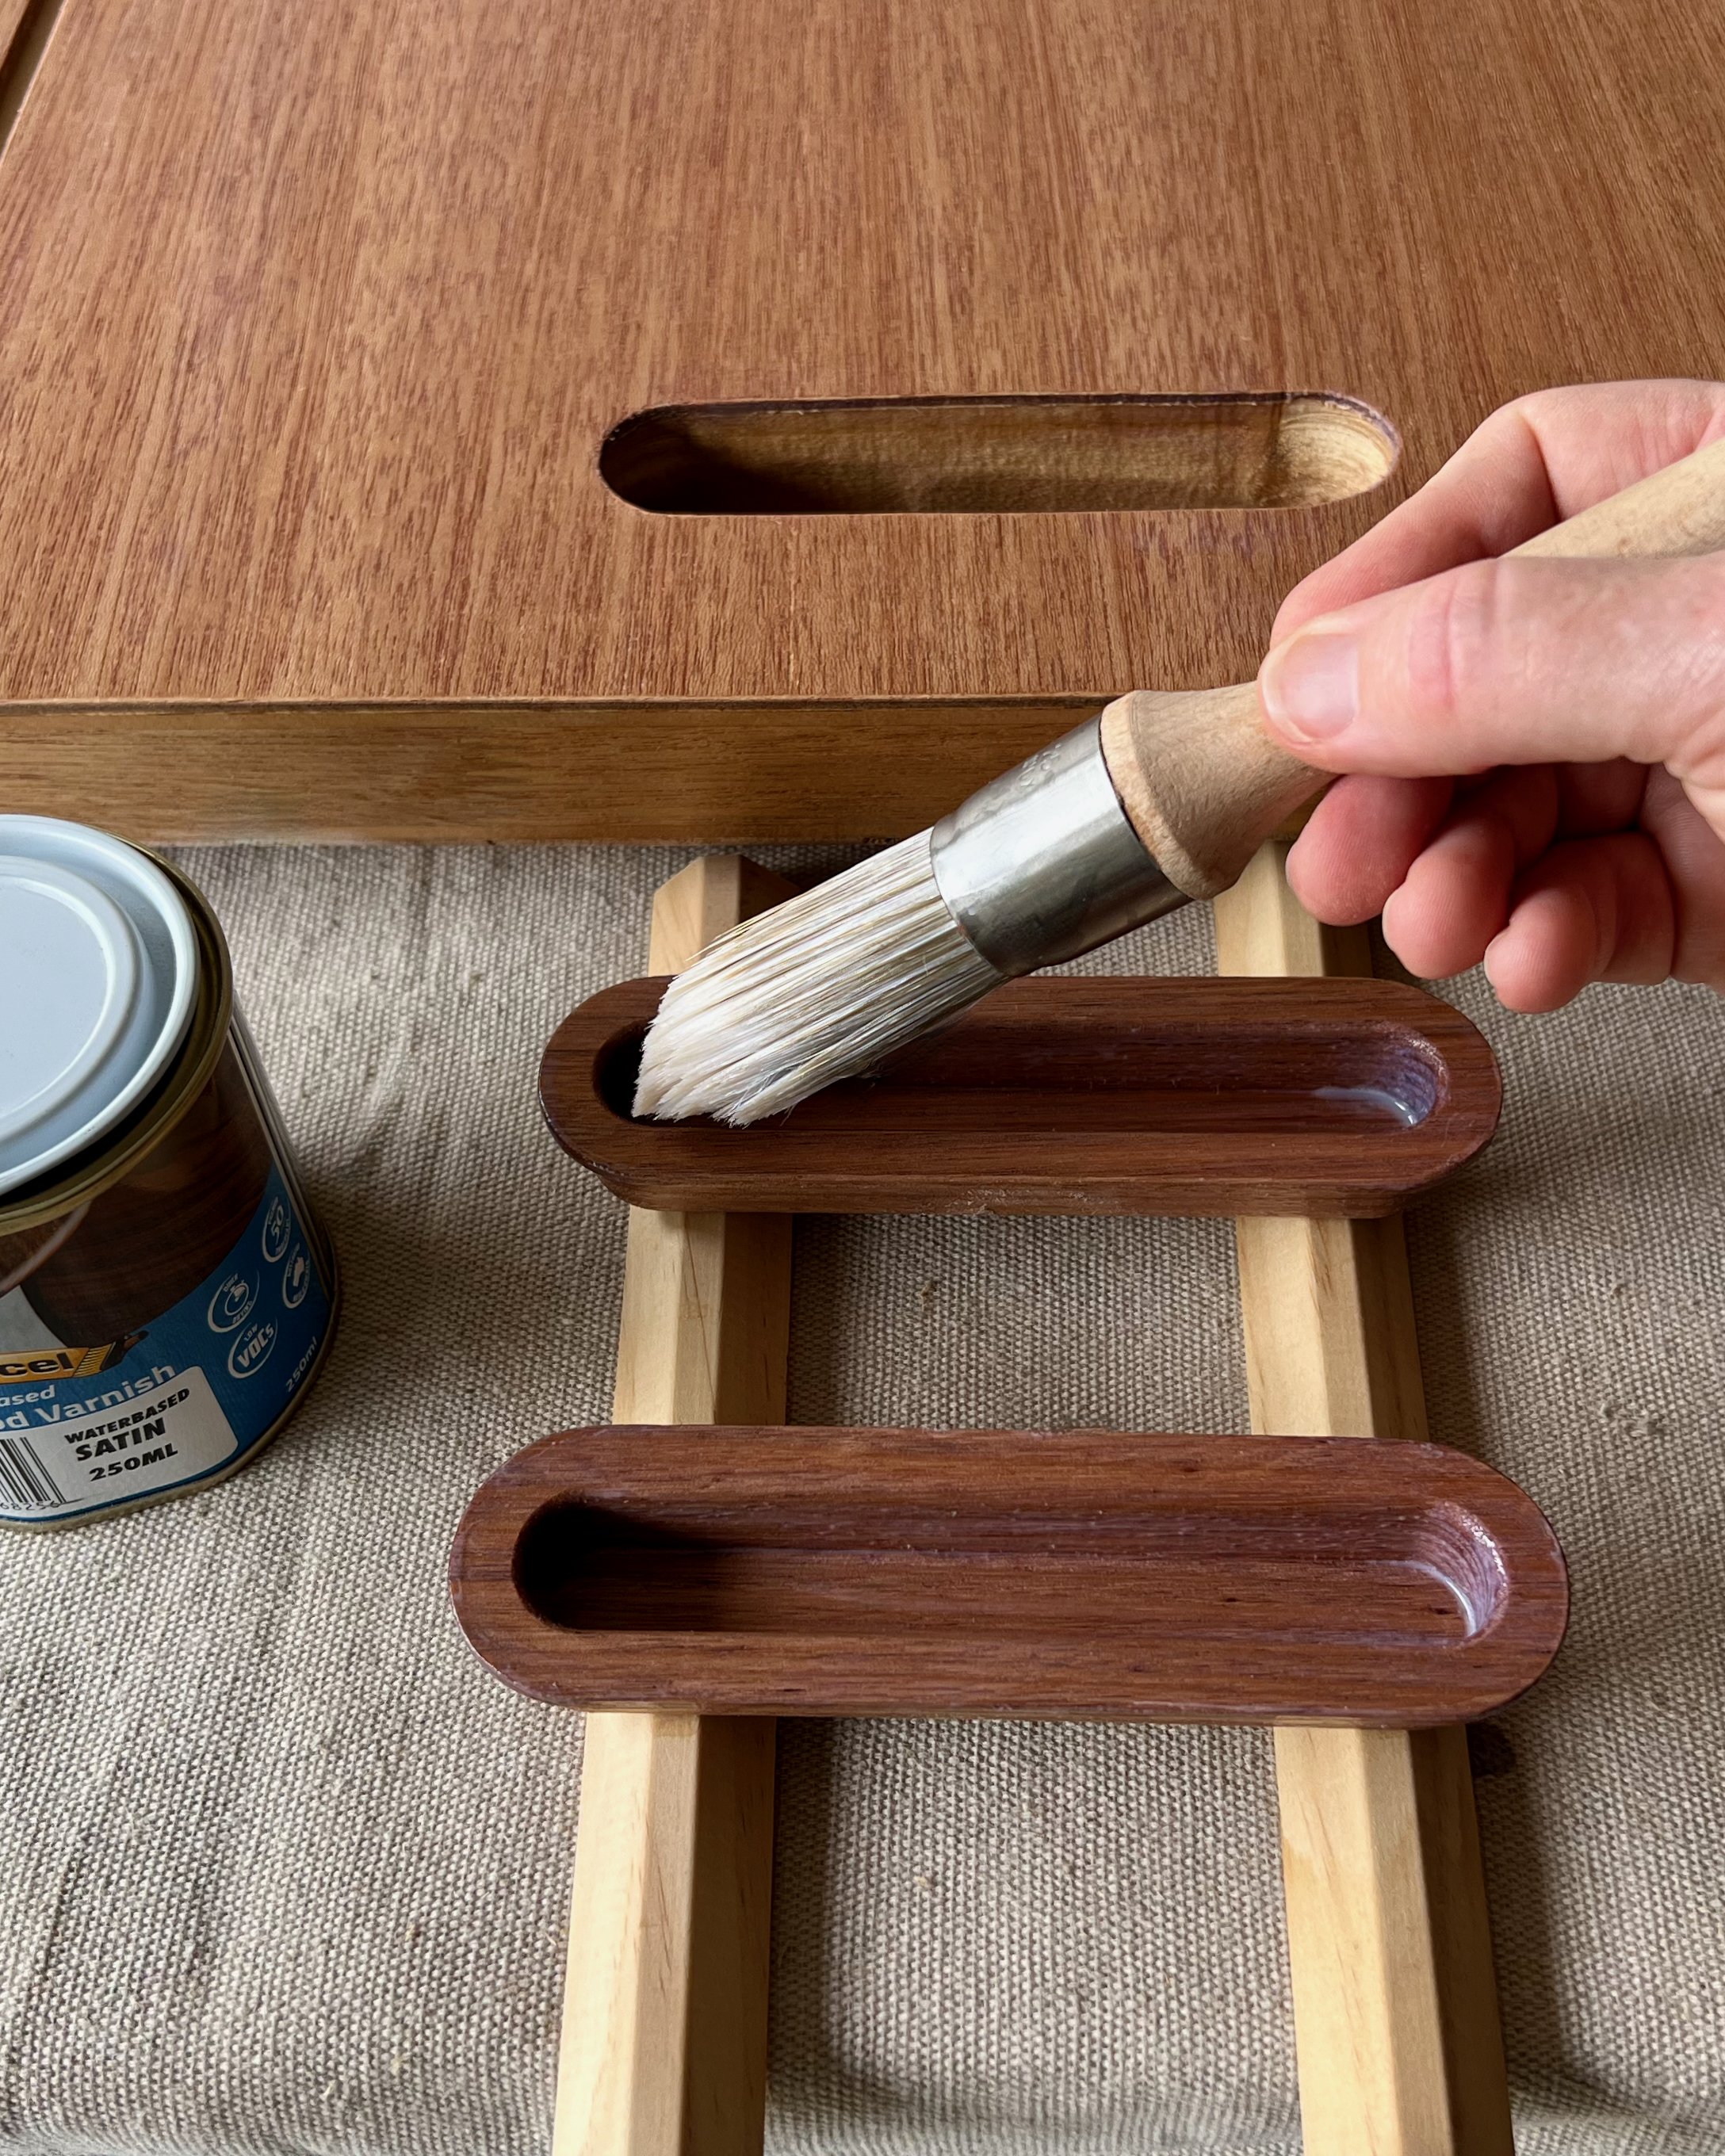
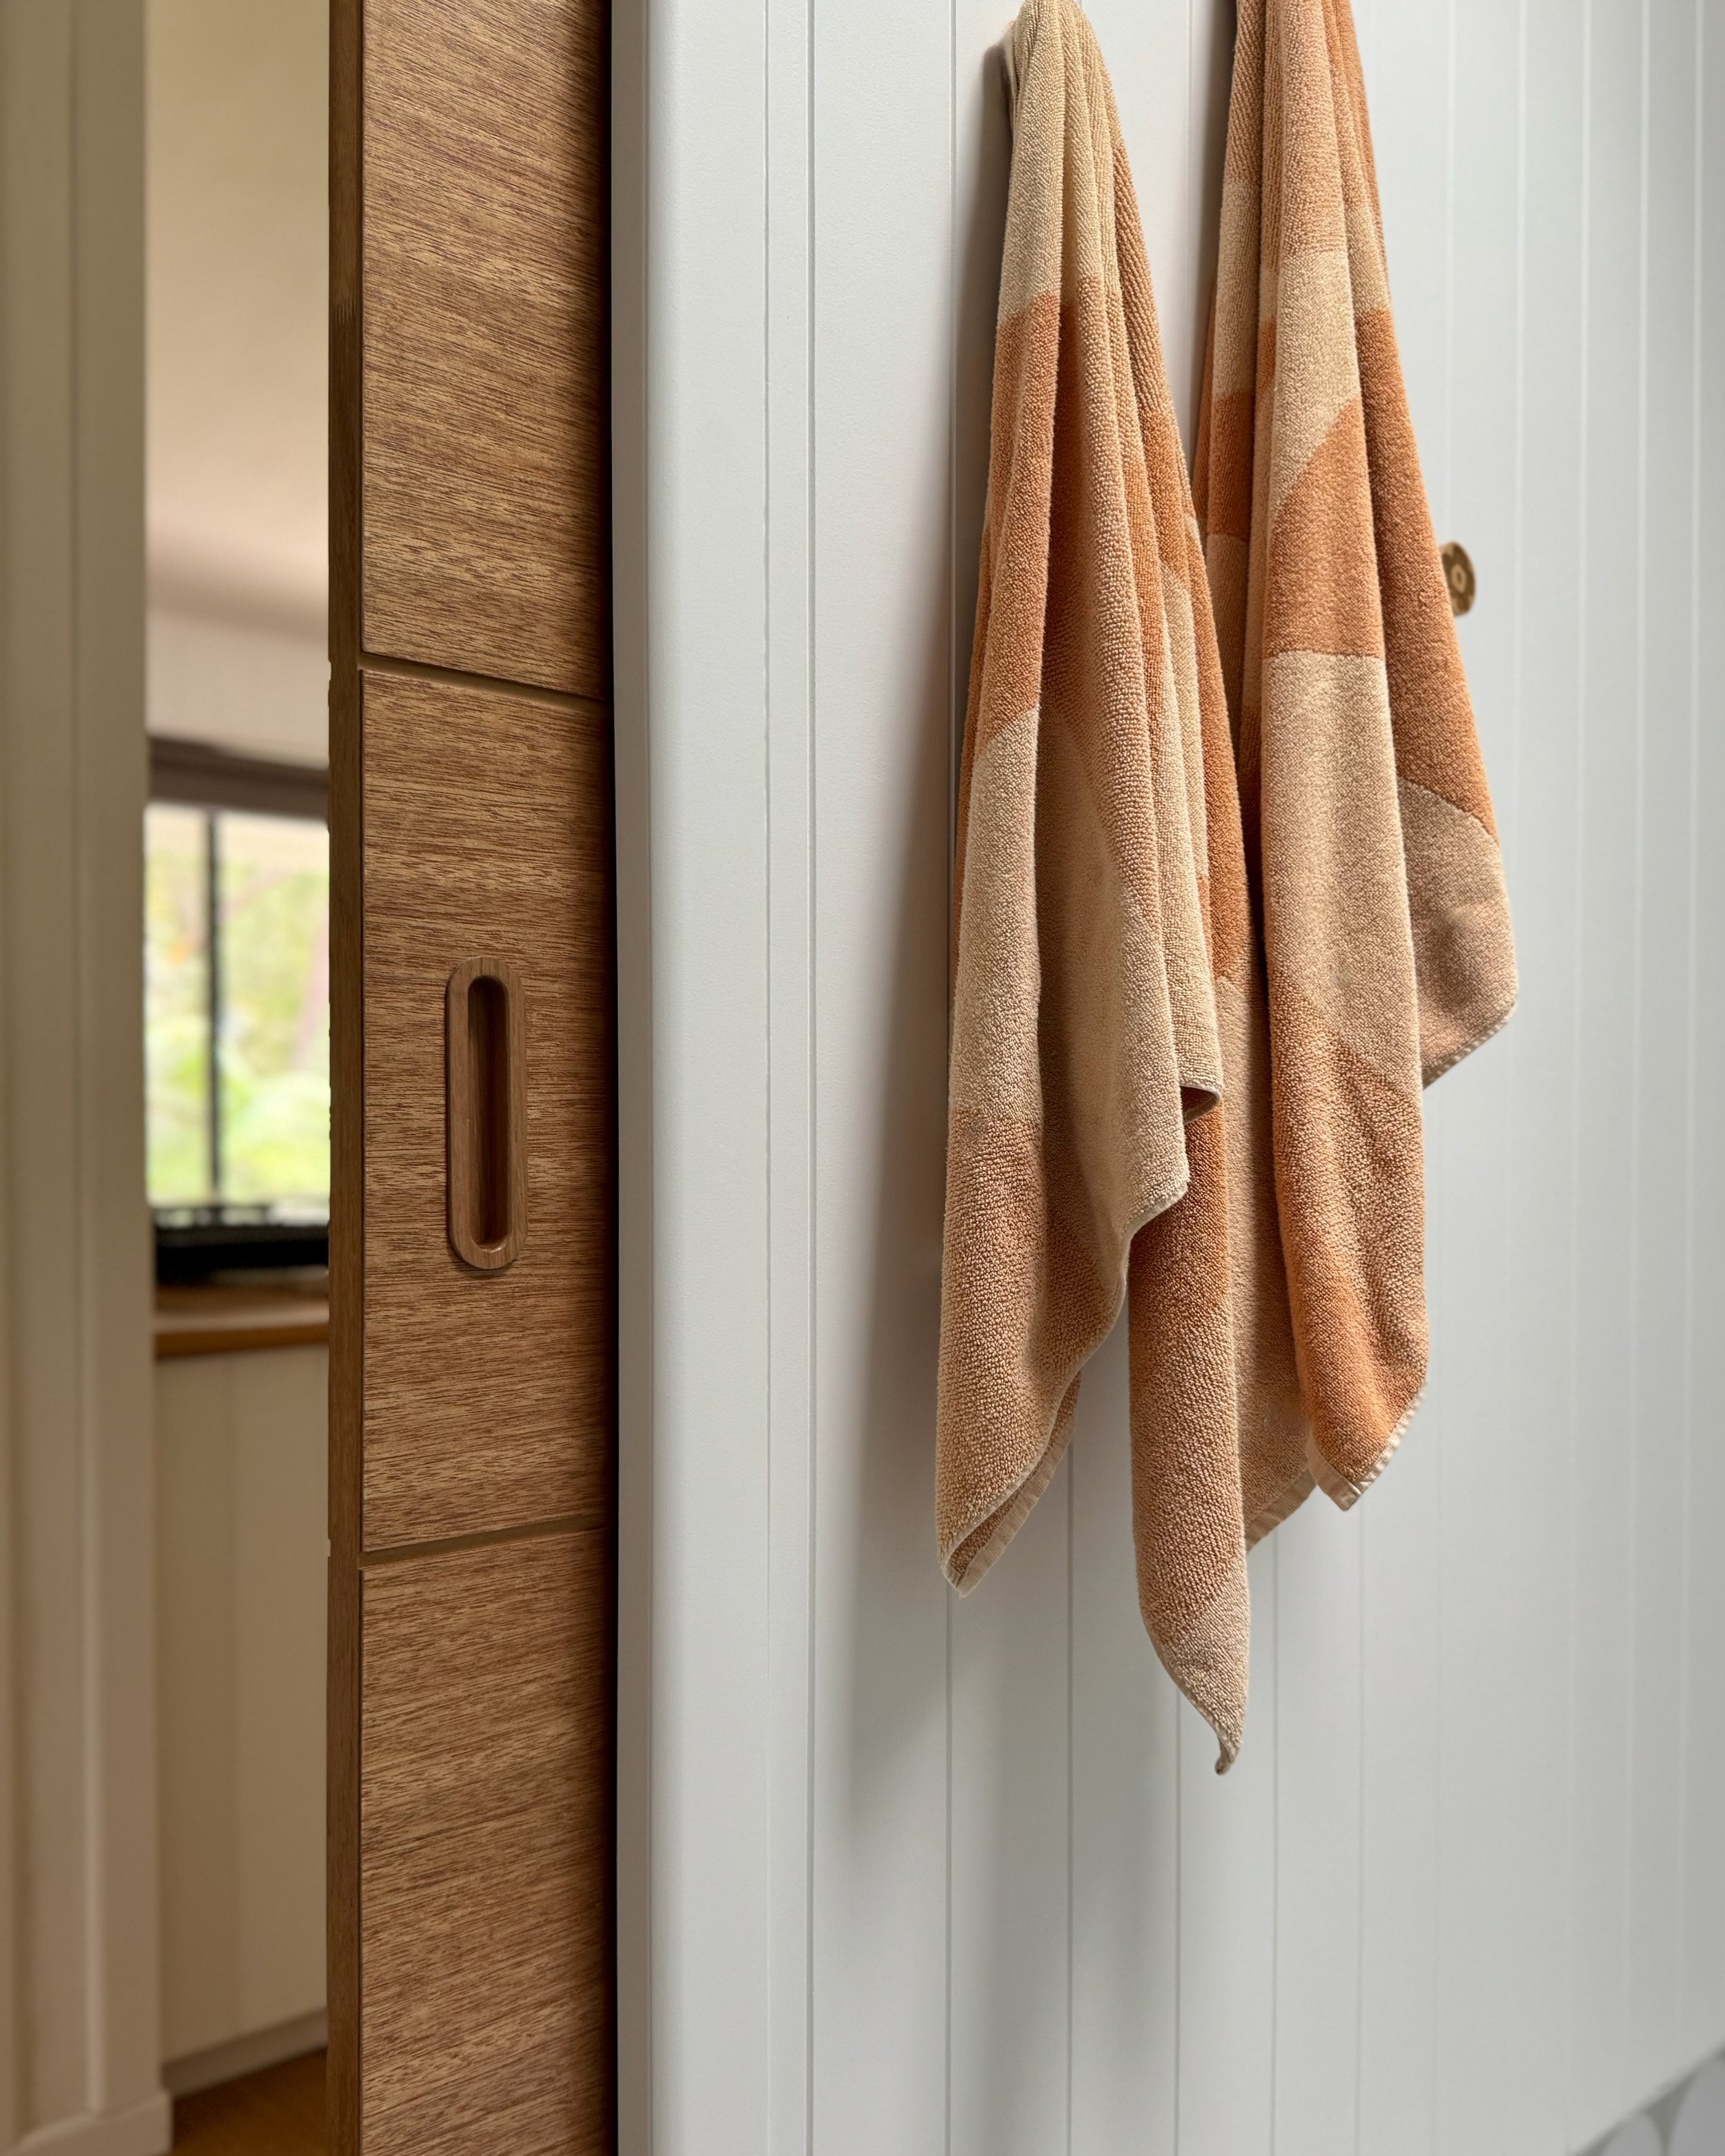
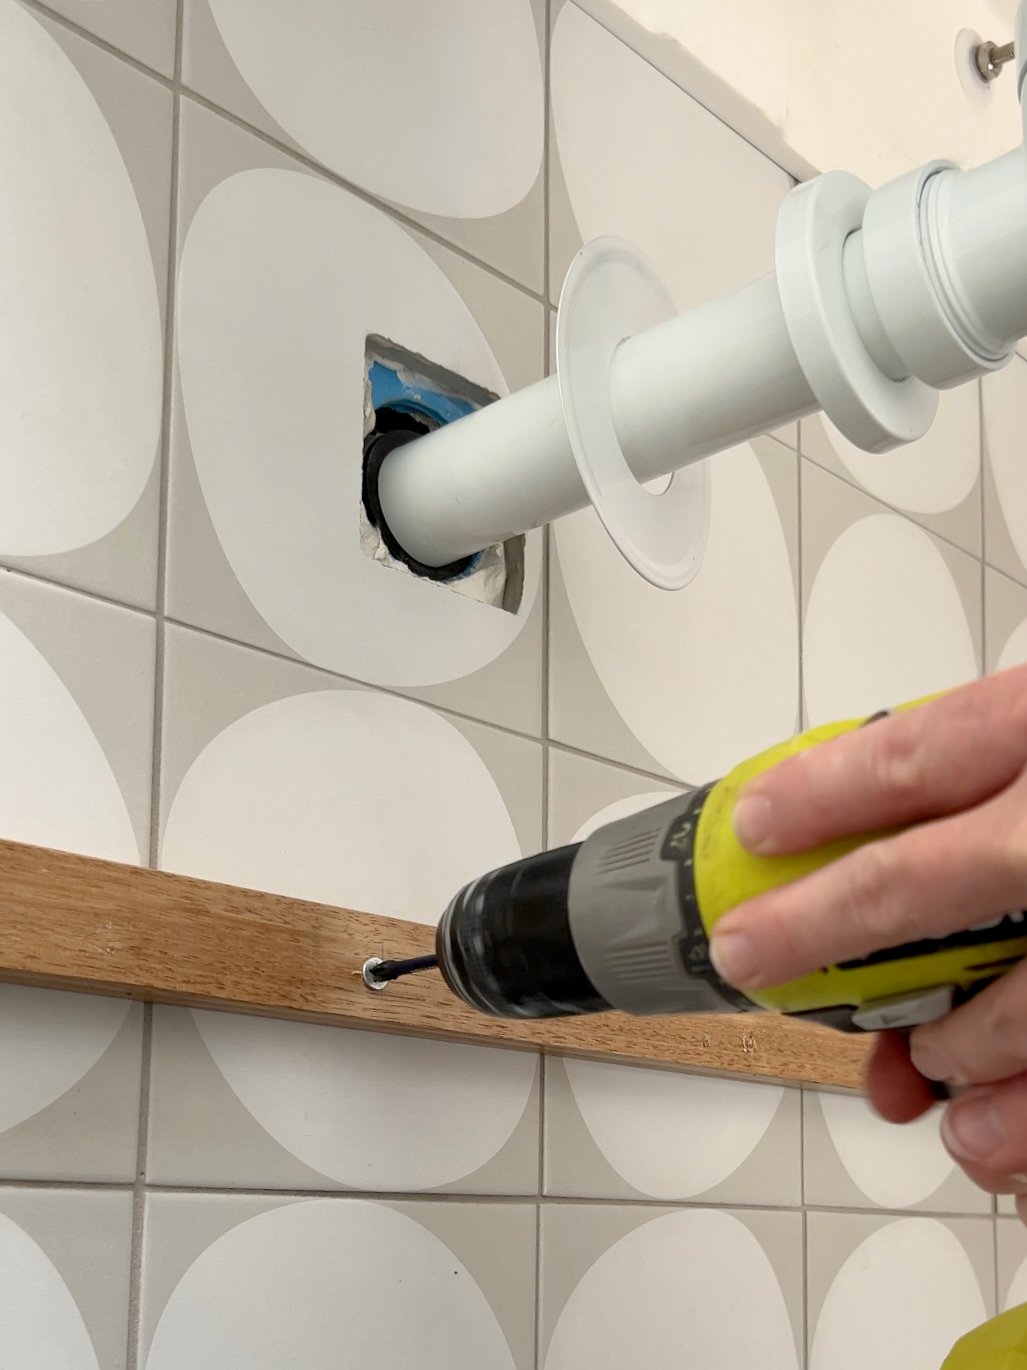
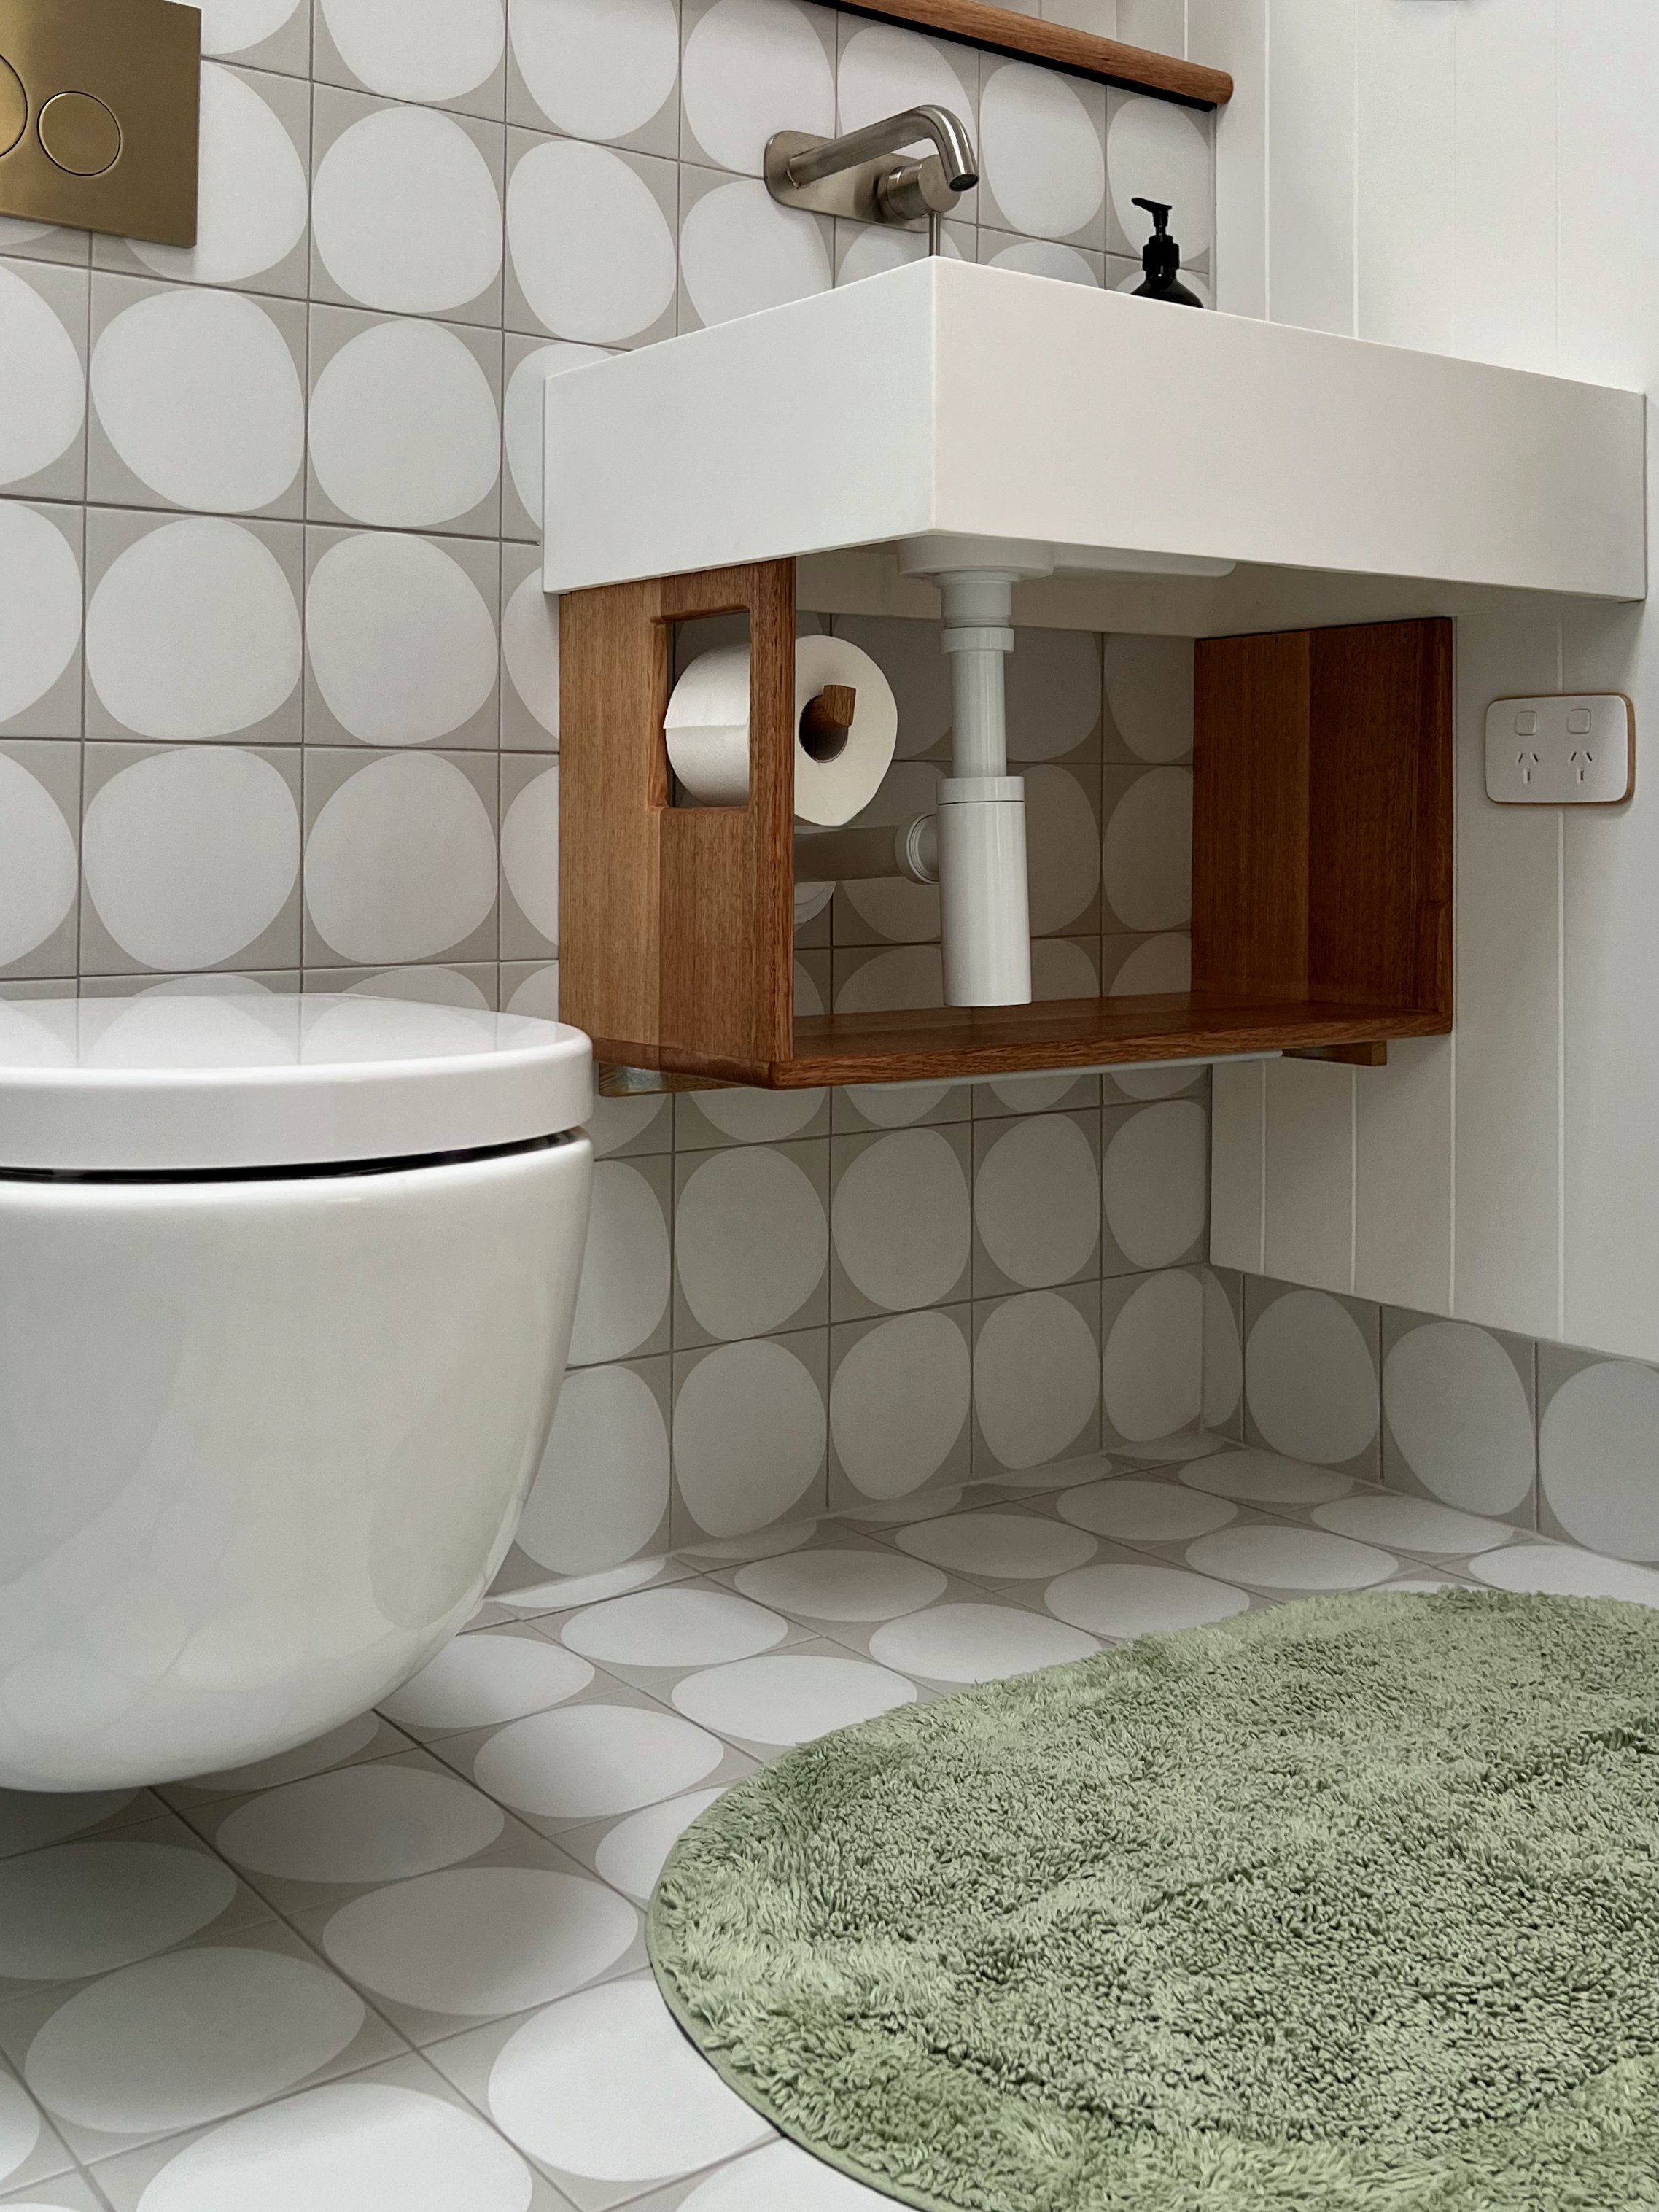
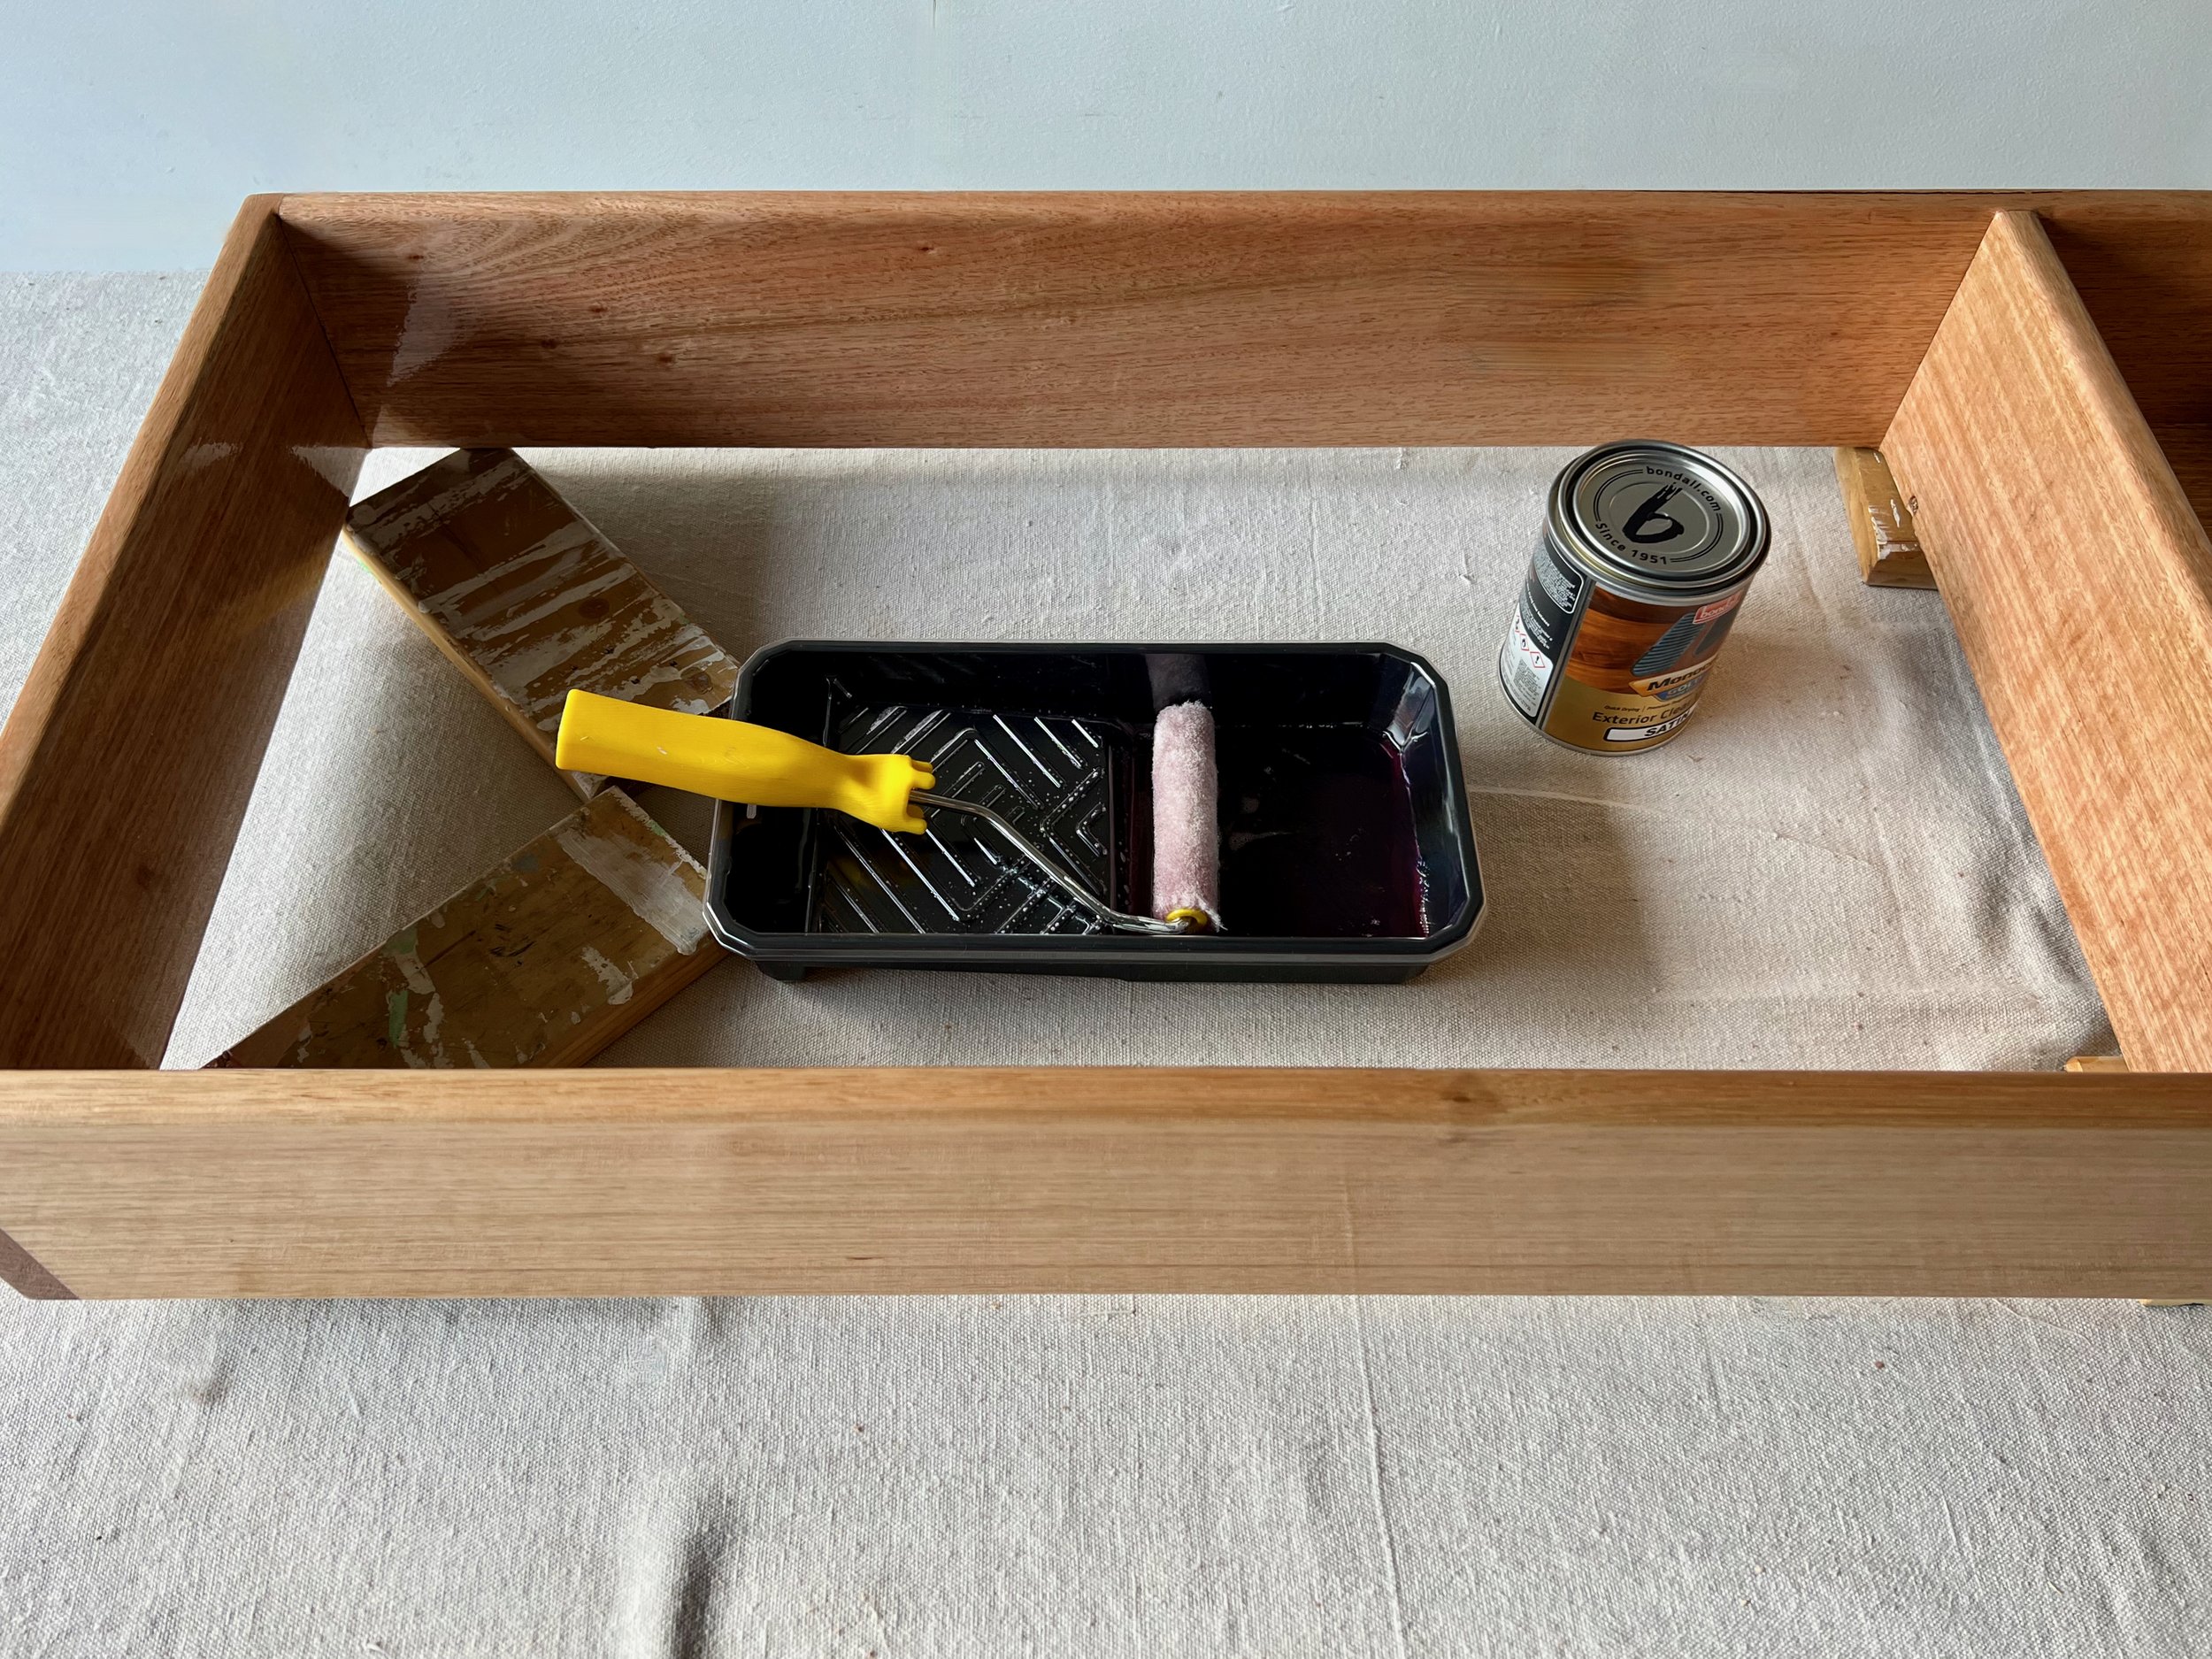
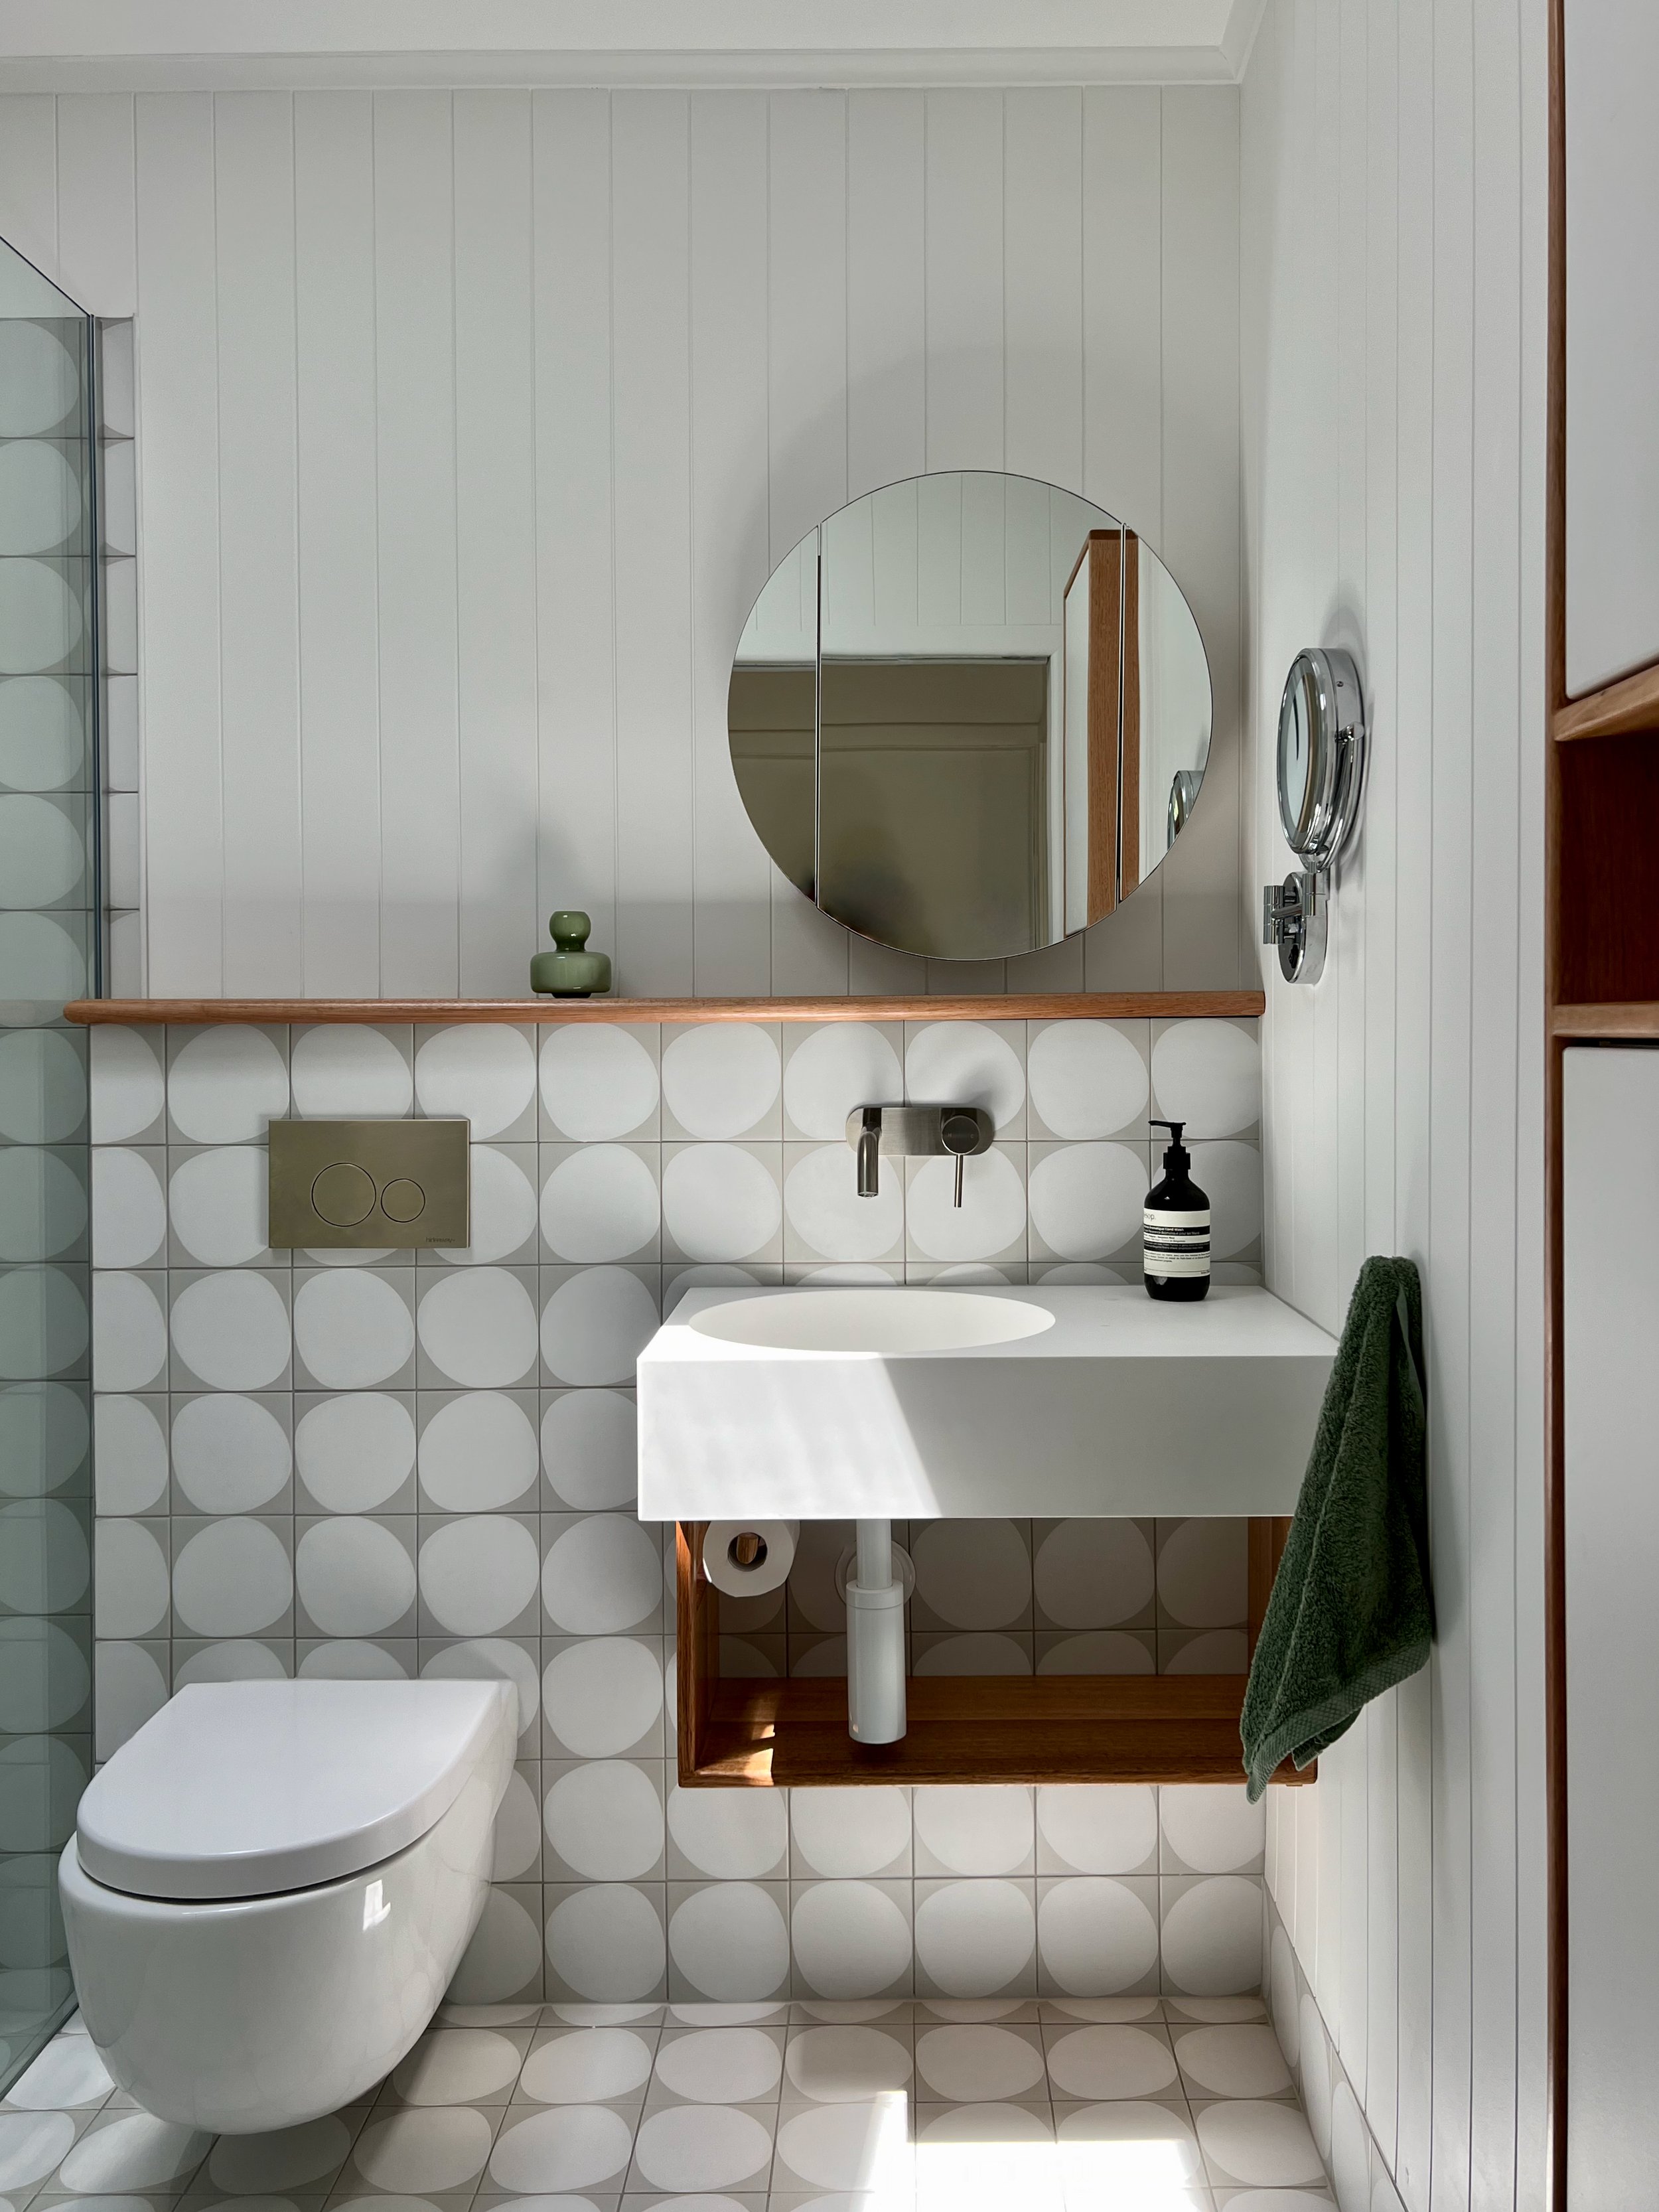
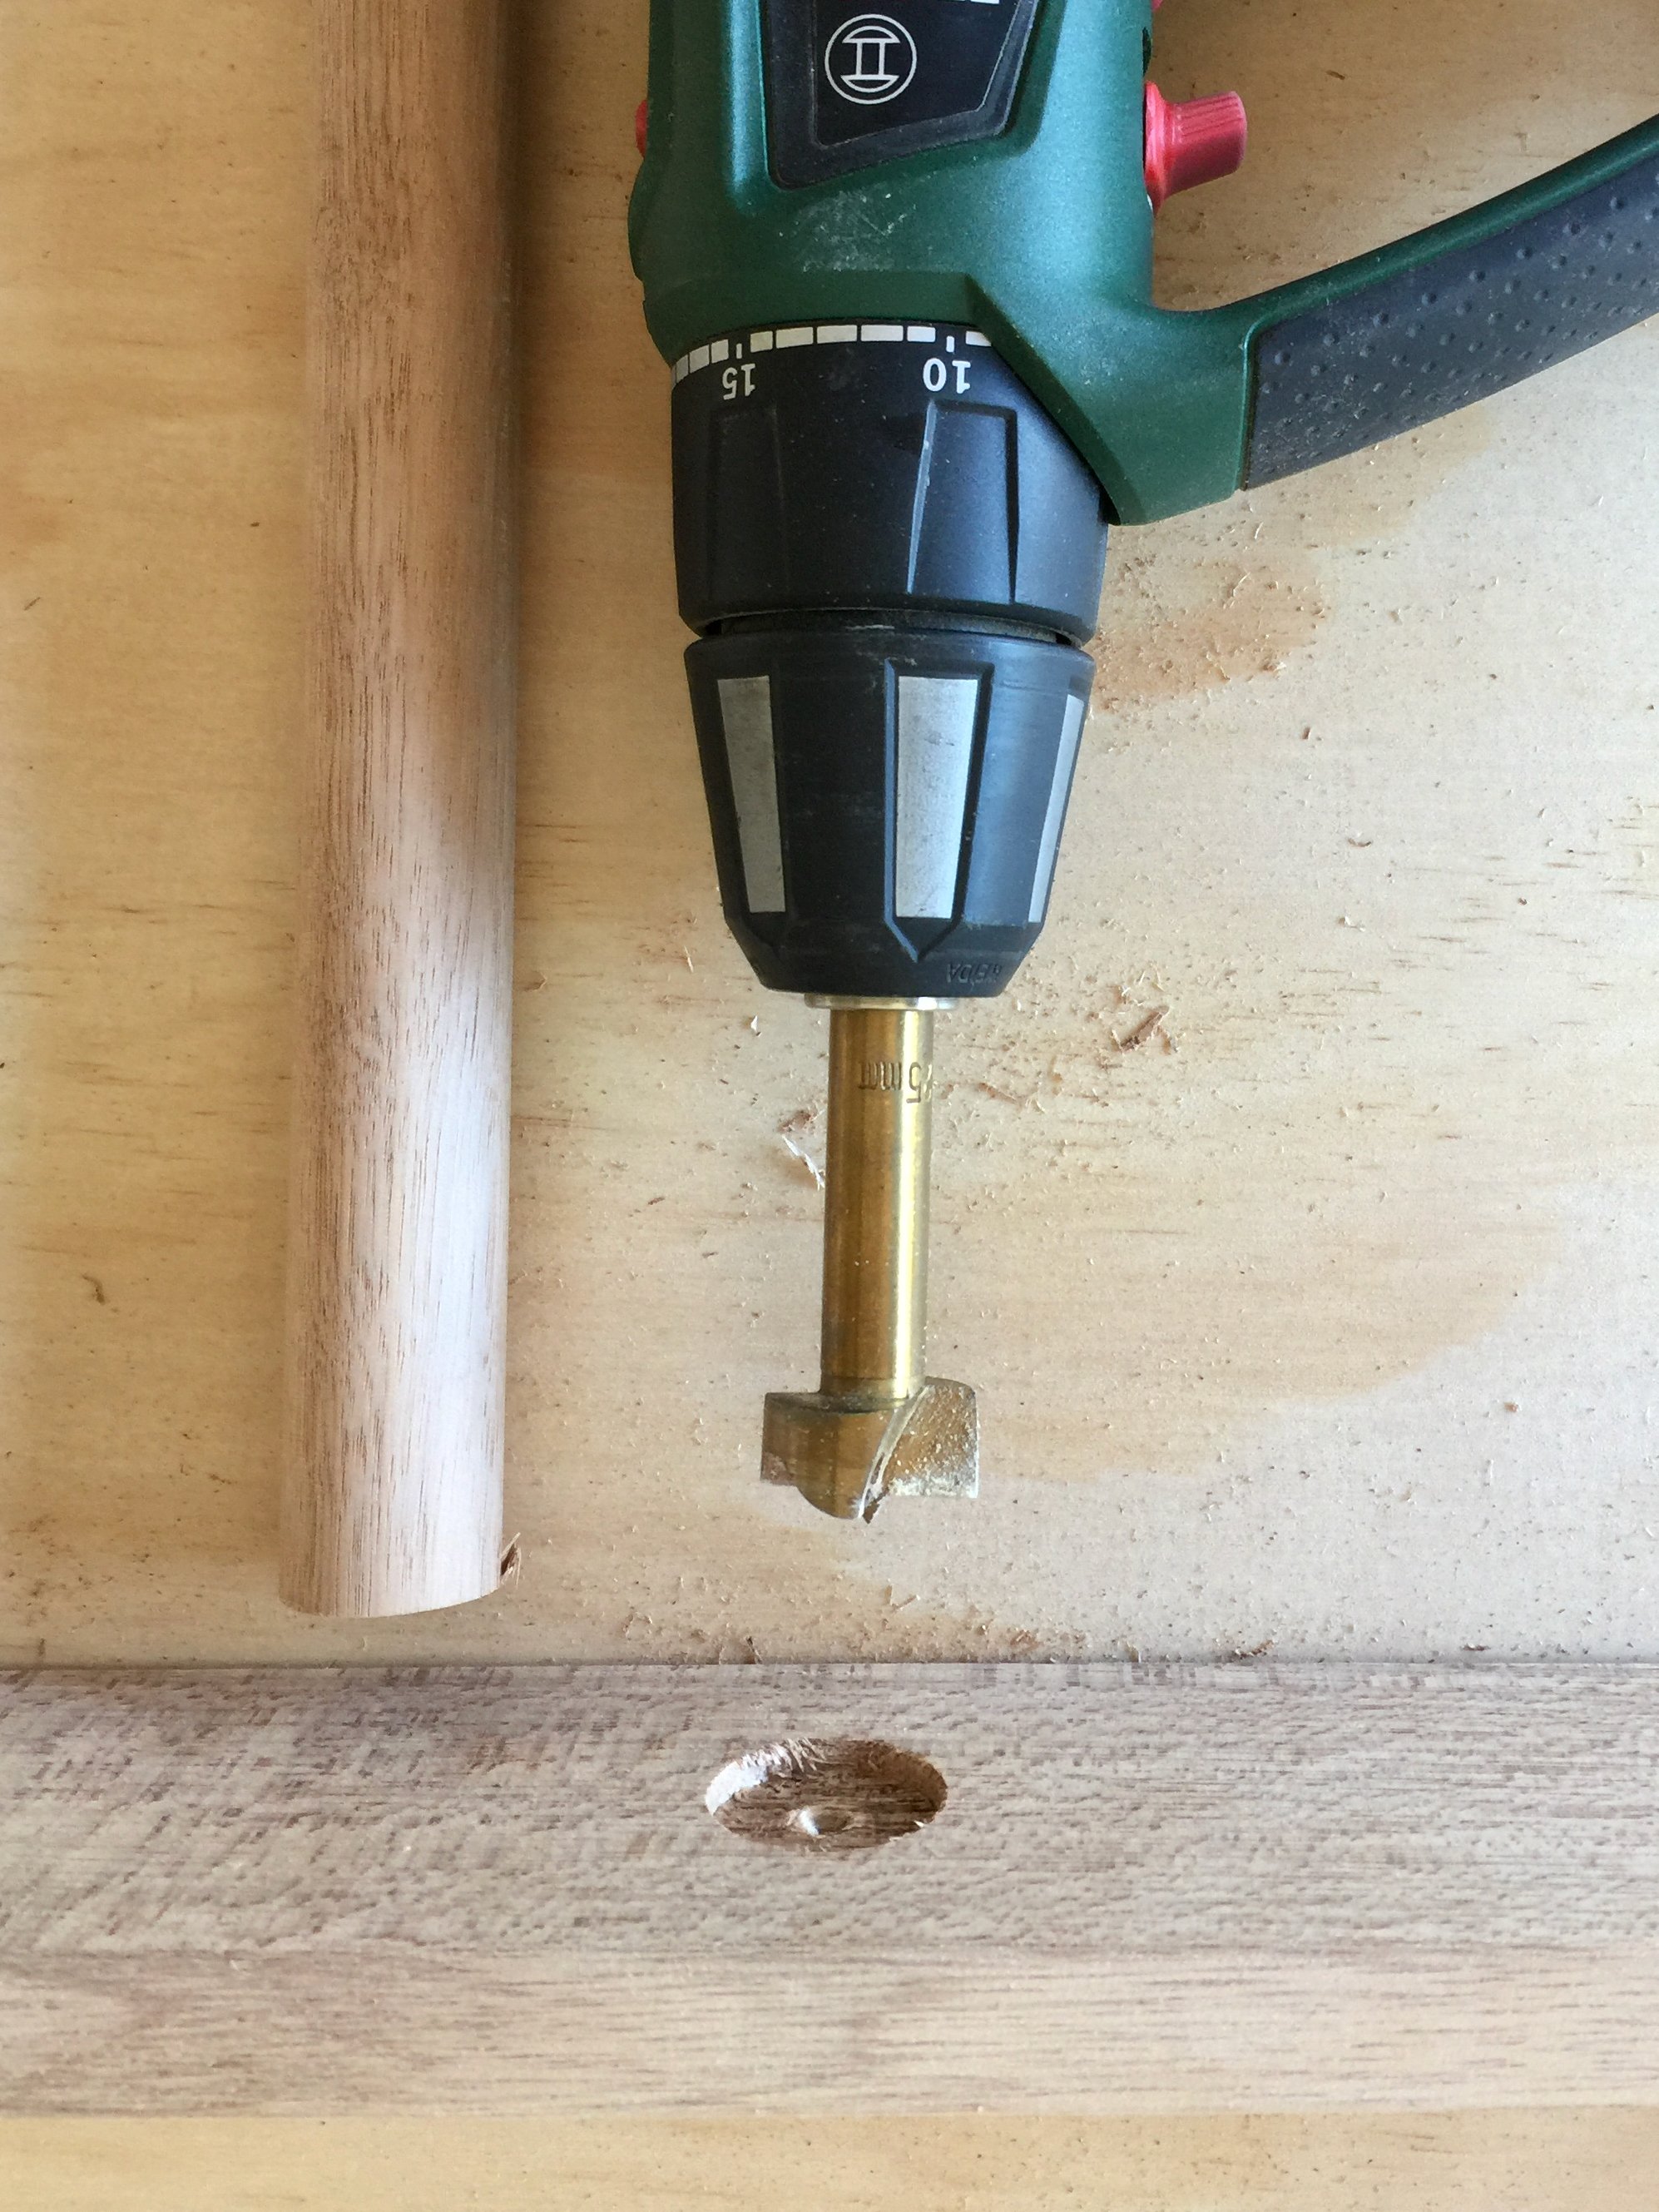
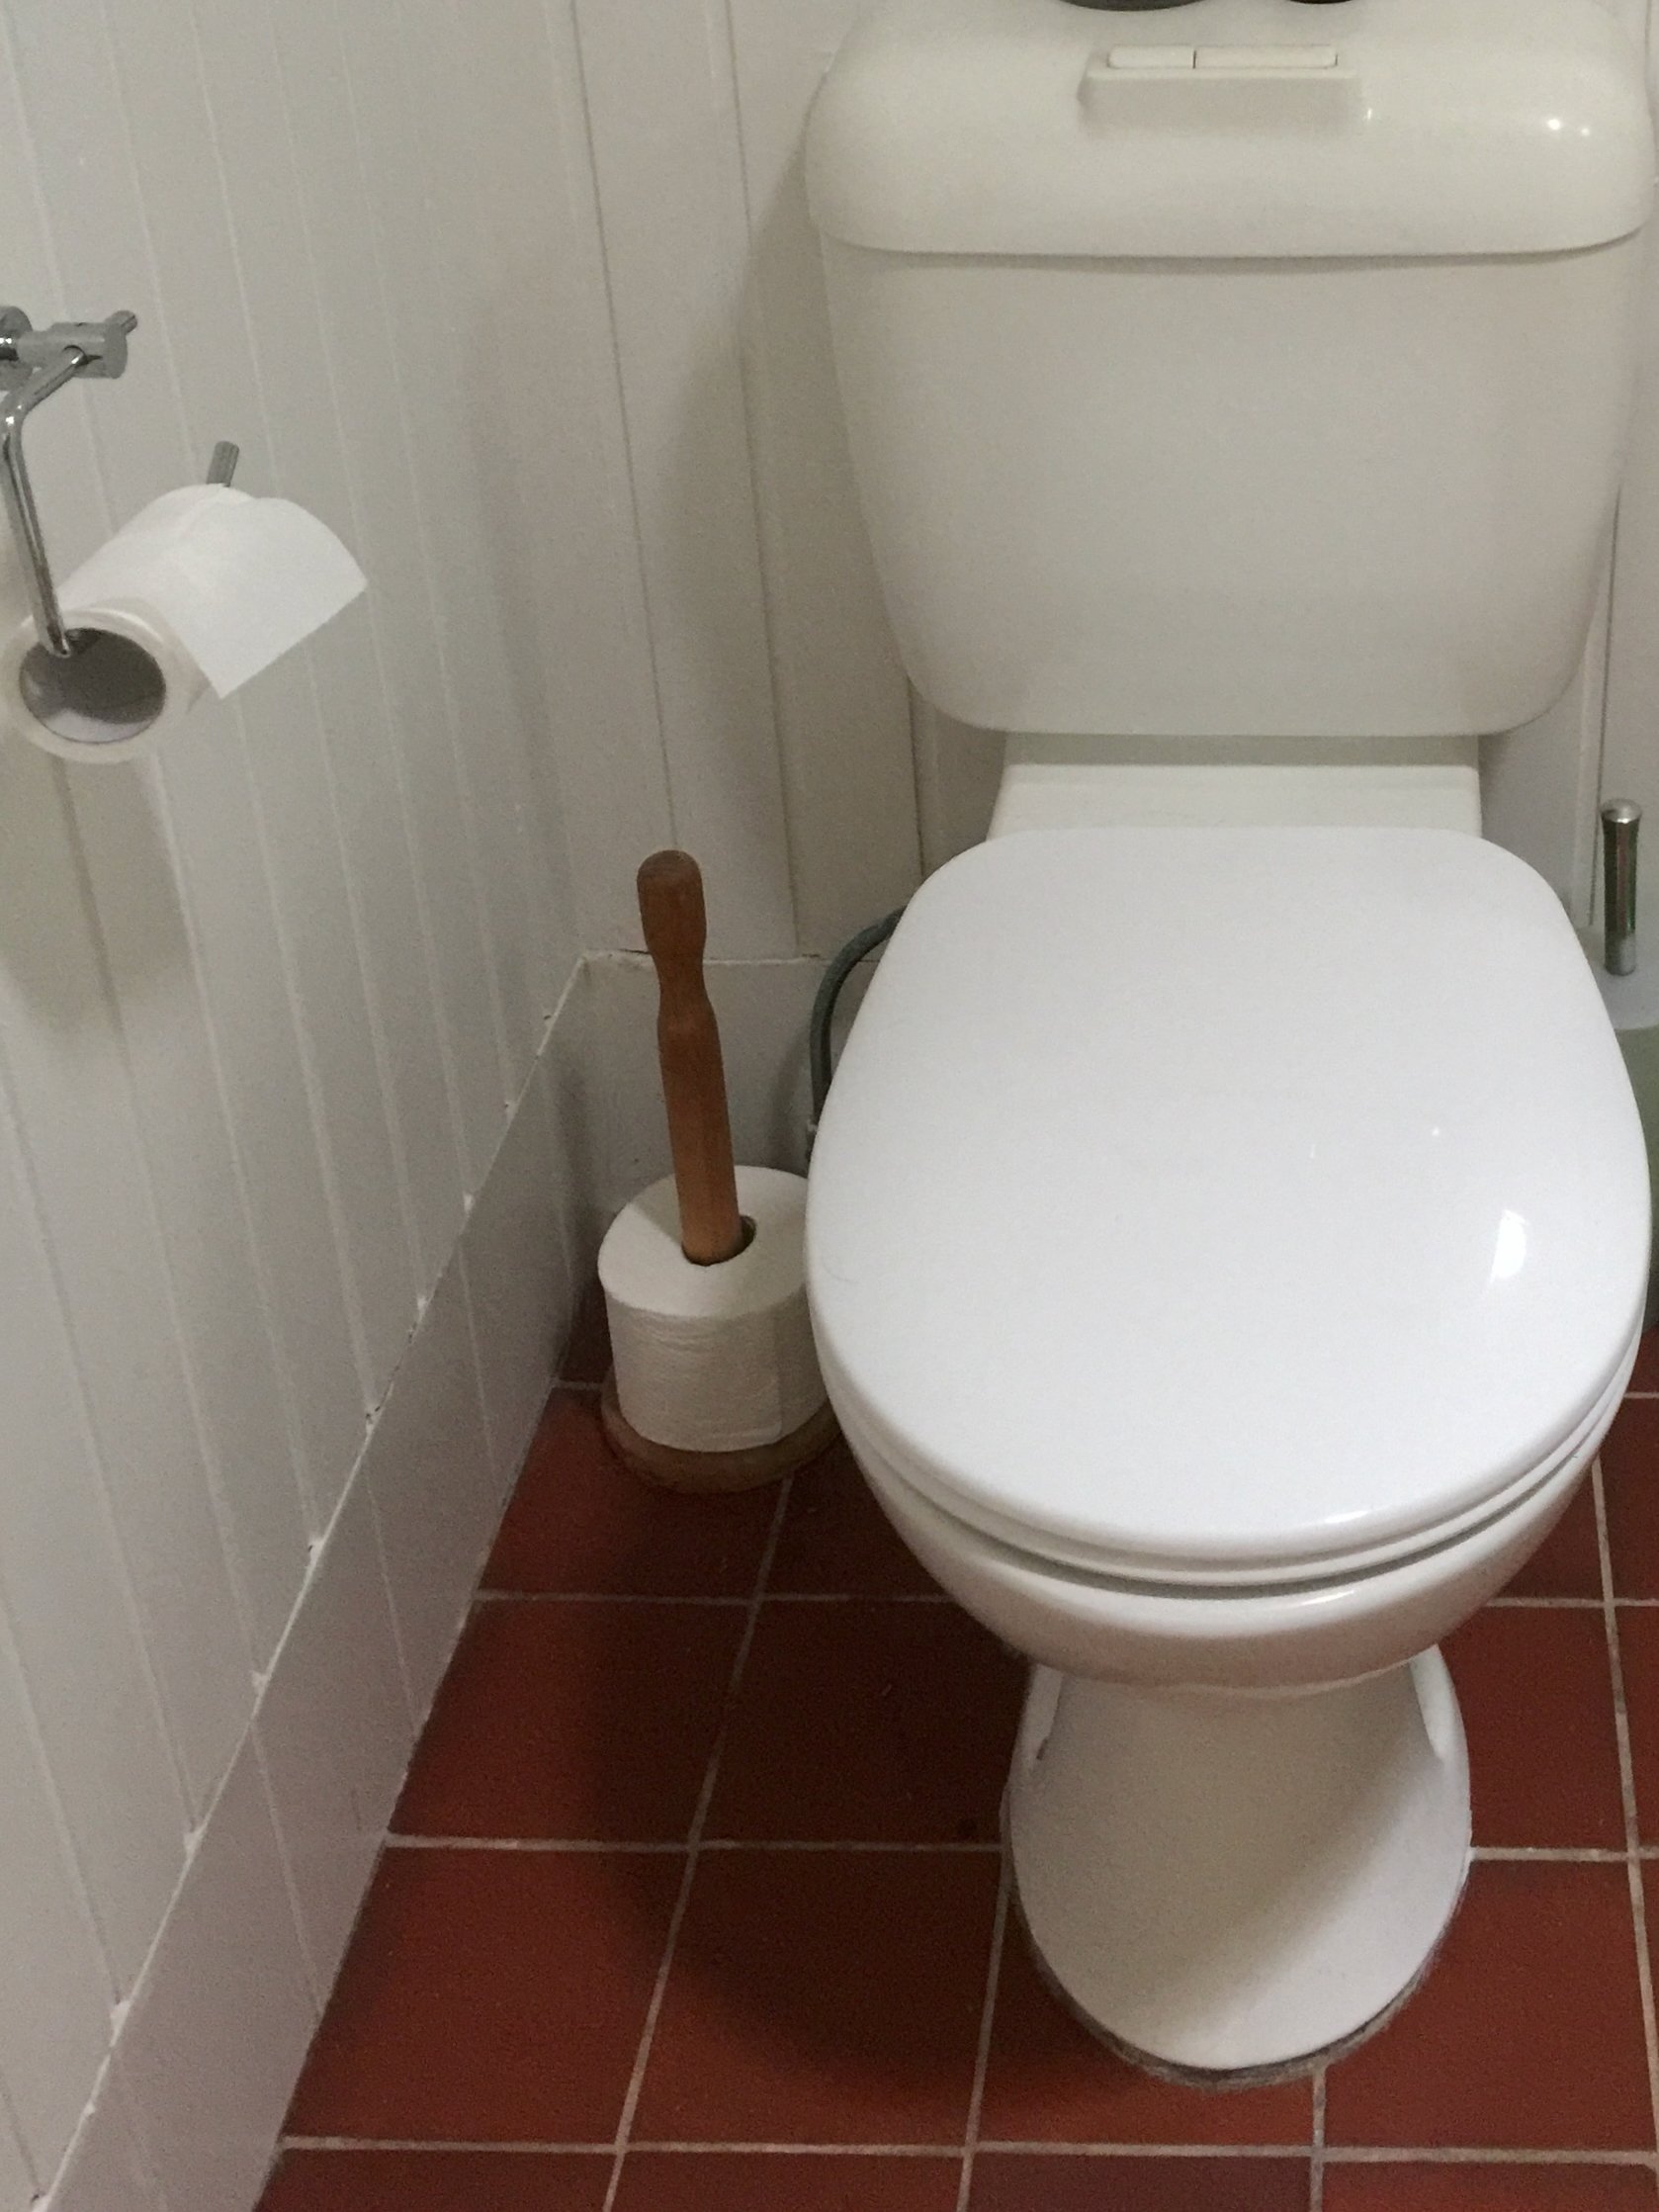
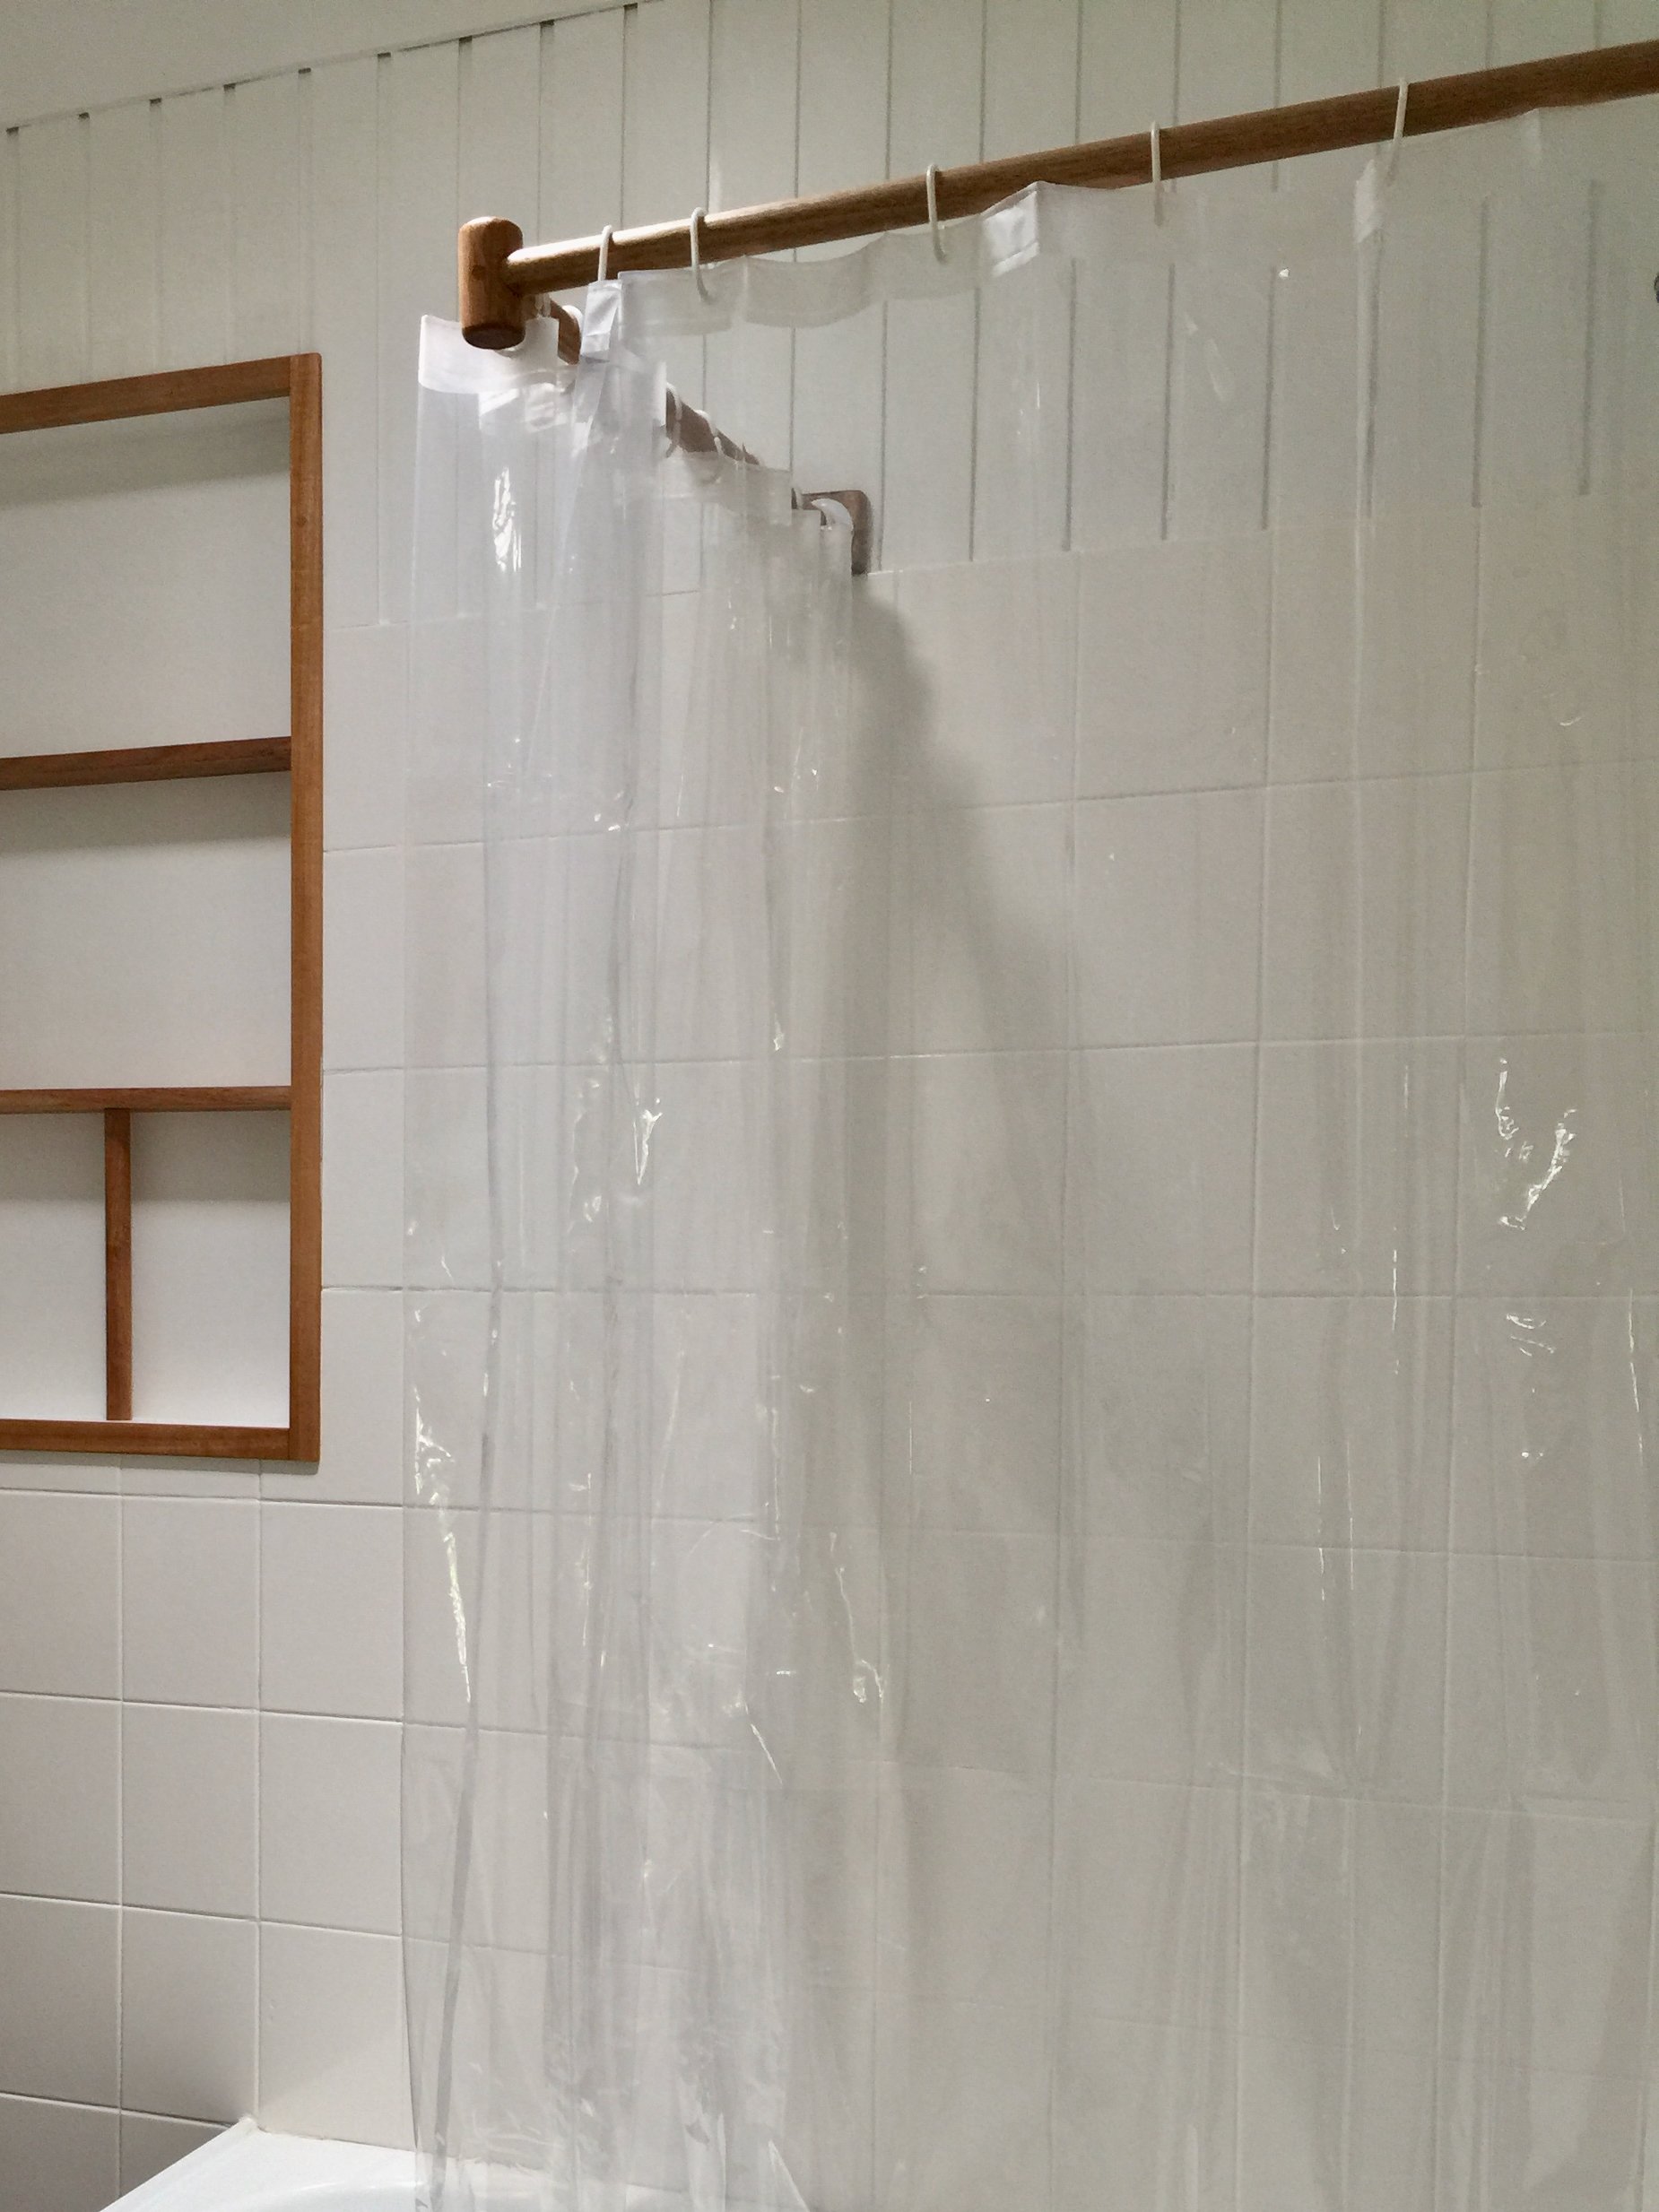
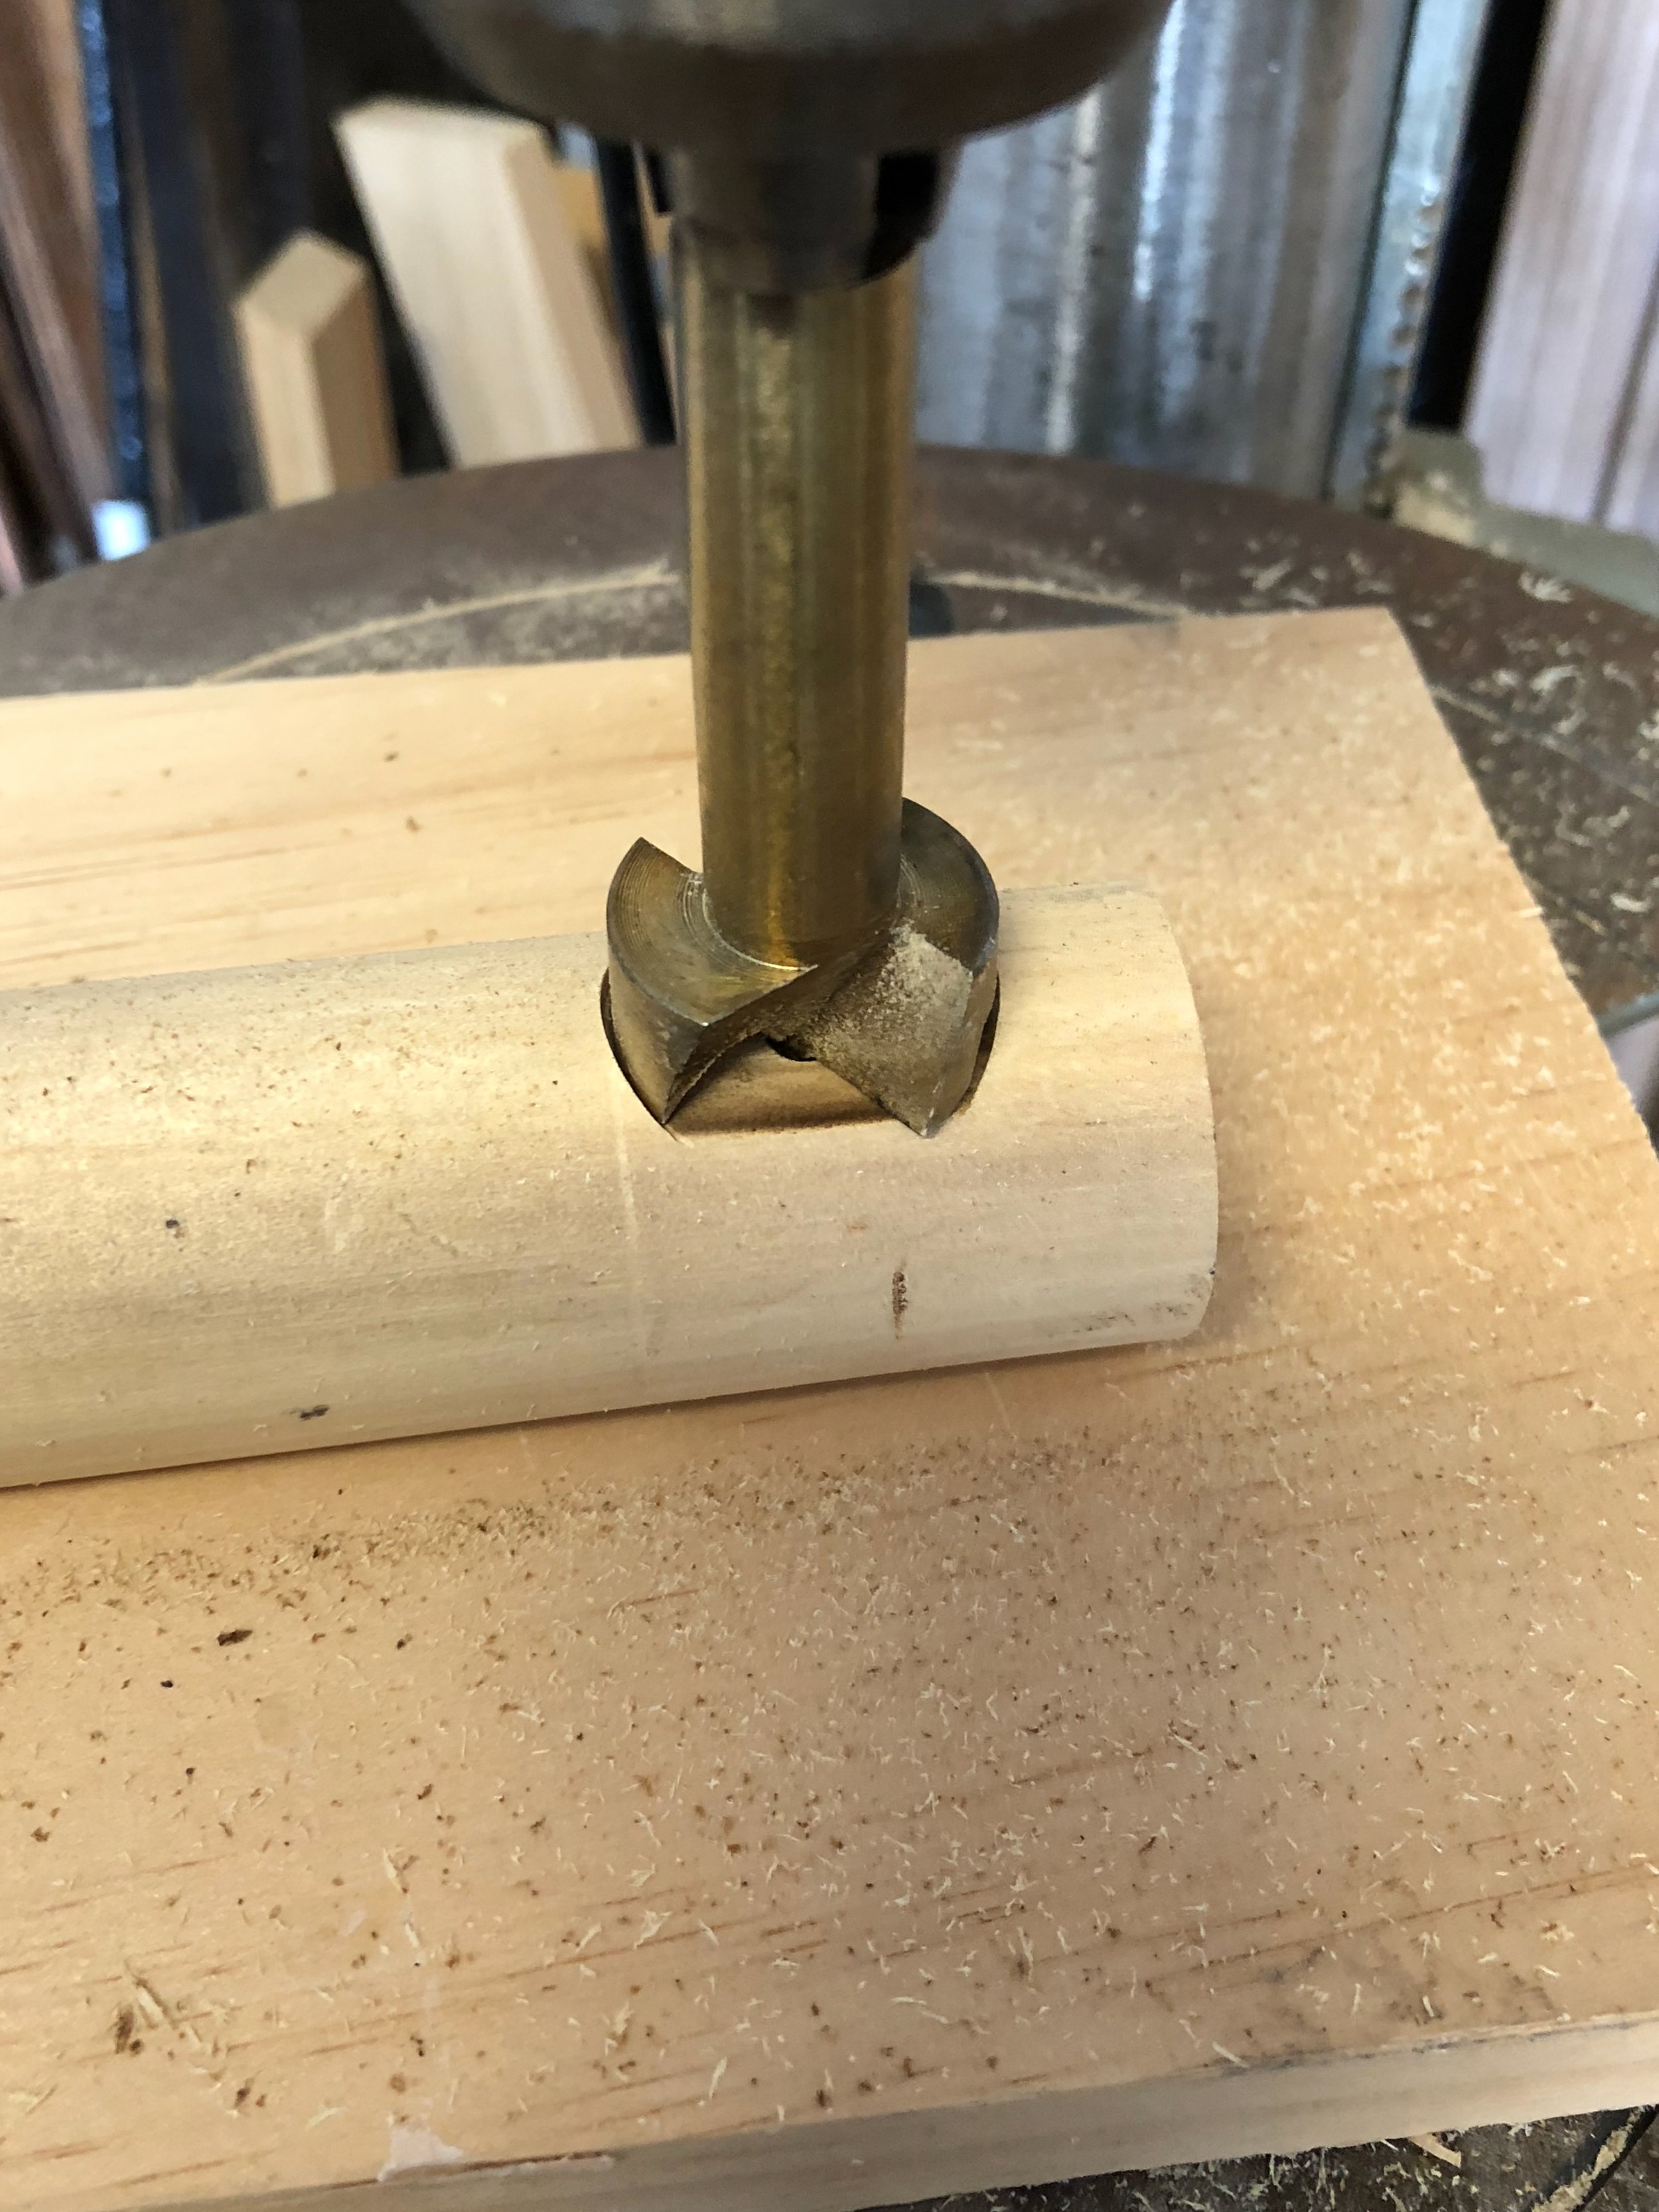
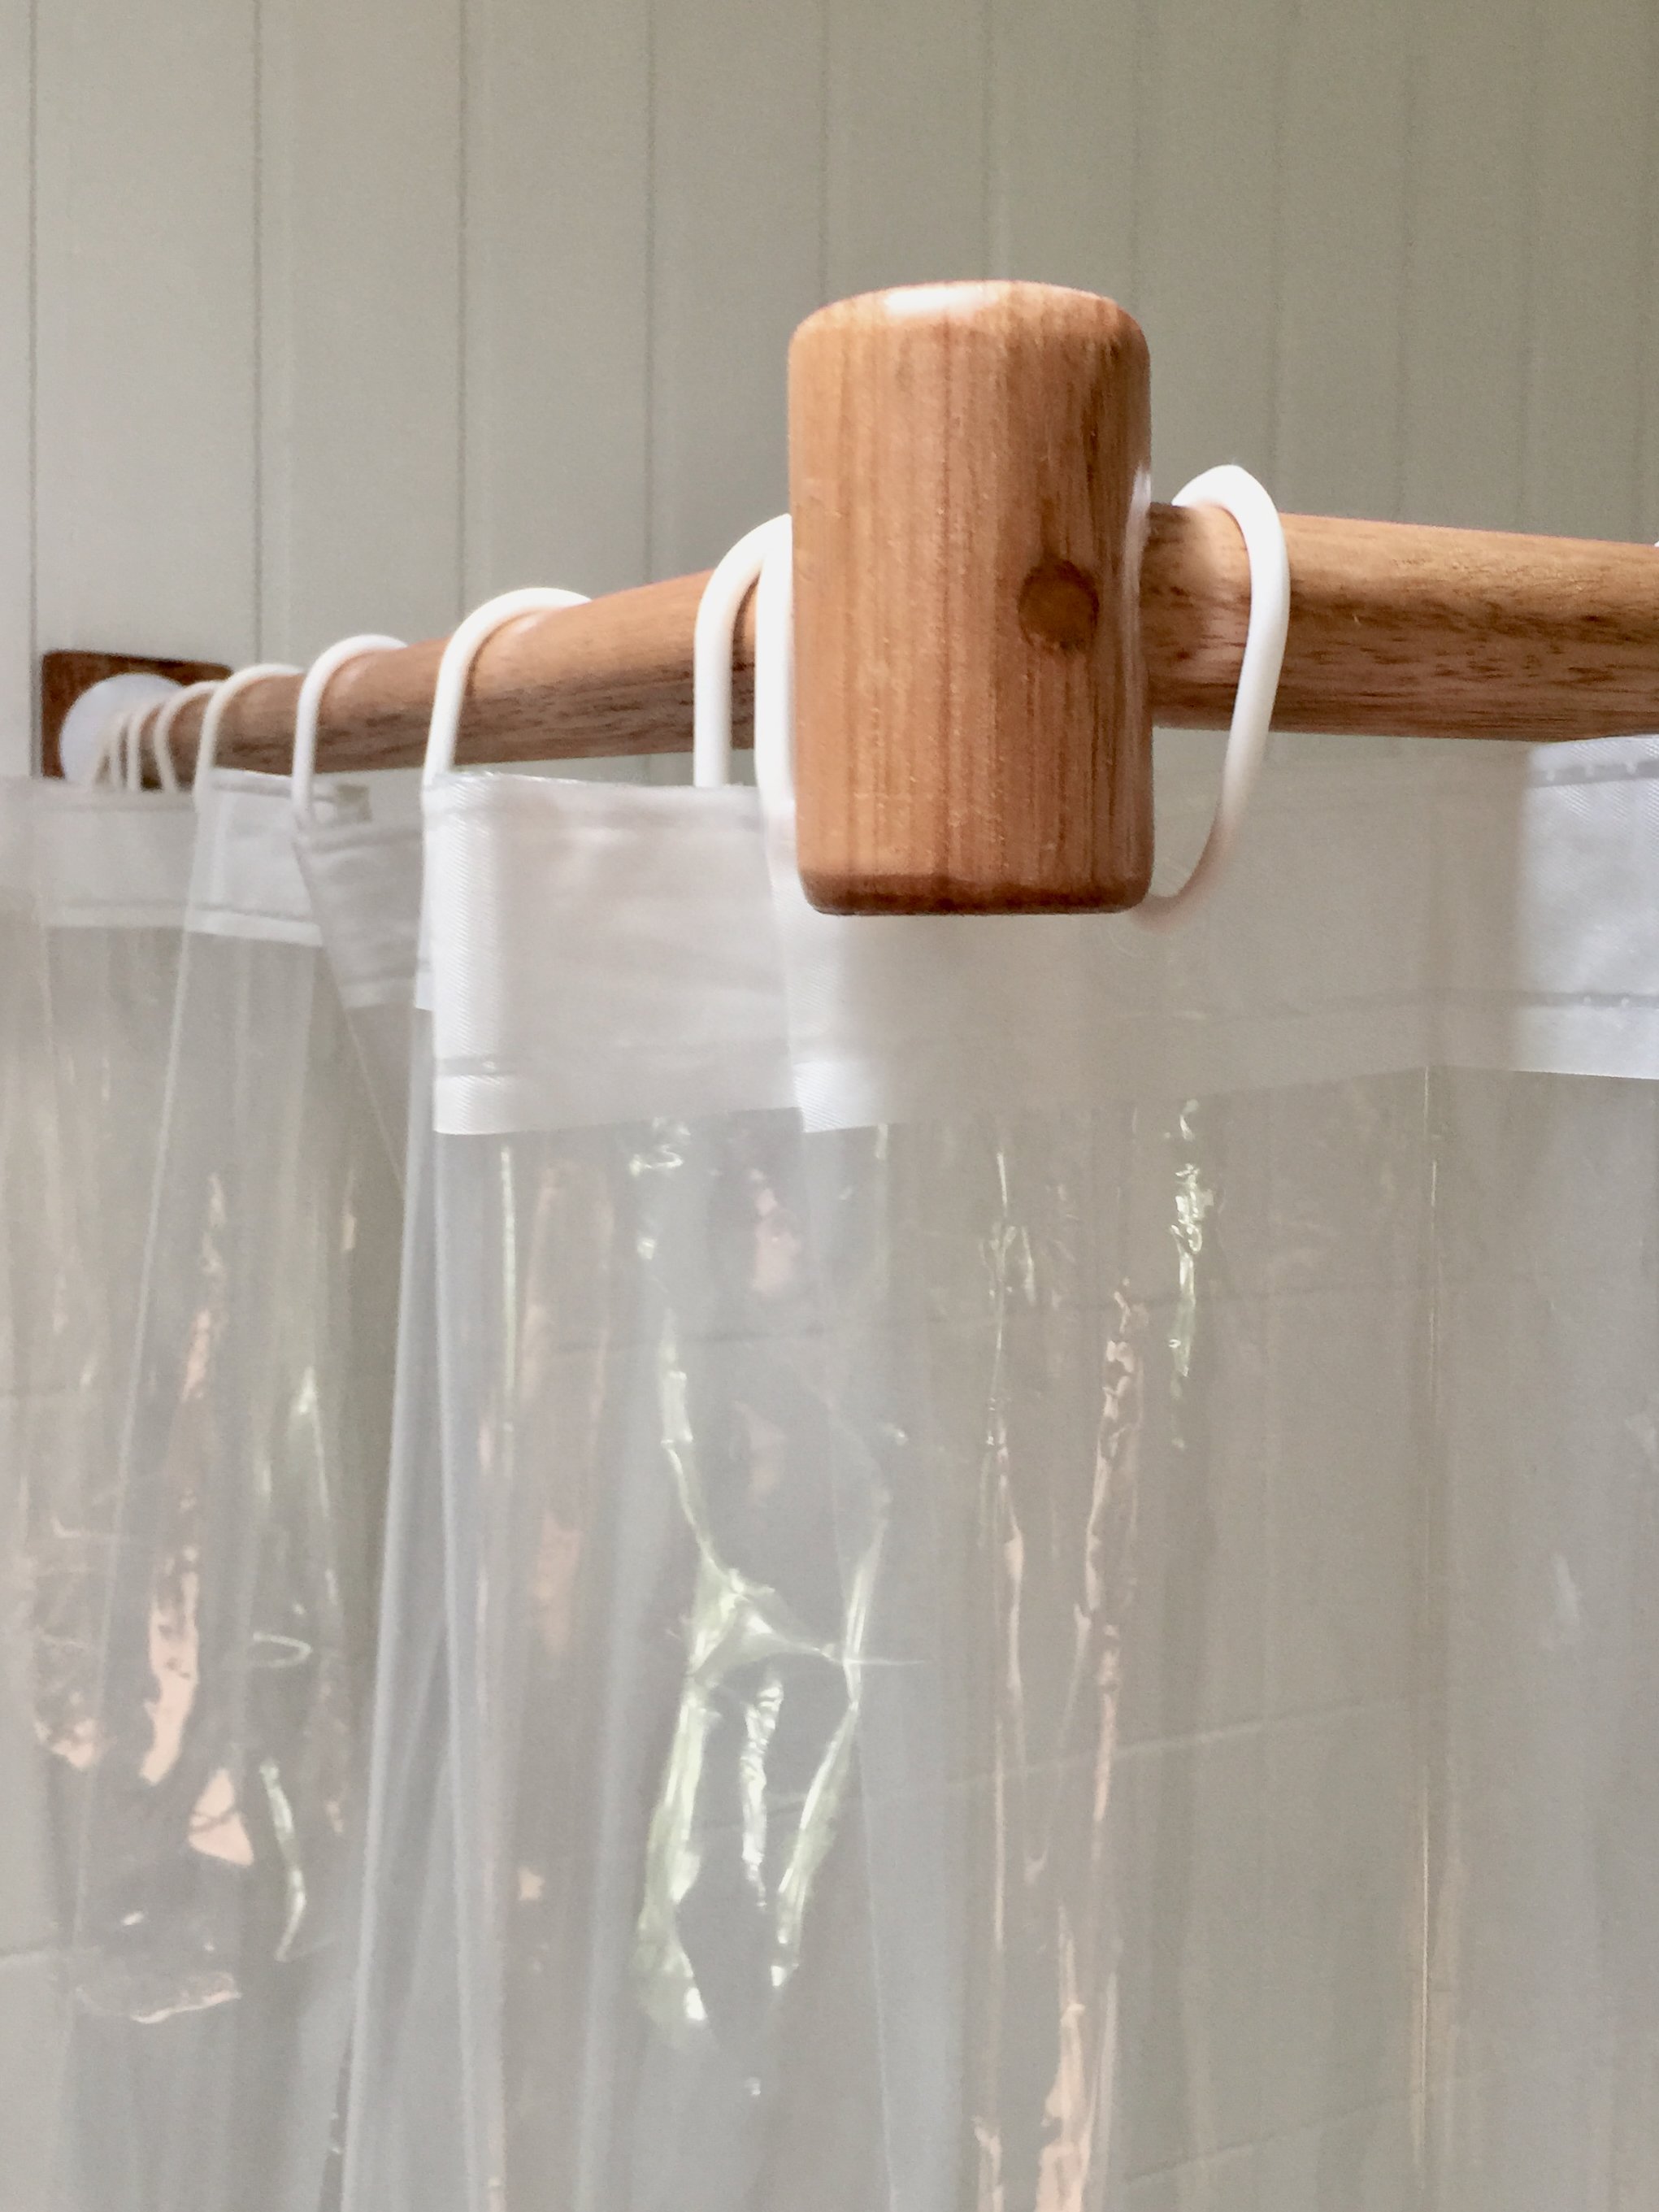
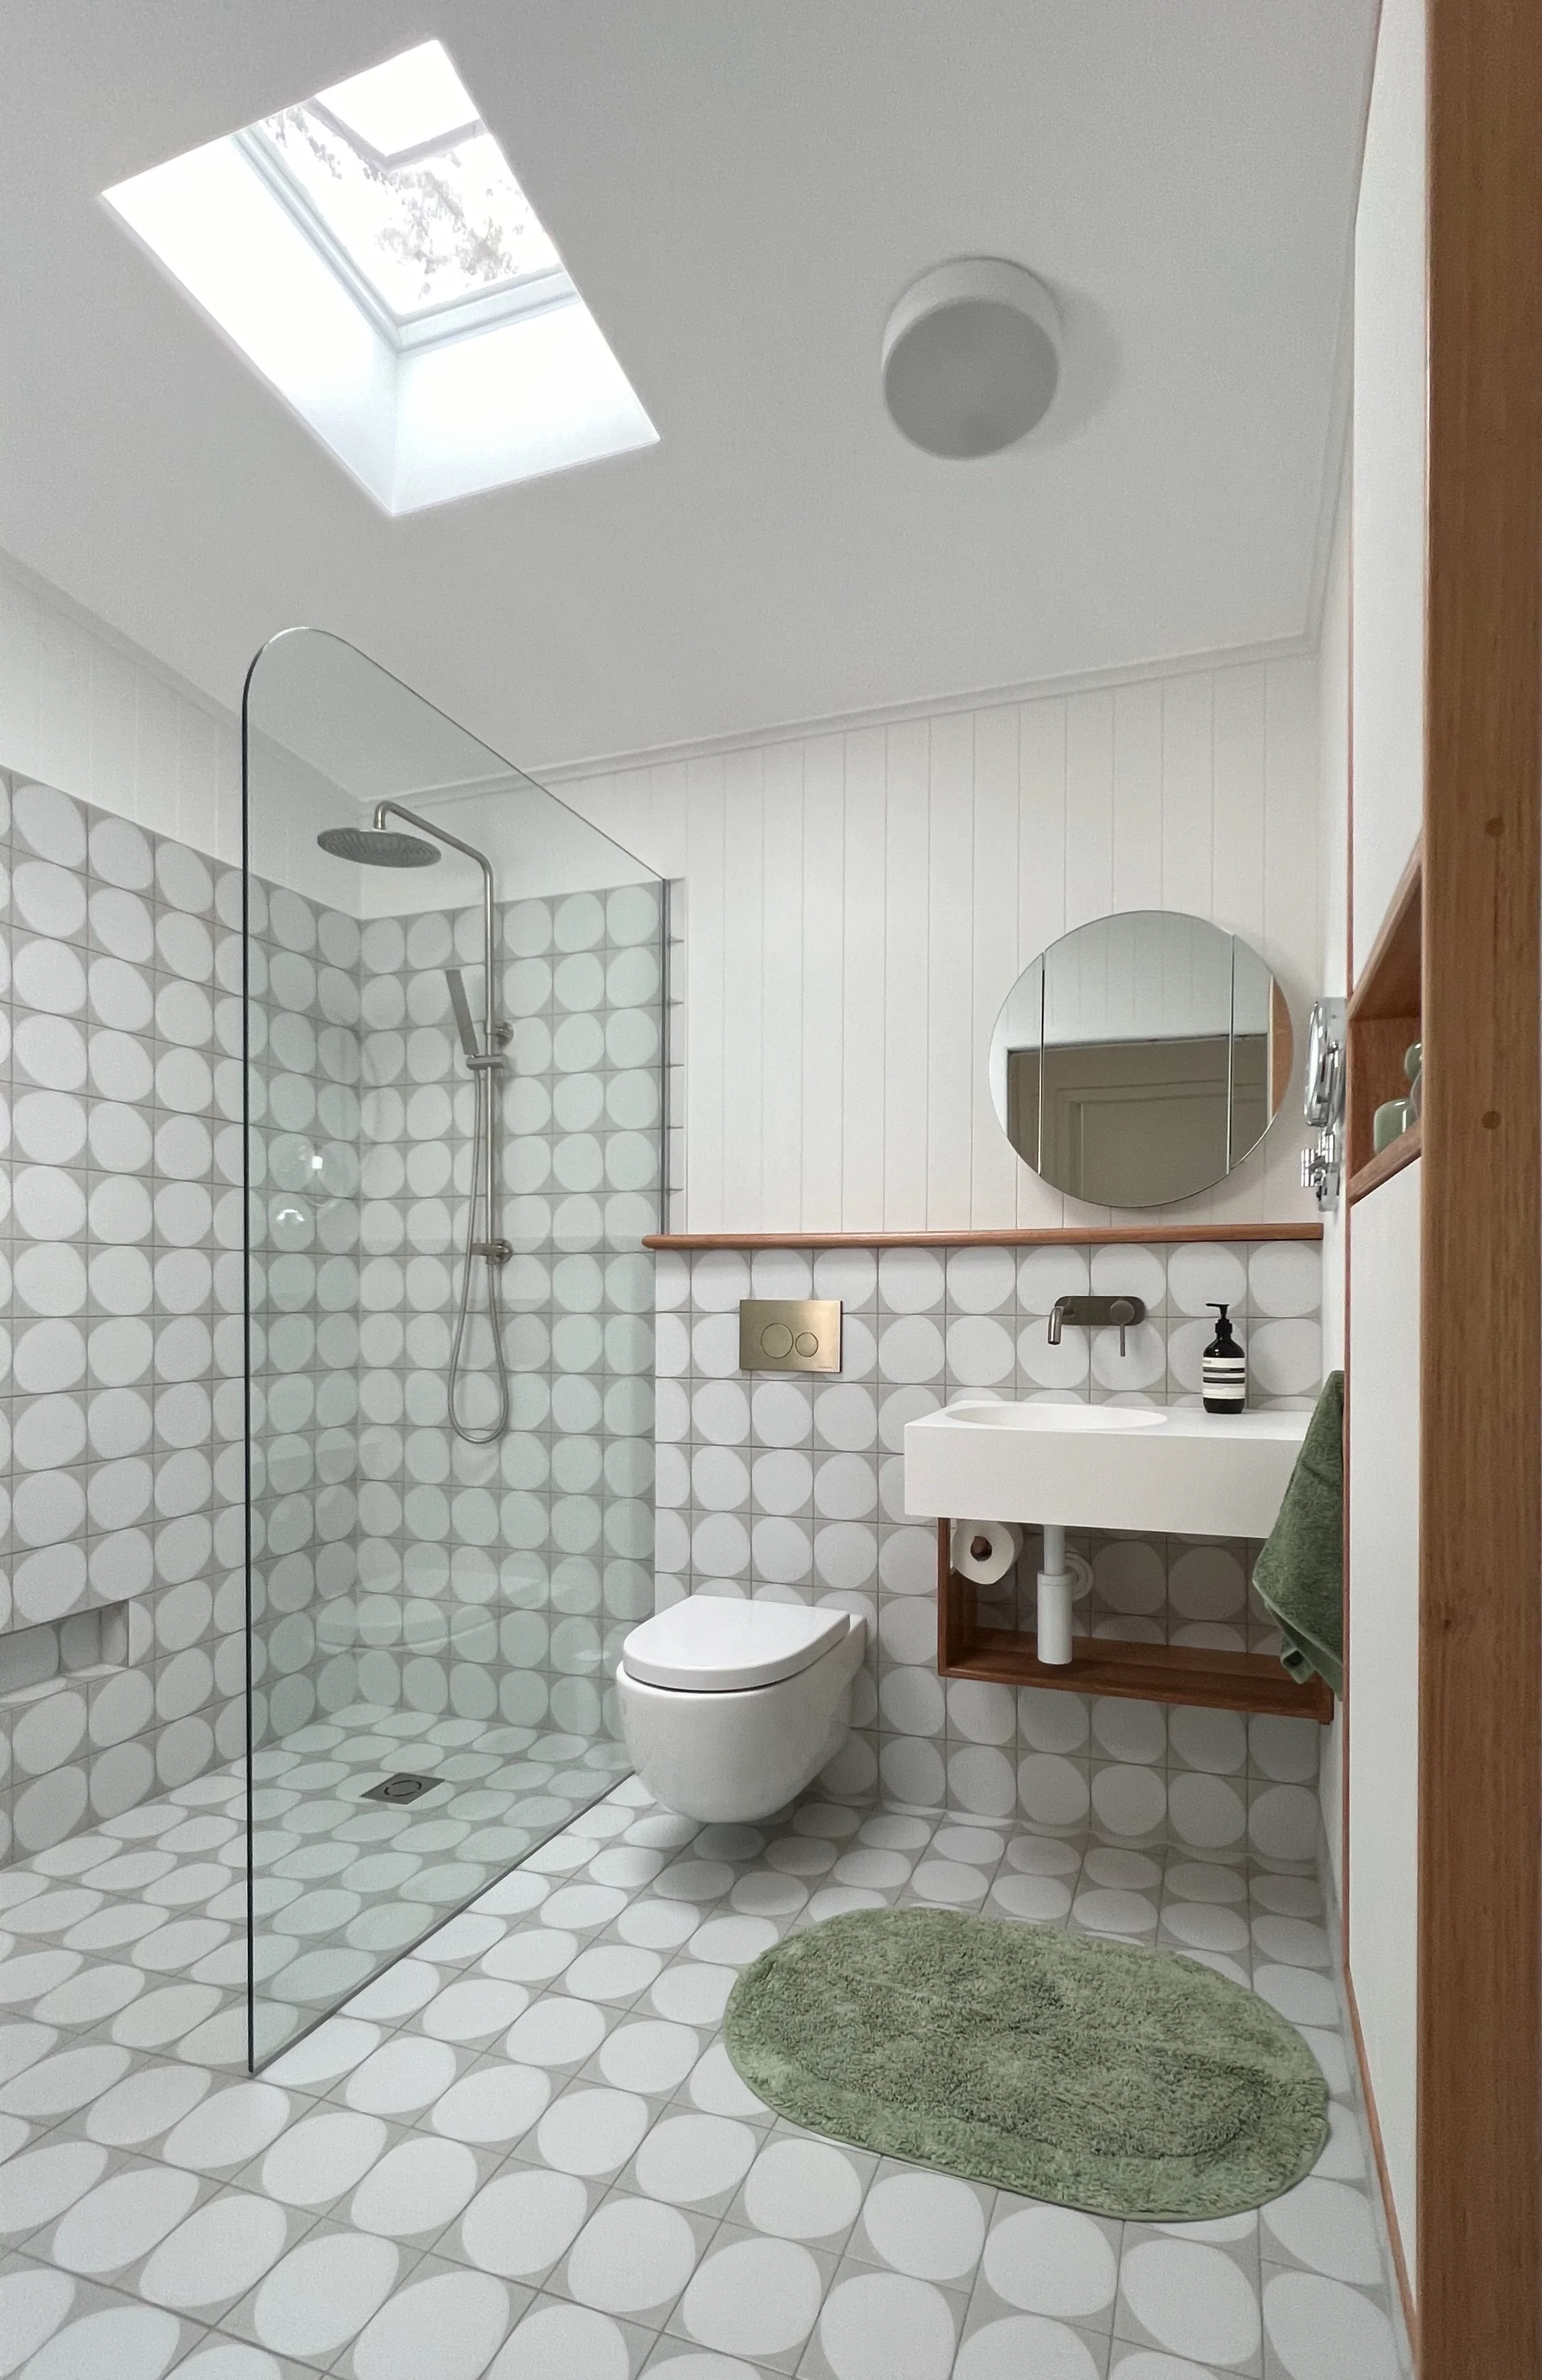
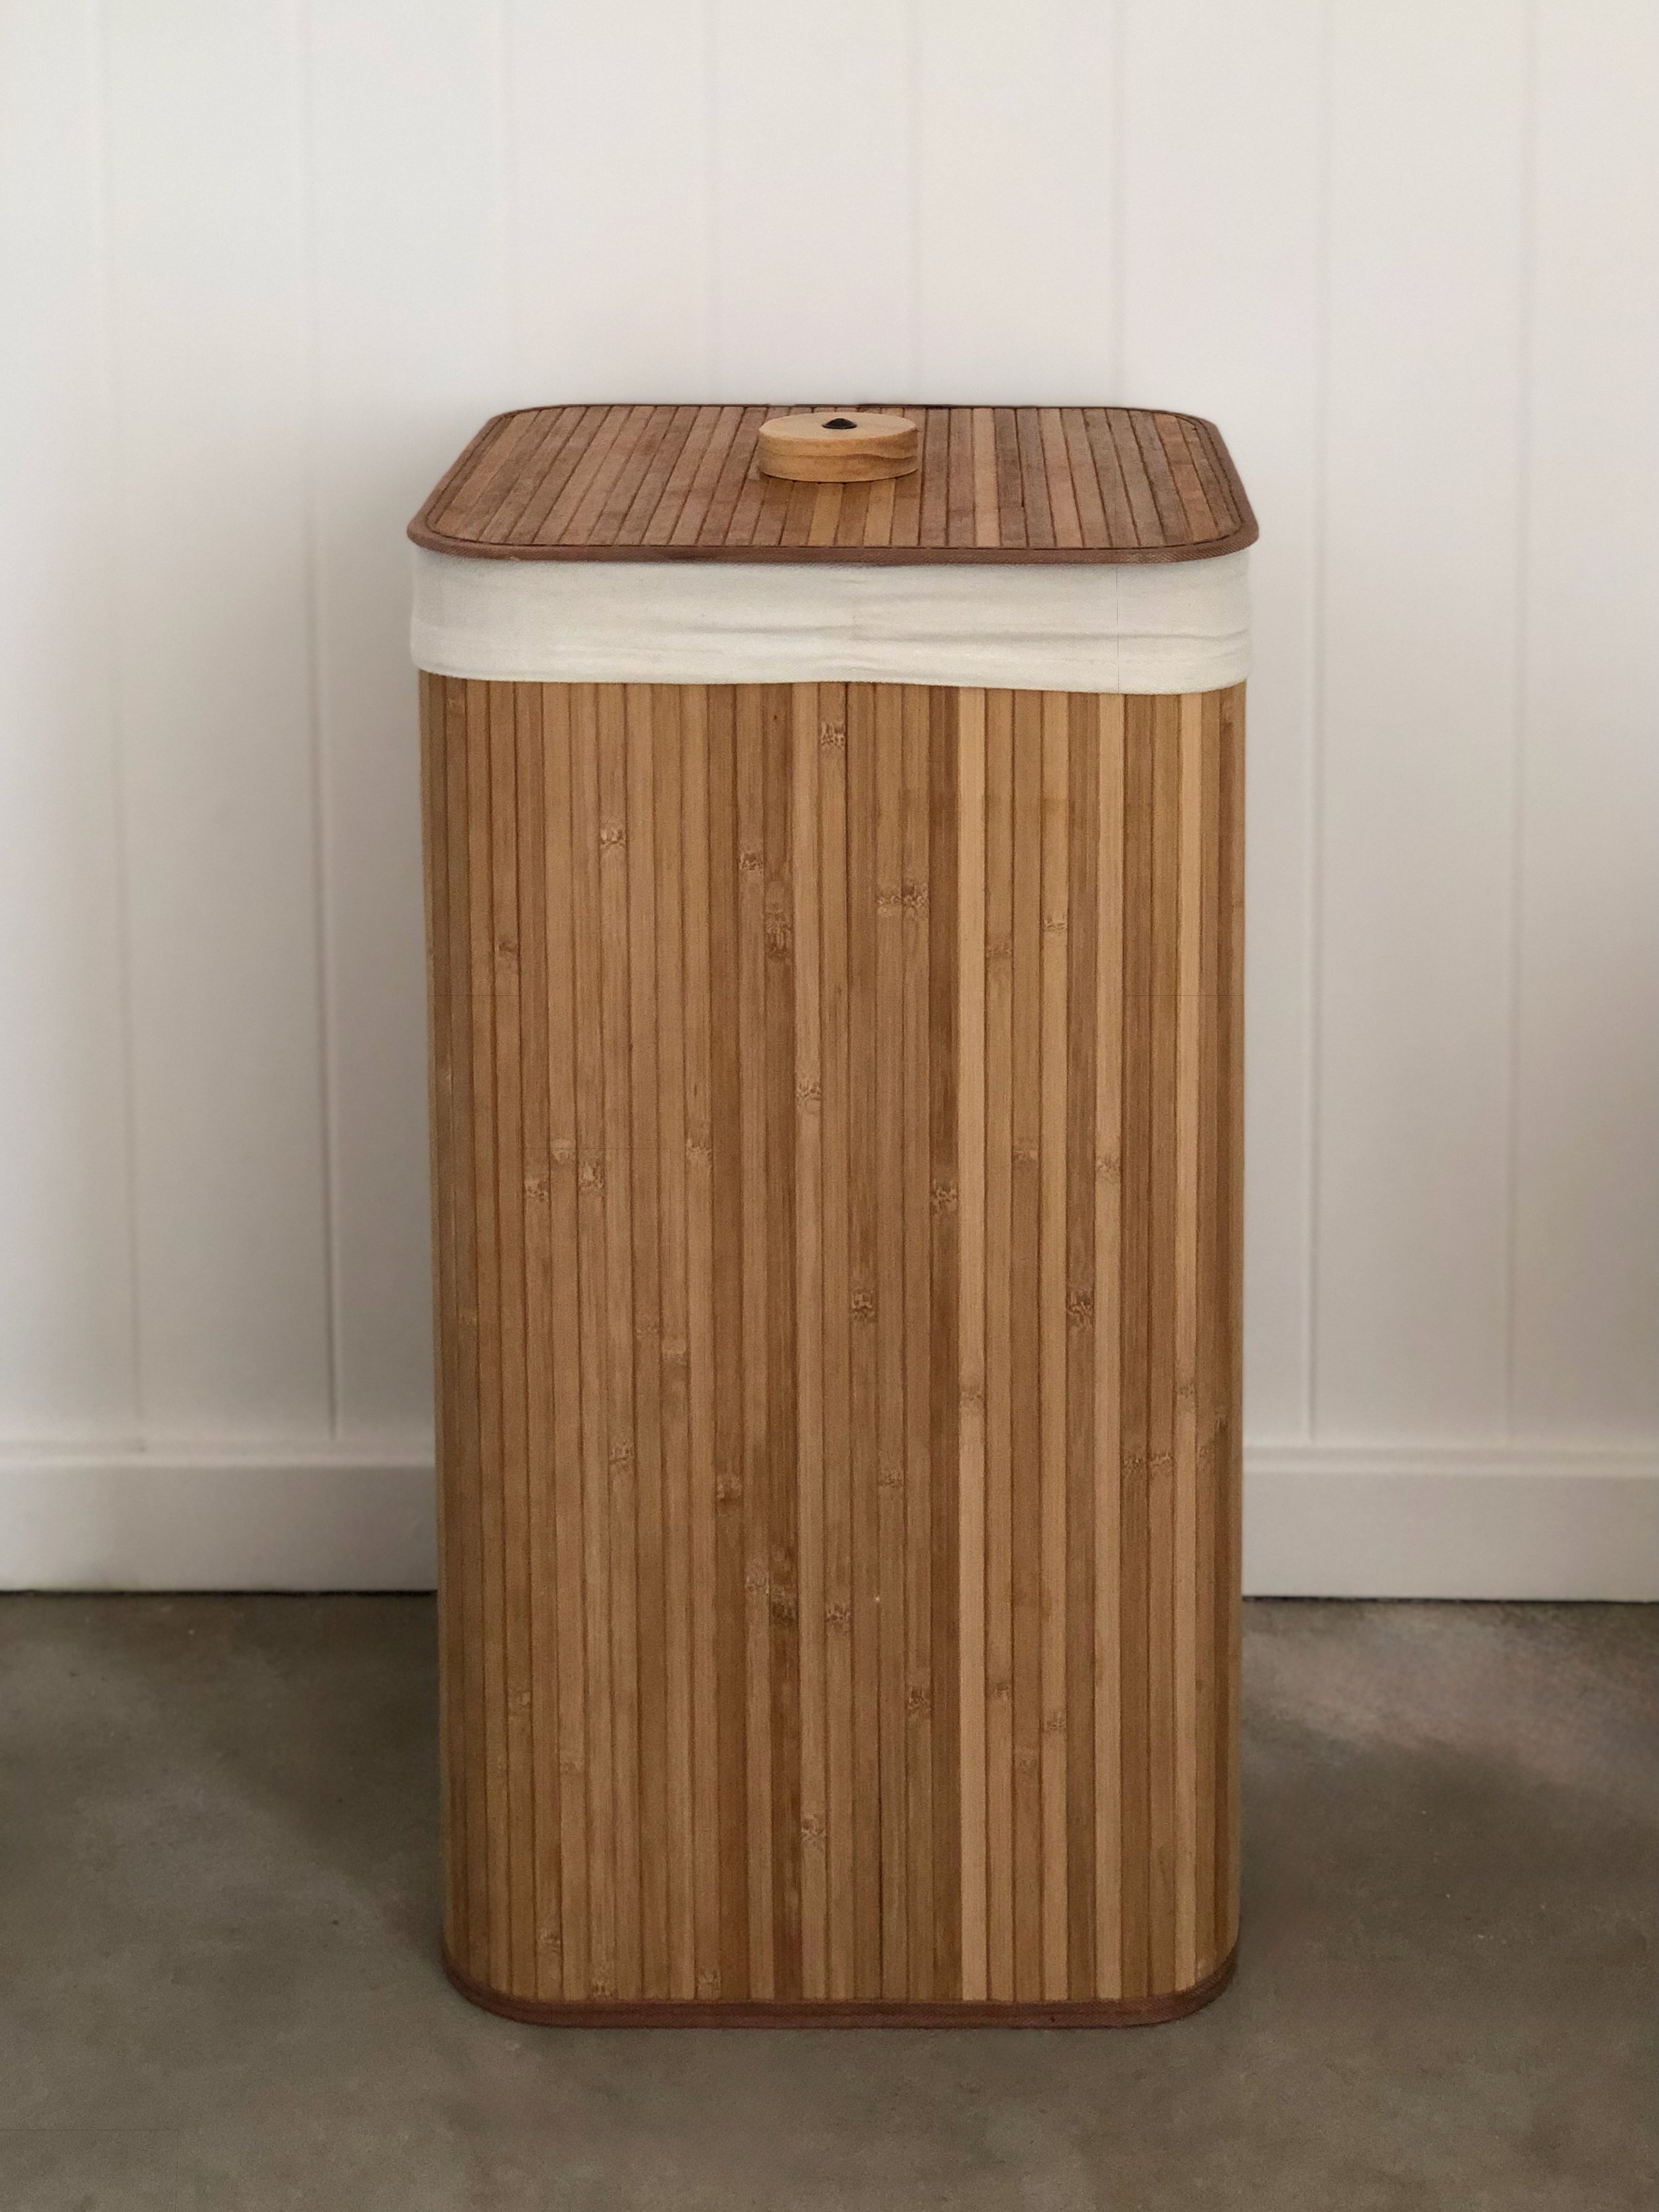
To add unique accents, add a little warmth and a handcrafted finish, I made towel hooks and a toilet roll holder from dowel. I changed the handle on the store-bought basket to match and finished all the woodwork in Monocel marine-grade varnish to withstand moisture and high traffic.

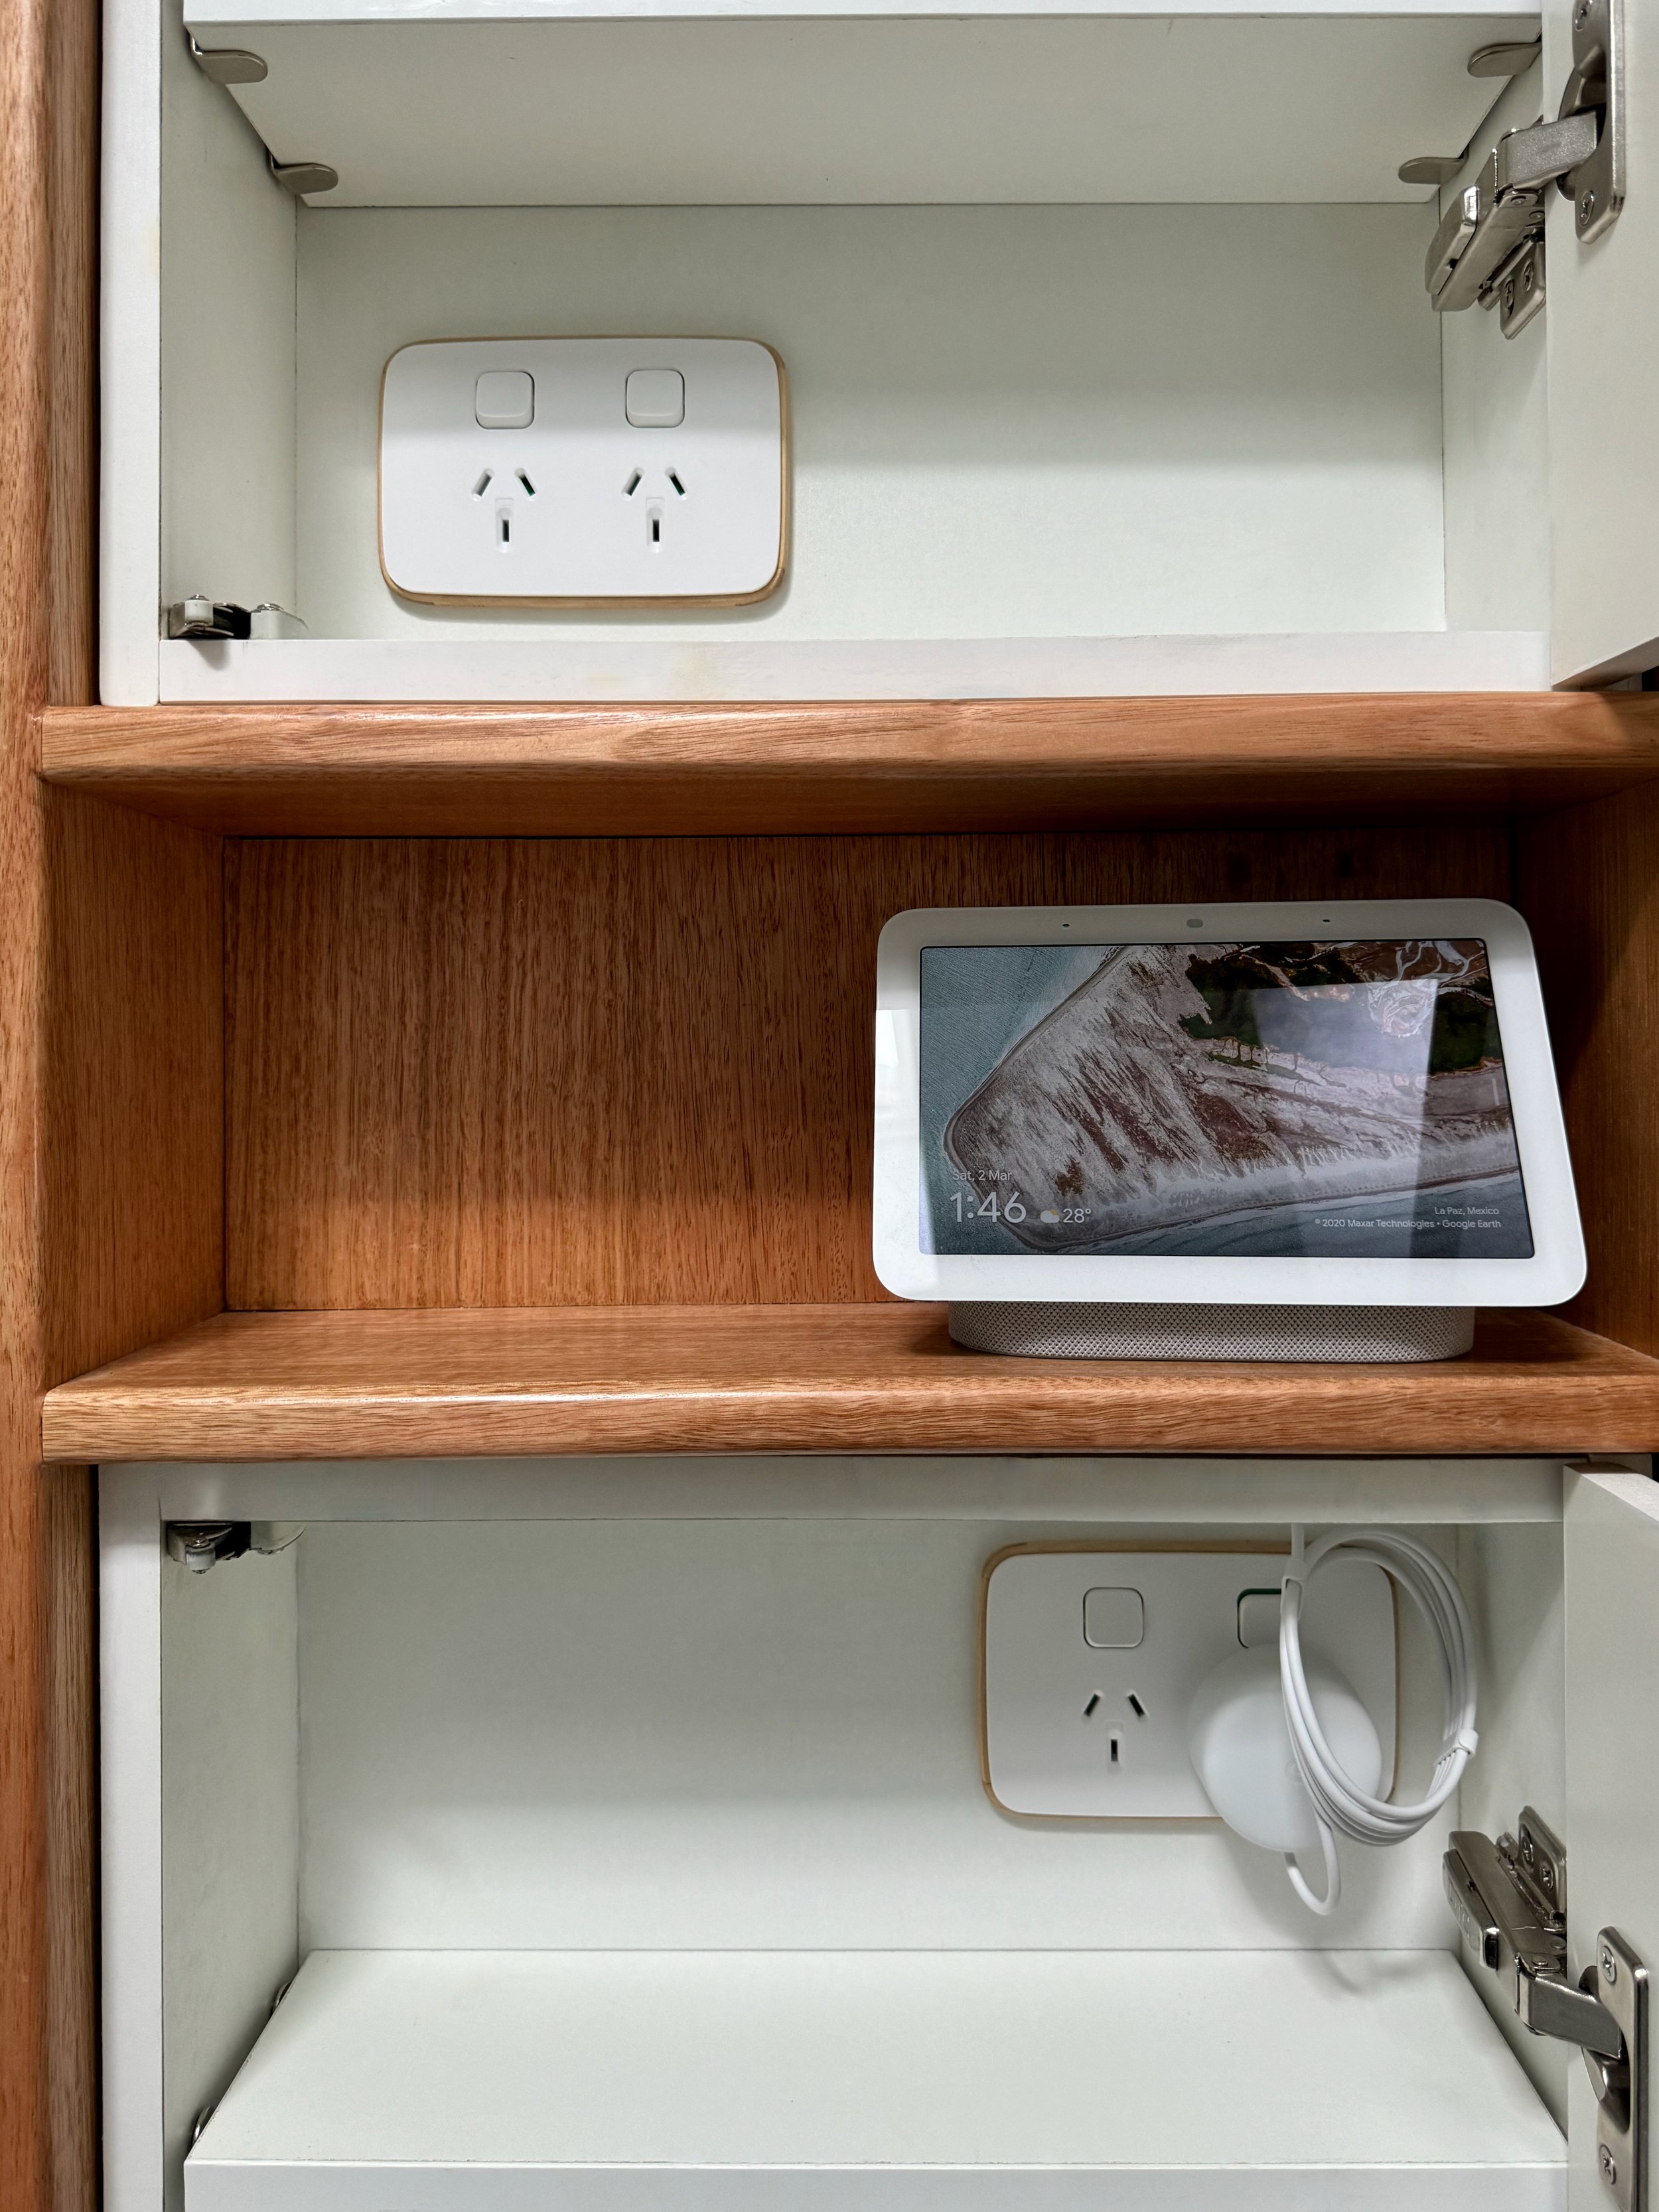
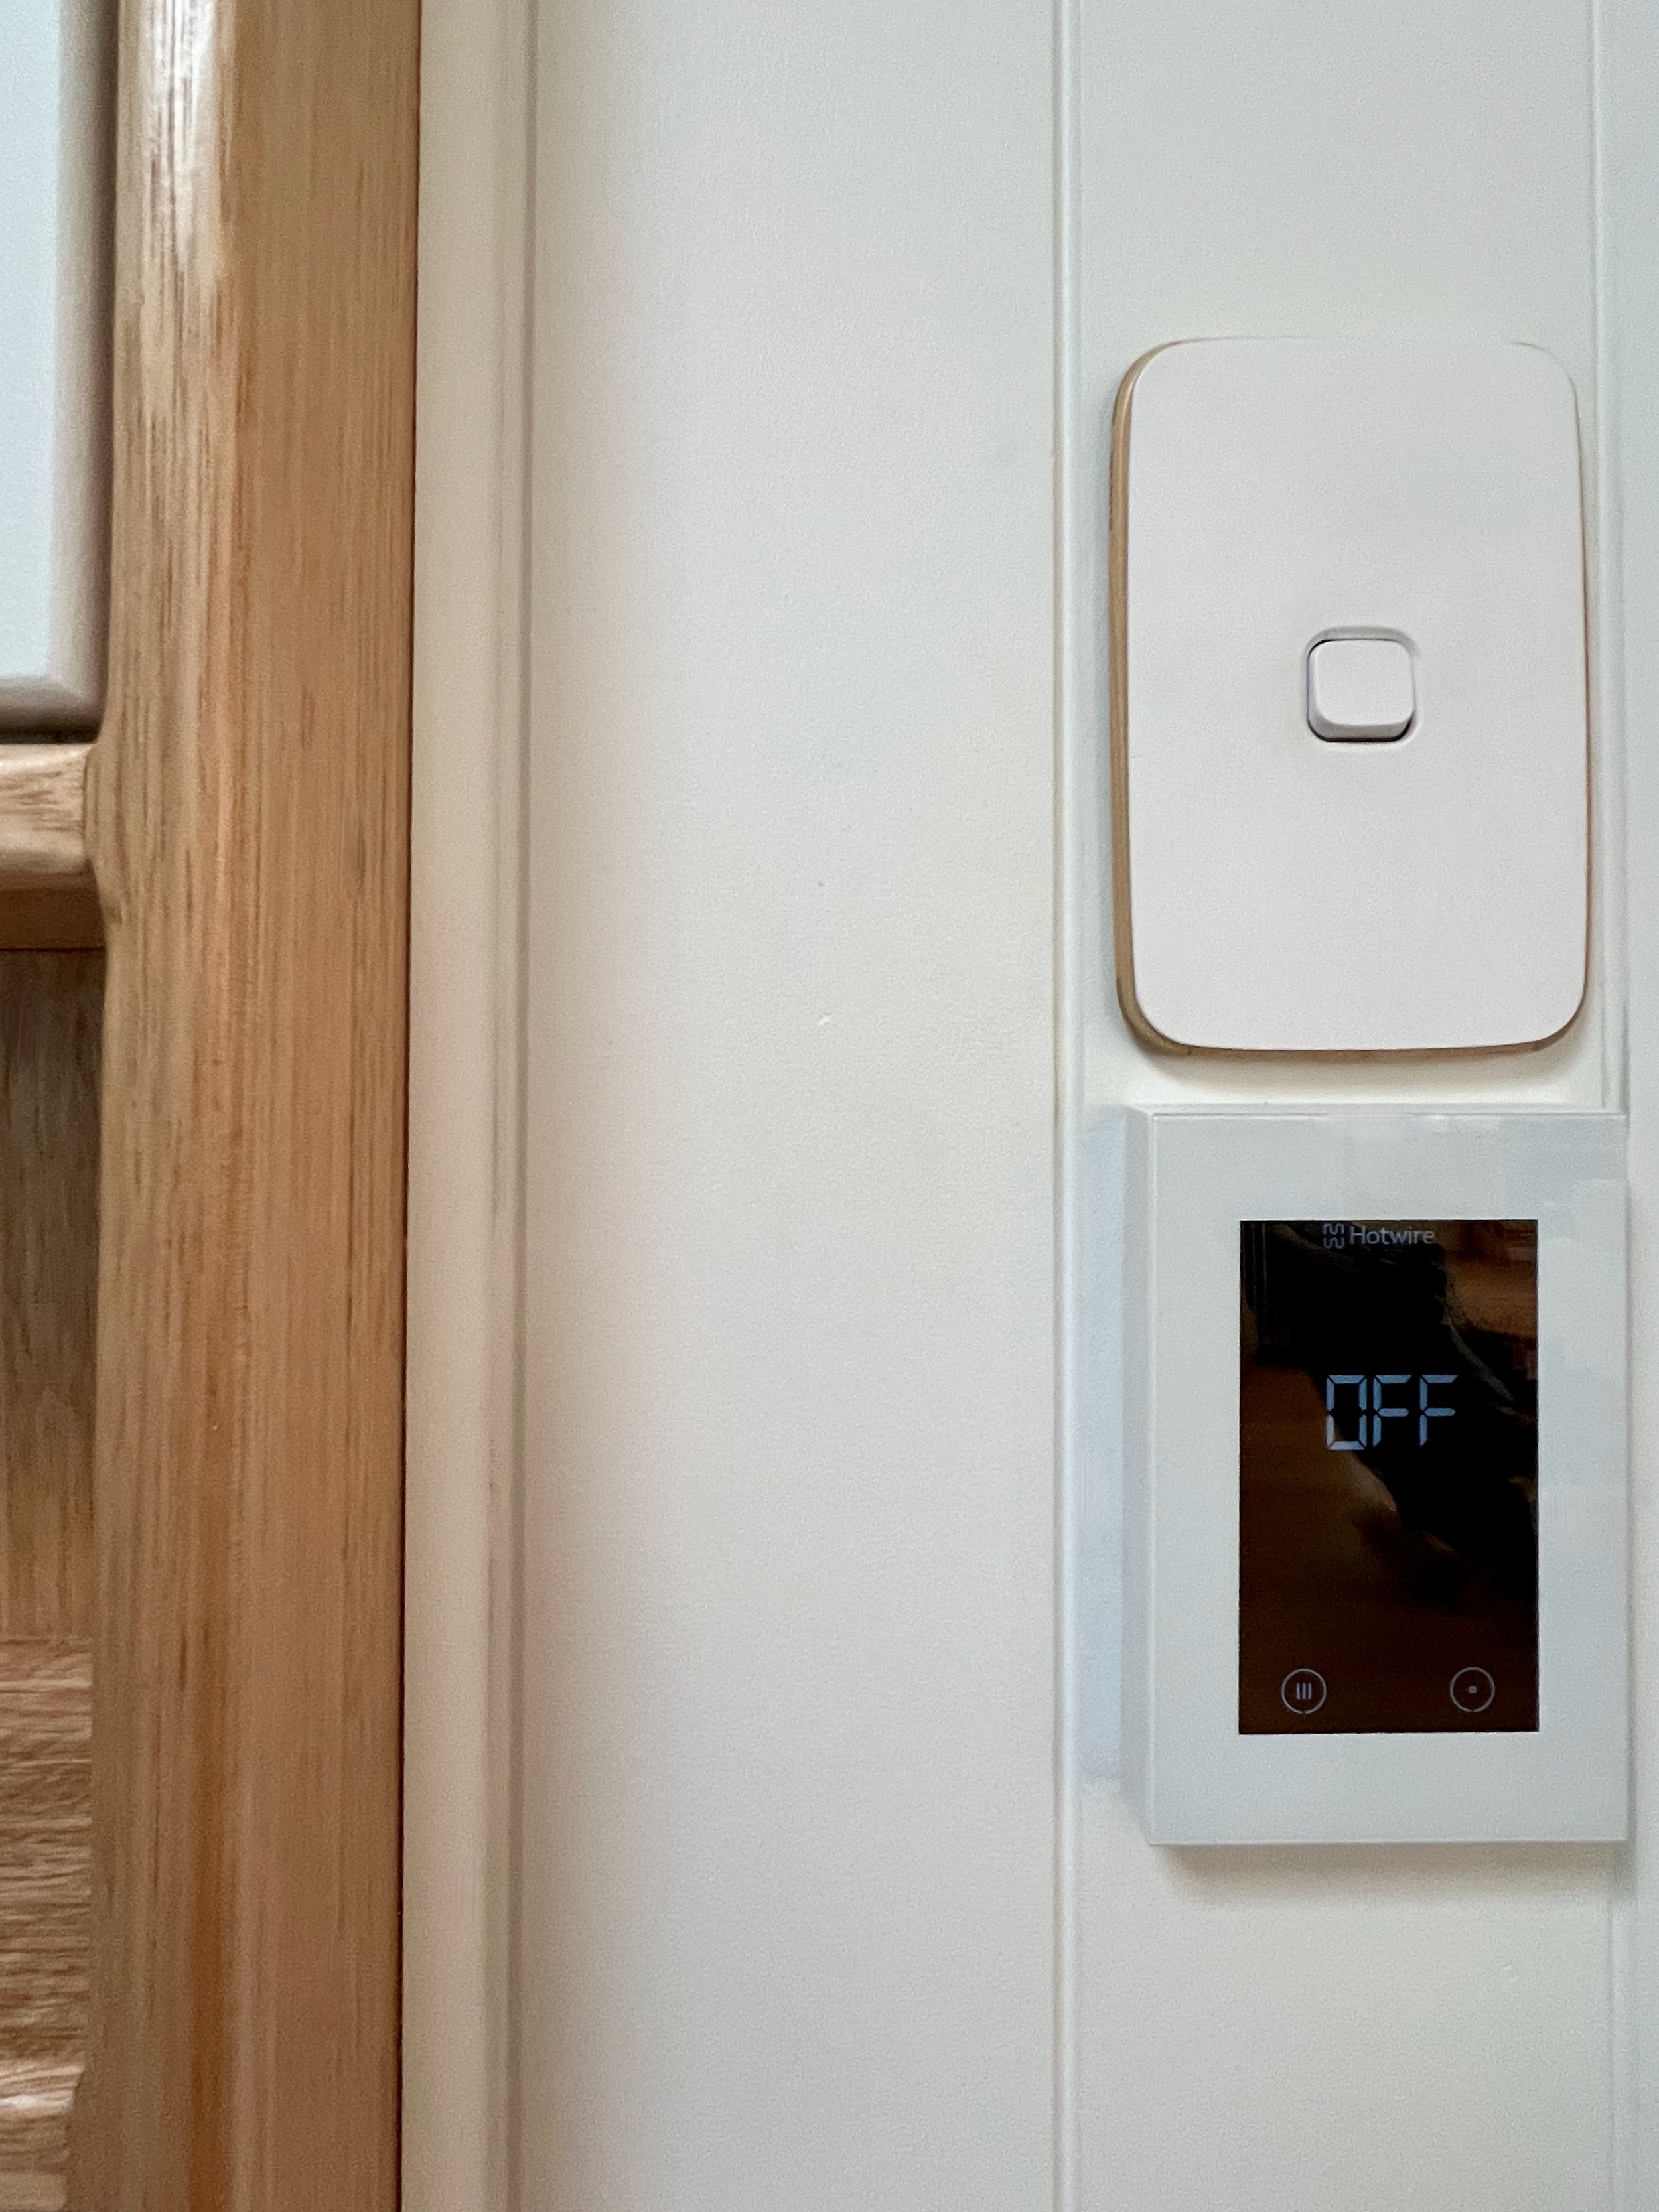
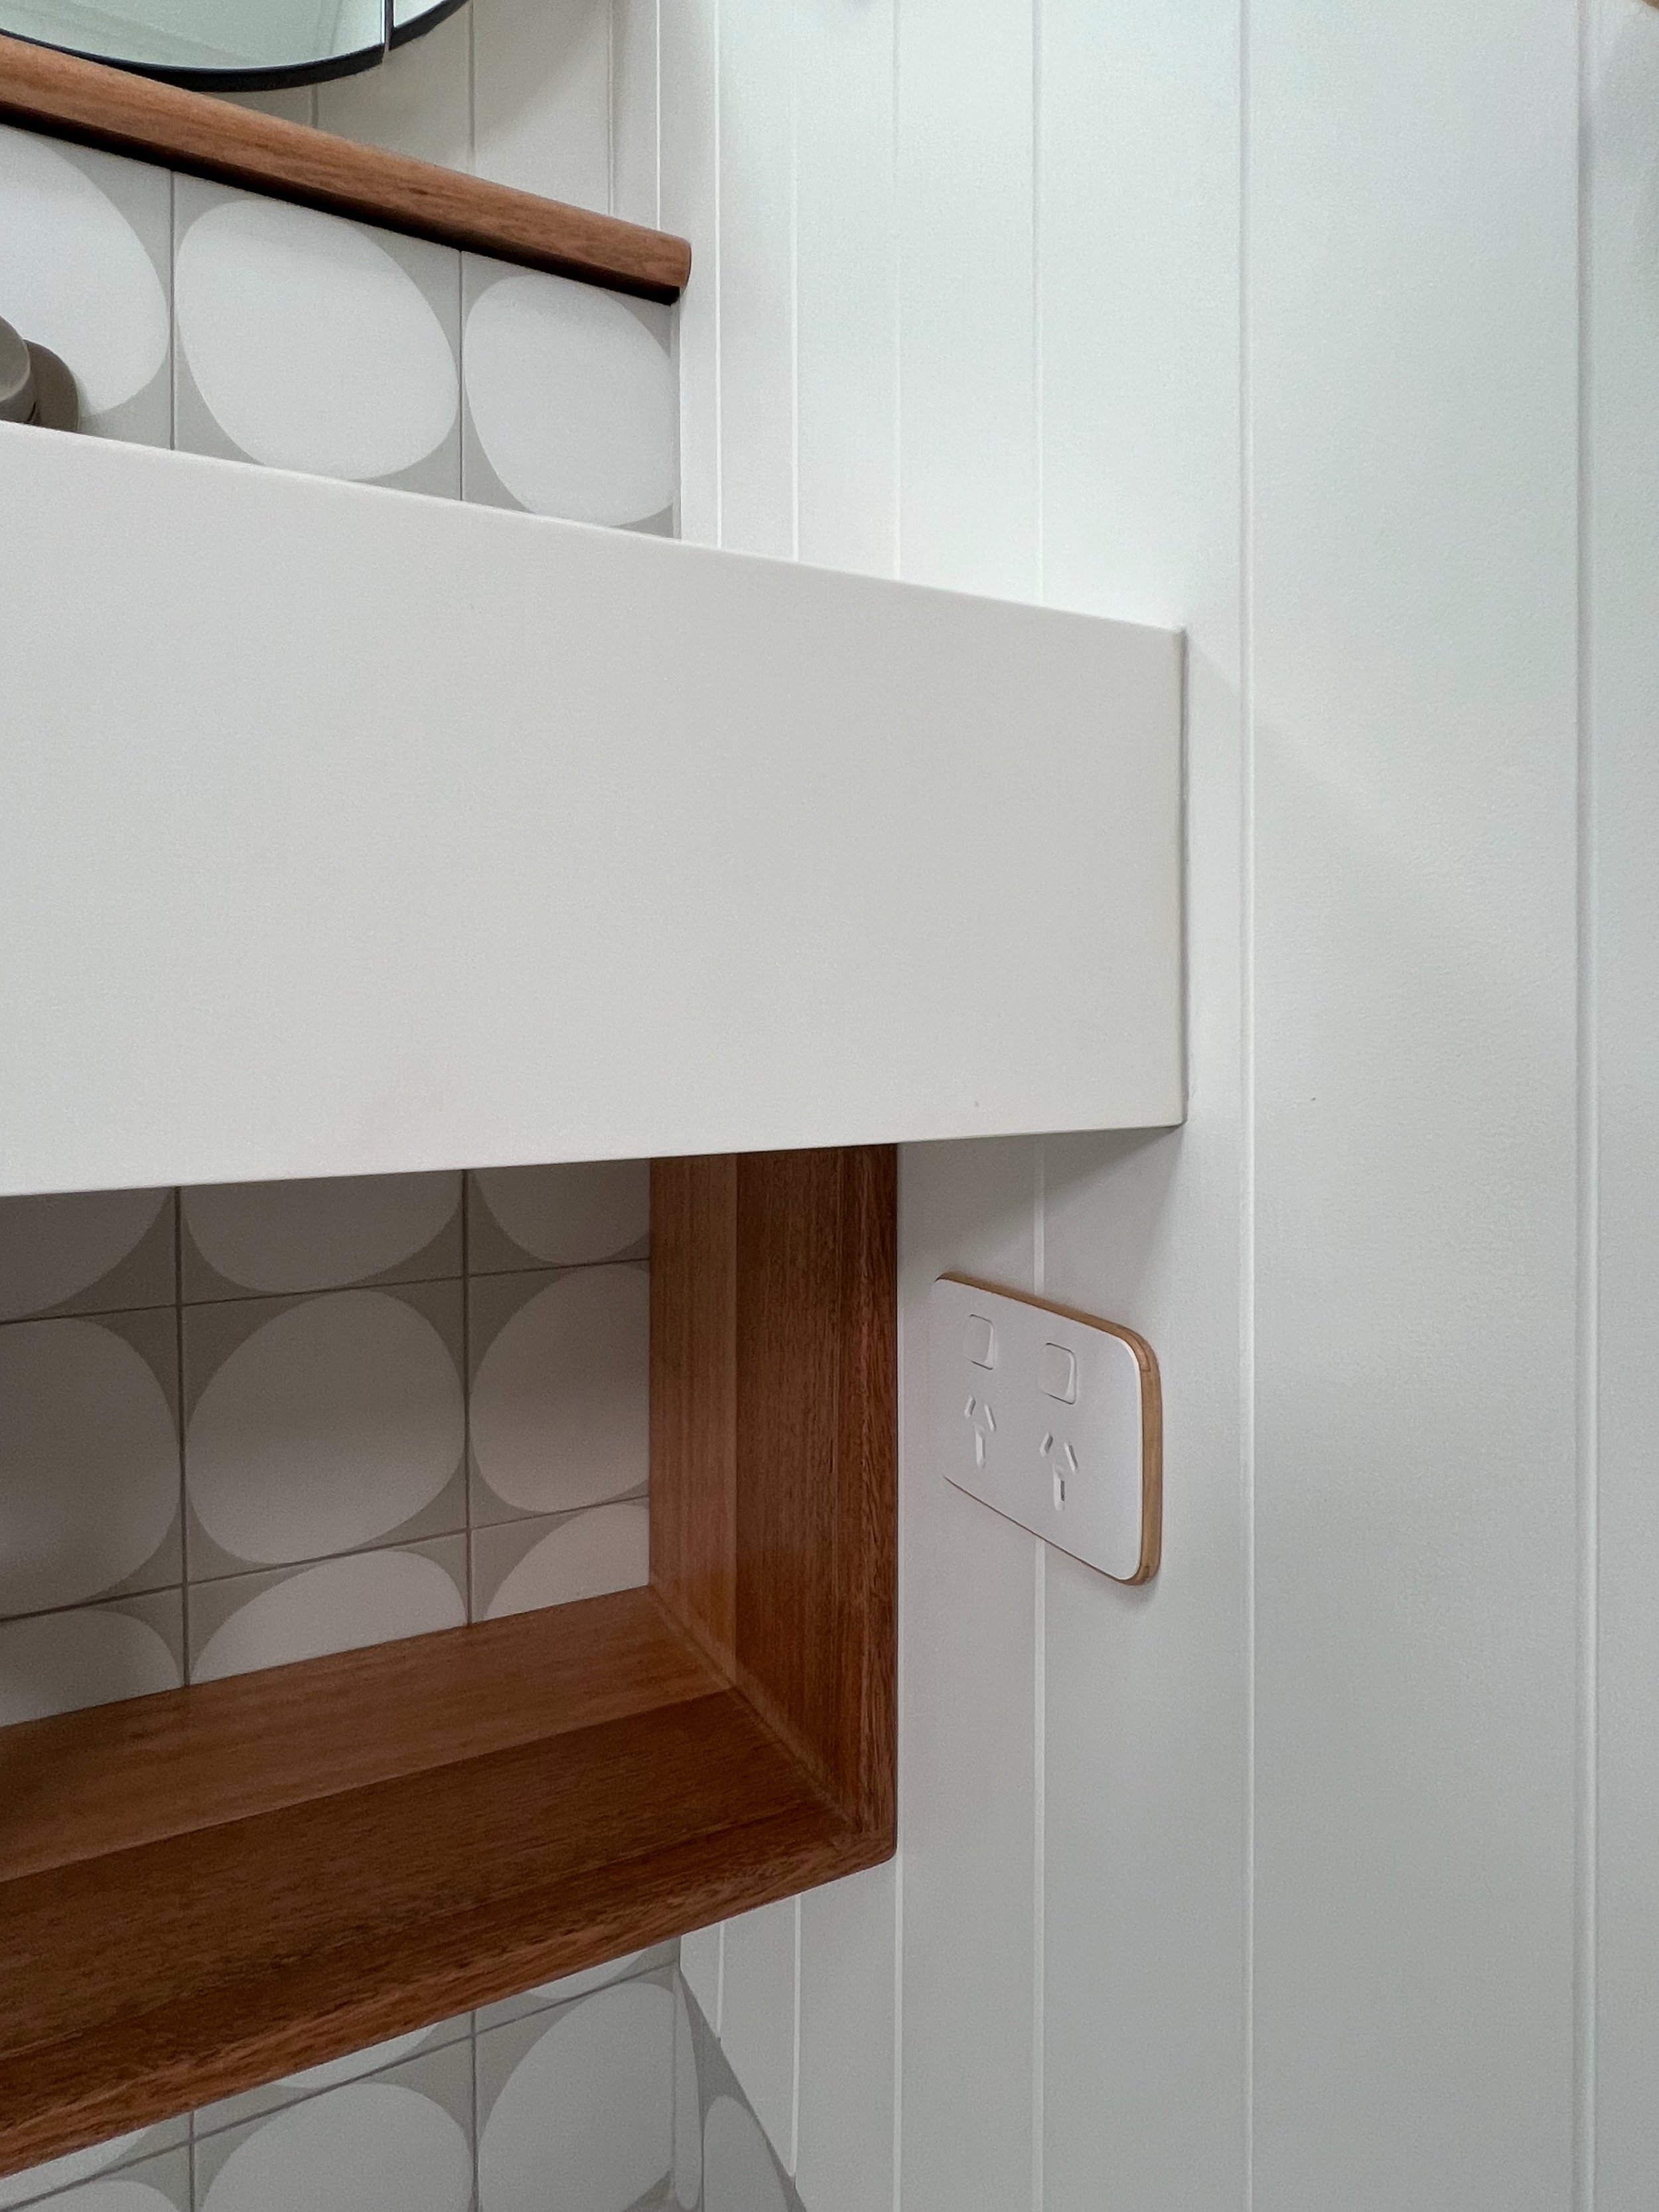
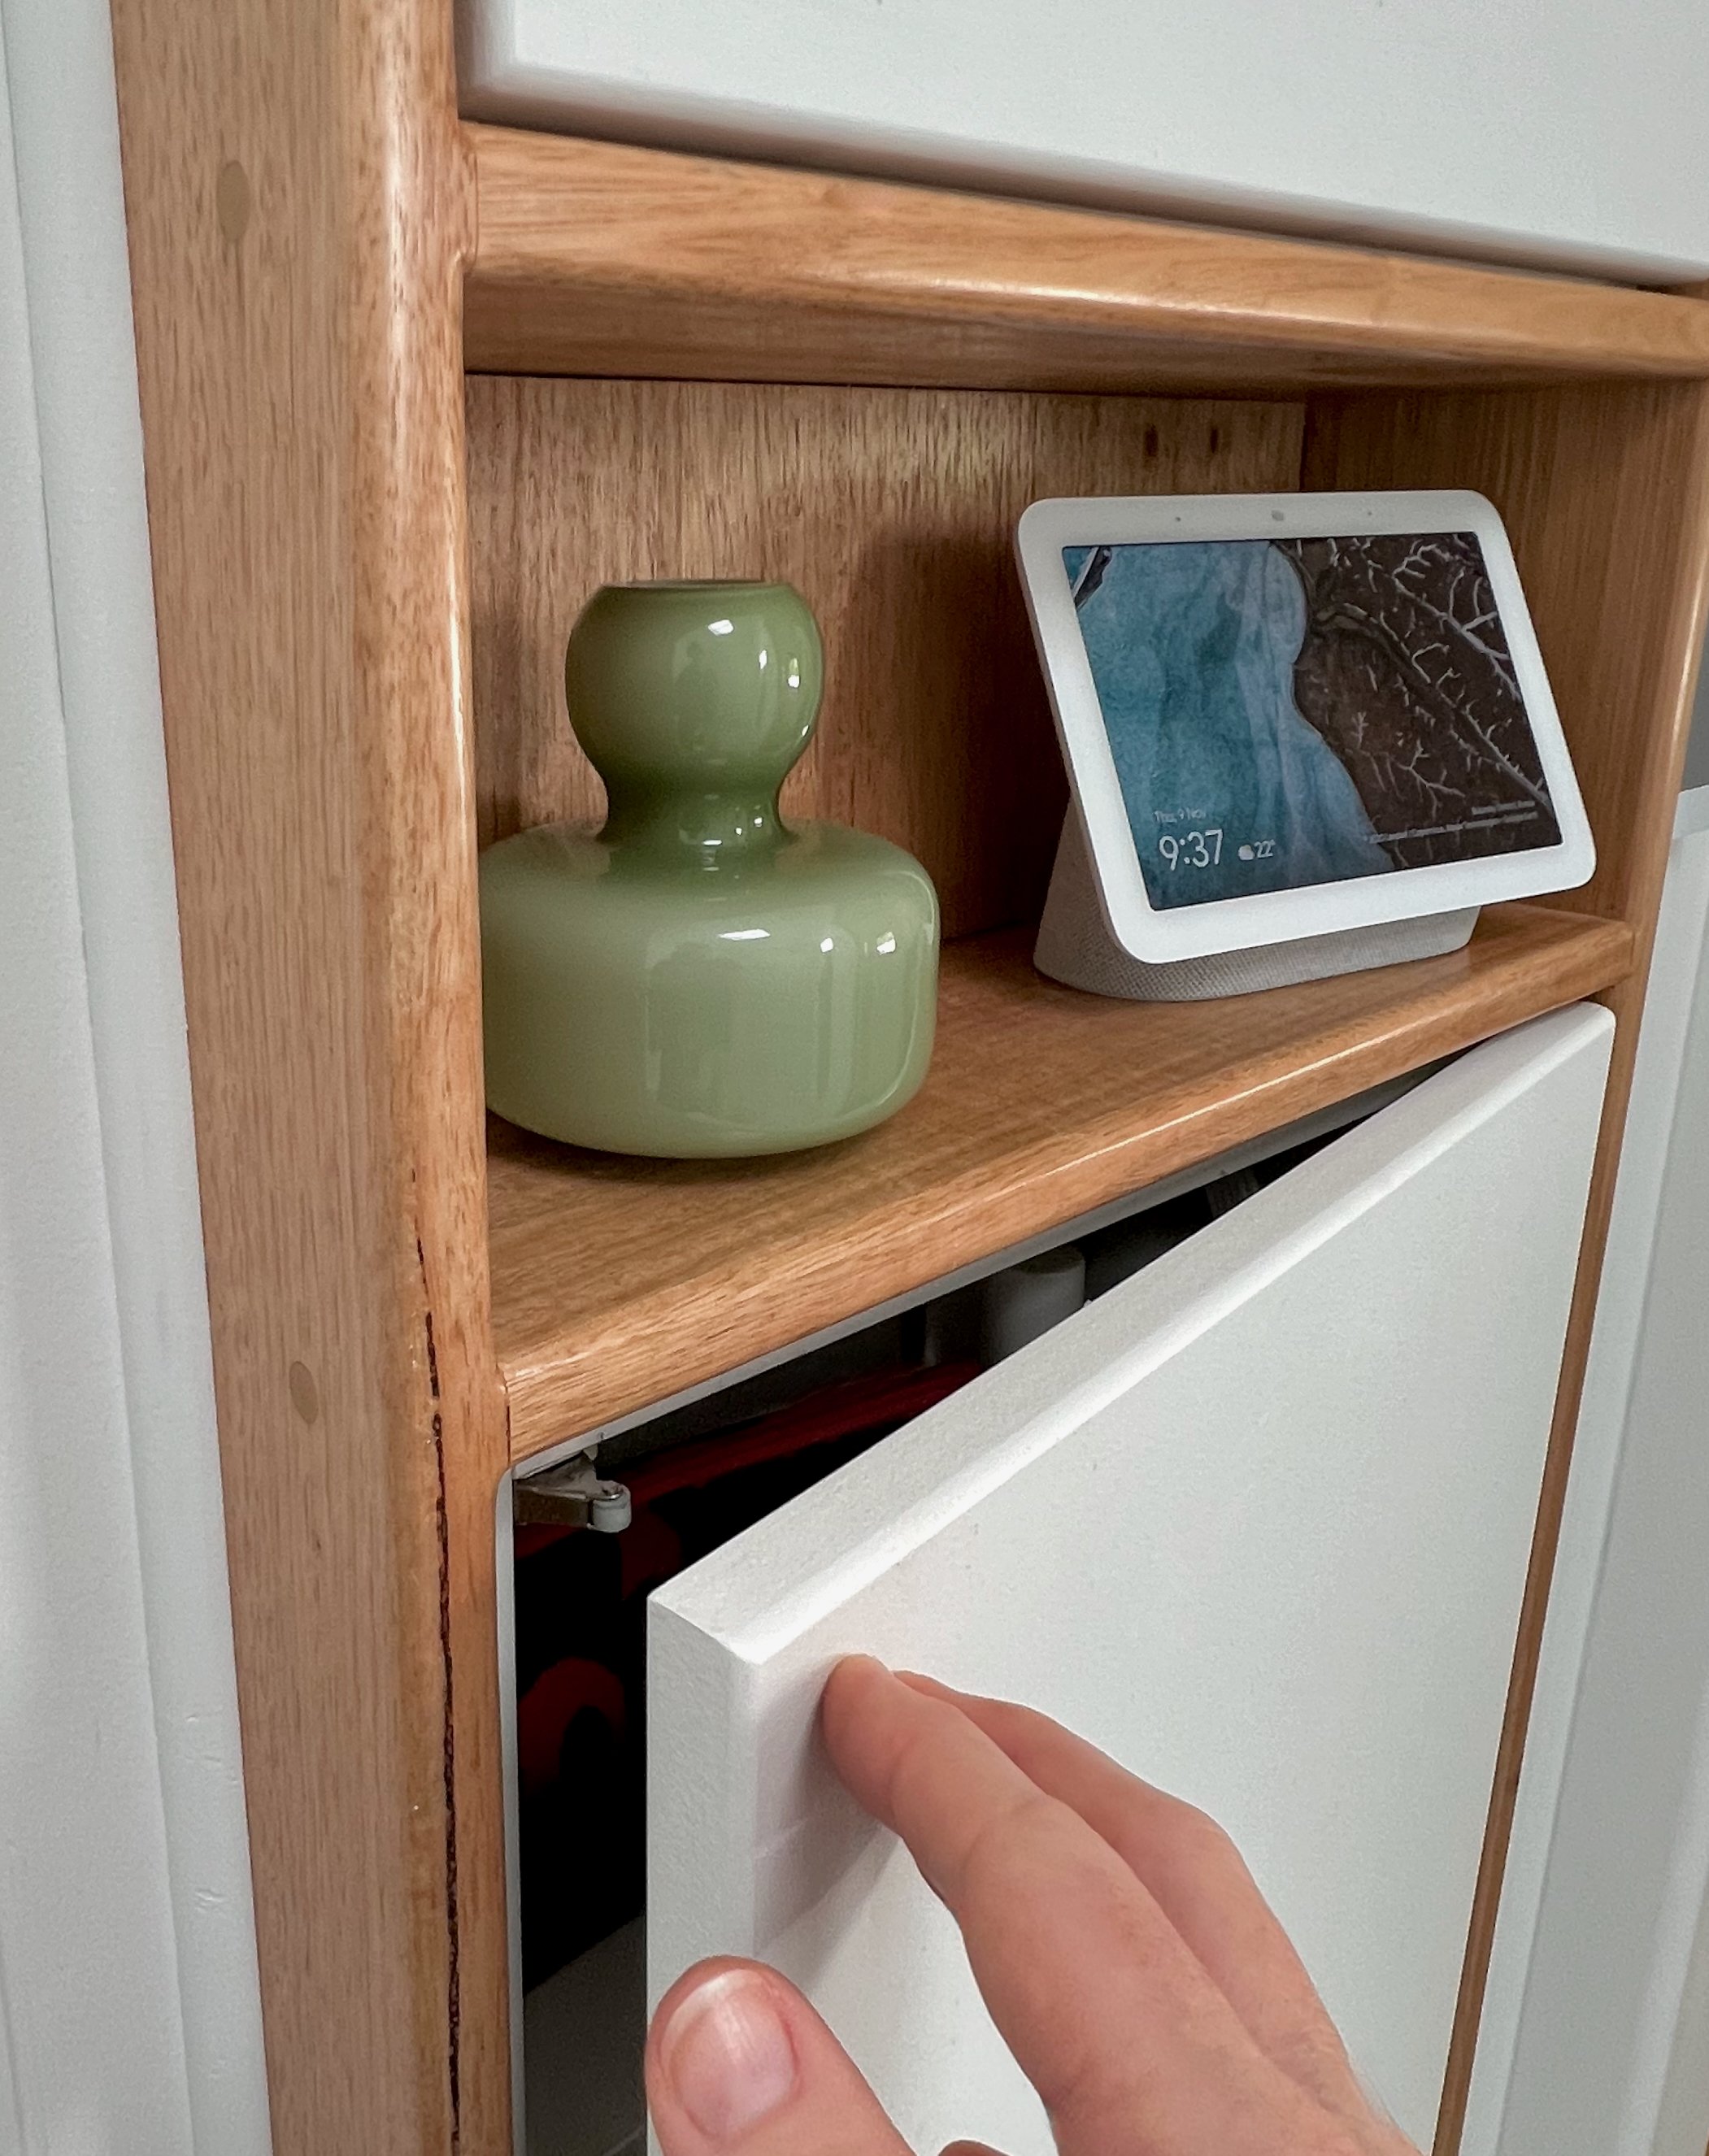
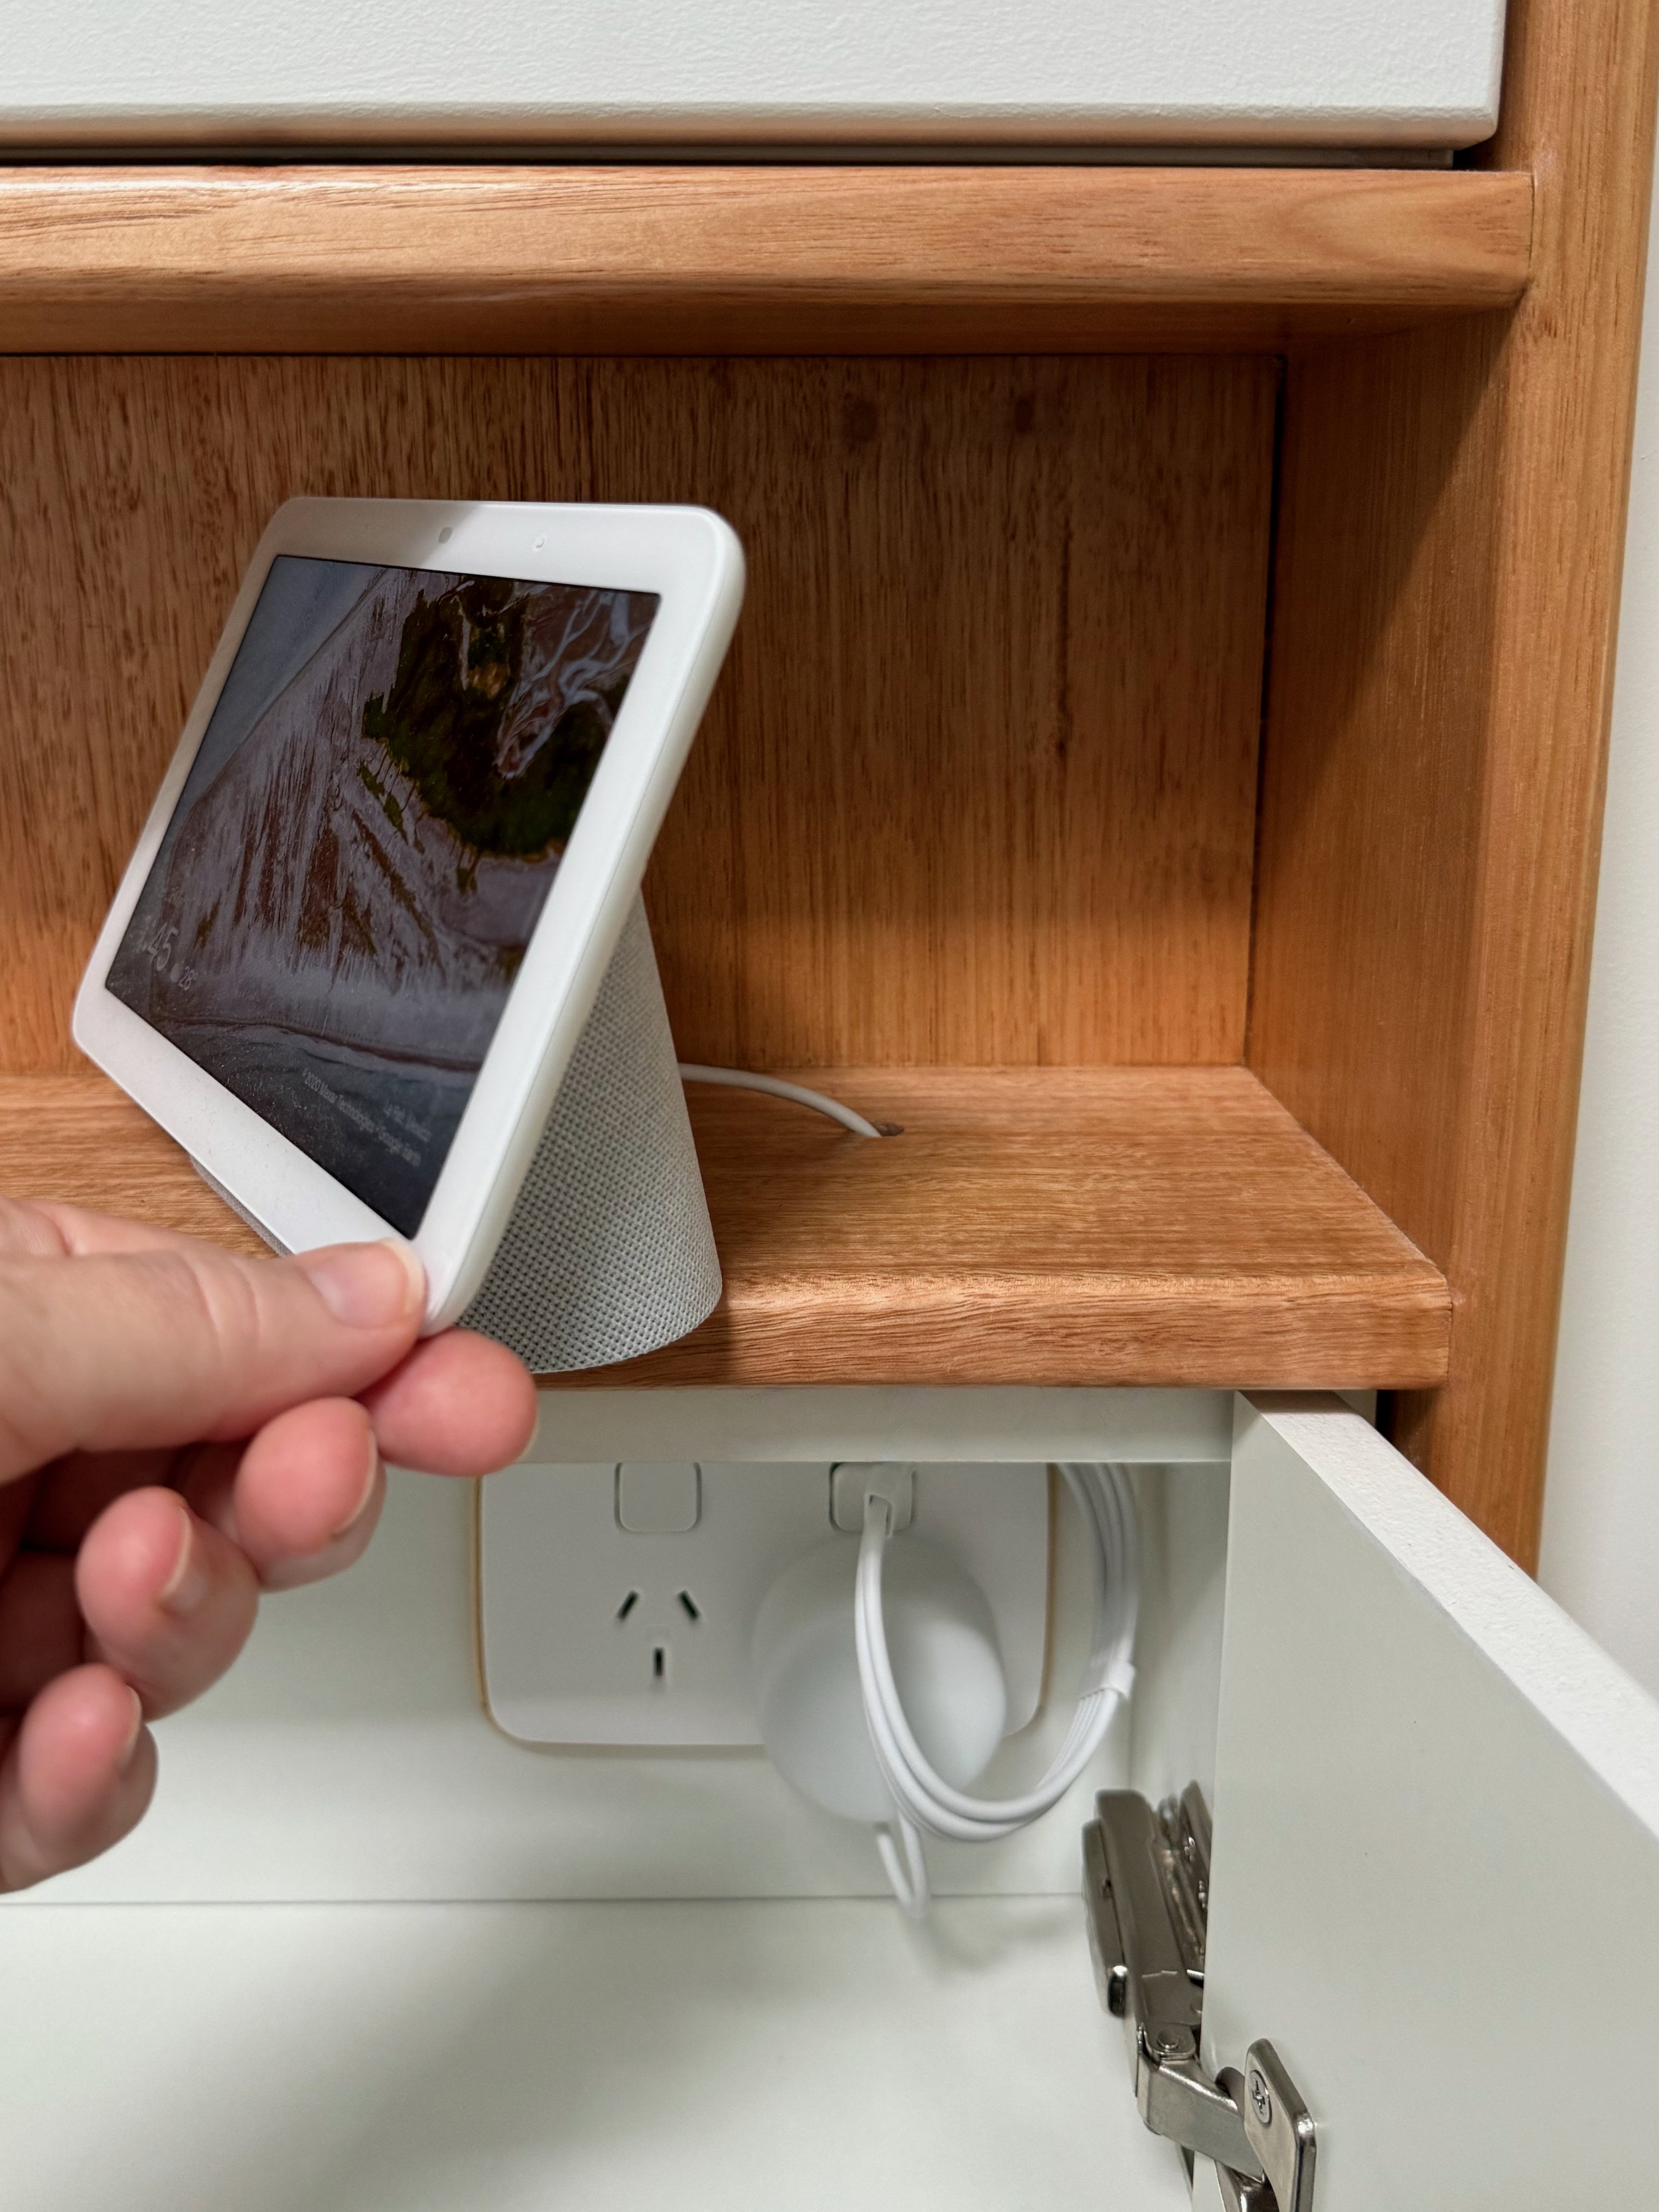
DESIGN TIP Choosing a Clipsal switch plate with timber edging continues my wood-on-white theme.


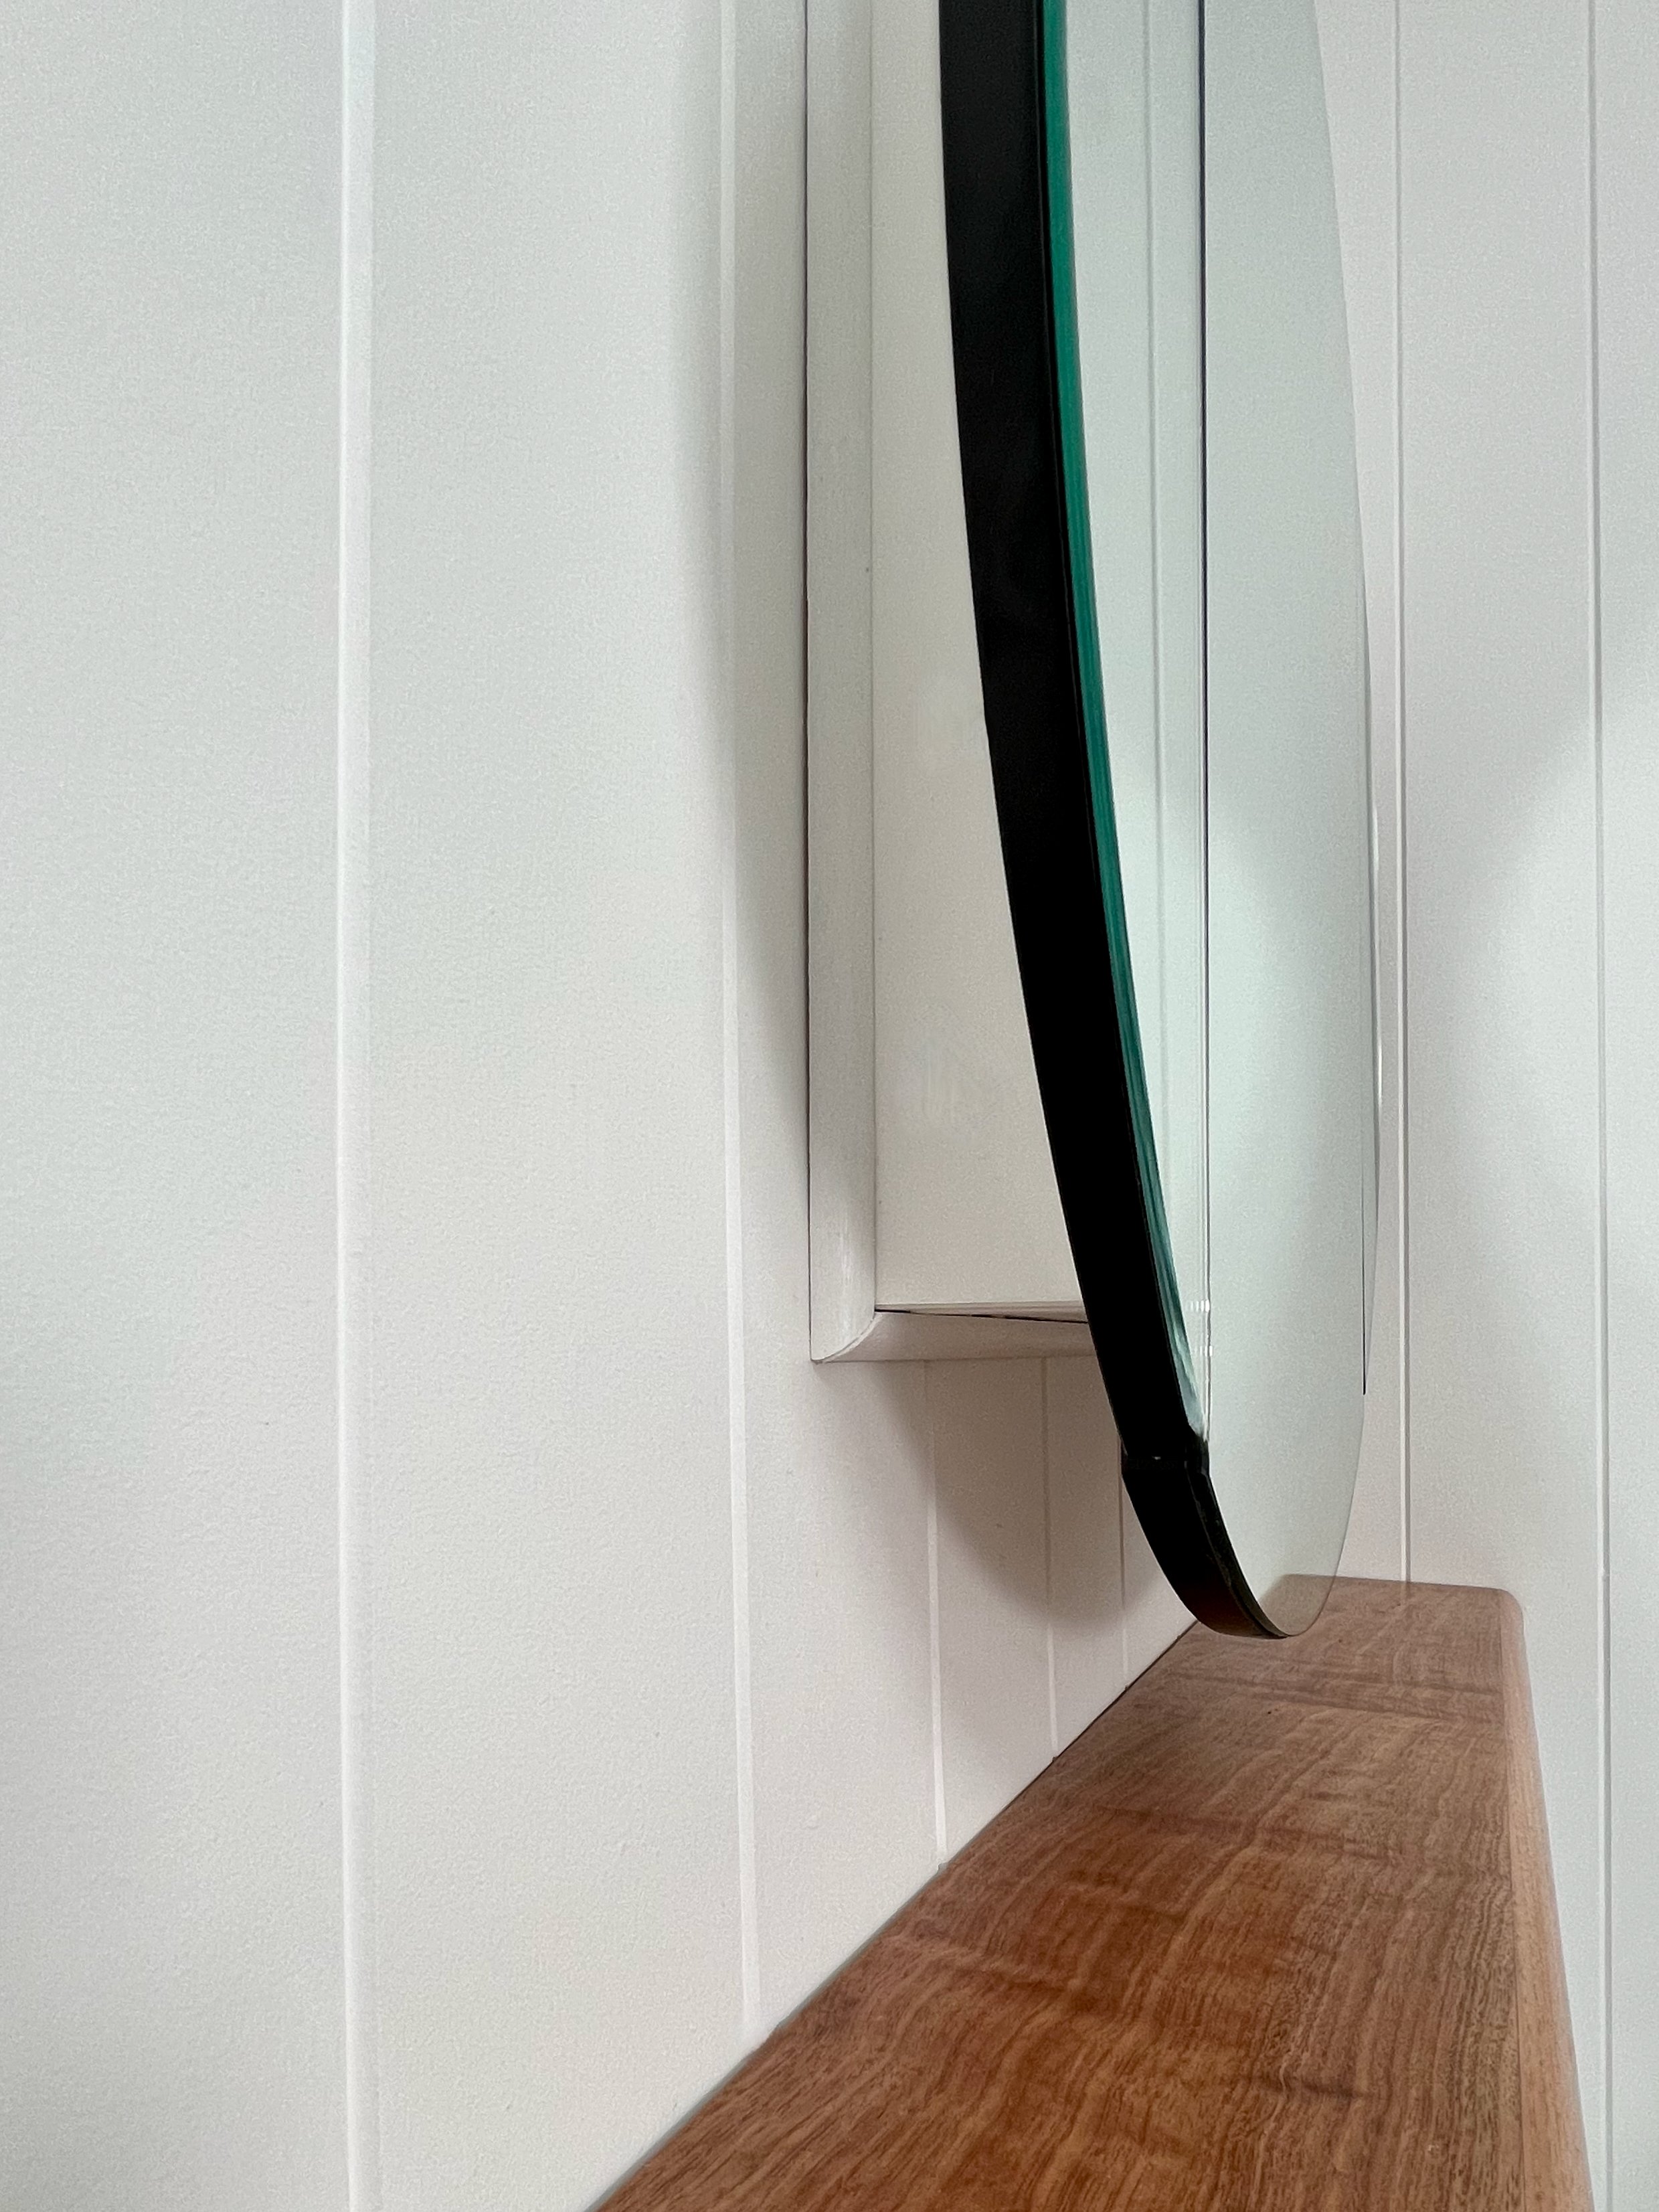
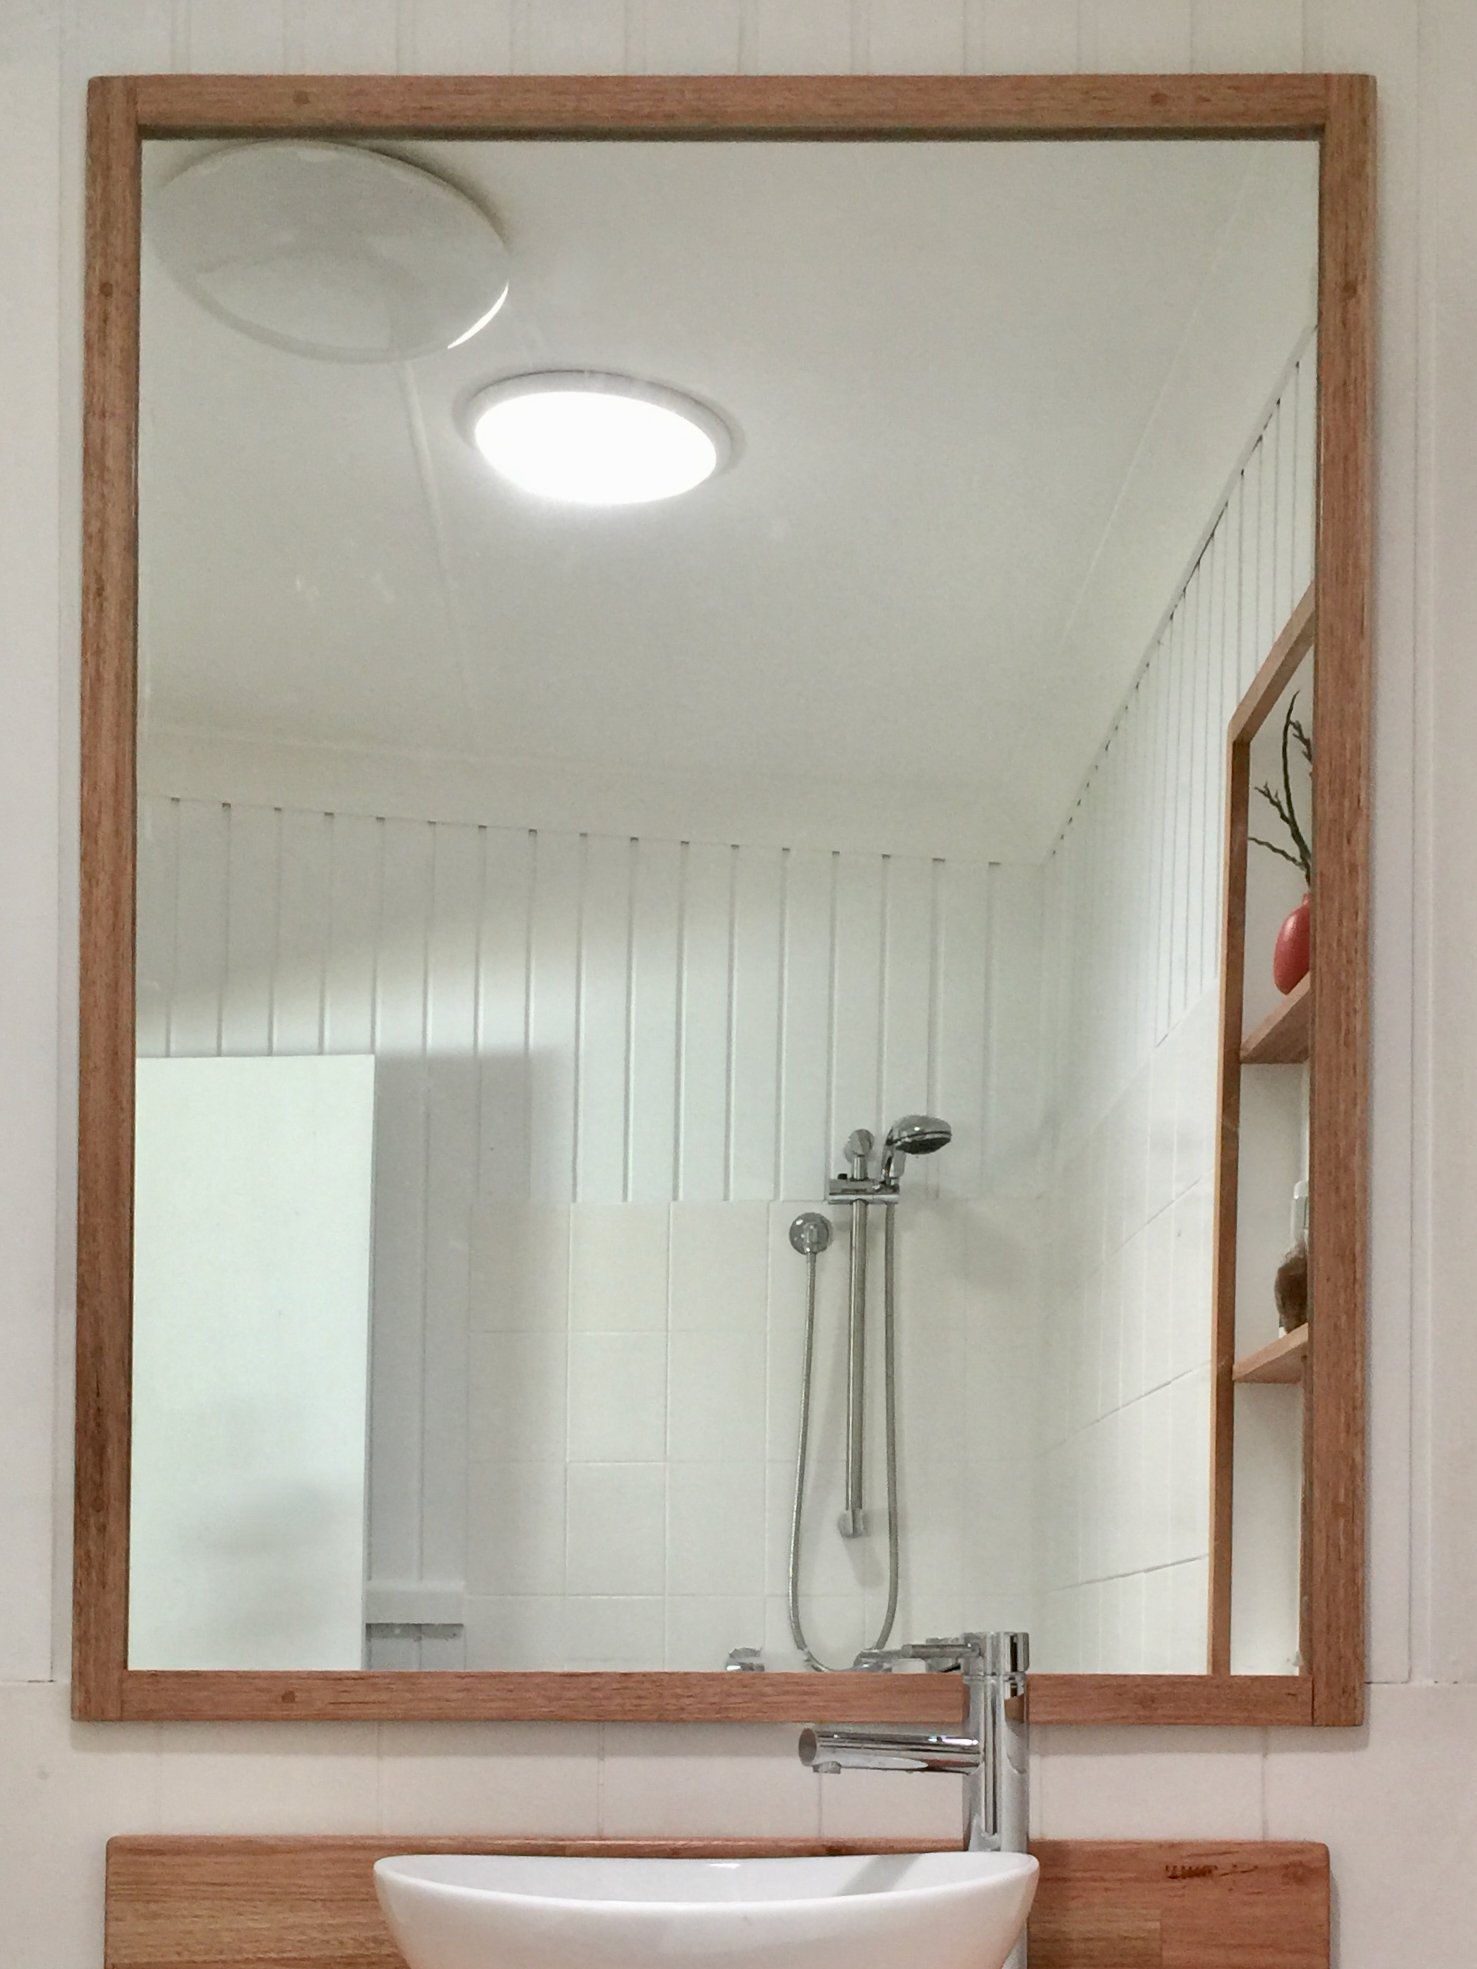
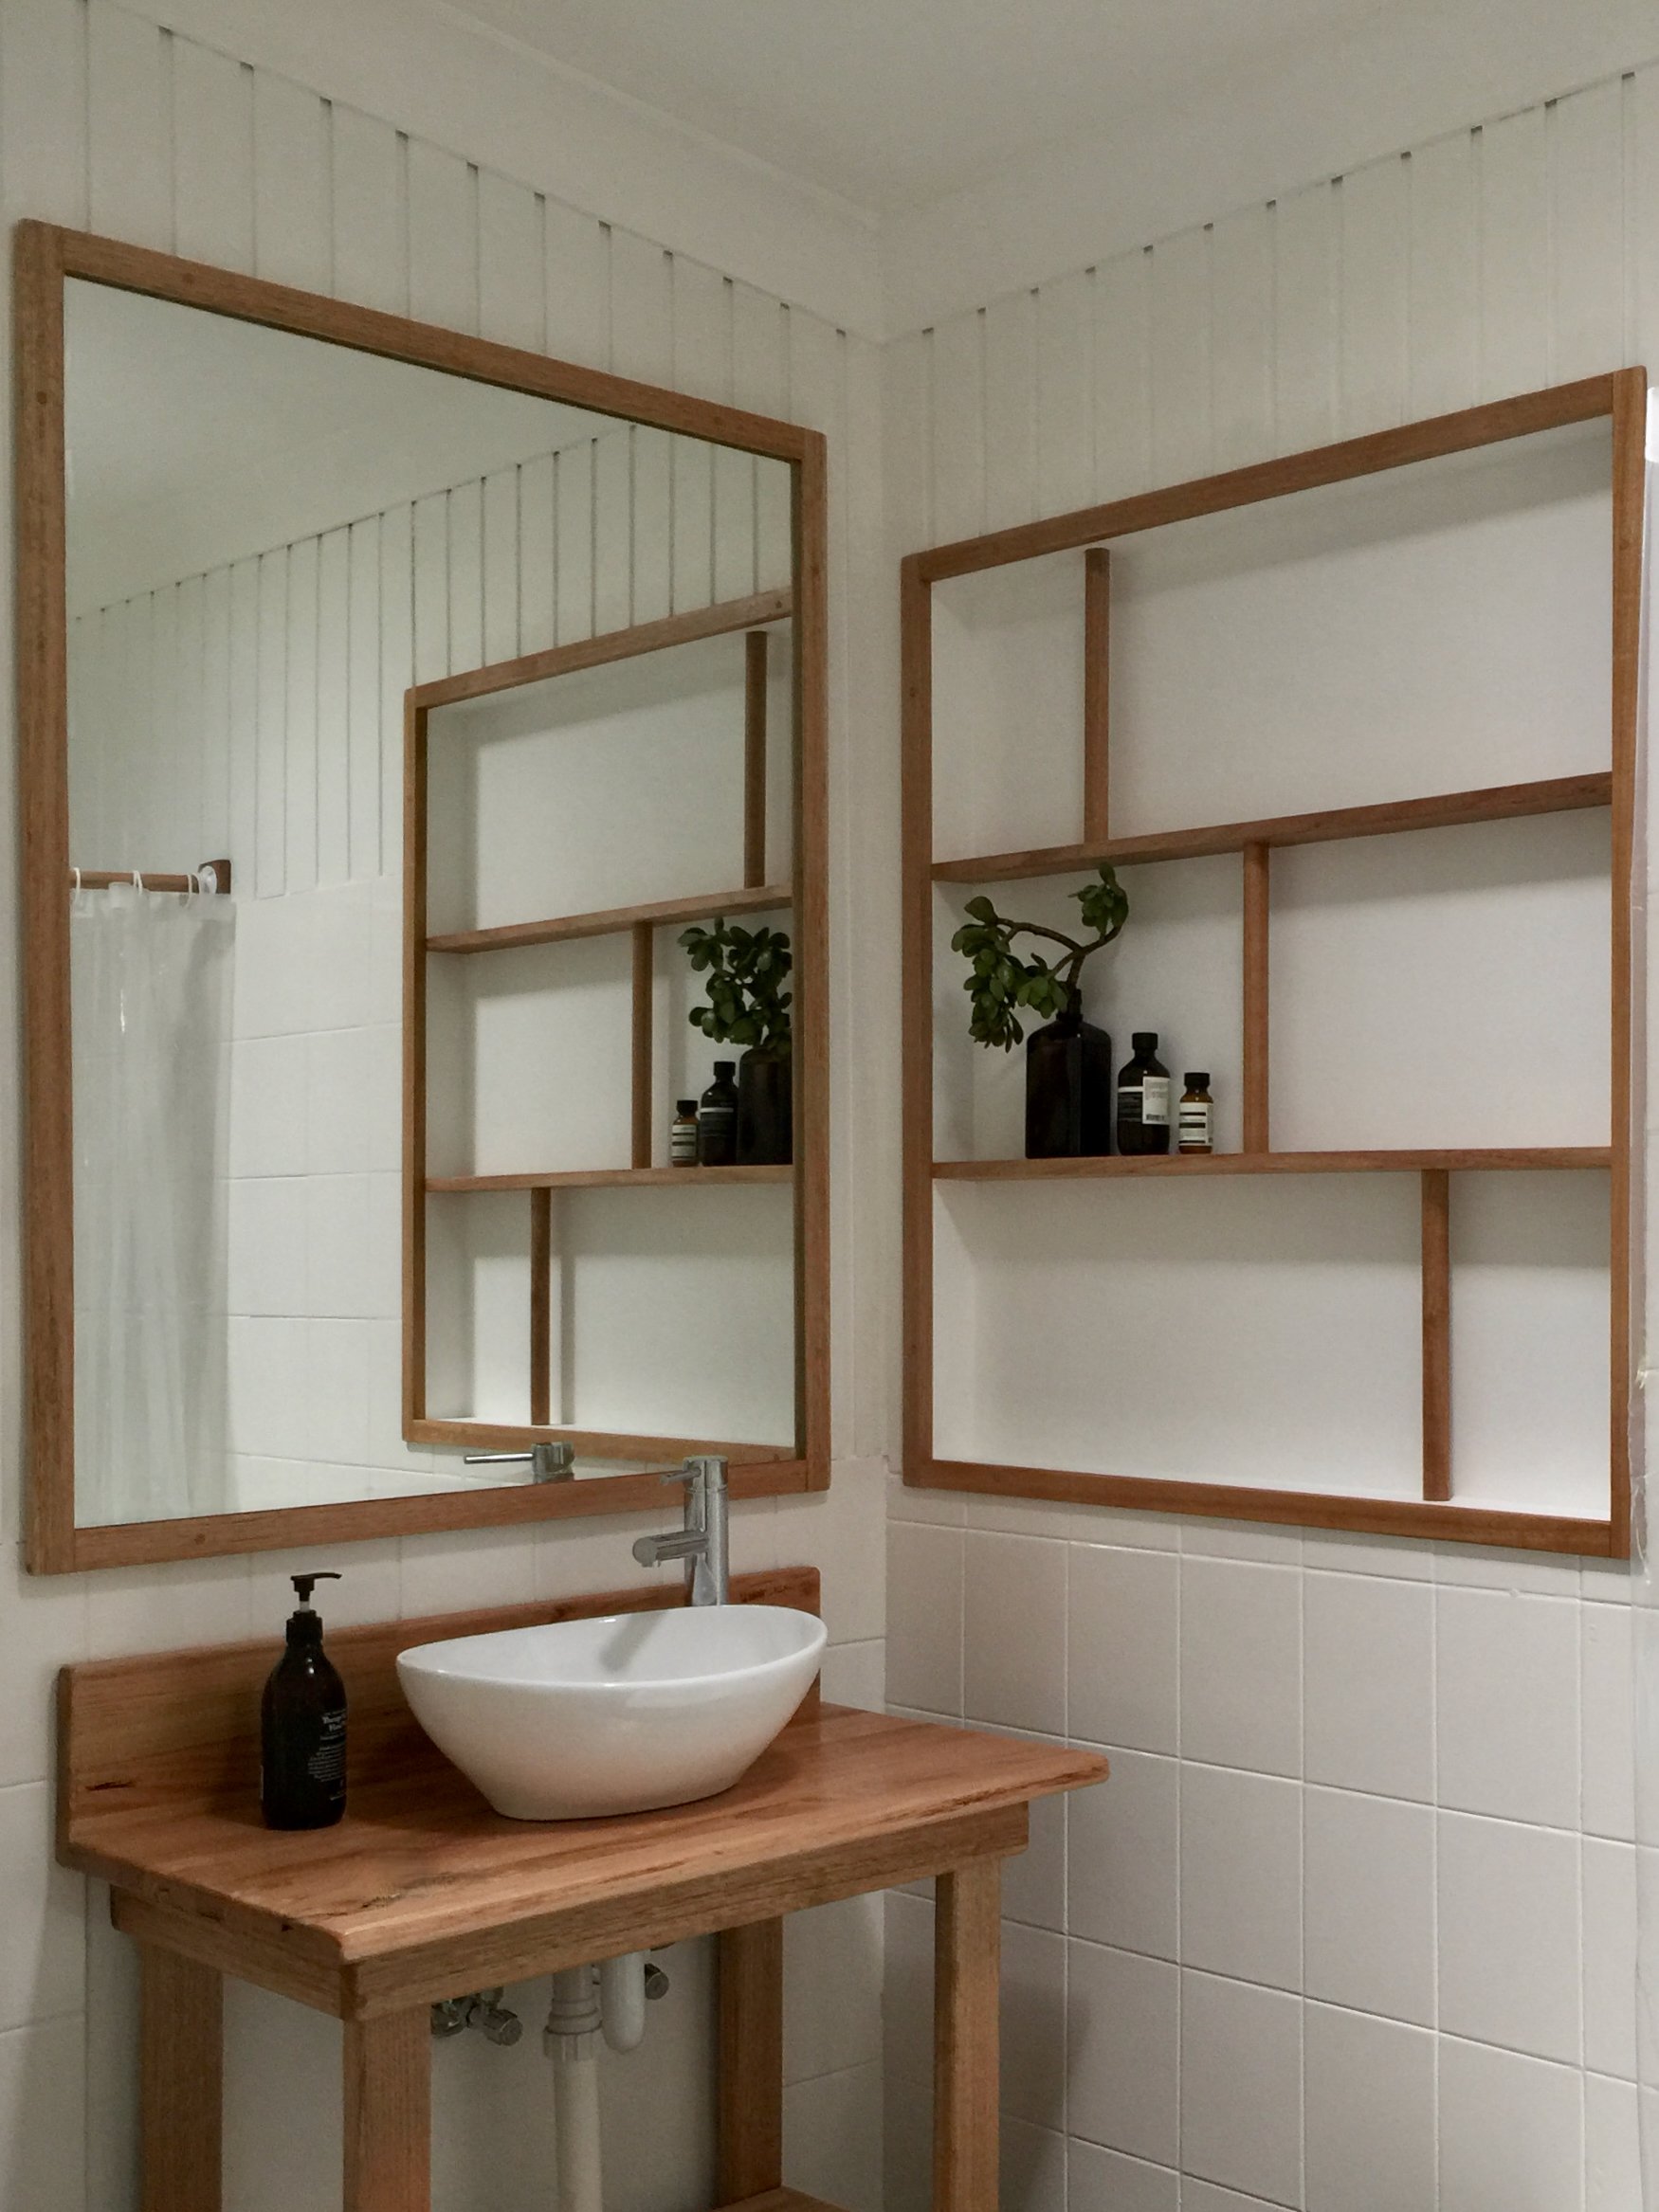
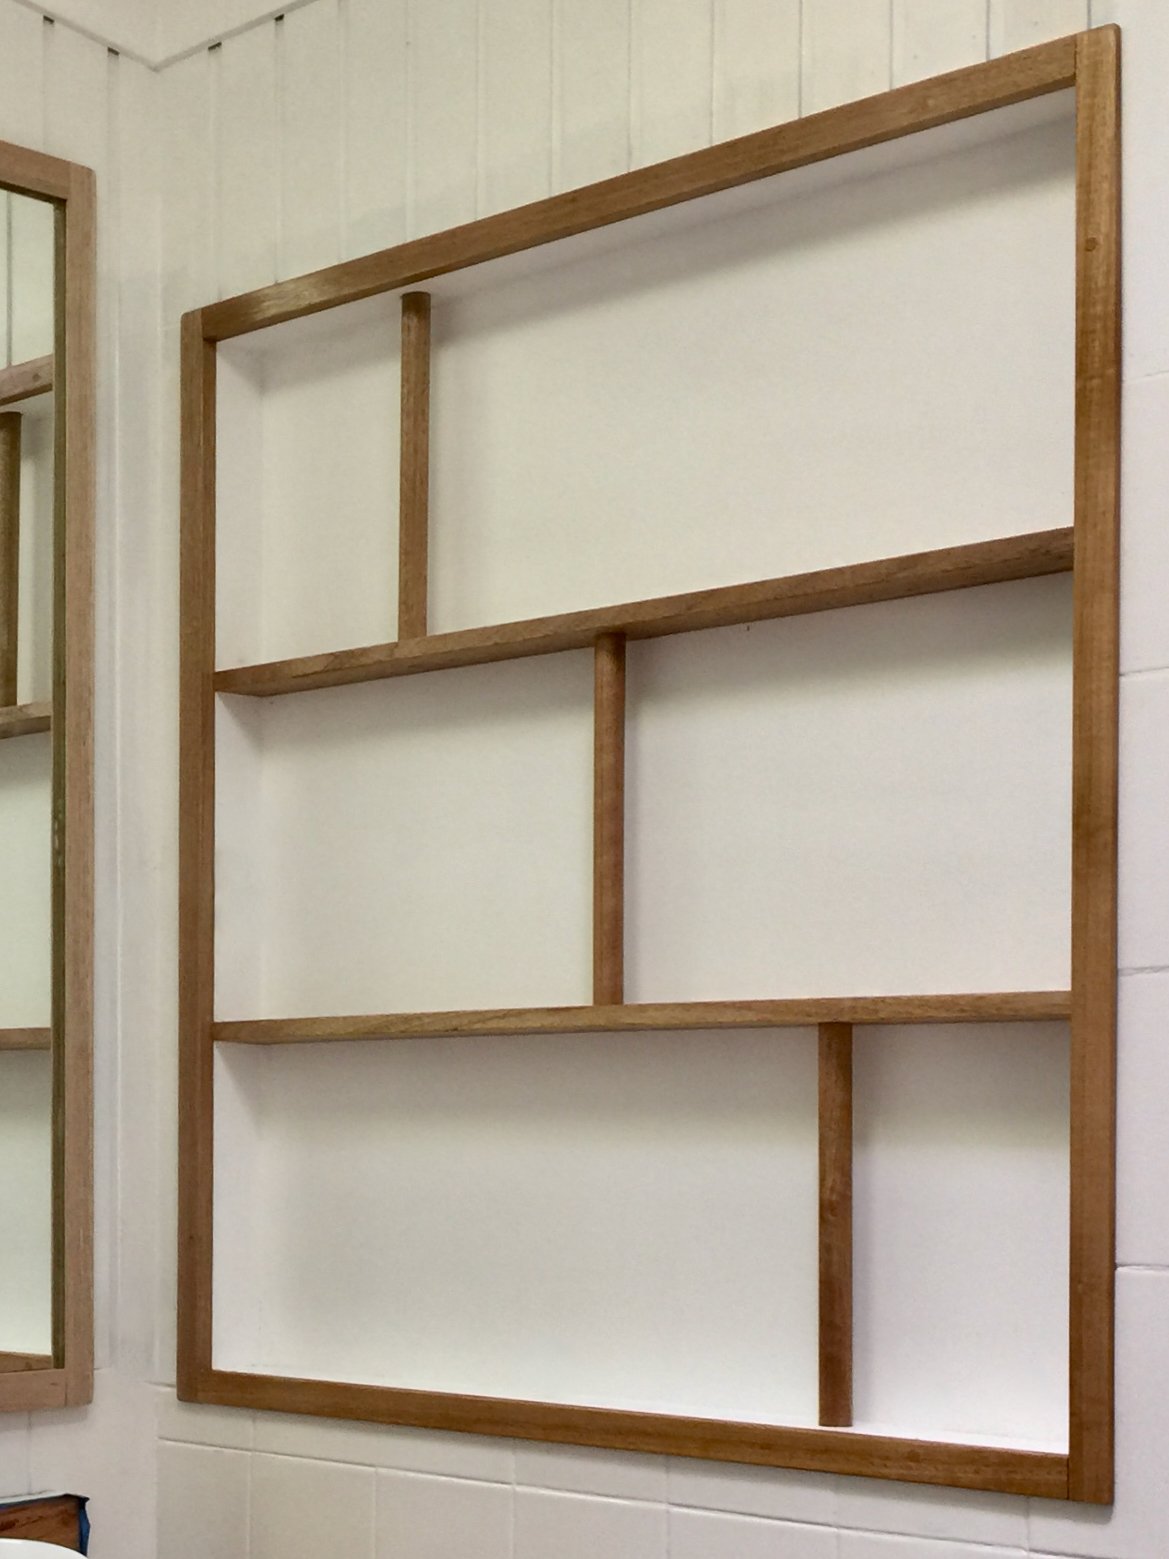
To stay on budget, I bought an inexpensive round mirror and made a frame to fit, mixing up the perfect green to match my little Marimekko vase.


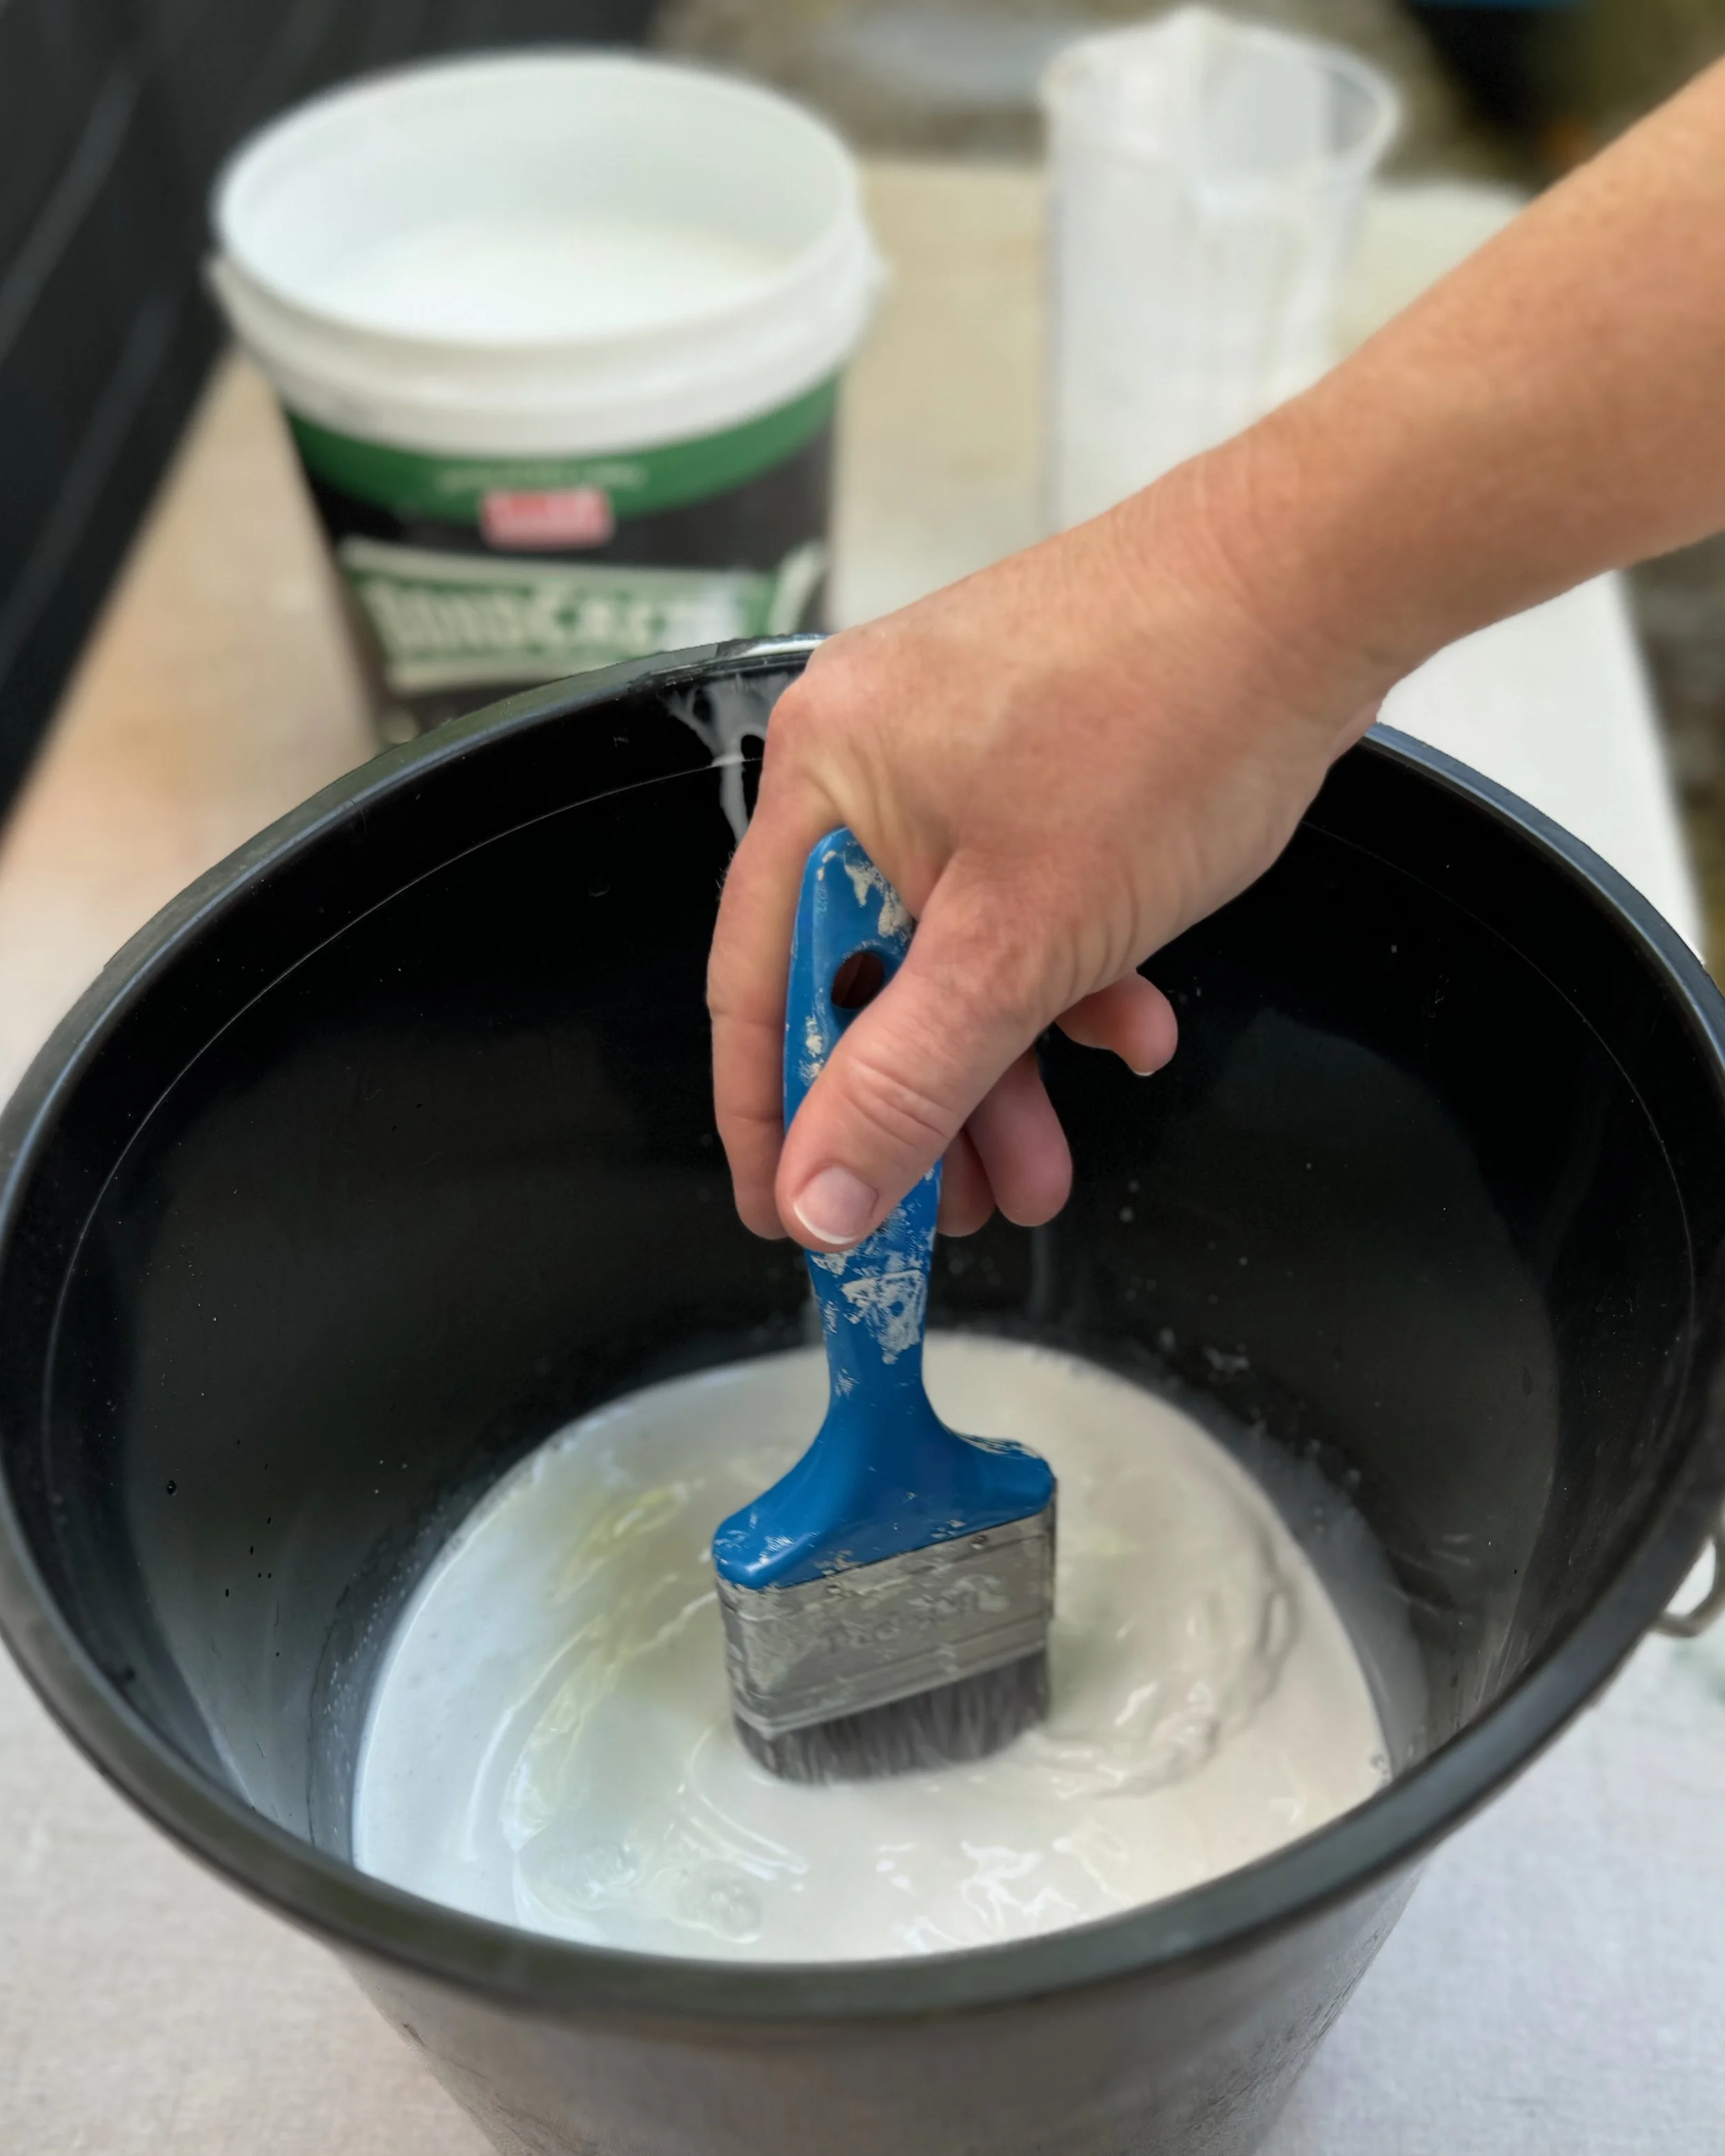
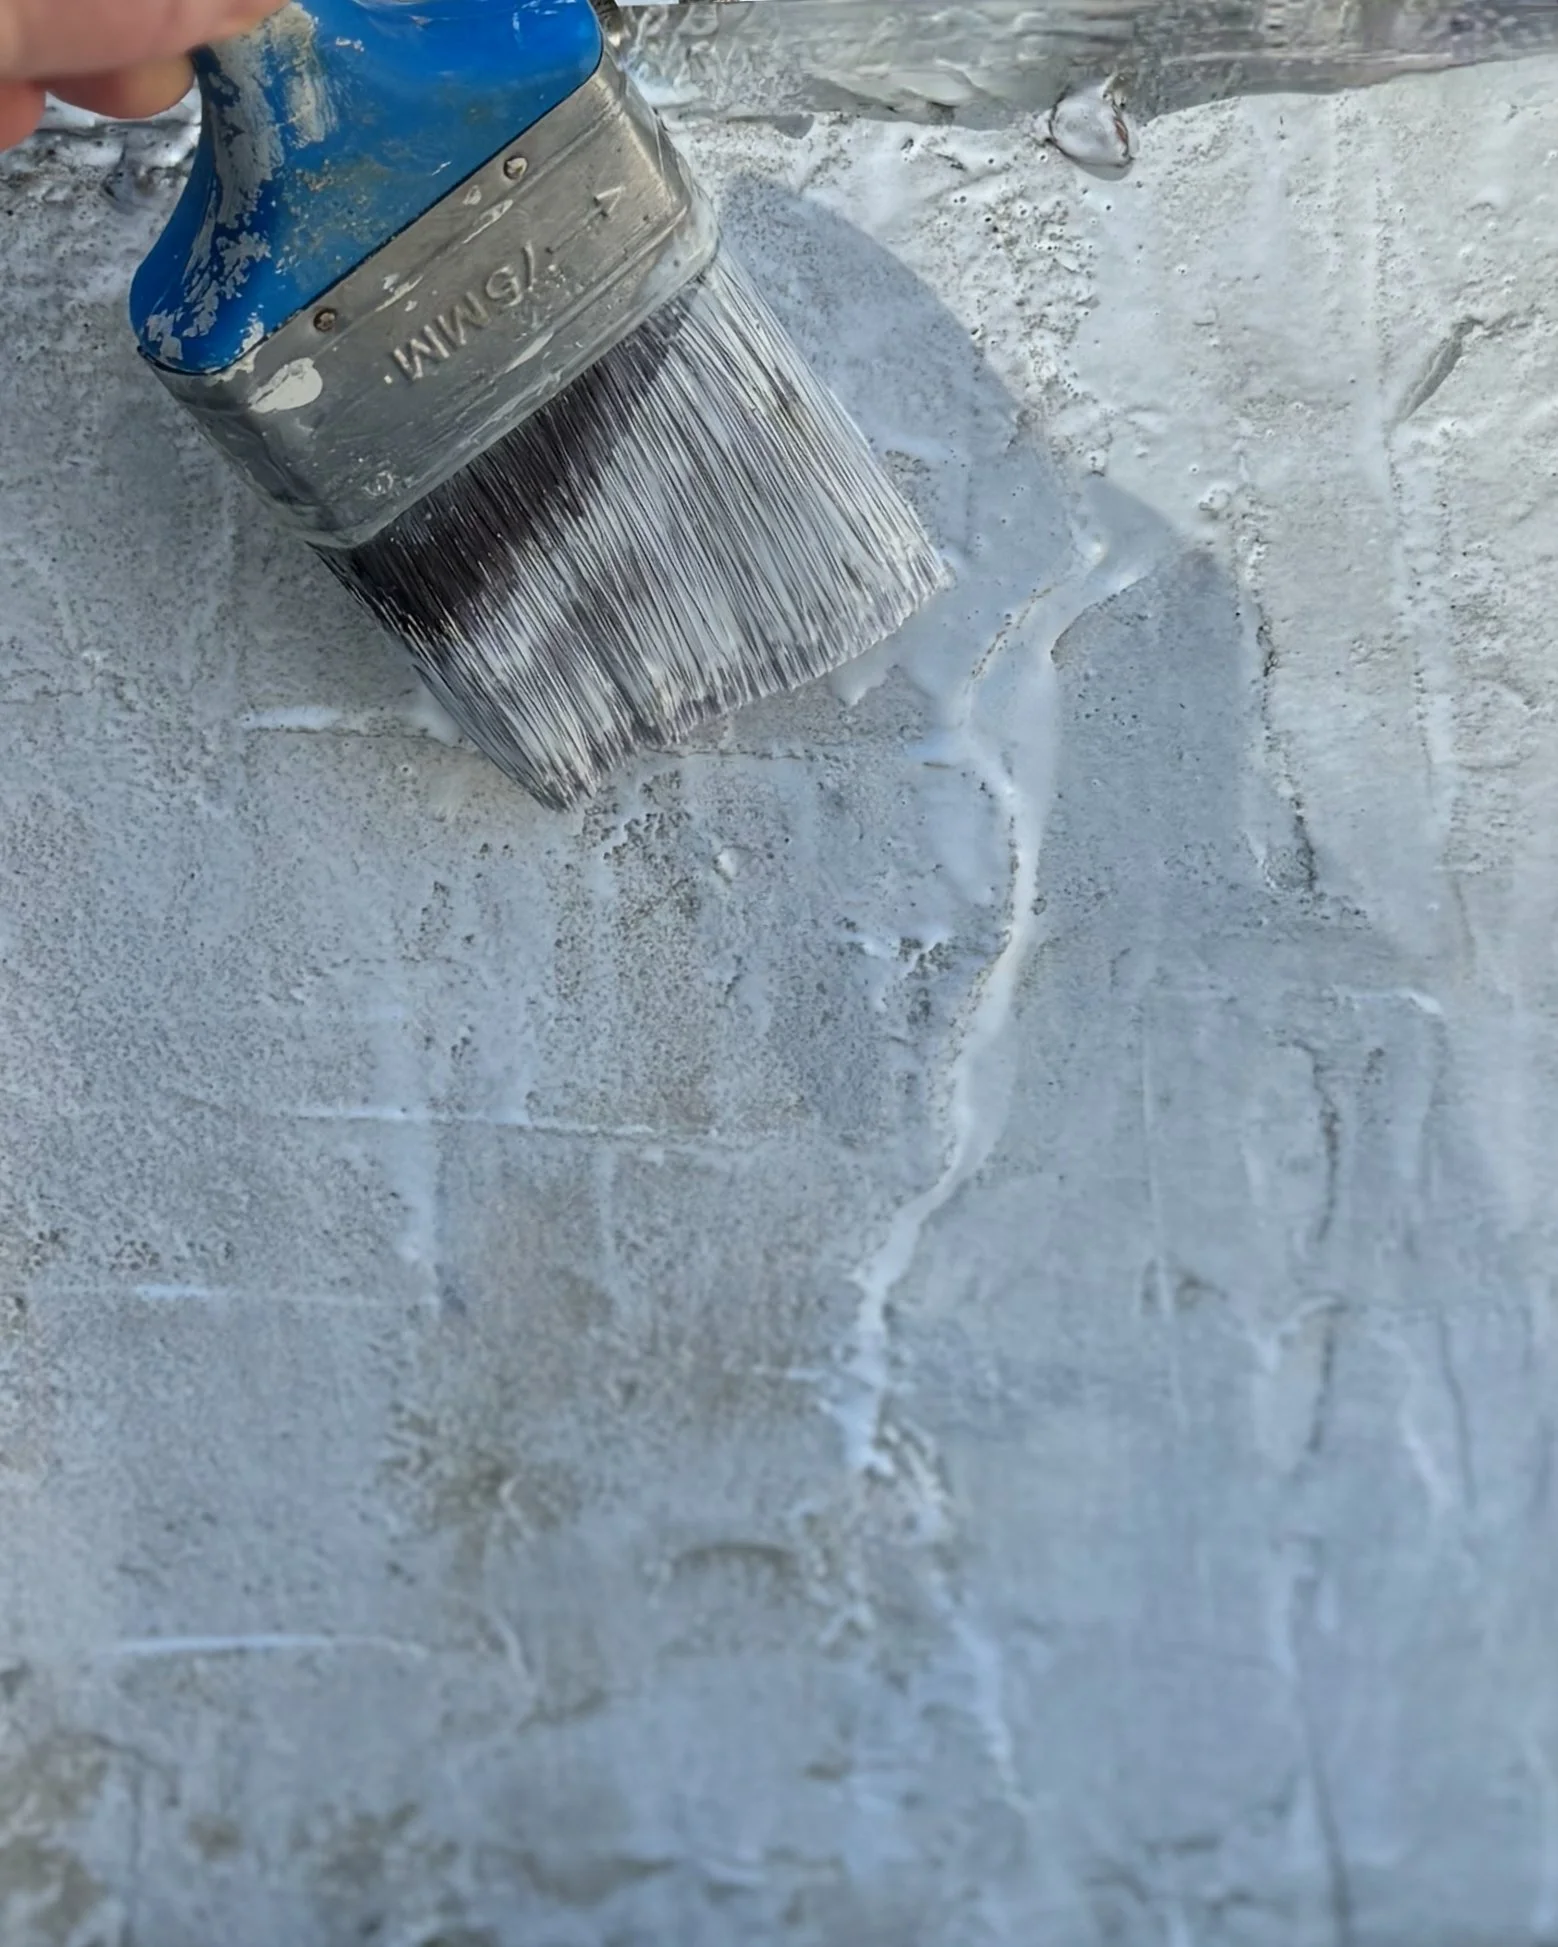
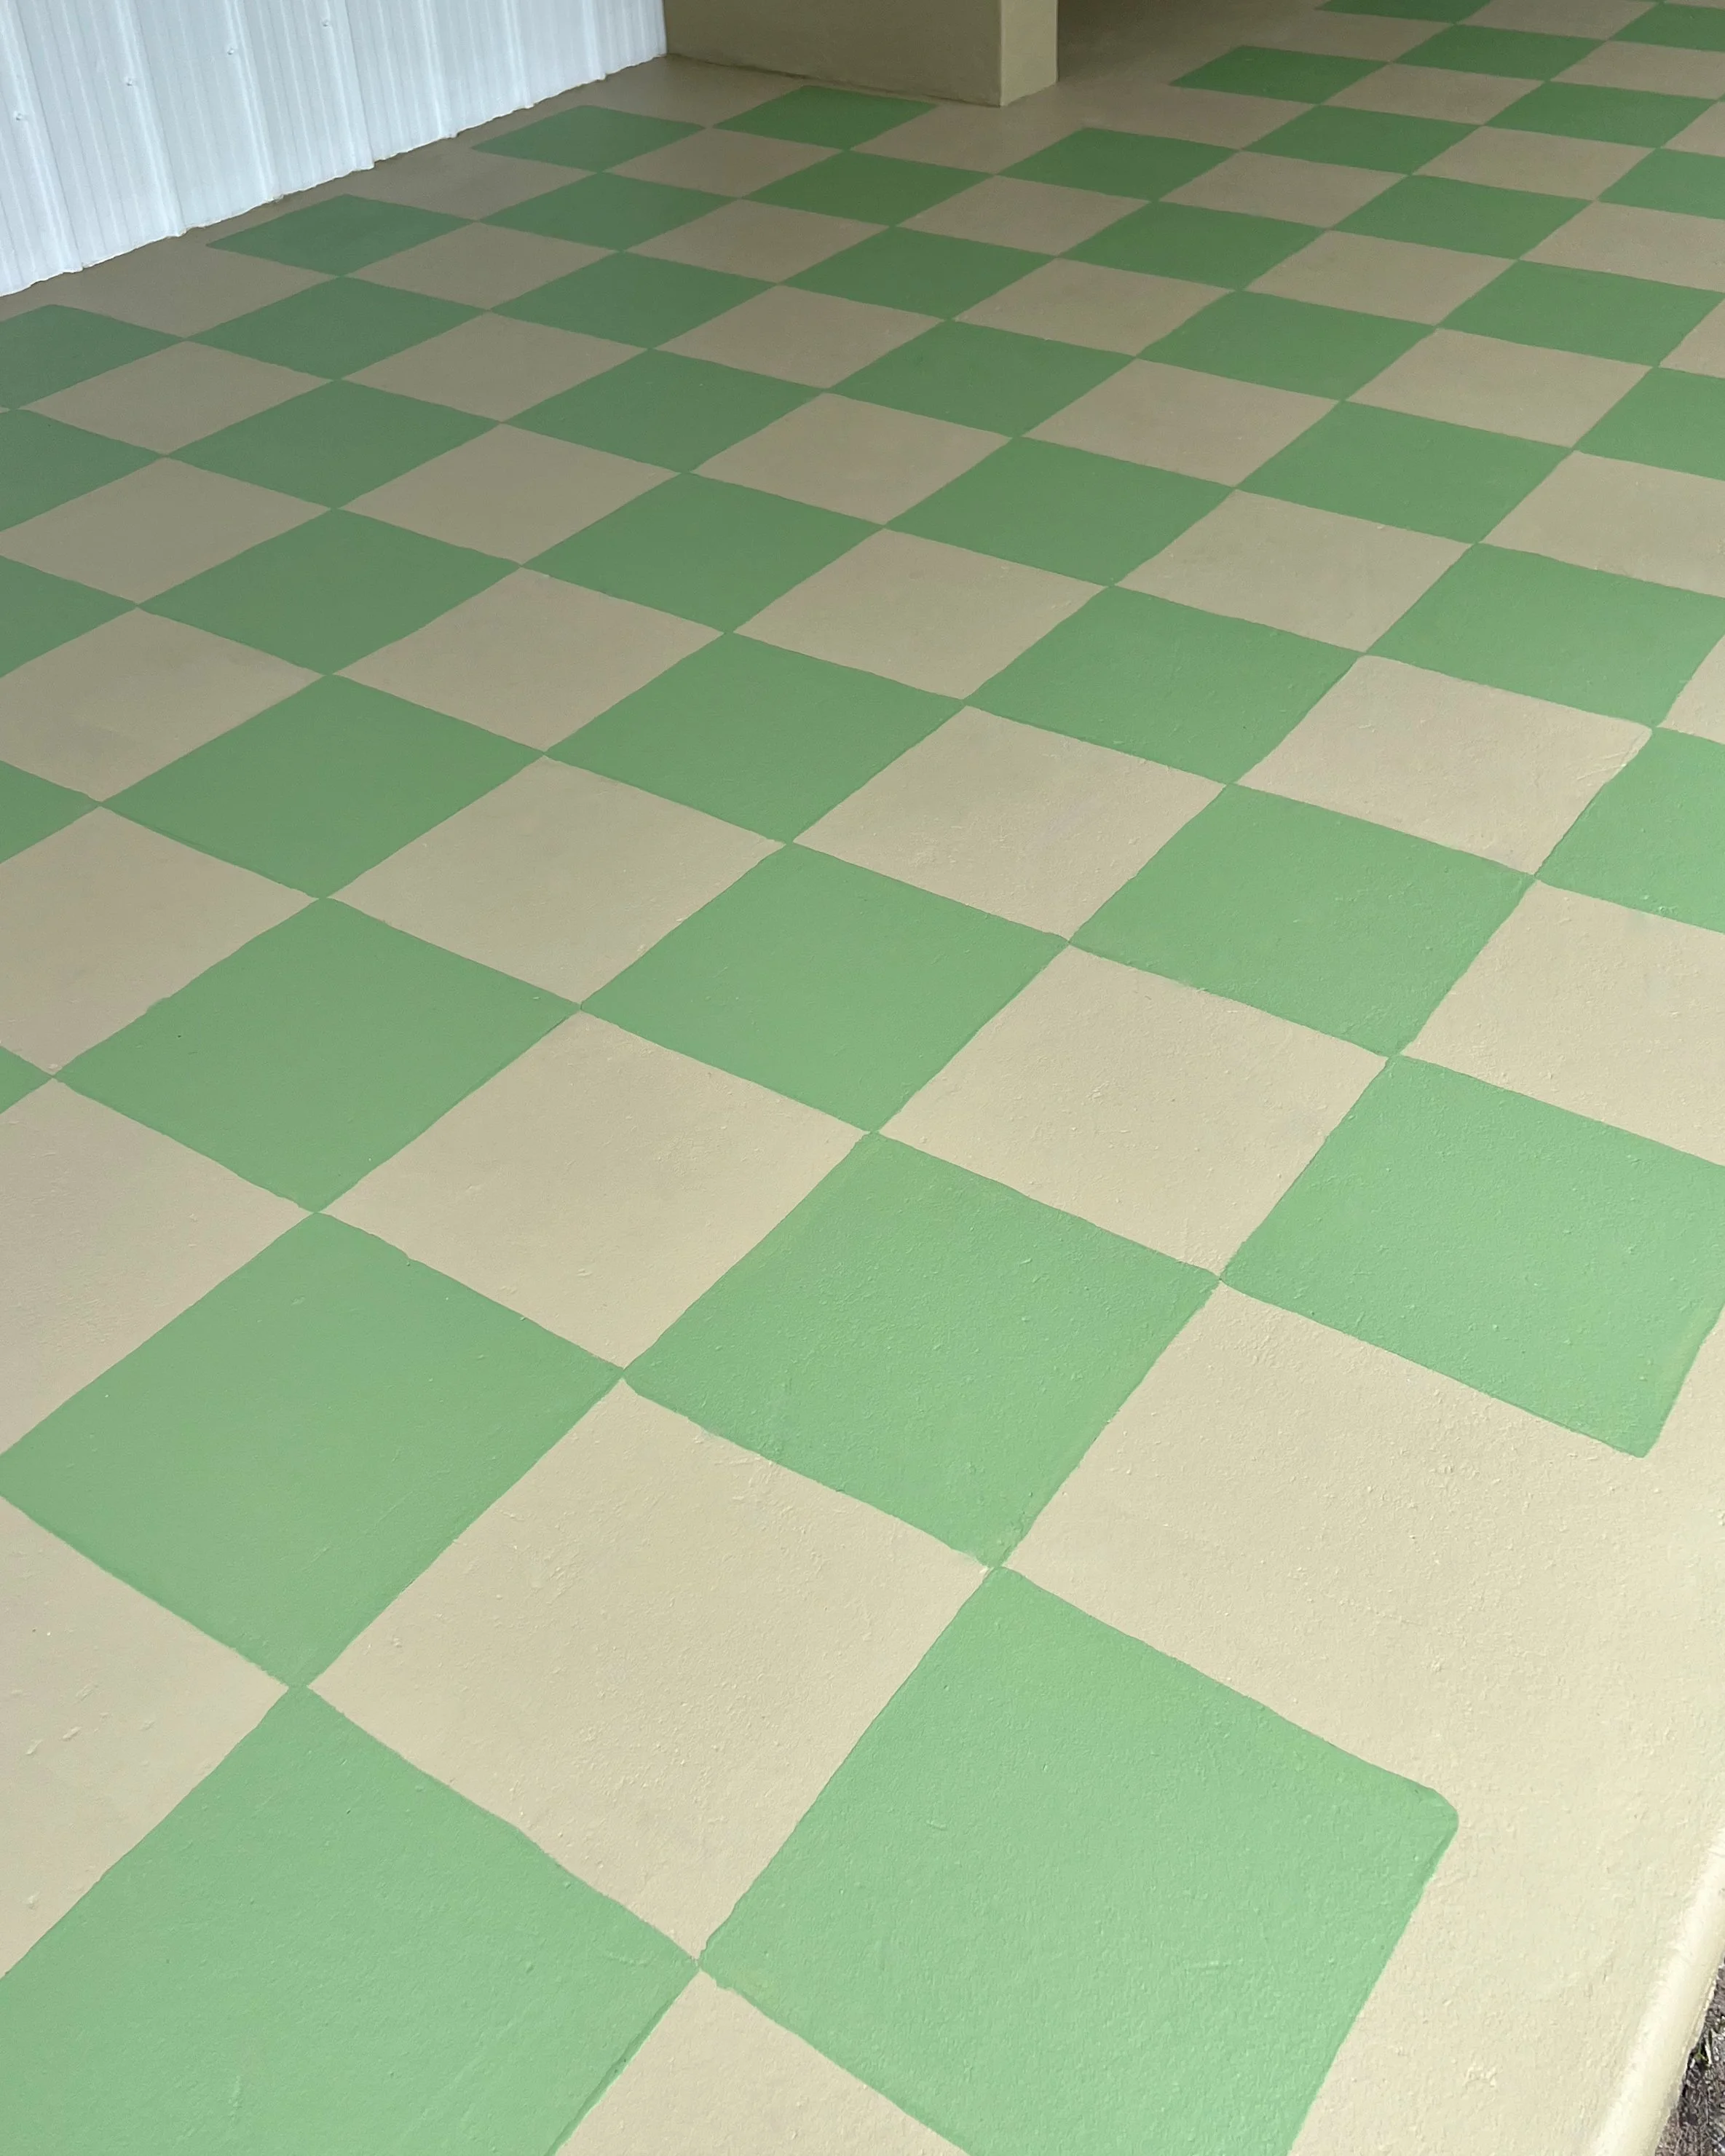
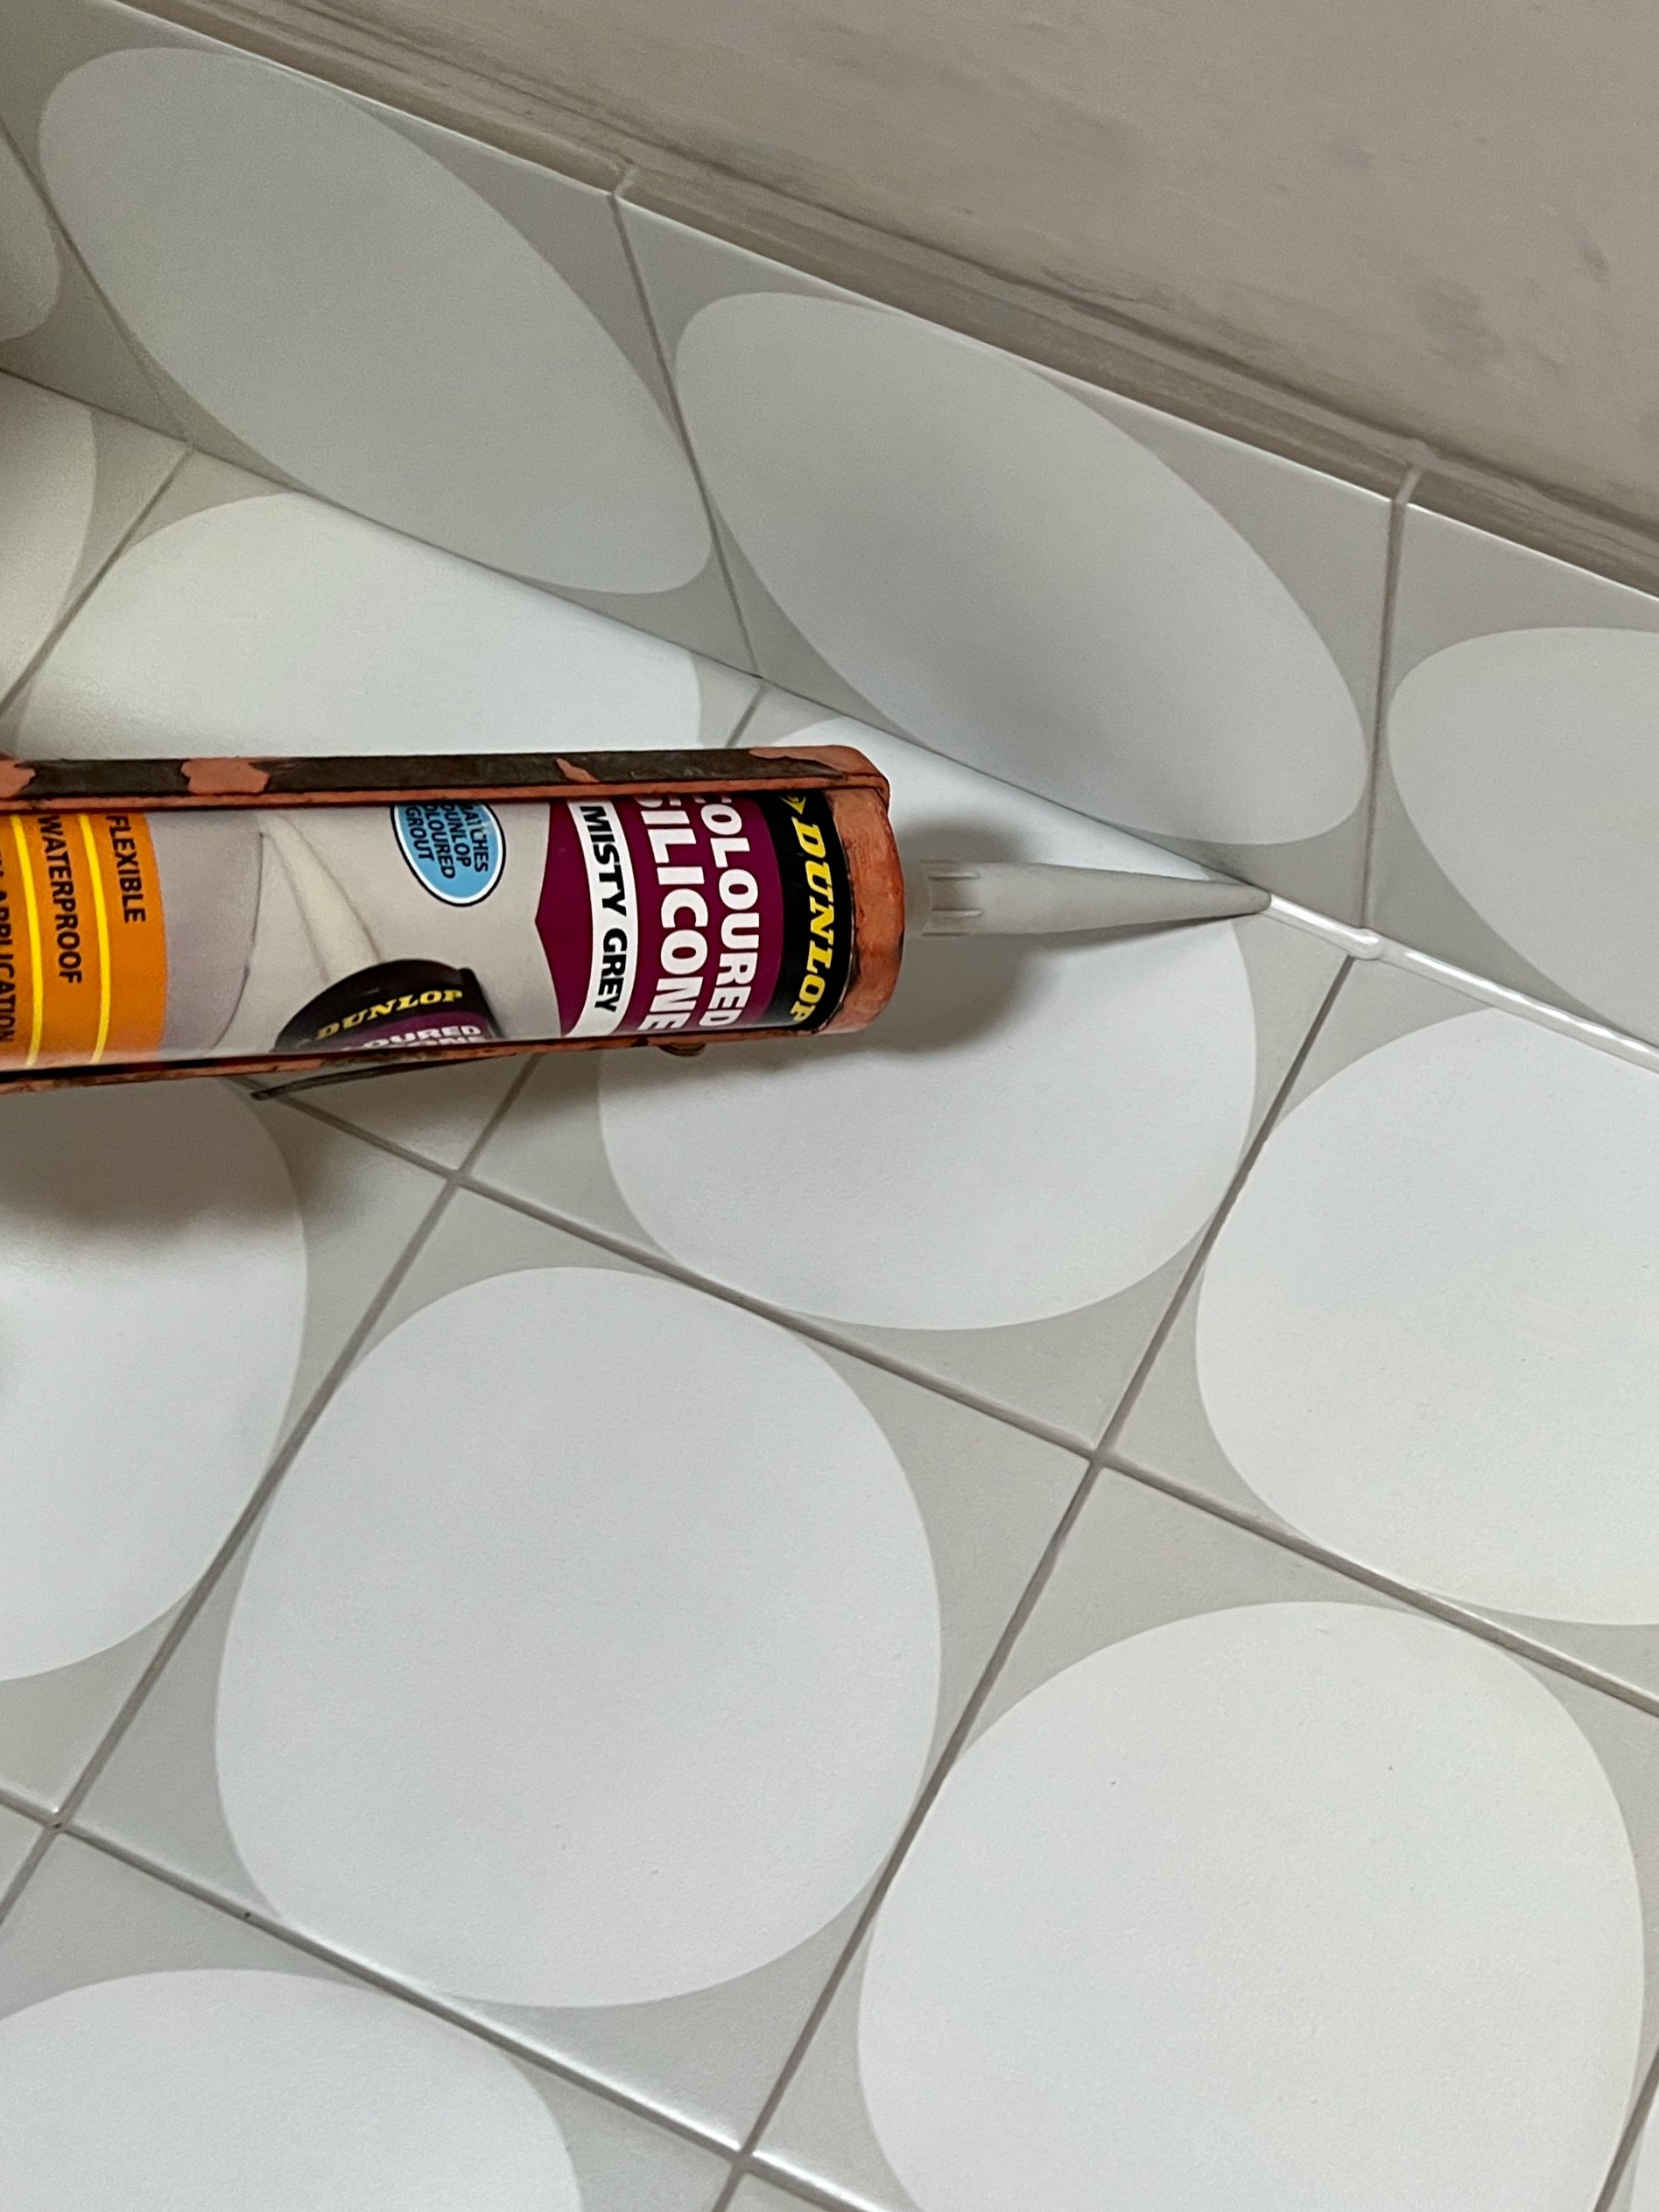
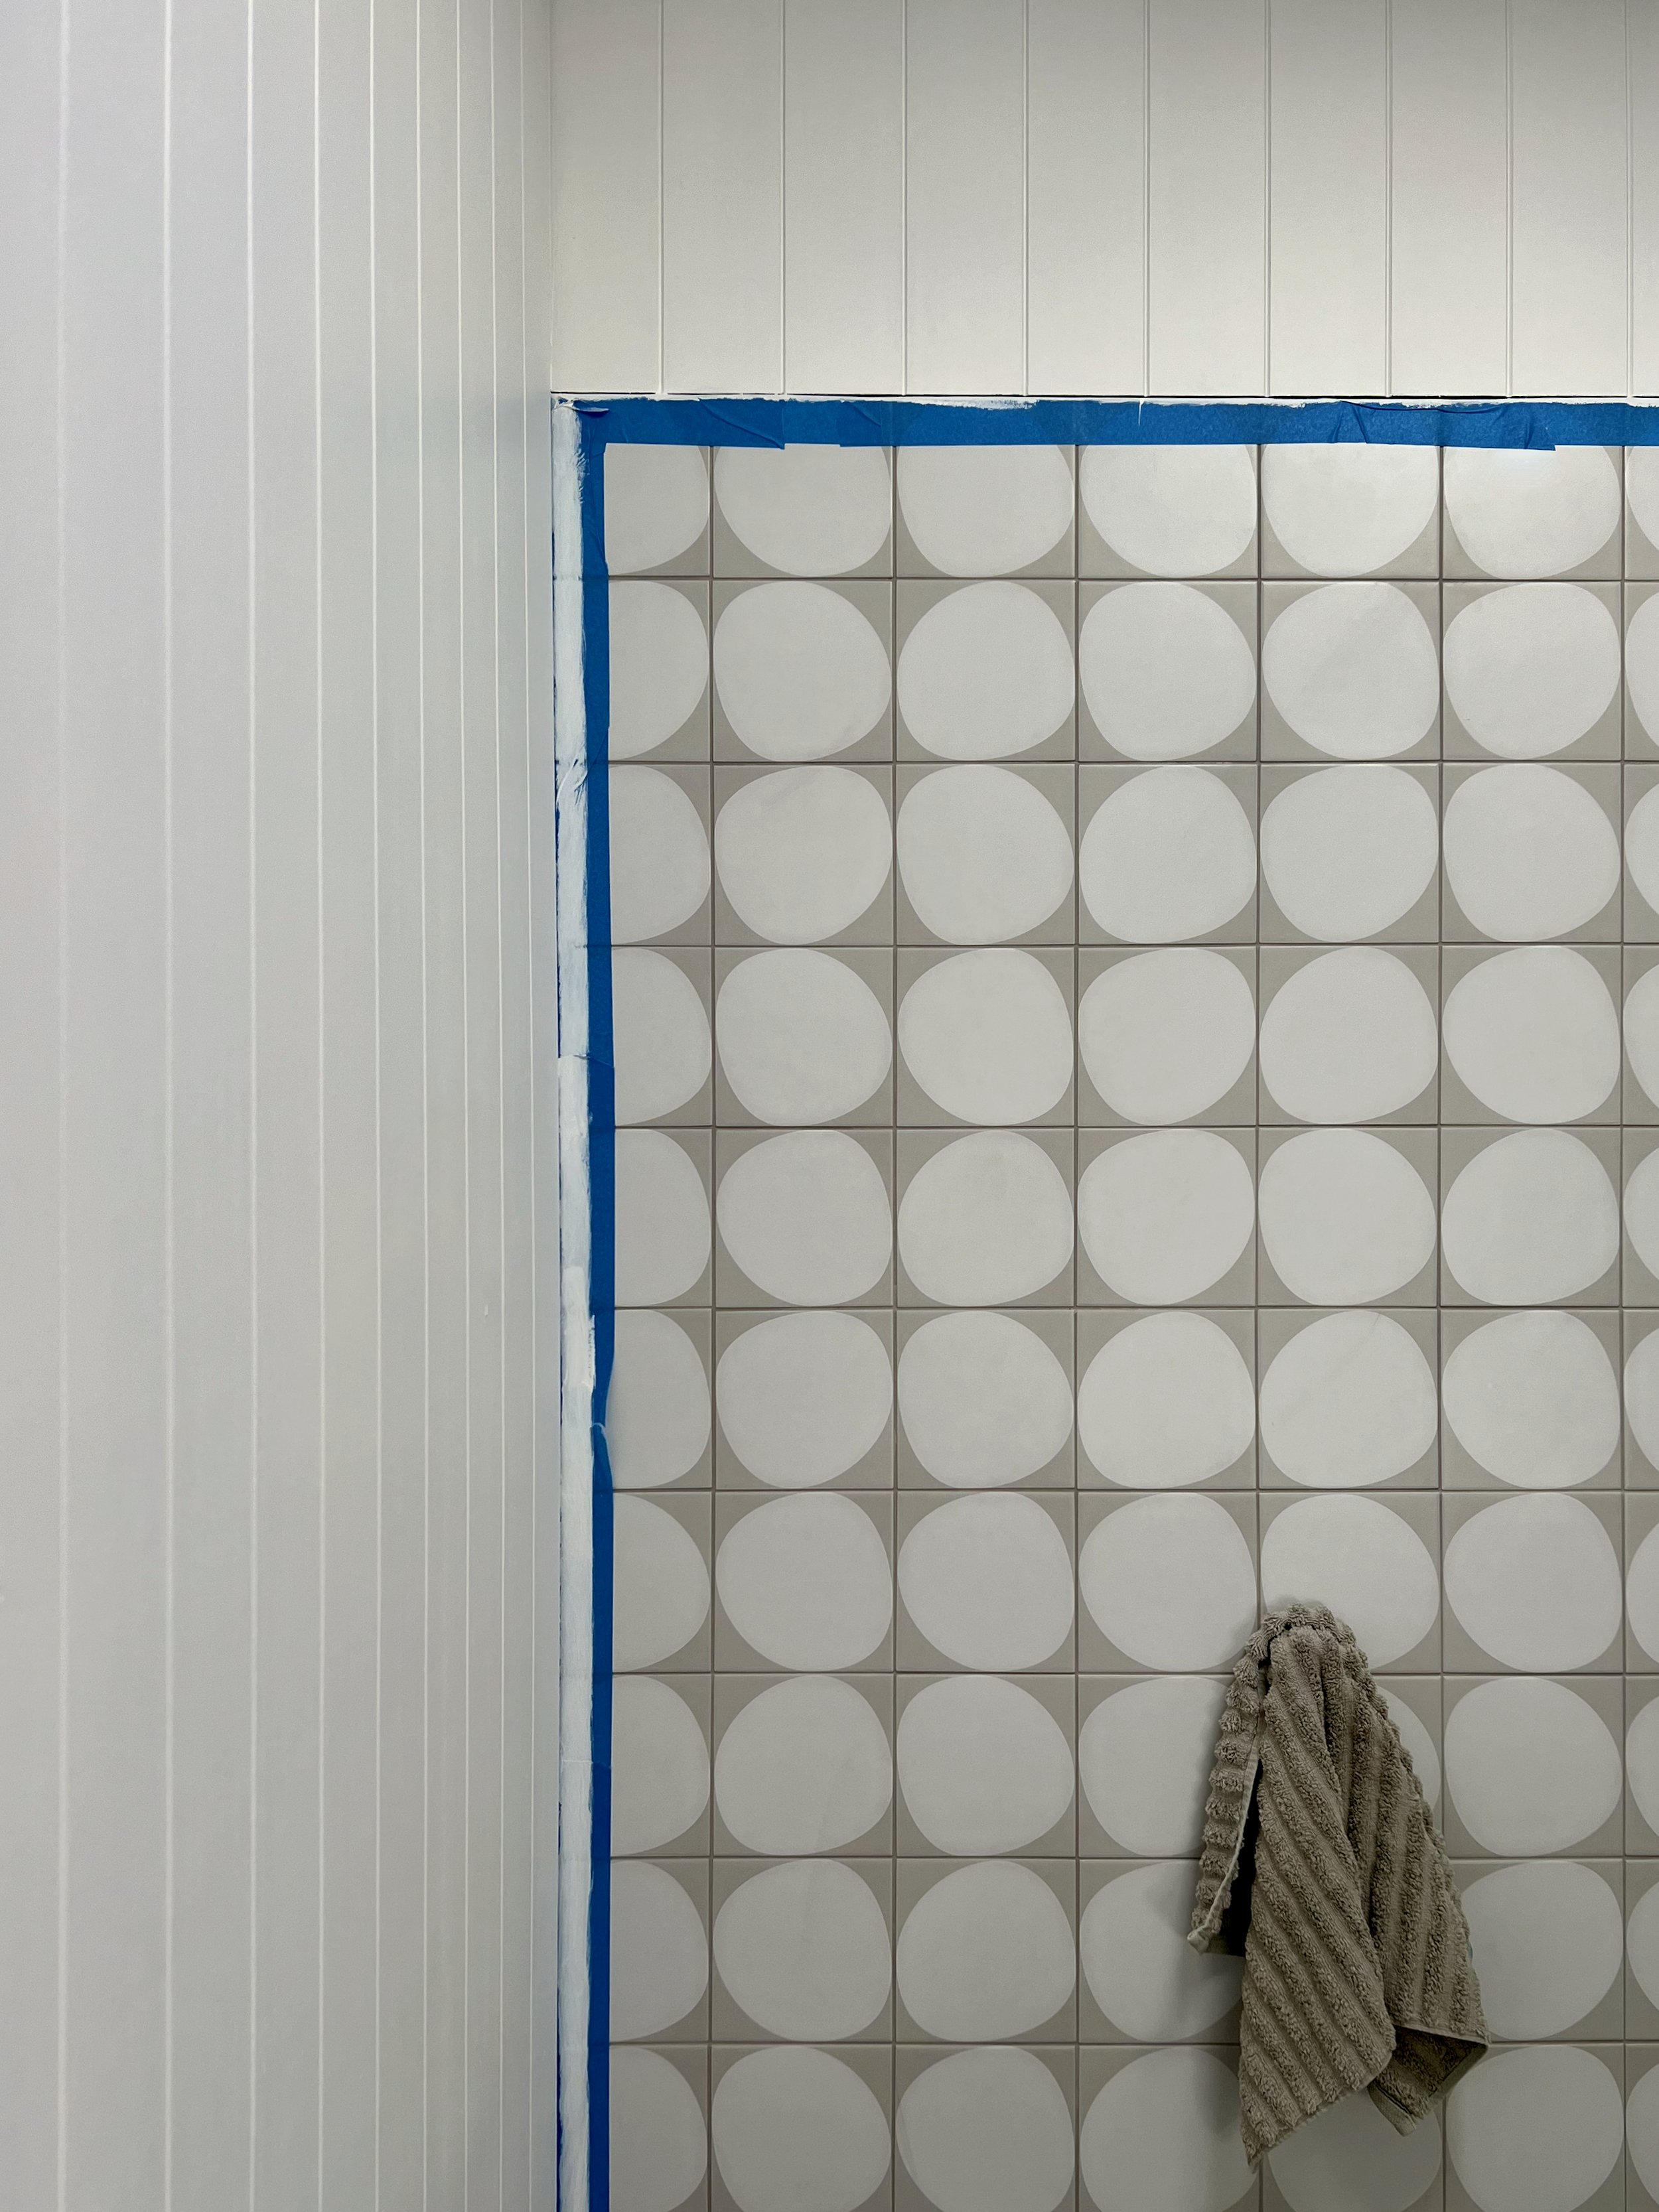
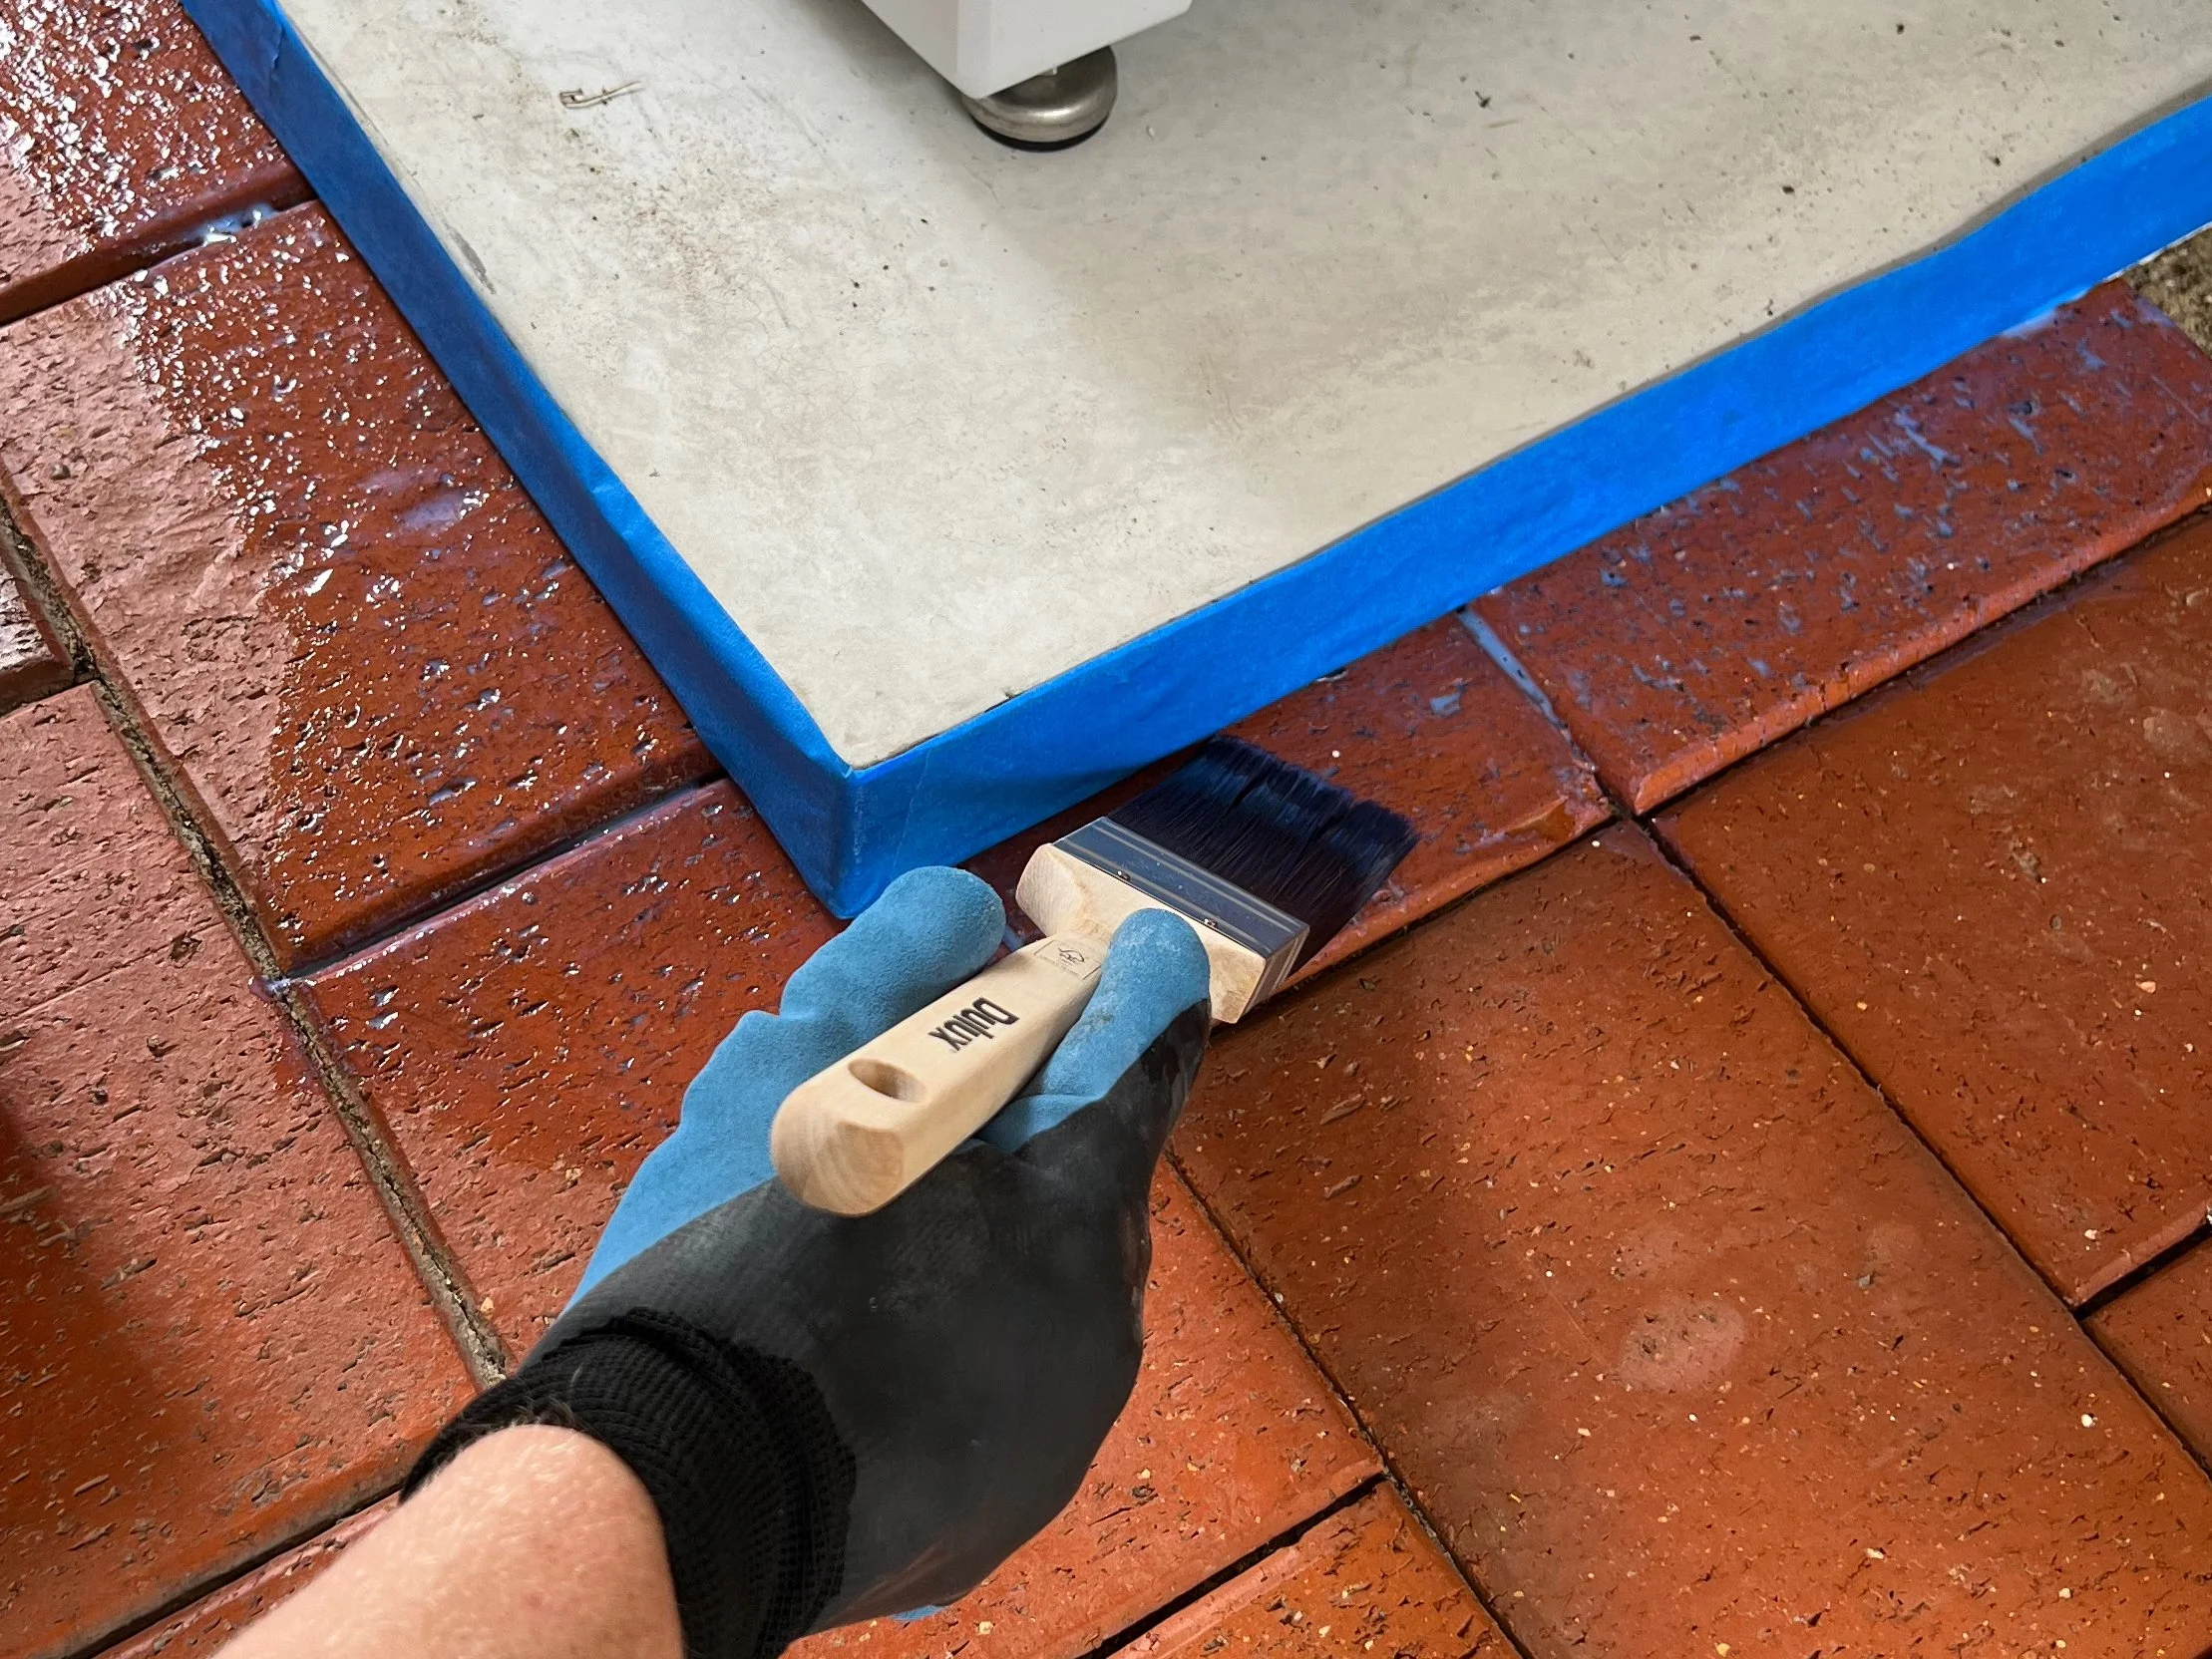
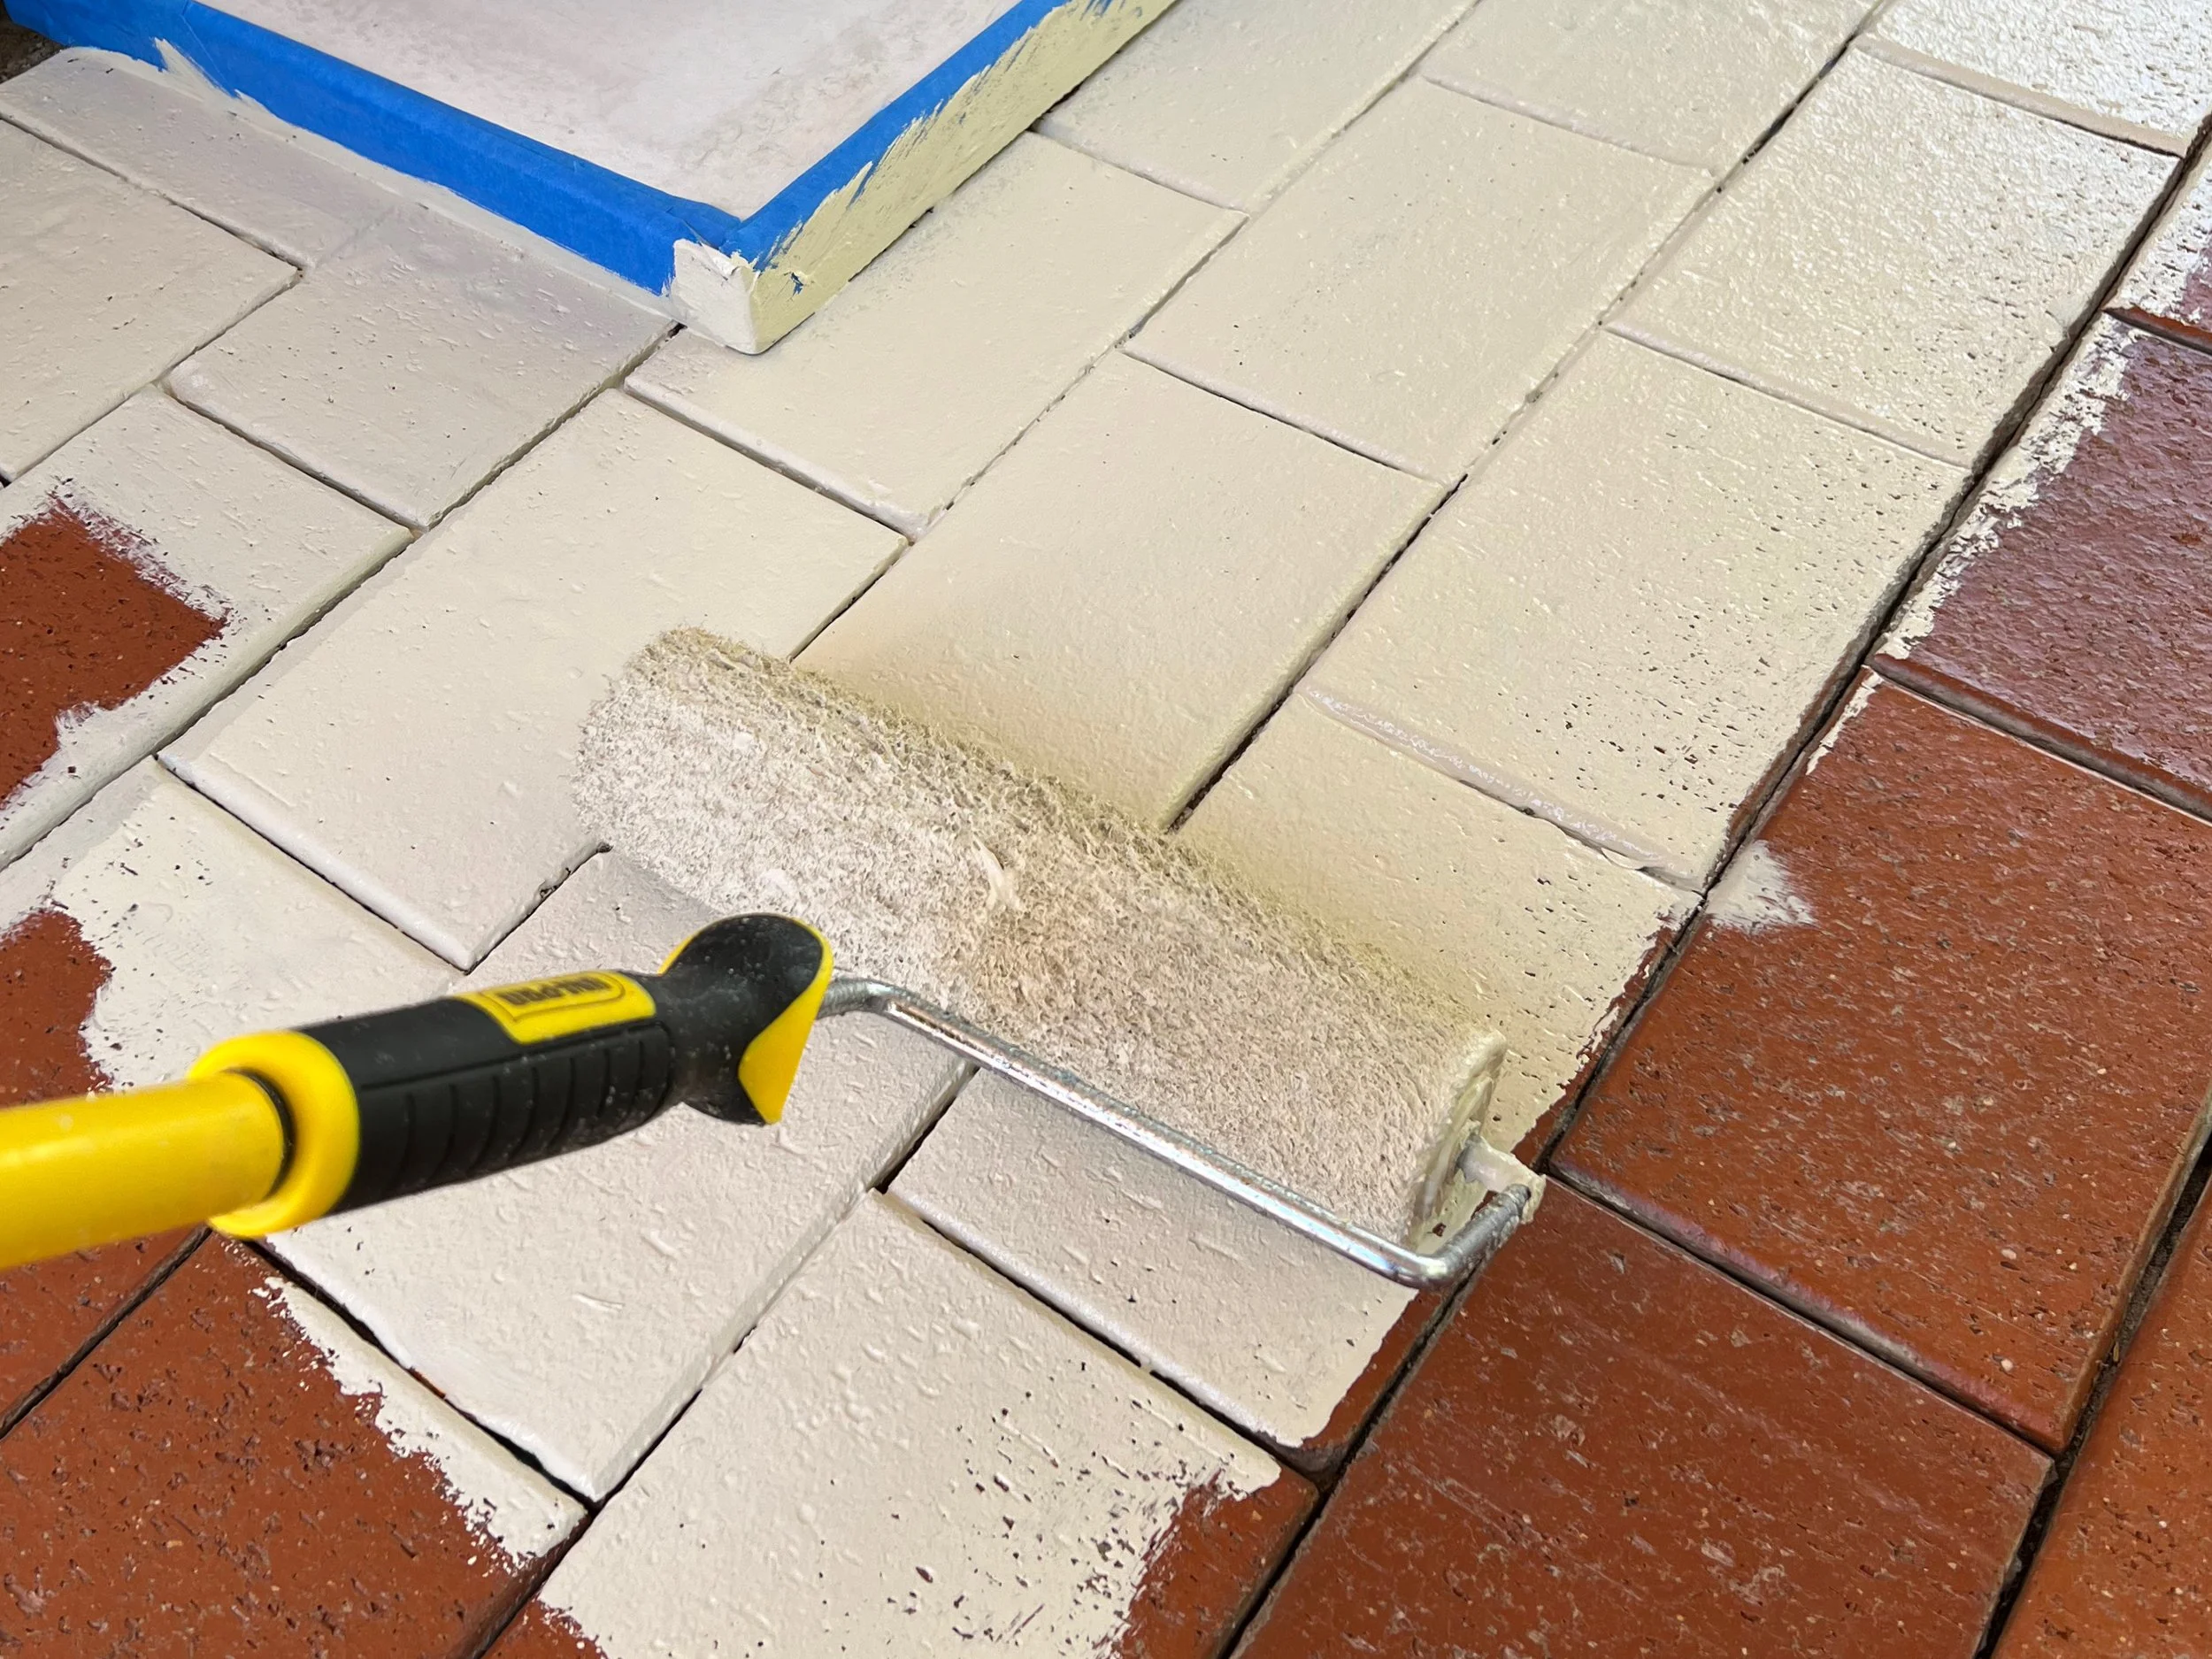
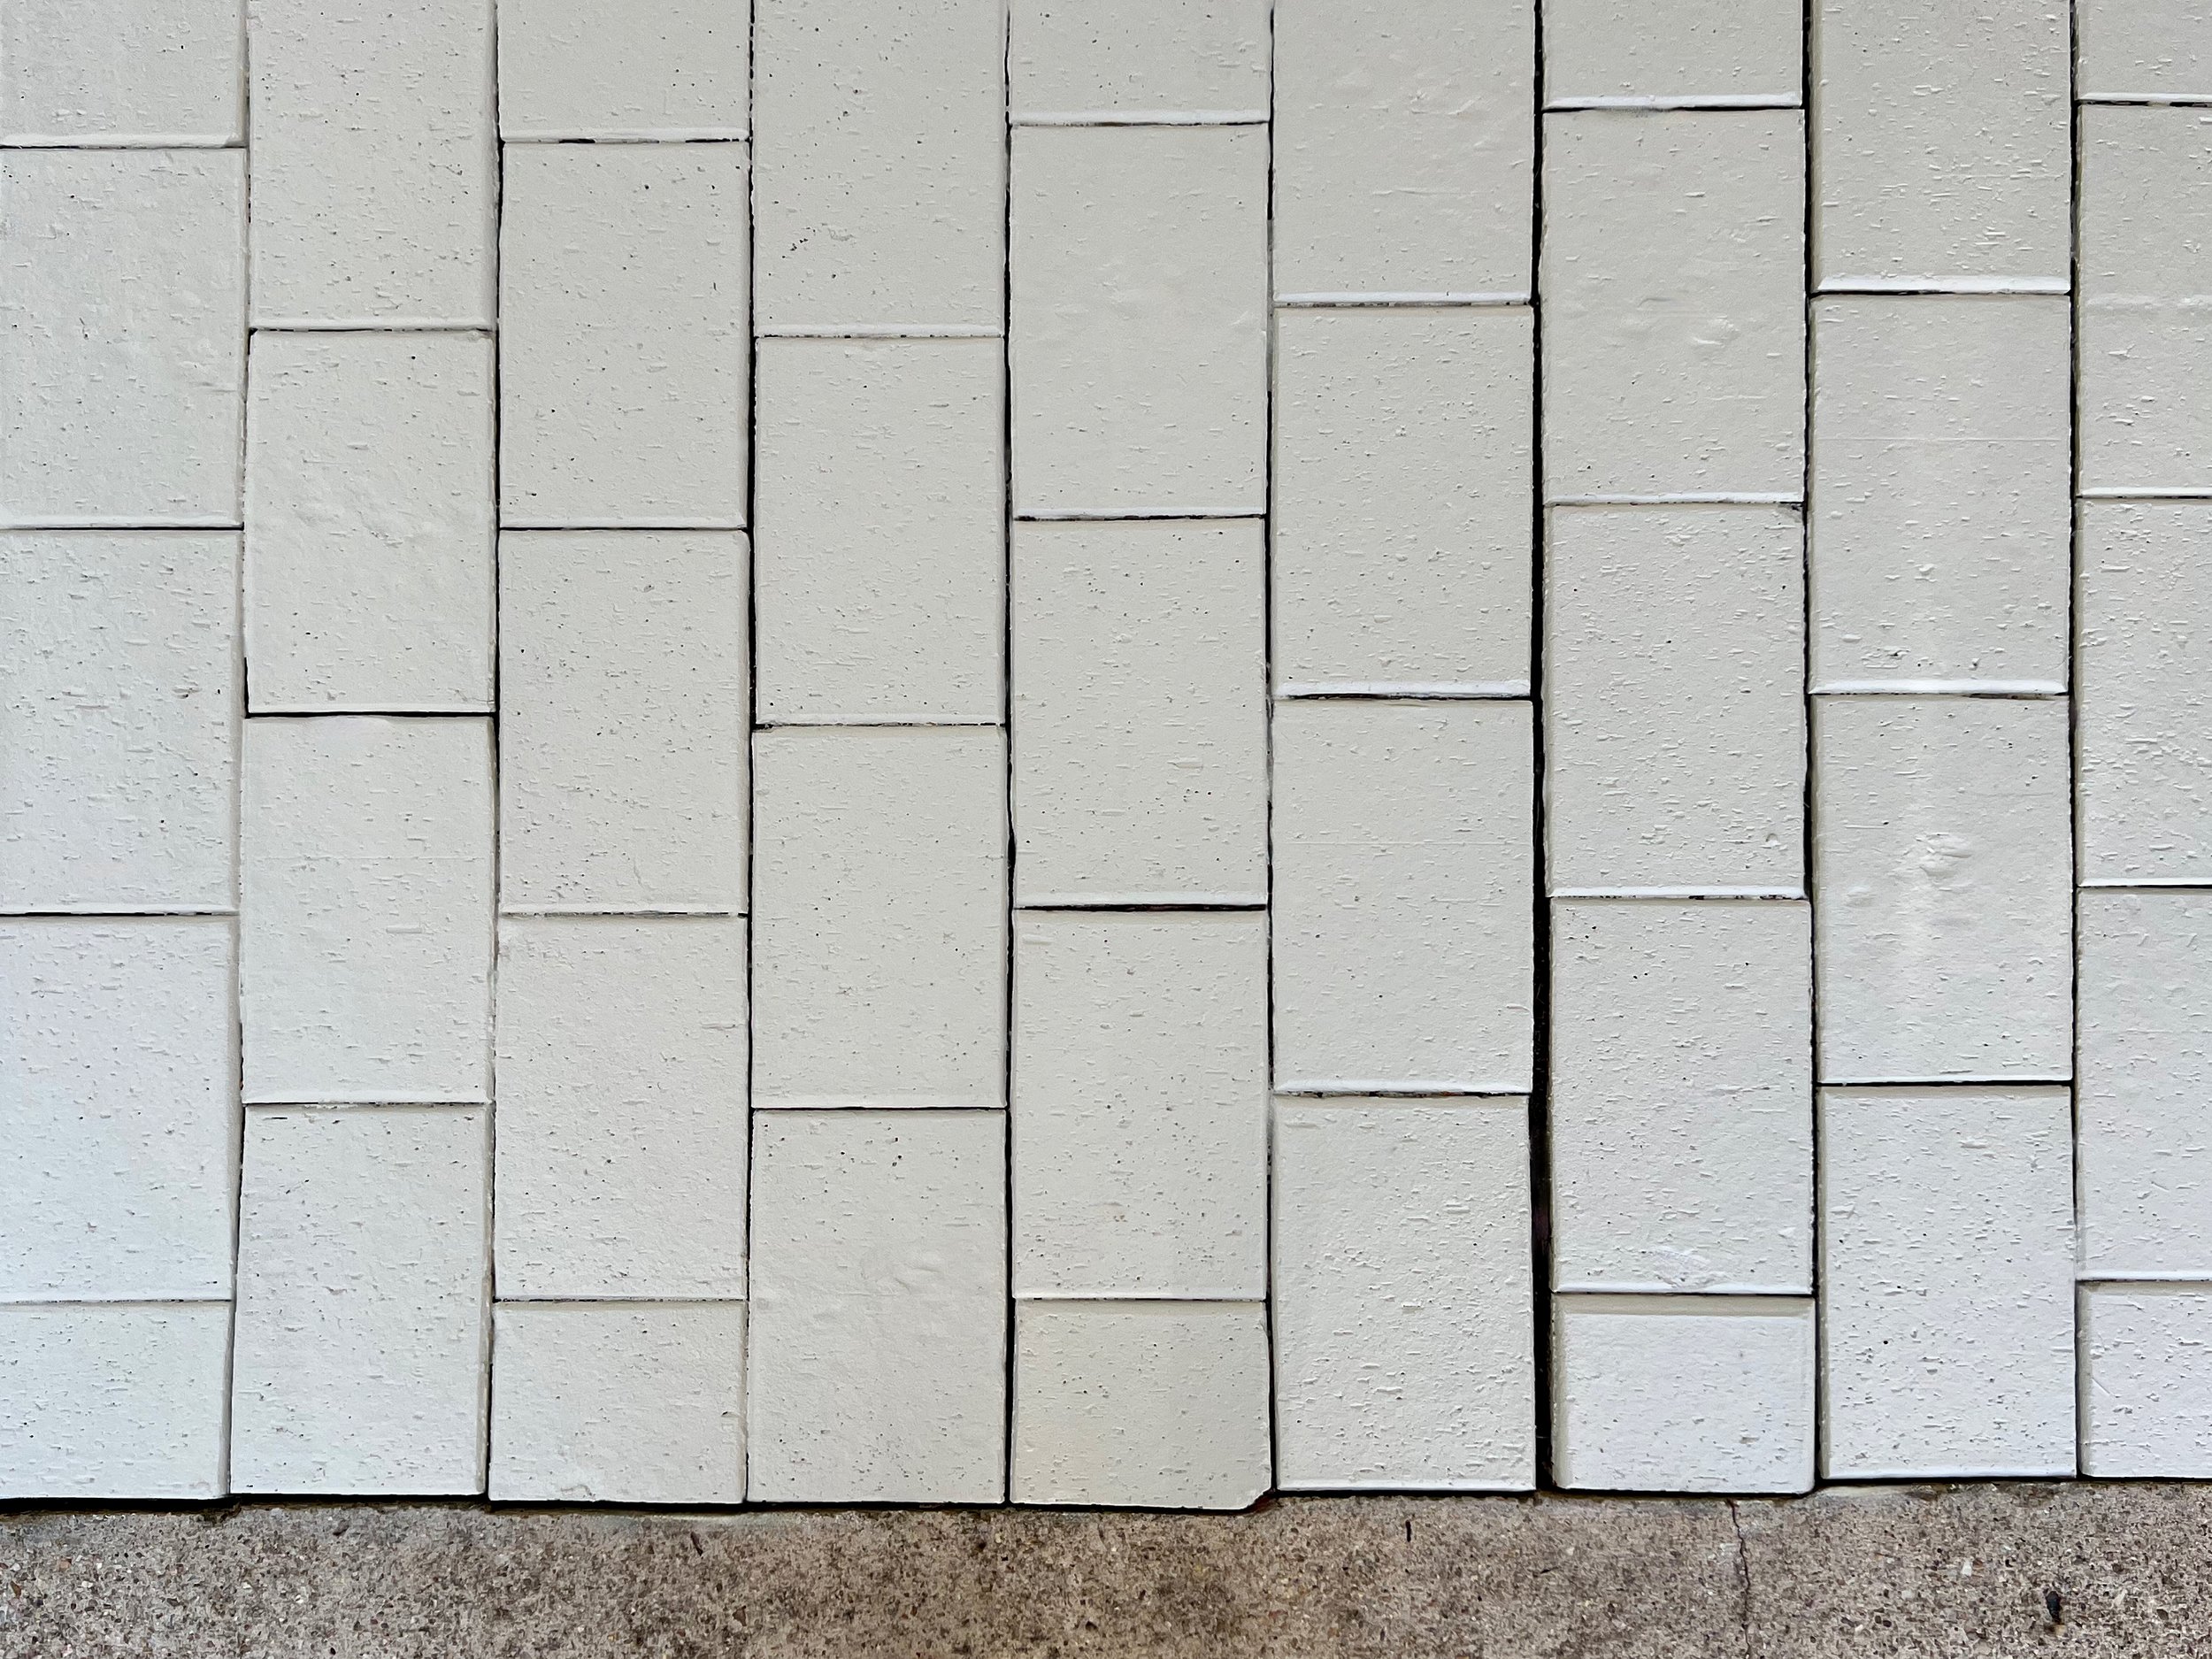
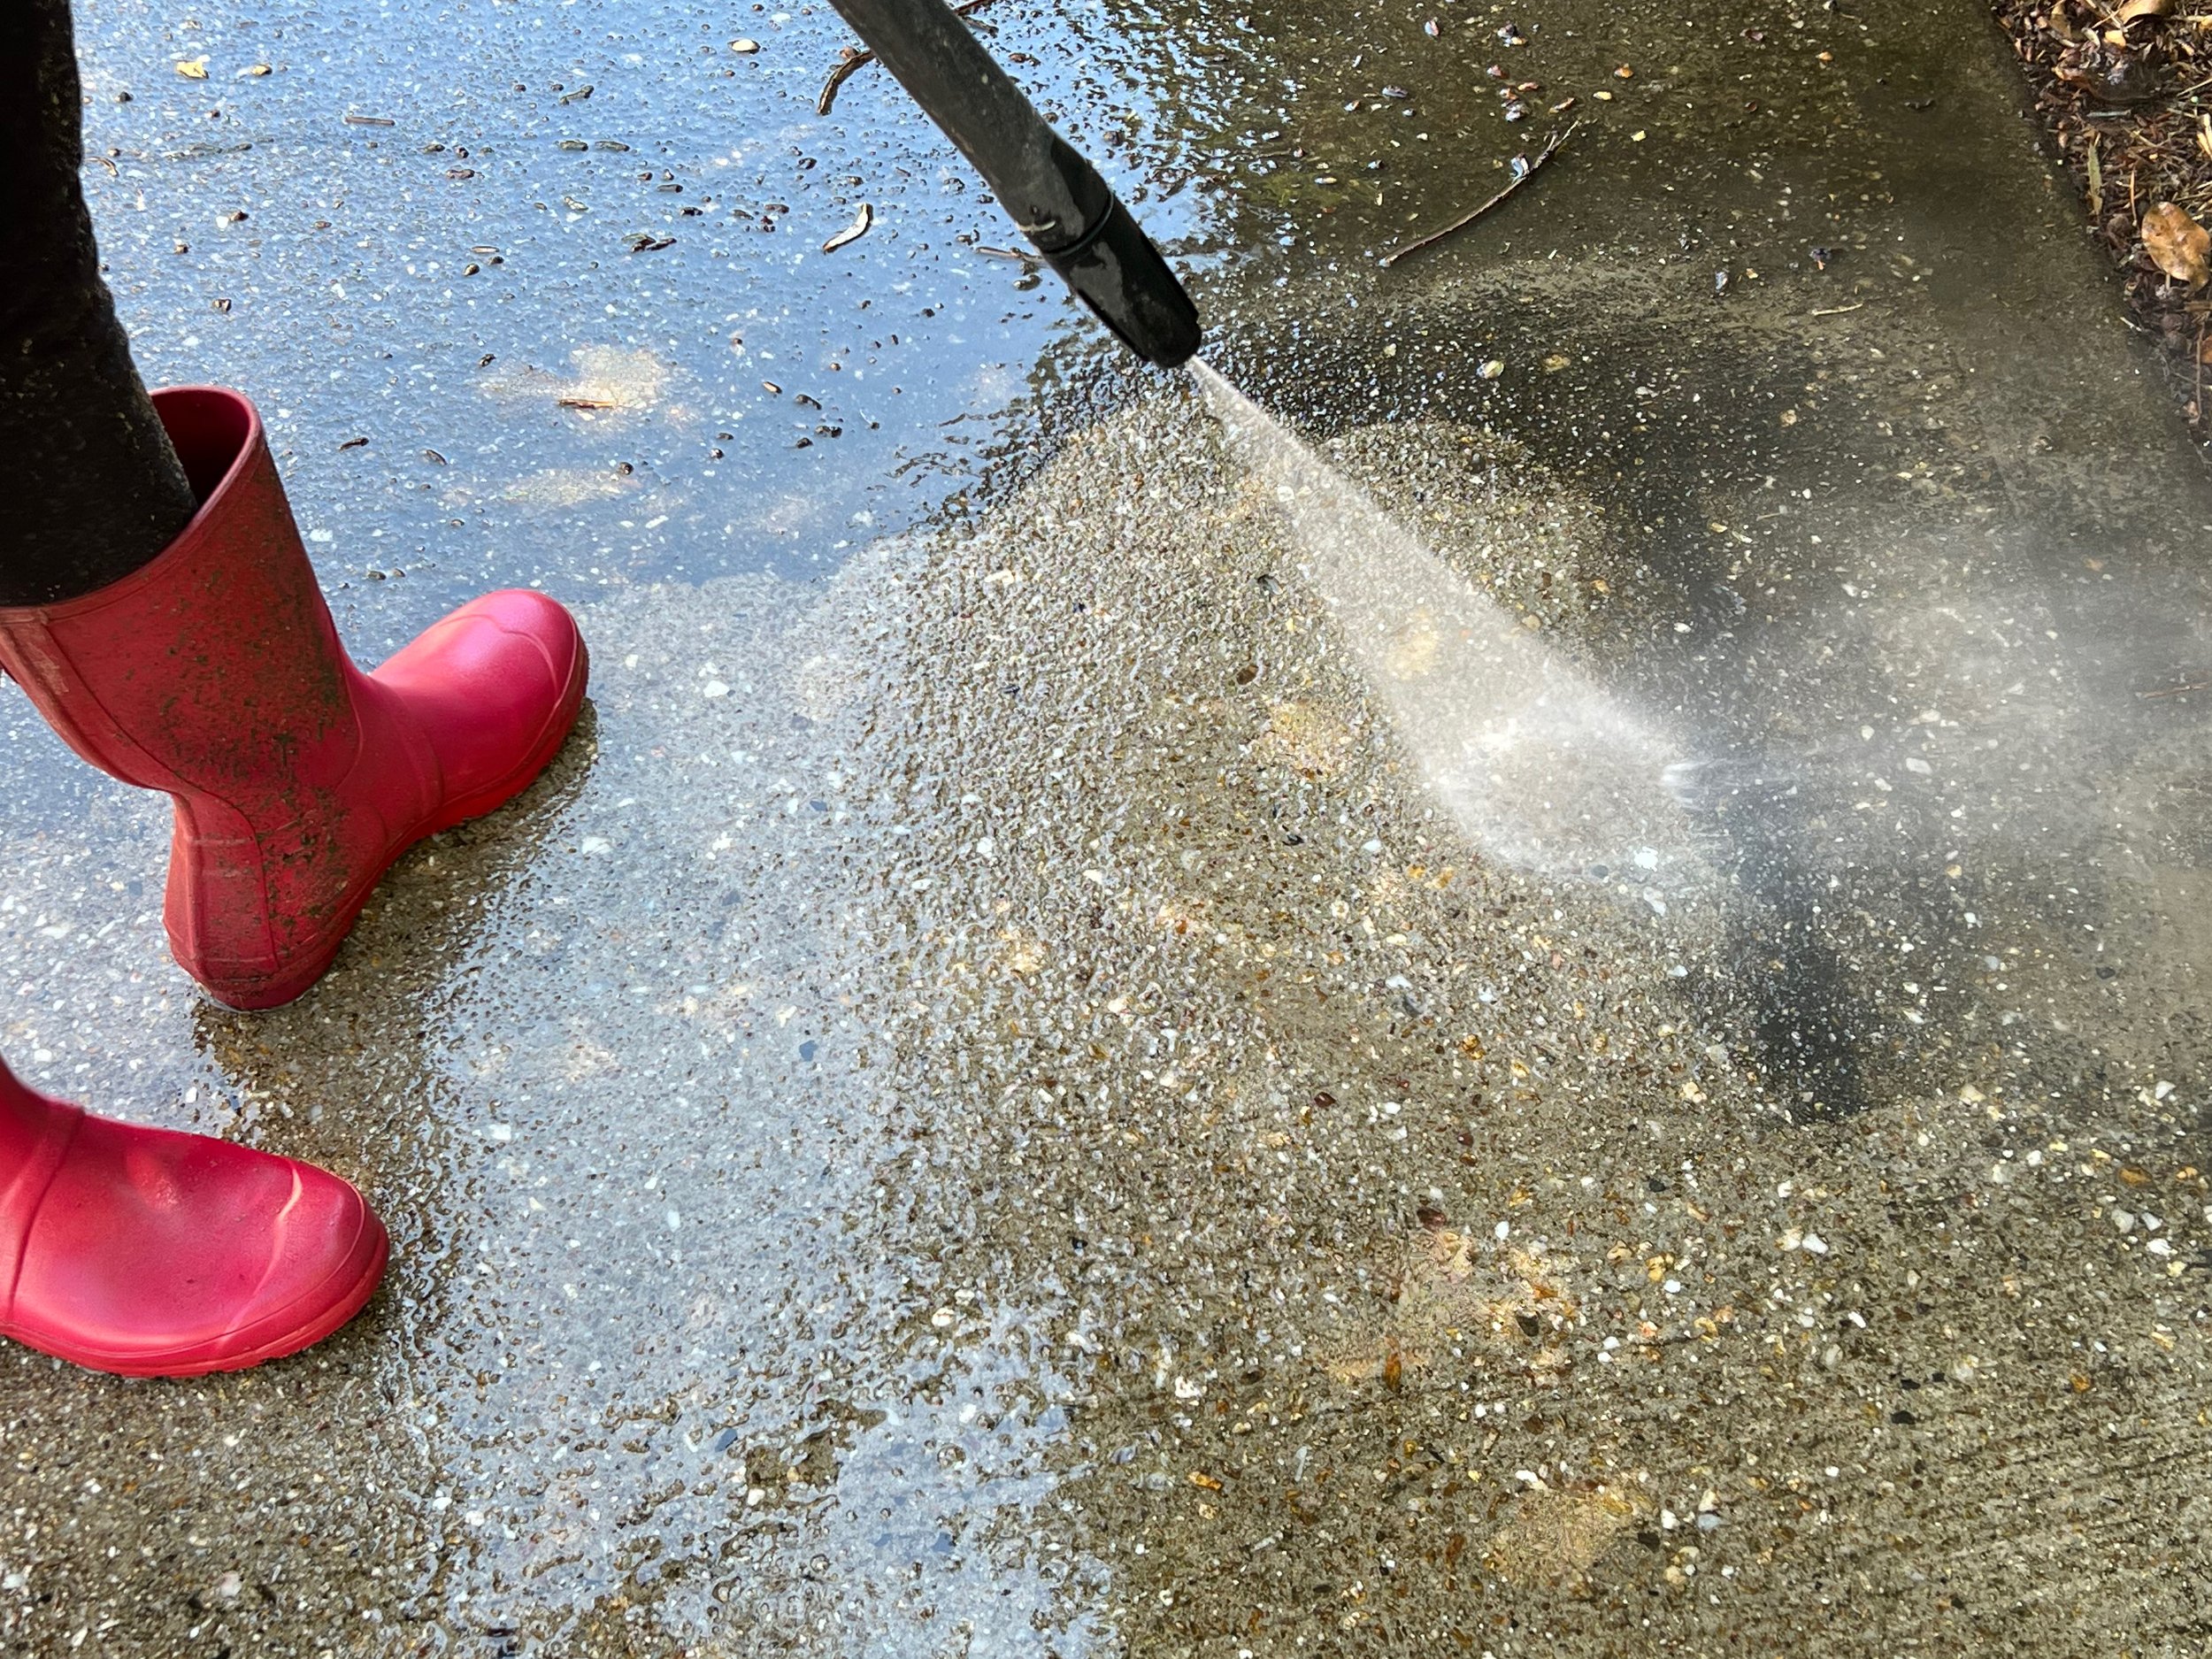
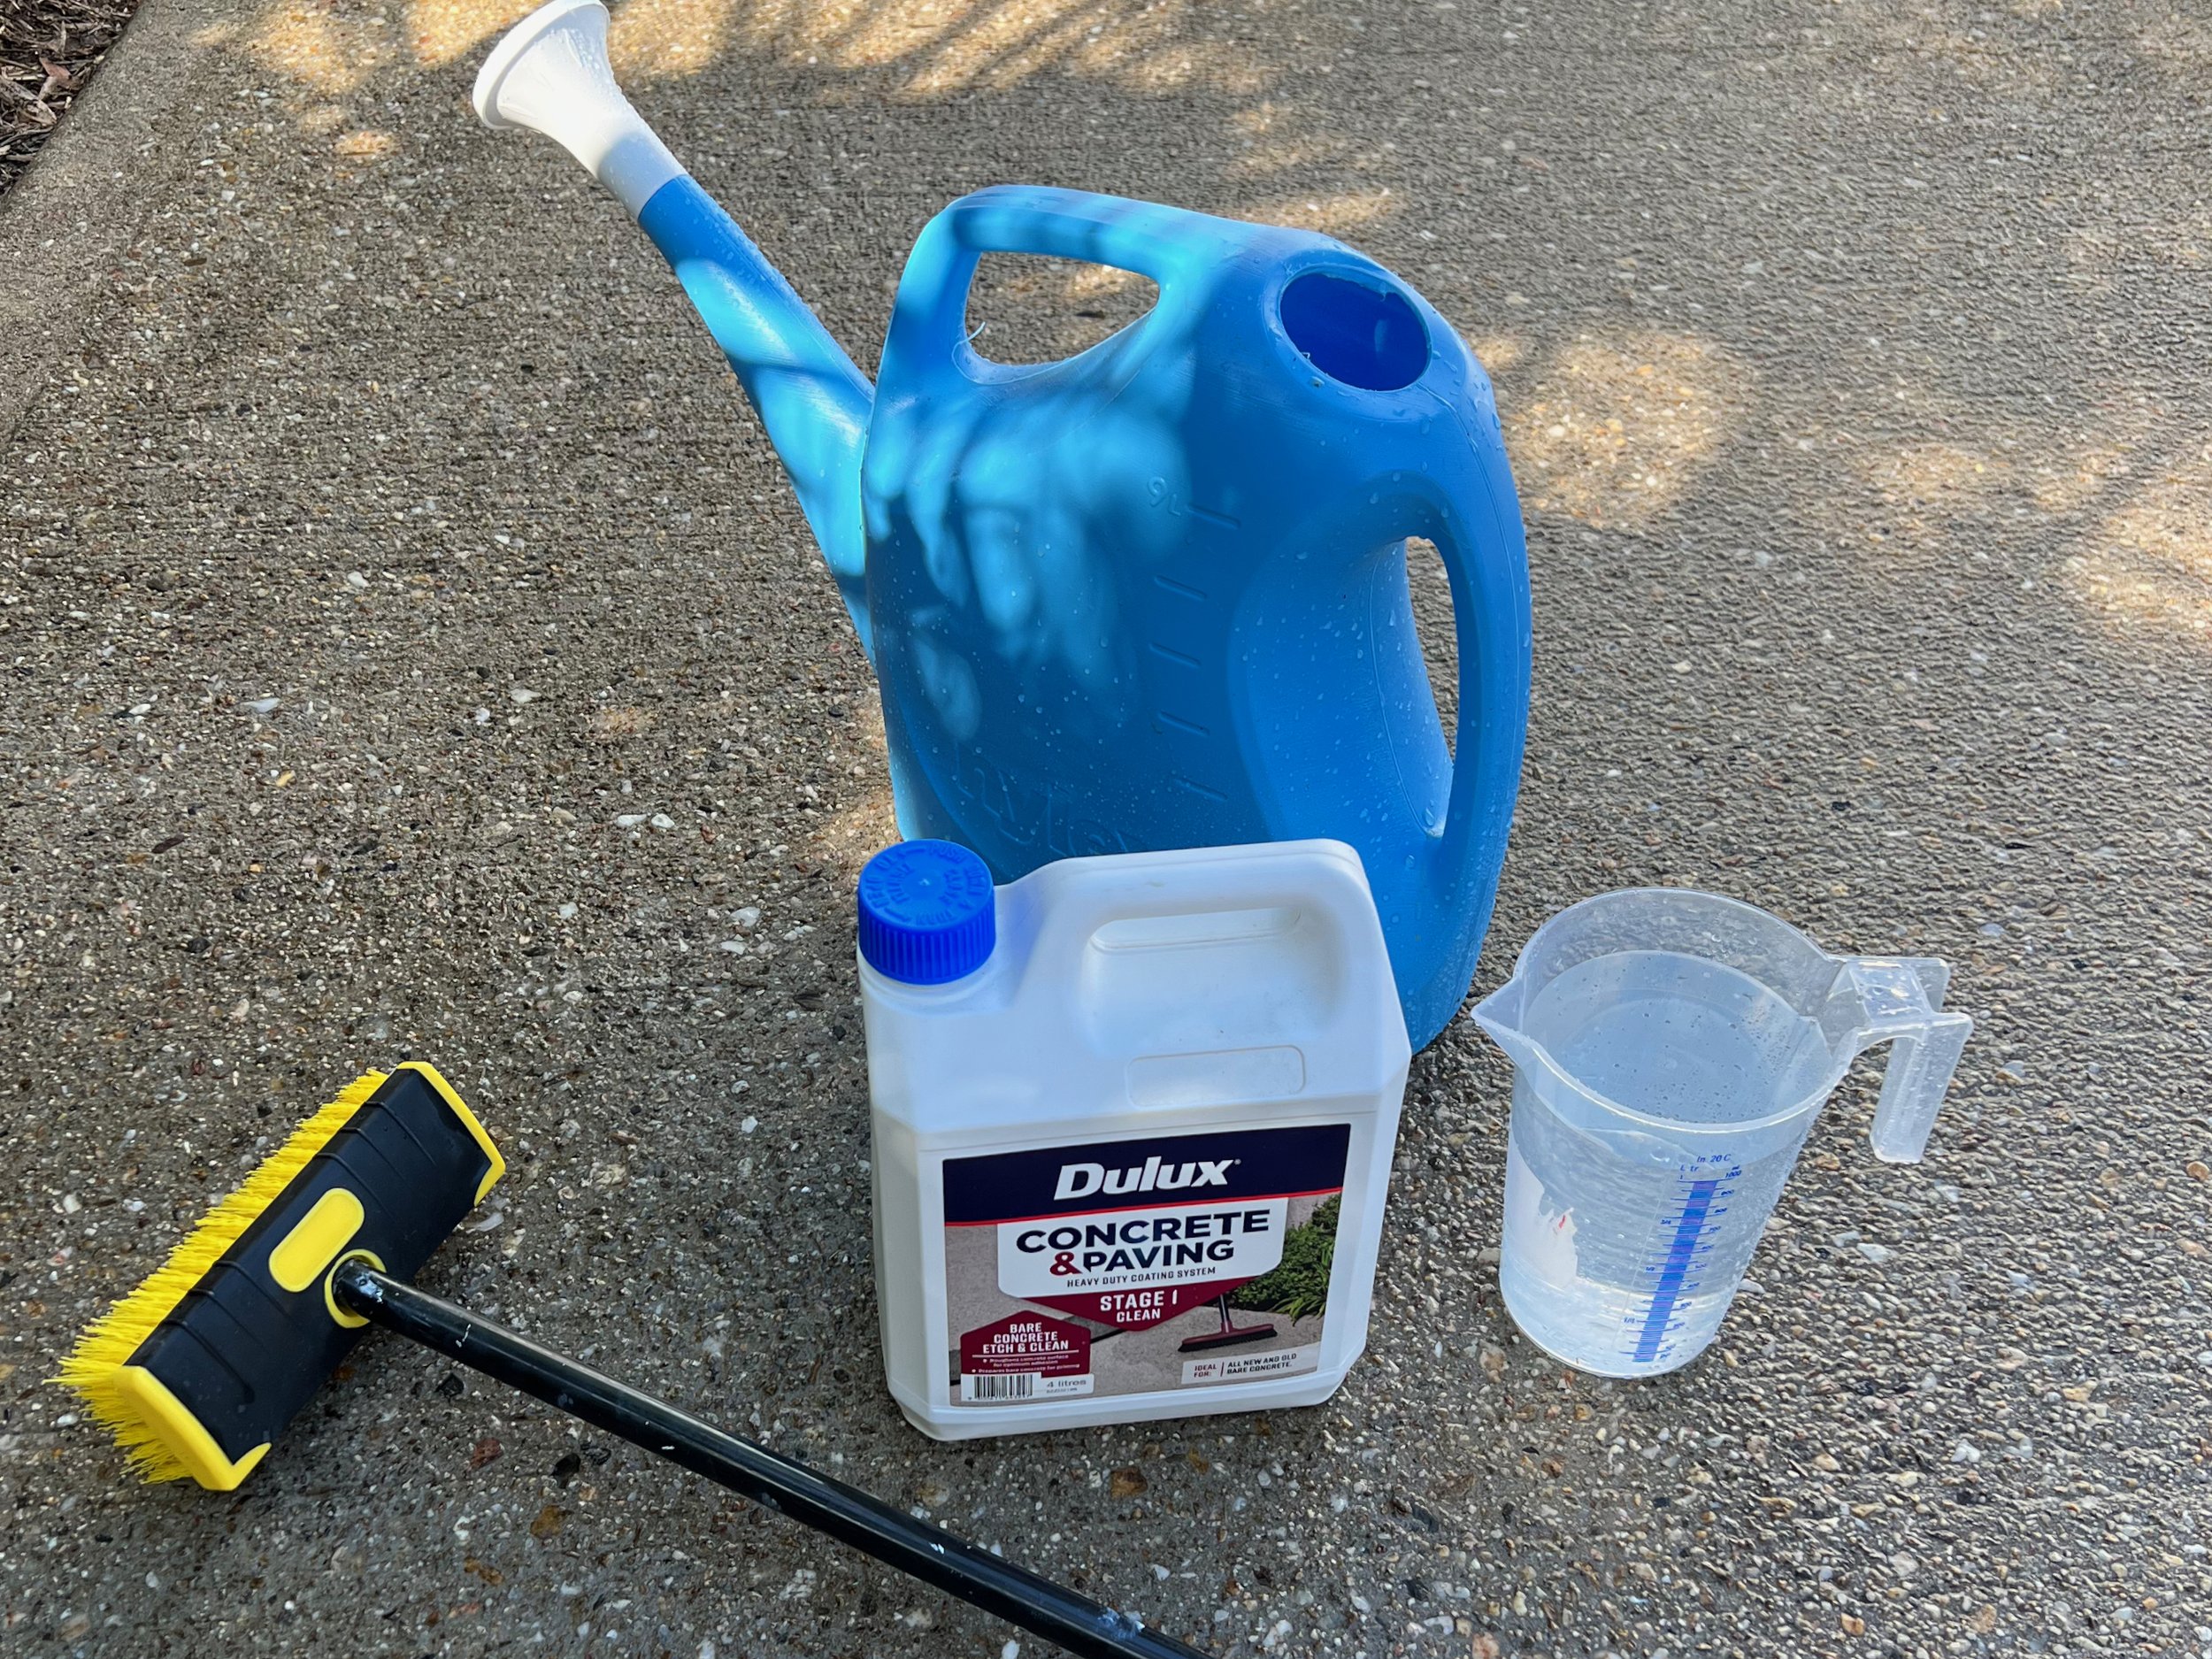
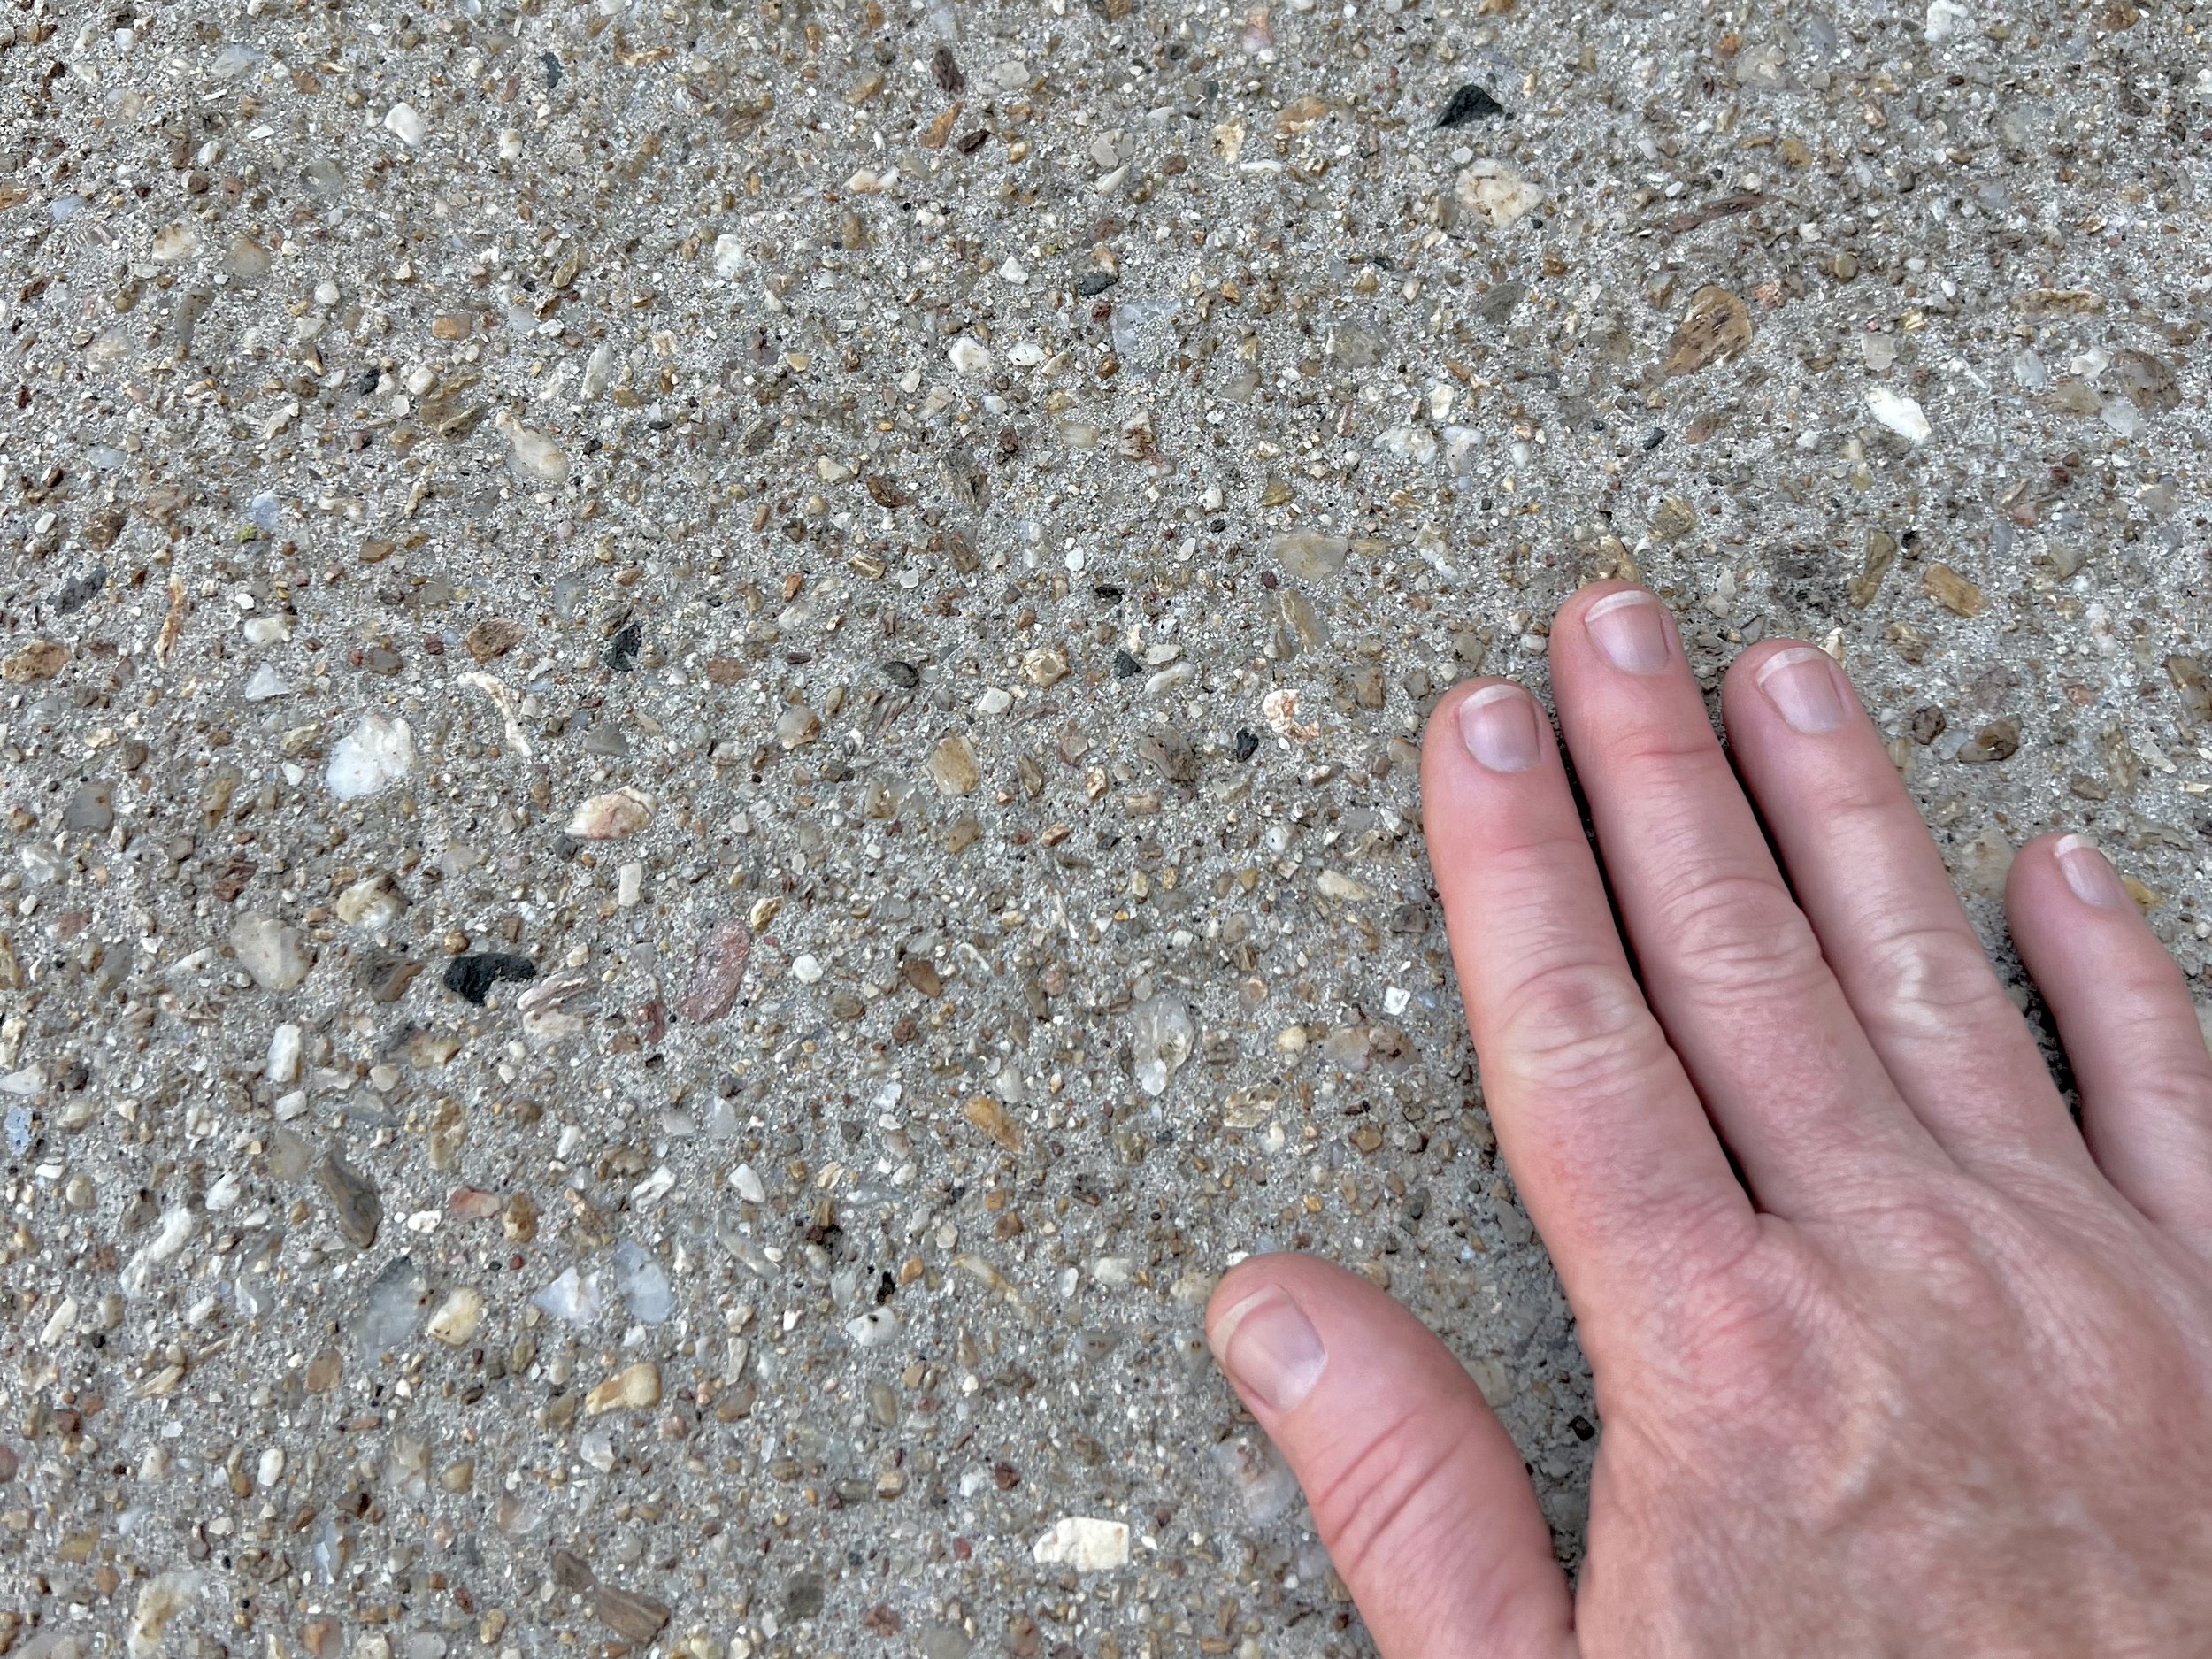
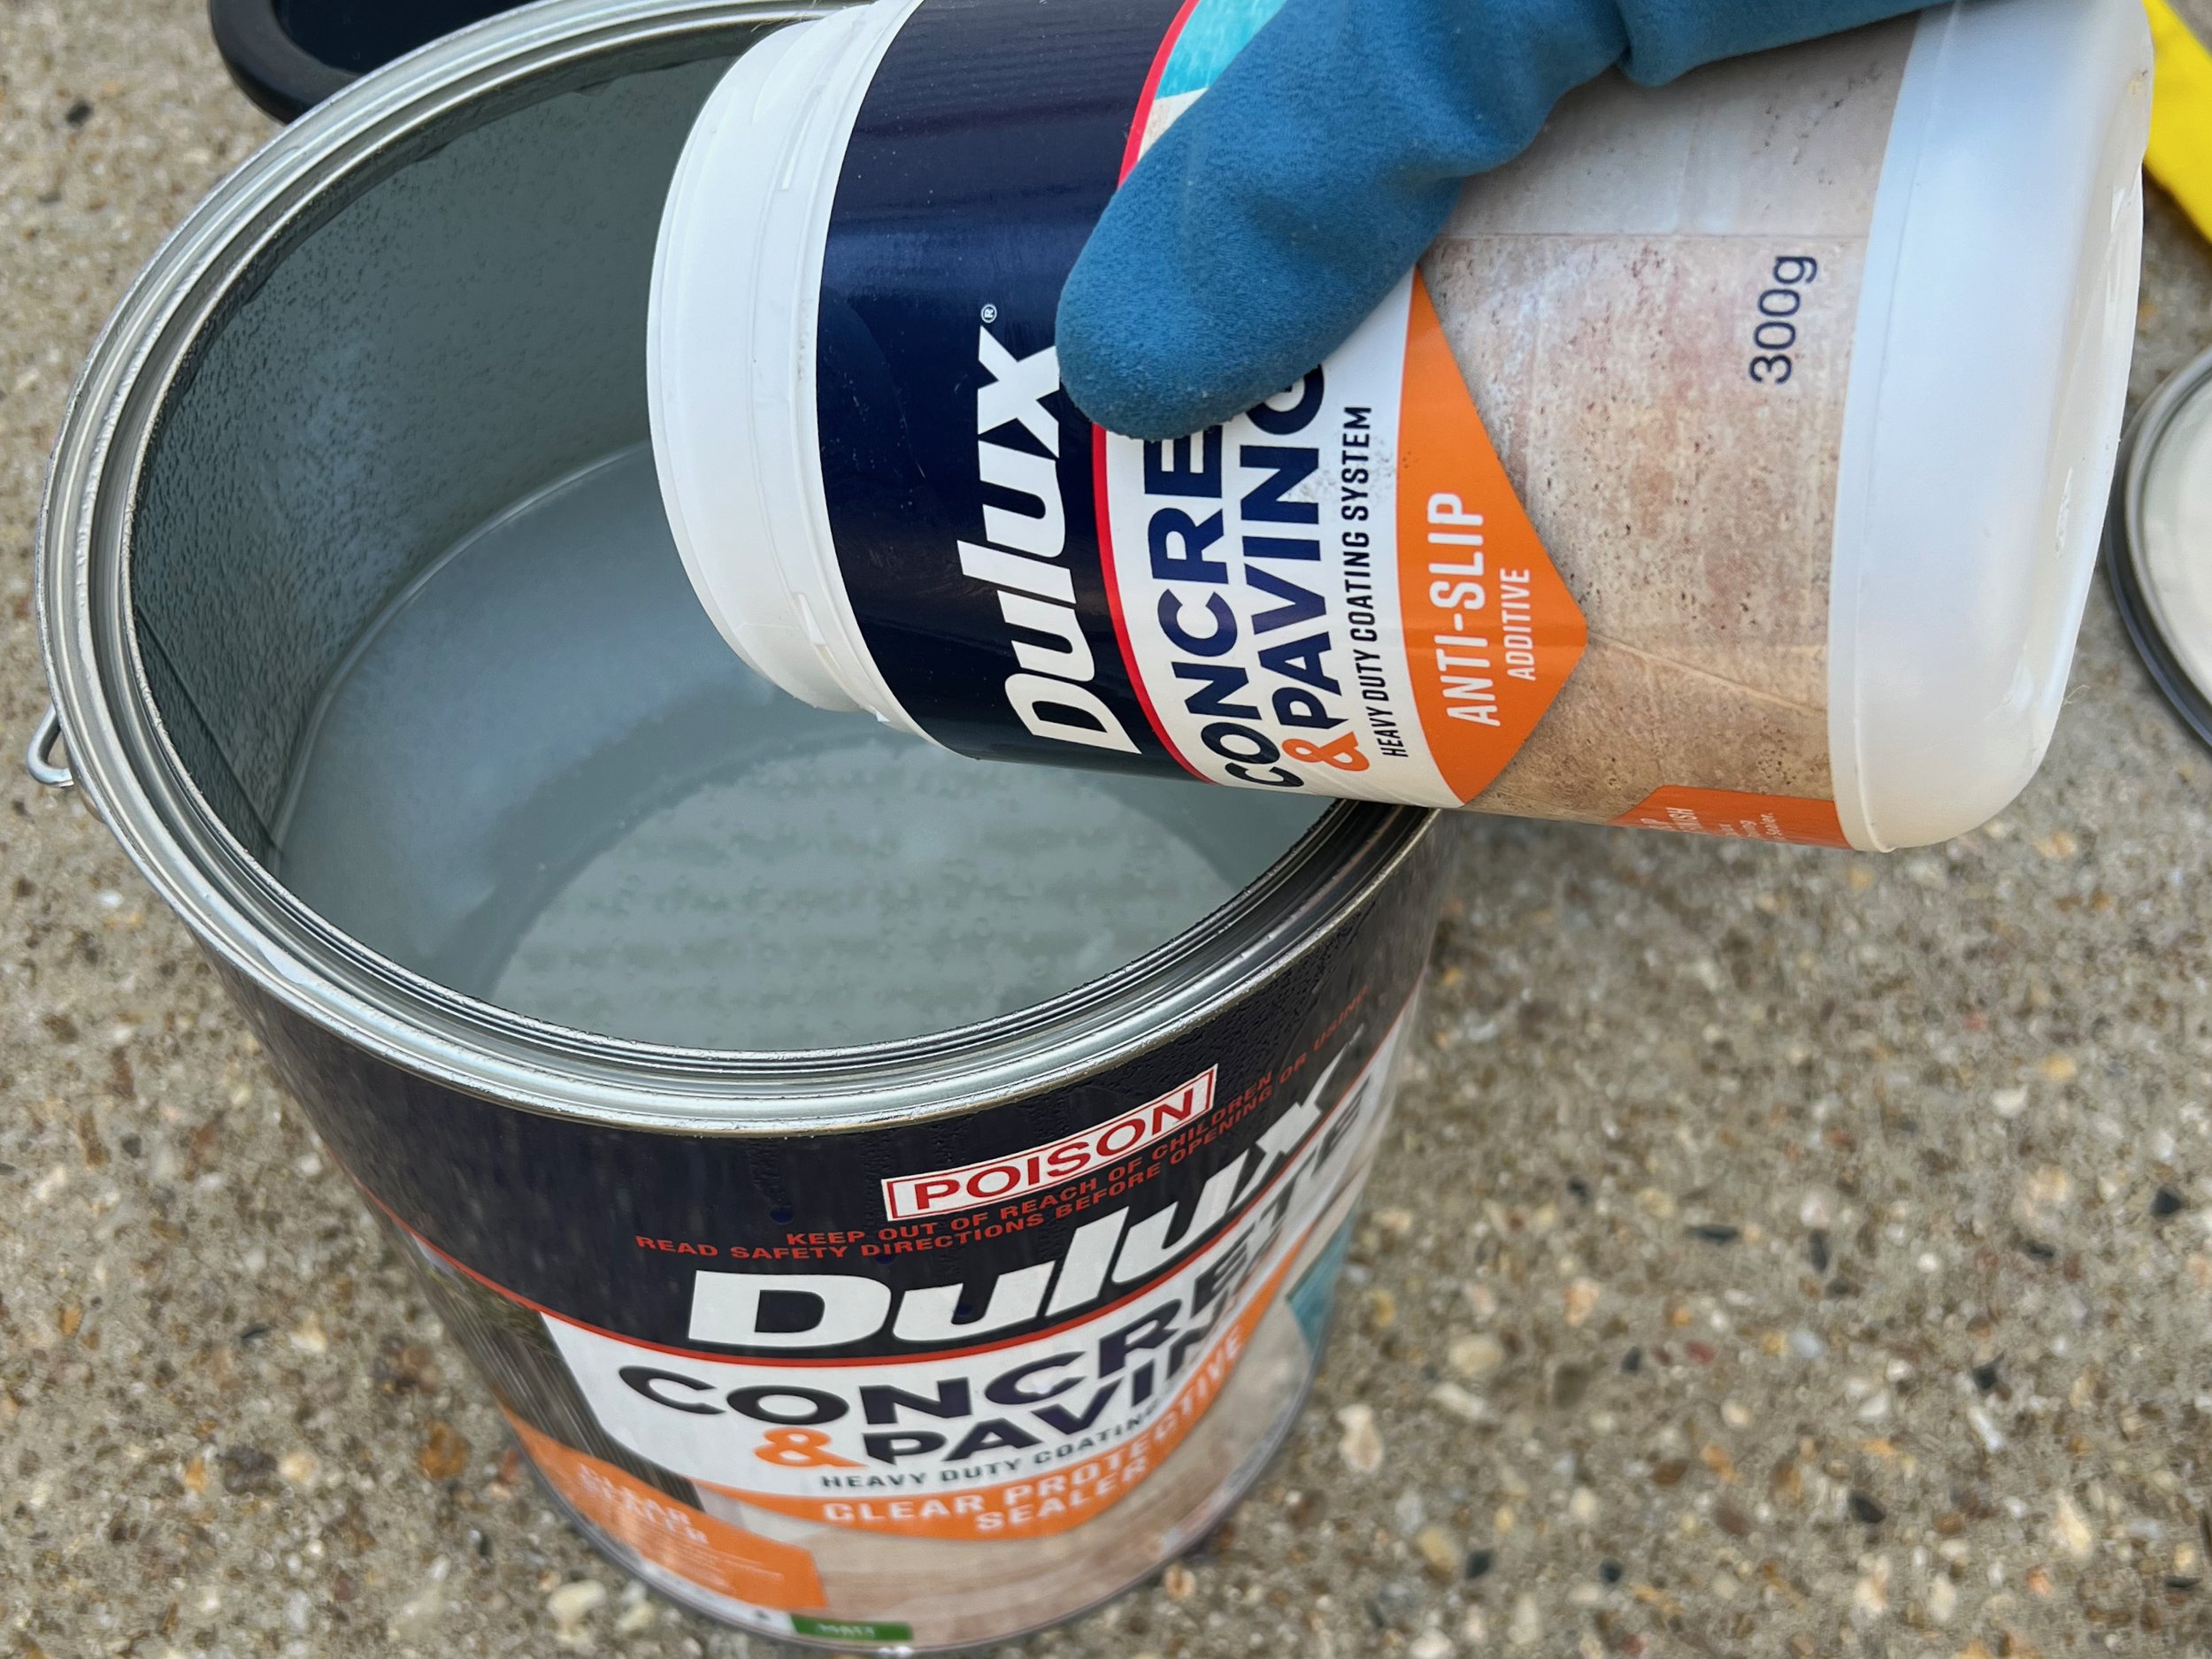
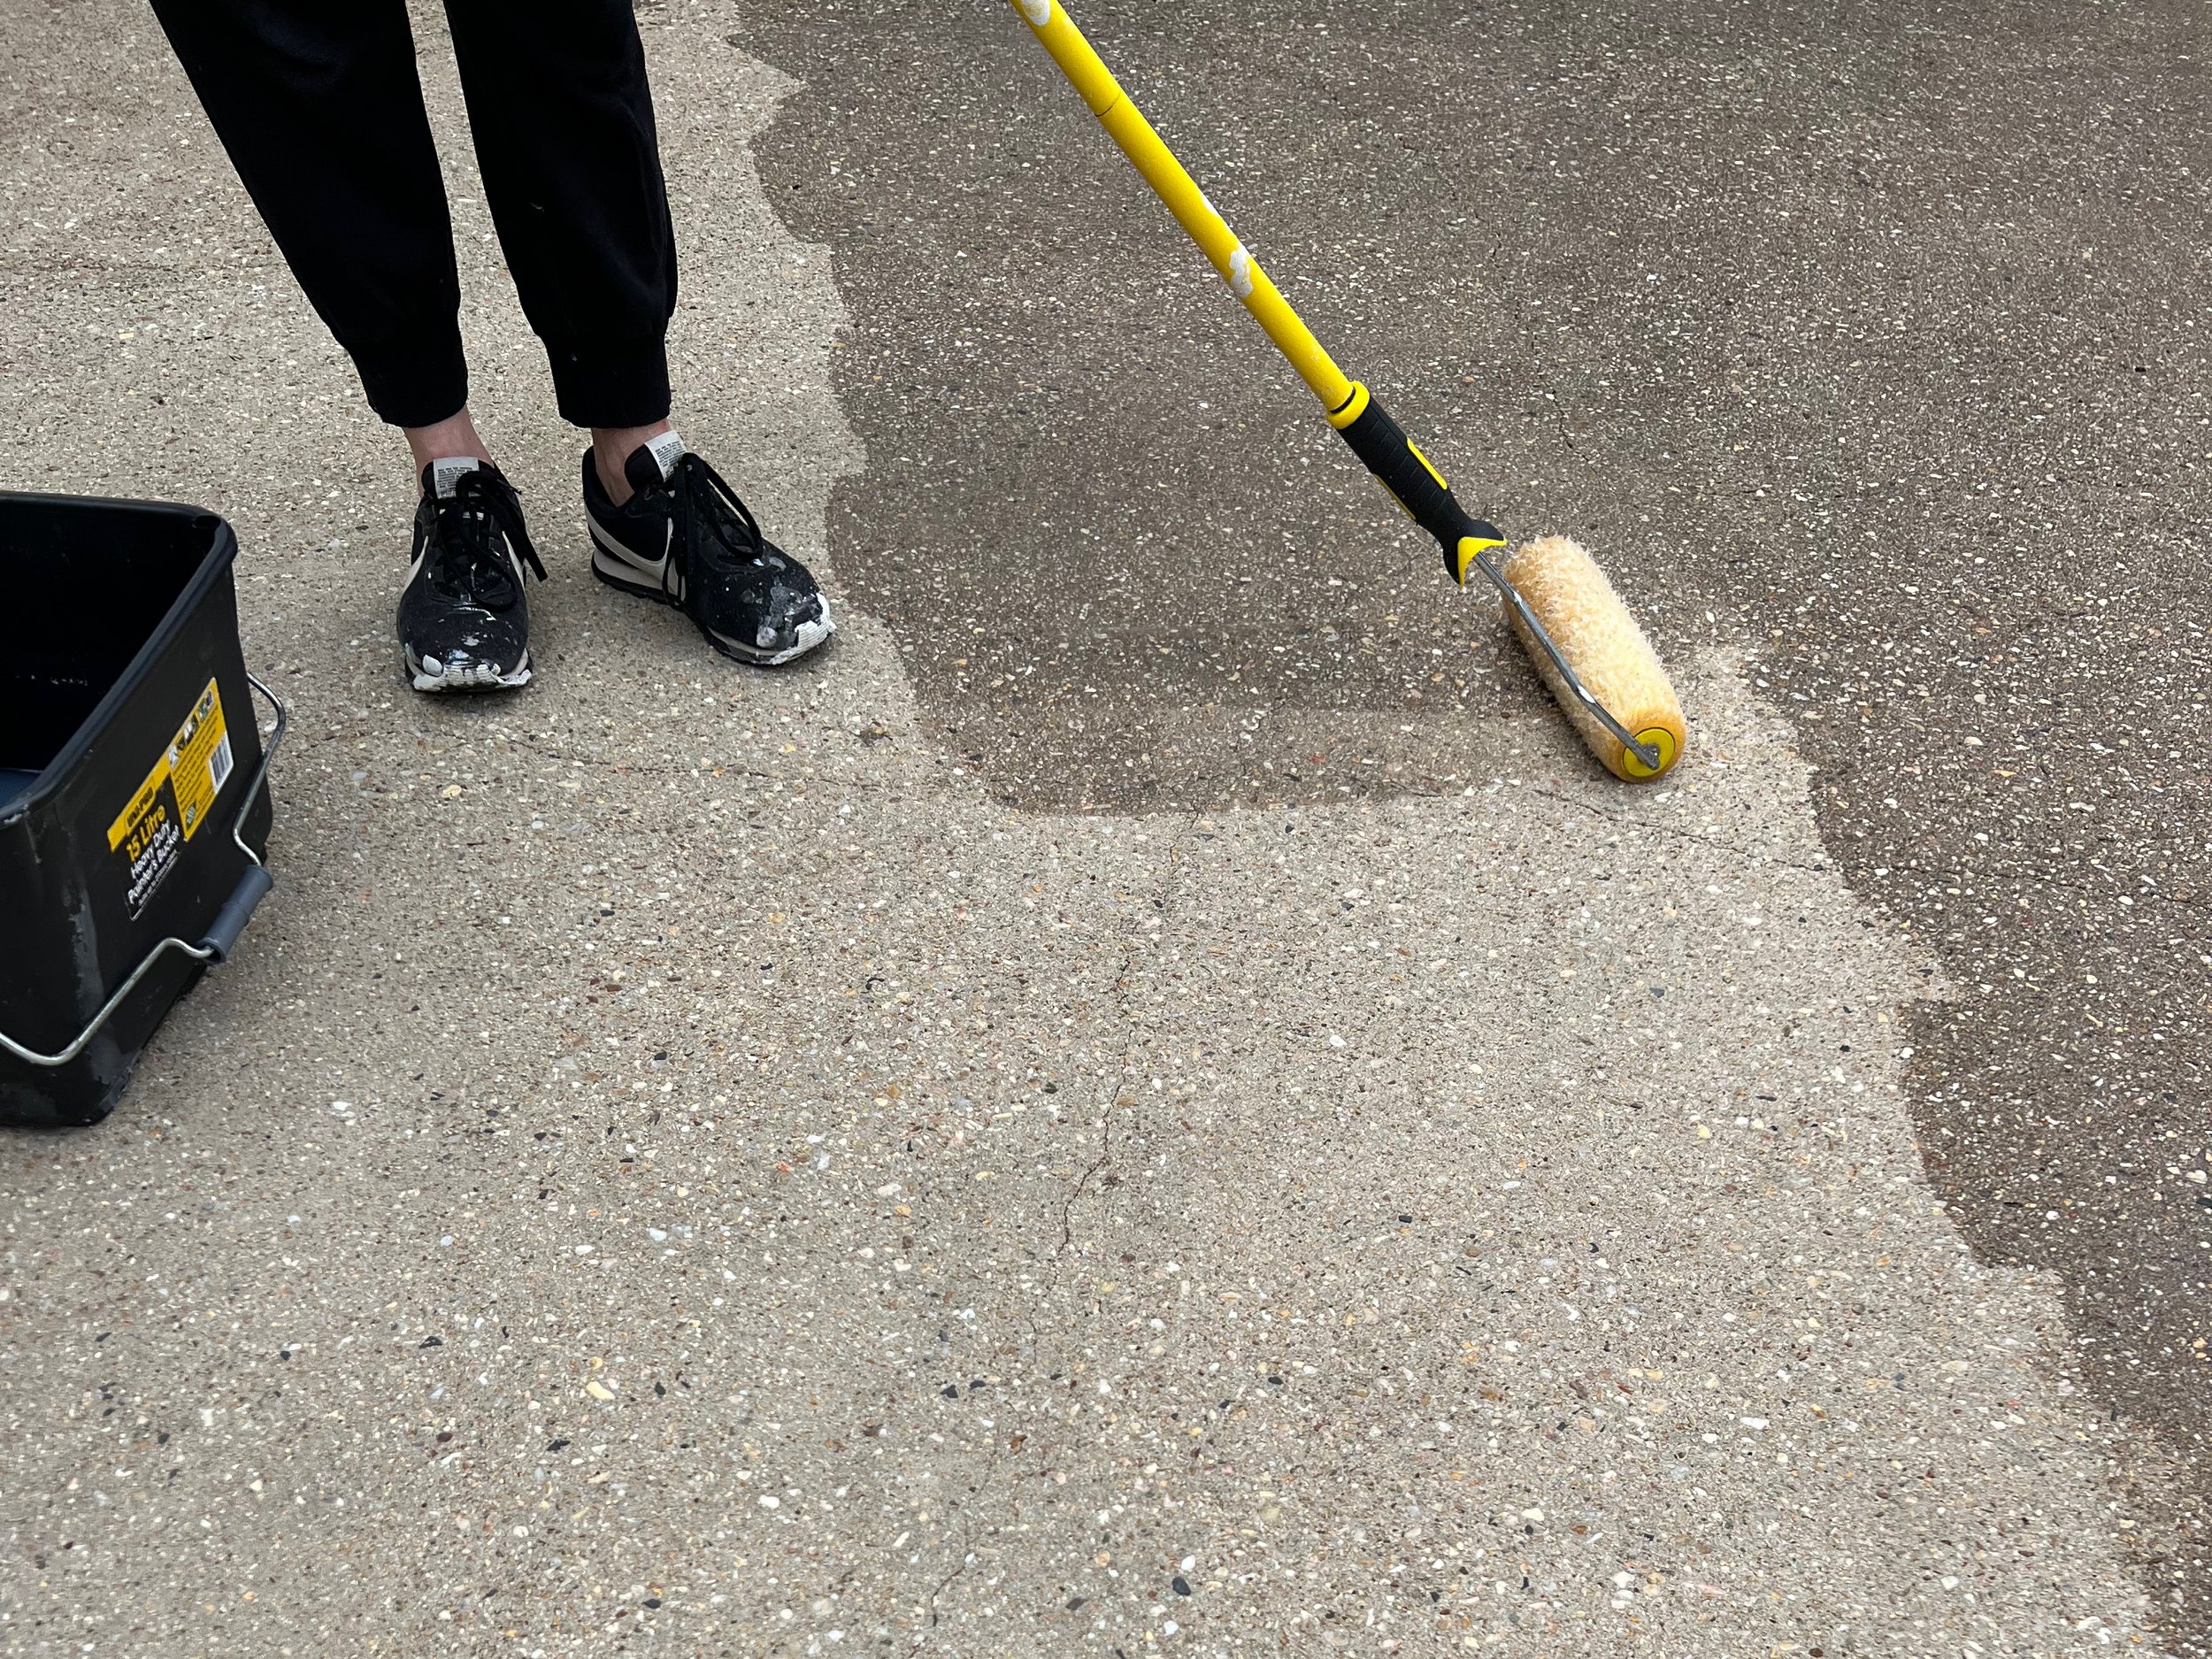
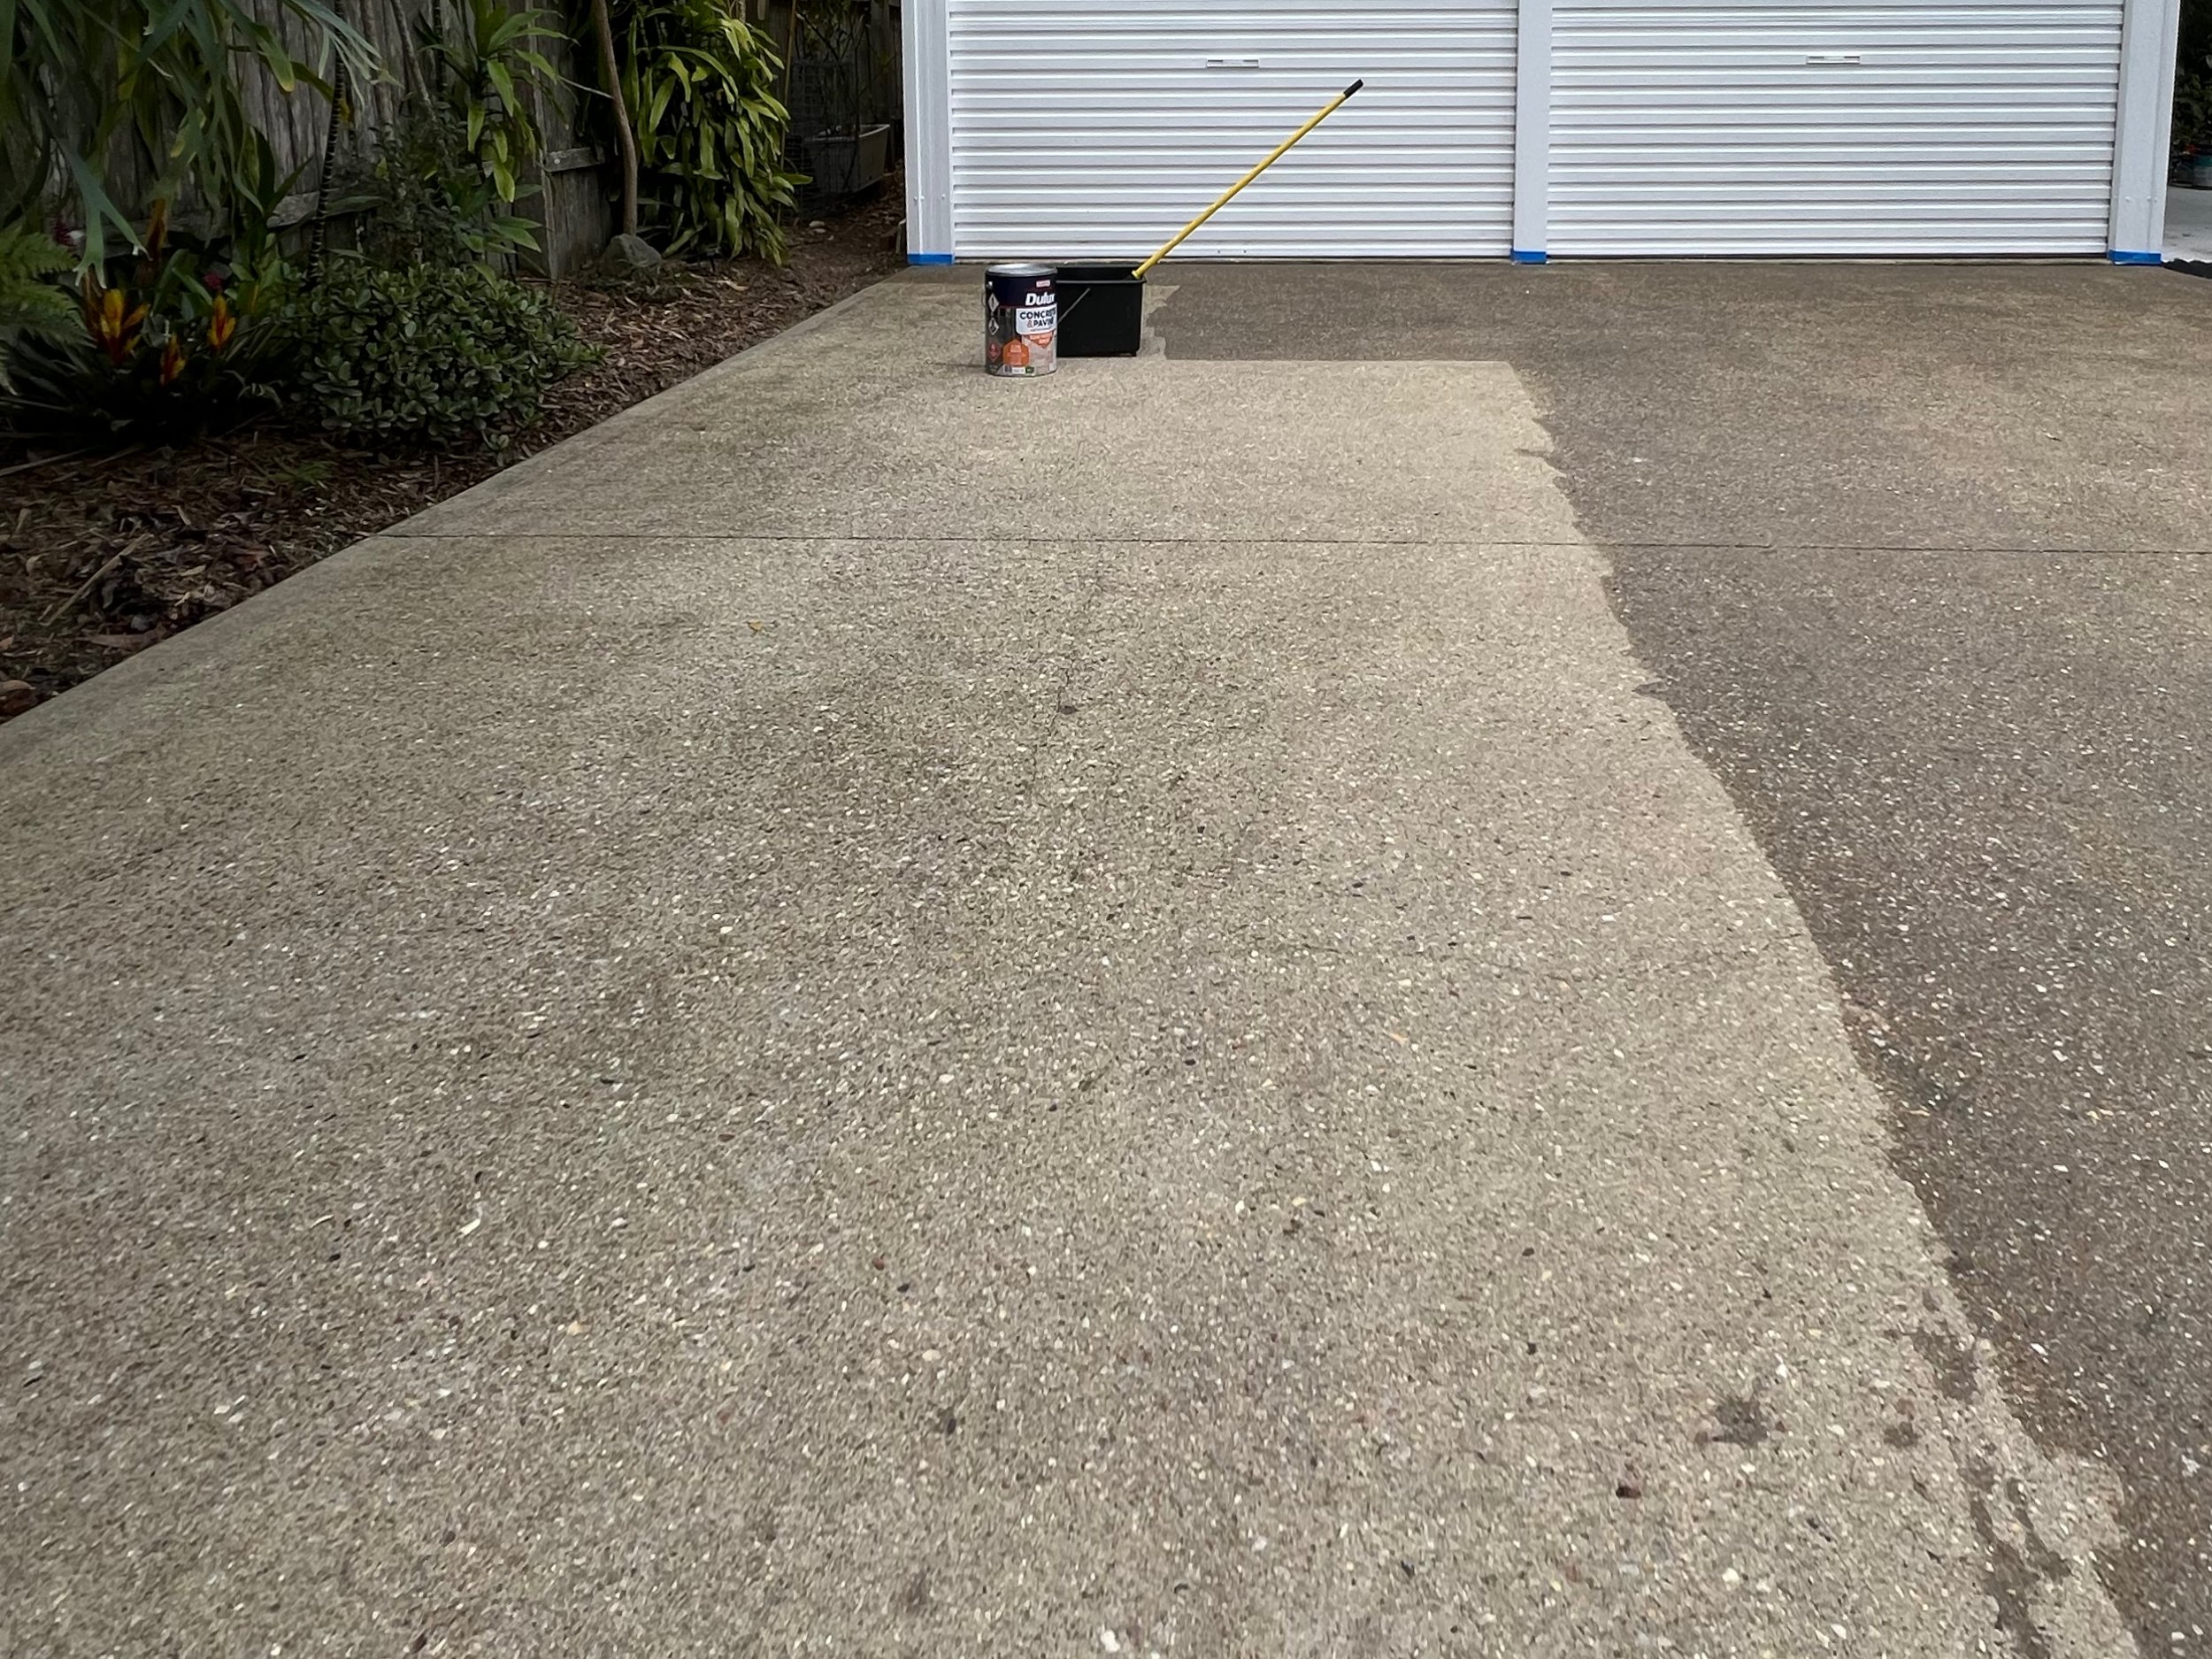
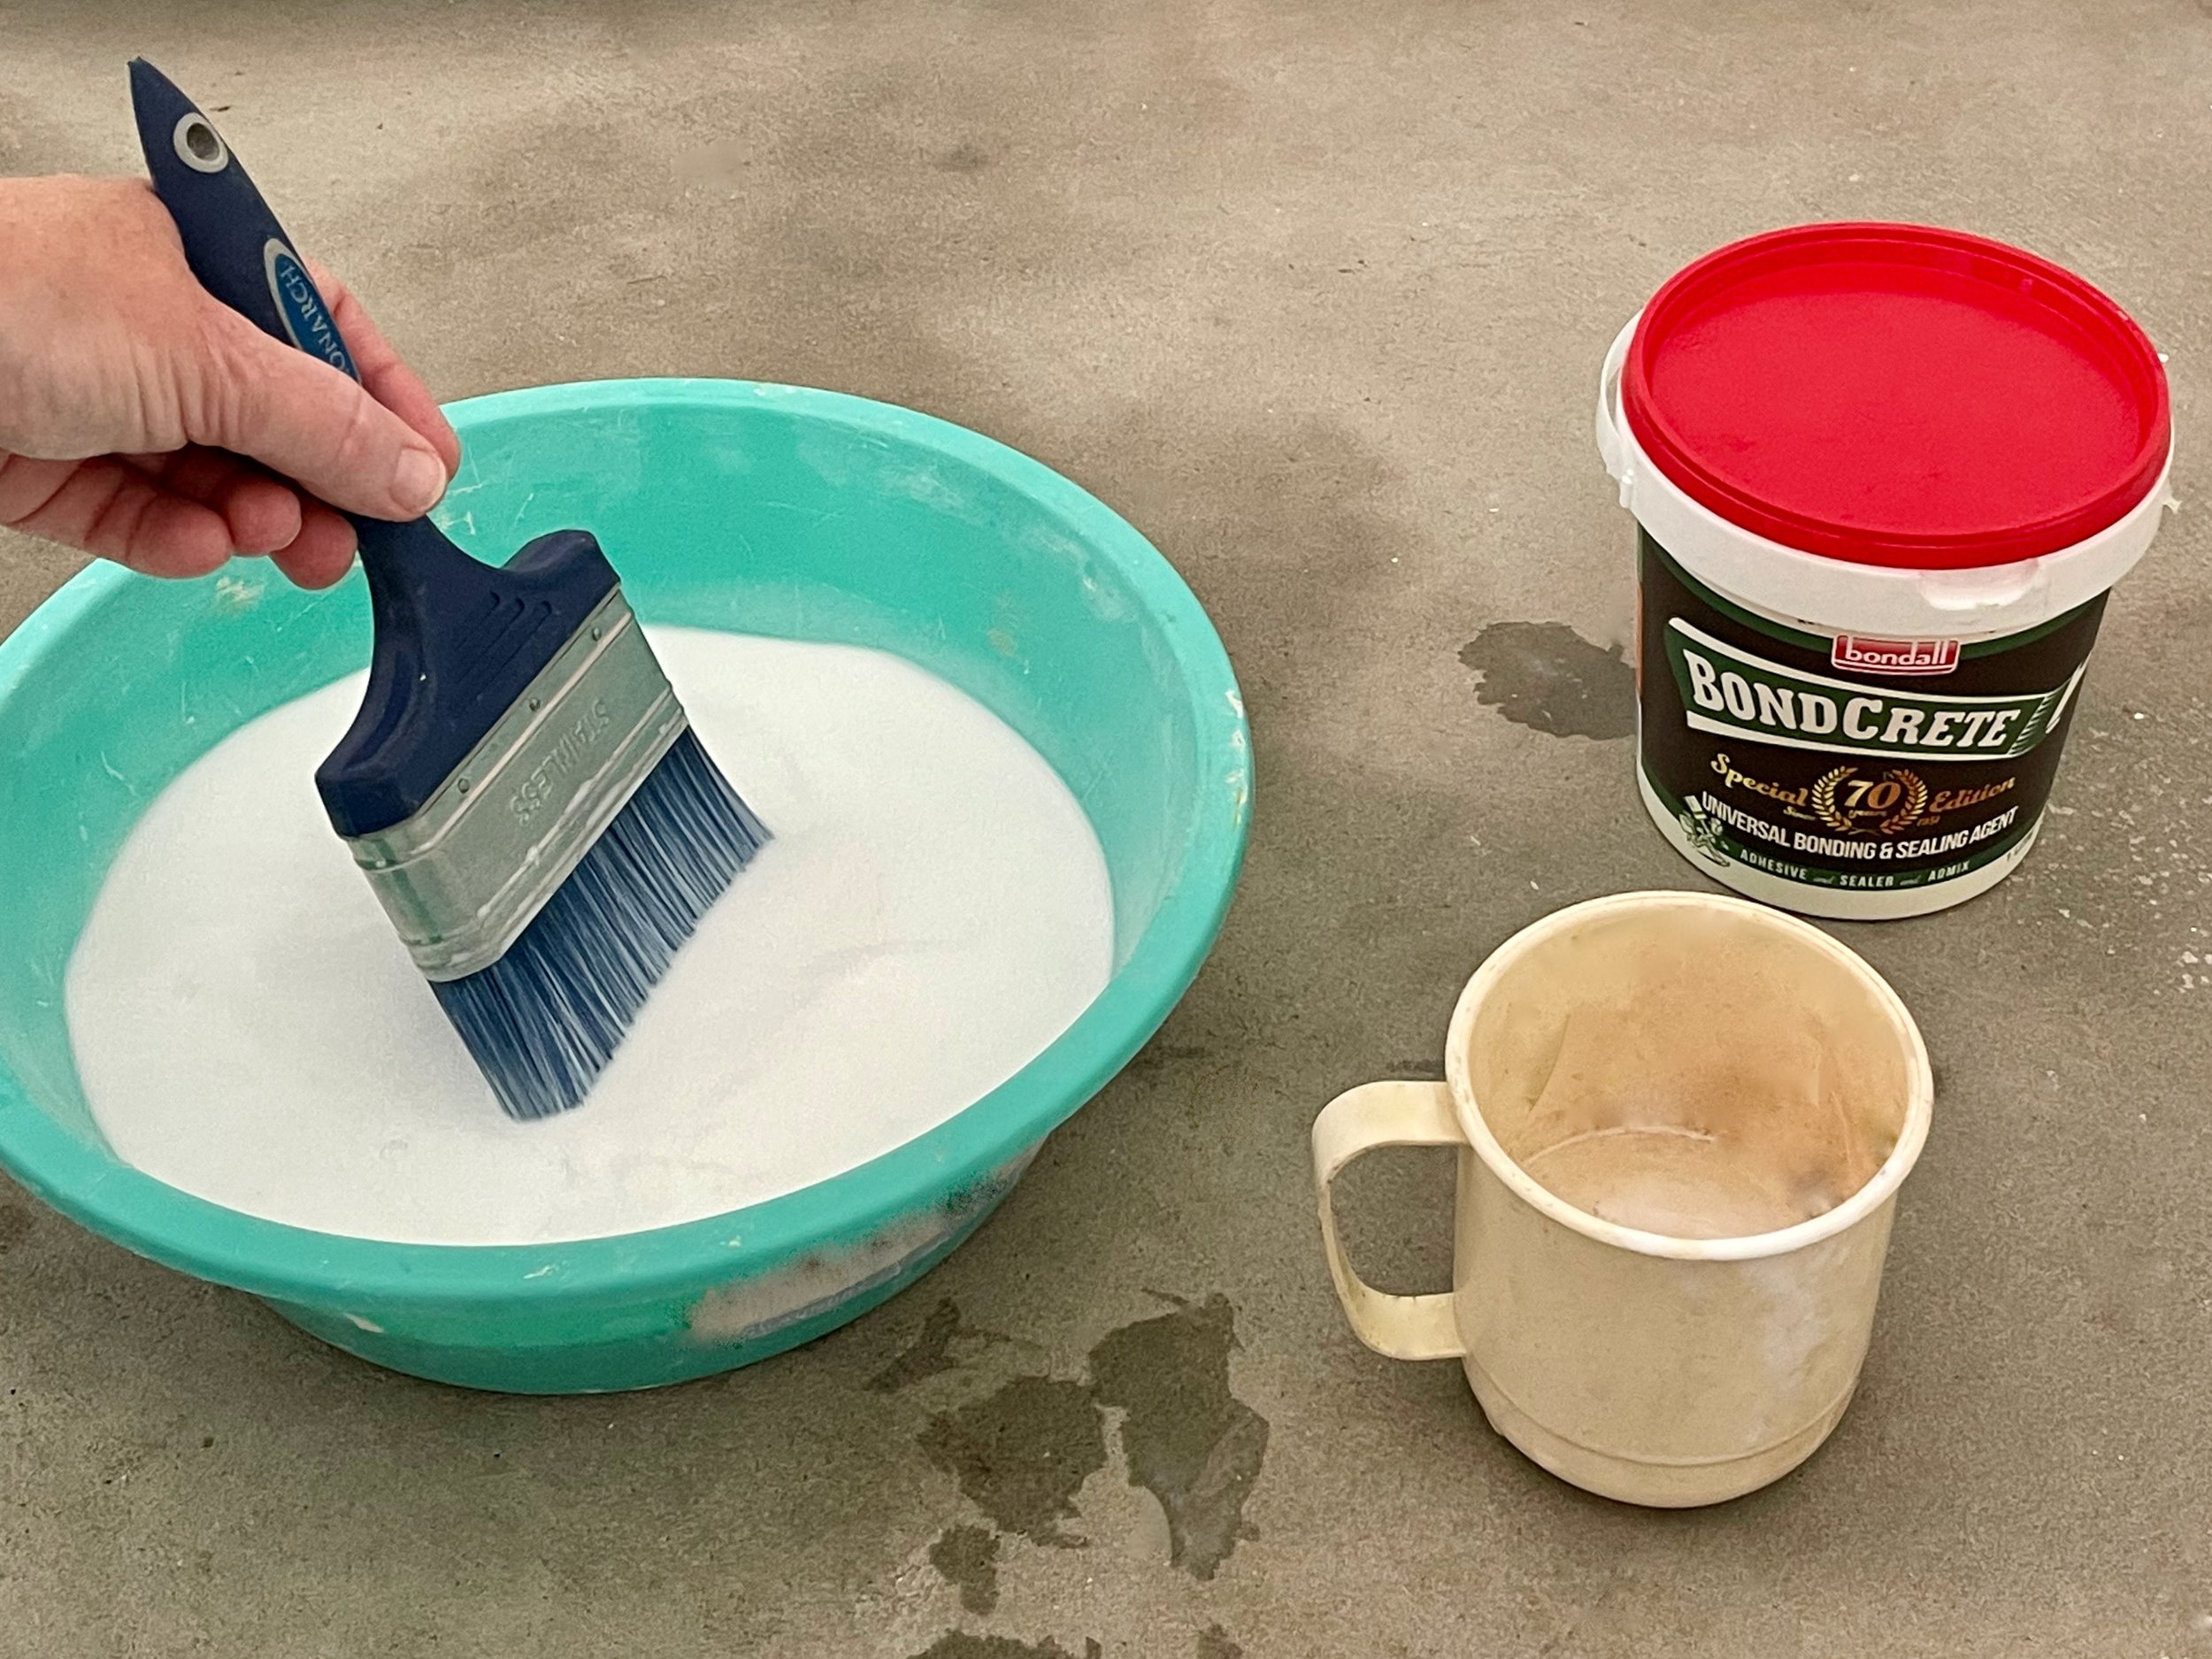
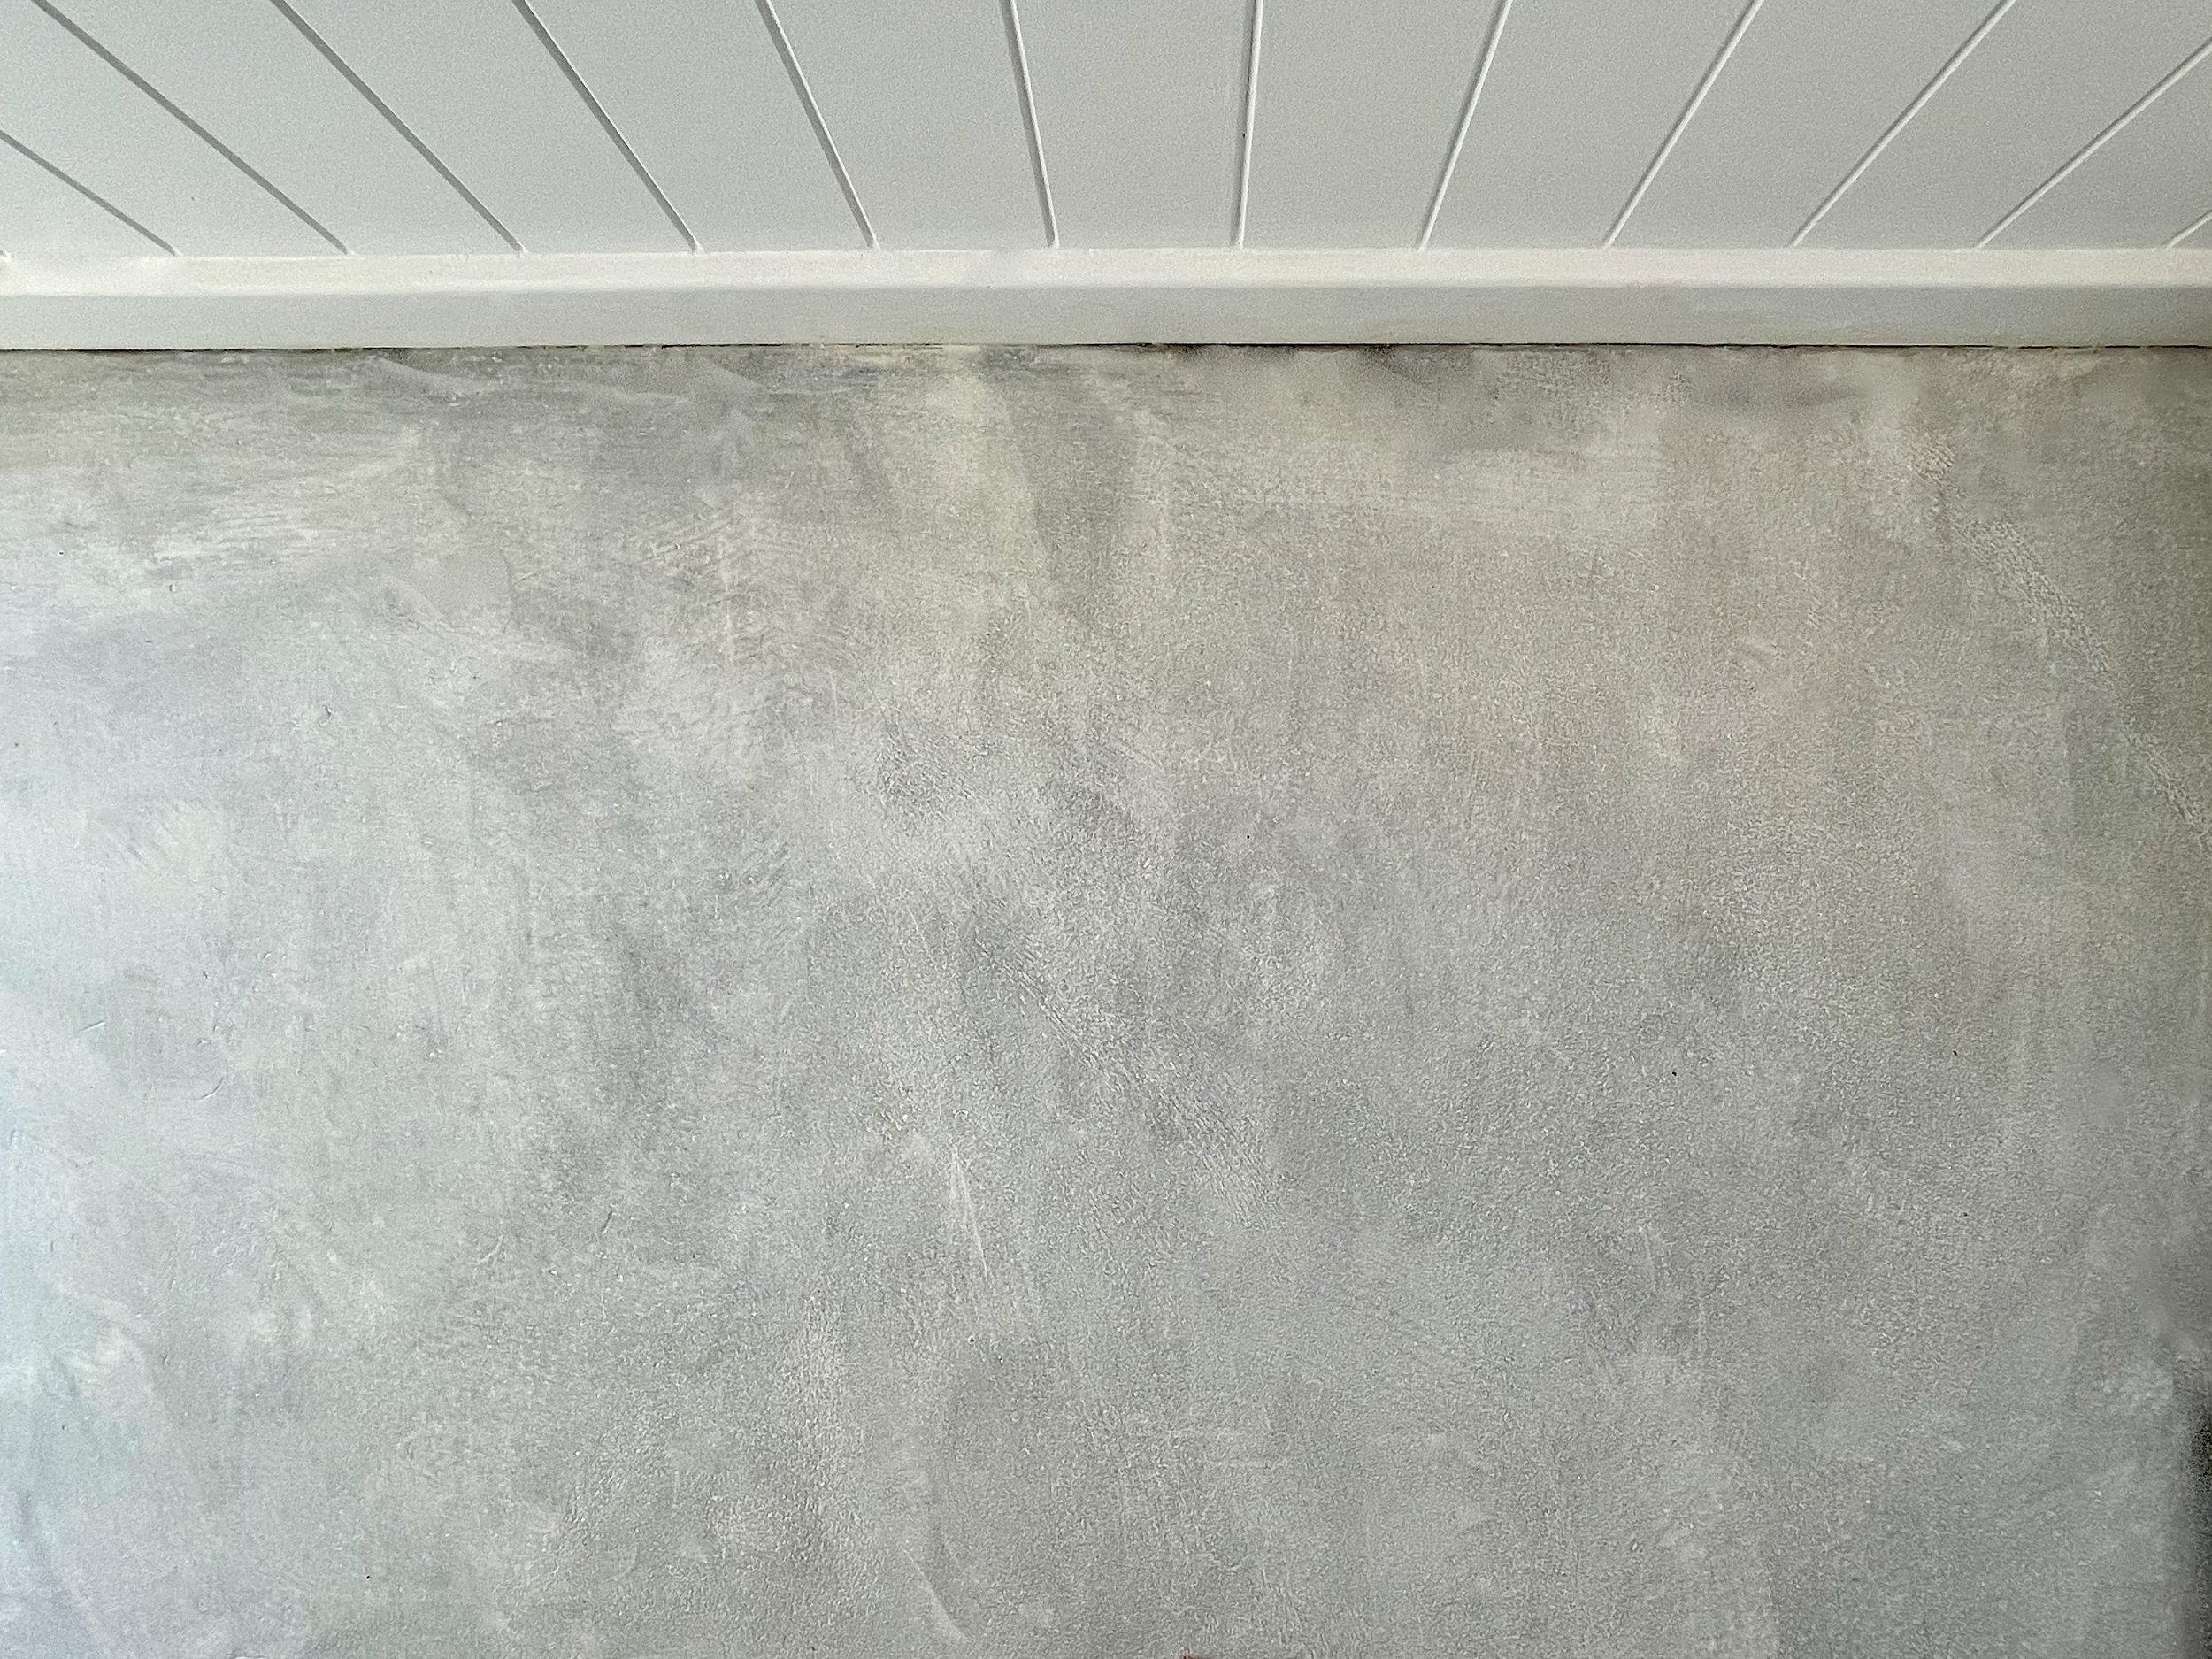
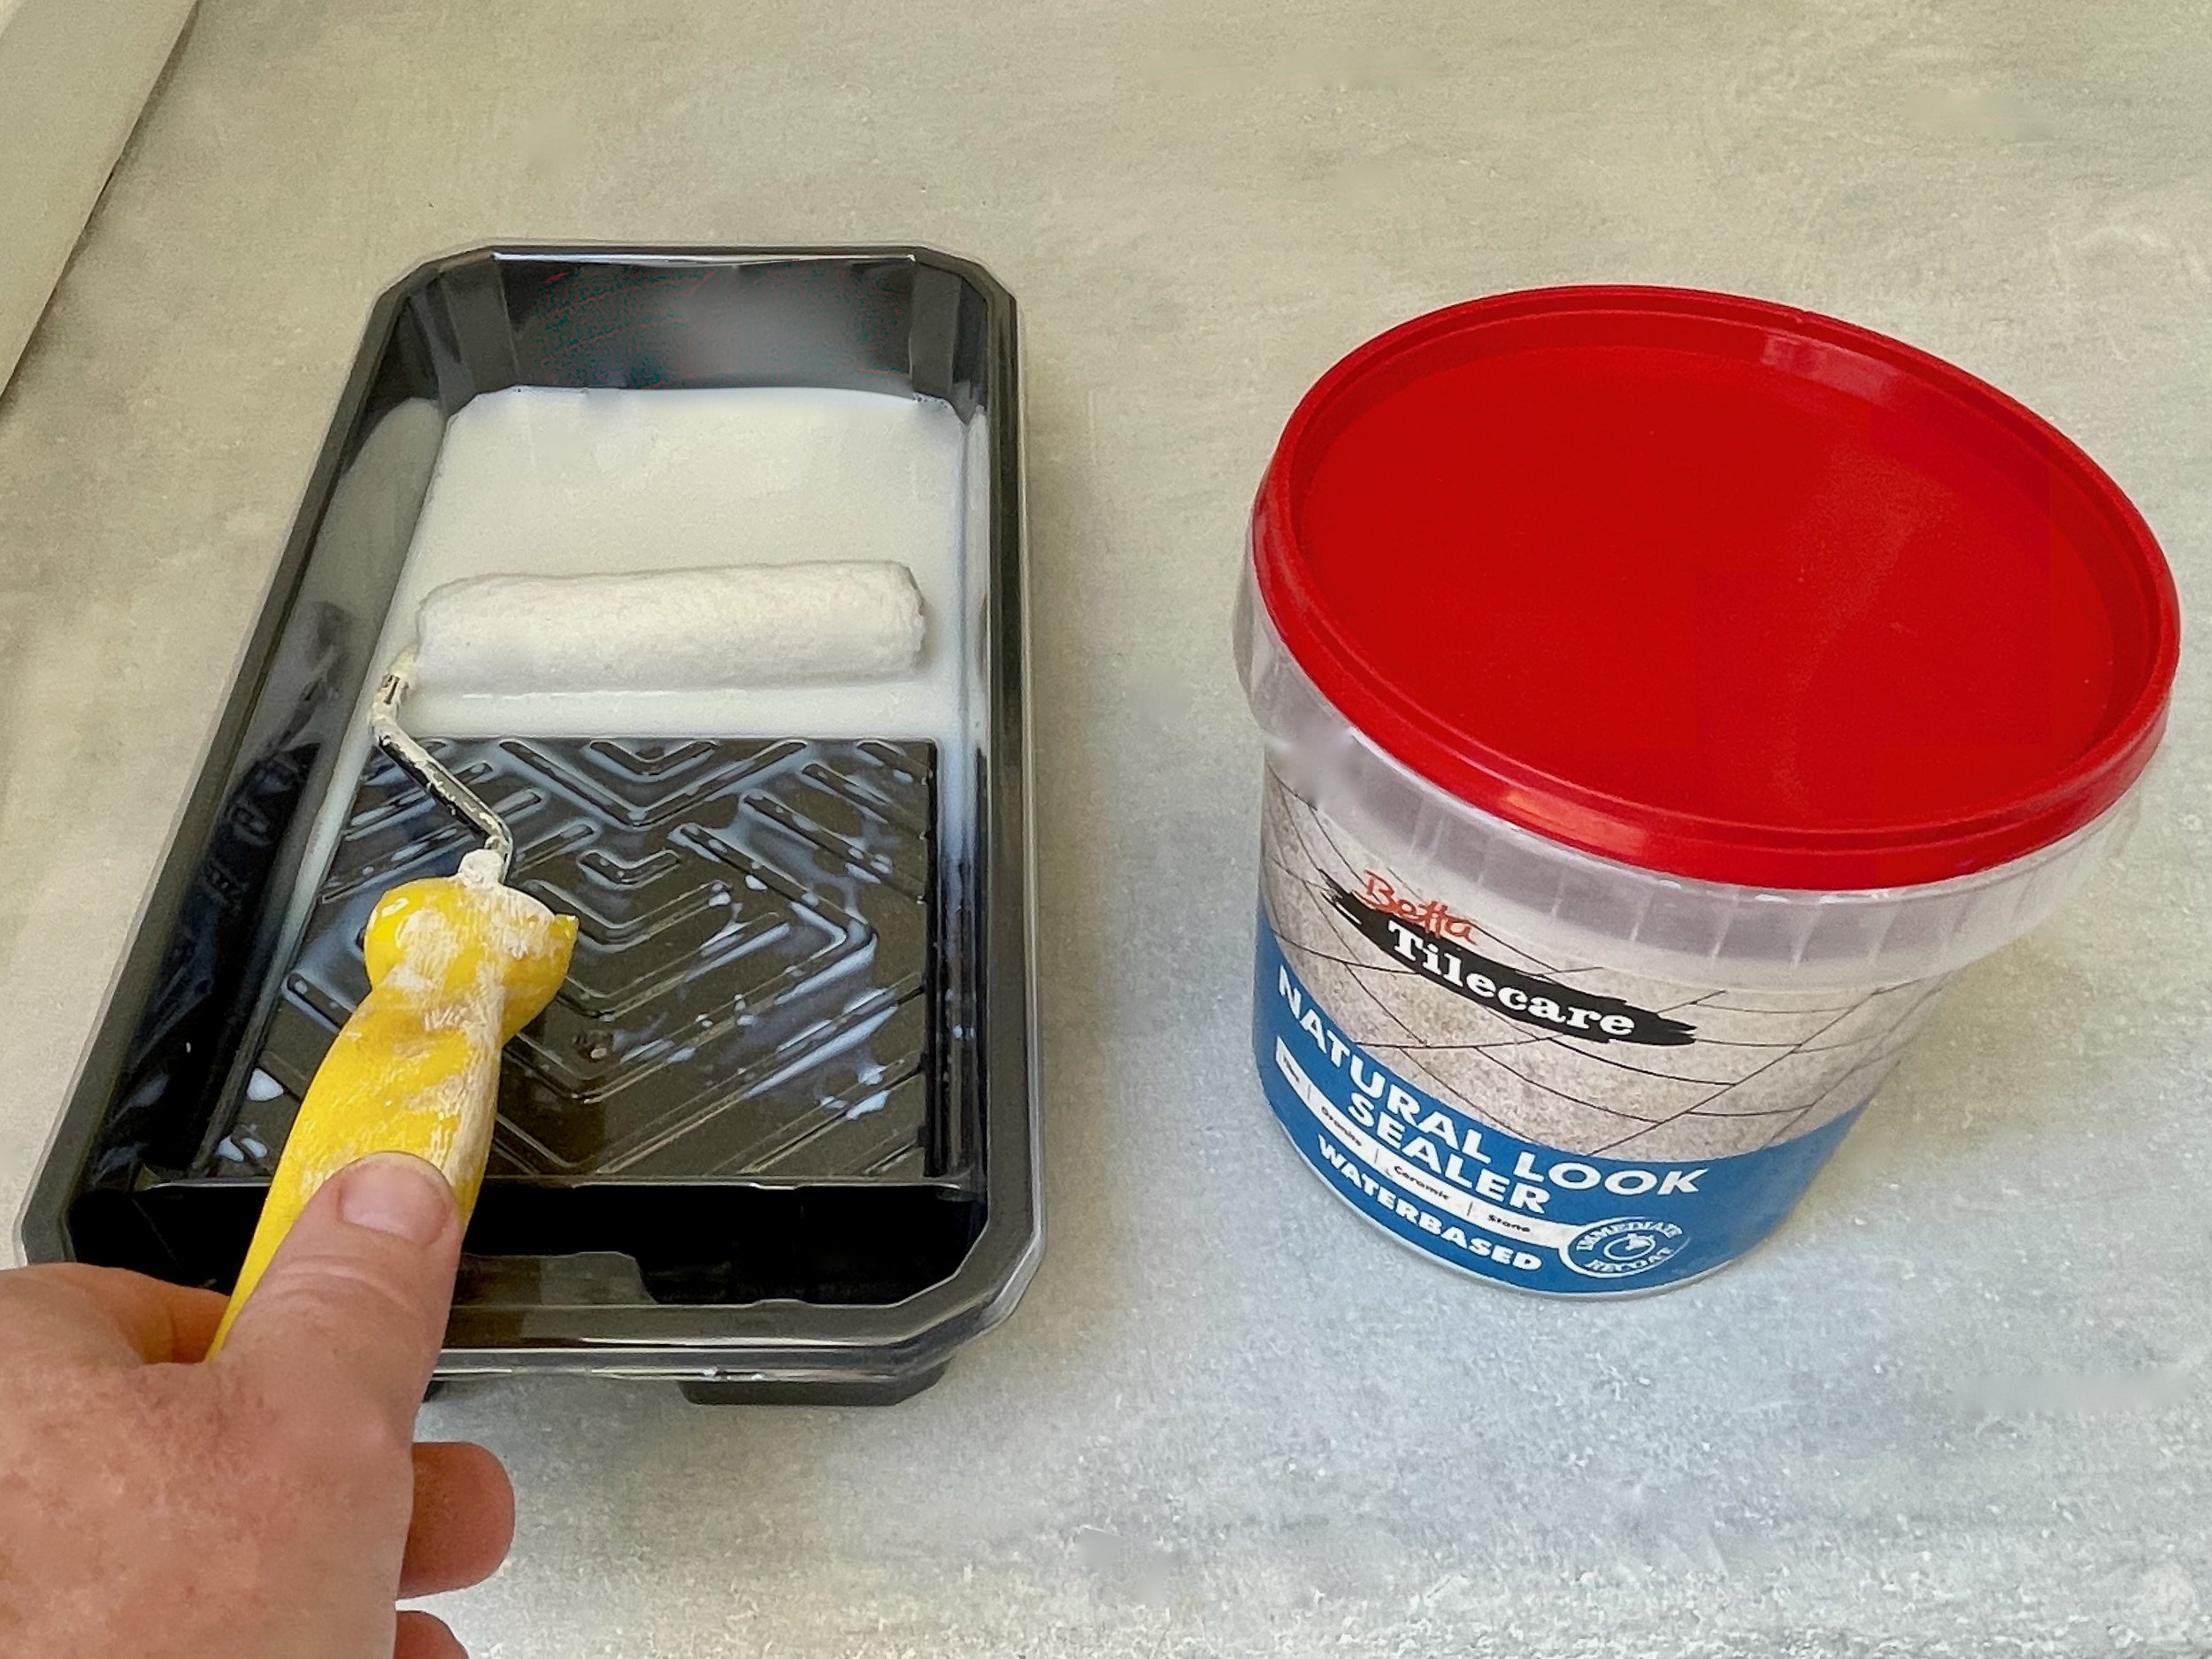
BRIGHTENING THE FLOOR

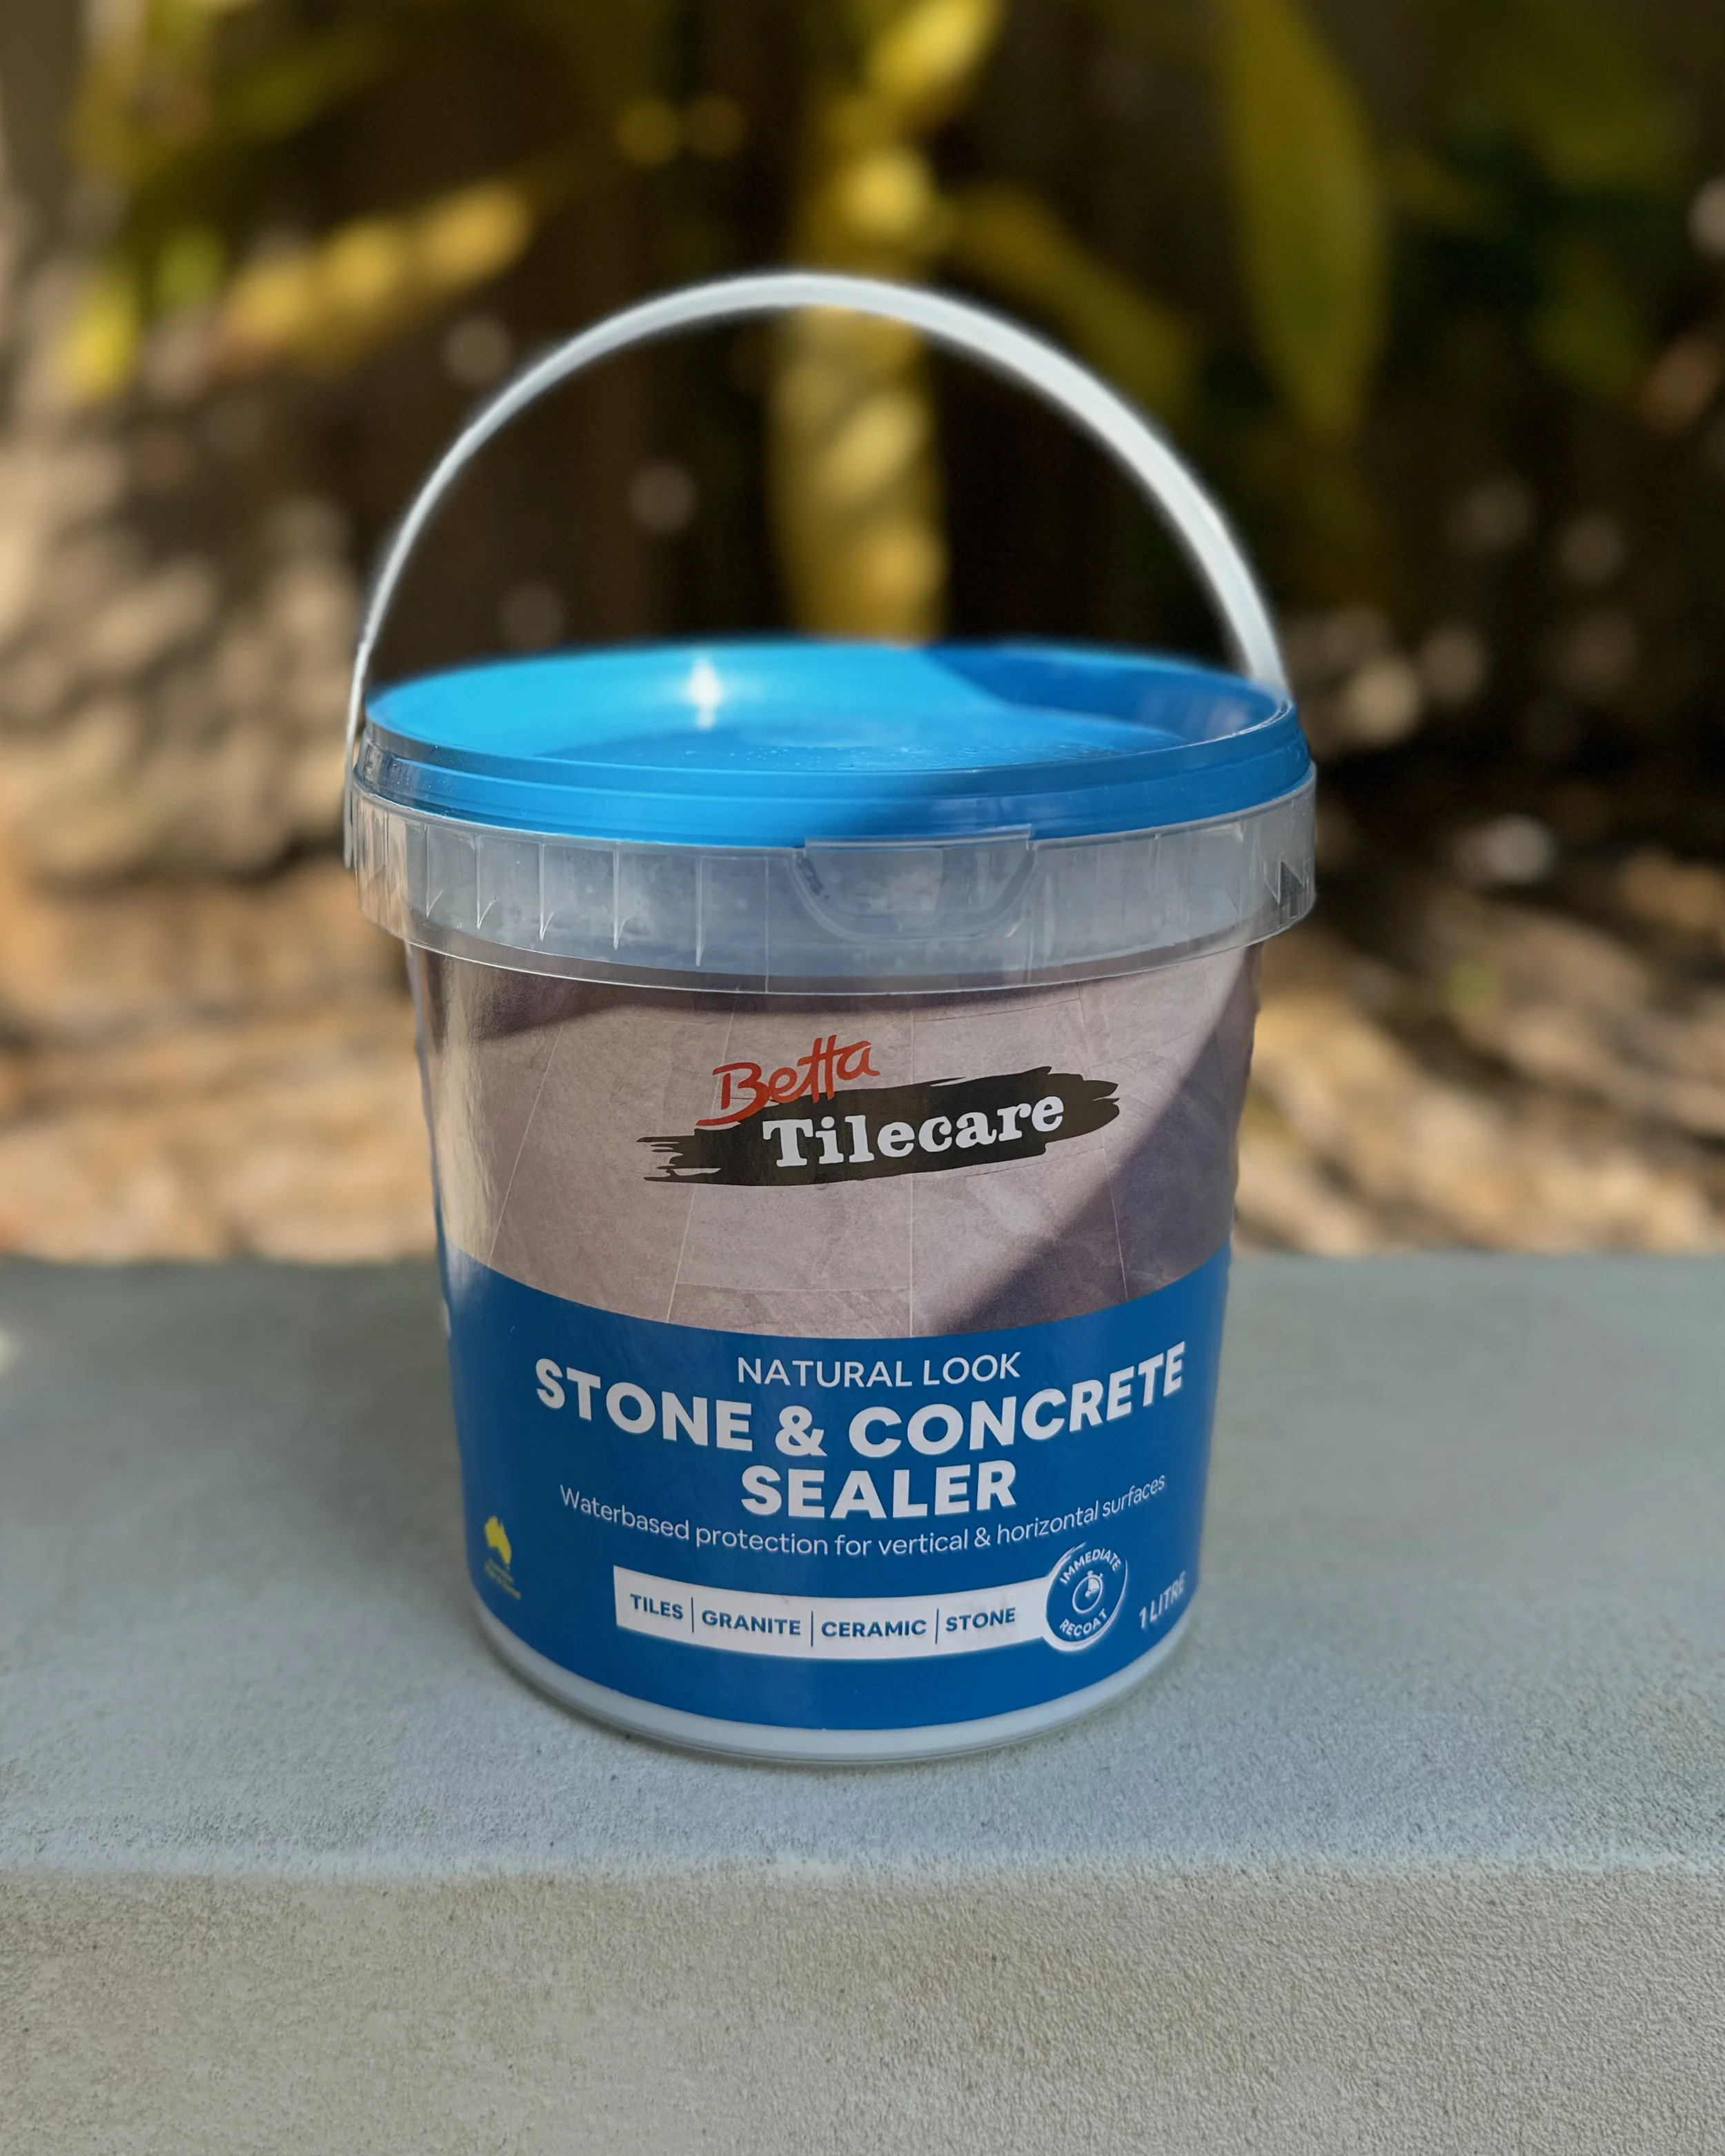
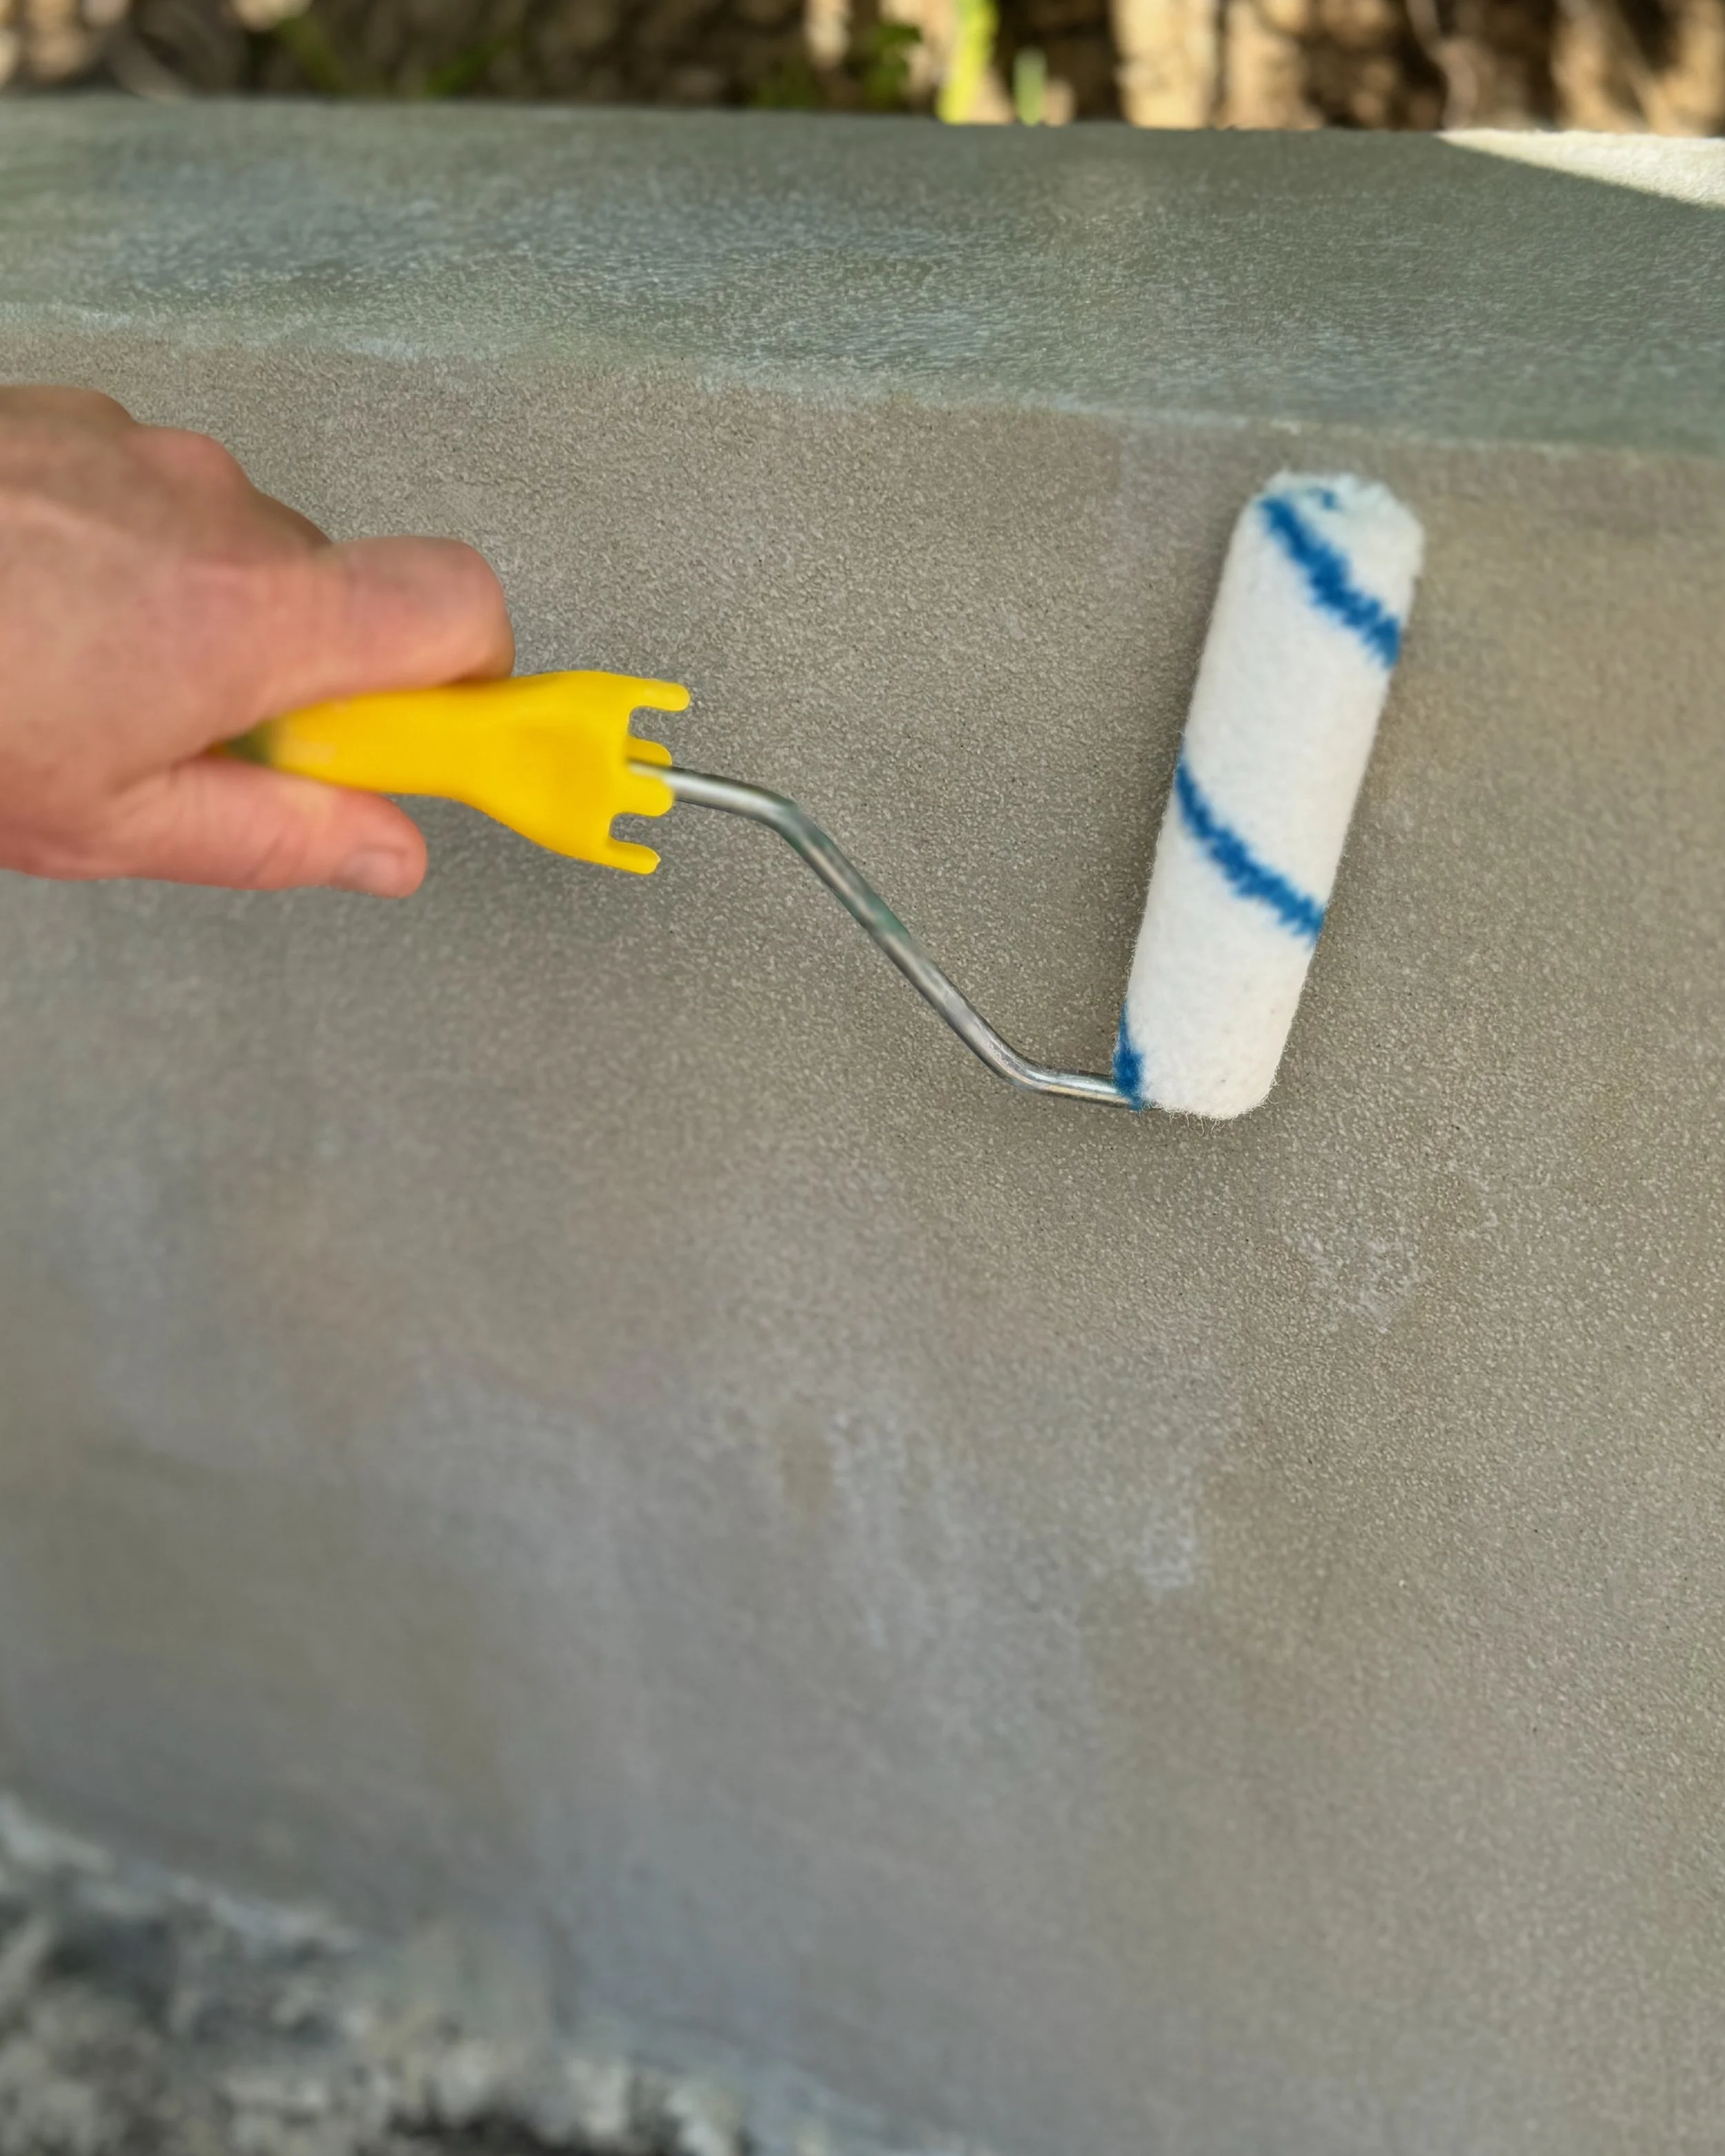
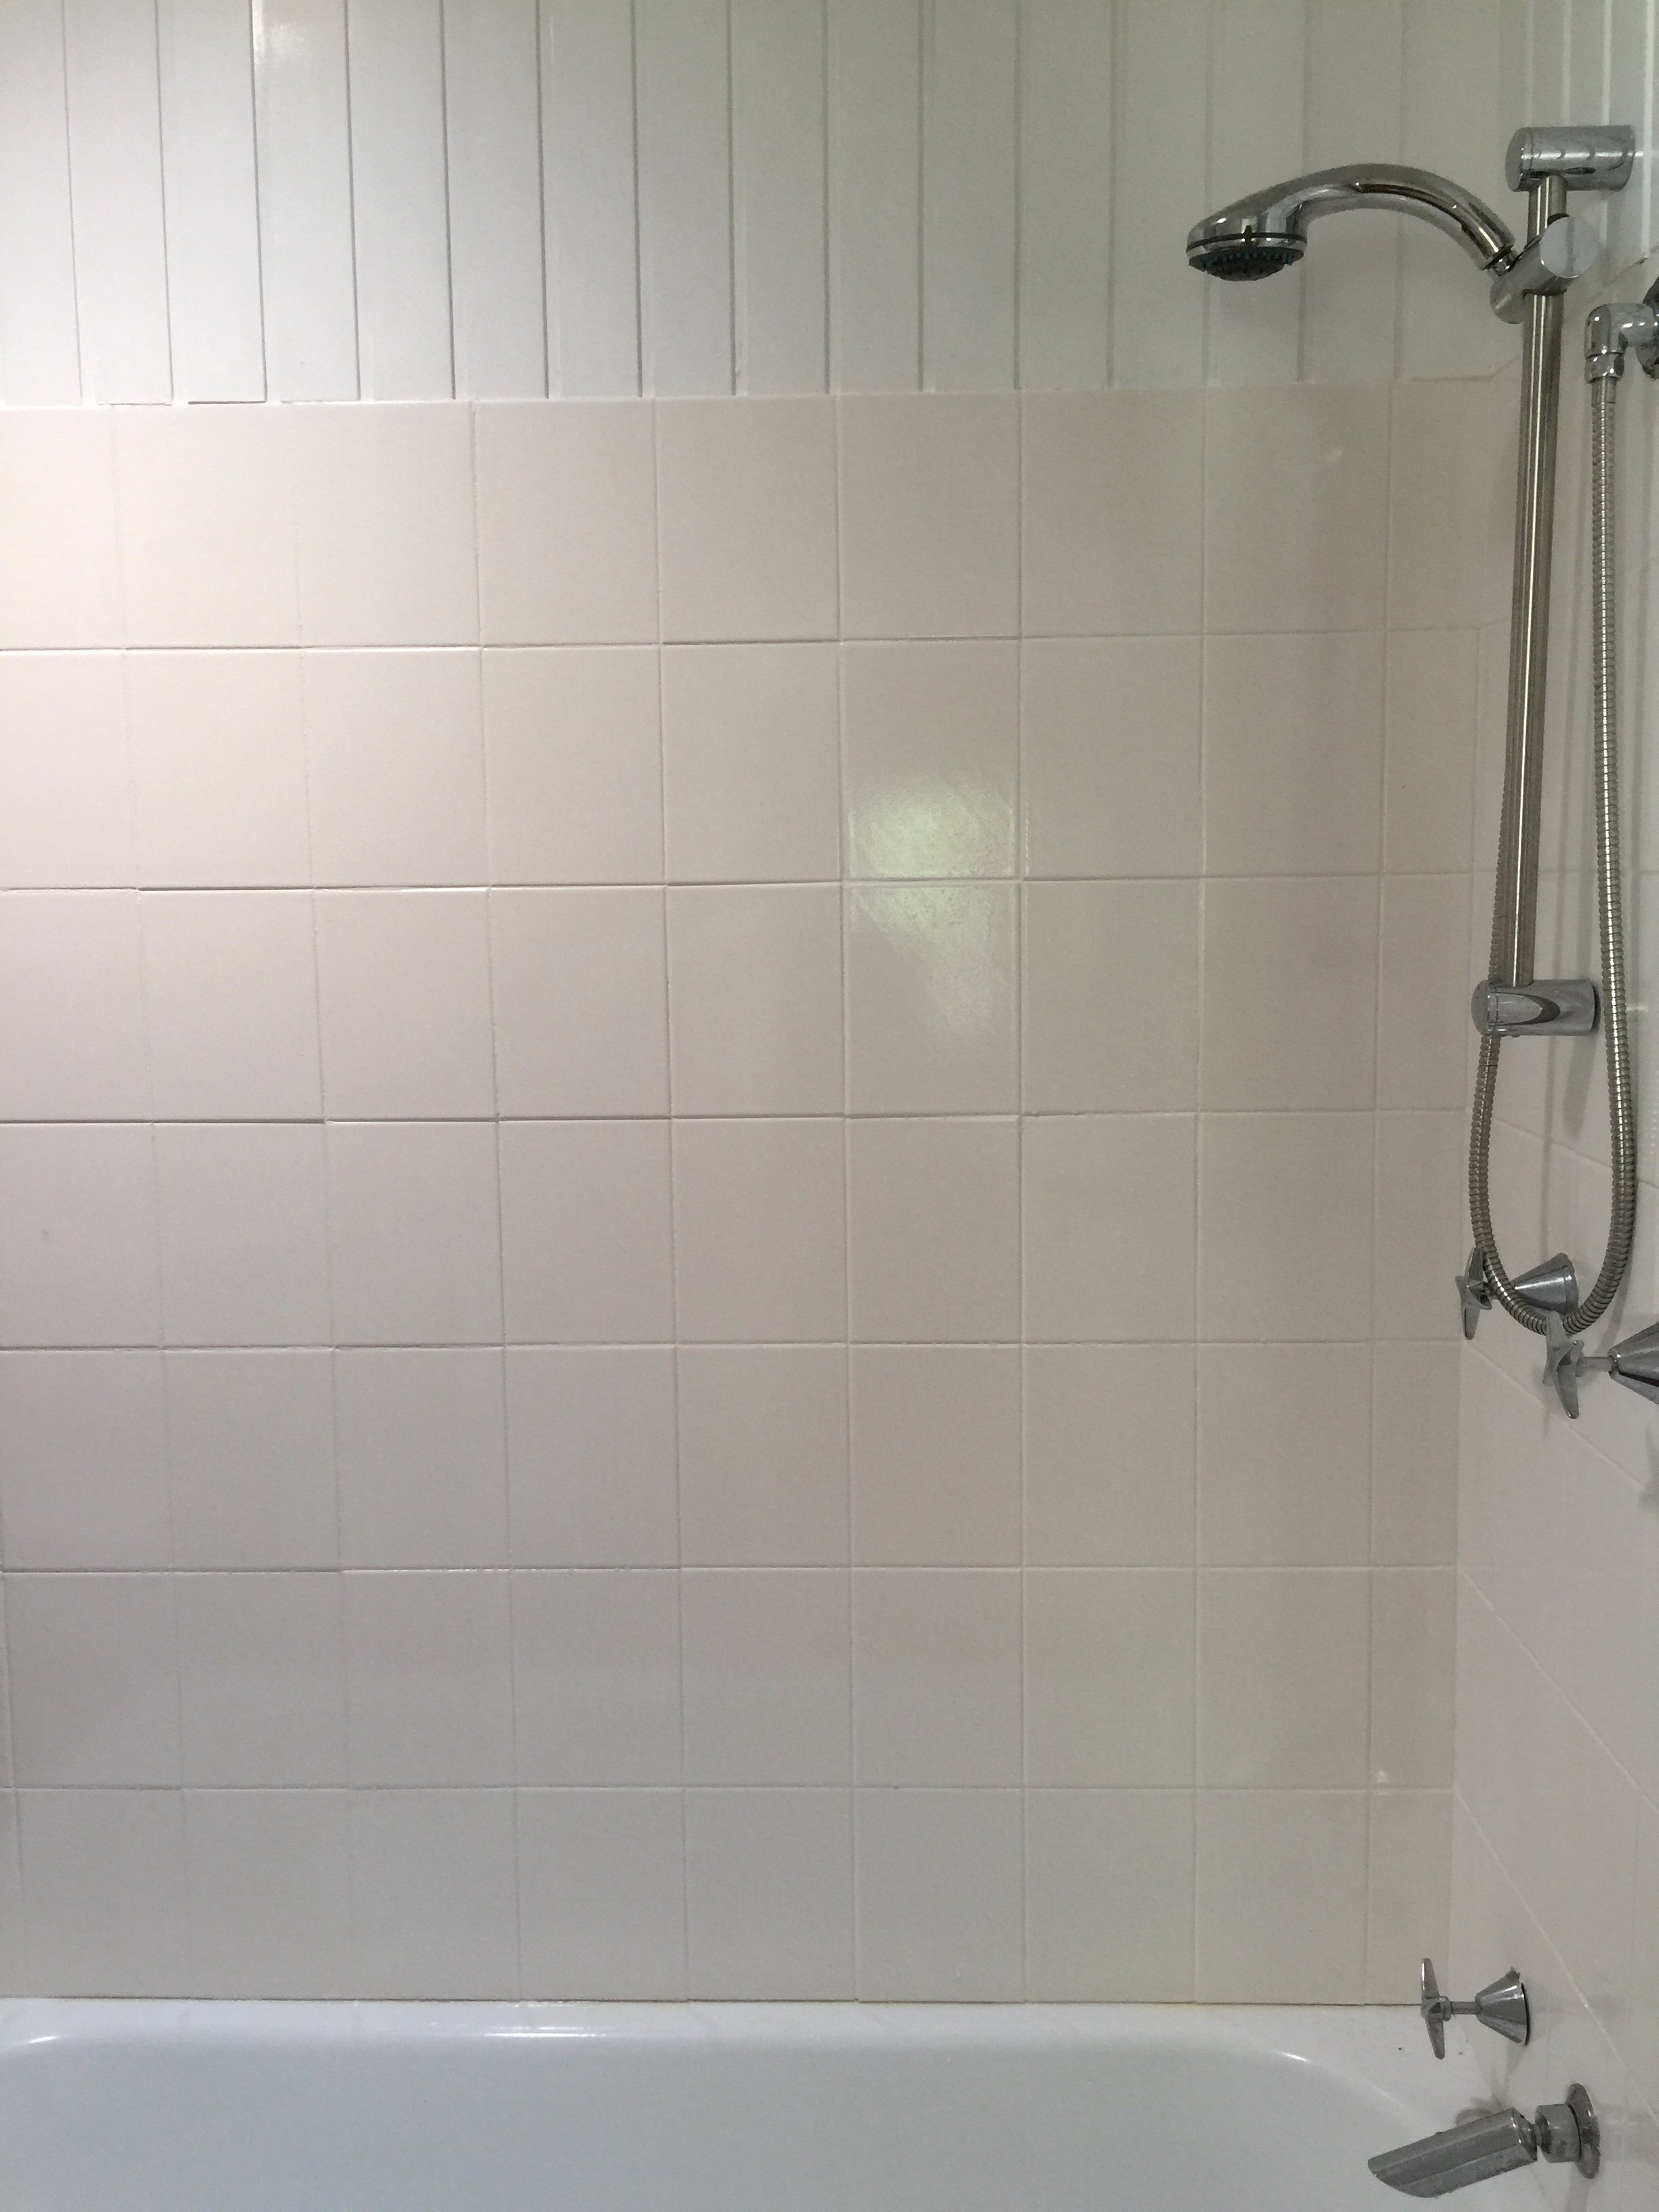
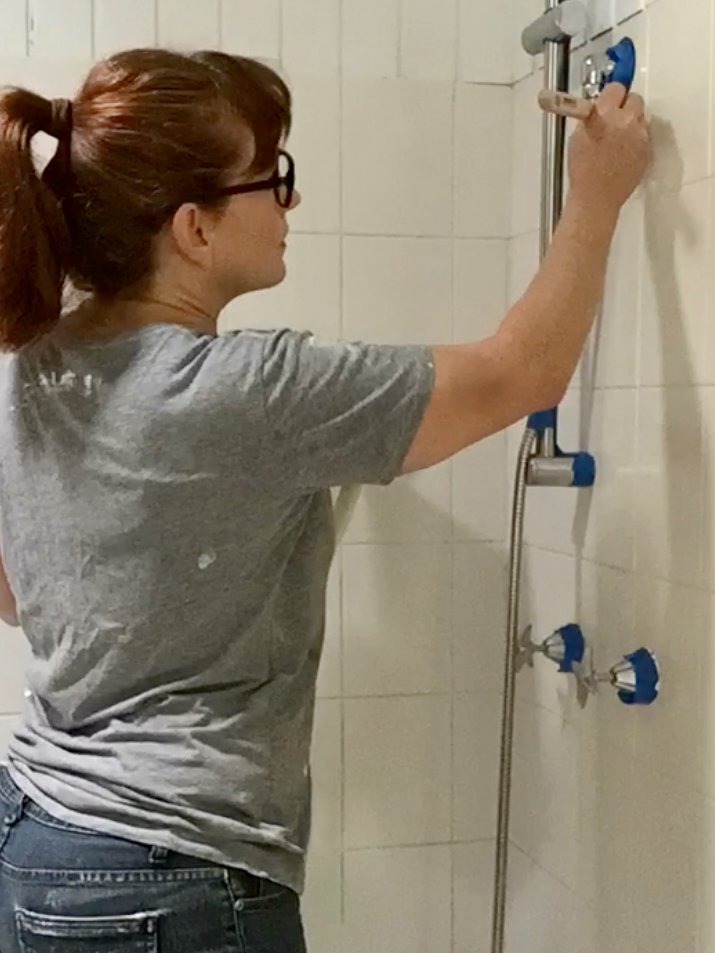
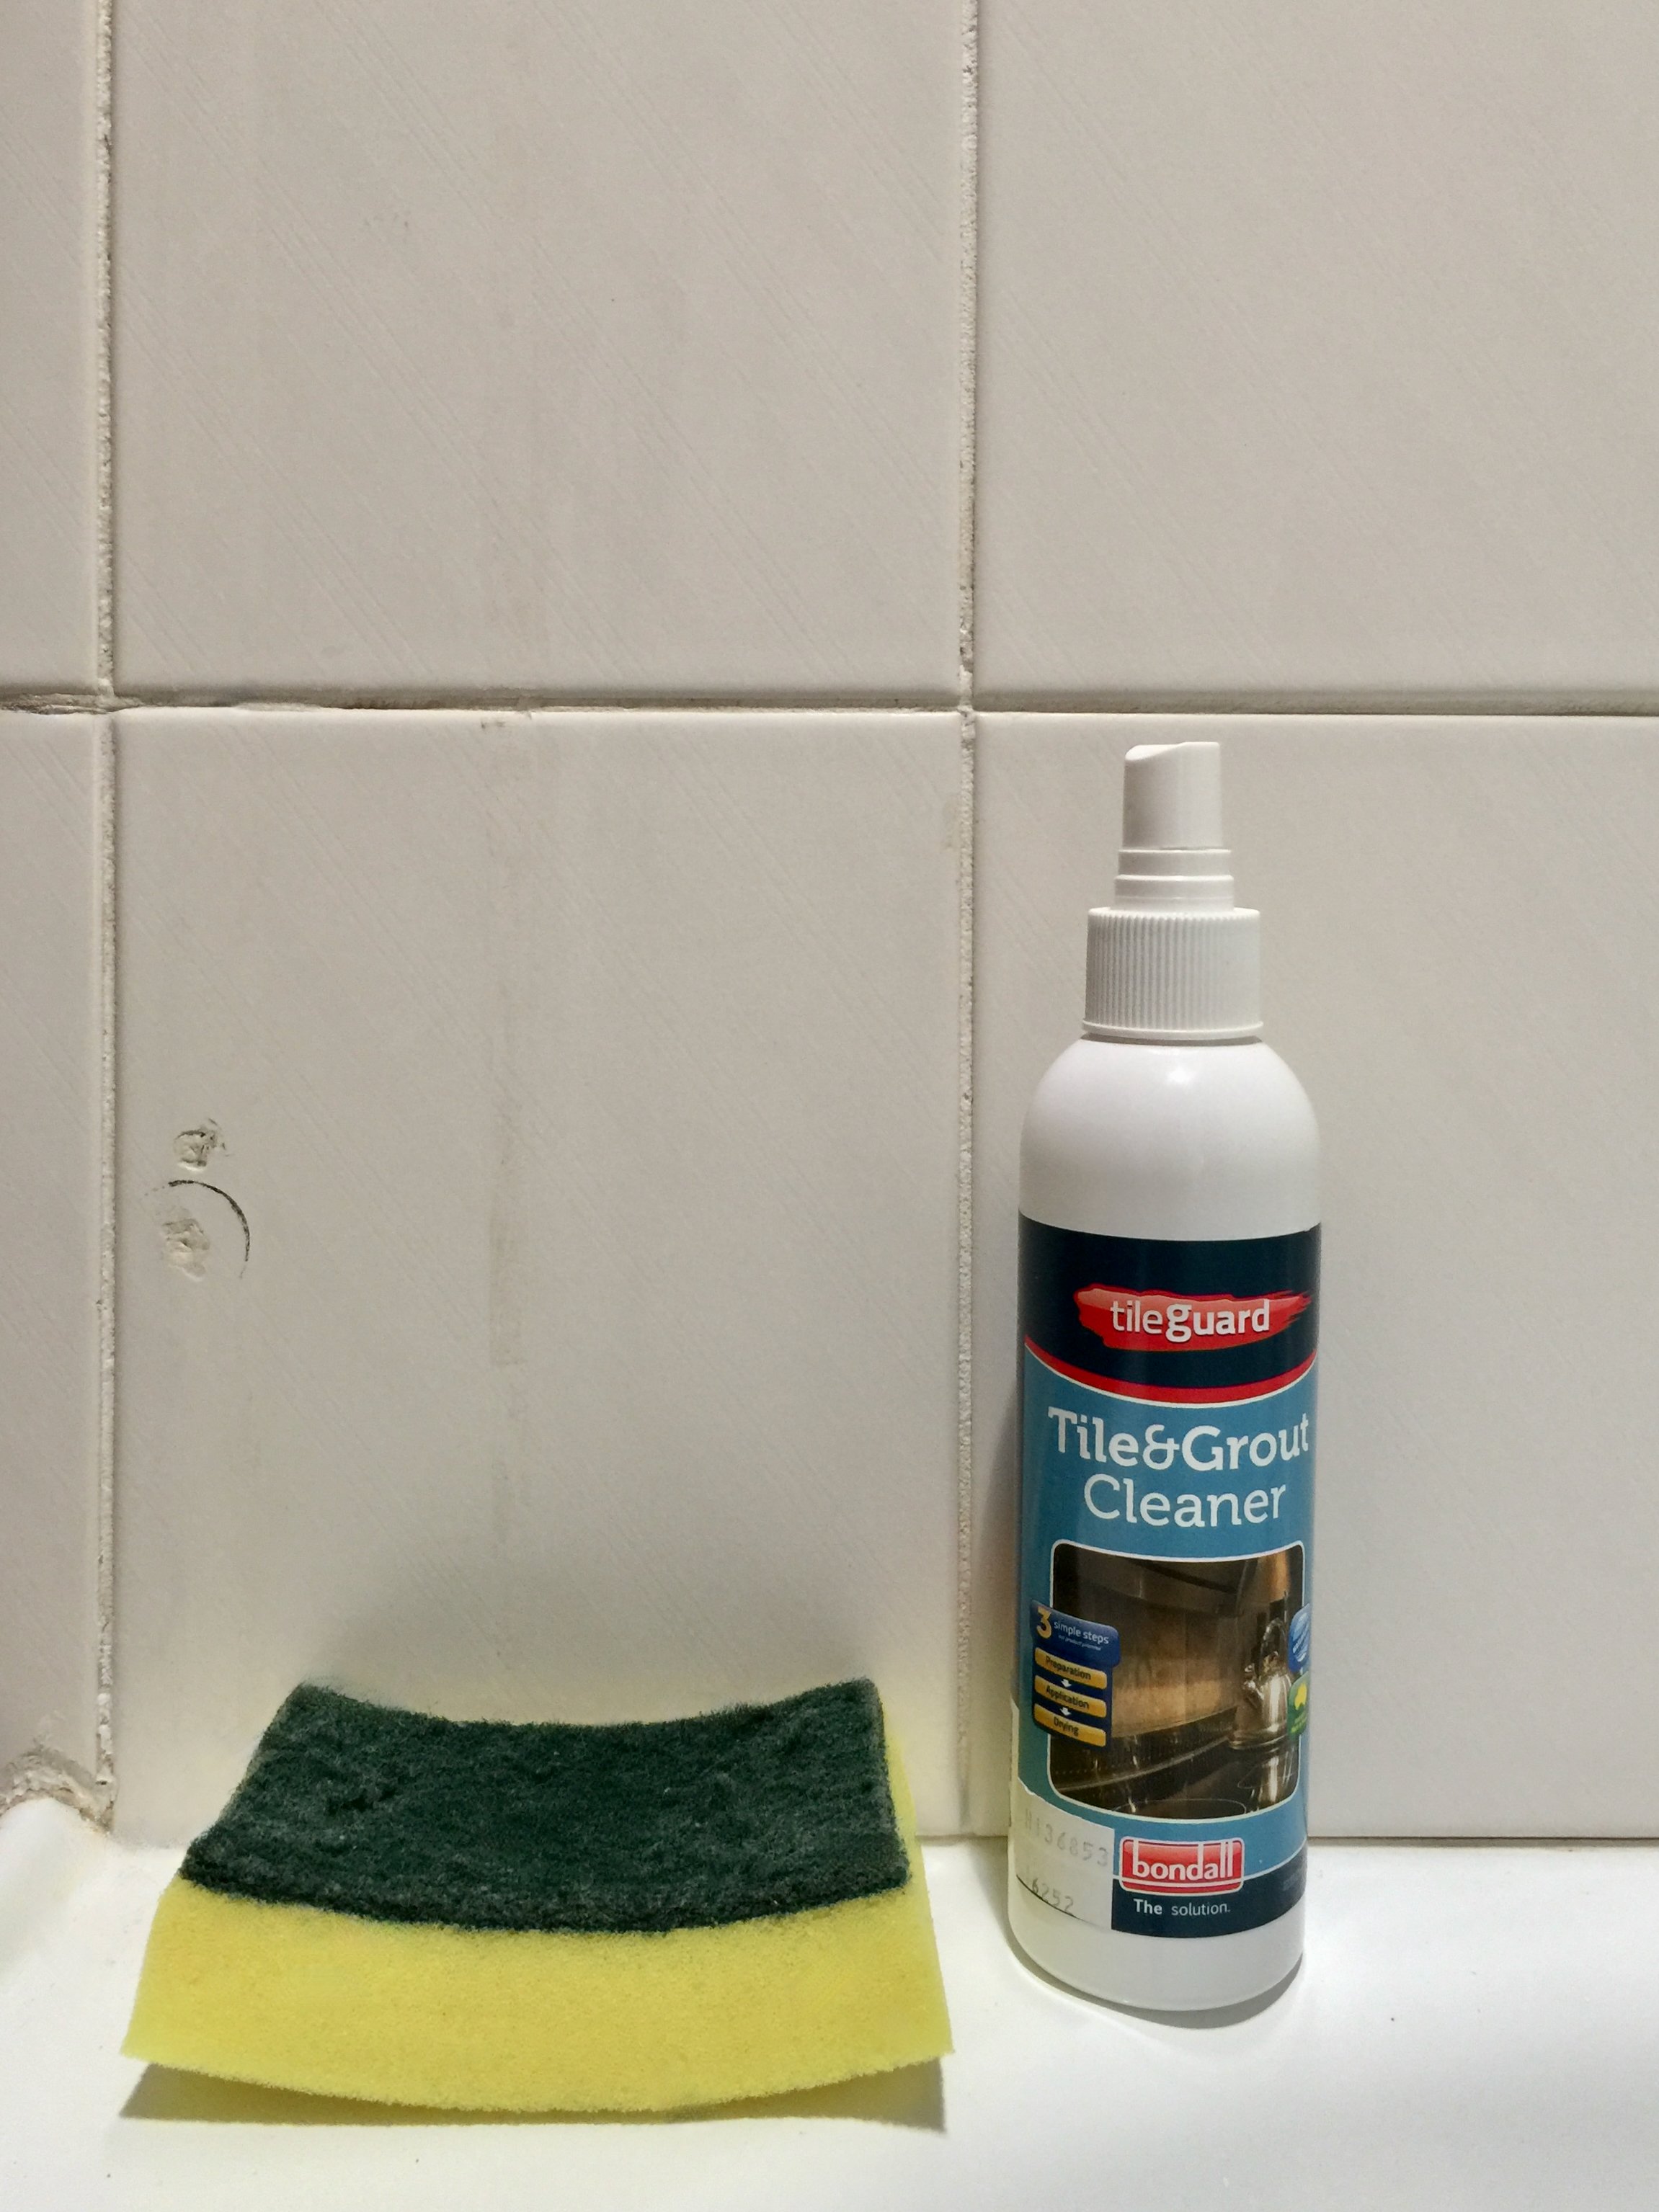
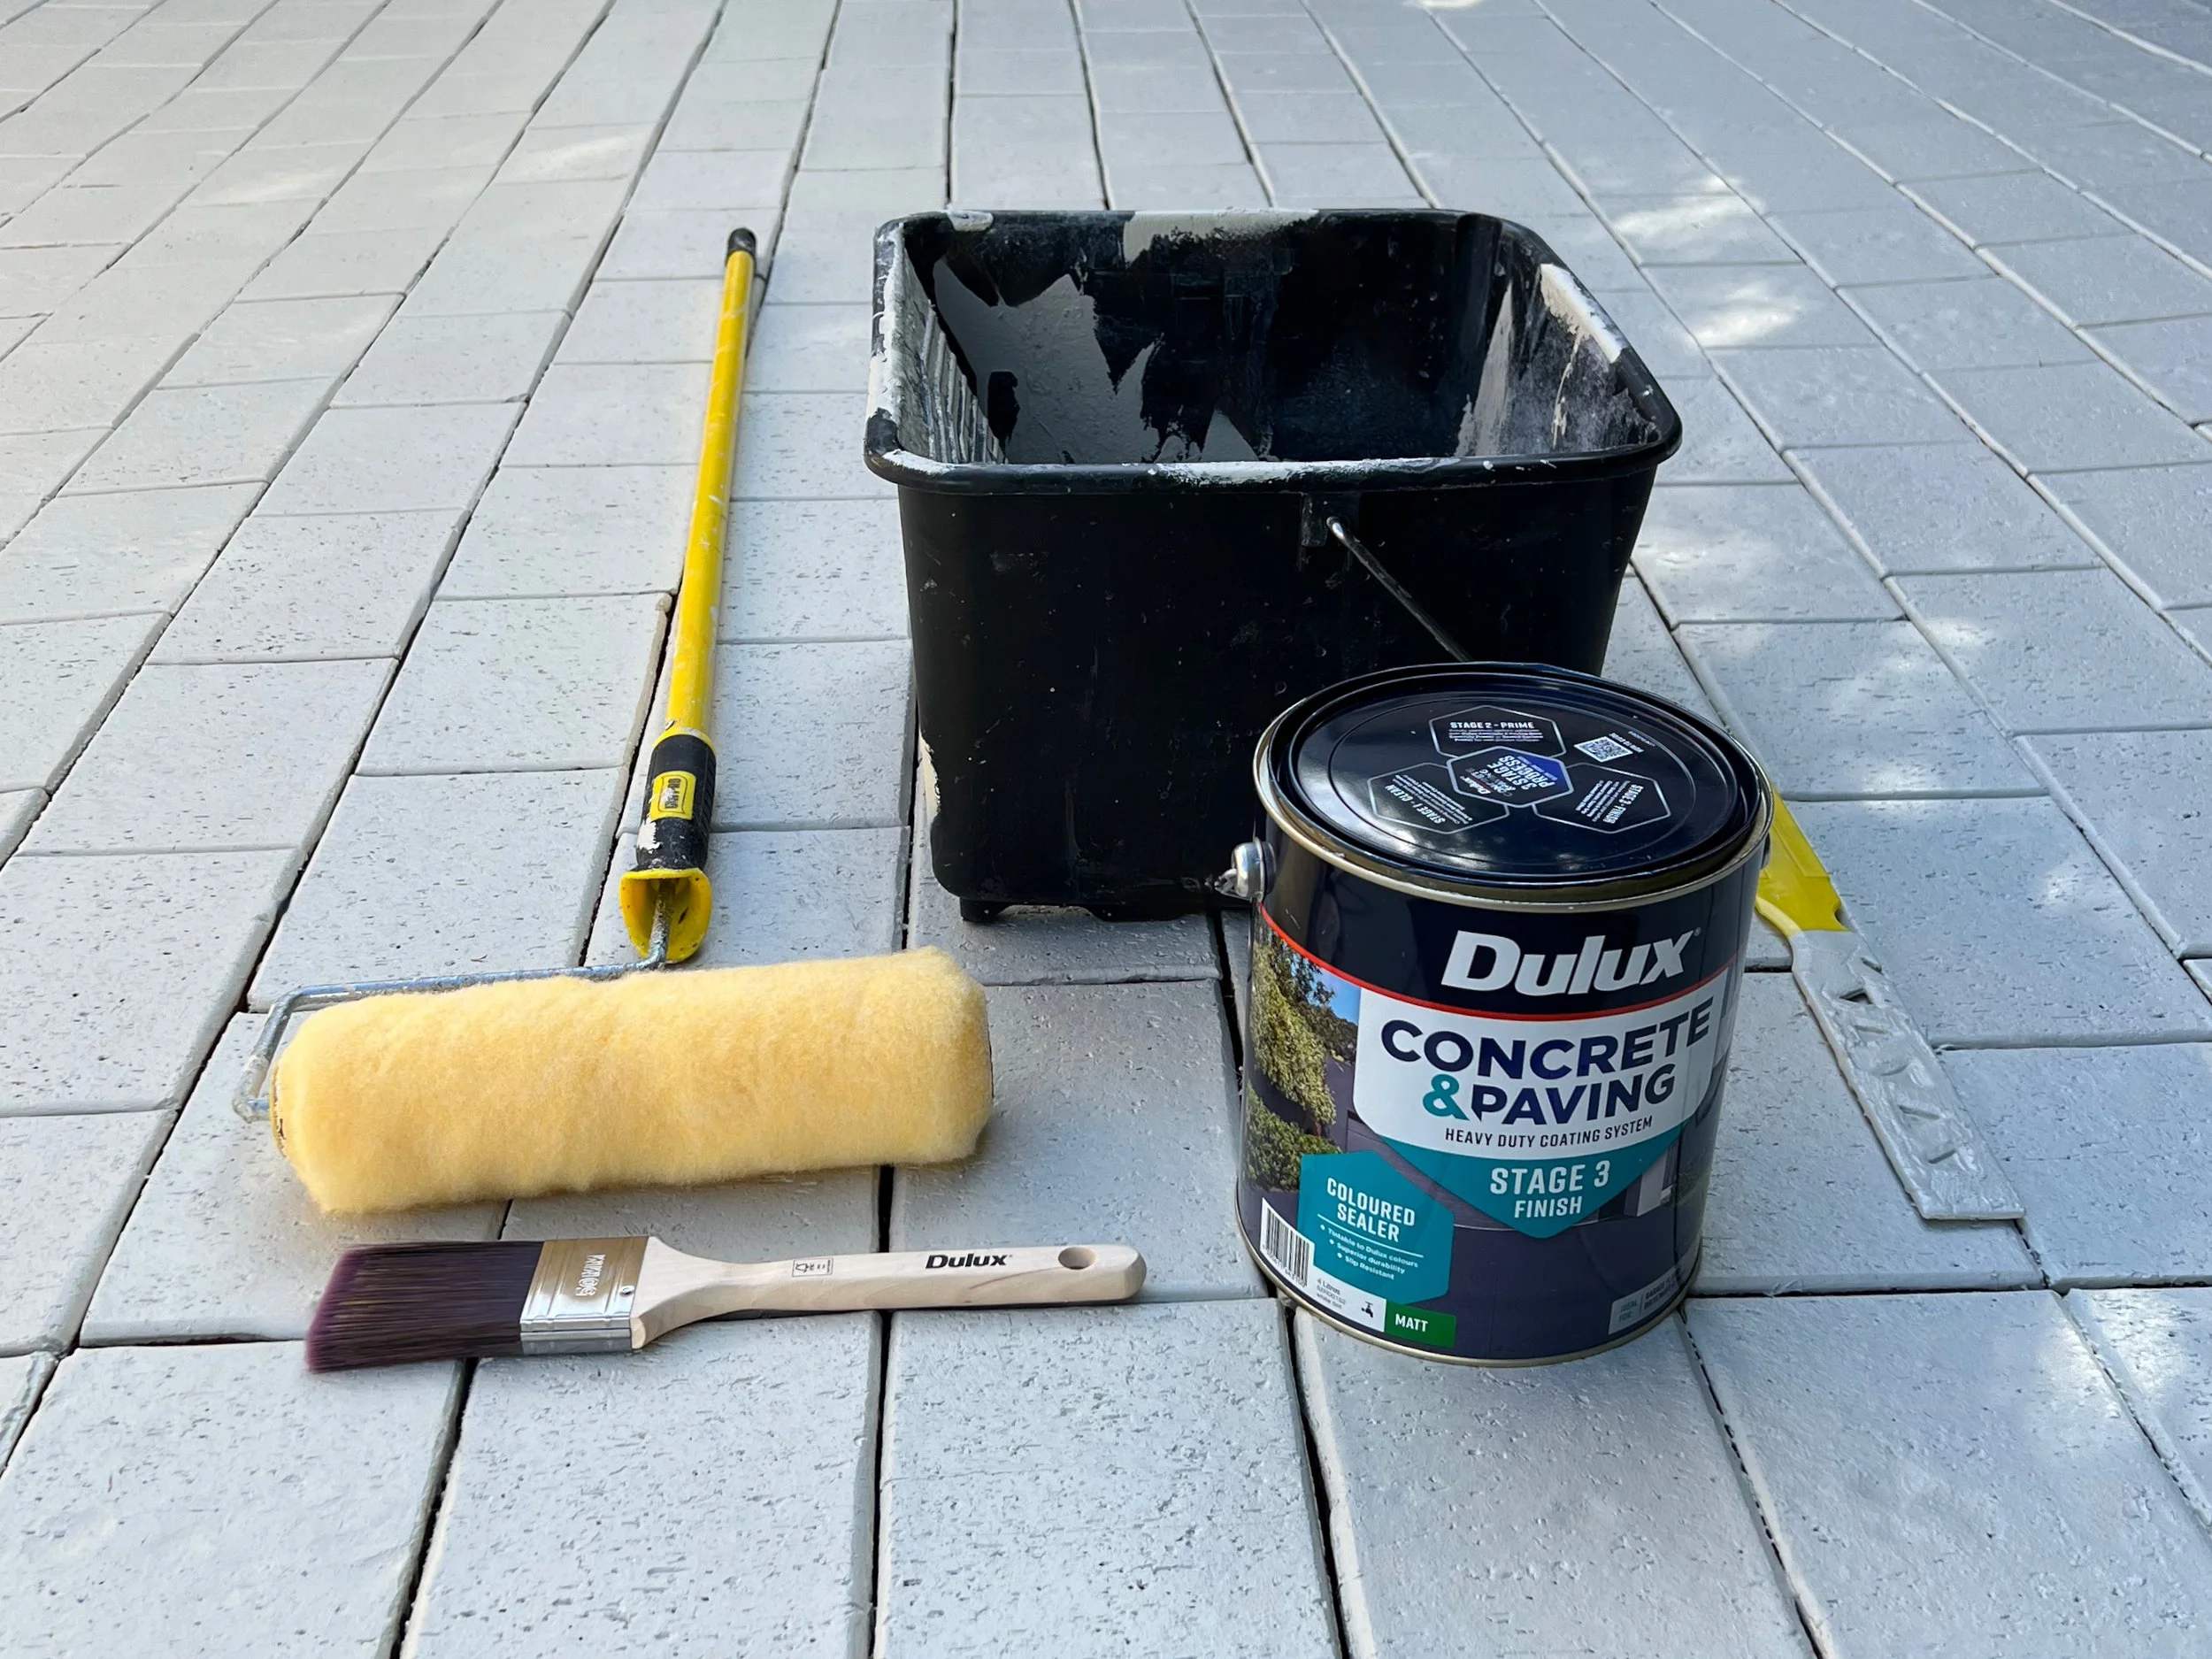
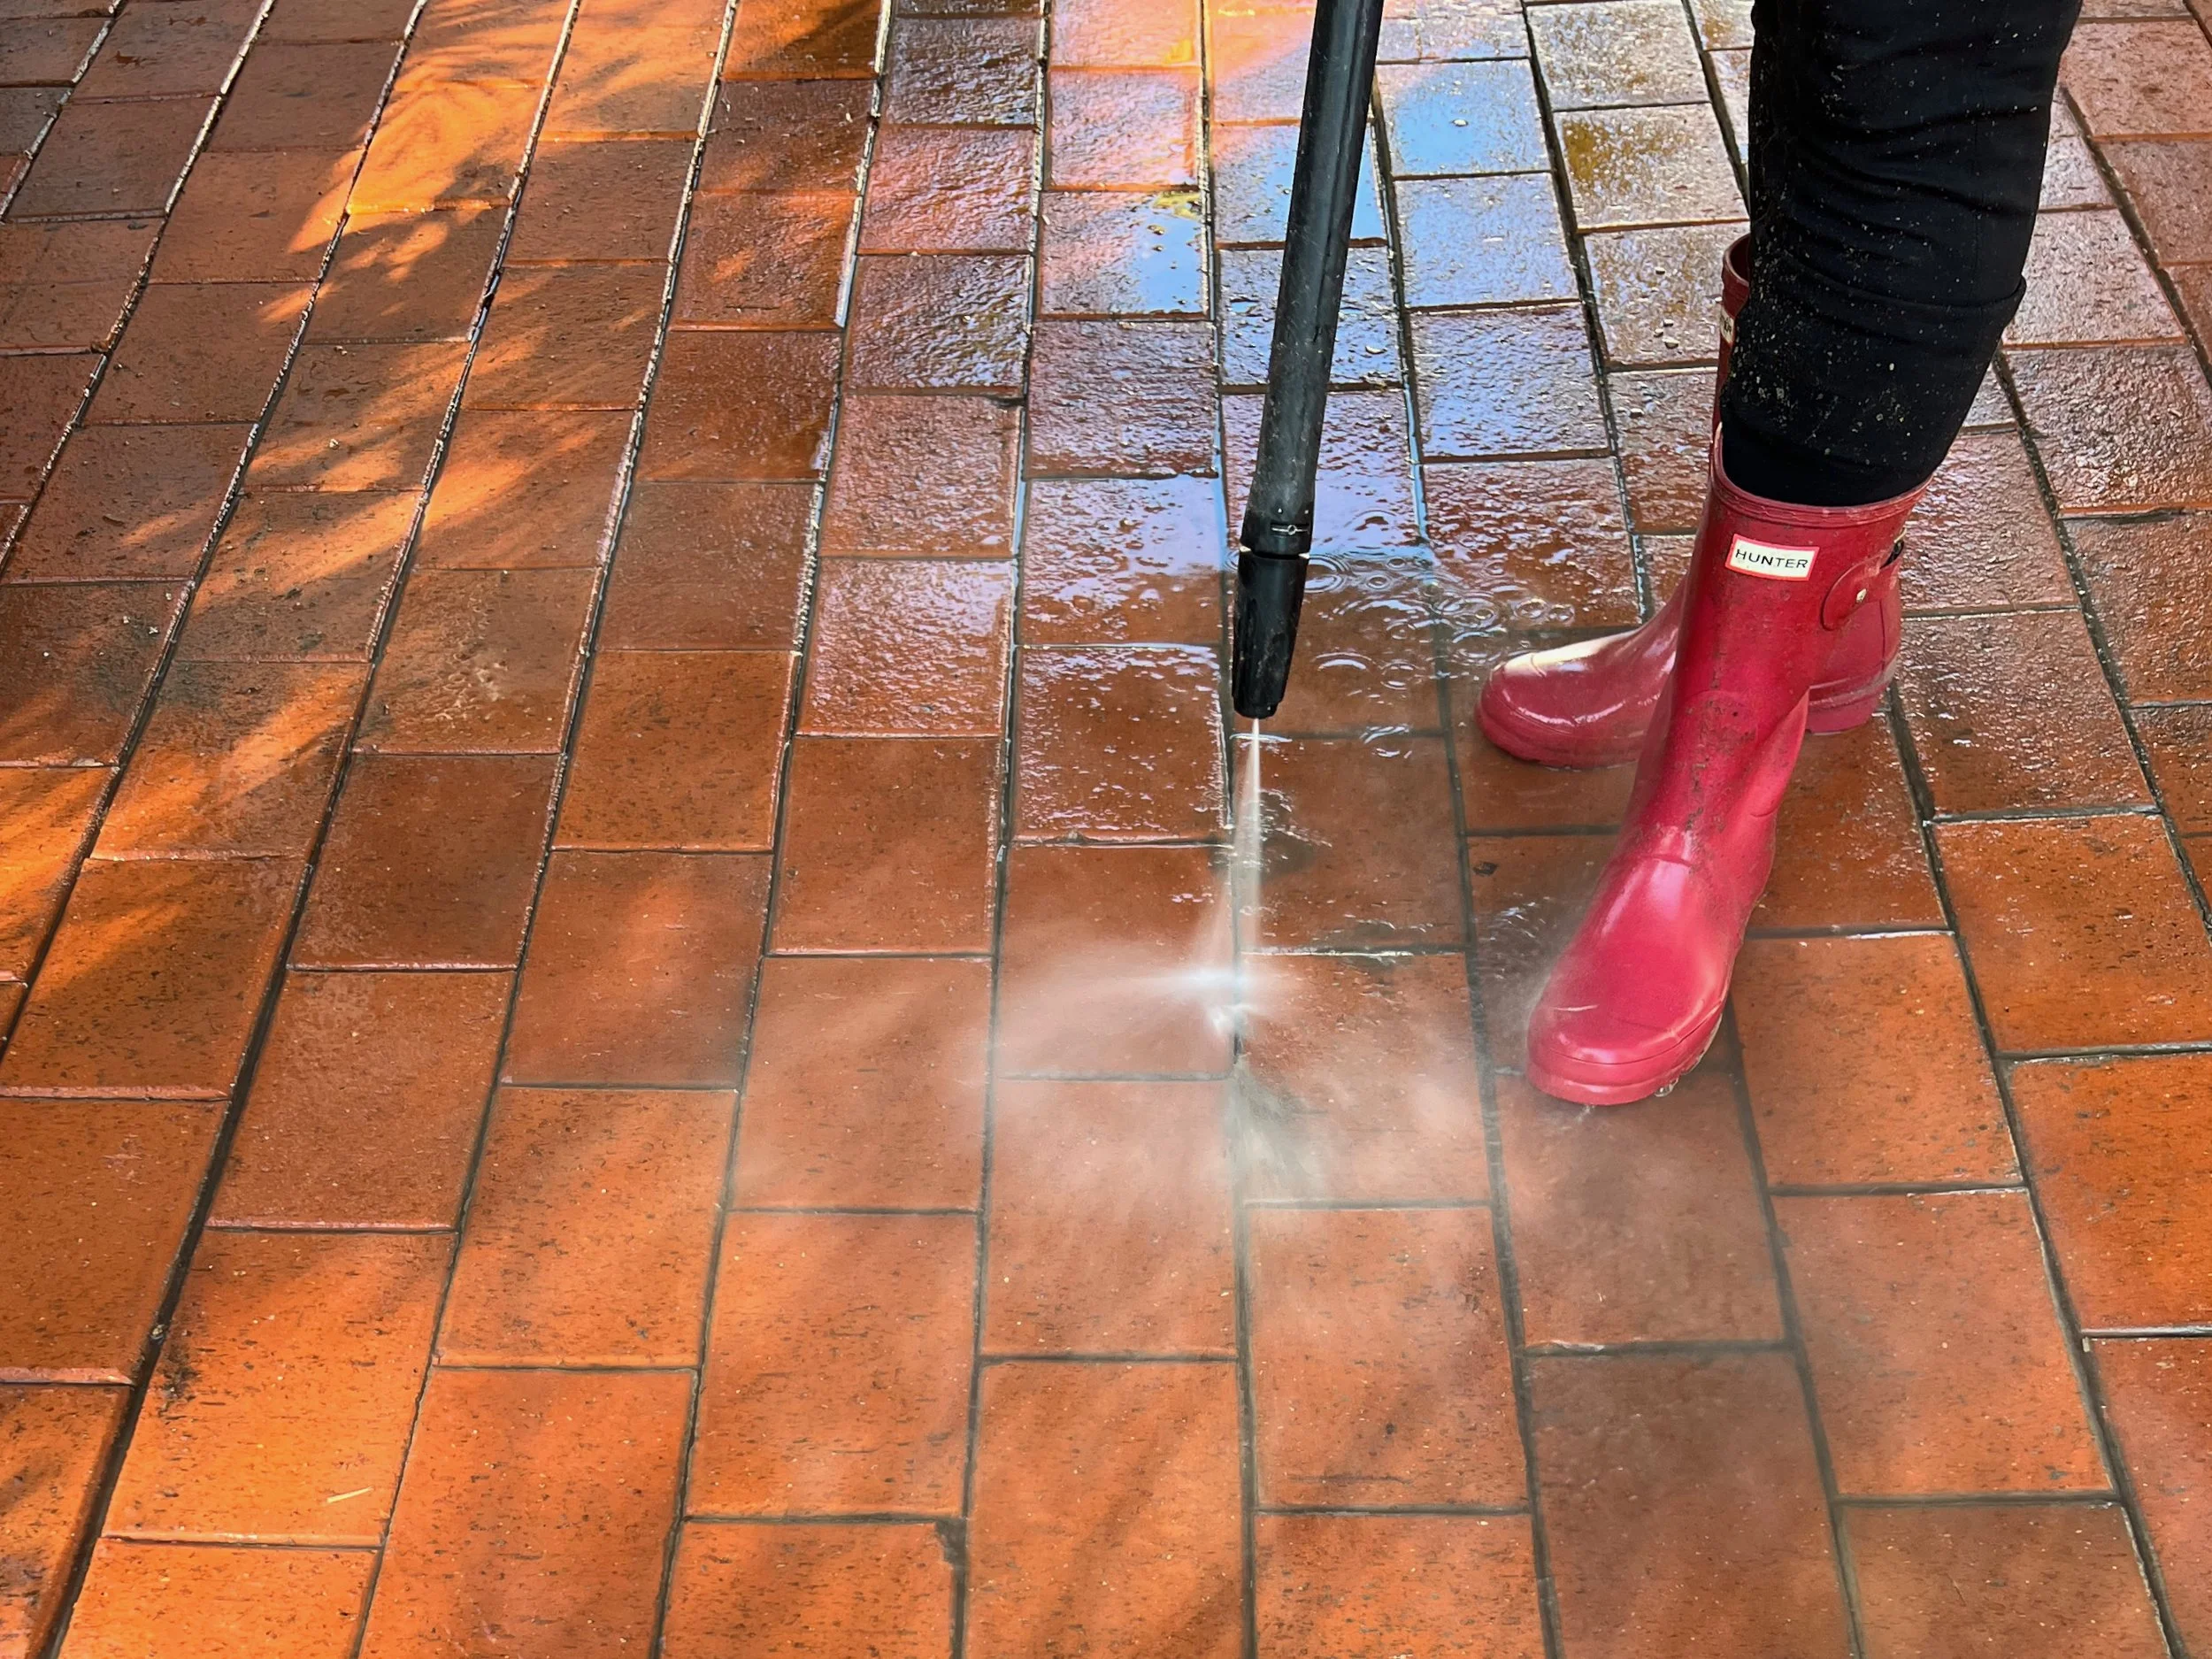
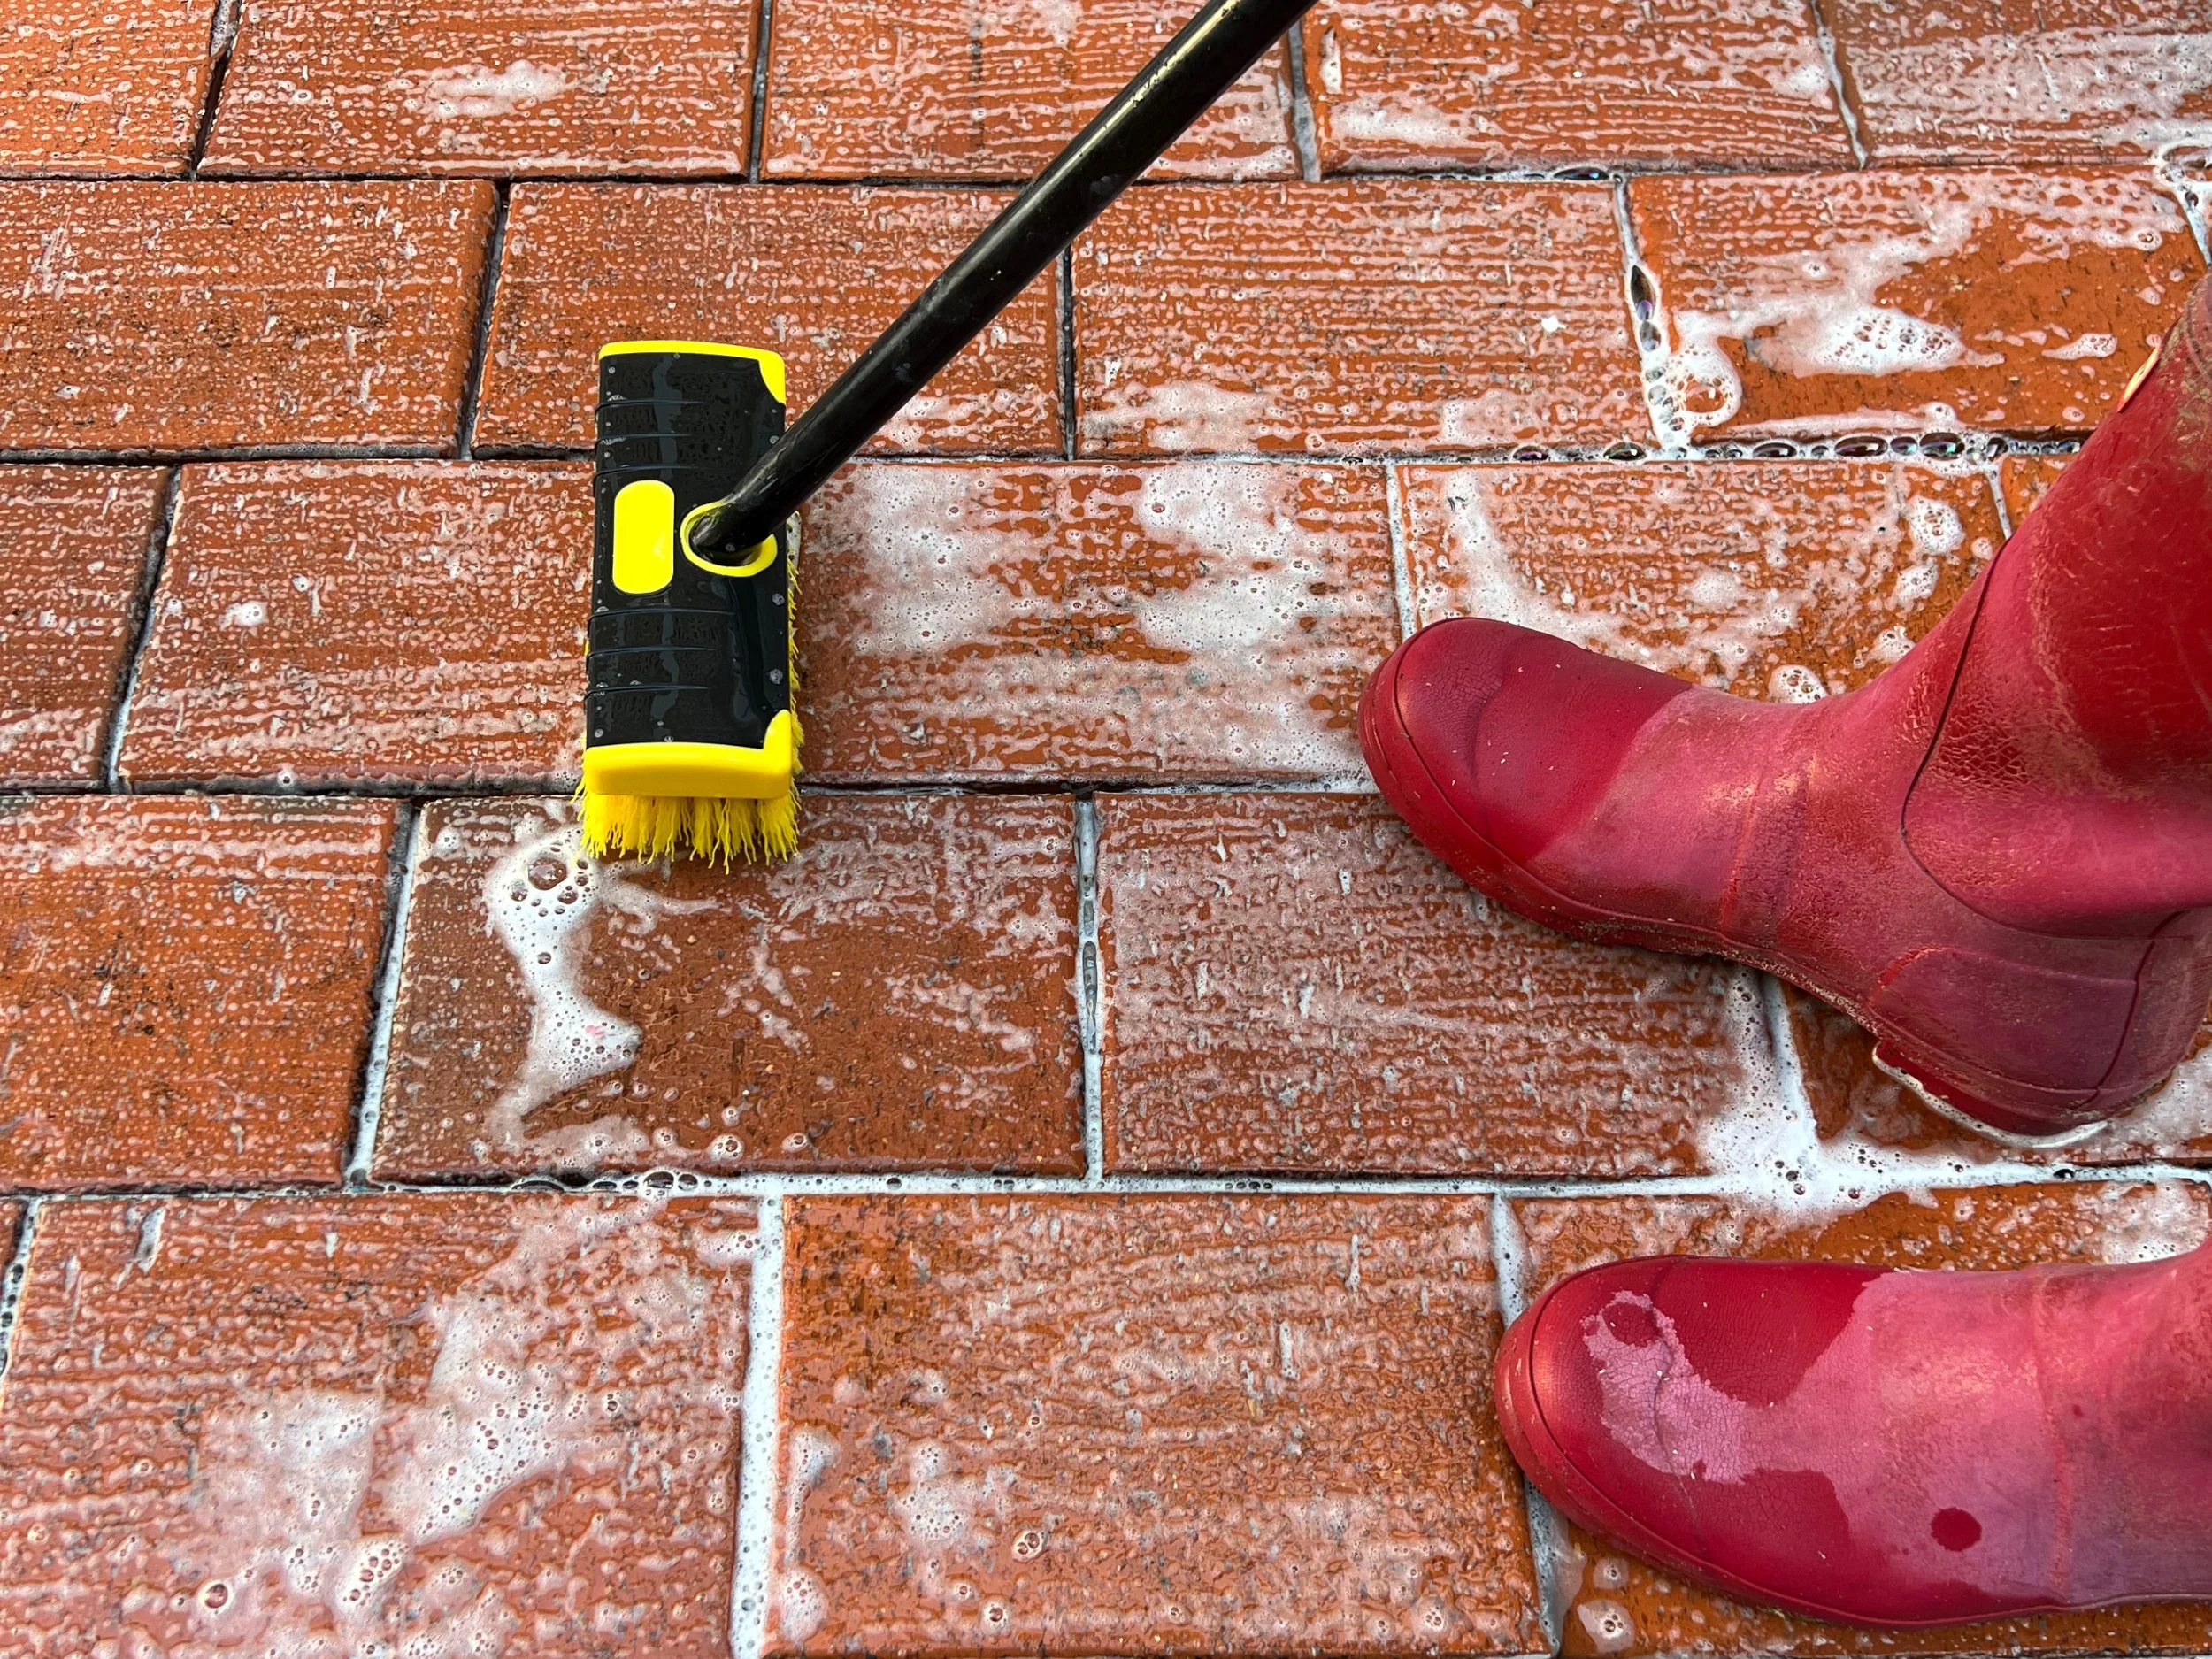
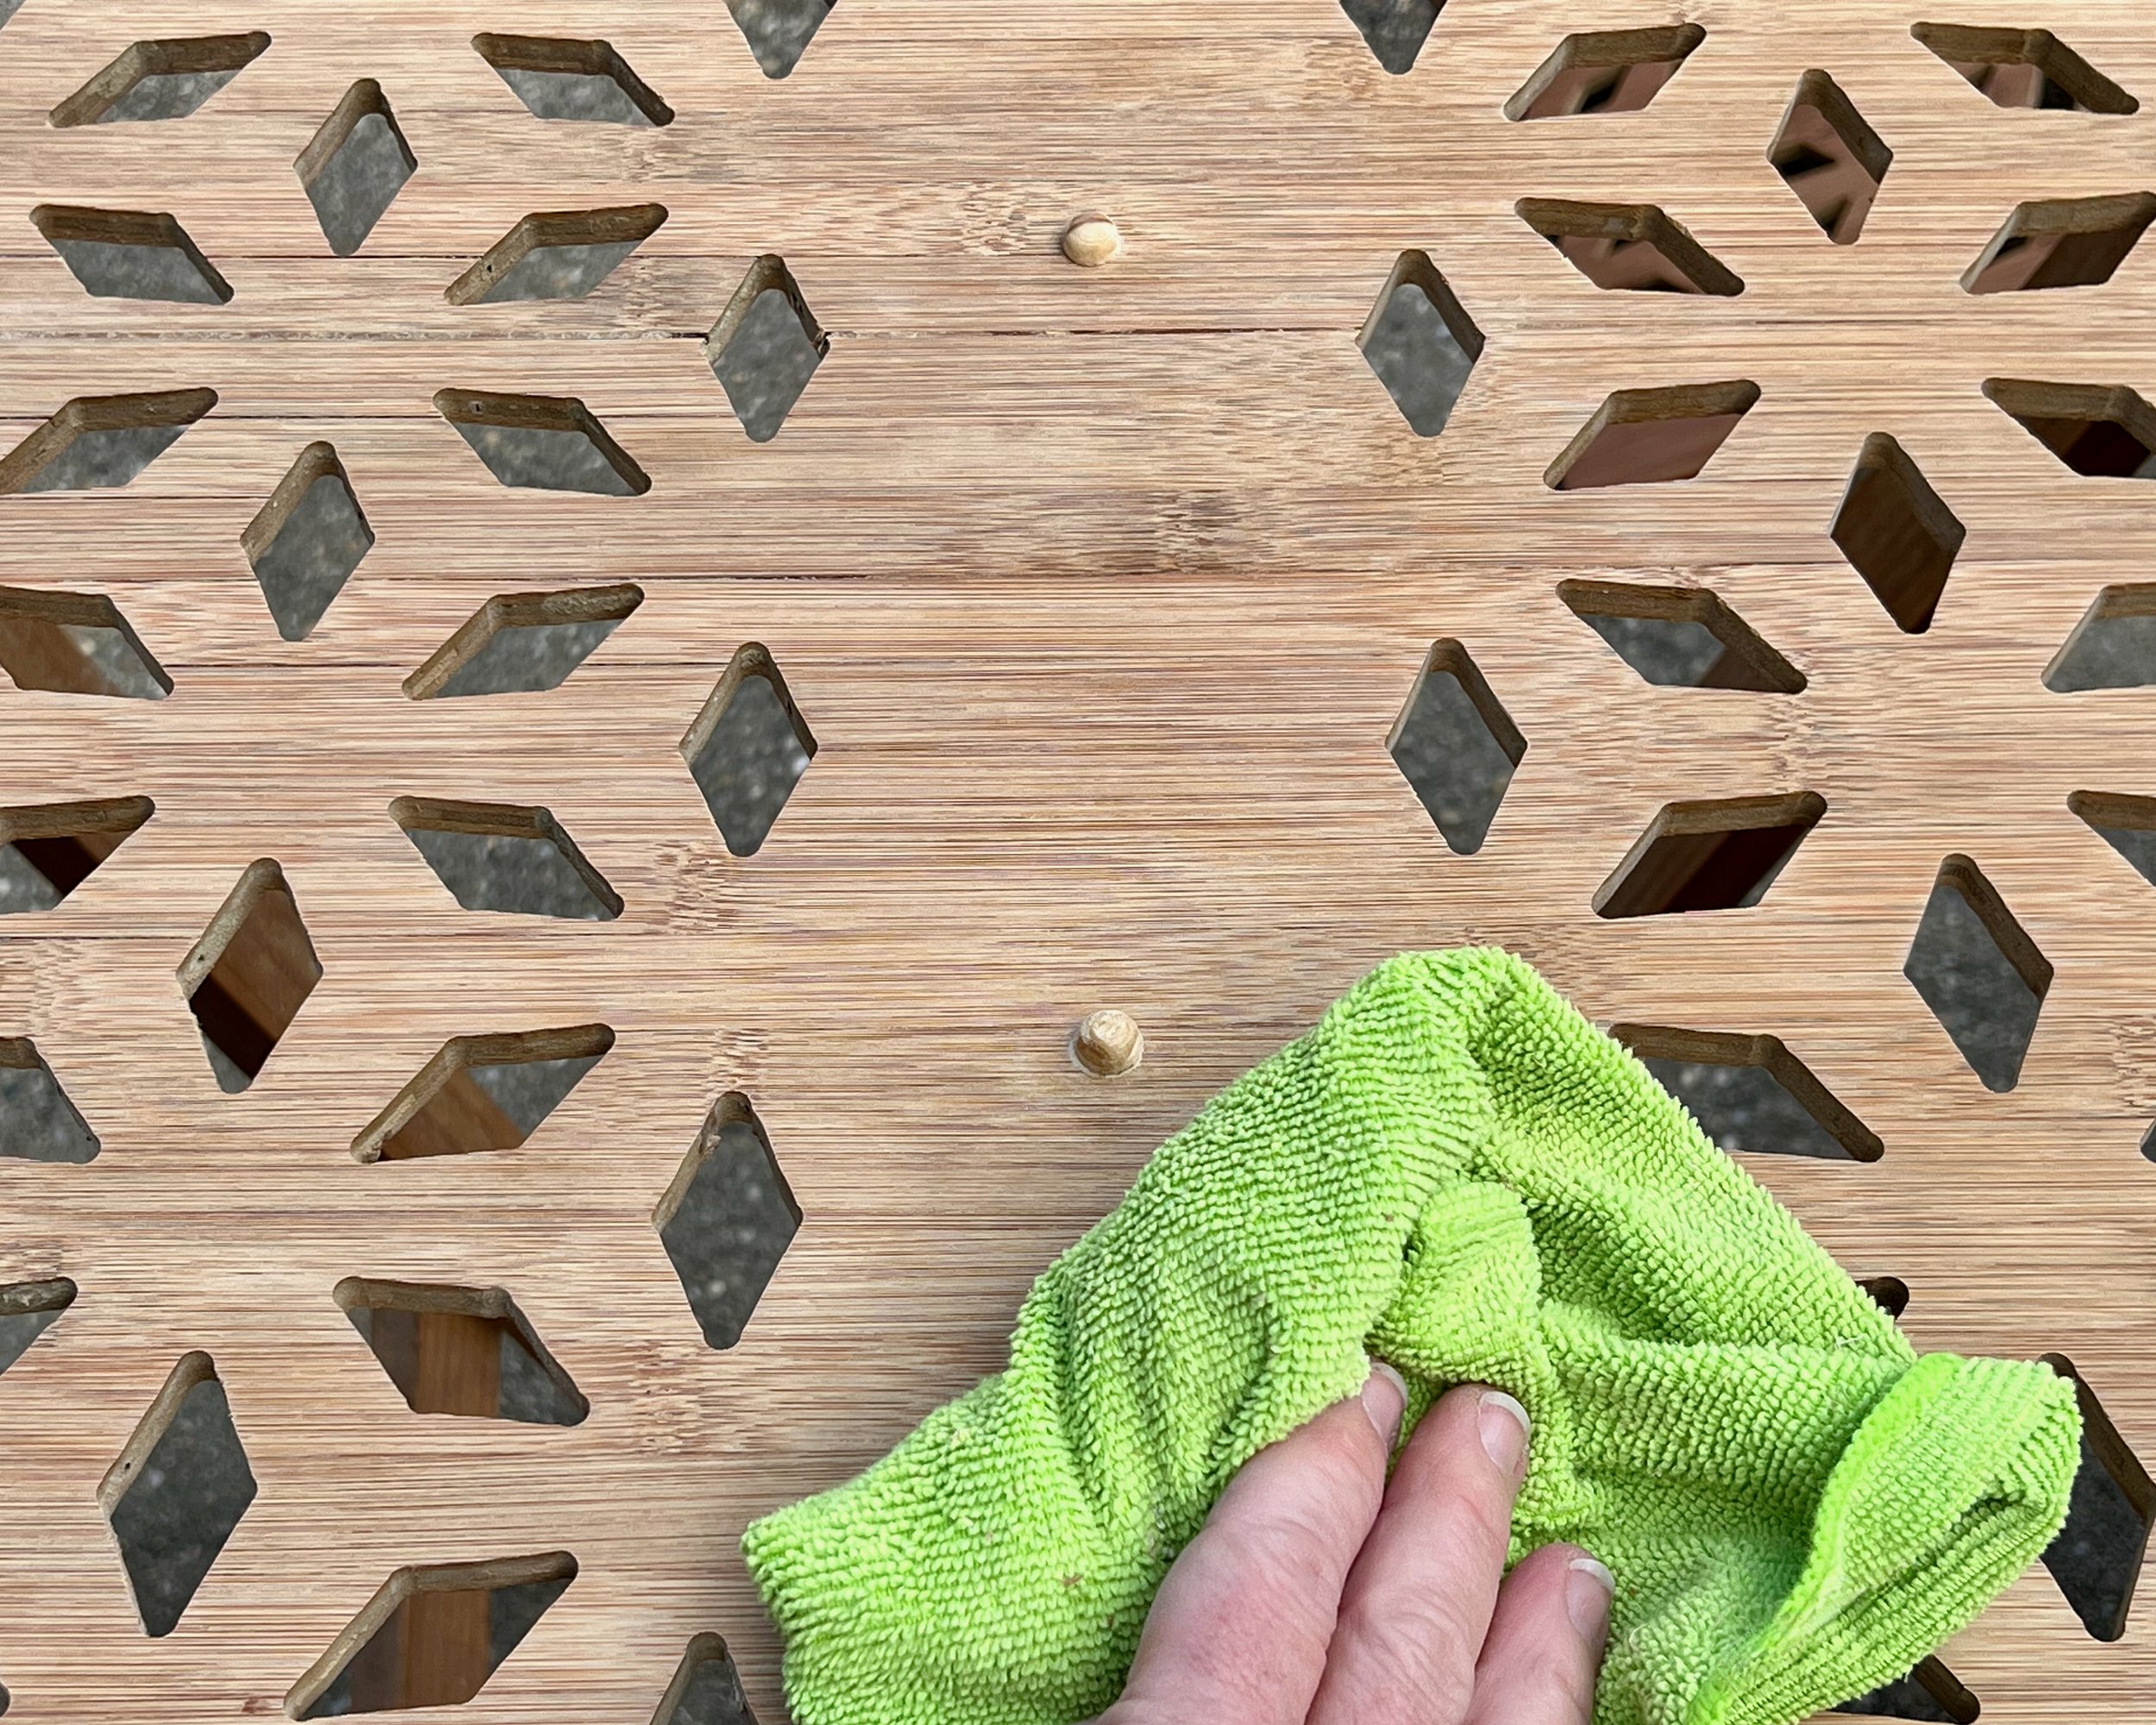
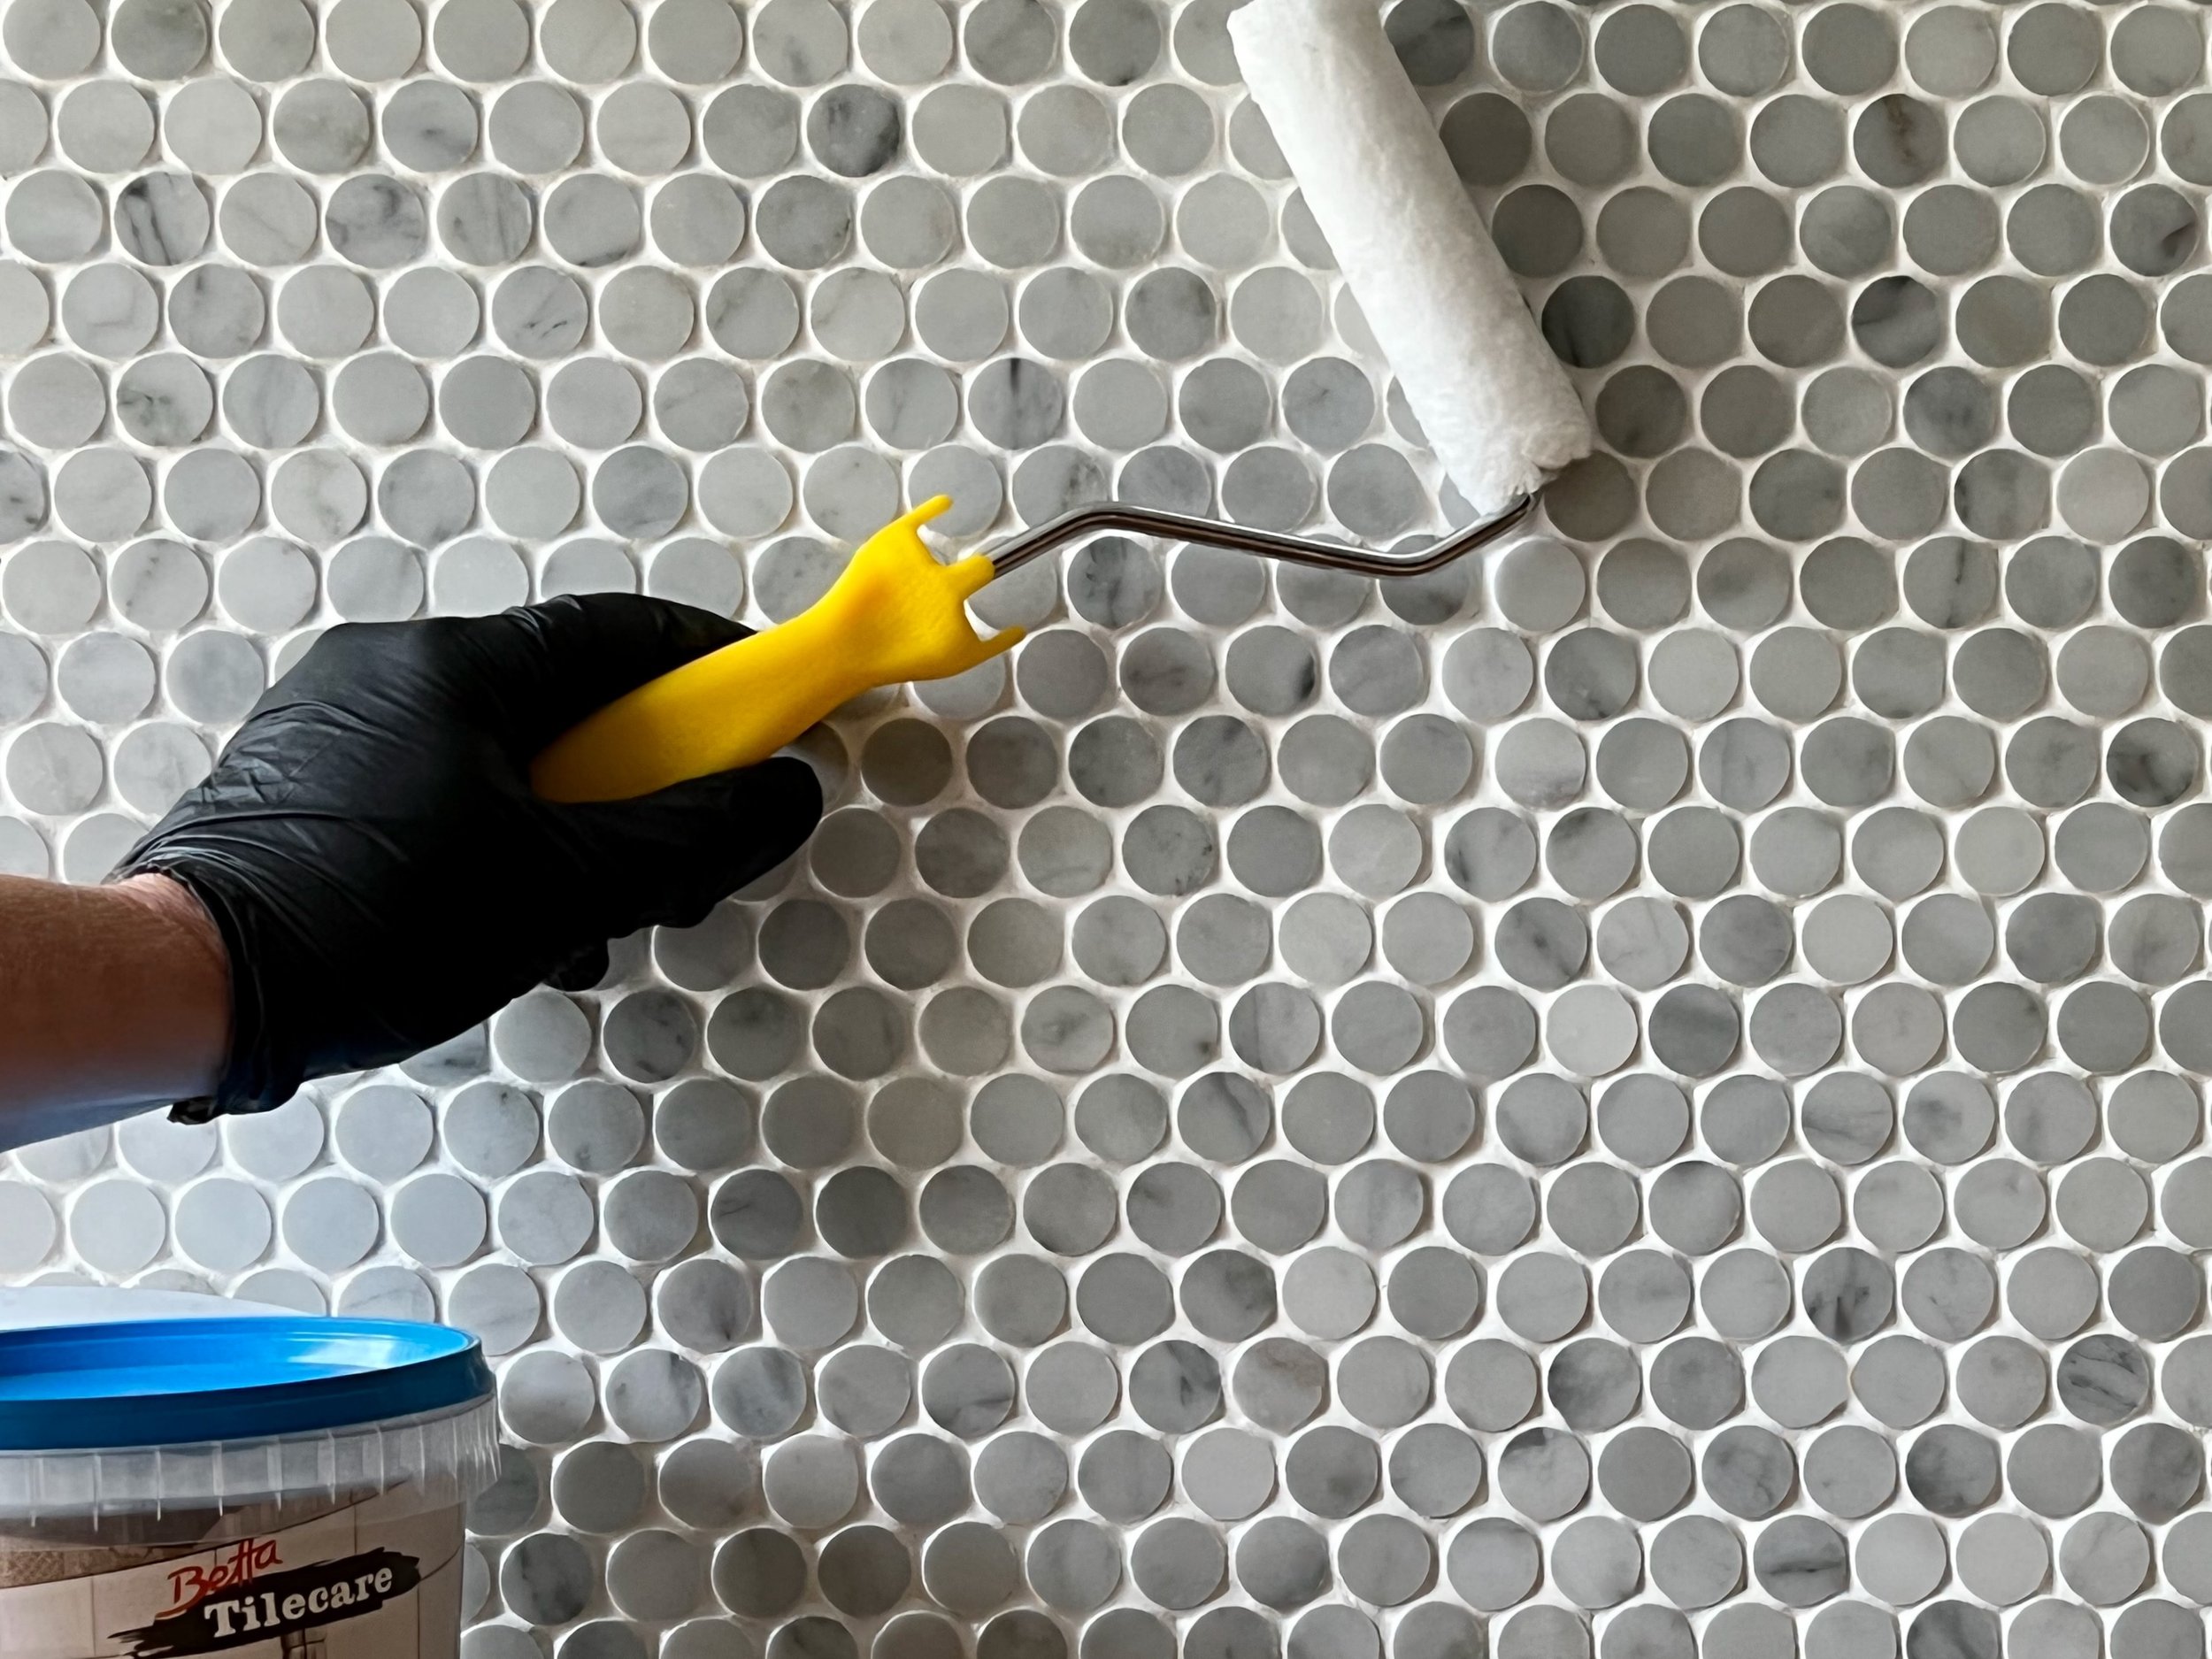
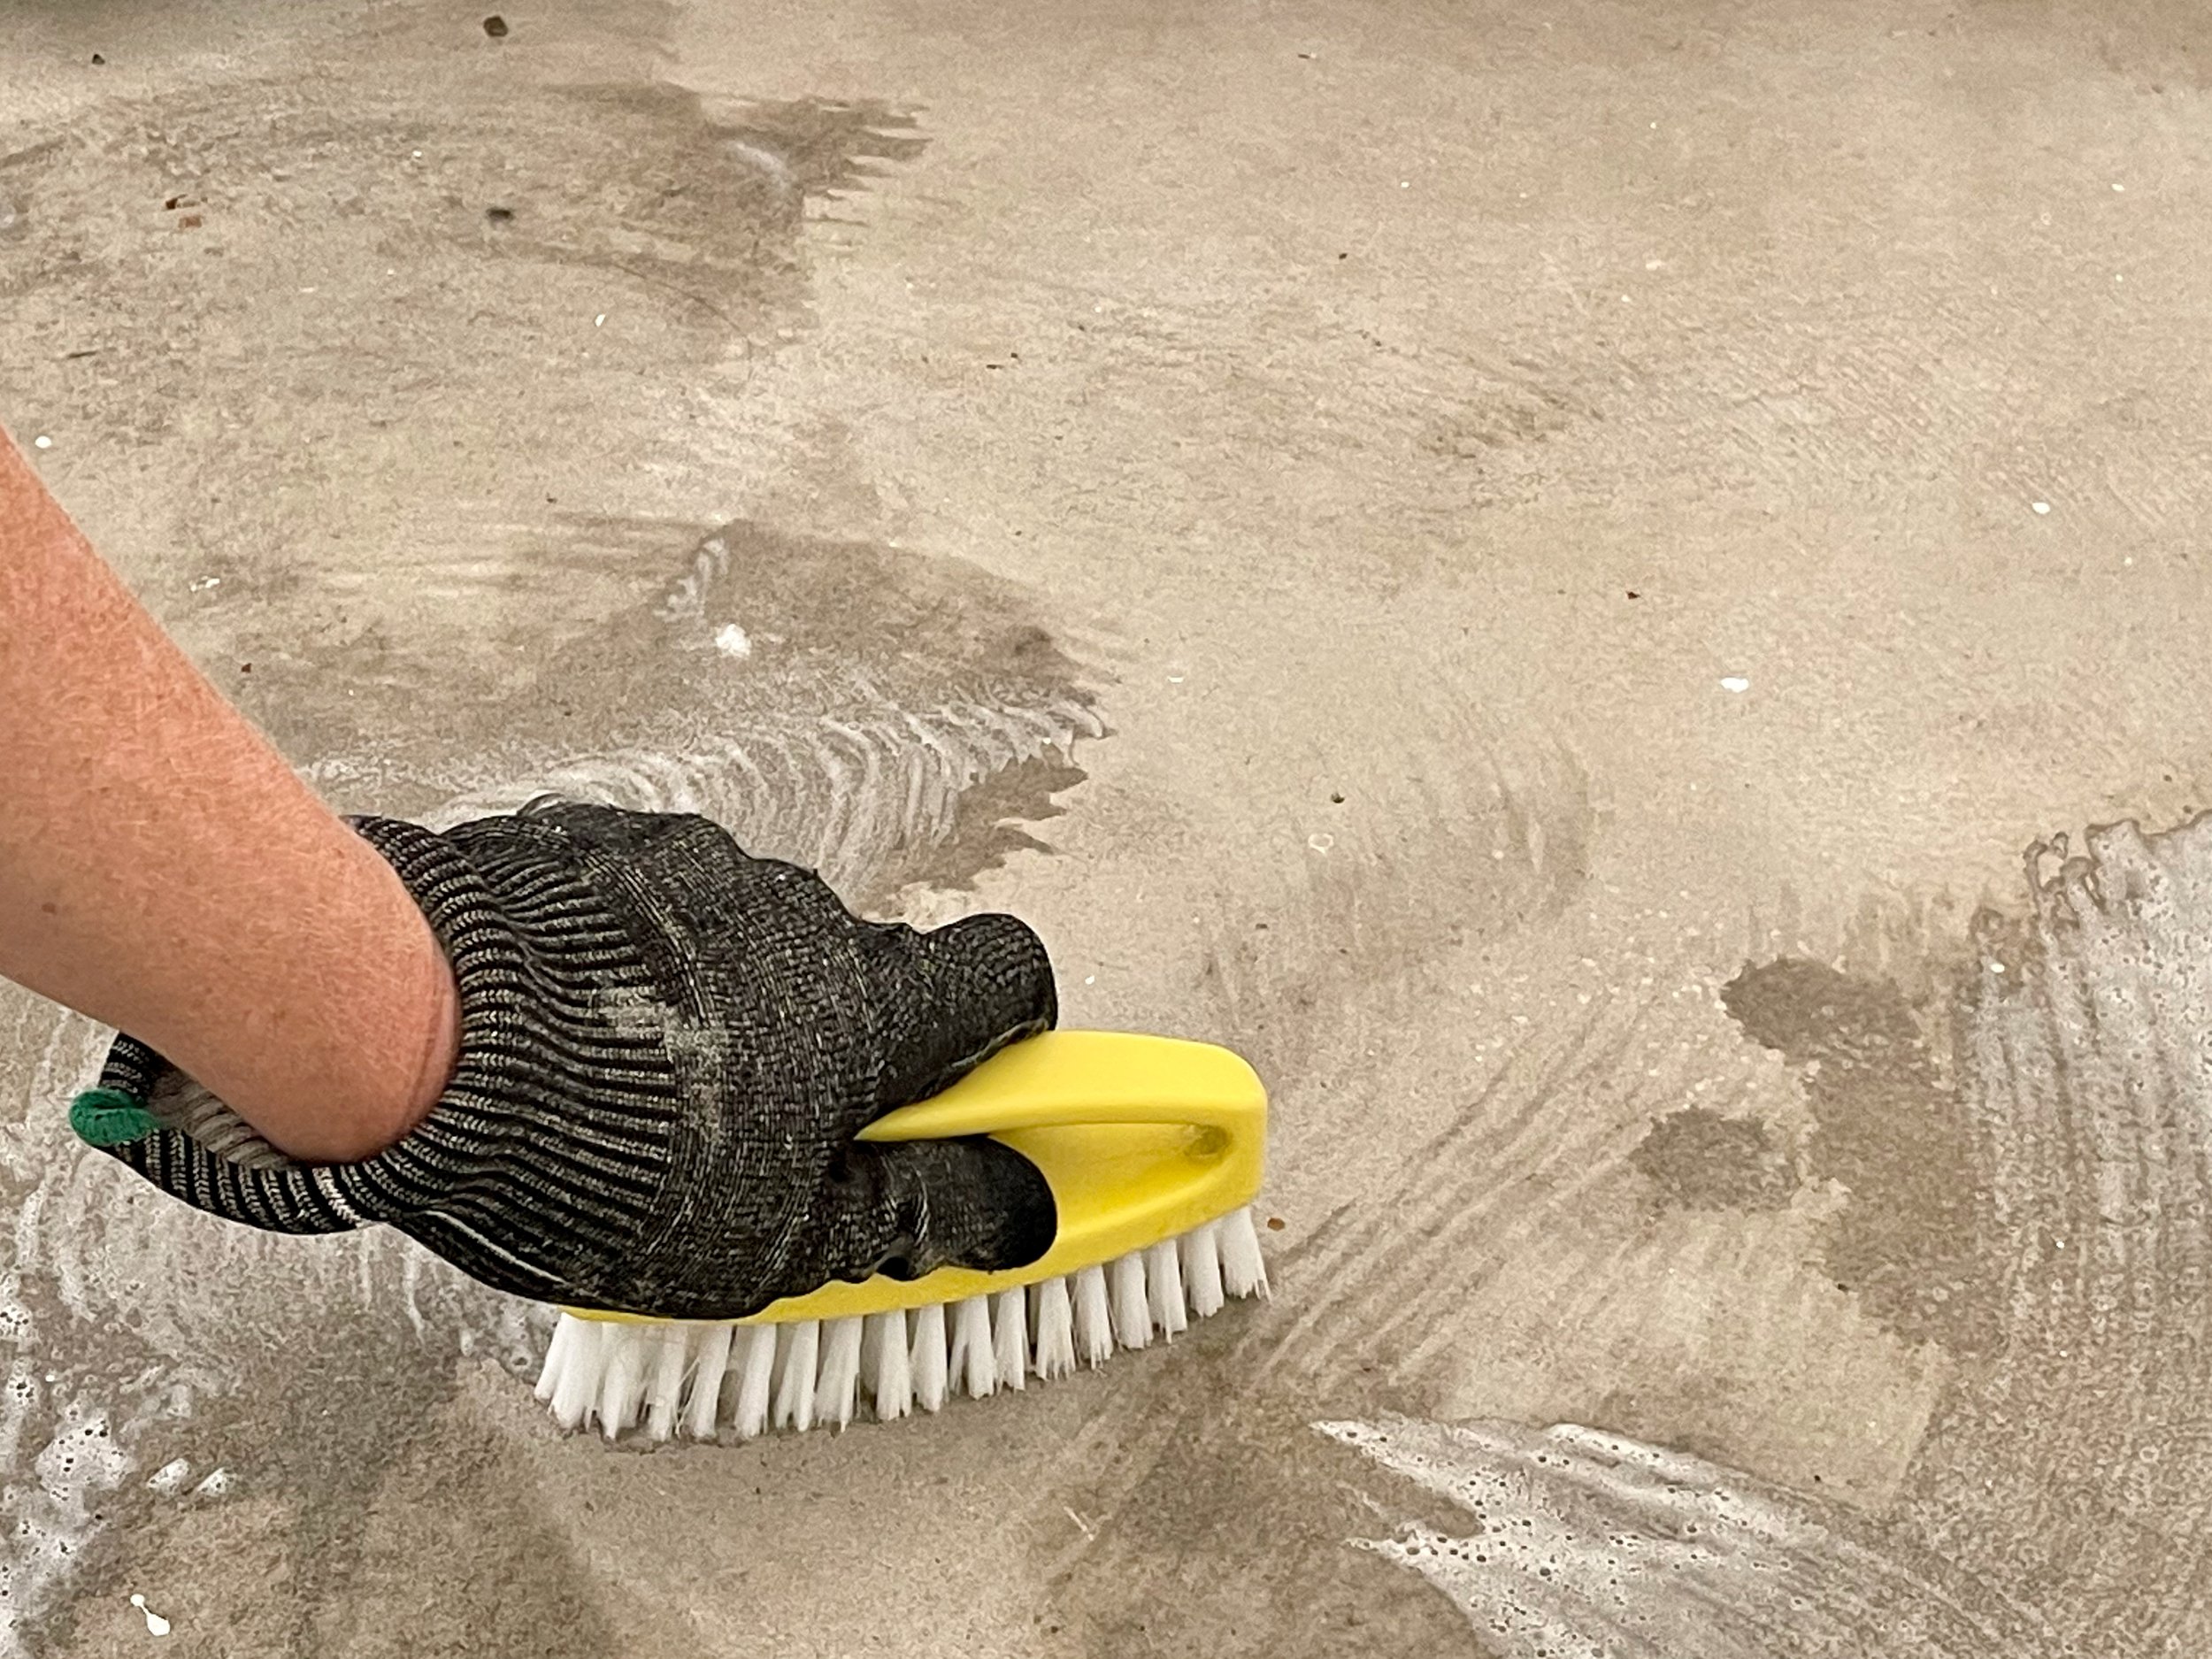
To finish the floor, I cleaned and lime-washed, which instantly made the room brighter.

I found this was a very economical solution and it’s been one of my most popular DIY projects. (Click through to see how it’s done.)
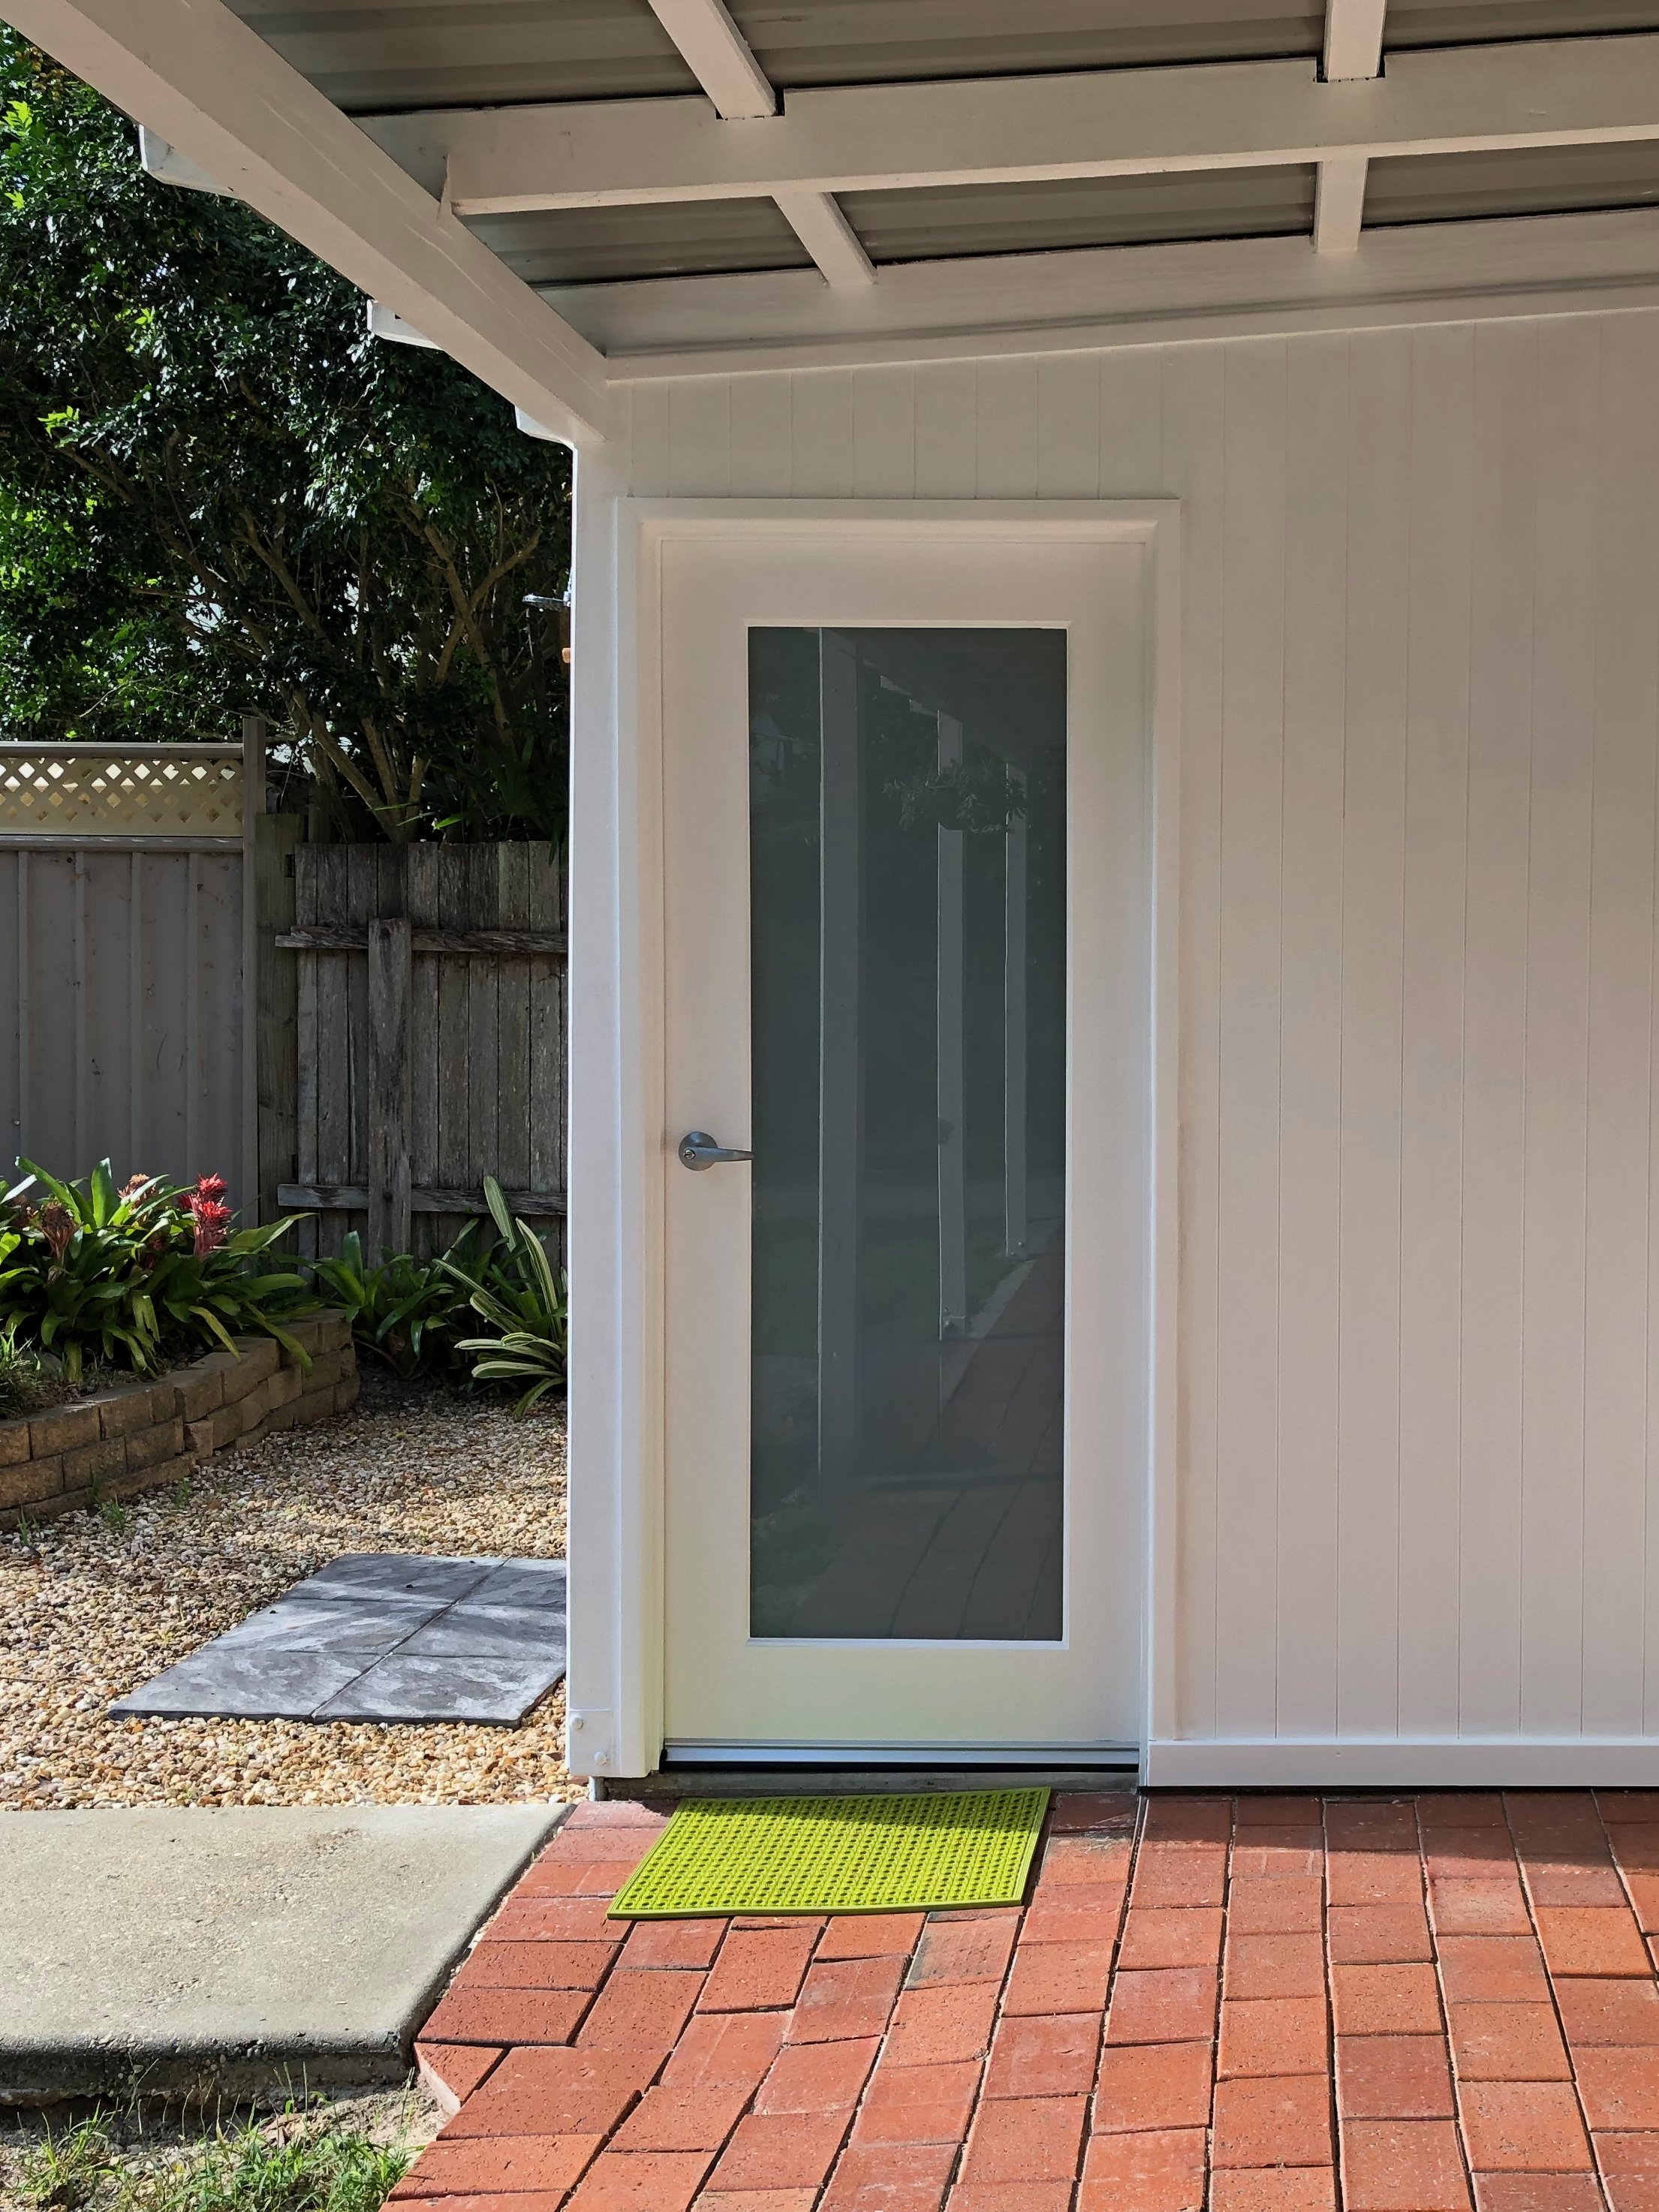
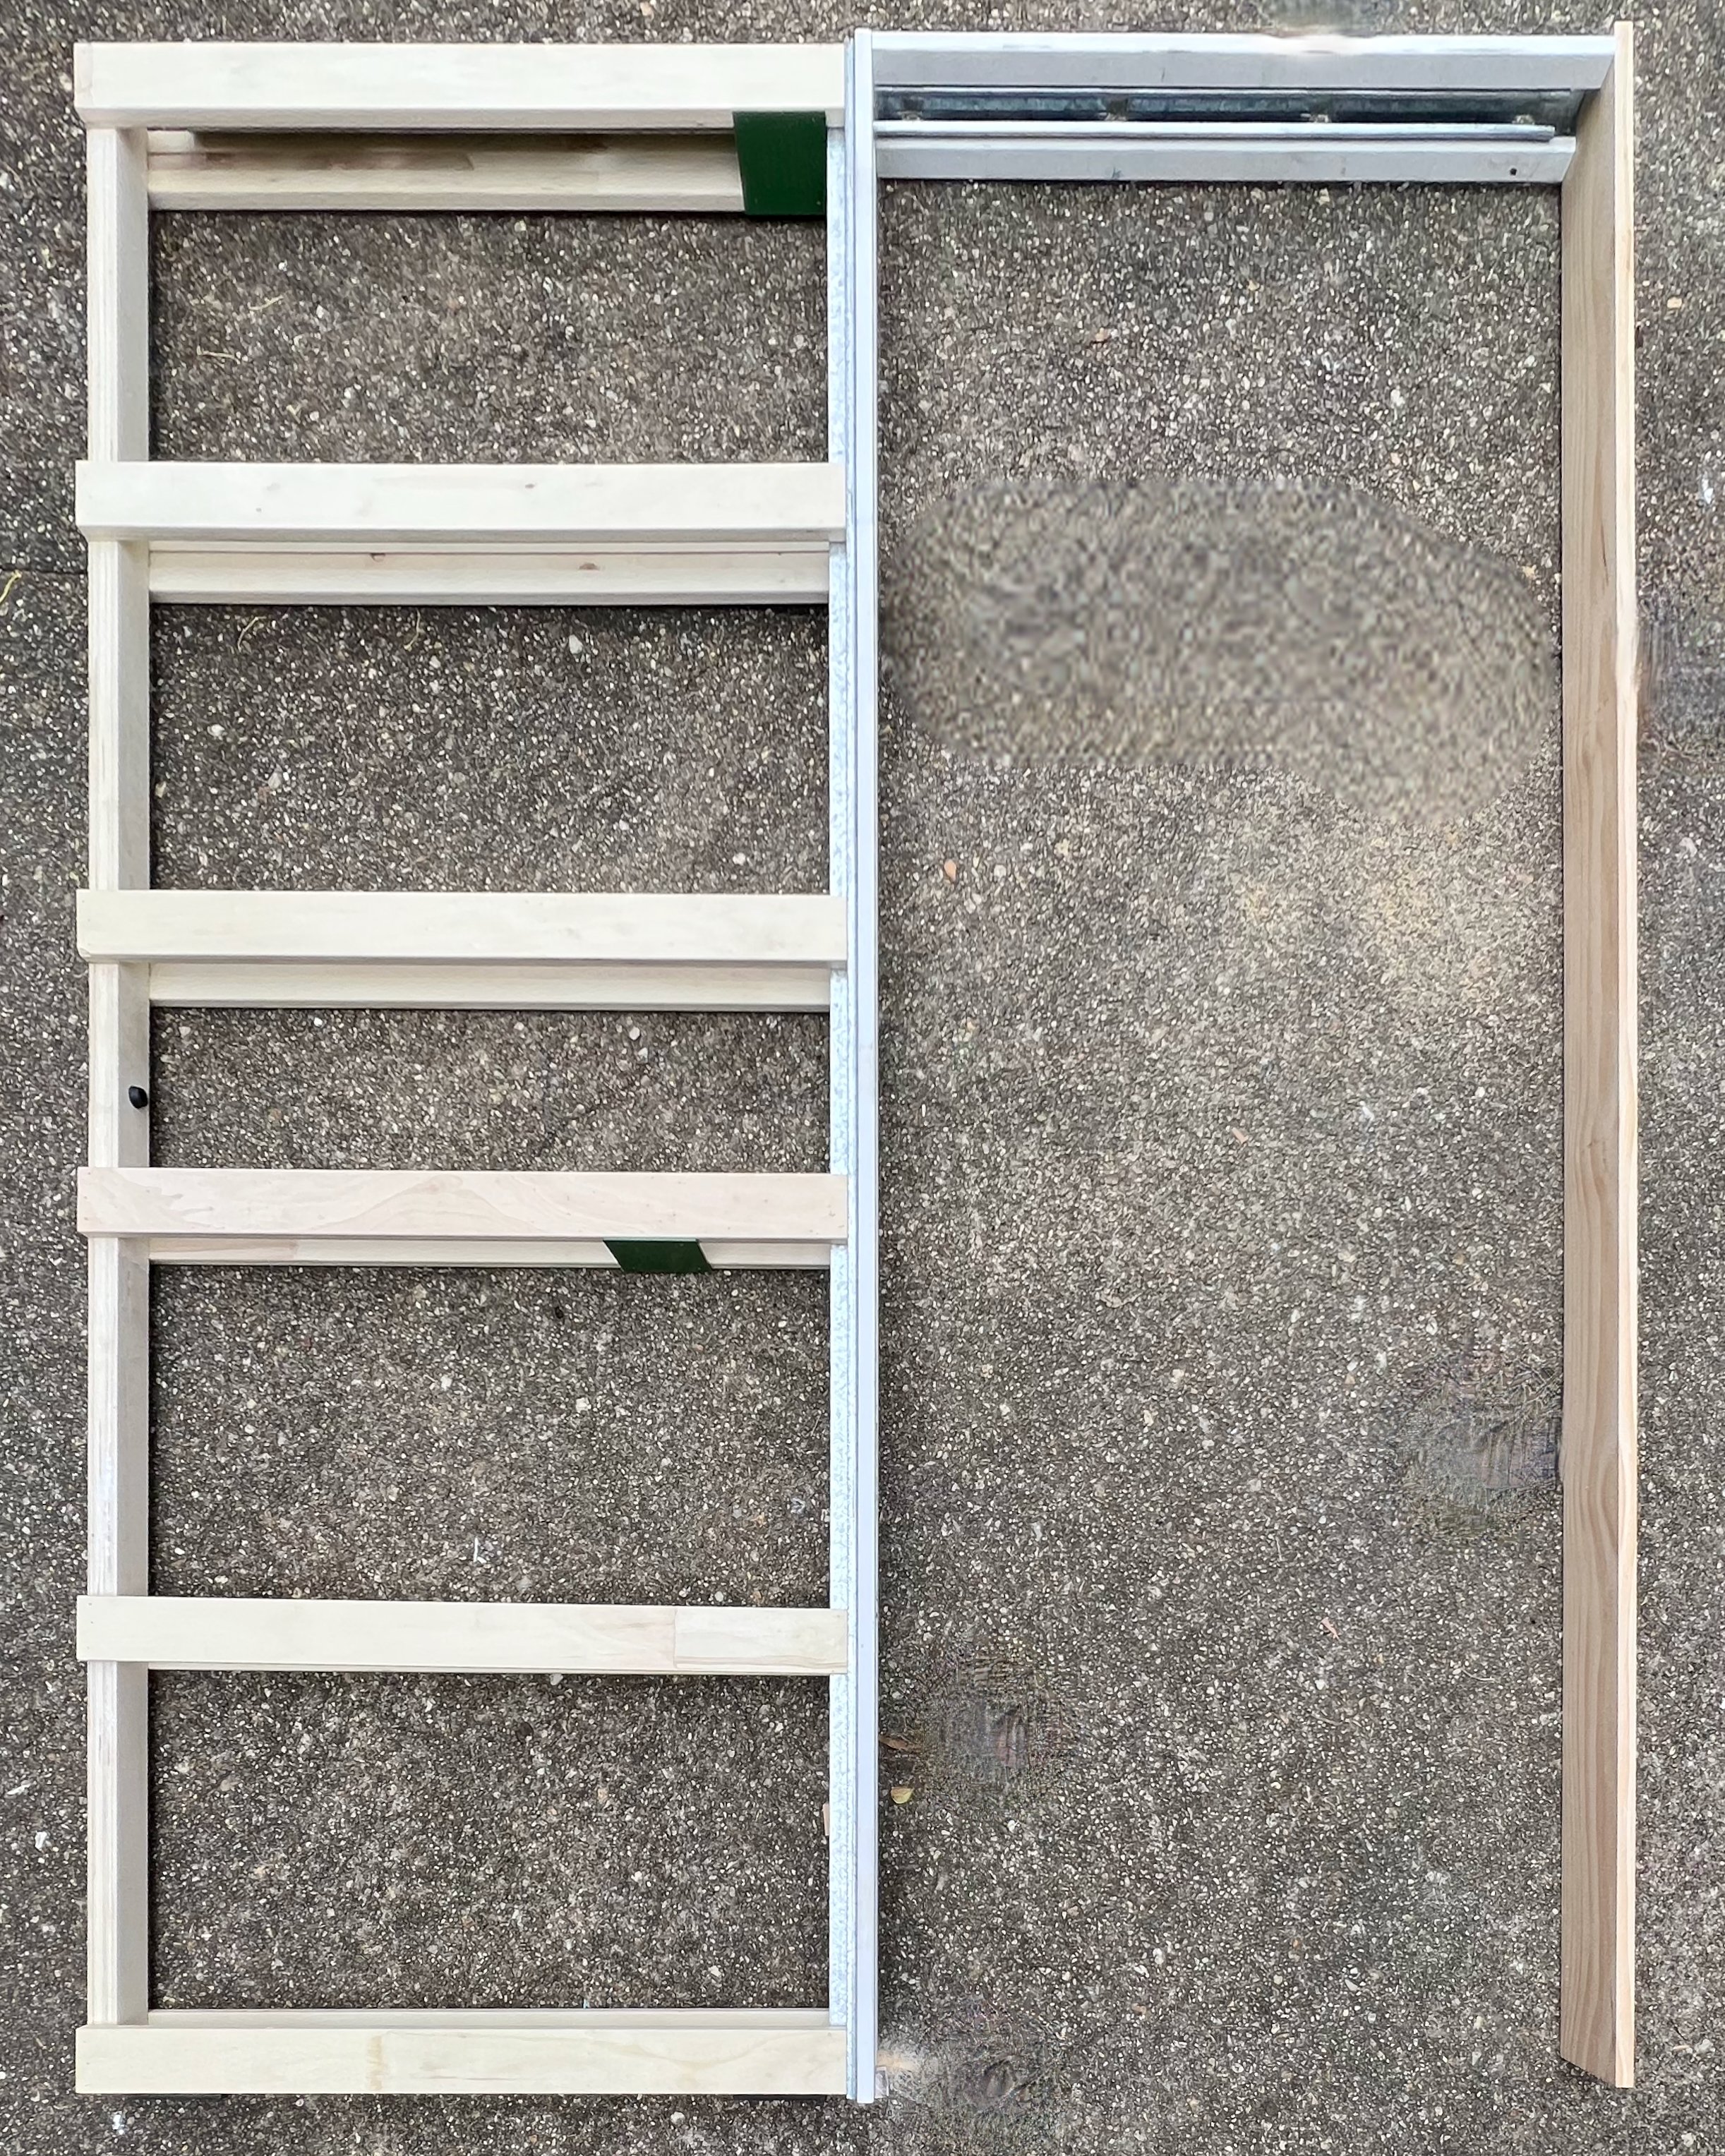
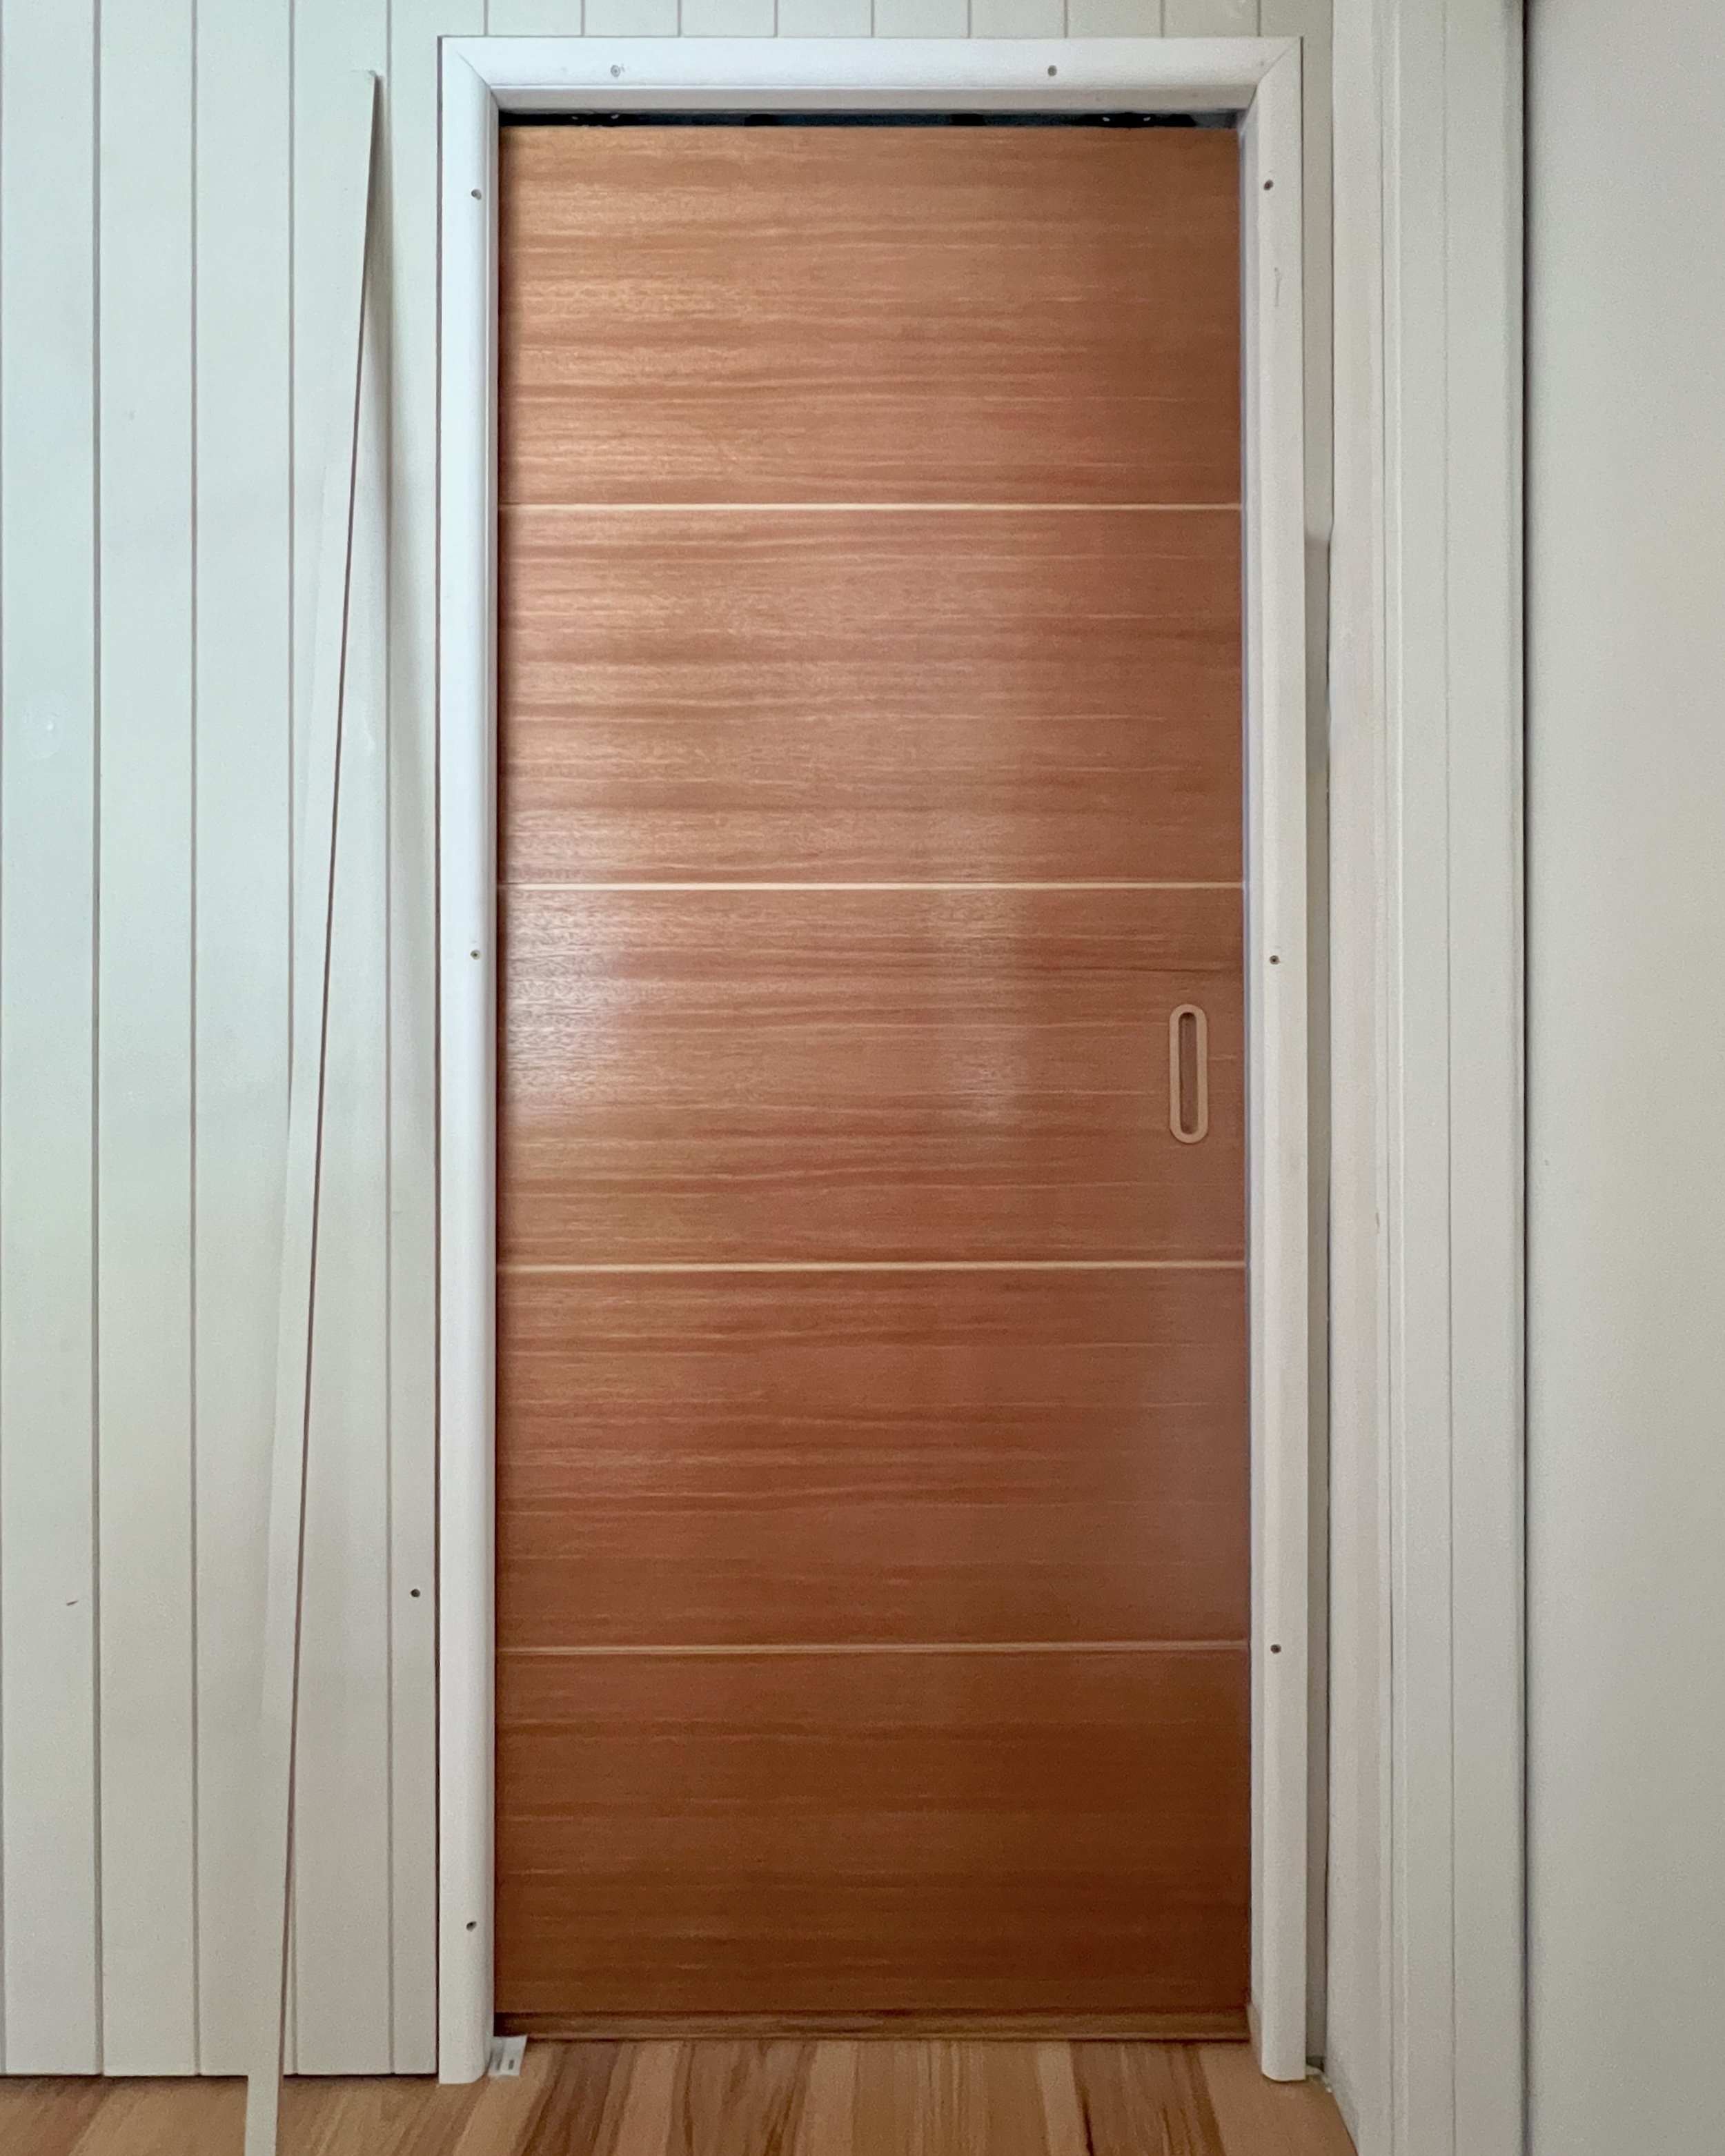
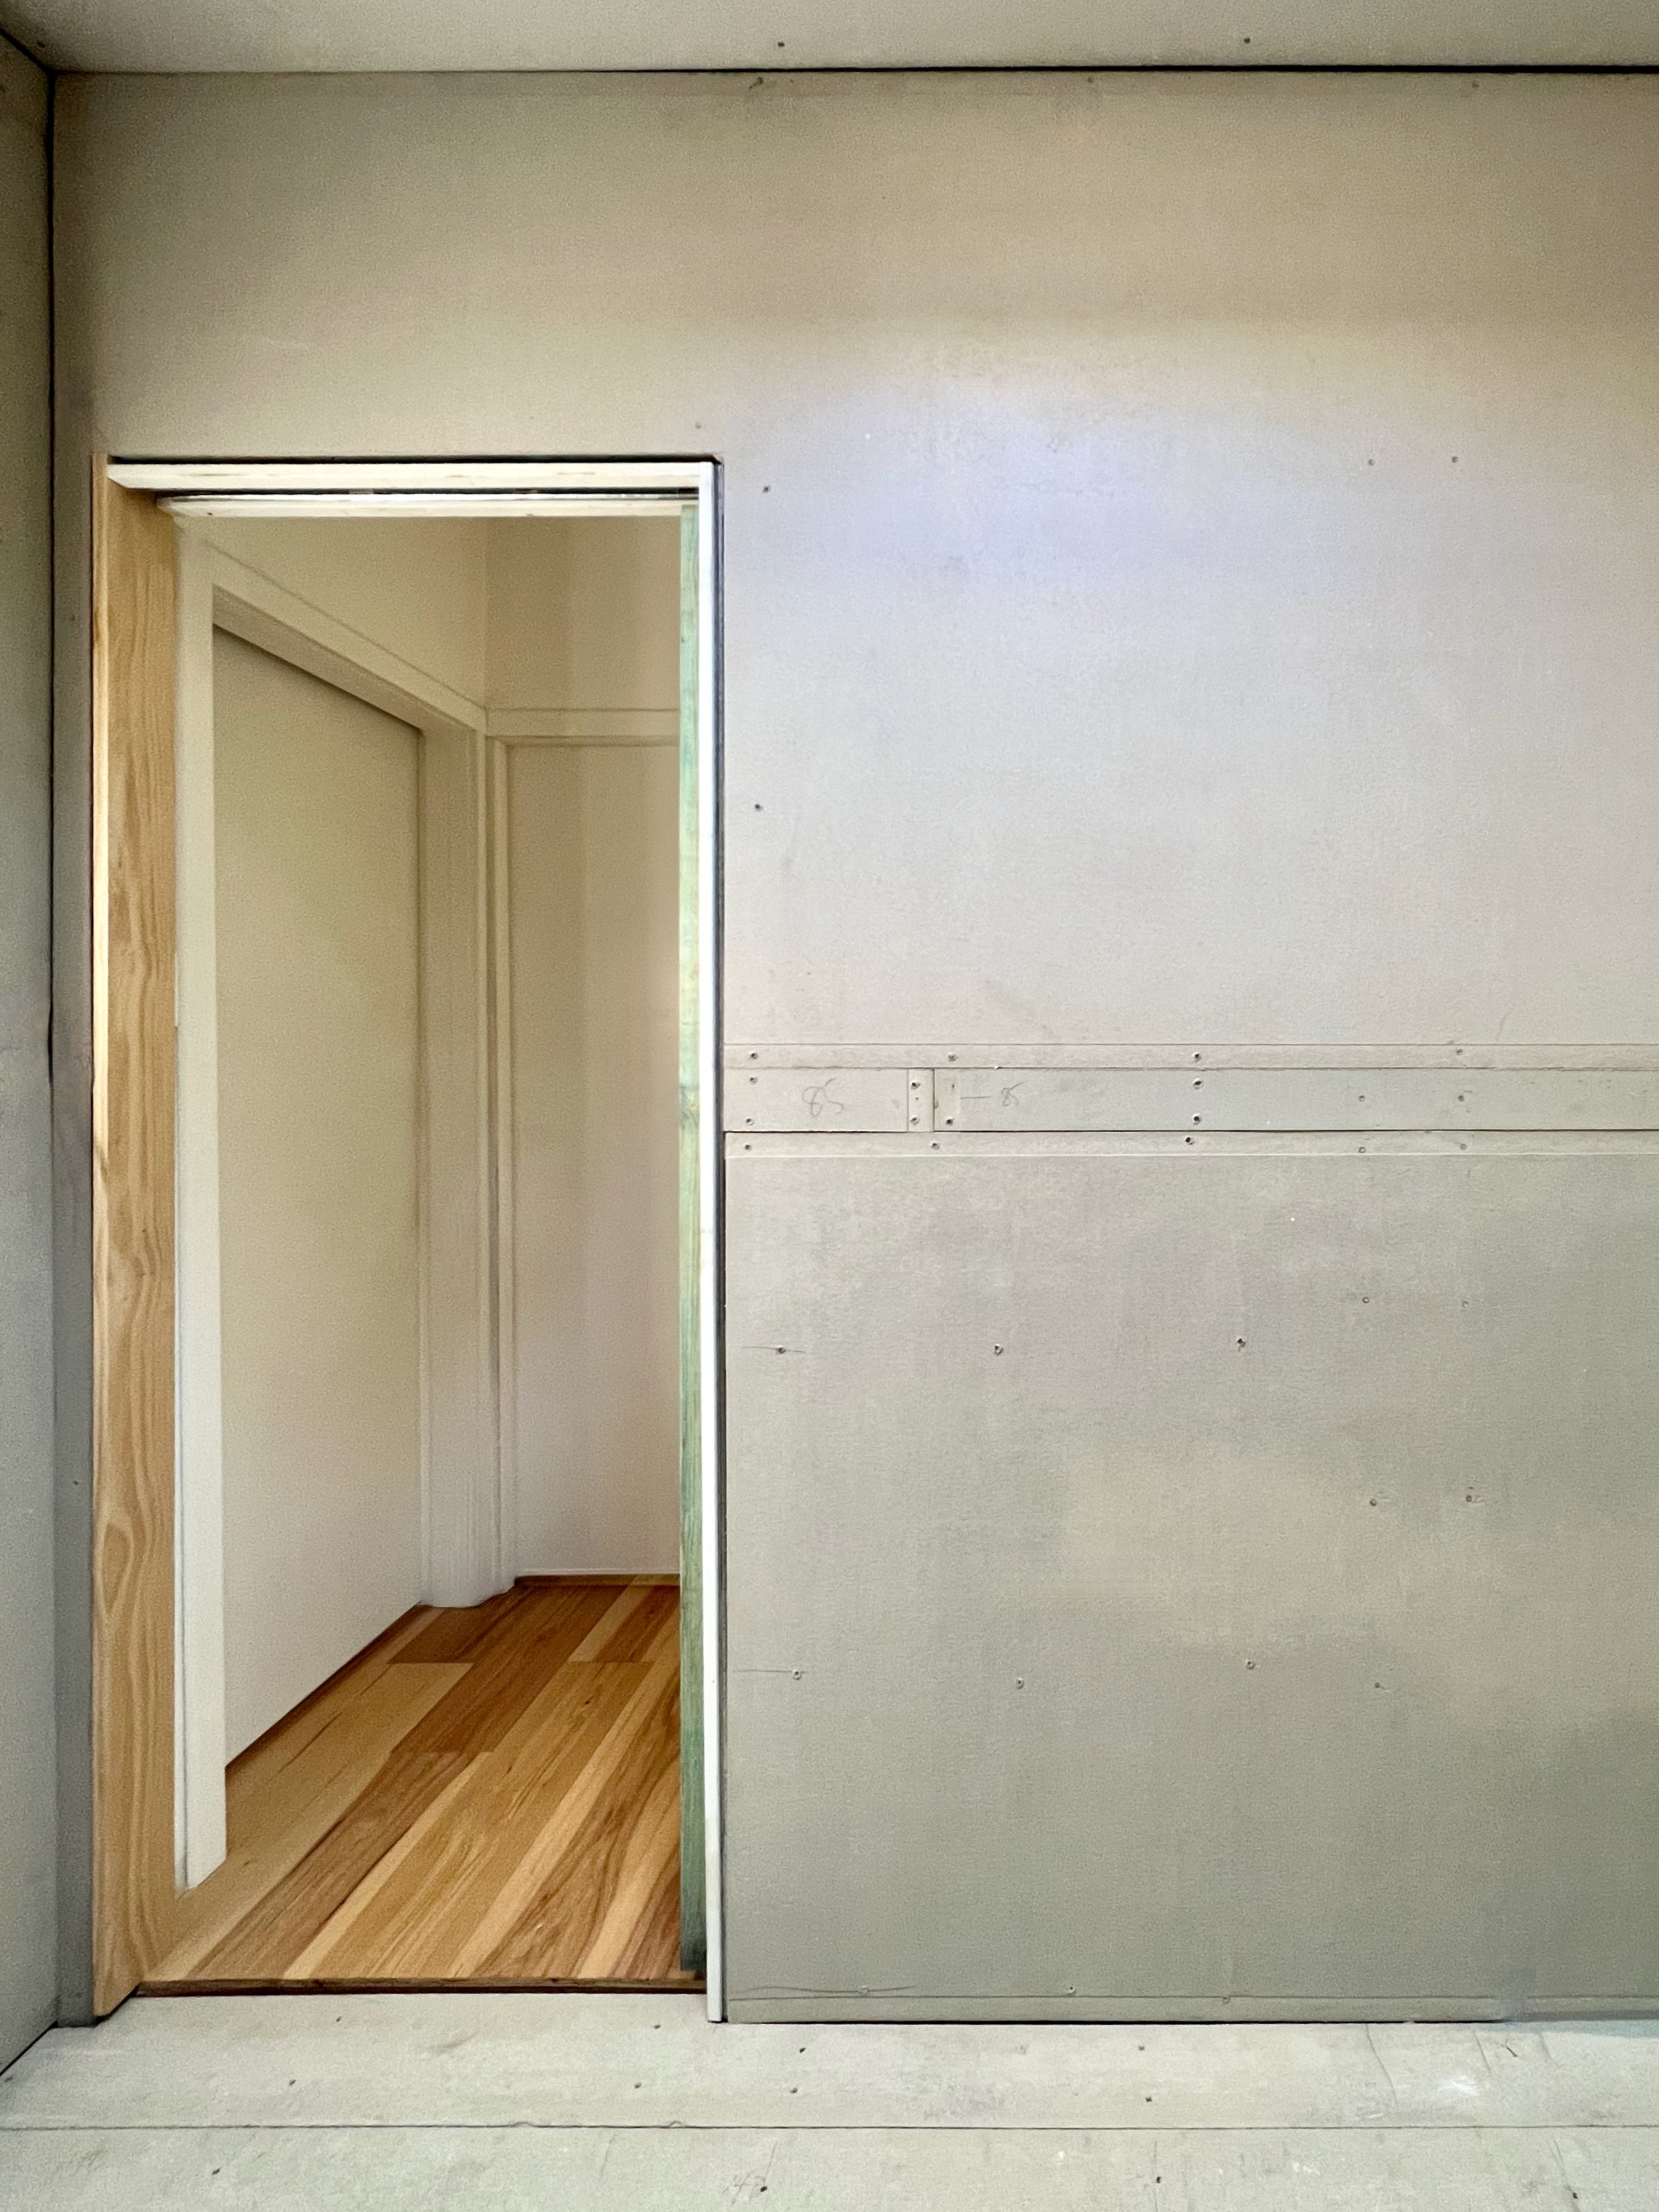
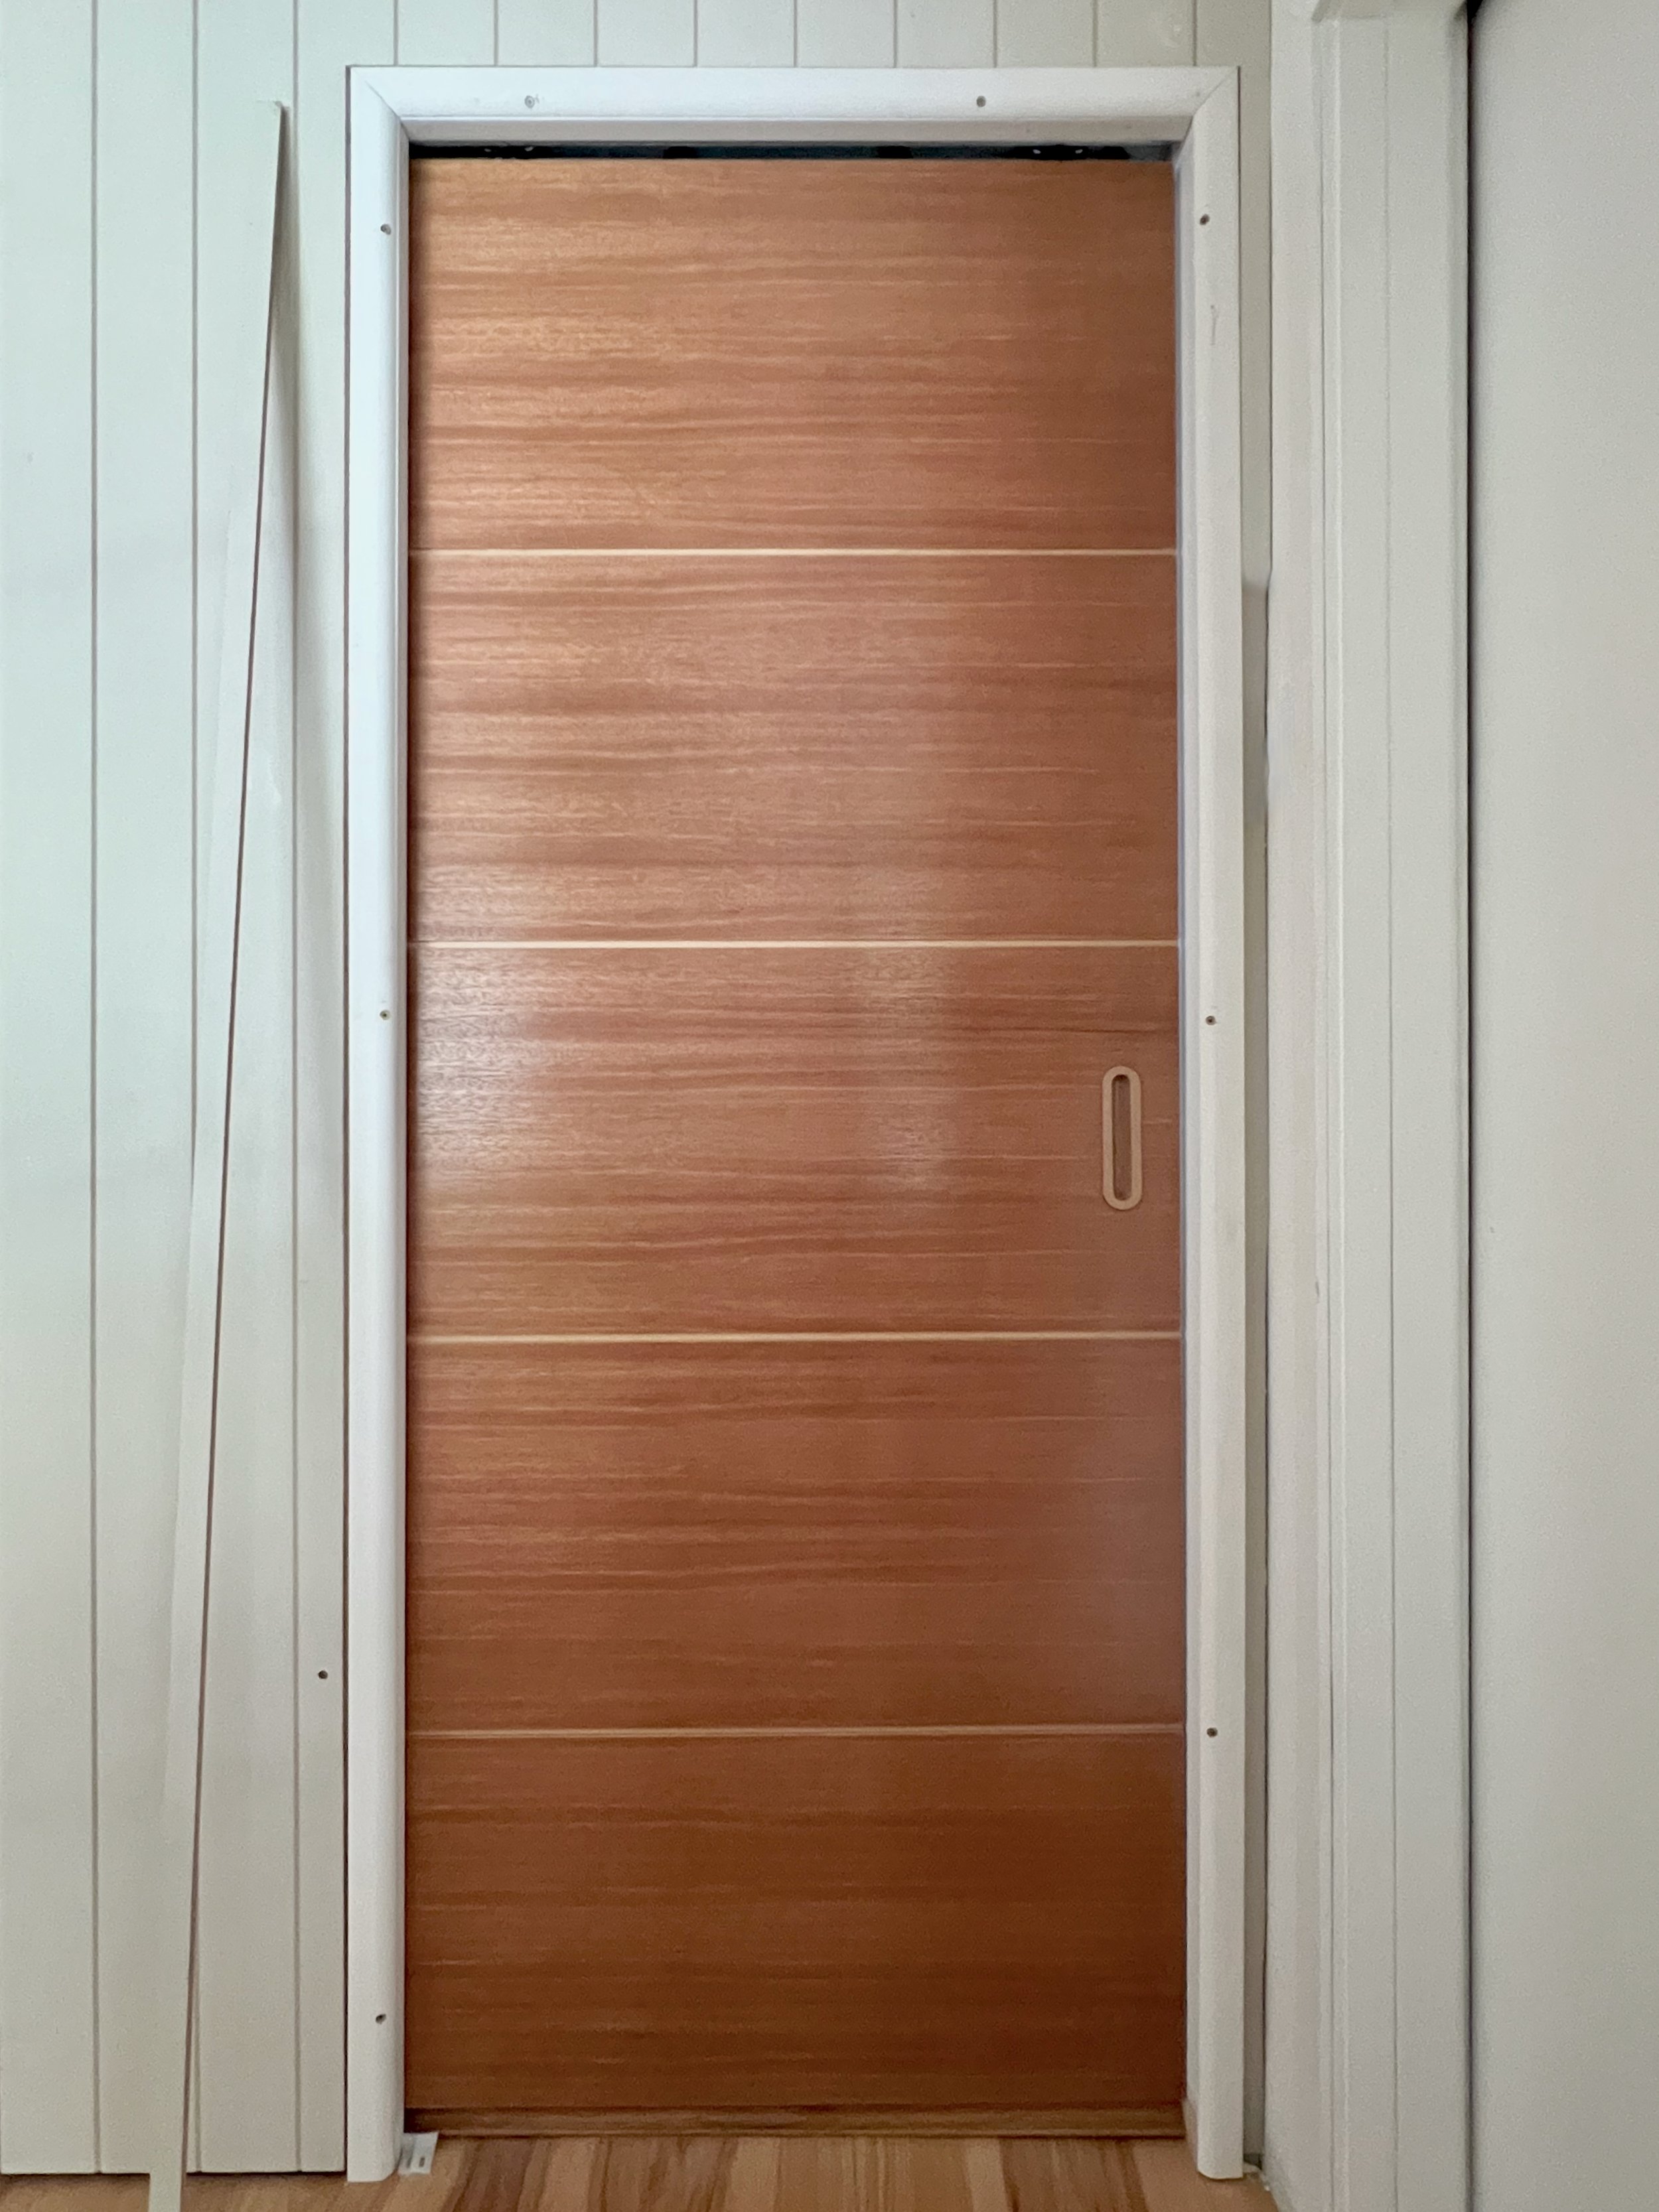
 

HANGING THE DOOR

I chose a Hume Doors frosted-glass door for infused light with privacy.

To hang it, I chiselled recesses for the hinges and strike plate, painted and hung the door, then installed a Lane Hardware lockable handle. Adding trim around the jamb and painting the surrounding wall.

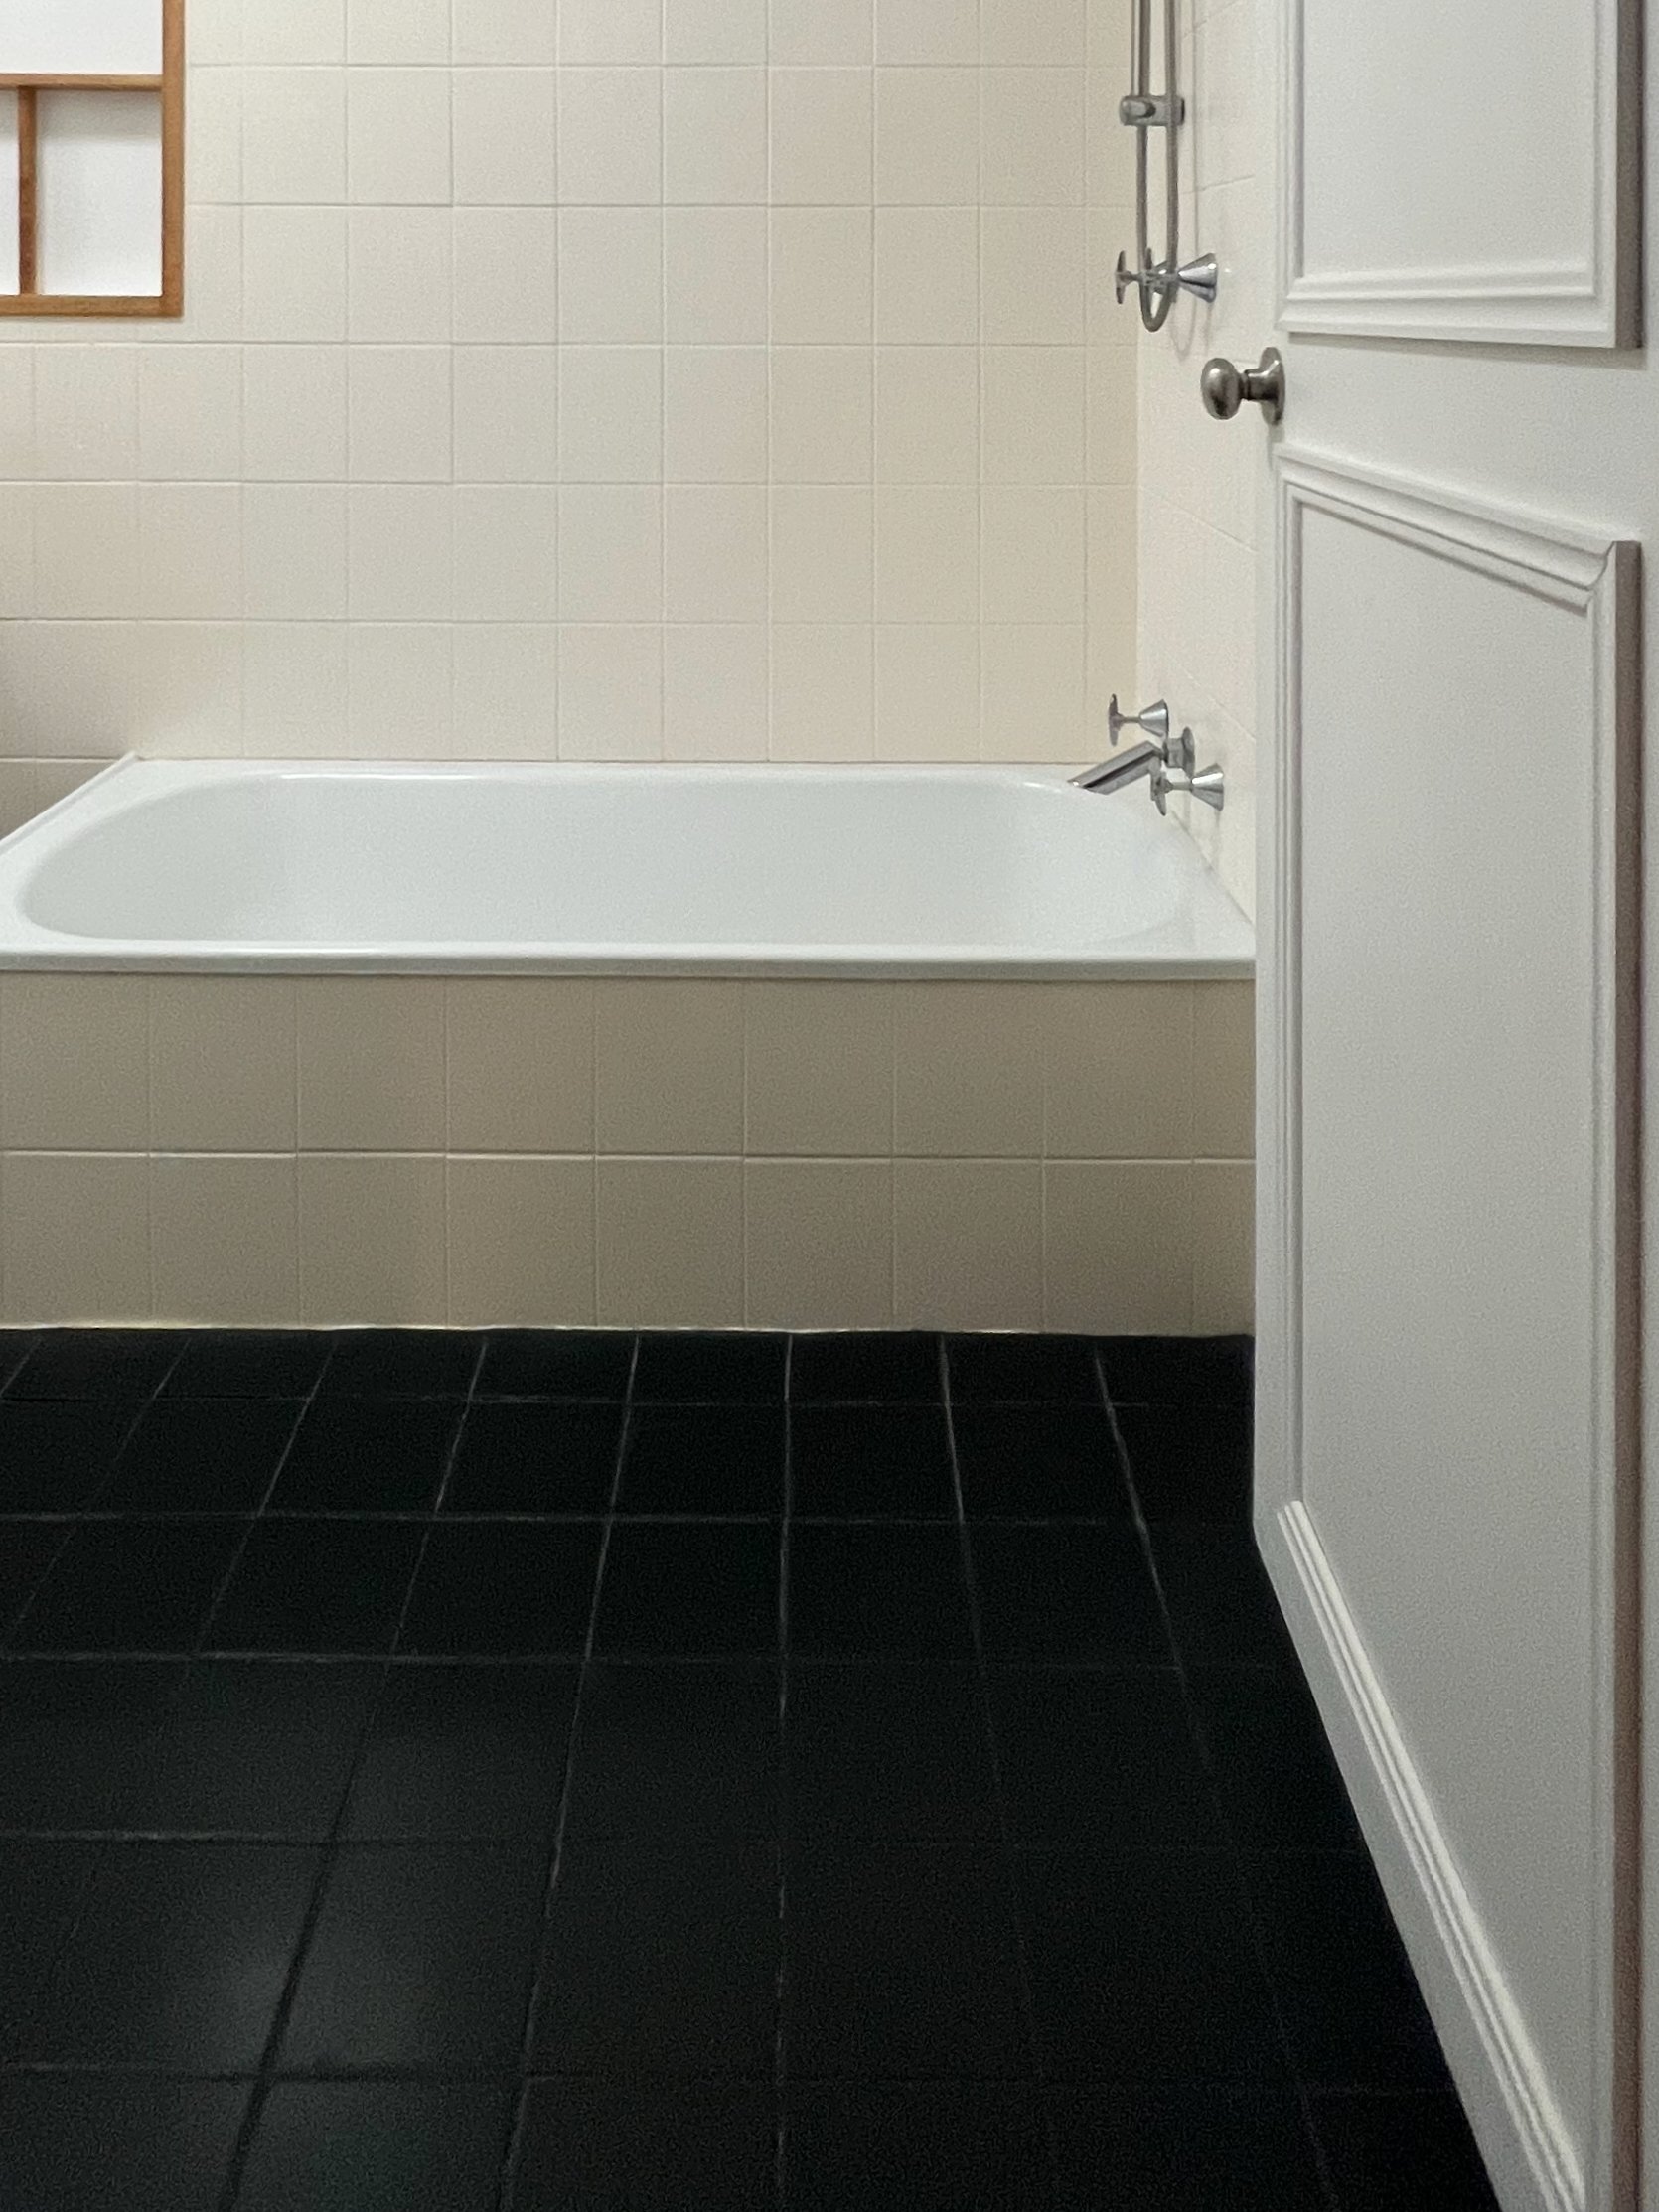
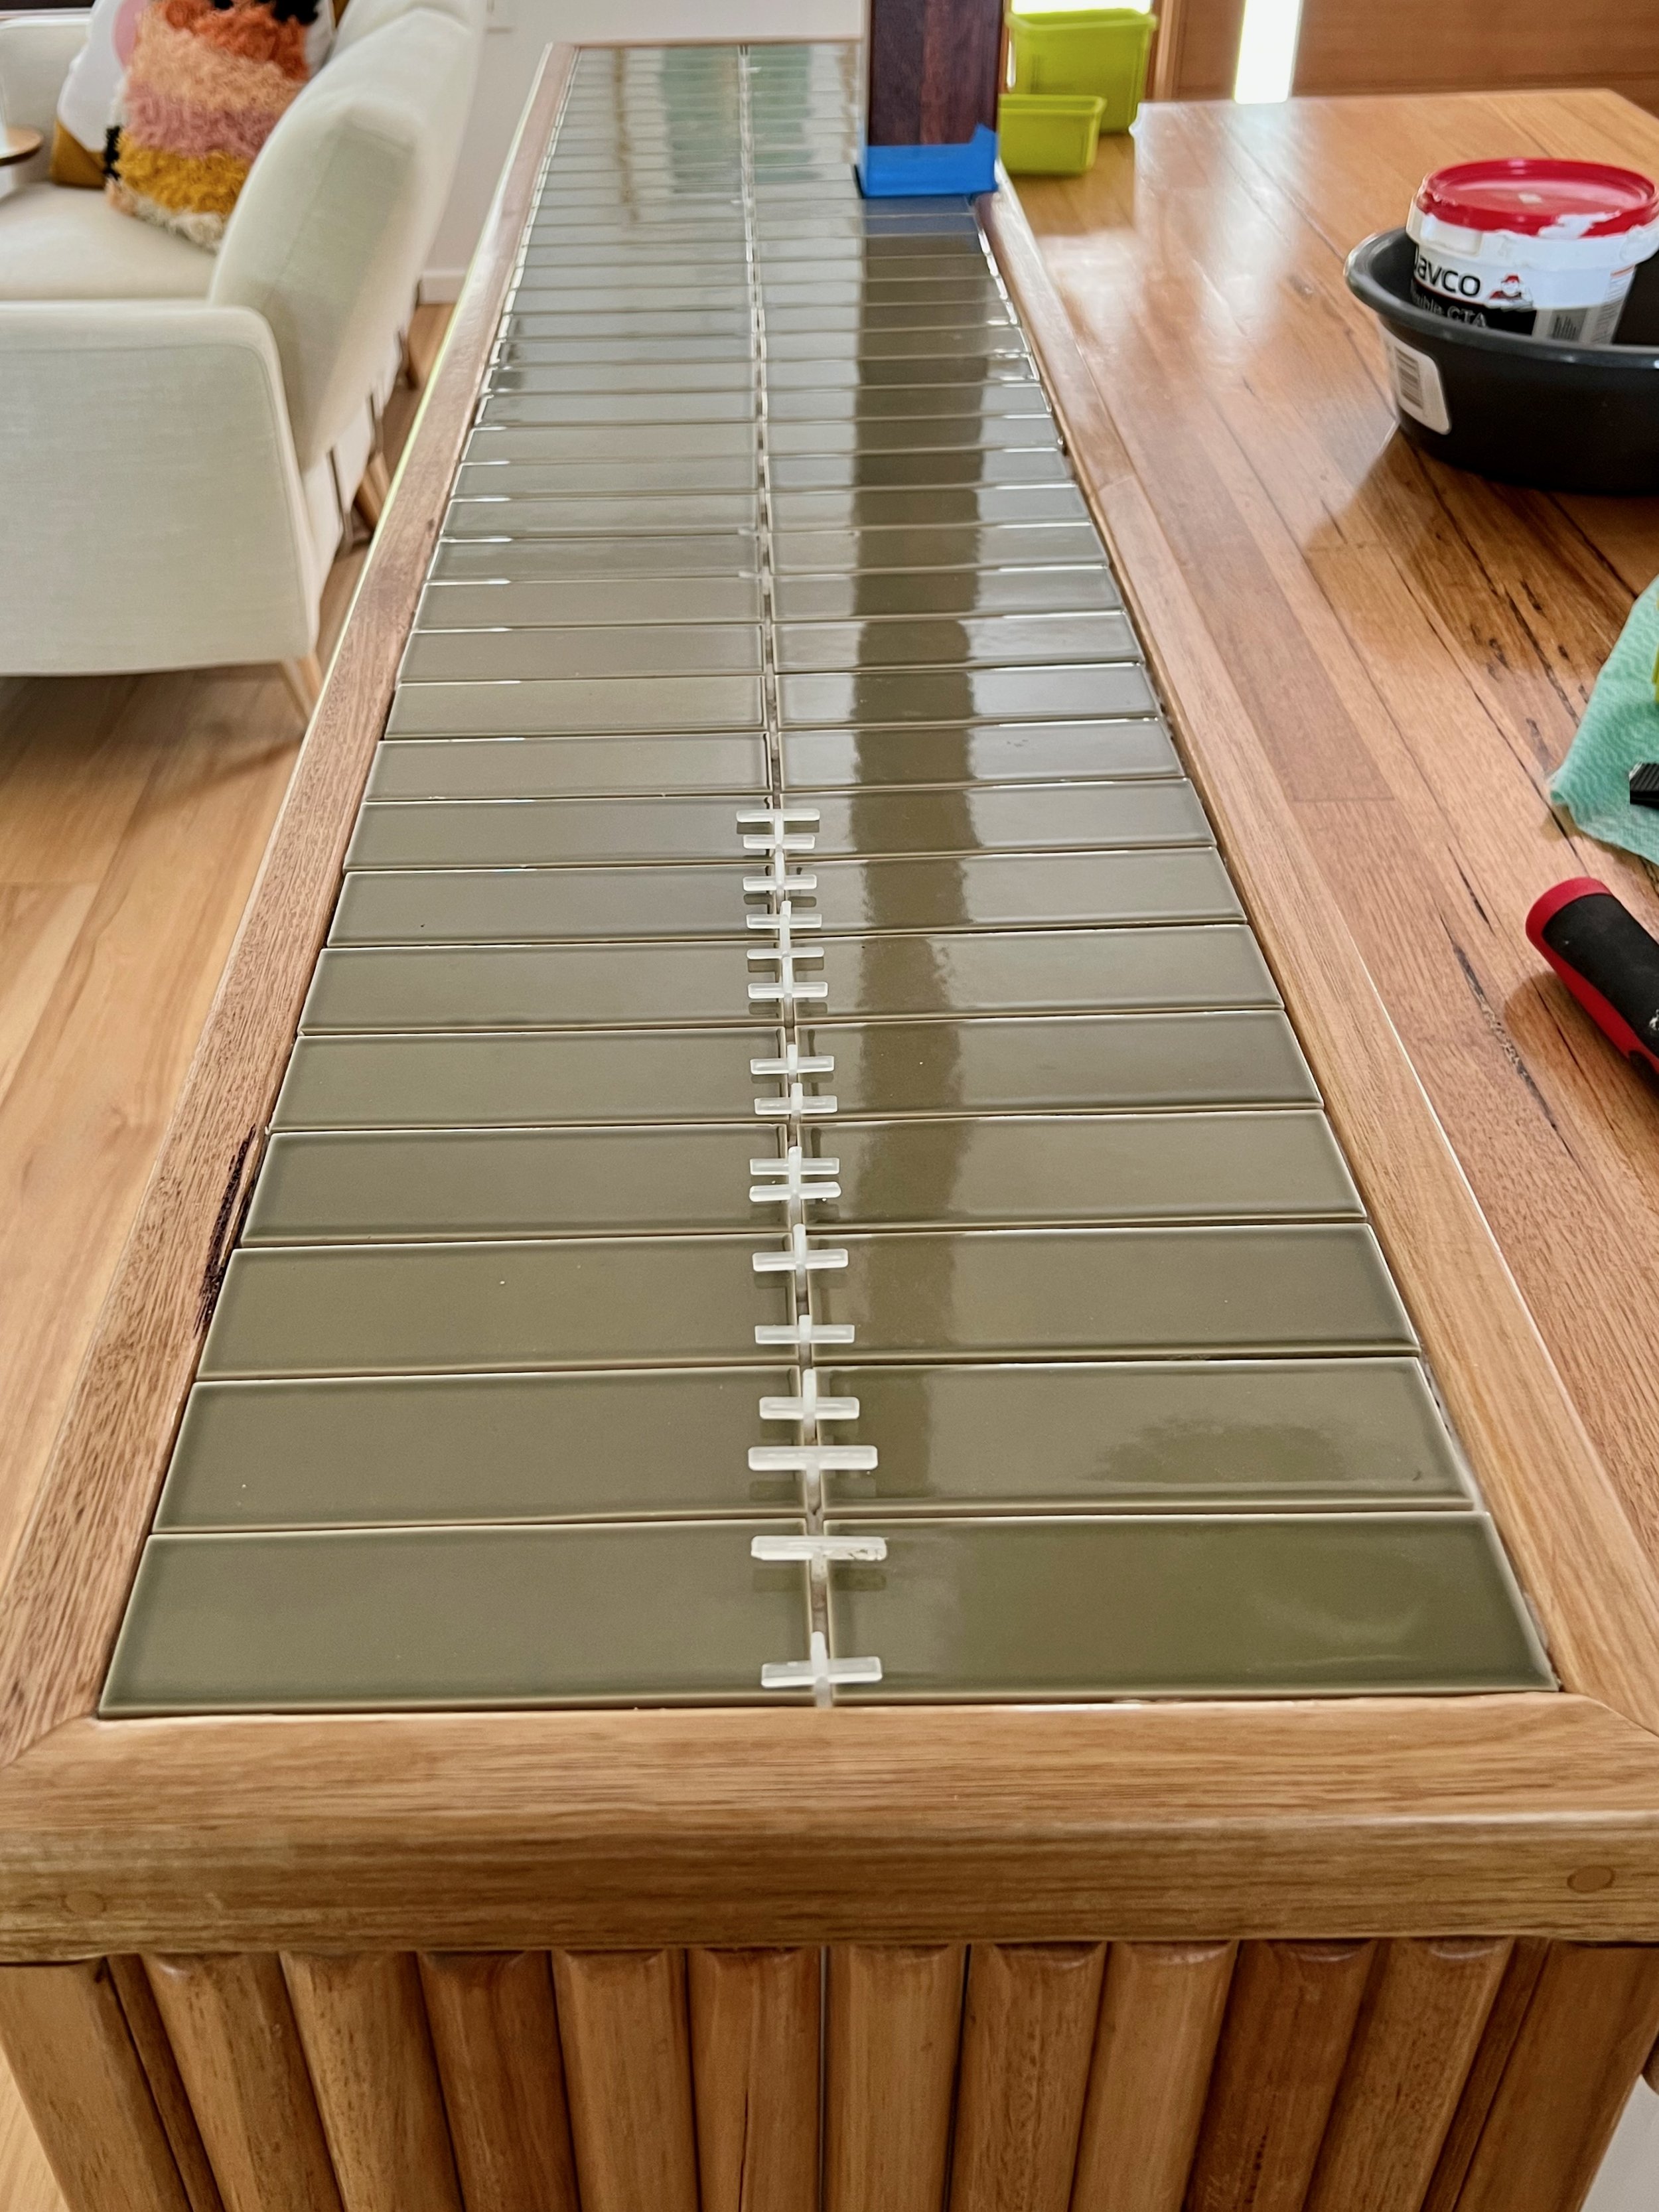
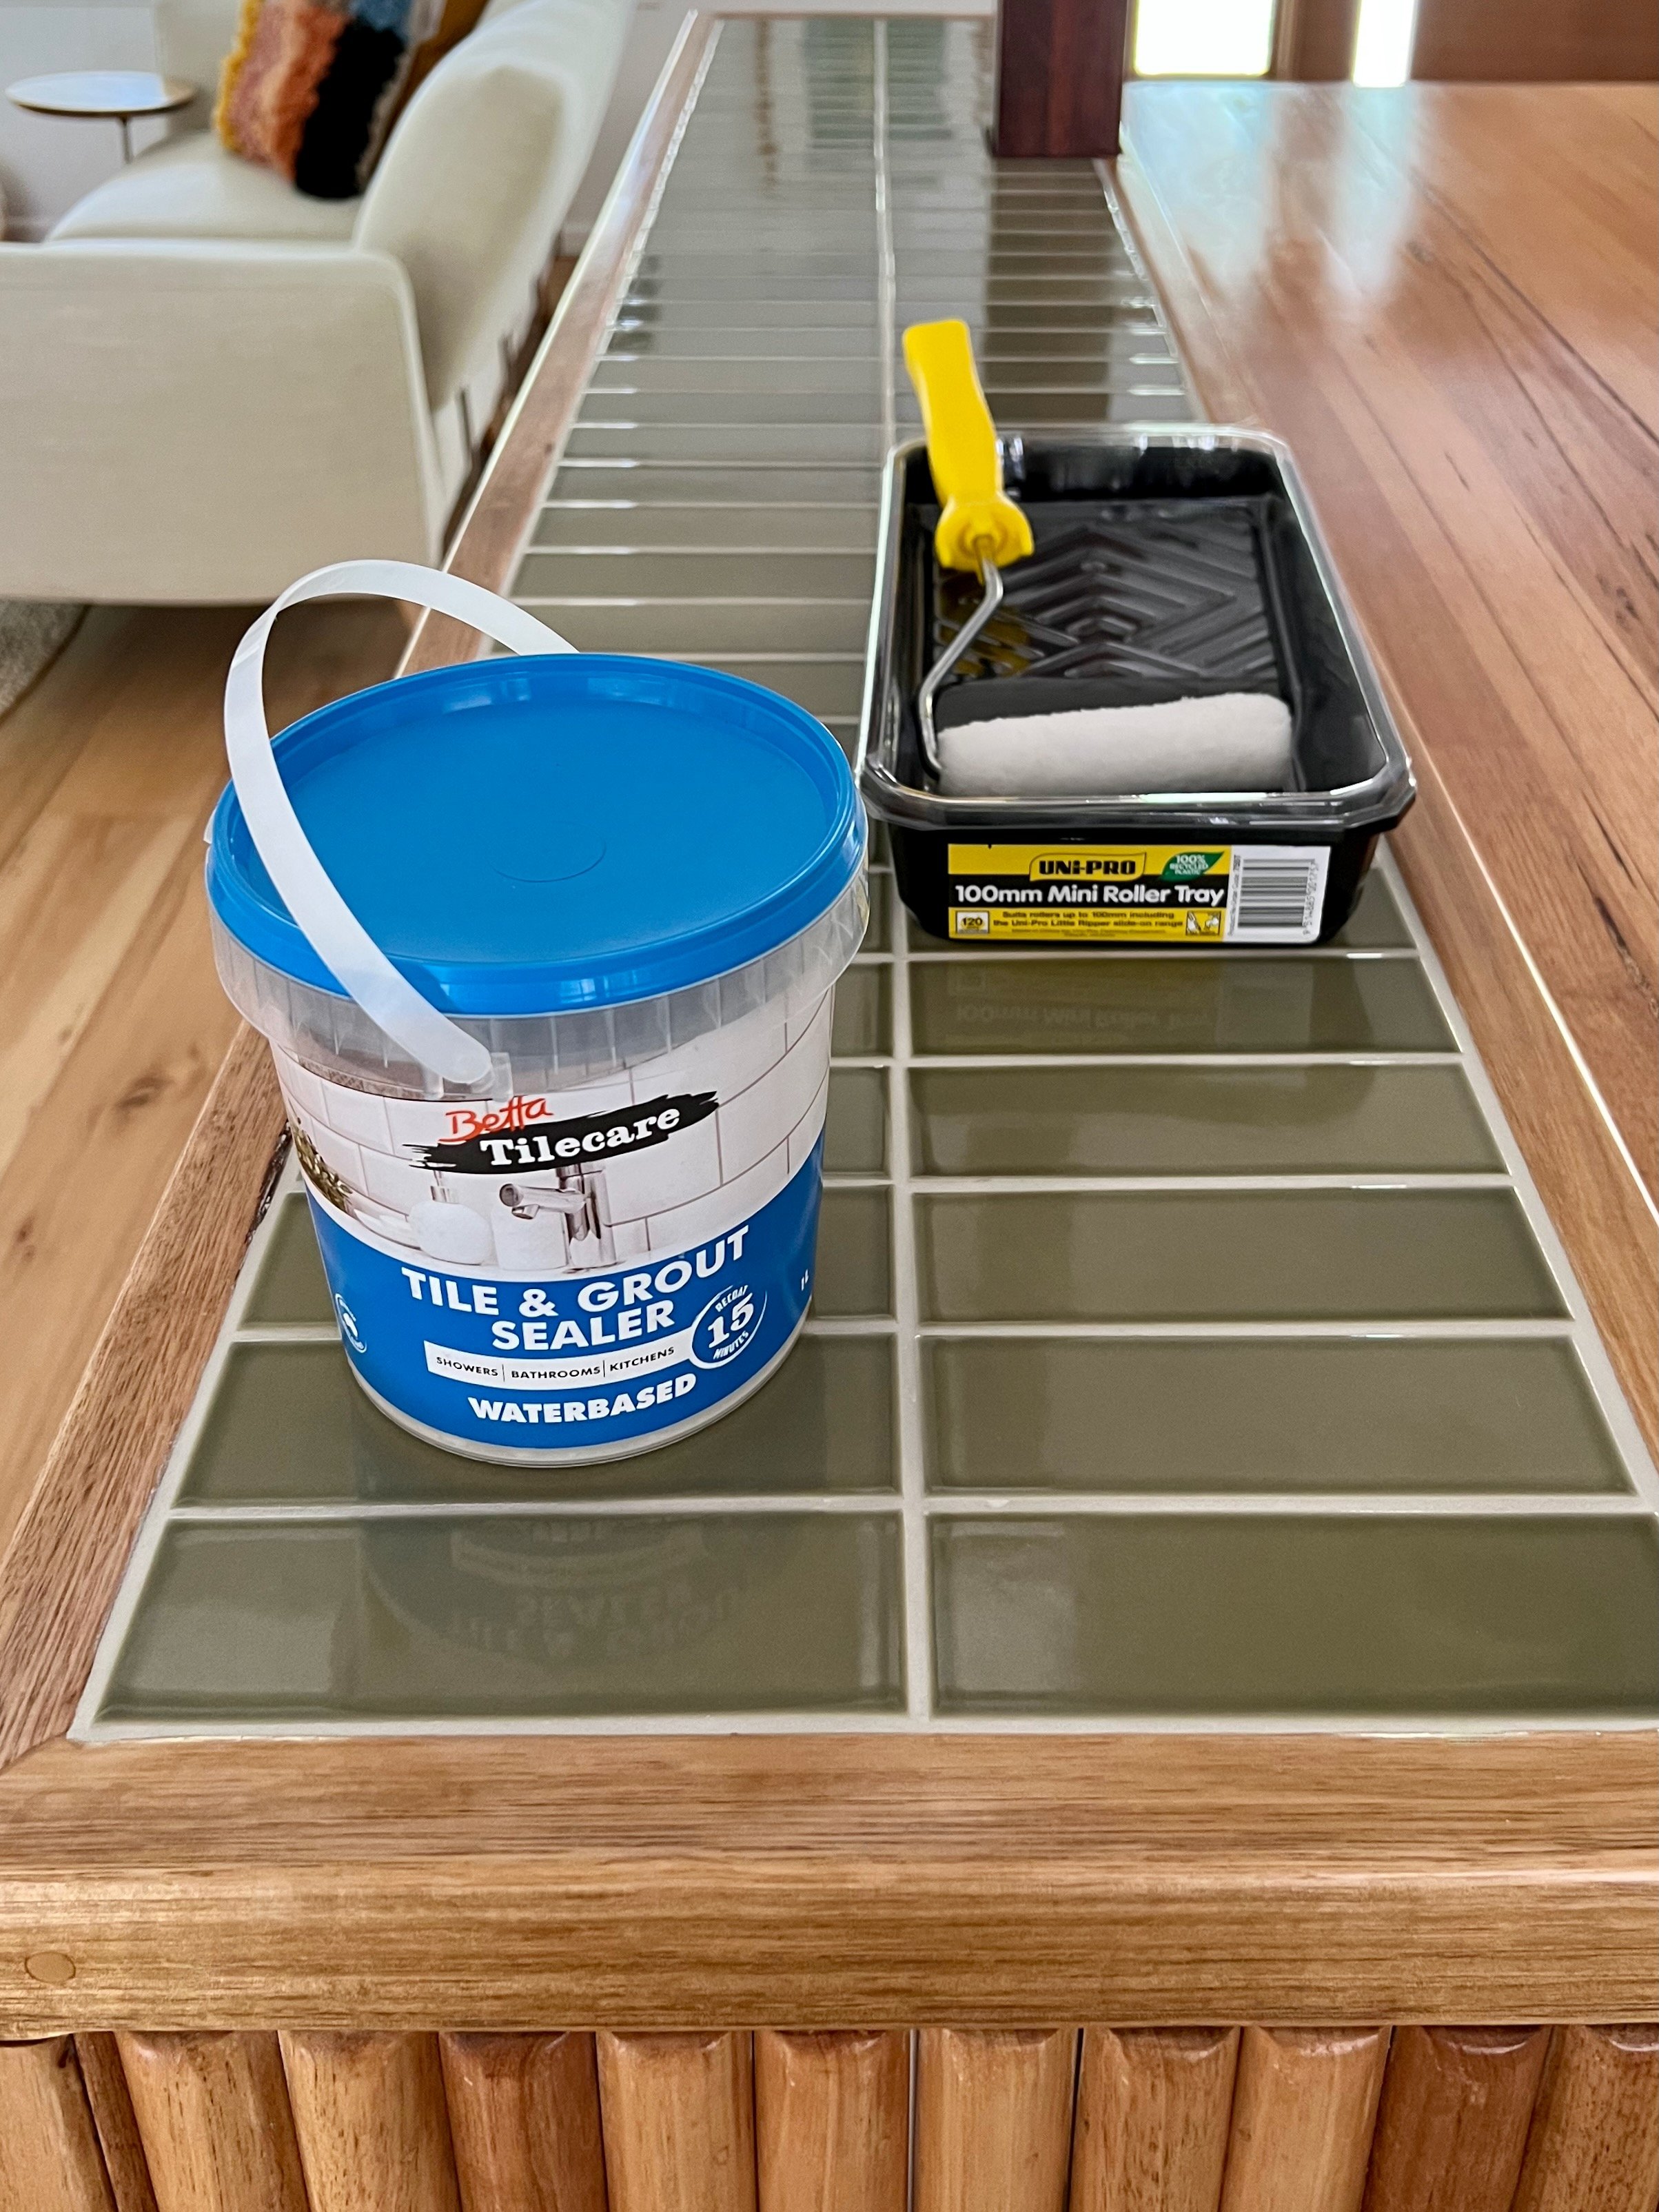
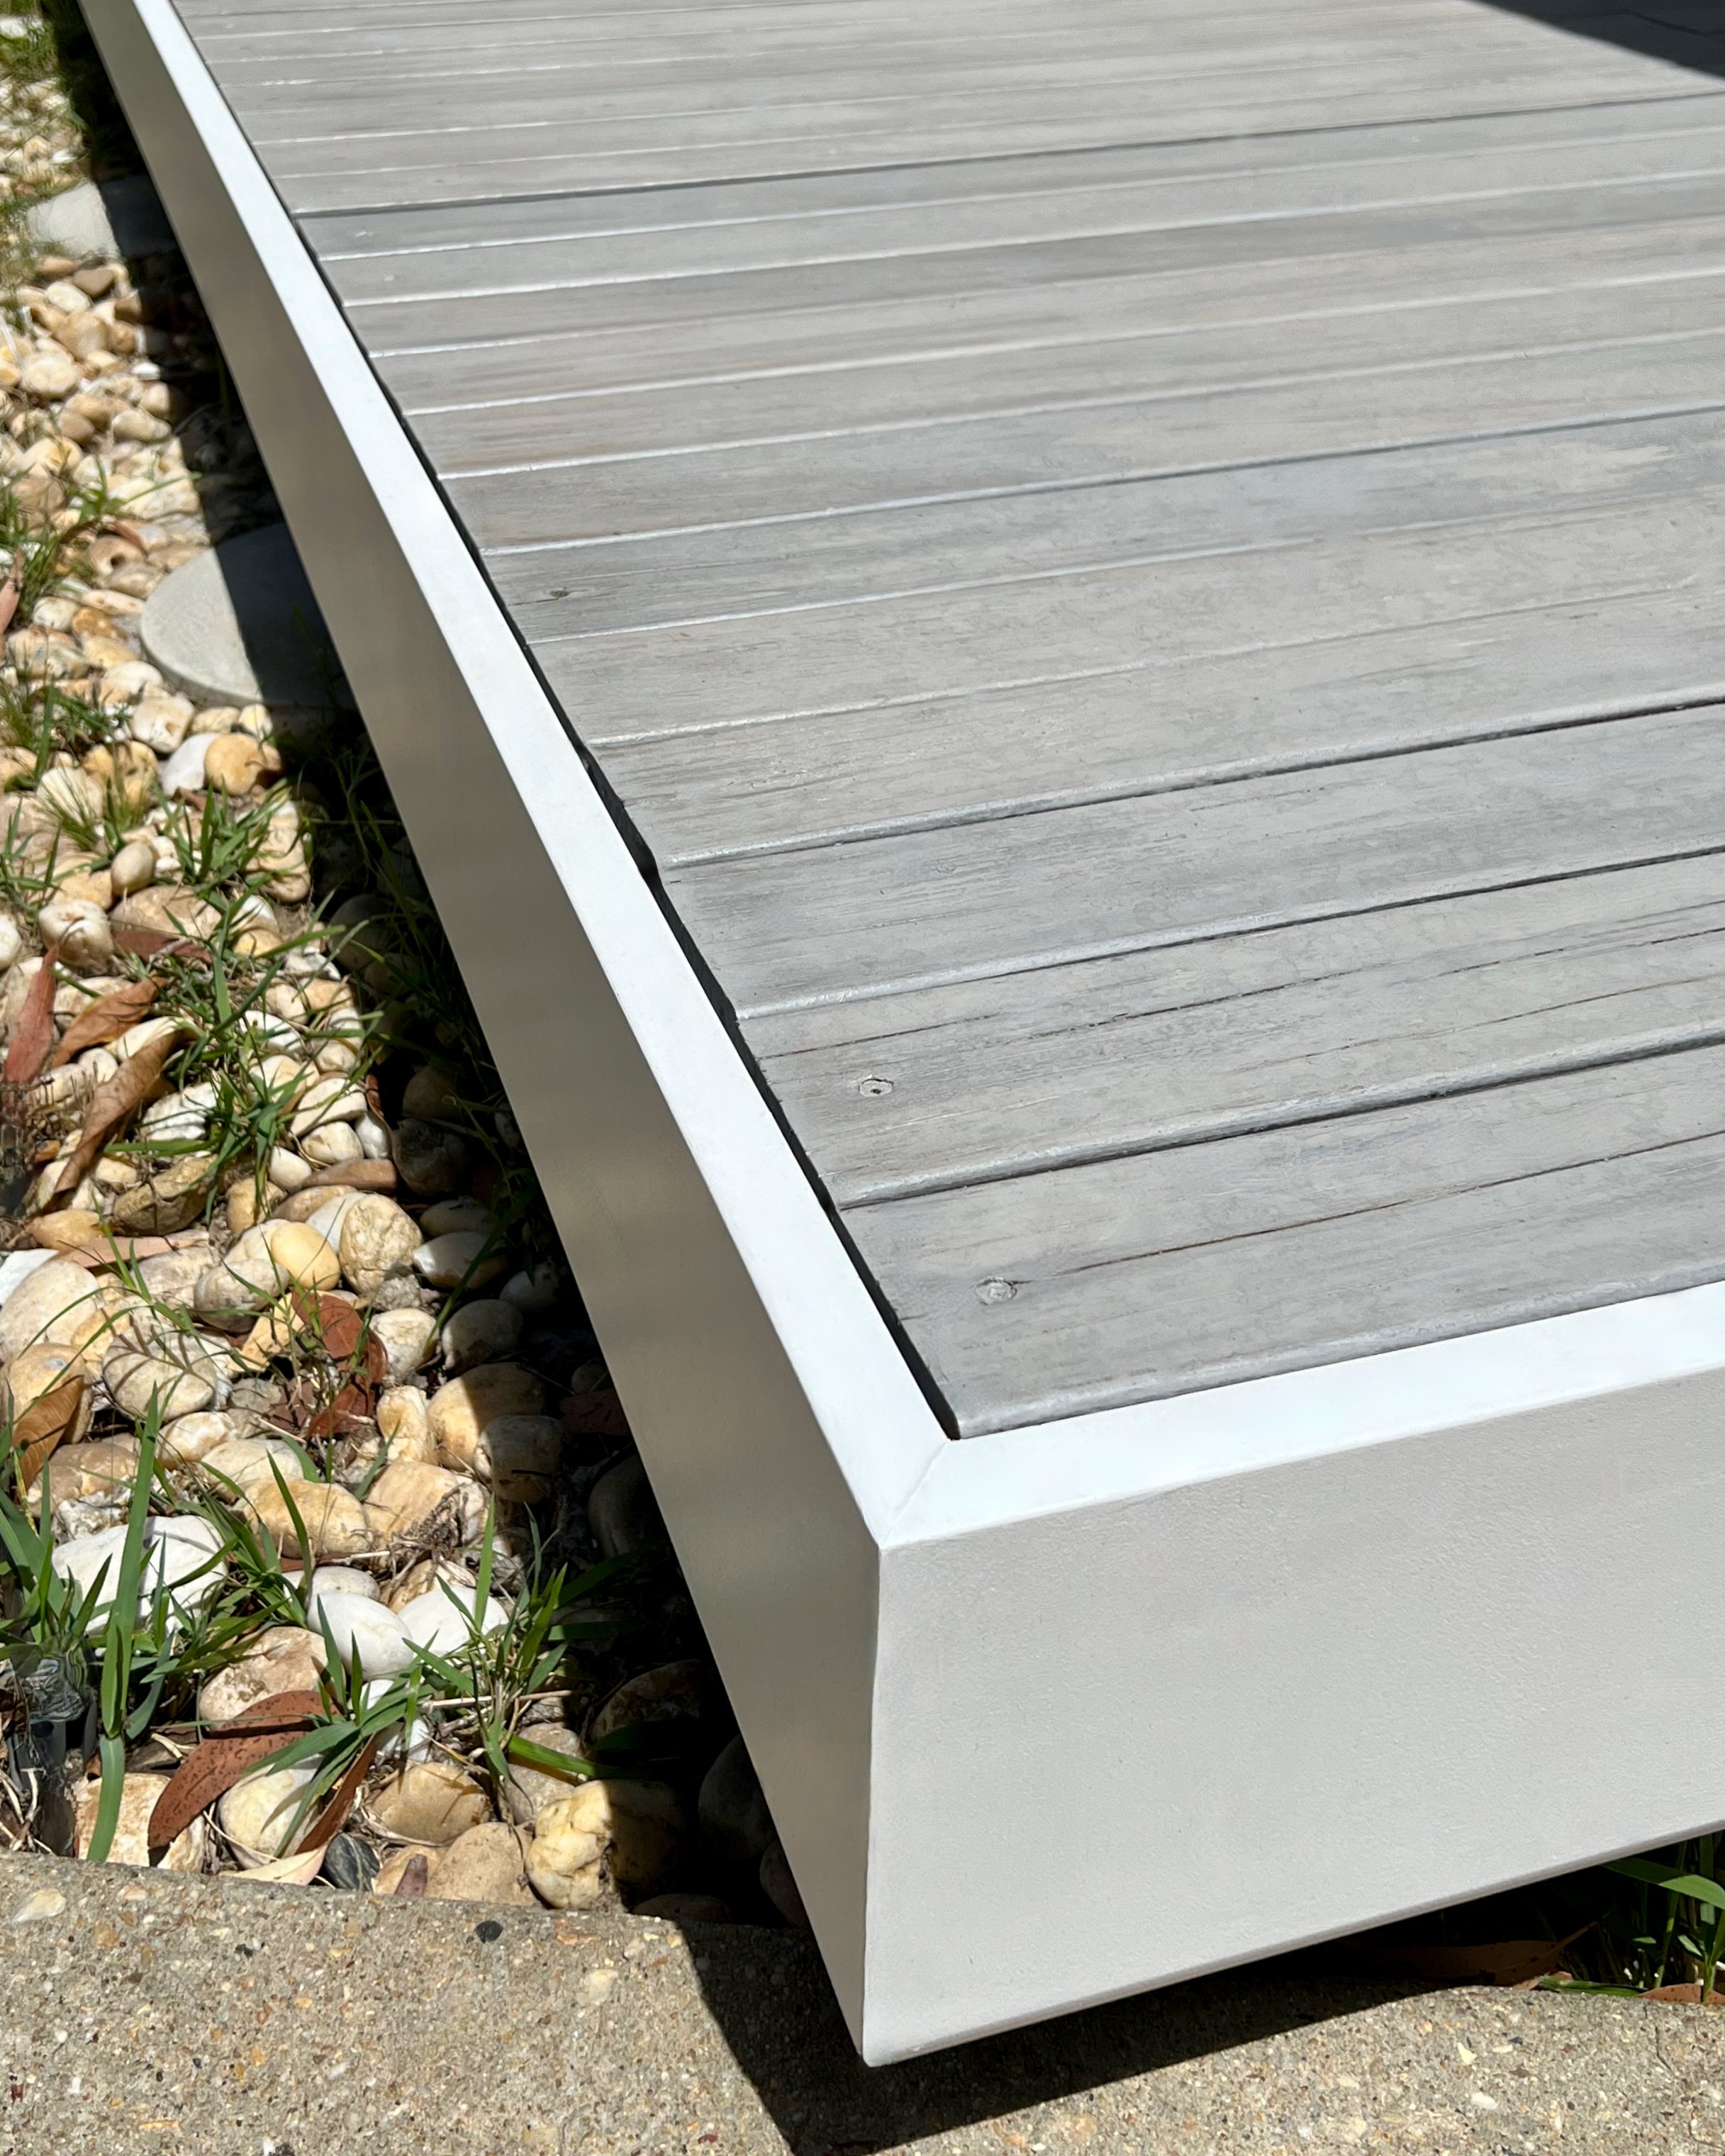
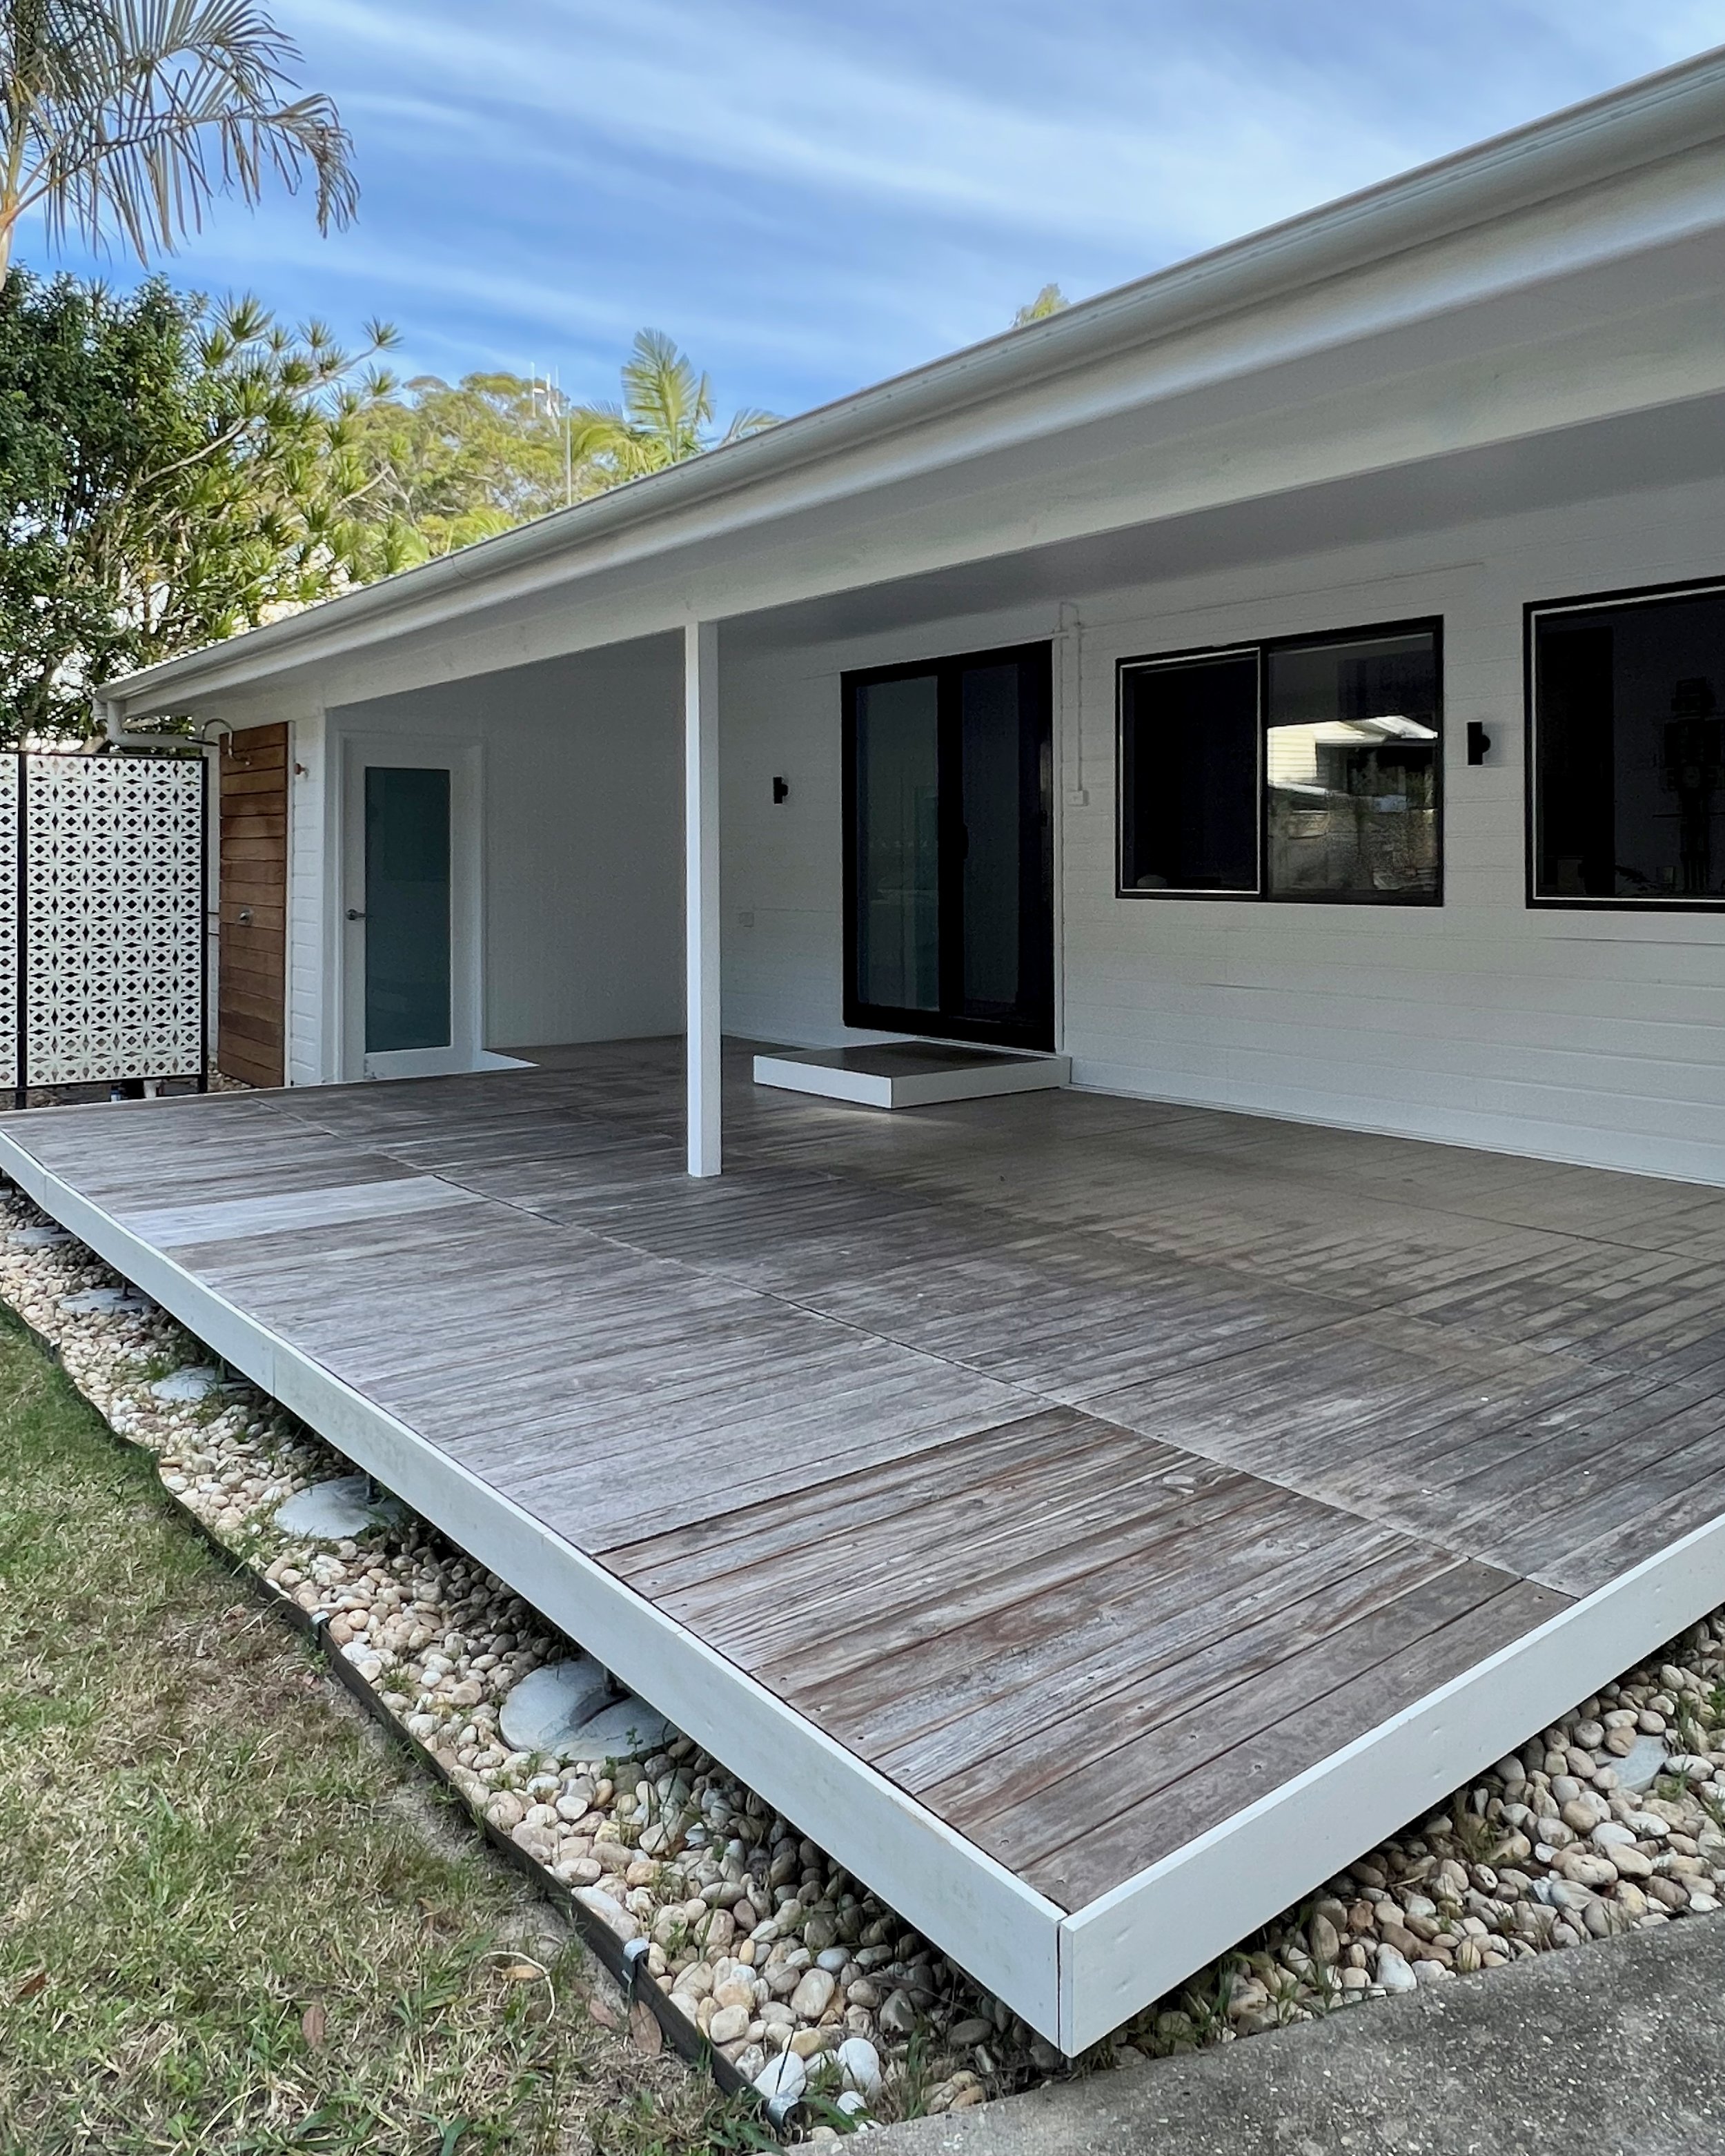
PROGRESS NOTE After building a deck that steps down onto the pavers in front of the laundry entry, I changed the orientation of the door to swing outwards on hidden hinges. This makes the room feel bigger but also meant I could tile the floor, adding about 10mm to the height, without affecting the smooth action of opening.


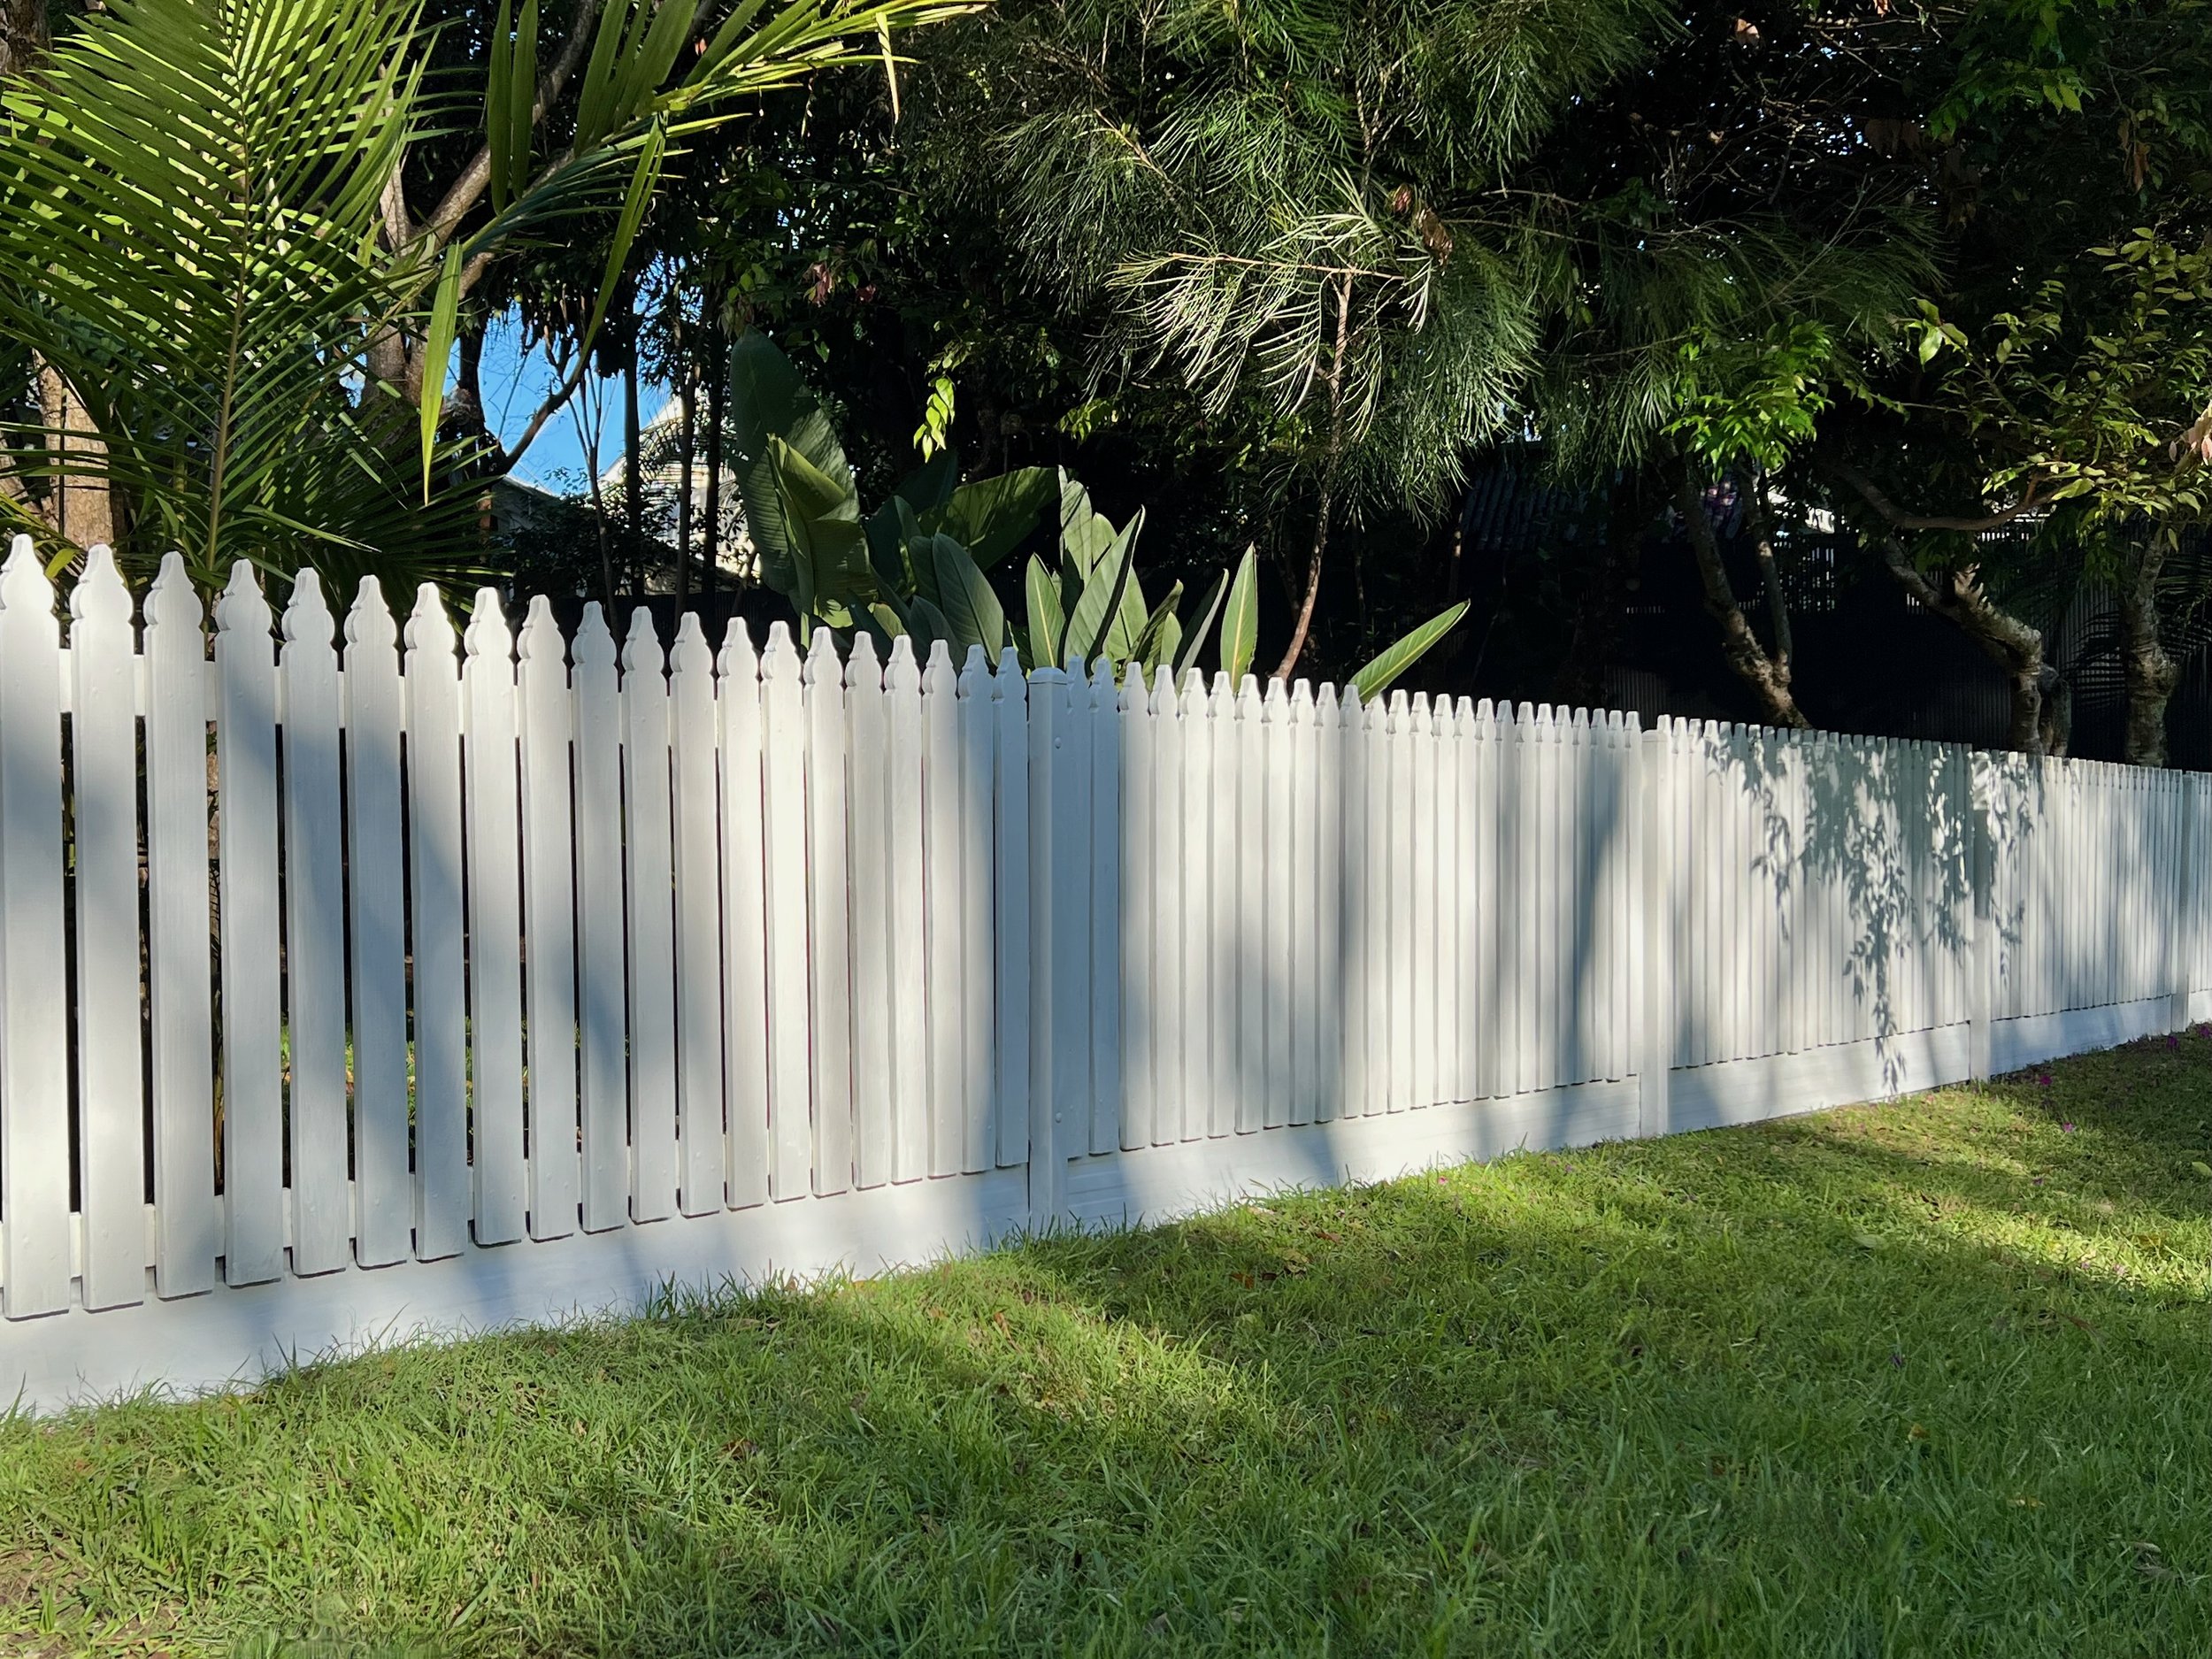
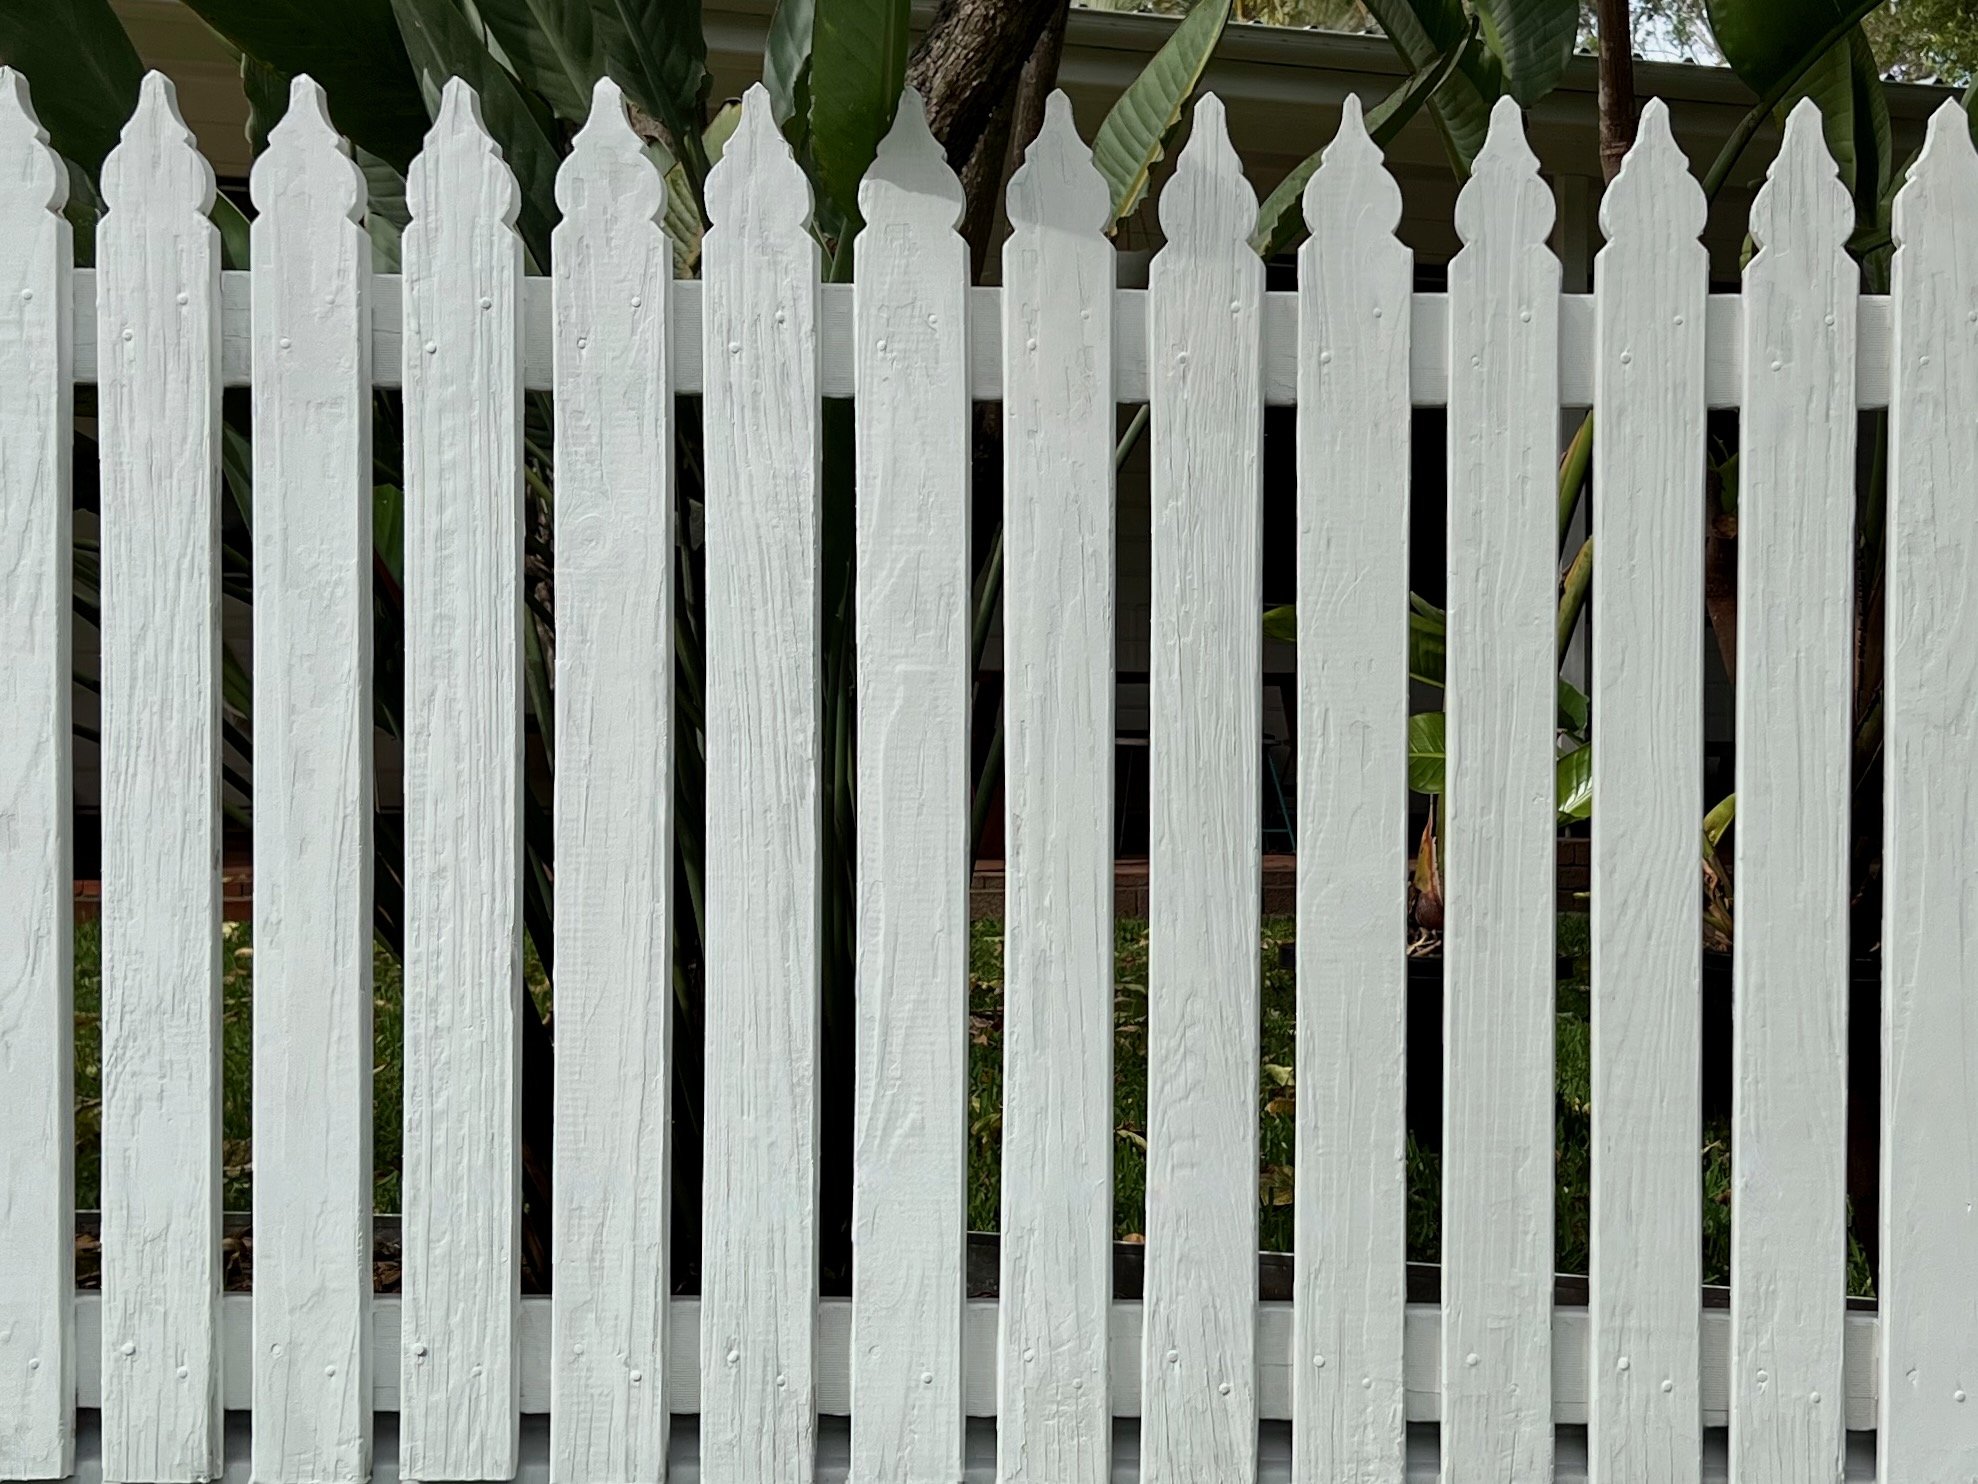
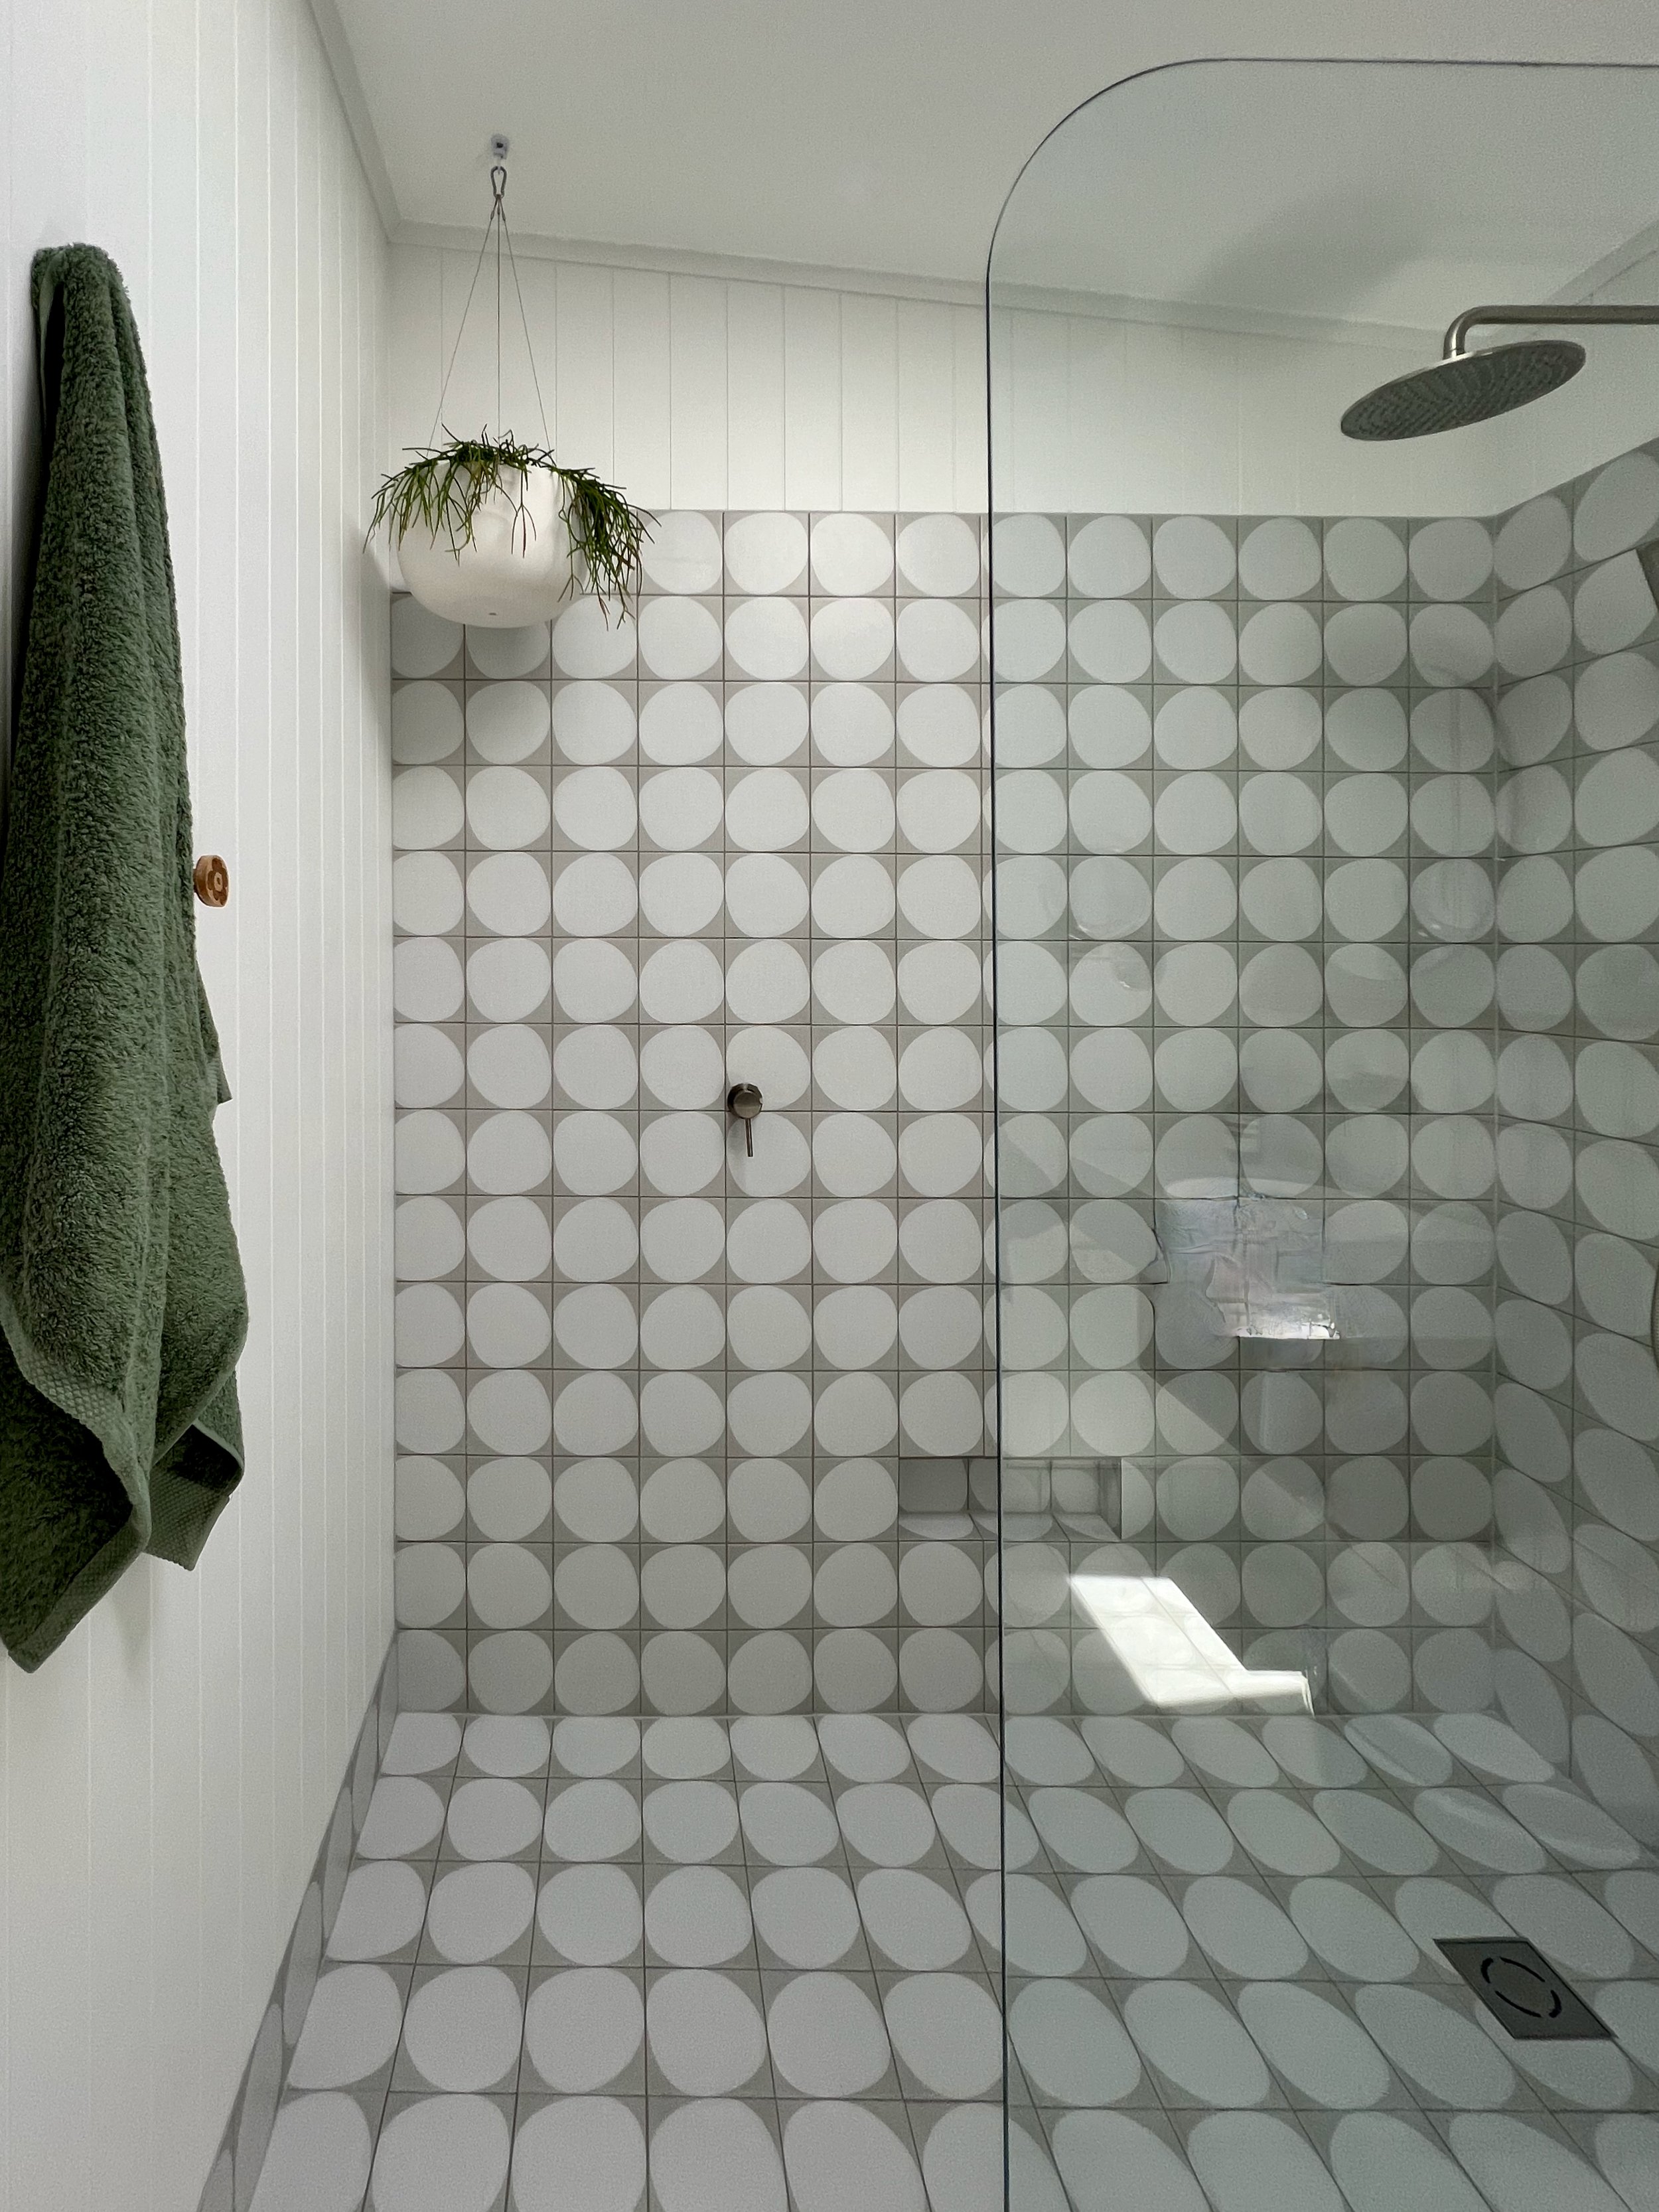
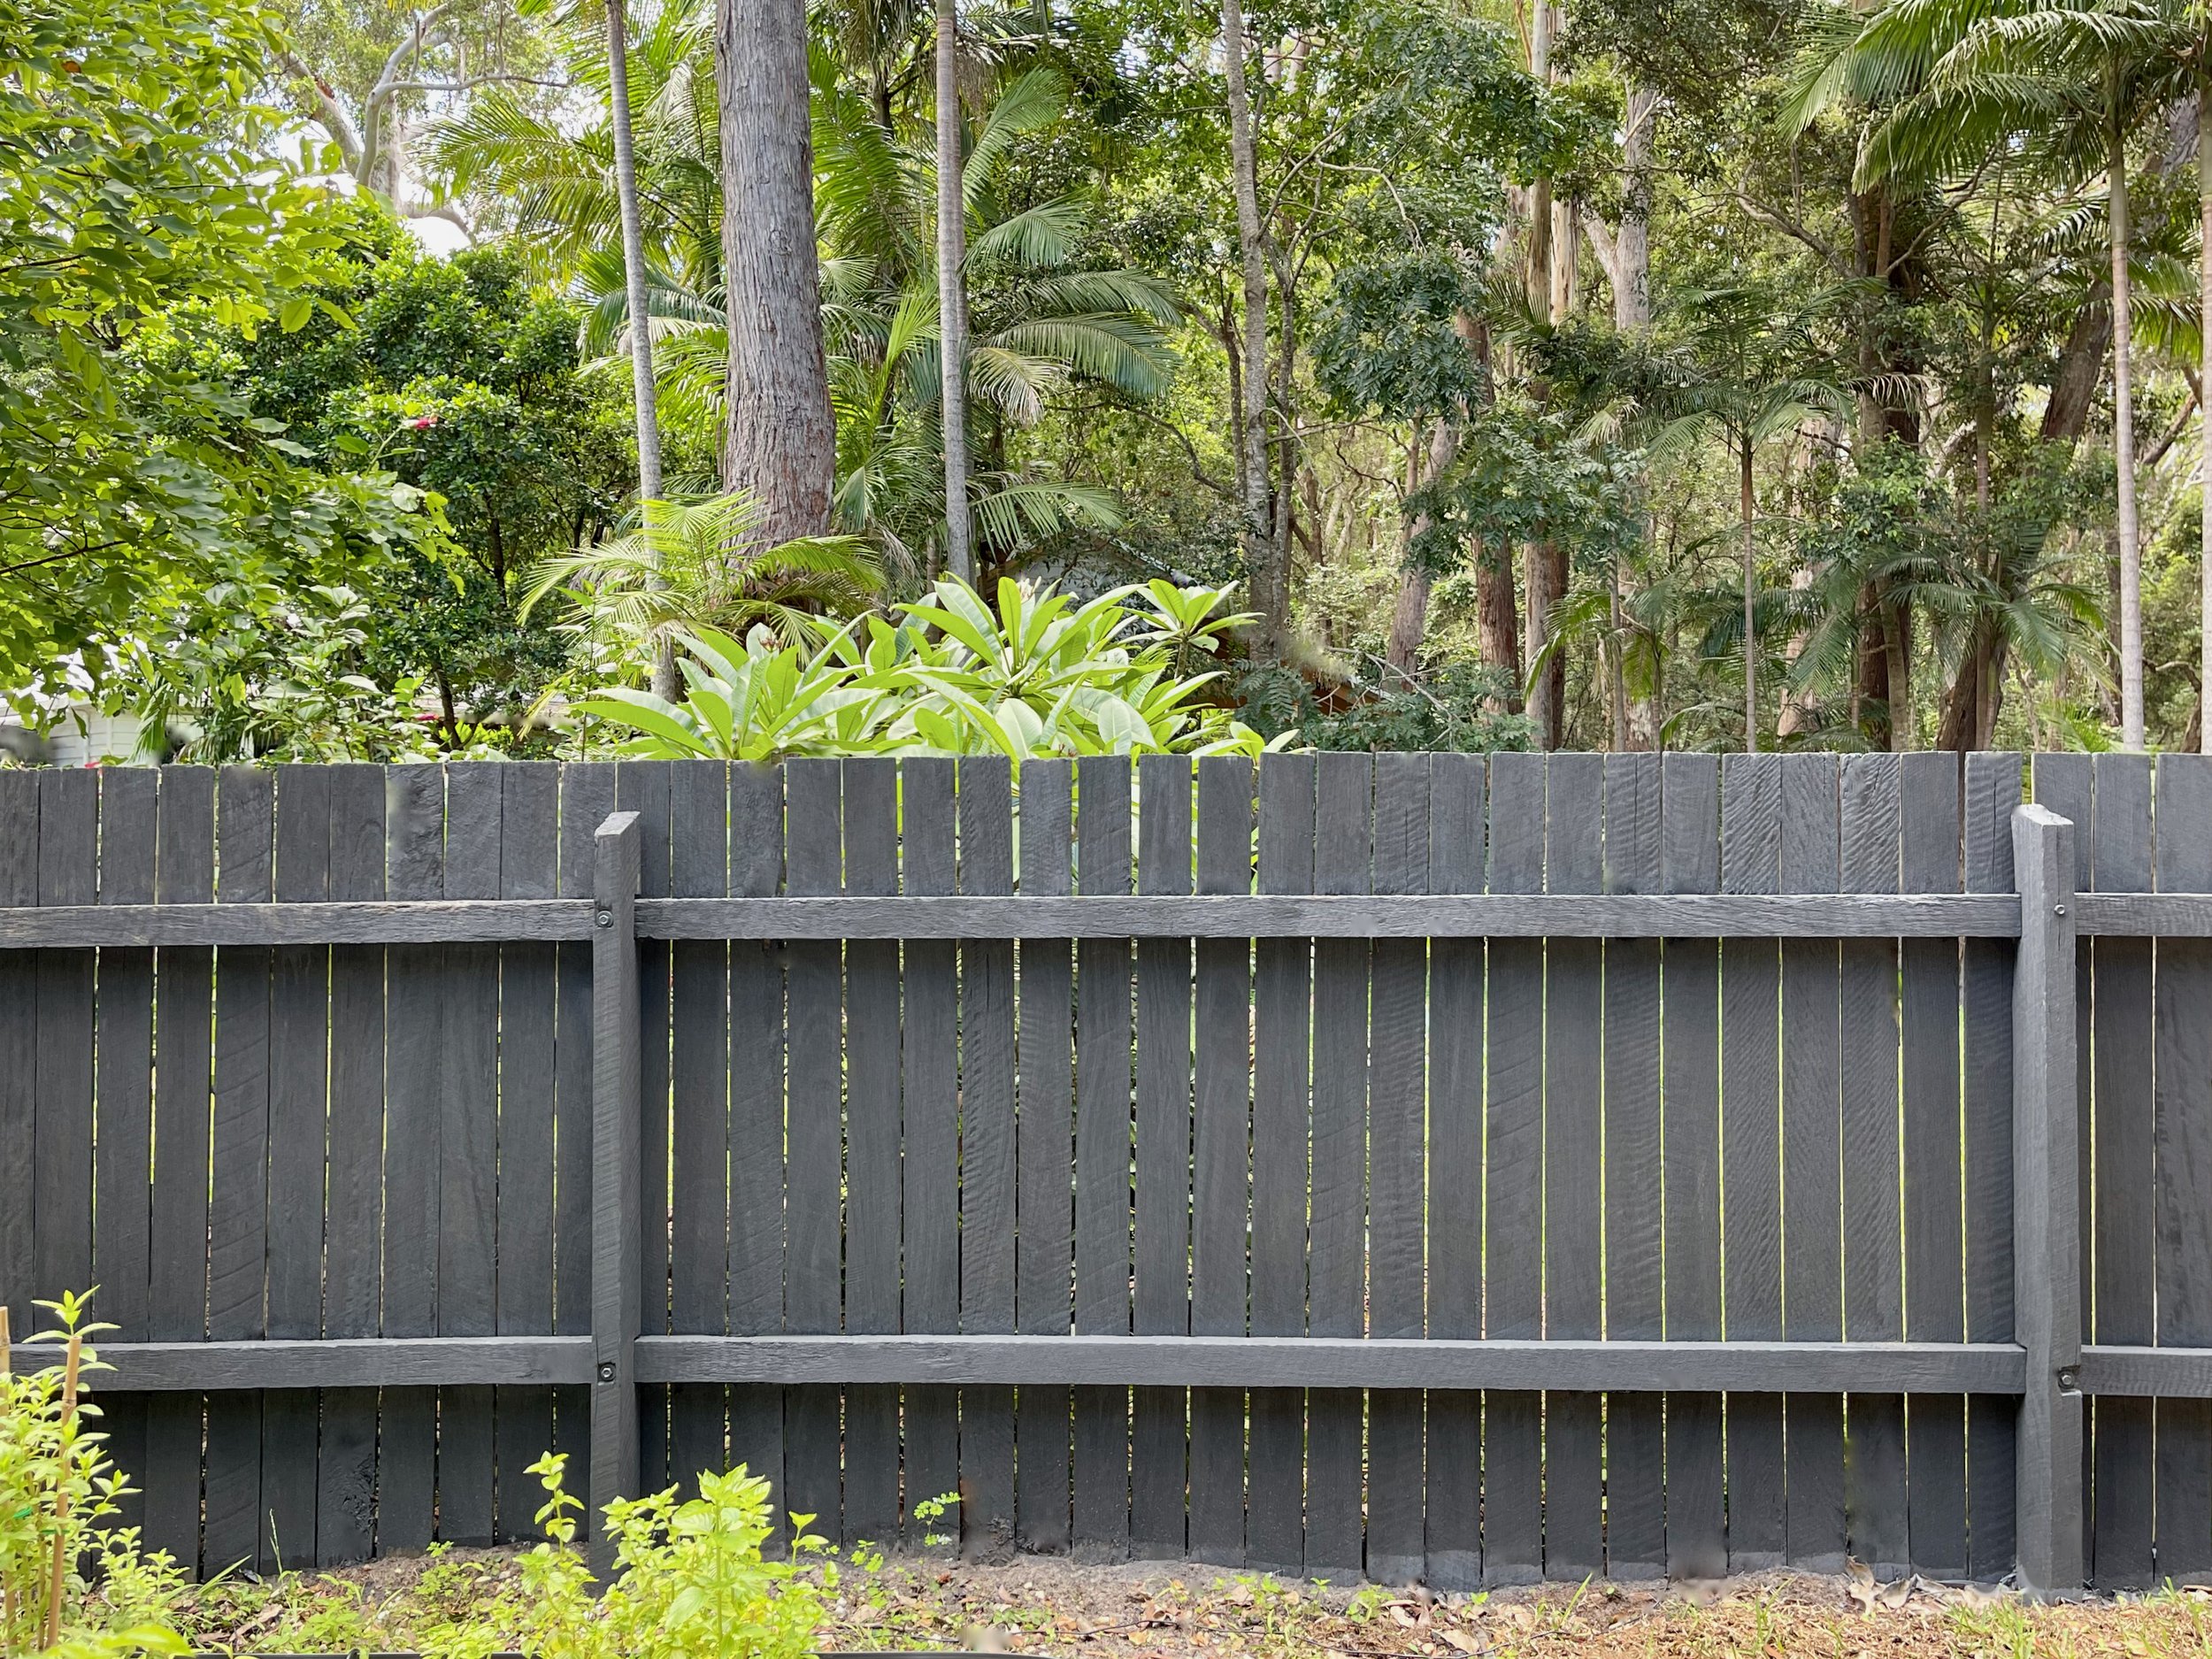
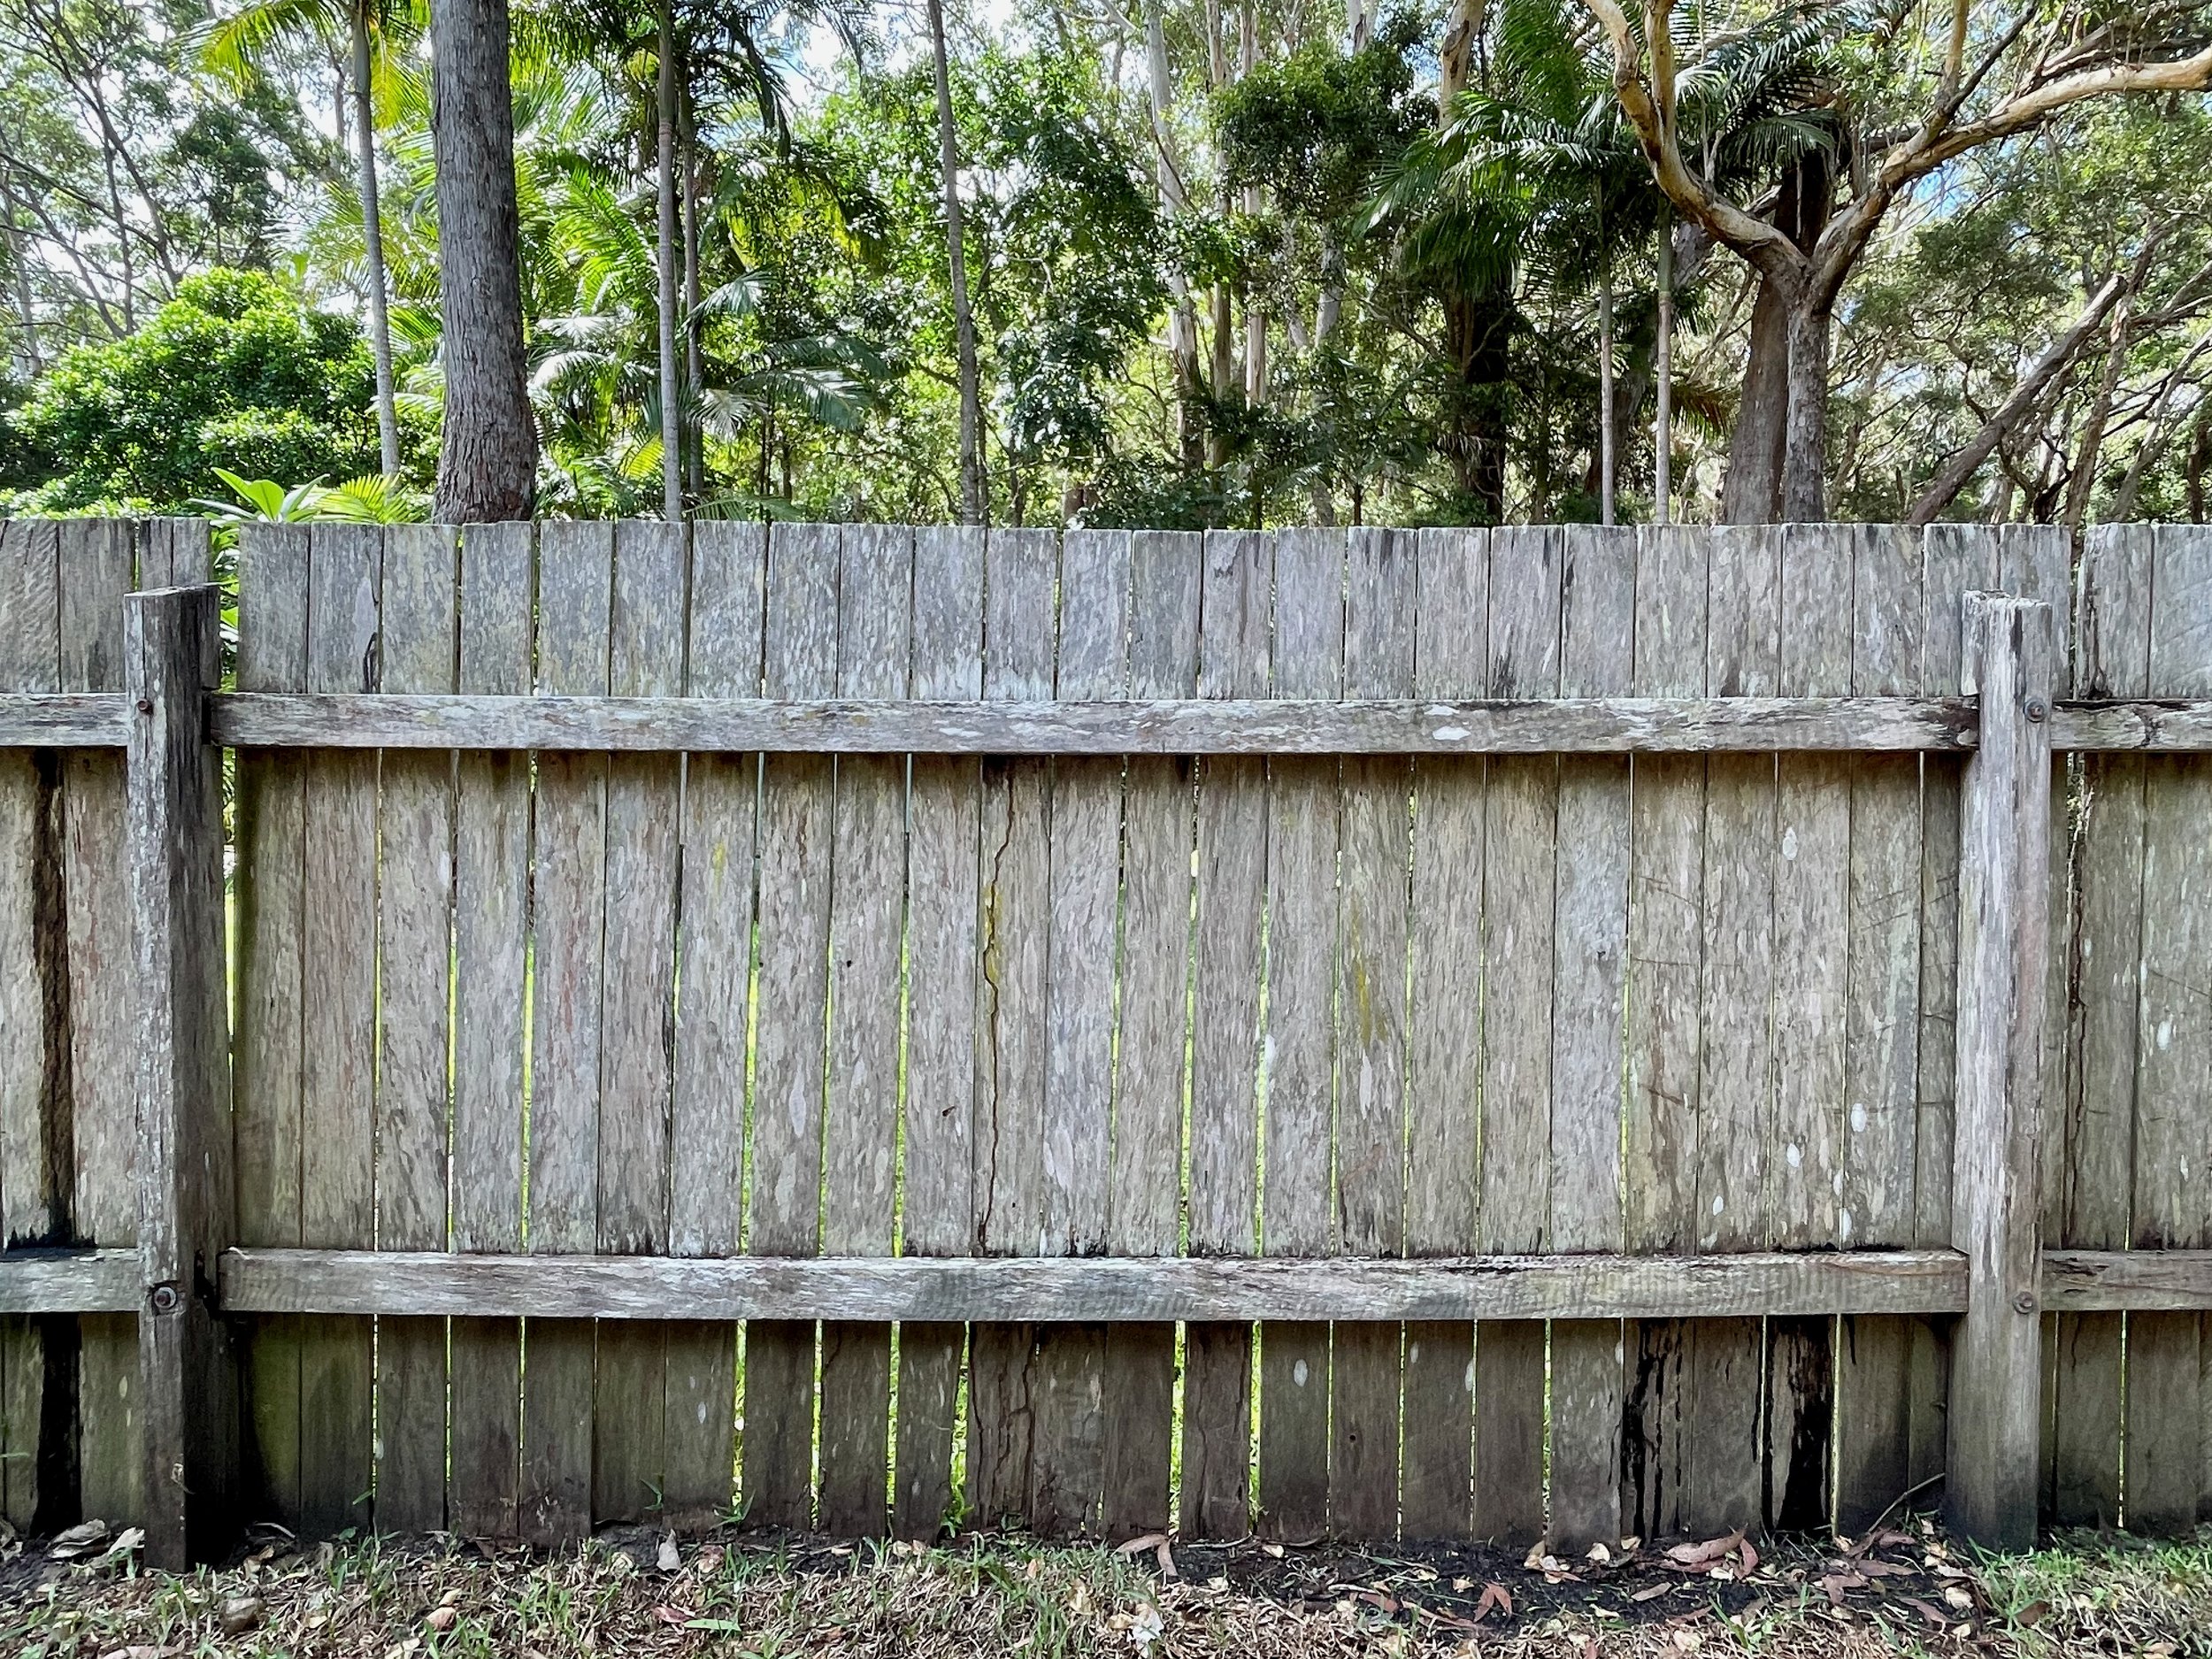
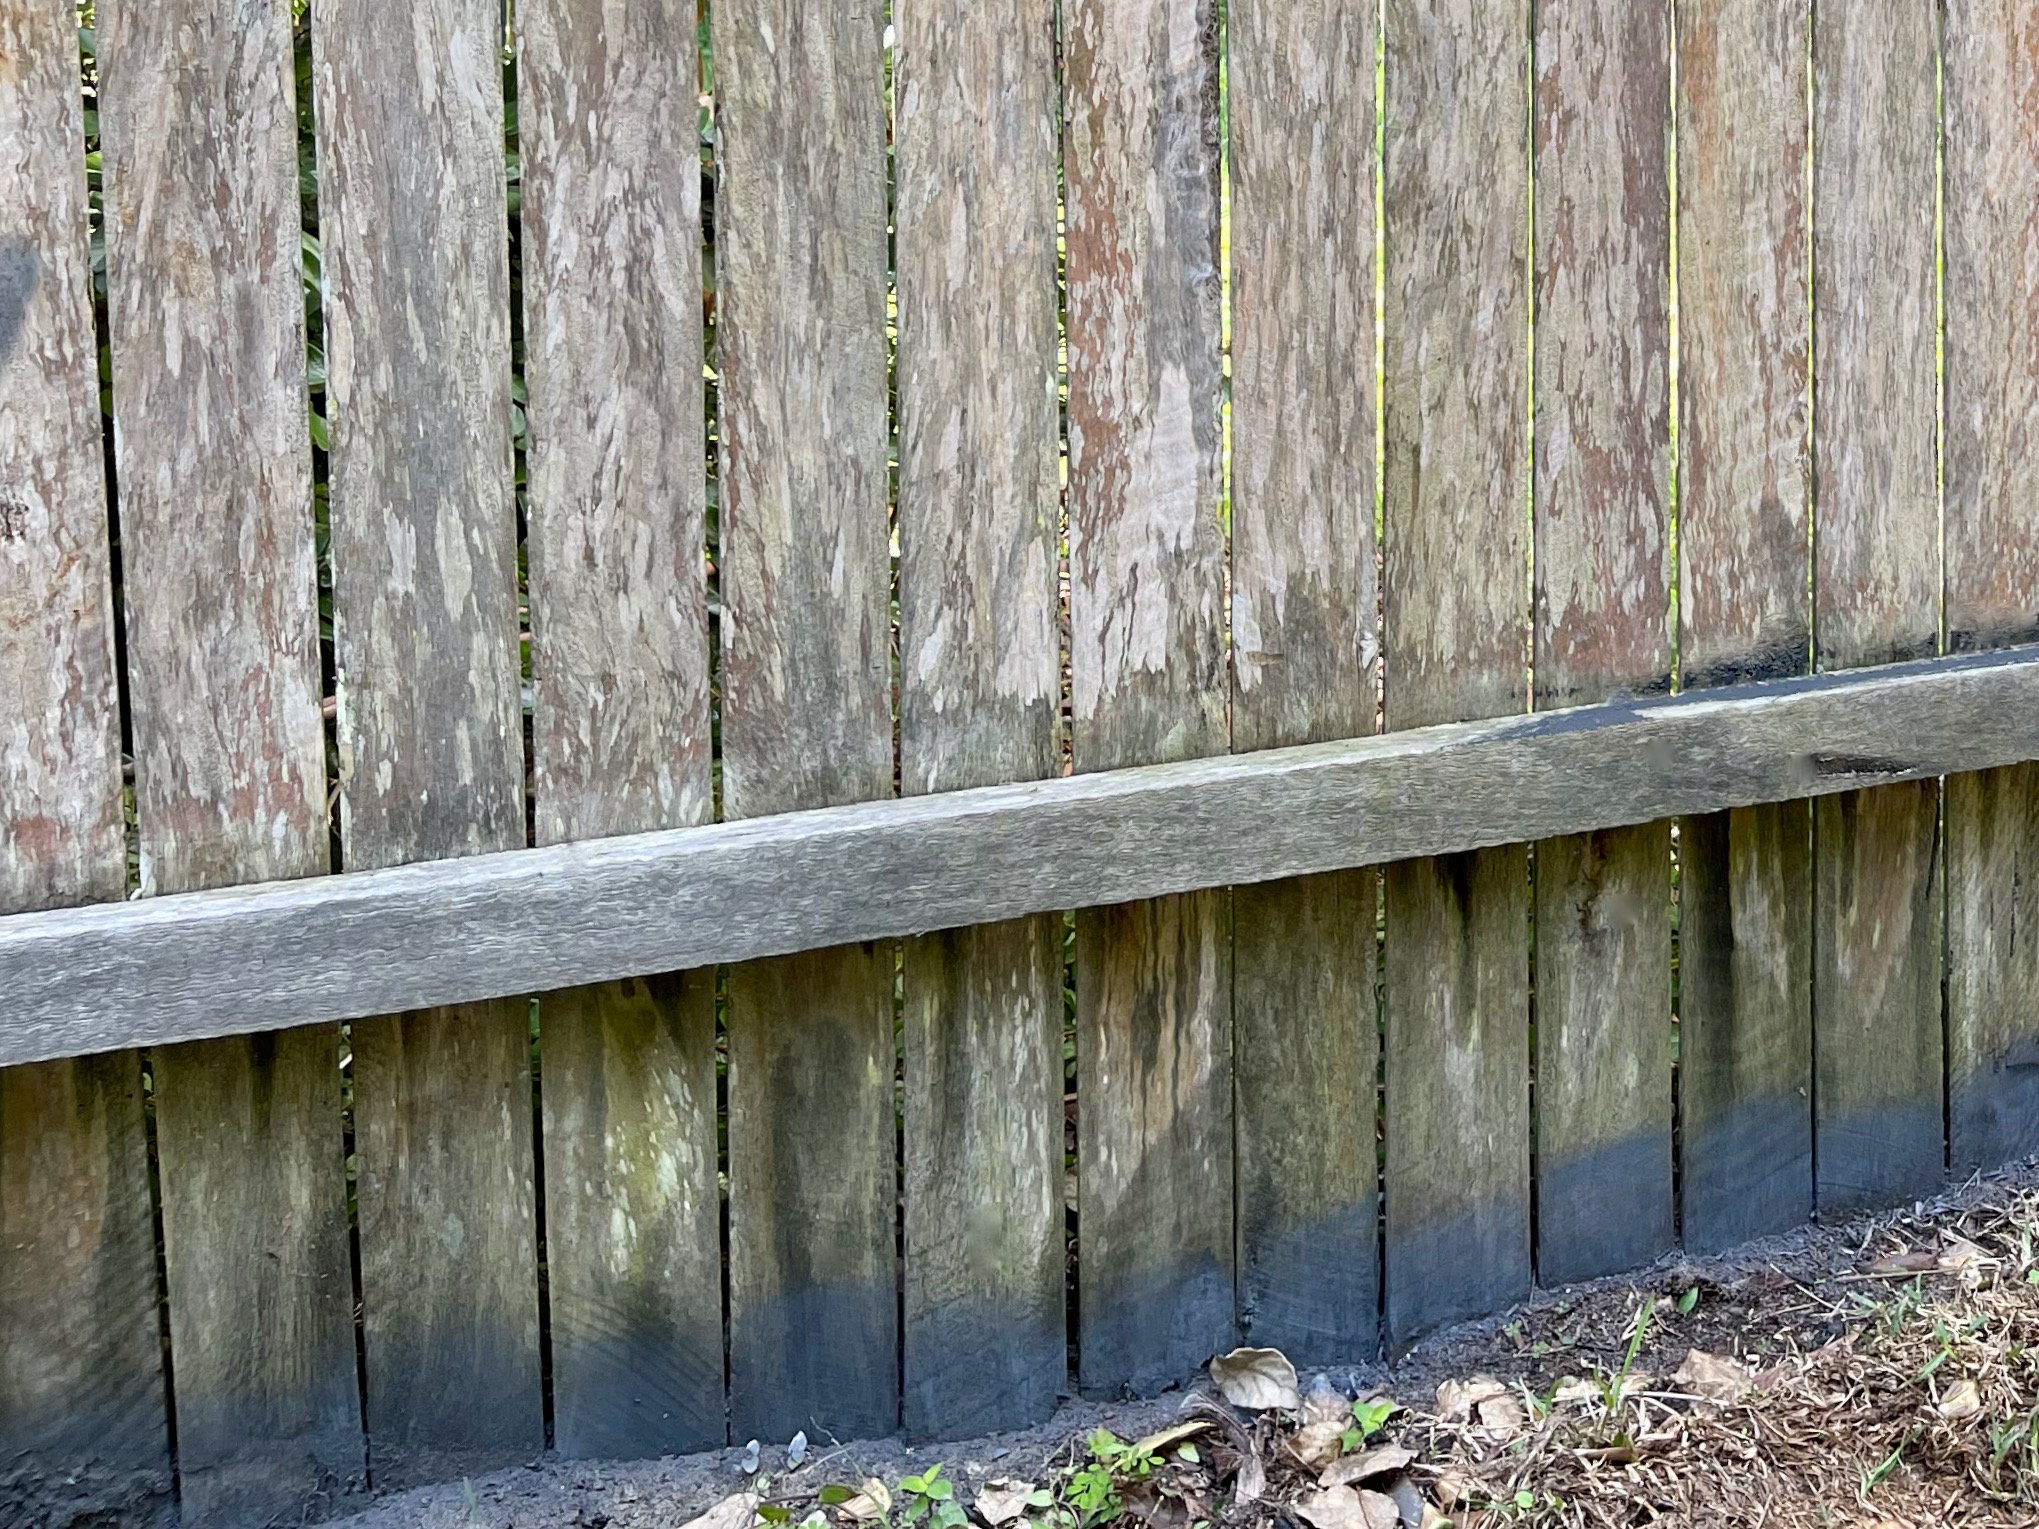
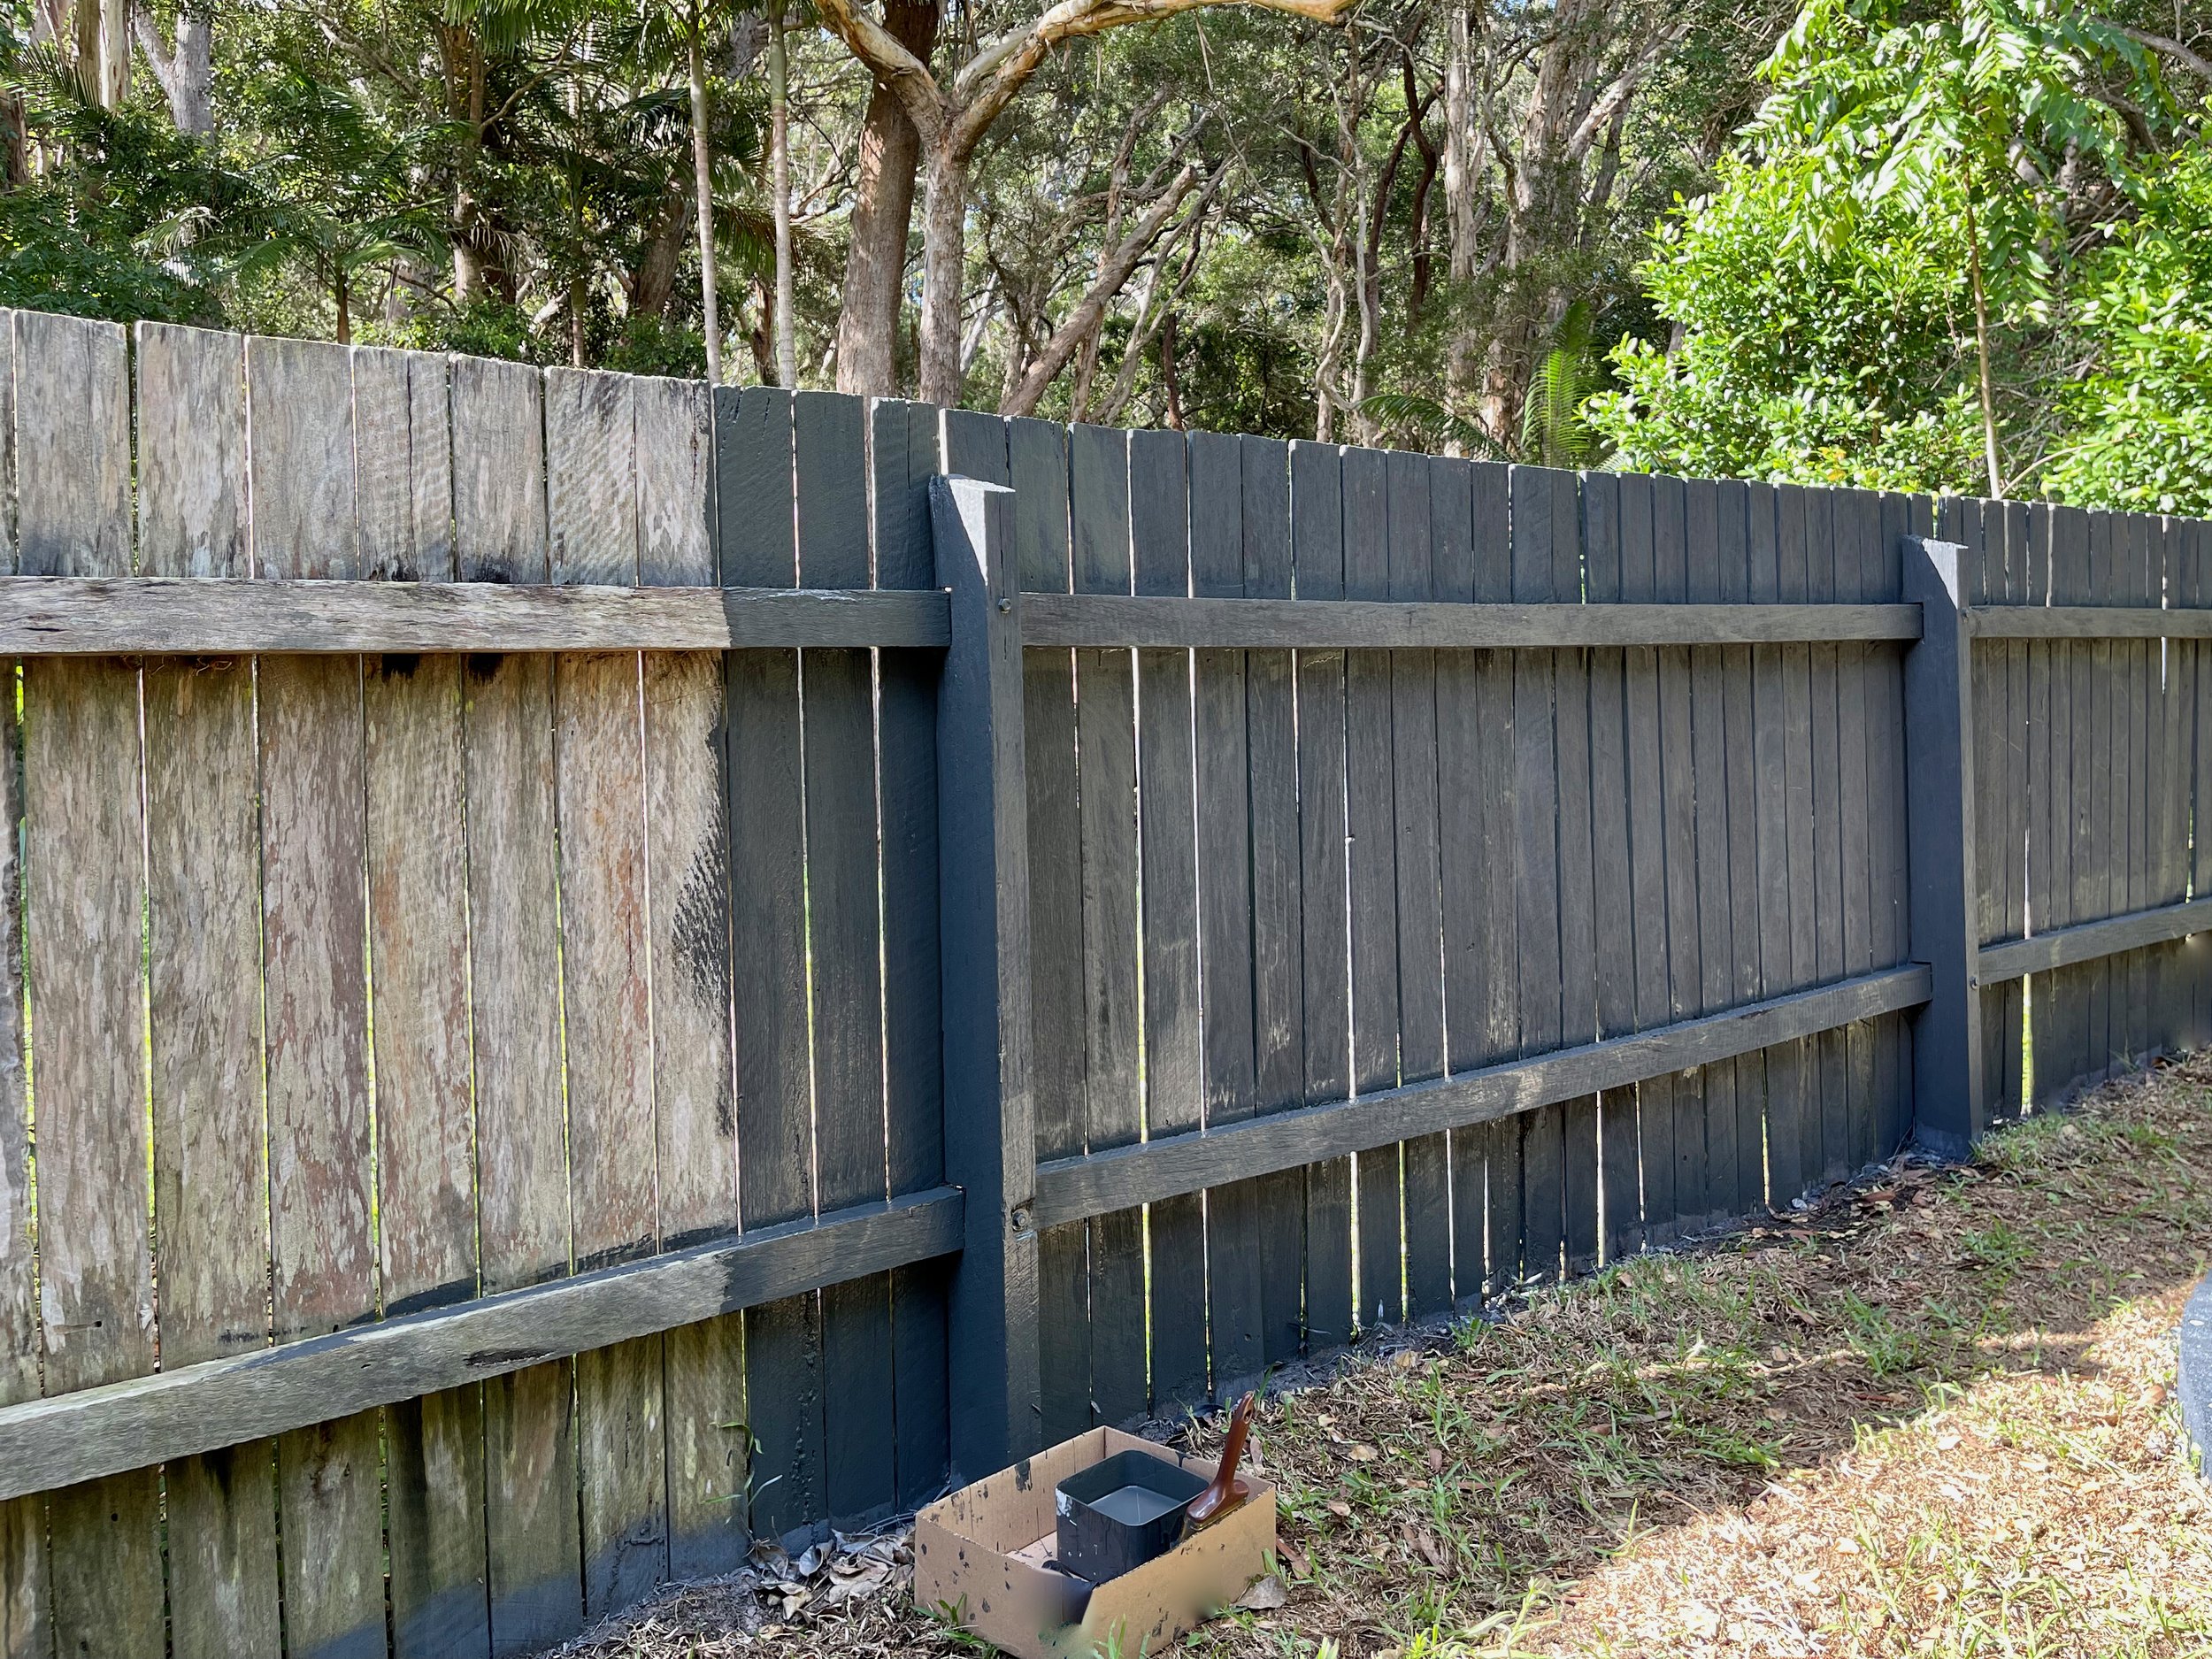
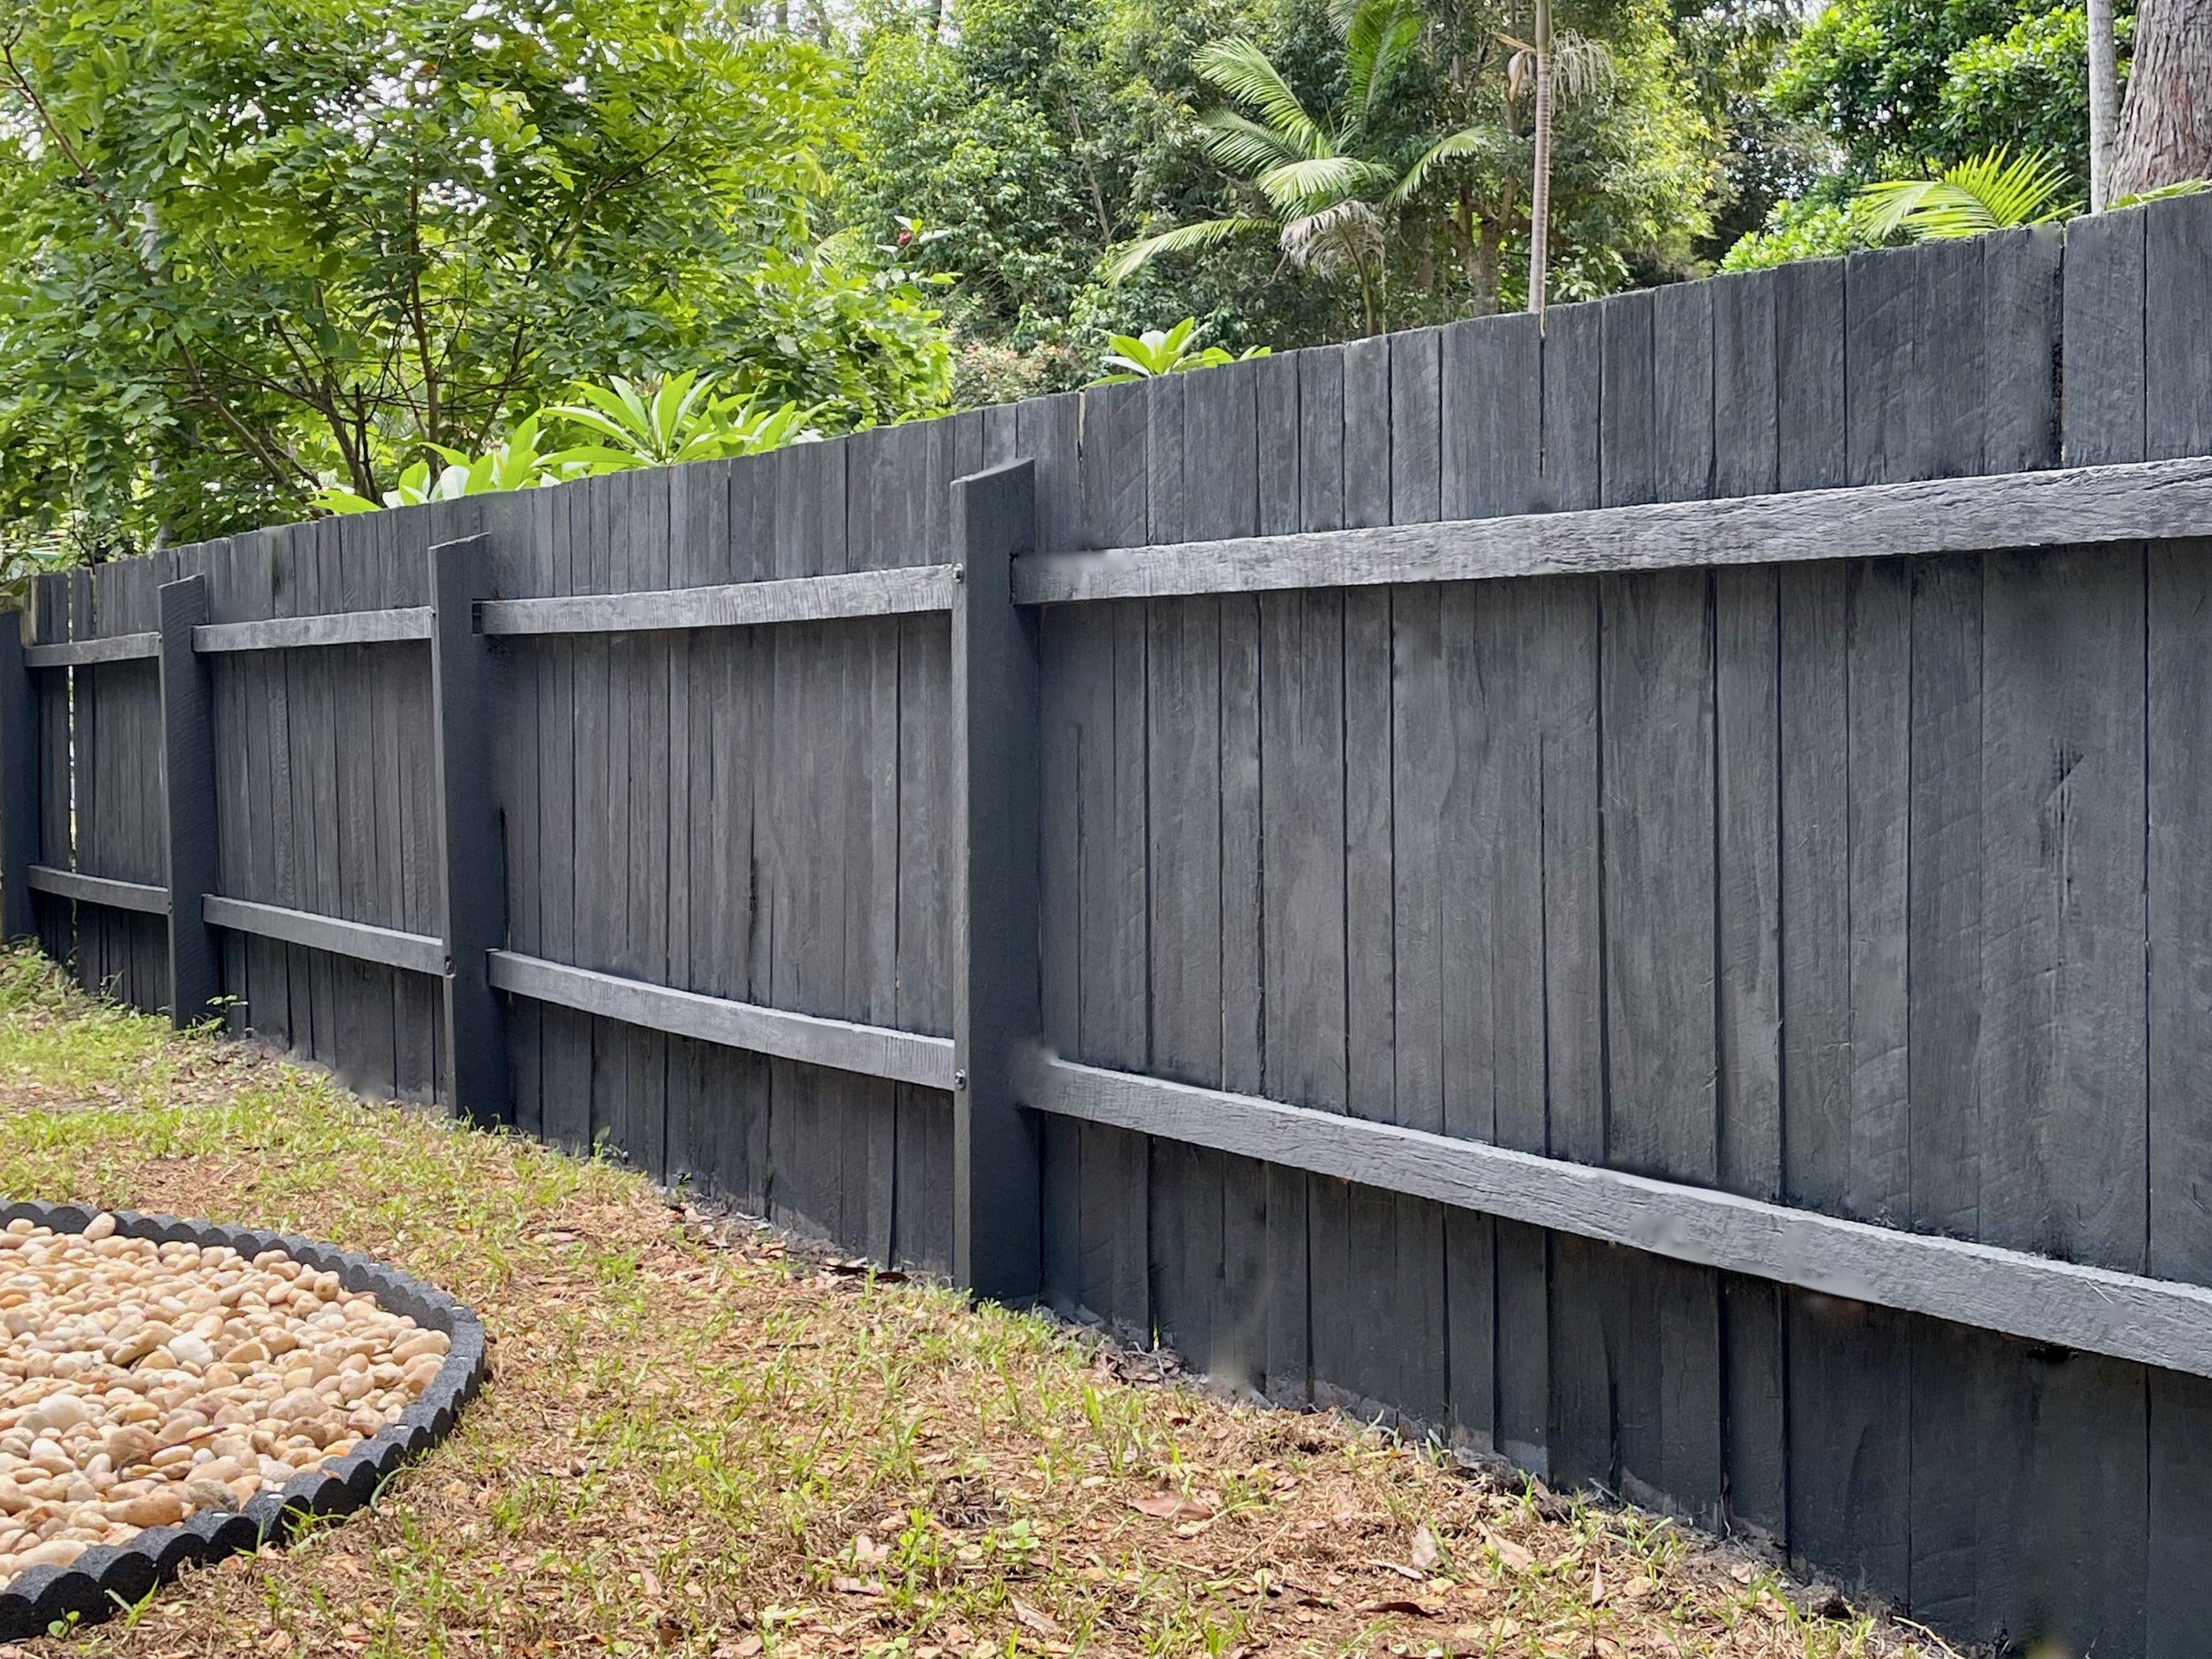
I’ve since added screening to the boundary fence and a privacy screen for the shower area, which gets lots of use after walks from the beach.

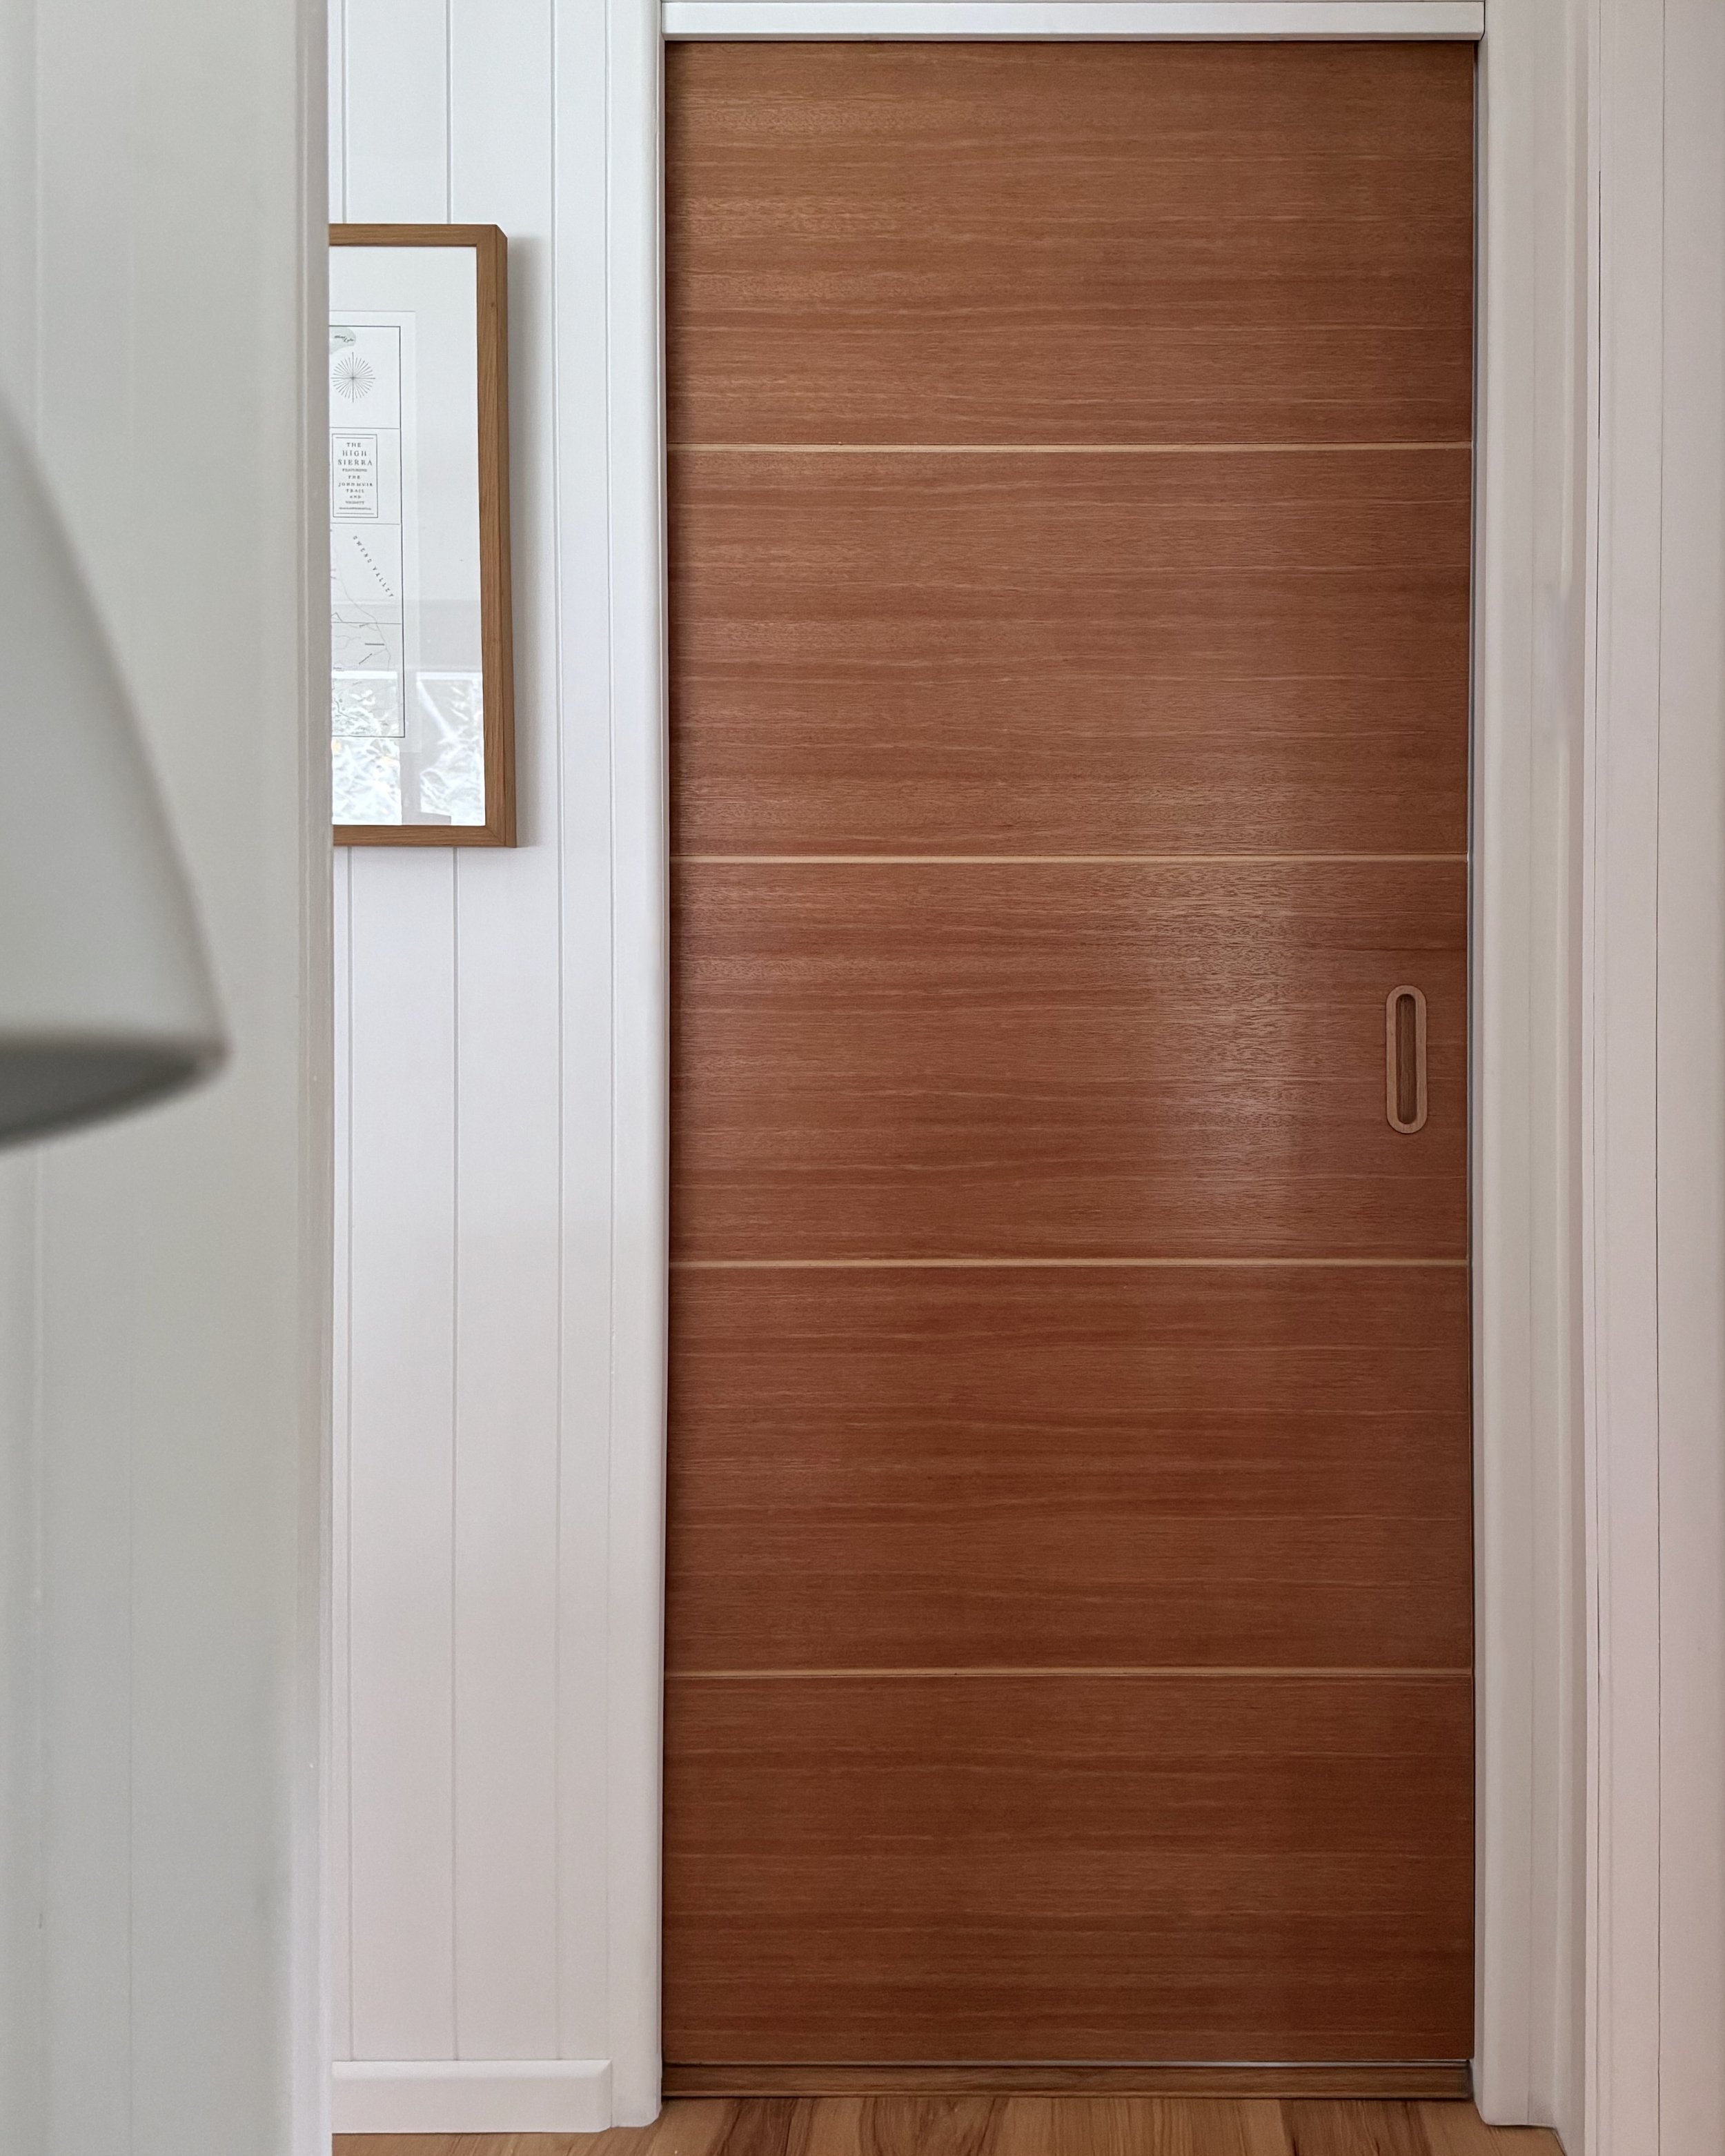
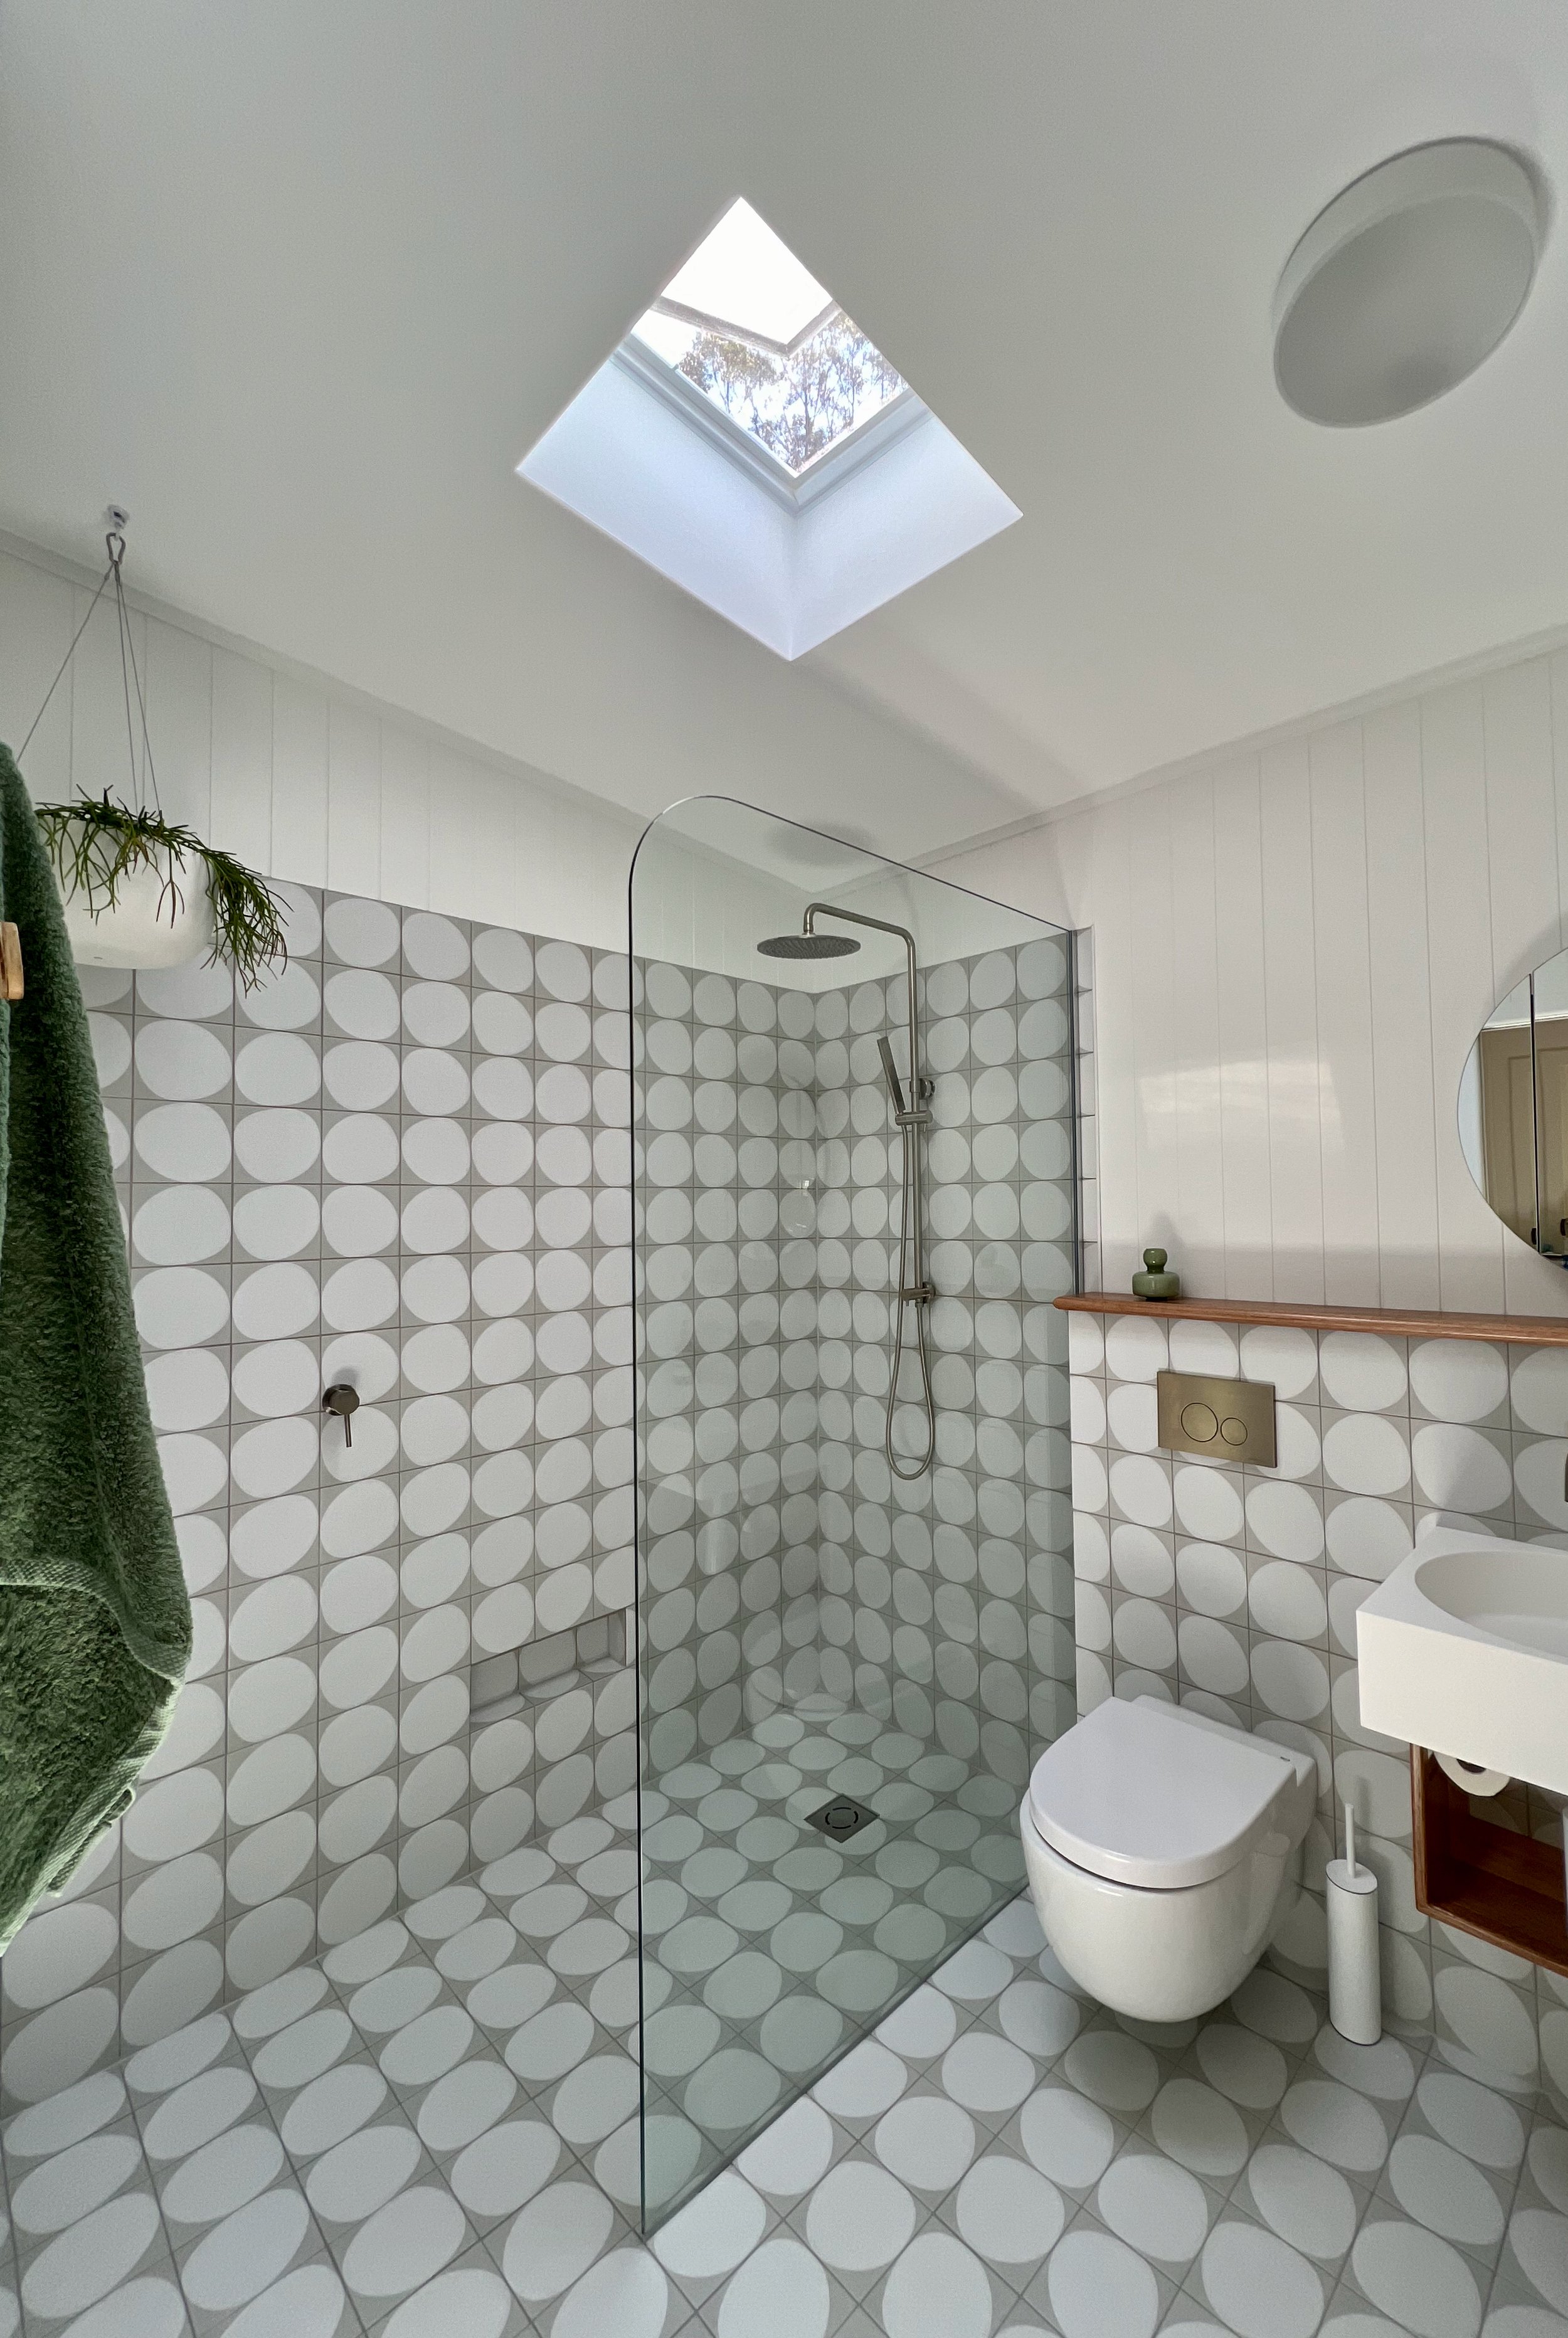
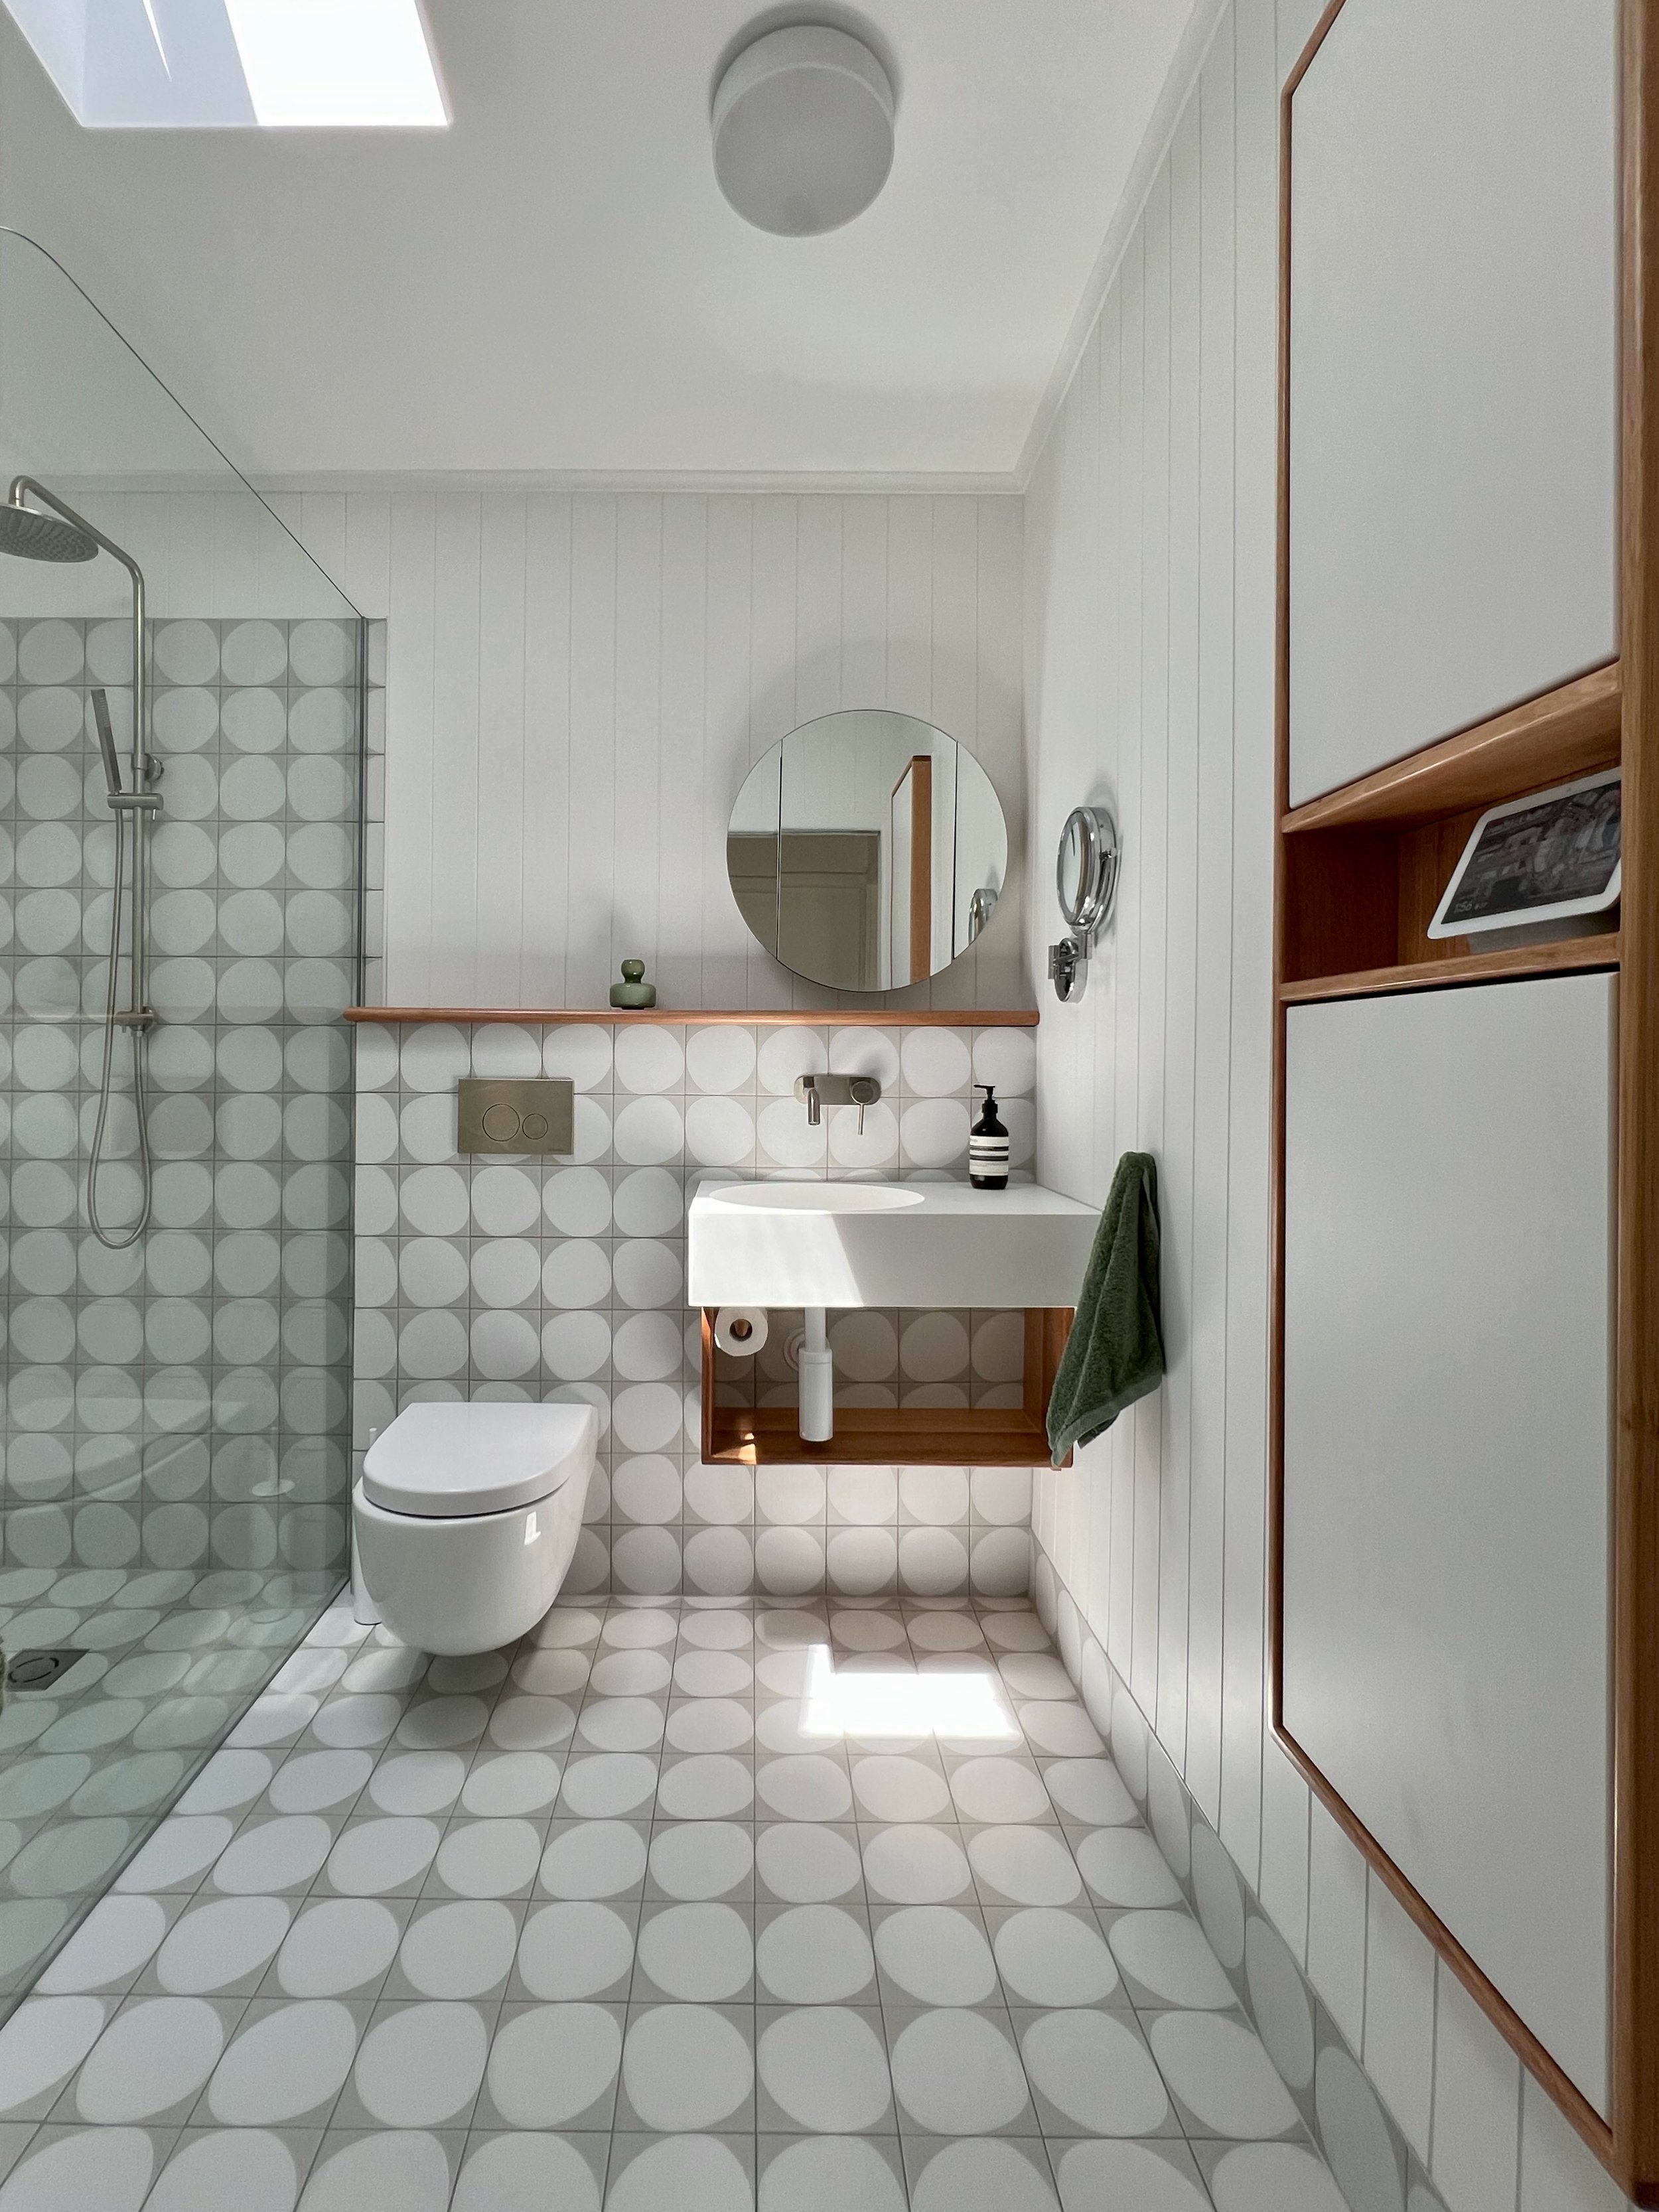
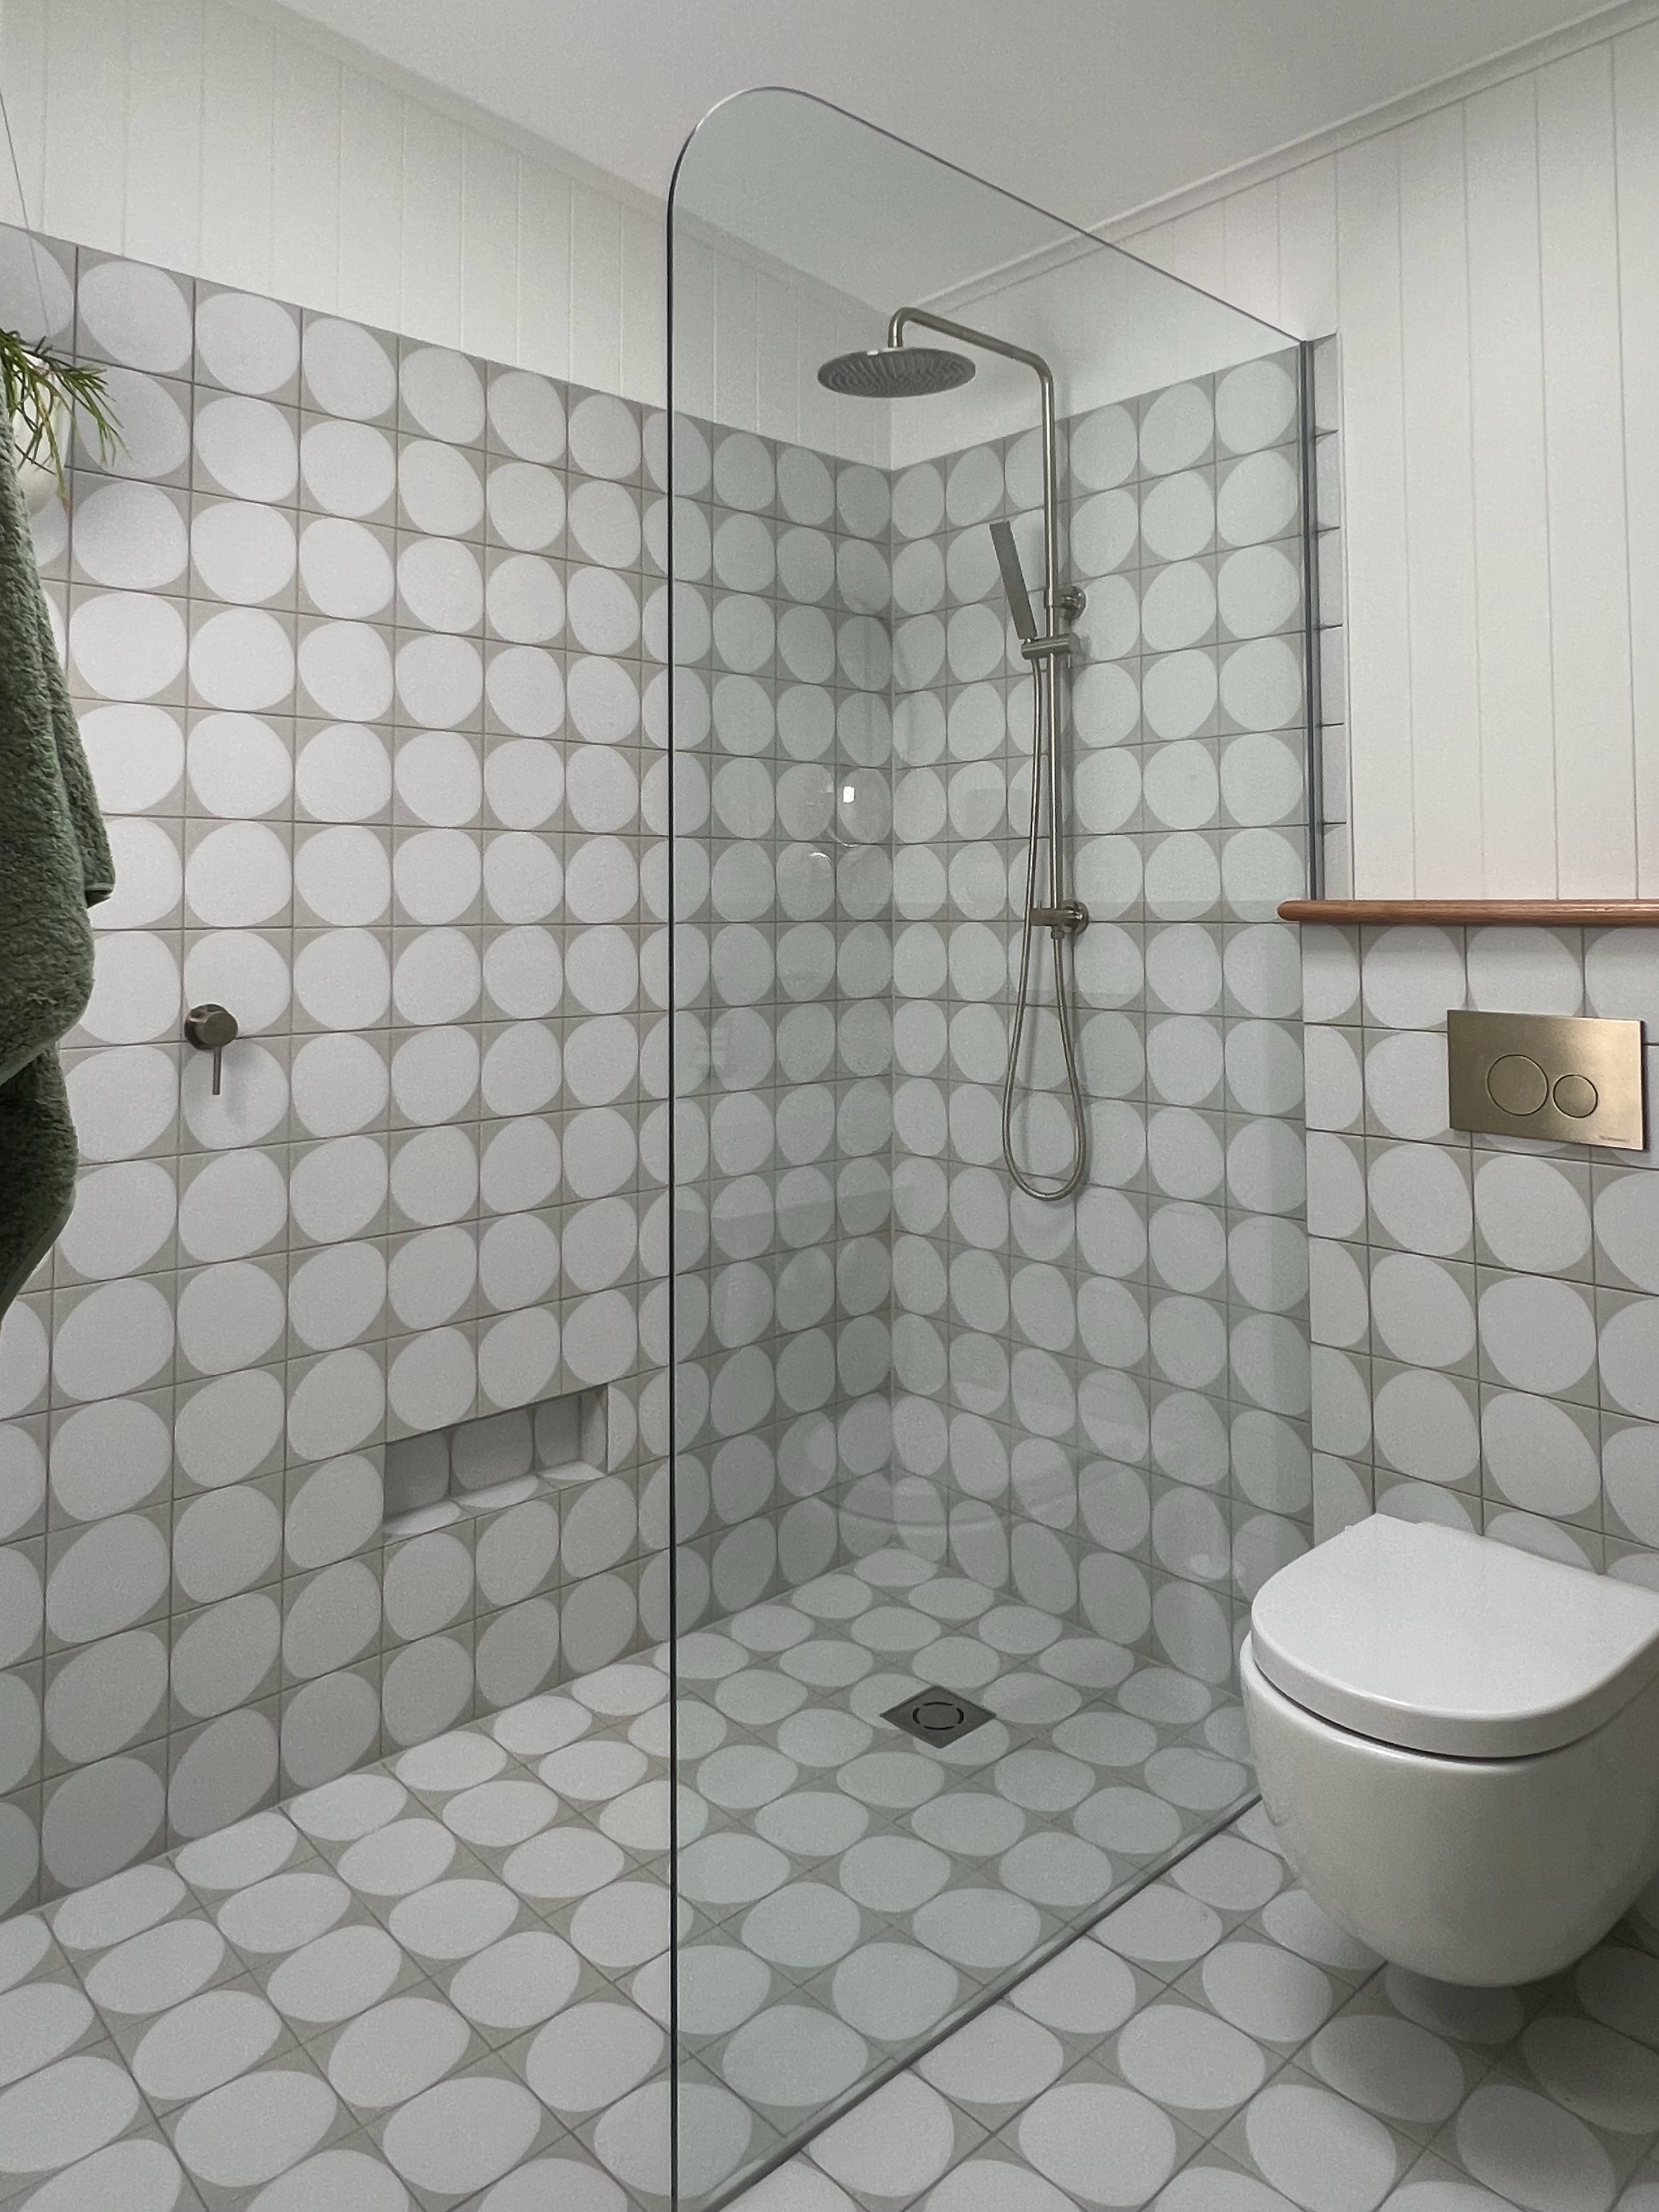
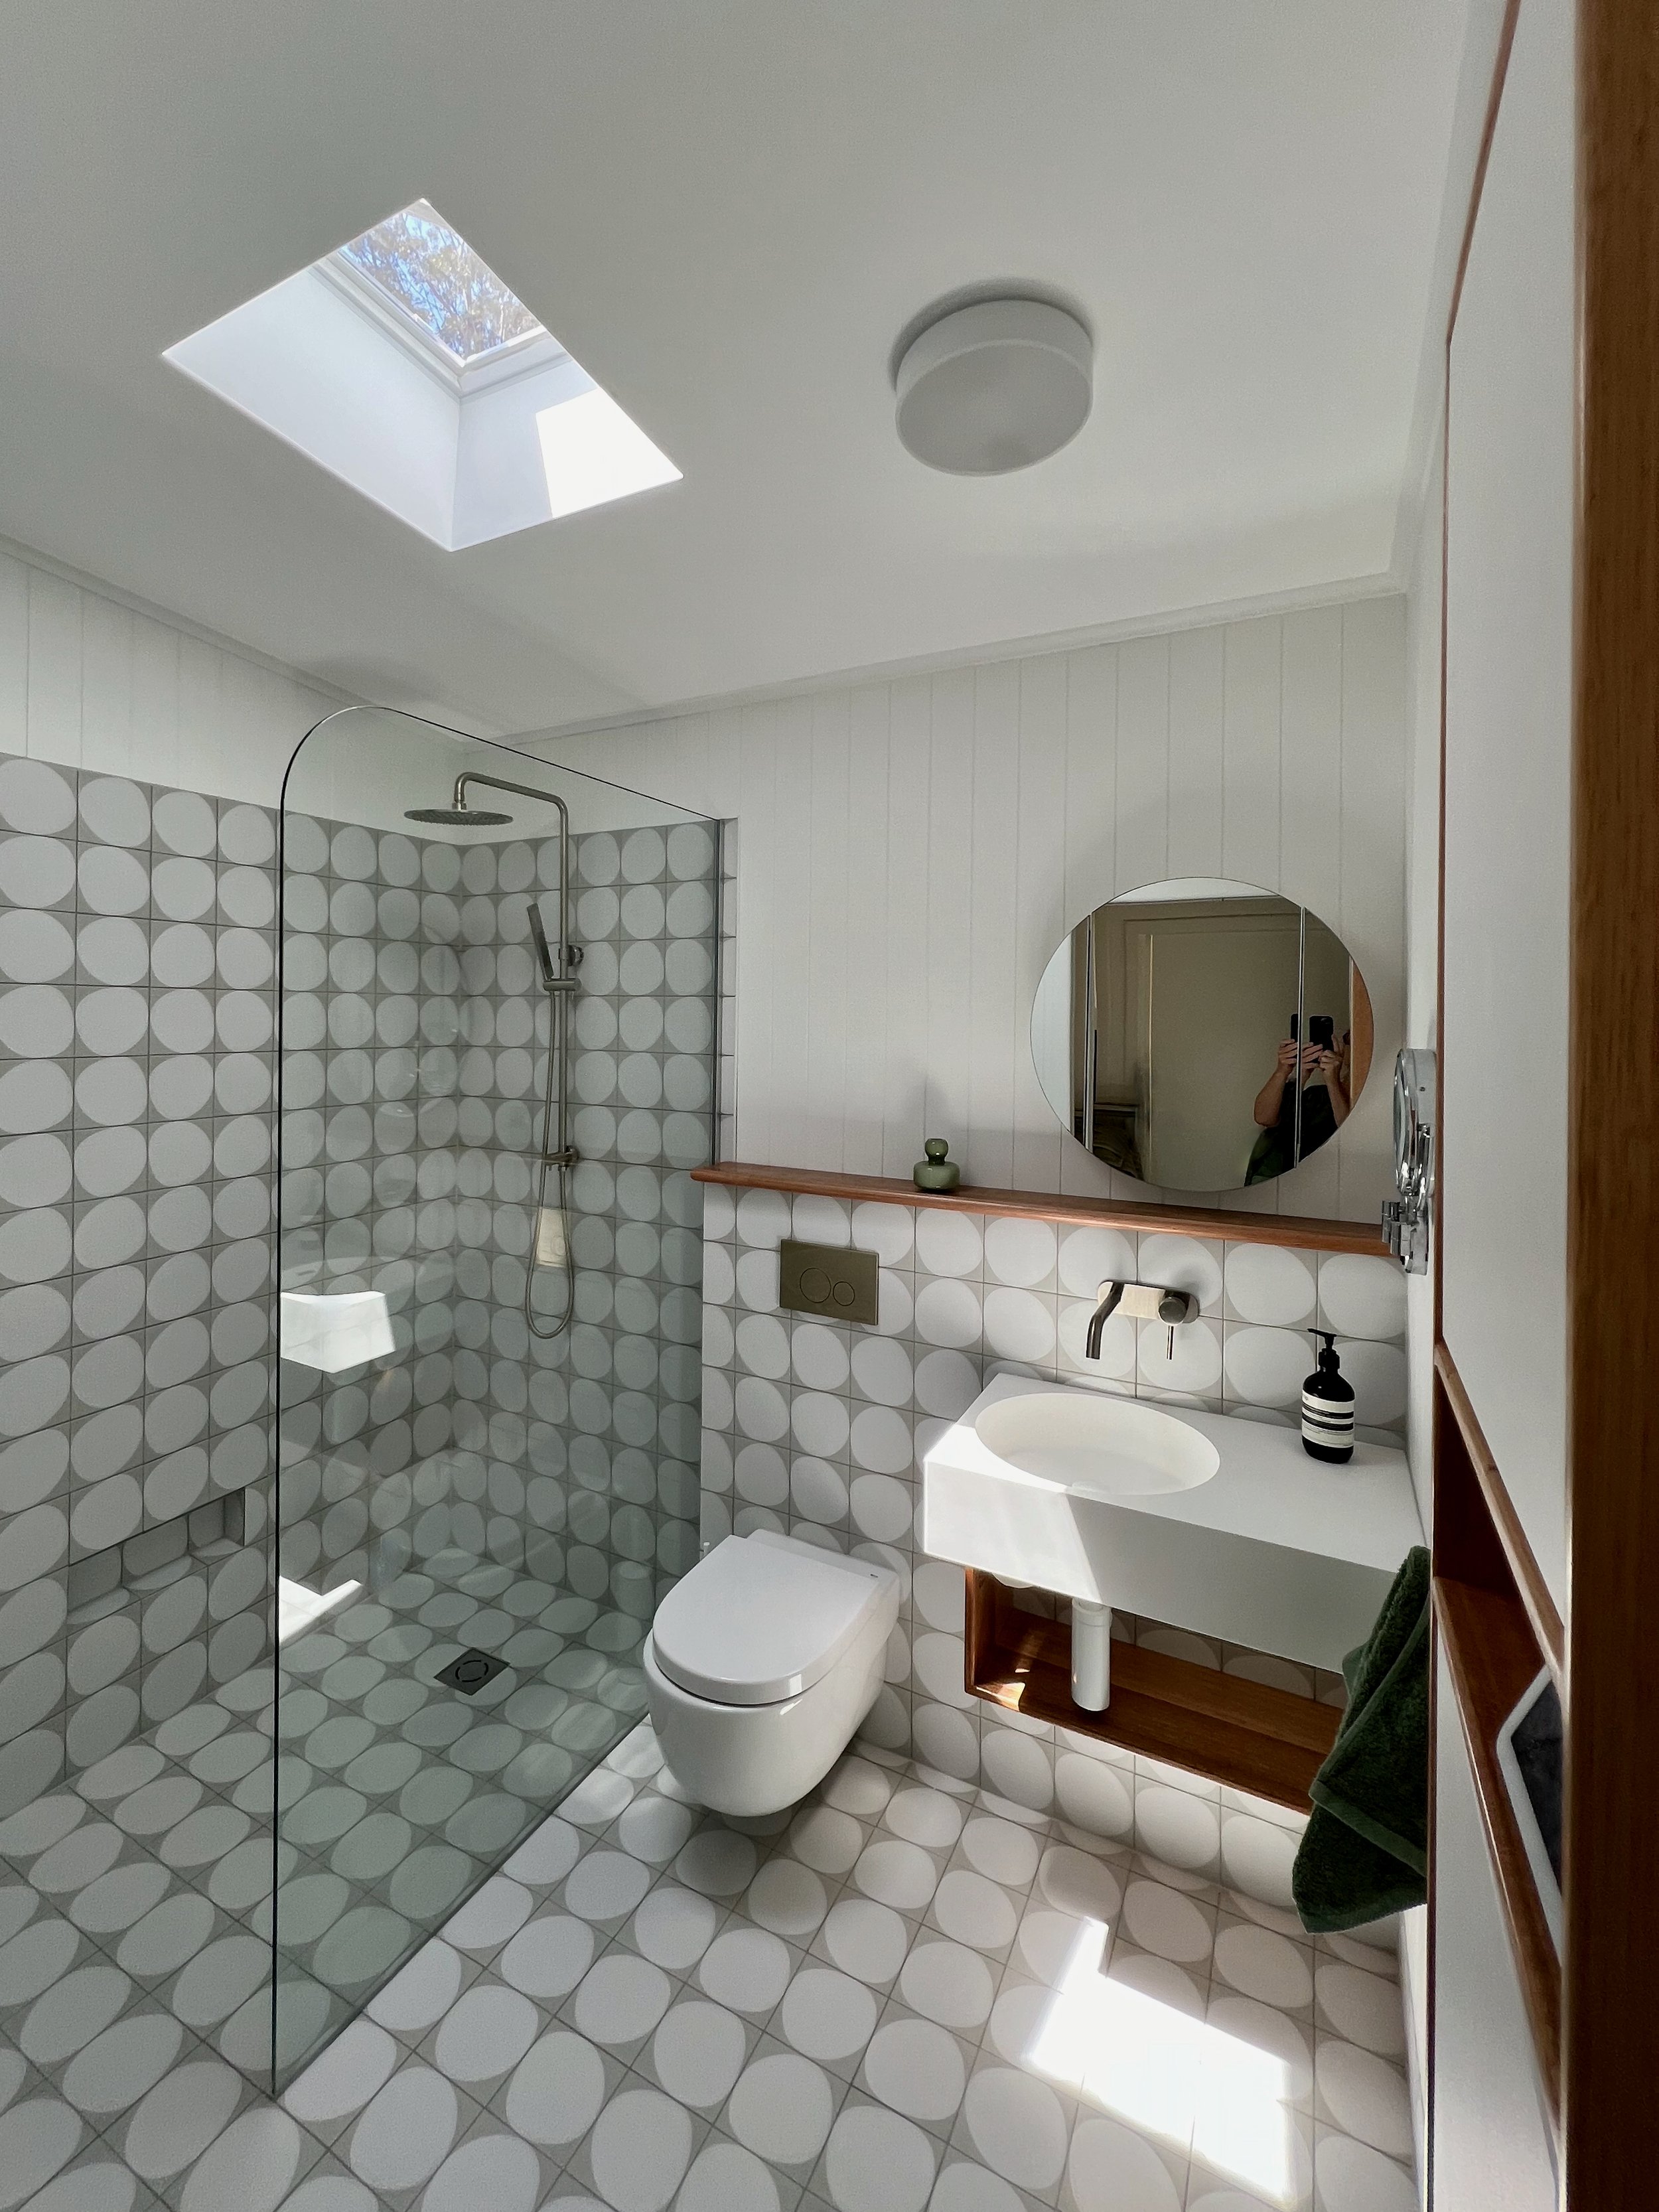
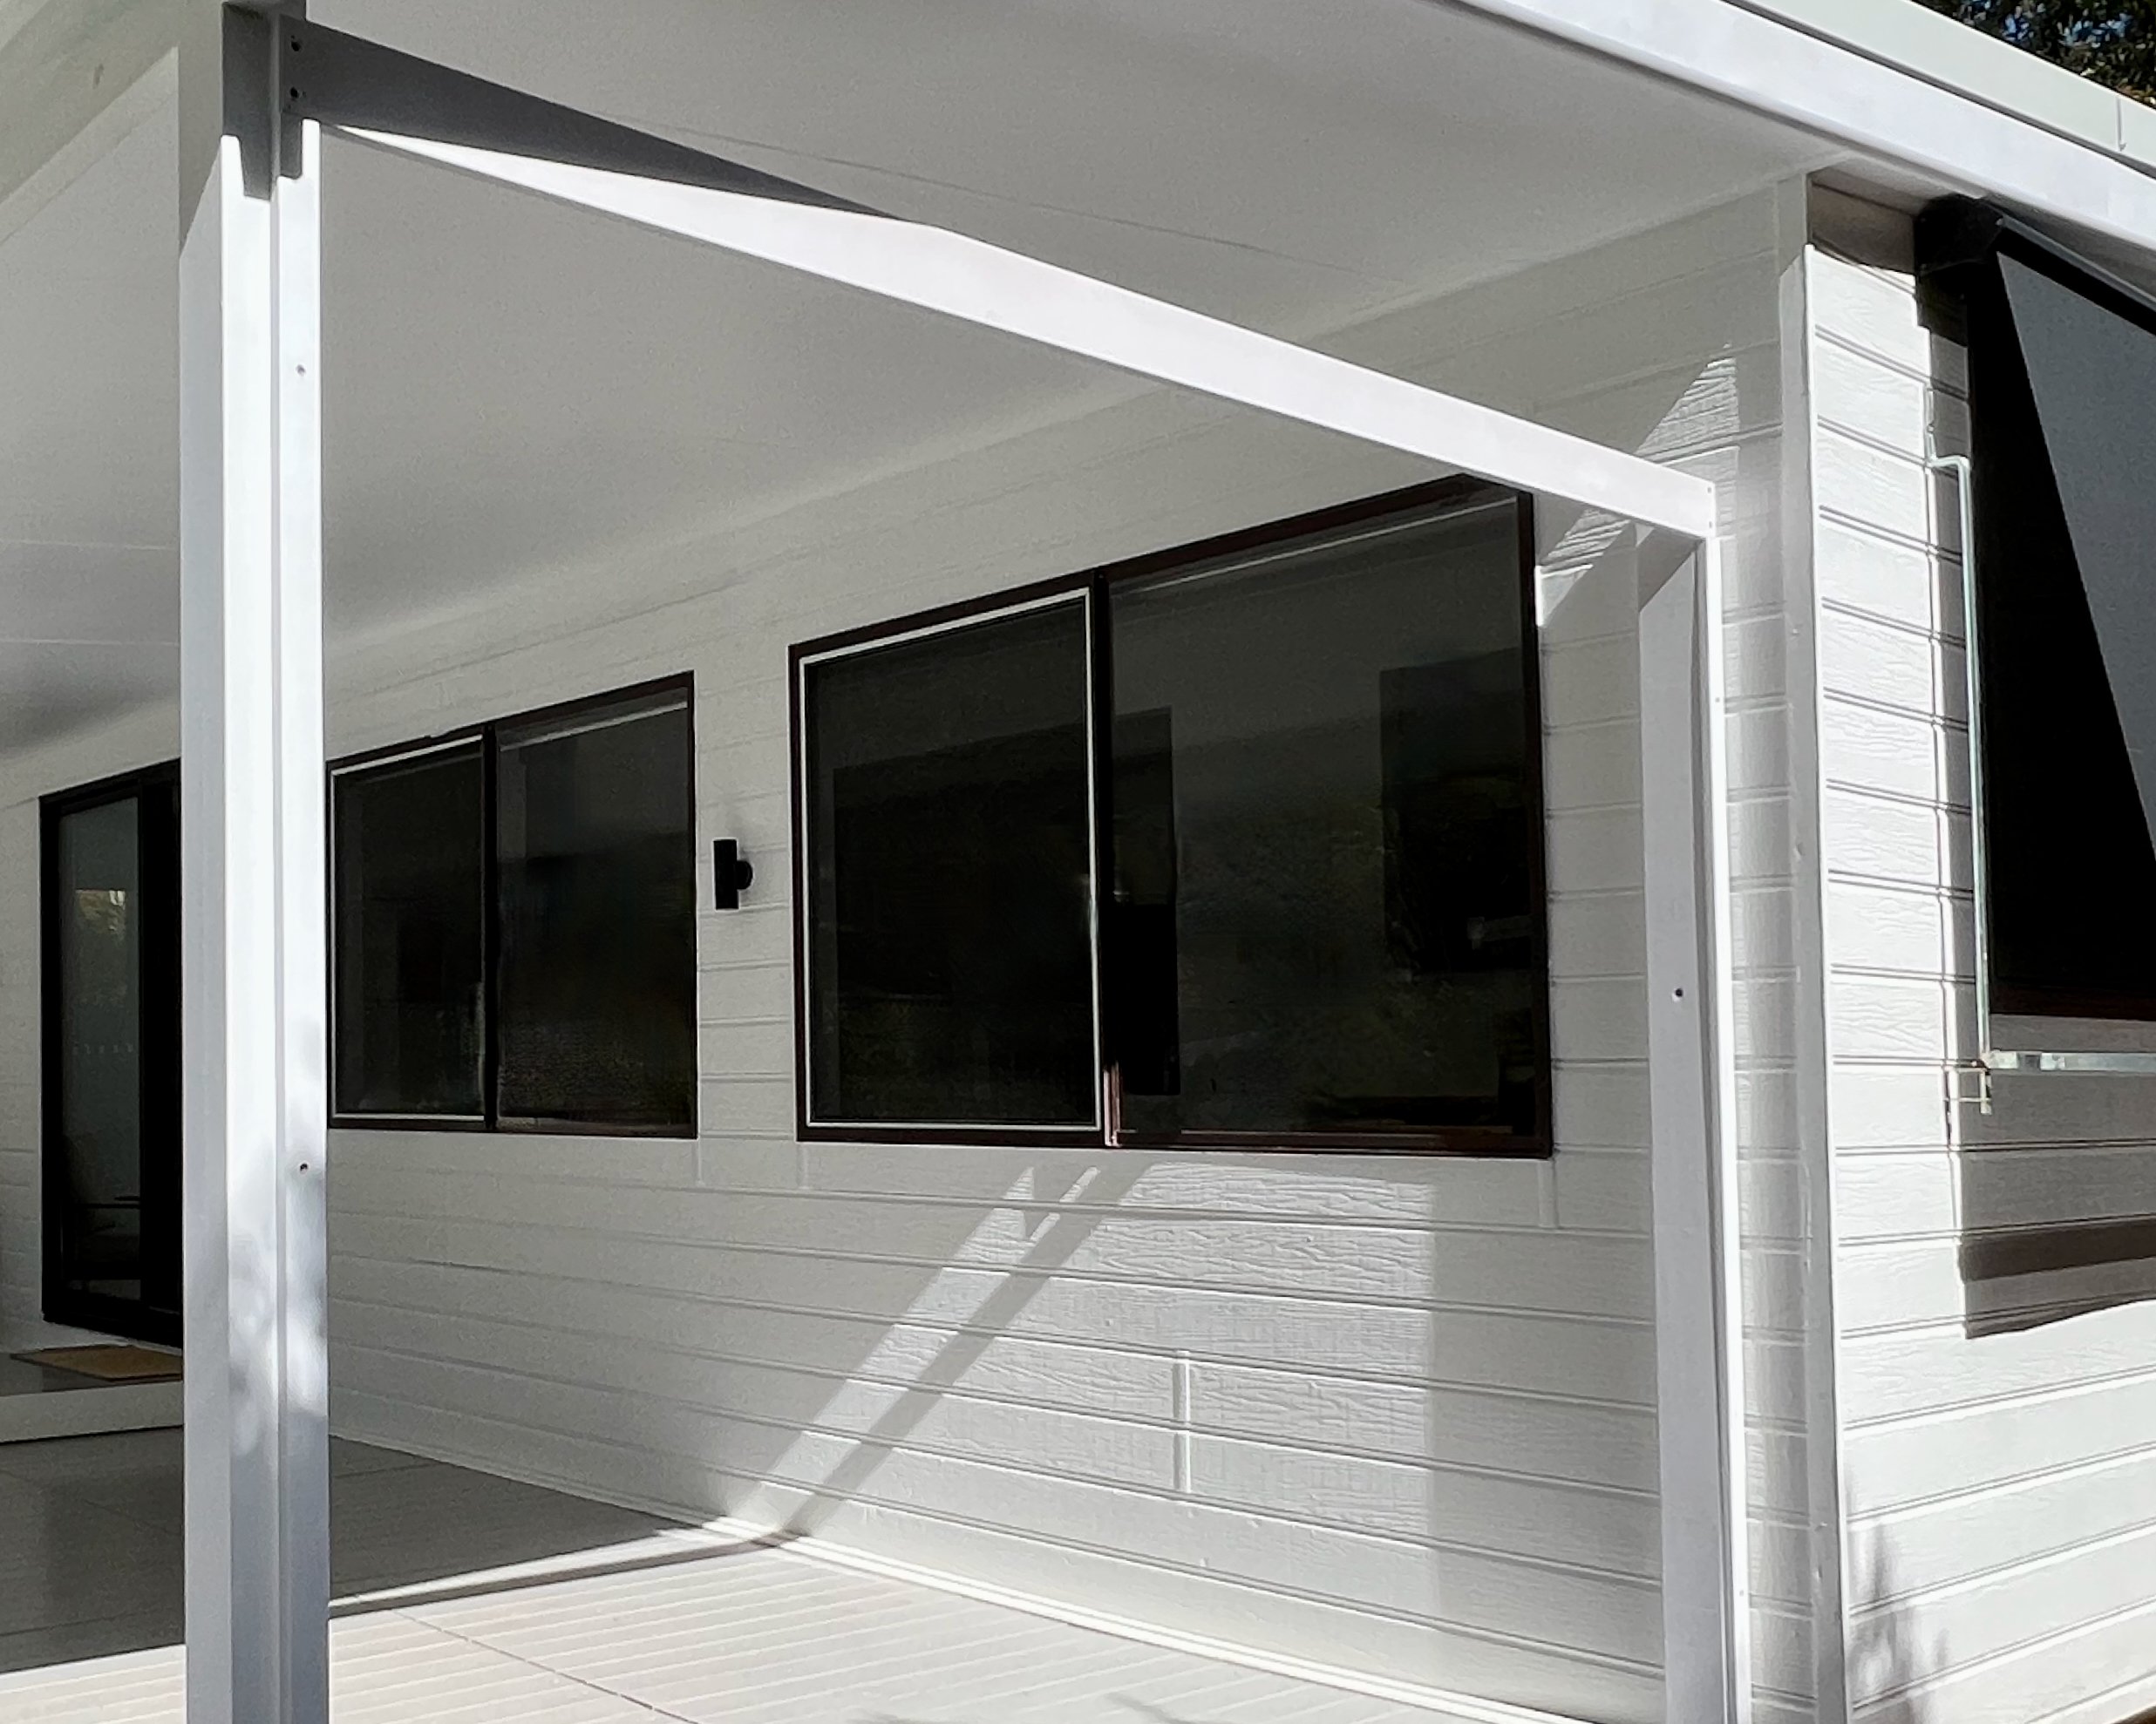
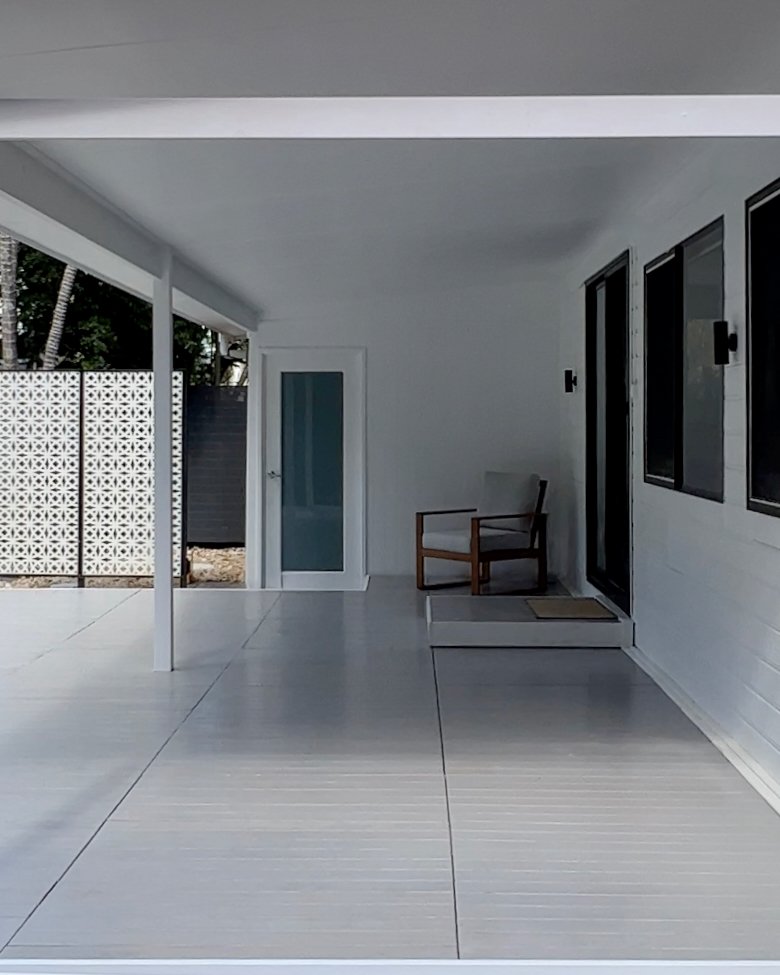
A new roof and a deck make this a truly functional living area, with the laundry serving as a powder room. The white VJ wall with frosted glass door remains one of my favourite features.


But while it looks good and has worn well, it’s been a few years. Time for another upgrade!


Stay tuned for Part Two and see how one simple change allowed me to resurface the floor, change the cabinetry and redo shelves to elevate this hardworking room to the next level.


Render a Retaining Wall

Natasha Dickins

Rendering has a reputation of being tricky, but having the right products helps achieve a professional finish. This was only my second rendering project and it turned out great!


The transformation of this pre-coated Besser-block retaining wall happened in three stages – sealing, creating a bond coat then rendering.

 
I was after a fast, efficient solution for resurfacing a garden wall and used one product as an additive to seal, adhere and render. The entire project materials cost about $150.
— Natasha
 

• Pressure cleaner
• Buckets
• Measuring vessels
Bondall Bondcrete Universal Bonding Agent 4L
75mm concrete and paving brush
Fine coat render 20kg bag
• Drill with mixer
• Steel trowel
• Large scraper
• Spray bottle
Plastic float
• Large foam sponge
Bondall Paving & Concrete Sealer in Matt
• Mini concrete roller with tray


I cleaned the wall with a pressure washer to remove mould, mildew, dirt and loose debris, then left it to dry out.


STAGE 1 SEAL COAT

In a bucket, I mixed one part Bondcrete into four parts water (1:4). Then thoroughly coated the wall using a 75mm concrete and paving brush, working in sections down from the top, dabbing into cracks and dents. It was almost dry by the time I’d finished.

TIP I used 2L water with 0.5L Bondcrete to seal this 6m-long wall.


STAGE 2 BOND COAT

Creating a sticky surface helps the render to adhere to the wall and cover lumps and bumps. I mixed four parts Bondcrete into one part water (4:1). Then brushed it on liberally. The next stage of rendering is applied while the wall is still tacky, so keep the brush in the bucket with leftover solution to reapply if it begins to dry out.

TIP I used 2L Bondcrete with 0.5L water.


STAGE 3 RENDER MIX

In a jug, I combined one part Bondcrete into 10 parts water (1:10). Then poured half a bag of render powder (10kg) into a bucket and gradually added the Bondcrete solution while mixing into a thick, smooth paste with a drill mixer.

TIP I mixed 150ml Bondcrete into 1.5L water and had a some left over.


I used a large scraper to load the steel trowel then applied the render in a thick layer, thoroughly covering the wall. This technique requires a bit of practice but the finish doesn’t have to be perfect.

TIP Rendering usually uses a trowel with a renderer’s hawk tool, but I found it was too big to work with so close to the ground.


I left the render for about half an hour so that when touched, it dents slightly but doesn’t come off. Working in sections, I lightly spritz the surface with a spray bottle then used a plastic float in a scrubbing motion to knock off any raised sections.


With a slightly damp foam sponge, I worked in a light circular motion to fill in dips and polish over the flat surfaces and along the edges.

TIP Have a bucket of water to keep the sponge clean, wringing it out to be almost-dry to avoid scratching and lifting the render.


I left the render to cure overnight, then sealed the wall with Bondall Paving & Concrete Sealer in Matt, stirring the contents with a paddle and applying with a specialty concrete roller.

TIP This also dries quickly. It rained sooner after I’d finished sealing and the water simply slid off.


I added hard mulch along the base and the garden behind the retaining wall is now ready for planting.


Rendering is addictive! Here’s another simple DIY project to make an outdoor seat that can also be made into a barbecue bench.

INSTALL A SLIDING POCKET DOOR

Natasha Dickins

To increase the floorspace in my new bathroom, I replaced a regular hinged door with one that slides into a concealed wall cavity. This was the final piece of my renovation puzzle.

Read more about my full bathroom reno and the design choices.


I chose a Hume Doors ‘Linear’ 820mm x 2040mm x 35mm internal door clad in SPM (sliced Pacific maple) timber veneer that can be stained or painted.

Auburn Woodturning custom-made the ‘Setto’ 150mm x 40mm long flush pull handle with rounded ends in Tasmanian oak.

 
Pairing a timber-veneered door with an oak handle and sealing them in a matt waterbased varnish was a perfect match that creates a lovely tactile feature.
— Natasha
 

I picked up a Hume Doors 2040mm x 820mm x 90mm flush jamb door cavity kit for about $200 from a hardware store and simply followed the instructions to assemble it using a drill.

TIP The kit doesn’t include the part of the jamb that the door closes against (above right). So pick up a 2.7m length of primed 18mm DAR pine, cut it to match the height of the frame and attach with screws or nails. (Note mine isn’t primed but it saves having to do an extra coat of paint.)


The wall framing was built to fit the cavity so it could simply be moved into position and secured to the studs with screws. Then the walls were sheeted on both sides.

TIP This installation requires access to the wall framing from one side, so if you’re not building the wall from scratch, remove the lining to install the cavity framing then re-clad it and add new trim.


I marked up the 150mm x 40mm flush pull handle on both sides of the door, drilled out the ends with a 29mm holesaw and finished the cutout with a jigsaw. Then I checked the fit and sanded around the edges.


After lightly smoothing over the door and around the edges with 240-grit sandpaper, I wiped it and the handles down with a slightly damp cloth to remove any dust.

Then I sealed with two coats of Monocel Waterbased Clear Wood Varnish in Satin, applying with a mini mohair roller over the flat surfaces and a round brush for the grooves and handles. I also sealed into the cutout to prevent potential moisture damage.


I applied Bondall Bondcrete woodworking adhesive around the base of the handles, fitted them into the cutouts, clamped them flat and wiped away the excess.


I added the base plates to the top edge of the door and slipped the wheeled carriages into the cavity track (this hardware came with the kit). Then I lifted the door into place and adjusted the height with the supplied flat spanner.


For the architrave, also called casing or trim, I installed primed bullnose moulding around the door jamb and painted it the same as the walls.


I love the tactile surface of the door. It adds a warm, welcoming feature to the bathroom while looking great from the hallway.


Are you planning to install a sliding door?

Tag me on your project and follow more of my DIY journey on Instagram for tool tips, home improvement and simple building projects.


Remodel a flatpack into a built-in cabinet

Natasha Dickins

I built this slimline storage for my bathroom by cutting a flatpack unit depth-ways and using the pre-drilled holes to reassemble it into two units joined by a timber frame that sits in the wall studs.

The doors have push-to-open hardware to eliminate the need for fussy handles. There are also hidden power points.


The finished cabinet is 1680mm high, 445mm wide and 140mm deep. It sits halfway into the wall, supported by the studs and protrudes into the room by 70mm. The shelves are 100mm, about the same depth as a regular shaving cabinet.

TIP Adapt these specs to suit your wall space by using a different-size flatpack and adjusting the height of the middle shelf.


I made up the cabinet so the builder could use the frame as a template when sheeting the wall and the electrician could run the wiring for power points. I installed the cabinet later in the process, simply pulling the wires through and leaving them for the final fix off.

 
I chose to use a flatpack, rather than make the cabinet from scratch because the pre-cut pieces with pre-drilled holes saved tweaking measurements and a lot of time.
— Natasha
 

The 400mm wide x 720mm high x 300mm deep Kaboodle Kitchen wall unit is the perfect size for this project. Use a base unit to make a much deeper cabinet.


To make two units from one, I used a combination square to measure 100mm in from both edges of the side, top and base pieces. Then I taped and marked the cut lines.

TIP Cutting from the sides means the units can be assembled with the factory edges facing forward for a neater finish.


On an extra piece of melamine I also marked out a second back and some shelves.

Then I made the cuts with a circular saw, beginning with the blade set shallow and doing a couple of passes, each slightly deeper.

TIP Using tape for cutting helps prevent breakout.


After ironing melamine edging onto the front edges of the newly cut sides and shelves, I trimmed off the excess with a sharp utility knife and lightly ran 180-grit sand paper along the joins.


Using the original pieces as a template, I transferred the pre-drilled assembly holes with a combination countersinking bit.

TIP The original flatpack has holes with plastic lugs for hinges on both sides so a door can be hung from the left or right. After cutting my pieces, I positioned these on the hinge side of the units.


I simply assembled the units as per the original instructions using Bondcrete bonding agent as a woodworking adhesive along the raw chipboard edges for added strength.


I added extra holes for the shelf pins, using a bit of tape as a depth gauge.

TIP Pick up an extra pack of 12 metal shelf support pins for about $7.


To make the frame, I set out the units and cut standard 135mm x 19mm Tasmanian oak boards to fit around them, with a shelf at the centre that is high enough to fit a display screen.

I used offcuts of 3mm plywood as spacers between the units and timber to create a gap for wriggle room when assembling the cabinet and so the doors open smoothly.

TIP Set out the frame so the top and base butt against to the sides so the screws can’t be seen once installed.


I assembled the frame by pre-drilling the joints with a combination countersinking bit bit, applying Bondcrete adhesive and securing with 40mm screws.


To install the middle shelves, I repositioned the frame around the units with 3mm spacers, pre-drilled and secured with adhesive and screws. Then I cut a backing to fit into the shelves, removing the units for access to secure it.


After rounding over the front edges with a trim router and sanding all over, I applied two coats of marine-grade Monocel Gold Clear Satin varnish with a mini mohair roller, leaving it to dry for a couple of hours after each.


I set out the units and frame again, using spacers to maintain the 3mm gaps while joining with 30mm screws. Then added screw caps to hide the screws.


Kaboodle Kitchen raw MDF doors fit perfectly over the units, with the front ready for painting and the back laminated with pre-made holes for hinges. I painted them with Dulux Wash&Wear +PLUS Kitchen & Bathroom in Casper White Quarter, the same as the walls.

Then I installed push-to-open hinges and latches using the pre-drilled holes. The end result is a seamless finish that doesn’t require handles.


Before fitting the cabinet into the wall framing, I drilled the back of the units with a holesaw to pull the electrical wires through when I moved it into position.

I used packers and a spirit level to ensure the cabinet was straight then secured into the studs with batten screws. The electrician later installed the power points.


Are you planning to remodel a flatpack into a new piece of furniture?

Tag me on your project and follow more of my DIY journey on Instagram for tool tips, home improvement and simple building projects.


REPAINT A PICKET FENCE WITH MINIMUM EFFORT

Natasha Dickins

I transformed this picket fence from weathered to wow in a weekend using products especially designed to take the effort out of painting.


While it took me just a couple of hours to do the actual DIY, spreading this project over a couple of days allowed the timber dry out after cleaning and let each coat of paint dry thoroughly.

 
It takes just five simple steps to transform a picket fence with minimum effort.
— Natasha
 

➀ CLEAN THE SURFACE

To get started, I used a pressure cleaner to wash down both sides of the pickets, moving the nozzle methodically up and down the rails. Then left the fence to dry thoroughly overnight.

TIP While this is quickest way to remove cobwebs and dirt build-up, it can remove more loose paint than you need. Do an out-of sight test, adjusting the pressure to suit, or move the nozzle further away from the surface.


➁ PATCH HOLES

Working along the pickets, I checked for holes and used an exterior filler with an 80mm 2-in-1 patcher scraper to smooth over them and scrape off the excess.

I also scraped off any flaking paint and stubborn sections of dirt.

TIP Filler lightens as it dries, so it’s ready to sand when the patch is all one colour and doesn’t feel spongey. On a warm day it won’t take long to cure.


➂ SAND TO SMOOTH

Using a large hand sander, I did a quick once-over with 180-grit sandpaper to smooth the filled holes and the front of each picket.

TIP To fit sandpaper, loosen the wing nuts of the sander, slip one end under a metal bracket and tighten the nut. Cut the paper to fit into the opposite bracket and tighten.


➃ CUT IN WITH A BRUSH

Then I used a 50mm sash cutter to dab into the gaps between the pickets and paint along the top and base rails, also painting around the profiles. I finished each gap by brushing along the bottom to catch any drips before moving on to the next.

TIP Dipping directly into the tin can contaminate any leftover paint, so mix paint thoroughly before pouring workable amounts into a smaller container or tray, and refill as needed. I used a 4.6L painter’s bucket with a 3-in-1 Magnetic Brush Clip that holds the brush between painting stints so it simply drips back into the paint.⁠


➄ ROLL ON THE PAINT

I spread a drop sheet along the front of the fence, then used a picket fence and post roller to halve my painting time by coating the front and edges of the pickets at the same time.

TIP To use, hold the roller flat and move it over the top of the pickets, then move the tip into the gap and roll downwards to paint the edges. Repeat for a second coat if needed.


HOW TO LOAD THE ROLLER…

Use a 230mm deep tray with disposable liner for an area big enough to move over the ridges in different directions.

Dip the sides in paint and run them up over the ridges to saturate and remove excess. Then dip the point in paint and move the roller sideways over the ridges.

TIP Replace covers of the picket fence and post roller with 50mm roller refills or simply use 100mm mini roller covers to paint larger pickets and posts.


Are you planning to paint a fence? 

Tag me on your project and follow more of my DIY journey on Instagram for tool tips, home improvement and simple building projects.

Transform concrete with a chequerboard pattern

Natasha Dickins

It took just three days to makeover my unused carport into a lovely alfresco dining area with the transformative power of paint.


BEFORE As with many Aussie homes, my carport is a concrete slab against a shed wall. It was grubby from use as a workshop area and had become a dumping ground.

There’s also a built-in barbecue bench hidden behind all the stuff. Time for a makeover!


AFTER I spruced up with Dulux Weathershield in Vivid White on the walls and posts, then created a floor feature with the Dulux Concrete & Paving range, finishing with Dulux Tuft as the base colour and contrasting with Dulux Equatorial Forest in a chequered pattern.

 
Goodbye dumping ground, hello entirely new outdoor area! I love how the chequered floor injects energy to this fresh and inviting space.
— Natasha

Inspo for the Dulux colour combo comes from the olive green Click outdoor chairs from SLH, which I bought before even deciding how to do the floor makeover!


WHAT YOU NEED TO DIY

• Safety eye and foot protection
• Pressure cleaner
• Gloves
• Bucket
Dulux Concrete & Paving Sealed Surface Cleaner 2L
• Stiff bristle brush
Dulux Precision All Metal Primer 1L
Dulux Weathershield Low Sheen in Vivid White 4
• Mini roller with tray and spare covers
Dulux Concrete & Paving Sealed Surface Primer 2L
• Paint can opener and stirrer
• Painter’s tape
Dulux Professional 22mm nap roller covers
• Extension pole, roller and tray
Dulux Concrete & Paving Coloured Sealer Matt tinted in Dulux Tuft 10L
Dulux Professional 50mm sash cutter brush
• Spirit level
• Pencil
• Builder’s square
• Length of skirting board
• Two 300mm-square vinyl templates
Dulux Concrete & Paving Coloured Sealer Matt Medium tinted in Dulux Equatorial Forest 4L
• Paint pad


DAY 1 SPRUCE UP THE SURROUNDS

On the first day, I primed the metal posts in Dulux Precision All Metal Primer, finishing with Dulux Weathershield in Vivid White, which I also used to refresh the previously painted shed walls. It dries super fast so there’s no waiting around between coats.

TIP A mini roller is the perfect size for painting posts and the metal profiled walls. Have spare covers for primer and a couple coats of paint.


Wearing safety gear, I used a pressure cleaner to wash the barbecue bench and floor.


I mixed one part Dulux Concrete & Paving Sealed Surface Cleaner with five parts water (1:5) and scrubbed it over the barbecue bench and heavily stained floor with a stiff-bristle brush. I waited 15 minutes, pressure washed again then left it to dry overnight.

TIP Before purchasing products check if your concrete is bare or sealed by pouring on 30ml of water, wait 30 seconds then dab the excess with a cloth. It’s bare if it has soaked in, otherwise it is sealed. My floor and bench had previously been sealed.


DAY 2 CREATE A BLANK CANVAS

Next day, I swept the floor then mixed up Dulux Concrete & Paving Sealed Surface Primer with the supplied additive.


For the barbecue bench, I masked around the timber then used a mini roller to apply primer.

For the floor, I used a larger 22mm nap roller with an extension pole to get the job done faster, working in overlapped sections and leaving to dry for an hour.


After stirring the Dulux Concrete & Paving Coloured Sealer to distribute the slip-resistant particles, I cut in around the posts with a brush then used a long-nap roller to apply it evenly over the floor. It dried quickly, so I applied a second coat then left it to cure overnight.

TIP I tinted the Matt sealer in a shade called Dulux Tuft, which matches the surrounding concrete surfaces.


DAY 3 CONTRAST WITH COLOUR

I used a spirit level to mark a straight line next to the wall with a pencil, then a builder’s square to mark the starting corner from the barbecue bench.

From there, I marked grid lines with a skirting board spaced evenly using two 300mm-square templates.

TIP Cut templates from vinyl or cardboard to save having to use a measuring tape. Begin by marking out squares from the centre or a solid structure, such as the side of a bench.


I marked the non-paint squares with tape then applied Dulux Concrete & Paving Coloured Sealer in Dulux Equatorial Forest by dragging a paint pad around the inside edges of the squares then filling them in with a mini roller.

TIP The aim was to avoid masking all the non-paint squares to save time and prevent any damage to the new paintwork. I found using a pad edger applicator resulted in straighter lines than freehand brushing, and finishing with a mini roller evens out the finish.


Walking on the unpainted squares, I removed any noticeable pencil lines while applying a quick touch-up second coat with the mini roller and left it to dry overnight.


The fun Dulux chequerboard floor is a great backdrop for my Click outdoor dining chairs from SLH in Olive and DIY dining table.

The revived area is bright and inviting, and has created an entirely new living space for cooking, dining and entertaining.


Are you planning to makeover a carport with paint? 

Tag me on your project and follow more of my DIY journey on Instagram for tool tips, home improvement and simple building projects.

My DIY BATHROOM RENOVATION

Natasha Dickins

Whoo-hoo! I’ve been planning the transformation of this bathroom for a long time.


But, before going into the details, I’d like to announce what a positive change it’s made to the way we navigate through our home.
Here’s a little about the design choices…

My simple aim is for life improvement through home improvement.
— Natasha
 

PLANNING an ERGONOMIC BATHROOM

My mum was in a wheelchair when she came to stay a few years ago. Like many Australian homes, ours was inadequate in catering for her.

While this new bathroom is definitely not set up for fully assisted living, I’ve made it as efficient as possible while exploring the concept of future-proofing.

We may eventually need a smart toilet, handrails, thermostatic shower and built-in seating, along with more storage and considered space for assisted care.

Meanwhile, I’ve invoked technology to create a seamless experience with a voice-activated skylight, sensor lighting under the basin and heated flooring.

The utilities are positioned at exactly the right height and the fixtures are chosen for functionality so they’re easily operable without full hand movements, good for guests who sufferer arthritis but also for paint-covered digits.

I’ve minimised protruding joinery and fixtures with push-to-open cabinet doors and a recessed toilet roll holder.

To maintain a friendly feeling of spaciousness I’ve chosen softer, rounded corners over sharper, square edges, such as with the shower screen.

And my number one requirement? An LED magnifying mirror so I can put in contact lenses and apply makeup without wearing glasses.

For me, future-proofing creates solutions to minimise the effects of getting older. So when it comes to bathroom design, it anticipates the effects of ageing by making our personal spaces ergonomically more efficient.
— Natasha

With a bigger budget and more time, every design decision for this renovation was to result in elevating the small room to feel generous, functional and beautiful.


BEFORE THE BEFORE

This room had a quick DIY cosmetic makeover six years ago, when I removed the shower screen, above left, replaced the old vanity and loo, and added some handcrafted features, above right.


BEFORE & AFTER FLOOR PLAN

To increase floorspace, the bath was pulled out and the inward-swinging door replaced with a sliding pocket door built into the wall that was moved into the hallway by 200mm.

A skylight adds light and ventilation to make up for the lack of windows.

Opposite the door is the basin. As the most visited utility it’s the most directly accessible.

The second most-used utility is the toilet, positioned away from direct sight lines of the doorway.

The nib wall stops at the shower screen to allow the walk-in shower to be as deep and wide as the room allows.


MOVING THE WALL

Adding 200mm to the room gives a little extra to the shower and the space in front of the toilet without impacting the hallway.

TIP When the builder popped in to discuss the plan, they provided a list of materials that I ordered and had delivered. This saved them a day of shopping and having to pay the initial bill, which in turn saved me.


A USEFUL NIB WALL

The builder framed up the 1200mm-high nib wall to run along the opposite wall to encompass the in-wall cistern and plumbing for the floating pan and basin.

Keeping them off the floor helps create the illusion of space.

TIP I found it essential to have fixtures on site before building began so I could check placement, heights and set outs with the trades. ‘Fixtures’ includes the toilet and cistern, basin, bottle trap, shaving cabinet, tap ware, shower set, even the floor waste and lights.


BEST INVESTMENT EVER

With no exterior wall for a window, a skylight was essential to increase airflow and natural light.

I chose a 665mm-square flat roof open skylight with solar panel and battery that’s operated by phone or voice. When it rains a sensor automatically closes it.

After the roofer installed the skylight and the builder hung the plasterboard, I sheeted up into the cavity, plastered and painted it along with the ceiling.

By day the room is bright and airy, by night I can see the stars while showering. But the most delightful result is how it channels the sound of the nearby South Pacific Ocean into the room.


ABOUT WATERPROOFING

The builder lined the walls in fibre cement Villaboard then the tiler waterproofed.

They used bond-breaker tape to close gaps around pipes and drains, then applied two coats of membrane to seal wet areas including the shower recess up to at least 1800mm high. It’s also applied over the floor and up the base of non-wet walls by 150mm where the tiles are laid as skirting.

TIP Waterproofing in NSW must be done by a professional. To ease the budget, I arranged for the materials to be on-site to save the tiler having to purchase them.


HEATING THE FLOOR

After waterproofing, the tiler screeded the floor to create a fall into the shower recess for directing water flow to the waste.

Then they bedded down a Hotwire floor heating mat in front of the basin and toilet, running the wire up the wall for the electrician to install the switch later.

Temperature control is also another element of future-proofing and, while we don’t have particularly cold winters, it’s nice to have warmth underfoot.

TIP I also purchased the heat mat before installation. When choosing a size, note it isn’t suitable for the shower recess.


THOSE TILES!

There’s no denying the tiles have big impact.

From DiLorenzo Tile Merchants, the 150mm-square Futura White Drop are a light beige and grey tile suitable for walls, floors and wet areas. They’re finished with flexible grout in Misty Grey and the joints sealed with coloured silicone in Misty Grey.

Get a quantity estimate from the tiler. I forgot to include the extended wall in my measurements and was a few boxes short. Thankfully, the supplier had more from the original pallet, although I paid for a second delivery and it held up production.

TIP When choosing tiles, be sure they suit the surface as wall-only tiles can’t be used on the floor. When choosing the grout, note it darkens when wet, so if you’re undecided between shades I recommend going darker.


WHEN IT COMES TO PAINT…

I installed fibre cement panels with VJ grooves along the walls from the doorway. This saves on tiling costs but also, as much as I love the design, would you want four walls in that full-on pattern?

Then I installed 55mm cove cornice, the smallest profile available, although the internal mitred corners were tricky to get right along the raked ceiling.

To keep the room as bright as possible, I matched the pale circle of the tile to the lightest white tone, choosing Casper White Quarter for the panelling and extending it onto the cornice to make the walls look higher. I used Vivid White on the plasterboard ceiling and skylight cavity to maximise light refraction.

TIP It’s worth splashing out on specialised hard-wearing paint with mould inhibitors. I used Dulux Ceiling White +PLUS Kitchen and Bathroom. For the walls and cornice, I primed with Dulux 1-Step then finished with Dulux Wash&Wear +PLUS Kitchen & Bathroom.


DESIGNING THE SHOWER RECESS

The aim was to have a walk-in shower, without steps or moving door and enough width to wash hair with elbows out. While there wasn’t space for a built-in bench seat, I did include a recess for shaving legs and washing feet.

The walls were slightly out of square so the screen had to be customised. While I had my heart set on fluted glass, the glazier suggested it would be double the waiting time, double the cost and suck up half the light in the room. So I chose clear glass with bevelled edges and a radial corner.


DOWNSIZE CLEANING TIME

After installing the screen the glazier advised, ‘Don’t use the shower until you’ve treated the glass with Enduroshield. You’ll thank me in six months when you hardly have to clean it.’ I did, and he was right!

TIP The EnduroShield Home Glass Treatment kit is the best $100 you’ll spend on cleaning products.


DOUBLE-DUTY SHOWER SET

This shower rail set combines a rain shower head with a hand held hose that makes cleaning easier while catering to potential mobility issues. The diverter turns easily and is less confusing to engage than pin-style ones.

The mixer is positioned near the entrance of the shower so you don’t get wet before the water is at the right temperature. It’s also easy to adjust and control the temperature accurately.

The simple square floor waste can be lifted out for access to the drain.


I’ve since installed this brushed nickel shower caddy that clips off to be cleaned in the dishwasher.

It’s positioned directly above the wall recess and in line with the mixer.


To finish the nib wall, I made a shelf from 19mm x 135mm DAR Tasmanian oak with mitred 30mm half-round dowel along the front to cover the top of the tiles and make it look more substantial.

TIP All the timber features in my bathroom are DIY – from the nib and under-basin shelves to the built-in cabinet and towel hooks. I’ve sealed everything in marine-grade Monocel Gold Clear Satin varnish, which is designed for boats so I know it can stand up to heat and moisture in a bathroom.


CHOOSING THE BASIN AND TAP

My original bathroom facelift included a bowl-type sink and mixer (above, left). They were inexpensive and install but difficult to clean around and accessibility wasn’t great, especially for kids.

So I did a one-stop online shop at ABI Interiors (not sponsored) for all fixtures, including the seamless white wall-mounted basin, bottle trap and pop-up waste (above, right).

The mixer set with backplate is also wall-mounted, matching the shower mixer in its simplicity to operate with one hand and without resistance.

TIP Tapware doesn’t have to be all the same brand, just choose the same finish for a cohesive look. I find brushed nickel more timeless than popular brass or black.


MY UNDER-BASIN JOINERY

While I love the all-in-one basin, it needed some storage underneath. So of course I DIYed.

Using the same Tasmanian oak as the nib shelf, I designed a compact shelf to sit back from the edge of the basin to prevent knees from knocking it.

There’s a built-in toilet roll holder, space for spare rolls and makeup bags, plus a power point tucked underneath for a hairdryer.


THE TOILET SET UP

The in-wall, wall-hung cistern is incorporated into the framing of the nib wall so it was essential to have it on site when the building began.

I chose the wall-hung pan with soft-close seat for the compact shape. Being rimless and off the ground keeps it easy to clean.

I also spent an extra on the in-wall metal flush plate in brushed nickel, rather than plastic, for better quality.

There was nowhere to position the toilet roll holder that didn’t require swinging around to the wall, so I integrated it into the basin joinery.

It works well while ensuring the dilemma of which way the roll should fall is answered every time as it only works facing forward.

I made the original holder using a similar technique.


RECESSED SHAVING CABINET

The builder created a recess for the shaving cabinet when framing up the wall. It’s positioned above the basin for easy access to water-using essentials like toothbrushes.

After hanging the VJ panelling, I installed it to open from right to left to avoid knocking the fold-out shaving mirror, then added white-painted moulding to hide the wall join.

TIP I chose a 600mm frameless mirror cabinet with backlit USB LED that lights up when the door is opened. The split mirror means the door doesn’t swing out as far as a full mirror would so you don’t have to step back to open it.


MAGNIFICENTLY MAGNIFIED

One essential item I didn’t compromise on was a magnifying mirror with LED light. This one is 8x. Although it cost more than $400 and required installation by an electrician, it gets used every day and is priceless.


HANDCRAFTED SUPER STORAGE

The wall to the left of the doorway was a blank canvas, perfect for adding a slimline, two-door cabinet with display shelf and hidden power points.


MY FLAT-PACK CABINET HACK

I cut a 720mm high x 400mm wide x 300mm deep flatpack unit in half depth-ways then reassembled it as two slim cabinets. I clad around it with a timber frame made from the same Tasmanian oak as the bench joinery.

Adding push-to-open hinges eliminates the need for handles, and the raw MDF doors are finished in the same paint as the walls for a seamless finish.

Using the same method as the shaving cabinet, the builder constructed wall framing to accomodate the cabinet, then I sheeted the wall, installed and added painted moulding to hide the join.

The flatpack cabinet cost about $95 and the doors $35 each. See my step-by-step DIY process here.


POWER PLAY

A shelf at the middle of the built-in cabinet is the perfect height for a Google Nest display screen plugged into the power point below via a hidden hole.

A double power point is also in the top cabinet for recharging USB appliances such as a hair straightener and shaver.


LOVELY LIGHTING

I’d planned for just one voice-activated ceiling lamp over the basin, but while the electrician had access to the roof they ran extra wiring to above the shower recess in case this wasn’t enough light and I decided to add another down the track.

For now, the ceiling and sensor lights, magnifying mirror and a little shelf lamp all add up to a well-lit room.


SPACE-SAVING SLIDING DOOR

I love the beautiful handcrafted look of this sliding Hume Doors door with customised flush pull handles. It simply glides into the wall cavity, swapping out the original swinging door to reclaim floor space.


INSTALLING THE DOOR

For the sliding door, the builder assembled a store-bought cavity unit and integrated it into the framing along with a jamb, then sheeted it as part of the wall.

I installed the handle set before hanging the door, sealing them in a matt Monocel Waterbased Clear Varnish in Satin for a lovely tactile finish.

The 150mm-long Auburn Woodturning flush pull handles are big enough for all hands to operate but small enough to fit elegantly into the linear design.

I have yet to install this sliding door end pull along with a concealed magnetic catch.


FASHIONABLE WALL PEGS

I combined my favourite label logo with my fave pastime of woodworking to make these wall pegs. Yes, they work perfectly. No the towels don’t slip off.


MY CHOPSTICK-REST HACK

I attached Marimekko chopstick rests to plywood backing and dowel then secured them into the wall studs with long screws.

Three are positioned for towels close to the shower, and another near the basin for a hand towel.

Follow my step-by-step instructions to DIY your own.


ADDING GREENERY

Lastly, I added a beautiful 300mm-diameter porcelain pot with the supplied stainless steel hanging system and a trailing succulent that survives on the shower steam and doesn’t require much watering.

TIP Before sheeting the ceiling, the builder added a batten between the rafters so I could hang this 200mm away from the walls using a white swivel ceiling hook so the plant can be rotated.


The original cosmetic makeover of this bathroom was done on a shoestring, over a couple of days (above, left).

Living with it for a few years helped me plan and make informed design choices for the new renovation (above, right).


The result is transforming.


What unique design choices would you make in your bathroom renovation?

Tag me on your project and follow more of my DIY journey on Instagram for tool tips, home improvement and simple building projects.


MY ORIGINAL Bathroom MAKEOVER

Natasha Dickins

I’ve just finished a new bathroom renovation that’s completely changed the way we live.

But the story began back in 2017 when I gave this small space a quick, low-cost facelift with simple cosmetic upgrades…


I had a budget of $1,000 (AUD) with a couple of days to do a temporary spruce up and make the bathroom more usable for a couple of years.

TIP When doing a bathroom makeover, even a small one, it’s helpful to plan for an alternate arrangement. Before tackling this, I did a full laundry reno that has a loo and outdoor shower with hot water. It also served as a stand-in when I renovated the kitchen.


Technology has come a long way since I shot this makeover so excuse the grainy images of this story!


Ten years ago this was not a well designed space.

The door swung into the room and banged onto the wall-mounted towel rails. Directly in front was the clunky shower screen with sliding door over a built-in bath with shower.

There wasn’t much room around the toilet. Next to it was a dilapidated vanity with peeling vinyl.

I decided to invest in replacing the vanity and resurface the rest of the room with paint, keeping the bath, shower, lighting and switches but removing the shower screen.


My first job was to pull out the clunky shower screen to open up the space and give me room to move. It instantly made the room feel bigger and cleaner so I decided not to replace it with a new one.


No amount of scrubbing would make the dated tiles feel clean so I resealed them with a tile paint system, with white on the walls and a dark blue on the floor.

TIP The key to a great finish is to use a specialised cleaning solution to scrub them down and leave the grout to dry thoroughly. Then choose a good mini microfibre roller that won’t shed to apply the primer and paint.


The shabby, too-big vanity was replaced with a smaller, more elegant table and new sink with mixer, making it feel modern again.


I bought the basin and tap before building the new vanity table so I could check the size, keeping it small but functional. It’s made from Tasmanian oak panel and DAR boards from my local hardware store and sealed in marine-grade varnish.

To keep the trades bill down, I had the table ready to go before the plumber arrived so they only need to visit once.

On the day, they fixed off the taps and waste so I could remove the old cabinet and drop in the new table. The plumber then drilled through the top and drop-in shelf to hook up to the existing pipes.


Two large wall mirrors were originally positioned in the corner over the vanity. I took them down to re-frame and re-hang one above the vanity.


The reason for the odd mirror placements became obvious when I removed them to reveal a former window on the right, which I decided to fill with slim shelving.

To repurpose one of the mirrors, I removed the aluminium frame and replaced it with Tasmanian oak moulding, sealing it with the same marine varnish.


The hidden window cavity was the perfect size for recessed shelving. Inside is painted the same white as the walls. The Tasmanian oak shelves and frame are sealed with varnish. The result has a midcentury style that features throughout my house.


To make the recessed shelving, I built an internal frame from pine to fit snuggly in the cavity. I added a 6mm plywood backing then set out Tasmanian oak shelves with dowel supports using a 25mm Forstener bit. I also fit a frame around the front with an overhang that sits against the wall.

Once painted, sealed and reassembled, the shelving simply slid into the cavity. I secured it with screws, filled and sanded them, then touched up with paint.


To keep the style cohesive, I chose Tasmanian oak for all the timber components, from the recessed shelving and moulding around the mirror to the variously sized dowel.

Each piece was sanded and sealed with Monocel Gold, a marine-grade varnish designed for boats that protects from moisture while still looking good.

TIP I’ve used Tassie oak panels and dowel throughout my home, all sealed and finished in the same method, from this tiled kitchen island and built-in banquette to an entertainment cabinet and furniture pieces.

At the time of this makeover I was doing lots of woodwork and wanted to try my hand at adding handcrafted timber elements for warmth and interest.
— Natasha

Then I made a toilet roll holder! The roll used to slip back off the original one, so I changed the orientation and added a stopper so it now stays in place. Here are the step-by-step instructions to DIY your own.

After a few attempts at fixing the old toilet, it continued to leak noisily. The seat also banged when it was closed. The new loo is slimmer, easier to clean and soft-close, so is quieter in every way. Totally worth the investment.


I finished by installing a handcrafted rail above the bath made from various thicknesses of dowel and sealing with varnish. Hanging a clear curtain helps prevent the feeling of showering in a cave.

We later found that showering without the curtain didn’t create much of a splash and later removed it for one less thing to keep clean.


The results featured in Handyman magazine, where I gave more details on how to DIY a similar vanity table, repurpose a mirror with a new frame and make midcentury-inspired recessed shelving.


A ‘couple of years’ stretched out to six, but my bespoke budget bathroom stood up to the test of time.


Then this happened! But that’s another story…


Have you done a cosmetic reno on your bathroom?

Tag me on your project and follow more of my DIY journey on Instagram for tool tips, home improvement and simple building projects.

Install a Misting System

Natasha Dickins

It’s been a super hot summer so I installed a misting system that instantly cools the outdoor area with a fine curtain of misty spray. It also reminds me of being on holiday in Palm Springs!

HOW IT WORKS

Tiny droplets of water lower the air temperature as they evaporate. They’re emitted from small brass jets attached to compression connectors, which are joined by short lengths of pipe. A longer length of pipe runs around the wall and joins to the garden tap.

TIP I picked up a tap timer with wifi hub so that it could be operated via smartphone. The same system also remotely operates the irrigation for watering our veggie garden.


To set up the misting system, I picked up a kit with 25m of pipe to fit my space. It included a filter to keep out debris and an auto-drain valve to prevent dripping when it’s turned off.

Also included are tee-shaped compression connectors for joining short lengths of the pipe, with an elbow-shaped one for the end. There is a brass jet for each connector.

There are a couple of plain elbows for running the pipe around the wall, plus pipe clamps with nails for securing to the wall and beam.

TIP Buy a tap timber if your kit doesn’t include one, along with a good pipe cutter (shown above).

Before installing the misting kit, I worked out how the pipe would run from the tap and along the roof beam, planning the jets to face away from furniture and any open windows.
— Natasha

WHAT YOU NEED
Misting kit
Tap timber and wifi hub
Step ladder
Tape measure and pencil
Painter’s tape
Hammer
Pipe cutter
Quick-grip clamps


I screwed the misting filter into the base of the tap timer, then attached this assembly directly onto the tap using the supplied universal tap adaptor. I inserted one end of the pipe into the filter and tightened the attachment.


From the tap, I ran the pipe to the wall and halfway up, using the pipe cutter to cut it cleanly. Then I installed a tee connector for the auto-drain valve.


TIP The valve is installed lower than the jets, so when the system is turned off, any excess water in the pipe drains back down and out the valve, rather than pooling in or dripping out of the connectors.


I unscrewed the brass jets, that look like tiny tap fittings, and set them aside on a clean surface.


To fit each tee connector, I pushed it onto the pipe by 10mm, holding it straight and twisting slightly. Once the pipe is fitted, it grips firmly and can’t be removed, so I used tape as a marker to avoid pushing it in too far where it could obscure the water flow into the jet.


I joined up the rest of the system without securing it to the wall or beam, standing on a step ladder to use clamps to hold it in place.


I spaced the tee connectors along the beam, about 600mm apart, cutting pipe to fit between them. I finished with an elbow-shaped connector at the end, opposite the tap, and used plain elbows to run pipe around the wall towards the tap.


After unscrewing the auto-drain valve, I turned on the tap to flush the system, leaving the water running for a few minutes to ensure any debris was removed to avoid clogging.

I turned the tap off and waited for the water drain out.

TIP Before turning on the tap, I removed the clamps and took down the section of the system that ran along the beam, moving it to the edge of the deck so water pooled away from the house. If you don’t mind the area getting wet for this clean-out, then leave it clamped in place.


To attach the system to the beam, I stood on the step ladder to hammer the pipe clamps about 50mm both sides of each connector to hold them in place. I also tapped the clamps around the pipe along the wall and either side of the auto-drain valve near the tap.

TIP I began at the far end to secure elbow connector, then gently pulled the pipe and clamped it to the beam to work on each section.


I twisted the small brass jets into the connectors, screwing them on firmly. These images shows the elbow at the end. I also reinstalled the brass auto-drain valve near the tap.


Then I set the tap timer to begin misting!

TIP This system isn’t designed to run constantly, so program it to come on when you’re outside or during the hottest part of the day.


A variation of this story first published in Bunnings magazine.


UPDATED PATIO PAVERS

Natasha Dickins

I wanted to modernise this outdoor area and make it easy to keep clean. For a simple weekend makeover, I used the Dulux Concrete & Paving three-stage system, finishing in a sealer tinted to match the surrounding concrete.

BEFORE No amount of scrubbing would improve these pavers. The red finish also makes the area look dated and not in keeping with the rest of the renovations happening around the house.

This area gets so hot in summer. Making the surface lighter has cooled it down so much that we can now walk on it in bare feet.
— Natasha

TESTING THE SURFACE

Before purchasing products, do the Dulux Concrete & Paving Surface Test to check if your pavers are bare or sealed. Pour on 30ml of water, wait 30 seconds, dab off the excess and check if it has soaked in. Soaked in means it’s bare, but still on the surface indicates sealed. This will determine which products to choose from the Dulux Concrete & Paving range.

WHAT YOU NEED

• Safety boots and eyewear
• Garden broom
• Gloves
• Pressure cleaner
Dulux Concrete & Paving Sealed Surface Cleaner 4L
Bucket tray
• Paint tin opener and stirrer
• Stiff bristle brush
• Painter’s tape
Dulux Concrete & Paving Sealed Surface Primer 2L
50mm paintbrush
• Extension pole and roller
Dulux Professional Roller 22mm nap covers
Dulux Concrete & Paving Coloured Sealer Matt 10L tinted in Dulux Tuft

After sweeping with a broom, I pressure washed the pavers wearing boots and eye protection.

TIP Hold the wand at an angle to minimise splashing debris, and be prepared to give the surrounding walls a quick wash down afterwards.

Stage 1 of the system involved mixing up one part Dulux Concrete & Paving Sealed Surface Cleaner into five parts water (1:5) then scrubbing it onto the pavers with a stiff bristle brush. Then I rinsed off with the pressure washer and left the area to dry overnight.

For Stage 2, I mixed up the Dulux Concrete & Paving Sealed Surface Primer with the supplied additive.

Then I cut in with the primer using a 50mm brush around the edges and a long-nap roller to cover the rest, working in slightly overlapping sections. I left the primer to dry while washing out the brush and bucket, ready to use with the Stage 3 sealer.

TIP Use painter’s tape to mask surrounding areas that won’t be painted.

After stirring the tin of Dulux Concrete & Paving Coloured Sealer to ensure the colour and slip-resistant particles were evenly distributed, I checked my shoes were clean and free of grit before using the brush to cut in around the edges.

Then I used a clean long-nap roller to apply, working from end to end in slightly overlapped sections and rolling into the gaps between the pavers, and left it to dry for two hours.

Before applying the second coat, I touched up any unpainted crevices and cracks with the brush, then used a fresh roller cover to repeat the application, rolling from side to side to criss-cross the first coat and ensure an even finish.

When the surface was dry enough to walk on, I removed the tape. It’s recommended leaving the sealer for a couple of days to cure completely before driving on it.

Are you planning to makeover a paved area? 

Tag me on your project and follow more of my DIY journey on Instagram for tool tips, home improvement and simple building projects.

SEALED CONCRETE DRIVEWAY

Natasha Dickins

The surface of my driveway had worn away with pressure cleaning and often becomes blackened with mould after wet weather. My plan was to clean the surface then revive it with a clear finish to keep that newly washed look for longer while ensuring it’s easy to hose down.

This makeover was a simple two-step process using the Dulux Concrete & Paving range. While the surface is now smooth and clean, it’s also safe to walk on, even in the rain.

My driveway needed some TLC so that it requires less water to keep clean. I did this makeover in a weekend and love how fresh it looks.
— Natasha

TESTING THE SURFACE

Before purchasing products, do the Dulux Concrete & Paving Surface Test to check if your driveway is bare or sealed. Pour on 30ml of water, wait 30 seconds, dab off the excess and check if it has soaked in. Soaked in means bare, still on the surface indicates sealed.

If sealed, prep with Dulux Concrete & Paving Sealed Surface Cleaner and follow the packaging instructions. If your driveway is bare, get started with Dulux Concrete & Paving Bare Concrete Etch & Clean.

WHAT YOU NEED

• Safety boots and eyewear
• Garden broom
• Gloves
• Pressure cleaner
Dulux Concrete & Paving Bare Concrete Etch & Clean 4L
• Plastic watering can
• Stiff bristle brush
• Paint tin opener and stirrer
Dulux Concrete & Paving Clear Protective Sealer in Matt 10L
Dulux Concrete & Paving Anti Slip Additive 300g
• Bucket tray
• Extension pole and roller
Dulux Professional Roller 22mm nap cover

First I swept away debris with a broom then, wearing boots and eye protection, I pressure washed from the highest point of the driveway so the dirty runoff doesn’t affect the cleaned area.

Using measurements on the side of a watering can, I mixed one part Dulux Concrete & Paving Bare Concrete Etch & Clean into four parts water (1:4).

Working in sections, I poured the solution over the driveway, scrubbing with a stiff bristle brush, waited 10 minutes for the etch to work its magic while re-watering and scrubbing any heavy spots and making sure the solution didn’t dry out.

TIP You know the etch is working on the concrete as it froths and makes a crackling noise. Be sure to wear gloves, glasses and protective clothing.

After rinsing off the etch with the pressure washer I left the driveway to dry thoroughly overnight. Next day, when I checked the surface, it felt like rough sandpaper.

I poured a full 300g tub of Dulux Concrete & Paving Anti Slip Additive into a 10L tin of Dulux Concrete & Paving Clear Protective Sealer in Matt and stirred until the additive dissolved.

TIP Always stir the tin before refilling into the bucket tray to ensure the tiny clear beads of the additive are combined with the sealer.

Using a wide 22mm-nap roller with an extension pole, I applied the sealer in overlapping sections, working from one end of the driveway to the other and leaving it to dry for two hours.

TIP A long-nap roller helps coat the rough surface evenly. For maximum efficiency, use it with an adjustable extension pole to suit your height.

I checked my shoes were clean and free of grit before applying the second coat of sealer, again working in slightly overlapping sections. I used a large bucket with built-in tray that required less refills than a regular tray.

To clean up, I washed the tray out immediately and wrapped the roller covers in a bin bag to disposed of them in household waste.

TIP It’s recommended that the sealer cure completely for a couple of days before walking or driving on it.

Are you planning to makeover your driveway? 

Tag me on your project and follow more of my DIY journey on Instagram for tool tips, home improvement and simple building projects.

Tile & Timber Benchtop

Natasha Dickins

This bench is made using leftover building materials. It began with a solid hardwood door cut down to make a base framed with timber moulding then tiled. The result is a cool countertop nicknamed The Ramen Bar because we love to slurp Asian soups here.

The bench was made off-site, moved into position then tiled because of the eventual weight. It attaches to the kitchen island underneath with hidden brackets, is solid and easy to clean.
— Natasha

The bench fits snuggly against the kitchen island so I used the exisiting dimensions and worked out the width to include two rows of tiles with 3mm grout gaps plus 30mm framing along the sides. One end is tiled, the other has fluted timber detail.

TIP To adapt this technique for a bar, coffee or dining table, even a bench seat, do a dry-fit set out with your tiles, tile spacers and frame moulding before locking in the measurements and cutting the base.

I used a track saw to cut down a solid hardwood door then butt-jointed the top of the bench against the sides, securing with Bondall Bondcrete Woodworking Adhesive and countersunk 14g x 75mm batten screws.

TIP Alternatively, use a 2400mm x 900mm x 33mm hardwood panel or laminate two sheets of 17mm structural plywood together. Make a number of passes for each cut, beginning with a shallow blade and gradually going deeper.

I cut 45mm x 30mm Tasmanian oak picture frame moulding to fit around the top with mitred corners and down the sides, securing with adhesive and countersunk 8g x 40mm screws. I filled the holes, rounded over the edges and corners with a trim router, then sanded all over with 180-grit abrasive paper.

To create the fluted effect I cut lengths of 30mm half-round dowel to fit, securing with adhesive and small brads.

TIP I created this detail at one end of the bench because of limited tiles, but it also matches the nearby built-in banquette.

Before sealing the timber I sanded with 240-grit and cleaned away the dust with a damp cloth. To apply marine-grade Monocel Gold Exterior Wood Varnish in Clear I used a mini mohair roller, manoeuvring the tip to seal between the dowel. I left it to dry overnight, sanded and wiped again then applied two more coats, leaving to dry after each.

TIP I did the woodworking outside to avoid dust in the house, then enlisted a second pair of hands move the bench into position for tiling, after which it would be too heavy to move.

After masking the frame with painter’s tape, I worked in sections to lay the tiles, applying a premixed adhesive and using spacers for even gaps. I pulled a rubber squeegee over the surface to push them in evenly, wiped away excess adhesive and left it to cure overnight.

To fill the gaps between the tiles I applied a ready-to-go grout with the squeegee, wiped away the excess with a sponge then removed the tape and left it to dry.

TIP The grout forms a haze as it dries. Continue to wipe and rinse the sponge in clean water every 15 minutes until there’s no residue on the tiles.

For the finish I applied Betta Tilecare Tile & Grout Sealer with a mini microfibre roller and repeated with a second coat before the first had dried.

TIP Wipe around the frame with clean, damp cloth to remove any sealer, which will dry clear but may later flake off the timber.

My finished counter is 365mm x 965mm, slightly higher than the kitchen island to accomodate bar stools underneath. The sides are secured to the island with screws and brackets hidden underneath. I also painted underneath with a quality wipe-down white paint.

Are you planning to build a similar bench with tiles and timber? 

Tag me on your project and follow more of my DIY journey on Instagram for tool tips, home improvement and simple building projects.

Deck Screening

Natasha Dickins

After giving my deck an upgrade by resealing the boards and replacing the fascia, I knew it would benefit from screening for privacy and shade.

I had five bamboo panels from a previous project. Originally designed to be installed horizontally as fence extenders, hung vertically they transform my outdoor area into an entirely new room.

The screening is built from the back so the base lines up with the fascia. For fixing points, I used the corner roof post as one side and secured a second 90mm x 42mm post to the house wall with 75mm batten screws.

The panels are sandwiched between top and base rails at the front and back. The front frame has sides attached to the posts. The back frame has uprights covering the 30mm gaps between the bamboo panels. My finished screen is 2150mm high x 2620mm wide.

TIP To prevent bowing, I created extra support using an angle bracket and an offcut attached to the deck. The base rail is later screwed into this.

I took five laser-cut bamboo fence extension panels, flipped them vertically, cut them down and sandwiched them between a painted frame to create a built-in wall of screening.
— Natasha

For maximum weatherproofing, I used Woodhouse Weatherproofed primed H3 LOSP treated pine for the frame and galvanised countersunk screws. I finished the panels in Monocel Gold Exterior Clear Varnish in Satin for a lightly lacquered finish.

I set my mitre saw to cut 5.4m lengths of primed pine of various widths…

• From 92mm x 18mm, four rails 2620mm long to span between the posts at the top and base, front and back.

• from 42mm x 18mm, two sides 1970mm long to fit the posts vertically between the front rails.

• From 92mm x 18mm, four uprights the same length (1970mm) to cover gaps between the panels at the back.

Before assembling the frame, I set out the pine pieces on sawhorses to apply two coats of exterior paint, making sure the ends were sealed.

To build the front frame I installed a rail against the posts just under the rafter, then added the two 42mm sides and a rail along the base, also securing it into the angle-bracket support attached to the deck.

TIP I pre-drilled with a 8G combination countersinking bit and secured this front part of the frame with 8G x 40mm galvanised countersunk screws.

I cut five 2400mm x 500mm bamboo fence extension panels with a track saw to match the height of the frame, trimming equally from both ends to keep the laser-cut pattern centred.

TIP Cut the first one and use it as a template to trim the others from the top and bottom.

After sanding the panels lightly, I dabbed Bondall Bondcrete Woodworking Adhesive into the original holes along the centre of the panels and tapped in timber cover buttons on both sides, using a damp cloth to wipe away excess while removing any dust.

TIP If the cover buttons are too big, enlarge the holes using a same-size drill bit. These add a cute detail while masking a reminder the panels were designed for attaching to a fence.

Once the adhesive was dry I applied two coats of Monocel Gold Exterior Clear Varnish in Satin with a mini mohair roller, leaving it to dry after each.

TIP The marine-grade varnish gives the bamboo a sheen, which contrasts nicely against the matt white frame while keeping it easy to clean.

To hang the panels I positioned the first one flush with the front frame, clamped the top, pre-drilled and secured with 8G x 25mm galvanised countersunk screws. I made a 30mm-wide timber spacer to use for positioning the remaining panels with even gaps, clamping and installing one at a time.

I installed a rail along the top of the panels, then the uprights and base rail, making sure this second round of screws was positioned to avoid the first round.

After filling the screw heads with exterior filler, I sanded and touched up with paint on the frame and varnish on the panels.

To DIY a screen that fits your space, adjust my measurements and cut your materials to suit.

The screening acts like a wall to create a cosy space with shade, ventilation and lovely dappled light. Looks so good it featured as an outdoor summer project in Bunnings Magazine.

Here’s how the fence extension panels started out as an indoor room divider, which also featured in Bunnings Magazine.

Are you planning to try my fence-panel hack to build a screen? 

Tag me on your project and follow more of my DIY journey on Instagram for tool tips, home improvement and simple building projects.

INSTALL DECKING FASCIA

Natasha Dickins

Most decks tend to be framed in the same material as the decking boards, but installing a snappy white-painted fascia contrasted with my grey-stained treated pine deck for a modern finish.

I trimmed the deck using barge boards traditionally used for eaves as I had some leftover from a roof install. They’re also weatherproof and insect resistant, and I wanted to include the rounded bullnose profile as a design feature.

I built this deck a couple of years ago, installing the original fascia with pre-primed 140mm x 18mm treated pine boards, butt-jointed at the corners. It looked great but has suffered a lot of wet weather.

BEFORE The longest board I had was 2.7m, so there were a couple of joins along the front. They’d since split and sustained moisture damage. The corners had also moved and come apart.

After knocking the original filler off the countersunk screw holes, I removed the screws and took off the original trim.

Then I washed, sanded and resealed the deck with two coats of Cabot’s Deck & Exterior Water Based Timber Stain in Beach House Grey, knowing it would drip down the sides, which is why held off reinstalling the fascia.

I set out to replace the original trim with Woodhouse Weatherproof 180mm x 25mm bullnose fascia boards as I had some leftover from a roofing project and bought a new 7.2m length to span the entire front of the deck.

The Woodhouse Weatherproof range of H3 LOSP boards is treated against fungal and insect attack and sealed with a pink primer, ready for painting. So I just had to mitre the ends, paint and install.

These wider boards would better hide the deck supports and make the entire area appear more substantial. The bullnose profile adds a subtle design element that helps with water runoff underneath.

Because they’re made for roofing, these boards come in super-long lengths. Great for downsizing joins but difficult to manoeuvre!

To cut my 7.2m-long board, I set the mitre saw on the ground with timber offcuts spaced underneath board, about 600mm apart. Then I used a spirit level to check it was straight, adjusting the offcuts as needed before mitring the ends.

I painted the boards all over with two coats of exterior paint using a mini roller, making sure the raw ends were properly sealed.

I positioned the boards around the edge of the deck using offcuts and clamps to hold them in place and used a countersinking bit to pre-drill before securing with stainless steel decking screws.

Then I went back to remove the corner screws…

… to apply fast-drying exterior construction adhesive along the inside of the joints to prevent them splitting. I reinstalled the screws and wiped away the excess adhesive that squeezed out.

I smoothed over the holes with timber filler, sanded and touched up with paint to hide the screws and neaten the corners.

AFTER Changing the fascia was like adding a giant picture frame around the deck. The revived area has become a blank canvas for outdoor living and is the most-used space in the house.

Are you planning to revamp your deck this summer? 

Tag me on your project and follow more of my DIY journey on Instagram for tool tips, home improvement and simple building projects.

Patch plasterboard holes of any size

Natasha Dickins

Whether the plasterboard hole is made by a picture hook, door handle or a relocated powerpoint, there’s a product that can help achieve a smooth finish in just a few minutes (plus drying times).

TIP Plasterboard (also called drywall in the US) is made by sandwiching gypsum plaster between sheets of thick lining paper. It’s dusty and crumbles when cut, so protect surrounds with a drop sheet and wear a mask.

The aim is to make the repair invisible and restore the wall to be perfectly seamless.
— Natasha
 

Patch a small hole

This technique is best for a hole up to 20mm, maybe made by a picture hook. Pick up a handy kit, such Monarch Fill Sand Go, that has everything you need for quick fixes, plus a small craft paintbrush and same-colour wall paint.

I used the 120-grit abrasive pad in the lid to sand over the hole and ran my hand over it to check the edges don’t protrude, then sanded again and wiped with a cloth to remove dust.


After scooping up a pea-size amount of filler, I held the applicator at 45° to smooth over the hole. Then held it at 90° to scrape away the excess and left it to dry for half an hour.


I lightly sanded in a circular motion and removed the dust with a cloth. Then dabbed a craft brush into paint, removed the excess and feathered over the repair, applying light layers into the surrounding area, leaving to dry between each.


Patch a medium hole

Use this technique for a hole of 30-50mm, maybe made by a door handle. Pick up a utility knife, sheet of 120-grit abrasive paper with a sanding block, self-adhesive fibreglass mesh tape, Selleys SpakFilla Rapid, a mini roller with tray and same-colour wall paint.

I used a utility knife to trim around the edges to remove torn paper, then smoothed over the hole with a sanding block and abrasive paper, wiping away the dust with a cloth.


Ensuring there was enough to adhere to the wall, I cut mesh tape to fit over the hole and pressed it into place.


Then I pushed filler into the mesh using the spatula – in a wiping motion from opposite directions – spreading it onto the surrounding wall 20mm past the tape. I scraped over the area to remove the excess and left it to dry for half an hour.


I sanded over the filled area in a circular motion, smoothing the edges and sanding the surrounding wall.


To reapply filler over the area, I used a wiping motion from opposite directions, extending the coverage onto the wall by about 20mm. I left it to dry thoroughly then sanded and wiped away dust.


After pouring a tablespoon of paint into a mini tray, I used the top section of the tray to roll out the paint and remove the excess. I rolled over the repaired wall area, feathering the edges and left it to dry before repeating two more coats.


Patch a large hole

This technique is for a hole up to 120mm,  maybe from moving a switch or powerpoint. You’ll need the Gyprock 1.5kg DIY Rapid Plaster Repair Kit, a paper cup, utility knife and a small plasterboard saw. Also a full-size roller, tray and paint to refresh the entire wall.


Using a repair panel from the kit, I marked a square slightly larger than the hole, scored it with a utility knife and snapped the edges – this will be my filler piece. I centred it over the hole and marked around it with a pen.


Using a plasterboard saw, I cut diagonally into the corners…


… and scored around the edges with a utility knife.

TIP Hold the knife with the handle slightly outwards to leave an angled edge that allows for more plaster.


Then I pushed the excess into the wall and cleaned up the outside edges with the knife.


From the remaining panel, I cut two backing pieces the same width of the cavity and double the height. I combined one cup of compound and ⅔-cup of water in the small bucket and mixed it with the broadknife.


I applied compound around the front face of a backing piece…


… and positioned it with the face against the wall to cover about a third of the cavity, holding it against the wall for 30 seconds to make sure it adhered.


I covered the other side the the remaining piece and left them both to dry for an hour or so.


I applied compound over my filler piece and positioned it to cover the backing pieces, wiping away any excess that squeezed out, and left it to dry.


I cut pieces of mesh tape and positioned them around the edges, overlapping at the corners.


I mixed up a fresh batch of compound and used the broadknife to apply it over the tape, feathering it out onto the wall and leaving it to dry thoroughly.


I sanded with 180-grit abrasive paper, wiped away the dust and applied another layer compound, leaving it to dry thoroughly.

TIP Don’t rush into sanding. The compound lightens as it dries, so make sure there are no dark patches. If it’s still wet, sanding tends to remove chunks instead of smoothing the surface.


I sanded again and wiped away the dust with a cloth.


To paint over the patch, I rolled over the repaired area with same-colour wall paint and left it to touch-dry. Then I painted the entire wall to refresh it completely.


Do you have holes to patch up for perfectly seamless walls?

Tag me on your project and follow more of my DIY journey on Instagram for tool tips, home improvement and simple building tutorials.


Tiling with Mosaics

Natasha Dickins

Tiling often gets put in the too-hard basket, but laying mosaics is a pretty simple DIY job. Just have a water source nearby when cleaning the grout, and allow for the full drying times. It also helps to keep the area neat and tidy as you work.

TIP This handy technique suits various applications, including a kitchen splash back. But if you prefer subways, check out my tiled fireplace hearth. For square mosaics, see my how-to tile furniture project.

For smaller areas I like to use premixed materials and products with built-in applicators because they get the job done faster, with less mess. I’ve found the extra expense is a great investment in time and energy.
— Natasha
 

For tiling the easy way, I choose round or square mosaics and set them out to avoid having to cut the tiles. Then simply take the guesswork out of mixing up adhesive and grout from scratch with pre-made products.


My project involved tiling over newly installed FC sheeting, but if you’re working with an existing background, use a level to check it is flat, sanding over high points and using a plaster knife to screed any dips with multipurpose joint compound.


After masking around the area, I covered the bench with a drop cloth and taped down the edges. Then positioned 3mm T-shaped tile spacers against the wall to keep the tiles from sitting directly on the bench while creating a gap to seal with silicone later.


I worked out the positioning of the sheets so the straight edges were against the bench and adjusted the size of the squares along the top edge by cutting the mesh from the back with a utility knife.

TIP Mosaics are most often sold as 300mm-square sheets with the tiles adhered to a mesh backing.


To install the tiles, I spread premixed tile adhesive over the area using a small square-notched trowel held at 45°.

TIP Choose small tools for working into awkward spaces such as underneath wall-mounted cabinets and around fittings.


Beginning along the base and working upwards, I pushed the sheets into the adhesive, moving them slightly to ensure evenly spaced gaps between the joins.


I tapped over the surface using a rubber mallet with a pine offcut to ensure the mosaics embedded into the adhesive with a flat, even finish.


Then I wiped with a damp sponge to remove any surface adhesive and left it to cure for a day.

TIP Curing tends to be affected by temperature and humidity, so check the adhesive is totally dry before moving onto the next step.


Marble tiles are porous so, after removing the spacers along the bench, I used an aerosol tile and grout sealer for two quick coats over the surface to help prevent the grout from sticking. This is the same product as the final sealer, but I used a spray for this step as it dries even quicker, and the surrounding area is still protected from overspray with the drop sheet and tape.

TIP Skip this preliminary sealing step for non-porous glass or ceramic mosaics, but always seal the grout to finish.


I used a small rubber squeegee to apply premixed, ready-to-go grout, working it into into the gaps then leaving it to semi-dry for about 15 minutes. I used 1.5kg of grout per four sheets of mosaics.

TIP I chose an ultra white grout to complement the pale green-grey of the tiles, but avoid using coloured grout, especially black, for unsealed natural stone tiles (such as marble, slate, sandstone and travertine) as it can stain the surface.


To remove the excess grout, I wiped over the tiles in one direction with a damp sponge, continually rinsing in a bucket of water and wiping until the surface was clean, leaving it to cure for a couple of hours.

TIP If grout smudges out of the joints, wait another 10 minutes before sponging. Keep the water and sponge clean by continually rising and refilling the bucket under a tap.


I tidied away the drop cloth and cleaned the area of dust, wiping the tiles with a microfibre cloth to remove the grout haze that develops as the surface dries.

After applying another row of tape between the bench and tiles, I applied white silicone sealant, running a damp finger along to remove excess and smooth the surface.

TIP Choose silicone with an applicator to save having to use a caulking gun.


After leaving the entire project to cure for another day, I wiped over the tiles again with a clean, slightly damp cloth and applied two wet-on-wet coats of tile and grout sealer with a mini microfibre roller.


Then I removed the tape and left it to dry overnight.


The lovely tiles are Decor8 penny-round, honed marble mosaics in Bianco Carrara, which come in standard mesh squares of 305mm. I used them to illustrate this how-to DIY project featured in Bunnings Magazine.


Are you planning to try your hand at tiling?

Tag me on your project and follow more of my DIY journey on Instagram for tool tips, home improvement and simple building tutorials.

Fire Pit with Built-in Seating

Alun Machin

When Bunnings Magazine asked if I’d like to show readers how to DIY a dedicated outdoor winter area with a fire pit and matching seating… my first reaction was, ‘How do I put a designer twist on a usually traditional-style space to make to look modern and inviting all year round?’

I decided to combine basic building materials for colour, texture and shape to design a zoned area, with the DIY completed in three stages.

  1. ZONED AREA Clear the area, compact road base into a big circle, install edging and fill with large white stones.

  2. SAFETY SURROUND Assemble a metal fire pit bowl and build a surround with bluestone retaining wall blocks in a simple design (no concrete required!).

  3. CURVED SEATING Set out the same blocks to create a curved bench, adding a contrasting seat made from marine plywood.


Here’s how I did it…

The hardest part of the project was clearing an overgrown section of the big backyard, so I called in some help to demolish the jungle.


I marked out a 4m-wide circle to compact with road base, then had top soil and turf brought in to lay around it. 

TIP The area is positioned away from the fence and overhanging trees. Purchase the fire pit bowl first and check that you can meet the safety requirements before getting started. 


Natural Impressions blocks in Bluestone are designed to curve slightly and stack as inset rows of a retaining wall using a lip at the back to hold them in place. But I didn’t need them to perform this way and tapped off the lips with a Craftright 1.35kg Club Hammer so the blocks could sit flat and flush.


To make a fire pit safety surround, 14 blocks is the magic number for a circle with minimum gaps. I skipped using concrete in favour of landscaping adhesive applied with a battery-operated caulking gun and lay three courses in a stretcher bond pattern.

TIP Click through to more info on the tools, materials and instructions for building the fire pit surround.


Once the surround was built, I assembled a metal fire pit bowl with feet and simply dropped it in the centre.

TIP The inner diameter is 1080mm, which is more than enough for most off-the-shelf pits.


I used 44 blocks to build a two-seater bench, setting them out to match the curve of the road base circle, with six facing outwards and five facing inwards, using two 200mm x 100mm x 50mm pavers as spacers at the ends. For the second course, I set the back of the blocks 10mm in, over the spacers, then lay the third and fourth courses, applying adhesive between all joints.

TIP Build the base before finishing the rest of the zone so the edging can be installed around it.


For a comfortable seat, and to add contrast with timber, I cut a sheet of 9mm marine plywood in half lengthways and glued it together with Bondall’s Bondcrete woodworking adhesive to make a 1800mm x 605mm x 18mm-thick panel.

To cut the curved edges, I installed screws and left them protruding halfway at 10mm and 420mm up from the base, and the centre 10mm and 420mm down from the top. Then I pushed a length of 20mm x 4mm coverstrip moulding against the screws to trace the curves and cut with a jigsaw.


While test-fitting the seat on the bench I marked the corners on the underside of the panel to cut the ends with a jigsaw. (Using the actual bench as a template for shaping the ends will ensure the best fit.) 

After rounding over the edges with a trimmer, I smoothed all over using a random orbital sander with 180-grit abrasive disc. Then I wiped away the dust and sealed both sides with three coats of marine-grade Monocel Gold Exterior in Clear using a mini mohair roller, ensuring the edges were well sealed for moisture protection.


To install the seat, I applied adhesive over the top of the blocks and dropped it into position, pushing down to hold it in place. 

TIP It’s worth investing in marine-grade products for maximum weatherproofing of outdoor timber features.


To mark out the zone, I installed scalloped garden edging, made from flexible rubber that is simply bent to match the curve of the circle. 

TIP Just tap in the nylon spikes with a soft mallet. It adds an on-trend feel that will look even better when the turf greens up. 


Then I covered the area with large 30-50mm white pebbles. Can rocks be classy? Yes. These look so good! I used 45 bags for good coverage. 

TIP Moving 15kg bags begins to feel like hard work! To minimise effort, drop them into position, slice the base of the bag with a knife and pull it upwards while spreading the stones as they drop out.


To finish, I spent $90 and two hours on sprucing up the background fence with a 10L tub of Walpamur Fence Finish in Charcoal. Discover my trick to making the job easier.


Bunnings Magazine loved this project so much it features on the cover! Find more details from page 68 in the April 2022 issue


Cosy winter nights around a safely lit fire.


Are you planning to build an outdoor winter zone? 

Tag me on your project and follow more of my DIY journey on Instagram for tool tips, home improvement and simple building projects.


Paint a paling fence the fast way

Alun Machin

This fence is here for a good time, not a long time, but it needed a quick makeover to be a neat background for a photoshoot. 

Here’s how I did it in just a couple of hours and for less than $90… 


BEFORE Installing timber fencing in coastal bushland that’s prone to termites, bushfire, corrosion and extreme weather is crazy. This bug-ridden one is rotting and will eventually be replaced with more a durable material.

 
This method isn’t for DIY purists. If you have a fence that needs some TLC, do take the time to replace rusty fasteners, treat deteriorating sections properly, give it a pressure clean and sand before painting.
— Natasha

I picked up a 100mm Monarch Fence Brush for about $6 and 10L of Walpamur Fence Finish in Charcoal from Bunnings for about $81, although only used half. 

Never used this brand before, but was super impressed with the just-right consistency and perfect colour that dries quickly and fades to be slightly more grey than blue. And it’s completely odourless.


After brushing down the timber, I used White Knight Squirts in Medium Grey along the base of the pickets and either side of the rails, into any rotting cavities and over rusty nuts and bolts. 

This helps avoid picking up sand and debris with the brush to maintain as much full coverage as possible.

TIP Use the same-colour spray paint if you have it, but any darker colour does the trick.


Working in sections, I cut in along the rails and posts then worked down each picket, brushing into the sides, taking the time to apply the paint thoroughly. 

TIP Transfer paint into a small container and refill as needed. Don’t dip strait into the original tub as this can contaminate the leftover.


Just one coat and some touch-ups over spots I’d missed was all it took to transform this fence!


Are you planning to try painting a fence? 

Tag me on your project and follow more of my DIY journey on Instagram for tool tips, home improvement and simple building projects.


Limewashed Concrete

Alun Machin

While the floor of my laundry is hard-wearing and cool underfoot, I wanted to freshen up the room by limewashing the concrete to give it a painterly texture and make it look brighter.


BEFORE The unsealed, porous surface always feel gritty, and there’s an accumulation of stains and paint spills.

 
Unlike paint, which dries on the surface, this wash soaks into the concrete and won’t peel or flake. The key is to finish with a sealer to prevent the chalky lime from brushing off.
— Natasha

The texture is achieved by mixing hydrated lime with water and a bonding agent. I’ve used Bondcrete that has a resin additive. 

It’s usually my go-to woodworking adhesive, but I’m trying it as a new application with an old-school technique.


To make the wash in a 10L bucket, you’ll need…


To make enough for applying three coats over my small laundry floor, I reduced the quantities listed above to combine 1.5L water with 500ml bonding agent in a bucket. 

I used flyscreen mesh to sift in 0.75kg of hydrated lime, mixed it up, poured in 250ml of mineral turps, then added another 125ml of water and mixed again.

I scooped some mixture into a cup and stirred in a sprinkle of white oxide pigment, then combined it in the bucket and left the mix to stand overnight.


After sweeping away debris, I removed spots and stains with kitchen detergent and warm water, leaving it to sit for half an hour before giving a quick scrub and wiping with a cloth.


To prepare and seal the surface, I diluted half a cup of bonding agent with two cups of water in a bucket then brushed it over the floor and left it to dry.

TIP My floor is 1700mm x 2450mm, just over 4m2. Adjust your measurements to suit the size of your area.


To apply the wash, I used a large brush to stir and combine the sediment. I dampened the concrete with a misting of water from a spray bottle then brushed on the mix and left it to dry enough to walk on without marking – about two hours.

TIP The first coat looks patchy and shows up the brushstrokes, so be prepared to add at least one more coat for a smooth finish.


After stirring again, I applied a second coat, left it to dry, then brushed on a third, touch-up coat to make the wash more opaque and hide any problem spots.

TIP Leave the brush in the mix between coats to prevent it from drying out.


I finished with Gripset Betta natural-look sealer, working in sections to apply two wet-on-wet coats with a roller. This ensures the chalky lime won’t rub off and prevents the surface from staining. It also dries quickly with a lovely matt texture.


The end result is a refreshed space that feels clean, and the textured finish of the floor is a warm contrast to the stark white walls and appliances.


Are you planning to try limewashing concrete? 

Tag me on your project and follow more of my DIY journey on Instagram for tool tips, home improvement and simple building projects.


7 DIY ways to personalise a wardrobe

Alun Machin

When installing this super-simple Multistore Solutions flatpack system, I came up with some handcrafted DIY elements to make it a truely personal storage space. These can be done when installing a new closet or to simply customise an existing one.

Most wardrobes are constructed from melamine and, while I appreciate the smooth, easy-clean surfaces, adding timber features warms it up with handcrafted detail.
— Natasha

REINFORCE JOINTS 

When assembling flatpack furniture, I always reinforce the raw particleboard joints with Bondcrete adhesive to prevent the wobbles and add strength. It has the perfect dry-time, staying sticky for long enough to make adjustments, but not taking more than an hour or so to cure. It also dries clear. 

TIP Click through to watch my quick video with more tips for assembly that you won’t find in the supplied instructions.


RESIZE STANDARD UNITS 

When installing a new robe that doesn’t quite fit the space, it’s a simple process to resize standard flatpacks to be slimmer or lower.

TIP For more instructions on resizing a flatpack robe, click through to the full project on page 80-81 of the January 2022 Bunnings Magazine.


REDUCE THE HEIGHT by cutting down the vertical sides, measuring up from the base, then re-drilling holes for the base and any shelves. Keep the offcuts to use as templates for re-drilling the holes, then assemble as normal with the supplied fasteners. 

REDUCE THE WIDTH by trimming all the horizontal pieces to the same width, working from just one side. Keep the offcuts to use as templates for re-drilling the holes, then assemble as normal with the supplied fasteners. 


SWITCH THE HANDLES 

Swapping out the supplied metal drawer handles for post-box pulls adds a little personality. I sealed them with Monocel Waterbased Clear Wood Varnish in Satin.

To ensure the handles line up, I made a template for the holes from 3mm plywood cut to the same width as the drawer fronts, and drilled right through with a 4mm bit. 

I used two pairs of pliers to snap the supplied screws to fit through the drawer front, installing them with a Phillips head screwdriver.

TIP Click through to watch how I installed this robe with timber handles.


MAKE A DRESSER

To convert a drawer cabinet into a dresser, I trimmed a 600mm-wide laminated timber panel to fit over the top and nailed half-round dowel along the front to create a lip that holds it in place.

I sealed it in two coats of Monocel Waterbased Clear Wood Varnish in Satin as it dries fast without a strong odour, which is great for a closed area. The lacquer-like finish highlights the richness of the woodgrain.

TIP Before sealing, sand the surface and round-over the edges slightly with 180-grit abrasive paper, remove the dust with a damp cloth, then use a mini mohair roller to apply varnish. 


CREATE HIDDEN STORAGE

A hat shelf spans the gap over the hanging rail and would normally run the full width of the units, but making it shorter frees up room for it to slide across, creating a mini attic area. Adding a wall batten prevents the shelf from bowing while acting as a support for the shelf to slide across.

TIP For a new install, choose a hat shelf the next size up from the gap. If your gap is about 1220mm, choose the Multistore 1200-1499mm kit, which also includes the hanging rail, flanges and wall batten.

For an existing robe, remove the shelf and trim it to fit over the gap, allowing it to sit over the unit by about 150mm.


INSTALL A SHOE RACK

To make stackable shoe racks, I cut 12mm-thick, 140mm-wide pine sides to fit the depth of the cabinet, and lengths of 19mm tri-quad pine moulding as rails to span the width, securing them over the sides using Bondcrete adhesive and small nails. 

I’ve spaced the rails differently on each rack to cater for various types of footwear – omitting some to give clearance for boots and positioning others together to prevent heels from falling through.

TIP Three racks fit perfectly here, but you could stack more as the rails have a flat-top profile that helps keep them locked in.


Are you planning to customise a wardrobe? Share your project and follow my daily DIY journey on Instagram for more renovating and home improvement, tool tips and simple building projects.