contact Me

Use the form on the right to contact us.

You can edit the text in this area, and change where the contact form on the right submits to, by entering edit mode using the modes on the bottom right.

109 Sydenham Rd
Marrickville, NSW, 2204

+61 (0)410 32 5575

In every Australian garage is an unloved chair... Little Red Industries aims to find them and completely revamp them to last another lifetime. Great design choices, unique finishes and fabrics and smart repairs combine with a guarantee that sturdiness and a solid structure always come first. If you're after a certain style or something special Little Red Industries can source it for you.

Renovate

Built-in Entertainment Cabinet

Alun Machin

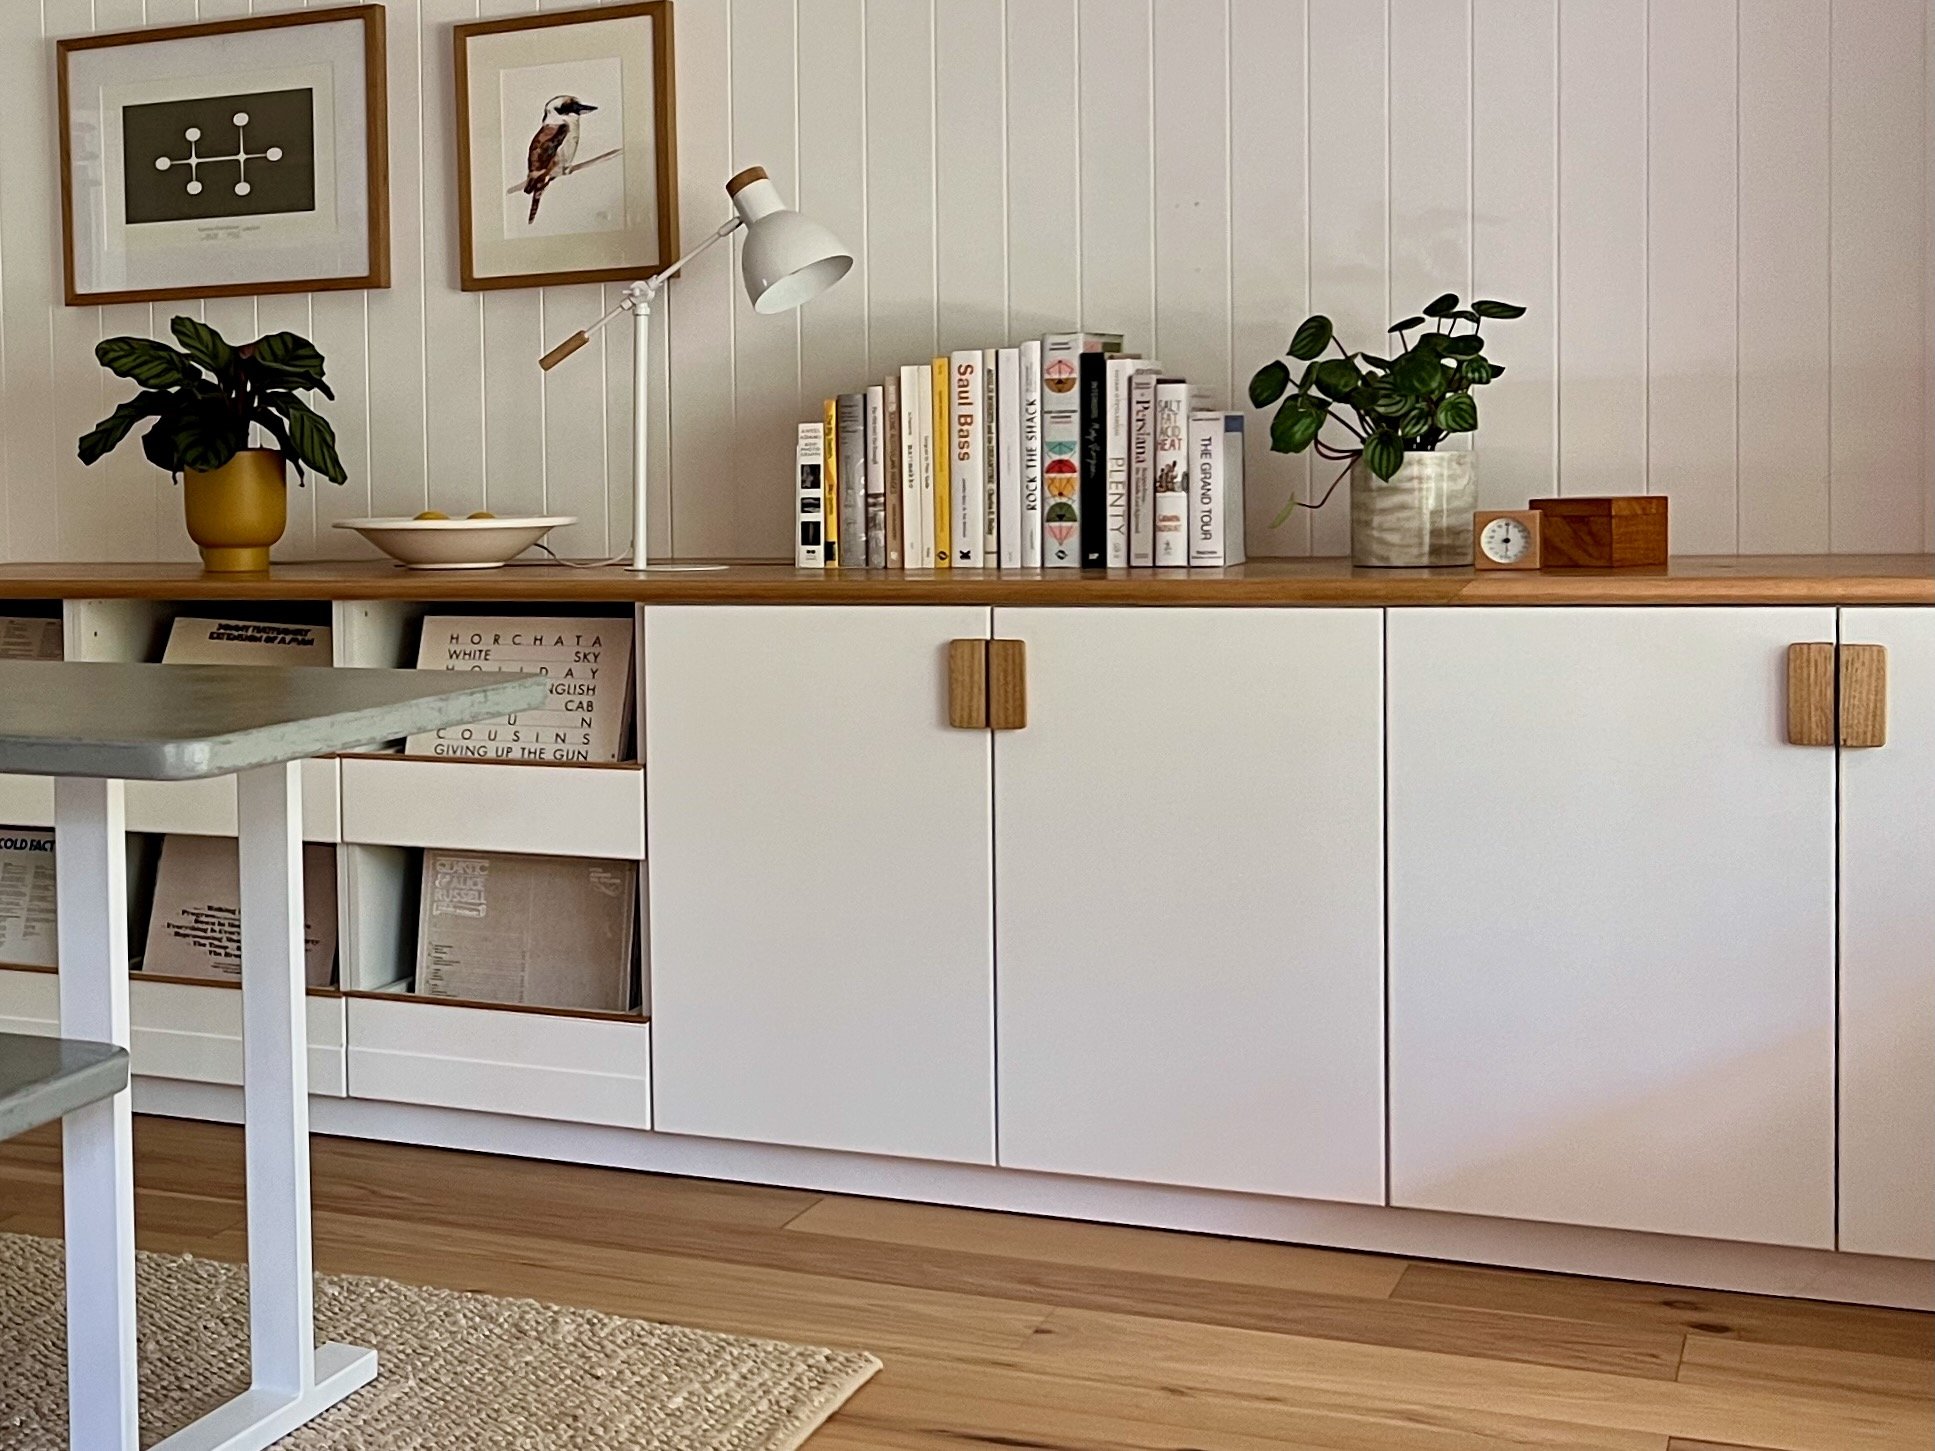
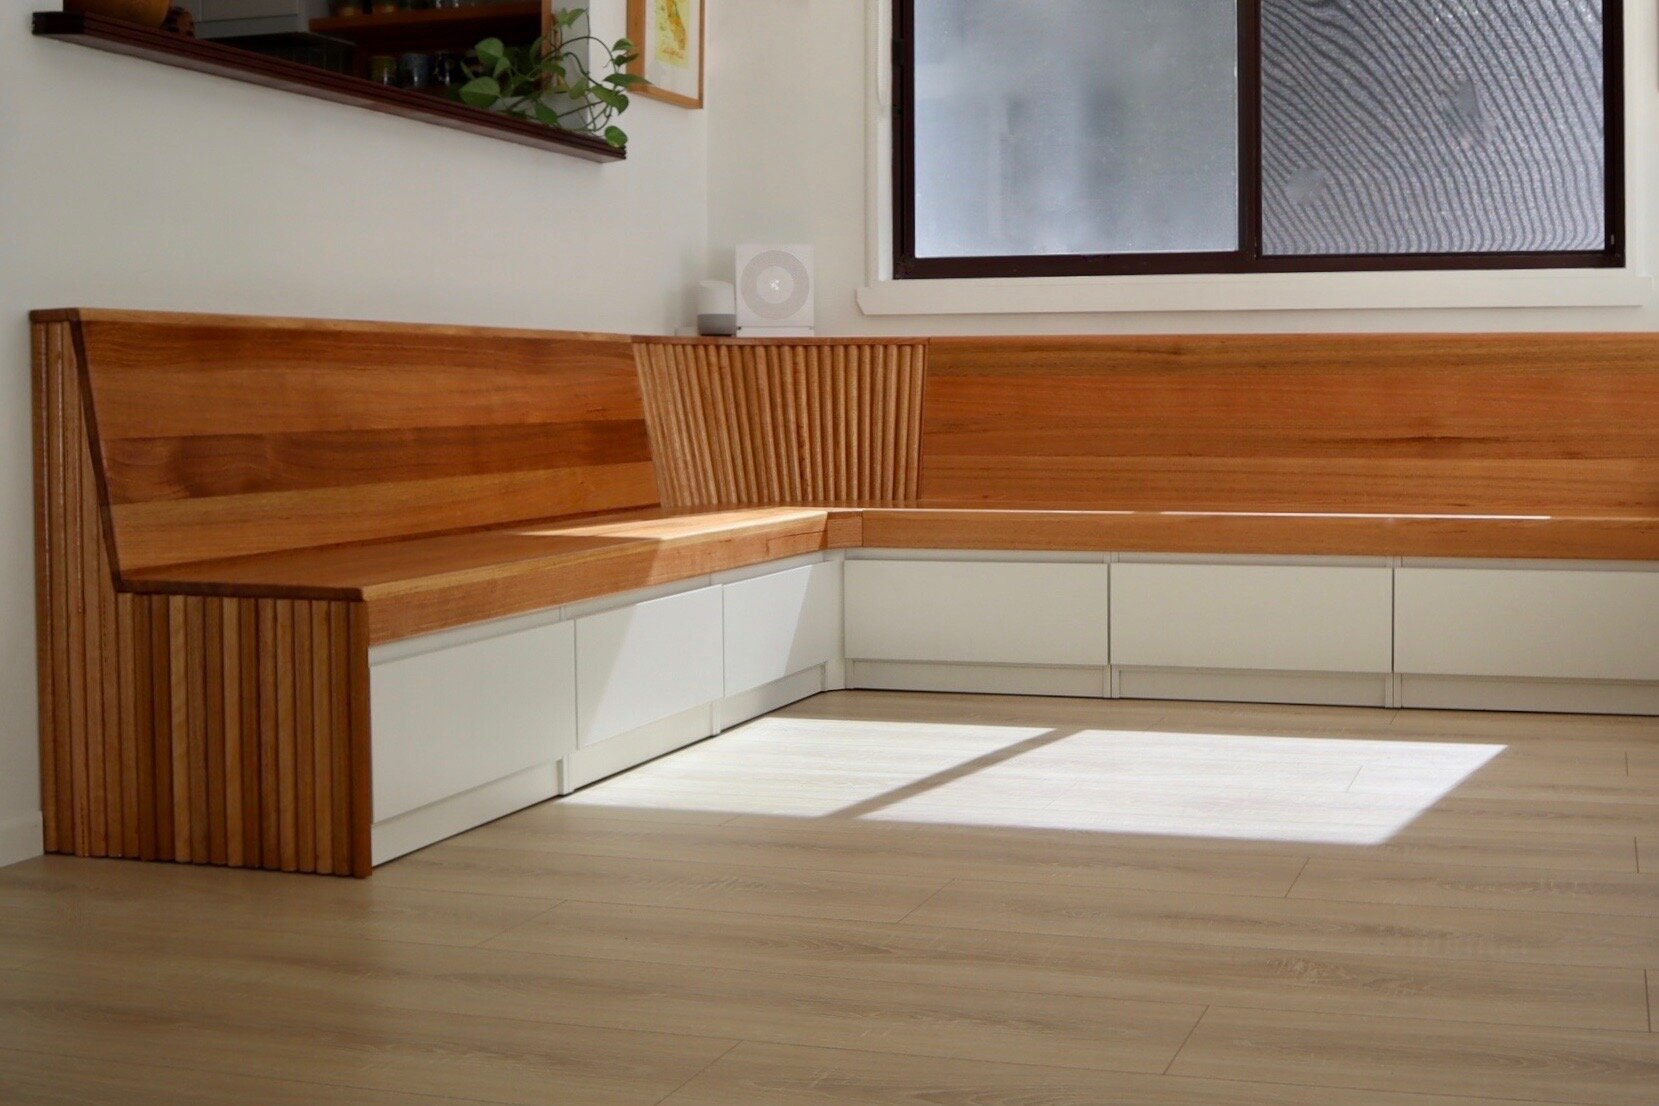
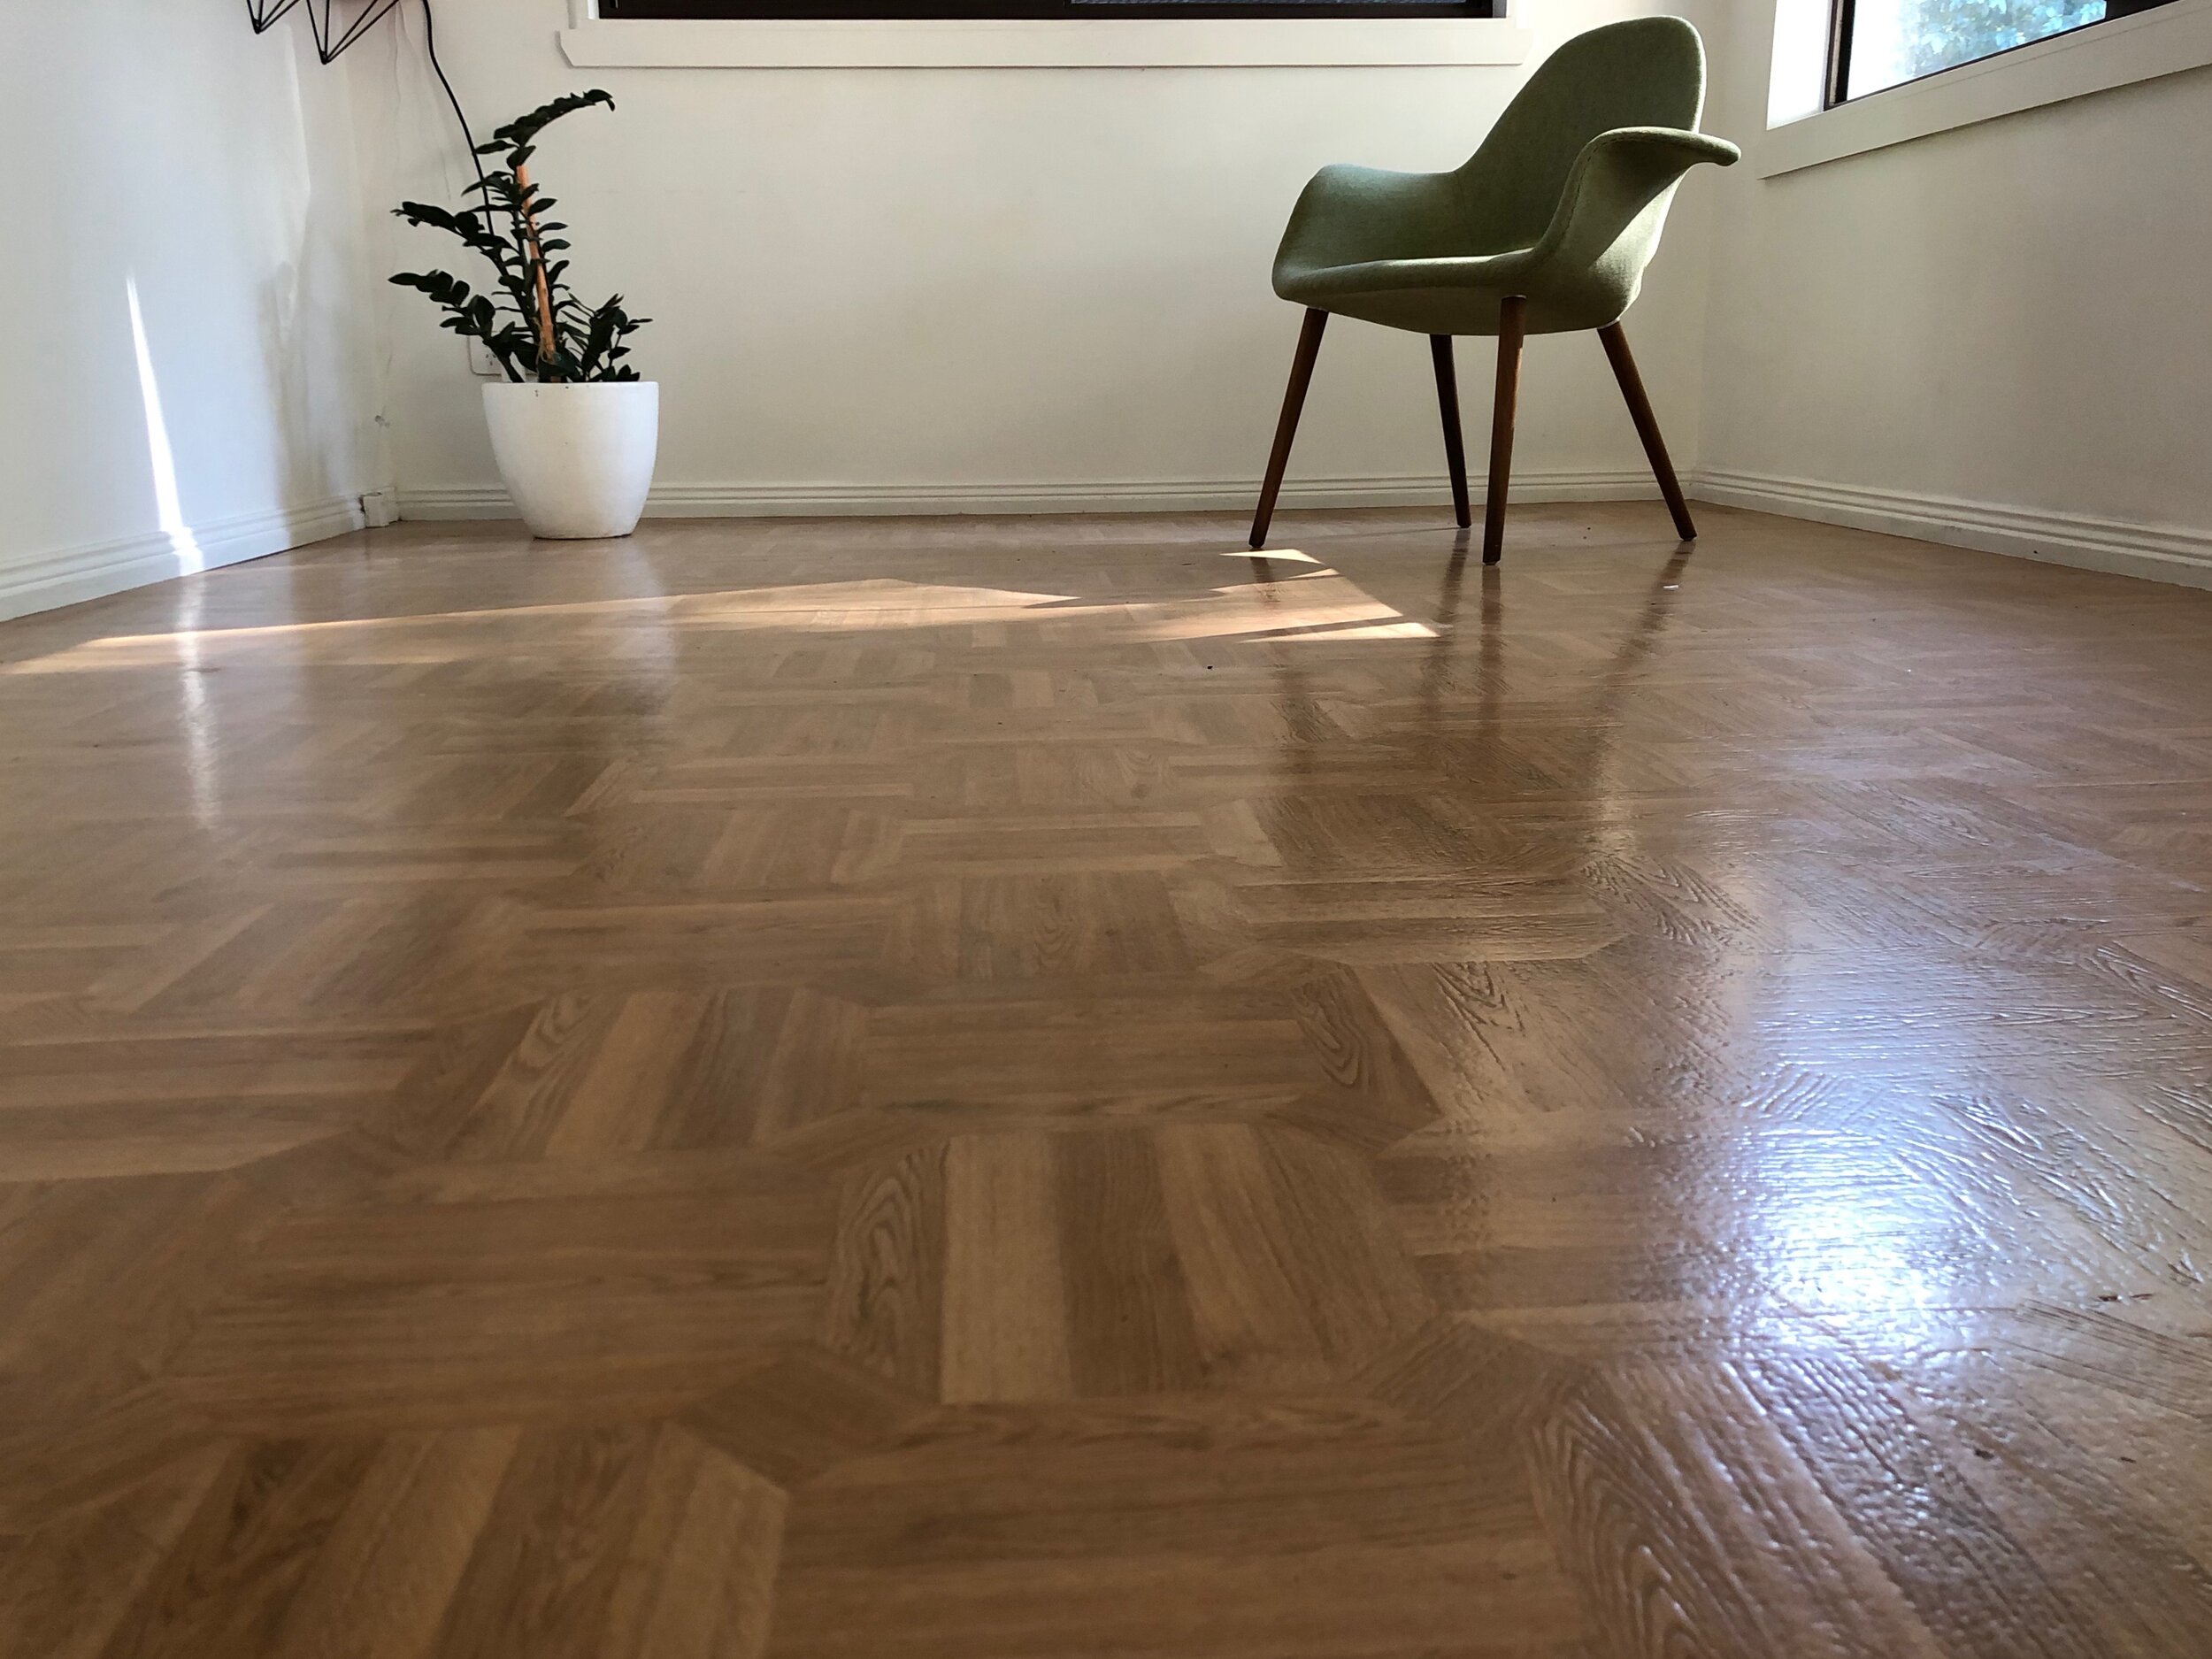
This living room was a long, narrow space, with no storage. So I created a built-in entertainment hub along one wall to hide the TV and stereo cables, store the vinyl collection and help consolidate the lounge area.


The 3.2m-long wall-to-hallway cabinet is made up of five flatpack units finished in the same style of Tasmanian oak benches as the nearby kitchen.

I built it in the workshop, moving the components to install on site. Here’s how it came together…

 
I built a hub for watching TV and playing vinyl, with customised drawers to house the record collection for Saturday-night crate-digging through the covers.
— Natasha

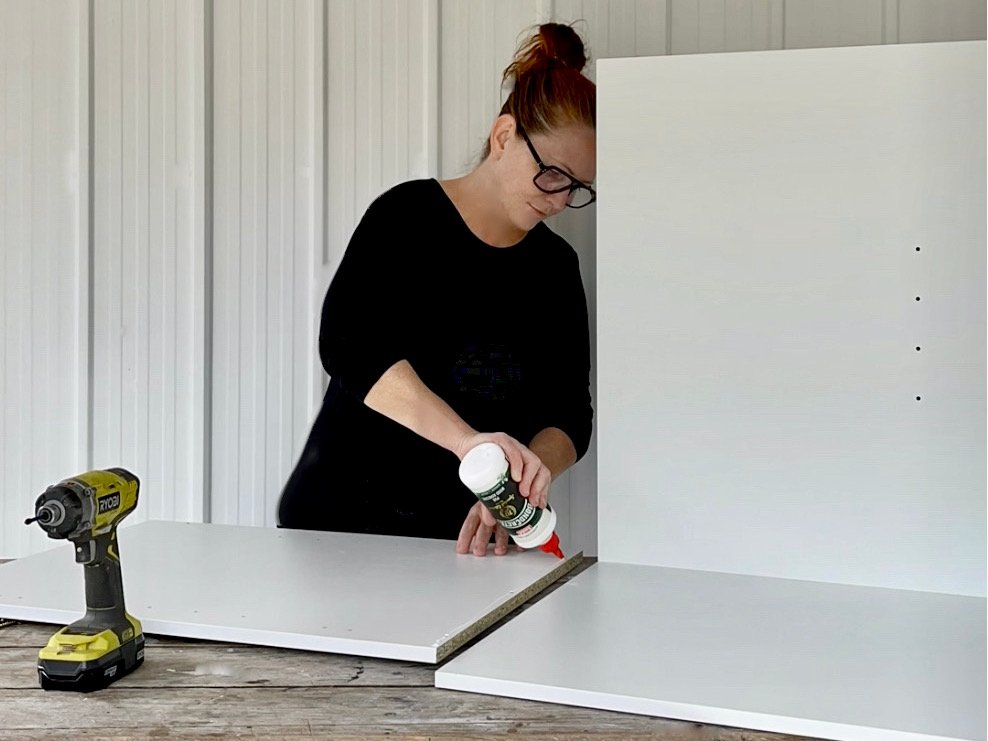
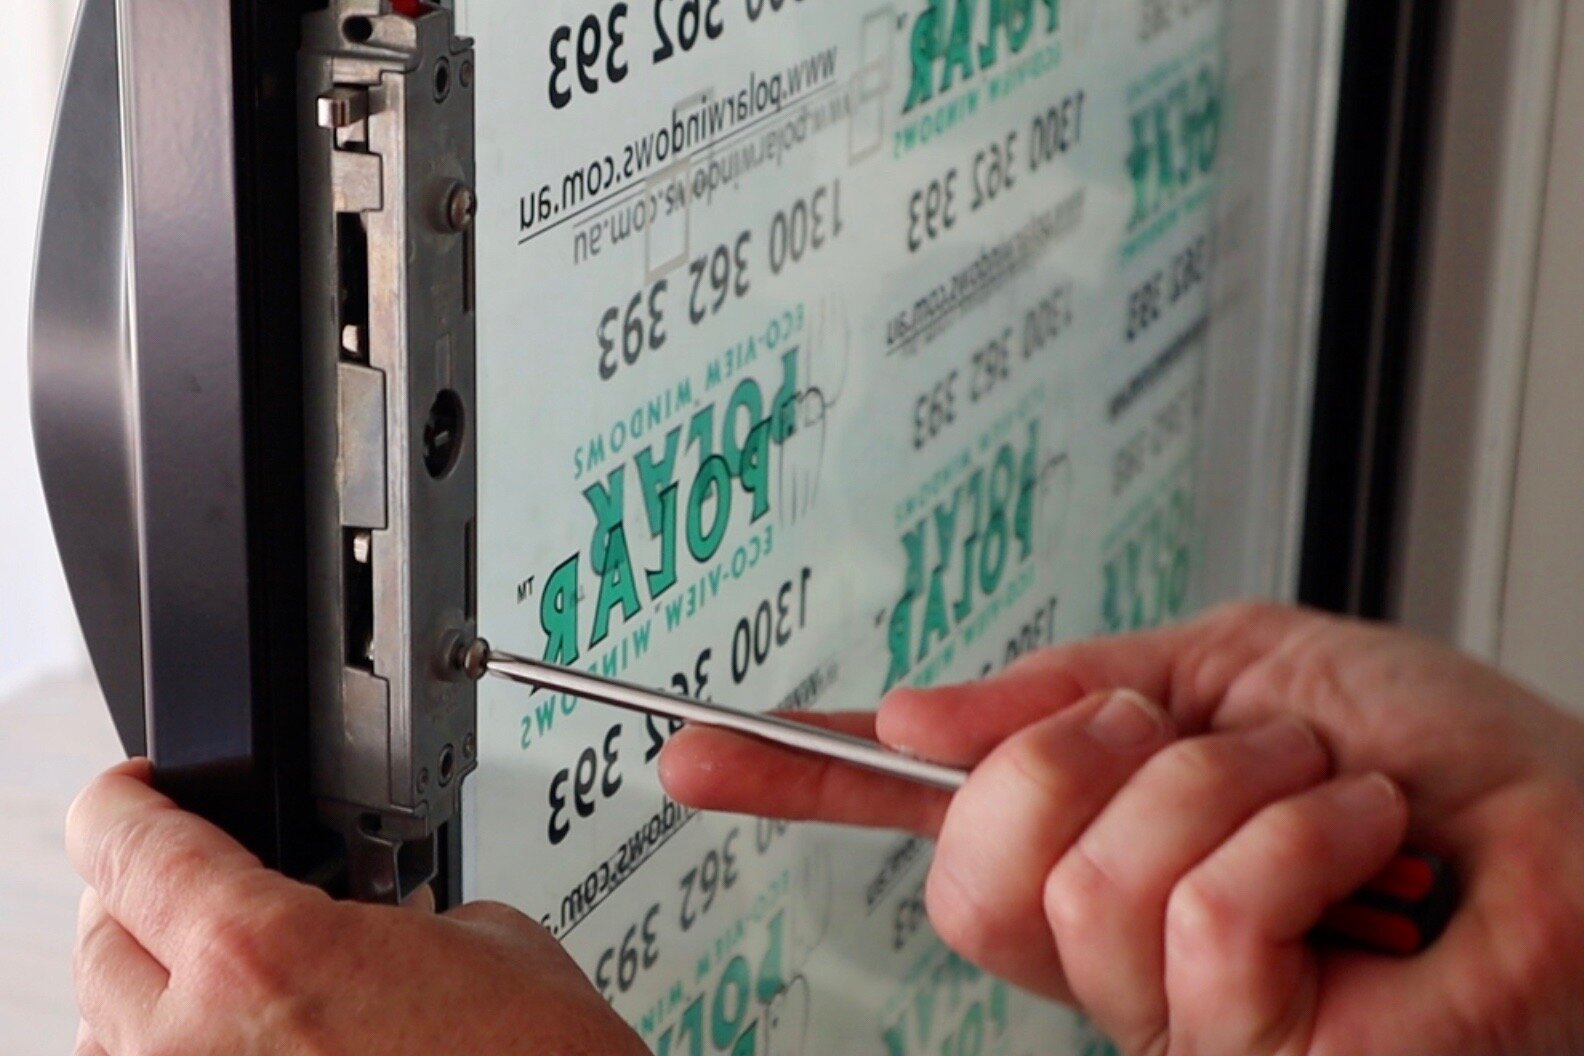
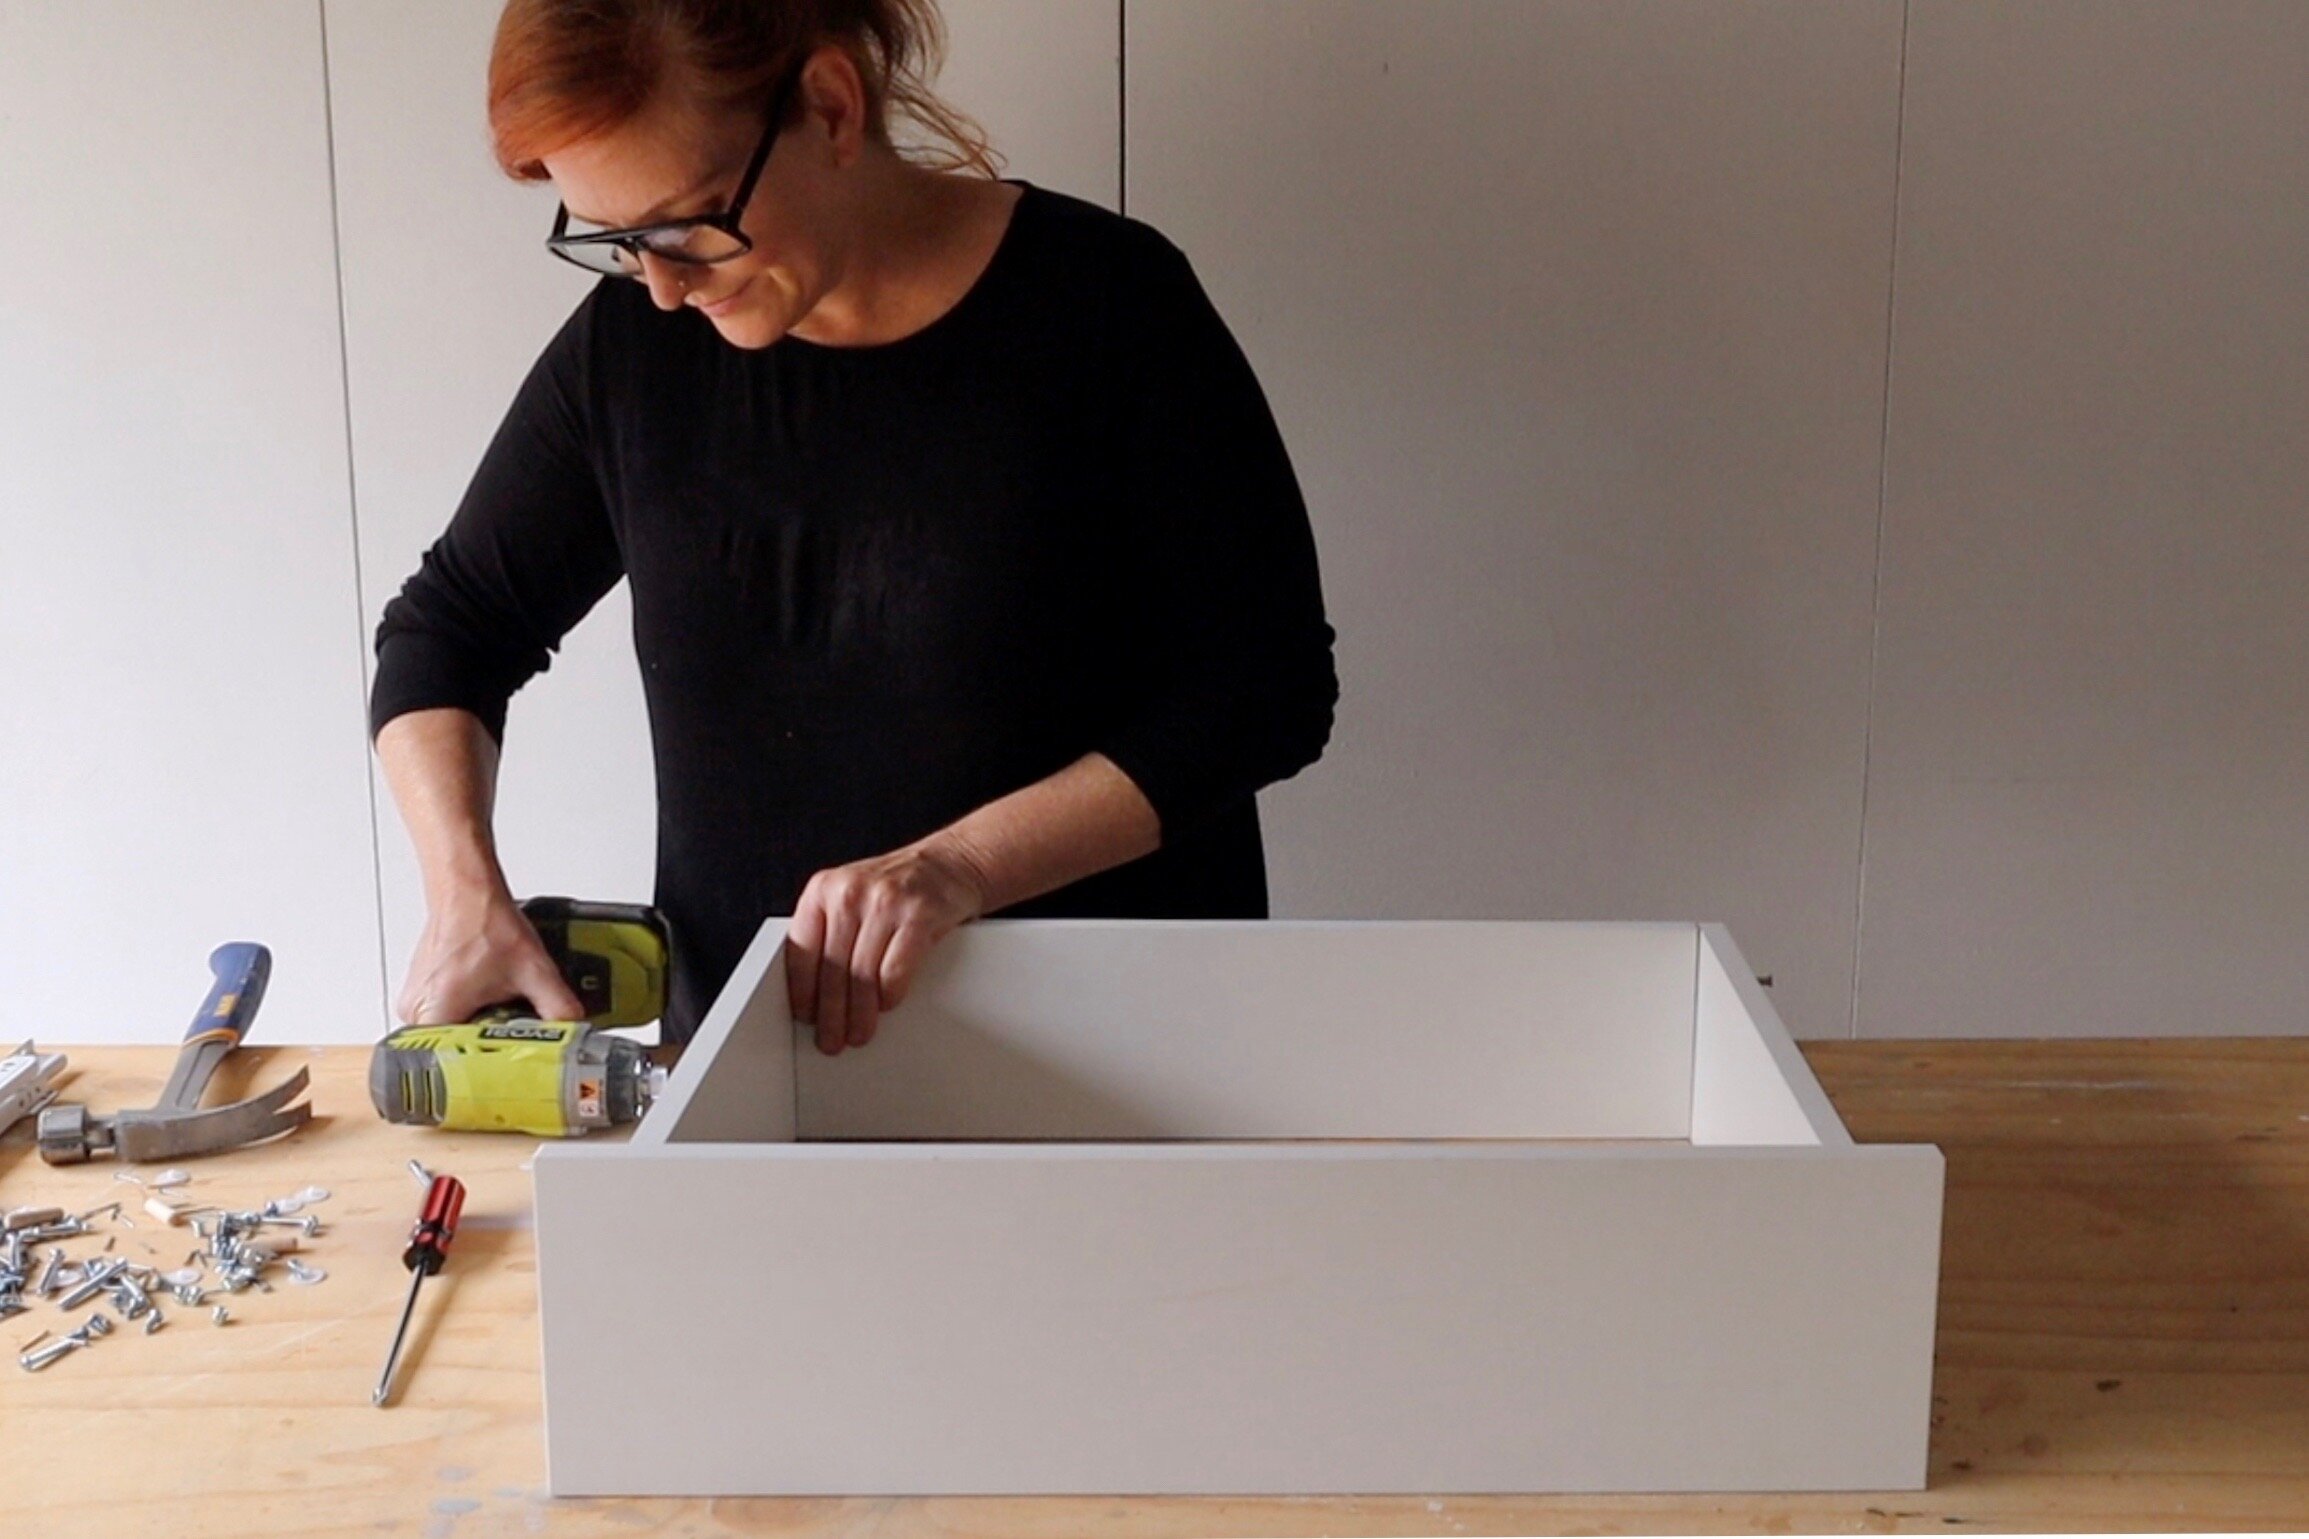
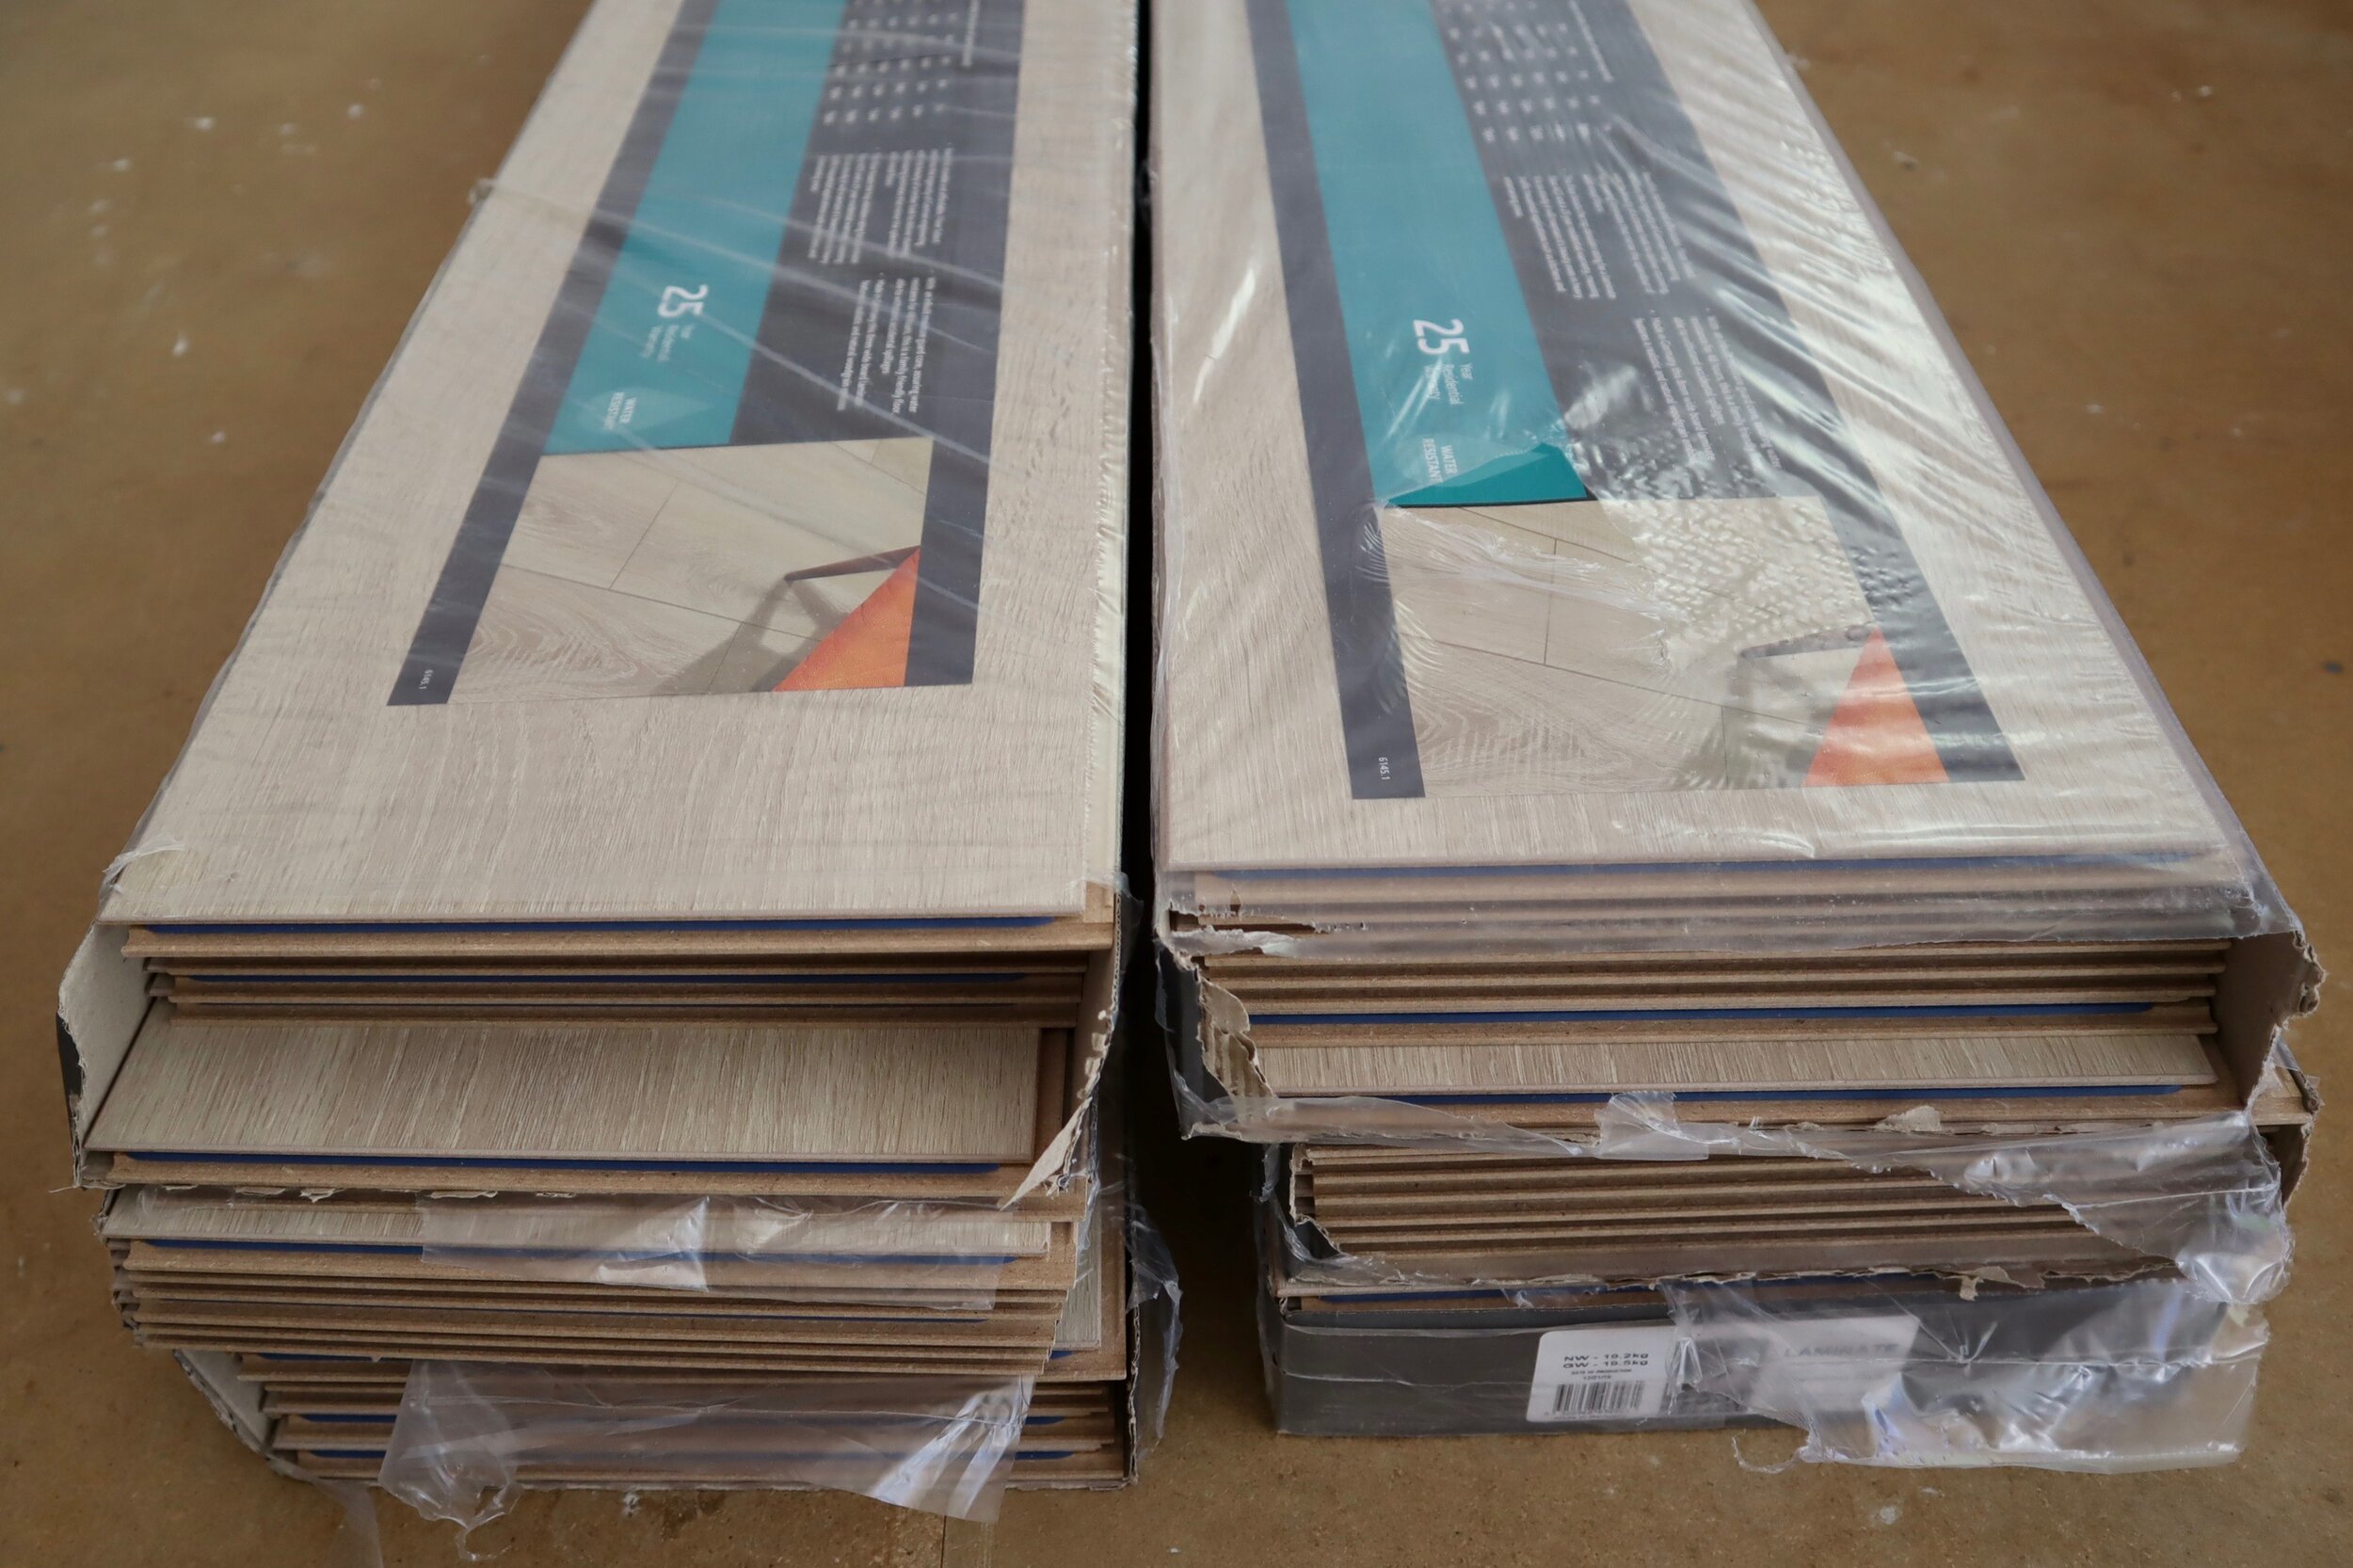
Choosing to use flatpacks instead of building the carcass from scratch saved time and workshop space.

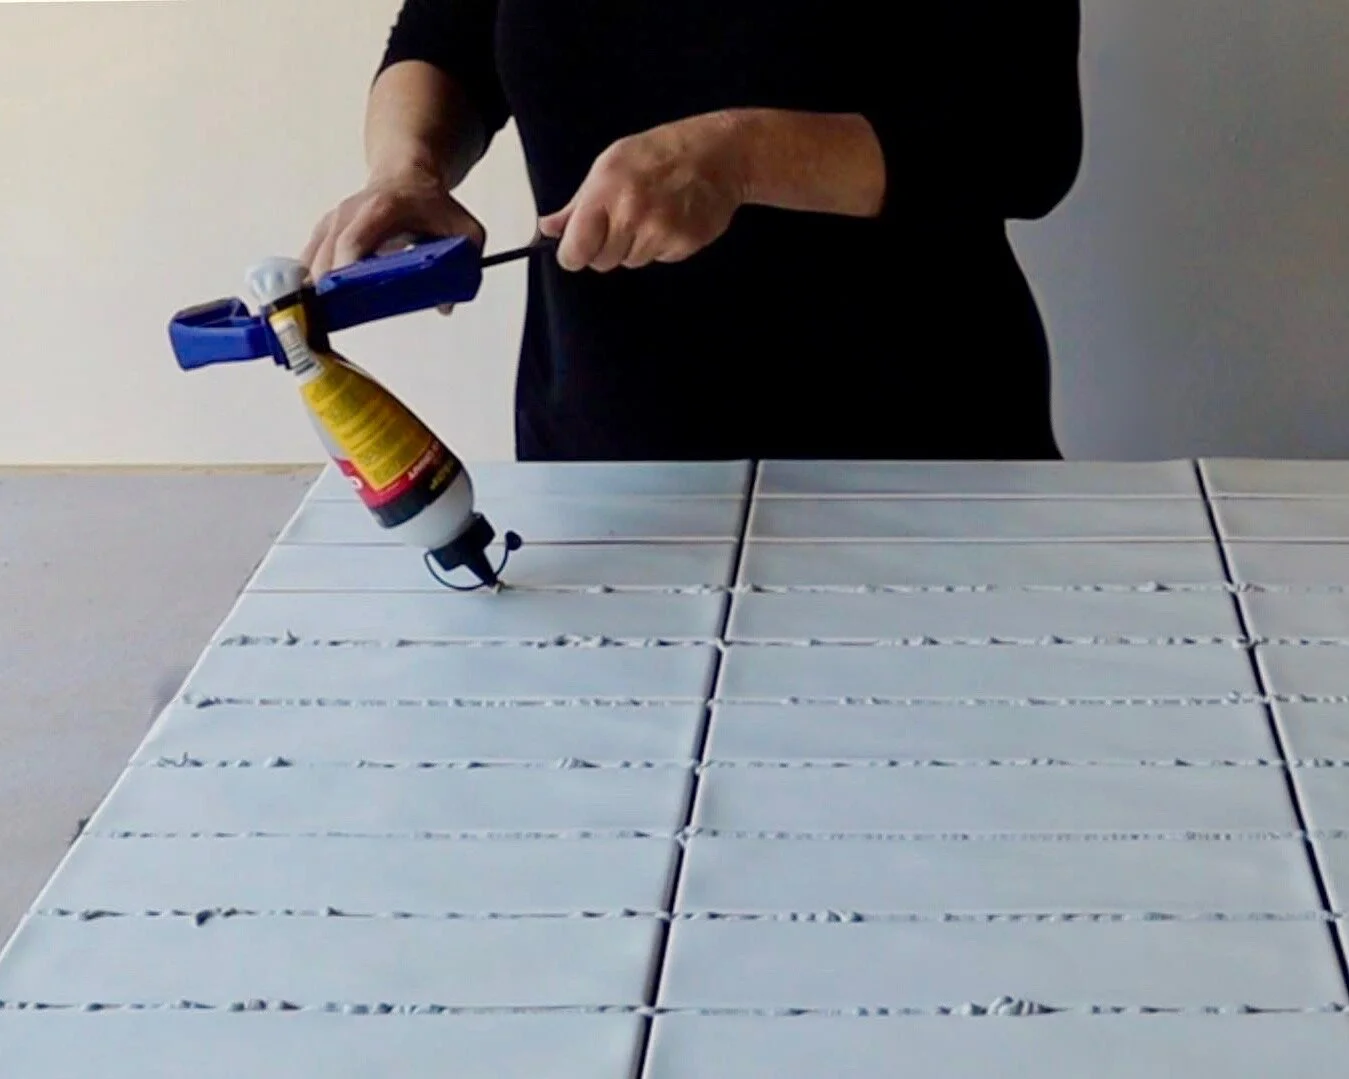
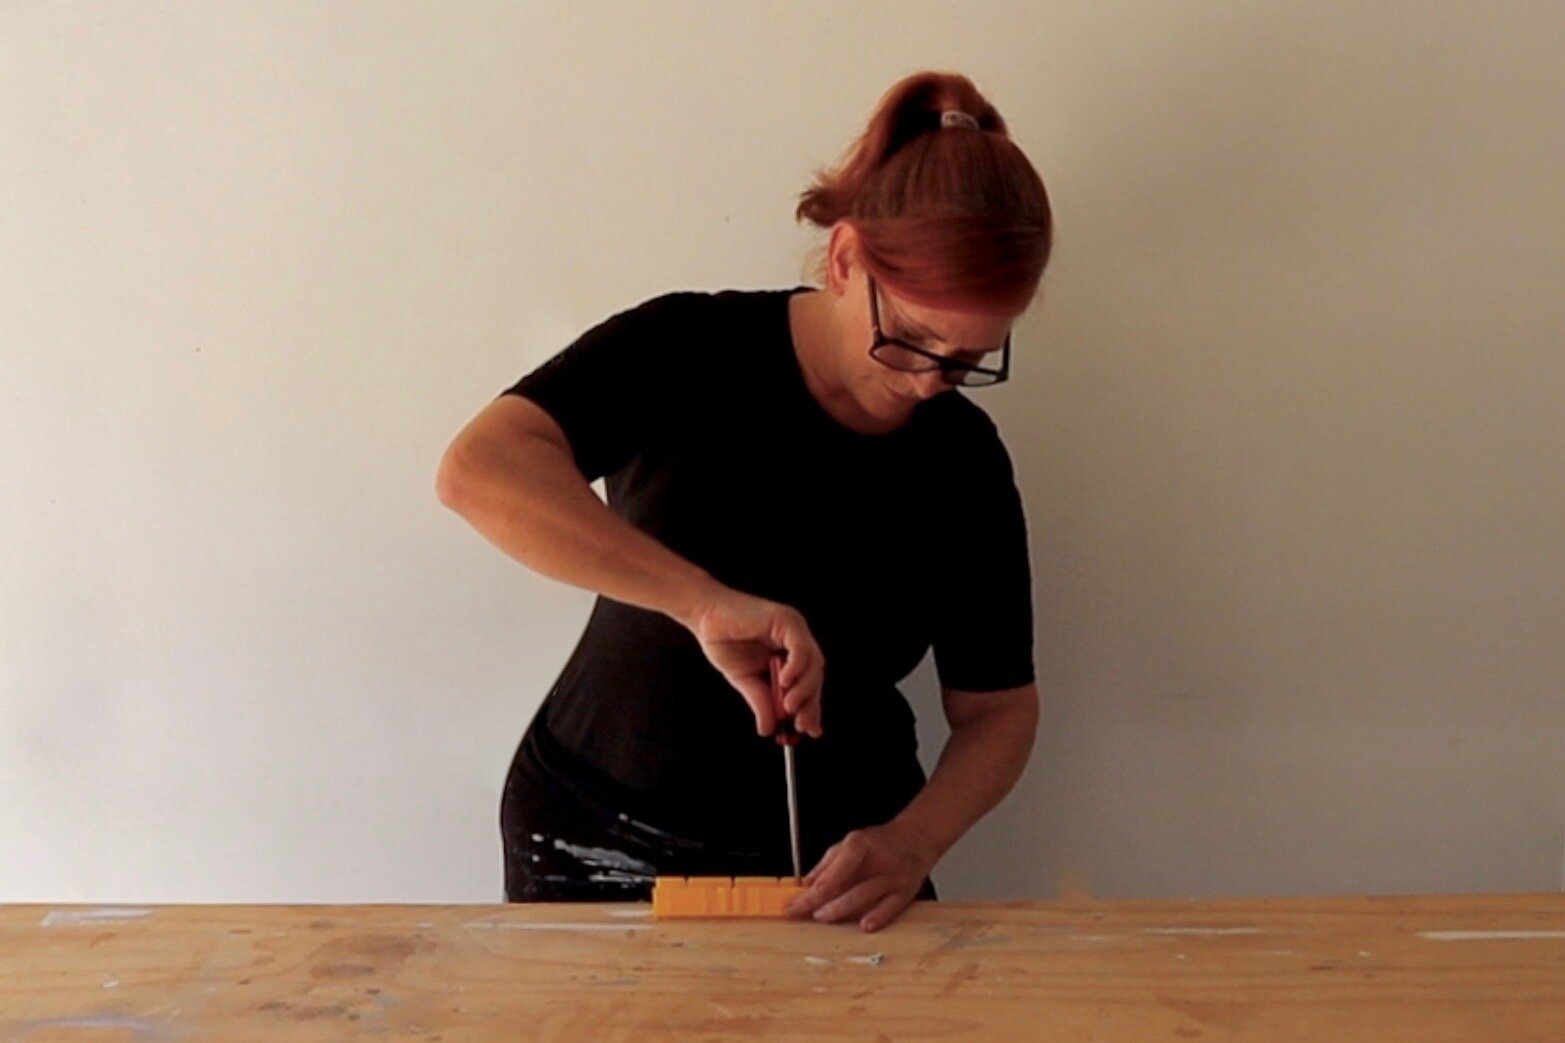
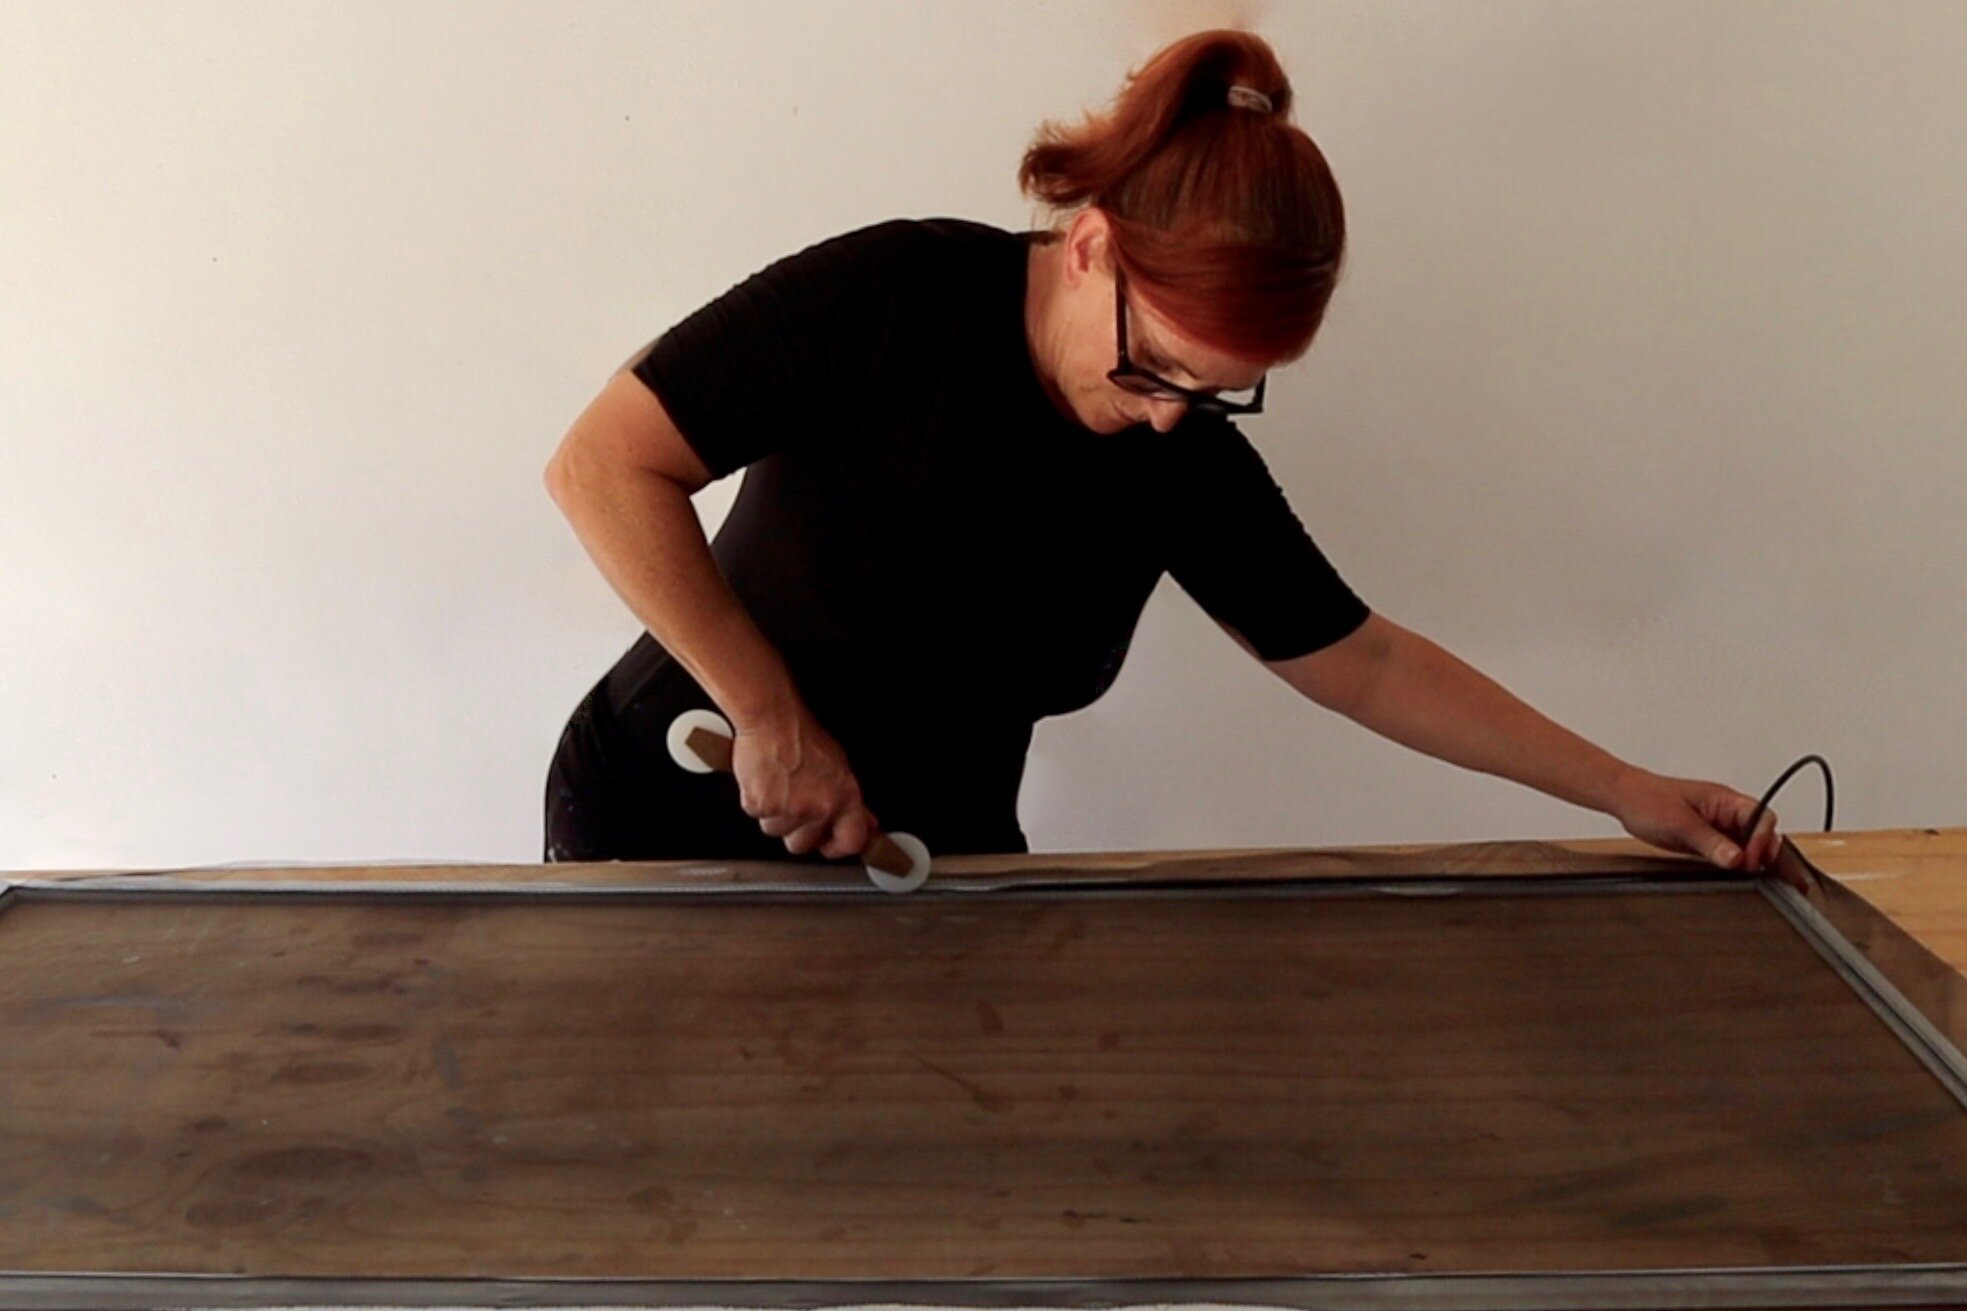
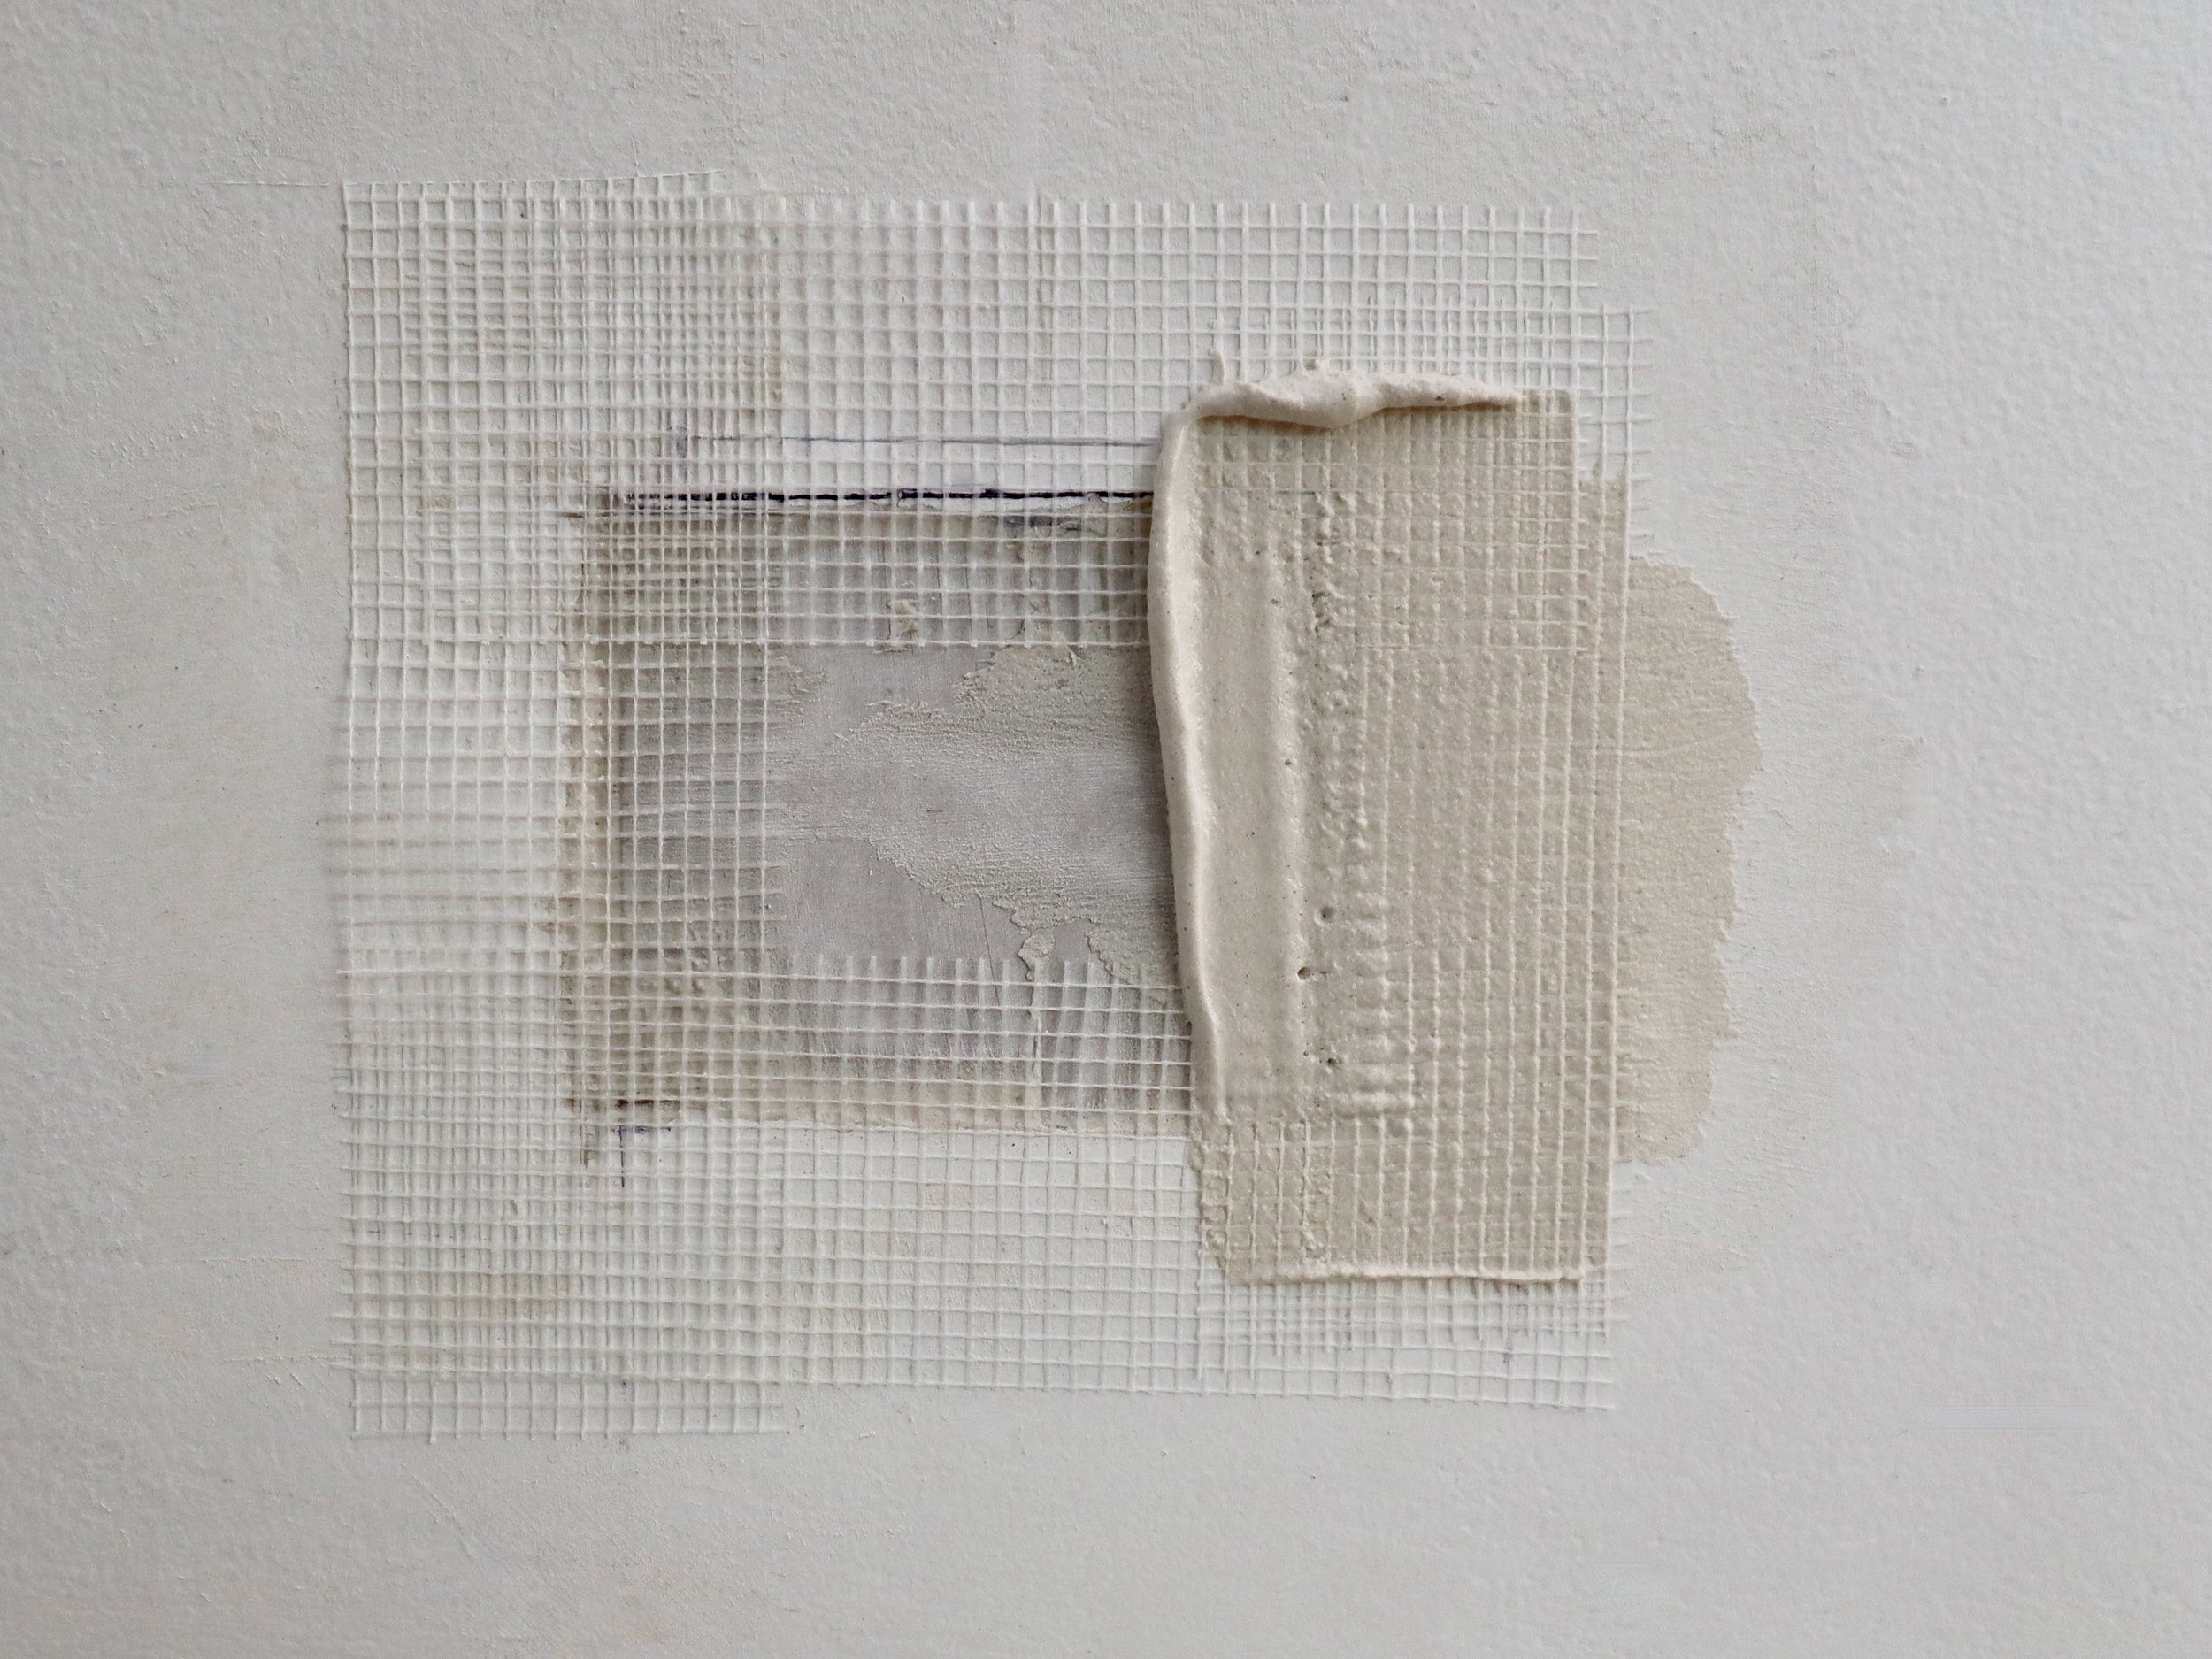
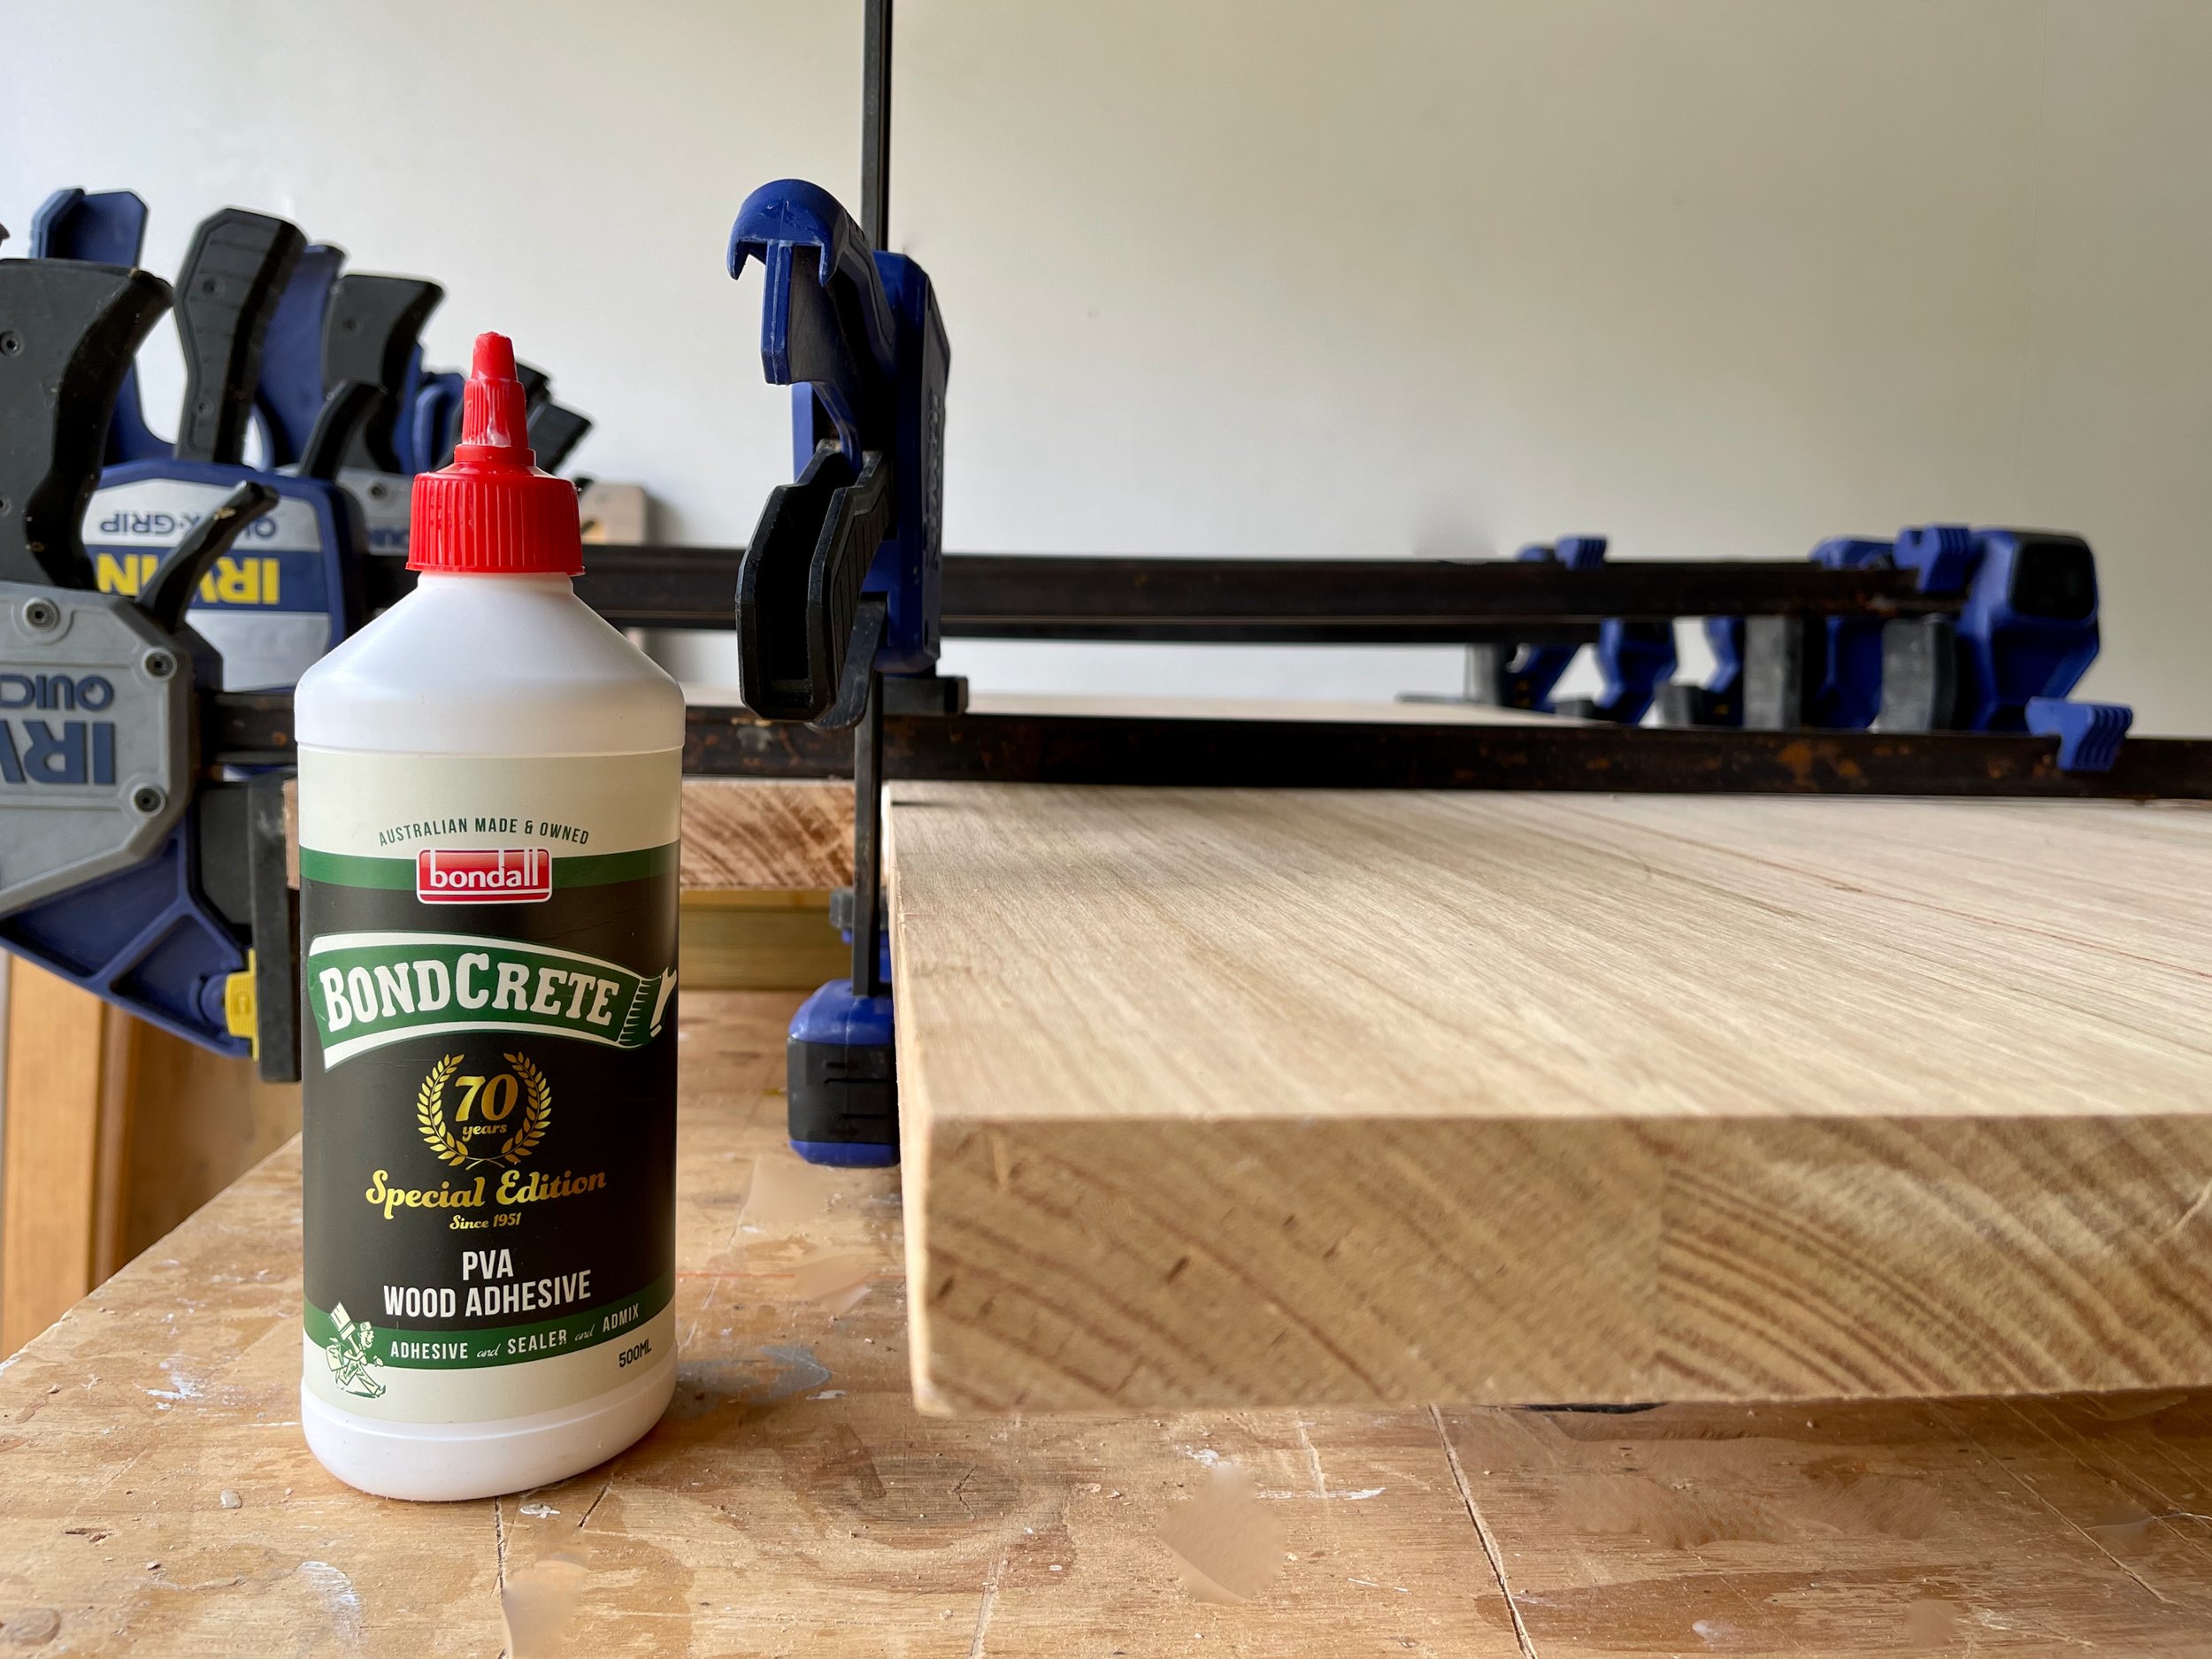
When assembling, I always reinforce the raw particleboard joints with adhesive to make it more durable, especially for drawers to hold a heavy record collection.

My go-to is Bondall’s Bondcrete, which dries clear. Rather than wiping away the excess I leave any drips to dry completely, then run a spatula along the surface to simply scrape them off the melamine.

WATCH IT Click through to see more DIY tips and tricks for putting together flatpacks.


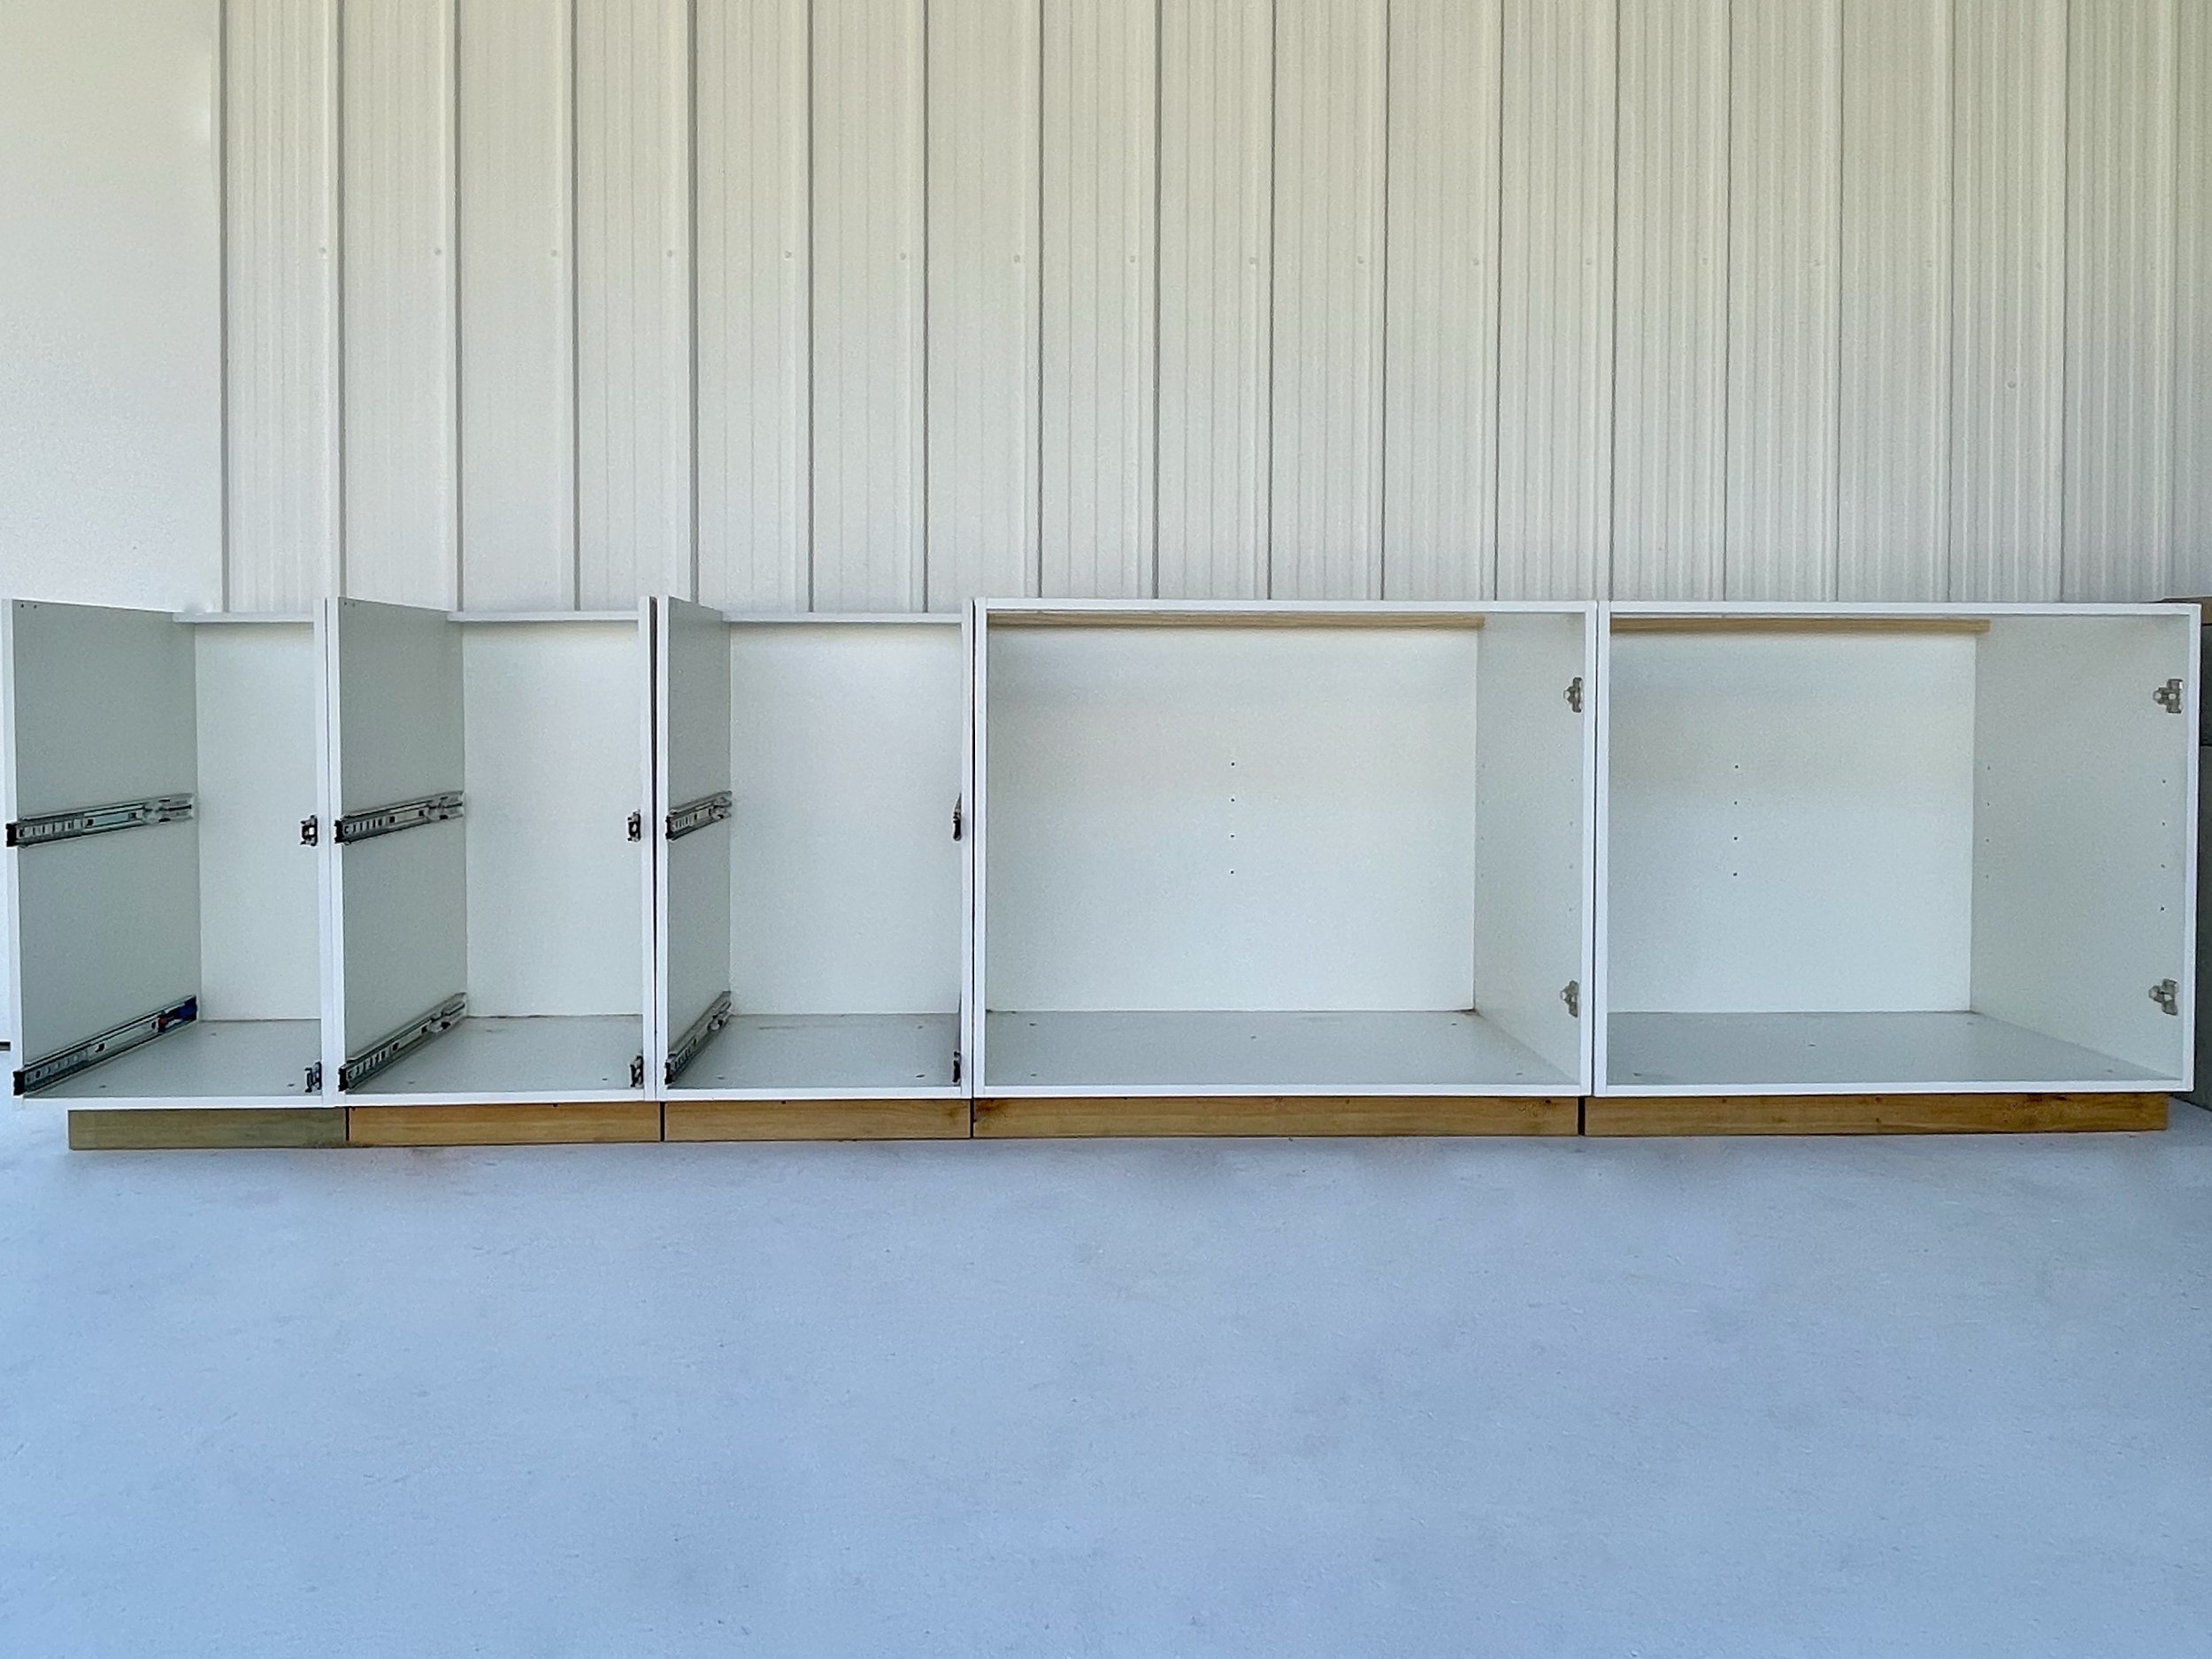
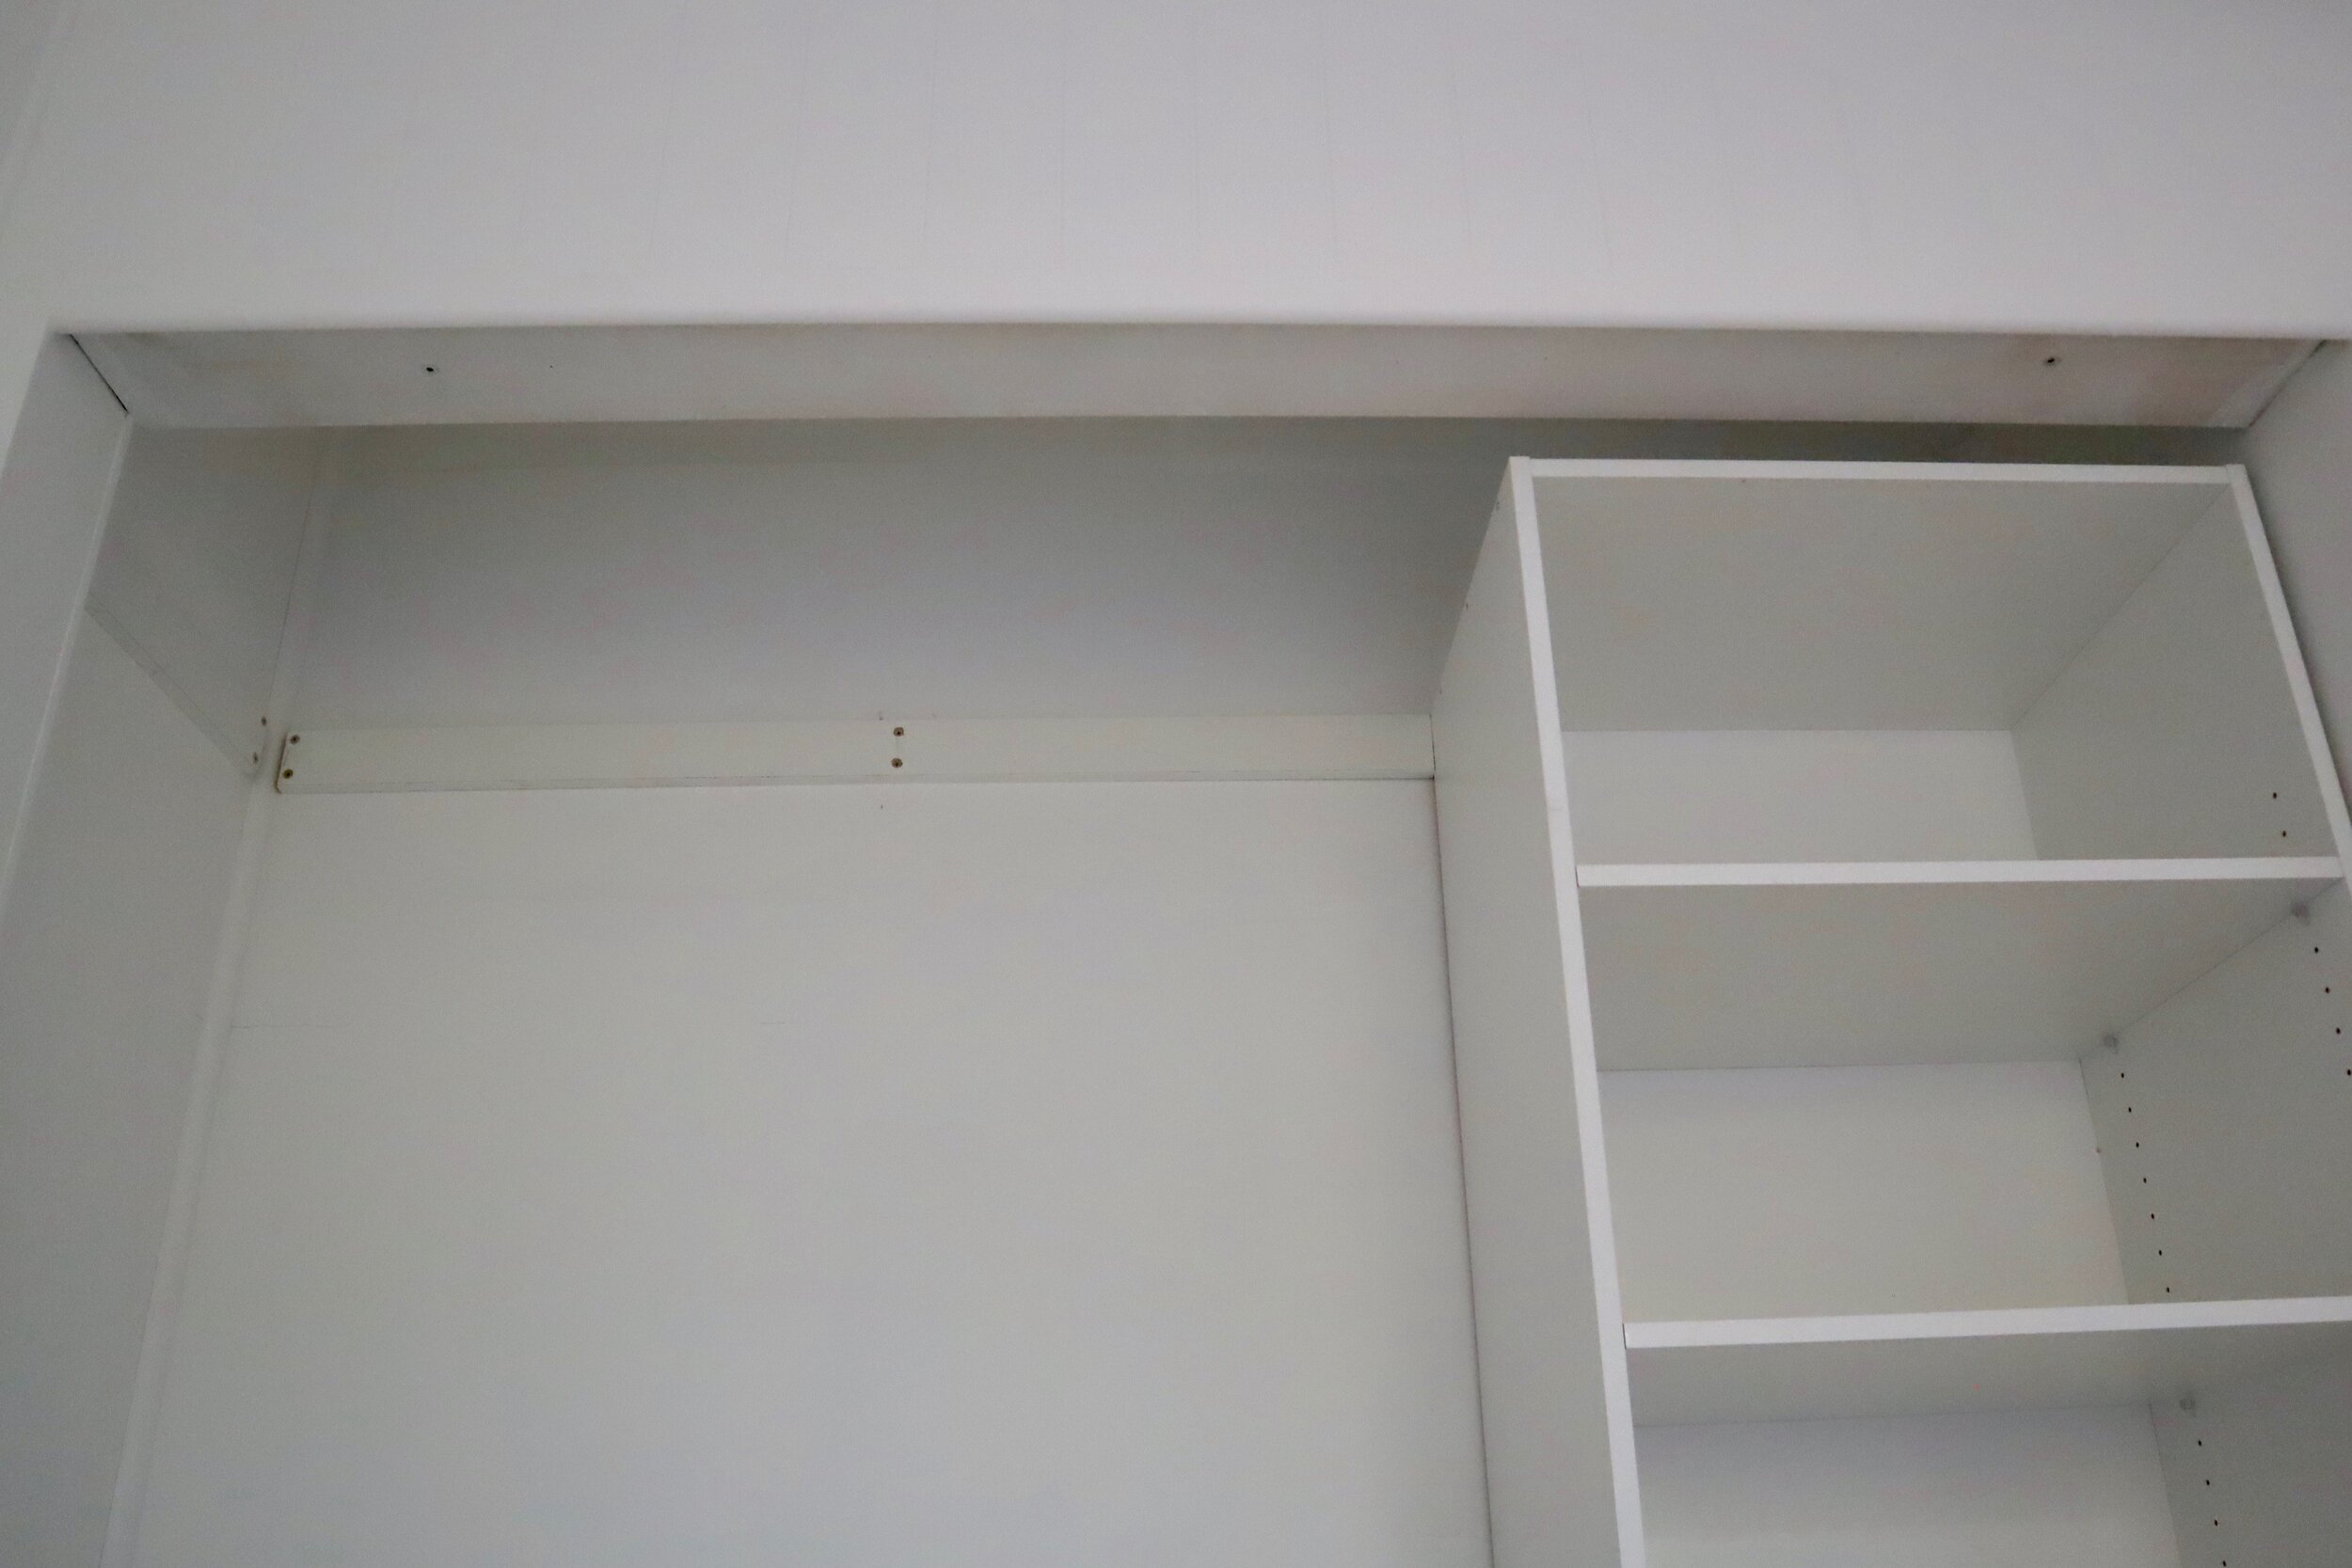
I came up with a combination of Kaboodle Kitchen base units to fit the space, using two 900mm units with doors and three 450mm four-drawer units. 

I built all the components in the workshop, including the three-part benchtop, keeping them unattached so I could easily move them.

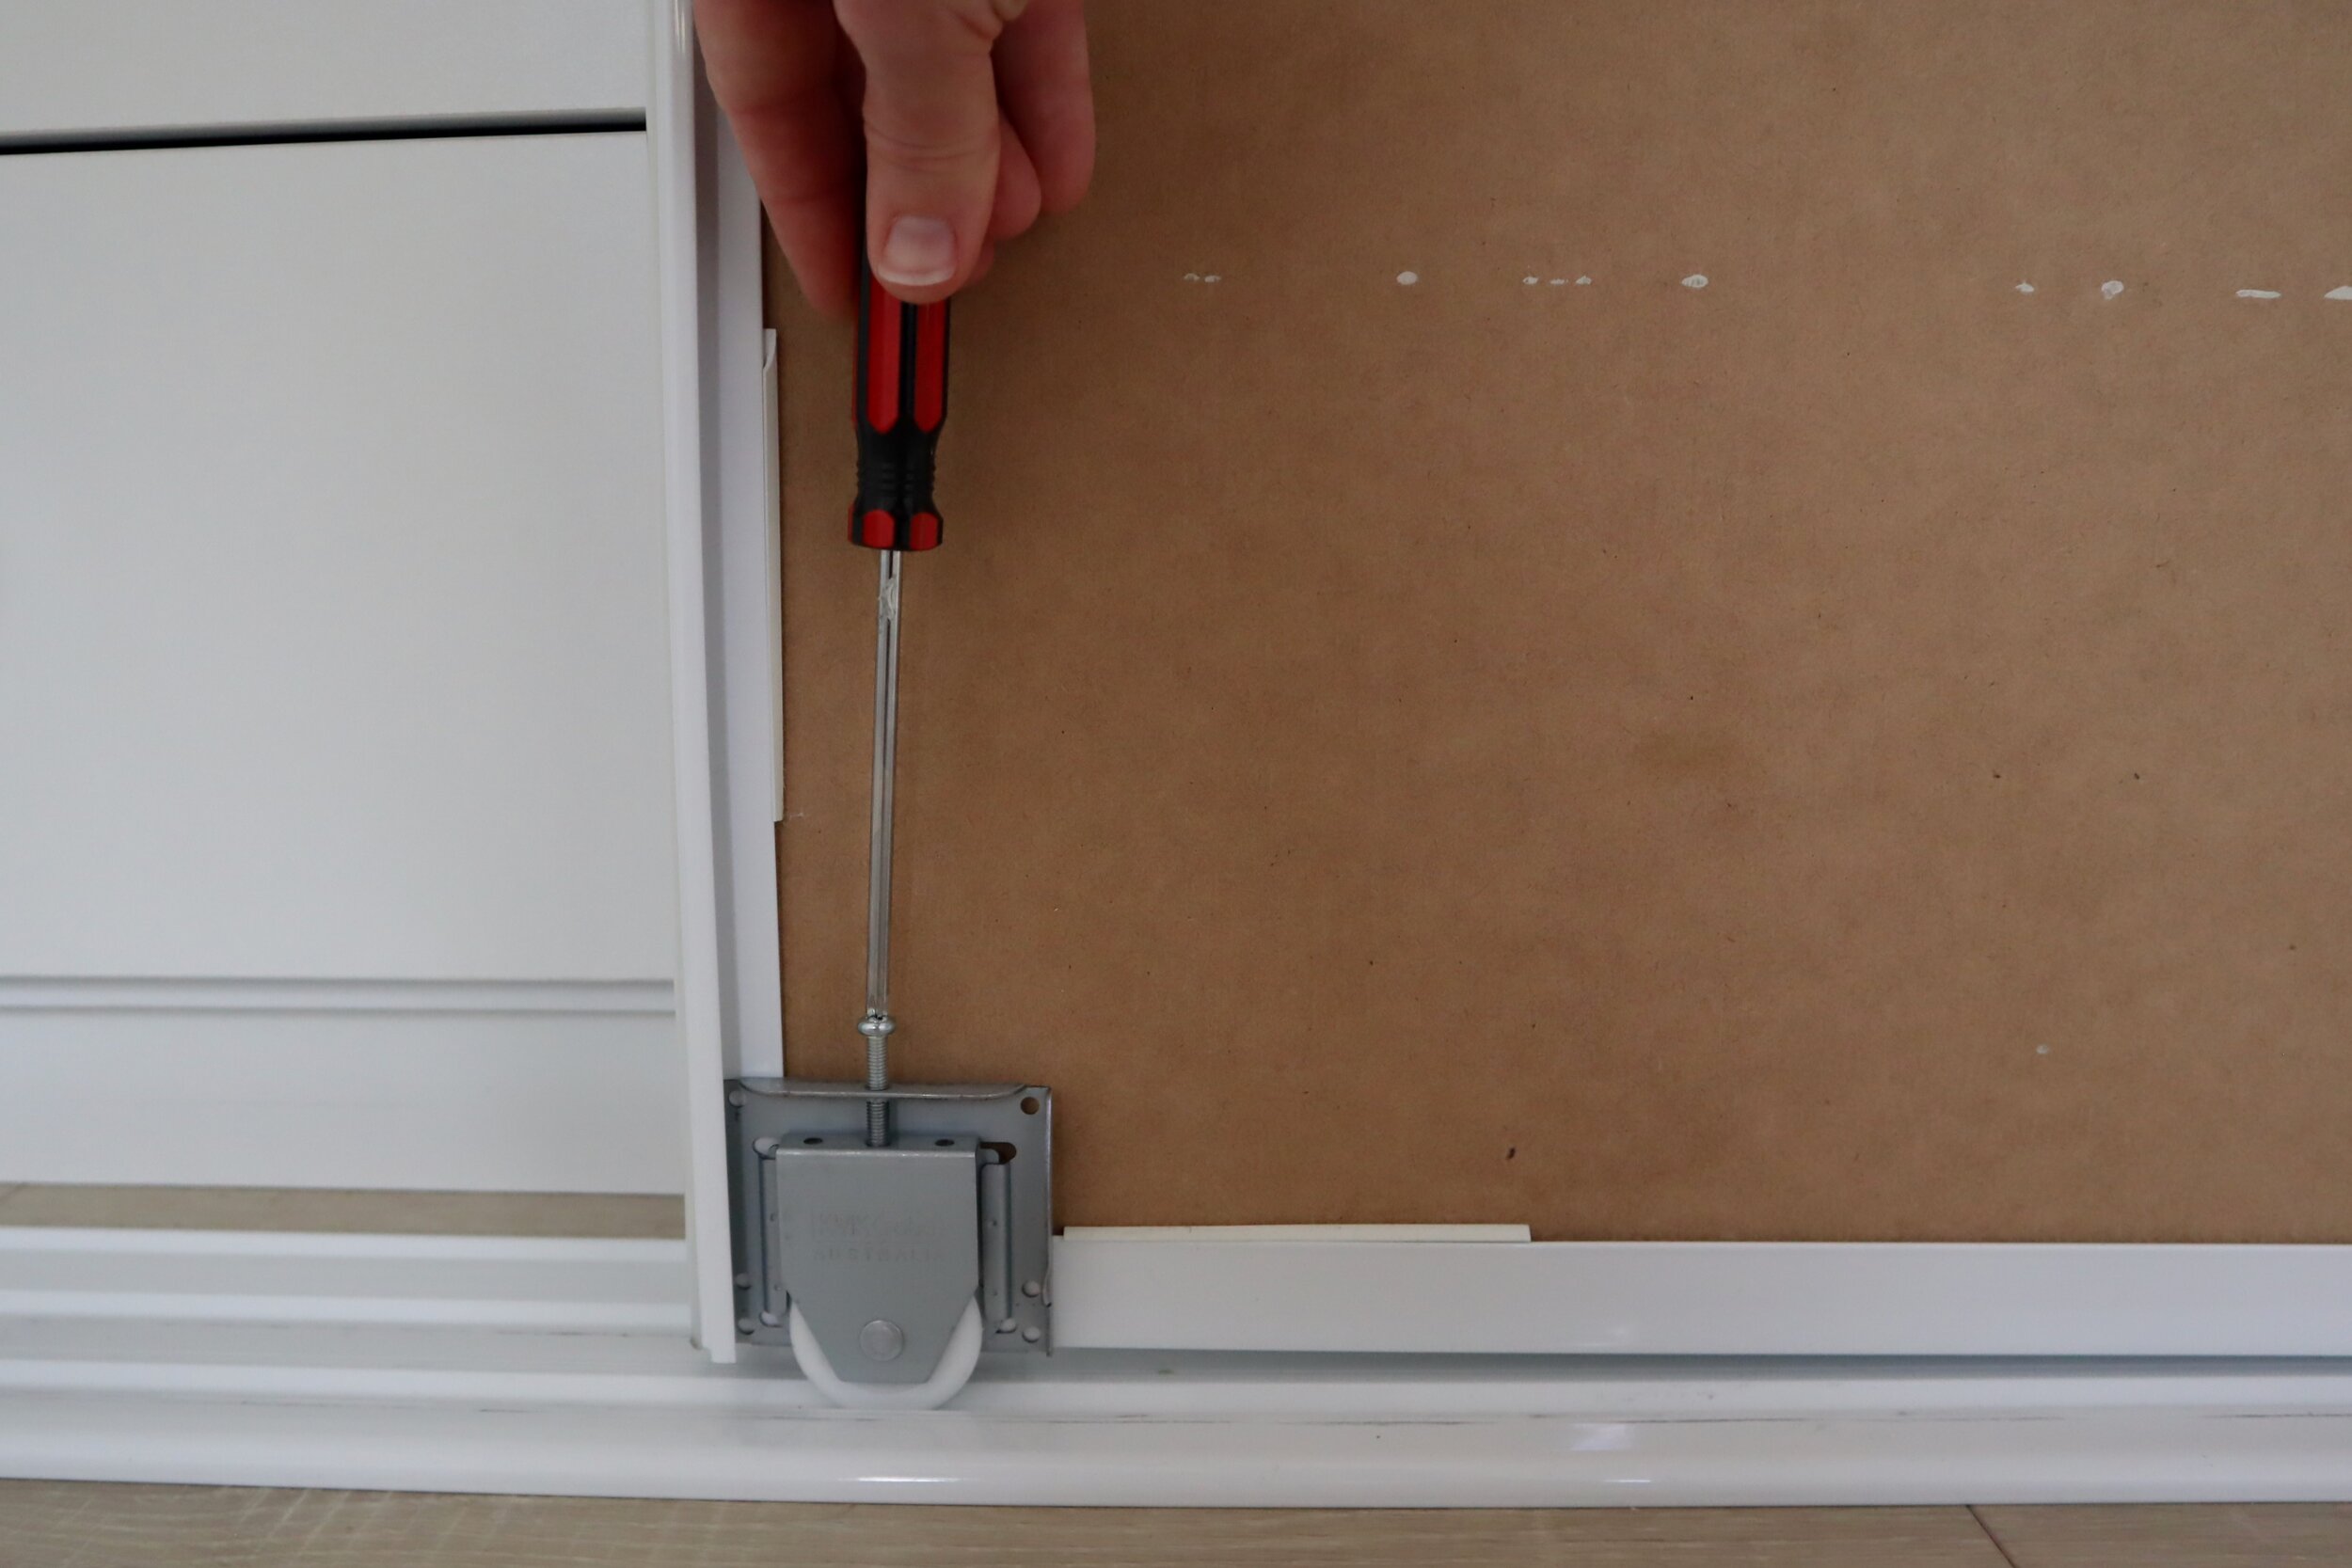
Once on site, I secured the units together with 30mm screws through the sides to create one long piece of joinery.


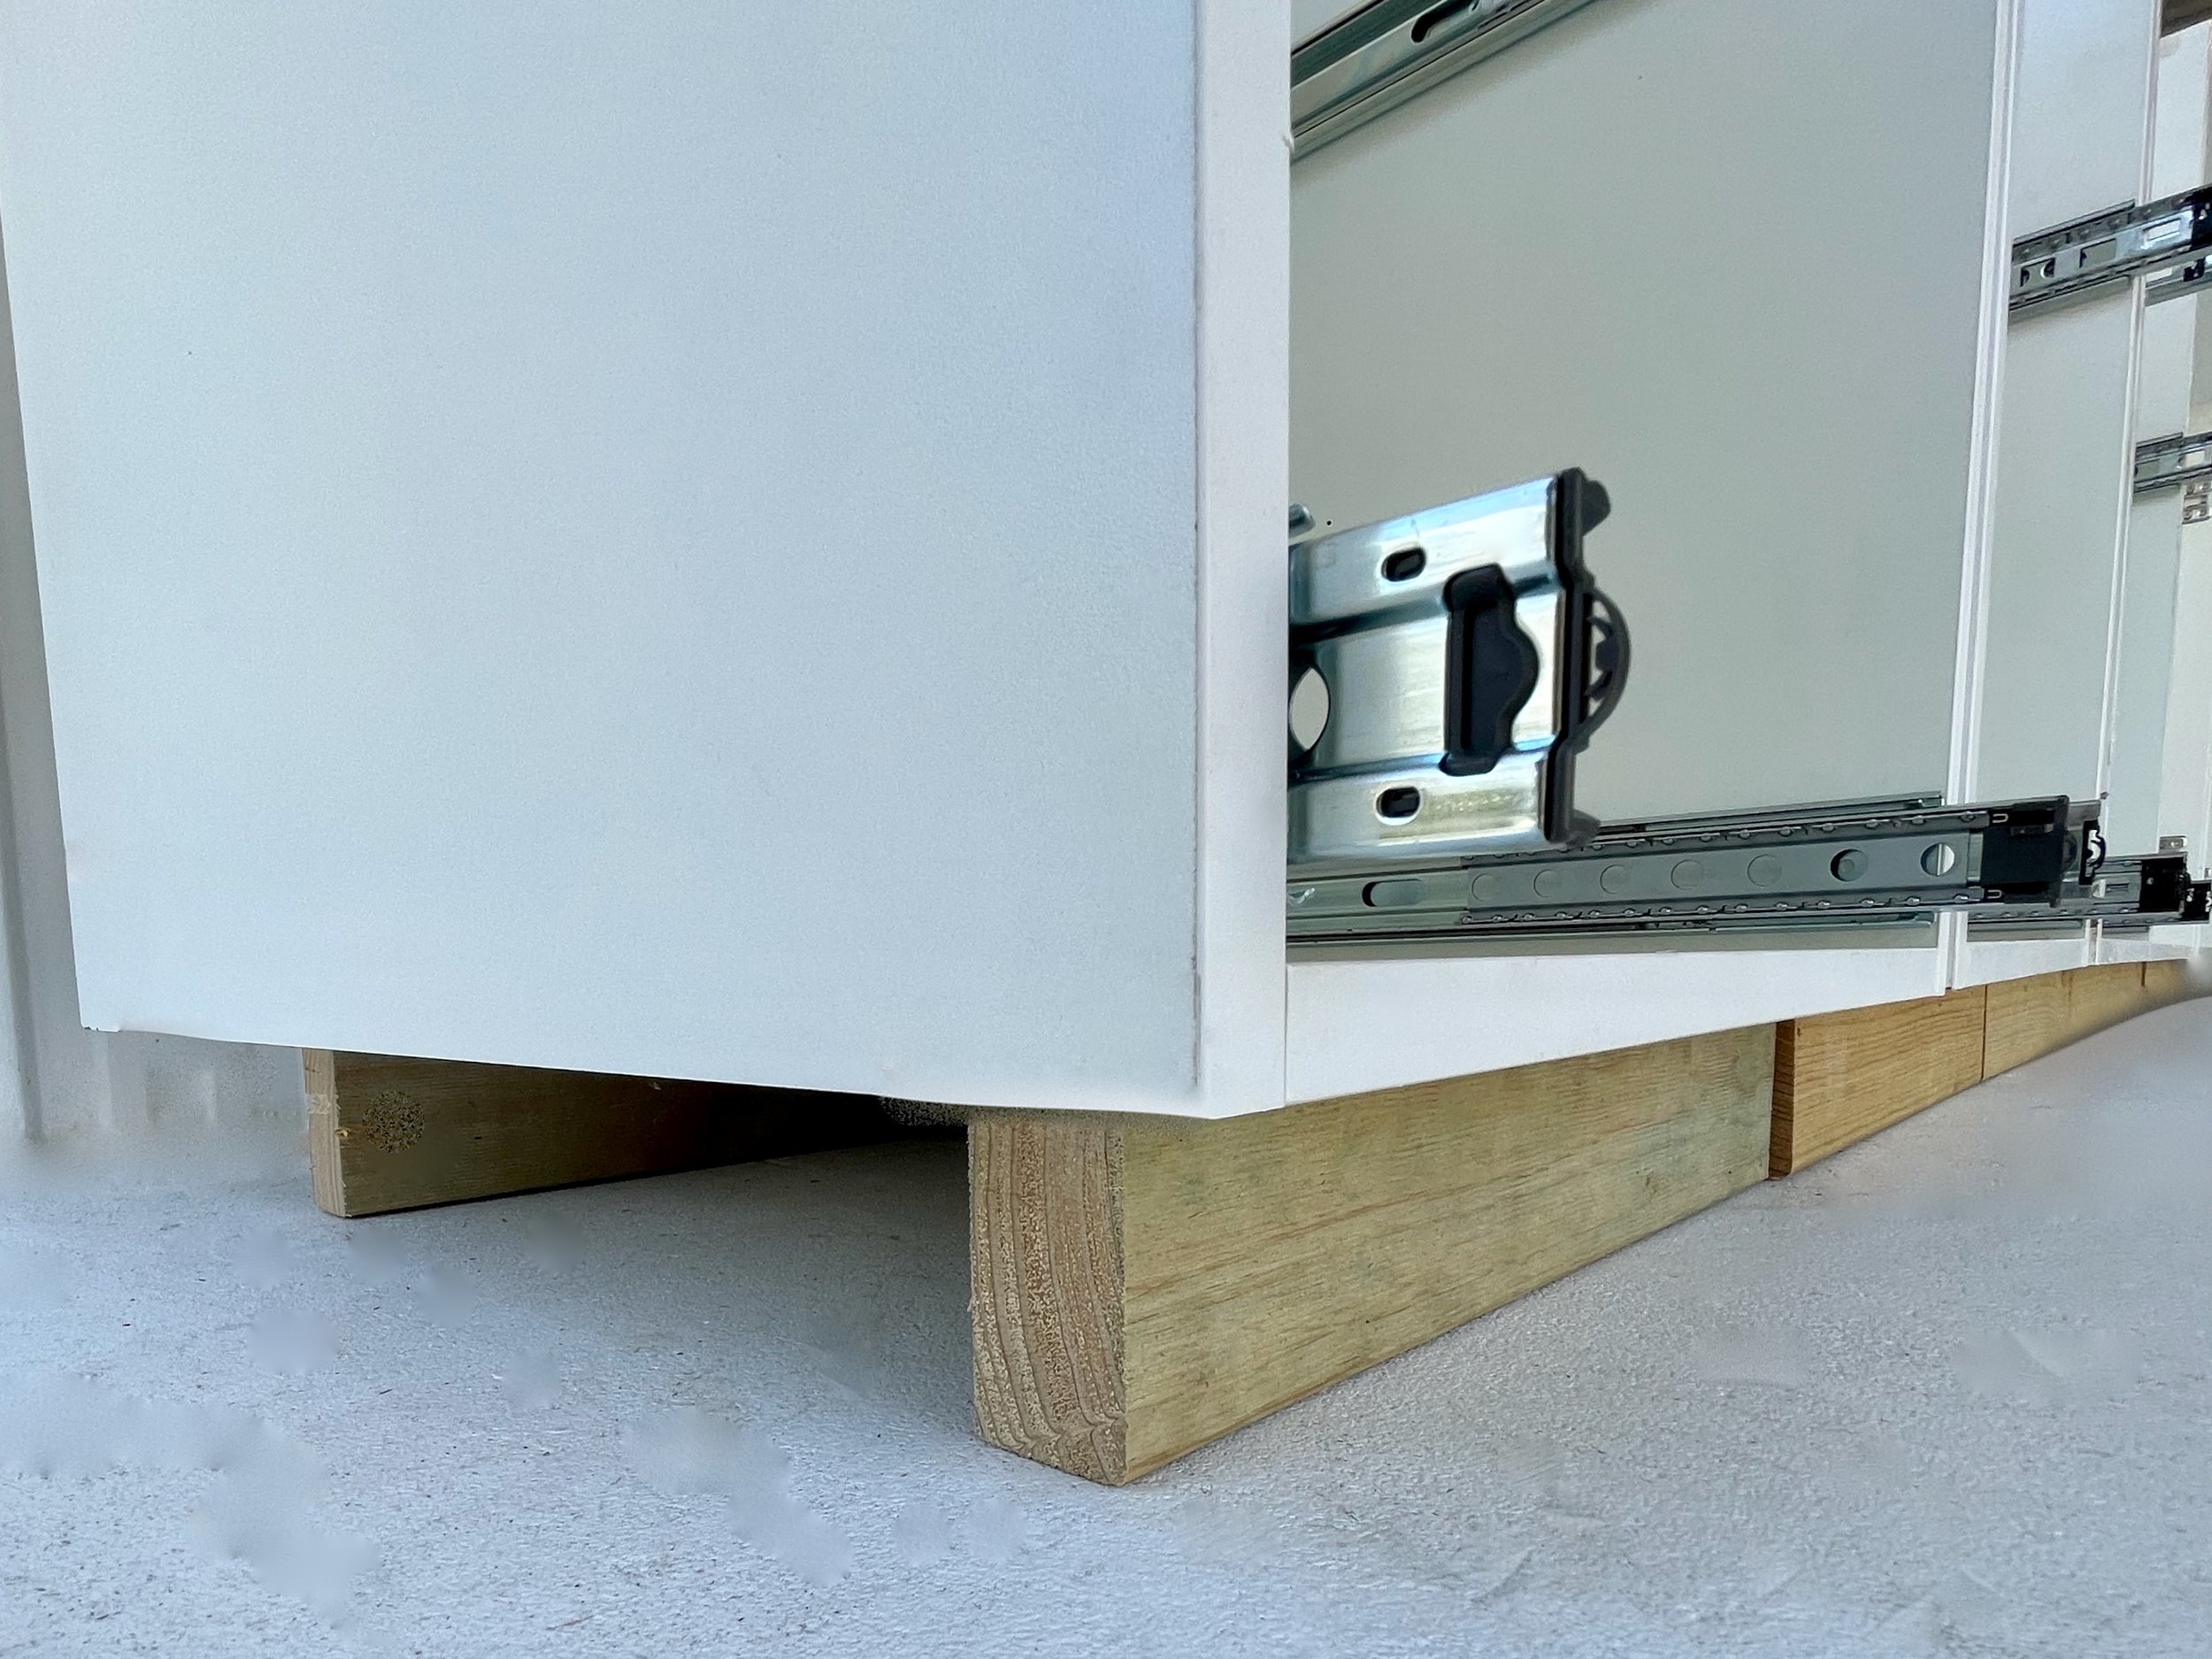
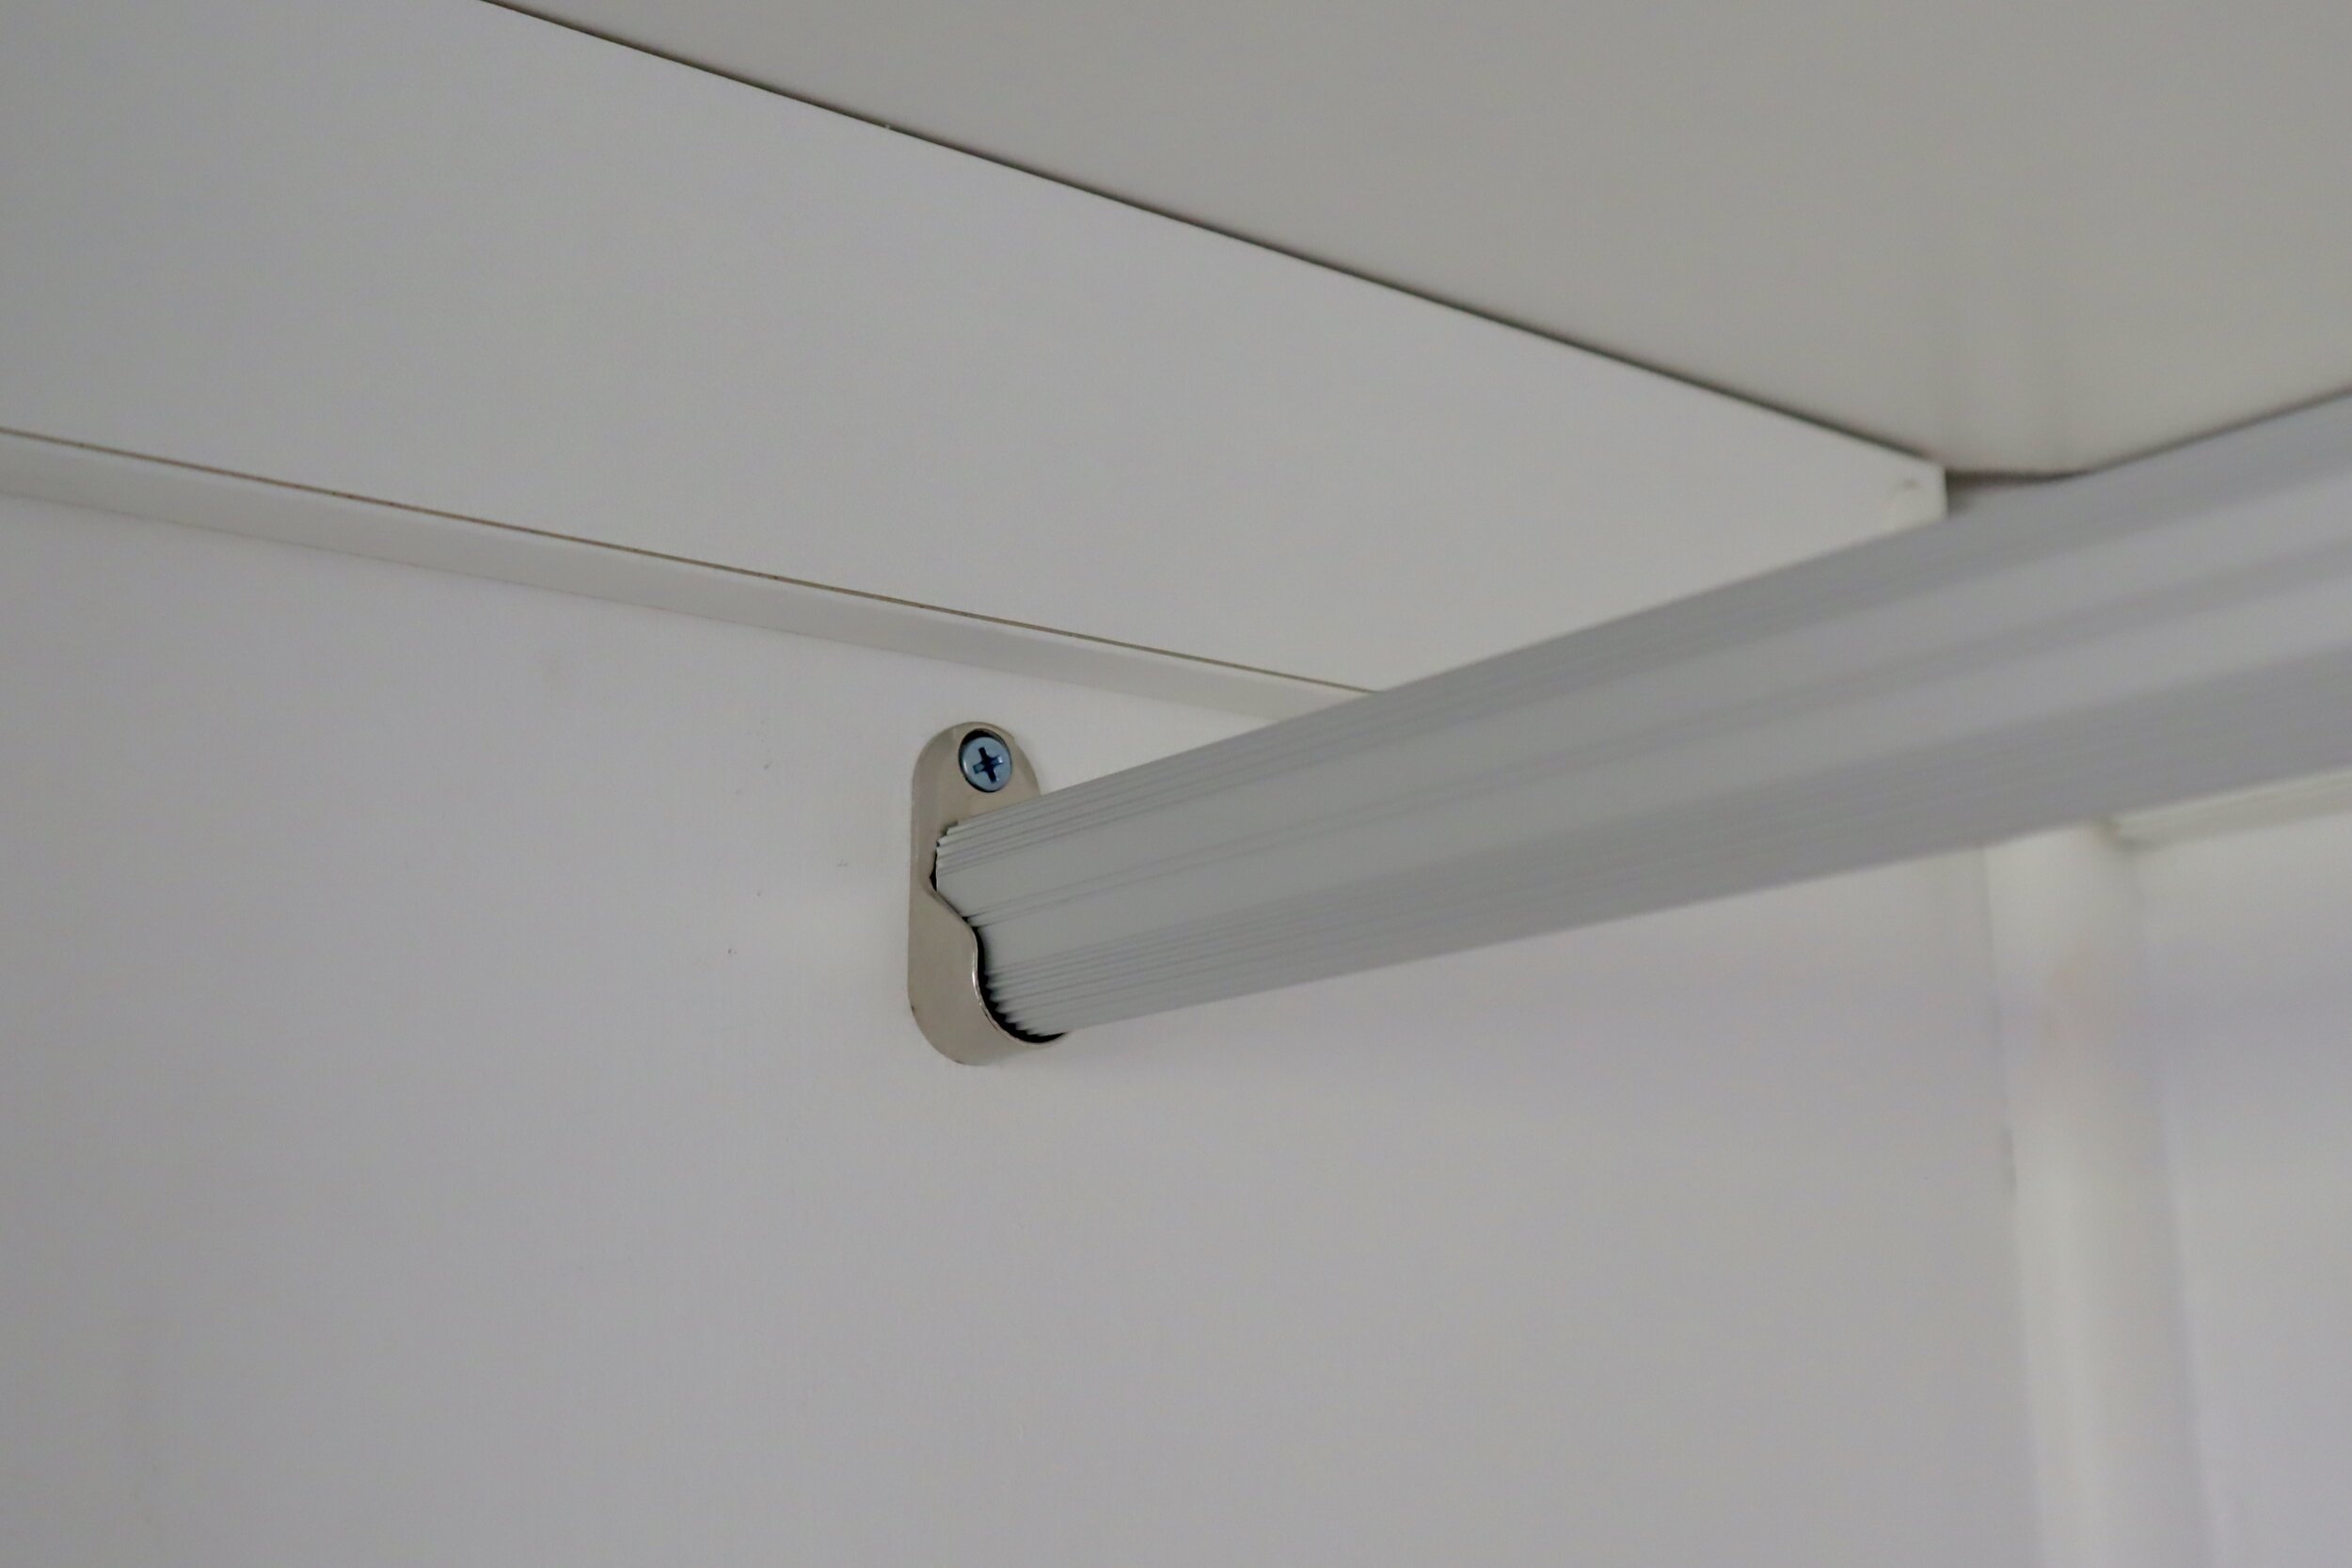
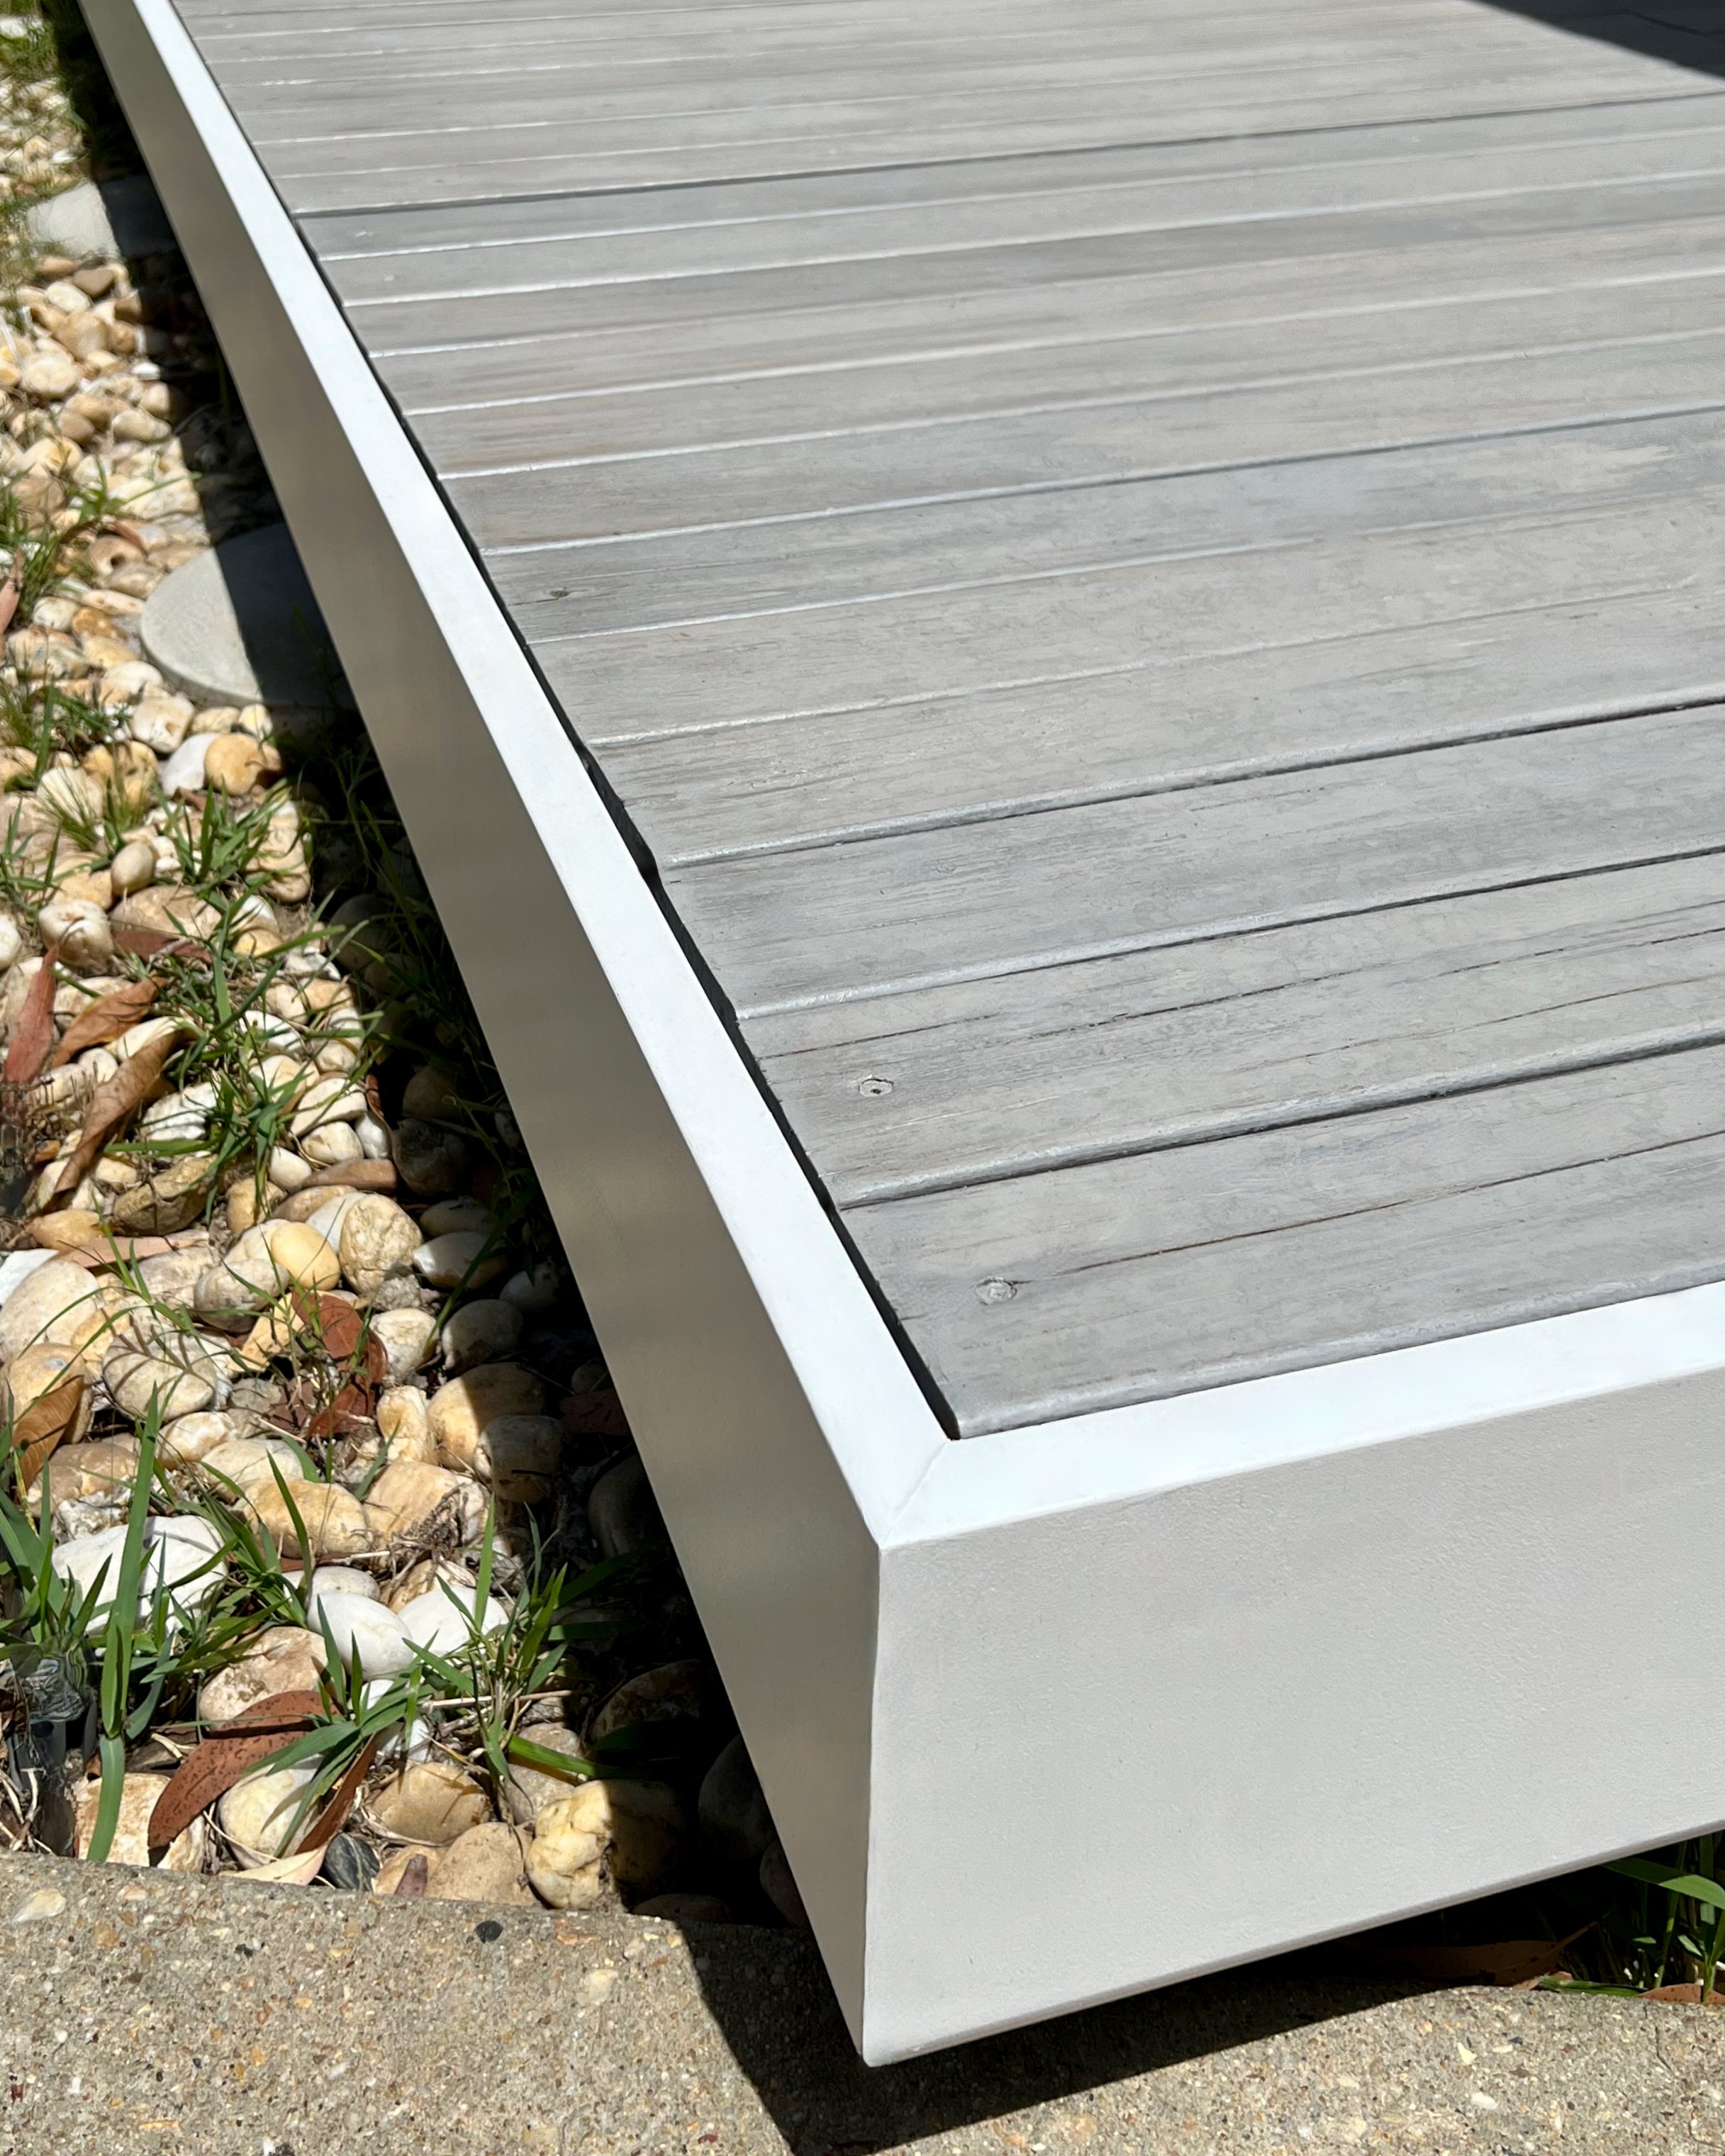
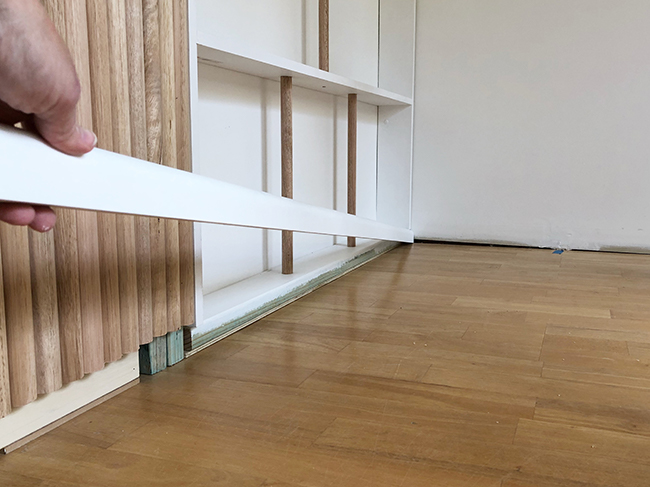
A base frame replaces the standard feet that usually support a kickboard, so the cabinet sits lower than a standard bench for better visibility of the TV from the sofa.

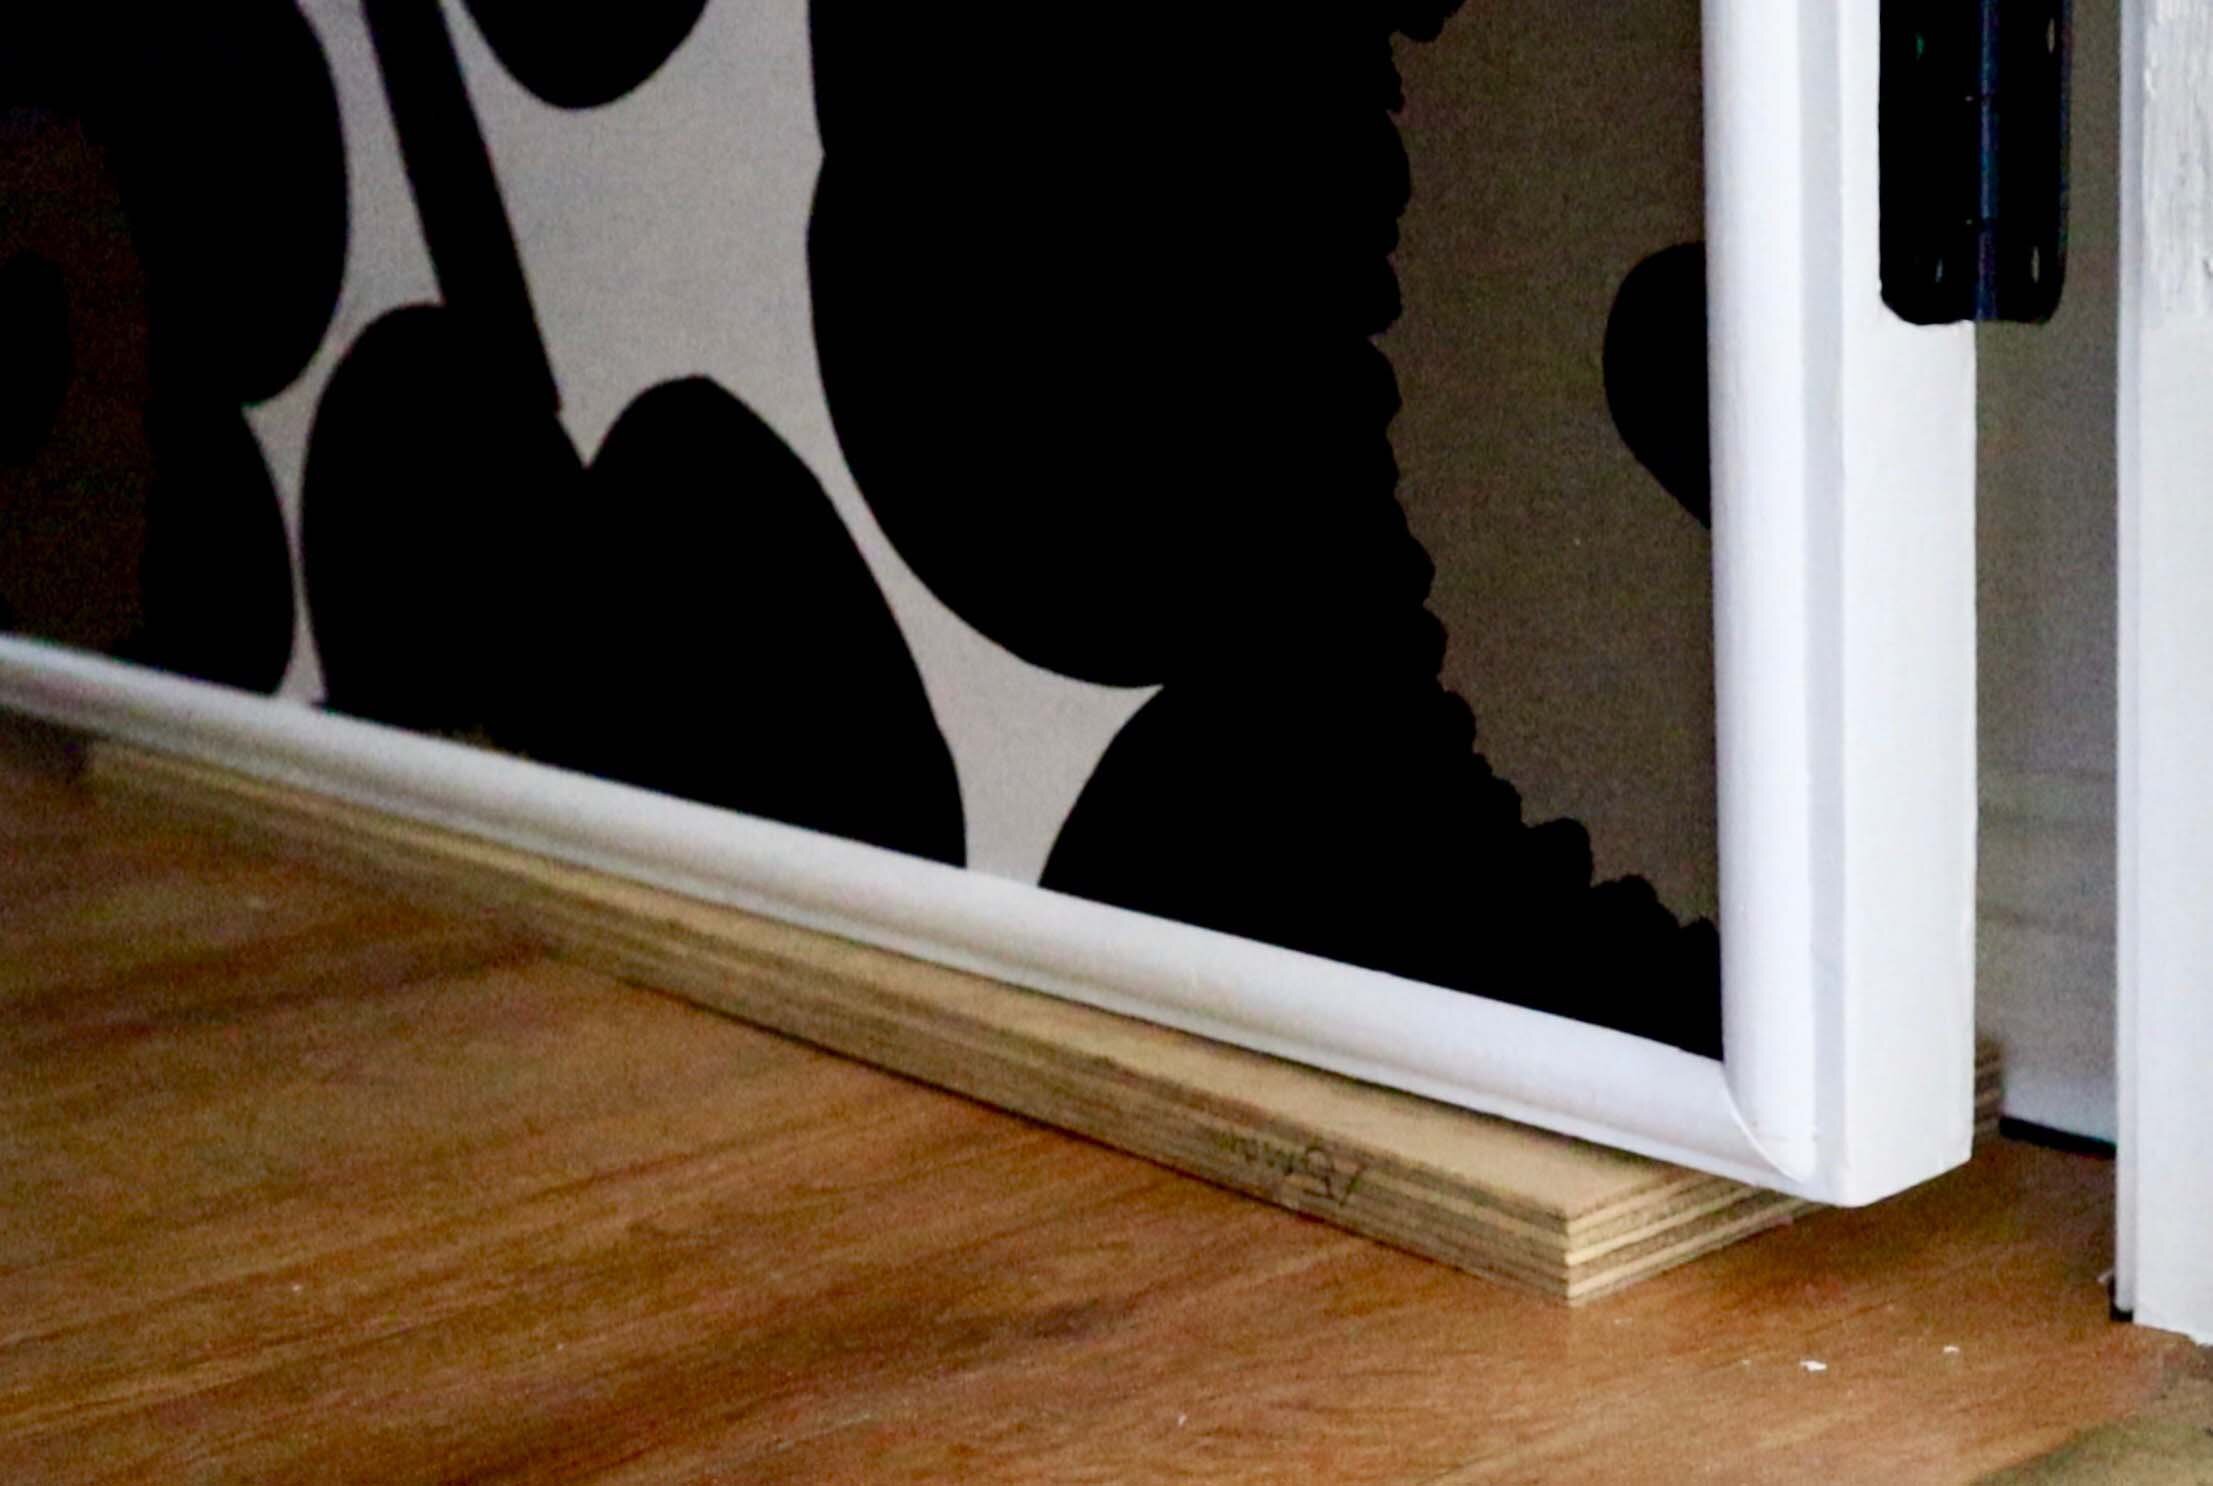
To make the frames, I positioned lengths of 70mm pine 40mm from the front and back of each unit, securing though the base. It’s the same height as the skirting in the living room, which I added later so the end result looks more like built-in joinery than kitchen cabinetry.

TIP I had an electrician install two four-outlet power points on the wall, then made cutouts through the back of the units with a reciprocating multi-tool.


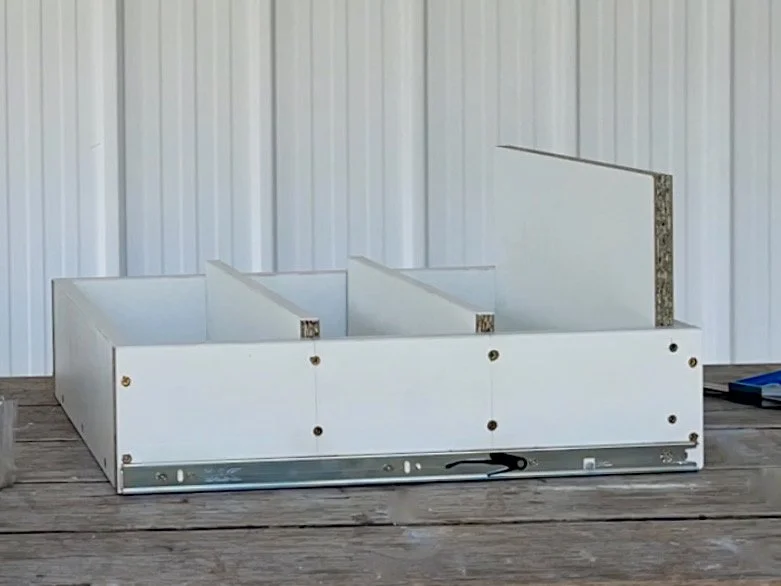
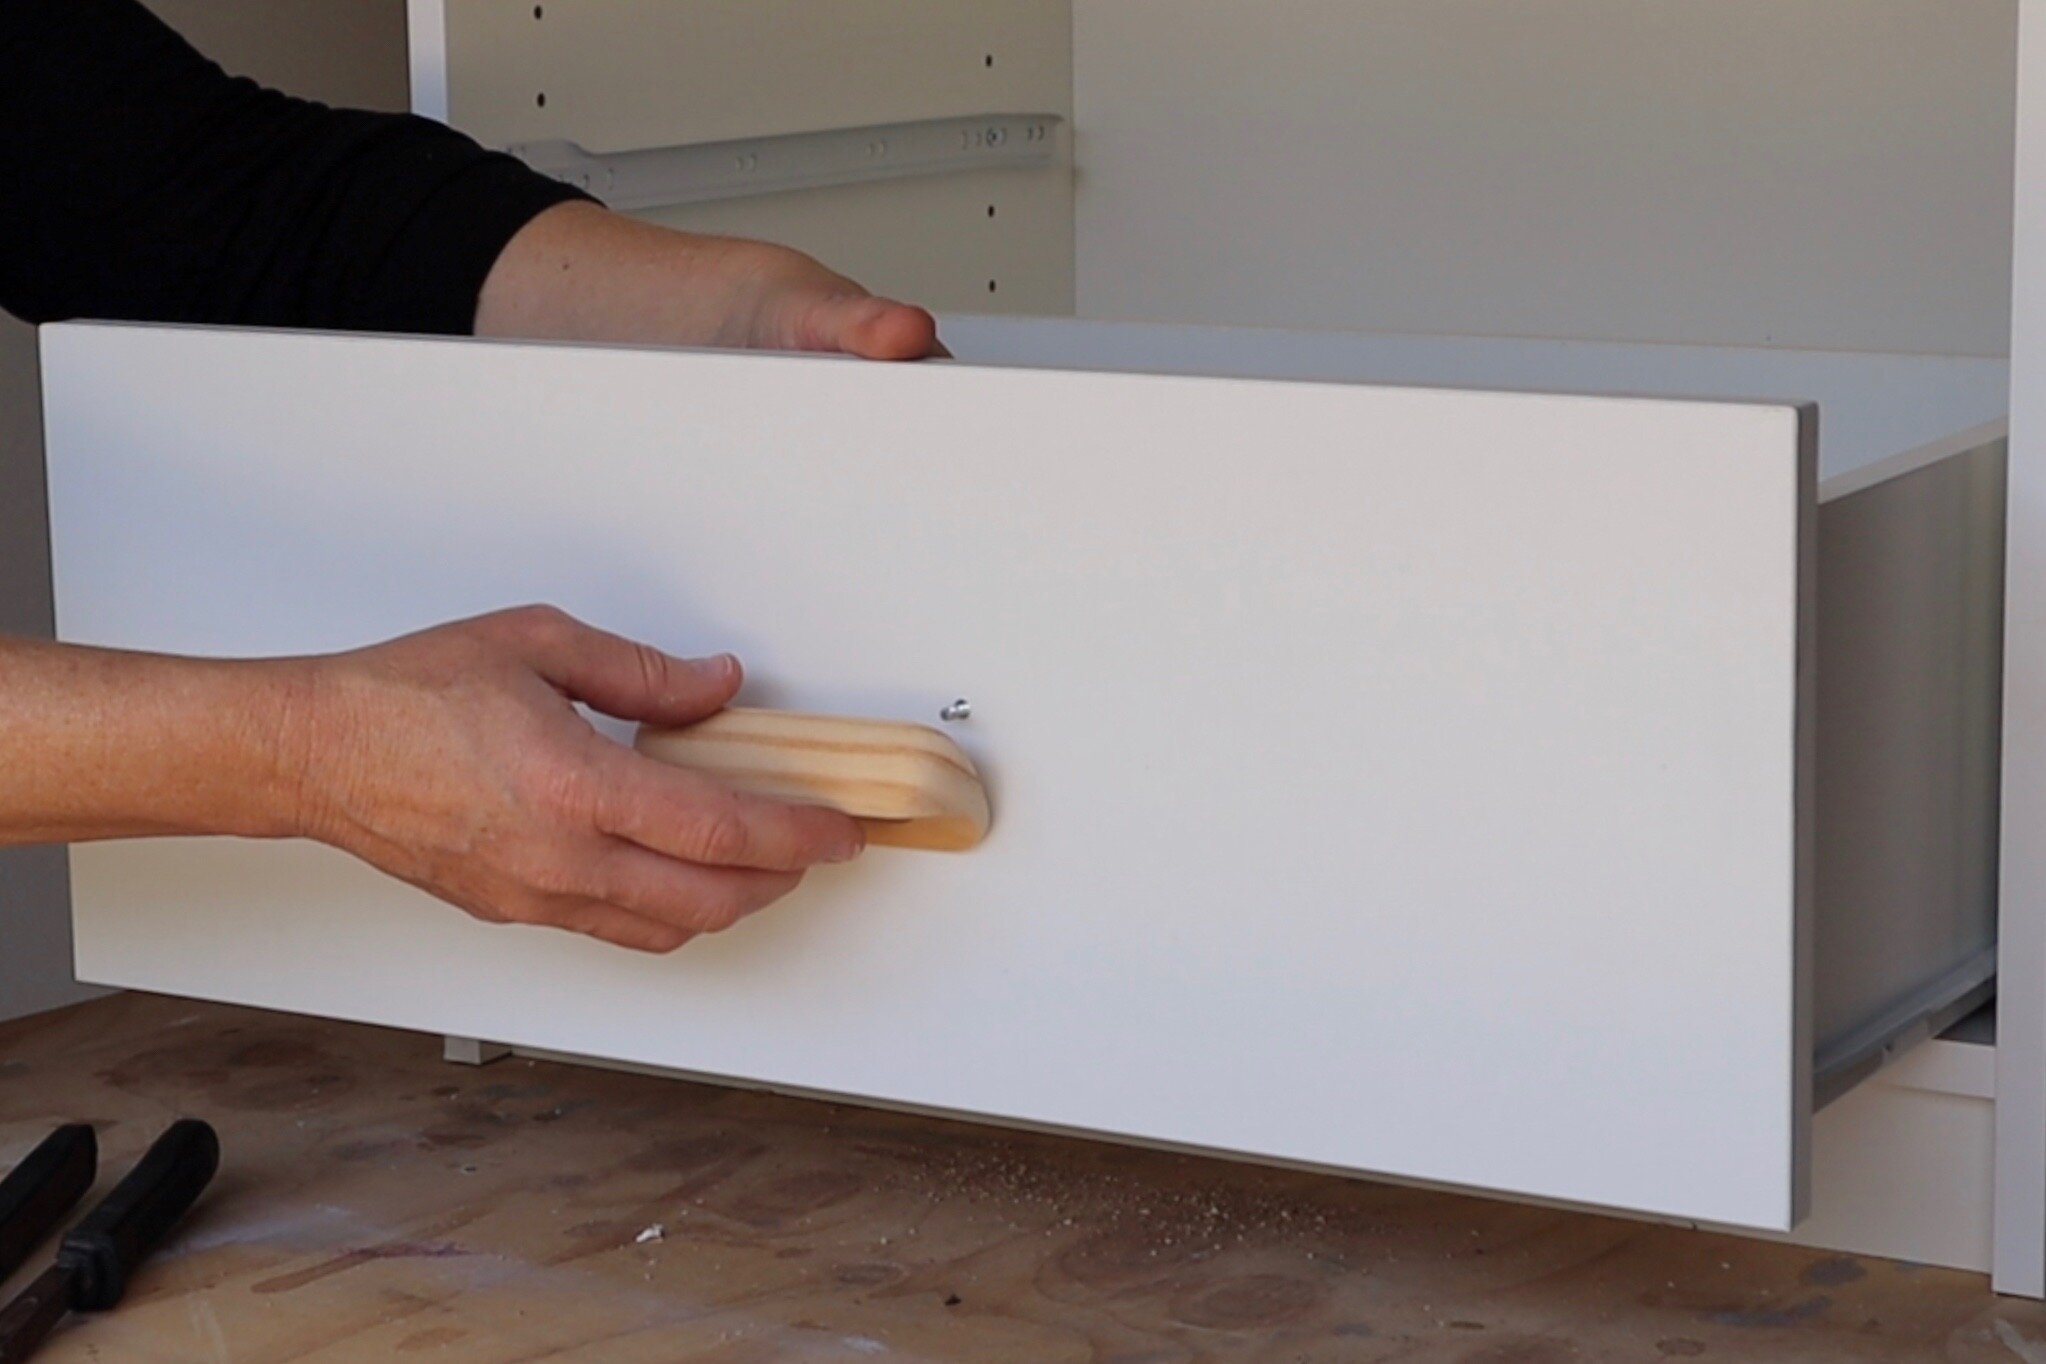
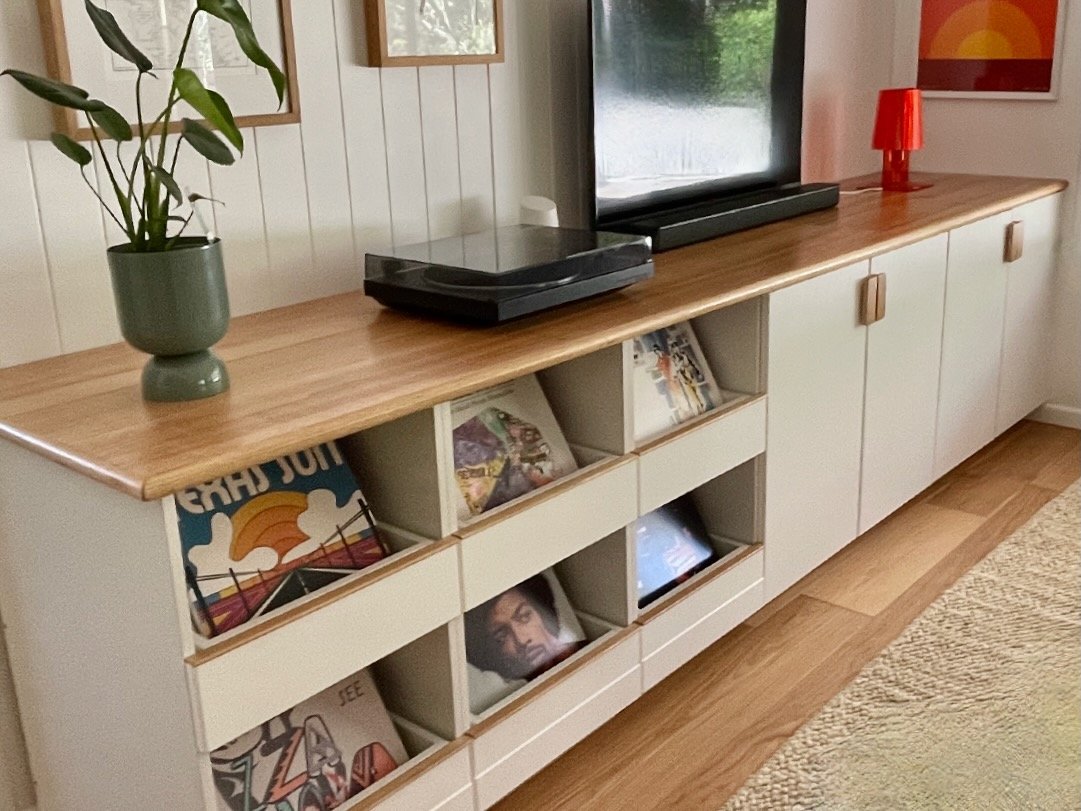
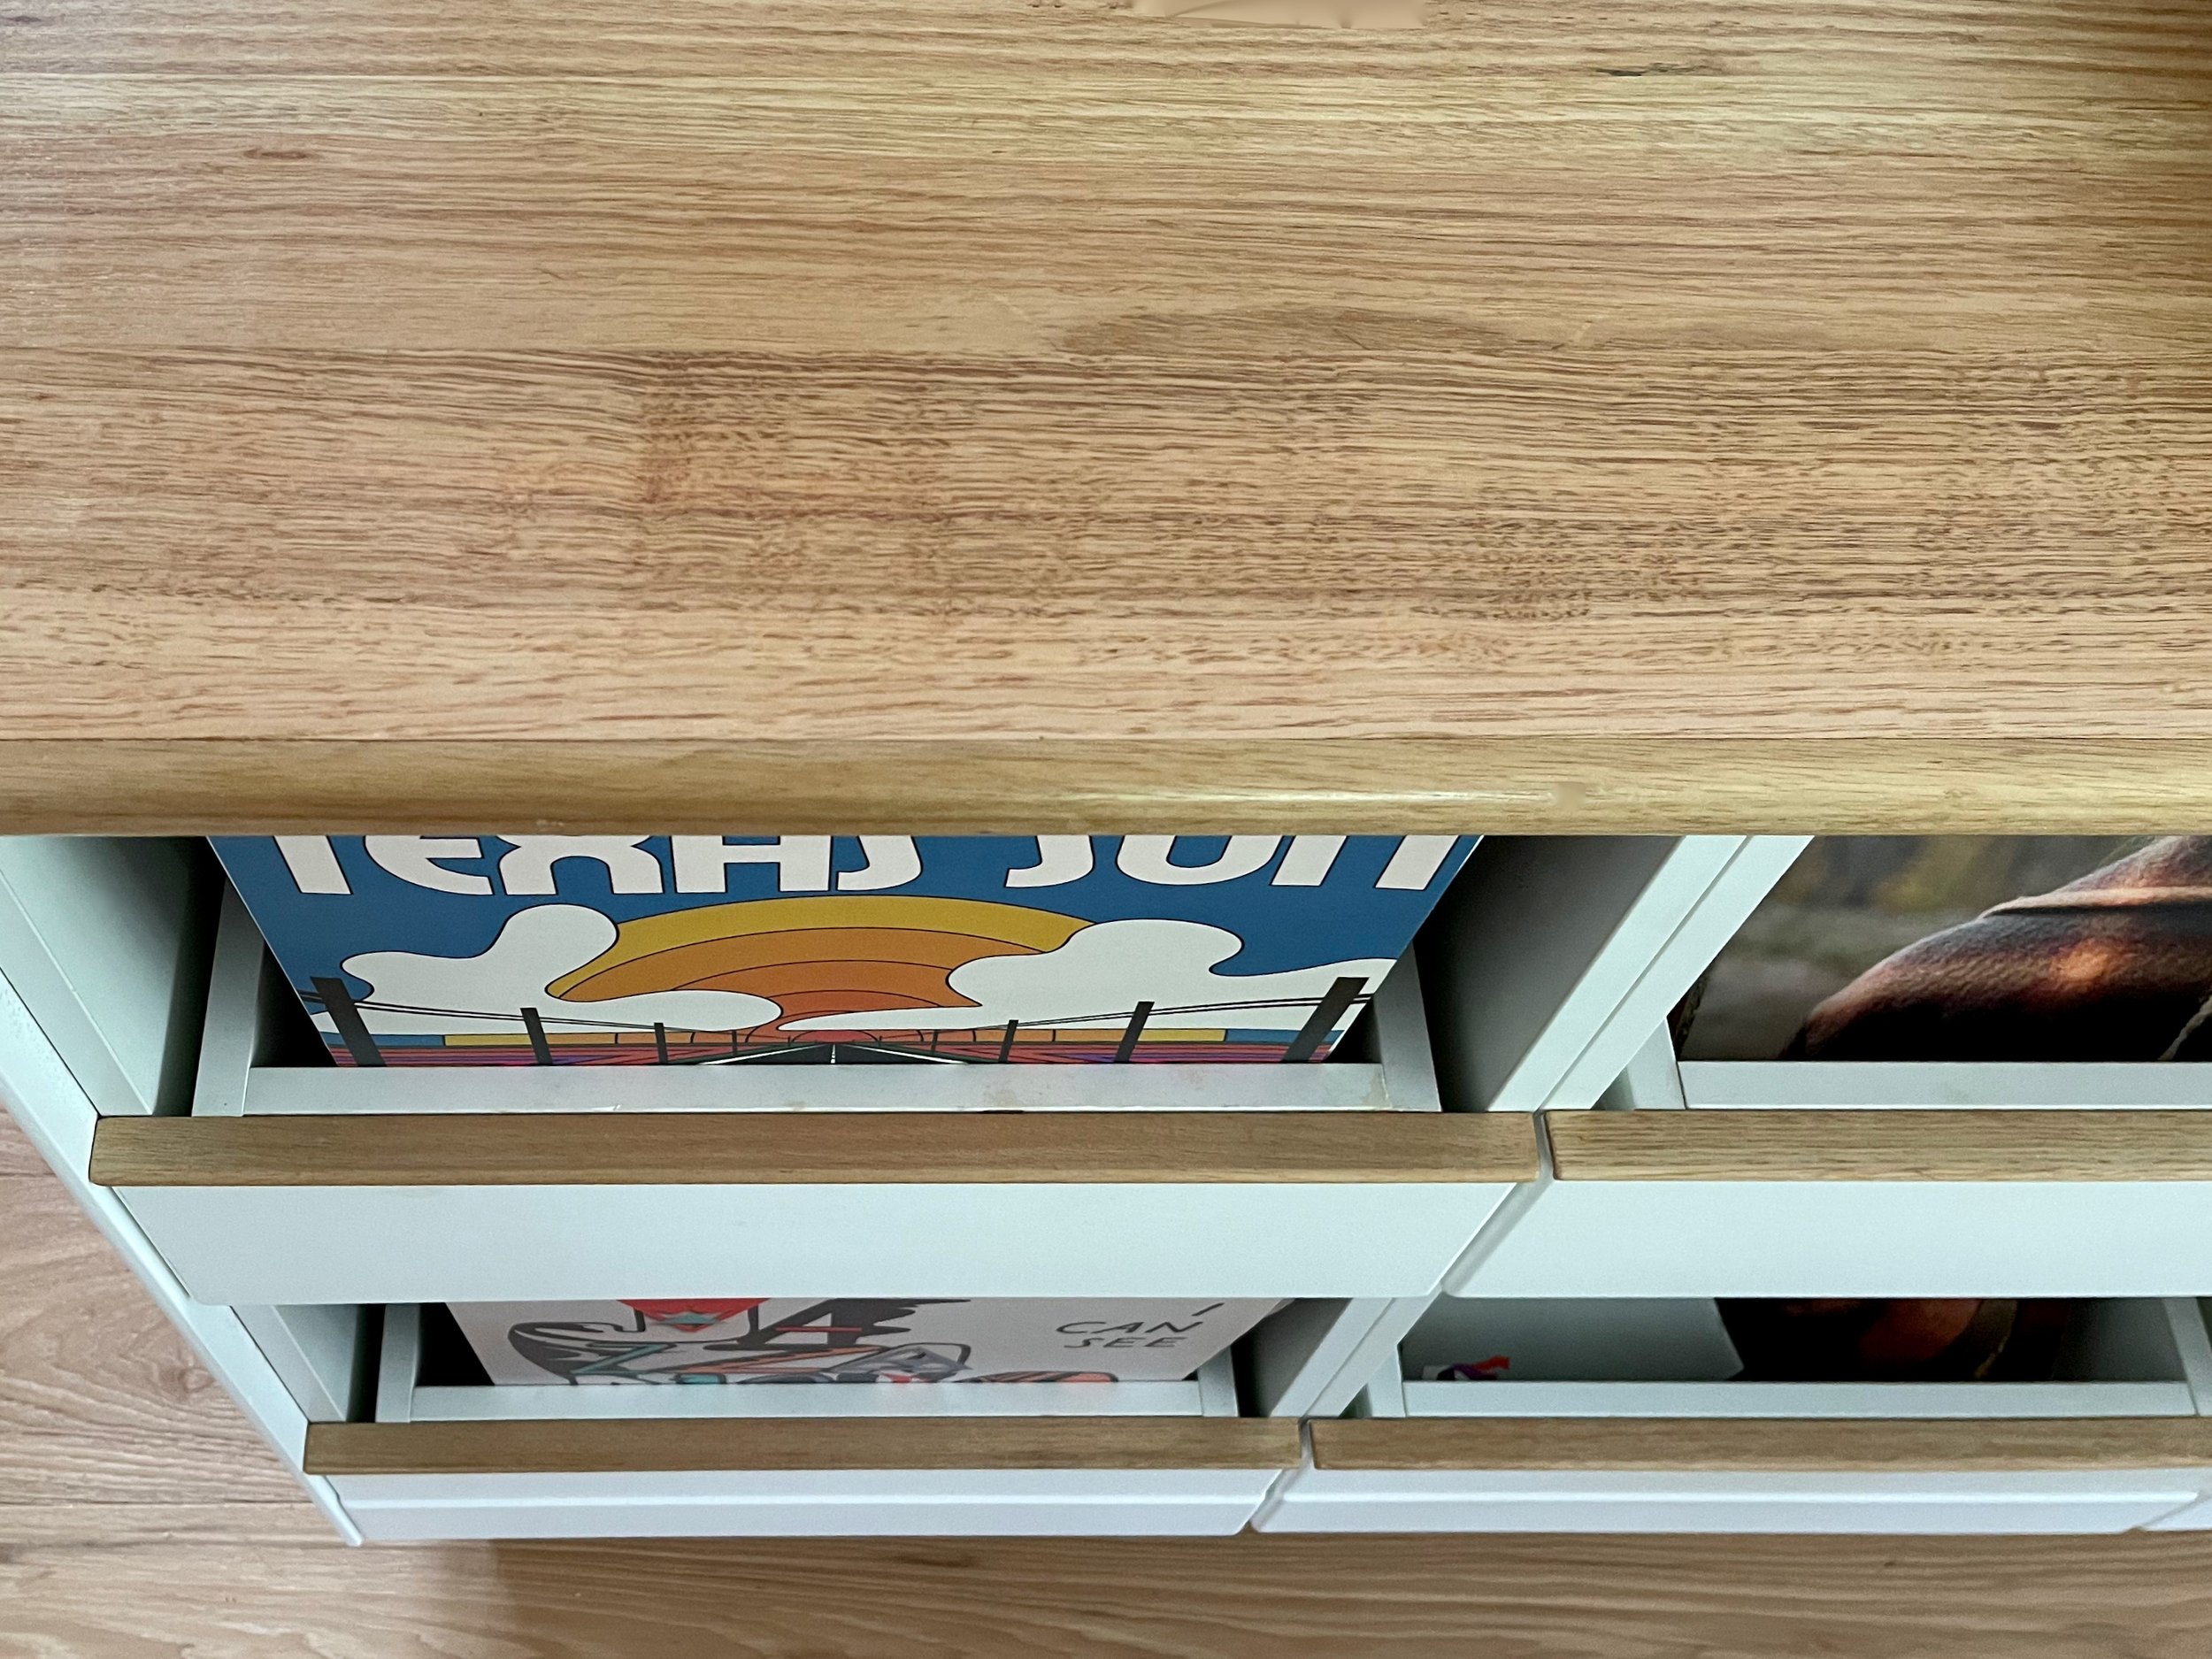
I customised the drawers by repurposing the pieces for every second one into dividers so the records are stored upright.  

WATCH IT Click through to see detailed step-by-step instructions on how to make a record cabinet using the same technique.


To finish the drawers, I trimmed down standard raw-board fronts to allow for clearance and added shelf edging along the tops to cover the joins. 

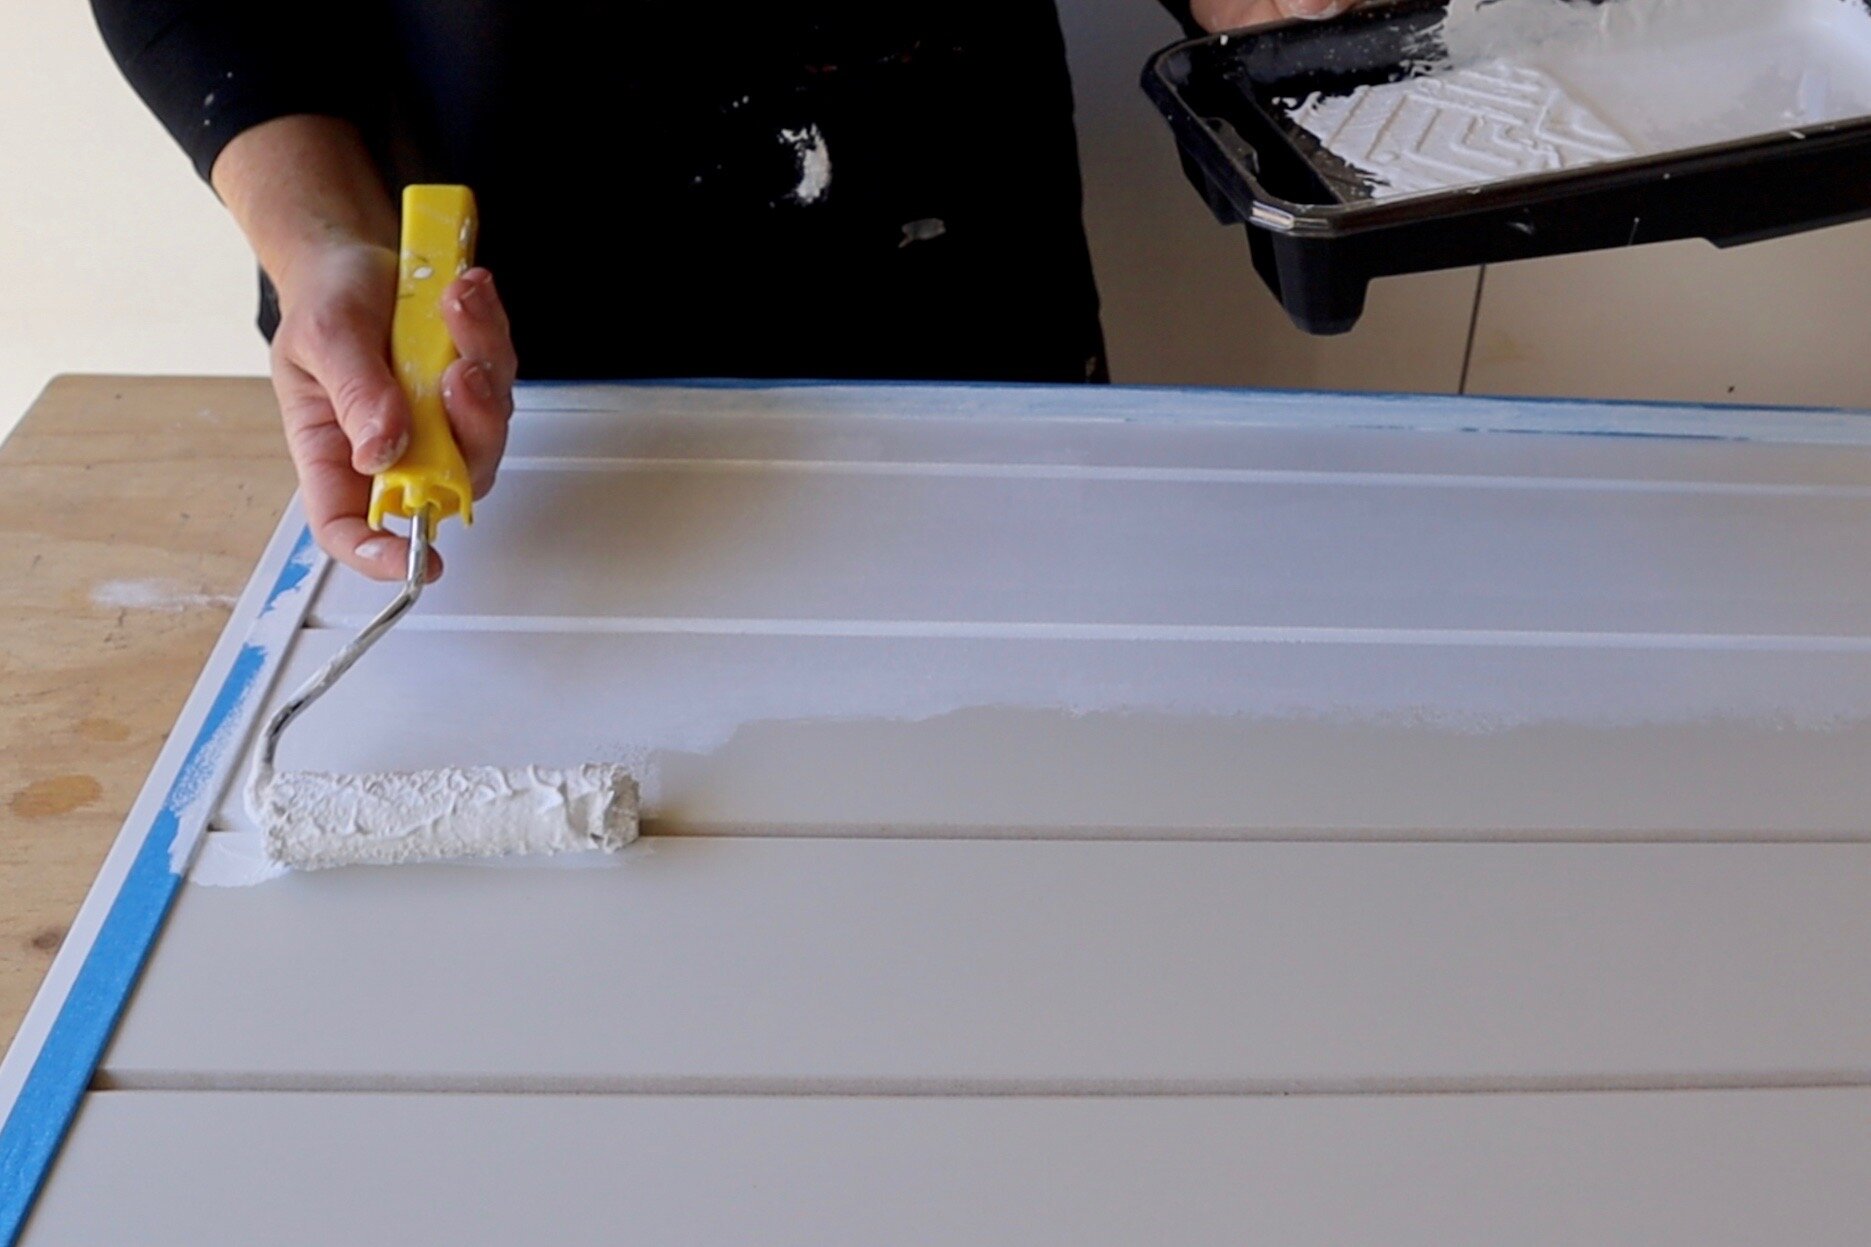
TIP I painted the MDF doors and drawers in low-sheen, water-based Taubmans Ultimate Enamel the same Brilliant White as the walls. 


To build the benchtop, I cut a 900mm x 2000mm, 30mm-thick Tasmanian oak panel in half lengthways to get two 450mm-wide panels, joining and cutting them to 3.2m long. 

The offcut was then cut in half and attached to the larger panels to make the bench 605mm wide. 

I added a drop-in piece along the centre back that can be lifted off for access to power points, made from matching timber from my kitchen renovation. 

TIP I joined the offcuts to the panels with Bondcrete and flat metal mending plates, clamping to cure overnight.


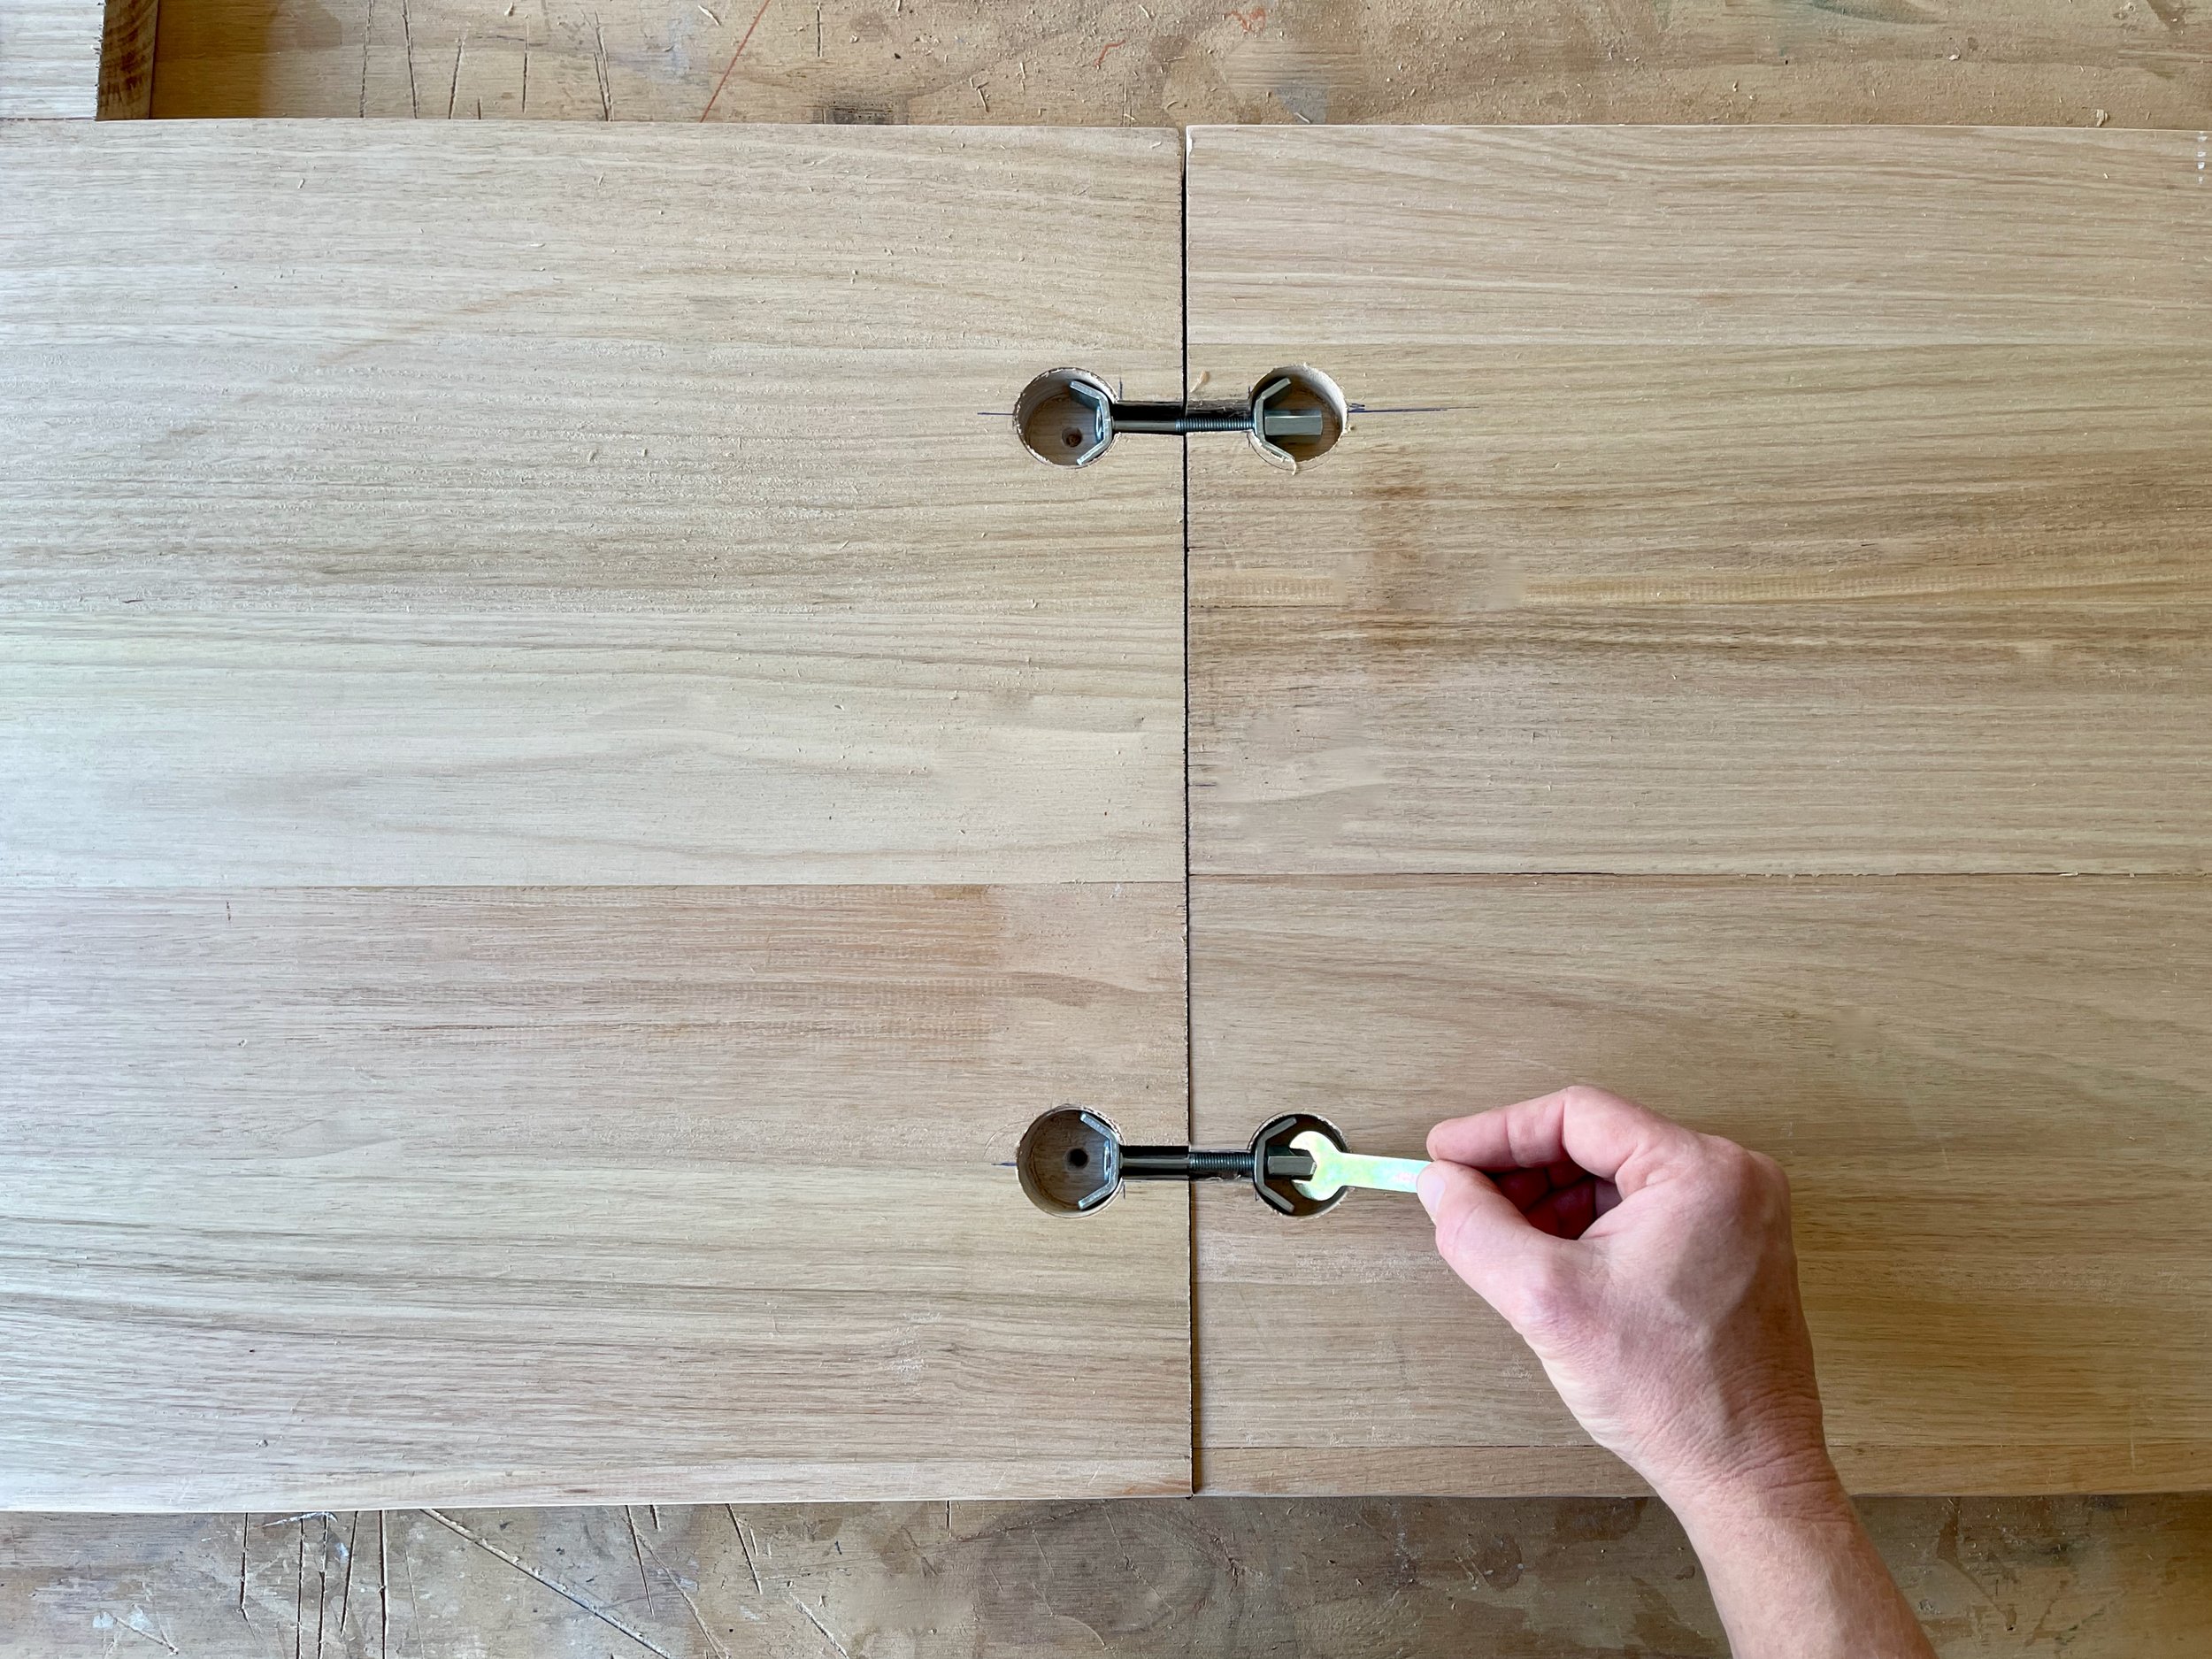
I joined the two heavy panels with benchtop connectors, doing the woodwork in the workshop where I could enjoy making a mess.

The top was assembled on site, where I glued and clamped it before securing to the units underneath with small brackets and 15mm screws.

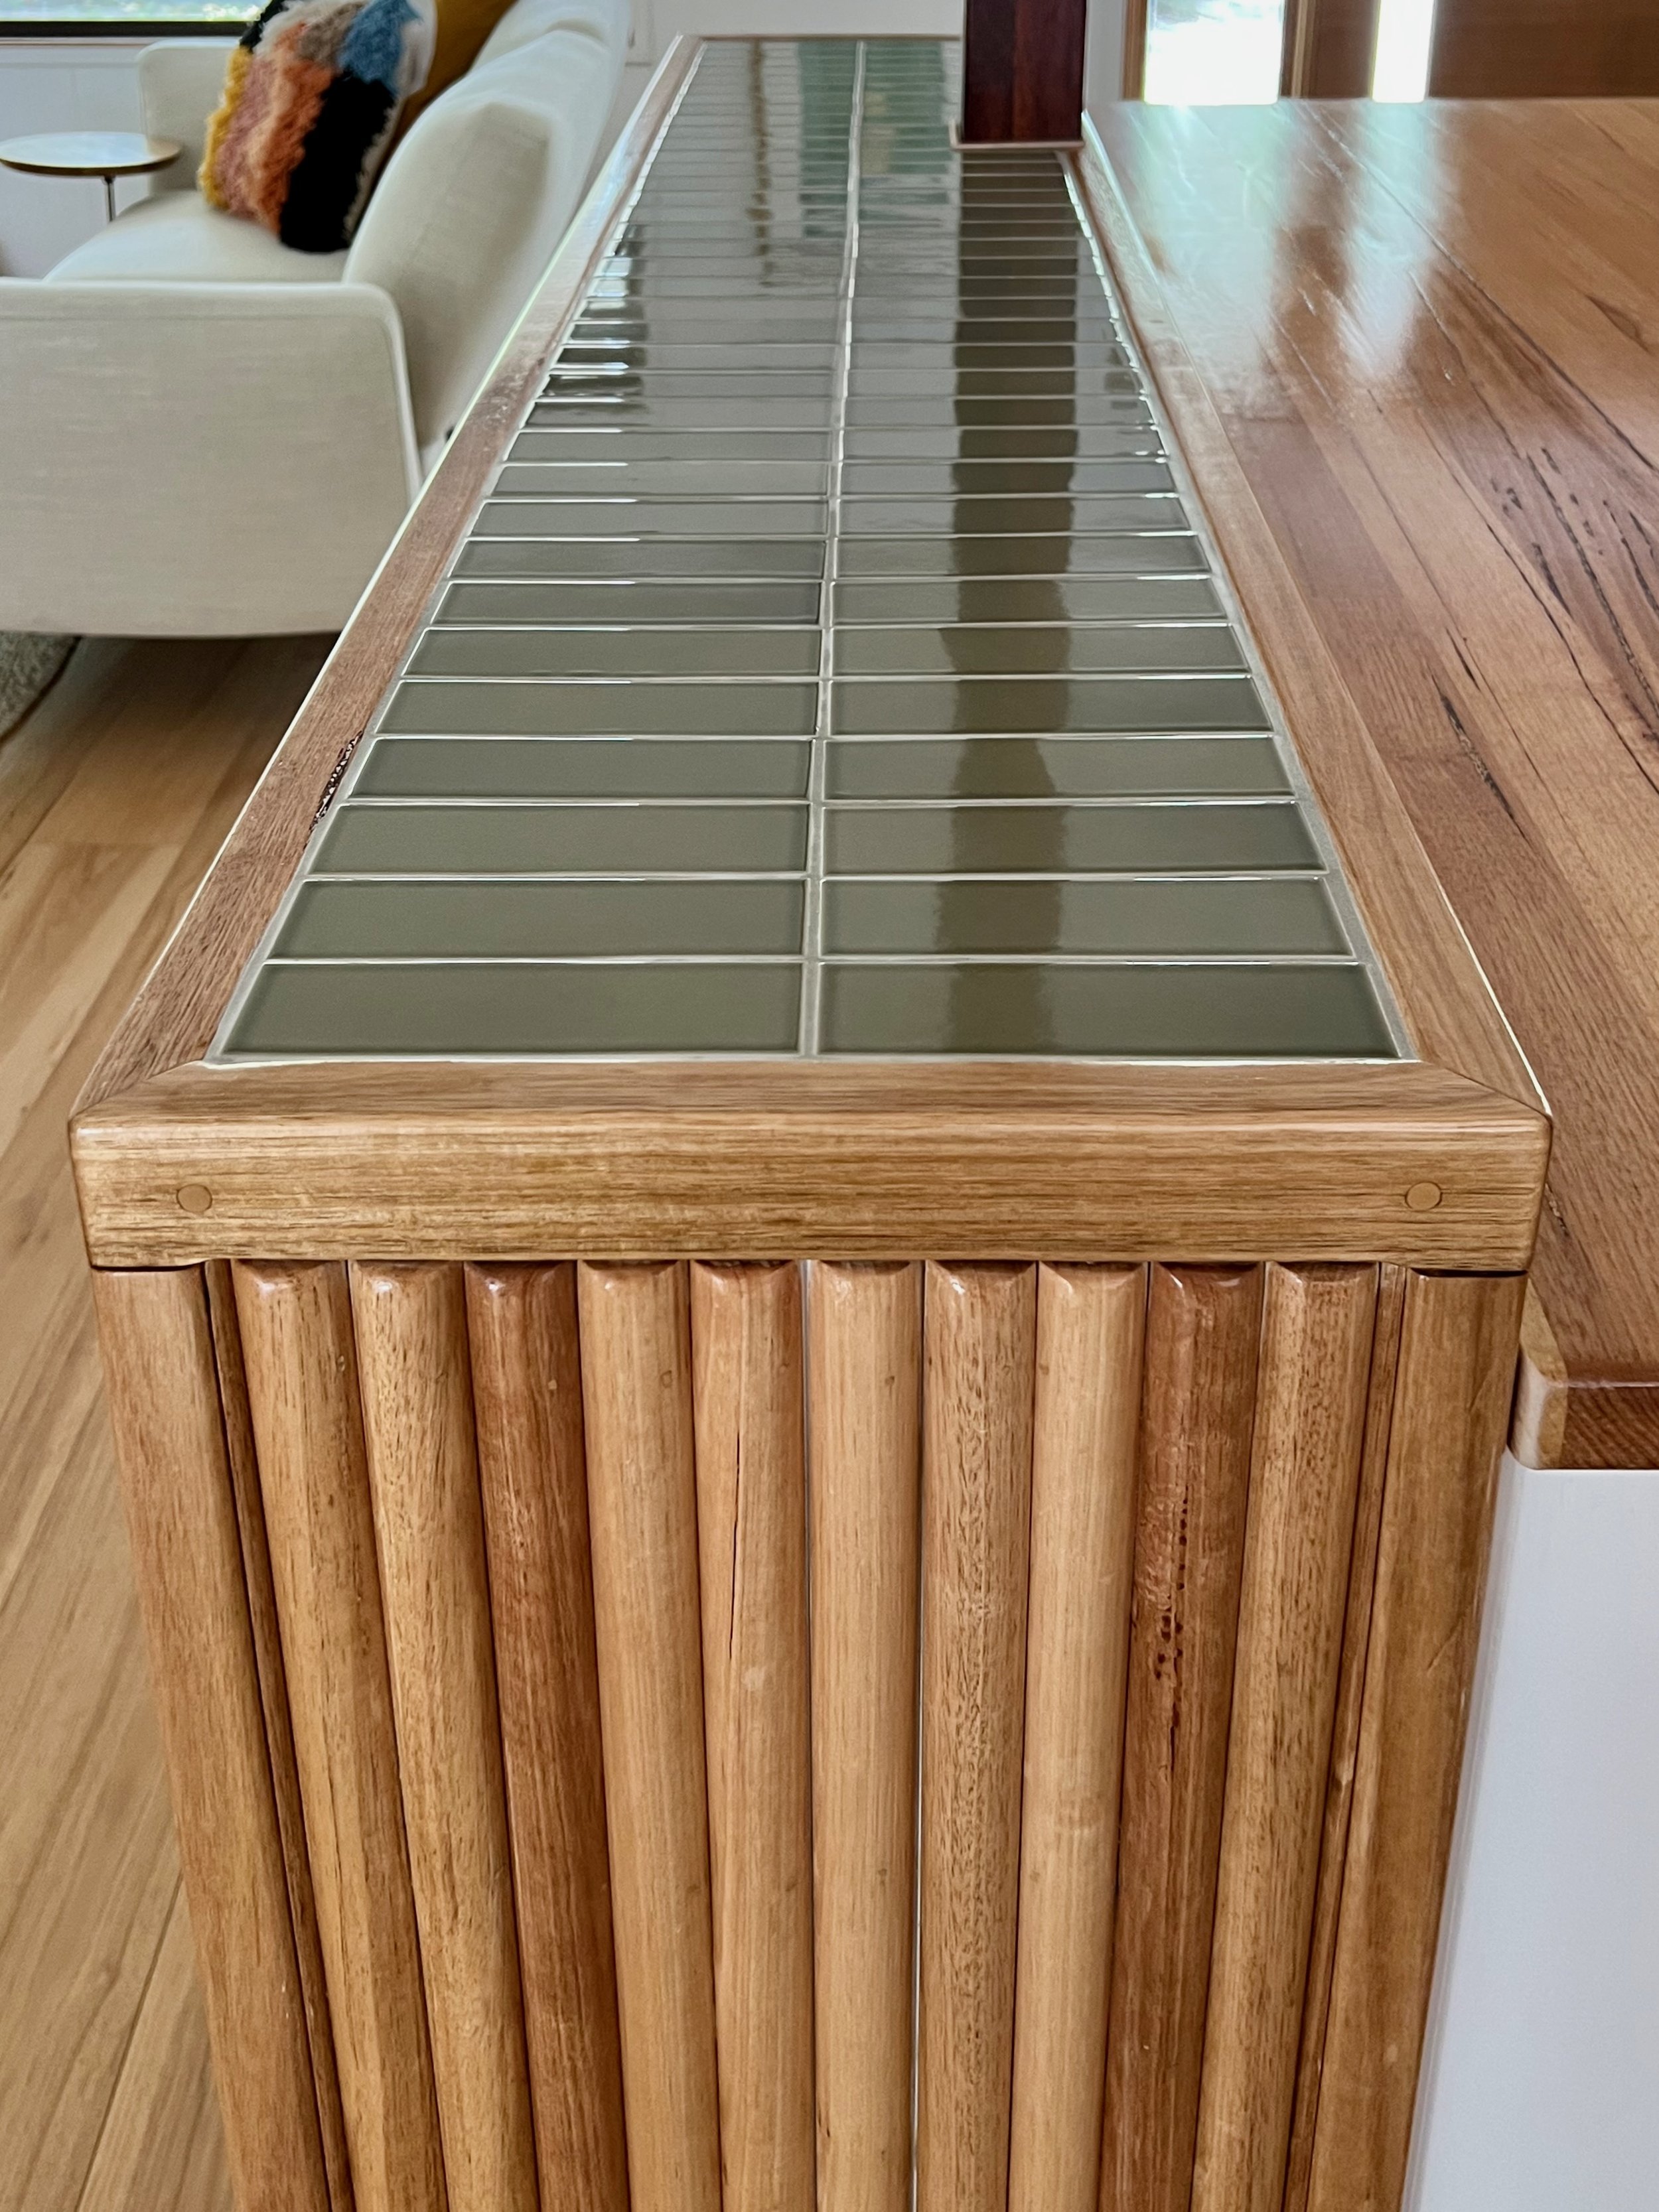
TIP The edge is finished in 30mm half-round dowel, which I also attached to the panels in two pieces.


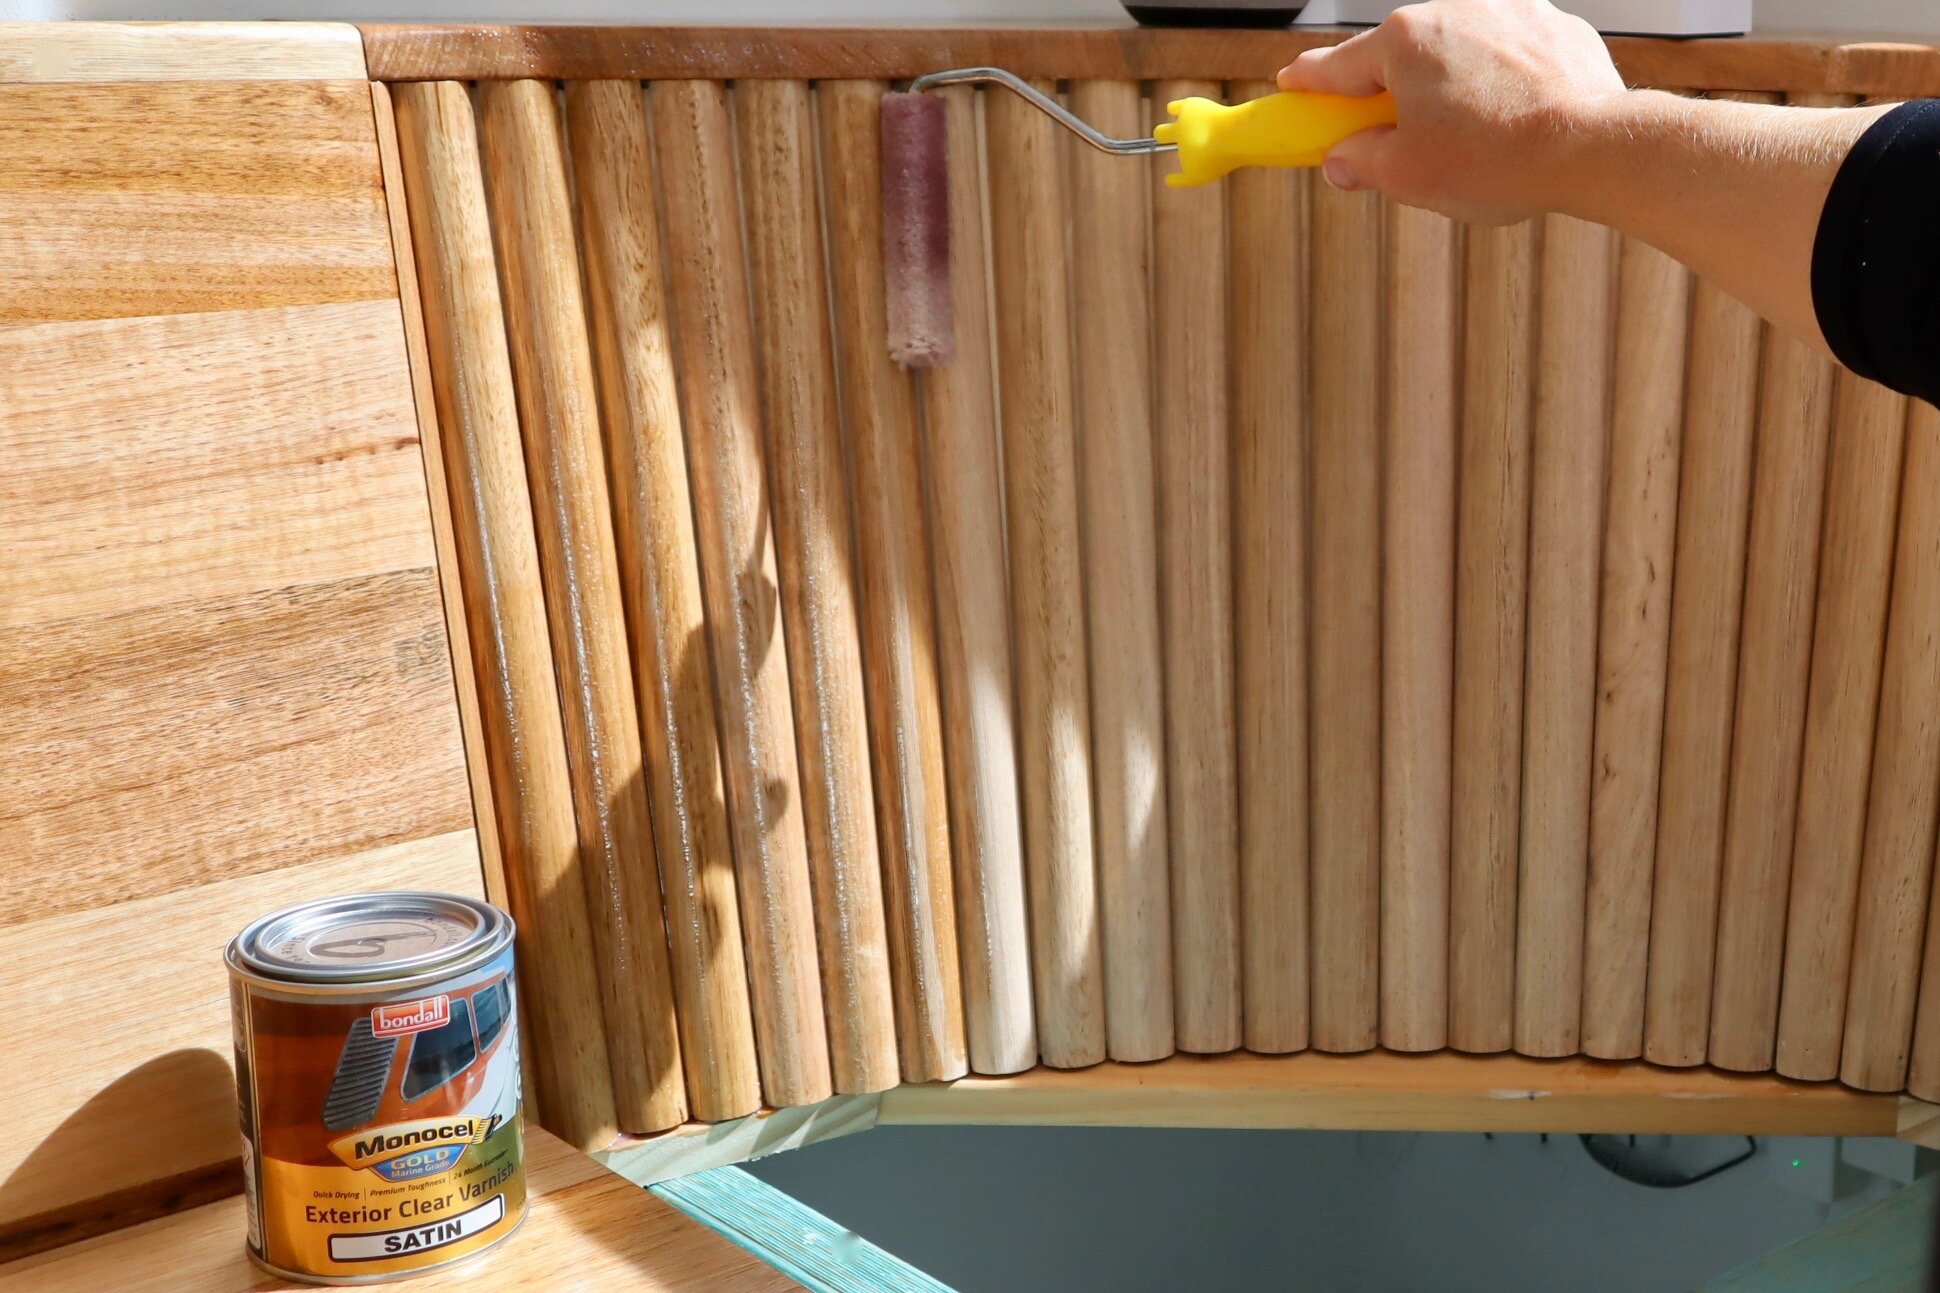
The timber features are all made from Tasmanian oak and finished Monocel Gold satin varnish.

I worked on the top, handles and drawer edging at the same time, sanding to 240-grit and applying three coats of varnish, leaving to dry for a few hours after each.

WATCH IT Click through to see the simplest method to apply varnish. All you need is a mini mohair roller and tray.


I made the handles from 12mm x 30mm moulding, rounding over the corners with a trimmer and attaching them through the doors with 25mm screws.

TIP You could use store-bought handles like these D-shaped raw pine ones, giving them a quick sand and a coat of varnish.


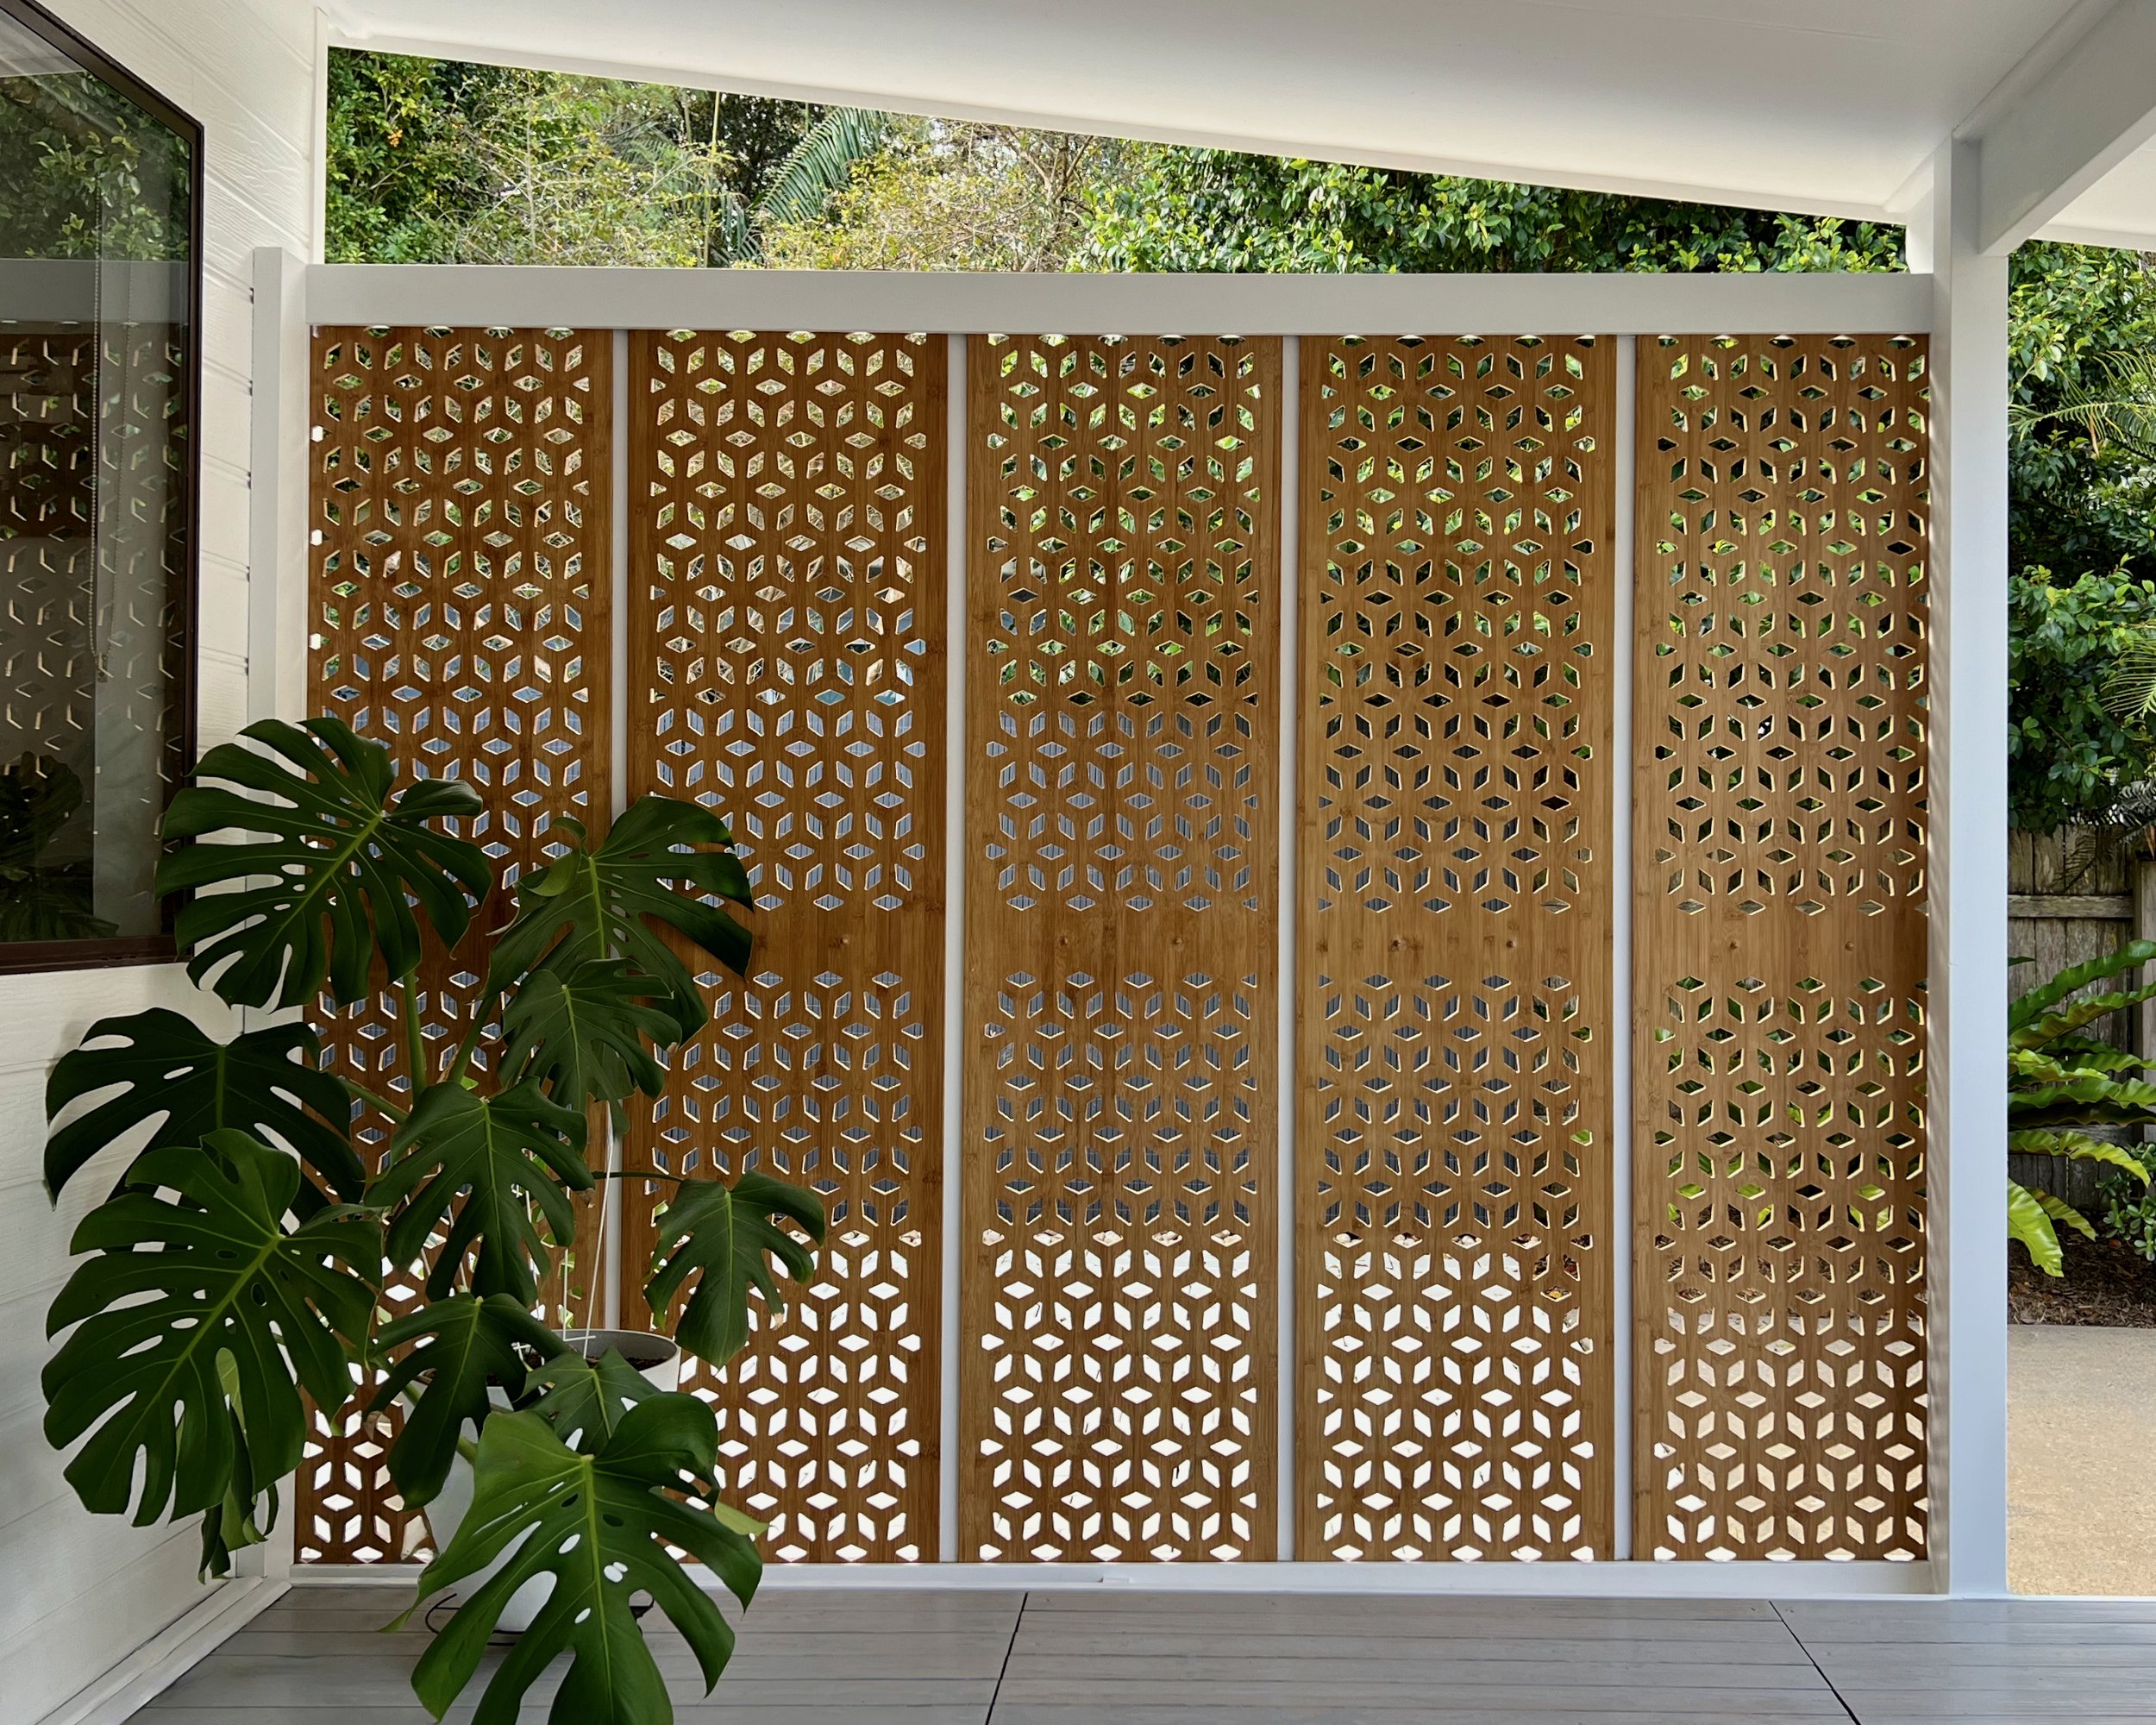
I finished the end unit in a sheet of Easycraft Easy VJ panelling to match the wall cladding above. Skirtingboard runs underneath it.


Adding a handcrafted element to the front visually ties in the rest of the timber features. I made these handles from 12mm x 30mm Tasmanian oak moulding, rounding over the corners with a trimmer and attaching them through the back of the door with 25mm screws.

TIP Alternatively, you could use store-bought handles like these D-shaped raw pine ones from Bunnings, giving them a quick sand and coat of varnish.


There’s no entertainment without access to power, so I added cable ducts to the lift-out section of the bench for access to points for setting up speakers, the turntable, TV and lamp.

TIP I used a 60mm holesaw to make the cutouts then ran construction adhesive around the outside of the ducts to hold them in place.


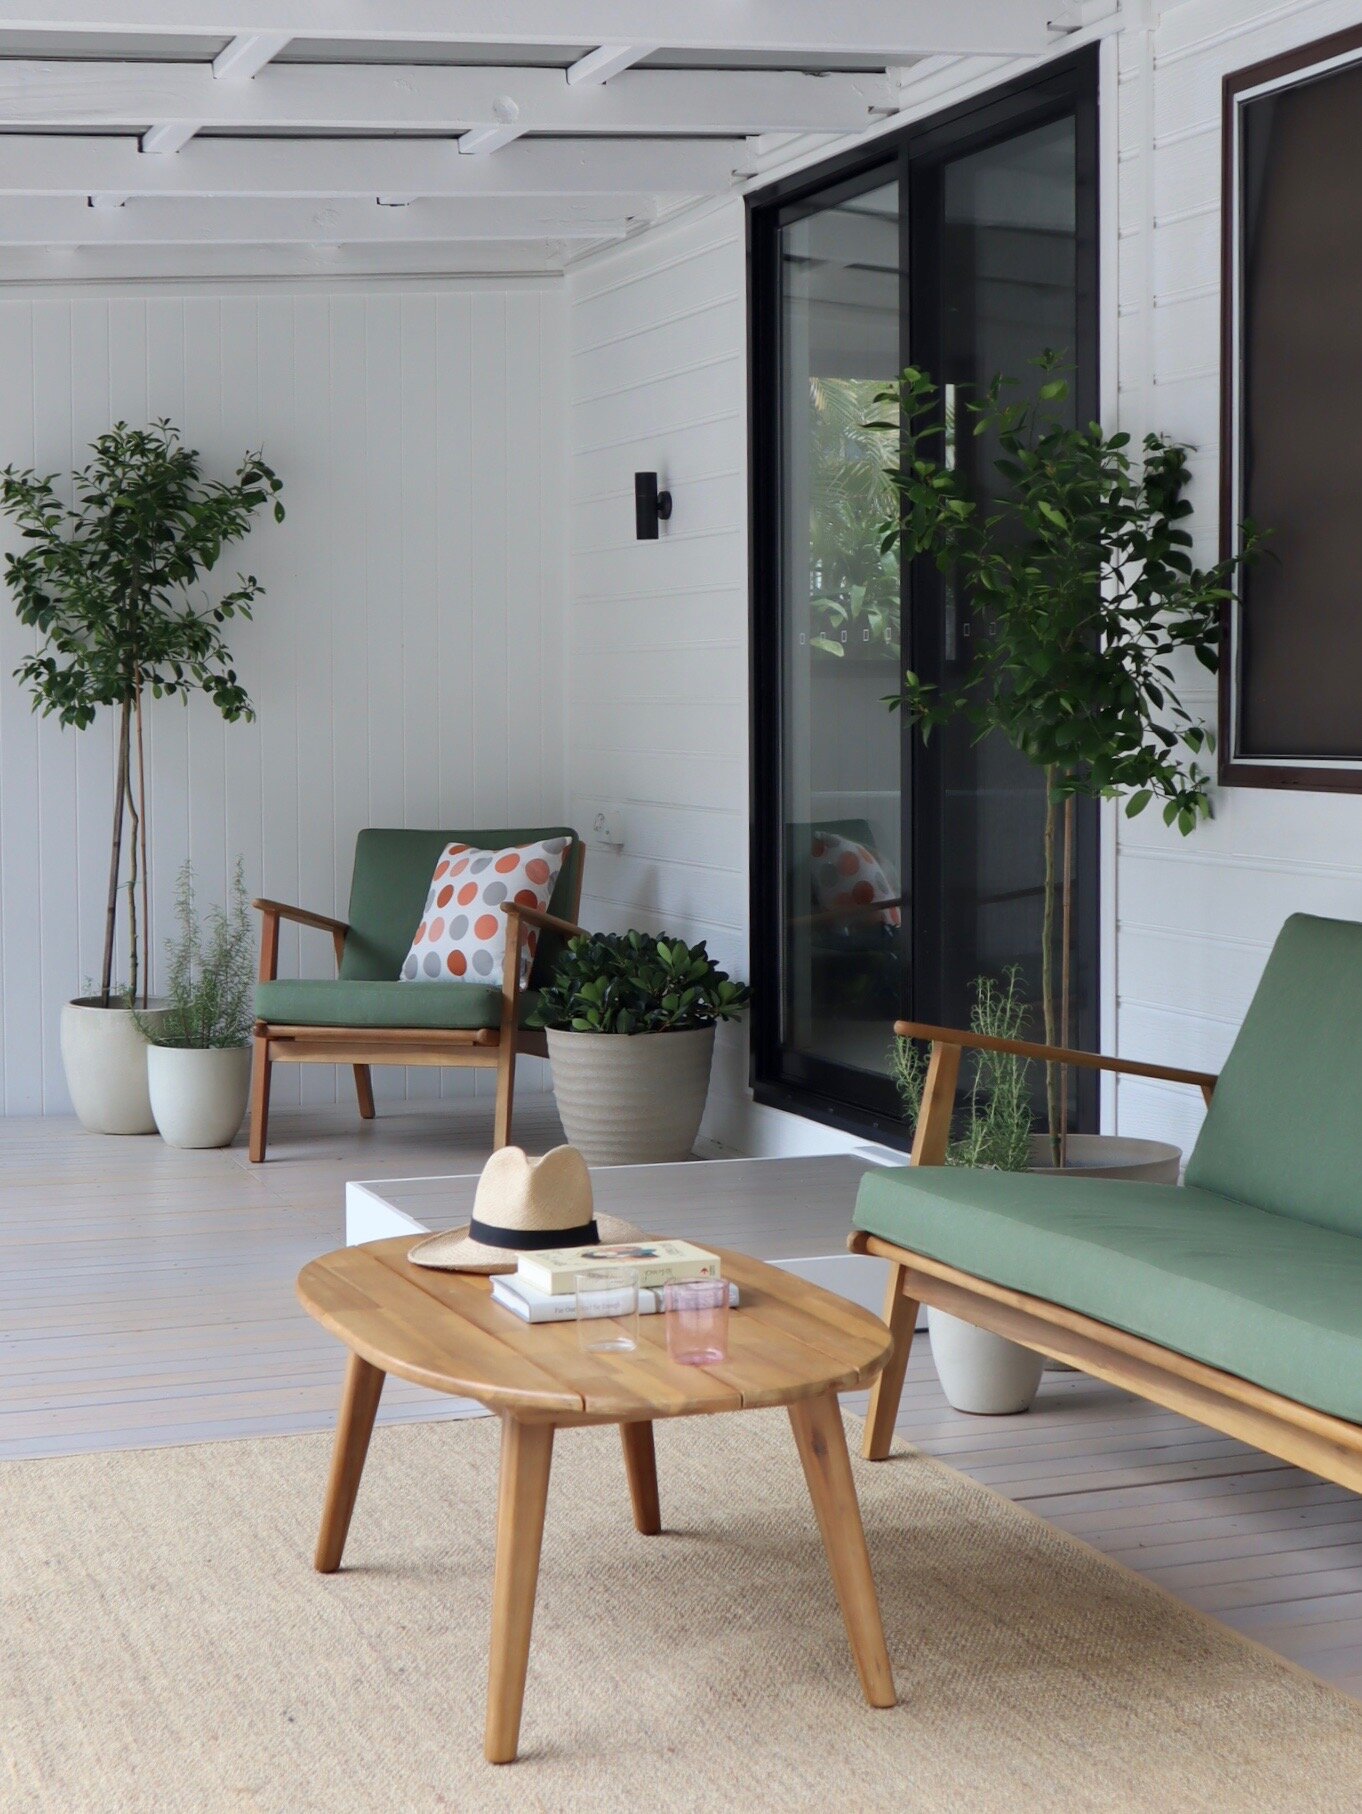
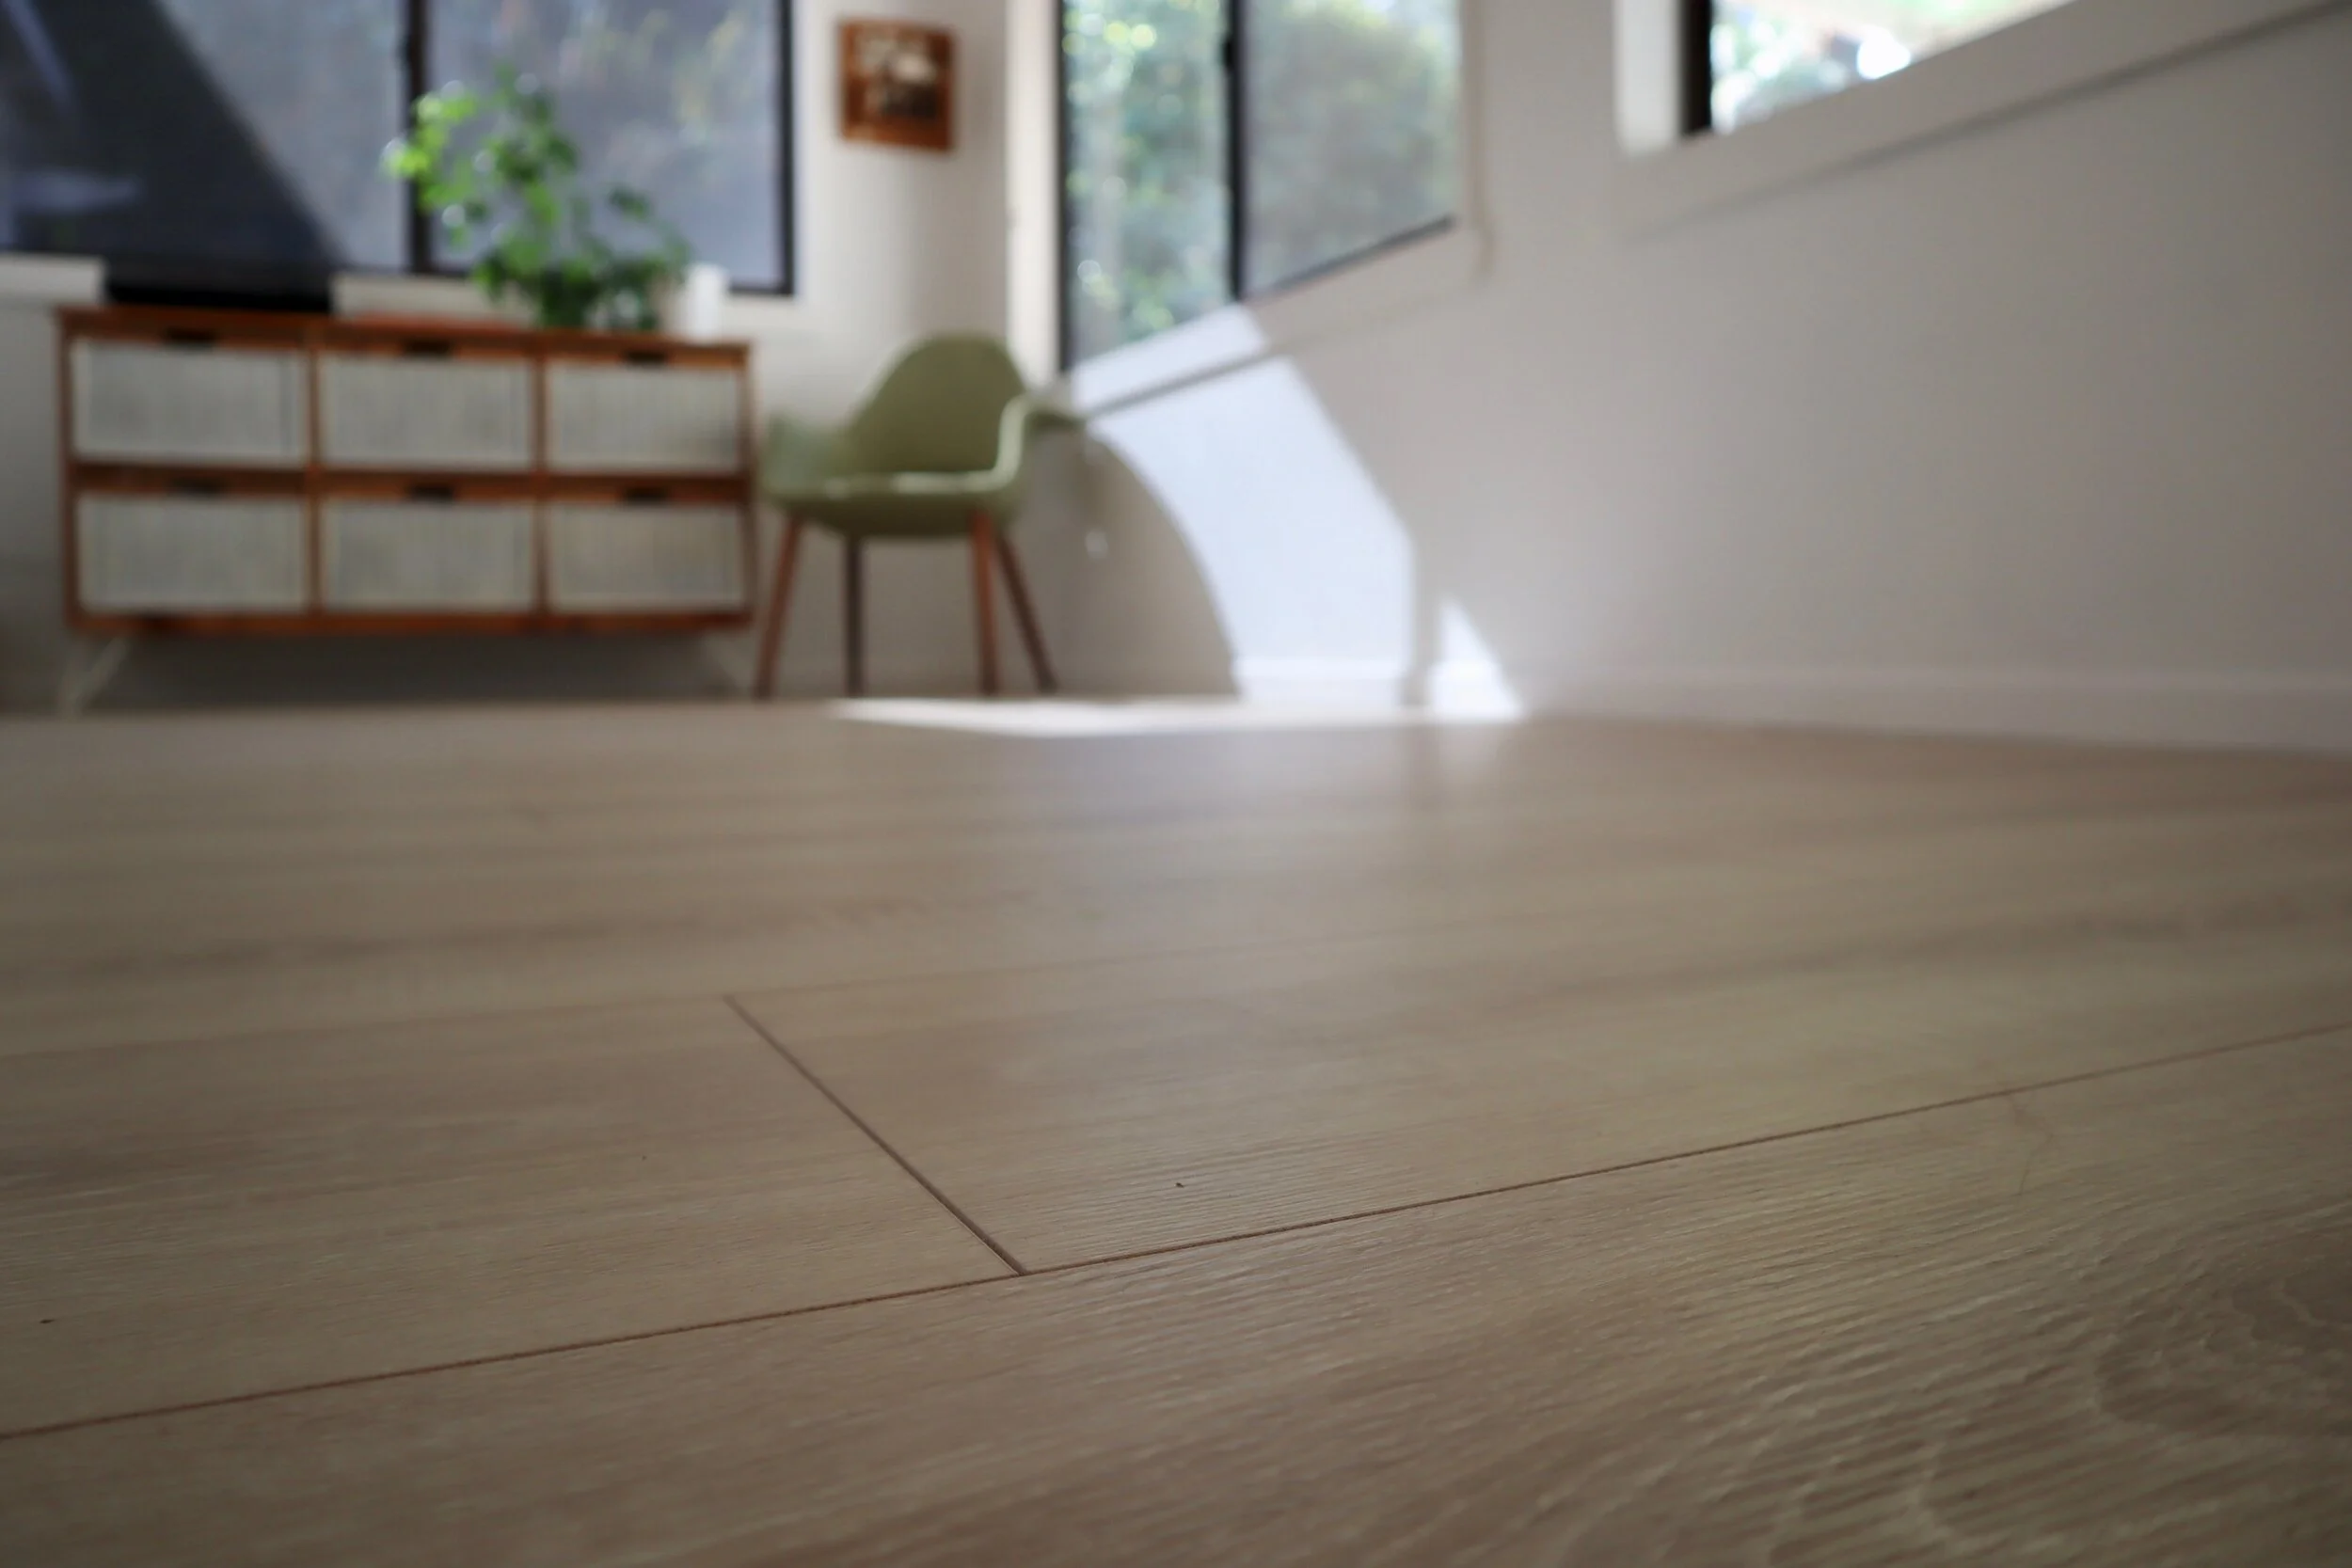
With the TV and speaker cords hidden away, the entire entertainment hub is easy to keep dust free and tidy.


The end result is a lovely cabinet that has made playing vinyl a breeze – it’s fun to crate-dig through the covers and there’s lots of space to spread out so records don’t get left on the floor. 


Have you installed built-in joinery?

Tag me on your project and follow more of my DIY journey on Instagram for tool tips, home improvement and simple building projects.


Why I Renovate

Alun Machin

1 tash wtih hand.jpg

I believe every Australian can have a home to be proud of by getting handy… But what’s so captivating about the process of renovating?

I’ve put some thought into the philosophy of ‘doing it yourself’ and have come up with eight reasons why it’s rewarding.

2 banquette.jpg
If the definition of renovate is to restore something old to good condition, to revive and refresh one’s spirits, then renovating should absolutely be uplifting.
— Natasha
3 front door.jpg

RENOVATING IS… ENVIRONMENTALLY CONSIDERATE

Our humble weatherboard began as a tiny fibre-cement shack in the 1960s and expanded over the years with clunky results, odd-sized bedrooms, a bathroom without a window and dysfunctional kitchen. But it’s structurally solid and nestled in bushland, surrounded by wildlife. 

> The key to improving the daily experience of living here is to keep it empathetic to the surrounds by making choices such as eliminating the need for air conditioning so we always hear the distant sound of the sea and changing the front door so there’s no need to take keys on walks.

 
4 fireplace.jpg

RENOVATING IS… AN EVERYDAY DELIGHT

A comfy home is all about quality of life – navigating smoothly through zones, with efficient temperature control, good lighting, space for privacy, decent storage, easy cleaning… 

> I like to work with what has stood the test of time, rather than ruthlessly tearing it down to start again. Taking on one room at a time to make a few changes has given me time to develop DIY skills to improve the house as a whole. Installing a new floor then moving the fireplace and upgrading to one with a lighter footprint has ensure this area is toasty in winter but feels cool and bright in summer.

 
6 knock out a wall.jpg

RENOVATING IS… A TEST OF STRENGTH 

Home improvement isn’t just about grand extensions, glamorous butler’s pantries or high-tech media retreat. 

> I find nothing more rewarding than rolling up my sleeves to spruce up a home to make life more comfortable, sustainable, tidier and easier on the bills. See how I knocked out a wall to move a bedroom door and build a wardrobe. 

 
5 wardrobe.jpg

RENOVATING IS… CREATING A VIBE

Considering the function of a space and how furniture, homewares and art integrates with it helps create a place I want to come back to. 

> I imagine every scenario of how life is lived in a room, breaking down the elements into what is essential and what isn’t. For this small but sweet retreat, I built a low bedhead with integrated shelves and wall-mounted lights to eliminate the need for bedside cabinets. A fan improves airflow and a customised built-in robe adds tucked-away storage. 

 
PHOTOGRAPHY Cath Muscat STYLING Matilda Roberts

PHOTOGRAPHY Cath Muscat STYLING Matilda Roberts

RENOVATING IS… A DOMINO EFFECT

How one DIY job affects another – and scheduling them in a manageable order – is the key to being able to cohabit with an in-progress renovation. I relish working out all the little details.  

> I start with what needs to be removed, such as the old kitchen joinery. Then plan for the big things that need to be added, in the most logical order, such as assembling the flat-pack cabinets and laying new flooring. Then I plan the finishes, beginning with paint and ending with features like  timber display shelves for coffee cups used every day.

 
8 spare room.jpg

RENOVATING IS… SPACE-MAKING

Most Australian homes built a few decades ago have a tiny bedroom. To prevent it from being a dumping ground for household stuff, I replaced the door with a sliding door cavity to increase the usable floorplan. I clad the side in timber to create a beautiful feature. It’s now a great home office.

> Looking at the big picture helps turn small and dysfunctional into well-designed and functional while increasing space – and the property value.

 
9 deck alternative.jpg

RENOVATING IS… TRANSFORMING

Who doesn’t get a kick out of a great before and after?

> When you see how this outdoor living area started out – and how I used simple DIY deck-building system to completely change it – you’ll agree.

 
10 Natasha DIYing.jpg

RENOVATING IS… ABOUT THE TOOLS (of course!) 

My renovating journey began with this childhood memory…

‘I’m in my father’s workshop, playing in the wood shavings on the cool floor, dust dancing in the sunlight streaming through the window, the warm scent of timber enveloping. Dad bangs away at the workbench while I keep rhythm with a kid-size hammer, knocking in tiny nails and frustrated that my bits of wood don’t stay together like his do.’

> Fast-forward through the decades to my own workshop and the knowledge that I was missing clamps and an impact driver. It’s always been about the tools! Check out my current workshop.

 
11 cover.jpg

I originally wrote a variation of this story for Better Homes & Gardens ‘Before-and-After’ one-off magazine, where I was honoured to share some of my DIY renovating projects.


Refresh entrance tiles

Alun Machin

1 after.jpg

Sprucing up this front entrance has been on my DIY to-do list for ages. I wanted to refresh the tiles while keeping them intact, so decided to apply a similar three-step process to the one I use for reviving timber: clean, coat and seal.

2 before.jpg

BEFORE The tiles were still in good condition, but the grout had weathered and chipped. The spacing between them allows for a new layer of grout 3-4mm thick. Choosing a pale colour will make the area look cleaner and brighter.

This three-part project takes just a couple of hours to DIY, but plan it over a long weekend to allow for thorough drying times.
— Natasha
3 paint stripper.jpg

PART 1: CLEAN 

I scrubbed off old paint spills with a scourer and Bondall Waterbased Paint & Varnish Stripper

4 tile cleaner.jpg

… then spritzed all over with Betta Tilecare Tile & Grout Cleaner, leaving it to work it’s magic for a couple of minutes.

5 water jet.jpg

While the cleaner was still wet, I rinsed it away using Fern Water Jet Power Washer that simply clips onto the hose, providing enough pressure to clean without damaging the surface.

 
6 apply grout.jpg

PART 2: COAT 

I used a pre-mixed grout solution, applying it with a small rubber trowel by pressing it into the gaps between the tiles in a diagonal motion, removing the excess as I went along.

7 sponge.jpg

Working in sections meant I could leave each for about 15 minutes before wiping the tiles clean, being careful not to press on any still-damp grout. When the re-grouting was done, I used a clean sponge to remove the haze that appears on the tiles as it dries.

 
8 seal.jpg

PART 3: SEAL

To seal the tiles and protect the grout from discolouring I used a mini roller to apply Betta Tilecare Tile & Grout Sealer, working in sections to apply one coat, applying the second while the area was still wet. 

9 finished.jpg

AFTER The entire surface took less than an hour to completely seal and dry with a lovely silky, non-slip feel.

 
15 presenter.jpg

Do you have tiles that need reviving? The trick is to seal the newly refreshed grout so it stays cleaner for longer.

Tag me on your project and follow more of my DIY journey on Instagram for tool tips, home improvement and simple building projects.

Tiled fireplace hearth

Natasha Dickins

Whatever it is, the way you tell your story online can make all the difference.

The installation of a new wood-burning heater gave me the opportunity personalise the fireplace area by customising the hearth.

Whatever it is, the way you tell your story online can make all the difference.

While renovating the bedroom behind this area I knocked out the wall and moved the bedroom door to the other side to make way for a built-in robe. After removing the old fireplace to install a new one slightly to the right, I lay new flooring.

Whatever it is, the way you tell your story online can make all the difference.

There were many upgrades to this space, but my favourite is the Scandia Edge 50 radiant wood-burning heater. The midcentury-inspired shape is compact, and the elegant feet help minimise the footprint. 

While I love the fireplace in winter, this coastal Aussie home heats up to 45°C in summer. To visually cool and soften how it fits into the room, I skipped the usual off-the-shelf hearth for one made of white tiles.

Whatever it is, the way you tell your story online can make all the difference.

Conscious of ensuring everything about this project was legal and safe, I applied for council approval, which took just a couple of days.

HEATER PLACEMENT must be a certain distance from the walls. The Scandia installation guide lists the minimum clearances and hearth size to meet building codes.

A HEARTH CHECK with the technical guys at James Hardie ensured the fibre cement underlay provided sufficient fire retardancy. 

A CERTIFIED PLUMBER ticked off all the safety boxes as he installed the heater and flue.

COUNCIL APPROVAL began as a quick chat with a council builder to check my unusual concept for the hearth, then the entire installation was inspected and approved.

I swapped traditional slate with modern subways to brighten the surface under the fireplace so it fits into the room all year round. In summer, a plant sits on top to soften the edges and liven it up.
— Natasha
Whatever it is, the way you tell your story online can make all the difference.

I marked out the hearth on a sheet of fire-retardant James Hardie 6mm-thick ceramic tile underlay, clamping pine offcuts around it as formwork. I mixed up Dunlop Wall & Floor Tile Adhesive in a small bucket, then used a small square-notched adhesive spreader to apply in sections about 5mm thick.

TIP Use paper cups to measure, keeping one dry for the adhesive powder and using the other for water, mixing a cup of adhesive to about a third-cup of water.

 
Whatever it is, the way you tell your story online can make all the difference.

The first tile is positioned flush with the corner, then I used 3mm cross spacers to set the rest out evenly, applying the adhesive in rows of about two tiles and mixing up more as needed to prevent it from drying out.

TIP I’d measured out the hearth to be 11 tiles wide by three tiles deep, laying them in a stack bond pattern to avoid having to make any cuts.

 
Whatever it is, the way you tell your story online can make all the difference.

After laying the tiles, I removed all the spacers and wiped away excess adhesive with a clean damp cloth. I ran a 150mm grout squeegee over the surface to ensure the tiles are flat and even, leaving them to set.

TIP I used 33 Decor8 75mm x 300mm white Devonshire wall tiles with a matt, slightly textured finish.

 
Whatever it is, the way you tell your story online can make all the difference.

To apply grout, I used an Irwin quick-grip clamp to squeeze the bottle while running the nozzle between the tiles. I smoothed it out with the squeegee, wiped the tiles with a damp sponge to remove the excess, then left the grout to cure overnight.

TIP I used Dunlop ready-to-go coloured grout in Misty Grey, choosing a shade that wouldn’t discolour with ash and soot from from the fireplace.

 
Whatever it is, the way you tell your story online can make all the difference.

After buffing the tiles with a dry cloth to remove the grout mist, I sealed it with Bondall Betta TileCare grout sealer, running the wheel applicator over the grout and wiping away excess with a dry cloth.

TIP This sealer is a lovely fast-dry formula that allows you to apply a couple of coats quickly. The finish is matt and clear and doesn’t dull the tiles.

 
Whatever it is, the way you tell your story online can make all the difference.

I trimmed the 6mm ceramic tile underlay in line with the tiles, then cut another underlay of 9mm-thick fibre cement sheeting to adhere underneath, making the hearth thicker to protect the floor. 

TIP Fibre cement cuts tend to have a rough edge, so smooth around the underlay using 80-grit abrasive paper with a sanding block.

 
Whatever it is, the way you tell your story online can make all the difference.

To edge around the hearth I mitred lengths of Porta 22mm x 7mm Tasmanian oak shelf lipping to fit. These were sanded and sealed with three coats of fast-drying Monocel Waterbased Clear Wood Varnish and secured with Selleys Liquid Nails, which I taped to hold while drying.

TIP The moulding was knocked off when the hearth was moved into position, so I had to re-glue it on site. Be generous with the Liquid Nails and don’t move the hearth until it’s completely dry.

 
Whatever it is, the way you tell your story online can make all the difference.

When the plumber came to install, we moved the heavy hearth into position and lifted the the Scandia Edge 50 radiant wood heater onto it. He checked the clearances from the wall met code then installed the flue up through the roof.

The combined weight of the heater and hearth ensures it won’t move. I later installed new water- and burn-resistant Floor Select laminate flooring in Palomino Oak around the hearth.

TIP To keep the hearth clean, vacuum or sweep up soot, ash and wood chips, then simply wipe the tiles with a warm damp cloth.

 
Whatever it is, the way you tell your story online can make all the difference.

How is your home being heated this winter?

Tag me on your project and follow more of my DIY journey on Instagram for tool tips, home improvement and simple building projects.


Build a banquette with fluted timber detail

Natasha Dickins

1 opener.jpg

Sitting in a booth or banquette makes you feel part of something special. It has a cosy, comfy, casual vibe, and that’s what I wanted for this dining area.

In creating the built-in seating I’ve also added storage for tablecloths, board games, cookbooks and shopping bags, while hiding the phone line, modem and switches in the corner of the room.

A banquette is ‘an upholstered bench along a wall’, ‘a dining bench that seats multiple people’ or ‘a freestanding or built-in breakfast nook’. It’s also a ‘booth’. Whatever it’s called, it’s not that difficult to build!
— Natasha
PHOTOGRAPHY Cath Muscat STYLING Matilda Roberts

PHOTOGRAPHY Cath Muscat STYLING Matilda Roberts

I recently renovated my kitchen that faces out to the dining area. To help the rooms feel more cohesive I used Tasmanian oak in both, with the same woodworking techniques to round over the edges and corners, sealing it in clear marine-grade Monocel Gold varnish for a smooth, durable finish.

TIP Read more about ‘How to personalise your kitchen design’ in a story I did with Bunnings.

 
3 banquette.jpeg

The banquette design is influenced by standard measurements of the materials used to keep the build as simple as possible.

DRAWERS I used six white Multistore Storage single-drawer flatpack cabinets. At 608mm wide x 430mm deep x 330mm high they’re the perfect size to frame up for seating.

JOINERY I bought the Tasmanian oak panels from Bunnings, for $65 each (these are similar). They are 22mm-thick, 1800mm-long x 405mm-wide and I used two panels for seats, two for backrests, one to cut down for the aprons and shelves, one to laminate for the corner shelf and drop-in seat, and one for the box shelf.

THE CORNER To cover the gap between the cabinets, there’s a curved drop-in seat that lifts out for access to the phone line and switches. The bevelled shelf above it has a cable duct to hide cords for the modem. It also provides the top brace for the fluted timber detail.

FLUTED TIMBER DETAIL The corner is clad in Porta 30mm-wide Tasmanian oak half-round dowel, creating an elegant curve to match the slope of the backrests. It’s repeated at the end of the banquette to cover the cabinet.

FILL-IN BOX SHELF I left the gap between the banquette and wall until the end, building a simple box to drop in as an extra shelf. 

THE RESULT The shelf running along the backrests is 800mm up from the floor. The finished seat is 410mm high, and I’m planning to add 75mm-thick upholstered sofa-style cushions.

 
4 diagram.jpg

There was a lot of sketching around working out how the backrest would sit against the seat and how to frame the fluted detail. I also wanted to minimise white painted pieces, using just one piece in the corner between the cabinets and another as a kick-board for the box shelf.

TIP I also worked out how to keep the skirting boards, having them run into the fluted detail at the end of the banquette.

 
5 template.jpeg

Making a template helped me move from planning to building. I used it to work out the angle of the backrests, how far from the wall the cabinets should be, and the shelf depth along the top. I also used it to mark out the framing.

TIP The backrests are angled at 10°, which is comfortable to sit against, but also an easy setting on most saws. Anything in this build that slopes, including the fluted detail in the corner, has a bevelled edge of 10°. 

 
6 joining cabinets.jpeg

After removing the drawers, I joined the cabinets, drilling through with 30mm screws. The units are much lighter to move around without the drawers.

TIP The cabinet sides are 15mm thick so don’t over-screw, or use 25mm screws to avoid protruding through the other side.

 
7 framing.jpg

The cabinets aren’t designed to take heavy weight, so I’ve reinforced them with a frame built of 35mm x 70mm treated pine. Framing is secured to wall studs with 50mm batten bugle-head screws and positioned over the joins so they’re supported by the sides of the cabinets. I ran framing around the wall for the backrests, packing it out in sections for extra support.

TIP Use a stud finder to locate the wall studs and mark them with tape. When setting out the framing, check the cabinets are totally supported and won’t move.

 
8 bevelled edges.jpg

To minimise dust and noise, I moved the woodworking outside, setting up the panels on sawhorses and cutting them with a track saw angled at 10°. I cut up one panel for the 70mm-wide aprons and 90mm-wide shelves with a bevelled edge.

TIP The bevelled edges help the backrests sit neatly against the seats, and the front of the shelf compliments the angle. 

 
9 seats and backrests.jpeg

To secure the aprons under the seats, I predrilled holes with a 10G combination countersinking bit, securing with adhesive and screws, clamping to dry. I did the same to secure the shelves to the backrests. 

TIP Bondall’s Bondcrete is my go-to adhesive as it provides a strong bond, dries clear and fairly quickly, and is easy to sand. I also have an army of Irwin quick-grip clamps with swivel jaws that flex for even pressure over angled joints.

 
10 framing the corner.jpeg

For the corner, I made a box from framing, securing it to the cabinets and into wall studs. To create a curved brace for the dowel, I made a template from scrap plywood, using it to cut a top and base from 15mm plywood, bevelling the edges with a jigsaw set at 10°. The base brace is positioned in line with the back of the seats, the top brace is attached under the corner shelf.

TIP The framing here also supports the corner seat, which lifts out for access to electricals. 

 
11 cutting the corner.jpeg

I joined two panel pieces side-by-side to create the 650mm-square of timber needed to cut the corner shelf and drop-in seat. Then I drew the curve with the template and made the bevelled cut with the jigsaw. The top brace was glued under the corner shelf, 16mm in from the edge, to allow for the dowel, which is 12mm high, and a backing of 4mm-thick flexible plywood.

TIP If you have the tools and the time it’s worth using biscuits to reinforce the panel join. I simply used adhesive and reinforced it with an offcut underneath.

 
12 cable duct.jpeg

To make a hole for the cable duct, I set up a drill with a 60mm holesaw and arbor, making the first half of the cut from the top, flipping the shelf to finish from underneath to avoid breakout.

TIP The 60mm cable duct is positioned in the back corner, at least 40mm from the edges to allow for the wall framing underneath.

 
13 dry fit.jpeg

I dry-fit the seats and backrests before sanding, using them to size the drop-in corner seat and apron. The gap between the cabinets was covered by bevelling a piece of pine and painting it white. I used a 3mm spacer to match the shadow line of the cabinets along the floor, then secured the piece to the cabinets with 15mm brads.

TIP While the joinery is in position pencil the edges to be rounded-over, including along the front of the seat and shelf. Avoid rounding any edges butting against other pieces, such as the seat against the bookshelf.

 
14 varnish.jpeg

Using a random orbital sander with 180-grit abrasive disc, I round-over the edges and corners and smoothed the countersunk holes, repeating with 240-grit. Then I applied varnish with a mini mohair roller and left it to dry. Next day, I lightly sanded with 240-grit before applying a second coat.

TIP Always wipe down the surfaces with a damp cloth to remove the dust before applying varnish.

 
15 install joinery.jpeg

I installed the seats, backrests and corner shelf with 10G x 40mm screws through the countersunk holes, then covered them with timber filler. 

TIP Because the joinery is already varnished, keep the filler neat by using a fingertip to push it into the holes and smooth the top with a scraper. Leave to dry, smooth over with 240-grit then, when varnishing the dowel later, dab over the filler with the roller to seal.

 
16 end dowel.jpeg

To cover the end of the banquette, I cut dowel to fit under the seat and backrest, positioning the first piece flush with the edge of the cabinet, working towards the wall. The last piece didn’t quite fit, so I sanded the edges to make it slimmer. Each piece is secured to the cabinet and framing with adhesive and 15mm brads, shot into the side of the dowel using a nail gun with an air compressor. 

TIP Position thick cardboard or 4mm plywood underneath as a spacer to maintain the shadow line along the floor, and to catch any drips of adhesive.

 
17 corner dowel.jpeg

In the corner, I fitted 4mm flexible plywood into the frame (from Mr Ply&Wood), secured with adhesive and small screws, which were removed once the adhesive had dried. I set the mitre saw to 10° and cut the dowel to length, then secured it with adhesive and brads.

TIP To minimise the gaps along the top of the starburst shape, sand the sides of the dowel, from the base up to about 150mm, then splay the pieces outwards. Position them with tape to check they fit before securing.

 
18 varnish dowel.jpeg

After dabbing timber filler over the brads, I sanded the dowel smooth and wiped away the dust. I applied varnish, leaving it to dry overnight, then lightly sanded with 240-grit before applying a second coat.

TIP An efficient technique is to pull the mini roller down between the dowel, then turn it to apply an even coat over the front. I’ve found mohair gives an even finish and is less likely to shed than other types of rollers.

 
19 framing for book shelf.jpeg

To fill the space between the banquette and the wall, I made a box from a panel. It’s positioned on framing that matches the shadow line of the cabinets along the floor with 3mm spacers, and is covered with a kick-board of painted pine.

TIP The end of the backrest near the bow isn’t noticeable, so I skipped the fluted detail and simply cut a piece of plywood to fit, varnishing it to match the rest of the joinery.

 
20 book shelf.jpeg

The box was varnished, then simply slipped into the space to sit 100mm higher than the seat. It’s quite heavy so I left it unattached for the option of moving it to run an electrical cord behind for a lamp.

TIP The framing underneath is attached to the cabinet, leaving room for the skirting. The kick-board is the same height and sits flush to the skirting for a neat finish.

 
21 end pic.jpg

Will you be installing a banquette? 

Tag me on your project and follow more of my DIY journey on Instagram for tool tips, home improvement and simple building projects.


Rusty Roof Patch Up

Natasha Dickins

1a opener.jpg

This is my fast, three-part fix for a leaky metal roof. It’s simple, just make sure you have a sturdy ladder before getting up to repair rusty patches.

1b floods.jpeg

My area was recently hit with extreme weather for nearly a fortnight. High winds and heavy rains resulted in a dripping water feature from the dining room ceiling, but the constant storms meant there weren’t many opportunities to fix the leak.

I waited for dry spells to seal rusty sections on my corrugated ColorBond roof. The third repair finally covered the patch that was letting in water. Each patch-up was done and dry in about two hours.

2 bondall product.jpg

The idea is to layer flexible waterproofing solutions using products with high adhesion properties that can also withstand UV exposure and heat. 

PART 1 Soak the rust with Bondall’s Ranex Rustbuster to treat the corrosion and prevent it from spreading. 

PART 2 Use Gripset Betta Waterproof Peel & Seal Tape as a flashing to seal over the damaged area.

PART 3 Finish with two coats of Gripset Betta Bitumen Rubber to form a flexible waterproof membrane.

 
Treating a section of rust doesn’t mean there won’t be more corrosion and it’s not a guaranteed long-term solution, but the immediate result is watertight!
— Natasha
3 wire brush.jpg

I used a wire brush to remove any loose debris, sweeping it away with a soft brush and wiping over with a damp cloth.

TIP To stay safe, wear eye protection, a mask and gloves. This patch is near the edge so I could stand on a ladder while working, but avoid going onto a roof without checking you have the proper safety equipment. 

 
4 pouring ranex.jpg

To prevent the corrosion from spreading, I coated the damaged area with Bondall Ranex Rustbuster, slowly pouring while using a cloth to contain and dab it to saturate the metal. I left it to work it’s magic while drying out completely, leaving it as long as possible (about an hour).

TIP Rust convertor works by chemically changing oxide to iron phosphate, which destroys the rust, leaving the area in a workable condition. It’s clear and doesn’t have a strong odour.

 
5 applying tape.jpg

I cut pieces of self-adhesive, tear-resistant Gripset Betta Waterproof Peel & Seal Tape to position down the corrugations, overlapping the edges about 3mm and extending the ends past the rust by about 20mm. I cut an extra piece to run over the ends horizontally to ensure they were totally sealed.

TIP Press the tape to remove air pockets and creases, then run along the edges to ensure they’re stuck down.

 
6 tape tip.jpg

To apply the tape, I peeled the paper back about 30mm and positioned it with the tacky rubber side facing down. Then I pulled it back while pressing along the tape to remove any air.

TIP Don’t pull off the full length of paper before sticking it down. If you’re working with long sections, cut a sliver from the end (or use masking tape) to stick across the paper to keep the two pieces together while peeling them back. 

 
7 apply bitumen.jpg

I sealed over the tape with a coat of Gripset Betta Bitumen Rubber, brushing it on lengthways and working it out past the edges. I covered the brush with plastic wrap to prevent it from drying out and left the patch to cure for about 45 minutes.

TIP This product has a surprisingly low odour, with a consistency that brushes on easily. Use a nylon brush and wear gloves as it takes a bit of scrubbing to remove from skin.

 
8 second coat.jpg

To apply the second coat, I double-checked the bitumen sealed over the ends of the tape, then brushed widthways over the patch to ensure the brush strokes didn’t leave any gaps. The membrane cured quickly and was waterproof against a light rainfall as soon as it was touch dry.

TIP To wash up, rinse the brush immediately in water then soak in Bondall Waterbased Turps, or wrap and dispose responsibly. 

 
9 finished.jpg

I didn’t have much time to get the rust patched up between downpours, but look how well the membrane cured with challenging dry-times. And the roof is no longer leaking!

 
10 replace Ryobi pic.jpg

Have you done a fast roof fix?

Tag me on your project and follow more of my DIY journey on Instagram for tool tips, home improvement and simple building projects.

Build a modular deck

Natasha Dickins

3E500FAA-C78C-47AA-9840-9437595D5A48.JPG

A new low-level deck has become a blank canvas for outdoor living. Here’s how I built, sealed and transformed it into the most-used room in the house… 

2 wide laundry wall BEFORE.jpg

Before

No amount of paint or scrubbing could get this space feeling fresh. The uneven red paving was installed over a sandy base and was very hot in summer. The paved area also finishes next to the house, leaving a gap that shows the cobwebs and dirt that can gather there. Even the corrugated section of roof was deteriorating and leaky.

The modular decking system meant I could install it quickly and completely DIY, without having to dig holes or mess around with concrete
— Natasha
3 Feb 2021 COVER.jpg

I’m totally chuffed that building a deck resulted in such a nice space, and it ended up on the cover of Bunnings magazine!

4 building.JPG

I wanted to install a low structure totally DIY, keeping the process simple and the materials fairly lightweight as I was working on my own and needed to get it installed quickly in the summer heat. 

Good Times modular decking ticked all the boxes. The simple system of flat-packed frames just over a metre square has pre-assembled panels that simply drop over the top. I chose treated pine over hardwood decking such as blackbutt or merbau as it’s lighter to move around and easier to work with.

I finished off using fascia (also called barge board). I mitred the corners and sealed them with construction adhesive.⁠
Because the pink-primed boards are made for roofing I could pick up a 7.2m length to span the entire deck. I also like the look of the curved base that helps with water runoff.⁠ See how it’s installed here.

link to sliding door project.jpeg

Then I installed a new Polar Eco-View sliding door with double glazing that blocks out the summer heat so well and looks a million bucks.

link to window project.jpeg

I also replaced the screens in the windows overlooking the deck, making the new white frames from scratch and adding stainless steel mesh. A simple but refreshing upgrade!

 
15 presenter.jpg

Follow my DIY journey on Instagram for tool tips, more home improvement and simple building projects.


Replace an external sliding door

Natasha Dickins

replacement image SLIDING DOORS.jpeg

Upgrading a wonky old ensemble with a new sliding door kit transforms the indoor-outdoor flow for movement and fresh air. Here’s how I did it…

2 The old door.jpg

The old door handle had broken off so it wasn’t lockable from outside and the screen door had bent out of shape. 

I also wanted to upgrade with energy-efficient double-glazed panels for noise-proofing and to help retain warmth from the fireplace in winter while reflecting exterior heat in summer.

The double-glazed door panels have made the room quieter and the temperature control is improved.
— Natasha
3 graph.jpg

I chose a Polar Eco-View double-glazed aluminium sliding door kit in black with a matching sliding screen door, which looks clean and modern. 

TIP Before ordering the door, check which way it will slide – from the left or right – looking from the outside. Mine is right-handed.

4 unboxing.jpeg

The door kit includes the frame and glass door panels, a base sill fin, reveal fins for the head and sides plus a lockable handle.

TIP The timber reveals don’t come with the kit, so order them separately with the screen door plus stainless steel or galvanised screws.

5 boxes.jpeg
 

MY SHOPPING LIST

DIY TOOLS 

I needed these to pull out the old door…

And these to install the new one…

 
1 removing trim.jpeg

To remove the original door, I started inside, slicing down the side of the trim with a utility knife to prevent the paint from peeling off the wall. I used a wrecking bar with an offcut of hardwood behind it to lever off the trim and pull out the nails. I finished by sanding the wall for repainting later. 

TIP You could reuse the trim with the new door, but I chose to install new moulding with a more modern profile to compliment the door.

 
2 remove door.jpeg

I removed the original fixtures including the rubber stop, screen door and framing, taking out the fixed panel before the sliding one. With a reciprocating saw, I cut through the nails securing the frame and knocked out the reveal with the wrecking bar and mallet. 

TIP This old doorway was so well installed, it took lots of elbow grease and a few hours to knock out.

 
3 plywood board.jpeg

Then this happened! A big storm hit so the tools had to be put away. The doorway was also too small for the new frame so I needed to drop the step. Usually the head would be lifted, but the raked ceiling meant there wasn’t enough space to go up.

TIP If you don’t get the door installed in a day, have plywood sheets on hand (just in case) and tape around the inside to seal out bugs.

 
4 cutting the step.jpg

Installing the door would usually take a couple of hours, including painting, but I had to cut into the joists and bearers to drop the step by about 50mm to enlarge the doorway. This took an extra day as I had a builder pop in to check it wouldn’t compromise the integrity of the house framework.

TIP Assemble the door frame first and check it fits before pulling out the old door. 

 
5 frame set out.jpeg

After setting out the parts of the kit on a flat surface, I positioned the sides against the head and base, checking the inside of the frame was facing up. 

TIP The rubber sill of the base faces outwards when the frame is installed.

 
6 corner screws.jpeg

I slid off the aluminium reveal fins before assembling and kept them aside, then used two of the supplied screws at each corner, checking they were positioned in the corresponding holes.

TIP Avoid over-tightening the screws.

 
7 add reveals.jpeg

The reveals are cut from pre-primed pine, and I painted them with two coats of water-based enamel before assembling. 

On the side reveal fins, 150mm in from either end, I pre-drilled 4mm holes, and another in the middle to secure through the aluminium and into the timber with 15mm stitching screws. 

For the top, I centred the timber reveal to protrude either end, secured with screws, then slid it back into the frame first, adding the sides so they were flush against it.

TIP The side reveals are the same length as the fins, and the top reveal is longer to allow for the thickness of the sides.

 
8 frame install.jpeg

I’d checked the jamb and sill were square and straight with a spirit level, and the doorway would now allow for a 10mm clearance down the sides of the new door frame and along the head. 

While the frame isn’t heavy, it’s best to have two people install – hubby provided a second pair of hands to lift it into position from the outside.

TIP When lifting, hold the side reveals to prevent them from sliding down, and check the rubber sill will face outwards over the step.

 
9 packers.jpeg

To attach the frame through the timber reveals, I checked the jamb was plumb, then used a combination countersinking bit to pre-drill the screw holes. For each screw, I positioned a packer between the reveal and the jamb and secured through the holes.

TIP Begin with a screw into each side, 100mm up from the base, checking the frame is square and plumb after each, working upwards.

 
10 sliding panel.jpeg

From the outside, I lifted the sliding panel onto the furtherest track, checking it was orientated to slide from right to left and that the base wheels ran smoothly.

TIP To install each panel, lift them up into the track of the head, move them into position, then lower them onto the track. 

 
11 lift panel.jpeg

I moved the sliding panel to the right for access to clip in the fixed panel sill, then lifted the fixed panel onto it, moving it to wedge into the side of the doorway frame.

TIP If the door slides from right to left, the Polar protective film on the fixed sill faces inwards and upside-down.

 
12 click in sill.jpg

I clipped the door sill into the track in front of the sliding panel and pushed the weather seal into the top side of the fixed panel. 

TIP Install the door stop at the base of the sliding track, clicking it into position to ensure it prevents the sliding panel from bumping the frame when the door is opened.

 
13 handle install.jpeg

To install the lock handle, I used the supplied fasteners and followed the template to drill holes for the lock bracket. 

TIP When installing locks and handles, use a screwdriver, rather than a drill, to avoid over-tightening and ruining the thread.

 
14 screen door.jpeg

To assemble the sliding screen door, I predrilled holes into the back frame piece, attached it to the screen panel with 15mm stitching screws, then lifted it into position, checking the wheels were centred over the track.

TIP I gave the screws a quick squirt of black spray paint to hide them.

 
15 to finish.jpeg

To finish, I installed new trim moulding around the door frame inside and out, countersinking the screws and smoothing them over with timber filler before sanding and painting.

I also covered the edge of the floor in aluminium trim to neaten the step that had been cut to enlarge the doorway.

TIP If doing a new build, install the door frame first and clad the outside house walls with weatherboard later so they tuck into the door frame without requiring trim.

 
6 last pic.jpeg

I also replaced the window screens next to the door, keeping the original windows and putting in new white frames with stainless steel mesh. 

 
15 presenter.jpg

Follow my DIY journey on Instagram for tool tips, more home improvement and simple building projects.


DIY Window Screens

Natasha Dickins

1 opener.jpeg

Making new screens from scratch turned out to be a simple DIY process that instantly transforms my existing windows. Here’s how I did it…

2 tash.jpeg

My coastal home is by the beach and in a bushfire-prone area, so I chose Cyclone Stainless Steel Insect Guard for the screening. It costs more than aluminium or fibreglass mesh but is corrosion resistant and offers extra protection against embers.

BEFORE & AFTER

BEFORE & AFTER The dusty old screens were in such a bad state that even the frames were bent out of shape, so I replaced them completely. 

The new frames are made from white aluminium channel, with the mitred corners cut by hand with a hacksaw. These are joined with hidden framing corner stakes pushed into ends.

TIP If your frames are still in good nick, simply remove the old mesh and spline, give them a clean, then go straight to Step 6.

The new mesh is almost invisible, making the windows instantly cleaner, and the breeze through the house is fresher.
— Natasha
4 splines.jpeg

The mesh is held in the channels with foam or rubber spline that is installed with a spline roller. There are different rollers for various applications…

PLASTIC ROLLER is for most types of mesh. The parrot-beak end is used to push the spline into the corners. 

TIMBER ROLLER is best for stainless steel mesh, which is stiffer than other types of mesh. The convex wheel is for creasing it before before rolling in the spline with the concave wheel at the other end.

ROLL-AND-FEED ROLLERguides the spline into the frame while it’s pushed along and is useful if you’re making up a number of screens.

5 materials.jpg

I checked the measurements of the old frame while it was still in the window, then pulled it out to use as a back-up template for cutting the sides. 

For one window I used a 2.1m roll of mesh plus two standard 2.4m lengths of aluminium channel for the framing, 4.5m of 5.7mm-thick foam spline, and four corner stakes.

TIP If doing more than one screen it’s worth investing in a longer 10m roll of mesh and a 13m coil of spline to avoid wastage.


SHOPPING LIST for one window


DIY TOOLS

 
1 mitre box.jpeg

STEP 1

After clearing a flat space, I used a screwdriver to secure the small plastic mitre box near the edge of the workbench.

TIP This little plastic tool cost less than $3 and is the key to ensuring neat mitres. I bought a couple as the slots lose their shape after lots of cutting.

 
2 cutting the end.jpeg

STEP 2

Before measuring out the first side, I placed the channel in the mitre box with the groove facing up and on the inside of the mitre to make a mitred cut close to the end with a hacksaw.

TIP Create room to use the hacksaw comfortably. Stand with your feet slightly apart and hold the saw as straight possible while moving the full length of the blade back and forward over the channel to cut right through.

 
3 marking the length.jpeg

STEP 3

I positioned the channel on the old frame, with the mitred cut matching one corner to measure the exact length of the side, marking the inside and outside corner at the other end with a pencil.

TIP If working with dark-coloured channel, apply masking tape where the cuts will be so the pencil marks are visible.

 
4 cutting.jpeg

STEP 4

I matched the marks on the channel to the slots of the mitre box, then clamped it to the bench to hold it while cutting. 

TIP Always cut a long side first – if you get it wrong, it can be cut be cut down as a shorter side. Cut a long and short side using the old frame as a template. For the remaining sides, use the new pieces as a guide for an exact match.

 
5 frame.jpeg

STEP 5

To assemble the frame, I pushed corner stakes into either end of a short side first, then added the longer sides, pushing down onto the workbench to close the mitres for neat corners. I added stakes to the remaining short side and pushed this down onto the frame, tapping the mitres closed with a mallet.

TIP Before assembling the frame, deburr the cuts and corners by brushing with 120-grit metal abrasive paper.

 
6 cutting the mesh.jpeg

STEP 6

I positioned the frame with the groove facing up and rolled the mesh out over the top, allowing for at least 20mm clearance around all edges and clamping one end. I used a sharp utility knife to cut a straight line between the strands.

TIP Stainless steel mesh is quite stiff and can be moulded over the frame to hold it while cutting.

 
7 cut corner.jpeg

STEP 7

At the first corner, just above the groove, I folded the mesh at 45° to crease a guide for cutting with scissors to prevent it from bunching. Clamping the mesh to the bench at one end I used the convex wheel of the roller to crease into the groove, keeping the strands as straight as possible, stopping before the next corner. 

TIP Work clockwise, on one side at a time, beginning each side with trimming the corner then creasing the mesh.

 
8 rolling the spline.jpeg

STEP 8

I pushed the beginning of the spline into the corner with the blunt end of the scissors, then held the spline over the groove while running the concave wheel of the roller over it to push down firmly, stopping about 20mm from the next corner. 

TIP Pull the spline slightly to stretch and make it thinner so it pushes into the groove smoothly.

 
9 push in corner.jpeg

STEP 9

Trim the next corner, crease the mesh, push the spline into the corner with scissors, then smooth it into the groove with the roller, repeating for the remaining sides.

TIP At the end, avoid bunching by cutting the spline at 45° to match the corner, then push it in firmly.

 
10 trim the excess.jpeg

STEP 10

To trim the excess mesh, cut one side at a time, holding the utility knife hormonally to run the blade around the inside, just above the spline. To finish, run the roller around the frame to check the spline is installed evenly.

TIP Protect your hands from the sharp edges of the mesh by wearing gloves. If there are visible loose strands around the spline, run a roller along the edge to push them down. 

 
6 END last pic.jpeg

AFTER I plan to do a full window makeover later by painting the brown glass frames in a white enamel paint. But that’s another story and I quite like the look of the contrasting screens for now.

 
Instagram_Presenter.jpg

Follow my daily DIY journey on Instagram for more renovating and home improvement, tool tips and simple building projects.


Customise a flatpack wardrobe

Alun Machin

after wide.jpeg

Take two flatpack units, a hat shelf and Multistore Solutions VJ sliding door package, then add customised timber finishes to create a bespoke built-in robe that transforms a tiny room into a lovely, functional space. Here’s how I did it…

THE PLAN

This small bedroom room is a nice space to sleep in, but it has no storage. So I created an area for a built-in wardrobe by knocking out the wall and moving the door to the opposite side and building a new cavity.

1 tash.jpeg

In such a small room, keeping any additions white helps to make it as seamless and bright as possible, so I’ve gone with white Multistore Solutions units, tracks and sliding doors.

after alternate.jpeg

The customised wardrobe in my guest bedroom now has it all – hanging space, lots of drawers and shelves, a vanity top and even hidden suitcase storage that makes the most of an awkward spot under the raked ceiling.

IMG_7906.jpg

As part of the full room renovation I chose the lovely grooved sliding doors so they would blend with the surrounding Easycraft EasyVJ wall panels in the small all-white room to help it feel airy and spacious.

I love the warmth of wood features though and couldn’t help adding a little midcentury touch by switching out the unit handles and adding a vanity-type timber top.

3 before.jpeg

BEFORE To prepare for the wardrobe install, I lay the flooring, clad the bedroom walls in VJ panels and painted all the surfaces.

2 diagram and flatpacks.jpg

 What I needed to get started was a plan, plus Multistore Solutions shelf and five-drawer unit, drawer unit, hat shelf with rail, door package with three VJ doors and triple track.

4 box.jpeg

To assemble the units I set up on a table in my workshop where there’s a great flat surface to work on and room to move. 

TIP If assembling in the room where the robe will be installed, work on the packaging to avoid scratching the floor.

 
5 assembly.jpeg

After unpacking all the components, I put together the top and base units by simply following the instructions included. 

TIP Use a flat-head hammer to knock in the nails that support the backing. I like using this Irwin 20oz steel hammer.

 
6 drawers.jpeg

Then I set up a production line to assemble the drawers and found that it’s best to have both a drill and screwdriver handy.

TIP When separating the runners into parts for the drawers and parts for the units, keep the pairs together with the supplied rubber bands.

 
7 handles.jpeg

By swapping out the supplied handles for these midcentury-style  timber Prestige post box handles I added a little warmth and personality to the wardrobe.

TIP Make a template and drill the holes outside as there’s lots of sawdust. Also check the handles don’t increase the depth of the units to catch the doors once installed.

 
8 runners.jpeg

To install the runners, check the instructions for which holes to use then count up from the base and mark with tape. 

TIP Make sure the wheel of the runner is at the front, facing down, then match up the holes to install two screws per runner.

 
9 dowels.jpeg

Before joining the units, I moved them into the cavity and dabbed adhesive into the holes for the dowels. 

TIP I like to use Bondcrete woodworking adhesive for assembling flatpack furniture as it dries fast and clear. I also used it to secure the join the drawer fronts to the drawer sides for extra hold.

 
10 install.jpeg

I lifted the top unit (with the dowels) onto the base then nudged the full assembly into position.

TIP The units are much lighter and easier to move without the drawers.  

 
11 units.jpeg

I added drawers and shelves last, checked the units were flush against the cavity back and installed the safety brackets to keep them in position. 

TIP Don’t skip the safety brackets, especially if you have kids that like to climb.

 
12 battens.jpeg

The hat shelf comes with battens that I cut to fit between the wall and the unit.

TIP While a handsaw will do the trick, using a circular saw makes for neater cuts.

 
13 rack.jpeg

I trimmed the corner of the shelf to fit around the moulding in the corner of the cavity and checked that it fit safely before sliding it across for access. 

TIP When ordering the units, you would usually check the hat shelf runs the full width of the units, but I wanted to be able to slide it to the side to fit a suitcase.

 
14 rail.jpeg

I marked the centre of the wall and measured down from the battens, checking that a wooden coat hanger would fit without banging the wall or doors. 

TIP My rail is positioned quite high to allow for shirts to hang over the shorter drawer unit, but position your rail so that it’s within reach while maximising the hanging area

 
15 paint.jpeg

Painting the room in Porter’s Eggshell Finish in Popcorn gives it a beautiful glow and I finished the VJ doors with the same. I love how creamy this paint is and how smoothly it rolls on. 

TIP While the MDF of the VJ panels is pre-primed, you’ll still need to apply at least three coats if using a pale colour.

 
16 roller.jpeg

After masking around the frame with painter’s tape, I used a 100mm  mini microfibre roller with a handy technique that avoids cutting in with a brush – keep the roller loaded with paint, use the tip to paint around the inside of the frame then push it along the grooves, saturating them without pooling, then paint the panels. 

TIP Choose a 10mm nap roller if using a flat wall paint, but go with a 4mm nap if applying gloss.

 
17 top track.jpeg

I used an angle grinder to cut the top and base tracks for the sliding doors then pre-drilled three holes into each with a 4mm bit.

TIP A hacksaw or a multitool with a reciprocating blade will also do the trick.

 
18 base track.jpg

Using 40mm-long screws, I secured the tracks through the holes, positioning the flatter, rounded edge of the base track along the front.

TIP Ensure the screws go in straight and are flush with the track so they don’t protrude and prevent the doors from sliding smoothly. 

 
19 door.jpeg

To install the doors, I retracted the wheels by loosening the screws above them, then lifted the doors into the top track and dropped the wheels onto the corresponding base track. 

TIP Position a door in the back track first, working your way forward.

 
20 adjust.jpeg

Using a long-handled screwdriver I adjusted the height of the wheels so the doors moved smoothly. 

TIP Use a spirit level to check they are straight, adjusting the wheels one at a time to suit.

 
21 top.jpeg

To make a vanity tabletop, I cut a 600mm-wide laminated timber panel to fit and nailed a length of half-round dowel along the front to create a lip.

TIP Always sand and varnish timber to protect it and give a professional finish. I applied two coats of Monocel water-based varnish which dries super fast and doesn’t have a strong varnish odour.

 
after light.jpeg

Transformed! The room is bright, practical and a delightful space to be in.

 
15 presenter.jpg

Follow my daily DIY journey on Instagram for more renovating and home improvement, tool tips and simple building projects.

Lay a floating laminate floor

Alun Machin

1 after opener.jpg

Installing this floating laminate floor requires the simplest lay-and-click technique. It can be done in a day and the results are instant! Here’s how to do it…

I’ve found that revamping the largest surface in a room tends to have the biggest impact. The trick is to keep the makeover simple by choosing one material that uses a technique that suits your DIY skill levels.

I’m so chuffed with how a new floor has completely transformed this room.

 
3 before.jpeg

BEFORE The original linoleum was installed in the early 1980s. It has suffered wear over the years and I can never get it to feel clean. Laid directly onto the subfloor without insulation, it’s chilly to walk on in winter and the room gets very hot in summer. Replacing the yellow-toned lino ticks all the boxes to refresh the area.

The fast-install flooring system has an insulating underlay that makes it ideal for coastal homes, keeping rooms cooler in summer. The tough abrasion-resistant surface avoids sand scratches and dents from dining chairs.
— Natasha
4 samples.jpg

First step was to choose the flooring. I went with Floor Select’s water-resistant laminated flooring in Palamino Oak (pictured in the centre). The warm blonde tones are modern yet welcoming and it compliments timber features in the house, such as the kitchen benches and shelving. 

 
5 chart.jpg

These Floor Select boards are 8mm thick, a lovey 244mm wide, and the 1380mm length keeps them easy to install. Positioned widthways across the room, they create an optical illusion of making the long, narrow area appear wider. For my almost-2.8m-wide by 6.9m-long room, I used eight boxes, with a couple of boards left over.

TIP There are eight boards per box, covering 2.69sqm. Add up how many boxes you need by checking the width and length of the room, then round up the measurements to allow for wastage.

 
6 underlay.jpg

Don’t forget the underlay when ordering the flooring. It’s worth investing in a quality product with moisture- and sound-proofing properties. This 2mm-thick QEP silver laminate floating floor underlay is mould and mildew resistant. The adhesive strip makes it super easy to lay while avoiding any overlap of the foam, which can leave a bump under the flooring.

 
7 scotia.jpg

The other product I picked up was a length of scotia, also called wall trim, to run along the sliding-door frame. I used QEP Roberts wall trim in Light, which matches the Palomino Oak perfectly. 

 
8 tools.jpg

I also recommend buying a DIY laminate floor laying kit that includes a tapping block, pull bar and spacers, which are helpful for keeping the boards 10mm from the walls to maintain the required expansion gap. 

Other essential tools include a rubber mallet, utility knife and a circular saw or jigsaw for cutting the boards.

TIP The end joins are staggered throughout and positioned at least 400mm apart. The key to this is working with boards of various lengths. To make the cuts, I set up my Ryobi battery-operated circular saw with sawhorses outside to minimise dust on the job.


TO PREPARE THE ROOM

1 slice.jpg

Before removing the skirting I sliced along the top with a utility knife to separate the trim from the wall paint and avoid tearing it.

TIP Get some quality knee pads! I recommend they go at the top of your tools and materials list for any flooring project.

 
2 remove.jpg

Then I used a pry bar with a rubber mallet to remove the skirting, keeping the originals as templates for cutting new ones with a more modern profile. 

To use a pry bar, tap the flat point down behind the skirting then pull the opposite end forward (rather than pushing) so the point pushes off the wall to apply pressure on the skirting, nudging it forward and away from the wall.

TIP The skirting frames the floor and hides the expansion gaps. Alternatively you could leave it, lay the floor and install matching scotia around the edges to cover the gaps. 

 
3 nails.jpg

To remove nails, I used a piece of hardwood timber as a packer to prevent denting the wall with the claw of the hammer. If you do make a dent, smooth over with a Selleys SpakFilla, which dries fast, then lightly sand and touch up with wall paint.

TIP I love discovering great hand tools and use this Irwin 20oz steel hammer for everything as it’s lightweight, has a magnetic nail setter and an anti-vibration handle. 

 
4 lift.jpg

After slicing the original lino into manageable sections, I simply rolled it up, then vacuumed to remove any debris.

TIP Check your local council regulations before disposing of old linoleum. A friendly truck courier offered to take mine to cover the floor of his trailer. 

 
5 tape.jpg

While the base of the walls are unobstructed, it may be obvious where the framing studs are. I put masking tape on the wall as an indicator so I could nail into them later when reinstalling the skirting.

TIP The subfloor may have builder’s markings to indicate where the studs are but, in this case, the plasterboard nails were an easy giveaway.

 
6 boxes.jpeg

The boxes of laminate flooring were brought in and stacked at the end of the room so the boards could acclimatise for a couple of days. While the room is otherwise empty, I used this time to freshen up the ceiling and walls with a coat of paint. 

TIP Open the packaging at the ends, avoid stacking more than three boxes high and leave for at least 48 hours.


TO LAY THE FLOOR

1 underlay.jpg

To install the underlay, I rolled it out across the room to run the same direction as the flooring, and cut with a utility knife. To install, I positioned it with the adhesive strip side against the wall.

TIP Use a strip of double-sided tape to hold the first piece in place.

 
2 first board.jpeg

I set out the first row with a full board, then a board cut to fit the rest of the width, allowing 10mm for expansion gap at either end. I set spacers around the wall and pushed the boards against them, pressing the ends of the boards together and temporarily holding the join with masking tape.

TIP Always work from right to left, with the end and side tongues facing the walls. The groove side faces into the room and the grooved end is on the left.

 
3 joining.jpg

To lay the second row, I slid a short, cut board along and into the groove of the flooring, pushing it against the spacer and the wall, manoeuvring it flat. To lay a second full board, I slid it against the groove of the flooring, pushing it against the end of first board so the tongue fits snuggly, then pushed it down to engage the lock hidden in the groove and tapped with a rubber mallet. I added another cut board to finish the row.

TIP There is a satisfying click as the ends lock in together.

 
4 sections.jpg

When a section of underlay was almost covered, I cut and positioned another piece, then continued laying boards.

TIP Work over sections of underlay, cutting and laying the pieces as you go to allow for any inconsistencies in the squareness of the walls. 

 
5 setting out.jpg

I was methodical about staggering the ends so I could cut a few boards at a time. This is how I worked out my pattern to make sure the joins are more than 400mm apart in my 2770mm-wide room (allowing for expansion)…

First row: full board, 1370mm board

Second row: 460mm board, full board, 910mm board

Third row: 920mm board, full board, 450mm board

Fourth row: repeat the pattern above

TIP Take boards from a couple of different boxes to mix up the woodgrain pattern and shade variation.

 
6 cutting.jpg

Each board must join another, so the cuts are positioned at either end of the rows. To get started, I set out a couple of rows, marked the lengths with a pencil then took the boards outside to cut with a battery-operated circular saw. Once I got into a rhythm it was easy to prepare a few rows at a time.

TIP Cutting creates dust and is quite noisy, so have the saw set up in a well-ventilated area, wear a mask plus ear and eye protection.

 
7 mark jamb.jpeg

It’s easier to undercut a door jamb rather than making a cutout to match the moulding profile, so I used underlay and board offcuts to mimic the height of the finished floor and marked around the jamb with a pencil.

TIP It’s best practice to use a pencil for marking up as pen tends to bleed into paint and doesn’t rub off easily.

 
8 cut jamb.jpeg

To cut the jamb, you could use a handsaw or reciprocating saw, but I prefer the fast option of a battery-operated multitool. Then I vacuumed again to pick up any debris.

TIP Cutting the jamb just above the mark ensures the board fits smoothly underneath, but allow for expansion behind the board, against the wall.

 
9 cutouts.jpg

To cut around corners, measure from the side and the top, marking with a pencil then cutting with a circular or handsaw.

TIP I used a circular saw for cutting the ends of the boards and a handsaw for this small cutout, but a jigsaw is a handy alternative for both. 

 
10 pull bar.jpg

The pull bar from the laminate floor-laying kit is useful in tricky spots and I used it to position the first boards for the rows that butted against the sliding door frame.

TIP To use the pull par, slot the wide hook over the end of the board, hold it down with one hand and tap the smaller hook with a mallet.

 
11 scotia.jpg

I cut a piece of scotia with a handsaw and positioned it across the base of the sliding door to hide the expansion gap, running construction adhesive along the door frame to keep it in place. 

TIP Nailing scotia into flooring can affect the movement so it’s best to nail into the wall. I used Selleys Ezi Press Liquid Nails along the aluminium frame instead. You may also need scotia along floor-to-ceiling windows.

 
12 skirting.jpeg

To finish, I installed new skirtings, using the originals as templates to cut with a drop saw. I used an air compressor with nail gun and 32mm-long brads, securing into the wall studs, which I’d marked out with masking tape earlier. 

TIP If you don’t have a nail gun, simply use a hammer with bullethead nails instead. 

 
13 finished.jpeg

The floor is easy to clean with a vacuum and the occasional mop. I keep mats at the doorways to pick up most of the sand that may be walked in. 

TIP Avoid installing heavy cabinetry such as a kitchen island or wardrobe on a floating floor as the weight can affect the way the boards expand and contract.


THE END RESULT…

14 flooring.jpg

Did I mention these Floor Select boards resist moisture damage and scratches from dining chairs? I also appreciate that they are burn resistant, a major plus for positioning around the hearth of a wood-burning fireplace at the other end of the room.  

 
15 presenter.jpg

Follow my daily DIY journey on Instagram for more renovating and home improvement, tool tips and simple building projects.


Set up a workshop efficiently

Alun Machin

1 in the workshop.jpeg

Setting out an efficient workshop begins with good storage that frees up floorspace and ensures you know where everything is.

I had a lot of stuff to organise so came up with a simple three-zone storage system that can be adapted to work for almost any DIYer’s workshop.

1b workshop AFTER.jpeg

While every DIYer has different requirements, my solution was to set out the three main storage zones suited to an all-rounder who does home maintenance, a bit of renovating and basic woodworking.

Note that ‘storage’ doesn’t necessarily encompass the work area, which may include a workbench, lighting, rubbish bin and dust extraction.

I’m a neat-freak DIYer but in the workshop it’s a constant battle to keep my tools tidy and accessible, so I came up with three zoning solutions.
— Natasha
2 numbered empty.jpg

The key storage zones in my workshop are for…

① DISPLAY 

Organise tools and accessories for easy access

② SET OUT 

Stack timber stock and building materials in open shelving

③ STORE 

Pack equipment, paint, adhesives and flammables in a lockable cabinet

3 workshop BEFORE.jpeg

BEFORE

Need a countersinking bit in a hurry? It wasn’t likely with this precarious pile-up! Sure it looks neater than most workshops, but when that stash of brads and screws tumbled all over the floor it was time to make a change.


ZONE DISPLAY TOOLS & ACCESSORIES

4 storage station AFTER.jpeg

This is where hand and power tools should be accessible, with accessories like drill bits, battery rechargers, sanding discs and saw blades at hand. It’s helpful to include fasteners (such as screws, nails, nuts and bolts), so you can easily match them with the right tool.

5 product storage bench.jpeg

DISPLAY SOLUTION

A storage station with adjustable shelves can display cases, and a metal pegboard with different types of hooks means hand tools can be moved around. I also squeezed in a lockable four-drawer mobile cabinet to set out drill bits and hole saws plus specialty pieces for my router and accessories prone to surface rust.

STORAGE TIP For the fasteners I used compartment organisers, attaching them to the pegboard with small nuts and bolts. Call me fussy but now all the screws are in order of length and type and the nuts and bolts are organised and I can find washers instantly!

6 mallet.jpeg

TO DIY

The Pinnacle Hardware Heavy-Duty Storage Station is the storage station of my dreams. Plus it was so easy to assemble and didn’t require any more tools than a mallet and screwdriver.

See how it’s put together…


ZONE SET OUT TIMBER STOCK & MATERIALS 

7 rack AFTER.JPG

I go through a fair bit of timber so have stacked up my stock on open shelves so it lies straight, with ventilation. If you’re renovating, store skirting and trim here, along with pipes, fencing, rolls of plastics or textiles.

8 product rack.jpeg

SET OUT SOLUTION

This heavy-duty racking system can take the weight of whatever gets thrown onto it and the rubber feet won’t mark the floor. It’s best secured to a wall but is very stable free-standing here.

STORAGE TIP I’ve stacked heavier hardwoods at the base where they’re easiest to move. Then, working upwards, regular timber, lightweight mouldings and extra-long lengths on the top shelf so they’re out of the way.

9 set out the pieces copy.jpeg

TO DIY

Simply set out all the pieces of the Pinnacle Hardware four-tier heavy-duty adjustable shelf before you start, then tap it together, starting from the base. Use masking tape to indicate where the shelves will go so they’re straight and level.

See how it’s put together…


ZONE STORE PAINT, ADHESIVES, FLAMMABLES 

10 cabinet AFTER.jpeg

I like the idea of a lockable cabinet for flammables but also to store items like varnish, timber fillers, sealers and other equipment that are best kept in a cool dark place.

11 product cabinet.jpeg

STORE SOLUTION 

I’ve set out the adjustable shelves for bigger, heavier paint cans at the base so it’s easy to lift them out. And choosing a shiny galvanised cabinet means that when the doors are open they reflect light into the shelves for visibility. 

STORAGE TIP Keep caulking guns and paint sprayers on the top of the cabinet.

12 drill for cabinet.jpg

TO DIY

There are lot of screws so I used an impact driver to assemble the Pinnacle Hardware metal storage cabinet. The power in the drill also helps pull the pieces together without effort.

See how it’s put together…


ZONE FOR A SMALL SPACE

13 small cabinet.jpeg

If your workspace is small, or as limited as a bench, the storage zones still apply. Just downsize to install wall hooks for tool display, put up a shelf for materials and use a smaller cabinet like this lockable four-drawer mobile cabinet to store equipment.

See how I assembled the mobile four-drawer cabinet… 

I researched heavy-duty racking and workbenches and ended up sourcing the entire project from Pinnacle Hardware for three good reasons…

Found them at my local Bunnings hardware store and the prices were on-budget.

I was working on my own and needed a system that could be assembled solo. 

Aside from doing the job efficiently, they look great (and match my workwear)!

Bedroom Door Revamp (with a secret DIY technique)

Alun Machin

1 IMAGE DOOR AFTER .jpg

Transforming an everyday, functional element of your home into a showcase for art and pattern is a great way to brighten up a space and give an average bedroom entry a point of interest.

This project is fun and very simple. It uses fabric and a new sealing technique I designed with Bondall’s Monocel Water-based Varnish – a bit similar to the retro concept of decoupage with that classic formula called Mod Podge.

2 IMAGE DOOR BEFORE.jpg

This hollow-core door had been damaged and badly repaired. And if you’re about to admit you prefer the ‘before’ to the ‘after’, I can assure you it doesn’t look so great up close!

Rather than simply paint the door, I turned it into a display for one of my favourite patterns – the iconic poppy print Unikko by Marimekko, designed in the 1960s. I’m such a big fan of bold, mid-century design!

3 IMAGE REMOVING DOOR.jpg

Once you have the fabric, pick up everything else you need at a hardware store. Allow two days to work, mostly for drying time. Put the door on a flat surface, outside and undercover so you can leave the varnish to dry overnight.

5 IMAGE DOOR HANDLE.jpg

While the door is removed, spruce up the jamb with a fresh coat of paint. I also decided to update the door hardware and chose a modern matt black lever so it’s almost invisible on the pattern. The black hinges match nicely too.

7 IMAGE MATERIALS.jpg

DIY TOOLS & MATERIALS

1 mark around the jamb.jpg

STEP 1 MARK UP THE DOOR

Close the door to trace around the inside of the jamb with a black felt-tip pen as a guide for positioning the moulding frame. 

 
2 remove the handle.jpg

STEP 2 REMOVE DOOR HARDWARE

Use a drill or screwdriver to remove the handle and strike plate, then remove the door and hinges, taking off on the bottom one first so the door doesn’t fall on you.

TIP Set up the door outside, on a flat surface and undercover so you can leave it dry overnight.

 
3 cut the moulding to size.jpg

STEP 3 SET OUT THE FRAME

To make the frame, position the moulding inside the pen marks, using the mitre box and hand saw to cut one corner of the moulding at a time. Check the pieces fit then sand the edges smooth.

 
4 prepare the door &  frame.jpg

STEP 4 PREP AND PAINT

Lightly sand the door then apply a two or three coats of paint on both sides and edges using a microfibre roller. Also paint the frame pieces.

TIP Use a specialty paint for doors and trim as it’s more resistant to scratching than a wall paint. If you have white fabric and a dark door, apply a few coats of paint so the woodgrain doesn’t show through the fabric.

 
5 cut the fabric copy.jpg

STEP 5 FIT THE FABRIC

Position the fabric on the door, moving it to showcase the pattern. Measure from the factory edge, tapping a guide to cut with scissors so the fabric fits inside the lines.

TIP Be sure to show off the pattern! In this case, the flowers are positioned to run down the centre, with a black background around the handle.

 
6 cut and glue the fabric.jpg

STEP 6 ADHERE THE FABRIC

To glue the fabric, tape the bottom half to the door to secure it while working on the top. Fold the fabric back to apply the Bondcrete adhesive in a light, even coat. Fold the fabric back and use a print roller or rolling pin to push out air bubbles. Tape down the edges then repeat with the bottom half of the door, leaving to dry thoroughly for a couple of hours.

TIP Use a mini foam roller to apply the adhesive, which has the perfect, fast-but-forgiving dry-time for this project.

 
7 seal the door.jpg

STEP 7 SEAL THE FABRIC

Use a microfibre cover with the mini roller to apply varnish over the fabric, working around the edges to prevent fraying. Cover the roller with plastic wrap and leave the door to dry for at least four hours. Cut out the handle hole then apply a second coat and leave to dry. 

TIP Although the instructions for Monocel Water-based Varnish suggest sanding between coats, it’s best to avoid sanding the fabric.

 
8 attach the frame.jpg

STEP 8 ATTACH THE FRAME

To secure the frame, start with the top piece, tapping in nails at least 50mm from the ends to avoid splitting, and about 300mm apart. Fit the sides, nailing the corners first to ensure a neat join, attaching the base last.

TIP The frame covers the edges of the fabric. After nailing it down, trim any escaping frayed edges with a sharp utility knife.

 
9 touch up with a small brush.jpg

STEP 9 TOUCH UP THE PAINT

Use a small paintbrush to hide the nail heads and touch up around the outside of the frame to cover any pen marks.


STEP 10 RE-HANG THE DOOR

To hang the door, attach new hinges then use a timber offcut to help lift and position it, securing the top hinge to the jamb first. Make sure the door closes without hitting the frame then install the new handle and strike to make an entrance!

 
8 CLOSING IMAGE.jpg

Doors have potential to make a surprising statement! Did you see my front door makeover?

How are you going to update your doorways? Tag me on Instagram or Facebook to share your DIY projects.

DIY outdoor shower (with hot water!)

Alun Machin

1 Opening image.jpg

The Aussie backyard isn’t complete without an outdoor shower, and hooking it up for hot water is the ultimate in alfresco luxury. 

Use Australian hardwood and an easy-to-use waterproofing system to create a resort-style retreat, just like the one I installed along the exterior wall of my laundry.

Waterproofing the house wall, building the timber splashback and laying the pavers are straight-forward DIY projects, although you need a plumber to hook up the shower up for hot water.

2  paving image.jpg

I checked the requirements with the plumber when he stopped by to give a quote and, in this instance, it’s enough to have pavers that wash off onto the surrounding pebbles and sandy soil underneath. 

Make sure you choose a spot against the house that has good drainage and where pooling water won’t cause moisture damage. 

3 Tash in window.jpg

BEFORE Behind the location of my new outdoor shower is the laundry, which is also being renovated. Knocking out the window and waterproofing the entire wall provides the perfect spot for a shower. 

The window cavity was sealed with FC sheeting cut to fit and both sides sealed by brushing on Gripset Betta Bitumen Rubber. The exterior wall was then waterproofed and painted to match the rest of the house.

4 Get the timing right.jpg

The splashback consists of two treated pine rails, positioned in-ground then attached to the wall. The 135mm-wide hardwood decking boards are cut and secured directly onto the frame with stainless steel screws.

To get the timing right, install the splashback first, but be prepared to remove some of the boards for plumbing access. 

Lay and seal the pavers after the shower is done to ensure they’re in the best spot for standing under the shower and they also need time to cure.

5 Choosing tapware.jpg

There are differing opinions about choosing outdoor tapware, which is expensive and difficult to source. My research resulted in deciding to go with a regular chrome shower rose, arm and mixer. They'll eventually lose their shine but will continue to function efficiently.

6 Setting the budget.jpg

To work out your budget, this project cost about $1400, including $400 for the plumber, $250 for the tapware, about $250 for the hardwood, $100 for paving and the rest in hardware and timber such as treated pine and stainless steel screws. 

See my post for the easiest step-by-step instructions on how to lay paving for the shower.

DIY MATERIALS

DIY TOOLS

  • measuring tape and spirit level

  • compound sliding mitre saw

  • impact driver 

  • drill with 10mm countersinking bit

  • random orbital sander and hand-sanding block with 120 and 180 grit abrasive paper


1 Measure up.jpg

1 Measure up

Use a mitre saw to cut two posts from treated pine to fit against your wall, mine were about 2.2m tall, adding an extra 100mm for setting them into the ground. Locate the studs behind your wall and position the posts over the wall studs.

 
2+cut+the+boards.jpg

2 Cut the boards

Measure the distance between the outside edges of the posts so the decking boards sit flush then cut the boards to length with the mitre saw.

 
3 Waterproof the wall.jpg

3 Waterproof the wall

Remove the posts and, on the wall of the house, apply two coats of Gripset Betta Weather Seal using a roller, leaving to dry between coats, then apply two coats of house paint.

 
4A Seal the posts.jpg
4B Paint the posts.jpg

4 Seal the posts 

Seal the bottom 100mm of the treated pine posts with Bondall In-Ground Timber Protector, leaving to dry between coats then paint all over with house paint. 

 
5 Attach the rails.jpg

5 Attach the rails

Using an impact driver, secure the posts to the wall studs with 75mm batten screws and apply a second coat of house paint. 

TIP Using an impact driver instead of a regular drill means the screws go straight in, rather than having to drill pilot holes first. 

 
6 countersink the boards.png

6 Prepare the boards

On the ends of the hardwood boards, measure and mark 50mm and 30mm from the top and bottom edges to countersink two holes using a #10 countersinking bit.

 
7 sand the boards.jpg

7 Sand the boards

Sand the boards with 120-grit abrasive paper, rounding over the ends and corners, finishing with 180-grit over the front and sides.

 
8 Seal the boards.jpg

8 Seal the boards

To make the splashback weatherproof, apply Monocel Gold Clear Varnish in Satin, leave to dry and sand lightly with 180-grit abrasive paper then repeat for a second and third coat of varnish. 

TIP Set out the boards so you can coat one face and one edge, leave to dry then turn them to complete the remaining surfaces. 

 
9 attach the boards.jpg

9 Install the splashback

Attach the boards to the posts using an impact driver and 50mm stainless steel decking screws through the countersunk holes. Begin with the lowest board about 150mm from the ground, using a spirit level to check that it’s straight. Install the remainder of the boards, working upwards and using spacers as you go. 

 
10 remove boards for the plumber_.jpg

10 Fit the tapware

Remove some of the boards to allow the plumber access to fit the shower, mixer and copper pipes. Use a spade bit to drill holes for the pipe through the side of the posts, making sure the pipes will sit level from the tap. The plumber can drill holes in the centre of two boards for the shower and mixer while they install the fittings. 

TIP Building the splashback first means the tapware can be centred and pipes hidden behind the boards. 

 
7 Closing image at end.jpg

To finish the outdoor shower, install a stable, hard surface to stand on while using the shower. See my post for the easiest step-by-step instructions on how to lay paving for the shower. 

Easy DIY paving

Alun Machin

1 Opening image.jpg

Set out pavers on a base of ready-mix concrete and simply add water!
It cost about $100 to lay and seal these six pavers, and you can use the same technique to pave other areas of your yard.

2 Position the paving RETOUCHED.jpg

Position the paving

To finish off my outdoor shower area, I added a solid platform underfoot with simple pavers, installing them after the shower to ensure they’re in the best possible spot for standing directly under the water.

3 What you'll need.jpg

DIY Tools & Materials

1 Set out the pavers.jpg

1 Set out the pavers

Lay out the pavers to check the pattern and position. 

TIP These are centred under the shower, about 240m from the wall.

 
2 Mark out the perimeter.jpg

2 Mark out the perimeter 

Tap metal stakes into corners using a mallet then run a stringline around the perimeter. 

TIP Wind the string around each stake from the outside and in the same direction to ensure straight lines.

 
3 Prepare the base.jpg

3 Prepare the base

Remove the pavers and use a shovel to clear the base, digging down to make it about 60mm deep.

 
4 Pour in the concrete.jpg

4 Pour in the concrete

Pour in three bags of ready-mix concrete to fill the base to halfway, creating a layer of about 30mm, keeping about two handfuls aside to use as grout.

TIP Avoid working on a windy day and wear a mask.

 
5 Screed the top.jpg

5 Screed the concrete

Ensure the base is flat by using a spirit level to spread the concrete and smooth the surface.

 
6 Lay the pavers.png

6 Lay the pavers

Position the pavers, beginning with the first row in the far corner and laying the second row from the centre to ensure the joints are straight. 

TIP Use a mallet to tap down the pavers and shift them into position.

 
7 Fill the joints.jpg

7 Fill the joints

Sprinkle the remaining dry concrete over the pavers as grout, using a broom to brush it into the joints and avoid flicking powder onto the surrounding areas.

 
8 Set the joints.png

8 Set the joints

Use a watering can to pour water over the pavers, making sure the edges are well soaked, and avoid pouring directly onto the joint lines. Leave to cure and dry completely.

 
9 Tidy up the joints.jpg

9 Tidy up the joints

Remove the stakes and check that the grout hasn’t washed away at the edges, adding a little more dry concrete and sprinkling with water if needed to make the edges square and neat. Leave to cure and dry completely for at least  24 hours.

 
10 Clean the surface.jpg

10 Clean the surface 

Use a scourer with Bondall TileGuard Tile & Grout Cleaner to prepare the surface for sealing, washing away the residue thoroughly with water. 

 
11Seal the pavers.jpg

11 Seal the pavers

Use a roller with Bondall TileGuard Natural Look Sealer, working quickly to apply two coats without allowing the surface to dry out, then leave to dry. 

 
12 Tidy the surrounds.jpg

12 Tidy the surrounds

Rake the pebbles or the surface material up to the sides of the pavers to finish.

 
4 Closing image.jpg

Check out the full instructions on how to install a luxury outdoor shower with hot water.

MY SPARE ROOM RENO

Alun Machin

desk with green chair.jpg

Where do you even begin to design a DIY renovation that improves the space in your home for everyday living?

 With a plan of action, of course! It helps you focus as you roll up your sleeves to get handy. 

before pic.jpg

BEFORE Like many Aussie homes, the third spare room at my house is too small for a bedroom but is a great size for a studio office.

after pic of wall.jpg

AFTER I’ve used a three-step method that works for any reno, big or small. It’s all about DIY with a designer eye to make a room function more efficiently while making it more welcoming.

my three step method.jpg

MY THREE-STEP DIY METHOD

My three-step DIY method really does work every time. See how it relates to this room.

1 Remove the most dysfunctional factor

Changing the door to a sliding one increases floorspace.

2 Add a practical but modern element

Cladding the new door cavity creates a lovely new feature wall.

3 Improve the experience

Designing built-in shelving creates storage and a display area.

Porta callout pic.jpg

I teamed up with Porta to do this room reno, They do beautifully milled timber moulding, trim and dowel that don’t need much sanding or finishing. 

For specifics on product names and more detailed how-to steps, head over to the step-by-step spec sheet I put together with them.

1 tash removing the door.jpg

Step 1. REMOVE THE MOST DYSFUNCTIONAL FACTOR

The door swings into the room but keeping this area clear takes up valuable floor space. So replacing it with a siding door will make the room more flexible.

TIP I used a drill to remove the hinges, taking off the lower one first so the door didn’t fall on my head, then removed the strike. Start filling these now as you’ll need to do it in stages to wait for the layers to dry.

2 call in the sparkie.jpg

CALL IN THE SPARKIE

Now is the time to have the electrician move switches and power points. I made the mistake of assuming the switch could simply move to the other side of the entry, but behind that wall was another sliding door cavity with no space for the new switch. 

It ended up outside the room, which is fine for an office, but not so great for a bedroom.

TIP Be aware of what’s on the other side of the walls and have a chat with the sparkie when you book them to check if you need to buy switches or fittings.

3 remove trim and skirts.jpg

REMOVE TRIM & SKIRTS

Removing the door also meant removing the trim, so I decided to also replace the wall skirting and window trim with a slimmer, more streamlined profile.

TIP To remove, run a utility knife along the top of the trim where it joins the wall to prevent pulling off the paint. 

Tap a chisel or crowbar into the gap and use a pulling-down motion so the tip of the crowbar pushes into the wall at the base, rather than above, which leaves a mark. 

4 find the wall studs.jpg

FIND THE WALL STUDS

When removing my skirting I found the screws attaching plasterboard to the studs, so I marked them on the floor with painter’s tape and left it there right to the end of the reno. 

Knowing where the studs are is essential for attaching the door framing, the shelf, new skirting and window trim, even for putting up pictures. 

TIP If you can’t find them, use a stud finder or ask the electrician to help you when he pops in to move any switches. Sparkies have a knack for knowing where they are!

5 prepare for painting.jpg

PREPARE FOR PAINTING

To prepare for painting, I ran a scraper around the walls where the skirting was removed, to scrape away paint built-up. 

I filled dents and holes with fast-drying crack filler, starting at the doorway and worked around the room thoroughly so I only had to do it once.

TIP Use a sanding block with 180-grit abrasive paper along the skirting line to smooth out the filler and the paint line.

6 paint the room.jpg

PAINT THE ROOM

Wow, that beige is a stronger colour than it looks. I applied a coat of ceiling paint first, painted the cornices with a brush and used it to cut into the corners of the walls.

Then I used a roller for the wall paint and repeated the full process, doing three coats.

TIP I like using a small plastic-back drop sheet and moving it around the room as I go, but you could put down a full canvas to cover the entire floor.

7 assemble door cavity.jpg

Step 2. ADD A PRACTICAL BUT MODERN ELEMENT

I used a Hume Doors cavity system, door and Evolution One Touch system, which is door hardware that, once installed, means simply tapping the door to open it. 

I followed the instructions in the Hume Doors video, which was so easy and lightweight I didn’t even need a second pair of hands to put it together.

TIP Buy the door and cavity ready to assemble with the frame in a standard 75mm or 90mm depth. I used a 90mm, and bought the Evolution One Touch at the same time because it needs installing before the door cavity is covered.

8 build framing.jpg

BUILD THE FRAMING

After positioning the door cavity I set up the dropsaw in the room so I could measure and cut to build the pine frame around it, with extra supports along the top for my feature wall. 

Before attaching anything I found the wall studs to safely secure the framing with brackets.

TIP Be sure to buy 35mm-thick pine framing in the same depth as the door cavity (mine was 90mm). You’ll need about 2.7m each side, 1.8m along the top and offcuts for extra supports.

9 clad the frame.jpg

CLAD THE FRAME

I clad the cavity and framing in 12mm thick plywood, not worrying about neat joins as it would all be hidden. 

I like using a small impact driver, which is noisy but it gets those screws in without having to drill pilot holes.

TIP This is where you need a good ladder, make sure your drill is charged and use 25mm timber screws, which are long enough to hold the plywood in place, making sure they finish flush with the surface.

10 cutting the dowel.jpg

CUTTING THE DOWEL

After working out that my ceiling has a fall of 10 degrees, I figured a system of cutting Porta 30mm half round dowel at the same angle along the top. 

Each stick was a different length so I cut then tested them against the wall before securing.

TIP When designing a feature wall like this, keep in mind the standard length of half dowel is 2.4m. If you have a sloping ceiling, it makes life easier if you plan the tallest full-length piece to be the same.

11 attach dowel.jpg

ATTACH THE DOWEL TO THE WALL

I applied a bead of Bondcrete adhesive along one piece at a time, positioning it then pinning with a nail gun.  

To finish, I lightly sanded the wall with 180-grit abrasive paper then coated all raw timber in Monocel Clear Varnish using a mini roller with microfibre cover.

TIP I used a Bostitch gun with tiny pins that were just long enough to go through the side of the dowel and hold it to the plywood while the adhesives dried. 

If you’re using brads or nails with a hammer, make sure they sit below the surface and use a timber filler if you need to hide them. 

12 build the shelf .jpg

STEP 3. IMPROVE THE EXPERIENCE

To build the recessed shelf next to the new wall, I used Porta primed 18 x 110mm DAR pine so it only needed painting once when assembled. 

I built it on site, measuring the pieces to fit and securing to the frame and the wall with 60mm timber screws. 

The width of my shelf is 1300mm so I added lengths of 22mm Tasmanian oak dowel for support to prevent bowing, and I like how it ties into the look of the feature wall.

TIP The dimensions depend on your room size. If your shelf is more than 900mm wide, add the dowel supports. I used a speed boar bit (the same 22mm one as for the Evolution One Touch door hardware) to create an indent then secured from the top with 40mm screws and covered them with white Prestige press-in screw caps.

13 add the framing.jpg

ADD THE WHITE FRAMING

I clad only the cavity in Tasmanian oak, rather than the entire wall, to give timber effect impact. Framing it in white also keeps the edges neat and ensures the timber doesn’t feel too heavy or dark. 

I painted 12mm Porta Quad Moulding for the frame, buying a 2.7m length to run the full length of the top. 

TIP If your ceiling slopes like mine, make sure you cut the ends of the framing at the same angle so it fits together neatly. It saves time if you set up the drop saw or mitre box with a handsaw and cut it to fit onsite.

14 install the skirting.jpg

INSTALL THE SKIRTING

I started with the widest wall, using a drop saw to cut one end of the skirting at 45 degrees to transfer the measurement (from the outside corners), cutting and fitting it to the wall. Then used a nail gun to secure it at intervals into the studs. 

For one wall spliced two pieces and positioned the join where it would be hidden by furniture, butting them and smoothing over with timber filler and touching up with paint.

TIP I set up the primed skirting outside to appky one coat of paint with a mini roller (which is easier than painting inside). 

When cutting, work on the longest wall first, just in case you mess it up and need to cut that piece down for another side.

15 install the door.jpg

HANG THE DOOR

It was simple to add the rest of the door hardware, including the rollers, and lift the door into place and tighten it up using the supplied spanner. 

This was super easy to do on my own once I worked out to prop the door on a slim piece of plywood to help me lift it slightly, and stand on a stool so I could reach the top.

TIP Paint the door outside while painting the skirting, doing one side at a time and leaving to dry. I kept my door white to bounce light back into the room when it’s closed, but you could add a surprise pop of colour.

How gorgeous is the Flowering Gum by Roofus Australia? It's a pop of colour and personality, and great Aussie design. 

16 tools pic.jpg

TOOLS TO RENO YOUR ROOM

Aim to have the home improvement basics that include a drill with drill bits, hand saw, utility knife and drop saw for cutting, a hammer and mallet, screwdrivers, measuring tape and spirit level, crowbar, chisel and scraper, a broom and paint equipment.

It helps if you can use a nail gun with air compressor and brads, a good ladder and vacuum cleaner.

You’ll also need adhesive, crack filler, ceiling and wall paint plus sandpaper and timber varnish, and timber screws for the framing and plywood cladding.

My Front Door Makeover

Alun Machin

Welcome to Little Red’s Reno! This is where I roll up my sleeves to get handy round the house. My coastal home is a dated 1970s weatherboard that needs a total upgrade.

And what better place to start the reno than with the front door?

The aim was to replace the original faux Victorian door and get rid of the banging brown aluminium screen (my pet hate!) 

The aesthetic reason was to upgrade the street appeal and let more light into the living area. 

The practical reason was to change the access to a keyless lock. No more worrying about losing the keys at the beach!

MY NEW DOORWAY

To buy a new doorway and have it installed by a door retailer was going to cost more than $3000.

The old door wasn’t my style but was in good nick, so I decided to shop online where I hoped to find a seller who’d be willing to swap, or at least take away the old door.

So I took the measurements to find a similar size, hit the Home & Garden category of Gumtree and came across this beauty! A brand new merbau door, ready to install and be painted.

Chris & Cath from Taree Recycled.png

The seller was Cath (above right), the Gummie for Taree Recycled, who sent me extra pics of the door and different styles of sidelights, so I was assured it was a one-stop shop.

I’d planned to DIY the installation but when I went to pick up the door, umm, couldn’t even lift it. Chris the owner (above left) offered to have one of his carpenters deliver and install (yep, he was the fastest chippie on the block!). 

Along with the new 1.2m-wide door and sidelight, the chippie brought spare timber to rebuild the frame. 

For $100 I sold the old door and hardware back to Taree Recycled to join the other items they sell on Gumtree. Everyone’s a winner!

MY DESIGNER MAKEOVER

On a recent trip to America I bought some groovy house numbers that remind me of midcentury Palm Springs and inspired the design of my new entrance. Actually I’m going to invoke that retro style for the entire reno!

The numbers are designed using the Neutraface Font by House Industries and the tiles made at Heath Ceramics. I made a special trip to the factory in San Francisco to buy them and the matching teak frame.

To install the frame I measured up, started the holes using a drill bit then changed to a driver for the screws. Always helps if you have good tools and this Bosch PSR Ergo Drill is so light it’s easy to use with one hand.

DIY TIP: Don’t skip drilling pilot holes so the screws go in easily and accurately for a perfectly straight install!

I chose orange to pack a punch and painted the front of the house in tradie white to make it feel clean and fresh. This is my fave colour, called Madras by Porter’s Paints

DIY TIP: Make sure you choose exterior paint with UV protection to prevent fading.

Then I tidied up around the door, installing trim where the frame didn’t quite fit into the wall and painted everything surrounding the door in an exterior matt white. 

DIY TIP: Paint the door jamb step in a hardwearing gloss designed for trims.

My twist on Midcentury style

While I was looking for patio furniture on Gumtree to match my door I came across some other great finds.

These planters with established plants came as a pair for $100. I bought them from Penny, who was moving to New Zealand with her Kiwi hubby and, while they were taking most of their other lovely pots, these were just too heavy. Picked up some green-thumb tips too!

The designer outdoor chair is manufactured by Italian company Gaber, is called Extreme and won the Good Design Award in 2010. It’s a new, not-replica chair shipped from the Melbourne company who import them. Normally $160, I bought two for $89 each plus $60 delivery. They have more!

brand new mat.png

It’s nice to be greeted by lots of colour! It turned out that Gummie seller Lucy lived just around the corner and was happy to take $25 for this brand new doormat. She was moving back to the UK with her young family and hadn’t even taken the label off. The original tag says it retails for $69.

I bought the keyless lock ages ago when I started planning the new porch. It retails for $249 but you can buy a similar one for about $150 on Gumtree.

COSTS FOR MY NEW ENTRYWAY

New door, jamb and sidelight with delivery, install and removal of old door
Gumtree $1090 (including $100 for the old door)
Retail $3490 (including door hardware)

One outdoor designer chair
Gumtree $89
Retail $160 

One planter with established plants
Gumtree $50
Retail about $245

Brand new doormat
Gumtree $25
Retail $69

Never-been used, new keyless lock
Gumtree $150
Retail $249

TOTAL

Gumtree $1404
Retail $4213